All Activity
- Past hour
-
 chris watton reacted to a post in a topic:
Chris Watton and Vanguard Models news and updates Volume 2
chris watton reacted to a post in a topic:
Chris Watton and Vanguard Models news and updates Volume 2
-
 Your making great progress and your model is coming out really well. As to "I didn't realize how time consuming cleaning up all the tiny parts would be," cleaning laser char seems to be an acquired skill. A lot of people here seem to have gotten really good at it (the logs of Chuck Passaro's new Speedwell kit are amazing). I've been working on the Dory, but cutting the parts out of a different kind of wood with the plan to not paint or stain. It hasn't been a time saver over cleaning up kit parts. Debonding is definitely a really important skill. I'll be following along. Dave
 -
JacquesCousteau reacted to a post in a topic:
Grand Banks Dory by davec - Model Shipways - 1:24 - Shipwright Series
-
JacquesCousteau reacted to a post in a topic:
Lowell Grand Banks Dory by MBerg - Model Shipways - 1:24
-
JacquesCousteau reacted to a post in a topic:
Lowell Grand Banks Dory by MBerg - Model Shipways - 1:24
-
JacquesCousteau reacted to a post in a topic:
HMS Beagle by brunnels - OcCre - 1:60 - first build
-
ccoyle reacted to a post in a topic:
US Brig Oneida 1809 by rlb - The Lumberyard - 1:48 scale - POF - Lake Ontario Warship
-
ccoyle reacted to a post in a topic:
AEG G.IV - Creature of the Night by DocRob - Wingnut Wings - 1/32
-
Gregory reacted to a post in a topic:
Cutty Sark by VitusBering - Revell - 1:96 - PLASTIC - Redux
-
JpR62 reacted to a post in a topic:
US Brig Oneida 1809 by rlb - The Lumberyard - 1:48 scale - POF - Lake Ontario Warship
-
 I am alive, or so they tell me. I am also finally becoming ambulatory again and my poor CS build is getting very dusty and lonesome. I will return to it, I've promised myself that. When, exactly, is an open question but this year certainly.
- 86 replies
-
- 1
-
-
- Cutty Sark
- Revell
- (and 2 more)
-
The frames are cut out, glued together, installed, and faired. I debonded and reglued the sternpost again after the picture was taken. When I dryfit the garboard strake, it was a little too short. I realized I had glued the sternpost a little too far out. I'm not using the kit parts, and without the laser marked guides, didn't get the post in the right place the first time. After regluing and refairing, it looks like the planks will fit correctly. I tried brushing water on the hull bottom as per the instructions. It looks like it works great on the kit wood, but not the boxwood I'm using. I didn't get an adequate bend, and there were some water stain marks (should have taken a picture, but didn't) on the other side of the wood at the margin of where the water soaked into the wood. I was able to sand most of the stain away. I got an adequate bend from fully soaking the wood (fortunately did not weaken the glue joints) and didn't have a problem with staining.
- 6 replies
-
- 1
-
-
- Grand Banks Dory
- Model Shipways
- (and 1 more)
-
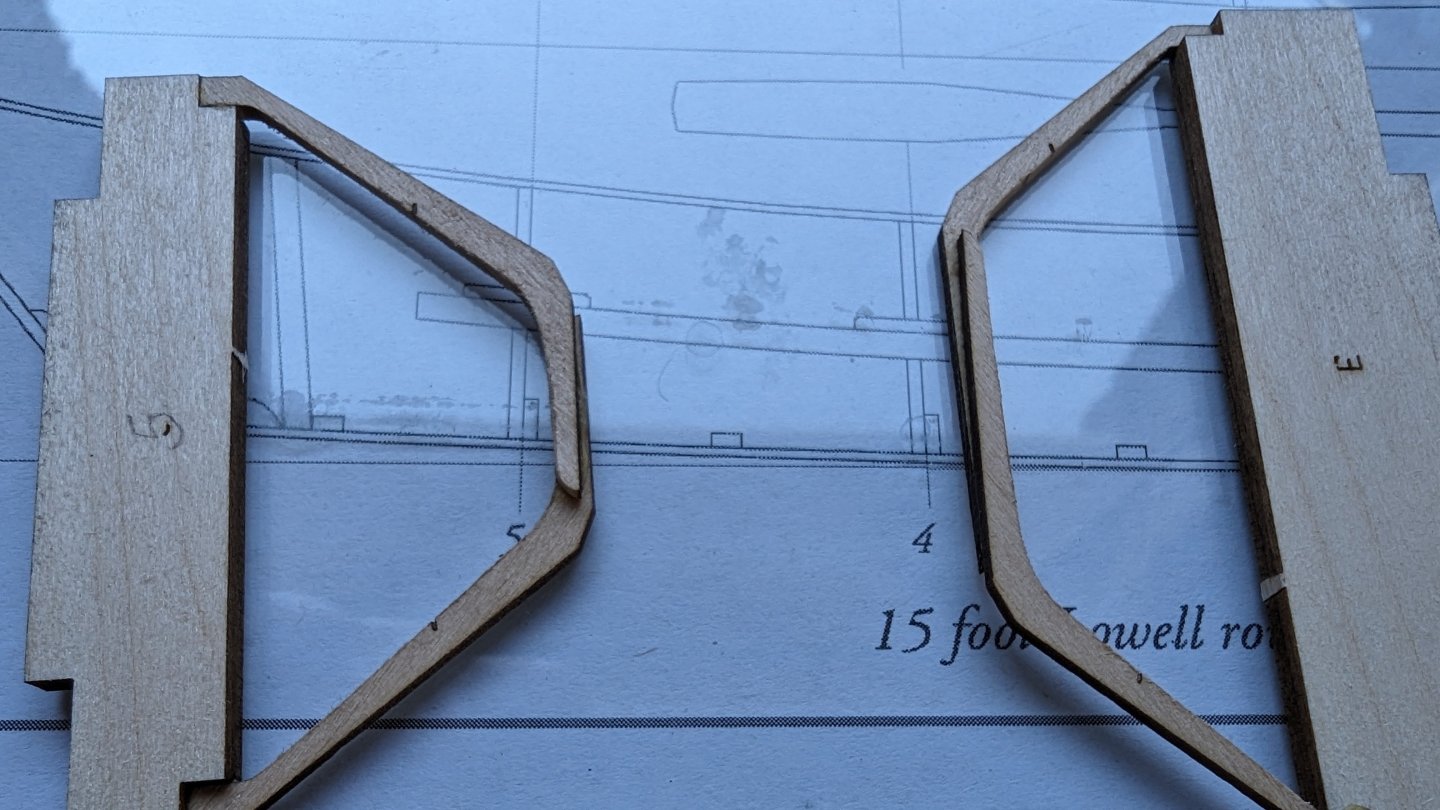
 Very brief update: I just took apart and cleaned up the two frames. Having a bit of experience doing this will no doubt help in the future. Soaking them in a closed container with 95% alcohol for an hour then gently wiggling them apart. I used tweeters and a blade to separate the frames. It worked great, and just needed a bit of scraping to get the rubbery glue residue off. 👍
 -
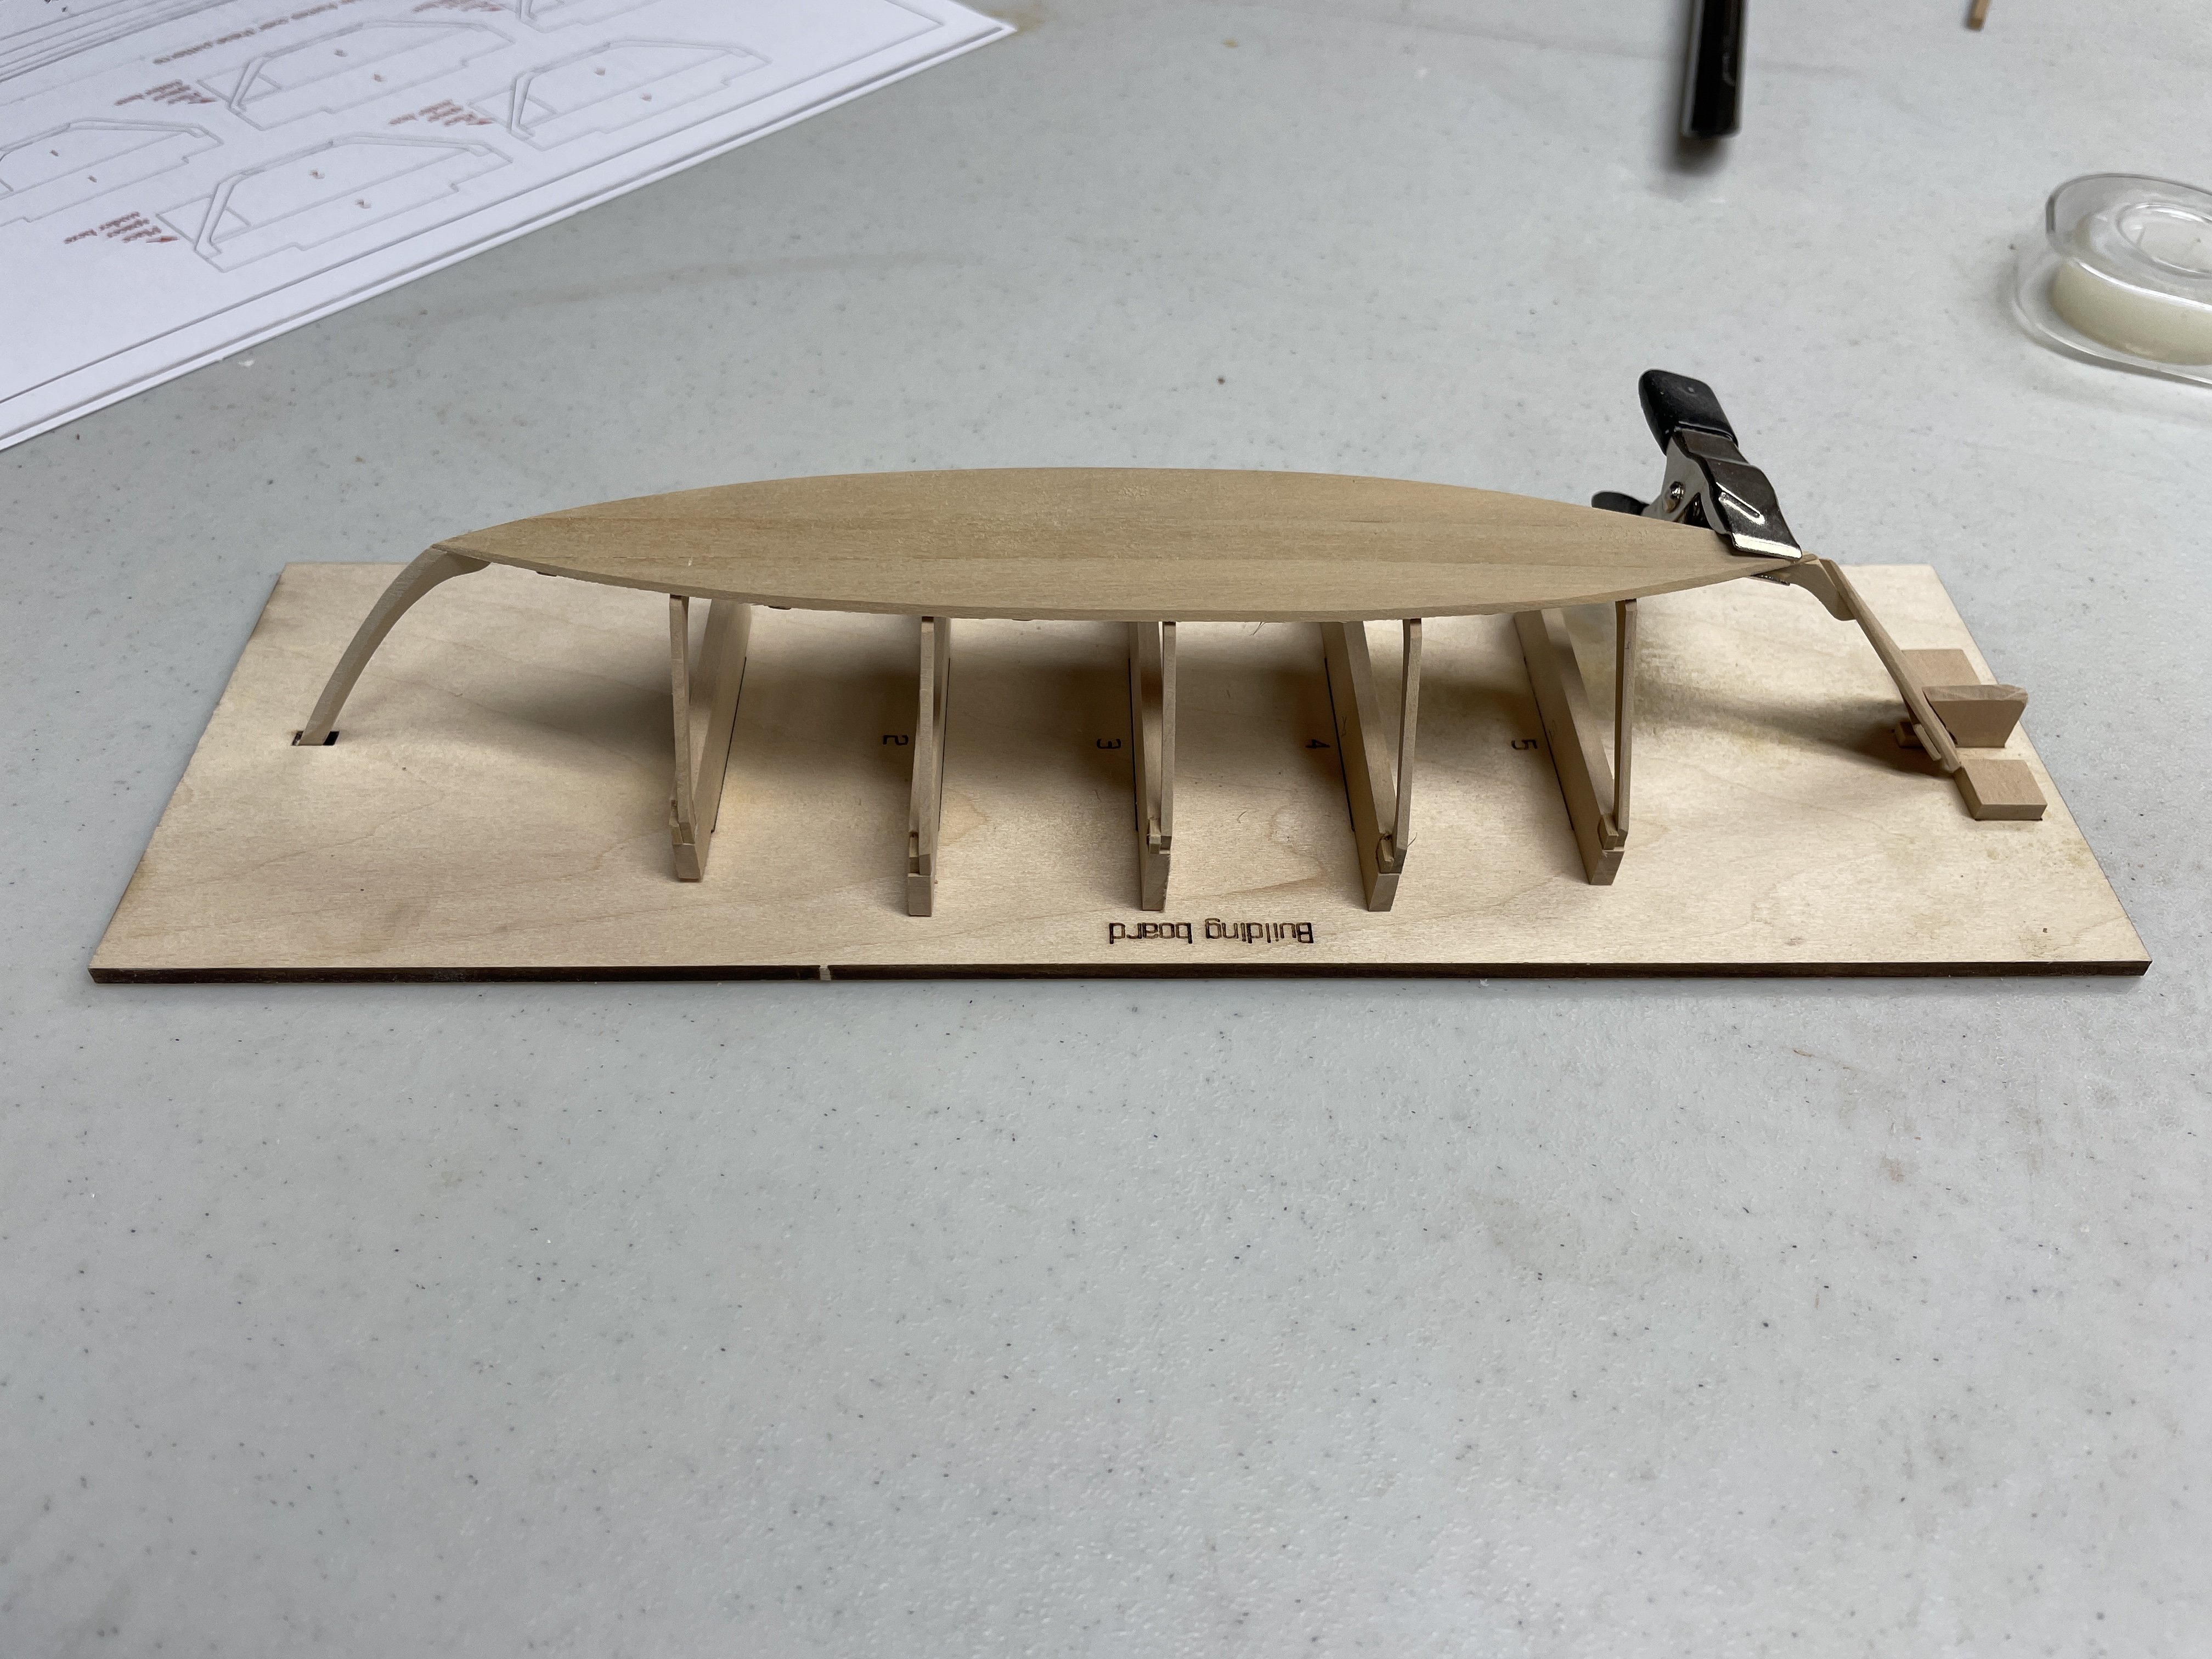
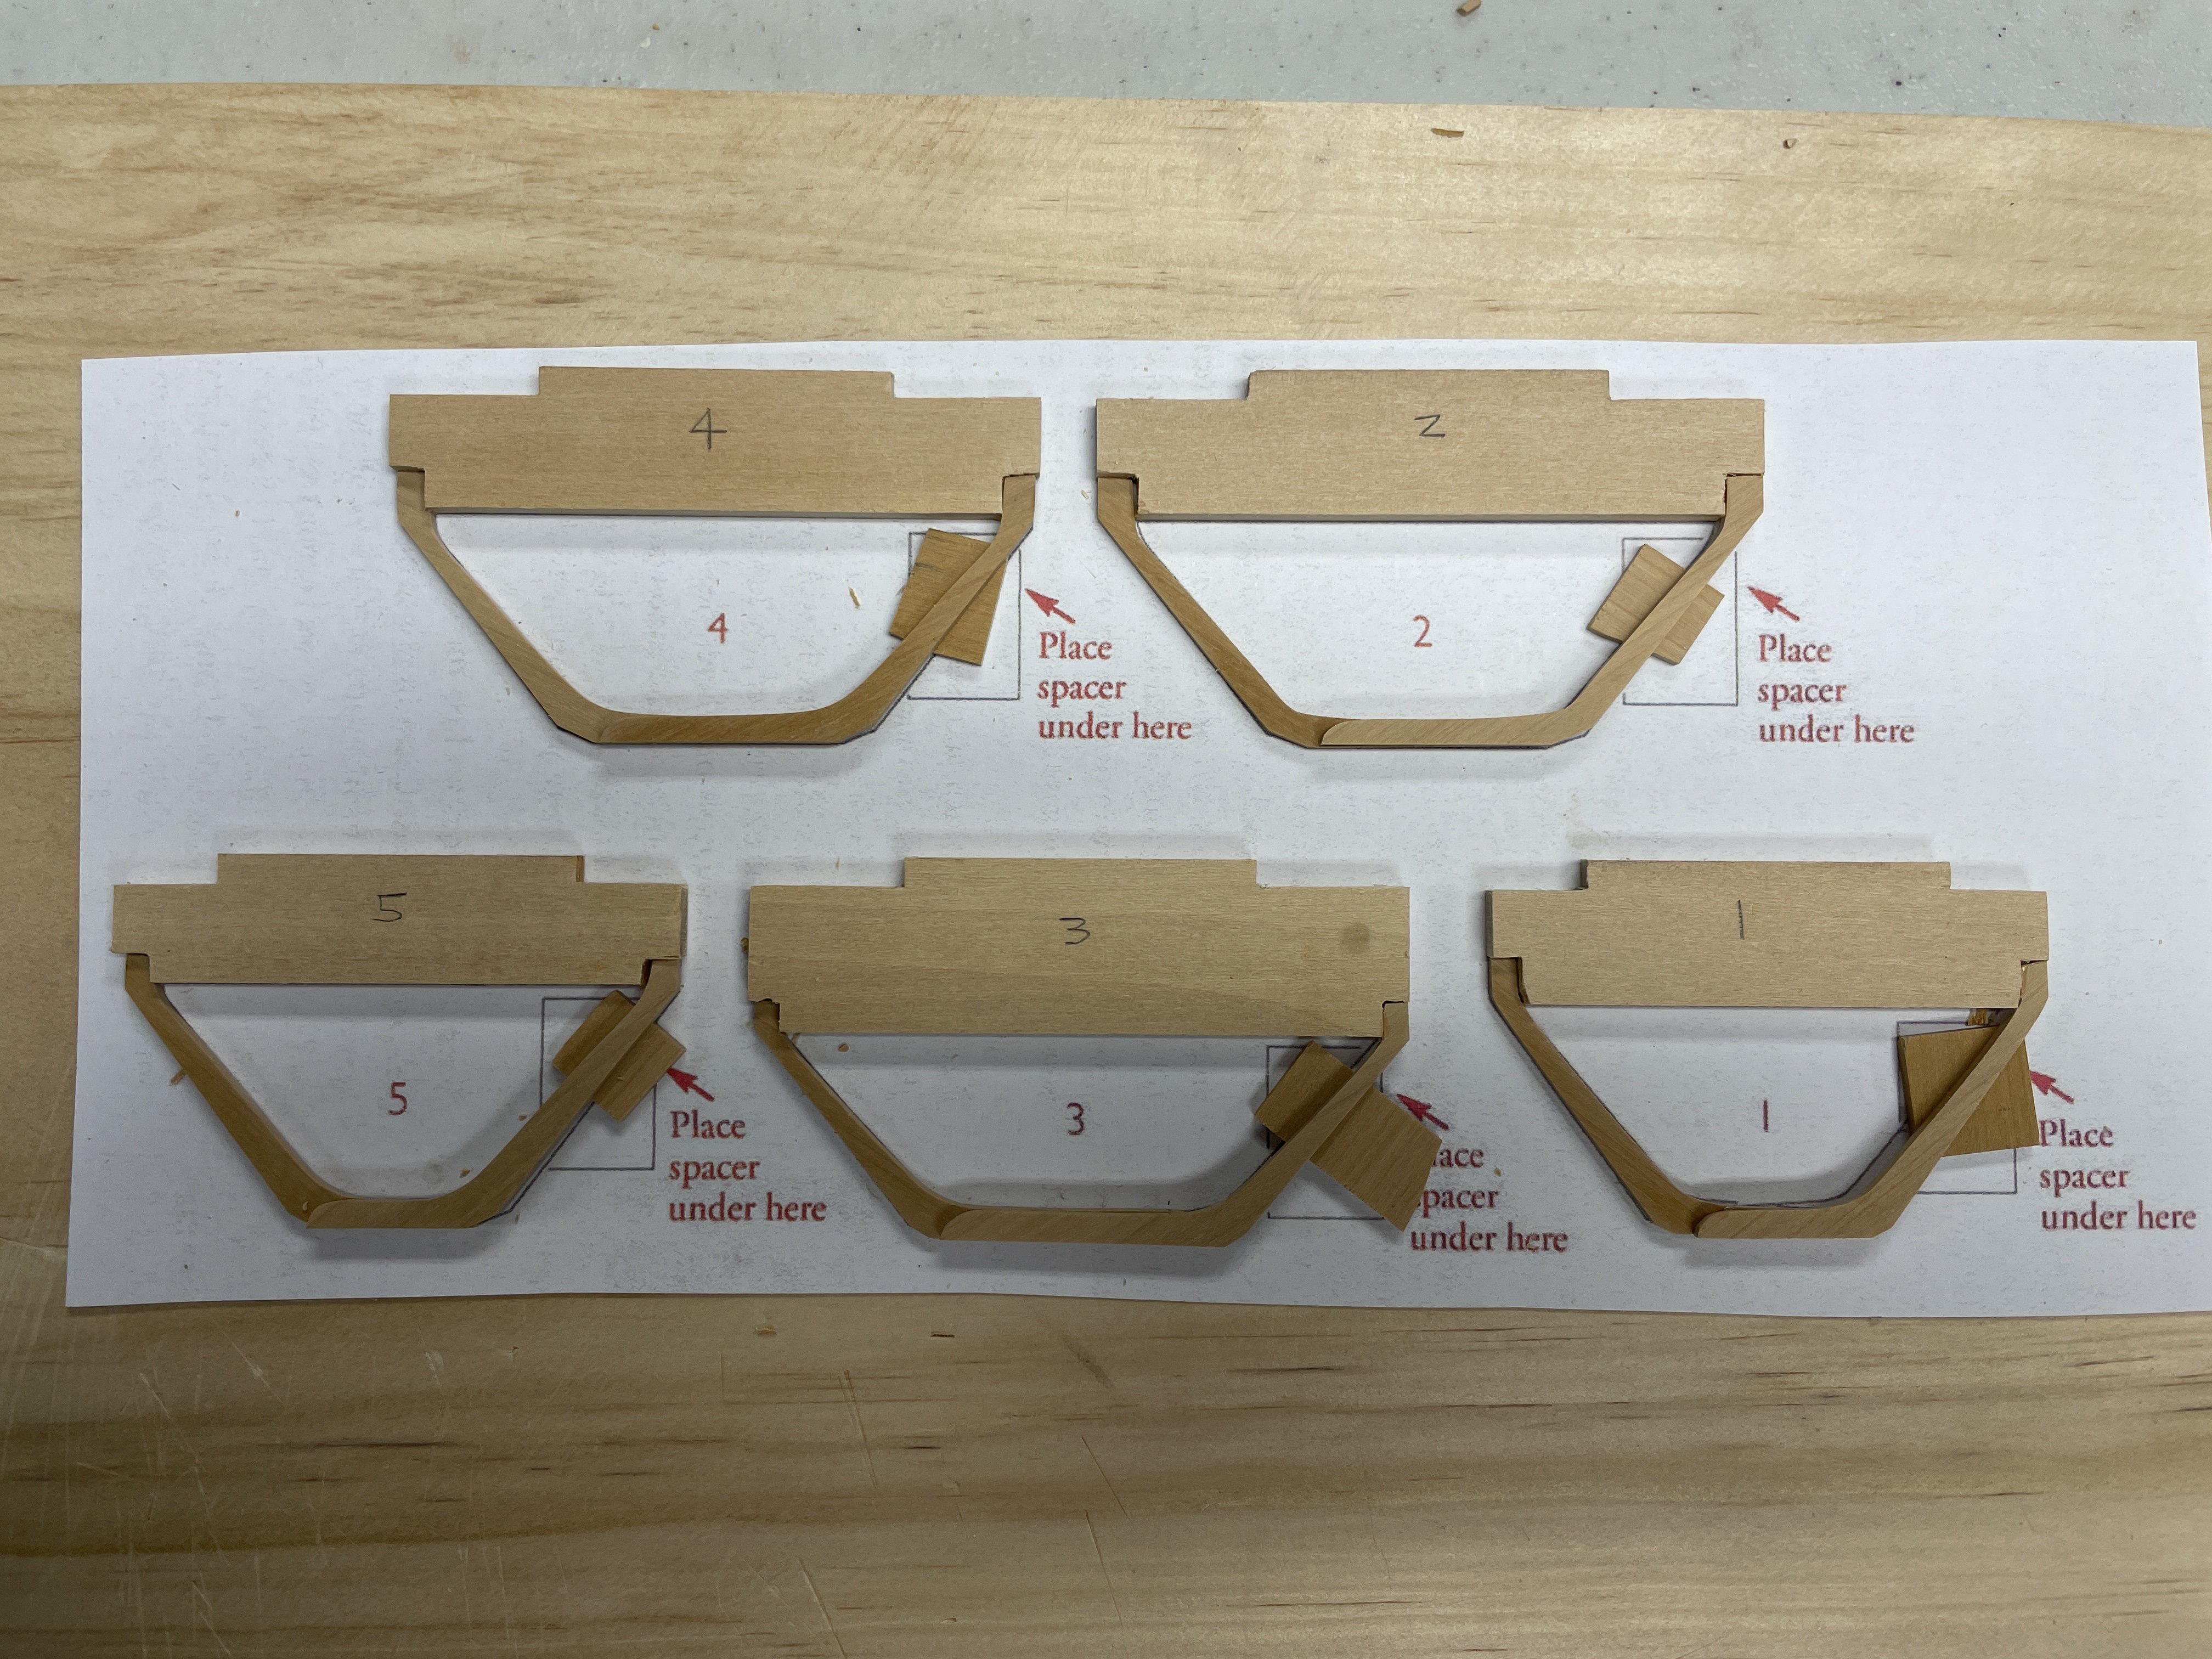
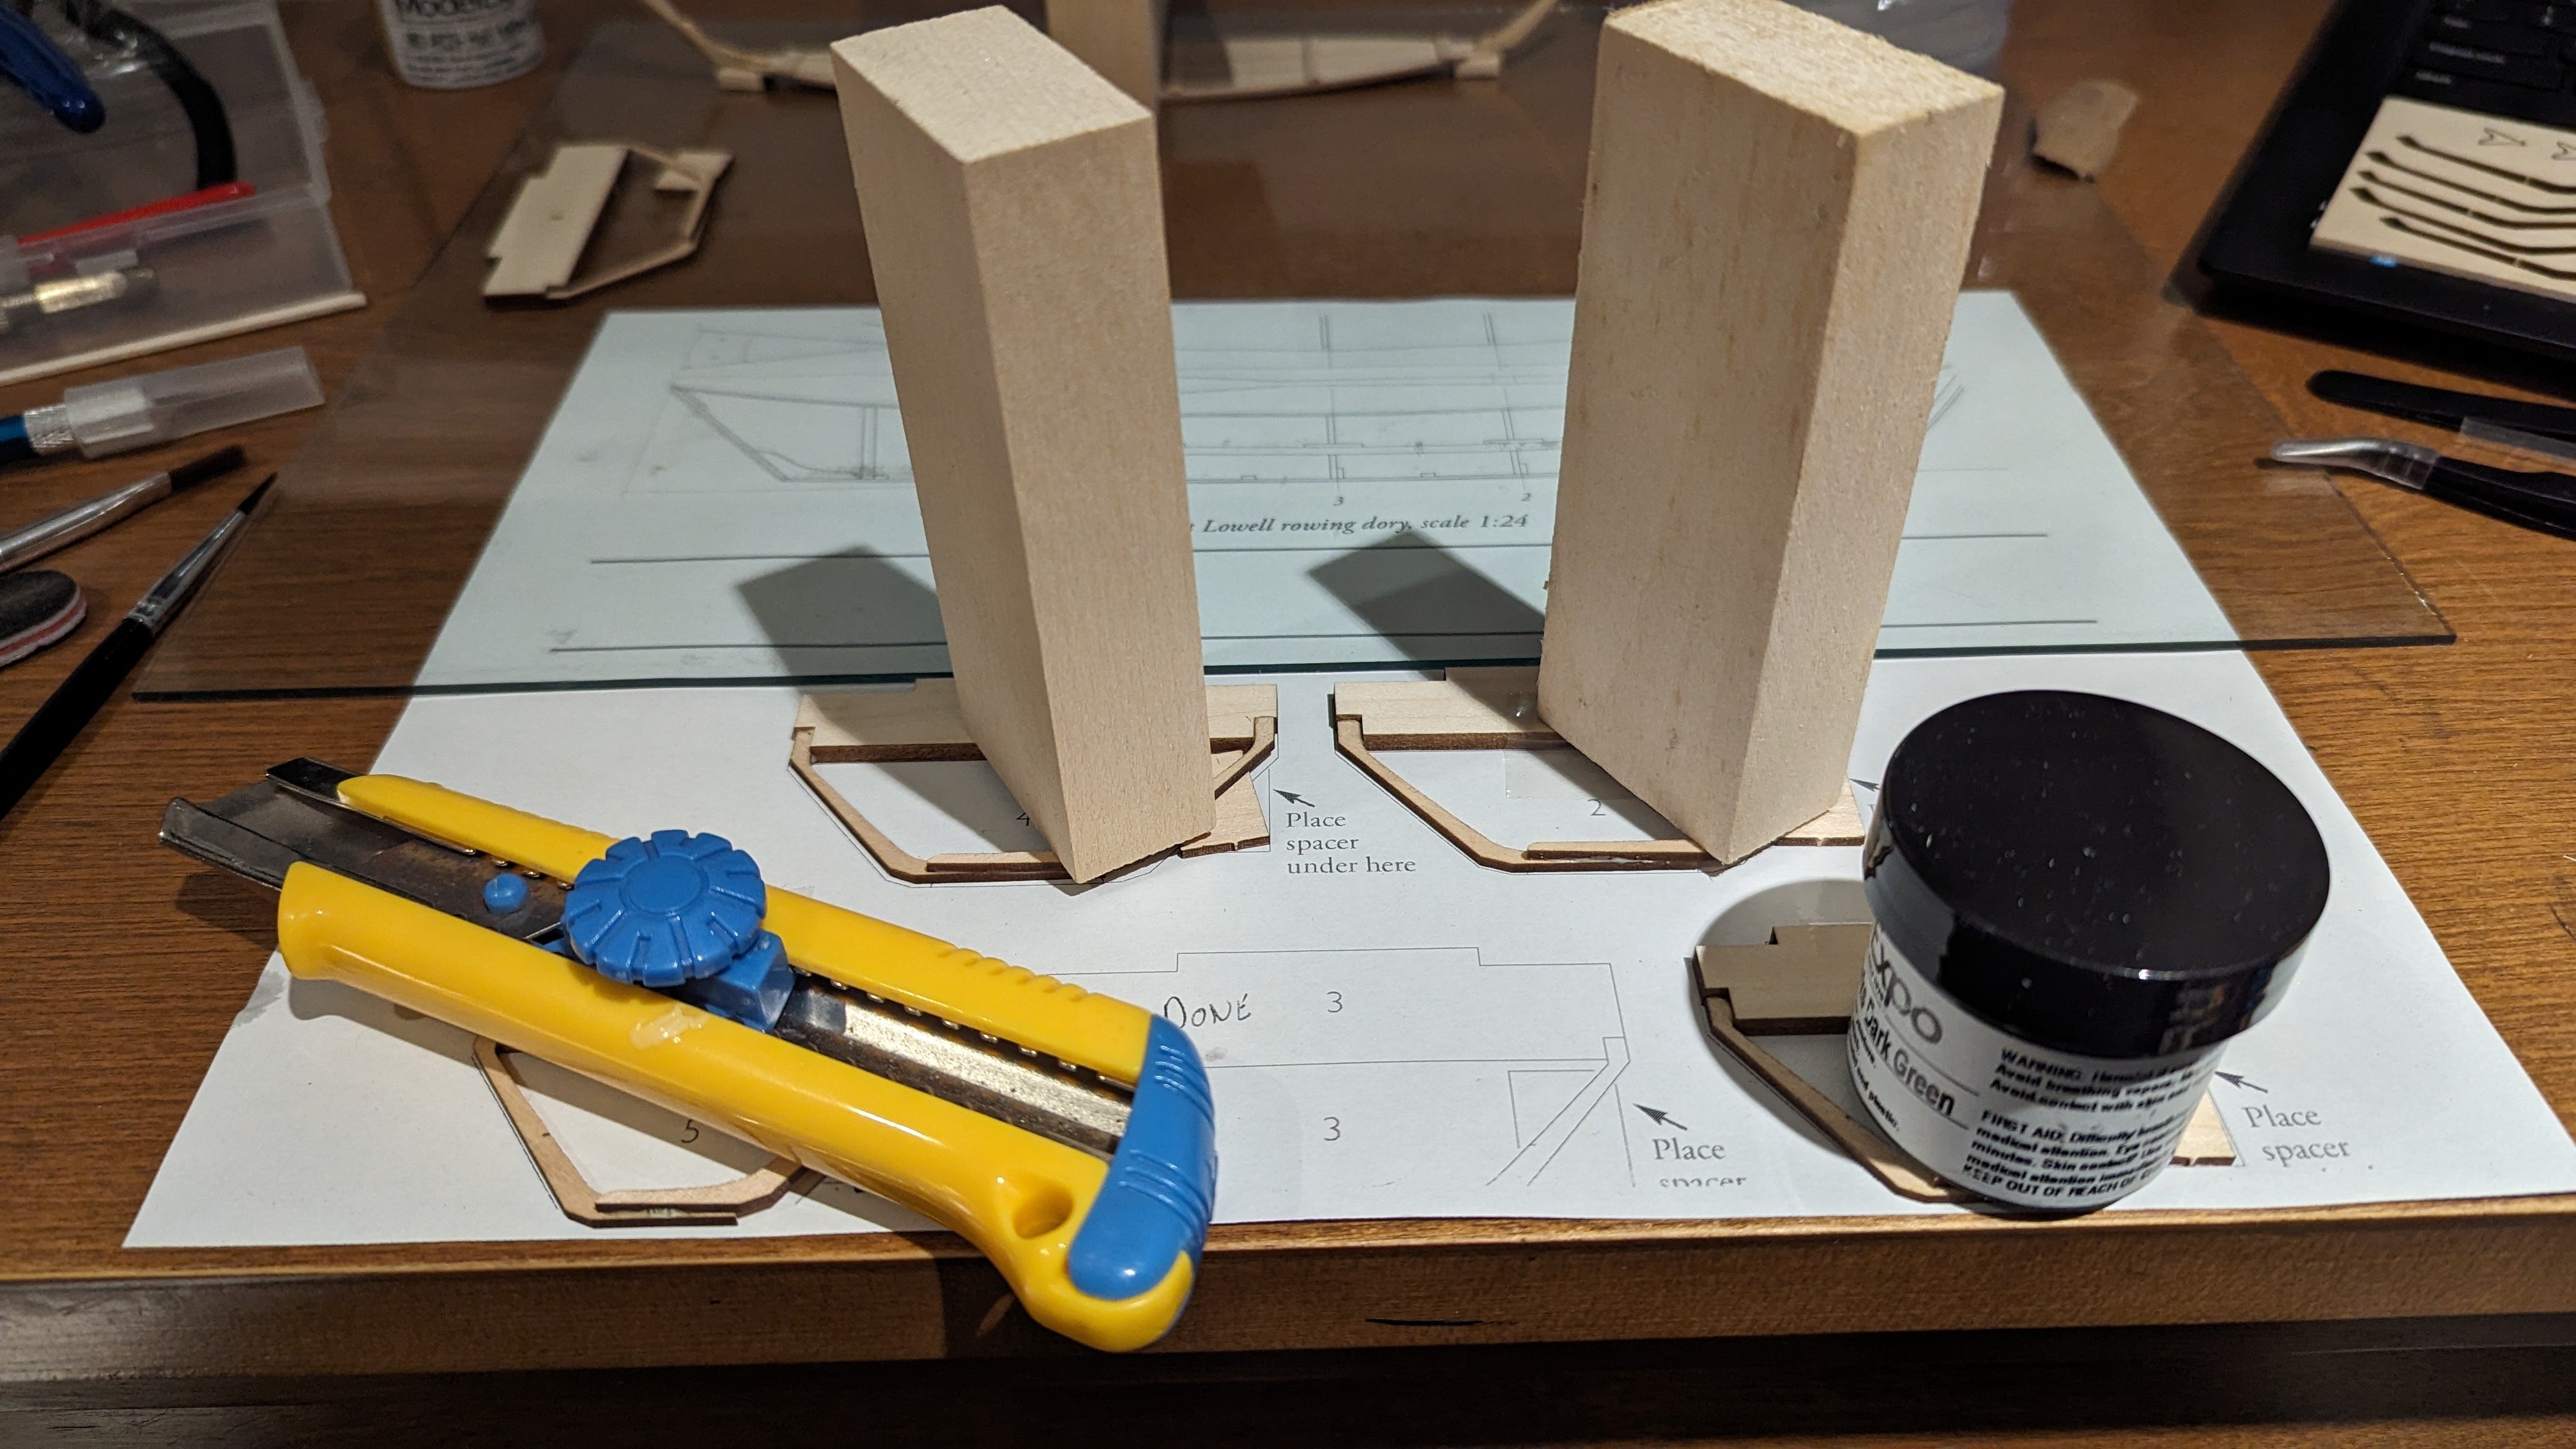
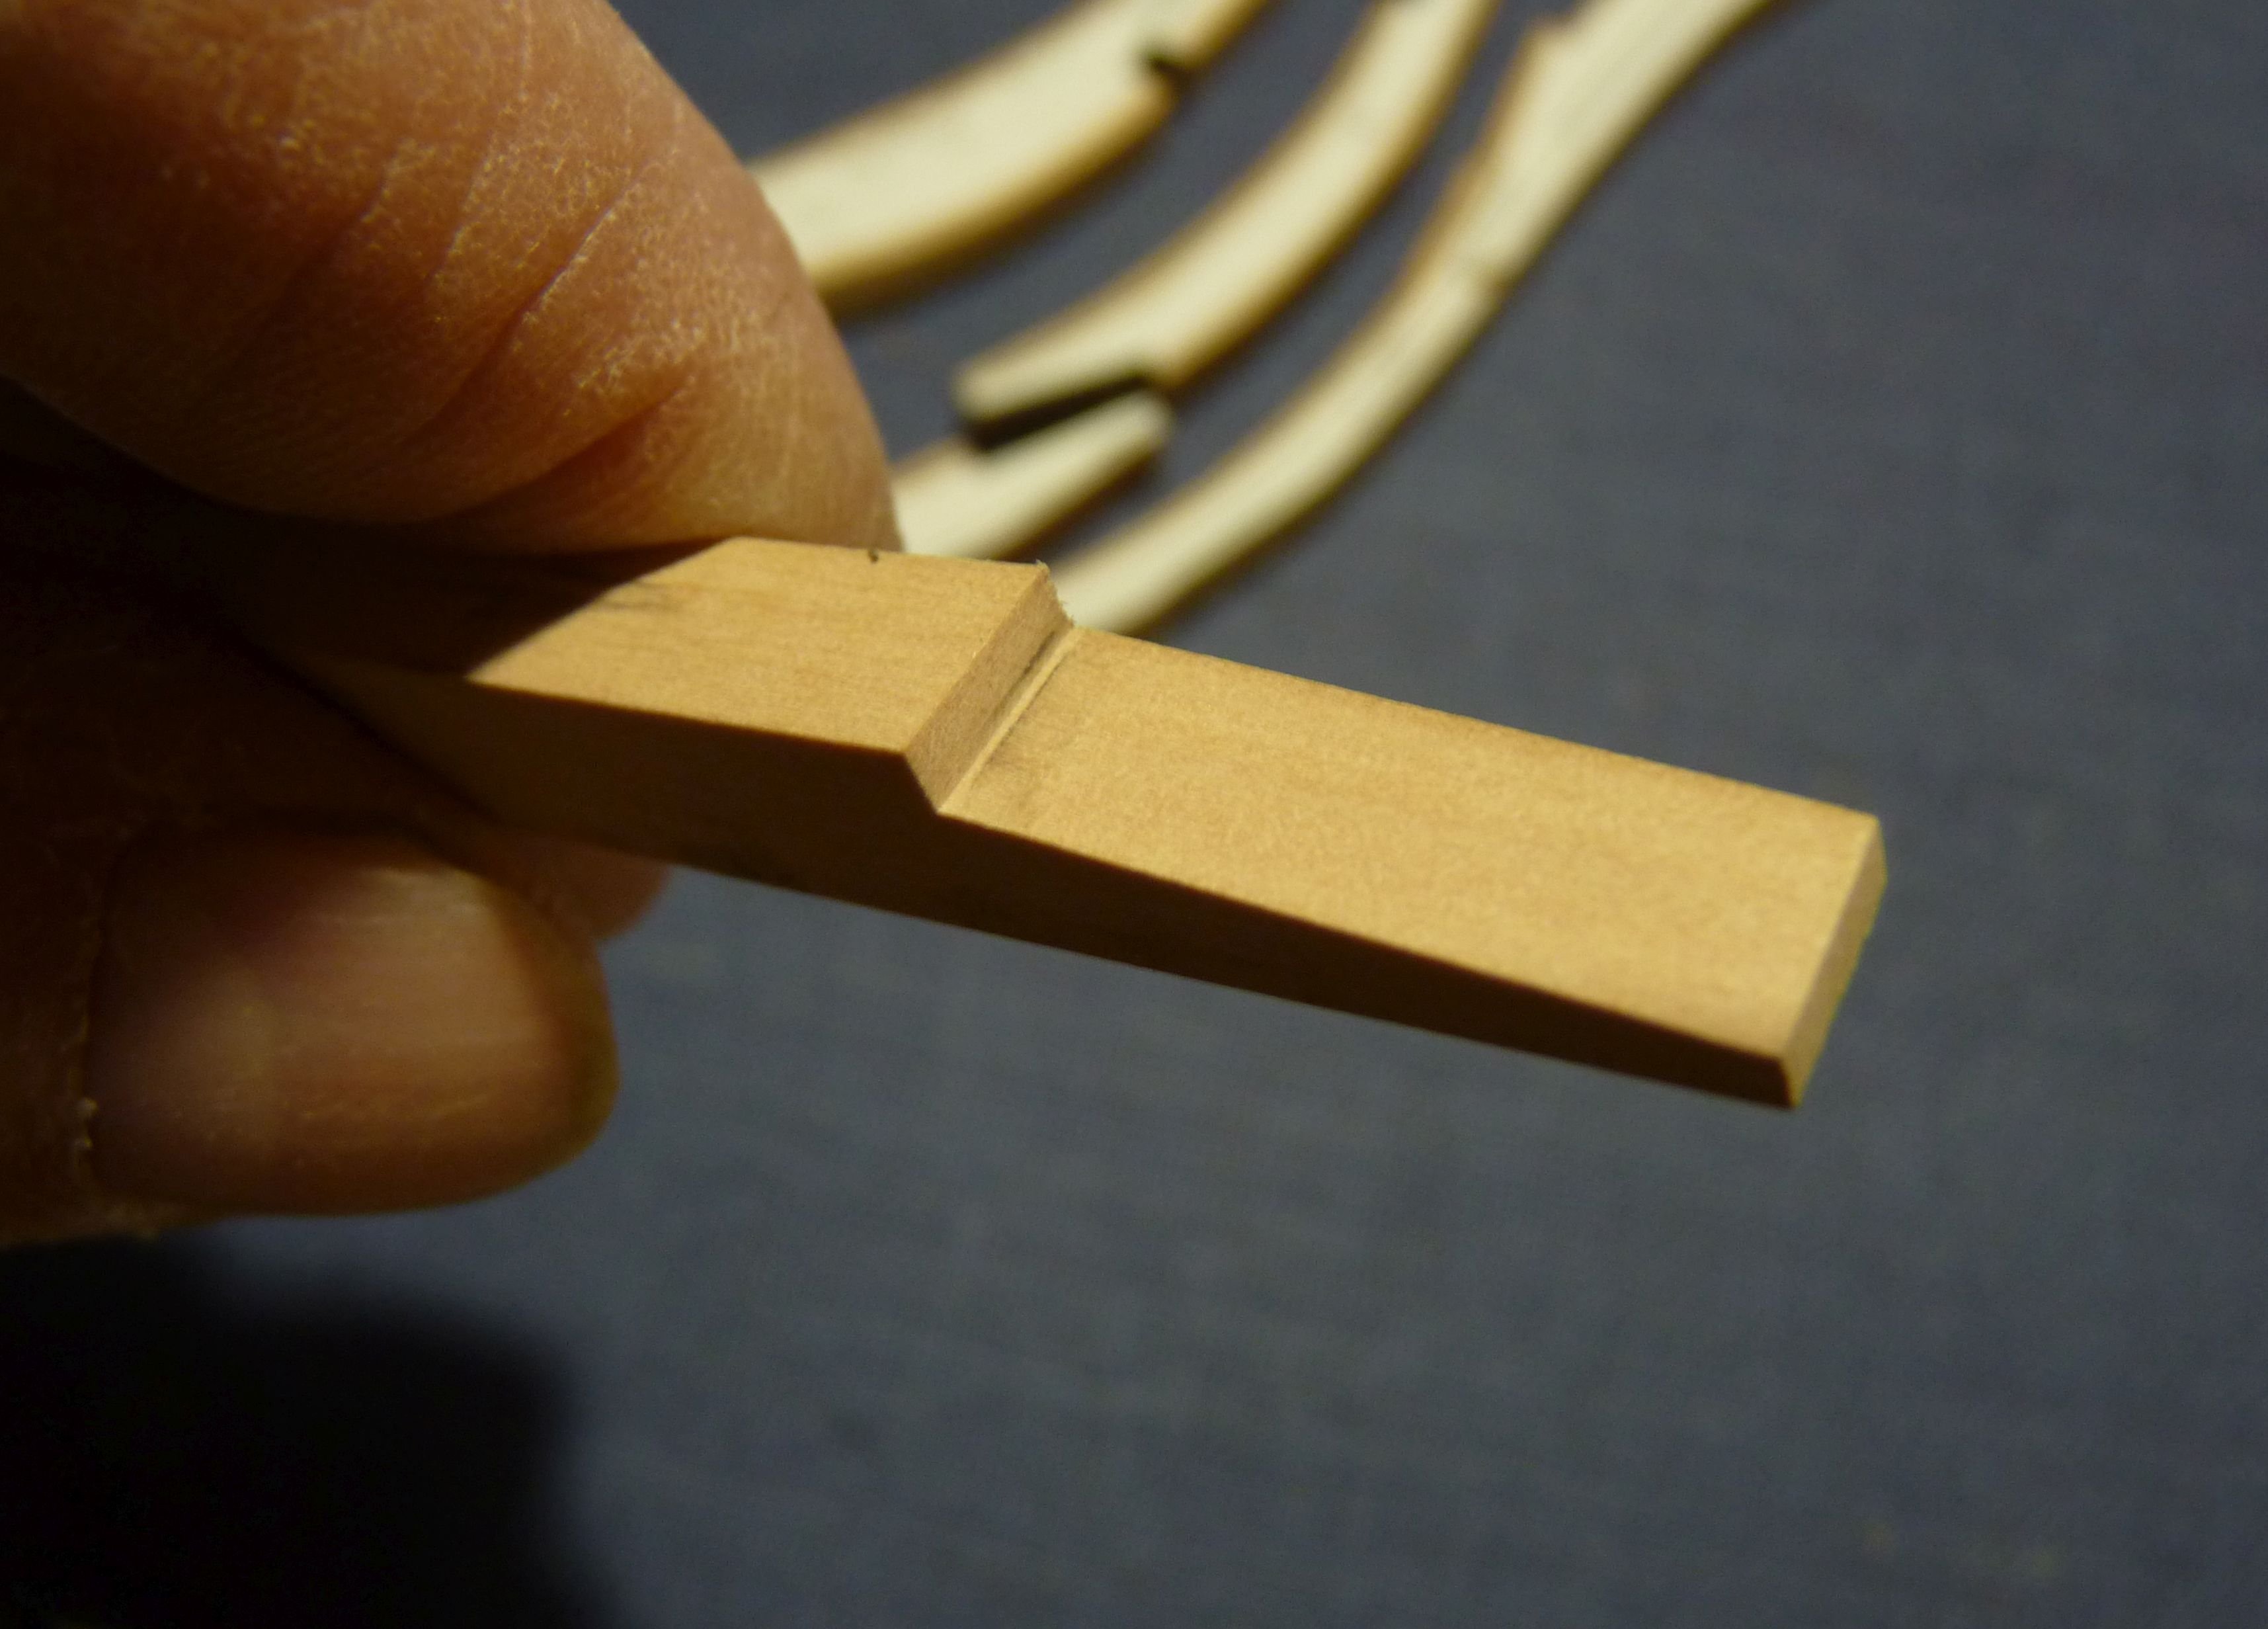
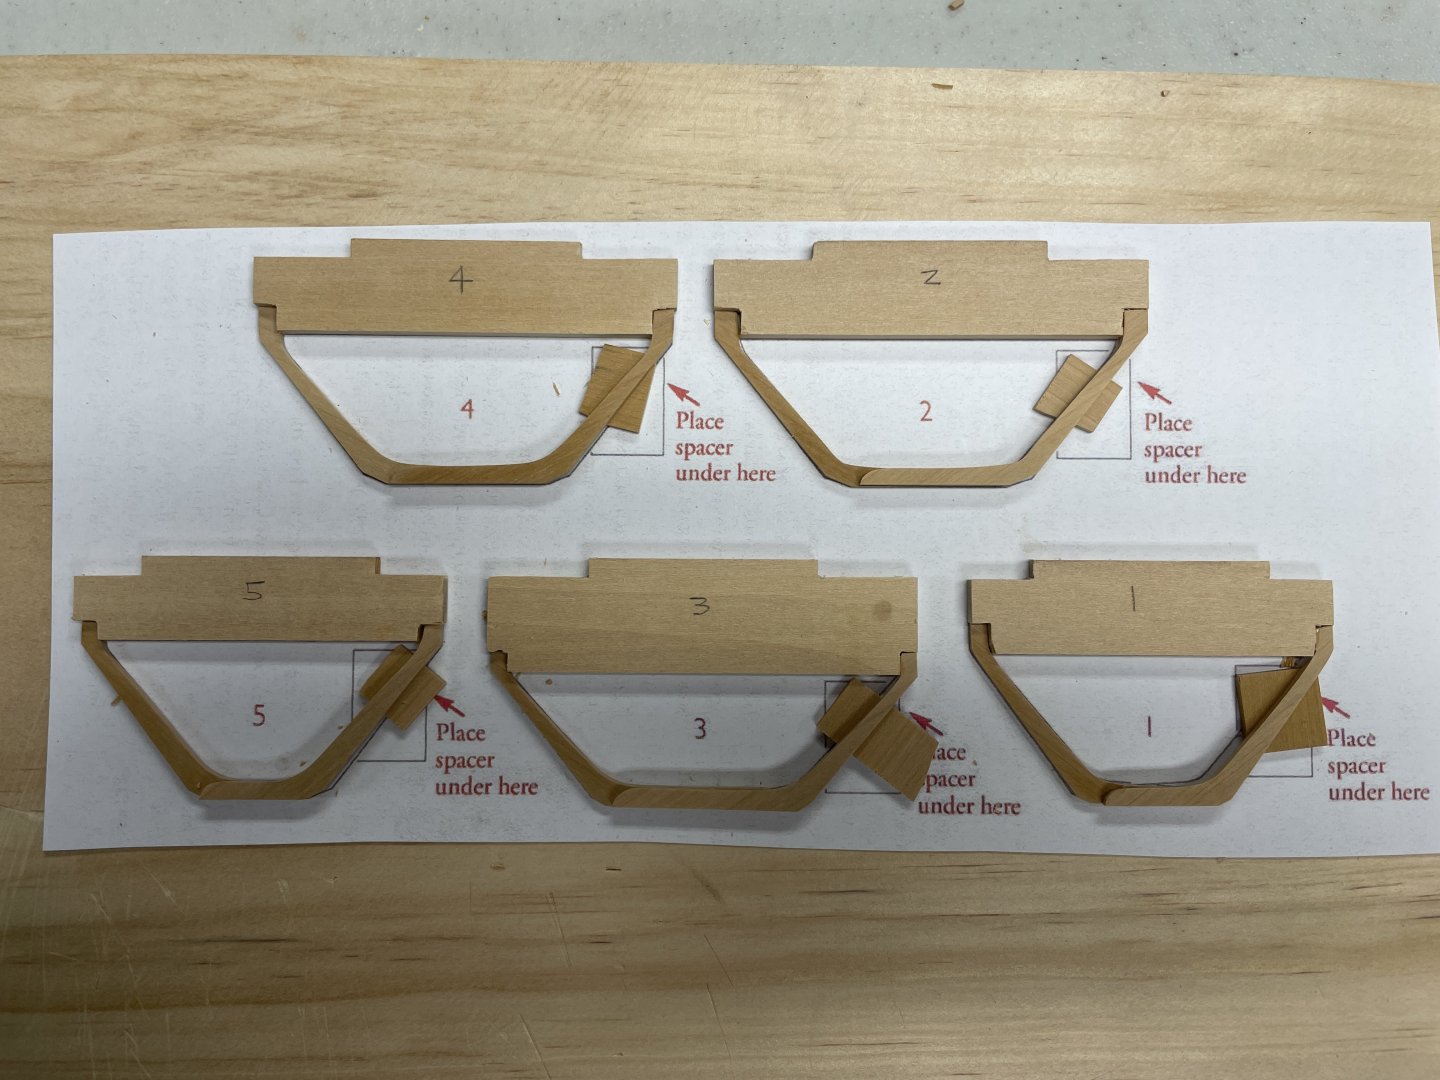
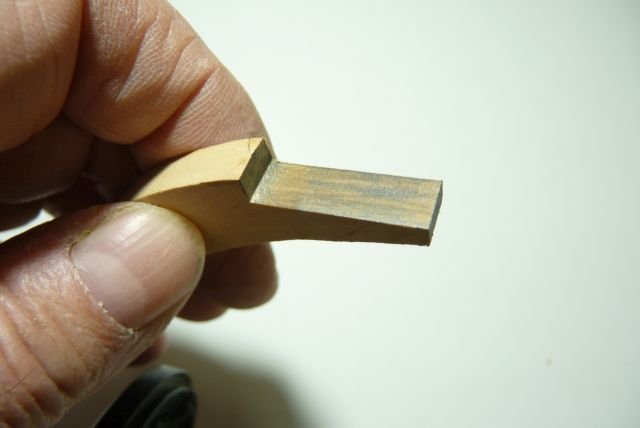
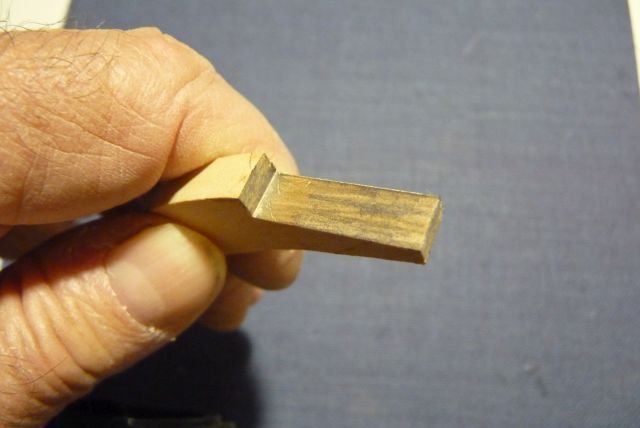
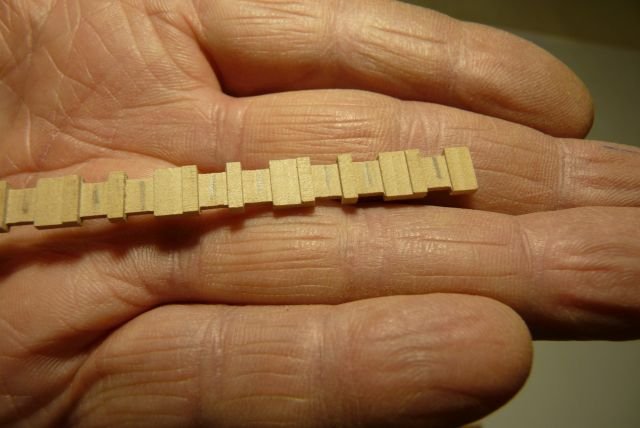
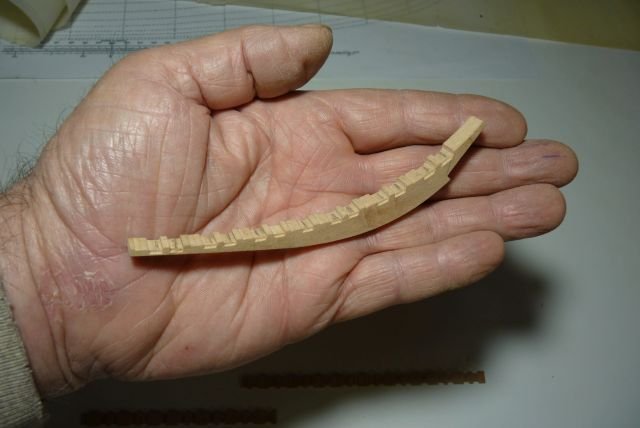
Log #3 Redoing a couple frame assemblies. I noticed, like others, that the instruction book isn't printed to scale so the frame template doesn't quite line up. With that, I downloaded the PDF and printed it out myself. Had I been at the office this week, I would've used our plotter. Since I'm at home, I had to mess with the settings and the best I got was a hybrid between two pages (since the PDF doesn't have the template as its own separate page). It worked, but you can see in the pic the bottoms of 1, 3, 5 are cut off. I left these to dry just before I went to bed. Well, subconsciously I must've really wanted to take something apart. In the morning, I noticed a couple of the frames were glues very cooked. Assemblies 3 and 5 shown below were the worst. I assembled them into the building board and thought about moving ahead, but decided to redo these two frames - they're now soaking in alcohol. In hindsight, Since the template I printed had the bottom cut off, I feel this contributed to me not lining these two frames up right. They were also the first two frames I put together. For whatever reason, I was more focused on the right angles where they meet the building cross piece than I was making sure the two pieces of frame were flush where they meet. Ultimately, my decision to redo was based on: Aside from #3, these are to have bevels sanded on them - having them so uneven will create a pretty sloppy, staggered bevel. The char isn't a great gluing surface and a lot of it wouldn't be removed when beveling which could compromise the strength and lead to unforeseen issues later. Even though the worst part will be hidden when glued to the rest of the boat, the frames wouldn't be at the correct angle and are closer together than they should be. I didn't want to risk this creating excessive gaps and bends when planking. I'm expecting to get the frames reassembled soon, but I'm playing catch-up with work today, and the wife's birthday is tomorrow so I'll have to play the rest of it by ear. Thank you, druxey for the peace of mind. This also led to my decision to err on the side of caution to redo the frames since they'll directly affect the shape of the bottom board.

- Today
-
 Thats really nice work it looks fantastic
 -
 The AEG got it´s teeth - hmmh, well - besides the painted on jaws I mean. The LMG 17/17 Parabellum are from Gaspatch, airbrushed satin black and then I rubbed on steel pigments with a cotton swab. Stock and grip are painted with oil colors and after seeing the pictures, I decided to put on some varnish for a more realistic look. The kit guns are not bad and I used one inside the fuselage, but detail of the Gaspatch ones is absolutely fantastic. Positioning of the guns is not final. I also made some touch ups and detail painting and added the artificial horizon. Gun mounts and other details got sprayed aluminum, then covered with hairspray with the dark sea blue on top and finally weathered with a toothpick. Cheers Rob
 -
 I bought this (or something similar) years ago when I was going to get into carving: https://www.amazon.com/PSI-Woodworking-DC725-Portable-Collector/dp/B000REX1UU?source=ps-sl-shoppingads-lpcontext&ref_=fplfs&psc=1&smid=AP845MBBUYCQH I haven't used it yet to be honest as I haven't been doing any carving, so not sure how effective it is. It wasn't exceedingly loud if I remember correctly. When I do things like sand or drill or work with resin, I found putting my shop vac nozzle in a vise near where I'm working is an easier and very effective method for removing dust.
 -
 Oneida is getting ready for her playdate with the other ships tomorrow in New London, CT-- Ron
-

Westland Sea King HU.5 by chadwijm6 - Airfix - 1/48
chadwijm6 replied to chadwijm6's topic in Non-ship/categorised builds
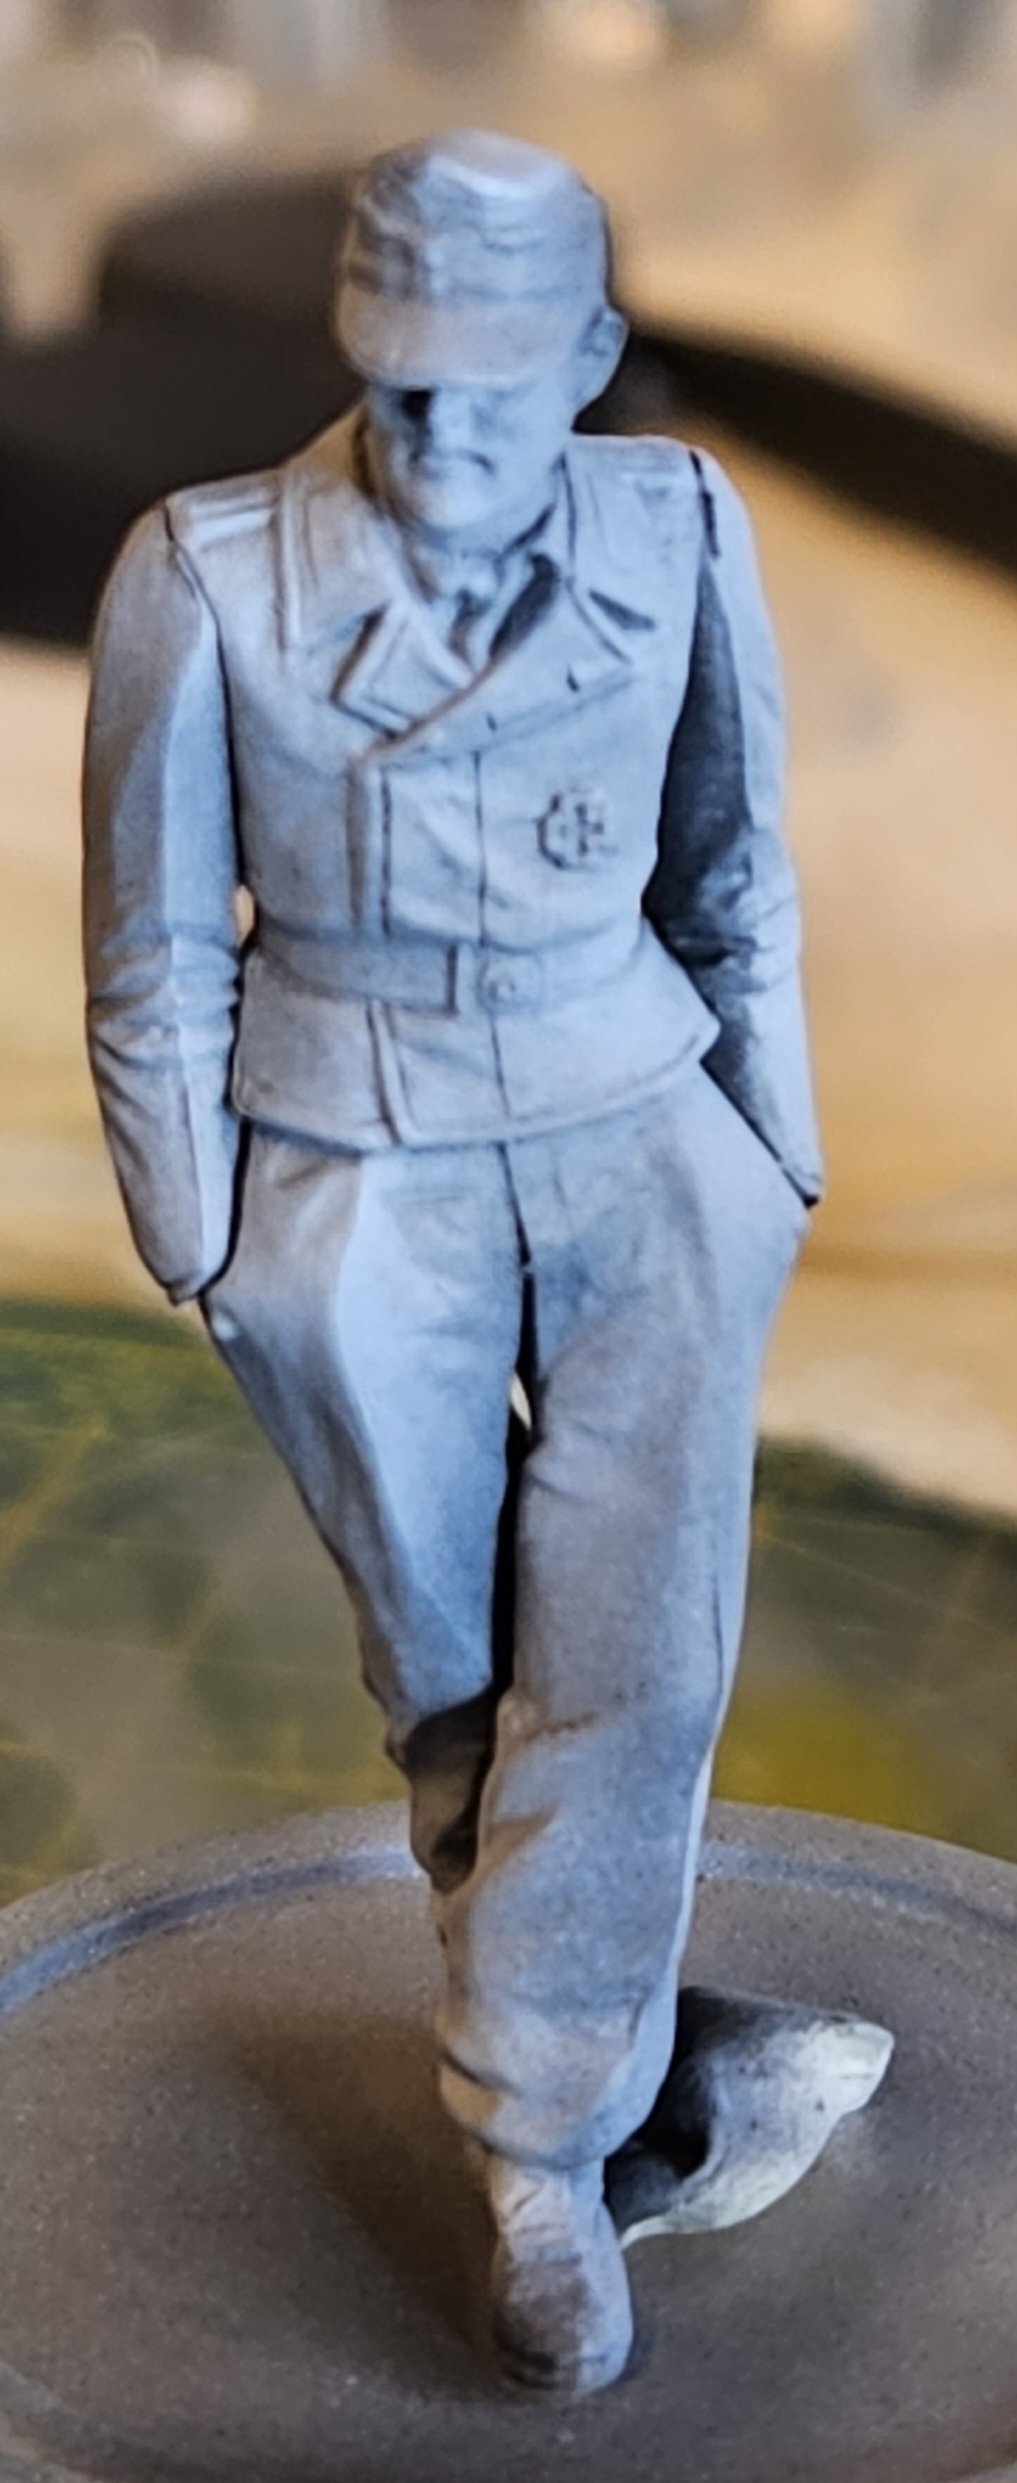
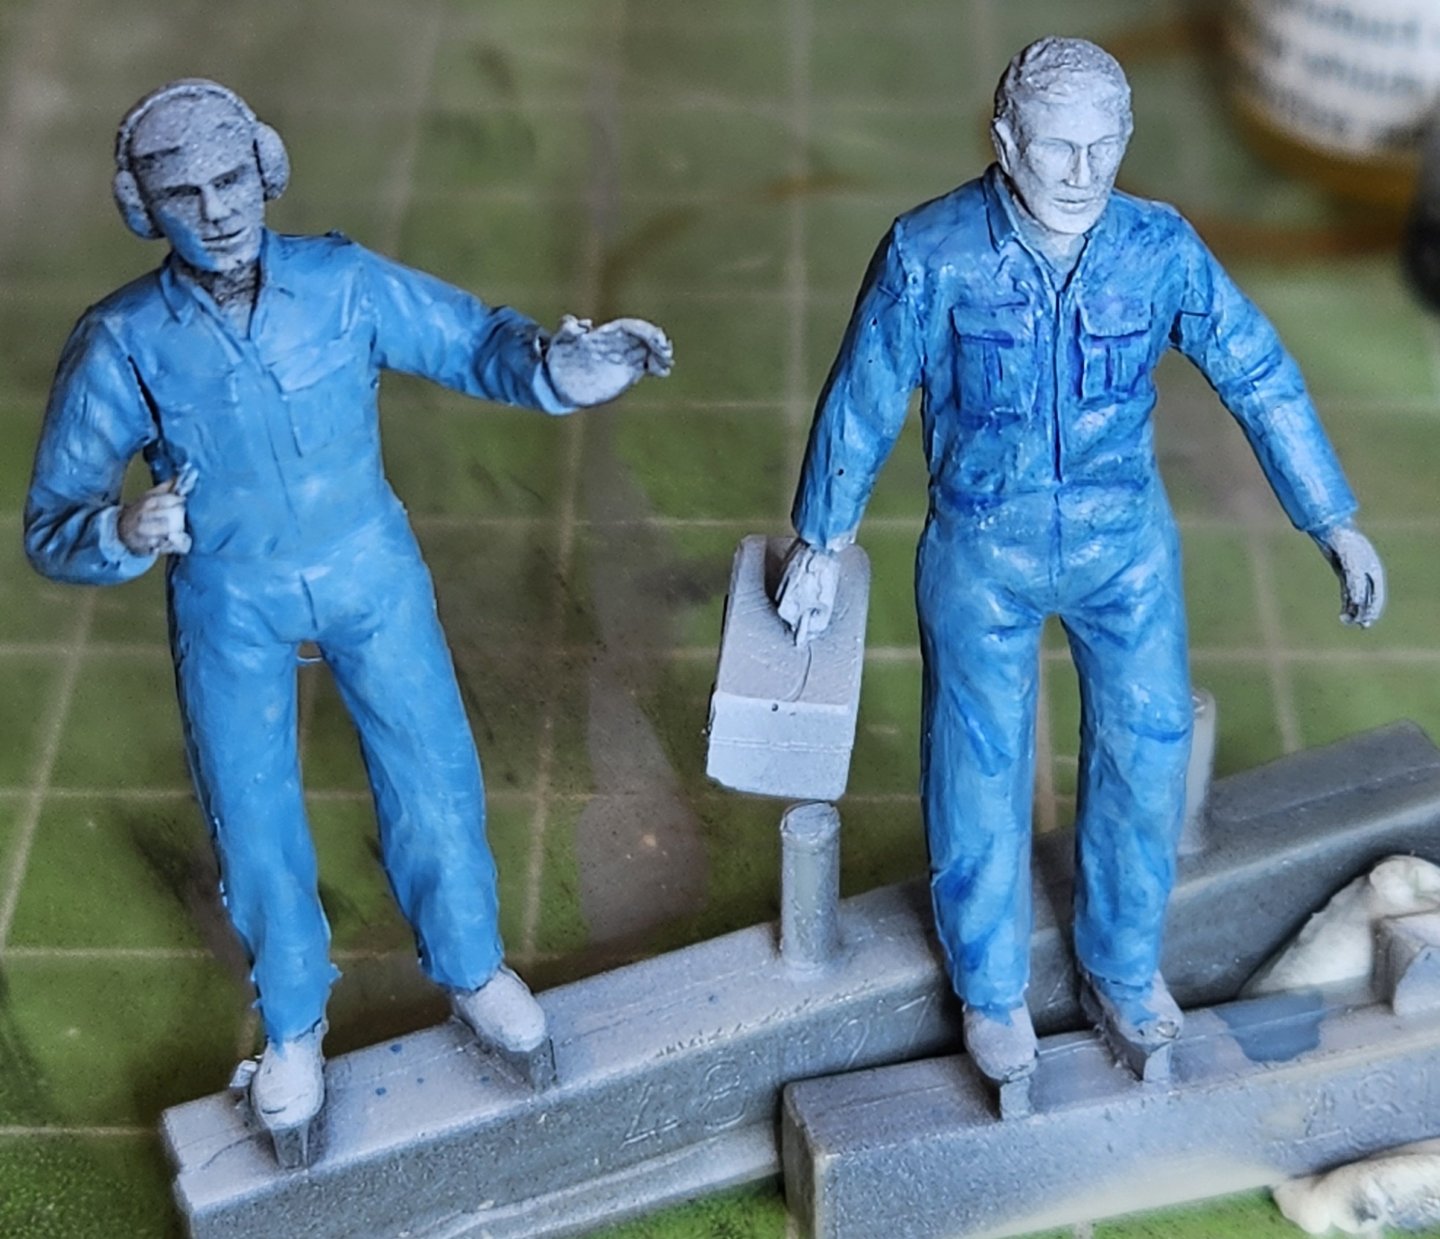
I'm painting the figures to go on the diorama and I'm very new to this... One previous attempt. So I watched a couple of YouTube videos. The one I've followed was to prime in black, then highlight with white. This is what I ended up with, although this figure is for a different project Next step was to water down the paint and apply very thinly, glaze it effectively, and then add some highlights by dry brushing and a bit of a darker paint wash to add depth. It's amazing how the the high and lowlights really make a difference, I've tried to capture it in the images below.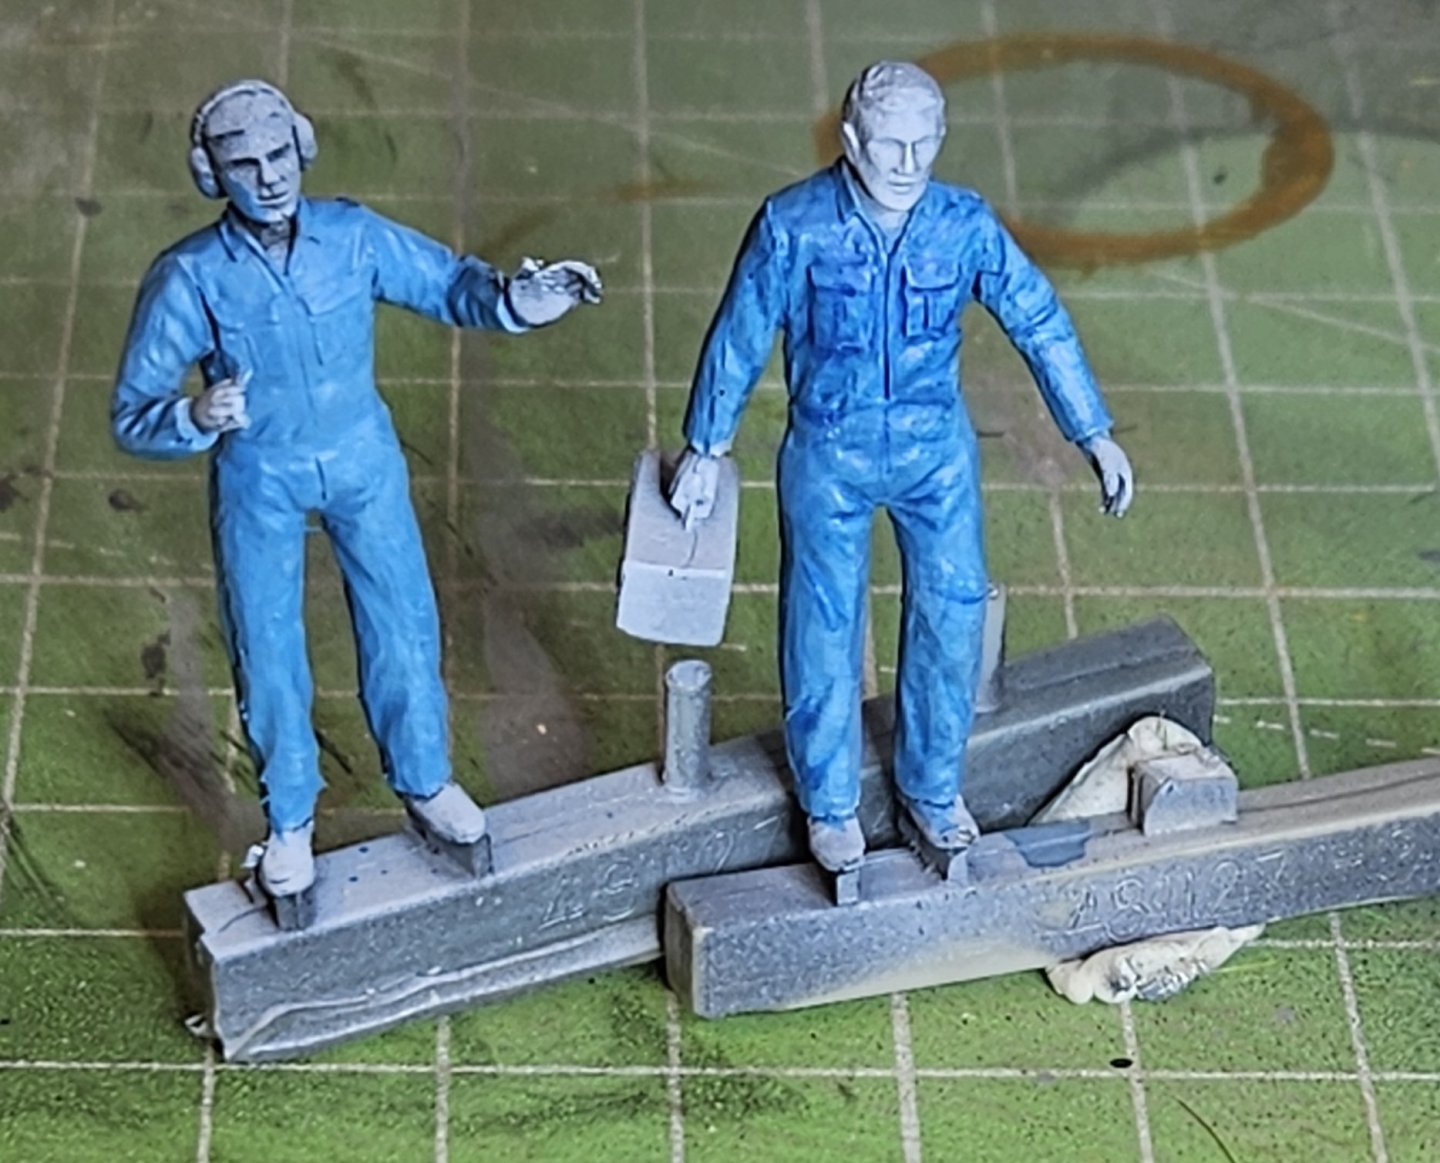

-
 No, it reminds me of some of the outbuildings on our farm when I was a child alan
 -
 Thanks Chris! Interpreting the war diary has proven to be a much bigger project than I anticipated, but it’s really fascinating. Especially during combat, the entries are very abstract (dates, times and map coordinates), being able to “zoom out” and see the bigger picture, although sometimes complicated to piece together, has definitely provided much needed context. My hope is, when it’s all completed, to get it printed and bound in a hardcover book to share with my entire extended family (well, I will have multiple copies printed so there’s no squabbling 🤪) Andy
 -
 New price for this kit of just $140 plus shipping! Dave
 -
How do I get to be friends with her too?
-
New lower price for this kit! Now $250 plus shipping. Several excellent build logs to assist are available on MSW. Dave
- 1 reply
-
- 1
-
-
 I would agree with your assessment. Much easier to get a flush fit.
 -
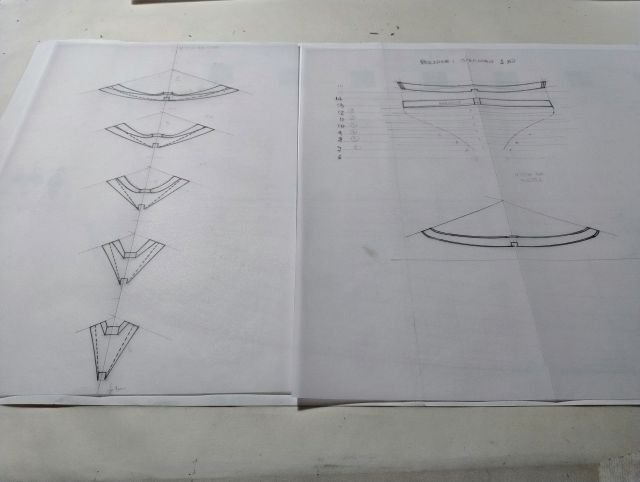
 Hello everyone, I am embarking on this new project, my favorite period is 1800, after having built a French ship and an English frigate, I am trying my hand at building a corvette, Boudriot's plans do not include the framework , I therefore proceeded to the drawing myself, by hand, what I needed to build this corvette in frame, I must thank Gérard Delacroix for the advice he gave me and for the plans he provided me, he was very kind, and thanks also to Francis Jonet for making one of his available books, after spending twenty days drawing, I started the construction with the axial elements, let's see what comes out of it , any errors will be corrected during the construction phase. This time I'm building in 1:48, because the model allows me to have manageable dimensions for me:
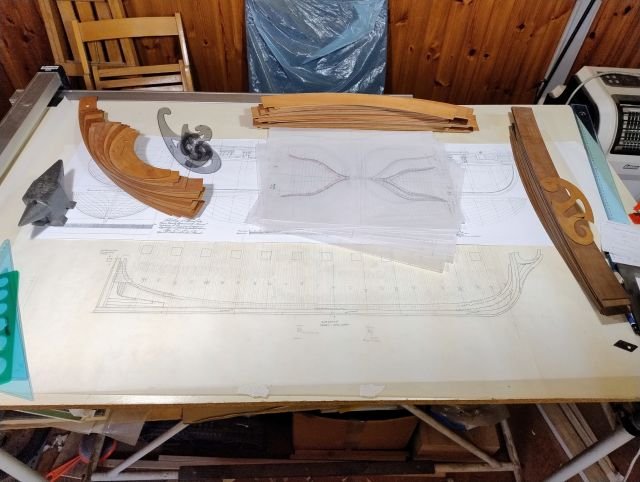


-
 I have the same issue with the material that came with the kit. I tried three approaches to deal with the problem. 1. I asked Model Shipways to provide replacement strips. (No response since their acknowledgement email on December 1, 2023.) 2. I ordered replacement strips from Modeler's Sawmill. Unfortunately the strips were significantly darker than the basswood that came with the kit. Because I was/am still hoping to keep a natural finish, these were not usable. (They were also significantly shorter - I'd say 2/3 the length of the stock in the kit, so ask about that when you order). 3. I went to Ace Hardware and purchased material that was a tad thicker than the kit's stock, and used my thickness drum sander to get make my own replacement strips. The color was an exact match, and the strips were spot on in their dimensions.
 -
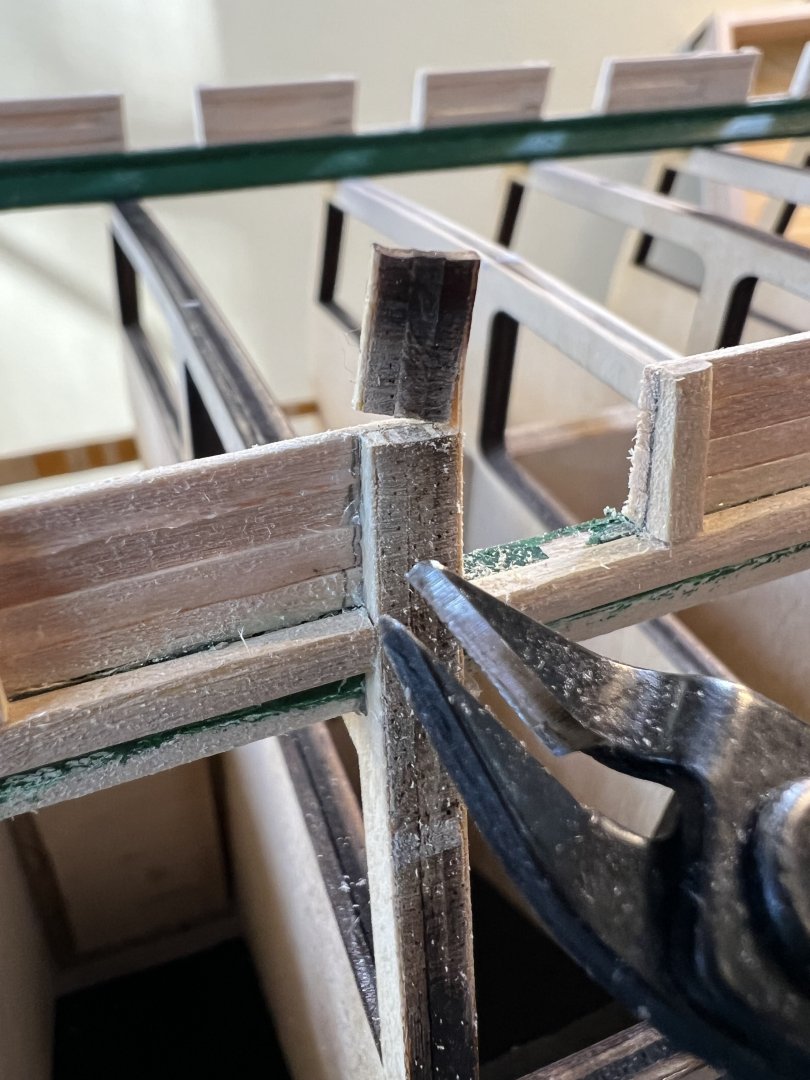
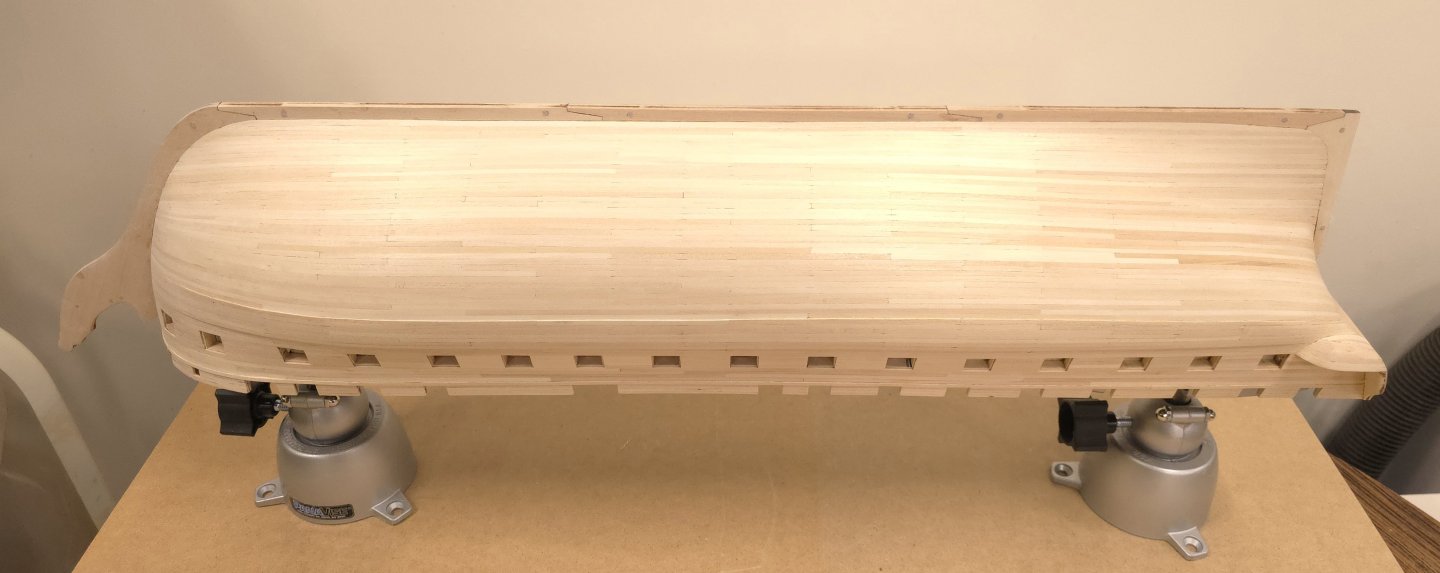
 The last of the port cutouts - of course - I nearly cut into the planksheer on my last section. I’ll have some painting to redo on my interior planksheer sections. I’m not convinced that early painting of the waterway & planksheer was either a good or bad idea. There’s a lot of sanding to be done to prep for the rail and painting but for now - I’ll leave that for later. On to the transom gunports.
-
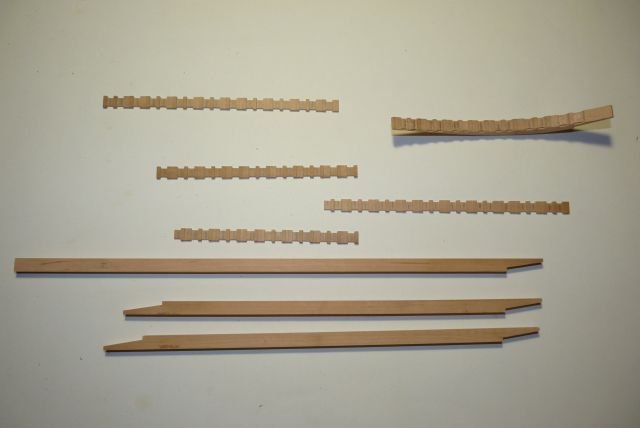
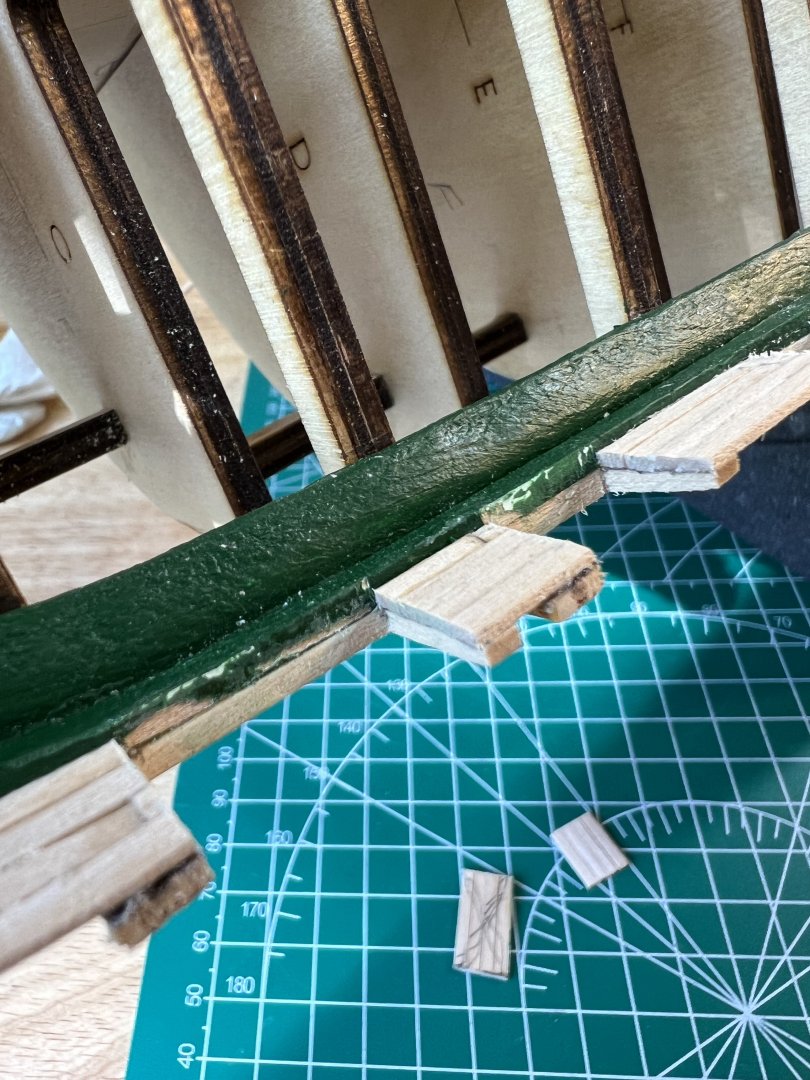
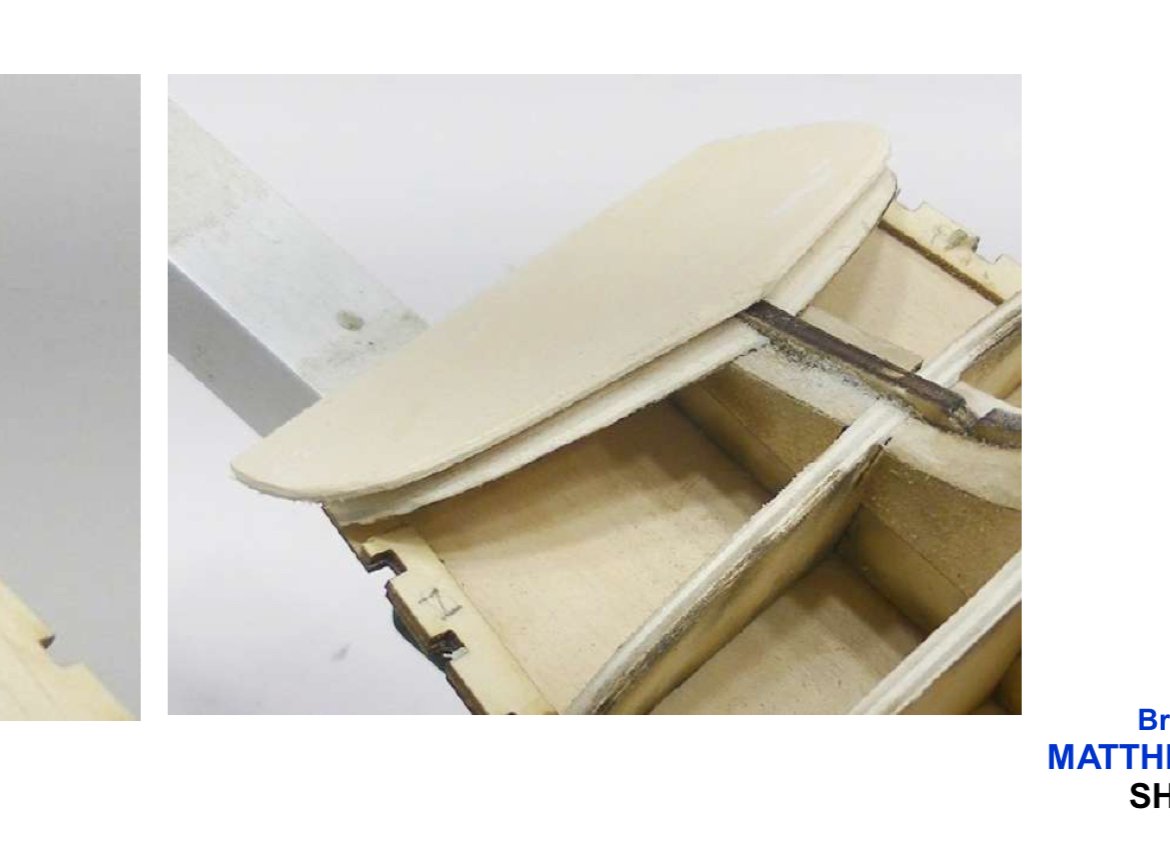
 I’m working on the modelers central Matthew turner. In the instructions it calls out installing the transom before planking. This would require fitting both ends while planking. I’m thinking I could let them run wild at the rear, trim flush with the transom support, then add the transom at the end. Am I missing something that the transom adds at this stage?
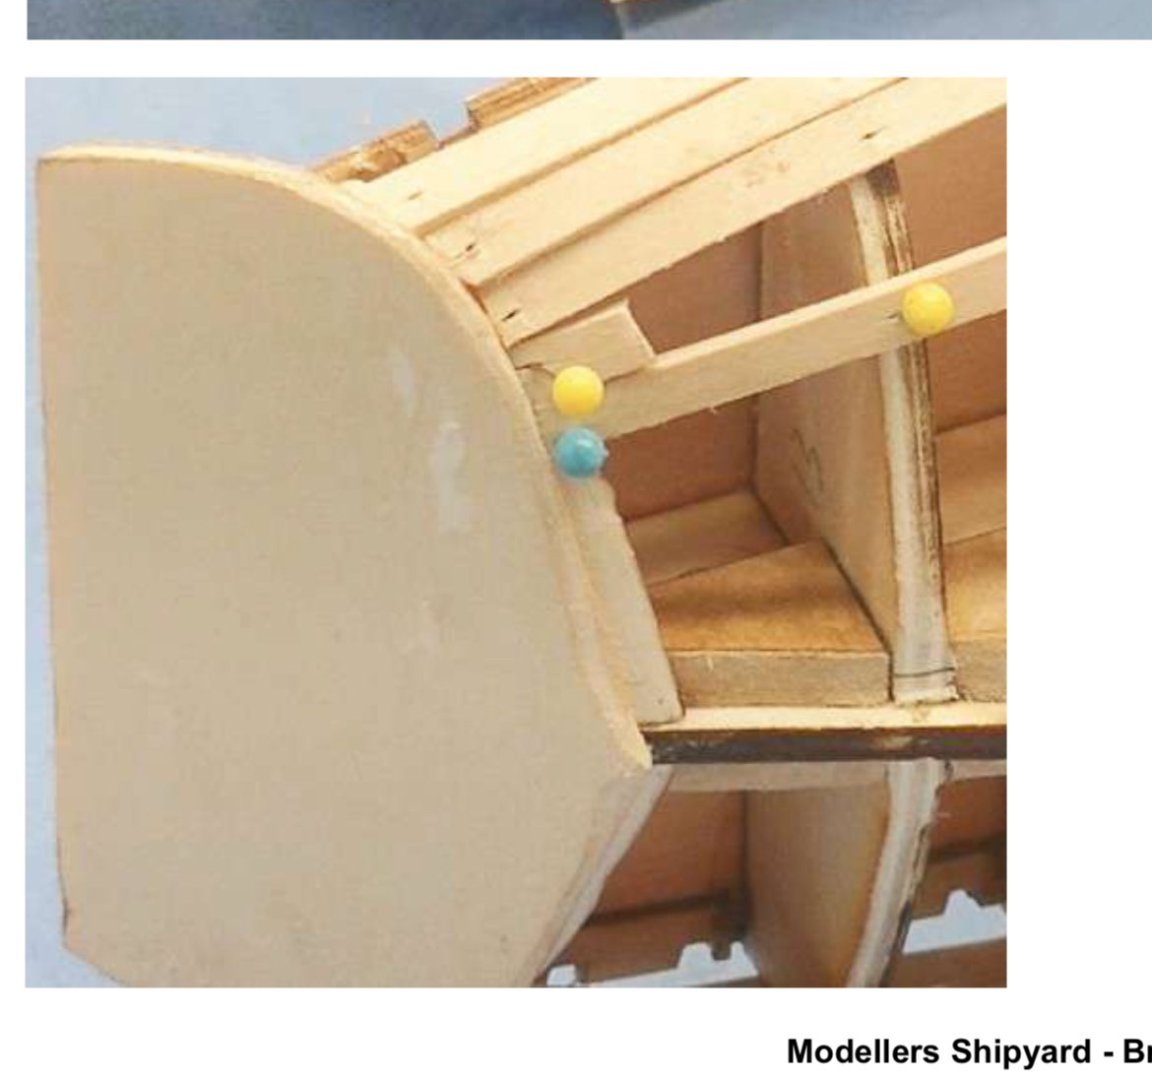
-
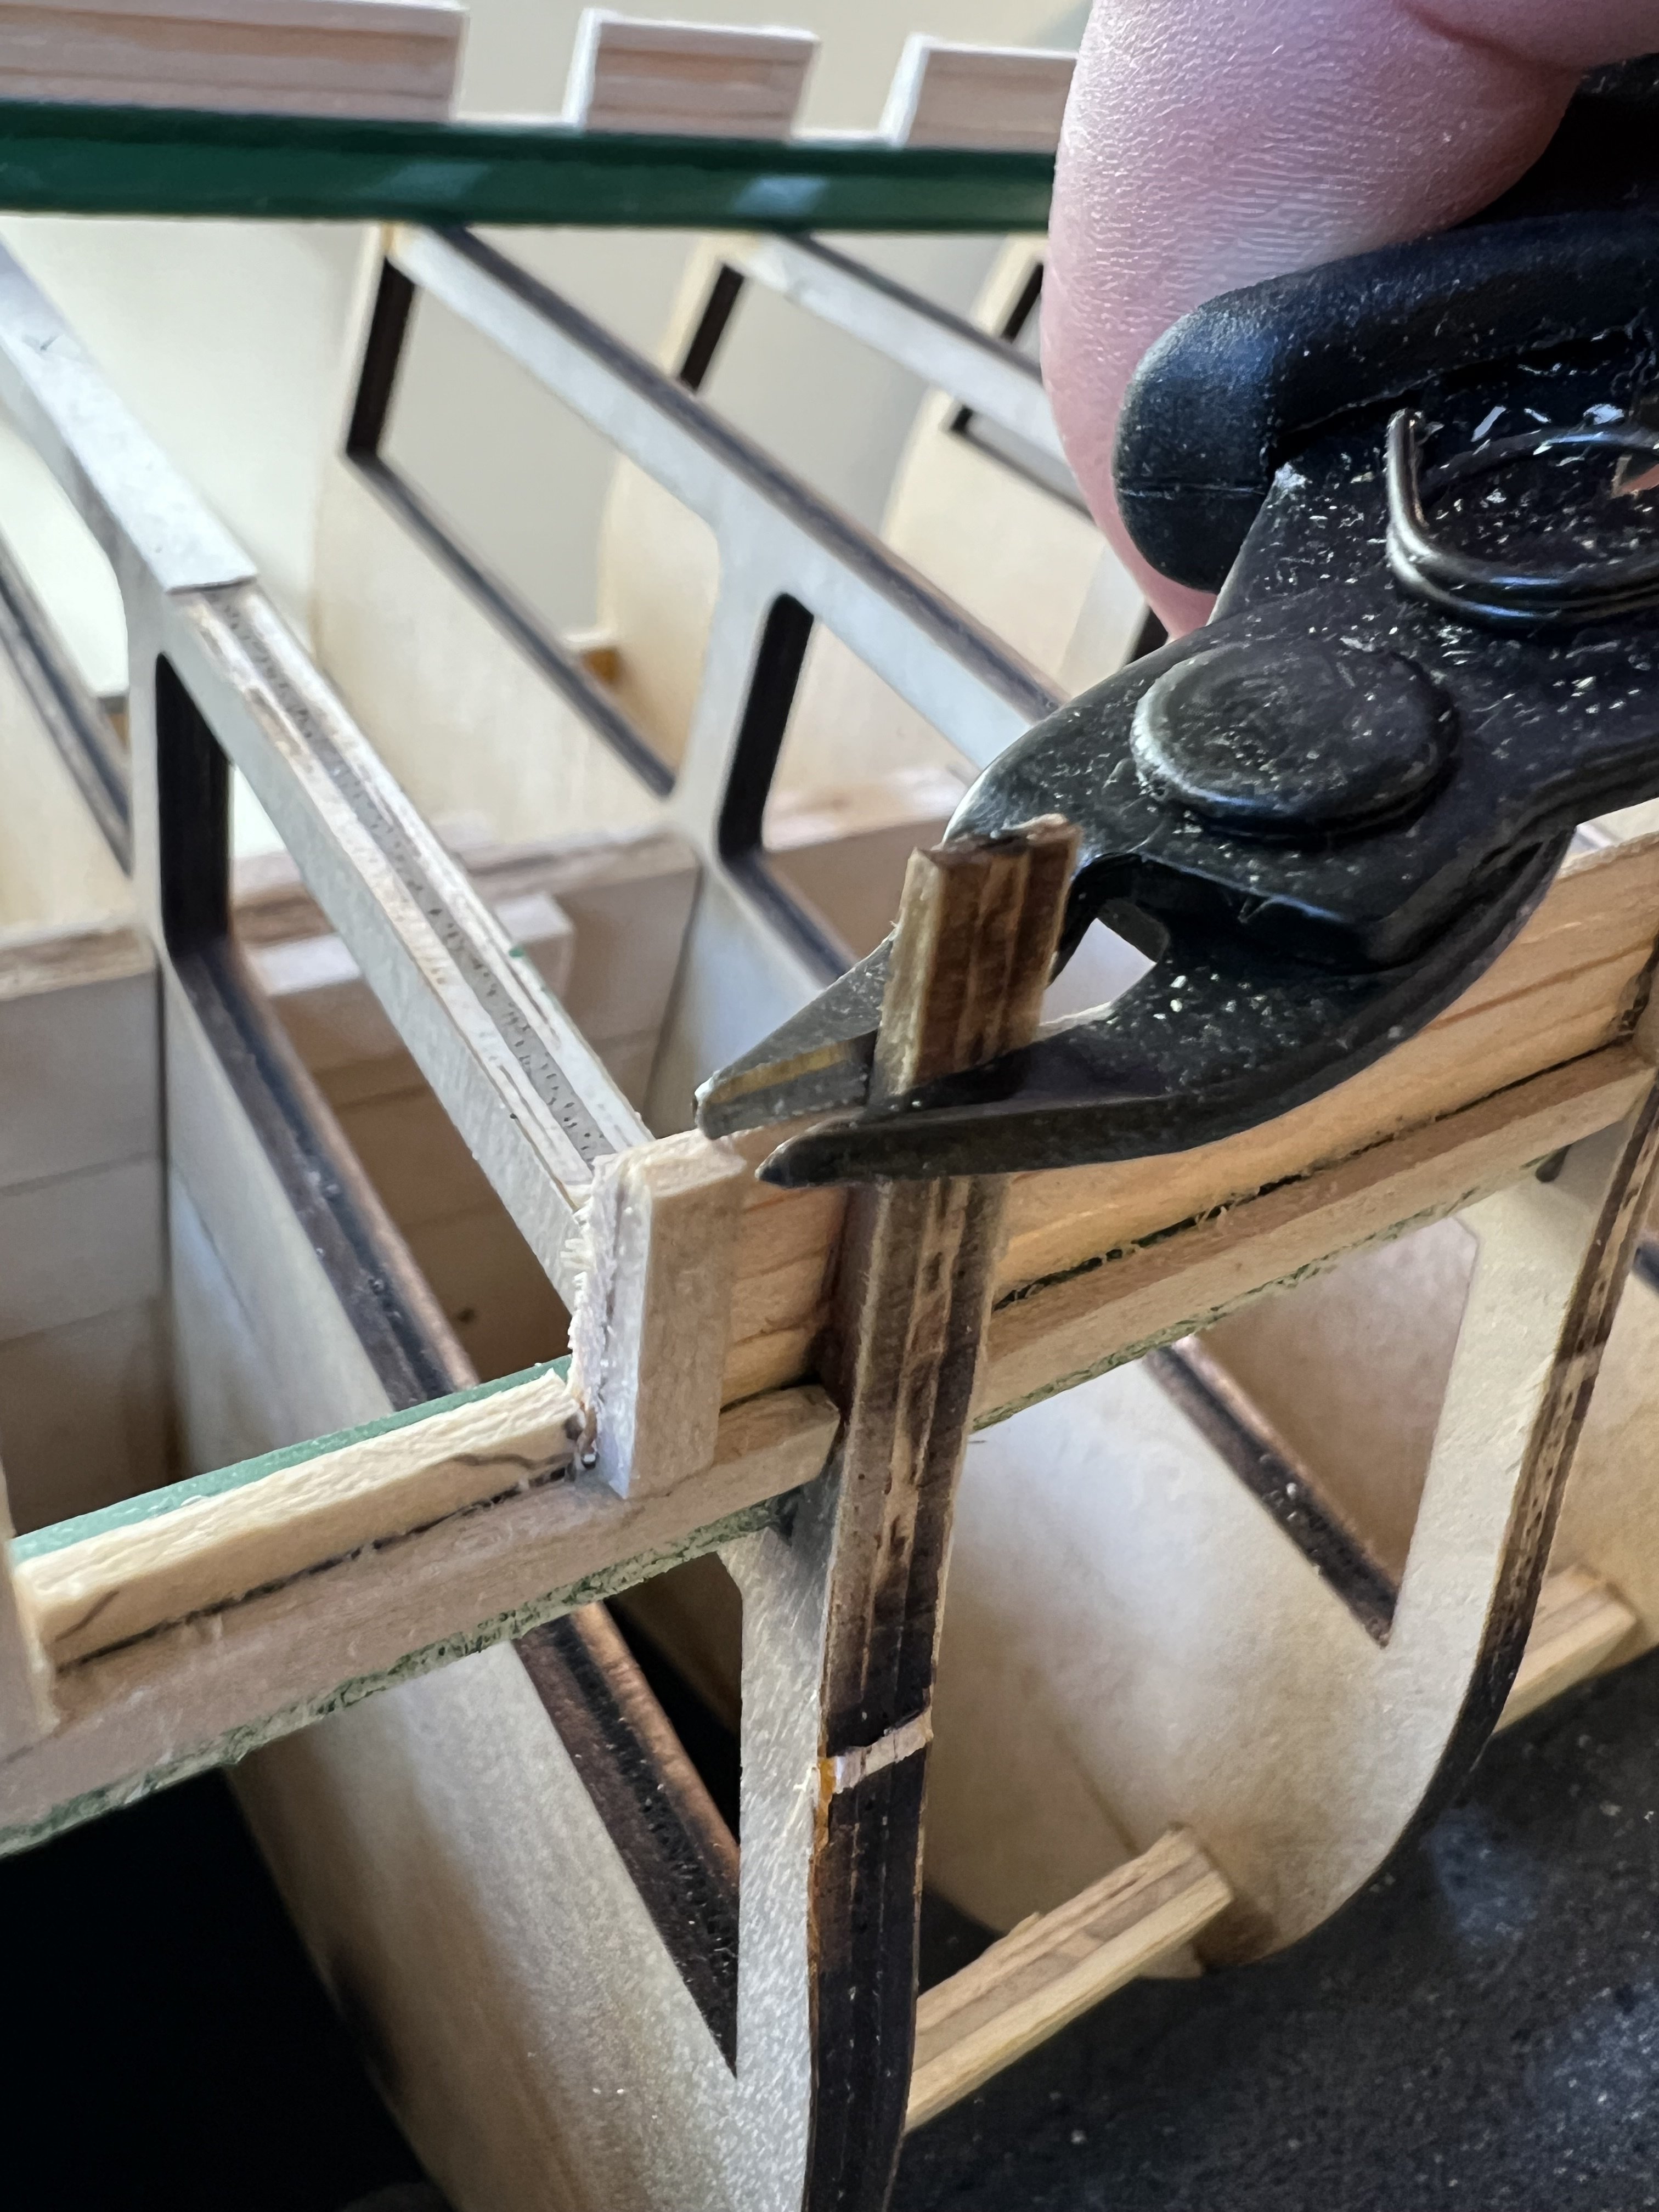
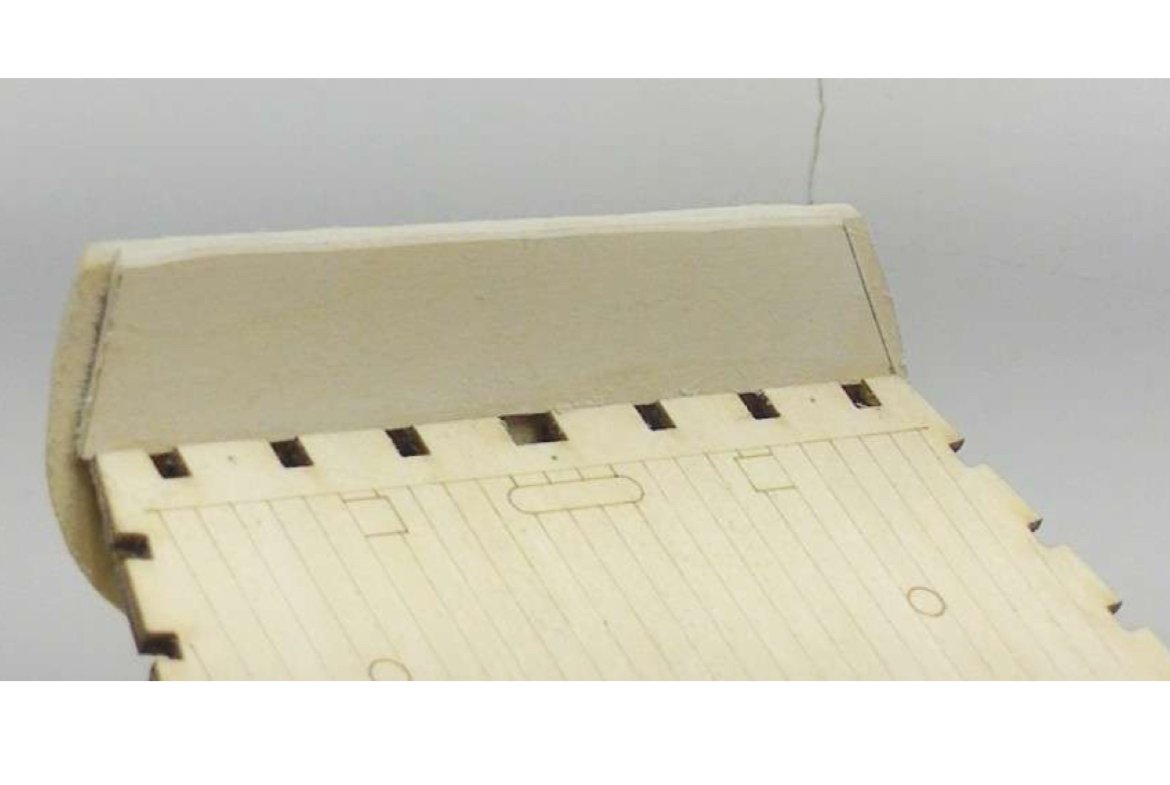
Due to the deteriorating condition of the upper bulwarks (the compressed layers have been separating- I needed to peel off and re-glue some of the layers on the main bulwark sections earlier on), it’s better to snip them than to saw them.

-
 Last couple nights I have been working on the rat lines, probably another couple nights before I complete them. The rat lines definitely take a while to complete, but they are easier to complete than I what I had imagined.
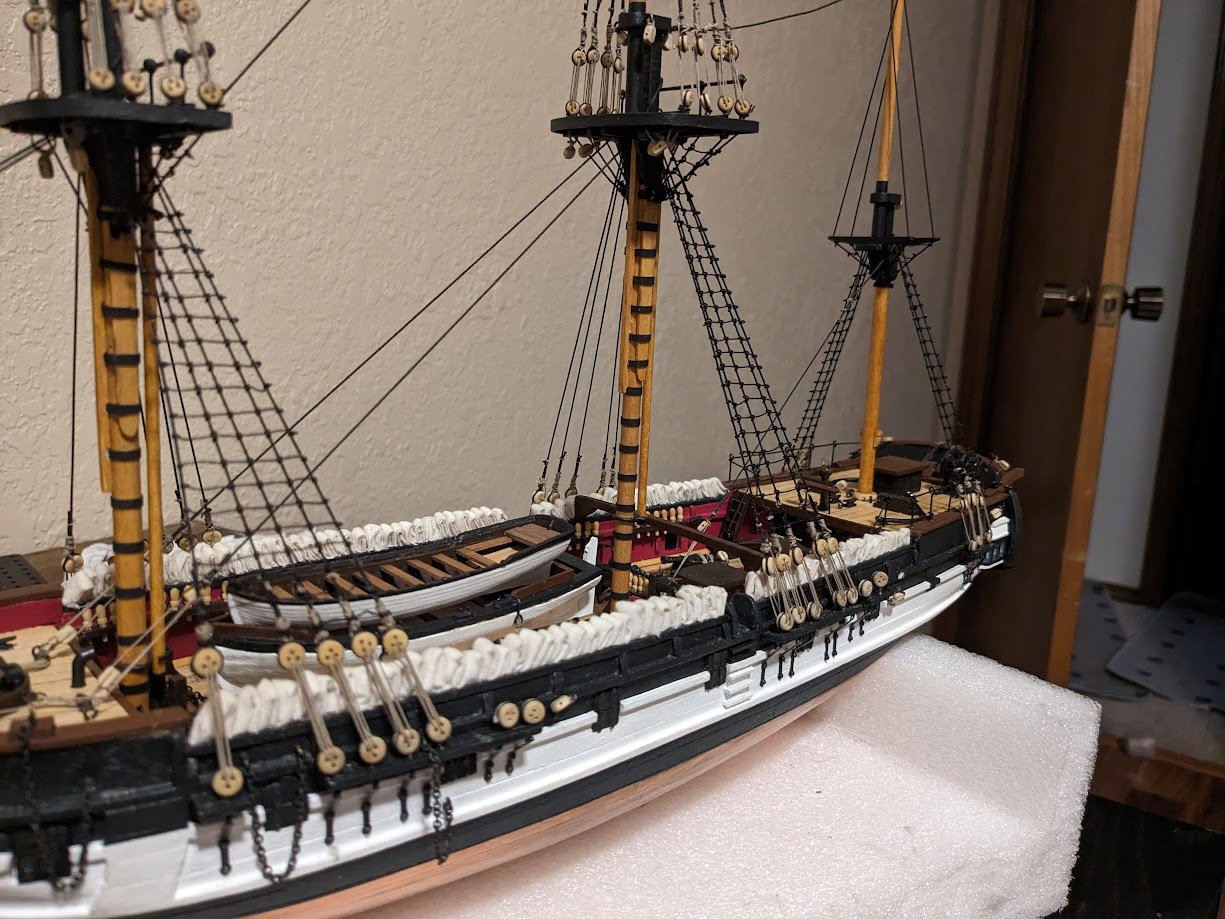
-
Micro-Mark Desktop Dust Collection System
Gregory replied to eurekapaul's topic in Modeling tools and Workshop Equipment
Steve, I use a small USB fan for that purpose. The dust settles in a corner of my shop, and I vacuum it up. l was a little put off by the price of the MicroMark device, but really couldn’t comment from experience. Your information is very useful. -
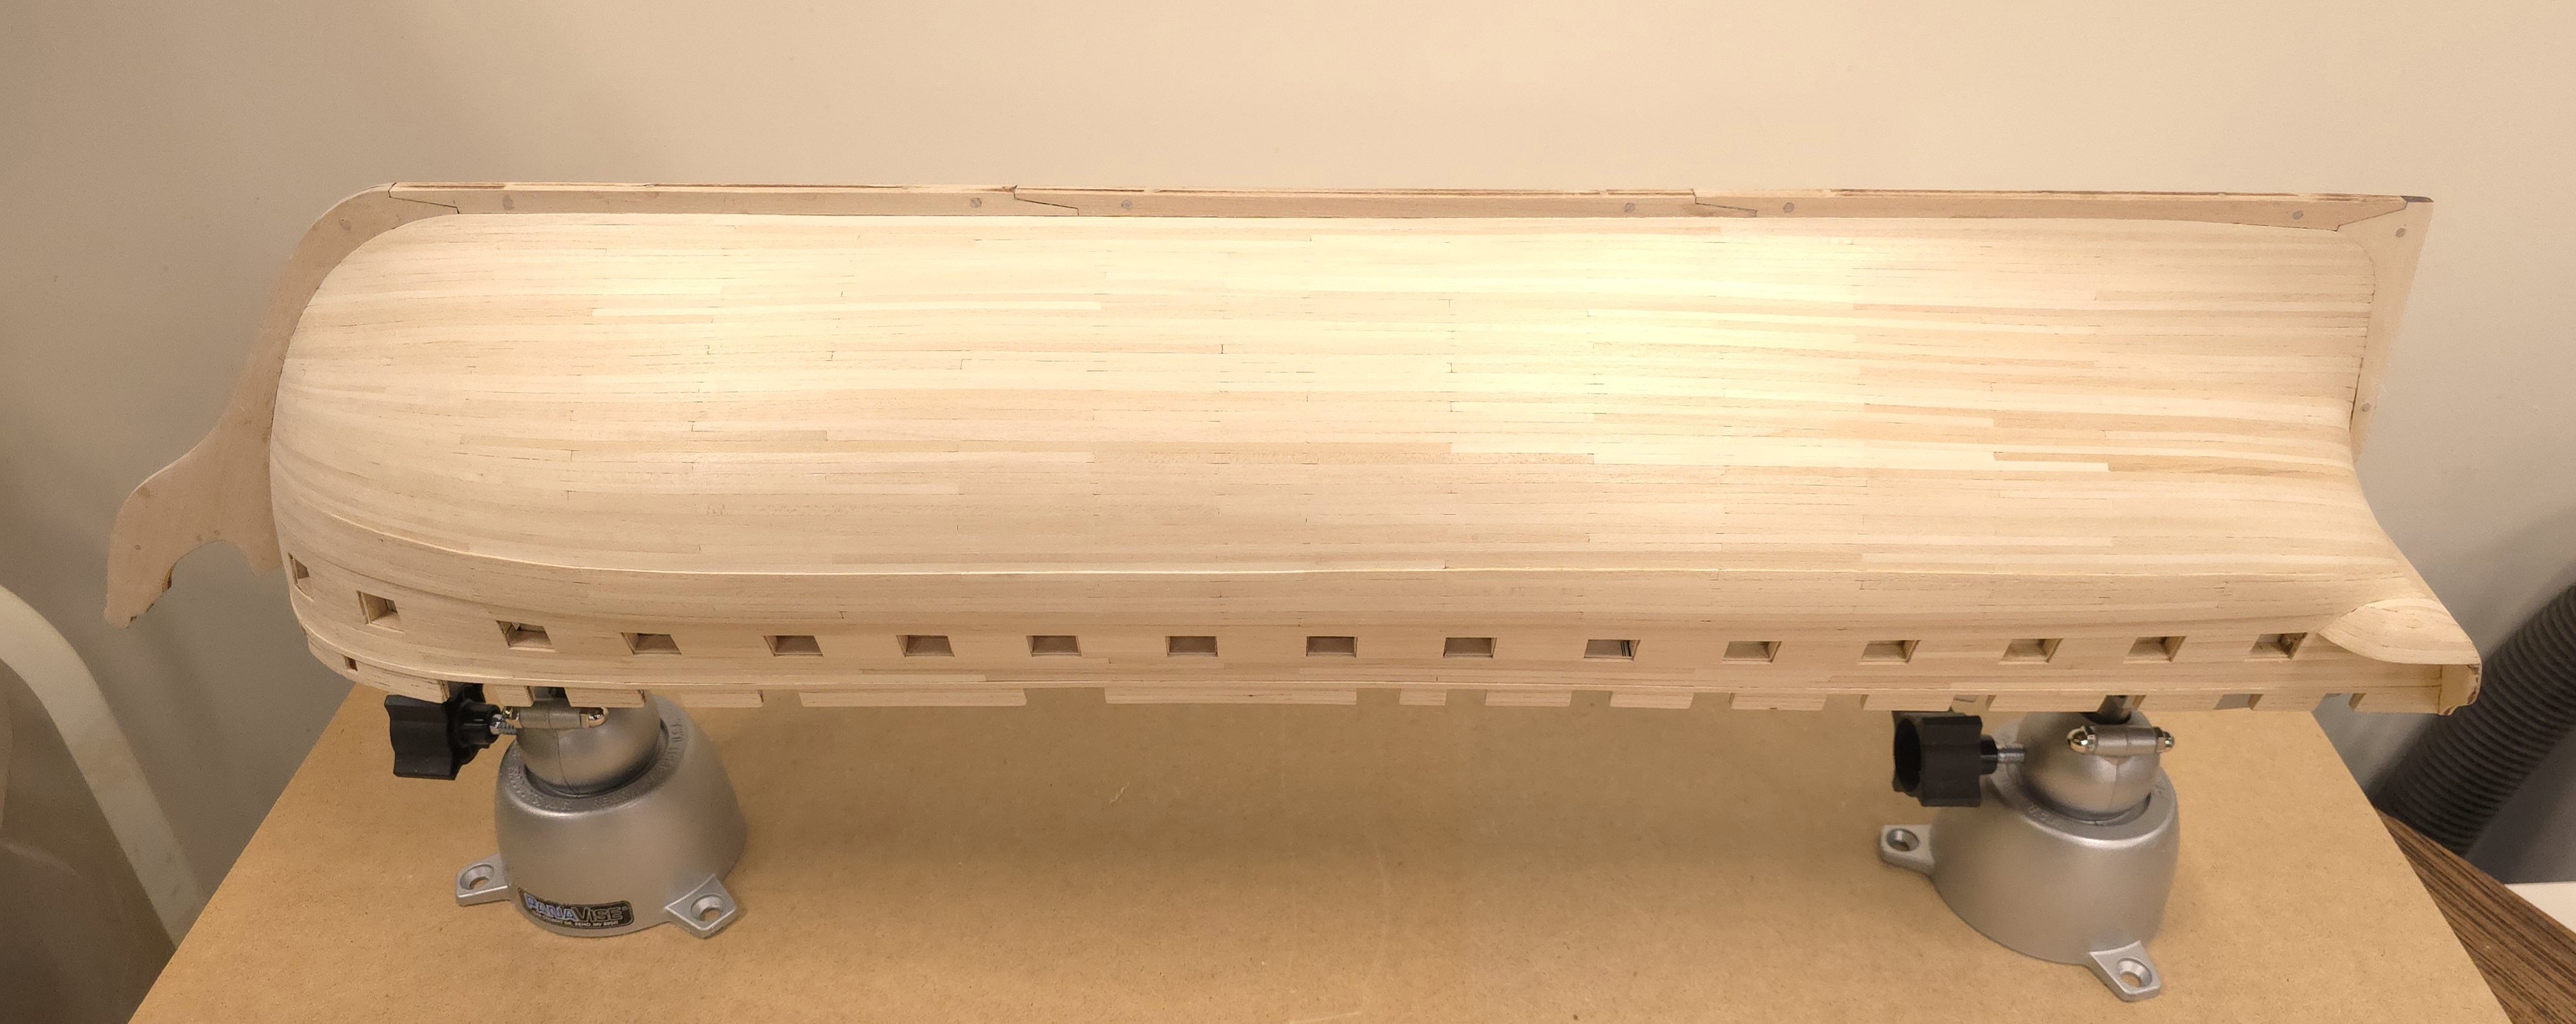
I couldn't resist posting this pic. Five more strakes on the port side and the hull will be fully planked. (I did fit the garboard strake there yesterday, so I'm close to being done.) One lesson I learned was that the fairing process at the onset - as well as that of carving of the rabbets at the bearding line, needed more attention to detail. I'm paying the price now. It took two days to lay in the garboard and remaining 4 strakes in zone 8, mostly because I had to fiddle with the rabbets and bulkheads at the bearding line. Really sharp gouges of varying sizes made this doable. And had I waited to do the garboard strake last, I would have been in deep doodoo💩! The good news was that I could use just one plank there. For all the attention to planking in the "guide" (Andre's term) there's no mention of handling the garboard strake. Several resources I've consulted handle that particular strake differently than the rest and install it earlier in the process.
-
 Researching family military history in the various records can be very rewarding. When I began doing genealogy work years ago, no one in my immediate family had any knowledge of our family's service prior to WW2. Through unit roll calls and a variety of other sources, I was able to piece together my 2x-great grandfather's service in the Palmetto Sharpshooters during the 'Late Unpleasantness'. I was very surprised to learn that the PSS were a highly regarded unit within the Confederate armed forces and fought in many of its bloodiest engagements, including Second Manassas, the Peninsula Campaign, Antietam, and The Wilderness. I'm sure my ancestor could have recounted many harrowing tales, but sadly I have no evidence suggesting he ever left any written accounts. Good luck on both your projects!