Search the Community
Showing results for tags 'shipyard'.
-
 Hi All It's with a little trepidation that I start this build log and as such a word of caution is required..... If you are of a nervous disposition and easily offended by poor quality workmanship, find a complete disregard of historical accuracy extremely upsetting and deem lowering the quality of this forum as morally outrageous then then I beg you to avert your eyes and leave now as the following content is probably not for you. Ok, for those of you that are still with me and made of stronger stuff there are some points that I need to make you aware of before I start a) I am not at one with wood b) tools are not a natural extension of my hands c) I do not see a plan on paper and turn it into a 3D matrix in my mind and compute complex curves and angles instantly d) If there are two ways to do something, I'll choose the wrong one e) If there is an easy way and a hard way, I'll inadvertently do it the hard way e) I was not blessed with any real woodworking skills and I have to make do with my God given abilities f) I enjoy making ship models and I struggle daily to overcome the points above. Let's begin This is my fourth model ship (see signature for details) and my first attempt at a scratch build. I'll be using the paper model by Shipways as the basis of the build and will be using as much as what is contained in the paper parts as templates to assist as I attempt to covert it into a wooden model. I've also downloaded the plans of Syren from wiki commons as an aid as the paper "plans" do not contain plans as such...what is provided is along the lines of Syren download The content of the paper model is really good and has excellent rigging, belaying, mast and yard info and in my opinion is as good as Caldercraft rigging plans...small example of rigging info Masts The paper model is at a scale of 1:96 so the first order of the day was to scan the sheets and print out at a scale of 1:64 and to try and identify what parts are printed on the 30+ A3 sheets and compile into a spreadsheet for ease of location. Bulk heads were cut out of 6mm plywood....this is just normal ply from the local hardware store (Bunnings), I know there is discussion in another topic on the merits of using something better but I've got to work with what I can get easily in my little corner of Queensland.... but first a little manipulation of the templates was required. As below the bulkhead templates only go to the main deck level and make no provision for the bulwarks The way the paper model caters for these is to add internal supports to the deck as shown in the photo below which has been copied from the paper build log of Mercury by @catopower These supports are few and far between and made from the templates I've used these templates to form an extension of the bulkheads I know I could have used the Syren plans to form the bulkheads but I want to use as much as what is provided as part of this build "Keel" piece is made from 3mm plywood....I can hear the gasps now "that won't be strong enough to support 6mm bulkheads....far too flimsy"....I originally considered the 6mm ply but this would result in a loss of definition of the bulkheads once a 6mm slot was cut into them. I've repositioned the bulkheads slightly to centre them over where the thin card bulkheads would have gone. The bulkheads at stem and stern have been positioned so that the face is identical to where the card bulkhead would be as I need to use these as refernece points for the bow and stern works. I've also omitted 3 bulkheads (no's 4, 13 and 17) as I deemed them not necessary with the 6mm ply and closeness to the others A strip of 1.5mm has been glued to the "keel" piece to form a rabbet for the planking. I'm further on than this but will call it a day for this initial post. Thanks for looking in Mark Thanks for looking in
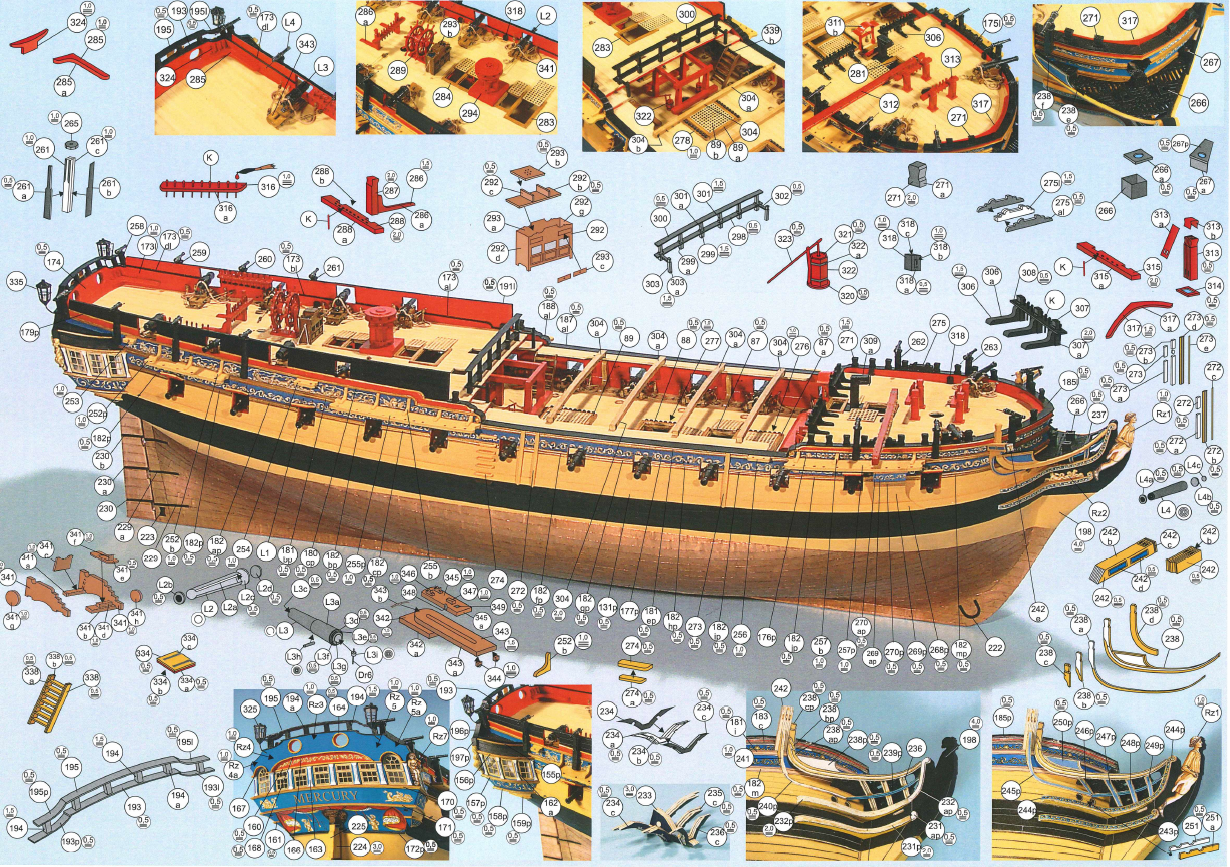


-
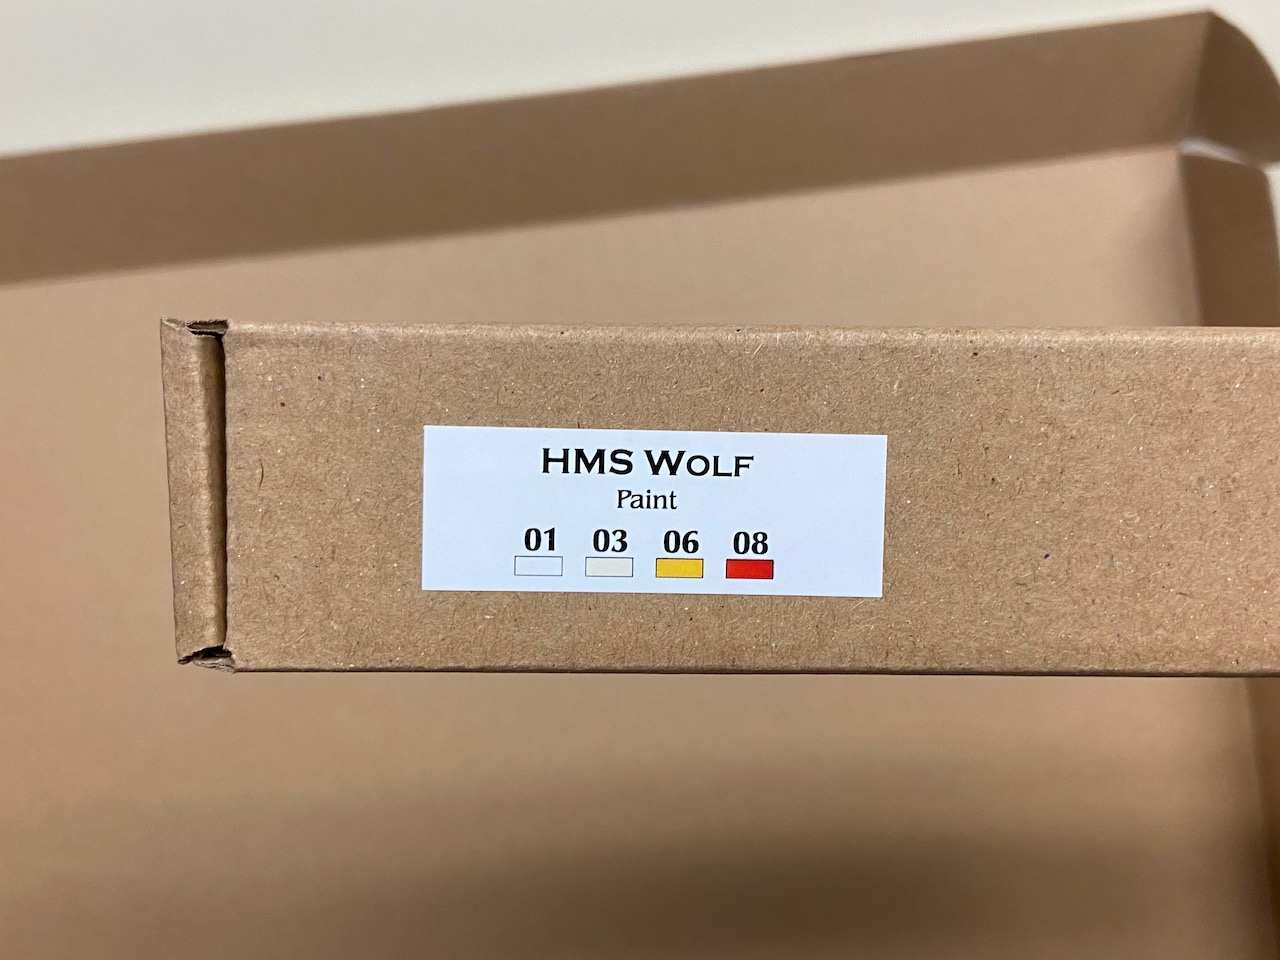
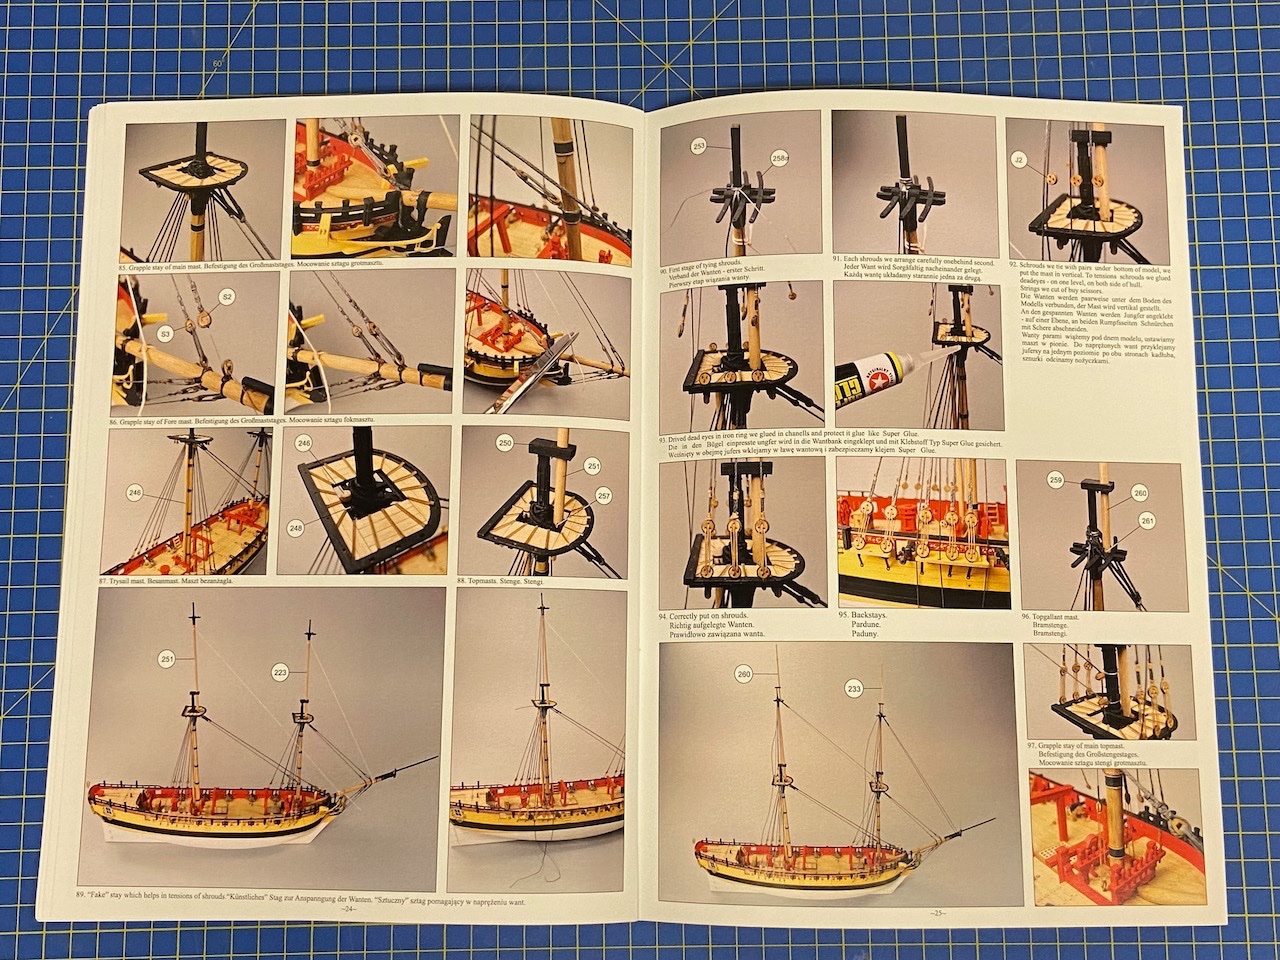
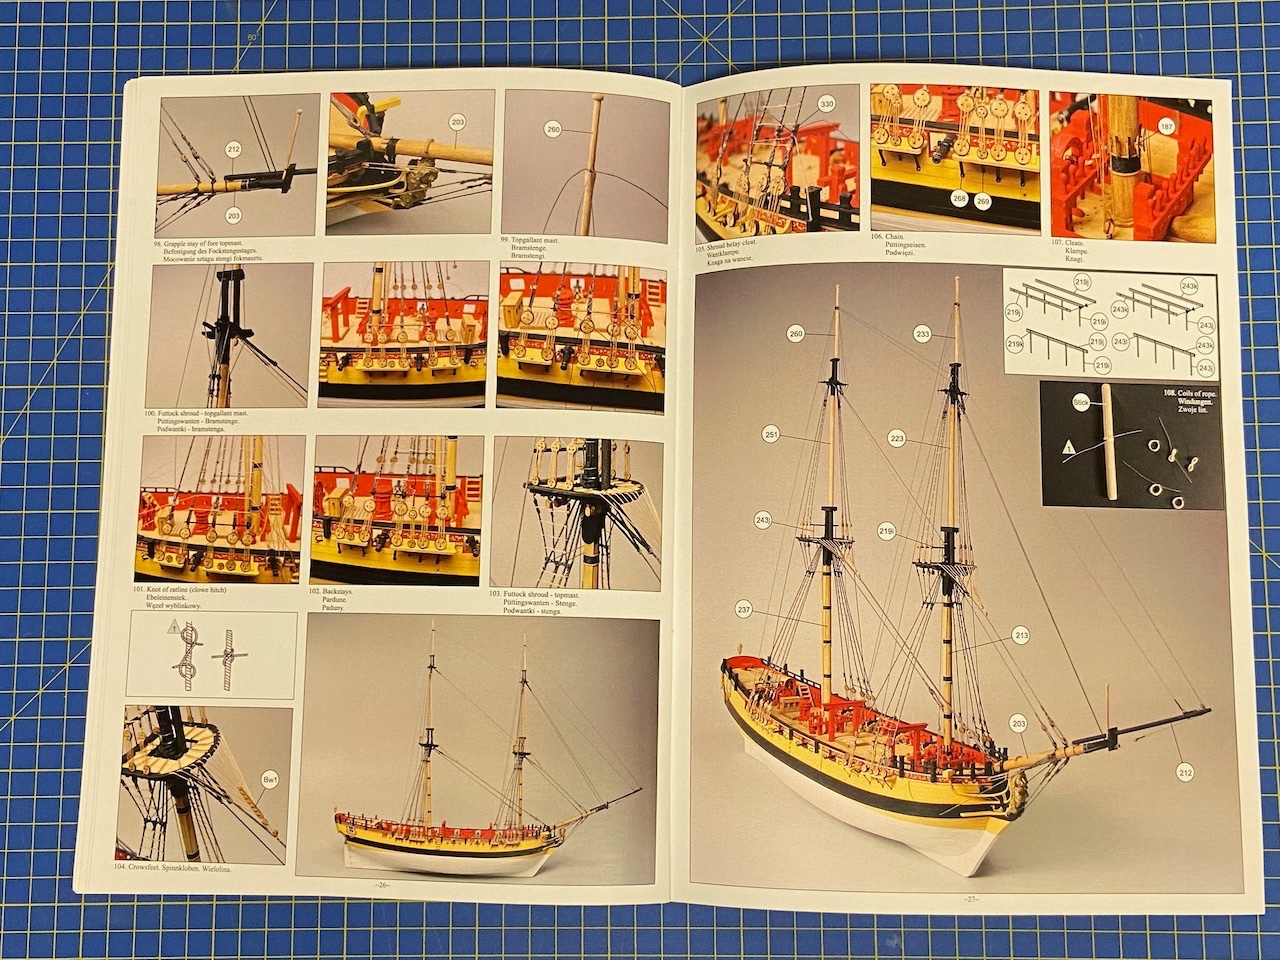
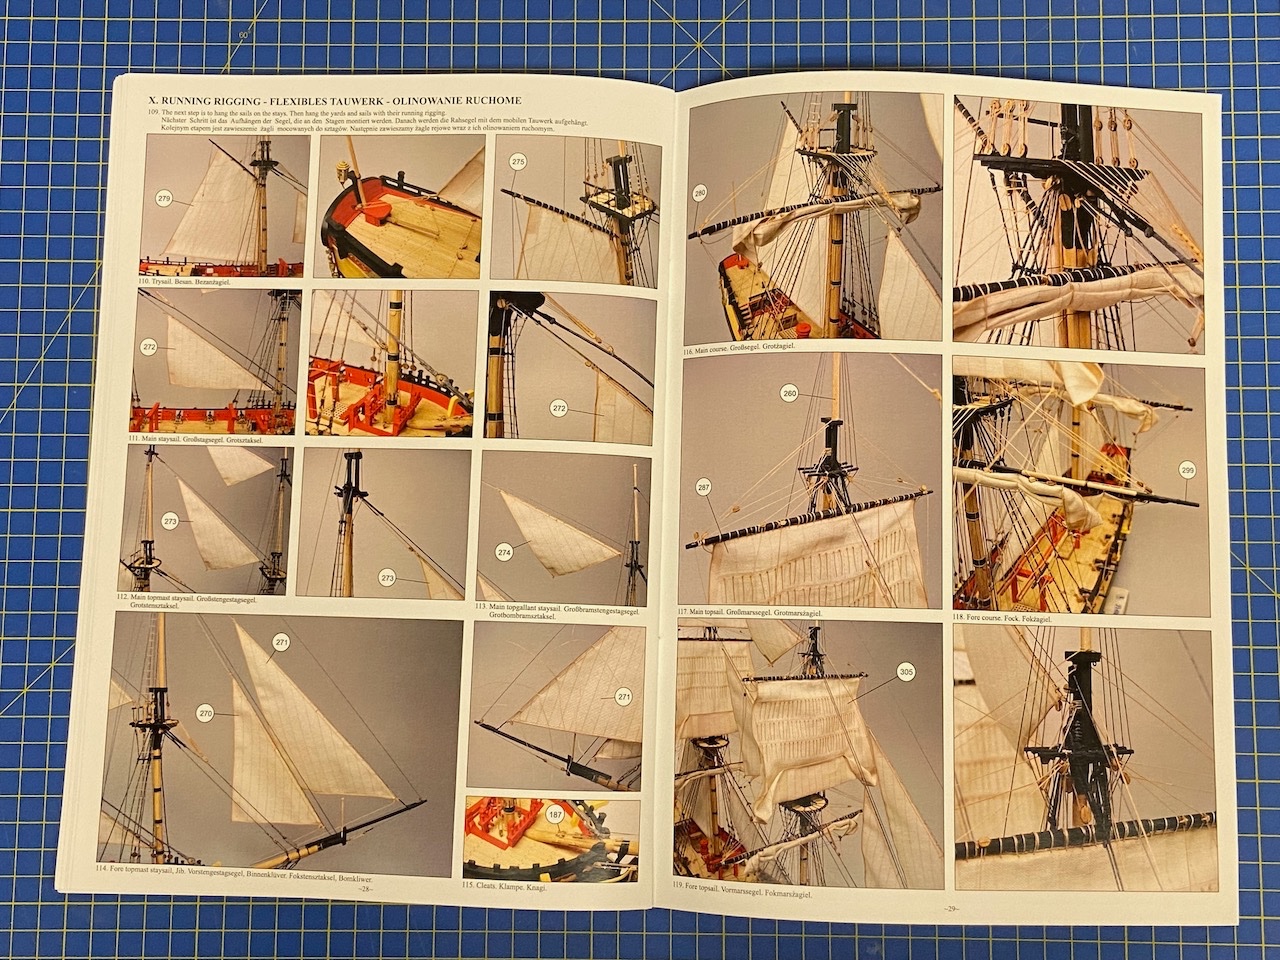
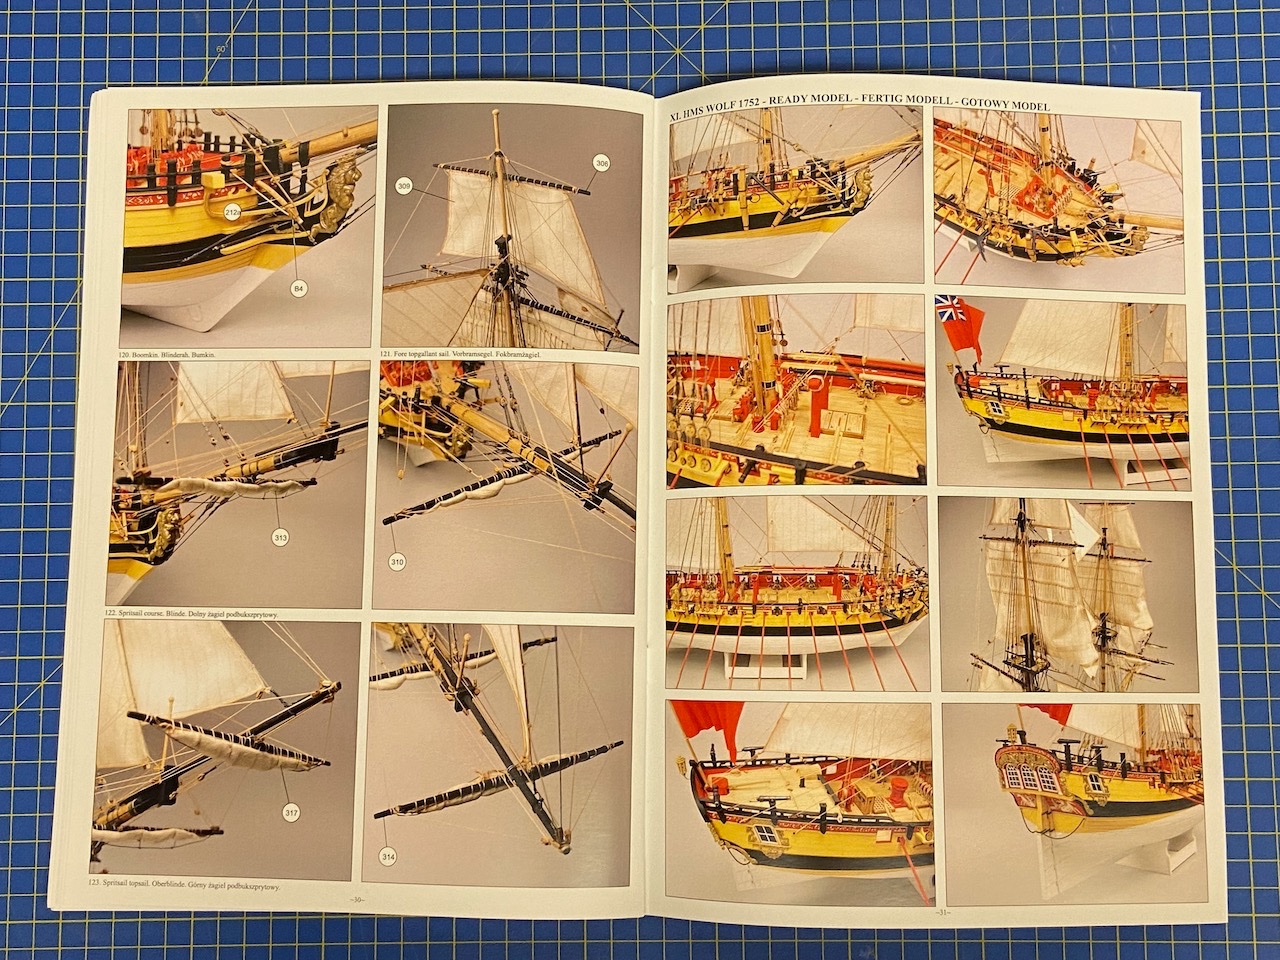
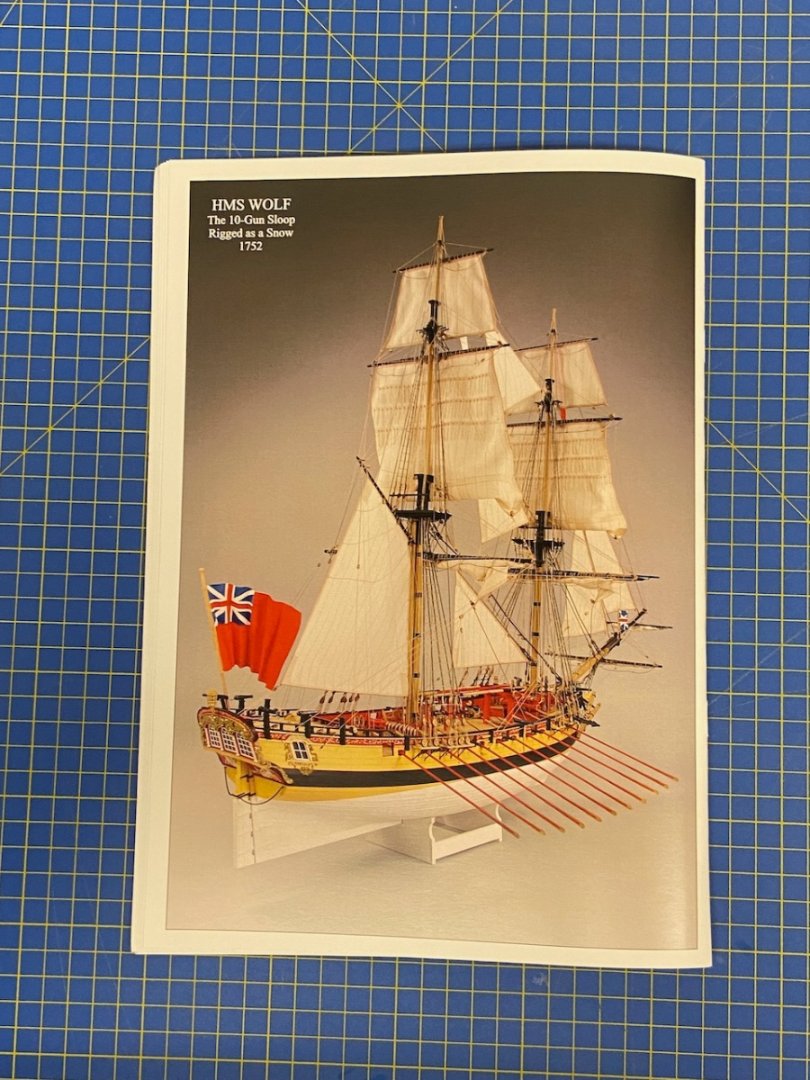
 I know I've got some other things in progress, and a couple of them are paper/card models. But, I've been trying to promote card model products for Ages of Sail, and I finally couldn't stand it any more, so I broke down and bought one of Shipyard's laser-cut card kits that I've been eyeing ever since it came out. In this case, it's Shipyard's 1/72-scale laser-cut card kit of the 10-gun snow-rigged (brig) sloop, HMS Wolf, 1754. Now, this has been something of a "closet" project, in that I hadn't posted any build log details, though I've been working on the kit since July 23. So, I'm going to maintain on this first page, an up-to-date photo of the build. Then, I'll go back to the beginning and share my build details from there, working my way forward. Someday, there will be a great convergence in the Universe, you will all feel a strange shift in the Force, and the build log will get caught up with the build... Photo taken 9/23/22: I bought Shipyard's 1/72-scale HMS Wolf kit from Ages of Sail. Officially, the US Distributor for Shipyard products. Yes, I do some work for Ages of Sail, and this build just shows how dangerous that situation is for me. But, I also build some things to make myself better acquainted with the products. At least that's my excuse for some of my partial builds. This build, however, has been so much fun and it's come along so nicely that I'm really looking forward to completing this model. In order to simplify this build log, I posted all my components photos into a kit review, which you can now find here:
- 29 replies
-
- 13
-

-
 Because I failed to build the Papegozan (Shipyard, ZL-005), I made the Hanse Kogge (Shipyard, ZL-048) in a week without painting. I found what was wrong and what I had missed before. - The Hanse Kogge (ZL-048) is a much more advanced kit than the old Papegozan (ZL-005). HK has two manual books, and the instructions are much clear and helpful. - The HK instructions has a very simple and fast painting method. I don't worry about painting anymore. - The method of assembly is much improved. The HK kit isn't a high-priced laser cut paper model. It is something in the middle of paper model kits and plastic model kits. If I had built the HK kit first, I wouldn't have failed the Papegozan kit. I recommend this kit as the best introductory kit for early Shipyard kits.
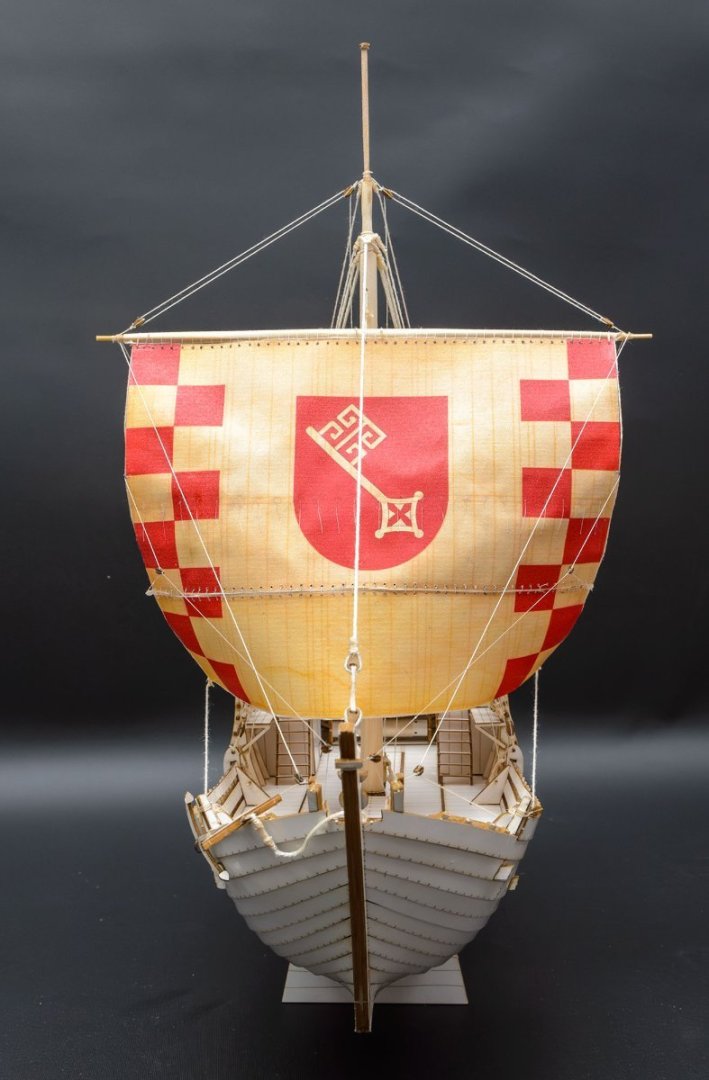


-
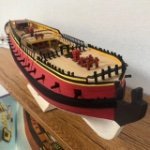
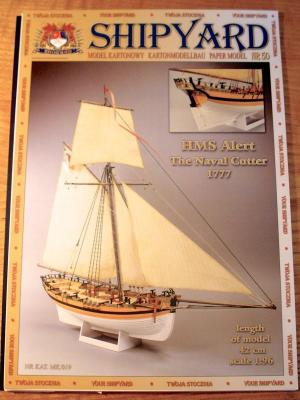
 Hello everyone Well Christmas has come and gone and as promised I am starting a build log. One thing to notice straight off is that I have named the ship Enterprise with an 'S' rather than 'Z' which is the spelling on the kit. Not a big deal but something I want to do. Now as stated in the title this is a card model. I have never done anything like this before so with the help of all you good people here I hope I can do her justice. Here are 2 photos of the kit.
 -
 Well started this build - not at all what I expected. Quite intriguing. Anyway dry fitted the keel and frames went together very nicely. Its all VERY SMALL !! I have obtained the card for the further parts (which I was a bit surprised wasnt in the kit )and awaiting the spray adhesive to laminate the card. I would have happily paid a bit more for a few sheets of card of the correct thickness without the faff of lamination. But its a much more interesting little project than I was expecting. Nice to discover something new !
- 8 replies
-
- 7
-
-
- Le Coureur
- Shipyard
- (and 1 more)
-
 I have been working on this for about a month. I had to stay home with my better half due to her scheduled minor operation. So since i had nothing better to do apart from this, i cracked open a few cold ones, turned on my favorite stream and been cutting out, shaping and glueing this lovely little kit. Chosen for its lack of complicated rigging, only two cannons and easy lines of hull. I need a little practice before i jump back in to the deep end of my Victory build. And Santa leocadia, La belle poule, Lexington and tonne of the others that i have all around me. every square inch of my workshop is filled with unfinished projects... i dont think i need to introduce this ship to anybody. Its voyage across the pond have paved way to later discovery of future Ungratefull Colonies, South Americas, great civilizations and magnificient rain forests. All sorts of things. i have not been very good when taking pictures on every step of the journey, it was too quick to be honest. kit is printed on good quality card. Shine is high on some parts. I like it that way, so no complain from my side. I tried my luck with touching edges, mixing shades and stuff, to little effect. I stuck to one shade of brown with a little variations. Did work mostly, but as you will notice, flash is cruel. i have purchased laser cut details and set of frames to make my life easier. These are of great quality, although i would take a few of them off and replace them with different ones. Never mind, i managed to assemble every paper part available in the kit and am now stuck waiting for a set of masts and spars. Coming from Poland, for a hefty price of £25 p&p to UK included. Once received, i will crack on and finish this lovely little ship. I noticed how huge the pictures were. As i have done the post on the mobile, i had no idea. i shall redo this post as soon as i get a minute tomorrow.
 -
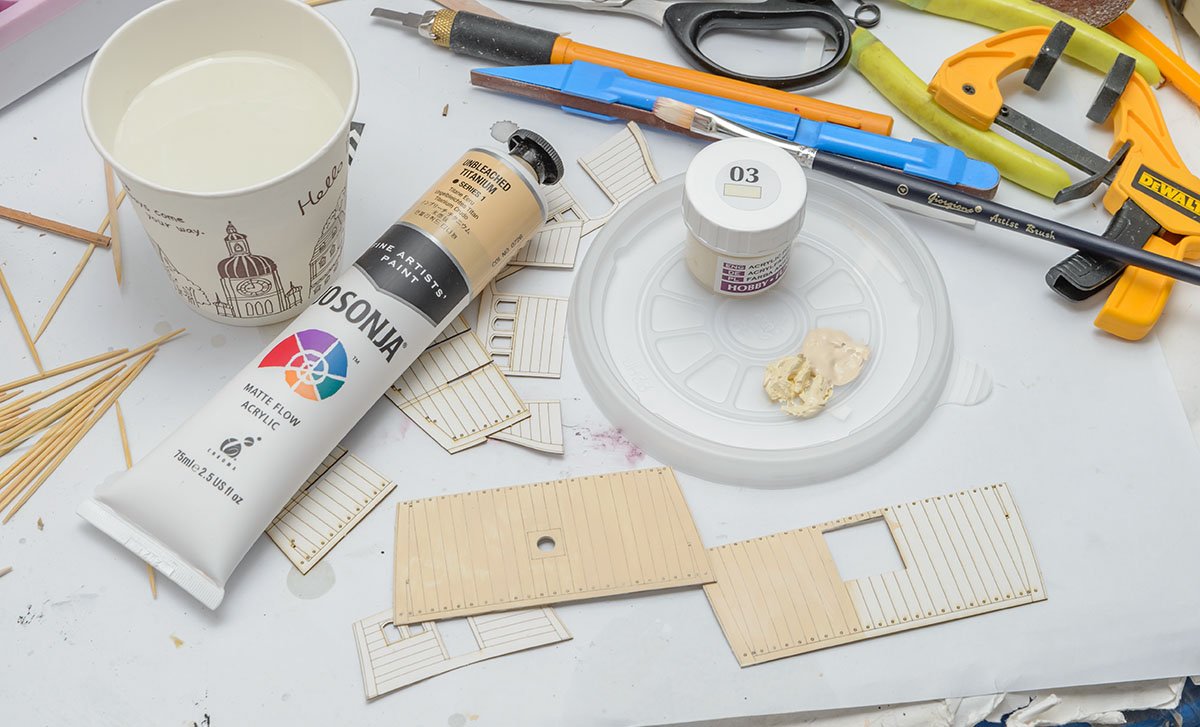
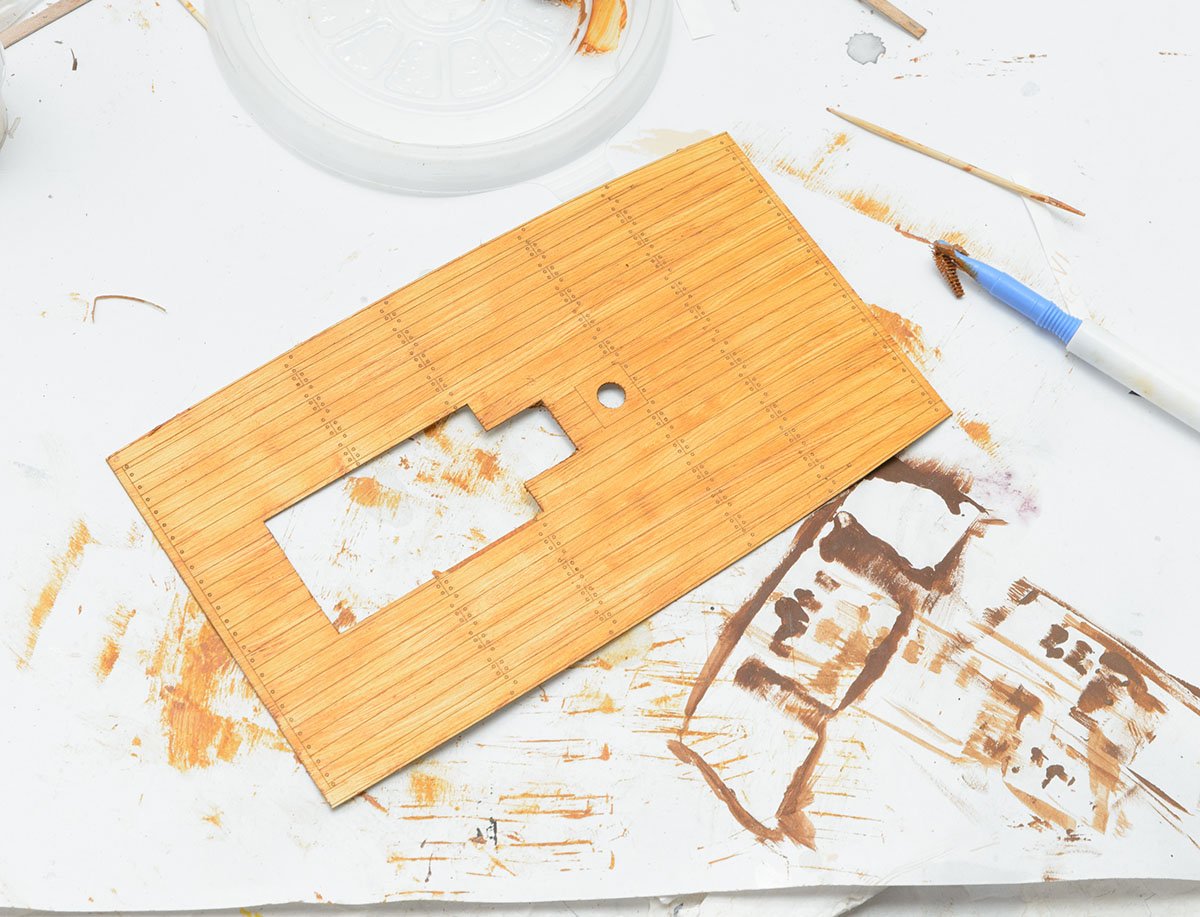
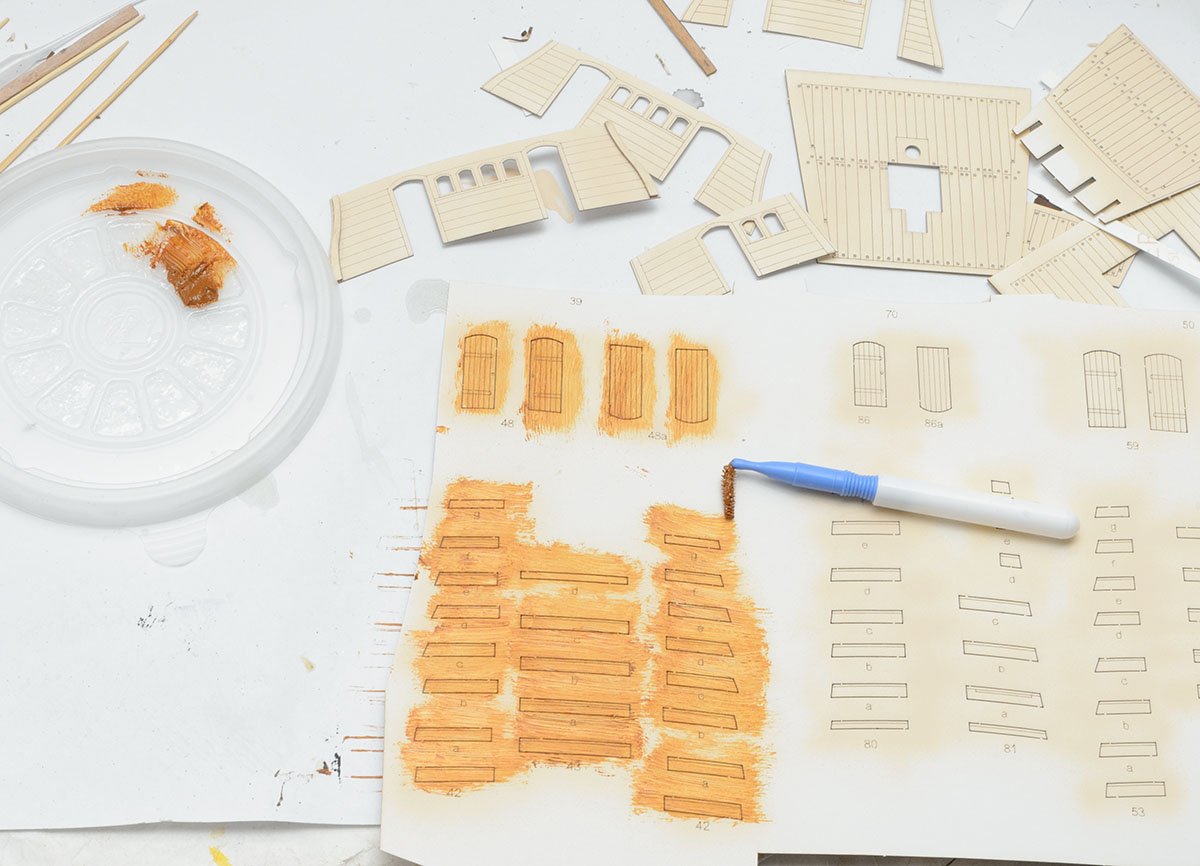
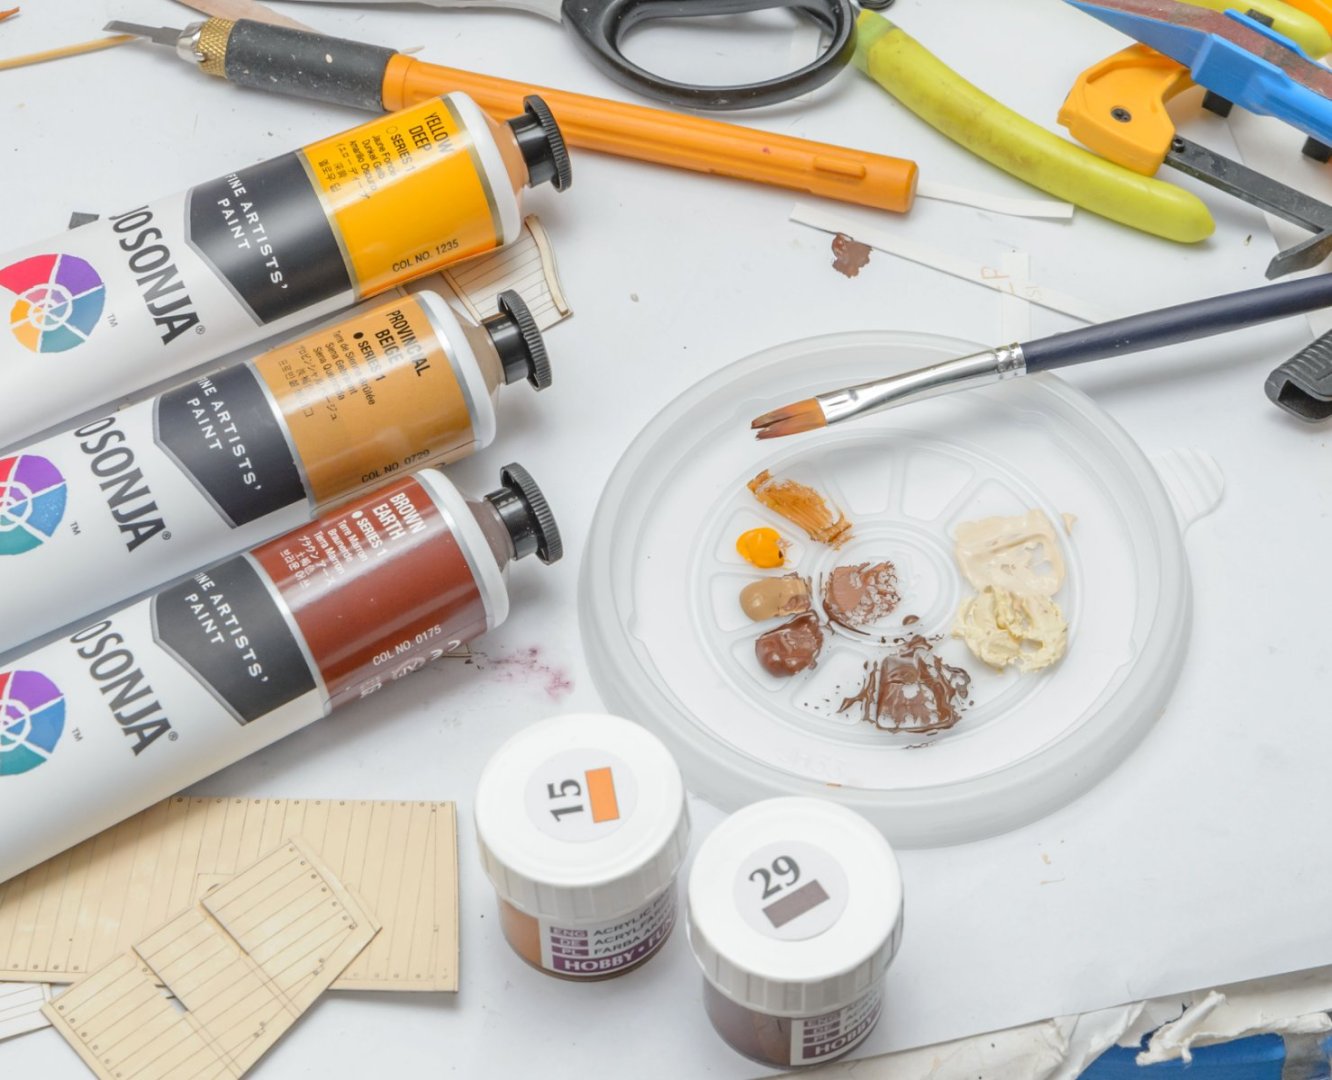
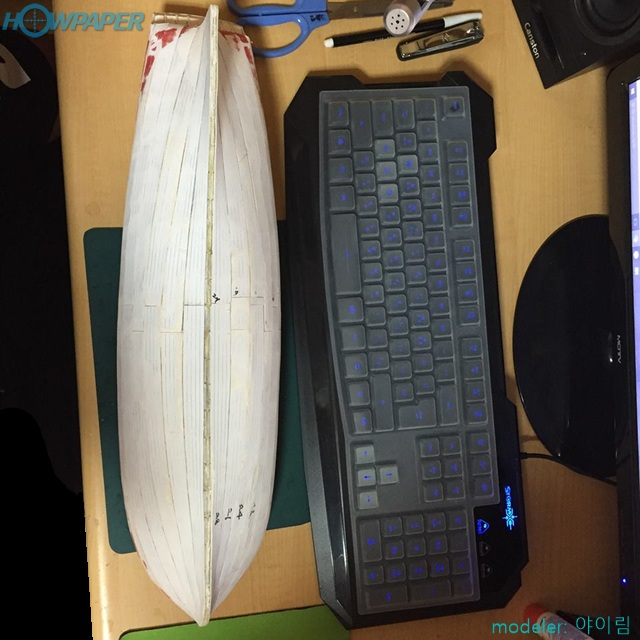
Hello, This is my new side project and the second cardboard model kit. The Shipyard makes the top premium sailing ship cardboard model kits. I have some words for their unfriendly manual, but the quality is better than the wooden model kits I've built. If you don't mind painting wooden patterns on paper planks, this is probably the best kit for building high quality model at a low cost and in a short amount of time. By the way, this year I'm not talking much, unlike the last year, and am focusing on experiencing as much as possible. I found the latest Papegojan build log in 2013, but the pictures were unfortunately gone. This build log will be mostly photos. If you have question about a specific part, feel free to participate in my build log. https://alexey.baldin.space/?p=1 If you are looking for a better build log, this site will help. Kit's error 1 Kit's error 2 The manual is hard to decipher... Make sure everything is in line. My ship is twisted again. 😭 Tan color base The kit's paint had dried like a stone. Oil paint and an interdental brush. Winsor & Newton Liquin medium helps reduce drying time. Yellow Deep 3 : Brown Earth 1
- 16 replies
-
- 13
-
-
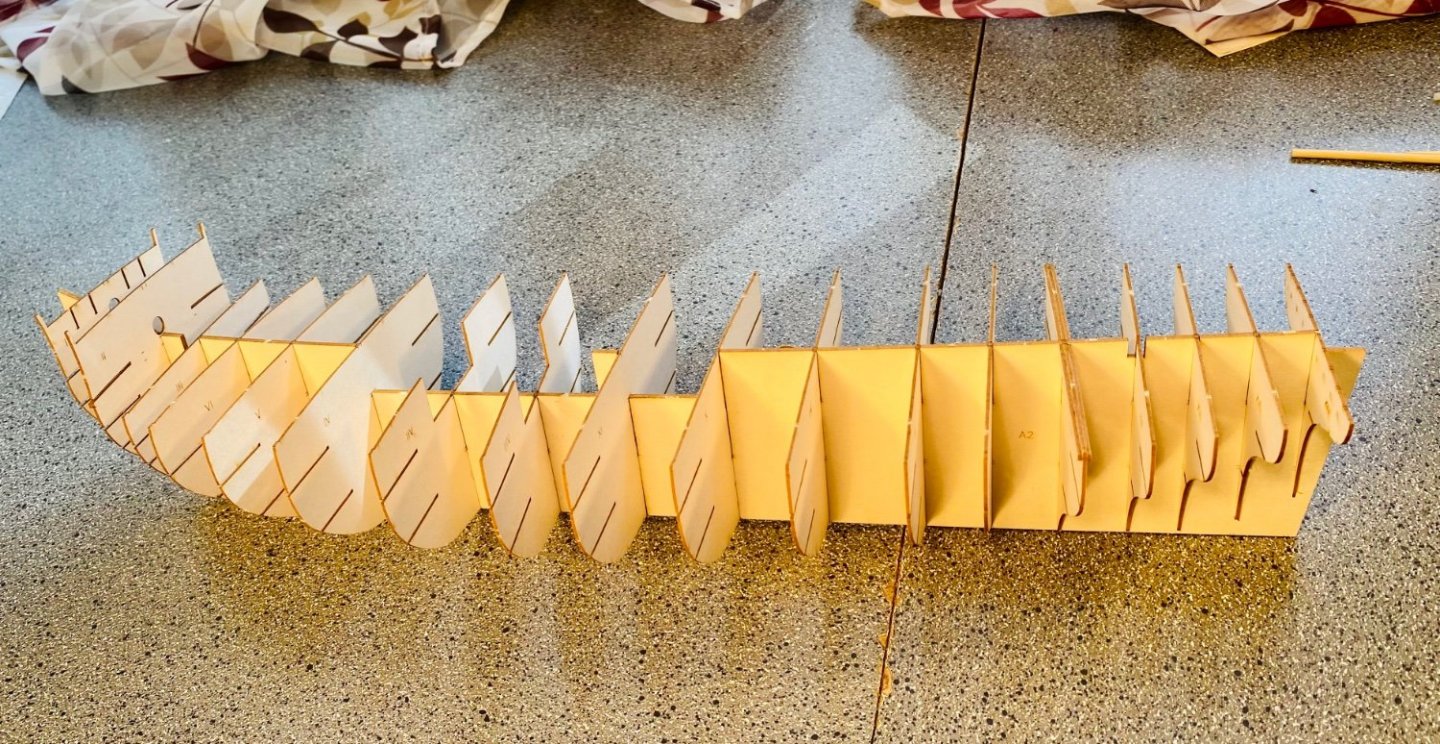
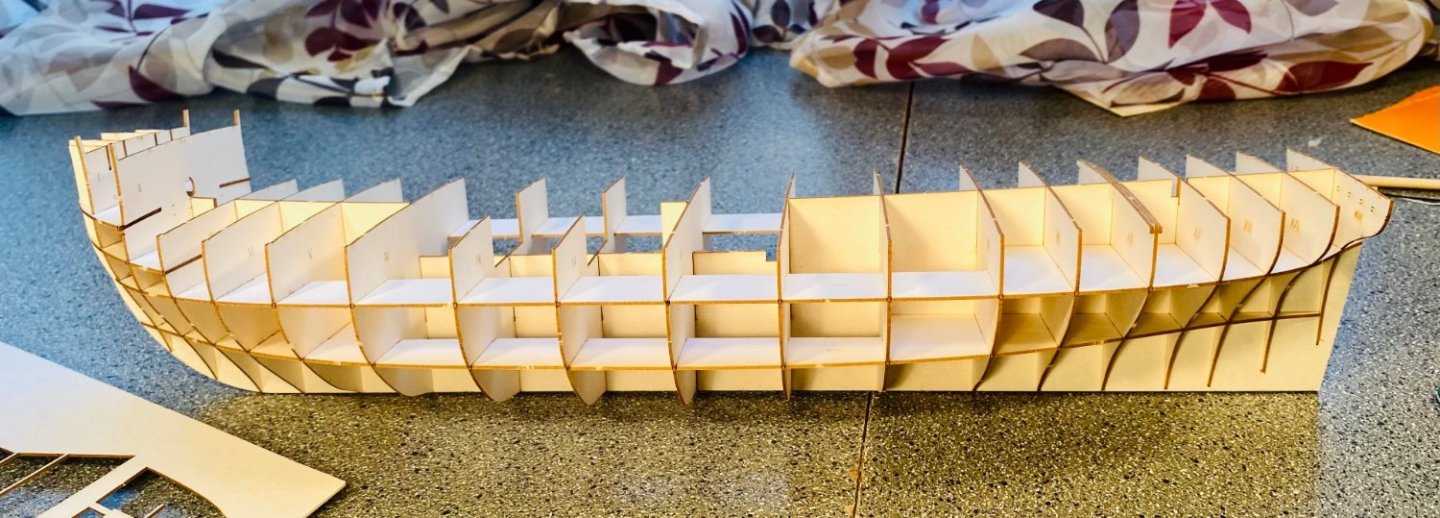
 I started my HMS Mercury by Shipyard Models. I couldn’t help it. I had to do it, lol. I’ve been wanting to build a frigate for a long time (a few years now). So, I started one. HMS Mercury was a Sixth Rate 28-Gun Enterprize Class Frigate. Her primary battery consisted of 24 x 9 lb. guns. This is a POB kit, out of card. Something I have learned in my last two completed builds is that I work well in card and I enjoy it. I am intending to build it straight out of the box, with hand carved guns and decorations. Sails will be made from muslin again. So here’s the start: Here’s the lower deck pieces and the false main deck: The Mercury is a little farther along than what I’m showing here. The laser-cut cardboard framework, which came with the base kit, is fall together quality. I had the frame assembled and glued within a couple of hours. Everything lined up perfectly. If you have never tried a Shipyard kit, I cannot recommend it enough. I have not been this happy with a kit for a long time.
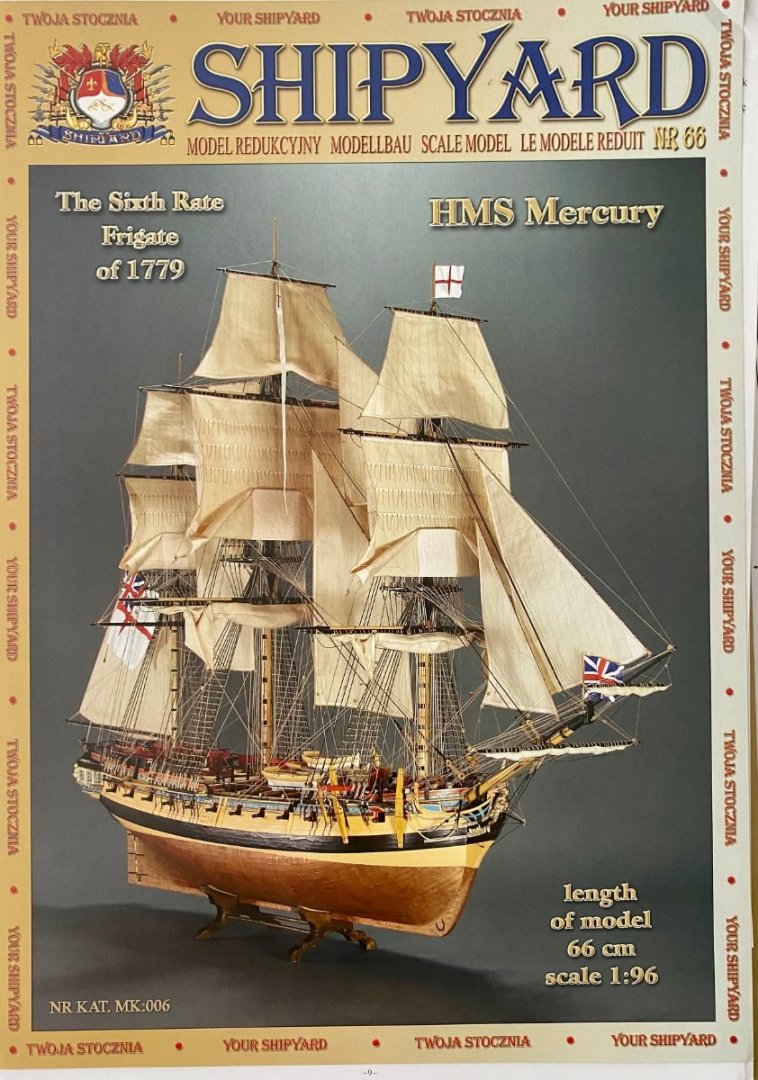


- 50 replies
-
- 14
-
-
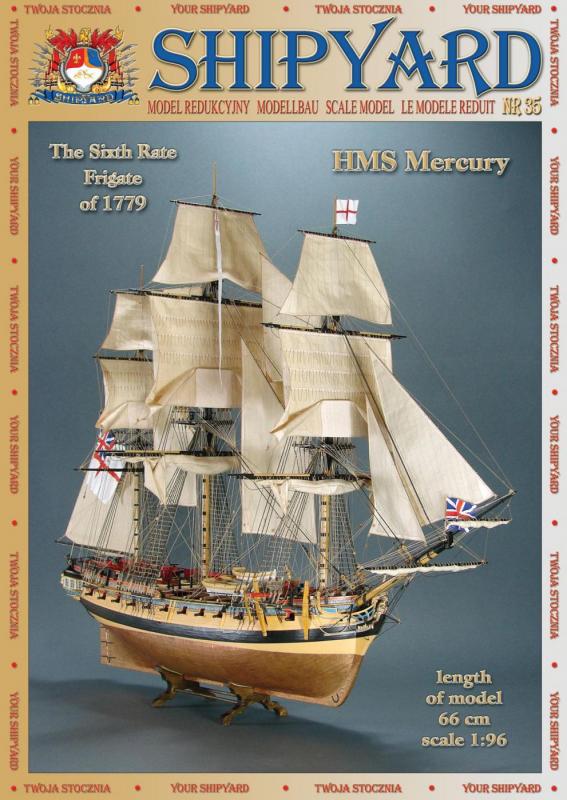
 Hi everyone. I would like to present to everyone my attempt to build a sailing ship from the Shipyard set. This is a 1779 model of the HMS Mercury frigate. HMS Mercury was an Enterprize-class frigate. The model is made of paper and is modified by me using wood and metal.
.thumb.jpg.84d664a84f6fcb5935f227b8a5a2521d.jpg)
-
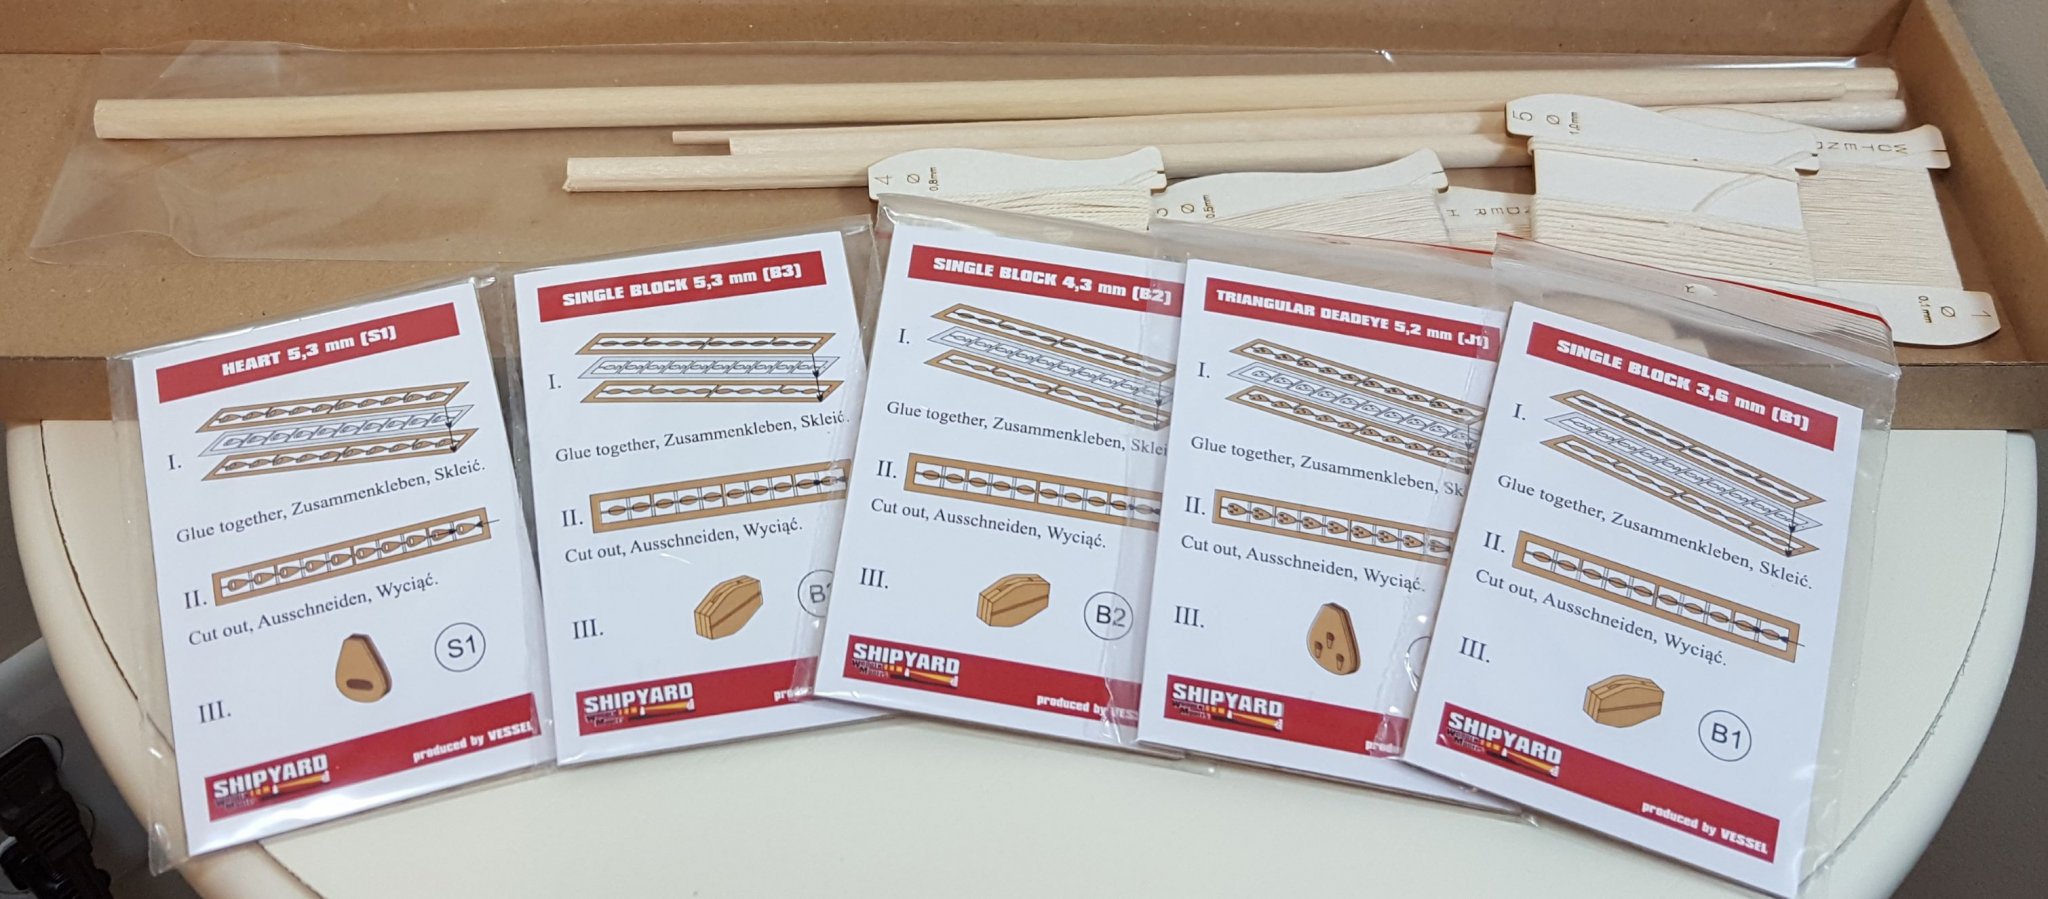
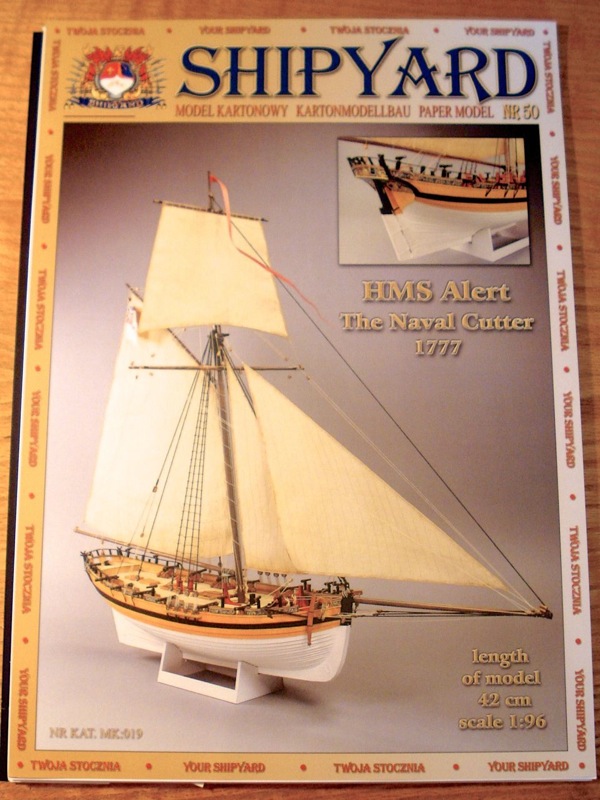
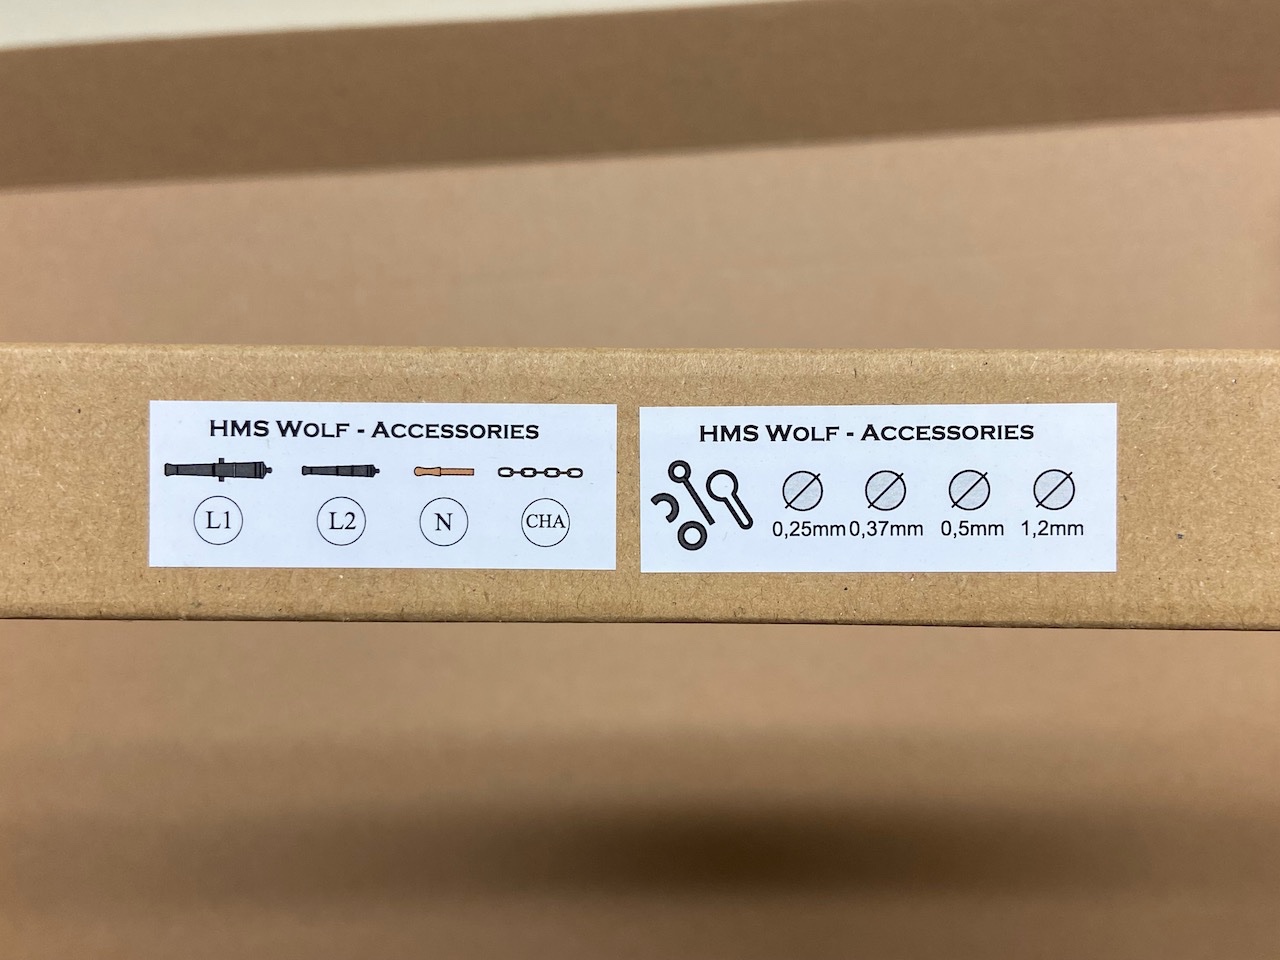
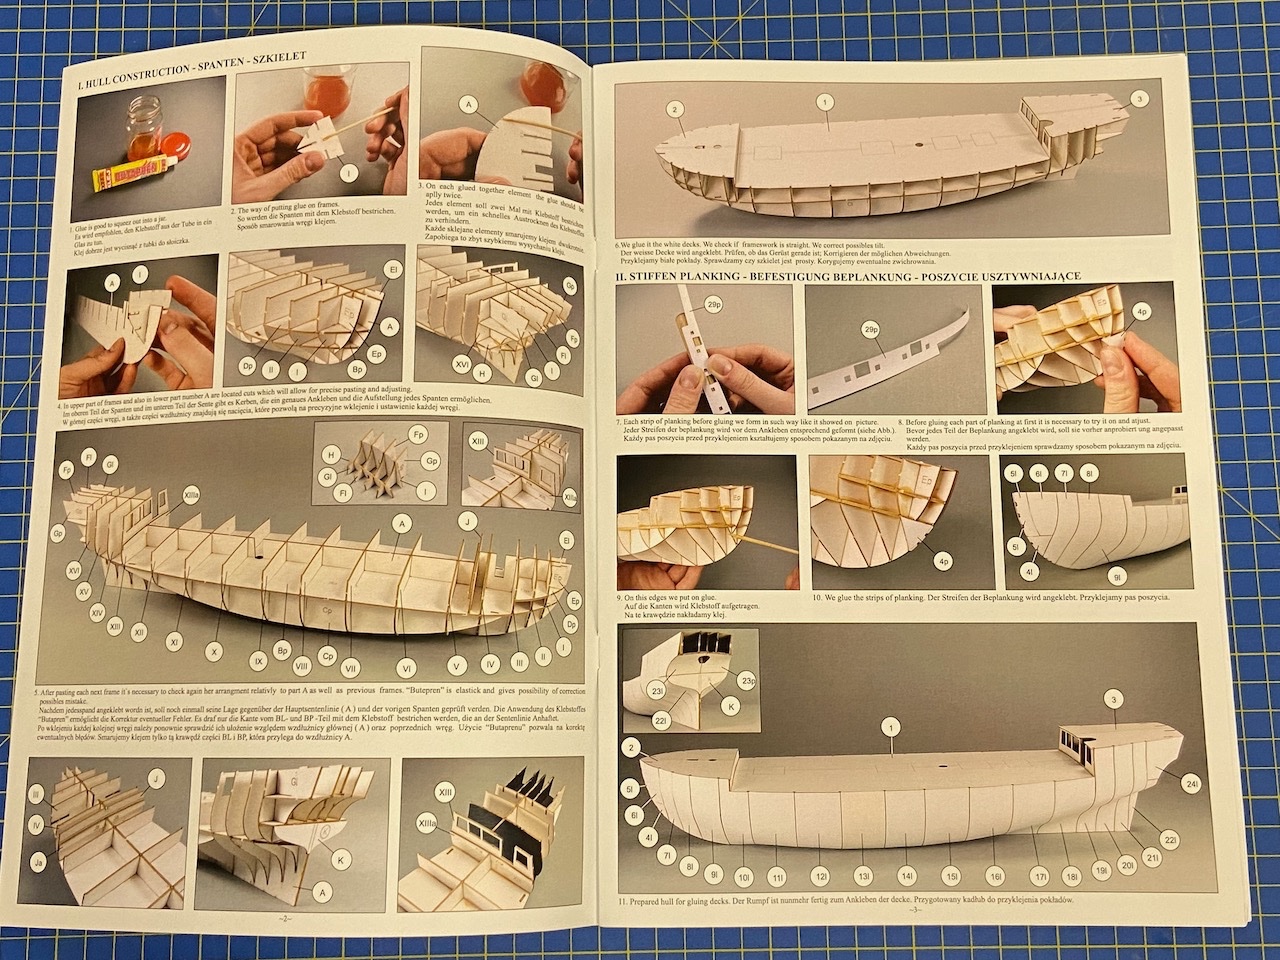
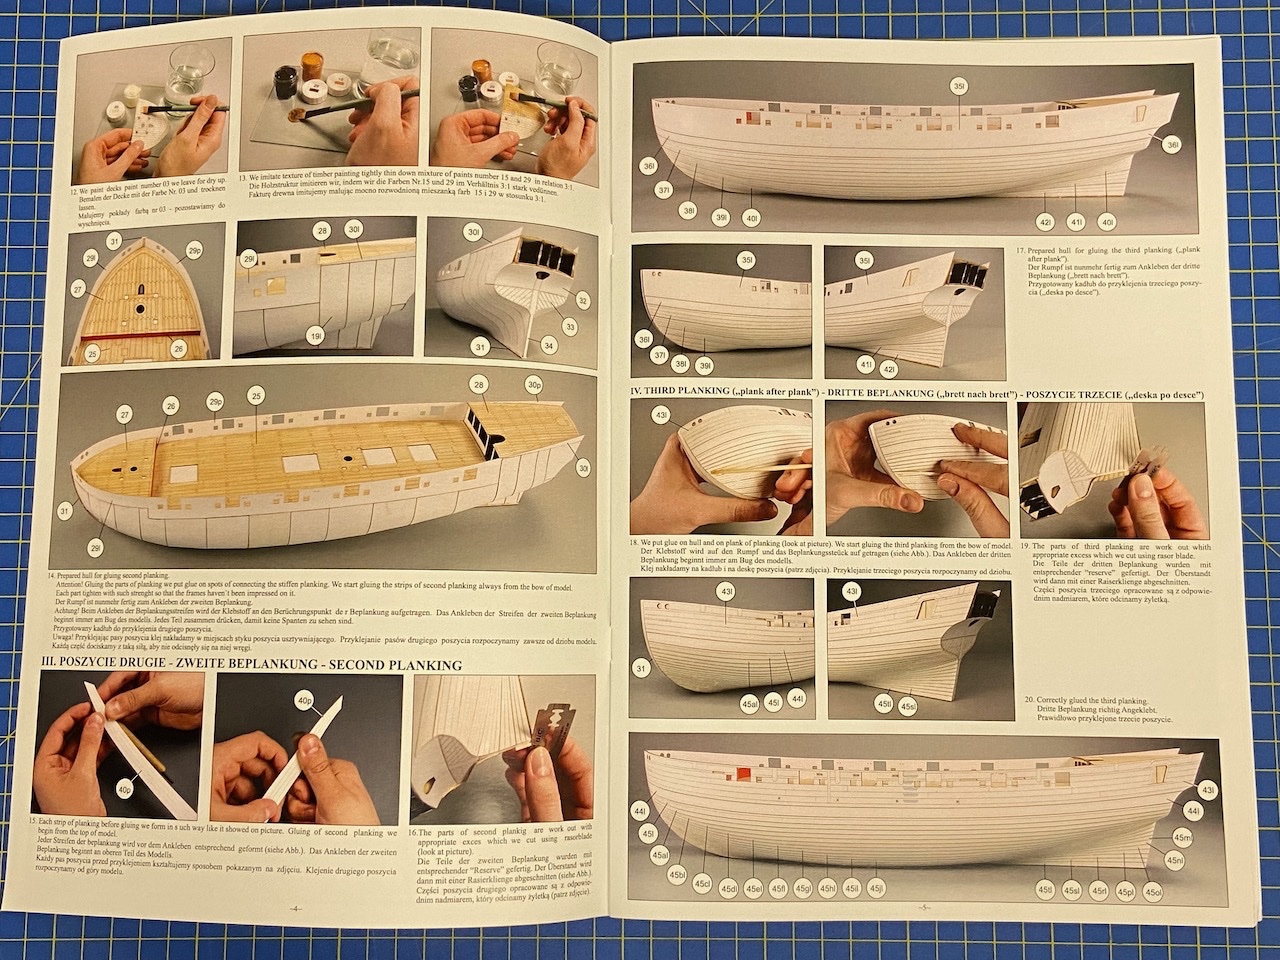
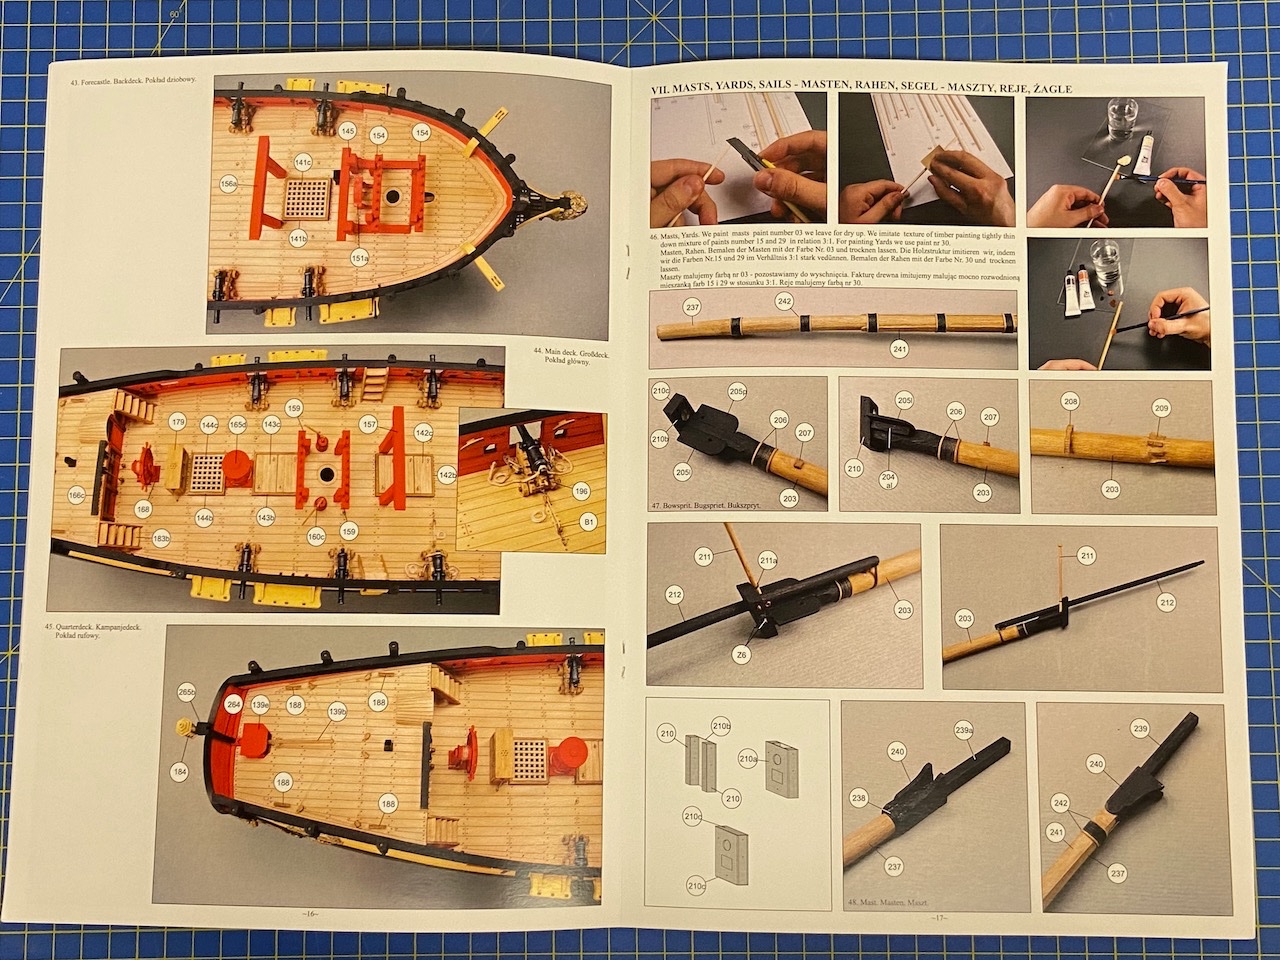
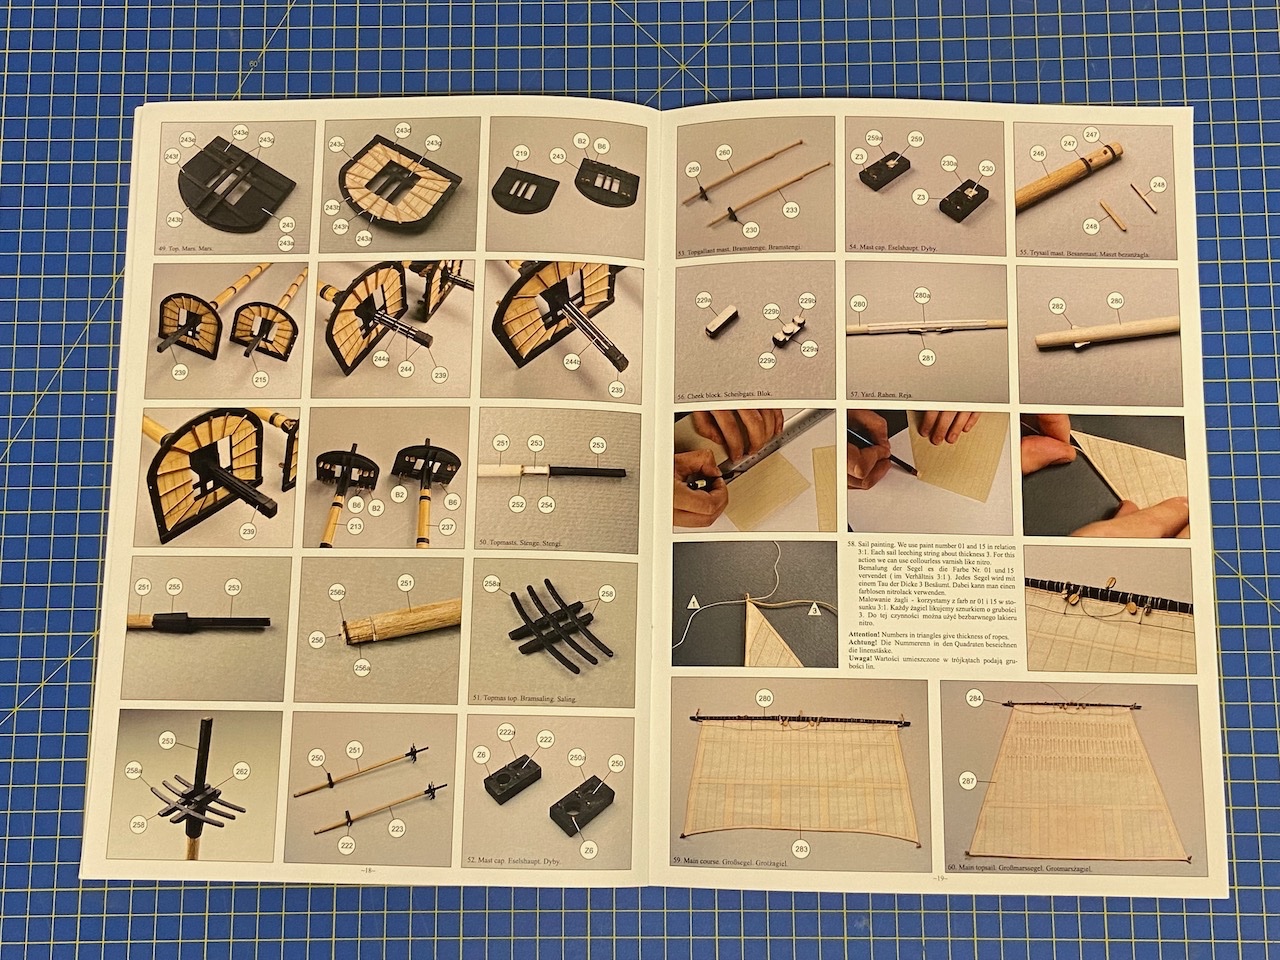
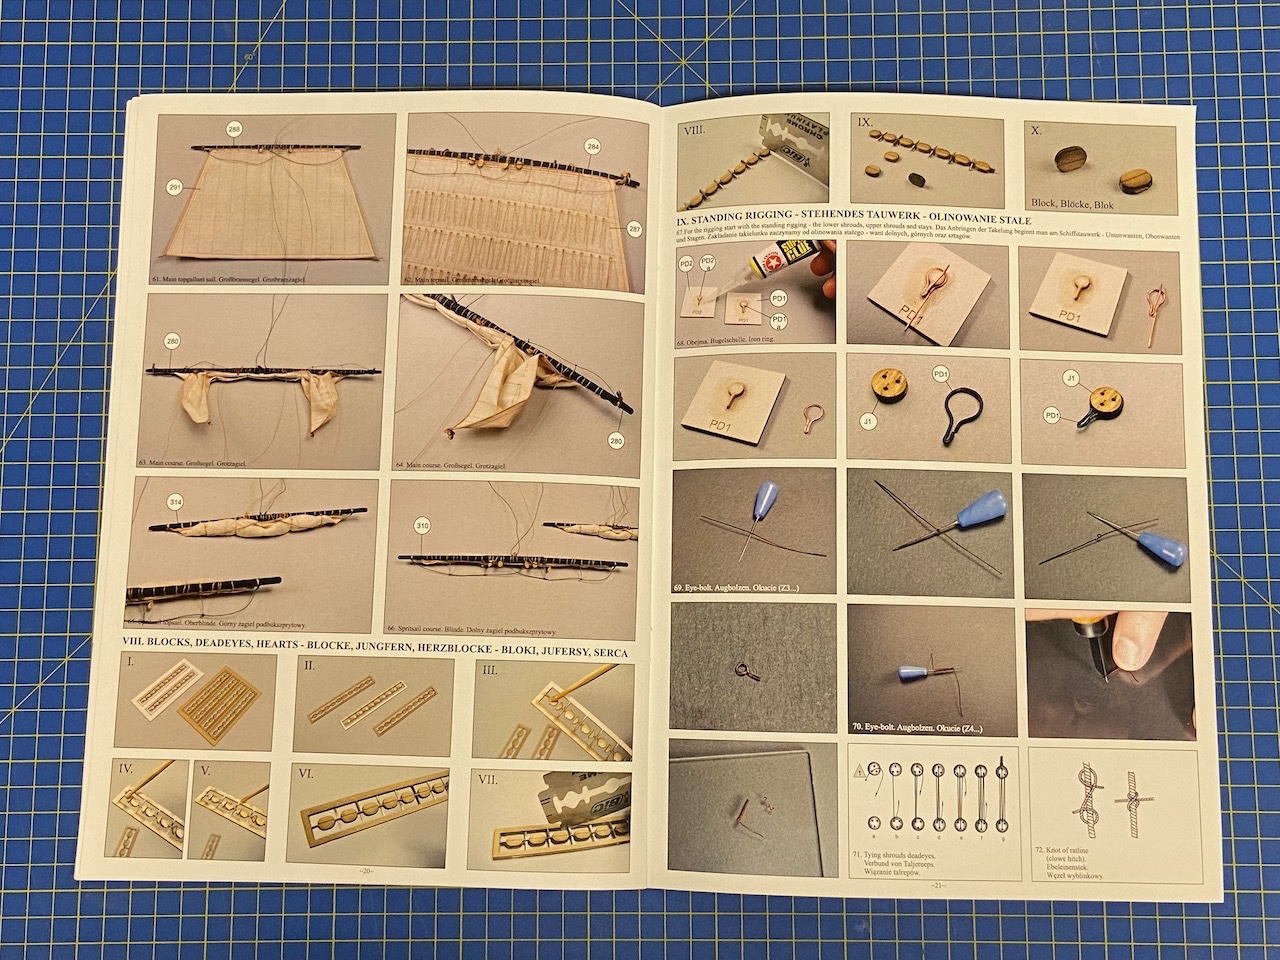
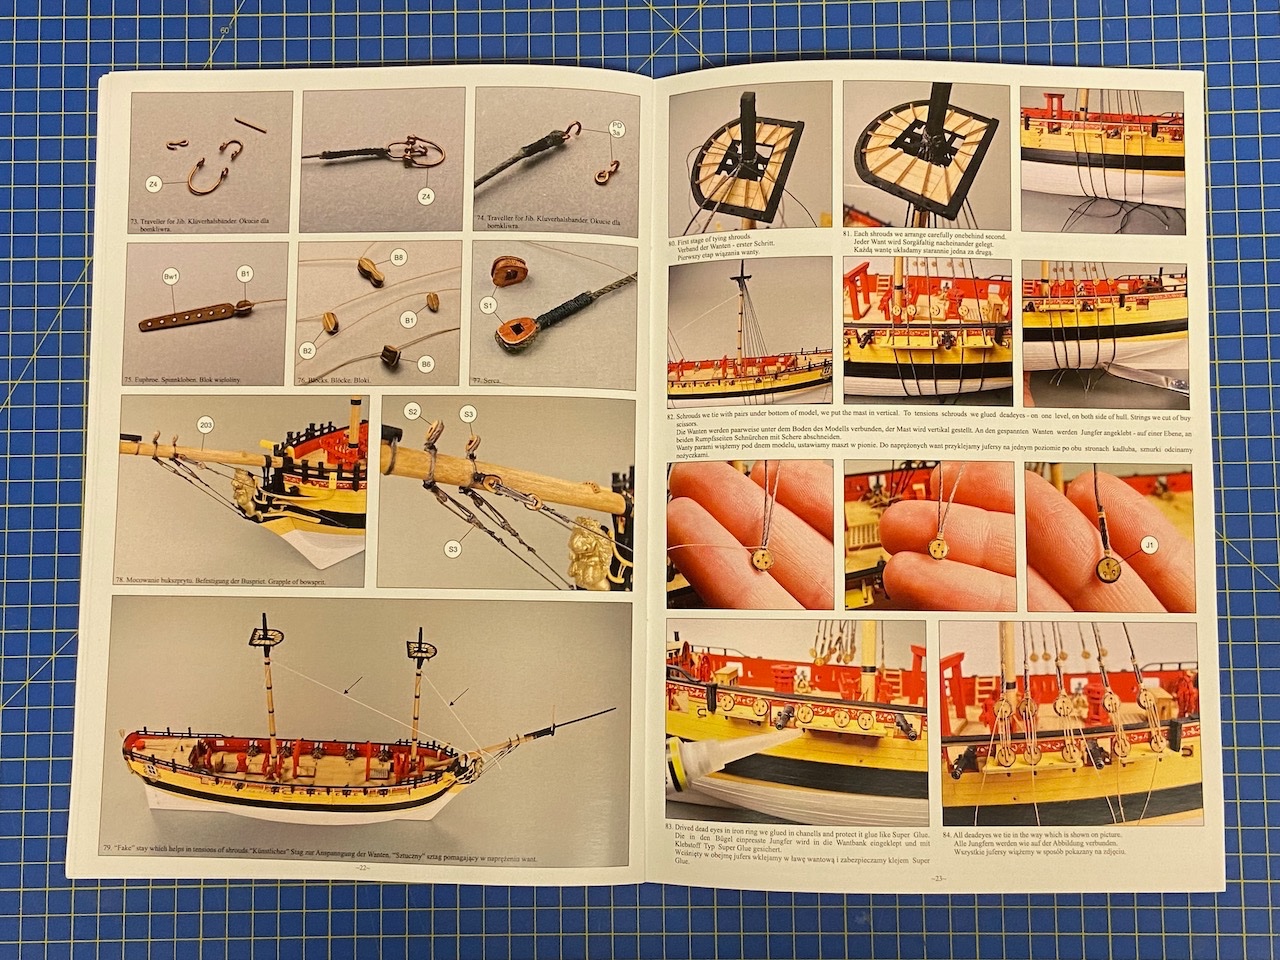
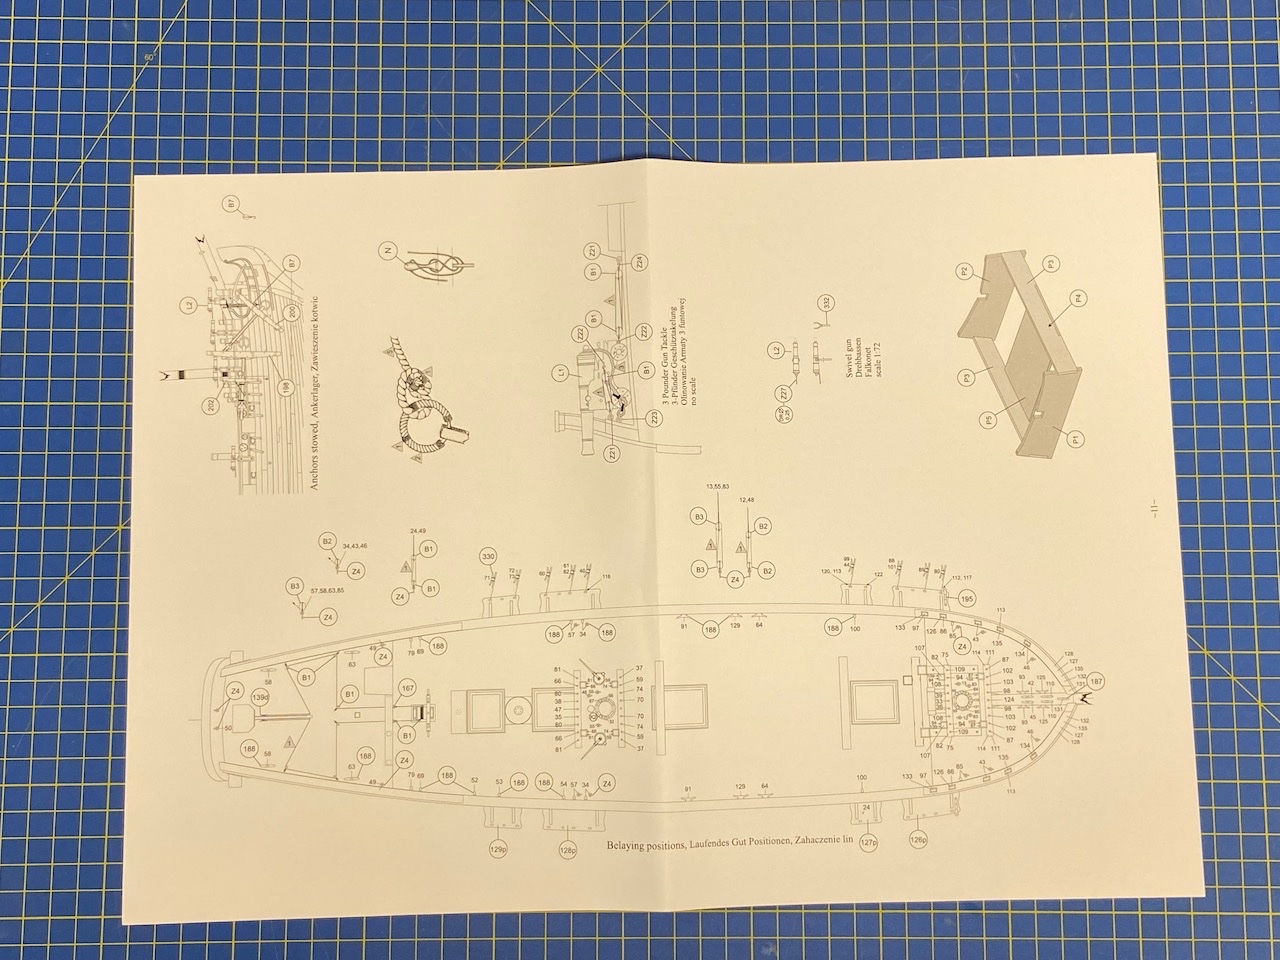
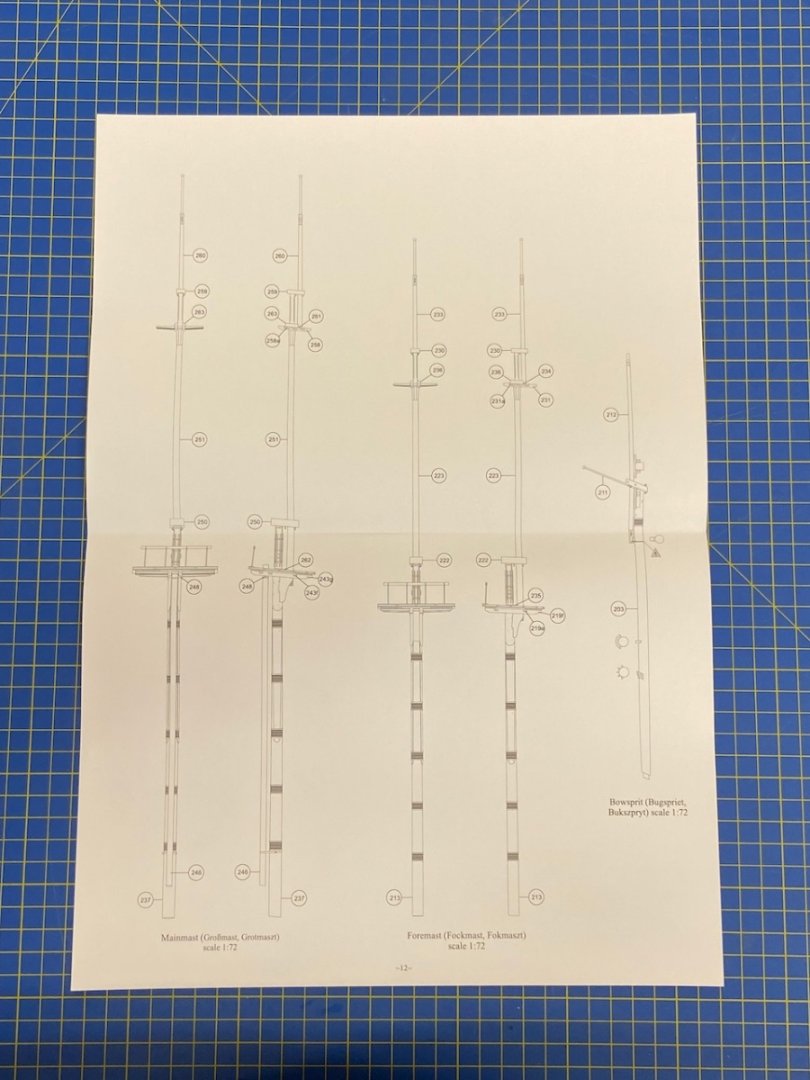
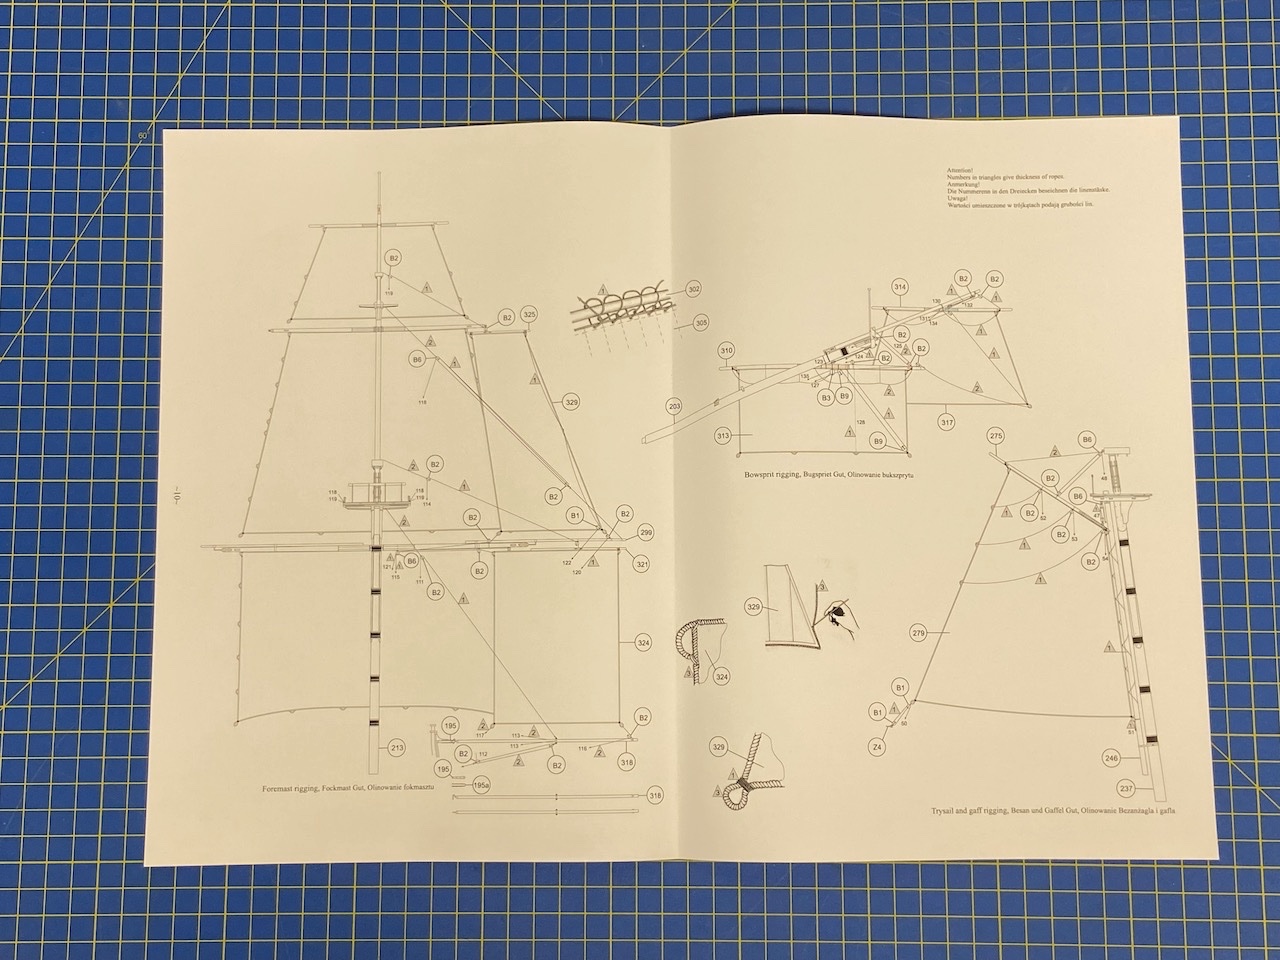
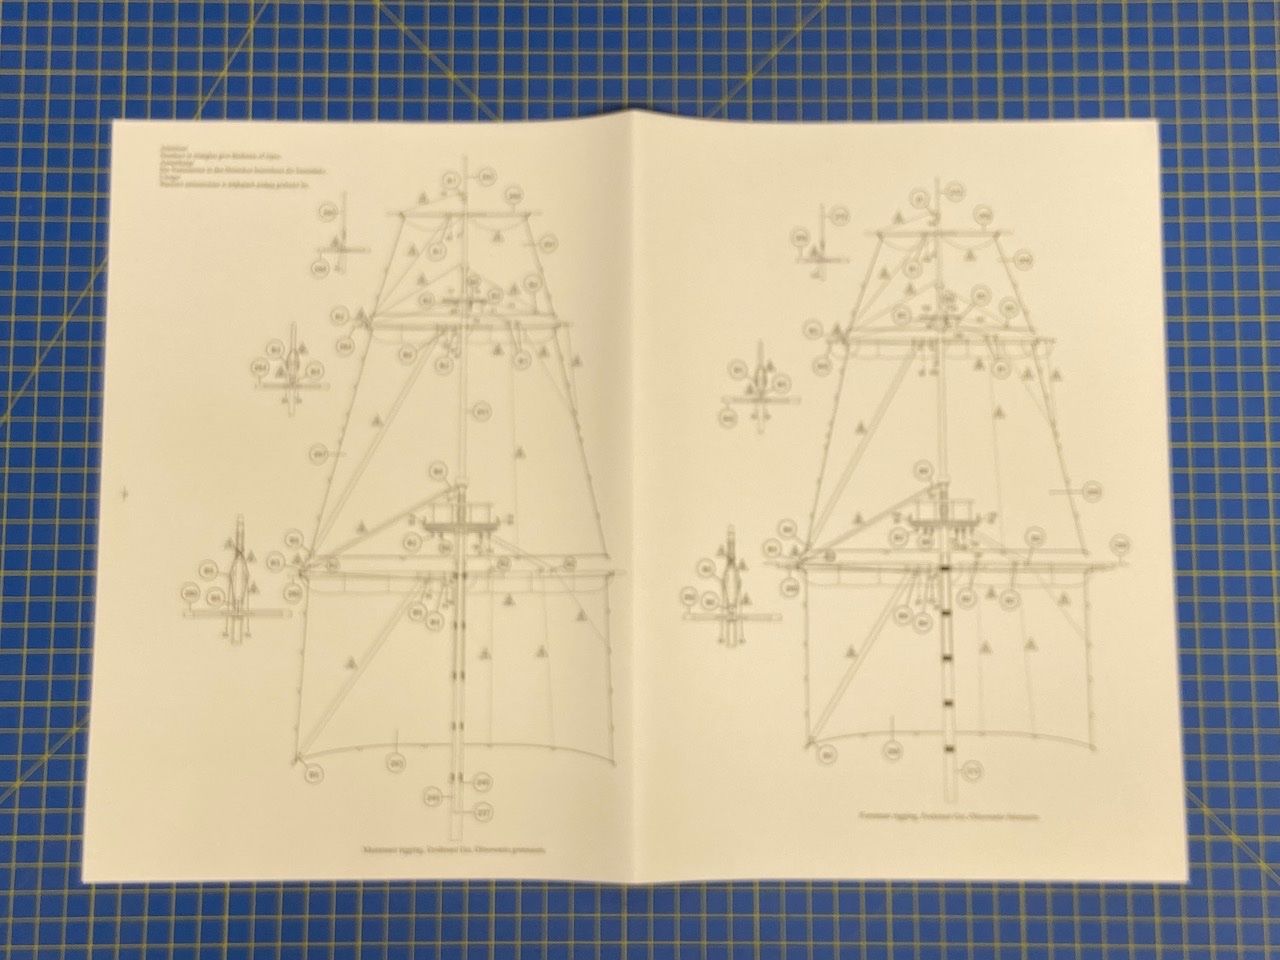
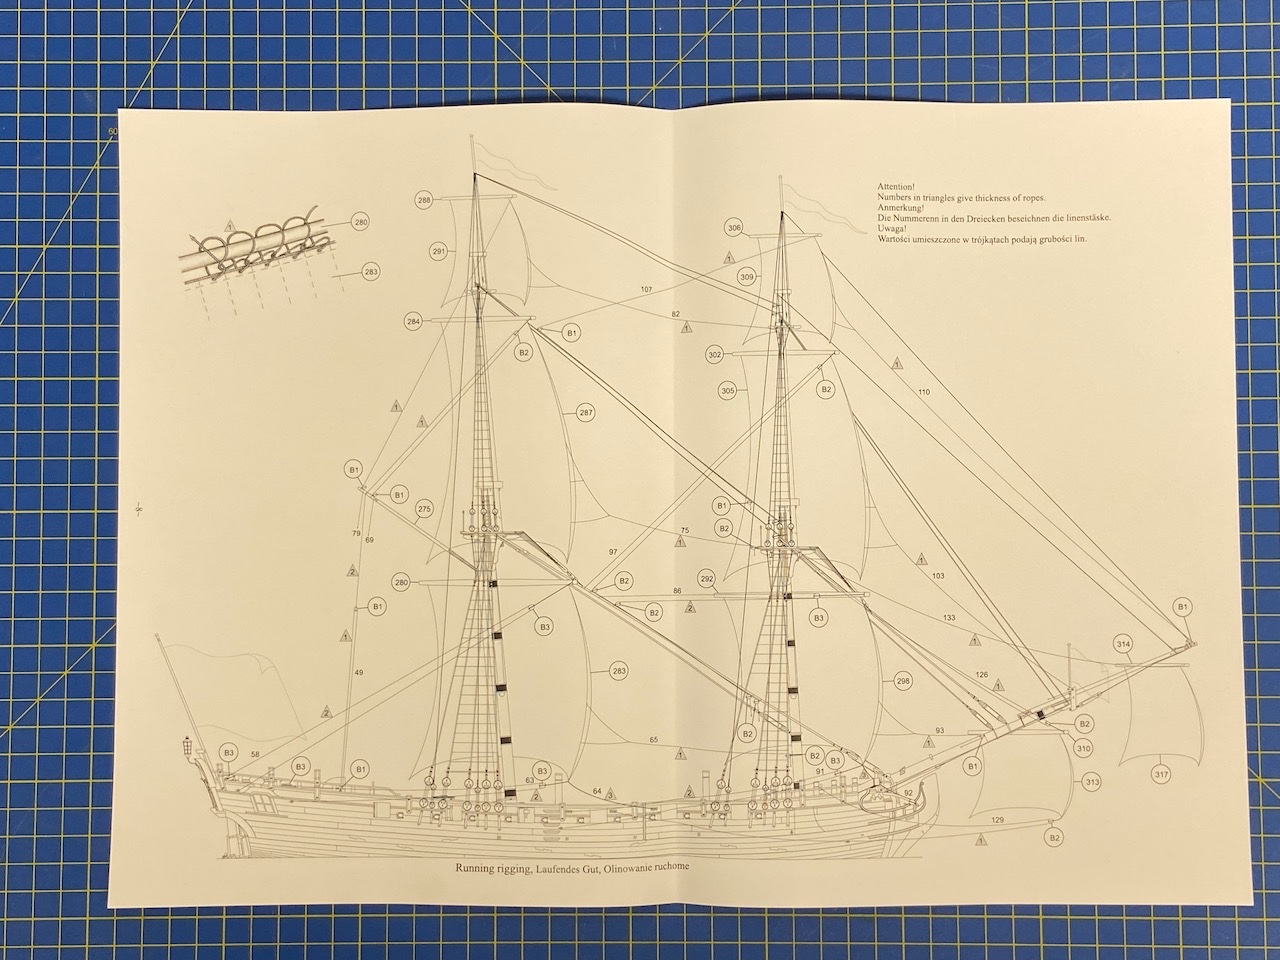
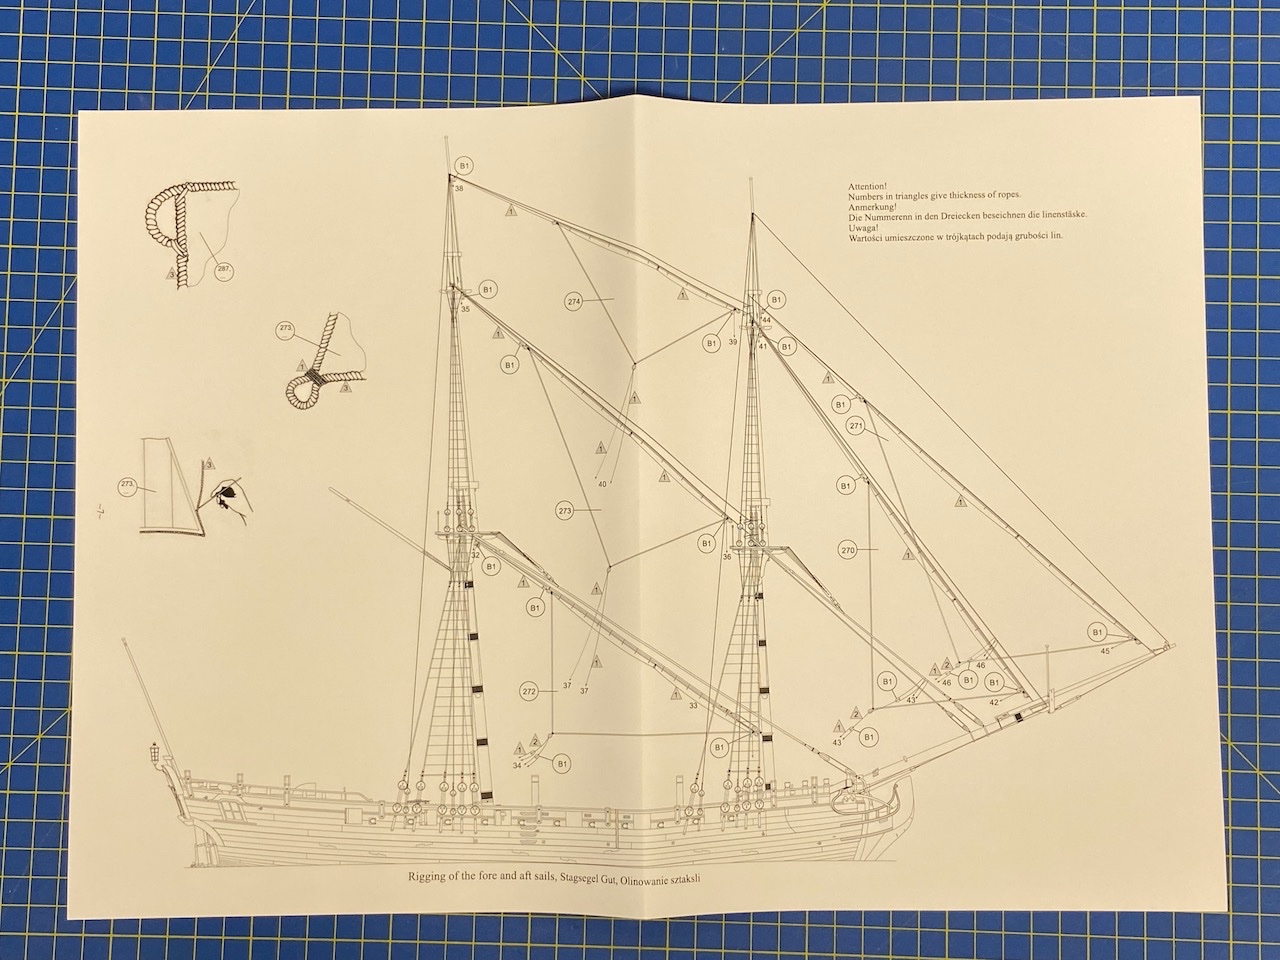
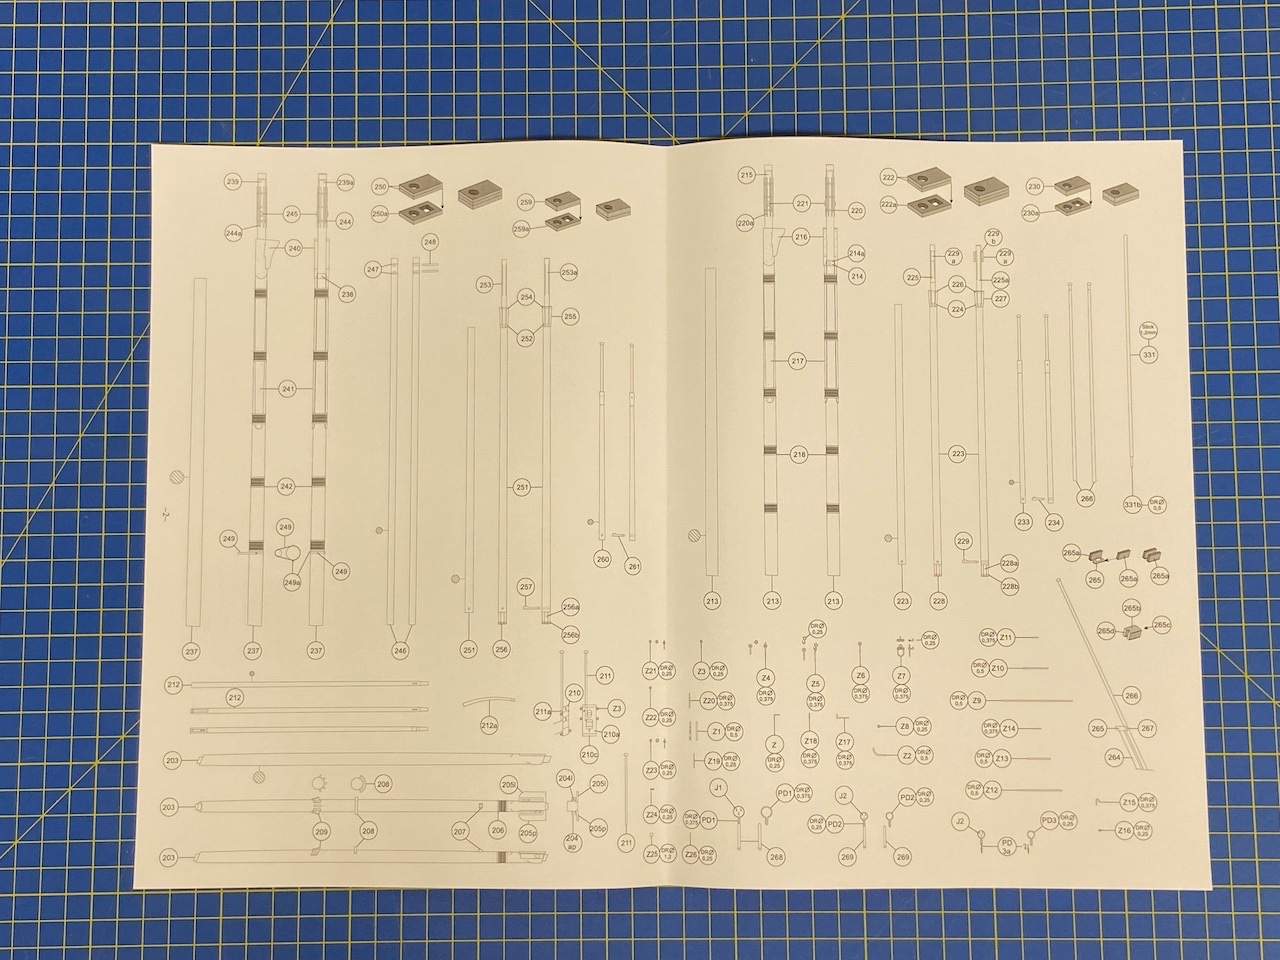
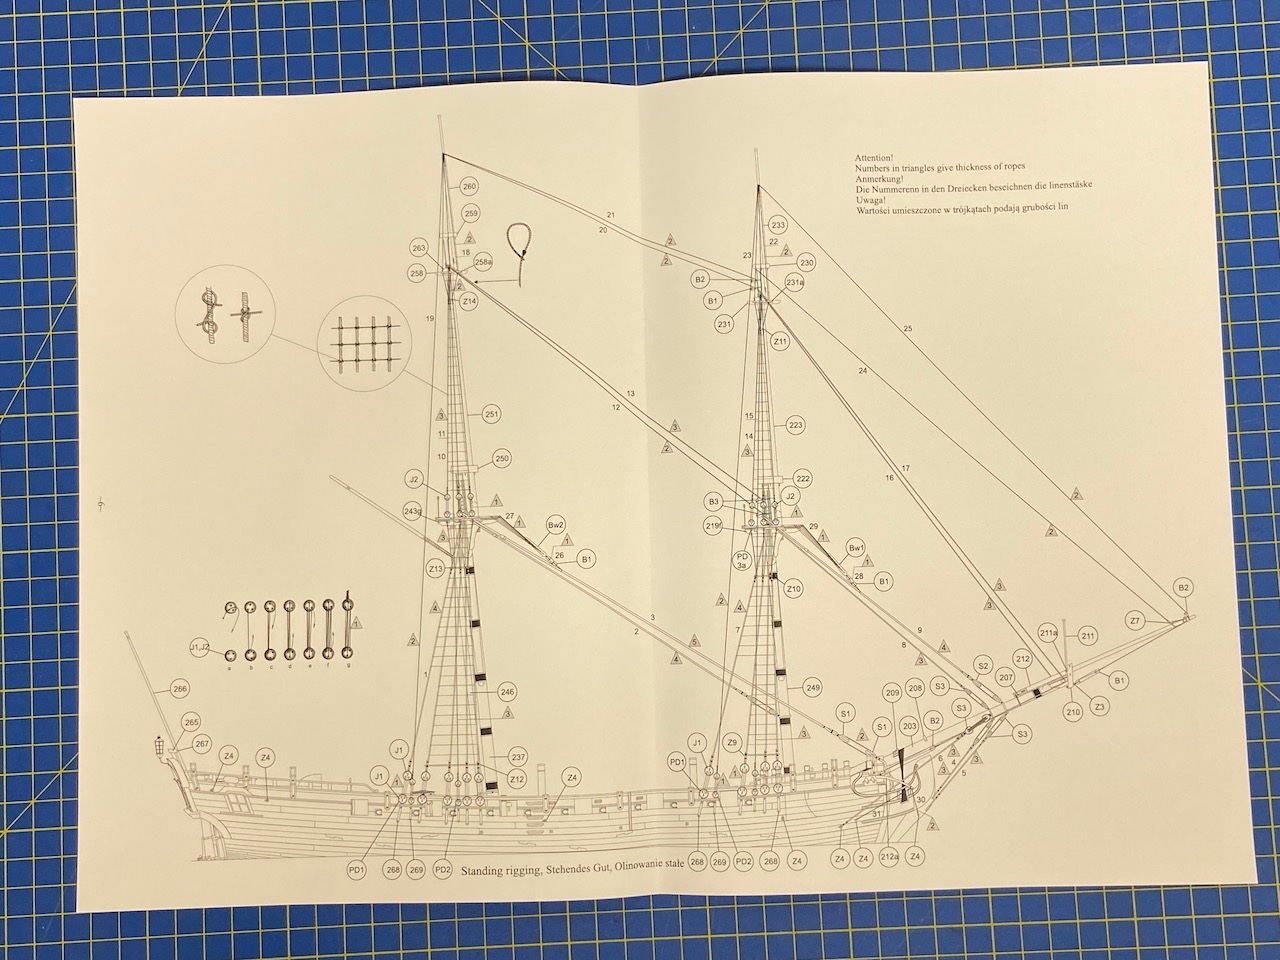
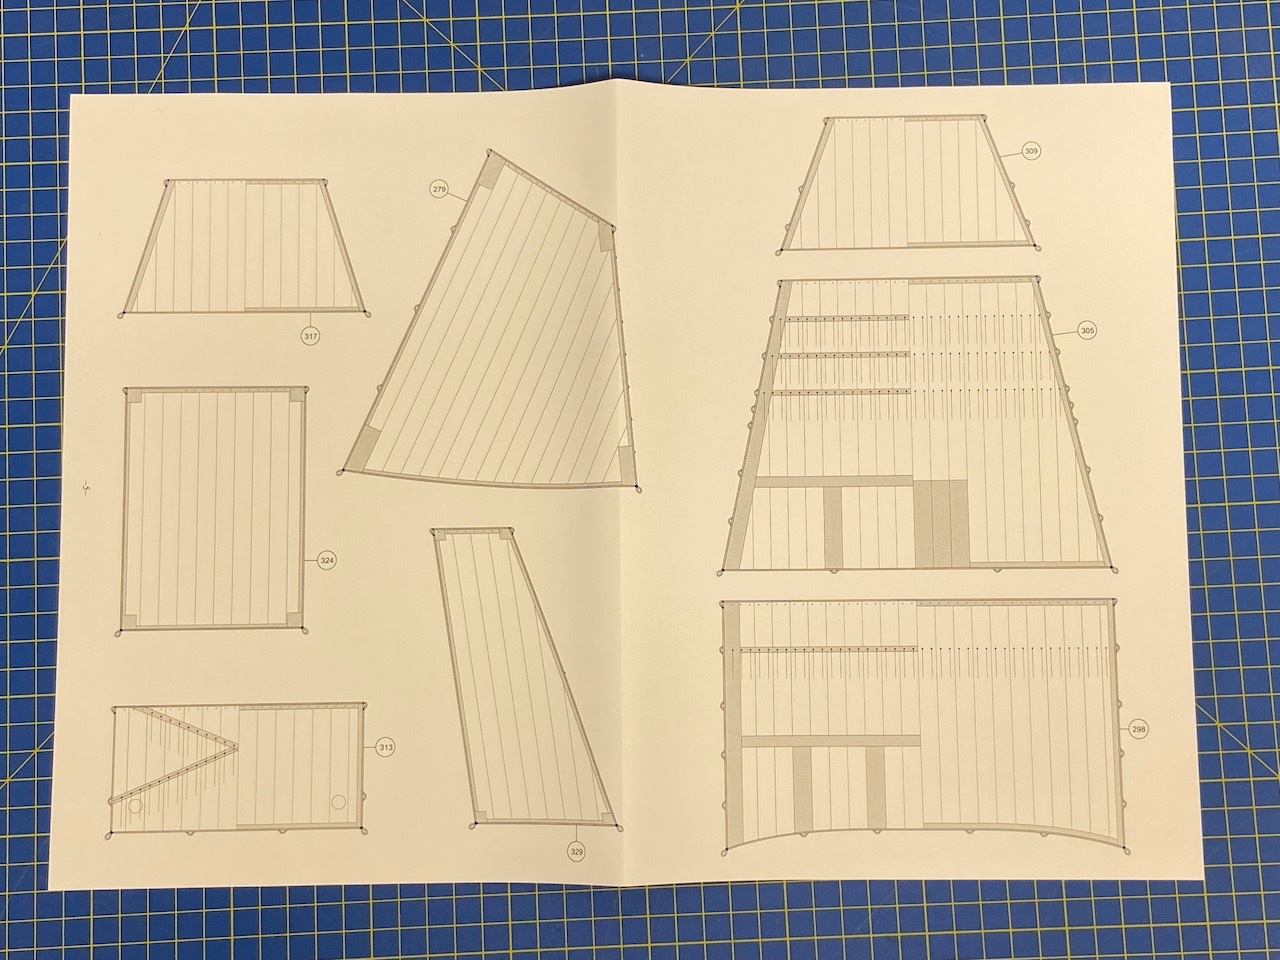
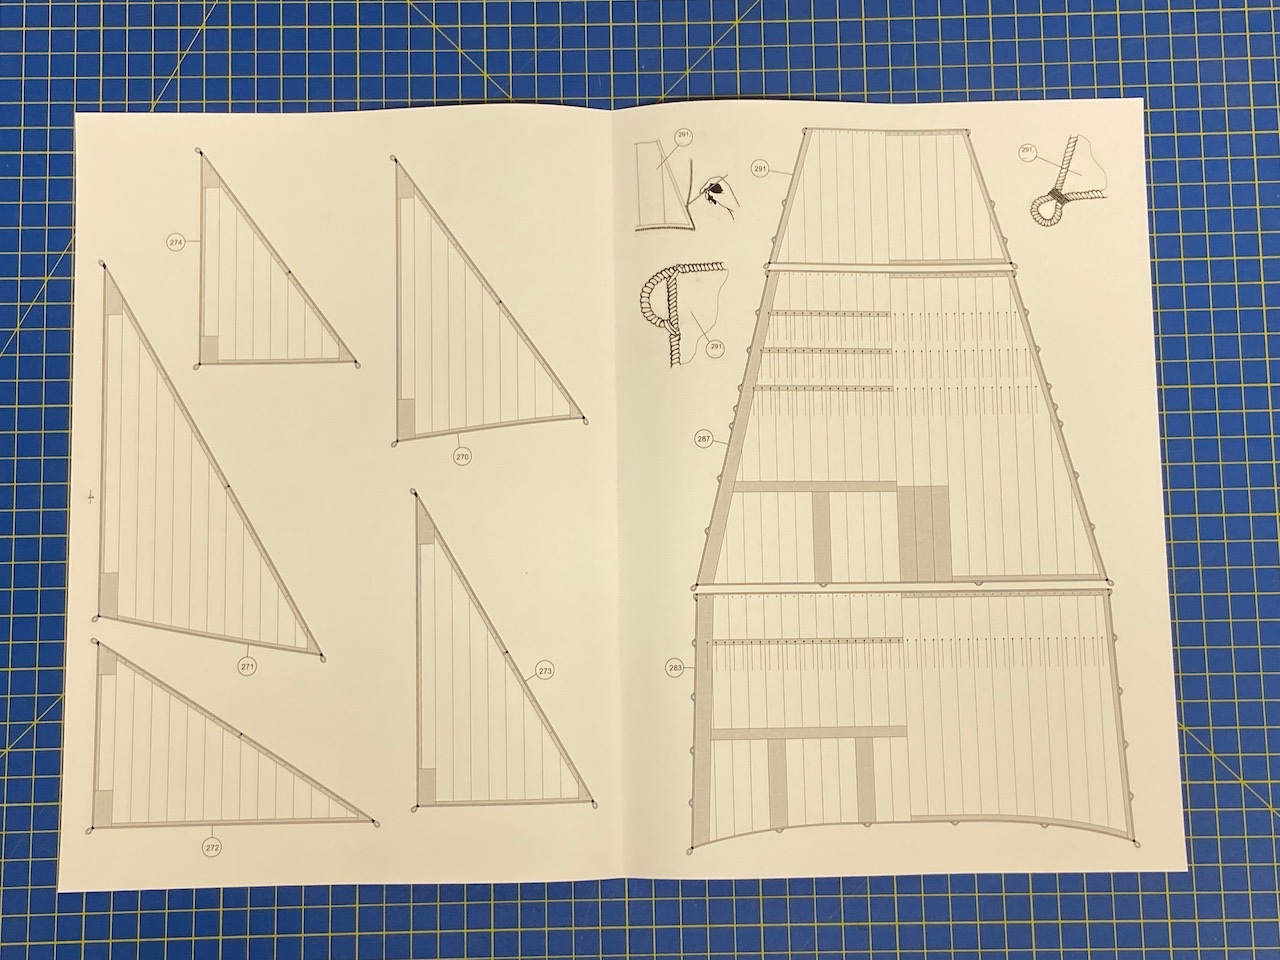
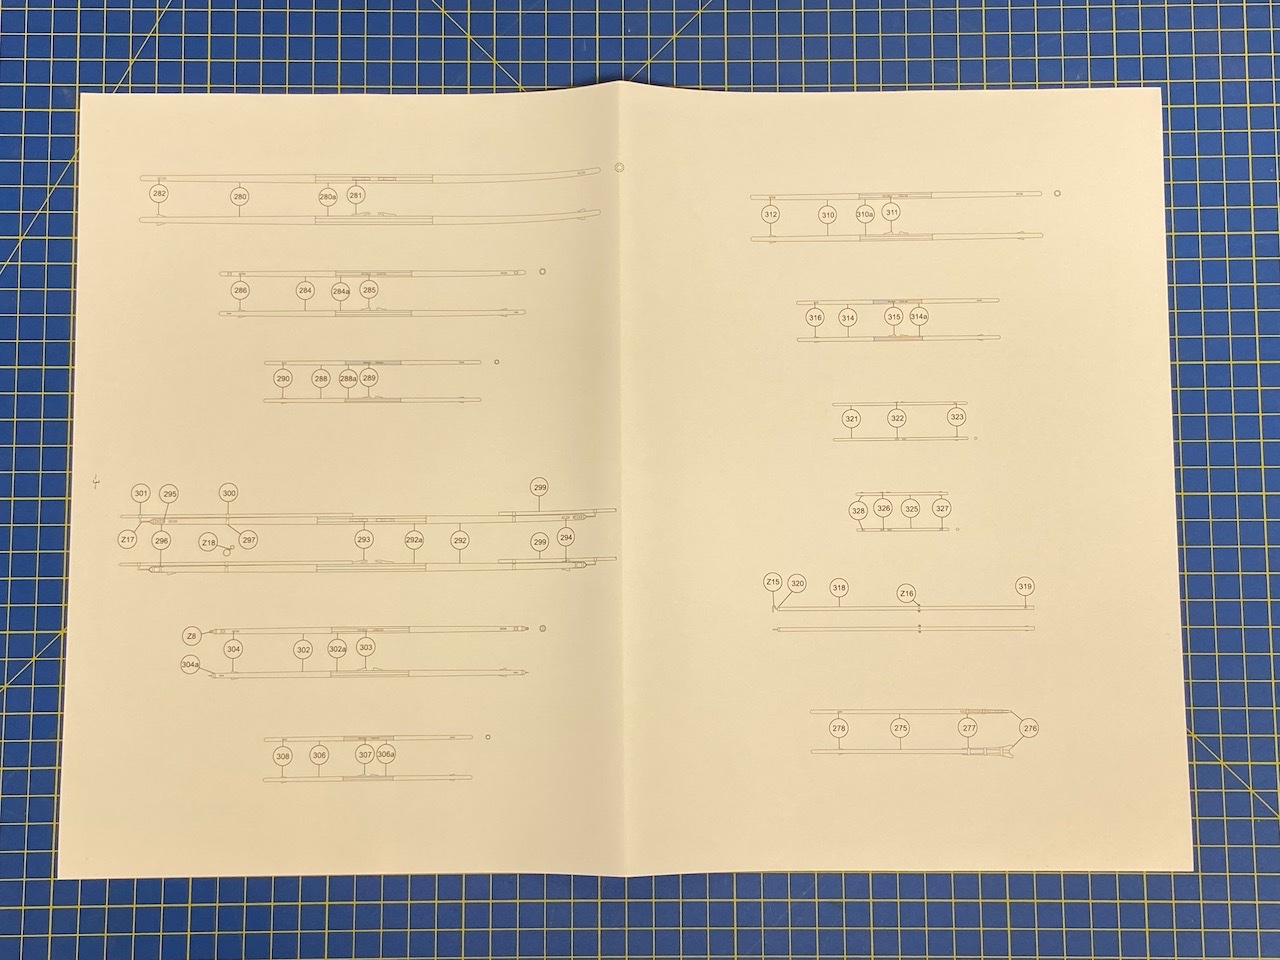
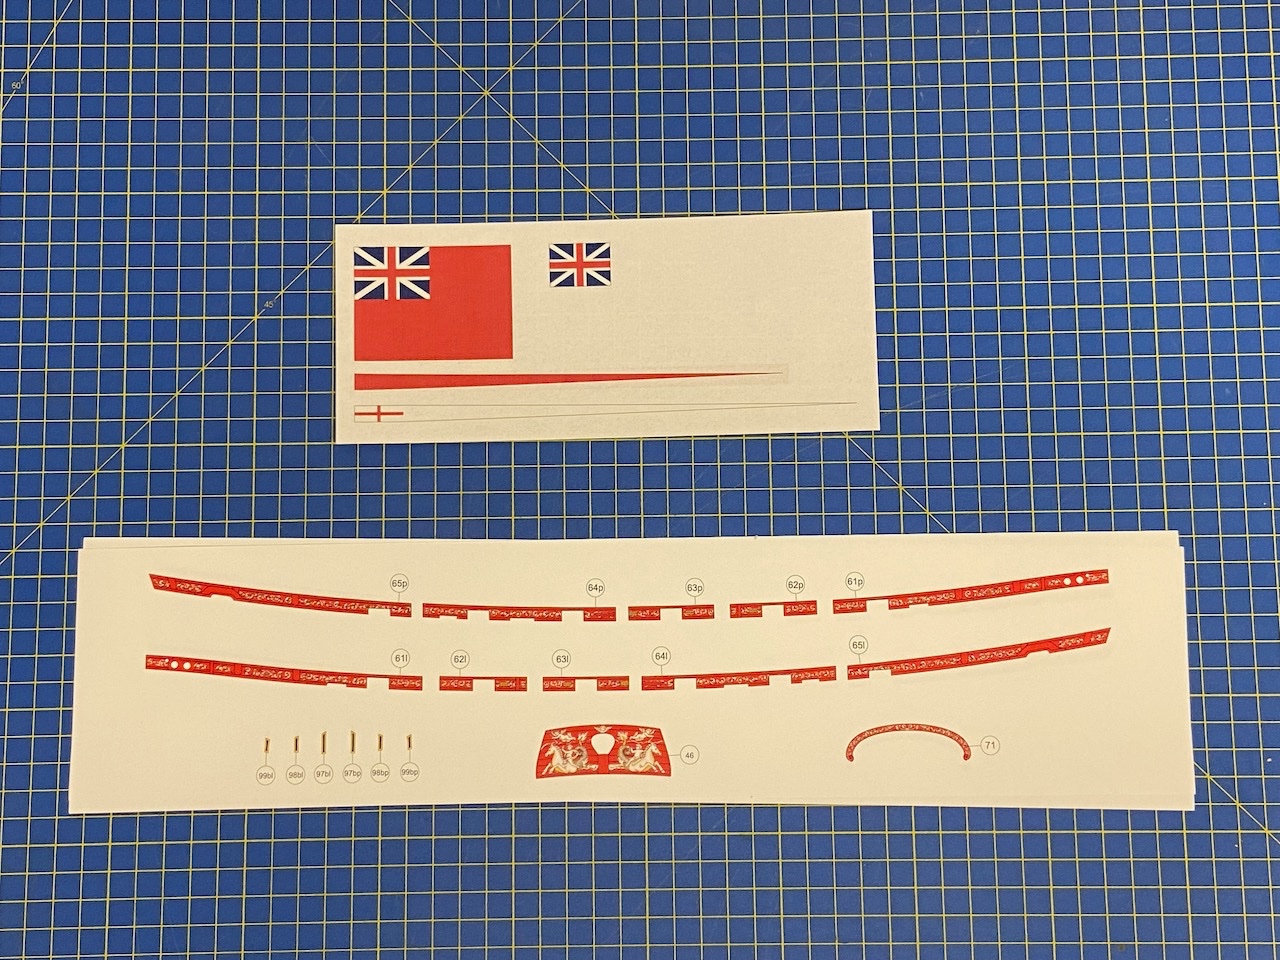
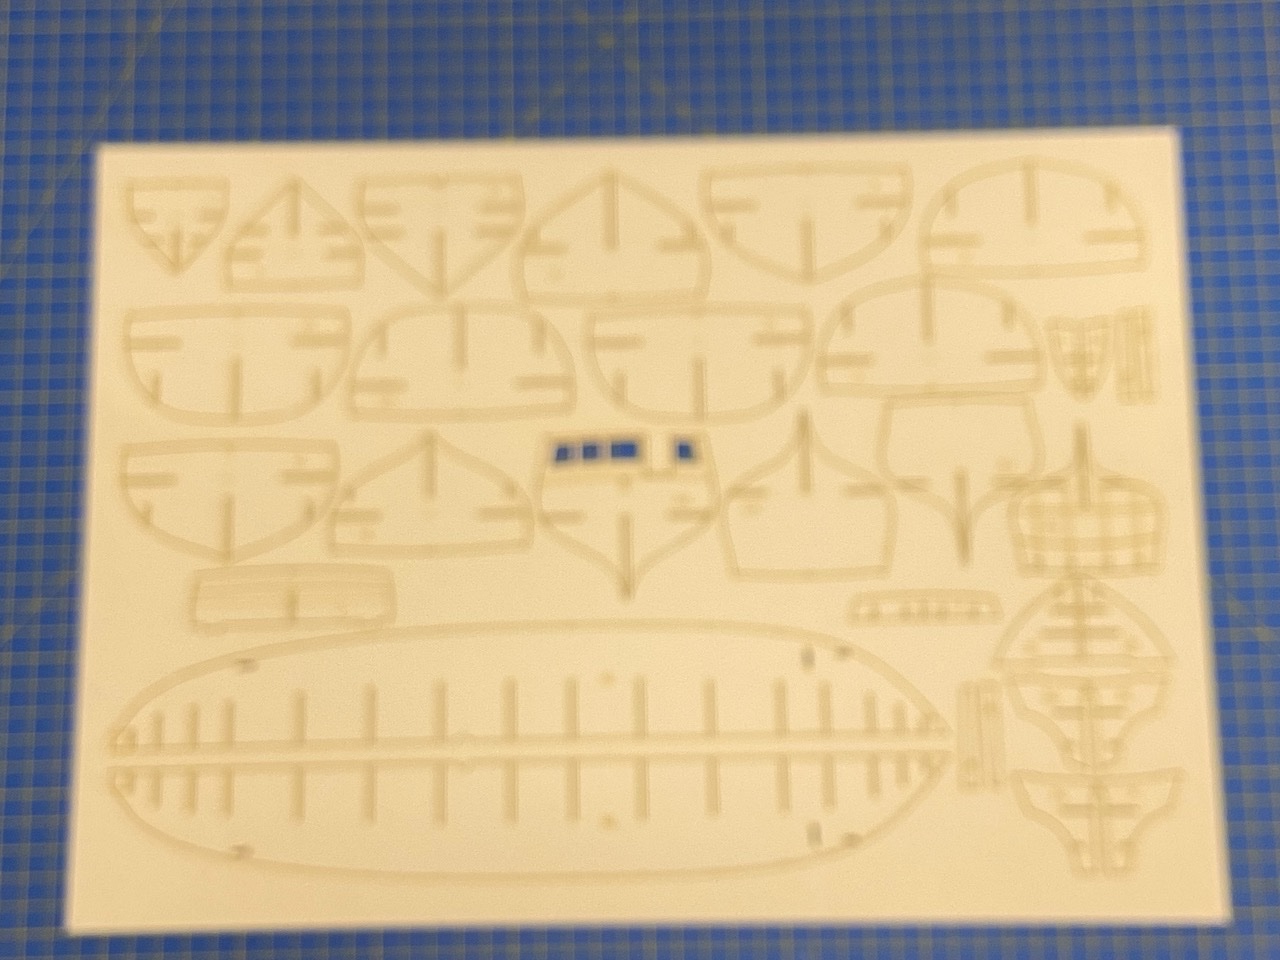
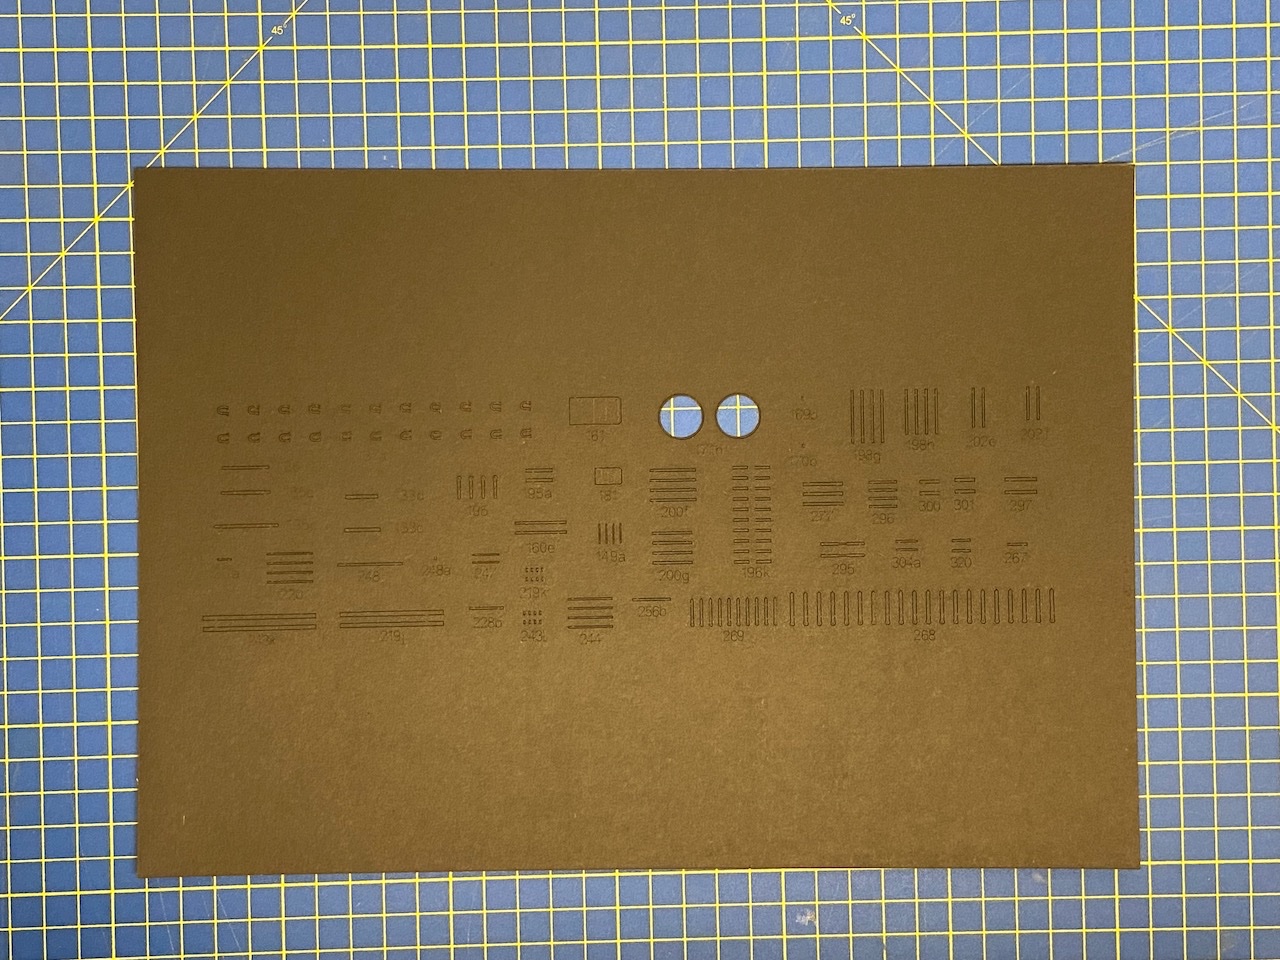
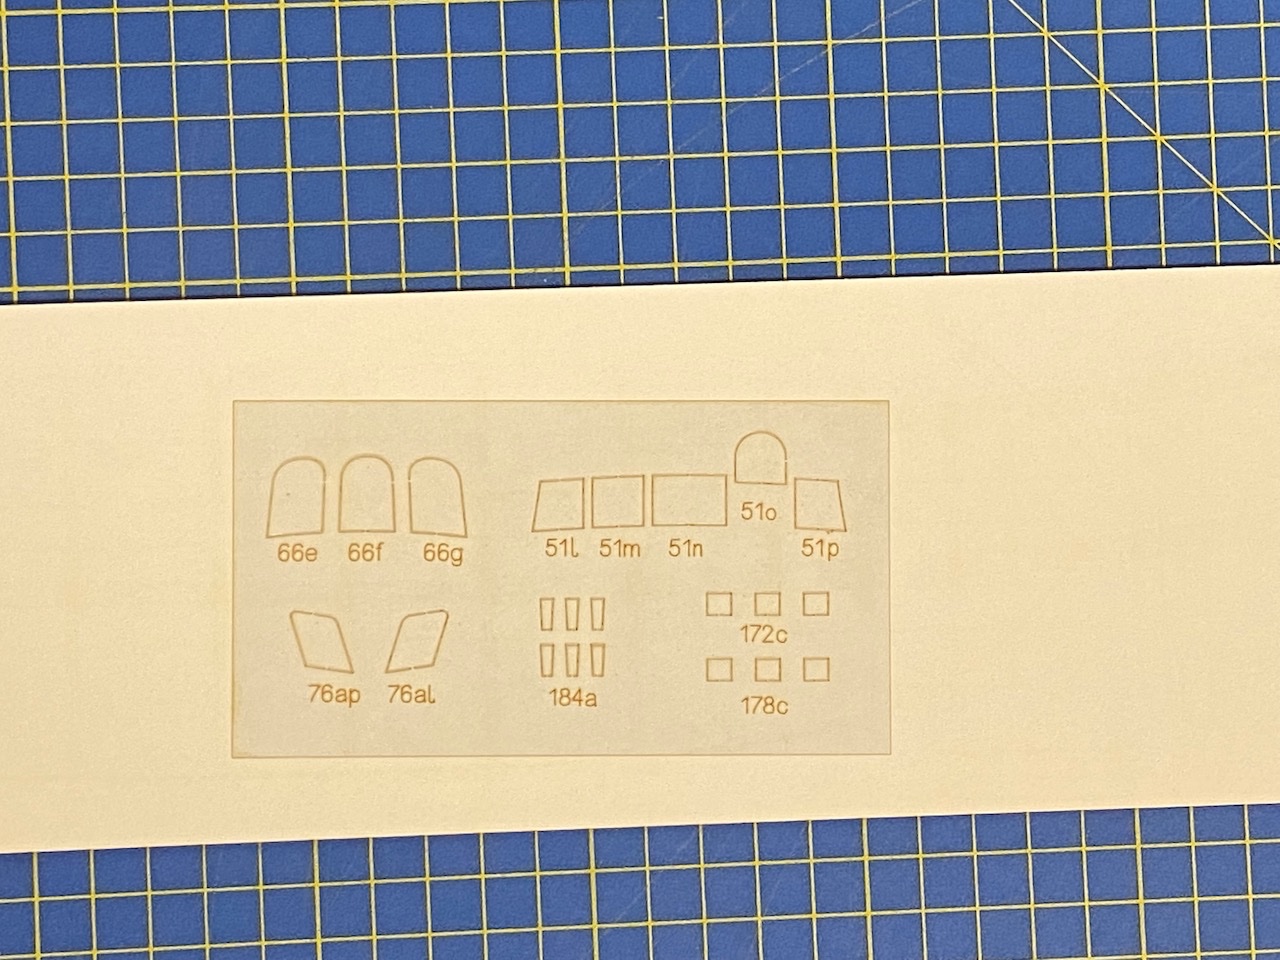
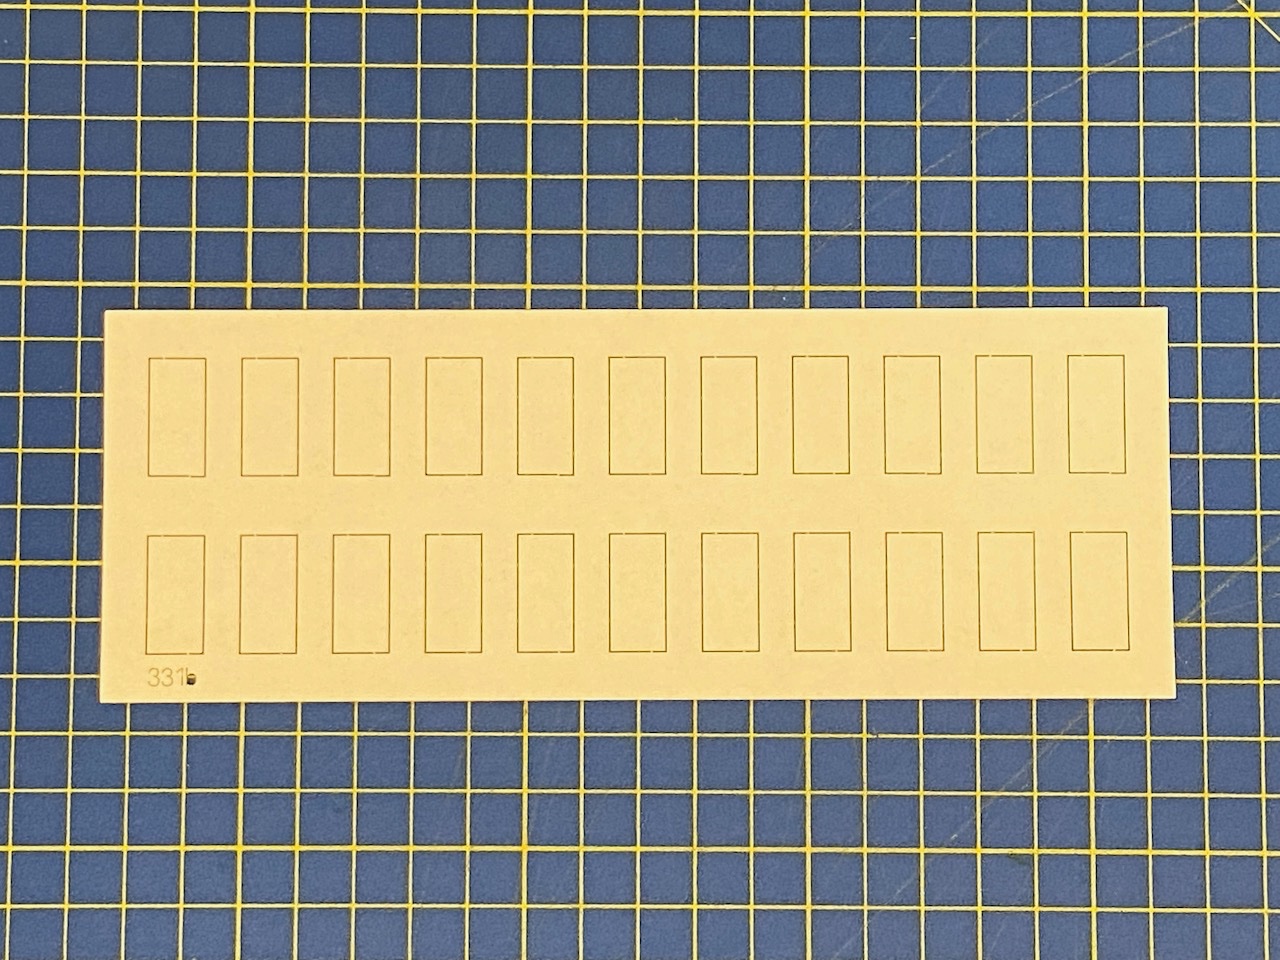
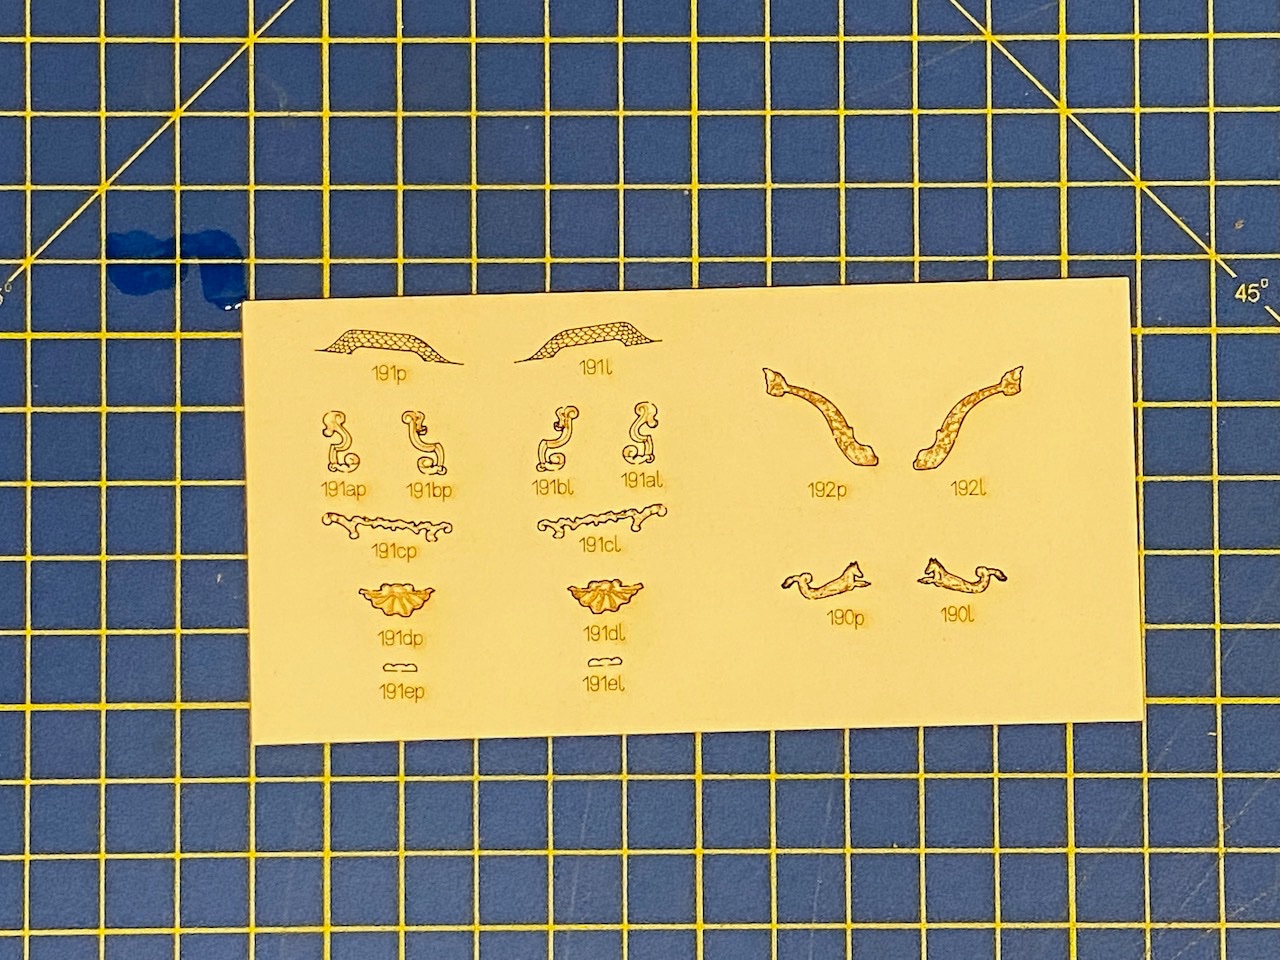
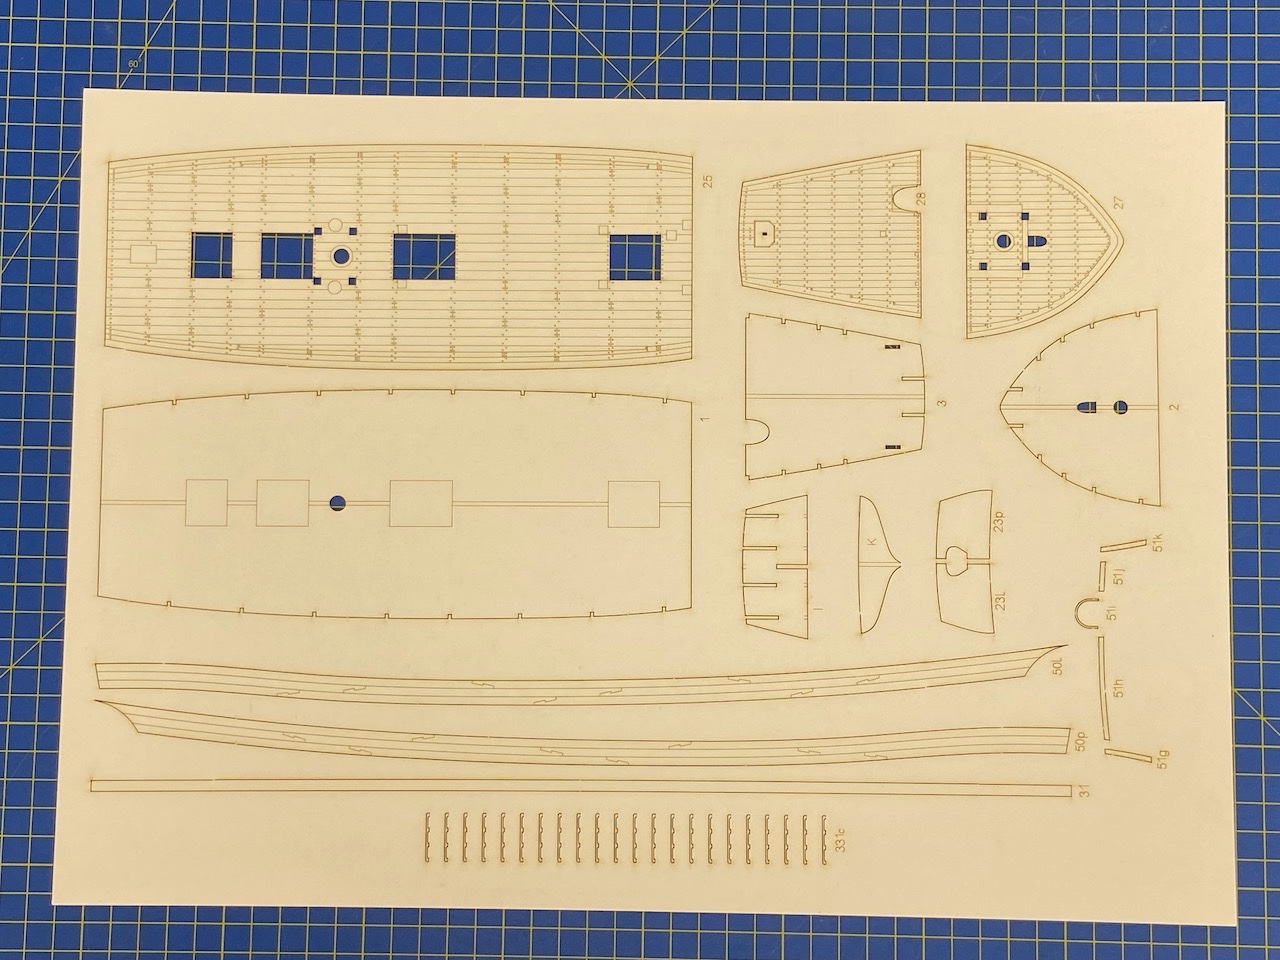
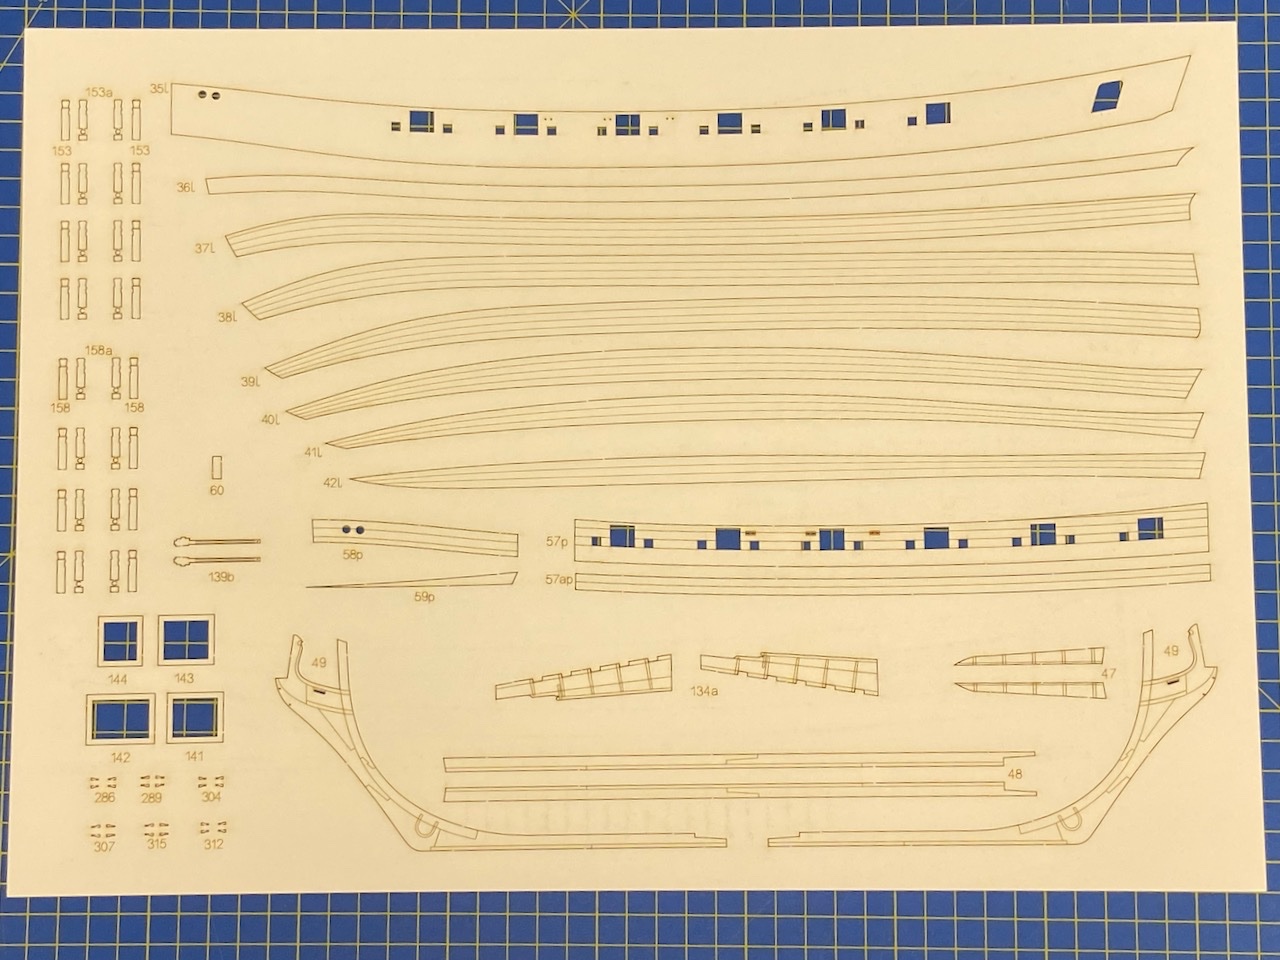
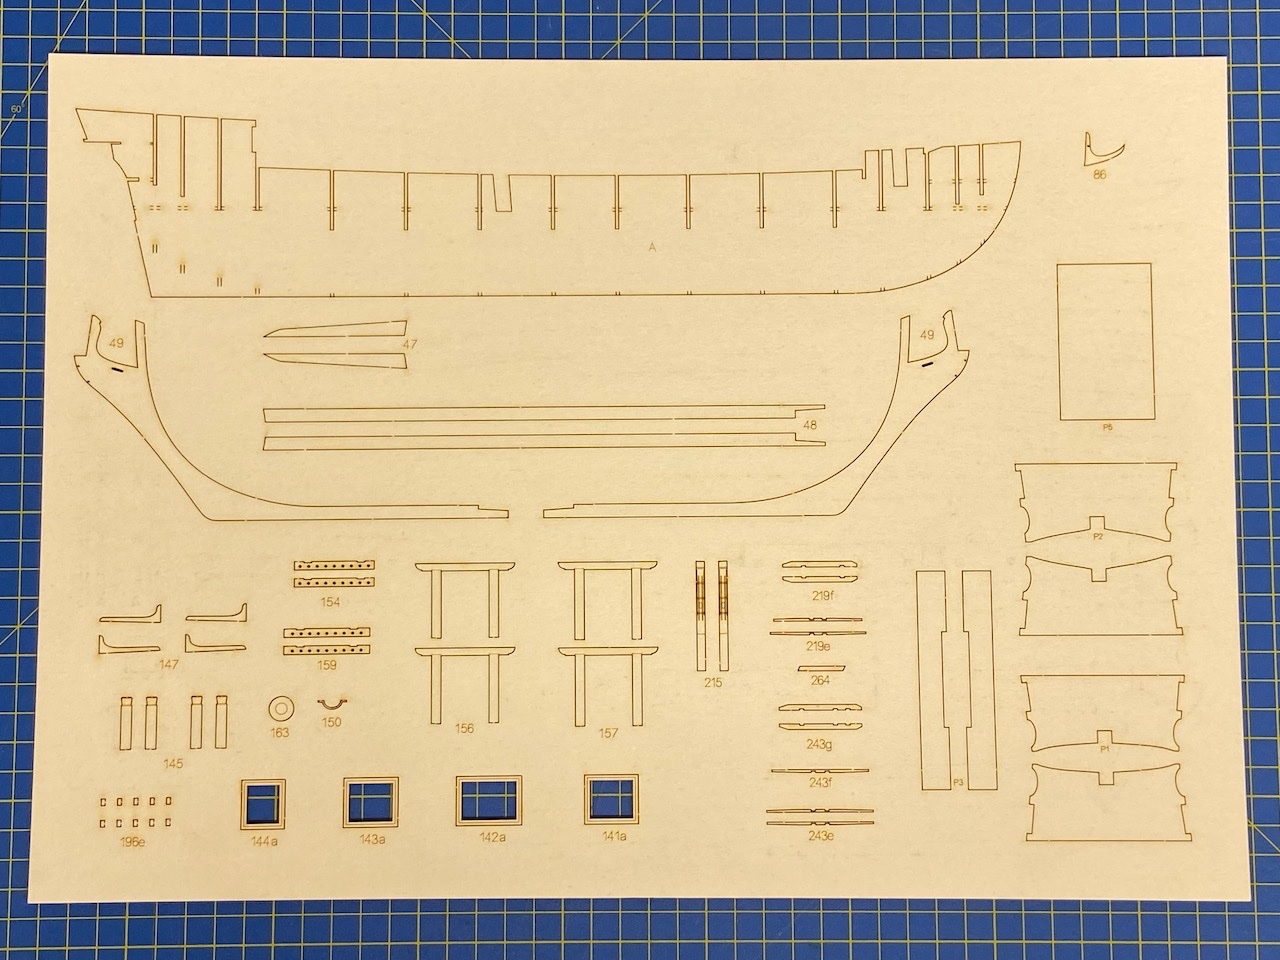
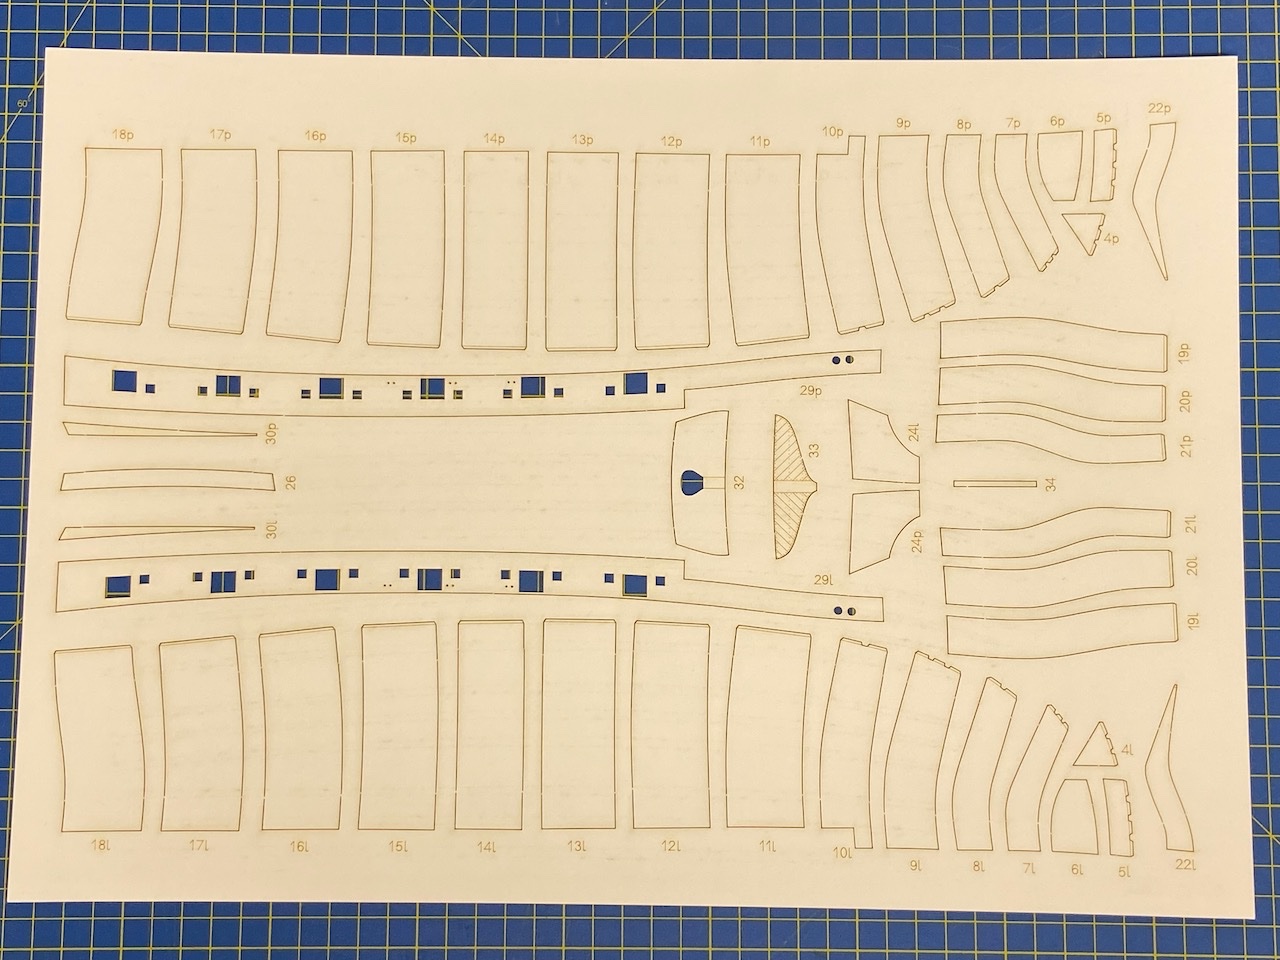
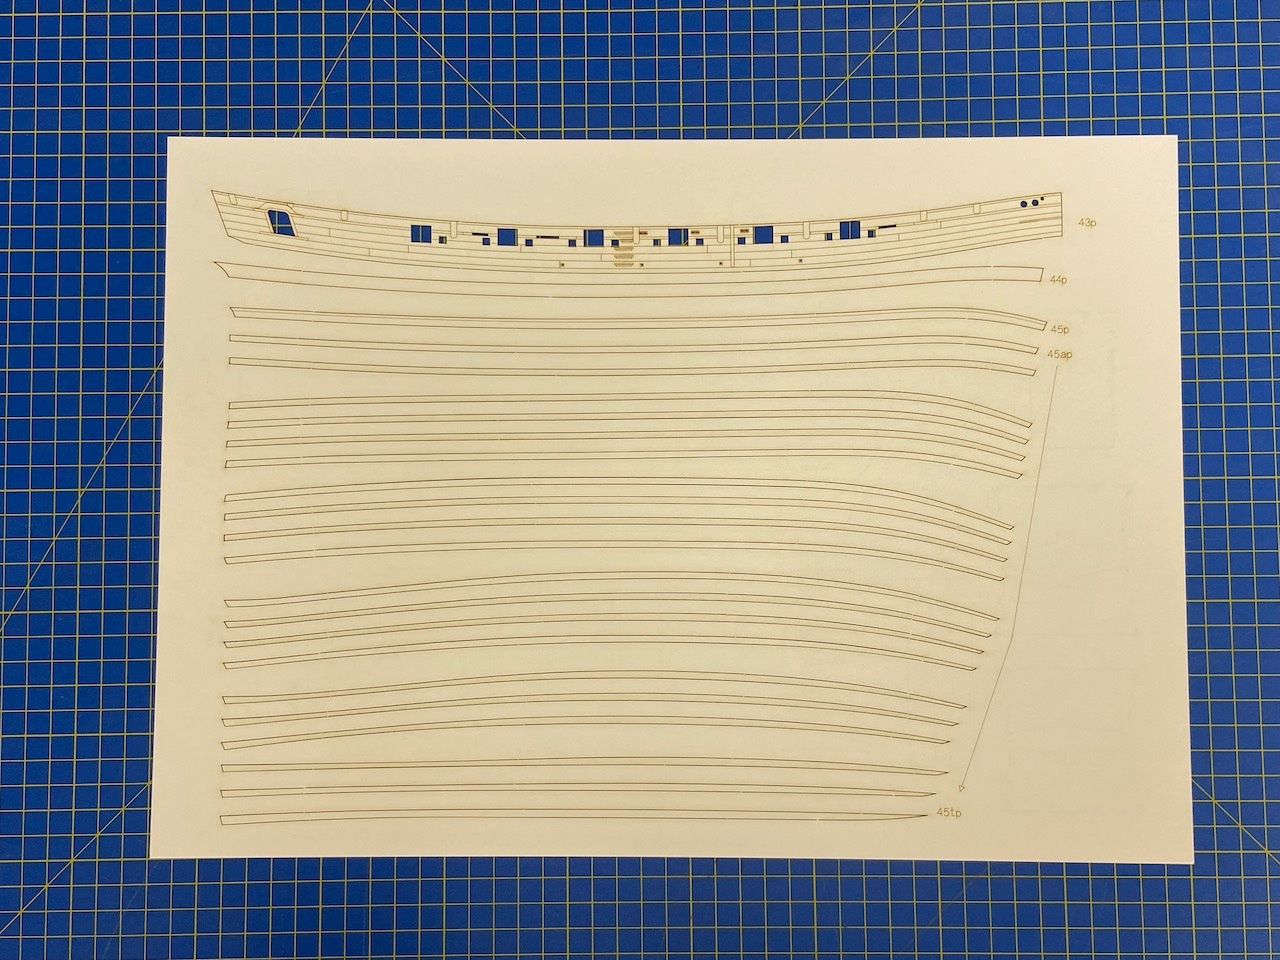
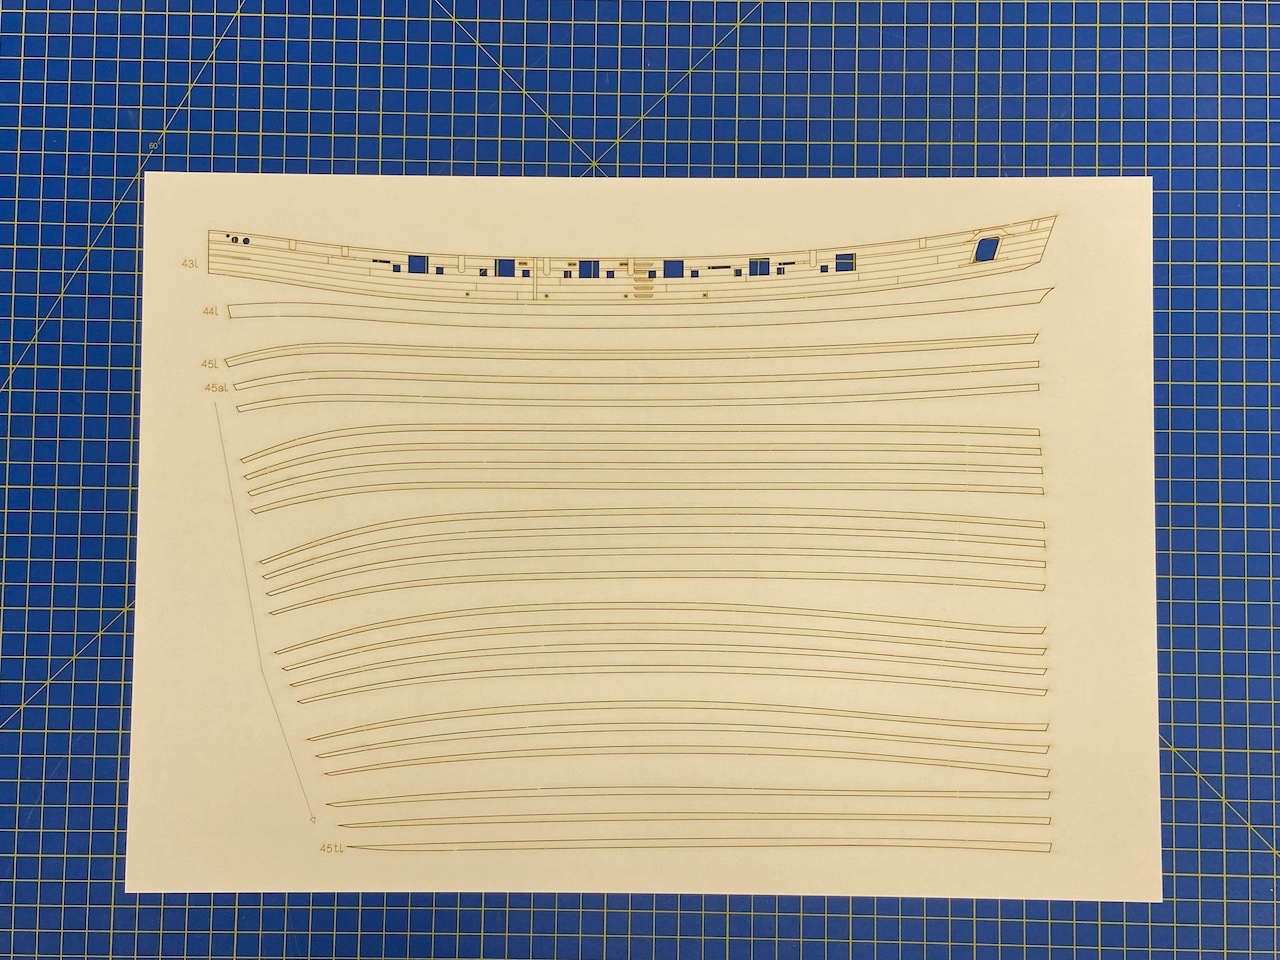
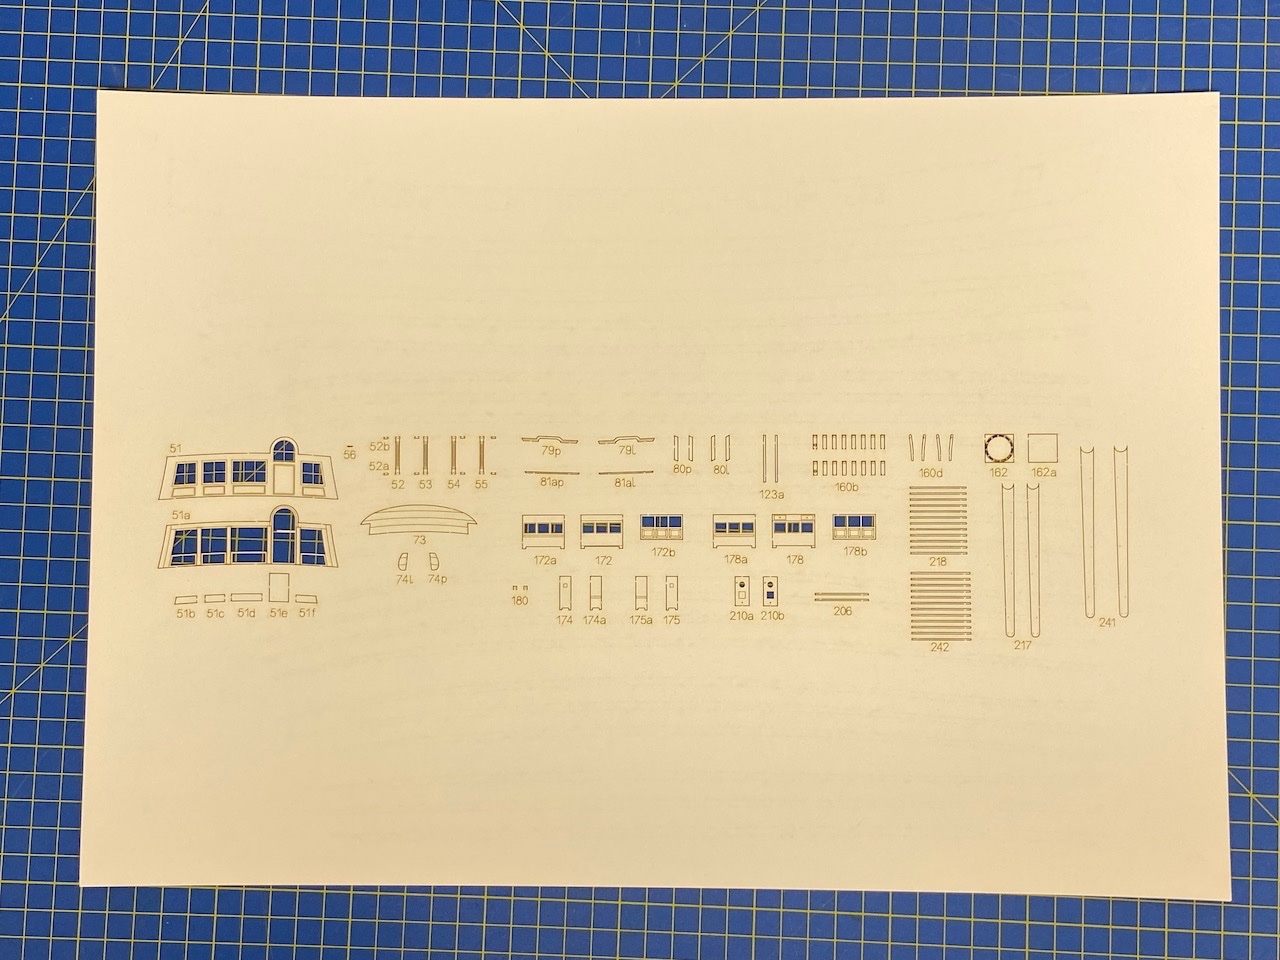
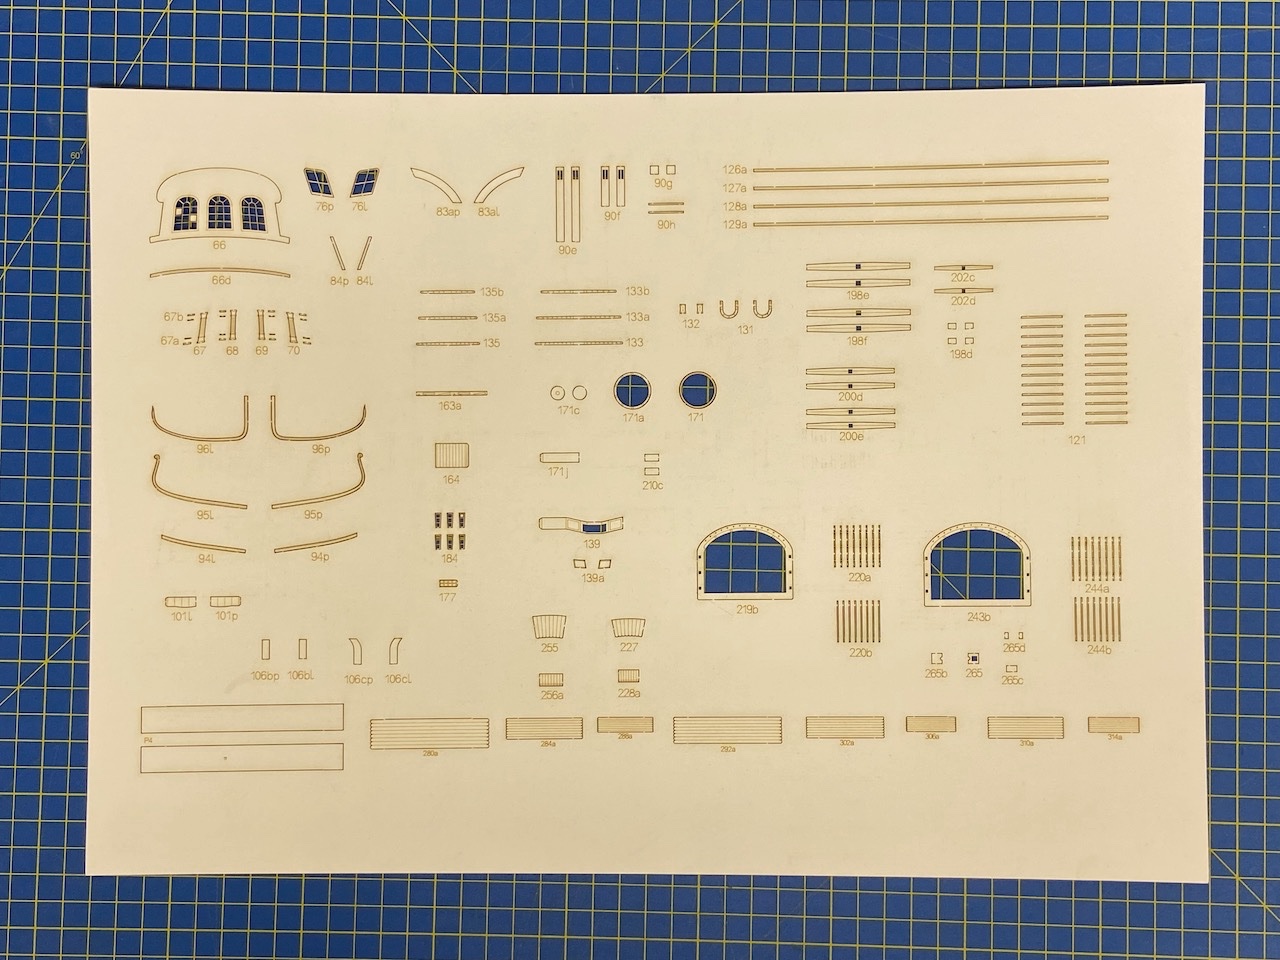
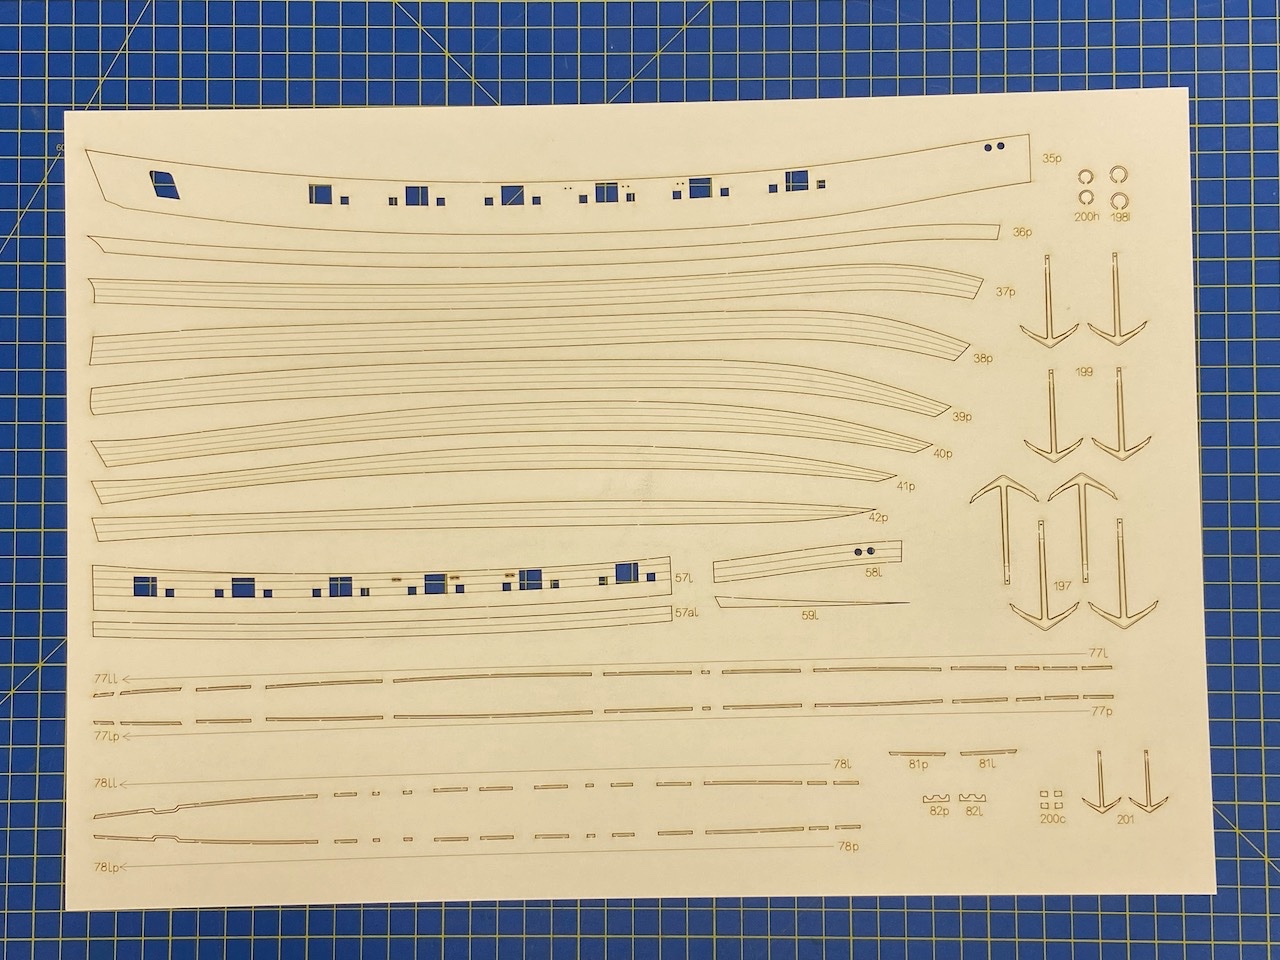
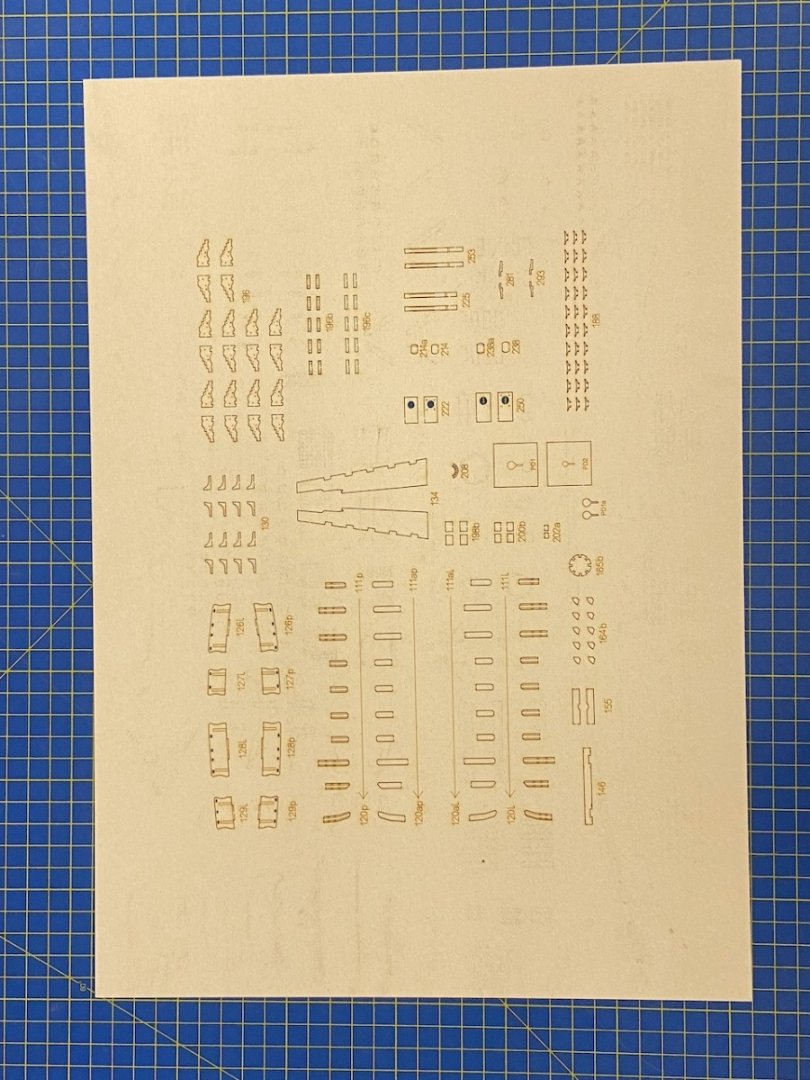
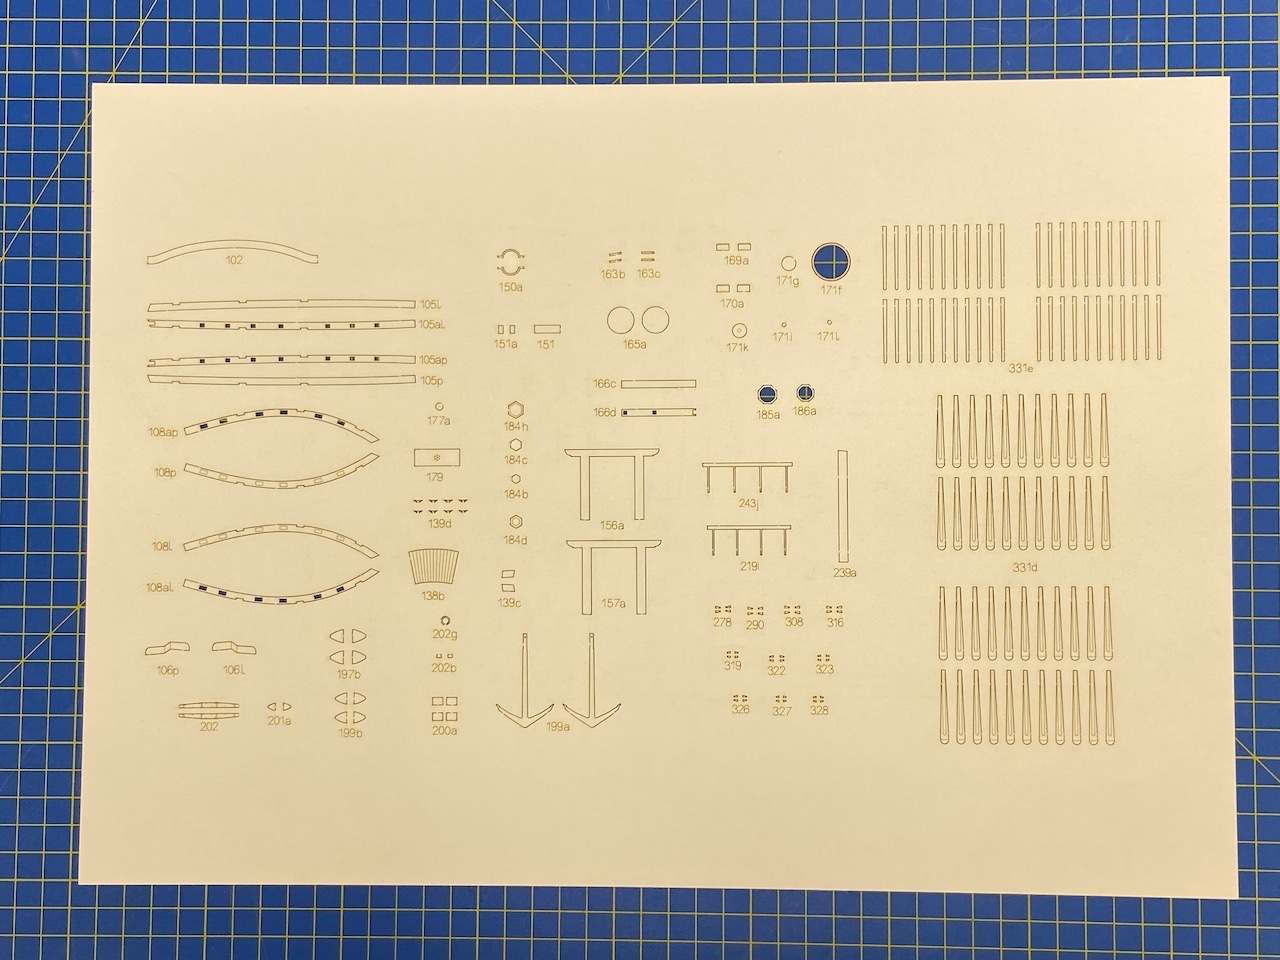
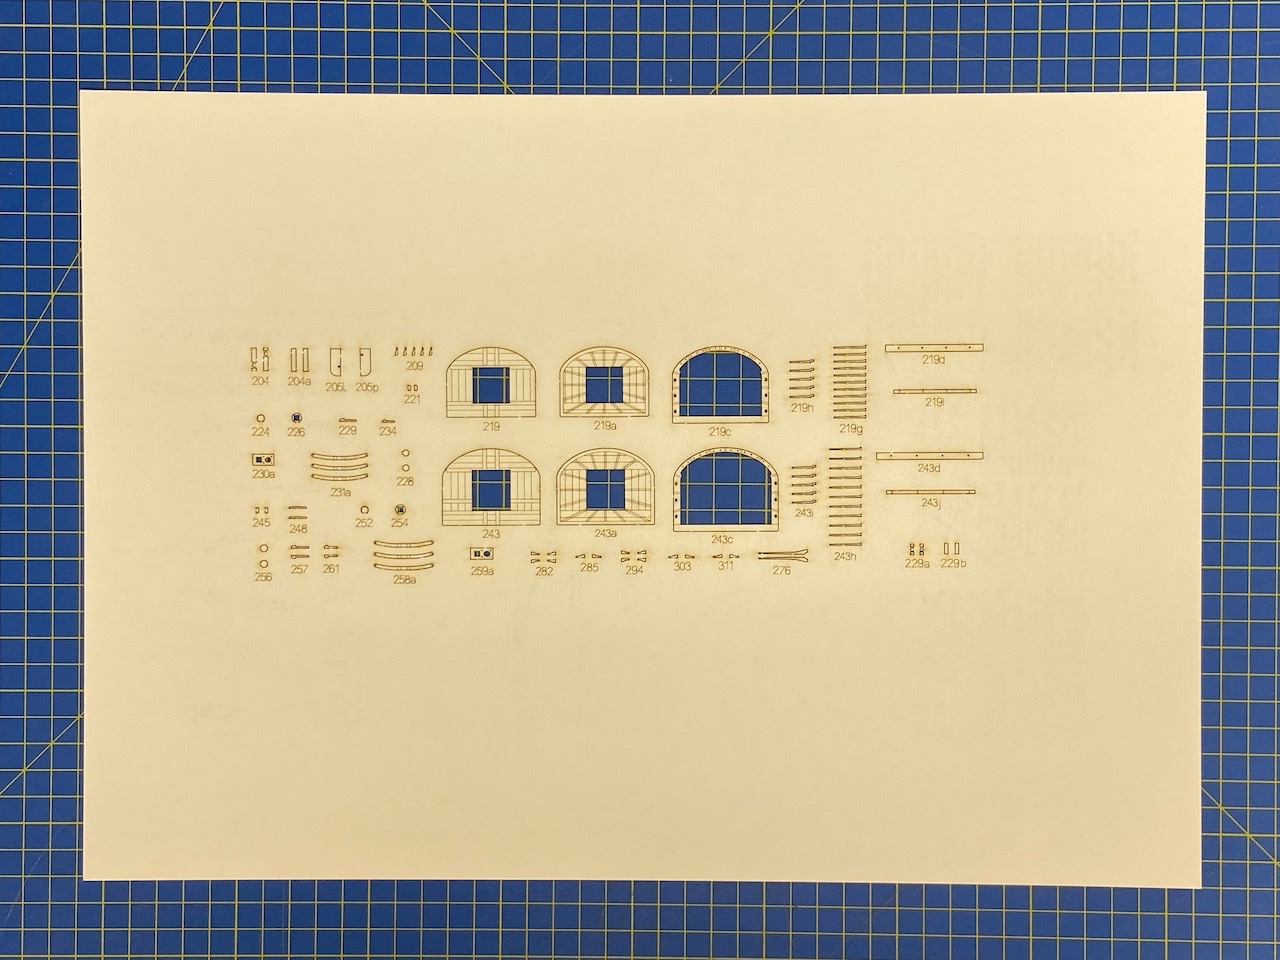
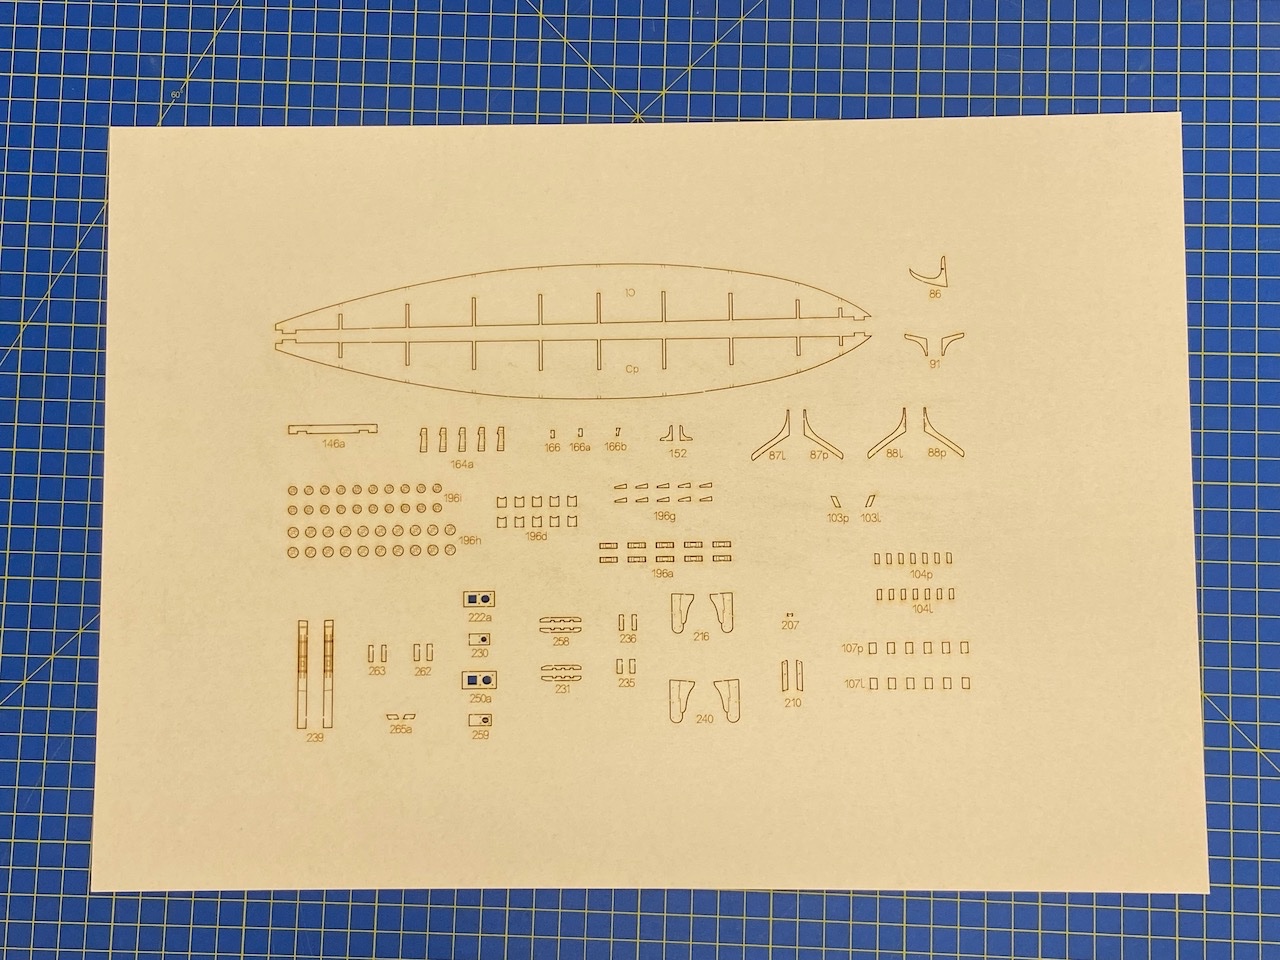
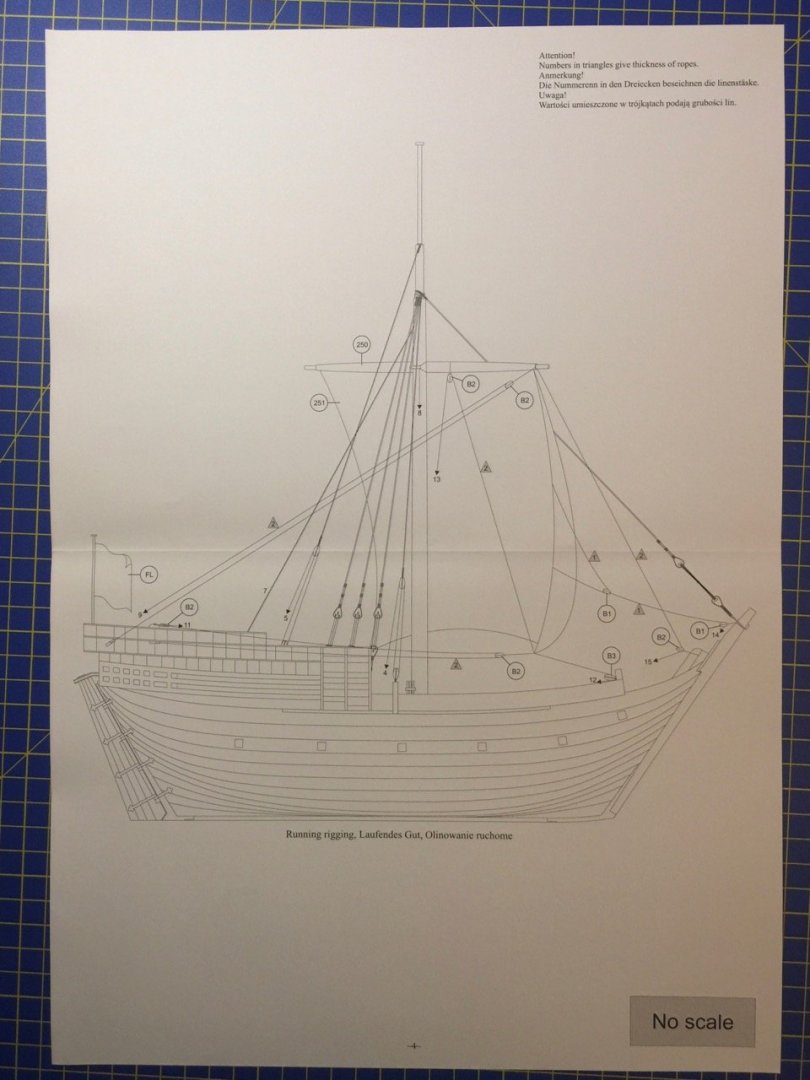
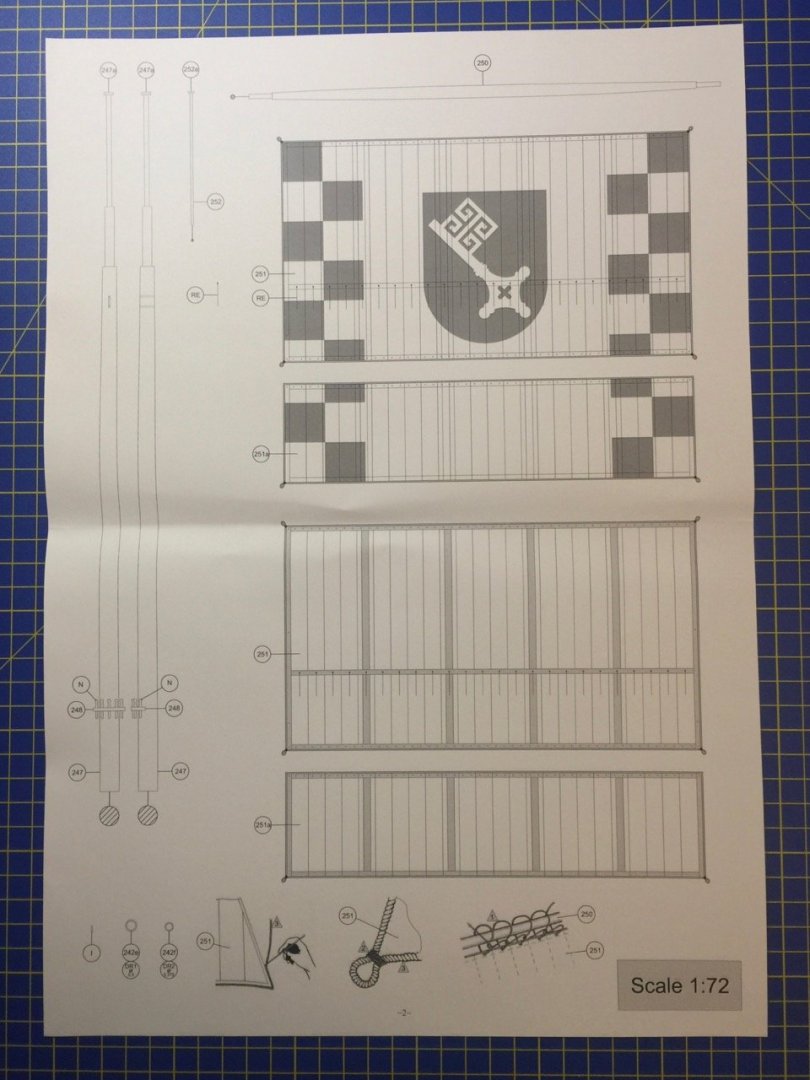
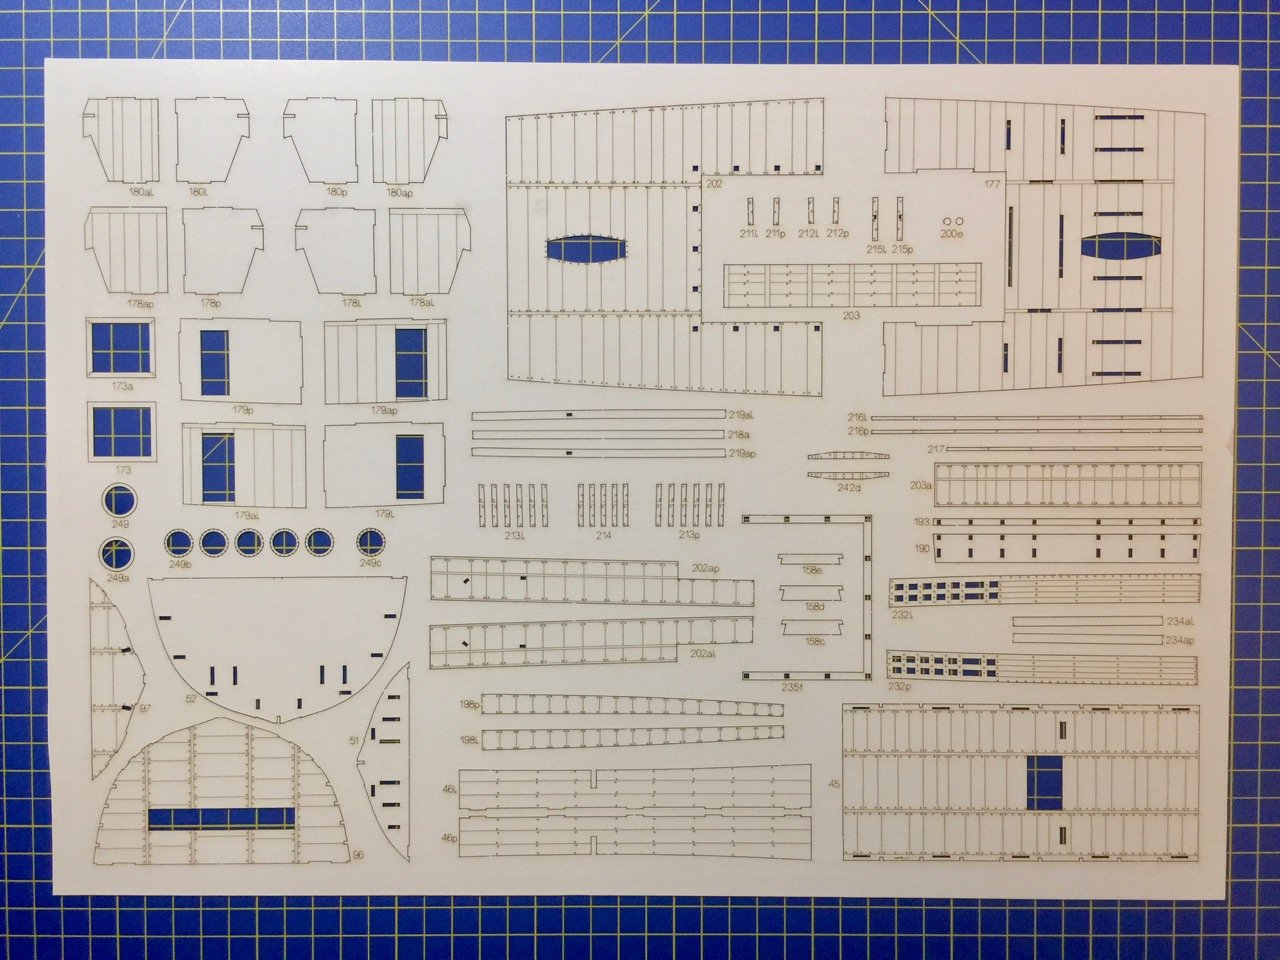
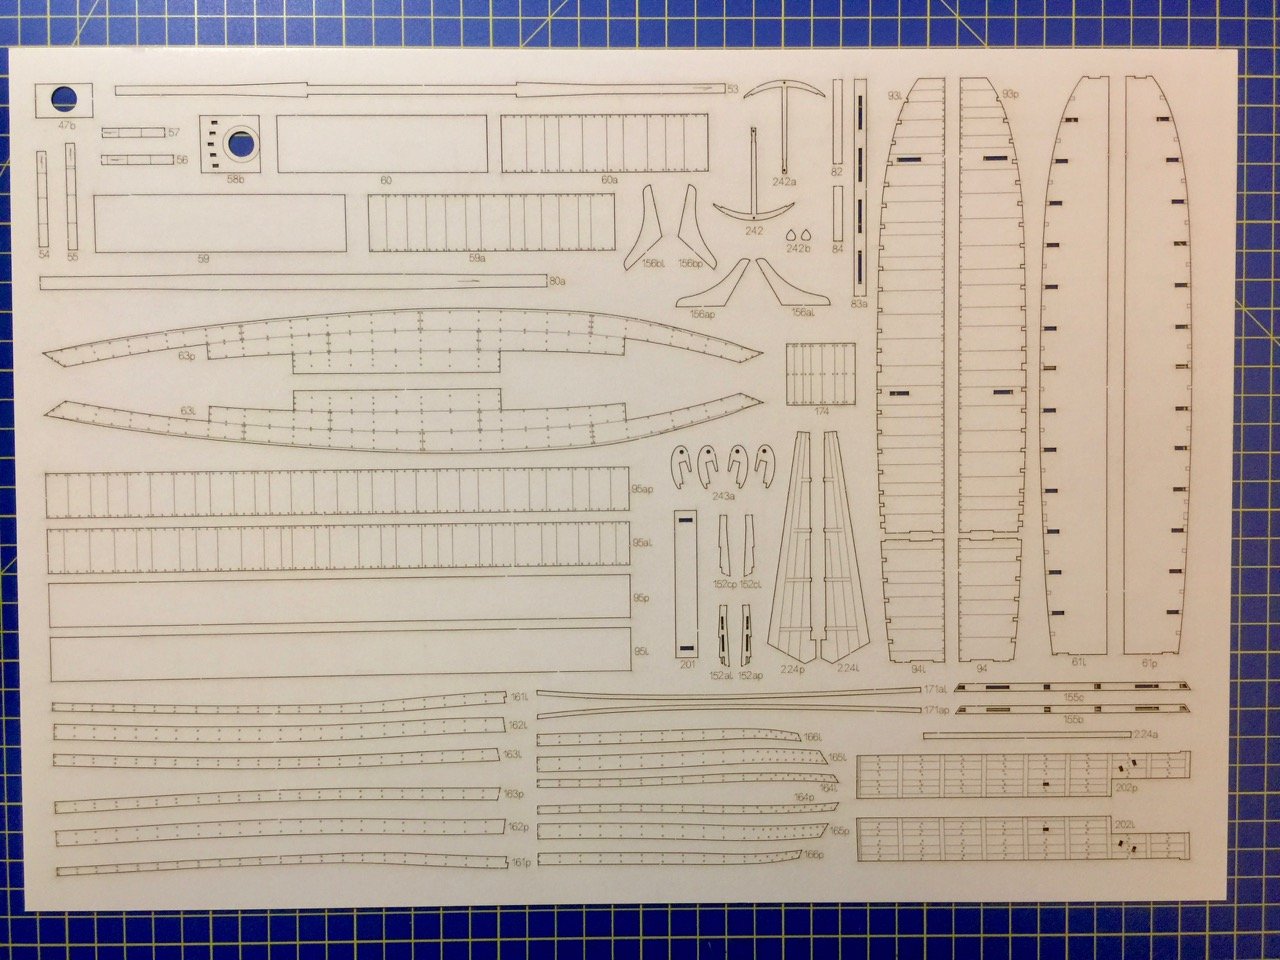
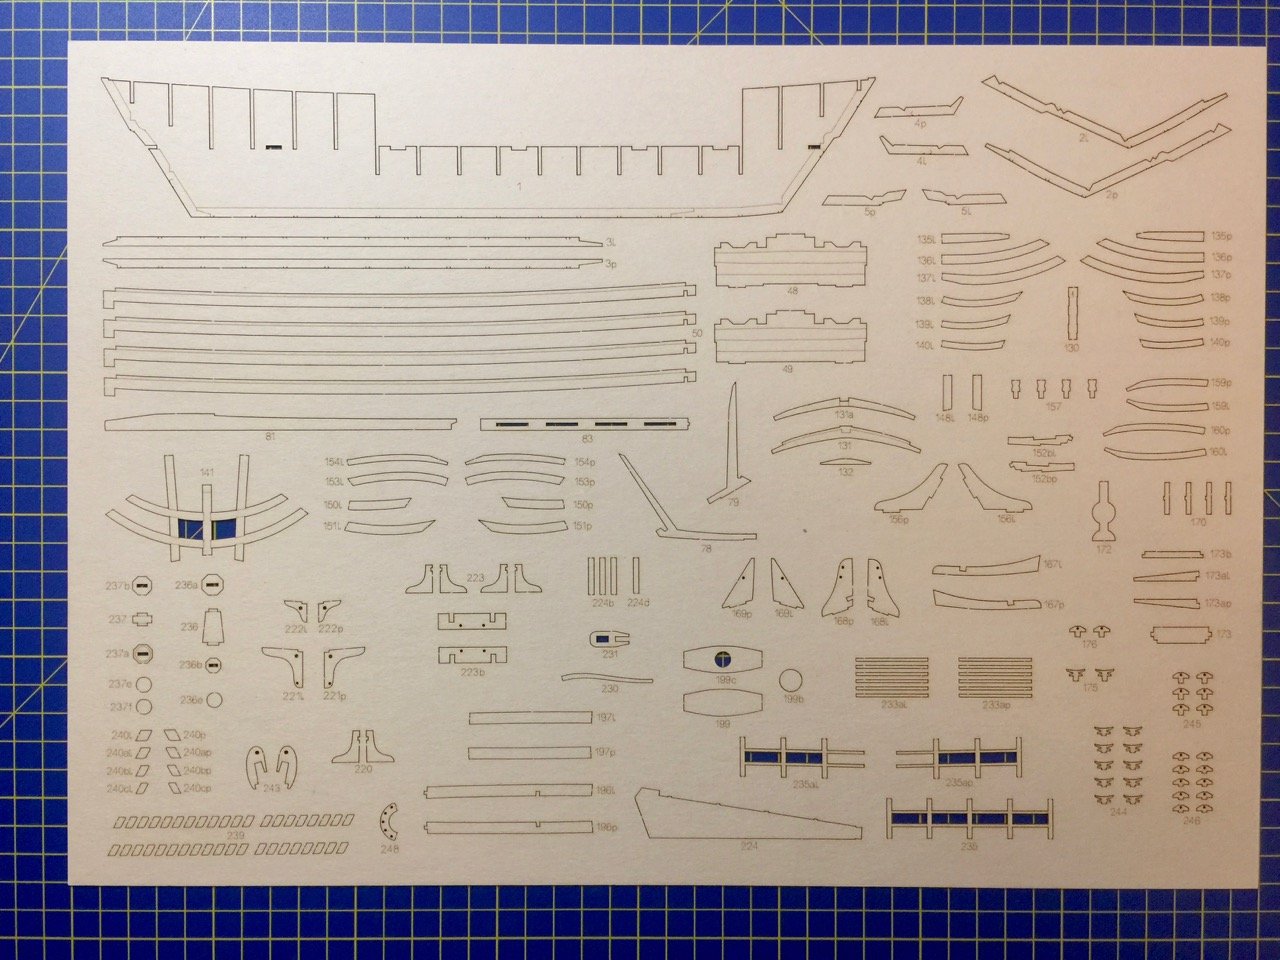
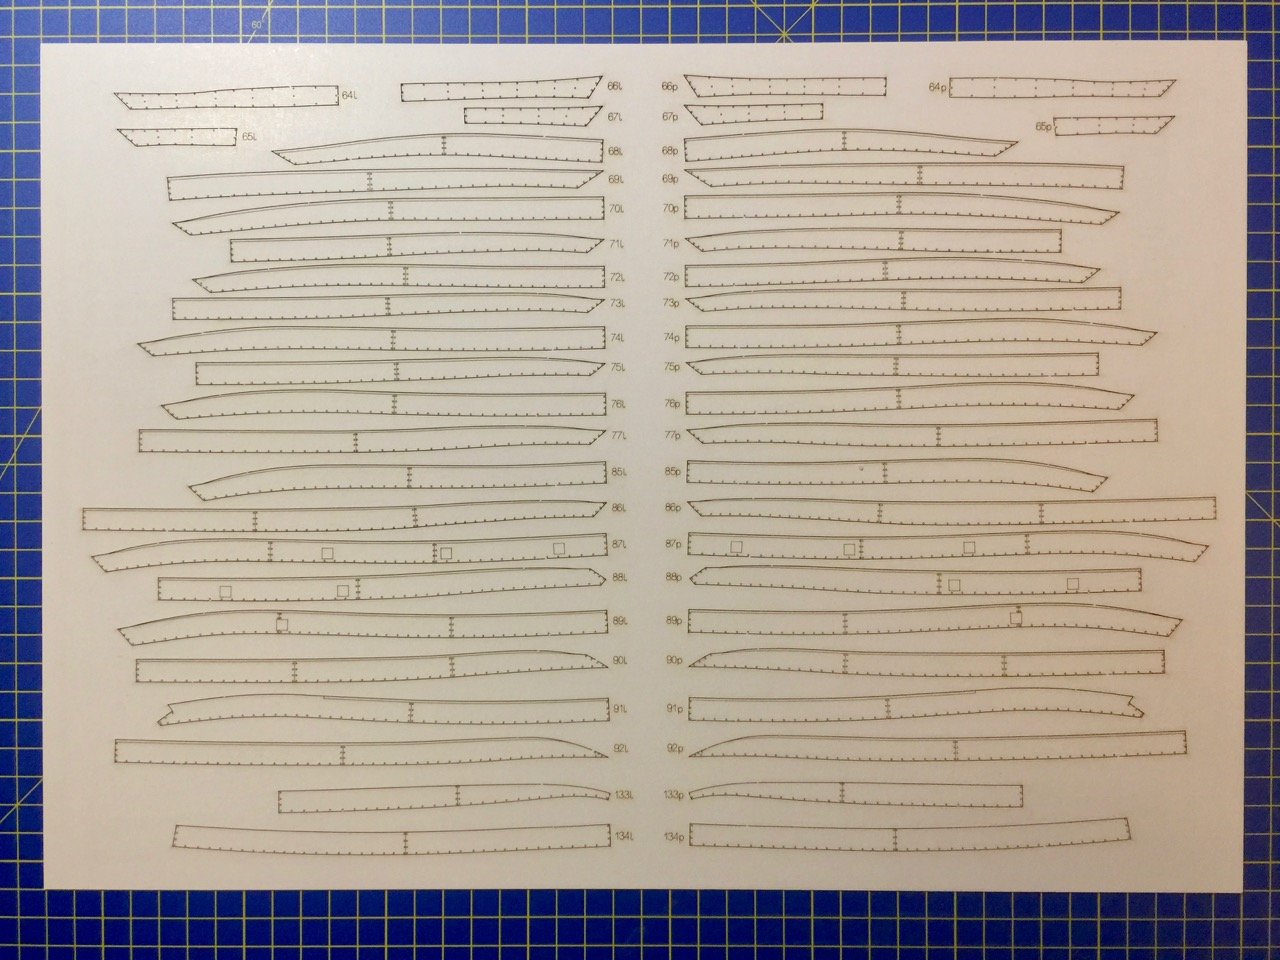
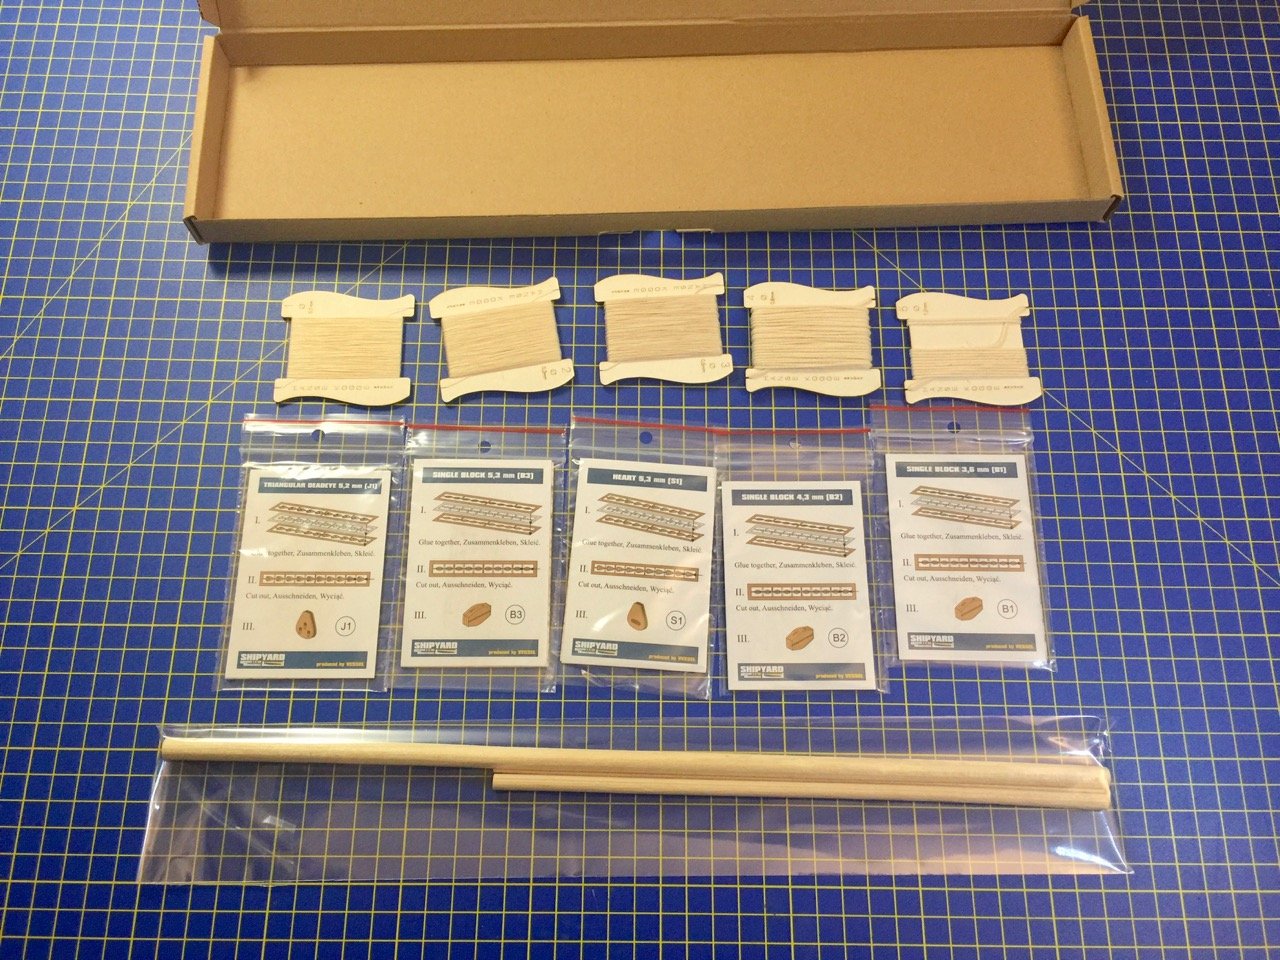
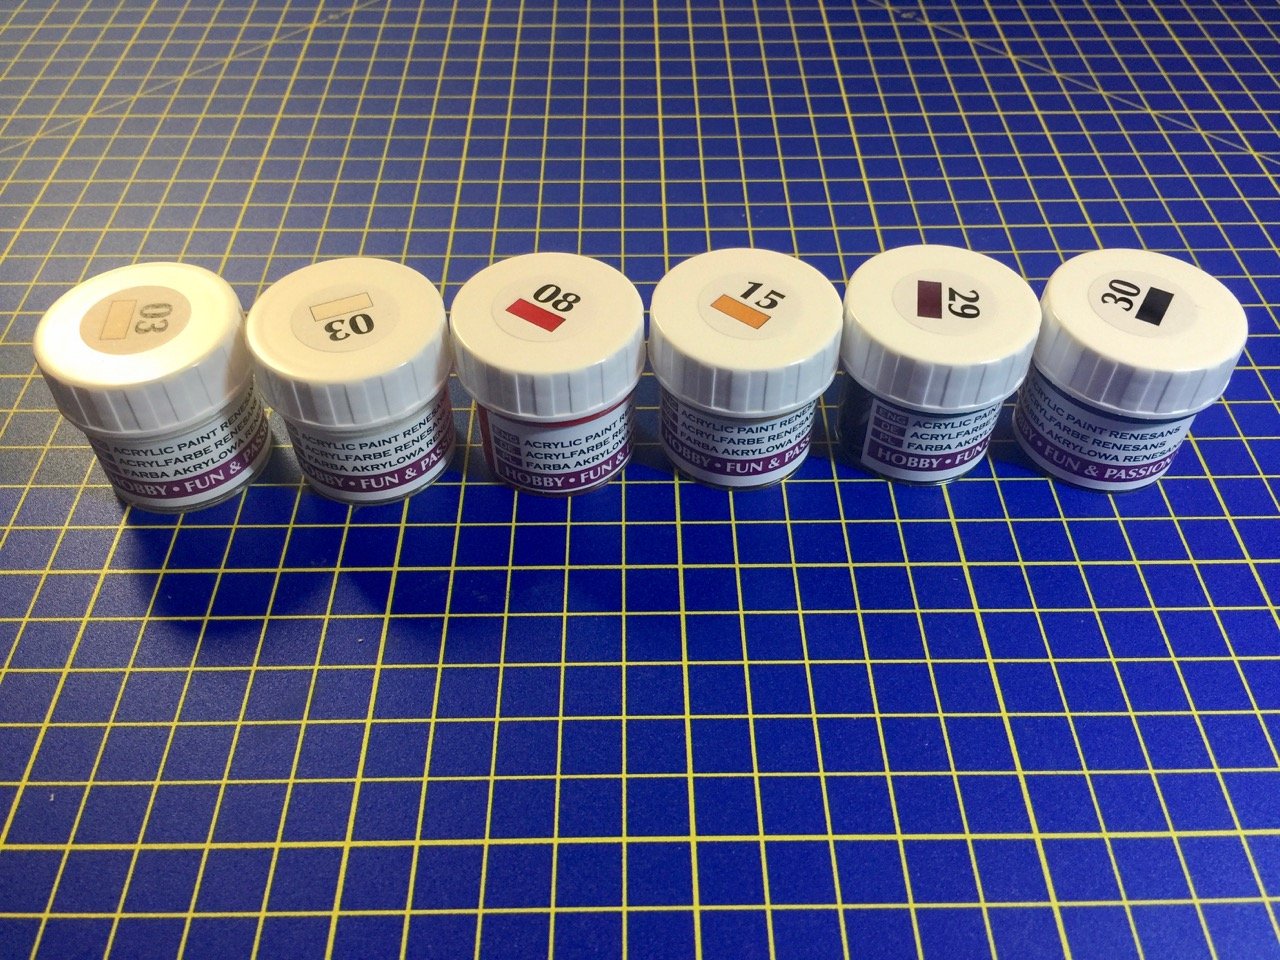
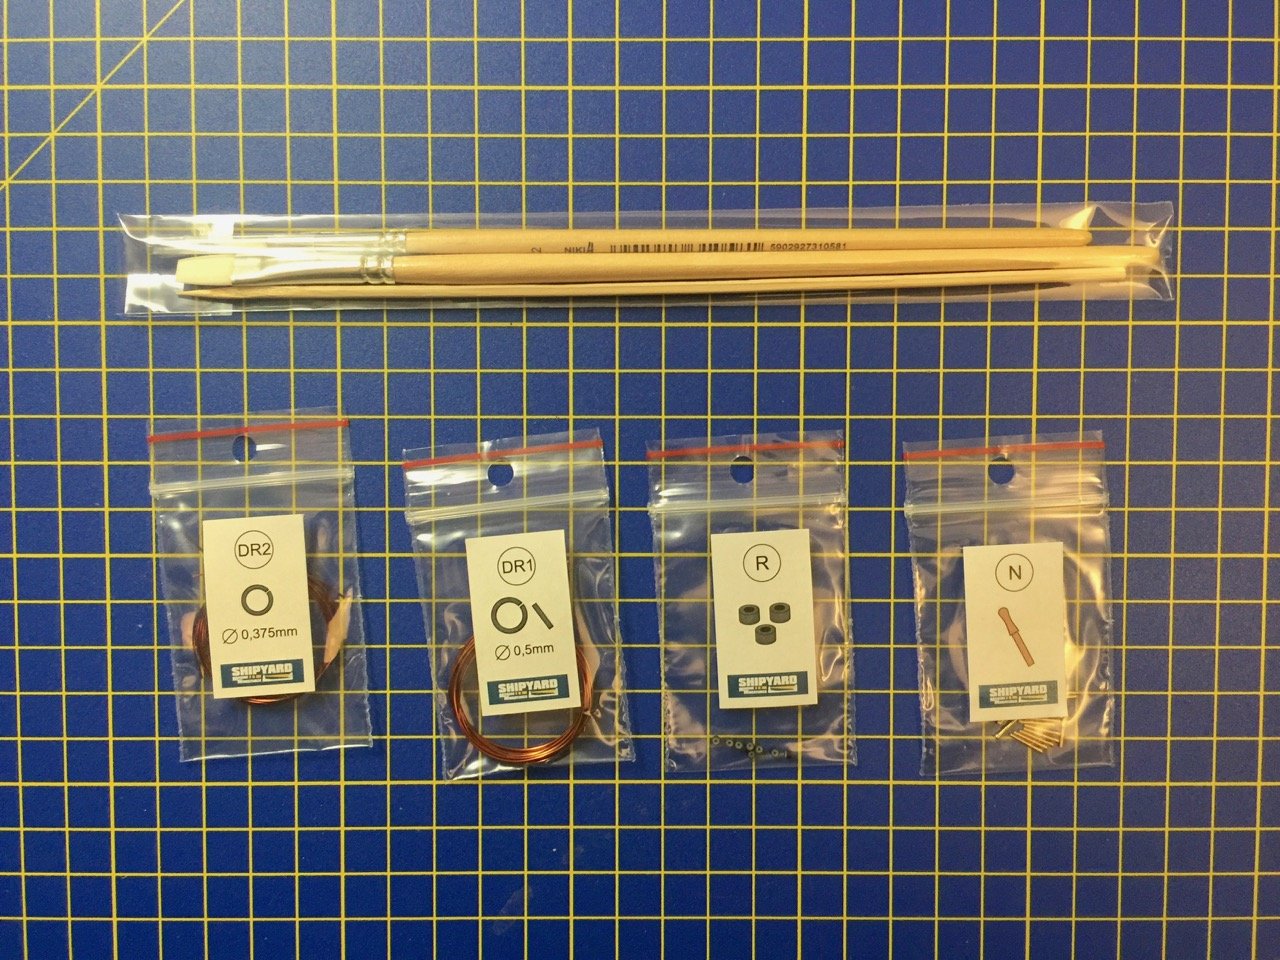
Shipyard is a line of paper/card models from Poland, where paper models seem to be so prevalent. Shipyard includes kits of sailing ships, world lighthouses, dockyard structures, and more. But, this review is a look at one of their higher end products – one of their kits which, rather than featuring printed paper parts that must be cut out from their sheet, instead provides laser-cut parts that must be cut loose from their sheets and painted. The range includes the small schooner Berbice, the Santa Maria, the cutter HMS Alert, all the way up in size to the 28-gun frigate HMS Mercury. The HMS Wolf kit, released around 2015, is about as close as one can get in size and complexity to the HMS Mercury kit, though their kit of the Dutch pinnace Papegojan is probably just about as detailed and complex. All of Shipyard's laser-cut card kits are made in 1/72 scale. They all come in large, flat boxes that contain all the laser-cut components, plus color printed instructions, some plan sheets that are mostly for the rigging, laser-cut and etched sails, color printed flag sheets, wooden dowels for masts and yards, laser-cut blocks and deadeyes kits, white linen rigging cord, turned brass cannon and swivel gun barrels, cast resin decorative pieces, several jars of acrylic paint, a couple nice paint brushes, and more. Everything comes pretty neatly packed with various components stored in separate cardboard boxes, which helps protect all the parts during shipping. The instruction book is 32-pages in full color, including the cover, and is mostly photos at each stage, with the significant parts labeled by their part numbers. There is some text, but not much. What there is is in Polish, with German and English translations also given. The Instruction Booklet The one thing that is not included that I think would be really helpful, is a parts list that shows the numbers, where in the instructions the part is called for, and on what sheet to find the part. I'll come back to this later. The Plan Sheets Masting and rigging is detailed in the separate plans sheets. There is no one overall profile plan sheet, these are all just detail sheets. But, if you look closely, you'll notice that some assemblies, like the gun carriage are more fully detailed in the plans sheets. Also, the metal parts that you need to make, like hooks and eyebolts and such, are identified on one of these sheets, not in the instruction booklet. So, it's a very good idea to study these sheets to see what's described on them. The kit contains no eyebolts, split rings, hooks or things of that nature. Instead, a couple sizes of copper wire are provided, and the plan sheet below identifies the small metal parts you must make in various sizes. These are all identified in the plans with the letter 'Z' as a prefix. The instruction manual will call for these parts, and you will find no part with this number. Again, that's because you have to make all the Z parts yourself from wire. If you prefer to make your own sails out of, say, paper, some nicely detailed patterns are provided, showing locations of reinforcements, cringles, reef bands, etc. The Parts As you can see here, there are a lot of parts sheets, and on each of those there are a lot of parts. There's a LOT of detail here, and just seeing how much detail there is in the kit makes the kit really exciting to work on. By the way, my apologies – these photos are on the blue background of my cutting mat and the photos were taken with an iPhone, which does it's own automatic color balance, so all the sheets look kind of yellowish here, which they are not. The only color printed parts in this kit include the flags sheet, which is printed double-sided, and the decorative friezes. I don't know if this was intentional, but my kit included two copies of this sheet. Apologies too for the bad focus on this photo – I don't know what happened here. In a sharper world, you'd see all the bulkhead parts and hull stiffeners. Those who've built Shipyard's paper models probably know already about how well these laser-cut parts fit together, and form a very stable hull structure. This odd, brownish looking sheet is actually dead black. But, at least here you can see that the part numbers are there. When I looked at this sheet, I had to hold it at an angle, under a bright light in order to see the number or to even identify the part. There is one small sheet of clear acetate for the windows and the stern lantern. Note that the deck planking is engraved onto the card pieces, with nicely located butt joints, nibbed plank ends, proper scarf joints, and treenails. Lots of parts make for lots of details and lots of work. But there's no shaping, drilling, milling, filing, sanding, carving, required. it's all mostly cutting, gluing, and painting. Sorry, I didn't take pics of the cannon barrels, resin "carvings", brushes, rigging line, or the paint jars. But, I will mention that earlier kits of this line had jars of paint that could easily dry up. I'd mentioned this problem to Shipyard years ago. They have since gotten jars with rubber grommets in the lids to create a better seal, and this seems to have alleviated the problem. Speaking of paints, those included in the kit are apparently some decent quality artist's acrylics. They go on dead flat and have some transparency to them, so you should be able to see some of the laser-etched details through the paint. The paint is a Polish brand called Renesans. I like them, but they hard to find, except on some European online art supply stores. Summing it Up This is a pretty well detailed looking kit. It, and the entire line of Shipyard laser-cut kits, are very different from most paper model kits, given that nearly every paper model kit is mostly paper that has to be cut, rolled, folded, or curved, and may have a laser-cut skeleton for strength. This kit is entirely laser-cut, but includes parts using other materials for best appearance or easiest construction. The heavy use of laser cutting comes at a cost, and these laser cut kits are a lot more expensive than traditional paper models, and this kit is no exception. This kit has a cost that's somewhere in the neighborhood of $200, give or take, depending on where you purchase it. That's a lot more than a traditional paper kit, but not really much different from a comparable wooden kit, and there's a lot more to it than a box of wood with some laser-cut pieces. The kit is available from a number of online shops, including Ages of Sail, where I got mine, Cornwall, Shipyard's online shop, and maybe someone will chime in about a Canadian shop. Did I miss anything?


-
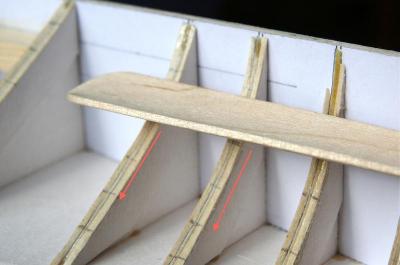
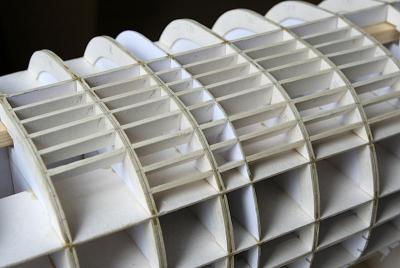
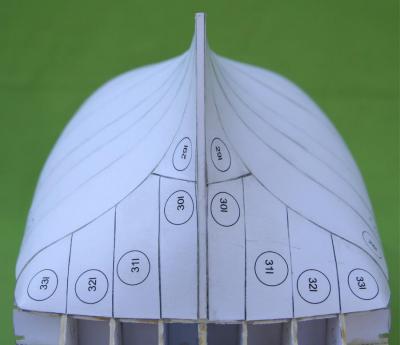
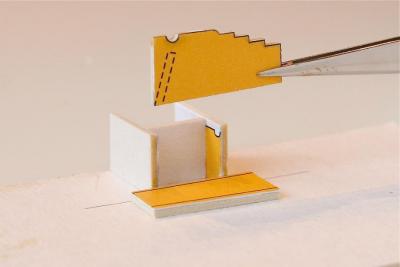
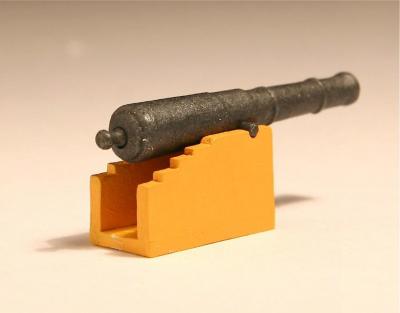
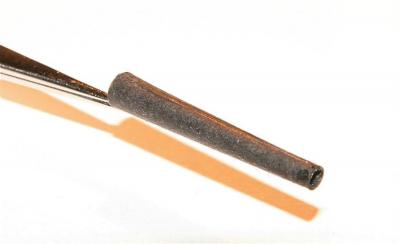
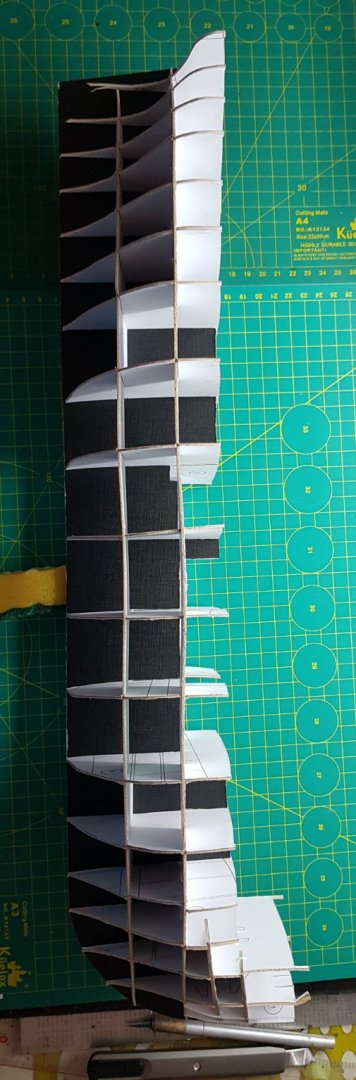
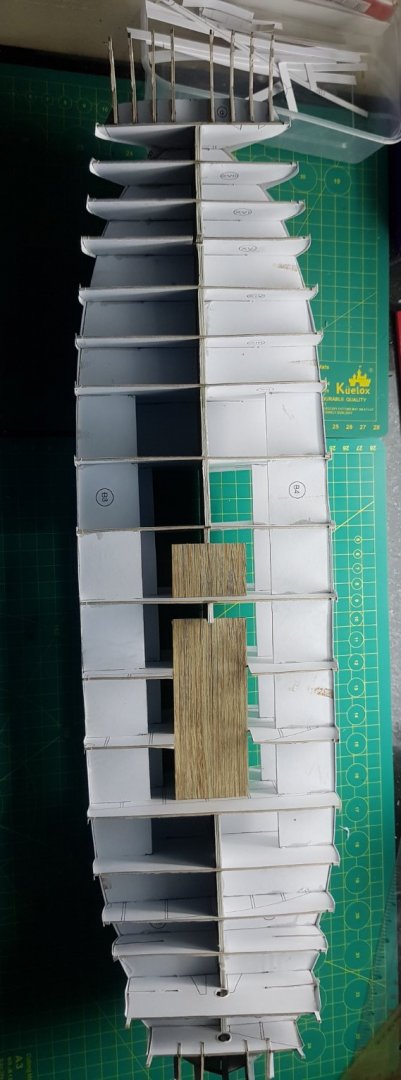
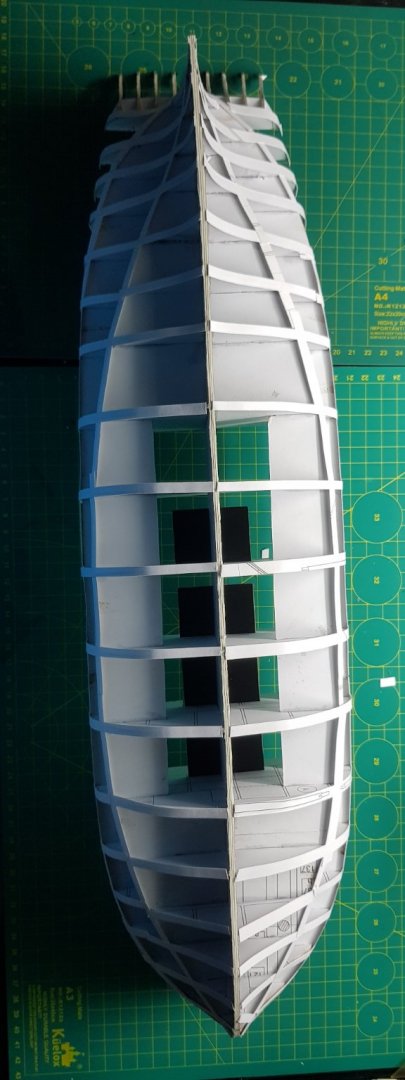
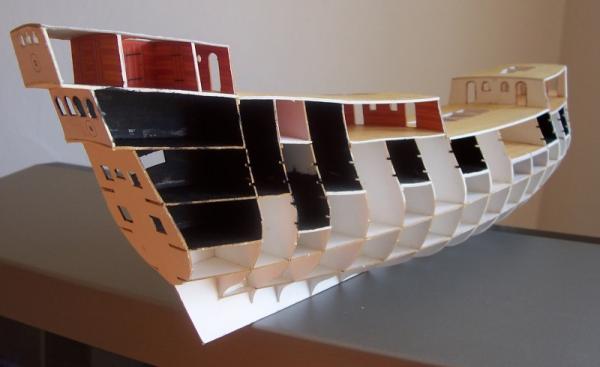
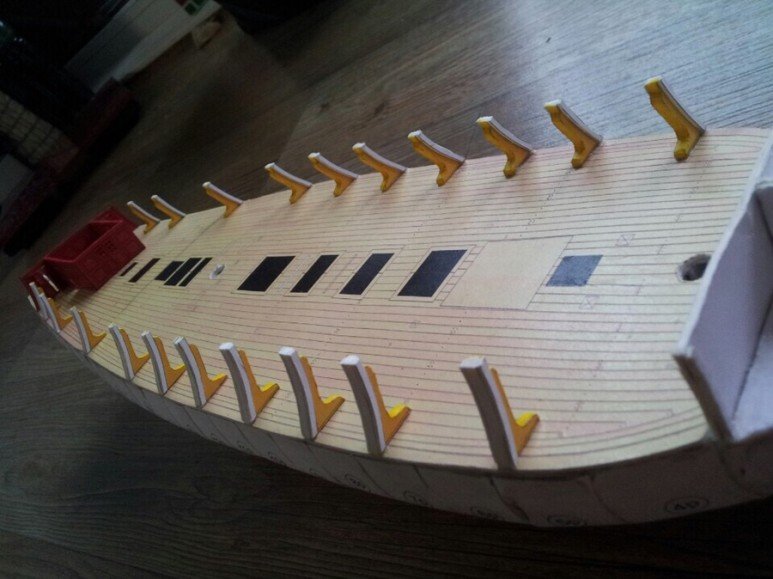
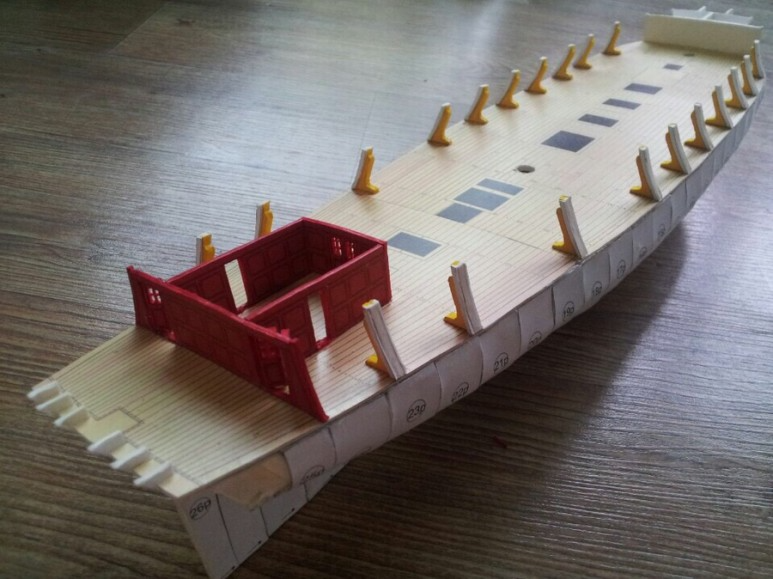
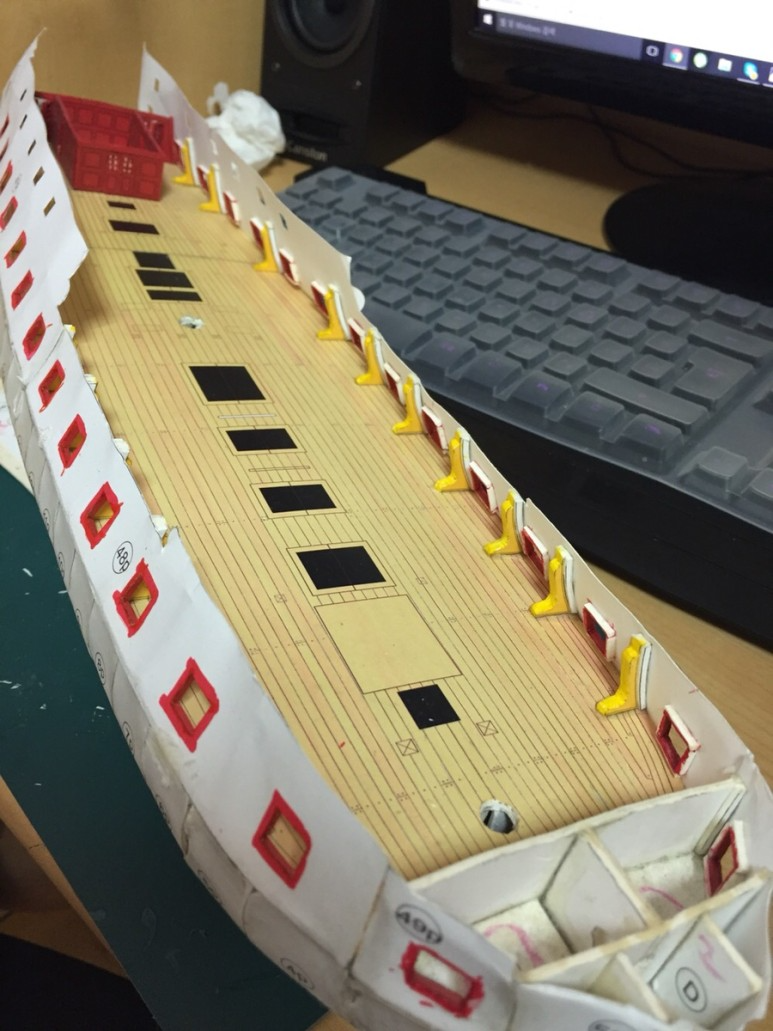
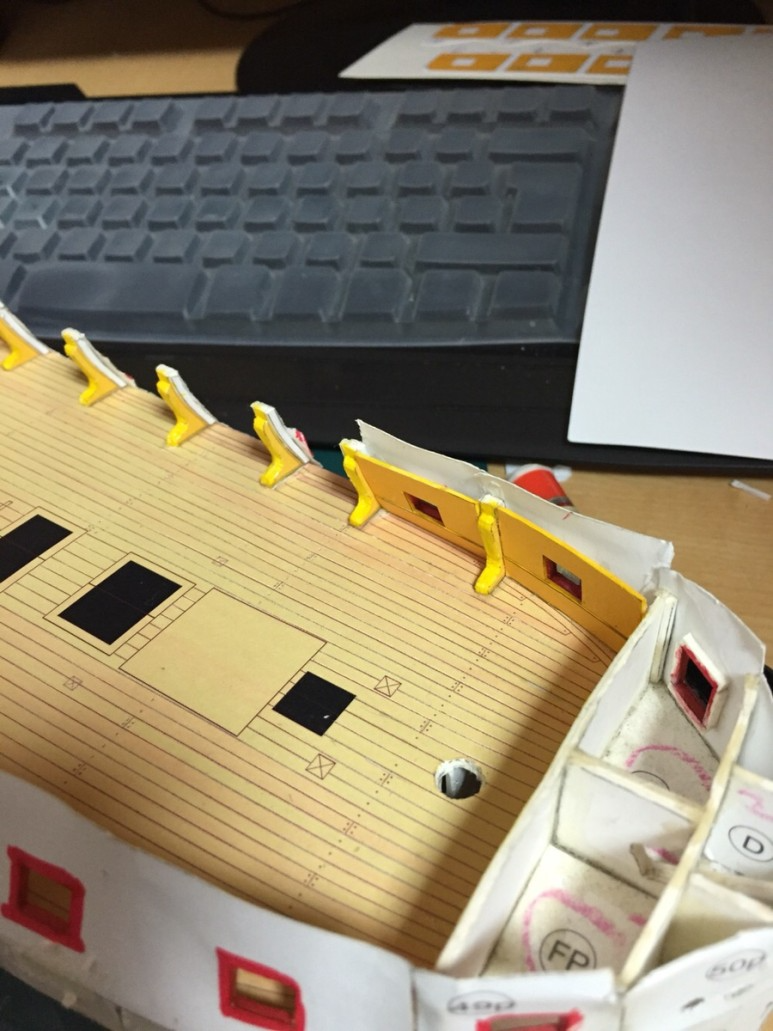
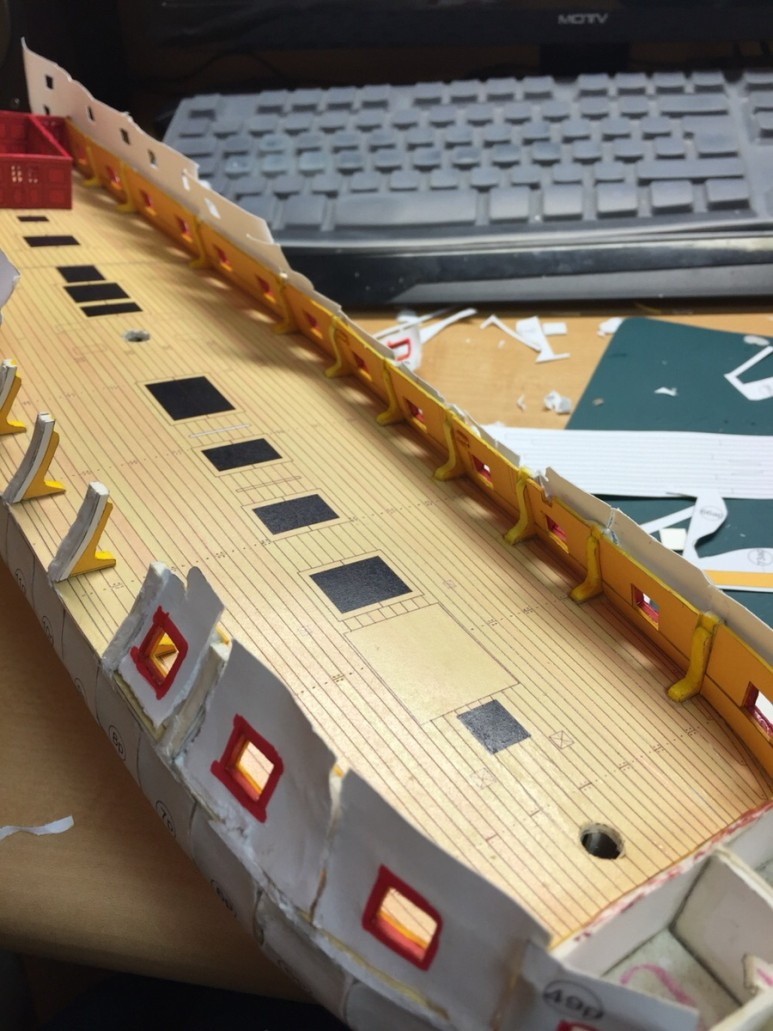
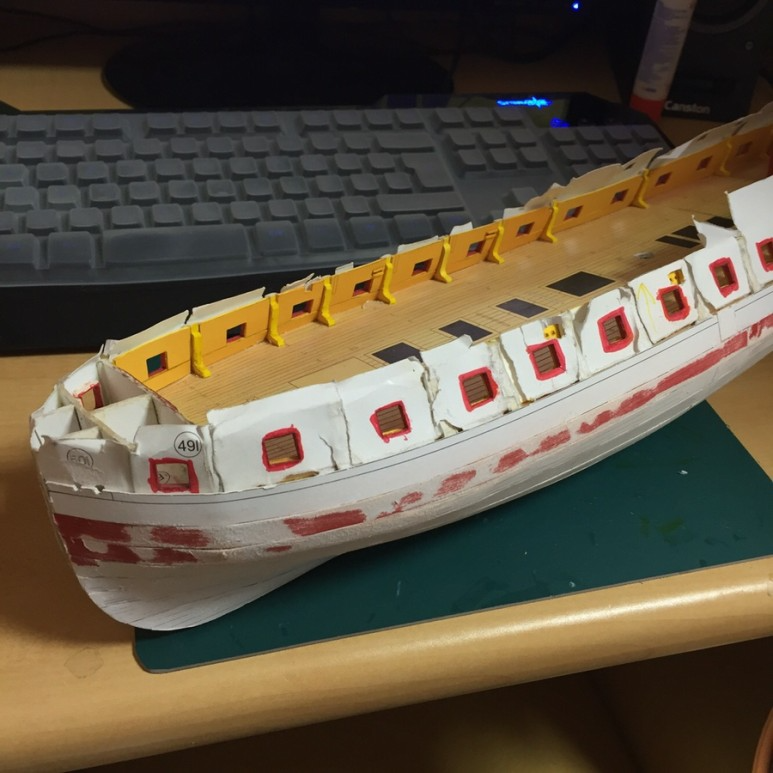
 Hello. My name is Jarek. A few months ago I’ve started building my own HMS Victory, as everybody should have this beautiful ship . I’ve been making Victory based on the Shipyard’s card model. I hope that the memberships of this forum help me to finish the project, giving me advice, supporting when doubts appear, criticizing when necessary. Sorry for any mistakes appear in my English All the bulkheads are made from 1 mm cardboard, except the bottom of hull (beneath the waterline), where the bulkheads are 3 mm thick. To increase the thickness I glued additional strips of paper on each bulkhead side. I made this because I wanted to have a wider surface to glue the first layer of “plank”. All sticking out parts of bulkheads I soaked using CA glue. It helps strengthen them to avoid accidentally damage. Also, I’ve made a jig, which helps me to work with a model upside down and not to be afraid of breaking down those sticking out parts. I glued two pine slats, one on each side, following almost from bow to stern, to keep the straight line of the paper “keel”. Every bulkhead was initially “sanded”, but without using sandpaper. I made this by using the colourless water glue, putting it on each bulkhead edge, to soften this element. Then, with a wooden spatula I smoothed the bulkheads edges. Between the bulkheads I glued cardboard pieces (2 mm thick). It helps to avoid “falling” the paper planks between the bulkheads, because they are not as stiff and hard as wooden. It’s hard to believe, but there are about 500 pieces. Finally, the view of the first "planking". On the lower decks, which are not visible, there are “not fully equipped” gun carriages. The small holes in the carriages were drilled. Before drilling I soaked the element using CA glue in order to have a hard surface for the drill. Firstly, all carriages had been varnished (2 layers), then slightly sanded and finally painted yellow ochre (Talens, Van Gogh). I’ve also made a small jig to build them properly. I’ve also made a “trial version” of the gun, needed temporary for marking the right position of the gun in gunports. In the future the gun will be a little modified, to achieve much better “product”, more resembling the original . It is of course made from paper, except trunnion and knob which are wooden. Before rolling the paper I put on it a thin layer of water glue (on the inside). When the paper is wet it’s easy to roll it and make a pipe, even a small diameter. After drying the glue, paper keeps the proper shape. Making the gun, the paper should be cut off with knife holding slightly in angle. Due to it, the edge joint is proper all along the gun, almost invincible. When you cut the paper holding knife perpendicularly, it is hard to join the edges without leaving a slot. To make a specific shape of muzzle, I also used water glue to soften the paper. When the paper was still wet, I’d formed the muzzle on rubber, pressing paper with wire rounded ending. The hole for trunnion was bored using 3 drills, firstly 0,3 mm, then 0,7 mm finally 1 mm, in order to avoid fraying the edges. Before drilling I soaked the paper with CA glue. I’m working on gunports now. Firstly, using a masking tape, I made fast to the skeleton the first layer of planks. This has been done temporarily for marking the position of gunports opening, on the red “battens”. After that, I cut the battens on smaller sections, so that they fit between each of the bulkheads. Every piece was glued from below, because this way is easier to achieve the good looking gunports. A little defect has brought to light. One of the bulkheads is visible in the gunport opening, which of course shouldn’t be. It will have to be cut down which is now not as easy, as before gluing all together. To be continued…
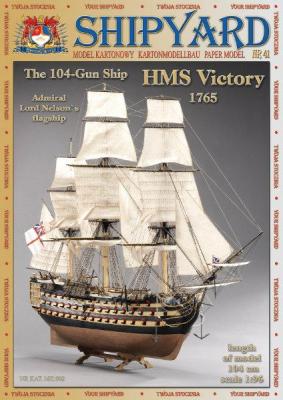


- 83 replies
-
- 15
-
-
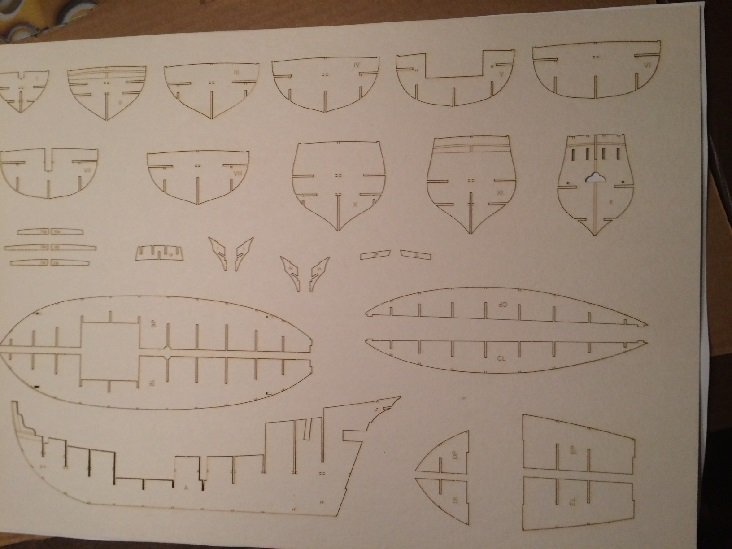
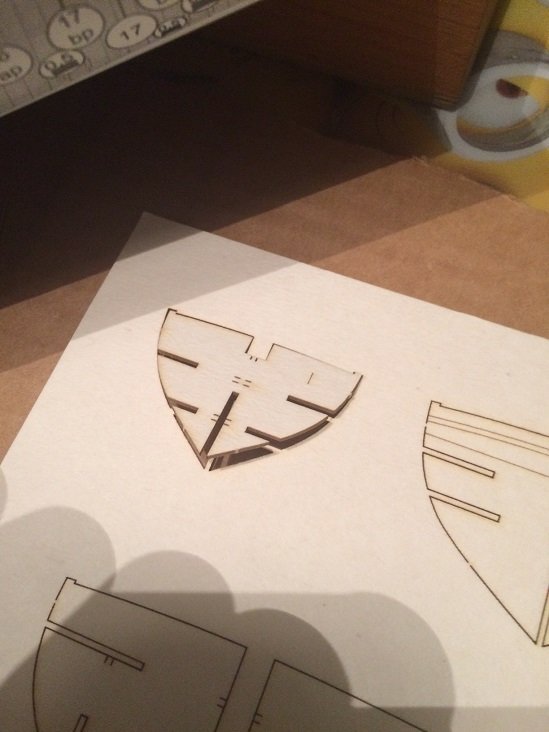
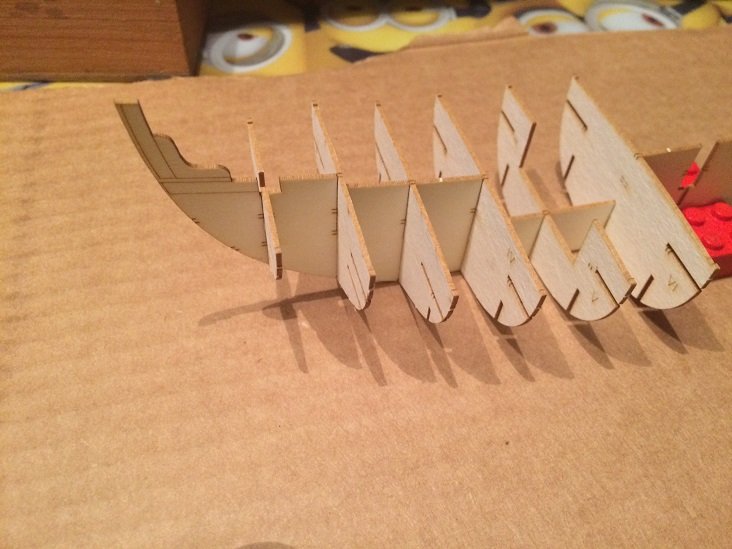
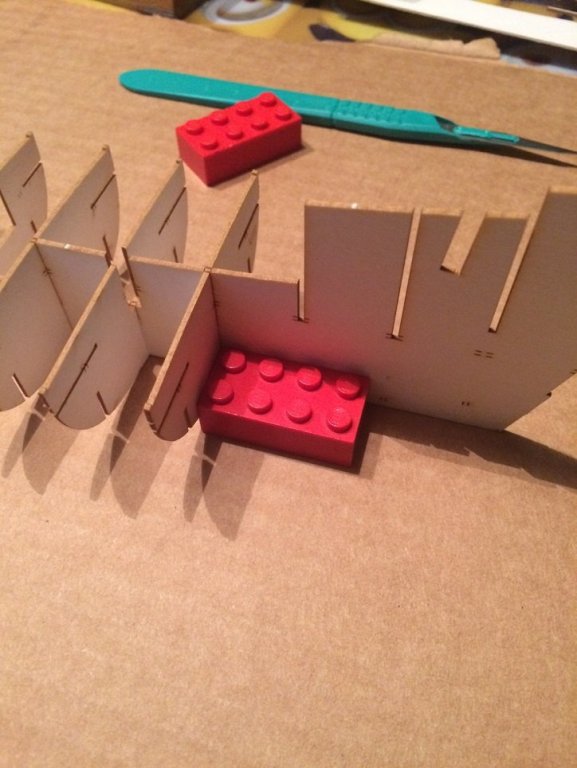
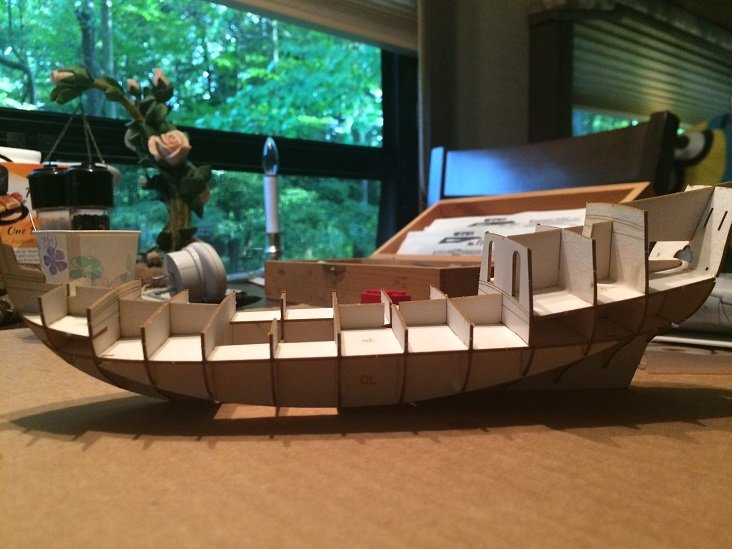
 Hello A With the summer camping season upon us I've had very little time to work on any of my modeling projects, the Harriet Lane still sits on the bench and I've parked the Niagara as well. I had toyed with the idea of taking some material along but was always deterred by the hassle involved with moving a semi completed project, so the idleness continued, that is until recently! I was perusing MSW one day and came across Clare Hess's (Catopower) build log for the HMS Alert from Shipyard (link below)) a paper model...I've seen paper done before, primarily following Doris's scratch builds (link also below). The attraction to paper is the lack of special tools required to complete a build. So with these two excellent builders as inspiration I took the plunge and ordered the Shipyard Pinta kit from Age of Sail. My primary reason for choosing this kit was cost, it is only $22, I did spring for sails and mast accessory kits which brought the total up to $36.16, less shipping. Not an exorbitant amount for an experiment. THe kit arrived in a couple days and was packaged very well, the main kit consists of 5 pages of printed parts, 1 laser cut in heavy cardboard and 4 printed color parts, some really nice flags, and lots of color photos/instructions . The sails are nicely printed on fabric and precut, the mast are just dowels of various diameters, but does come with a laser cut crows nest, which is a nice addition. So here goes another build log...this one though will only be added to when we get away for the weekend as it is happening on the rv dining table! The first couple pics show the kit packages, I plan to take a snap of the individual sheets as they are used. The ships keel and frames are laser cut from heavy pressed card... These were easy to remove with a #11 scalpel... Once all the parts were removed the main structure was assembled using PVA, the parts fit was very good, the parts went together with no fiddling whatever... I used a straightened paperclip to run a small bead of glue on each kerf before mating the pieces together then used a lego to square things while I readied the next part... It didn't take long to complete the frame... So that were she sits for now, the plan is to build this little ship pretty much box stock with the exception of the ropes, which I will spin up on my rope walk, looking through the sheets of parts the real challenge looks like it will be the rigging blocks, those I may replace as well, but we will see. Thanks for looking in, appreciate you time and attention J
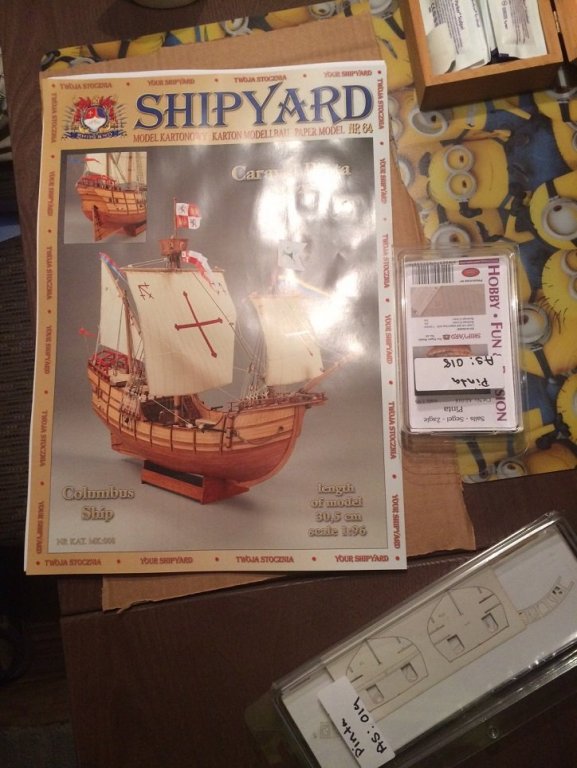

-
 Hi, I am 34 years old and live in Vietnam. This is my first post on this forum, hoping to get acquainted with everyone. My English is not good, so most of the time I use google tools to assist with translation, hoping for your understanding. When I received this kit I realized the detail part was too small for me so I zoomed in to 1:64 to make it easier to do. However, when I launched the Kit I realized that the thickness of the parts had changed a lot and I had difficulty checking their size. But I don't think this is important so here are my first results:
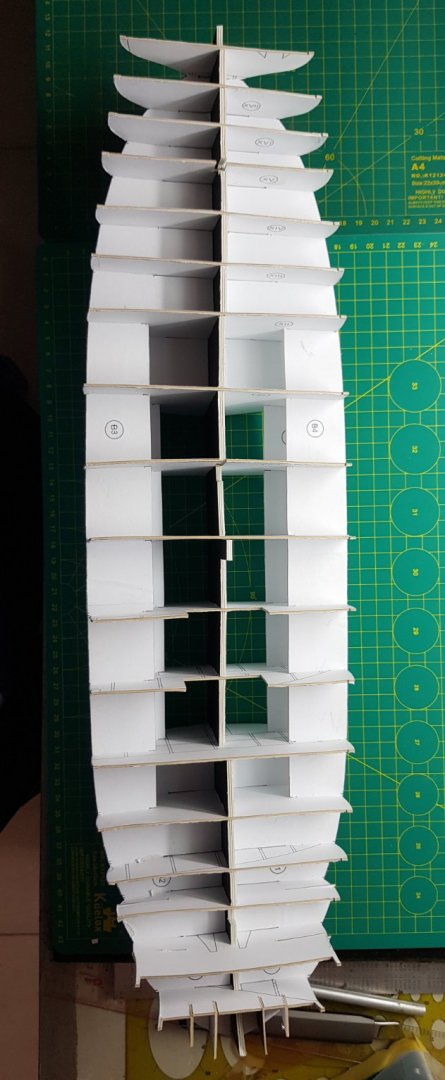


- 28 replies
-
- 12
-
-
- Shipyard
- Enterprize
- (and 2 more)
-
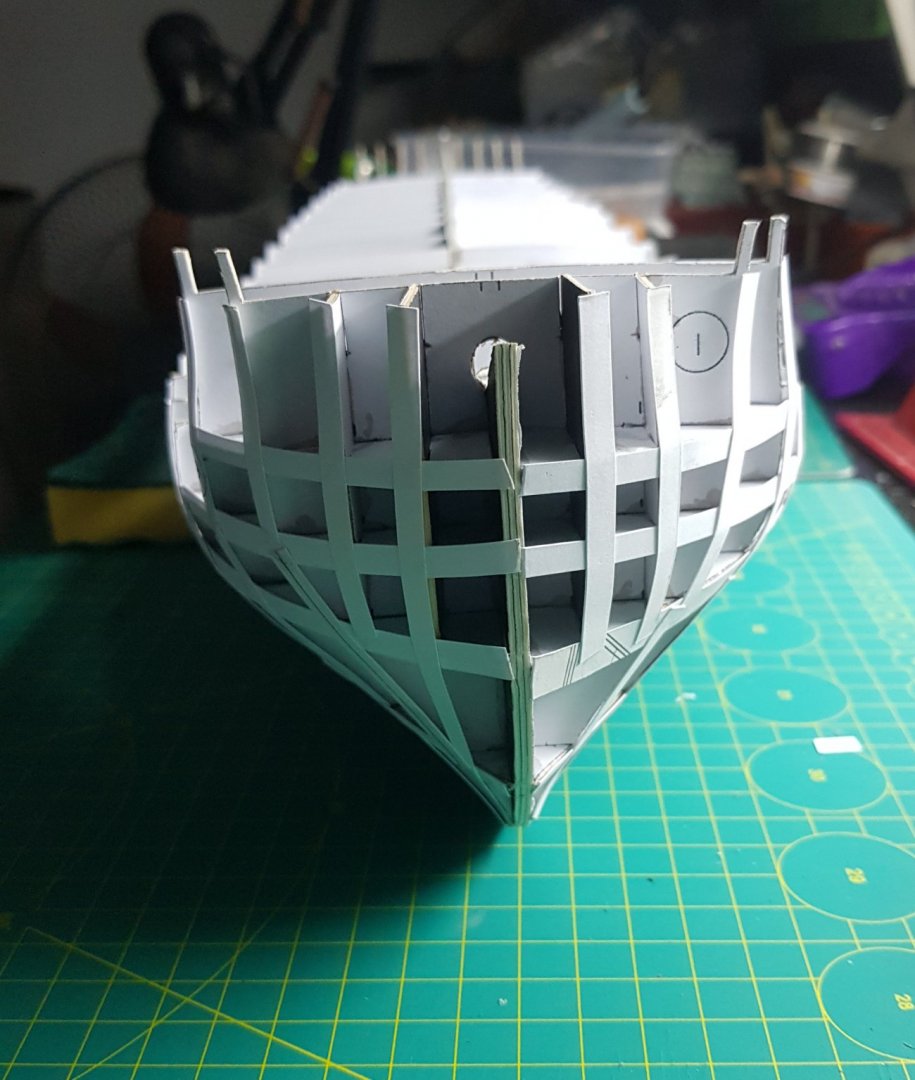
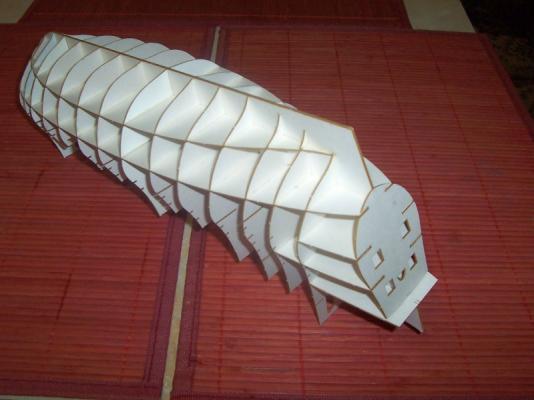
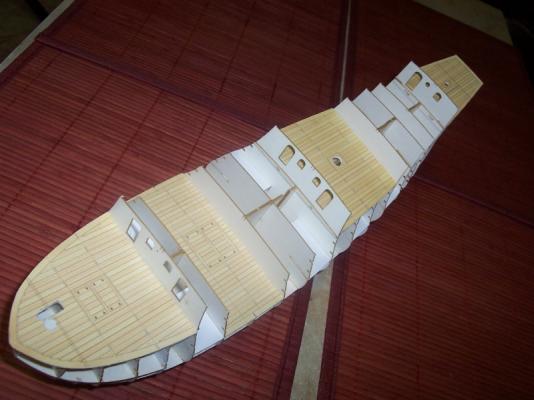
 Hello my friends, As the next ship I decided to build the famous english galleon built in 1577 Revenge, flagship of the sir Francis Drake during the Armada campaign in 1588 and mostly famous for his last fight with the spanish fleet in 1591 ( she was under command of Richard Grenville ).I think that´s no necessary to explain more about this ship Now I decided not to build the ship from scratch, but I decided for the Shipyard model of this ship, re-released last year. I alredy built this ship fro mte 1st release in 2009 - it was my first ship model after a very long pausem and because I love ships from this age, after re - releasing of this model I had no doubt about the next ship in my collection I started the build immediately after receiving of the kit. The frame of the ship is laser cutted, but there are no all of the necessary parts cutted, several of them you have to cut out personally. You can see it on 2,3,4 th picture. Until today I completed the frame including decks, today I´d like also to grind the hull ( it´s necesarry - some parts are printed with excesses an because of 90 degrees of angles ). There are some little mistakes in some parts as they were in the old one, but nothing special. Here are pics. Jan
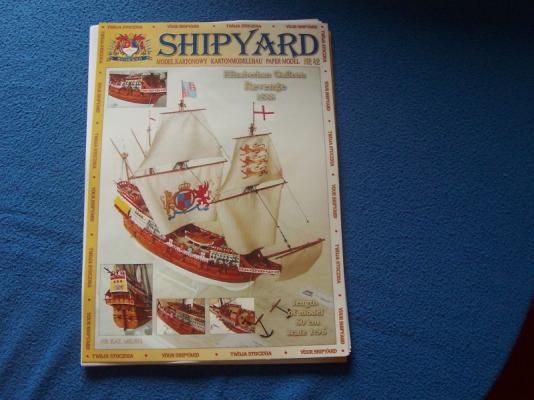


-
 Thank you for your warm welcome! This is my first ship. And I am making that since 2016 (16 years old) When I looked meber's ship model, I can't believe my eyes. There are amazing Compared to them, It's not good work, but I will show you my ship.
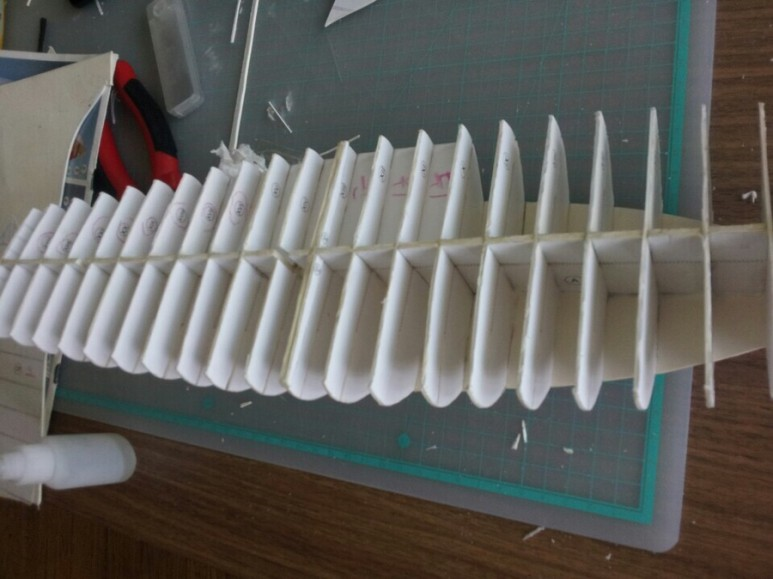

- 5 replies
-
- 2
-
-
- Santa Leocadia
- Shipyard
- (and 1 more)
-
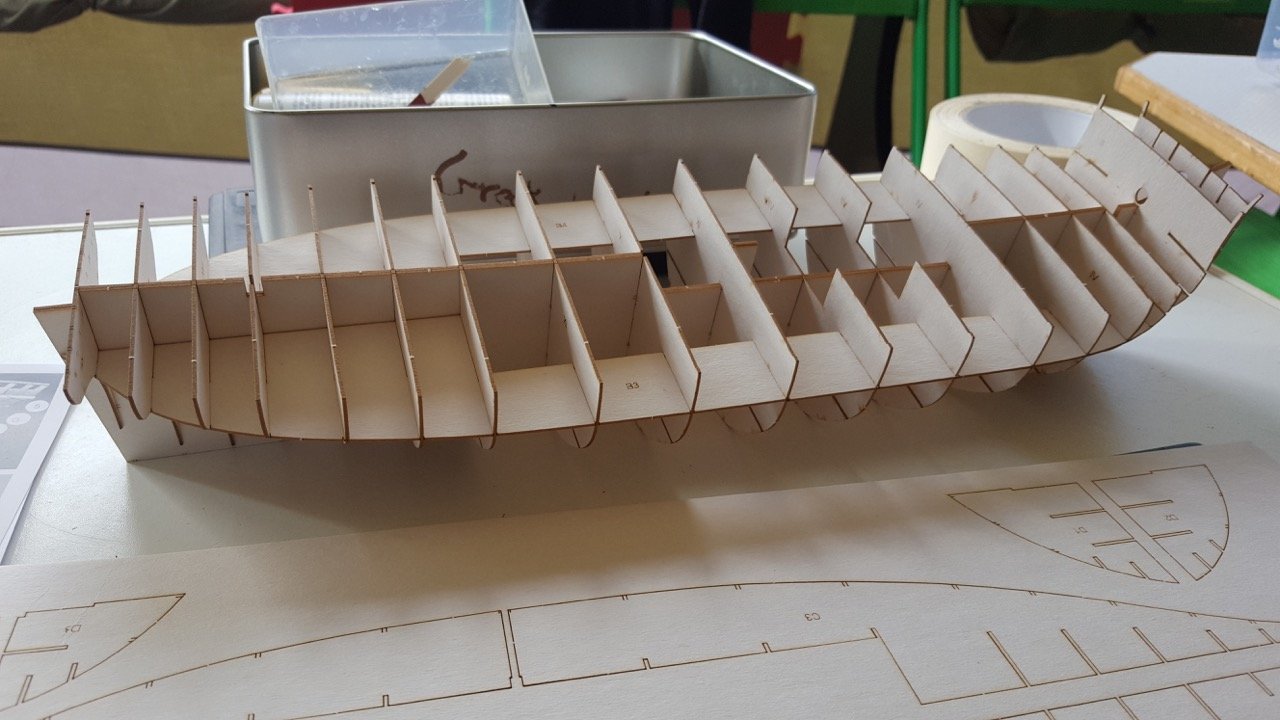
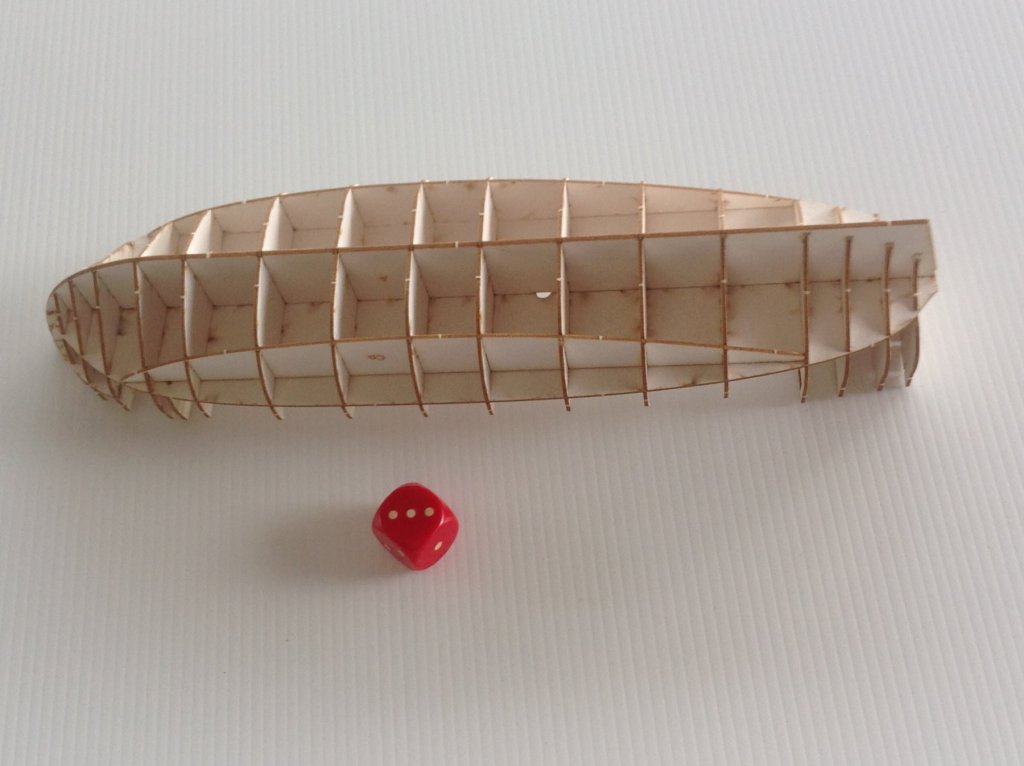
 Well, here we are back at it. I decided to skip doing a turn on a card model and instead roll with the wood momentum and go straight to Wütender Hund (hereafter referred to as "WH"). I won't do an unboxing here, as I did a complete review of this kit in the reviews section. It is the first wood offering from the Polish firm of Shipyard, who are well-known for their excellent line of tallship card models. Clare Hess is currently working on a very similar cog model, also from Shipyard -- although its name is different, it is more or less the card version of this kit. So, I didn't make very much progress on Day 1, getting only as far as removing the longitudinal profile former and gluing up the parts that form a false keel. I noticed after the glue had already set that one of the parts is slightly misaligned, so I may have to debond that part and reposition it. One thing to watch out for on Polish kits is that left and right parts are marked L and P, not L and R. L does in fact indicate left, same as in English; to remember that P is right, I always think of it as the Greek letter rho, then it makes perfect sense. As you can see, the box is quite large -- too big for my modeling area. And the exciting work of Day 1. The cutting mat is a little less than 12" wide, so you have an idea of how big the finished model will be. TTFN!
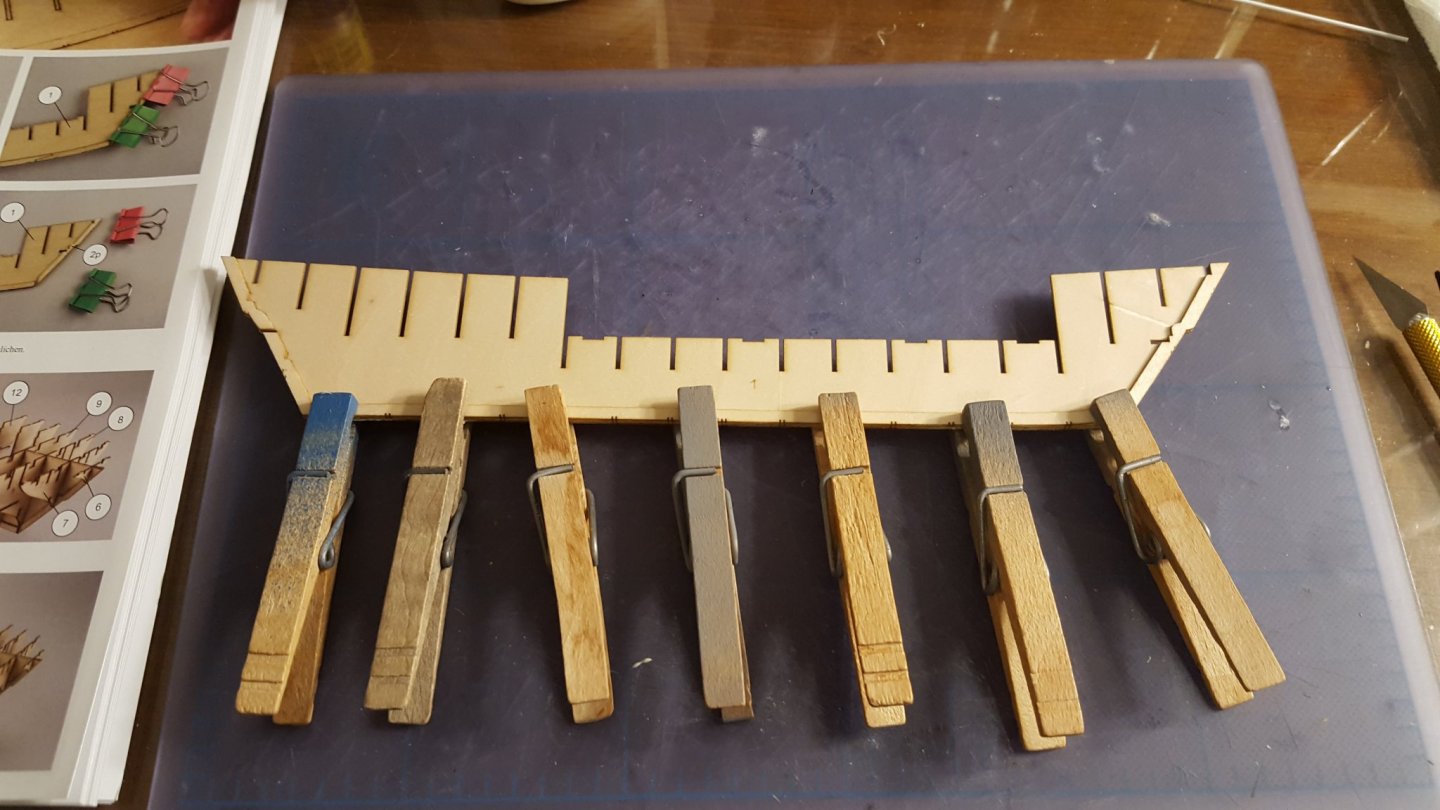

- 179 replies
-
- 15
-
-
- shipyard
- wütender hund
- (and 1 more)
-
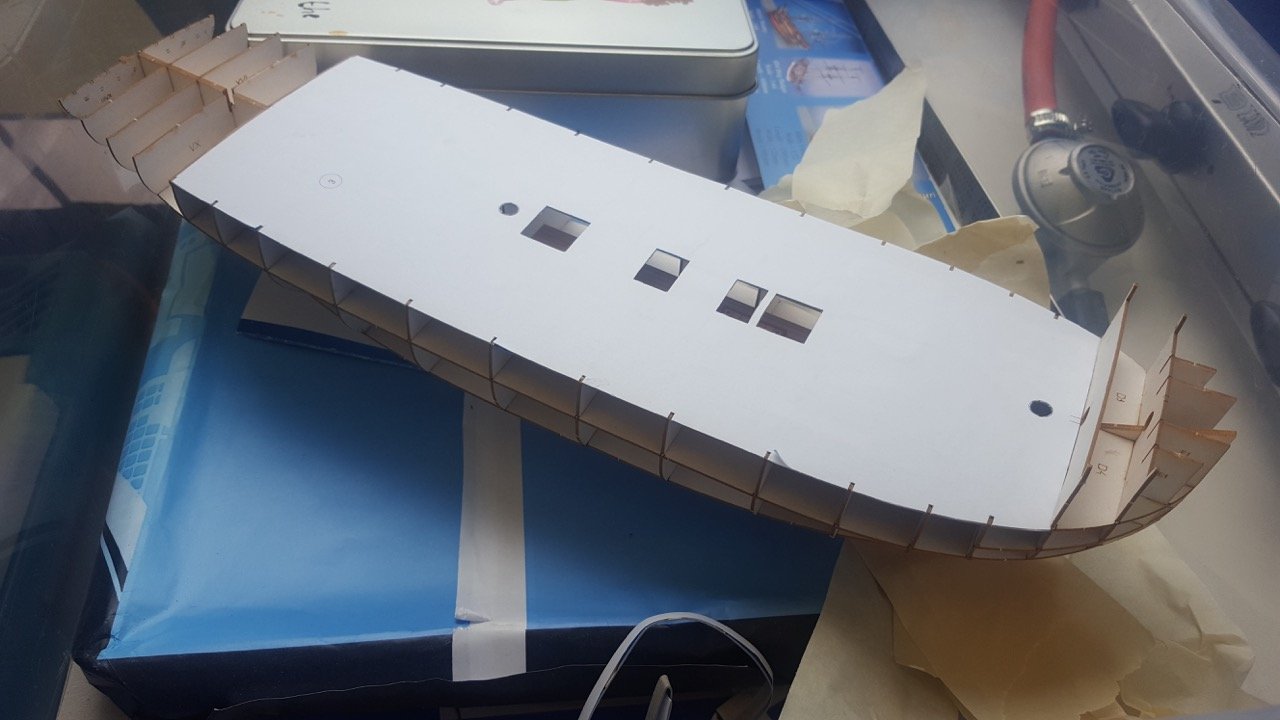
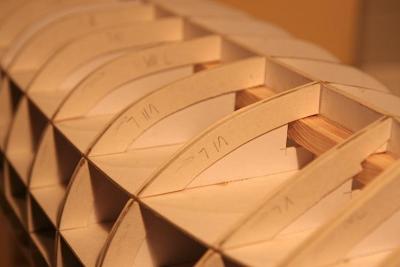
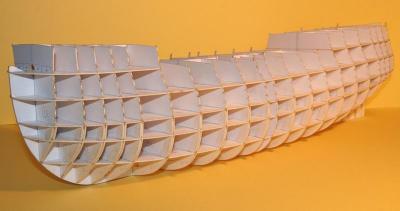
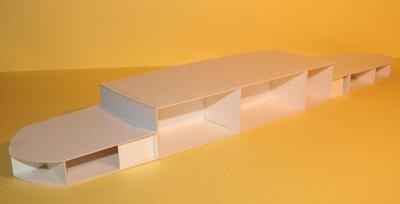
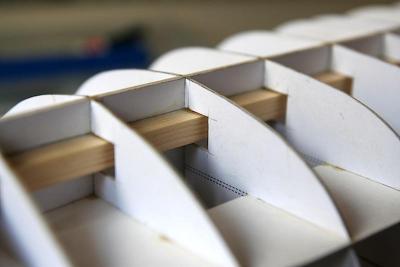
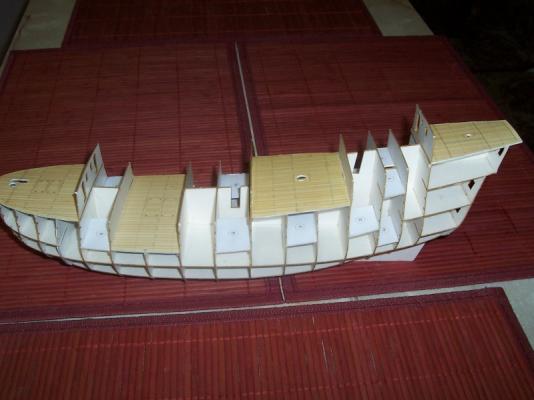
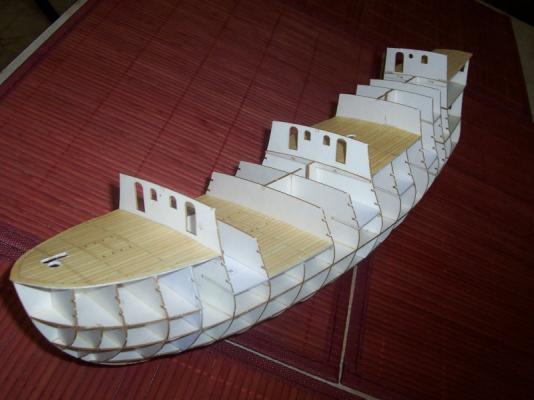
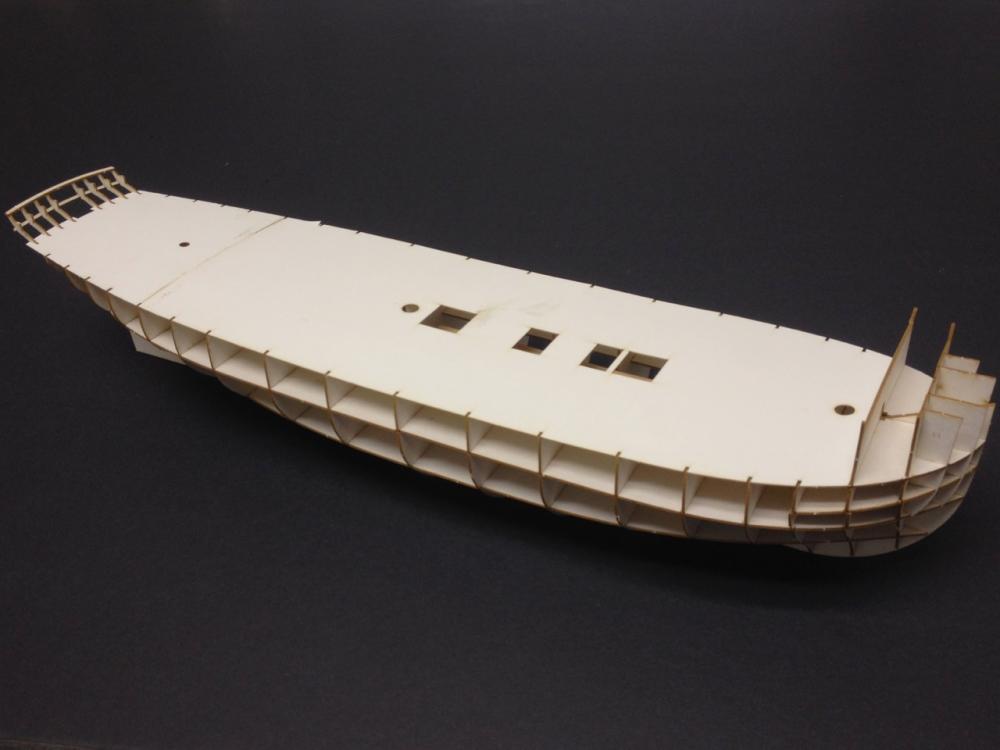
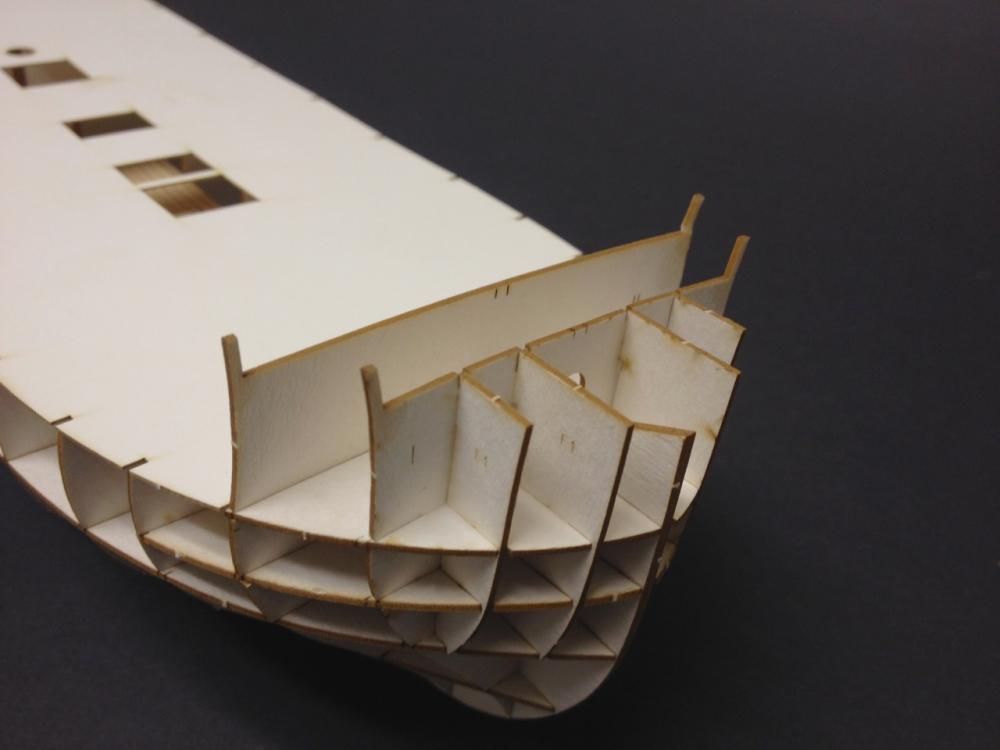
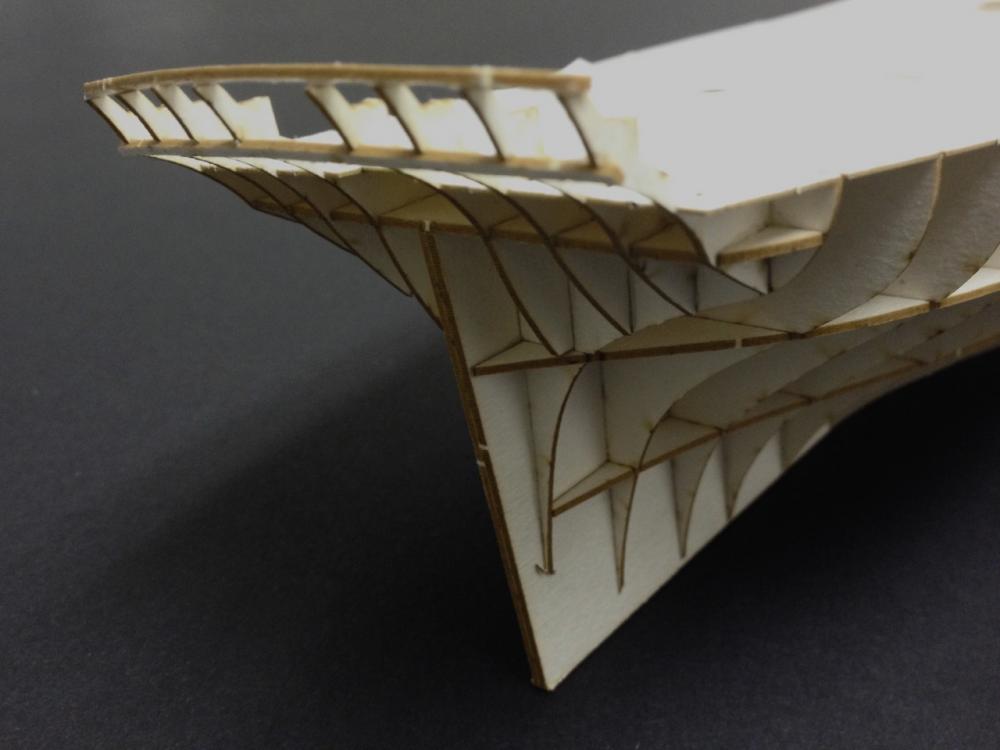
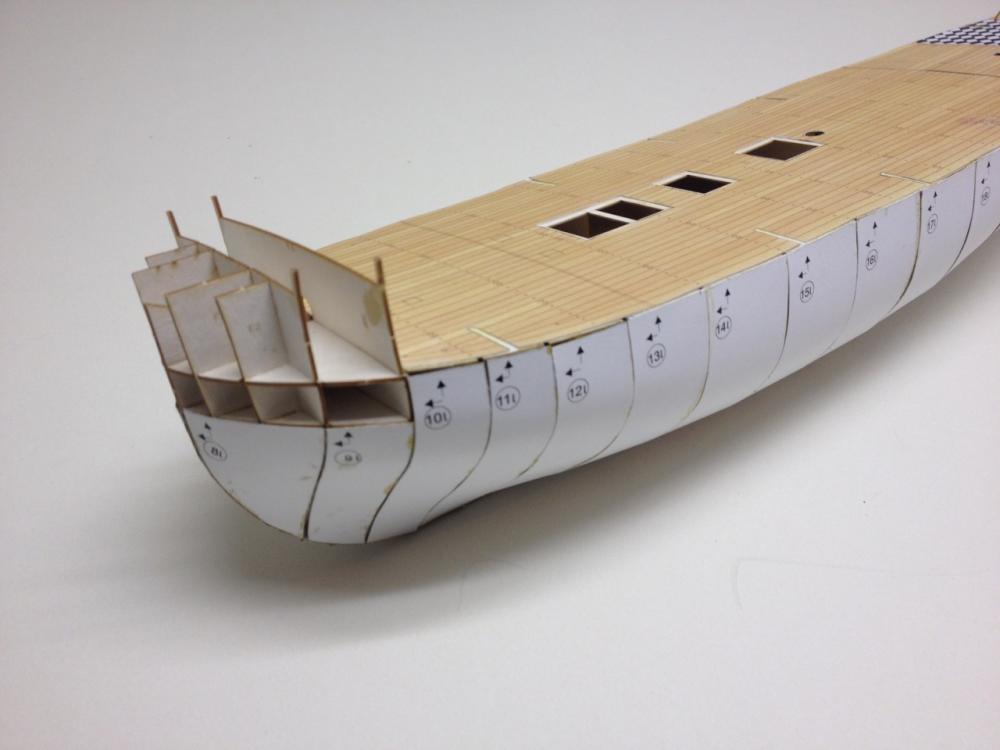
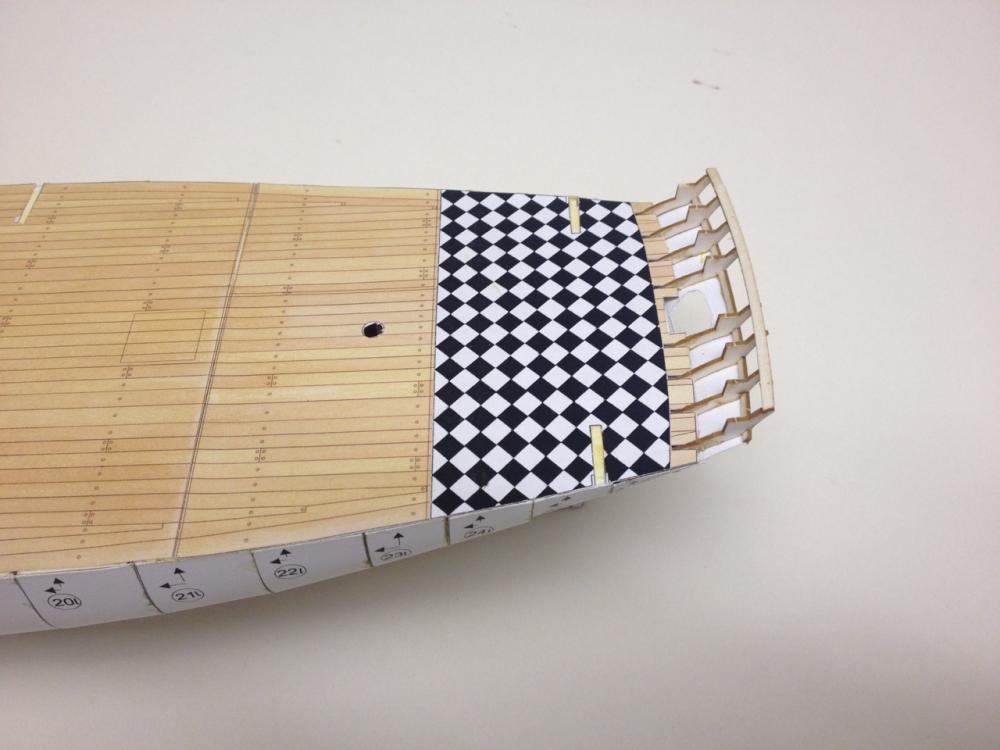
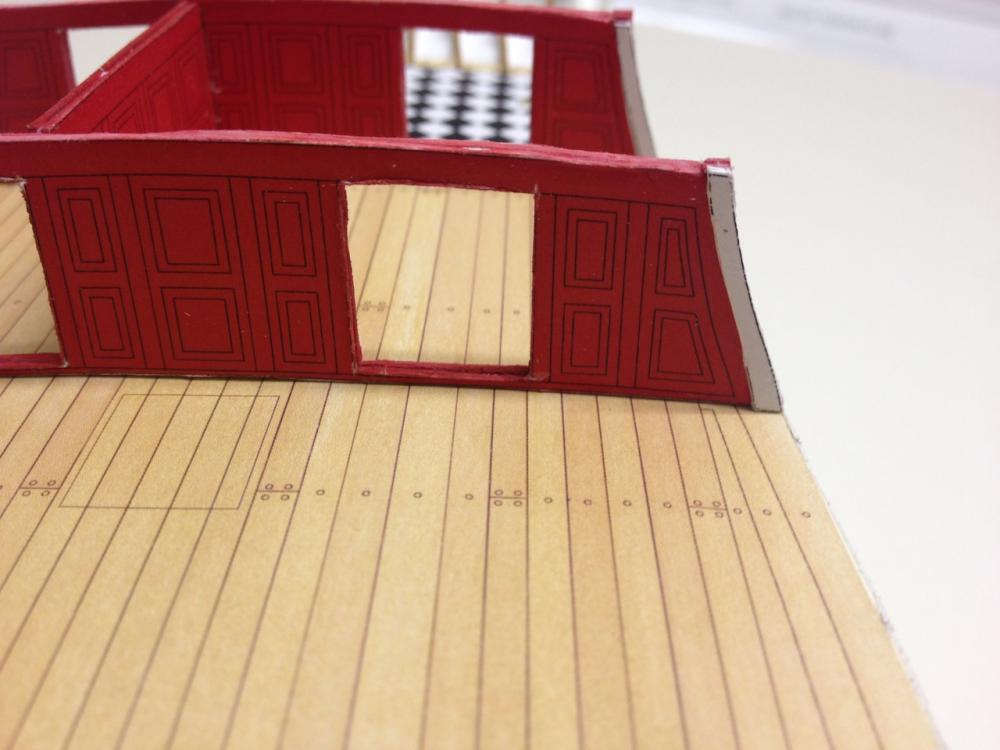
Having completed HMS Alert, which is now safely in a case, I'm left with a kind of paper emptiness... I have plenty of projects, but I'm so accustomed to having a paper model project in the works that it just didn't seem right to not have one now. So, I've taken on the 28-gun Enterprize-class 6th rate frigate HMS Mercury. Shipyard (Vessel) makes 2 versions of HMS Mercury. One is a 1/72-scale boxed kit with laser-cut parts and all the fittings, brass cannons, resin figurehead, wooden spars, cloth sails, plus paints, brush and rigging line, etc. However, that version is a lot pricier than the simple 1/96-scale paper model where you have to cut everything out yourself. I got the latter from Ages of Sail for around $40. The kit includes pre-printed parts that you have to cut out, plus laser-cut framework that makes hull-construction very quick and accurate. I've actually had this kit for quite a while, probably at least a year or more. I also started it some time ago so I would have a hull that illustrates how these kits go together. I was going to just do a partial start and give it to Ages of Sail as a demo model. But, that never happened. As I got further along on the Alert, I thought about how interesting a larger ship might be. Also, knowing the complexities of a 3-masted square rigger, I thought I might just build this as a kind of admiralty style model. Possibly building a launch ways and adding pole masts for the launching flags. In fact, right now, that's my plan unless I eventually change my mind and decide to rig this model. The kit includes some 15 pages of printed parts, the laser cut framework, several sheets of drawings and templates, including patterns for making sails. Printed parts are included for two different color schemes. The completed, fully rigged model, measures about 26" long. The hull itself is just about 16" long. I put the hull framework together many months ago. It goes together very easily and takes very little time. More recently, I started putting on the first layer, which basically turns the model into a hollow solid hull model. As you can see, I also added the deck. The parquet floor is a separate piece which sits on top of the wood-pattern floor. Lastly, over this past weekend, I wanted a distraction, so I started working on the cabin partitions. I have to say that this is one advantage that these paper models have over their wood counterparts – there is much more internal arrangement provided in these kits. It even includes furniture for the great cabin. So, there you have it. Another paper model begun. As I said earlier, this isn't a priority project, just something I'll tinker with over time. But, like HMS Alert, it may very well get to the point where it takes on a life of its own and demands more of my time to take her to completion. Clare


- 81 replies
-
- 29
-
-
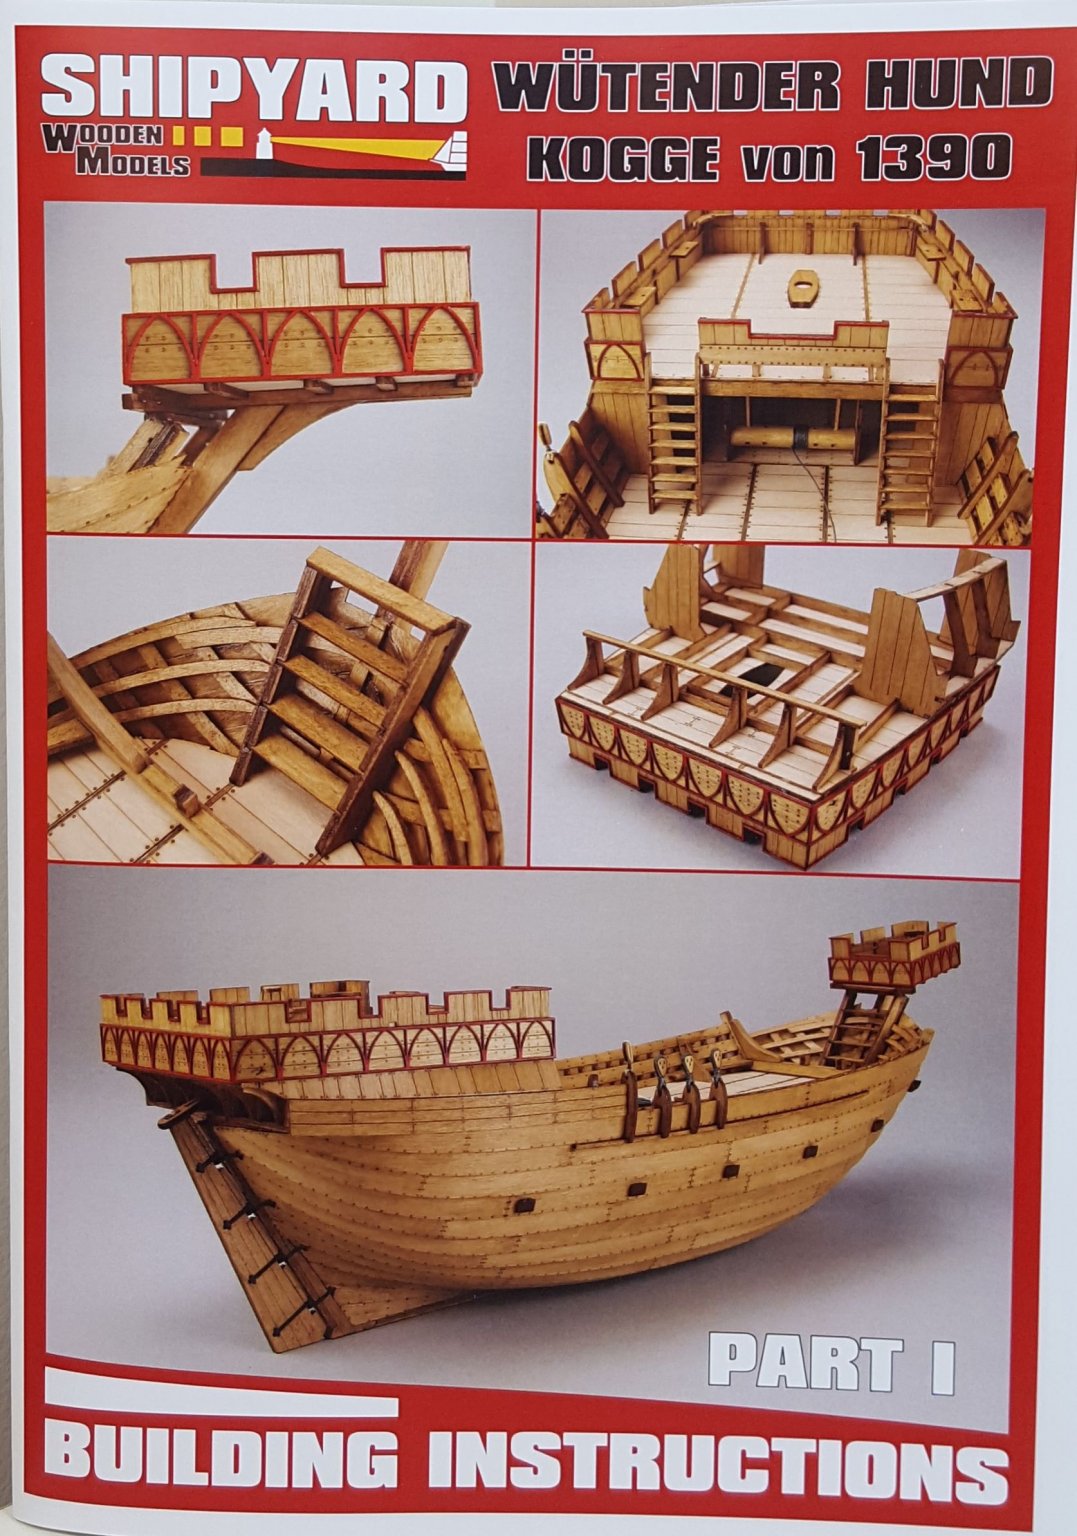
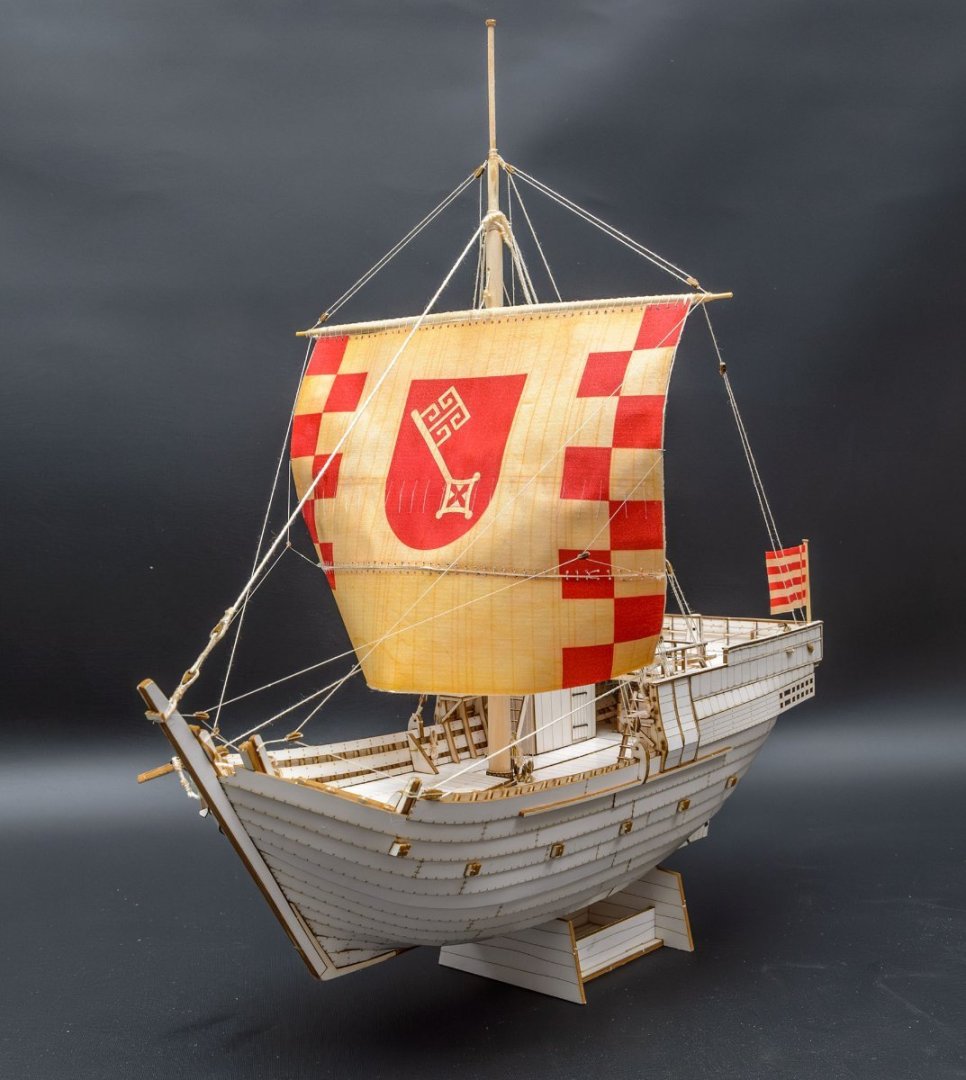
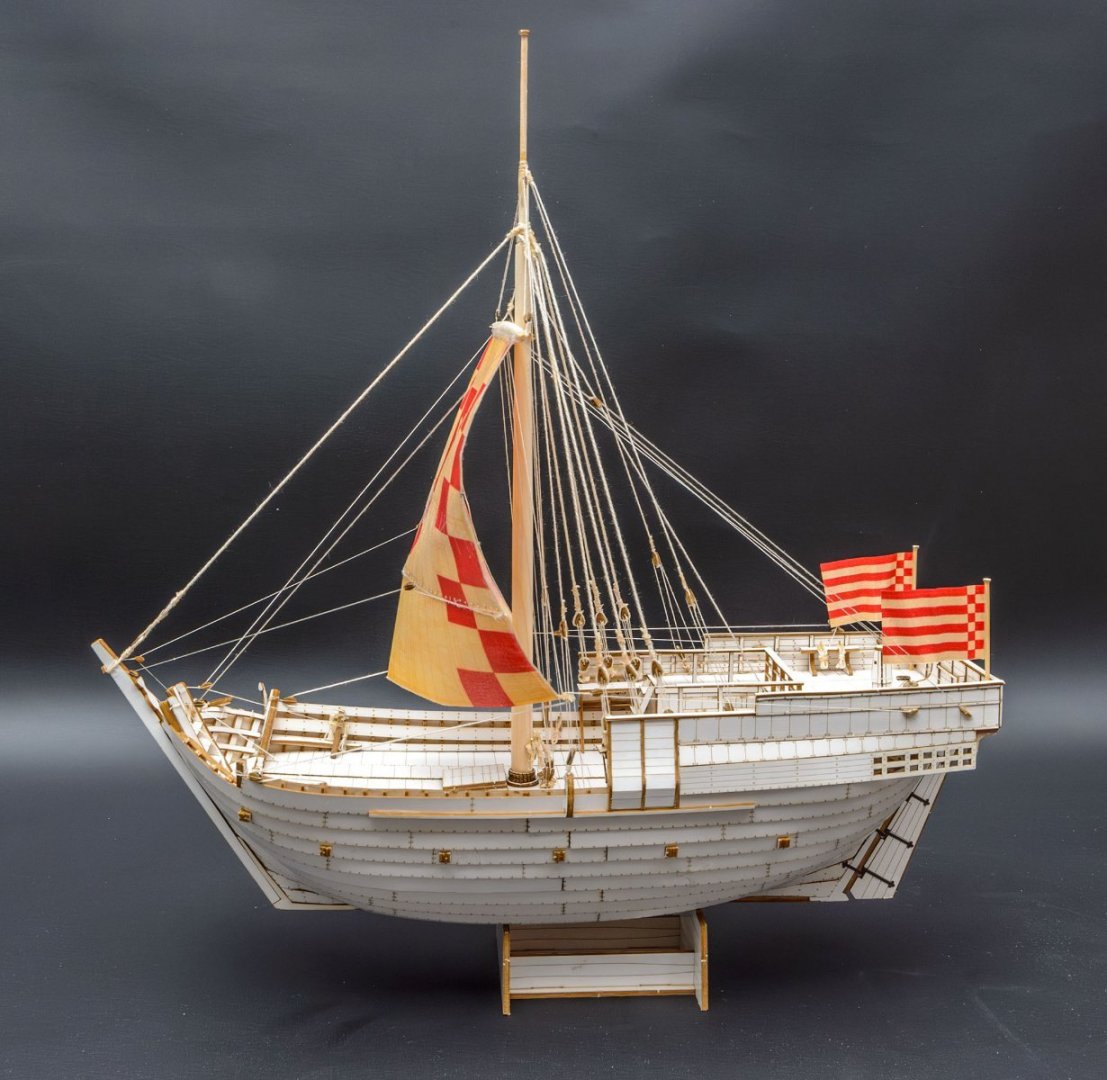
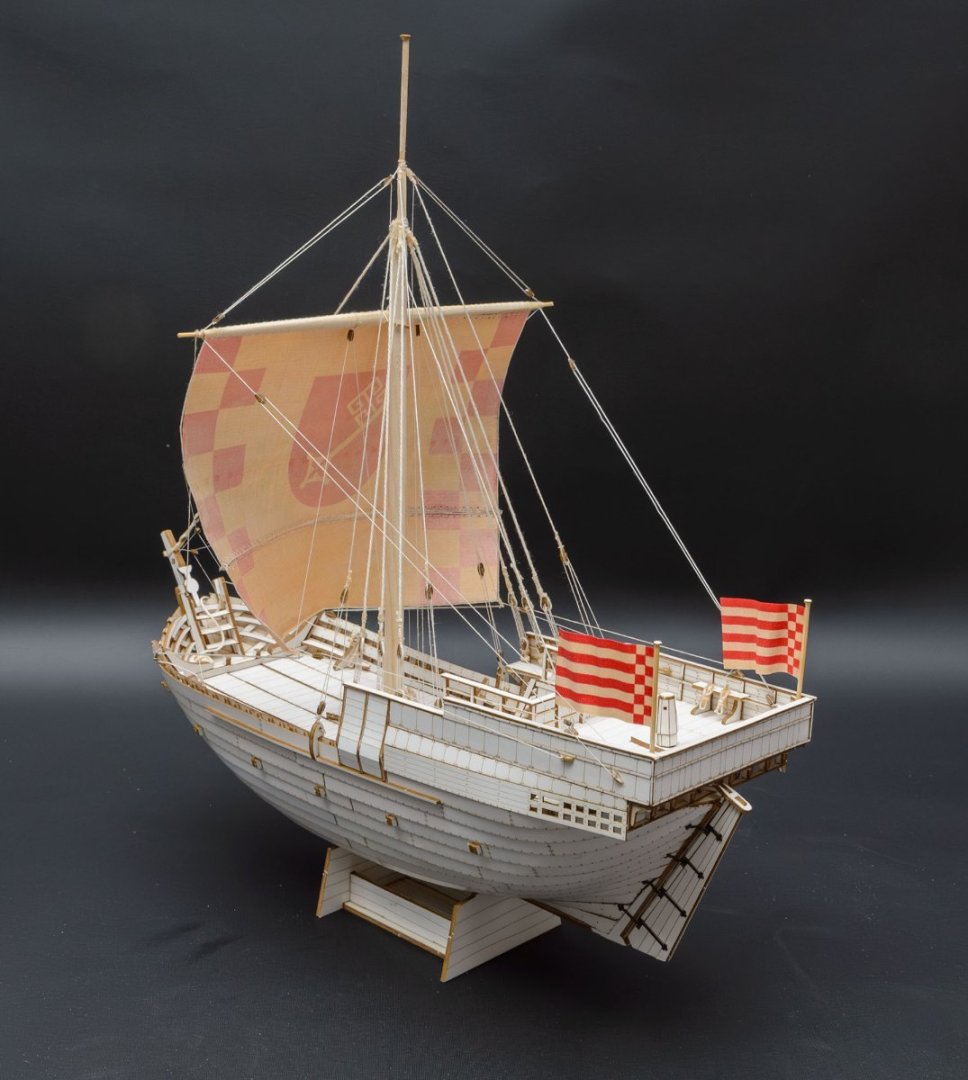
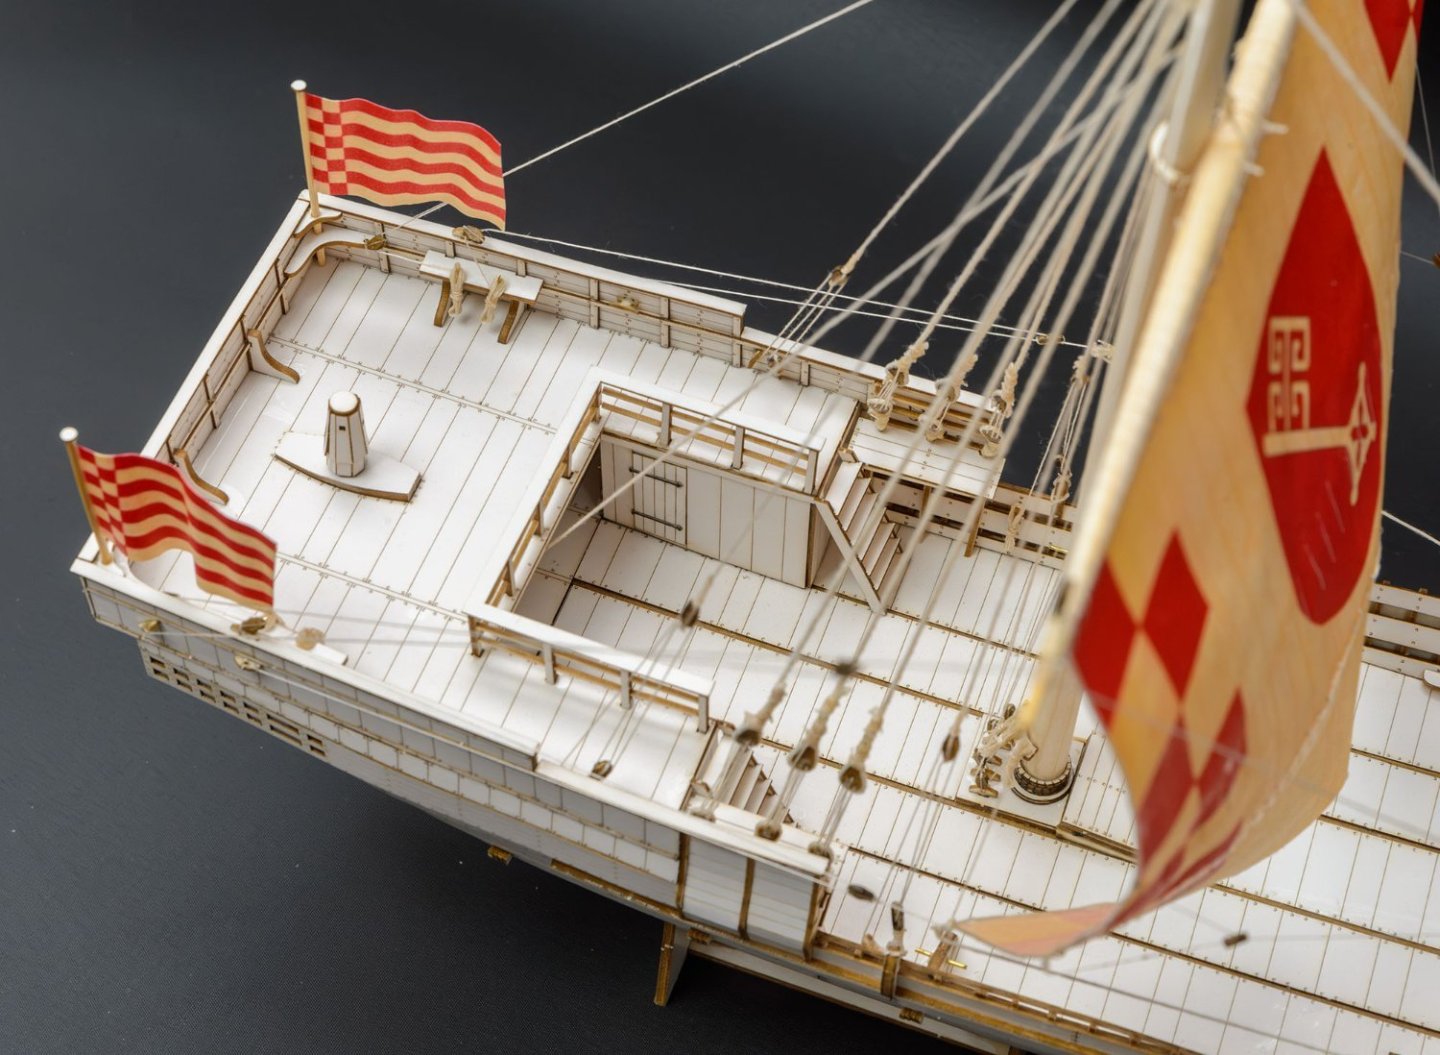
 My current project is a cardboard model of a late 14th century Hanseatic cog (kogge). If you have followed my builds before, you will know that walking and chewing gum are not my strong suit. When I try to build a model AND document it with a build log, I usually get distracted. Here goes. Here is what is SUPPOSED to look like when completed. We'll see.
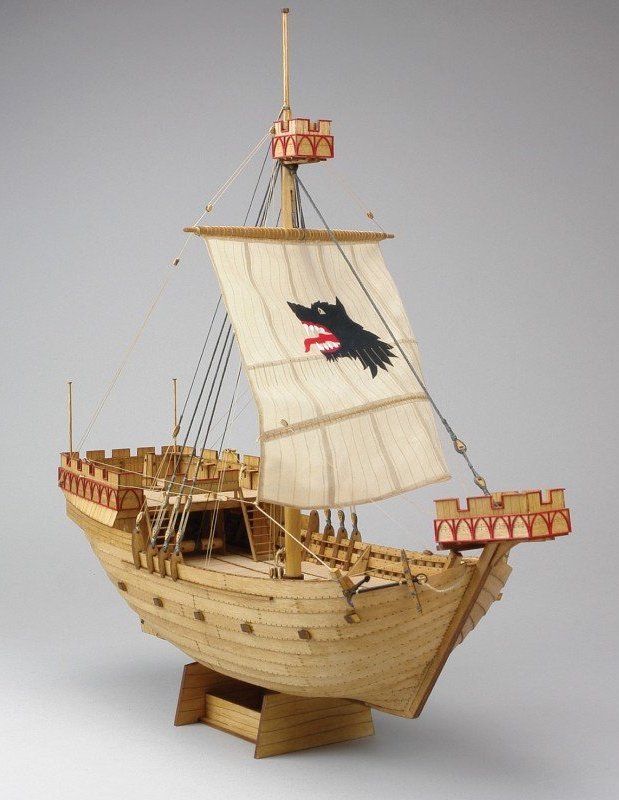
- 130 replies
-
- 4
-
-
- wütender hund
- hanseatic
- (and 2 more)
-
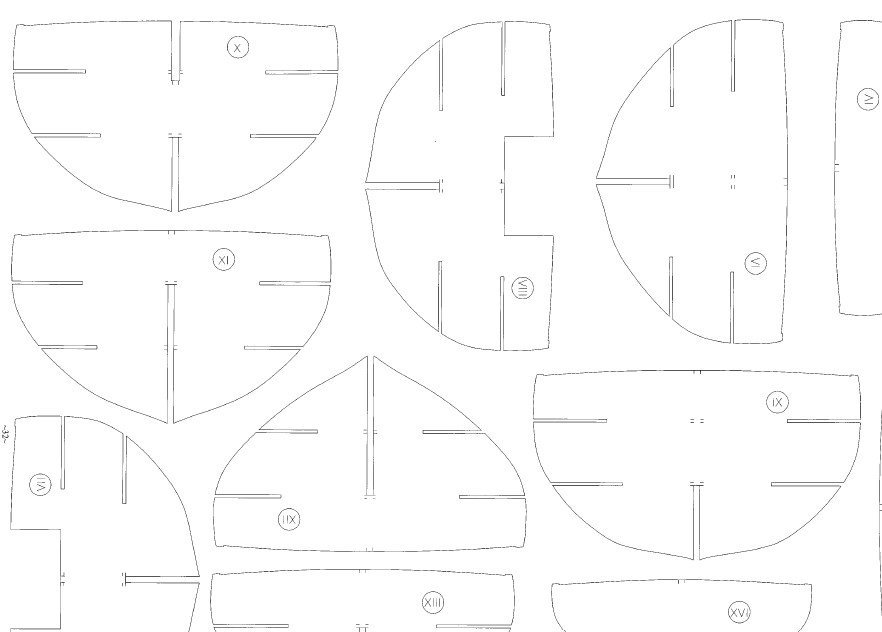
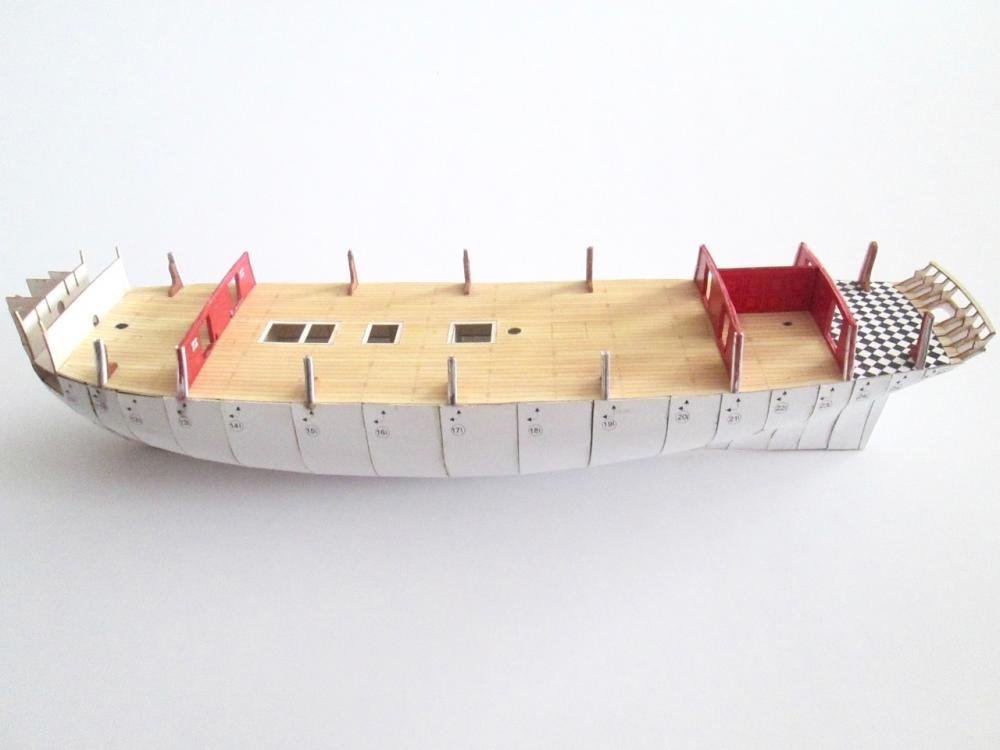
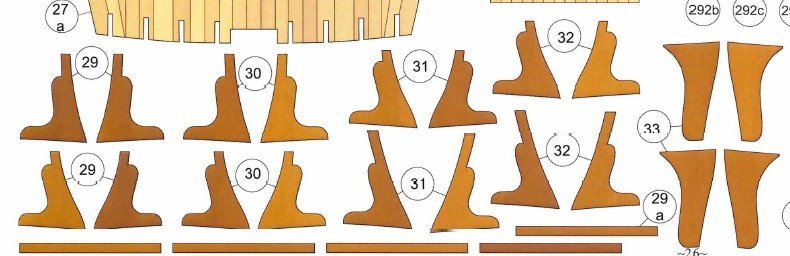
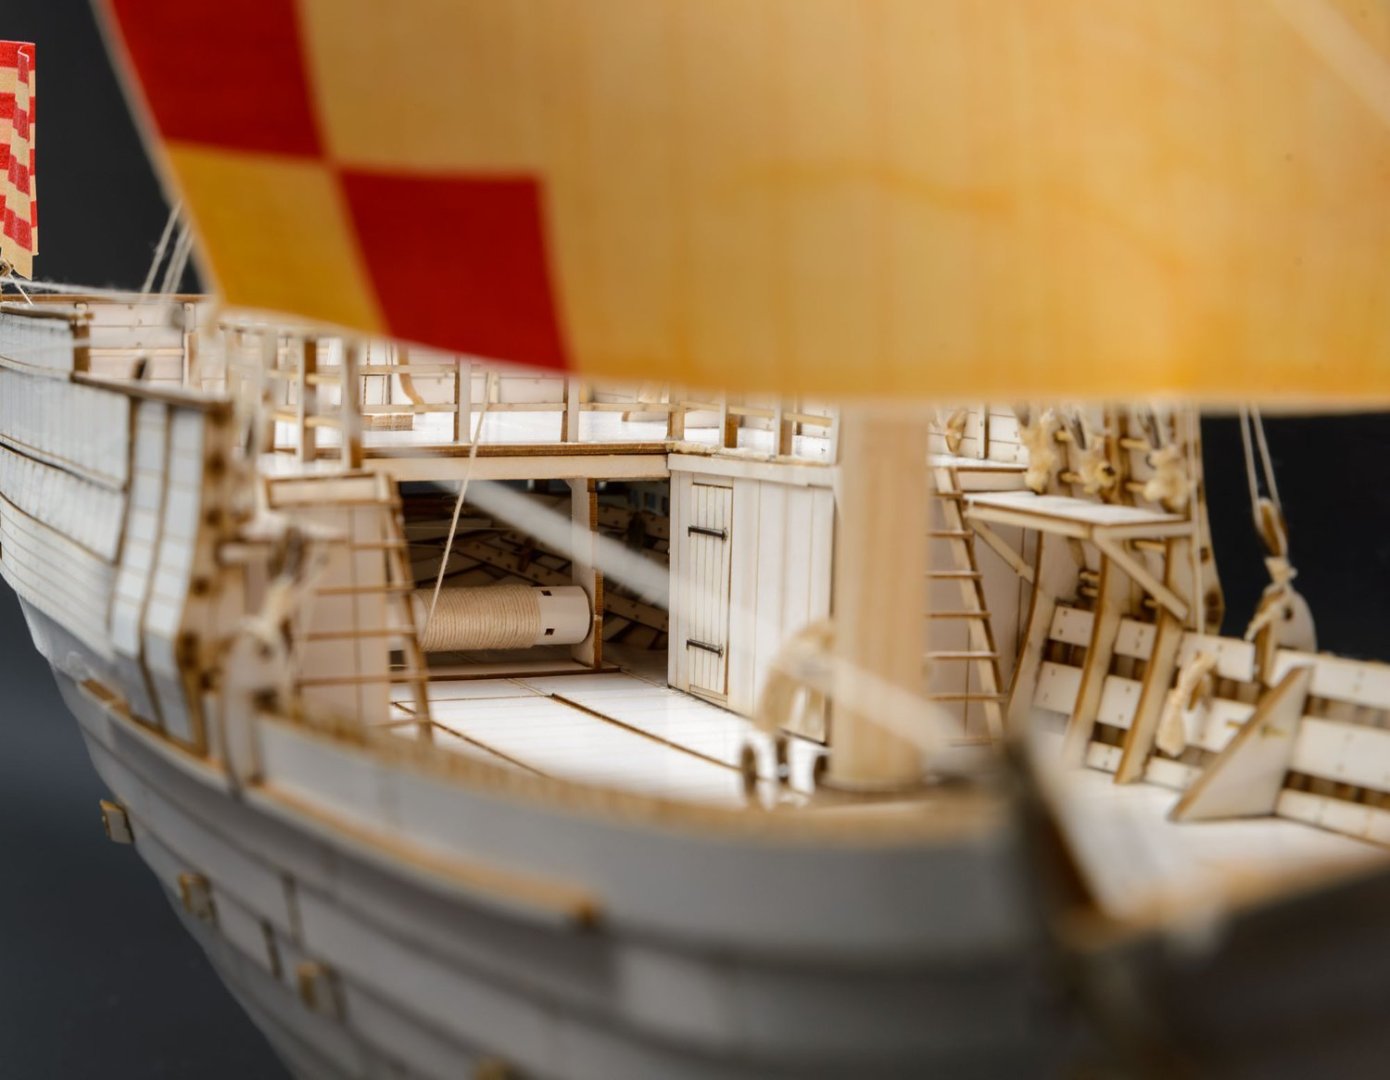
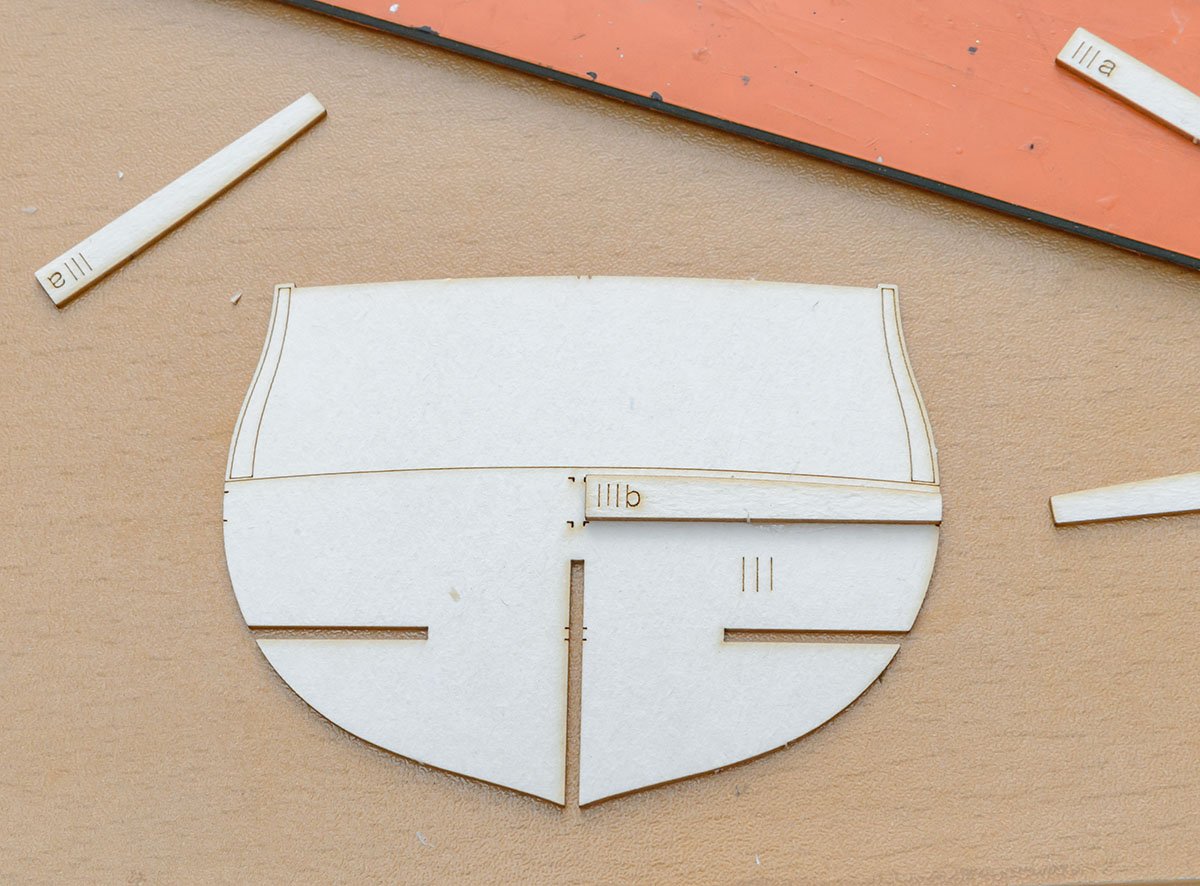
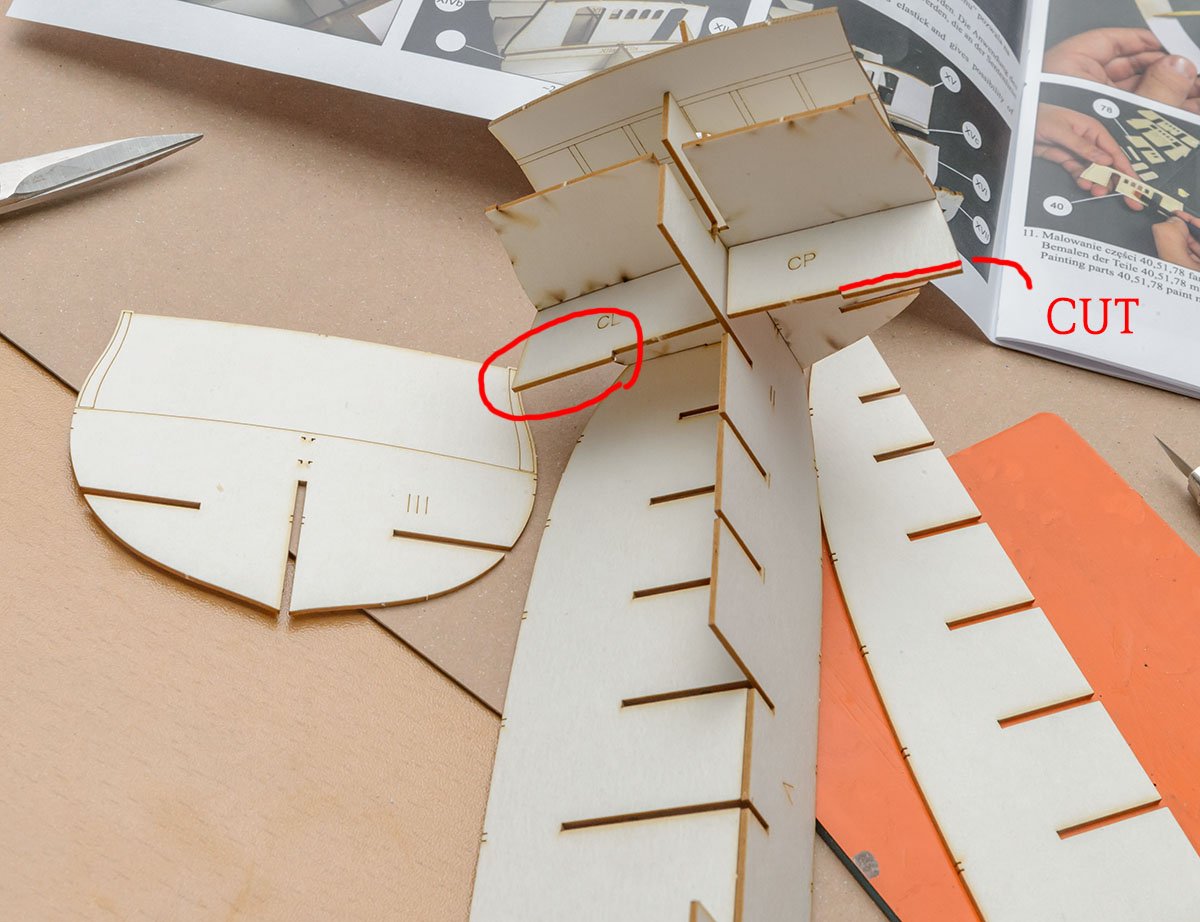
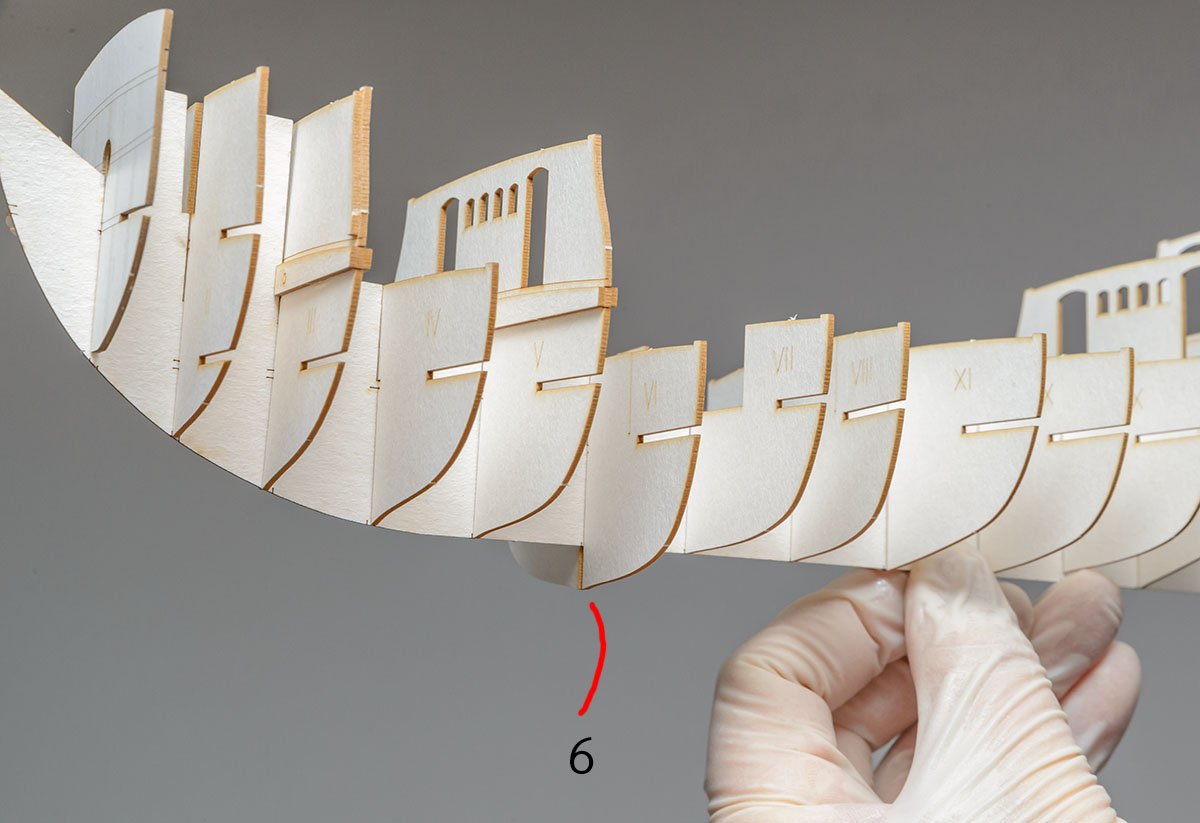
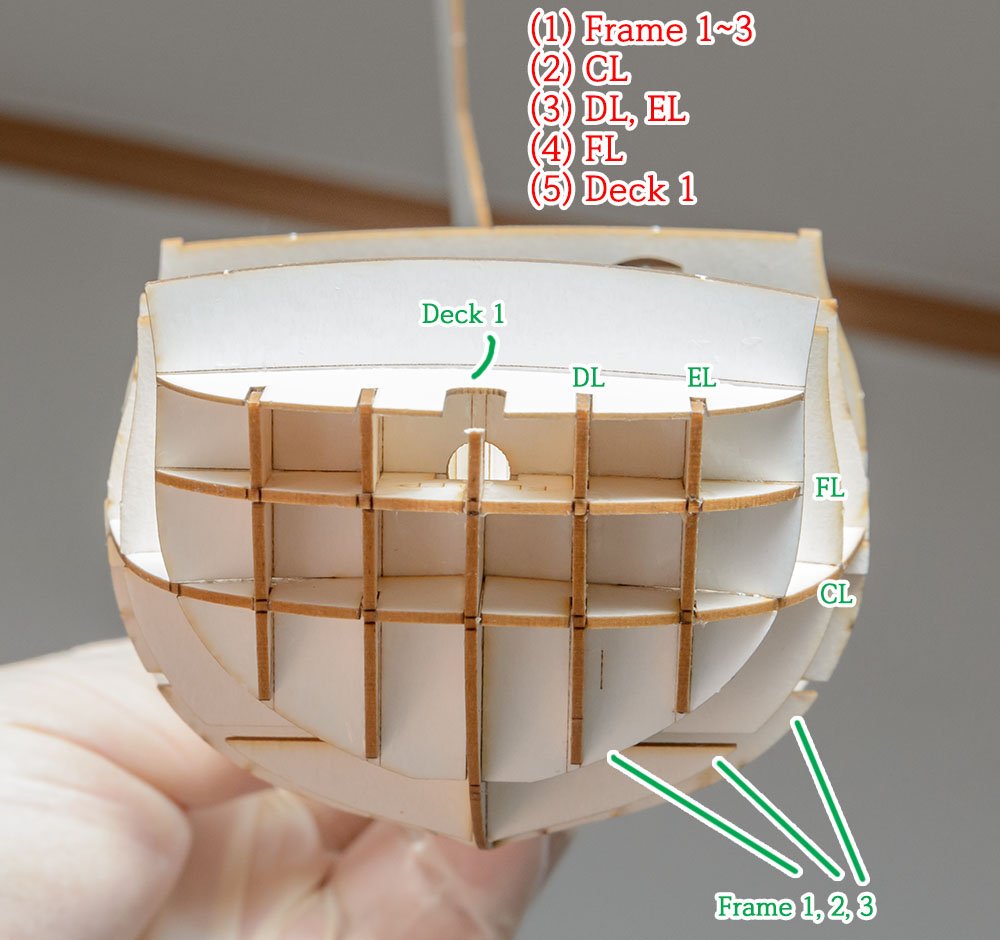
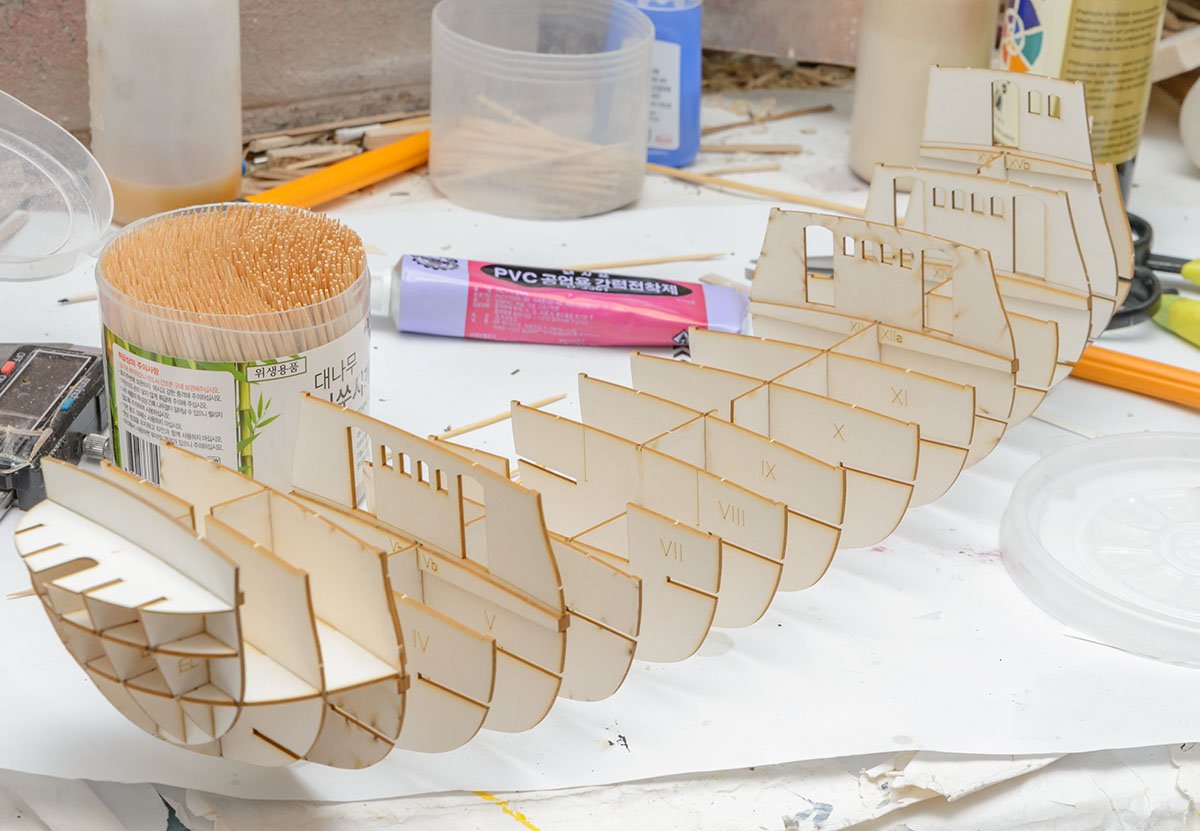
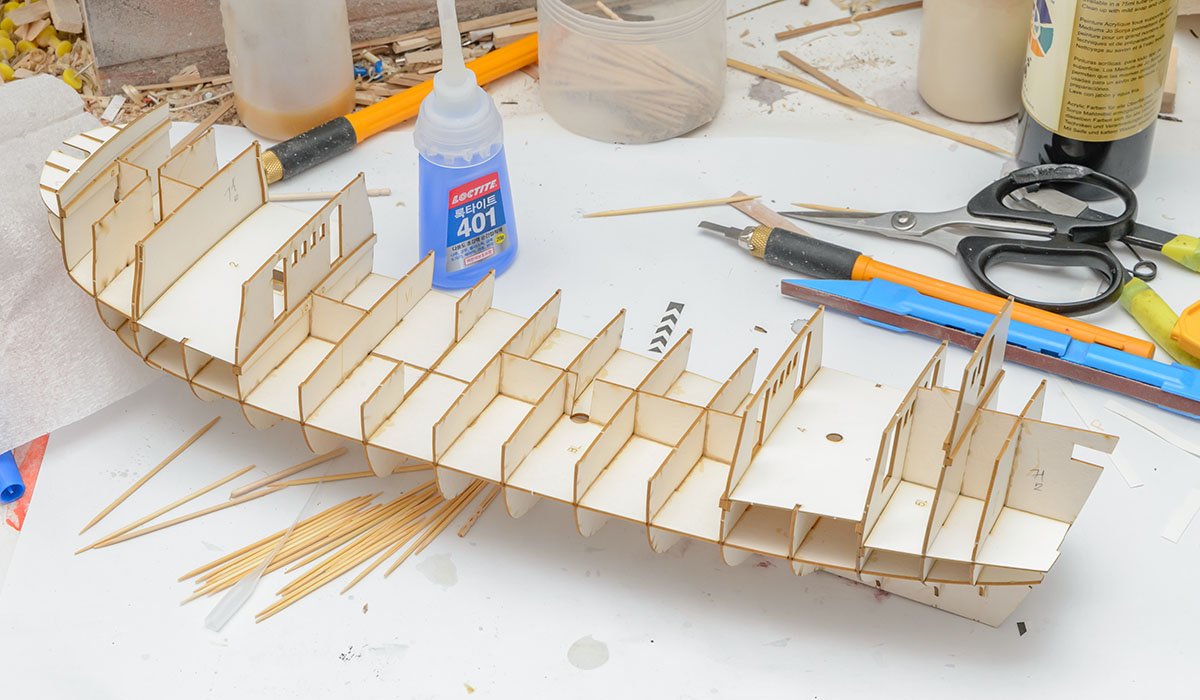
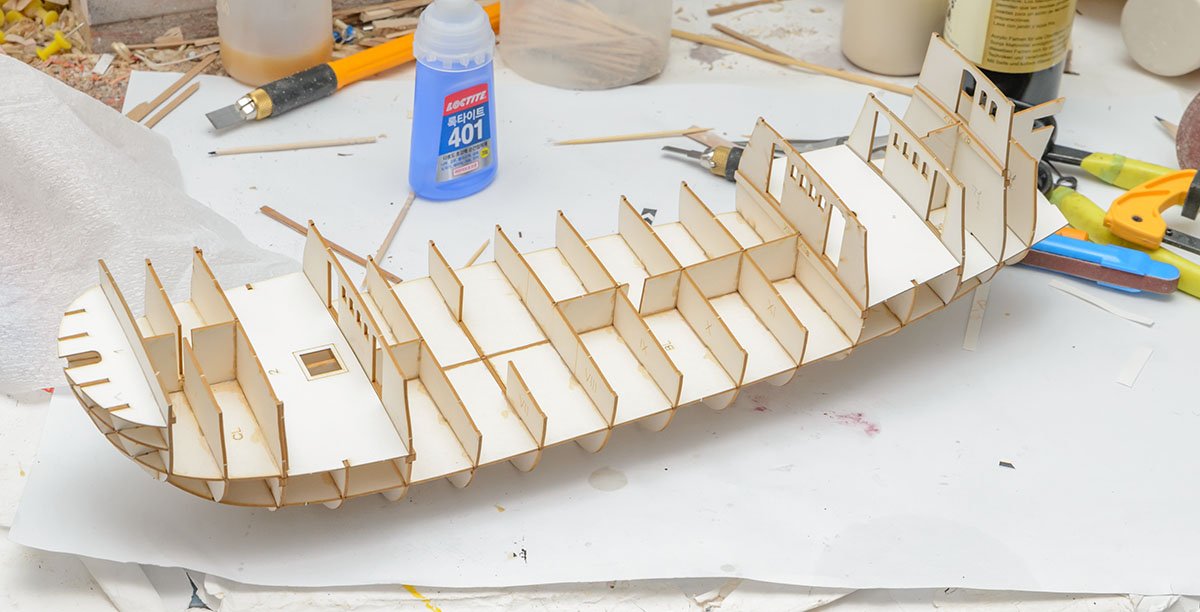
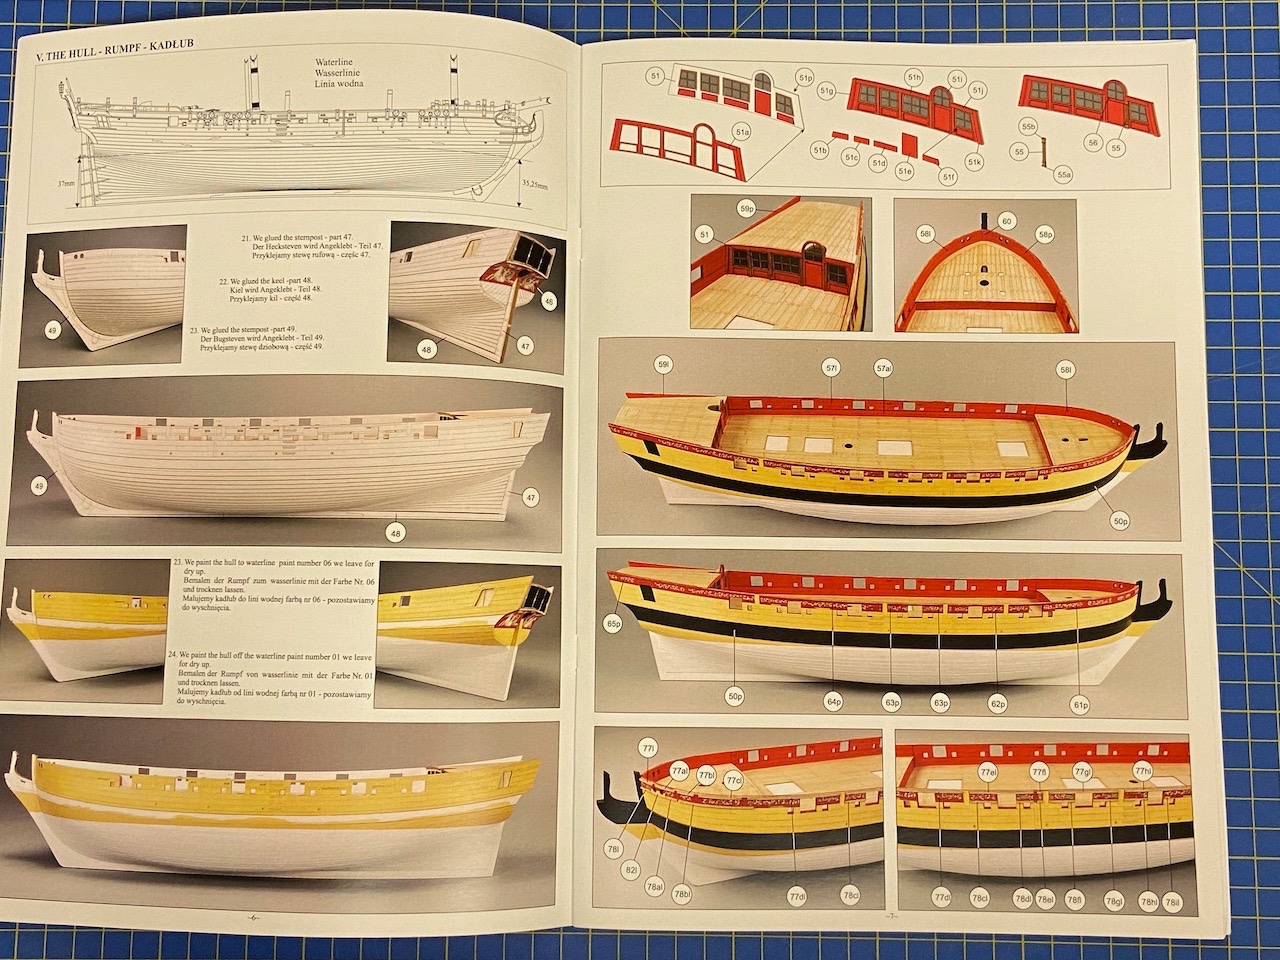
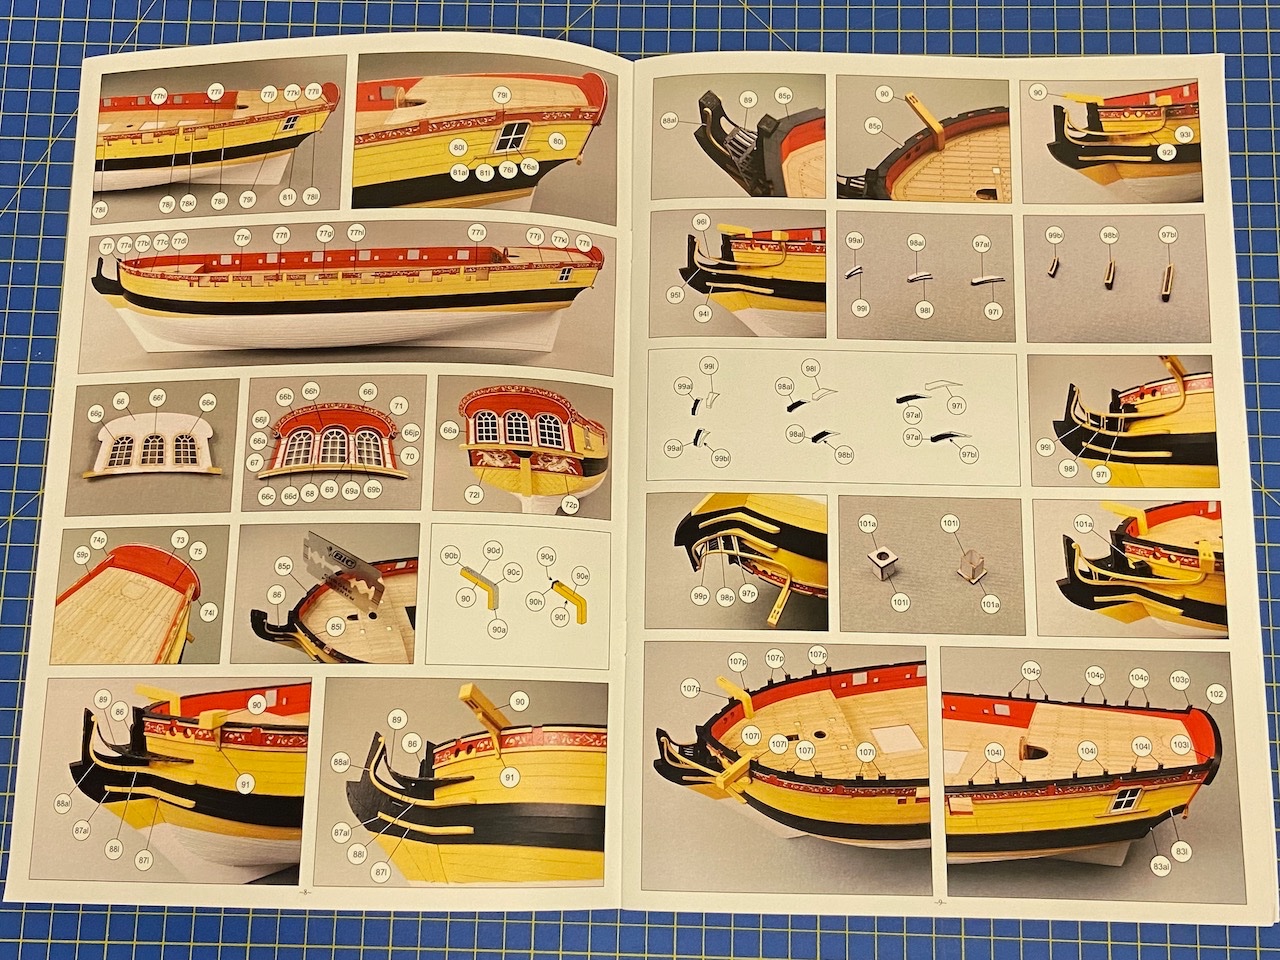
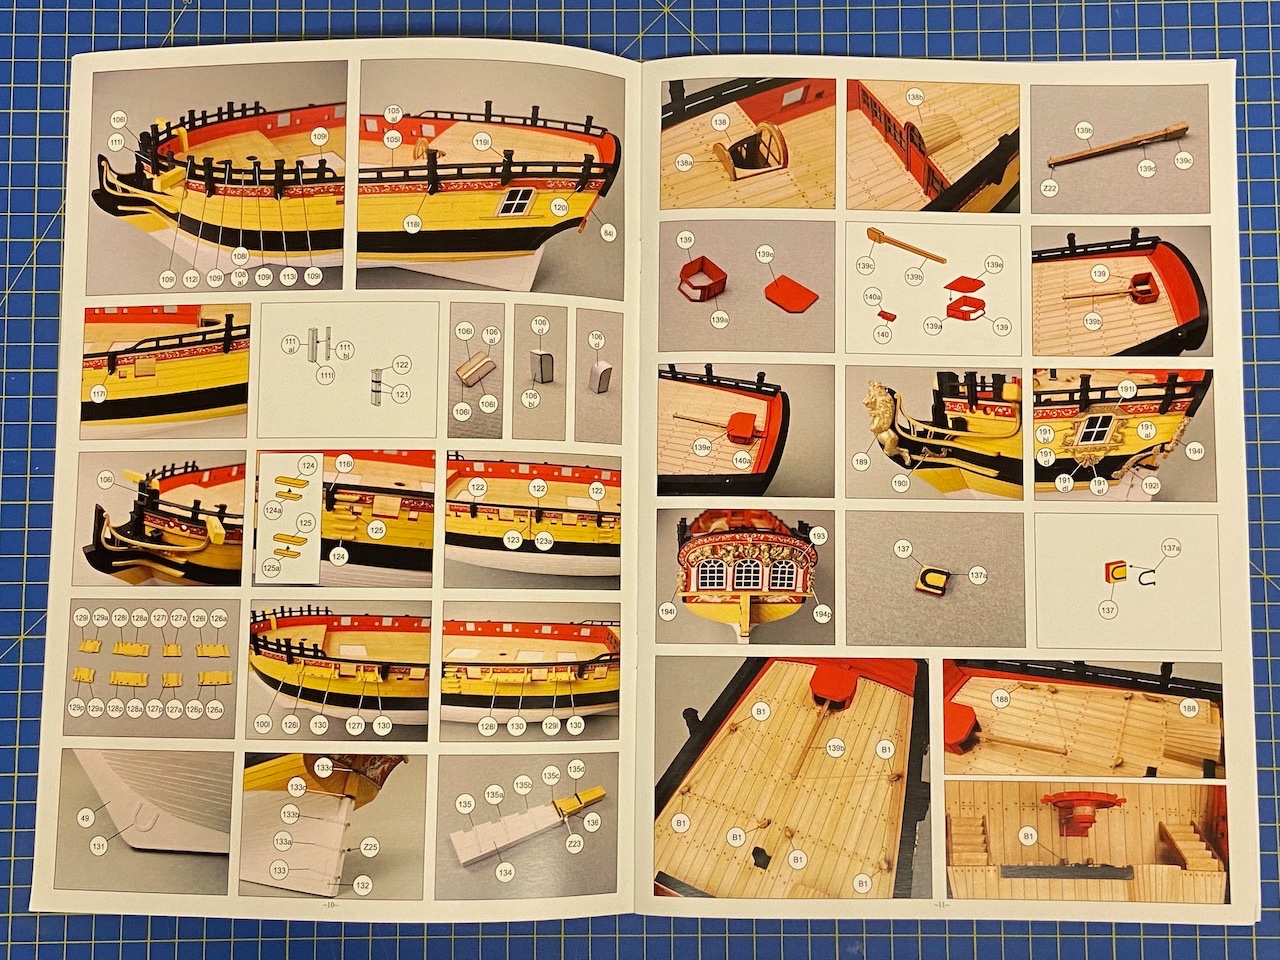
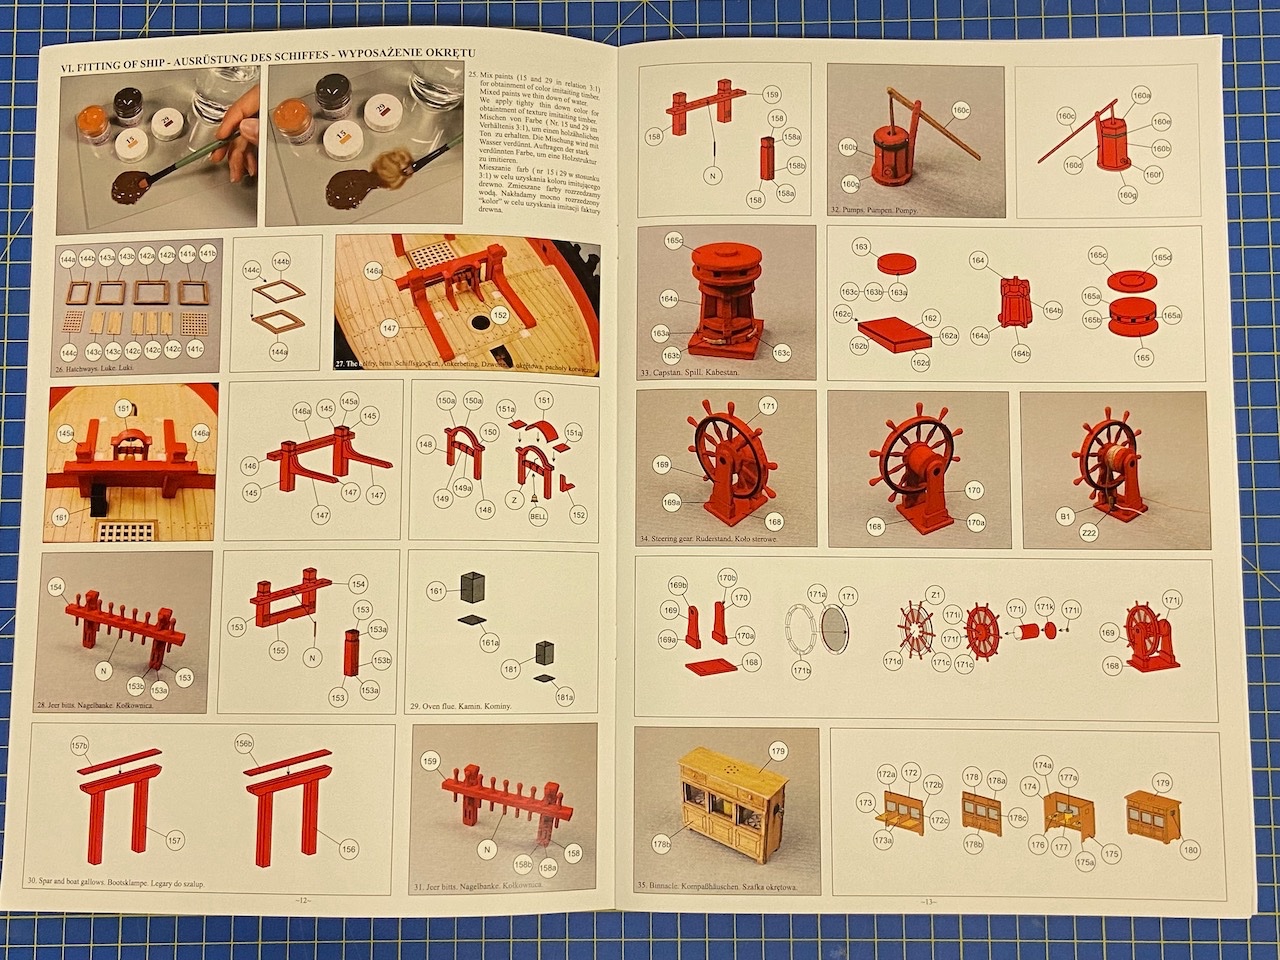
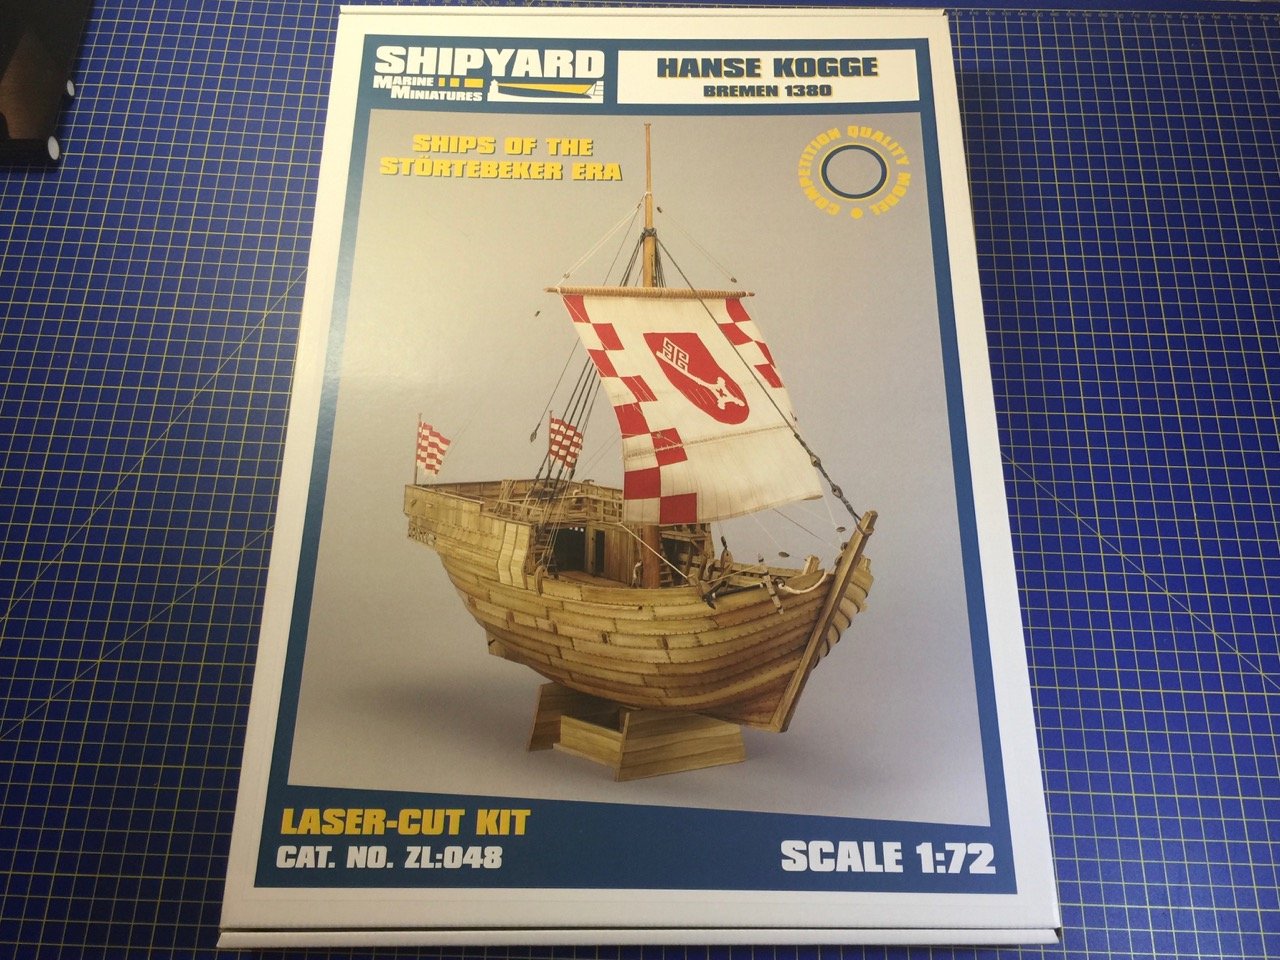
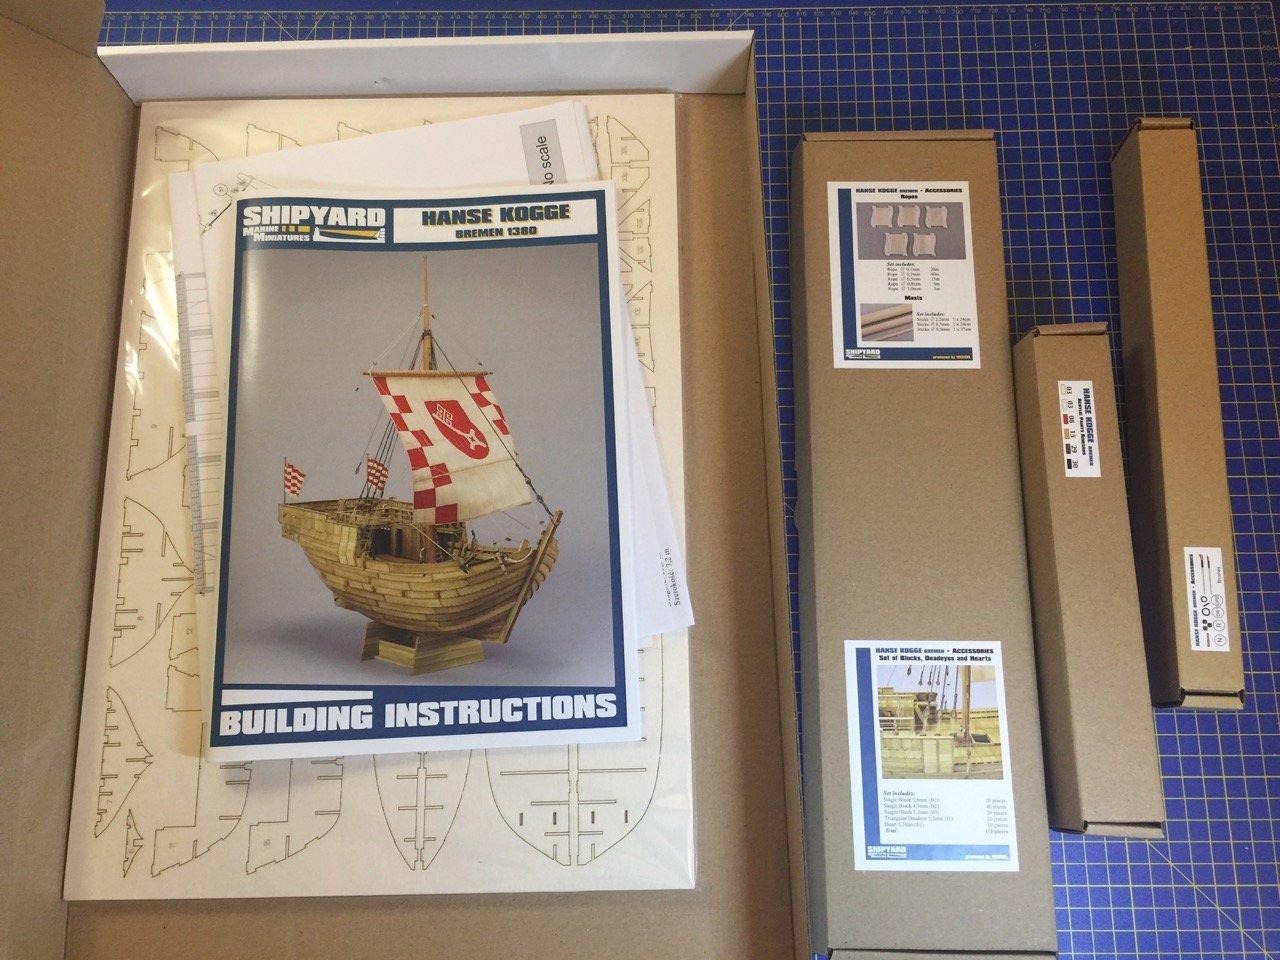
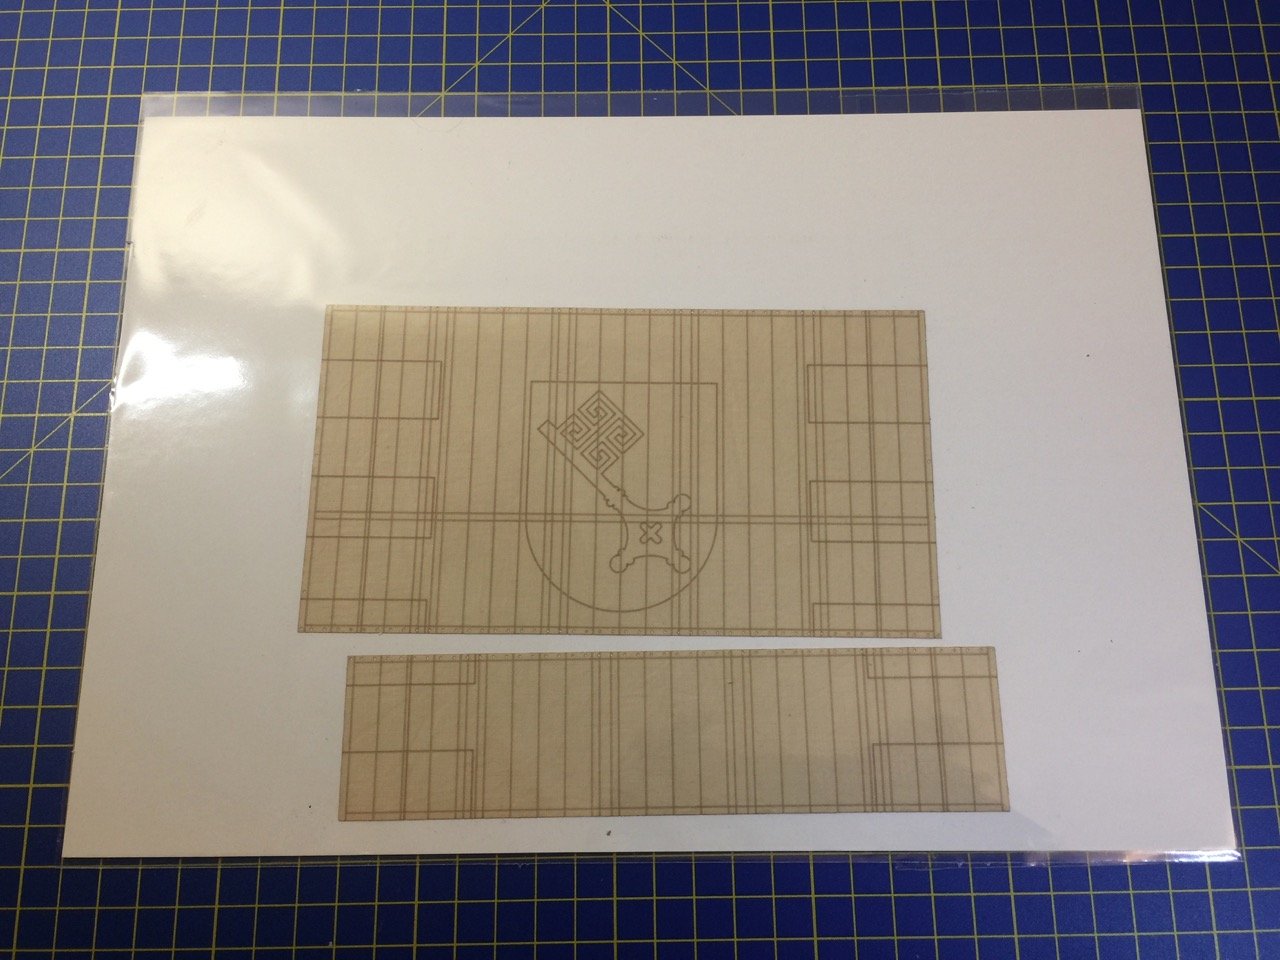
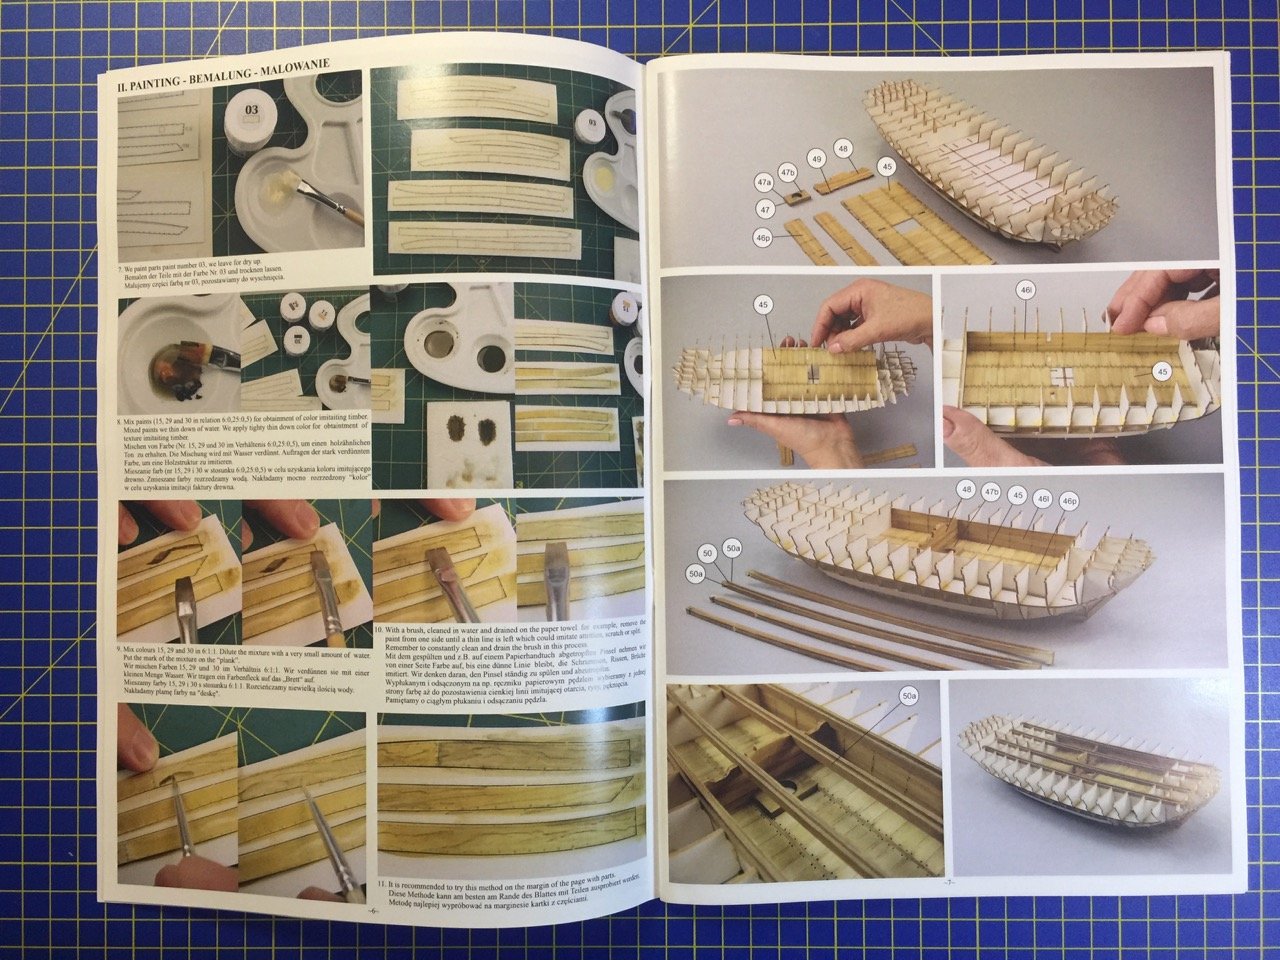
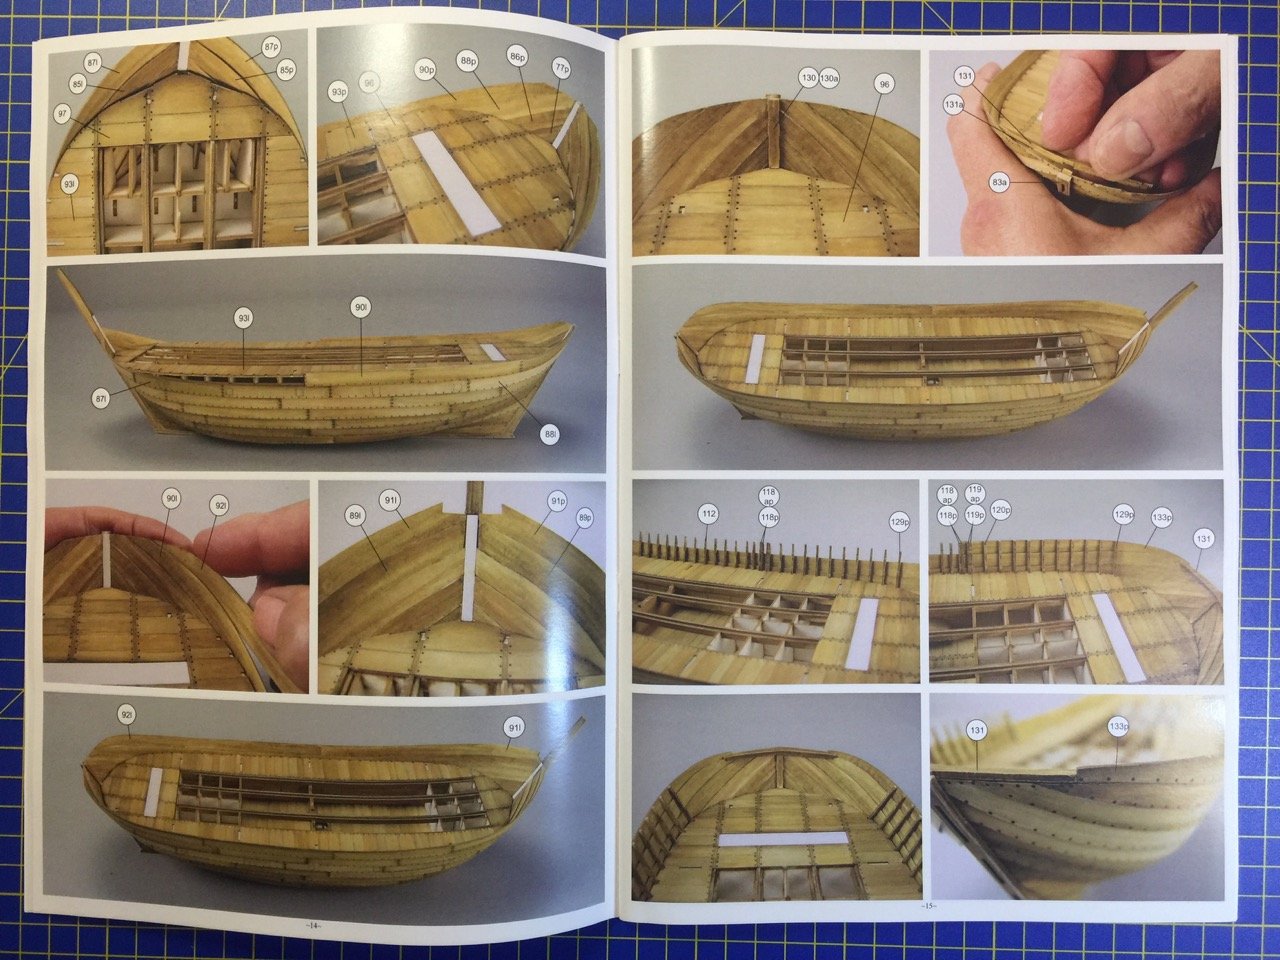
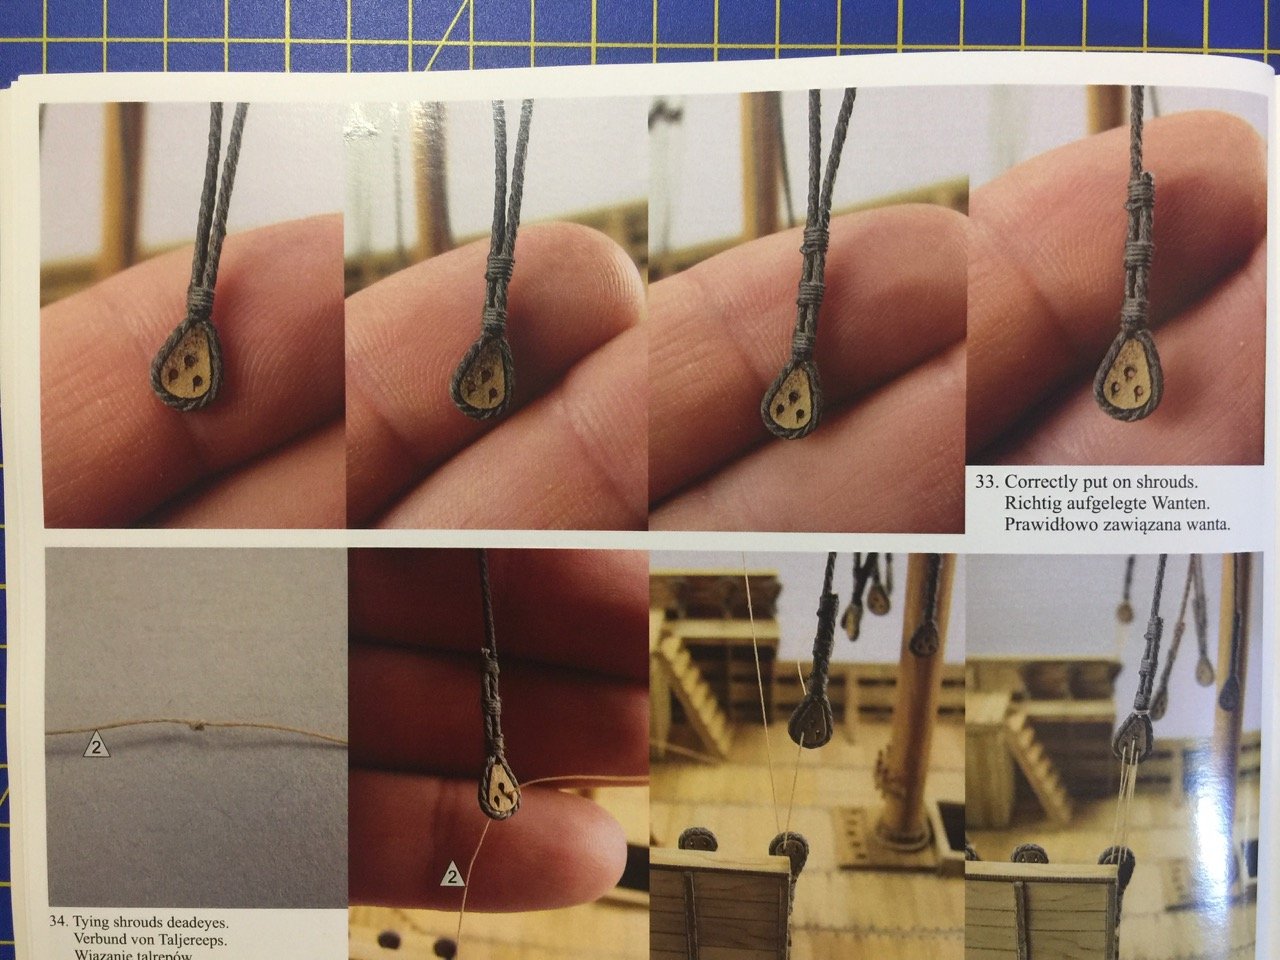
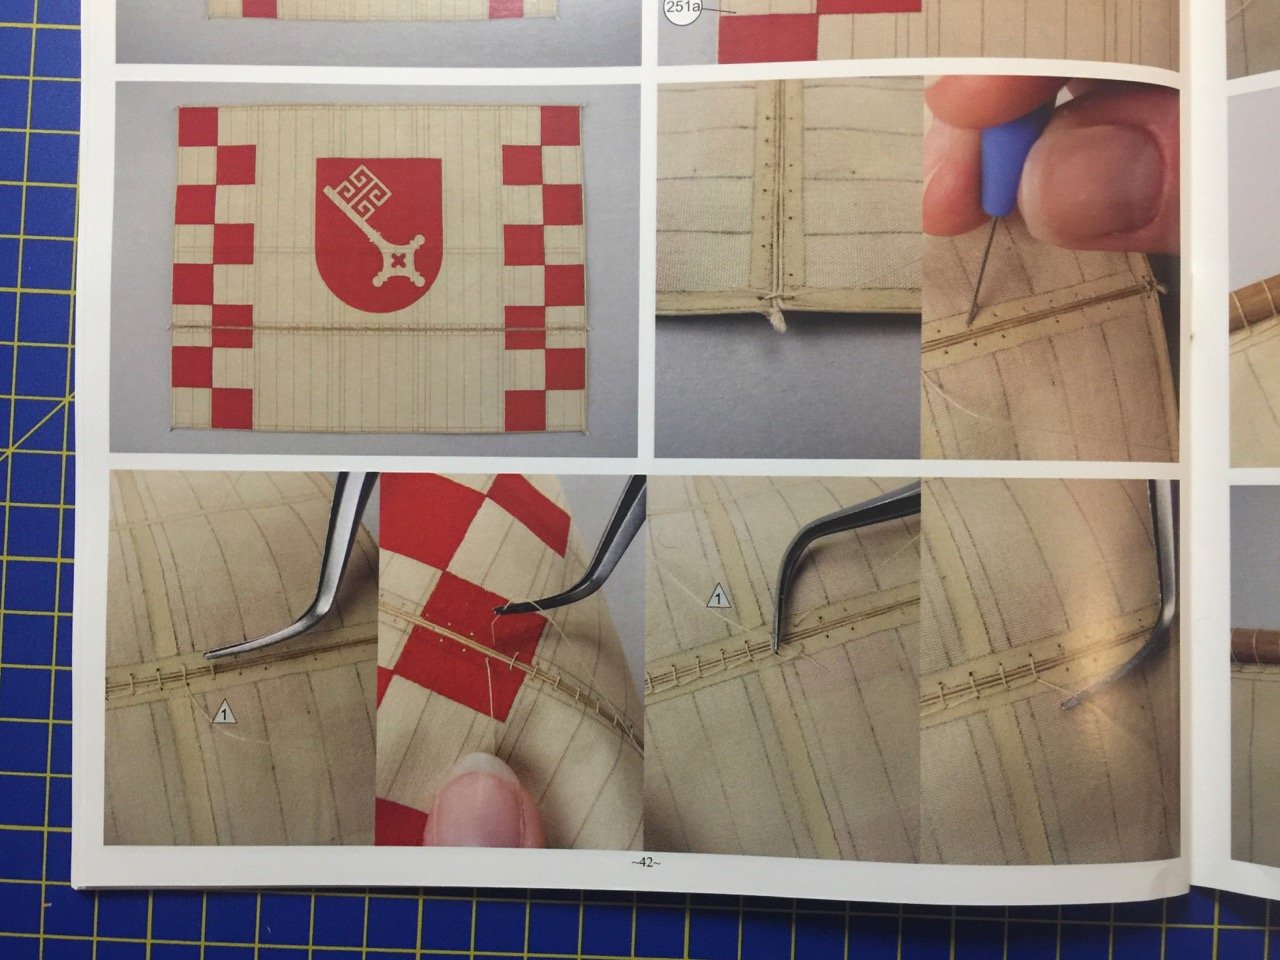
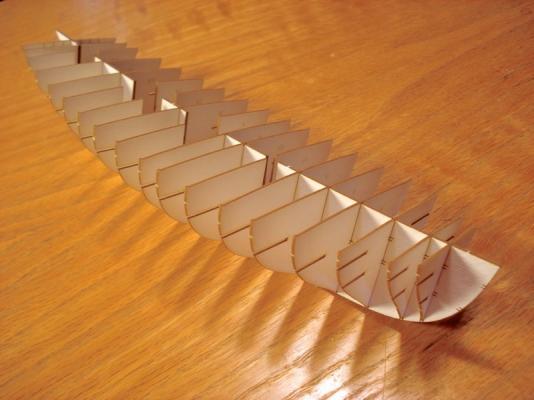
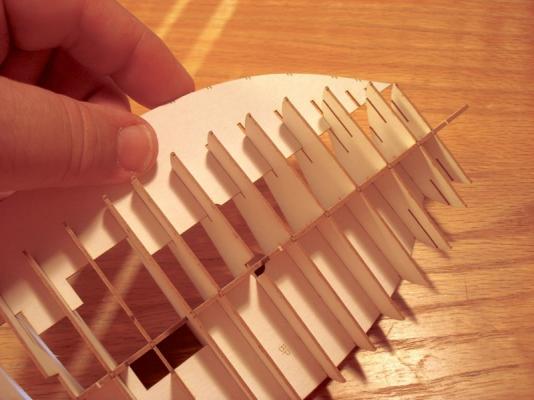
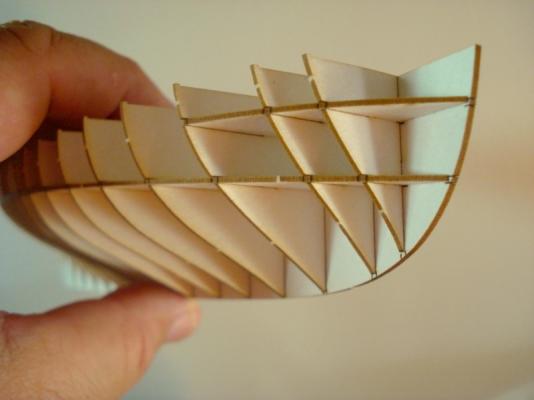
Earlier this year, I managed to acquire a relatively new kit produced by the Polish card model kit maker Shipyard. The kit is one of two that were released at least a year ago, maybe longer. Both kits represent medieval Cogs from the 1300s. Unlike other Shipyard kits I've worked on (yes, I only finished one paper ship model kit, but started a couple of them) which were paper kits and required cutting out pre-printed parts, this is a laser-cut card stock kit. Everything is already cut out in this type of kit, and the model requires painting. The kit I am building the kit listed by Shipyard as the Hanse Kogge - Bremen 1380. It is a 1/72 scale laser-cut kit based on the Bremen Cog. The completed model measures a little over 13" long and about 12.5" high. I decided to go ahead and take on this kit, though I have other projects, as the laser-cut design should make construction much simpler than the paper kits I've worked on. Ages of Sail, which is how I got my kit, sells this kit for about $125. There is a second Cog kit available called the Wütender Hund. It's a slightly bigger kit, maybe a little more complex, that sells for about $10 more. If you're interested in buying one, I'd really like to see other build logs! Here's a link to the kits on Ages of Sail: https://www.agesofsail.com/ecommerce/catalogsearch/result/index/?cat=72&q=Kogge So, taking a look at the contents of the kit... The laser-cut parts are in a cellophane envelope, individual carboard boxes keep things from knocking around in the main box and contain parts, paints, etc. The instructions make up a full-color booklet filled with photos. There's very little text, and what there is in multiple languages. Parts that aren't part of the laser cut sheets are provided in a couple cardboard boxes that include rigging line, laser-cut blocks and deadeye sets, paints, brushes, dowels, metal accessories, etc. The sail is pre-cut and pre-marked, but will need to be painted. There are several sheets of laser-cut card stock in various thicknesses and finishes. Some of the sheets have a glossy finish. Here are just some of the sheets. There are a couple sheets of plans included, which mostly cover rigging details. This looks like a very good kit and I'm pretty happy to be able to work on it. Next time, I'll post the start of construction. Clare
- 175 replies
-
- 17
-
-
- hanse kogge
- shipyard
- (and 1 more)
-
 https://blog.agesofsail.com/2020/06/18/new-wooden-kits-from-shipyard/?fbclid=IwAR0BasyN-l8-cXKHOKbuLbj7MttBj8jqRximbt7eHD6jgr-Ty1pUzaERZlY
 -
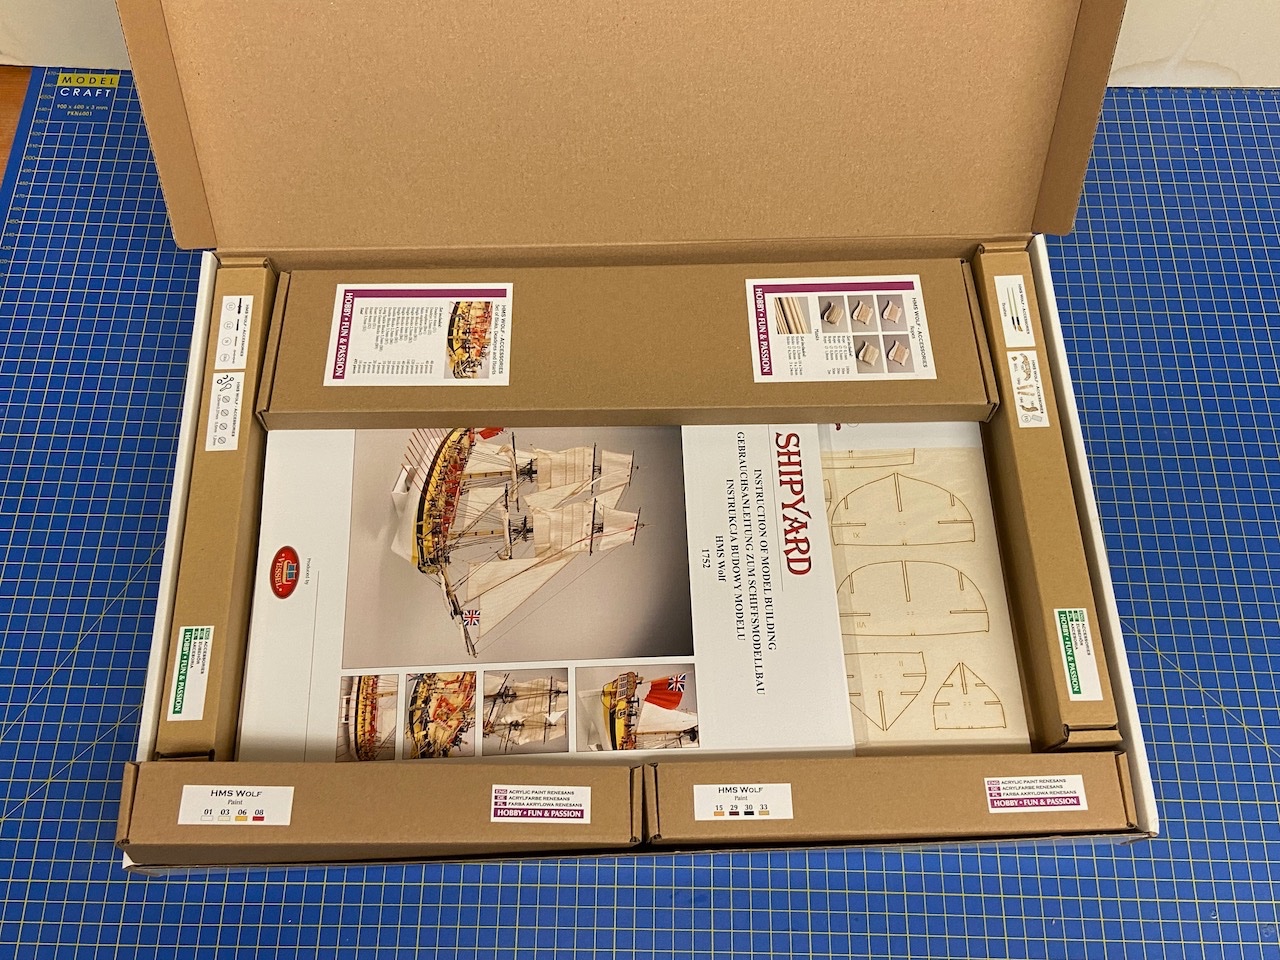
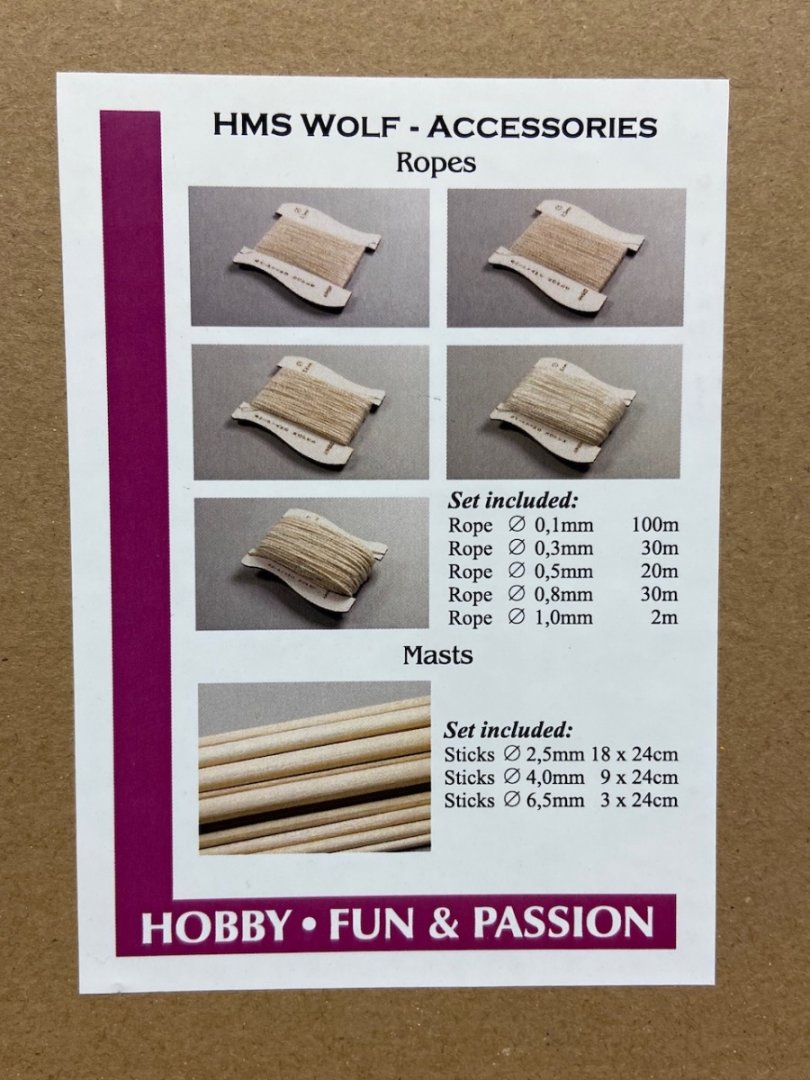
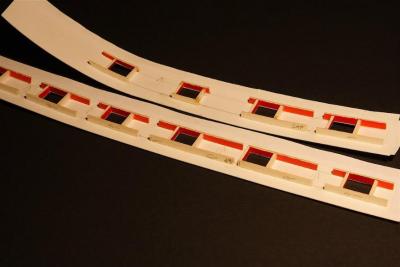
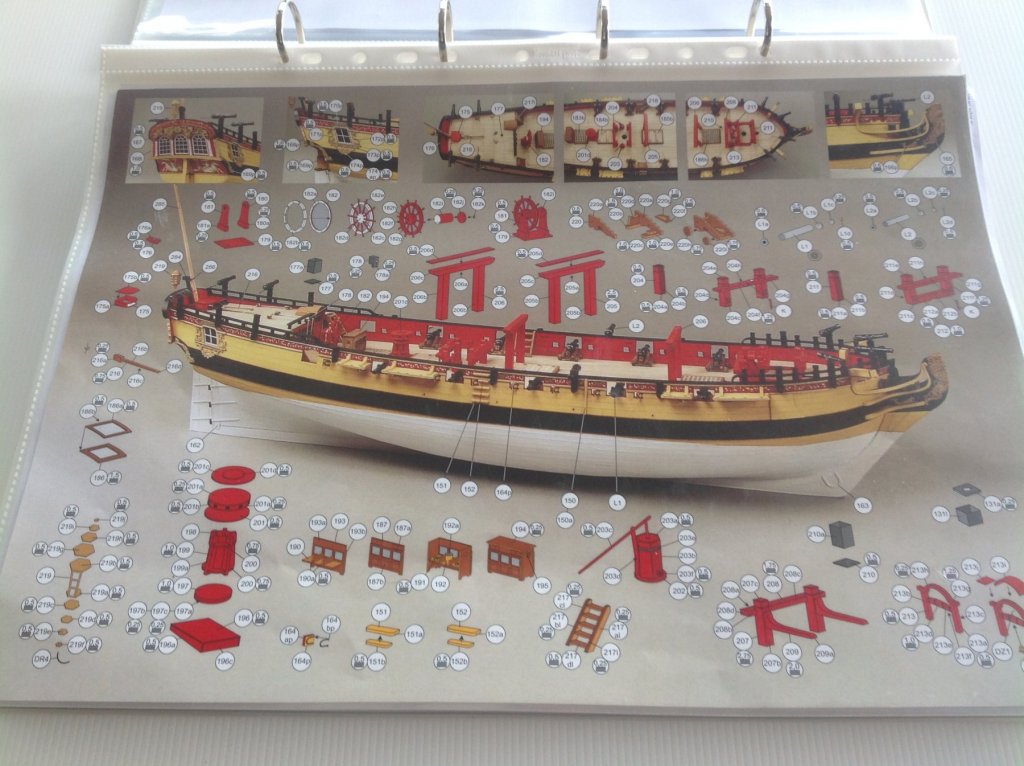
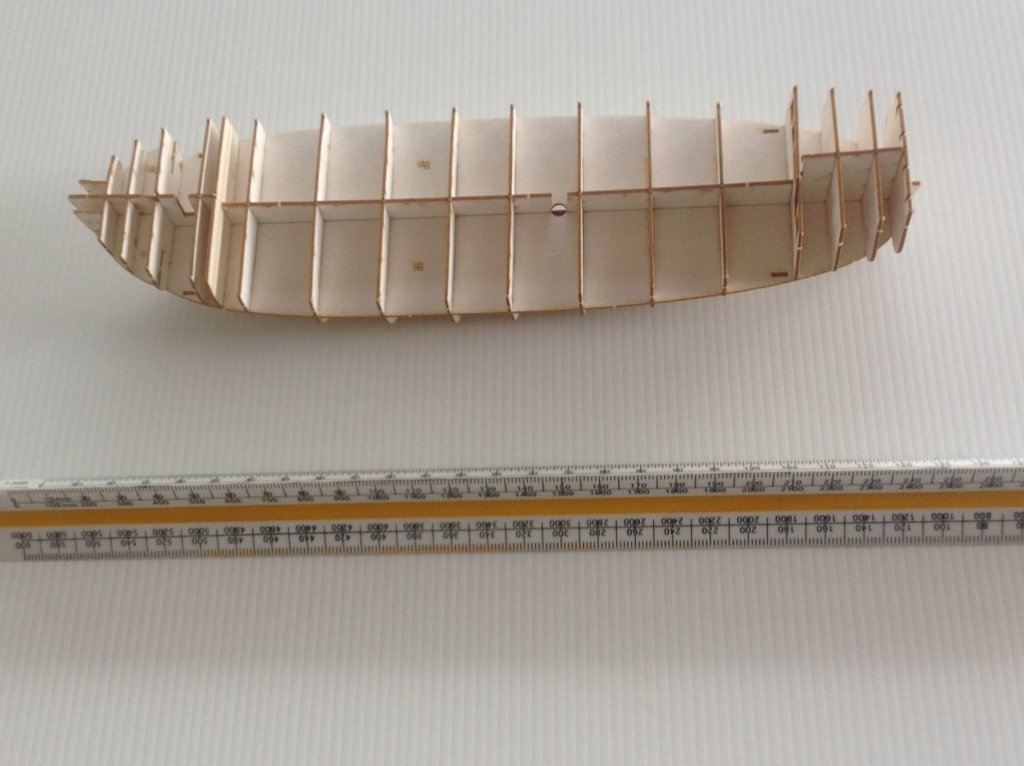
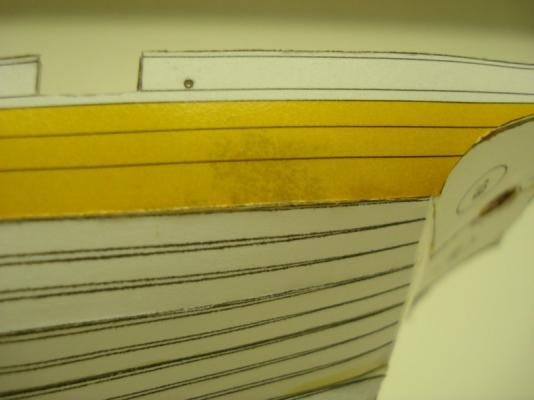
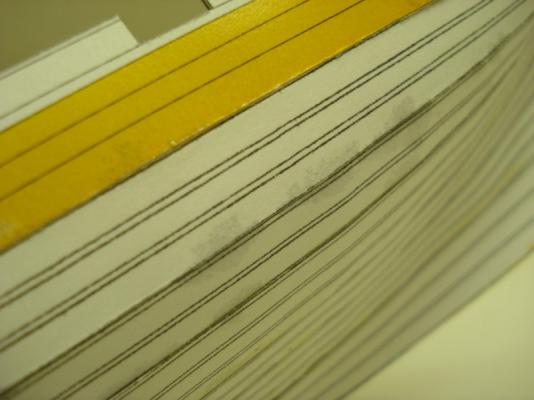
 I have recently purchased the HMS Wolf, a Shipyard paper model, from Cornwall Model Boats in the UK, I also purchased the extra sails and masts sets but was reticent to splash out on the laser cut blocks, however after receiving the model and seeing the size of the parts, each just a few mm and all containing multiple parts I have decided to save my eyes and will place an order for these as well. I was considering purchasing laser cut timber blocks however it seems an extravagance for a simple card model. However I may purchase wooden gun carriages and associated brass guns depending on how I go with cutting and assembling the card parts and the model generally. I have only one complaint in that there was a couple of pages of assembly instructions missing from the kit. I am really hoping that Cornwall are able to convince Shipyard to email me a pdf of the missing pages. Hopefully, as its assembly details and not parts details that are missing there will not be any issues. I will email Cornwall tomorrow. The beauty of this card model is the skeleton is laser cut. I have recently been struggling with cutting and assembling the skeleton for the RMS Mauretania and I find it very time consuming. I have been on that build for several months and have still not progressed beyond the skeleton! Following Dan's lead I have been busy cataloguing all the parts into a spreadsheet with part numbers, page numbers, thickness of any laminations, names of the parts/ assemblies and any relevant comments and then cross references to assembly pages. Anyway here are few some photographs of the kit - The cover, and example assembly and parts pages. Note there is only one colour page of assembly details the rest are black and white. Other than the rigging details all assembly detail is by photograph (no words). A close up of some of double blocks parts as you may be able to discern in this example each block contains 7 parts all of which need to be laminated to either 0.25mm or 0.50mm card. The length of the block in this example is just a few mm. An extract of the assembly instructions for the blocks in question. The assembled skeleton - the majority of the skeleton has been assembled - I think it took less than 15 minutes to dry fit it. I really must say the quality of the laser cut card is absolutely top drawer.
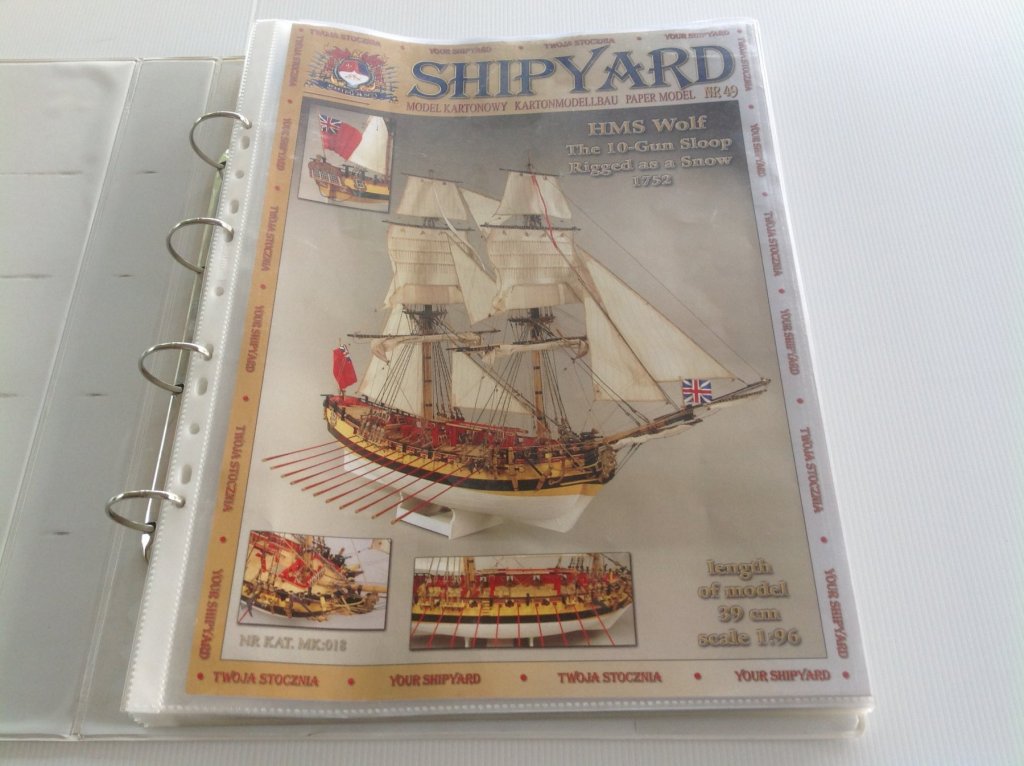
.thumb.JPG.ae641c07c3b01c2ec9ecbbb2391ed996.JPG)
- 33 replies
-
- 18
-
-
kit review 1/72 Wütender Hund by Shipyard - Hanseatic Cog
ccoyle posted a topic in REVIEWS: Model kits
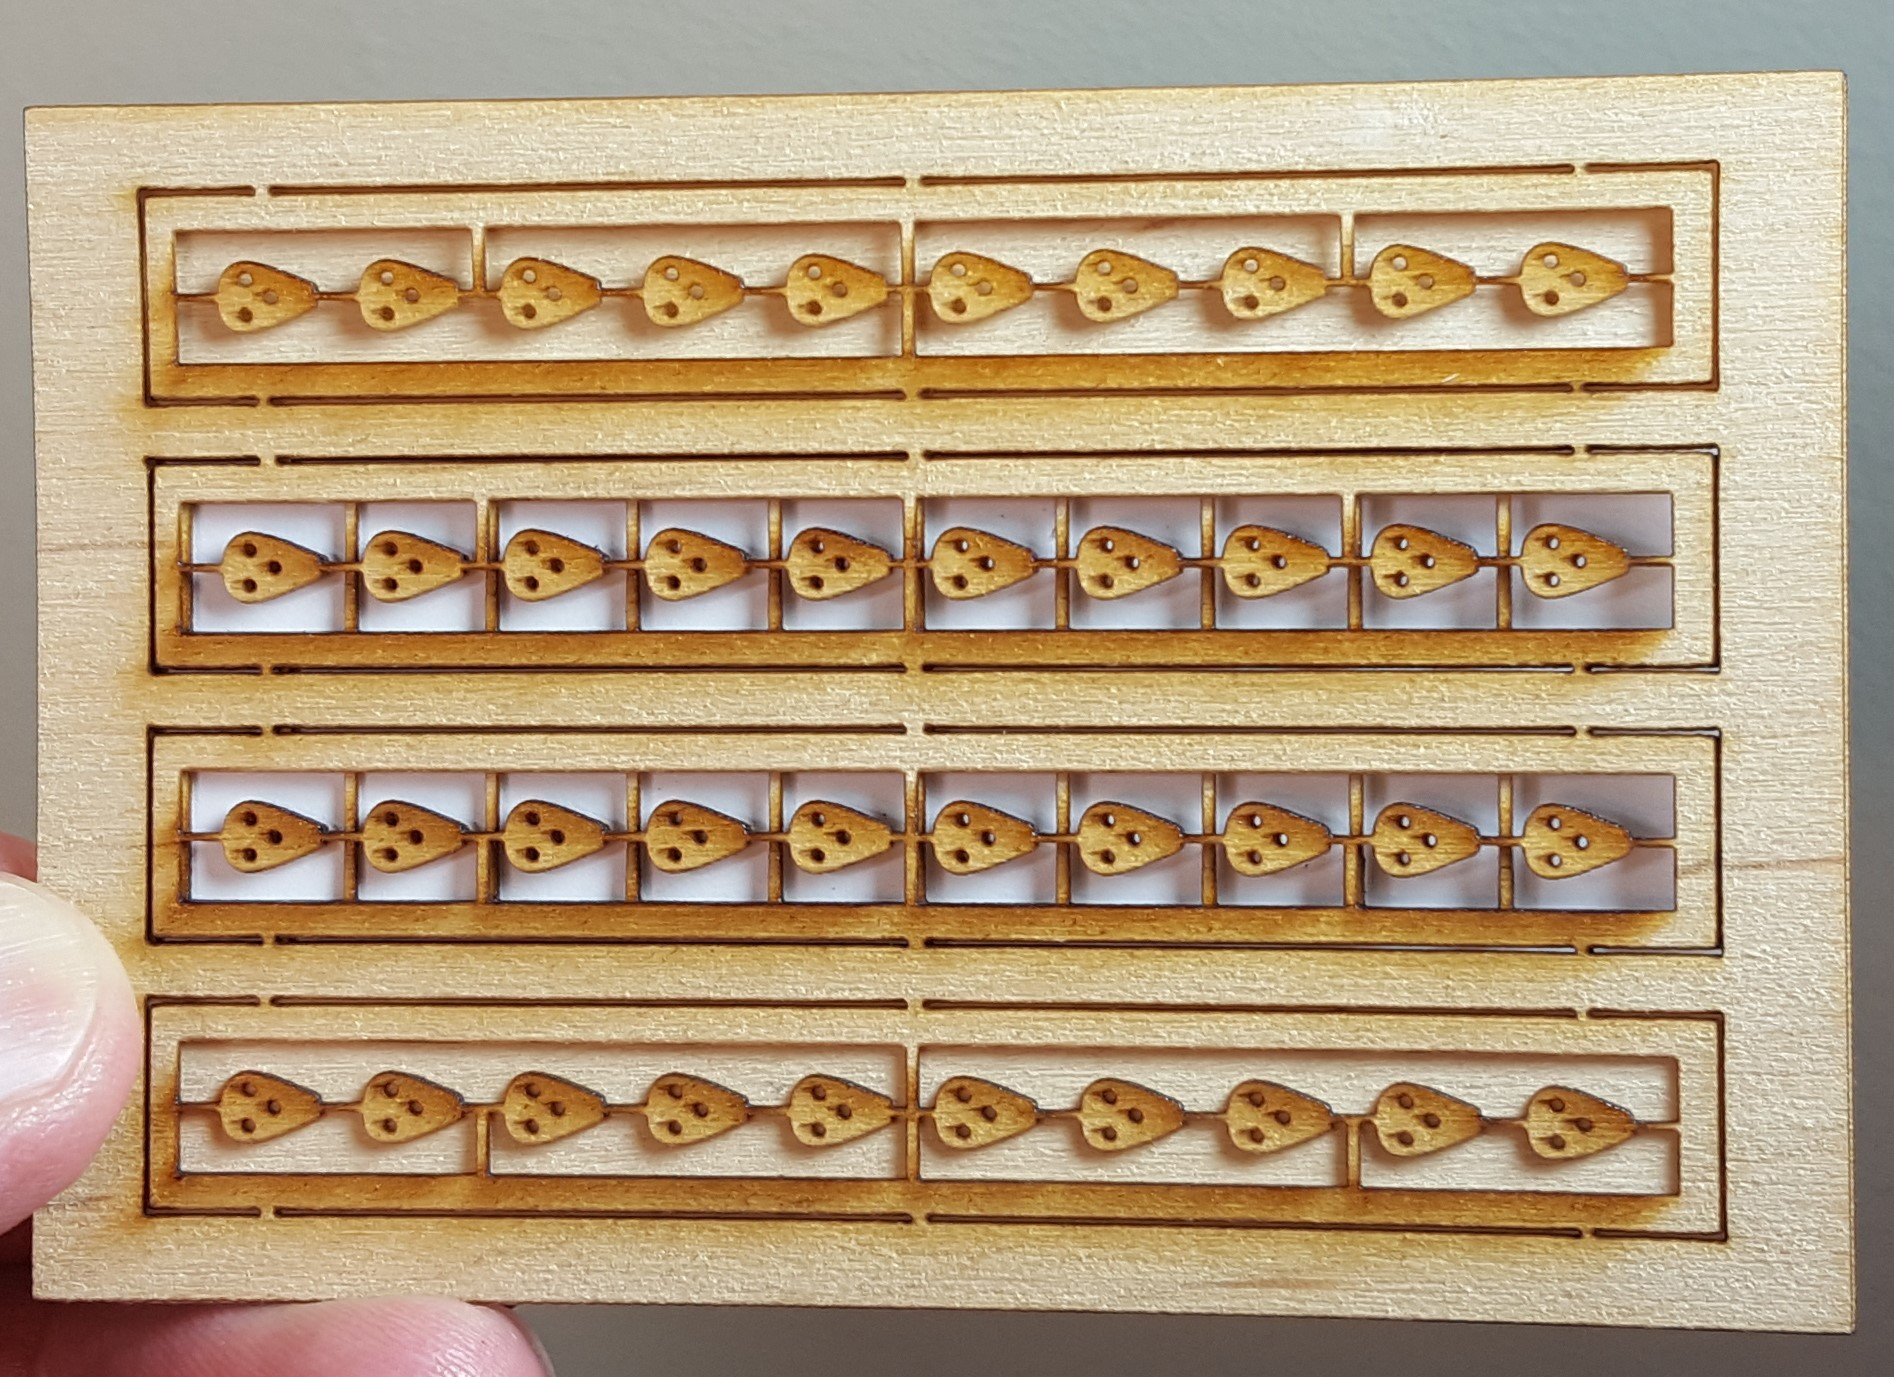
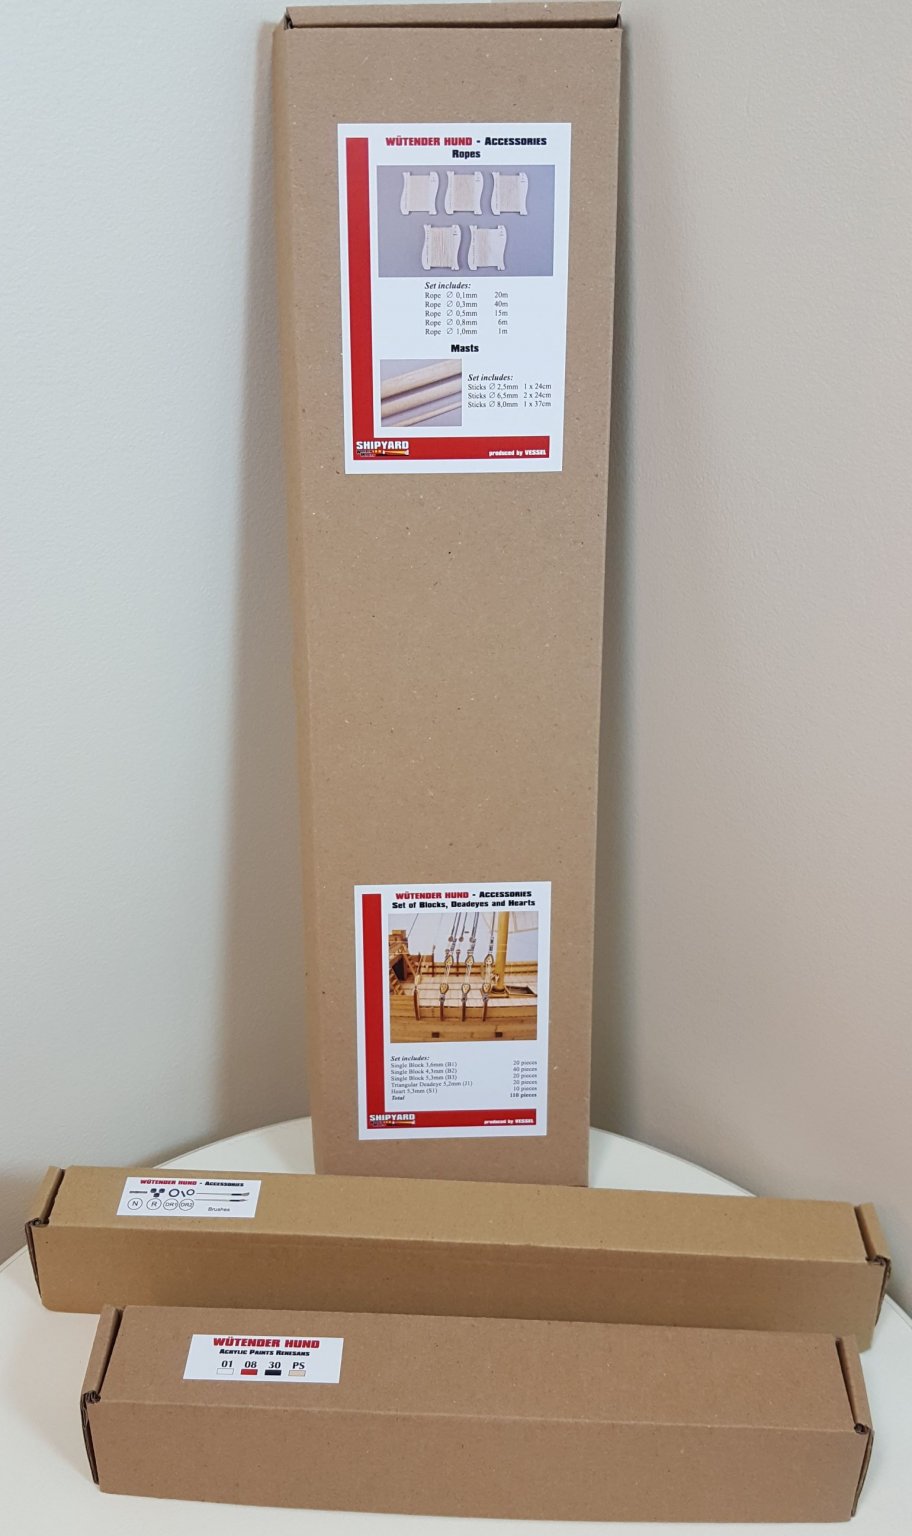
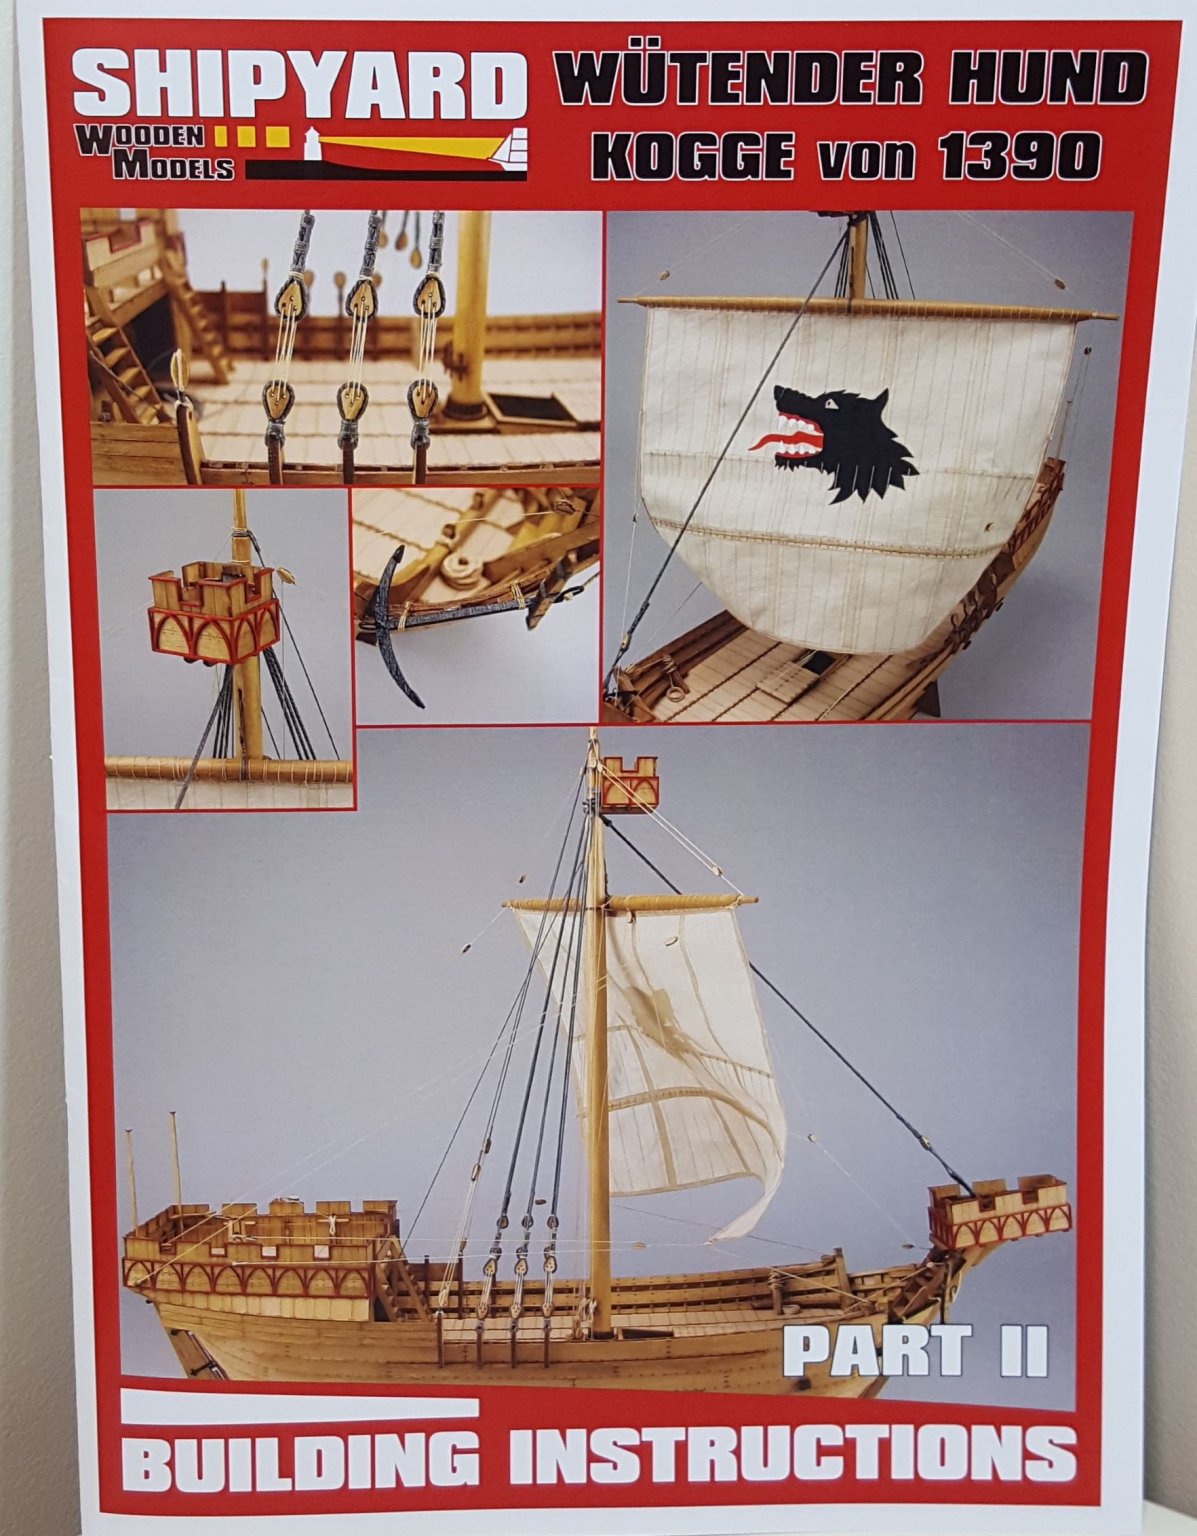
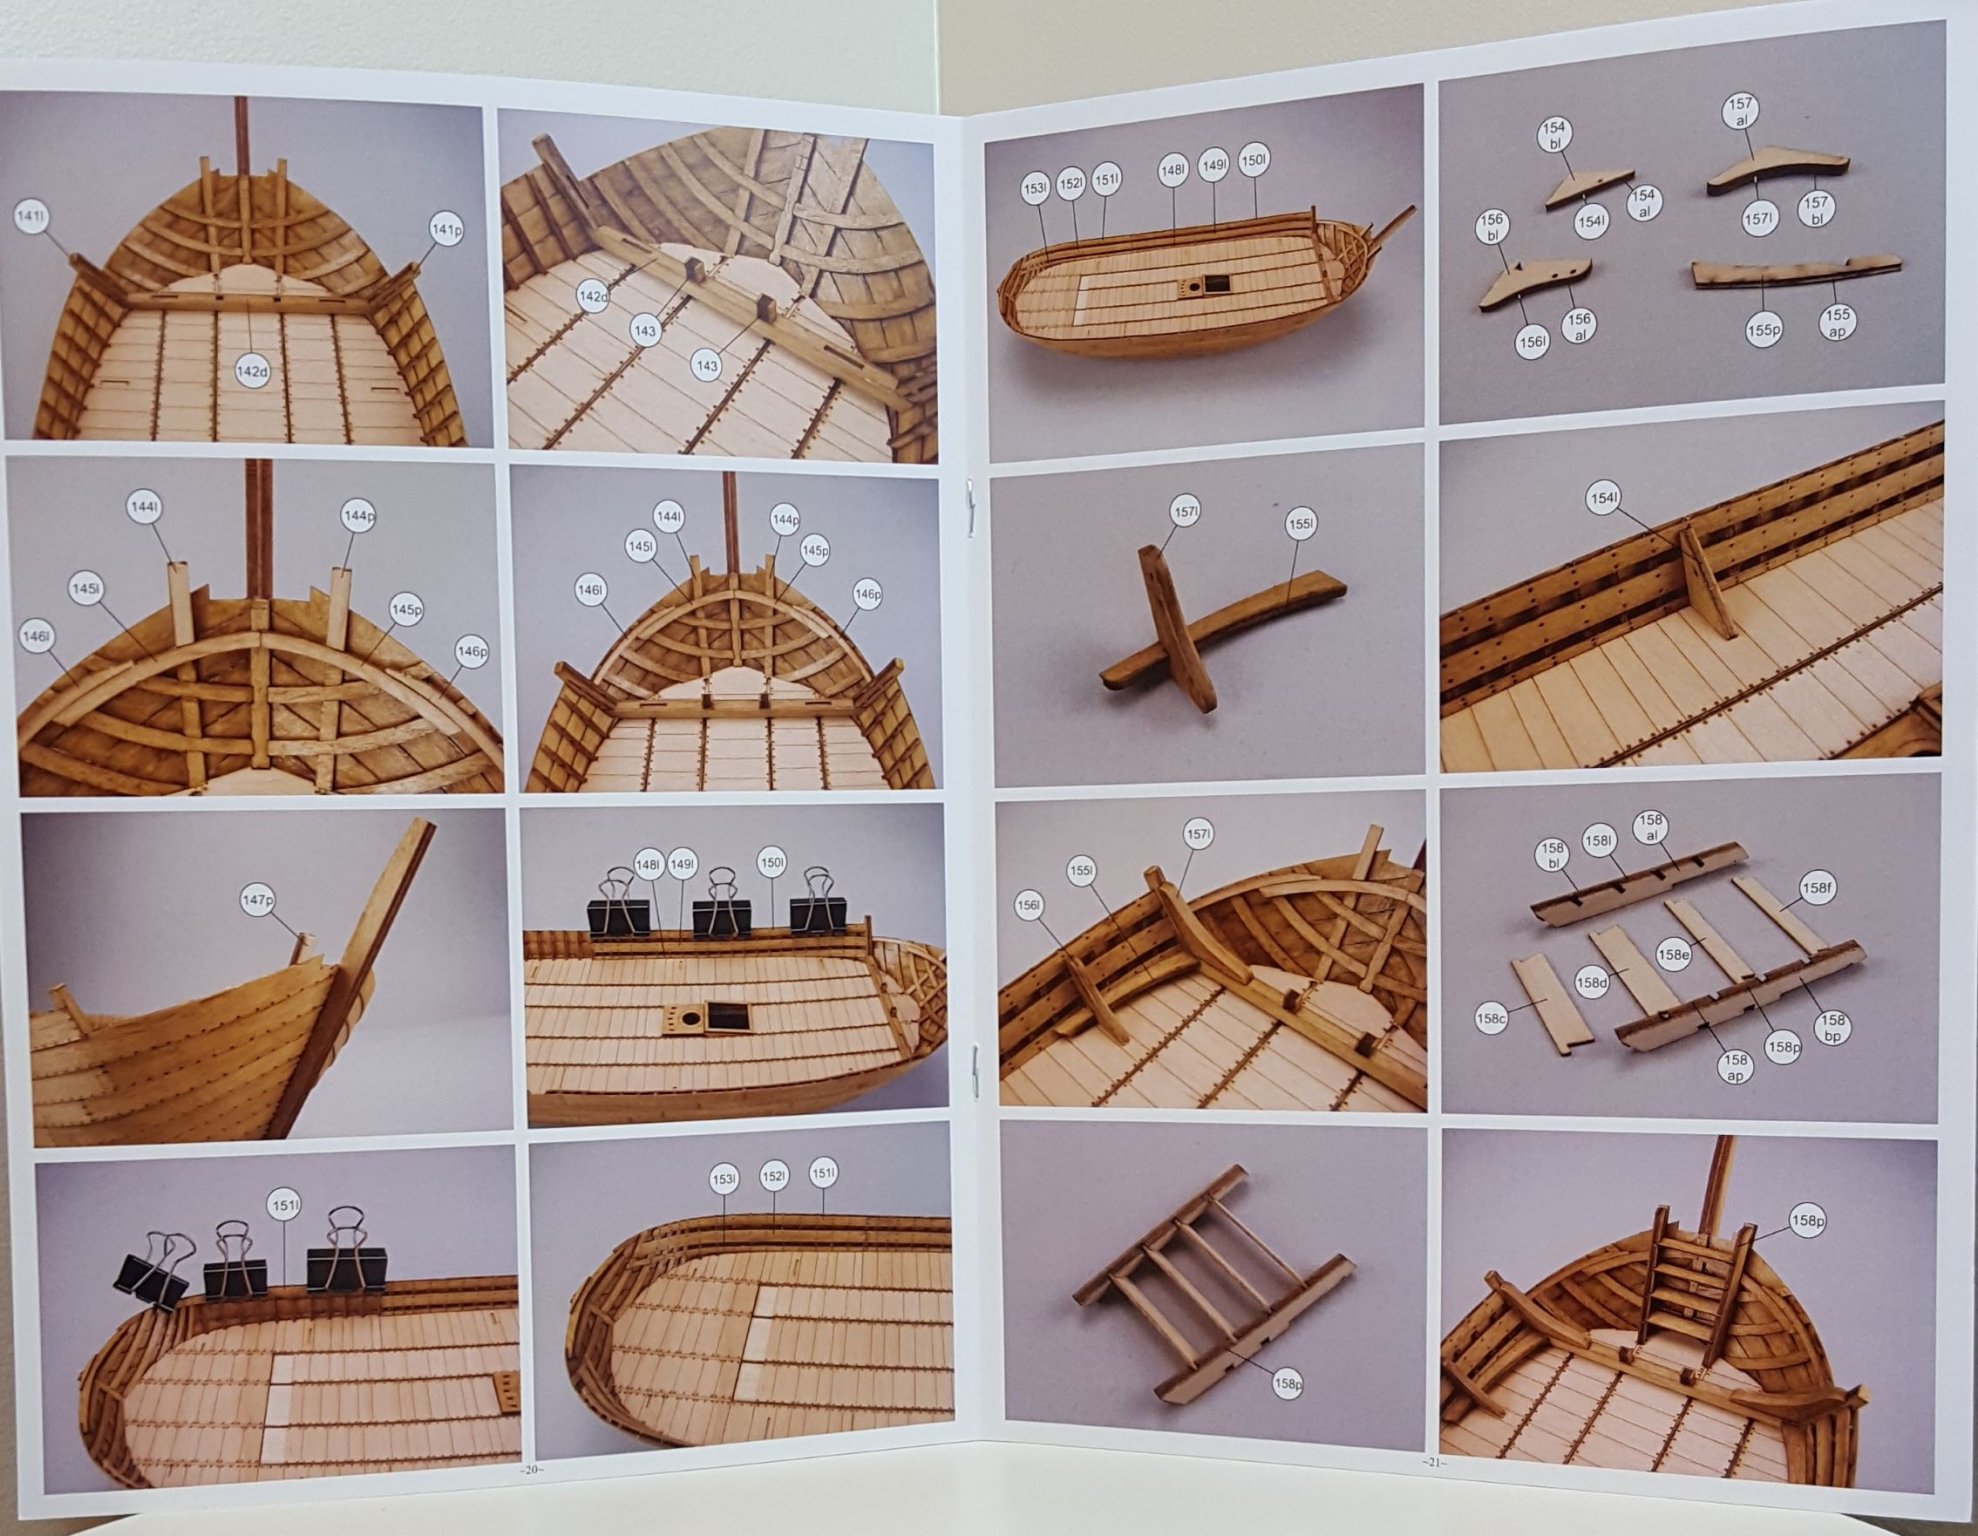
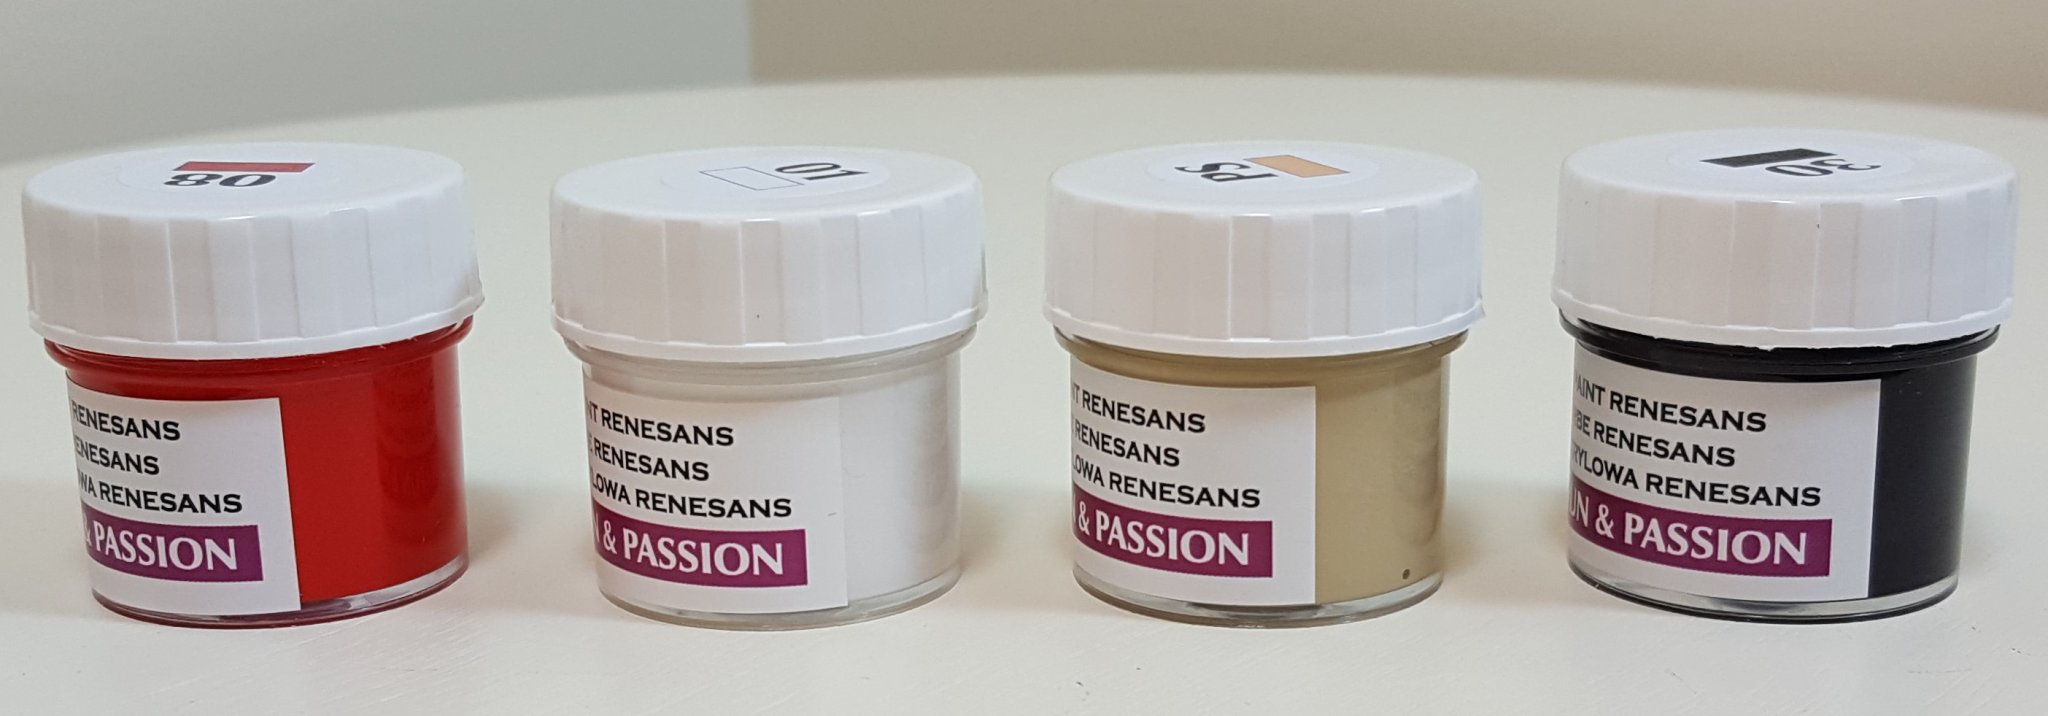
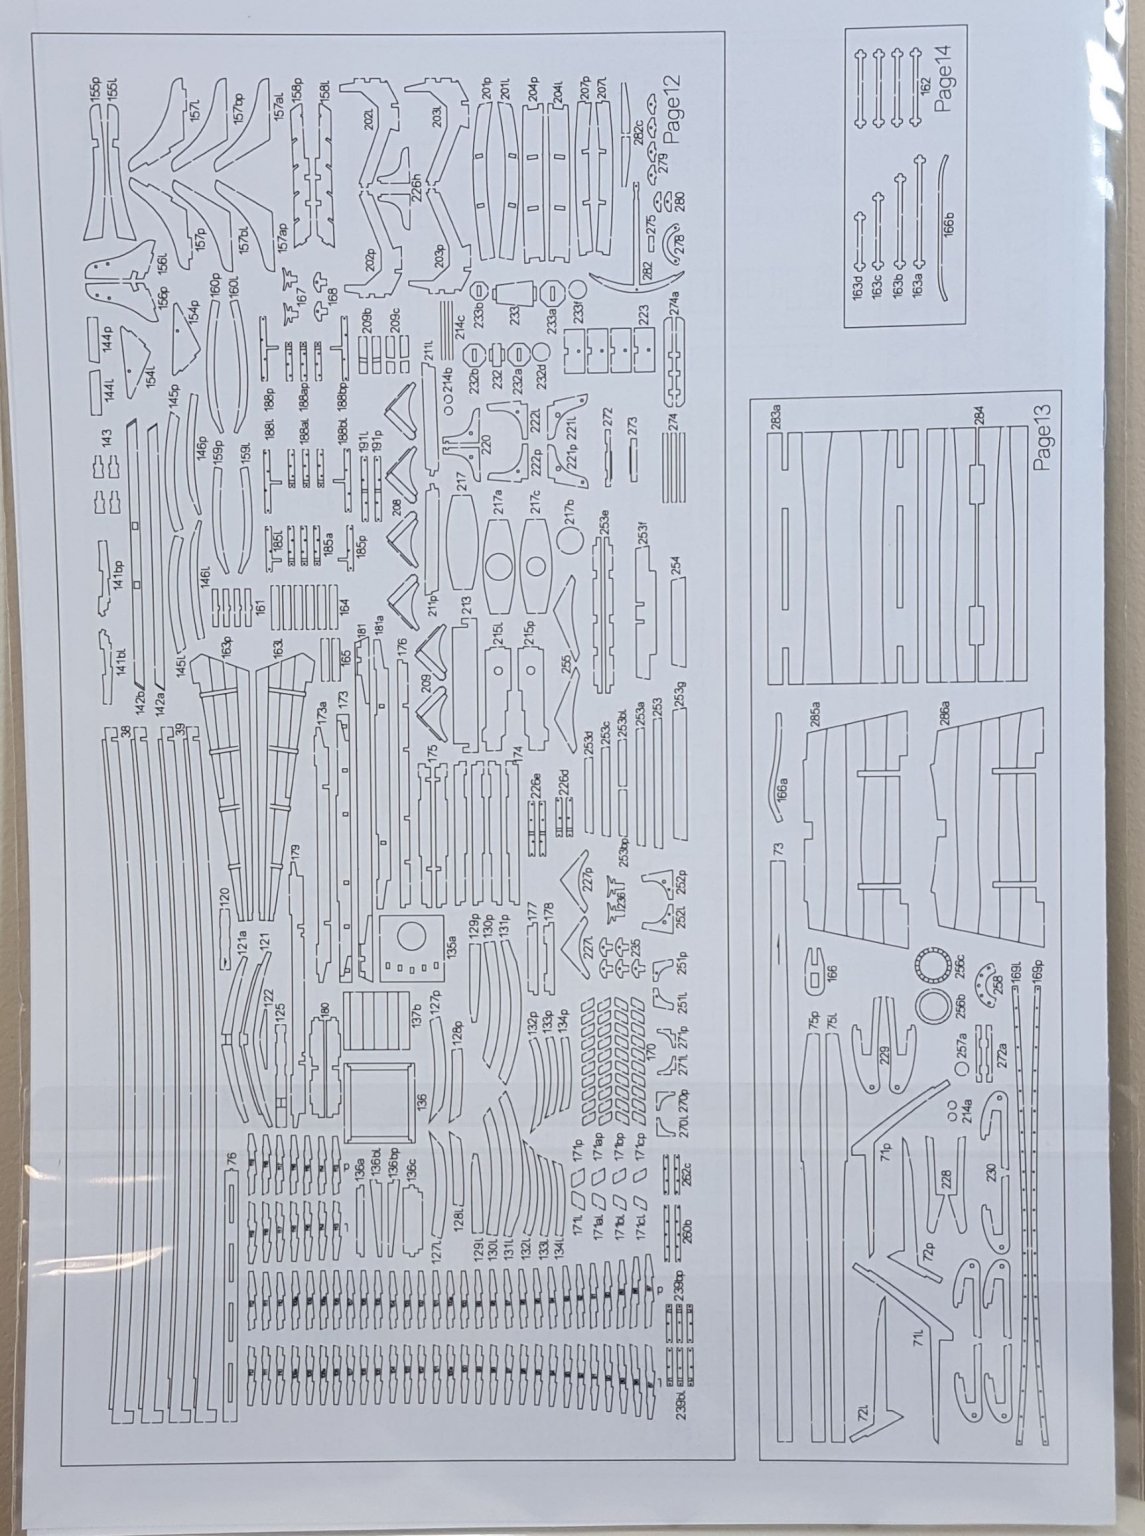
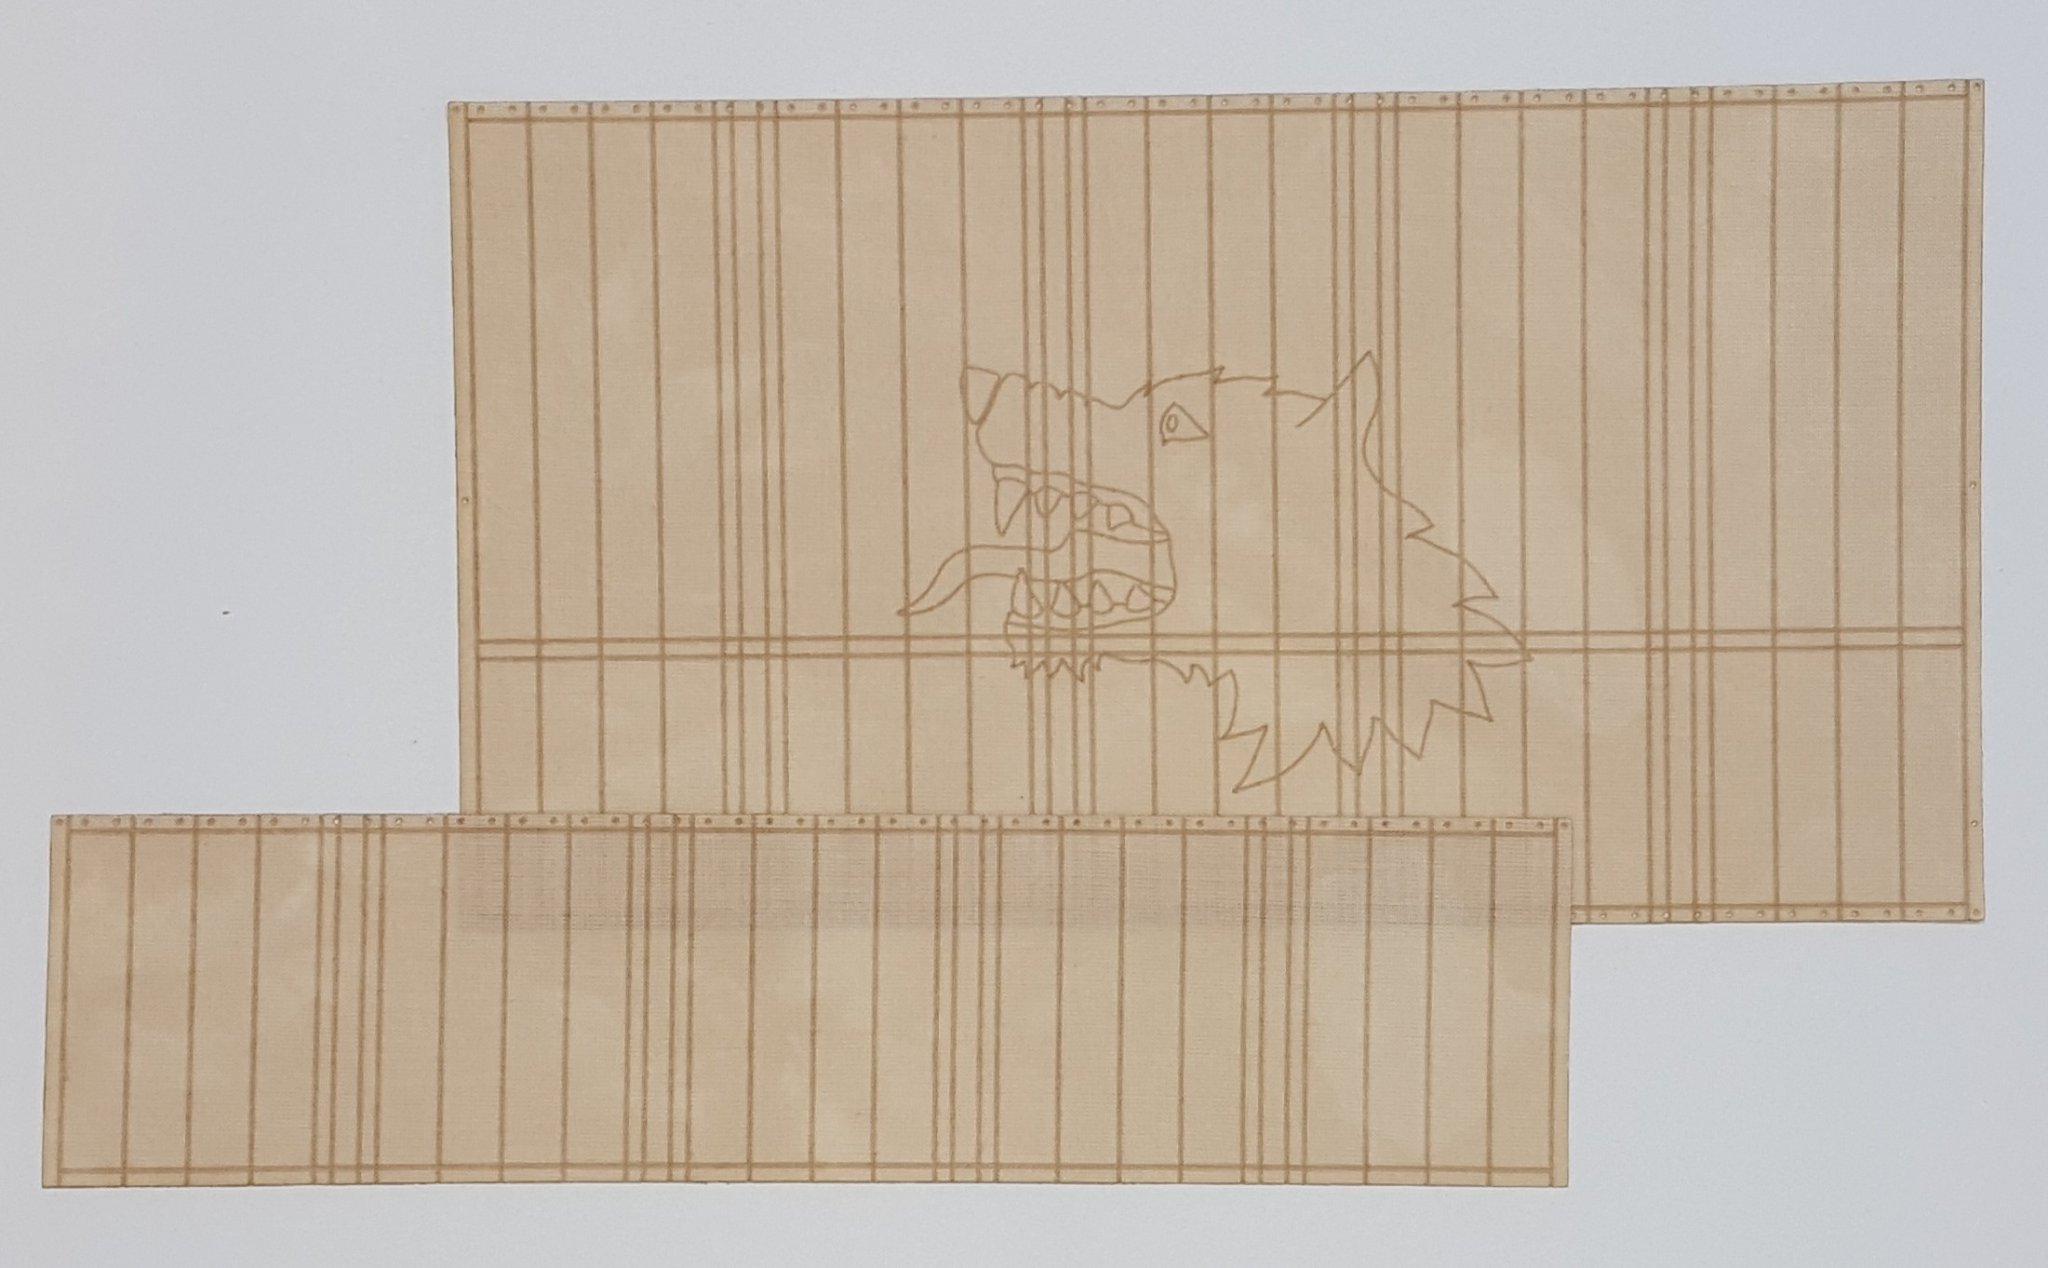
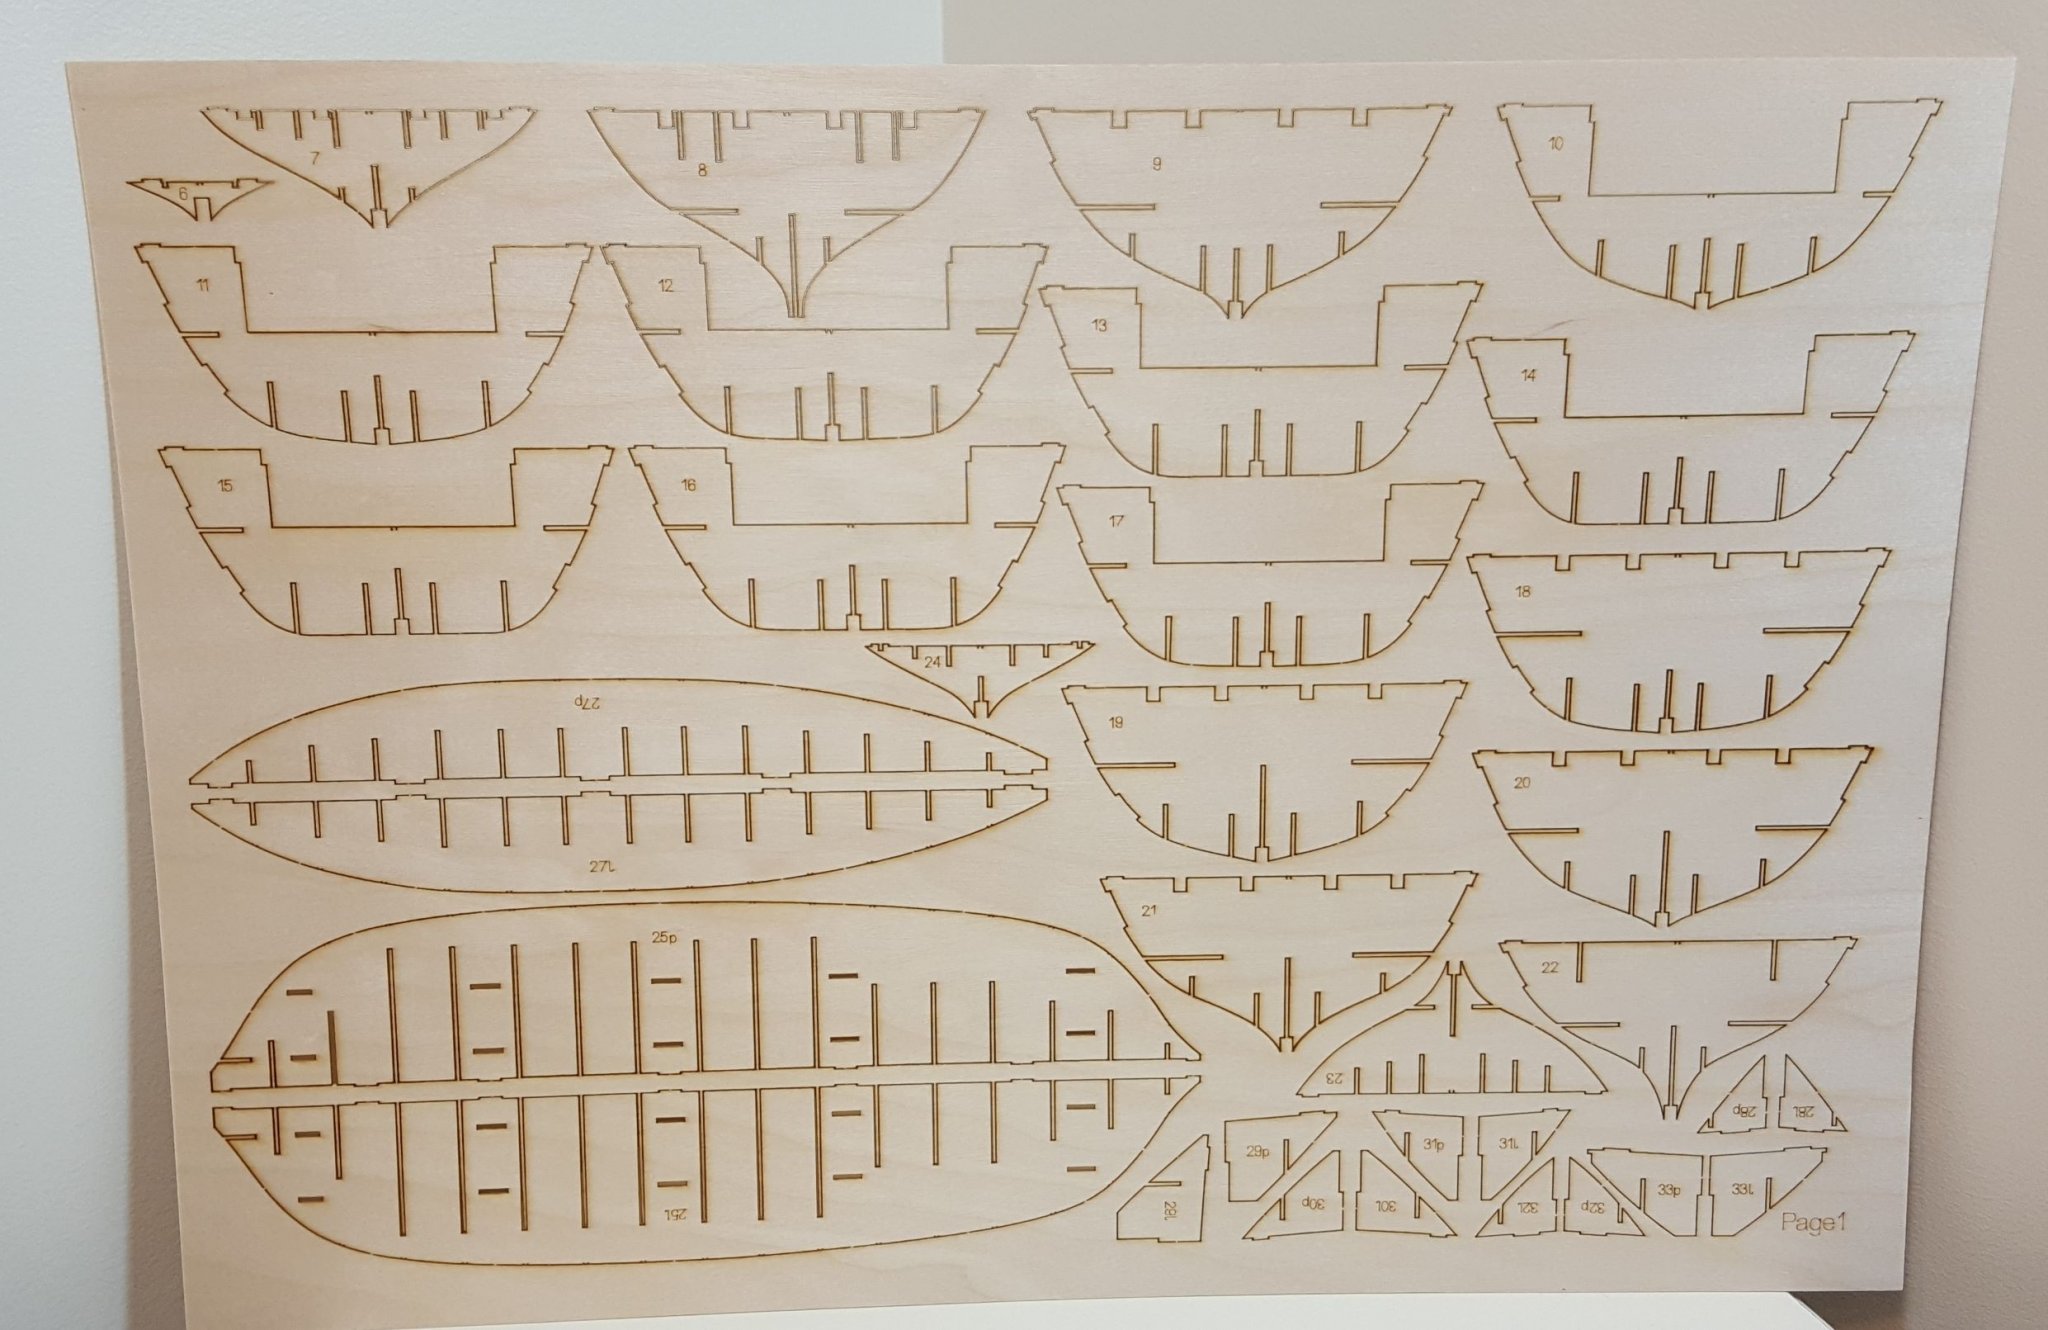
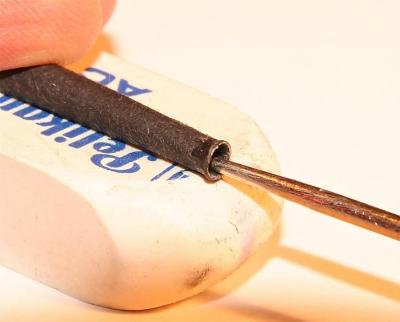
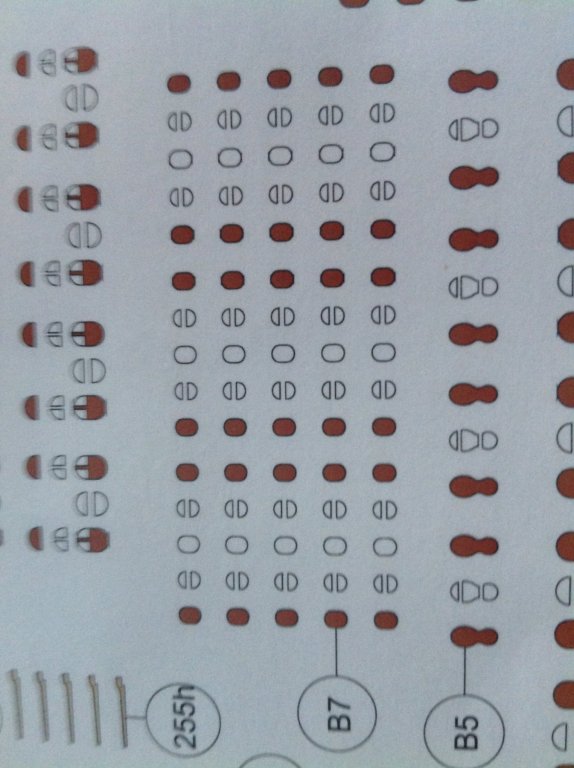
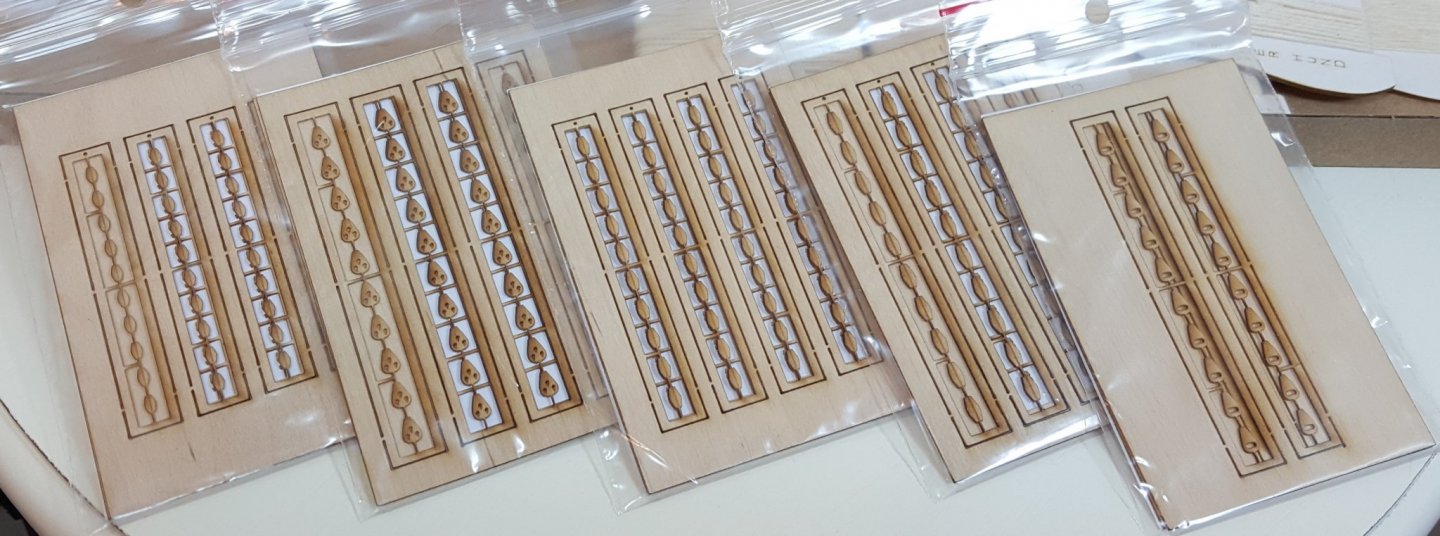
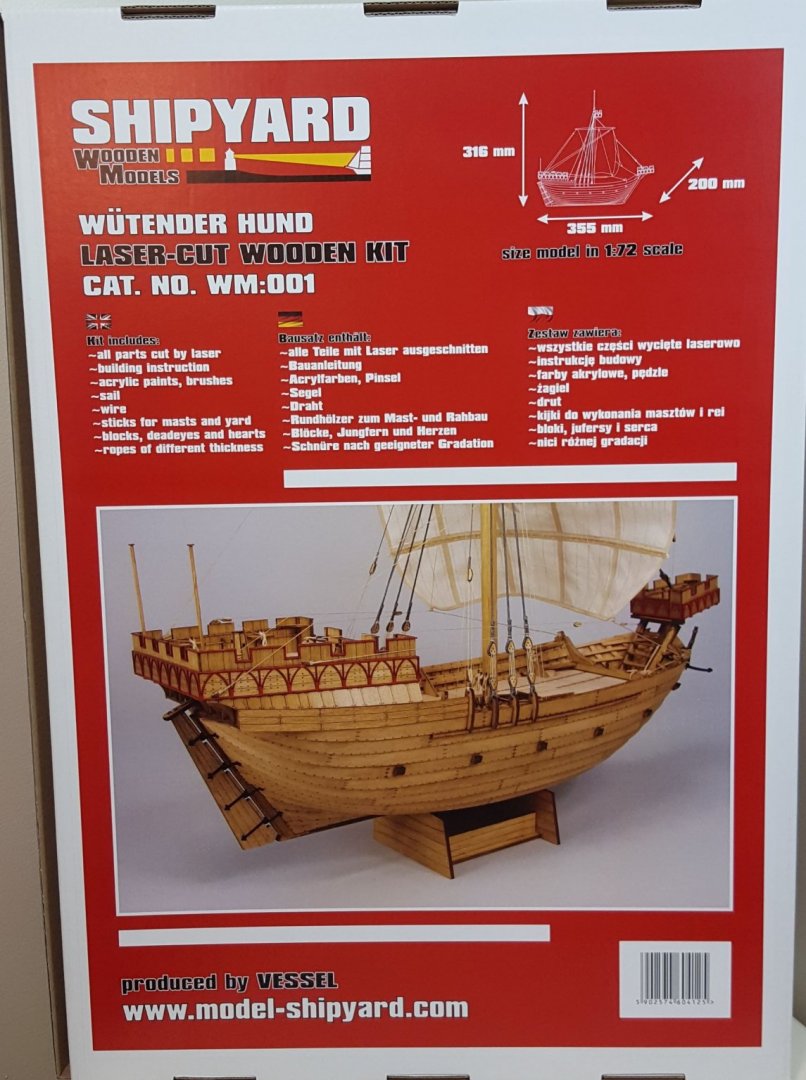
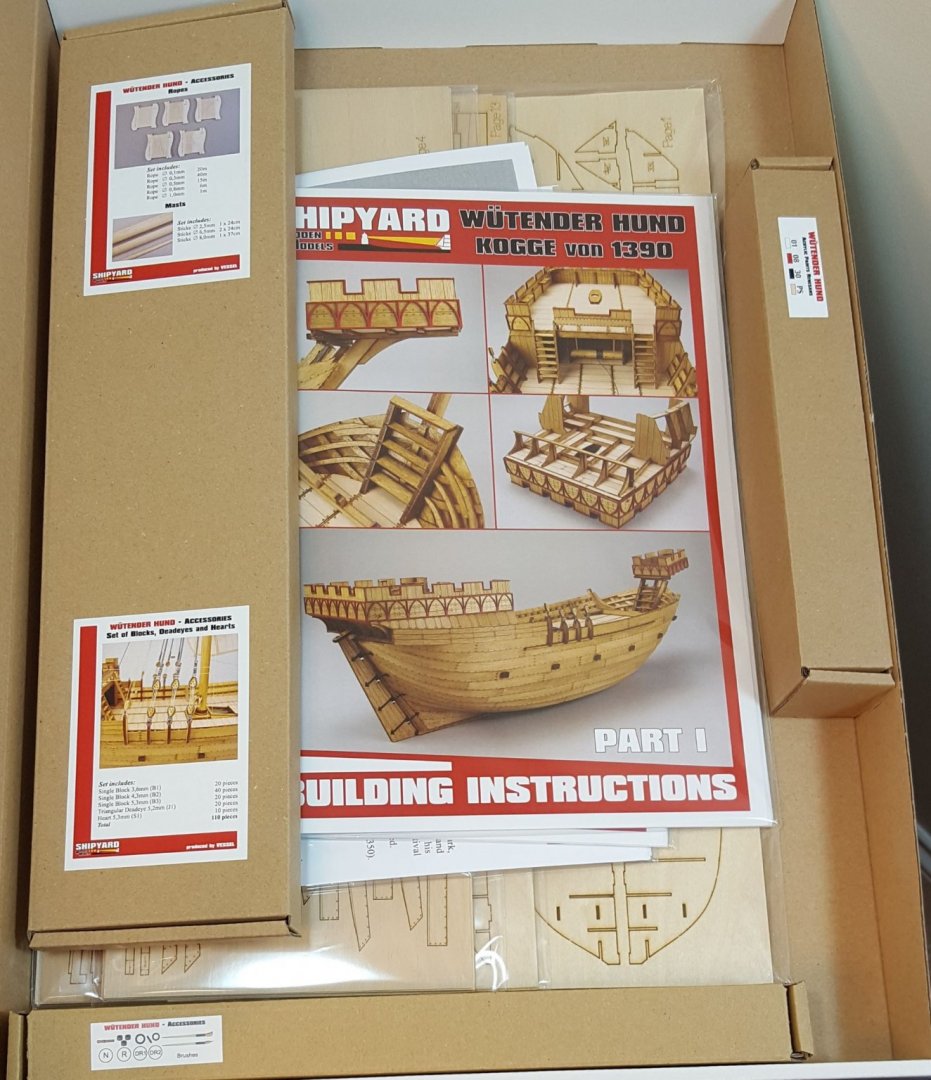
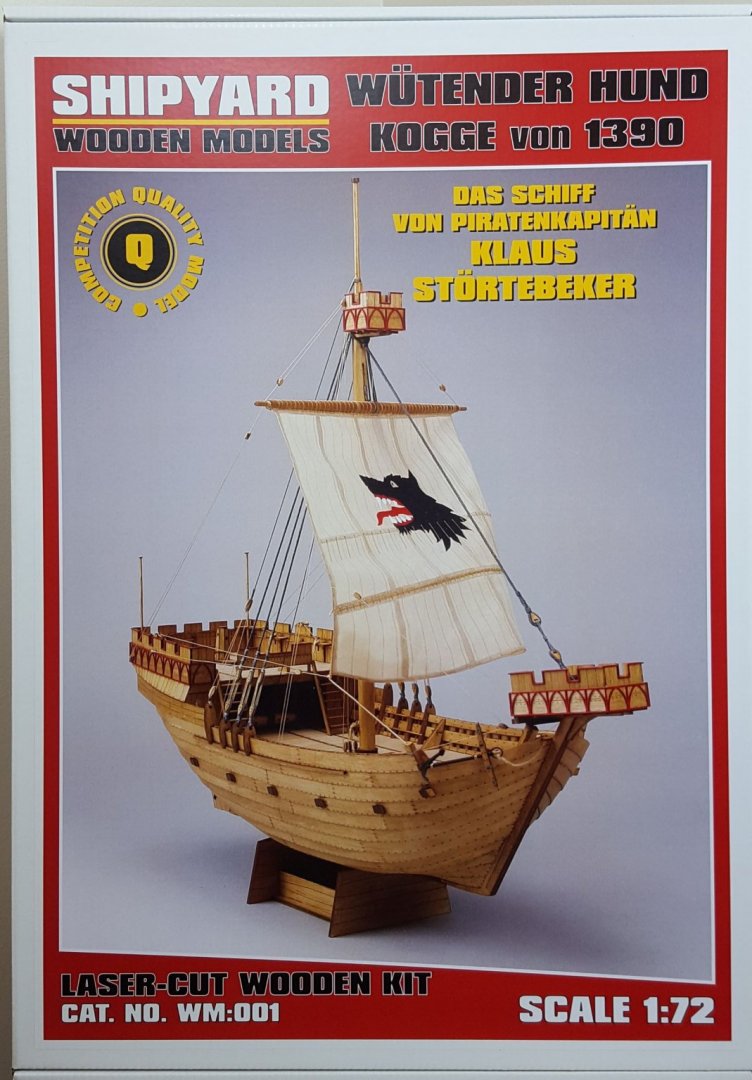
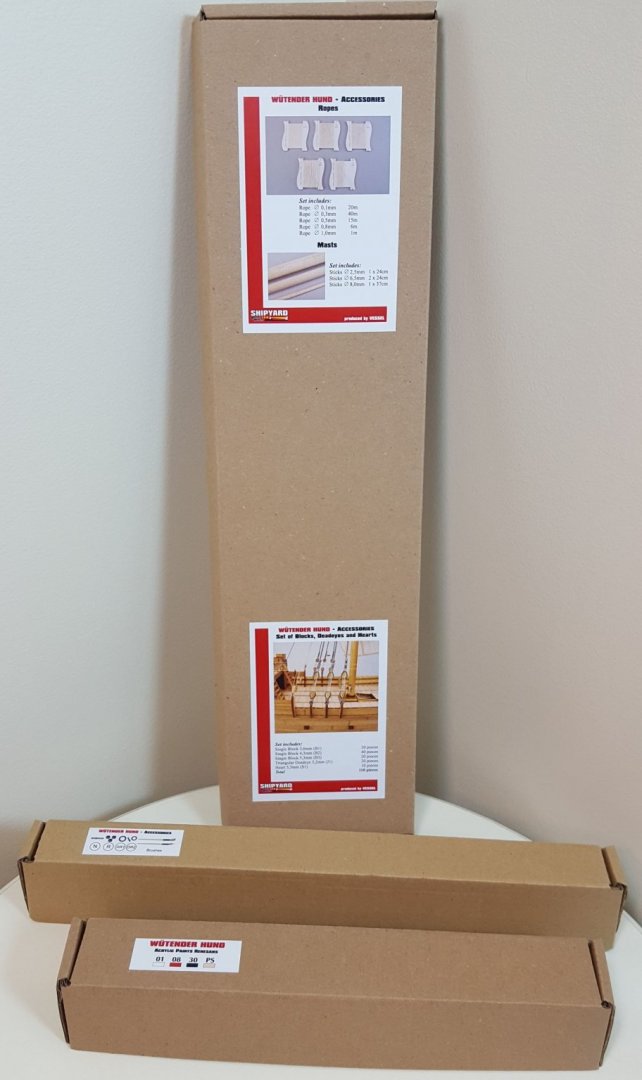
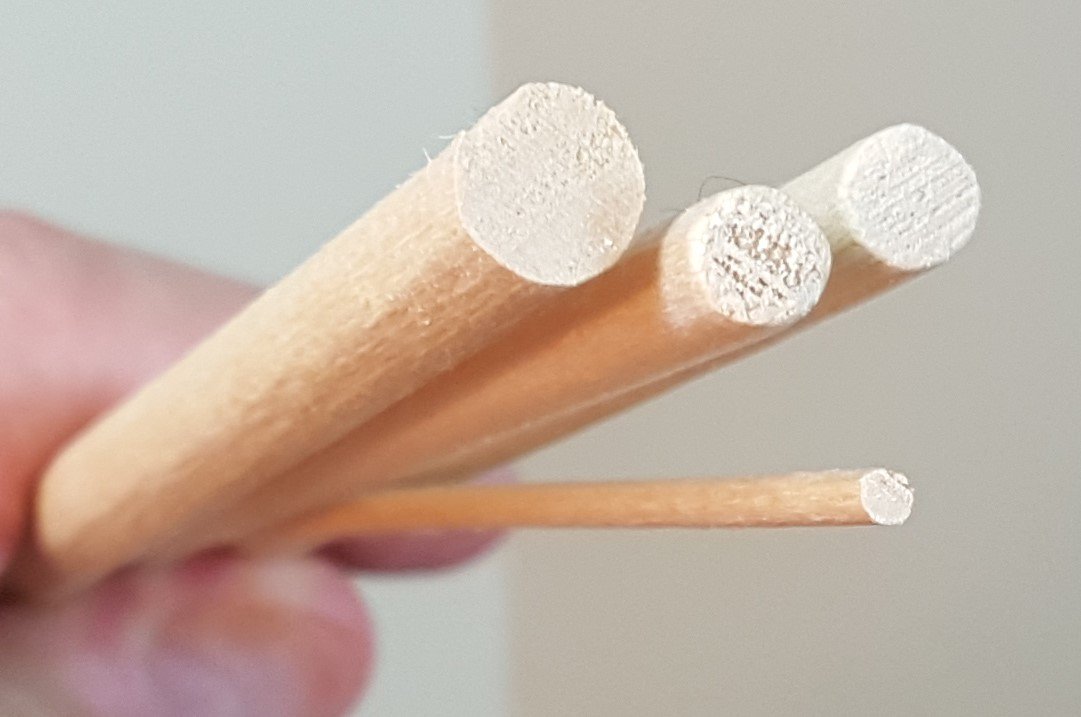
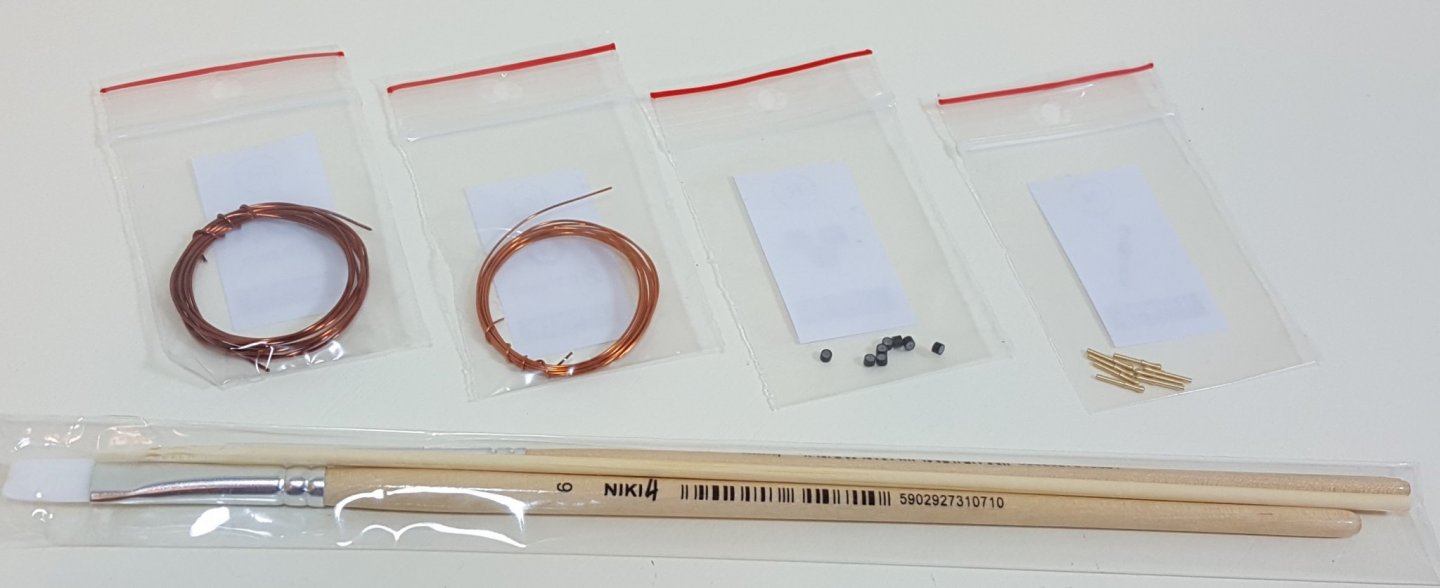
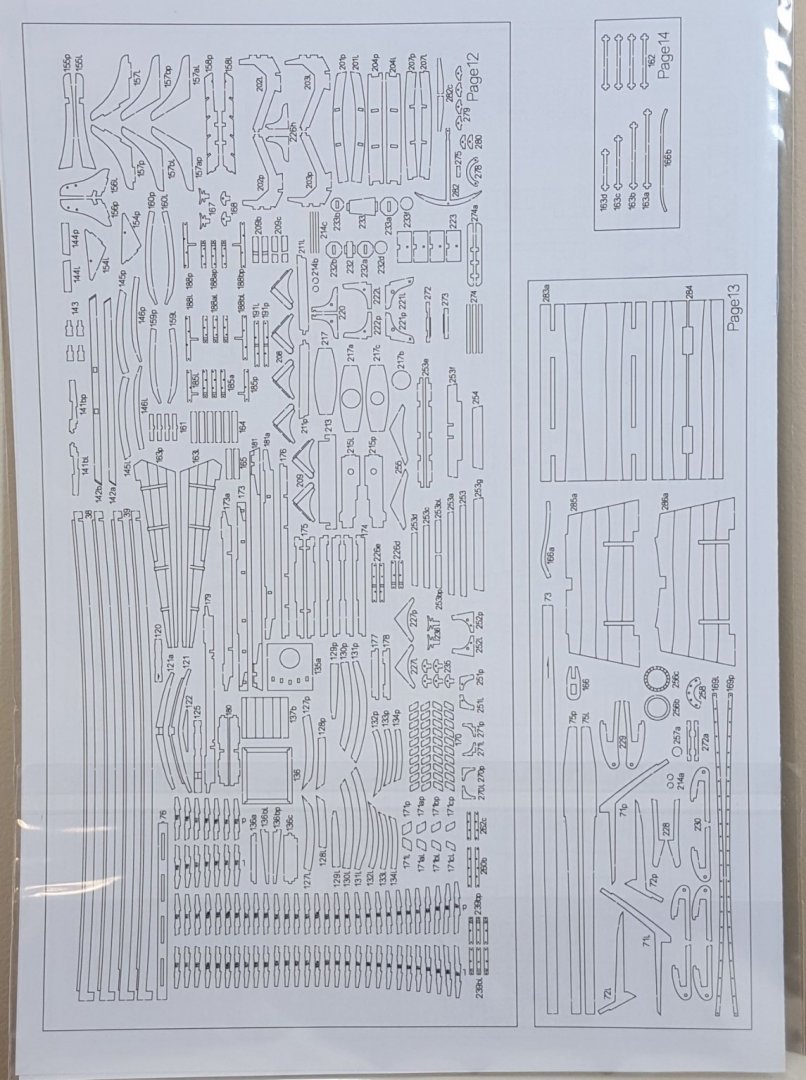
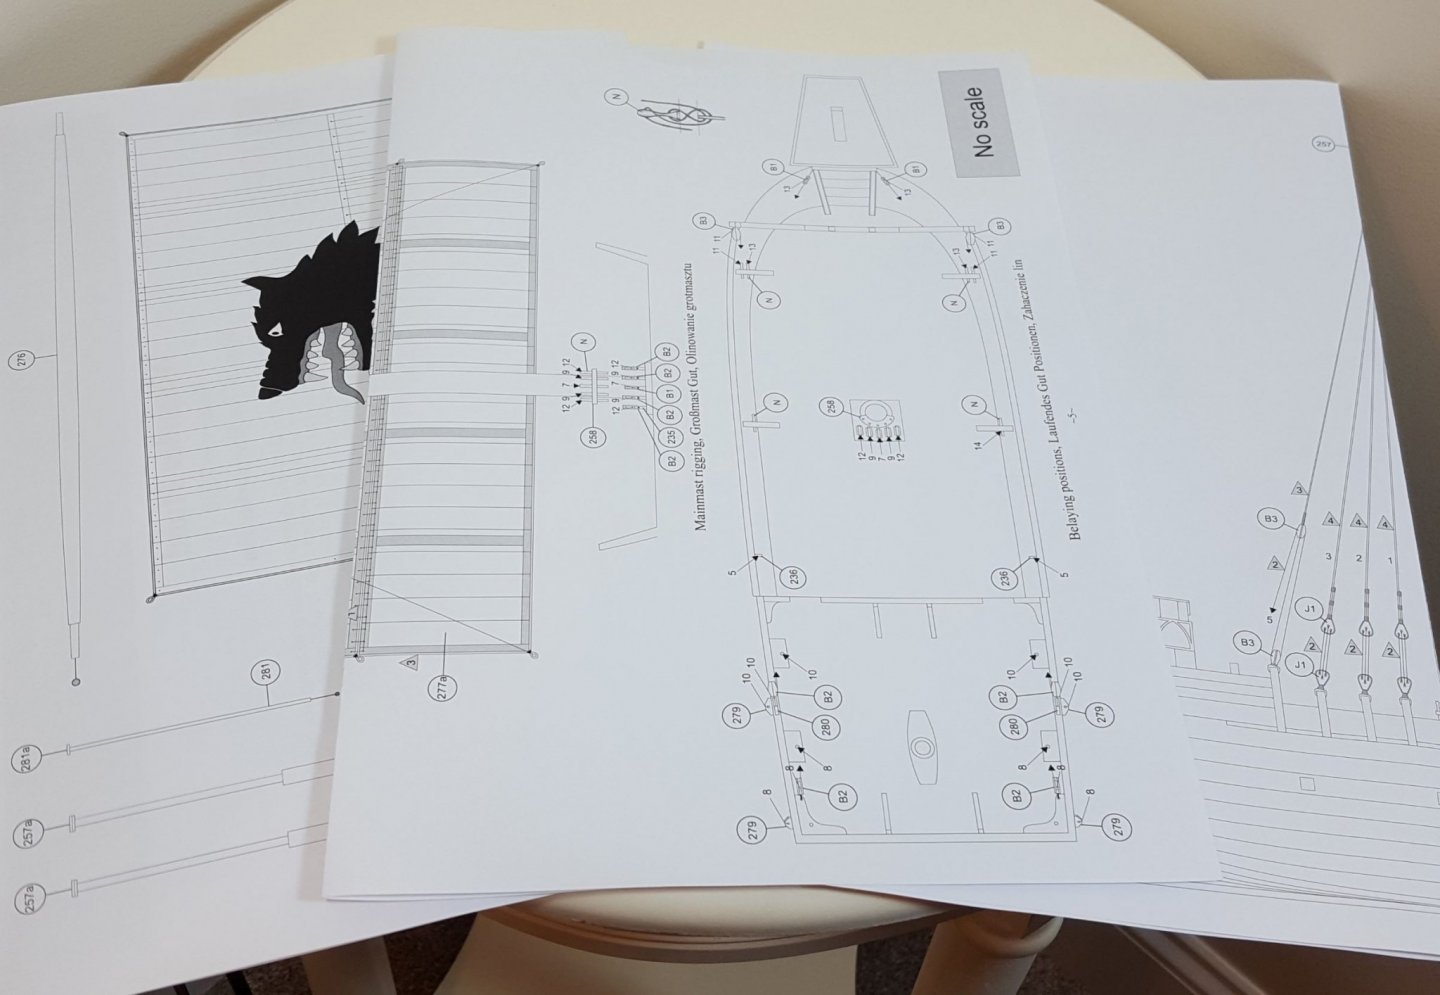
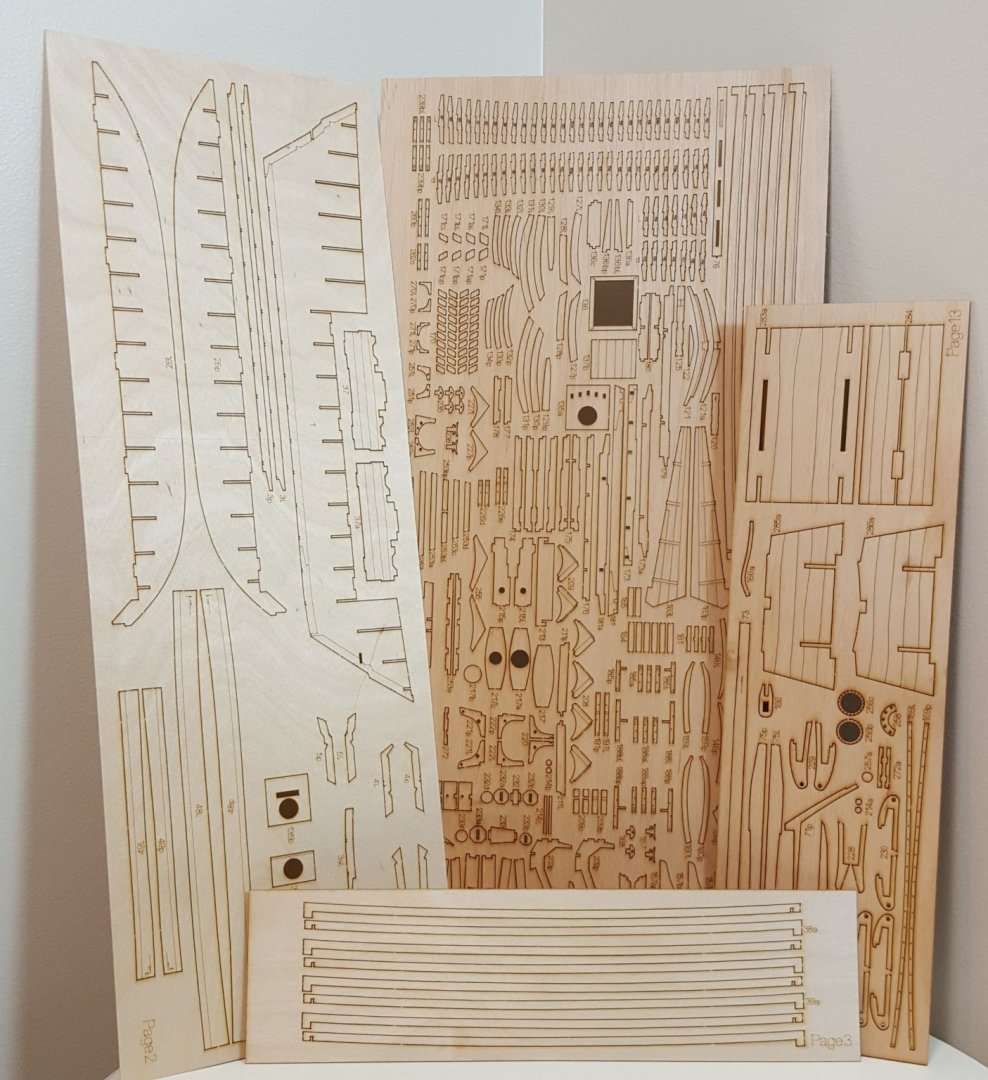
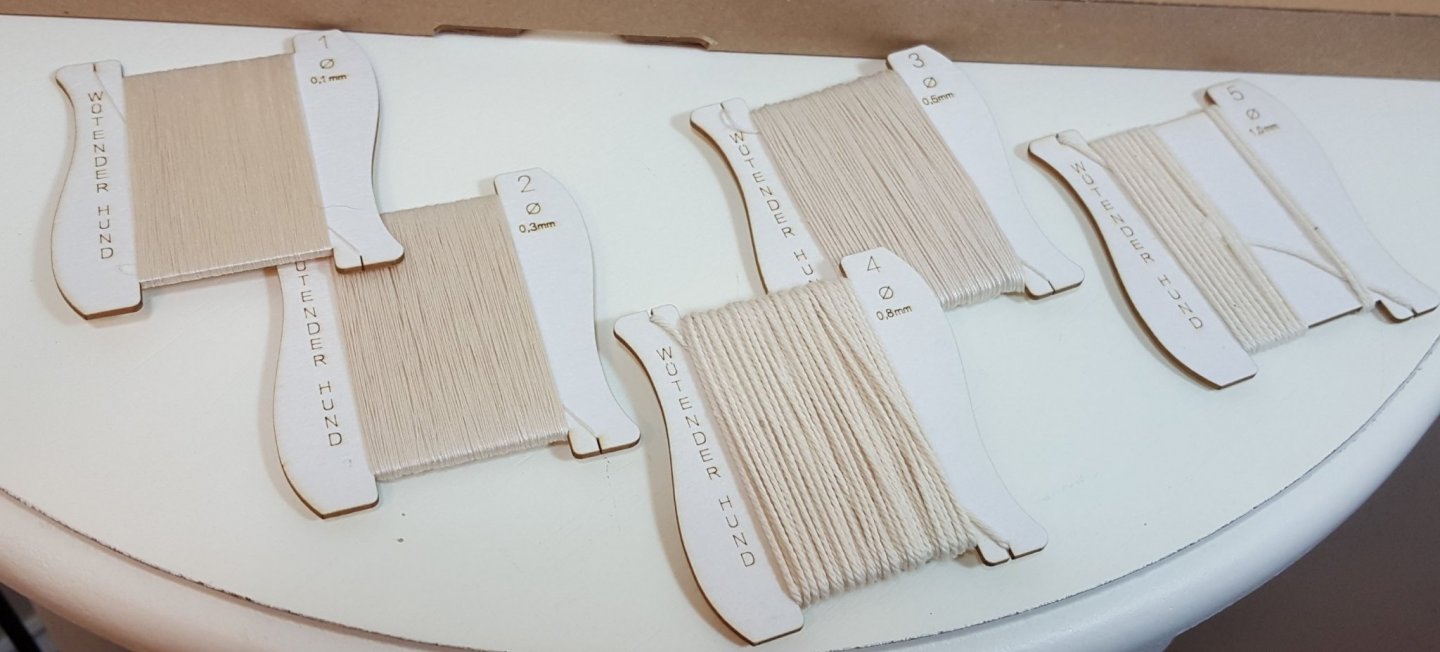
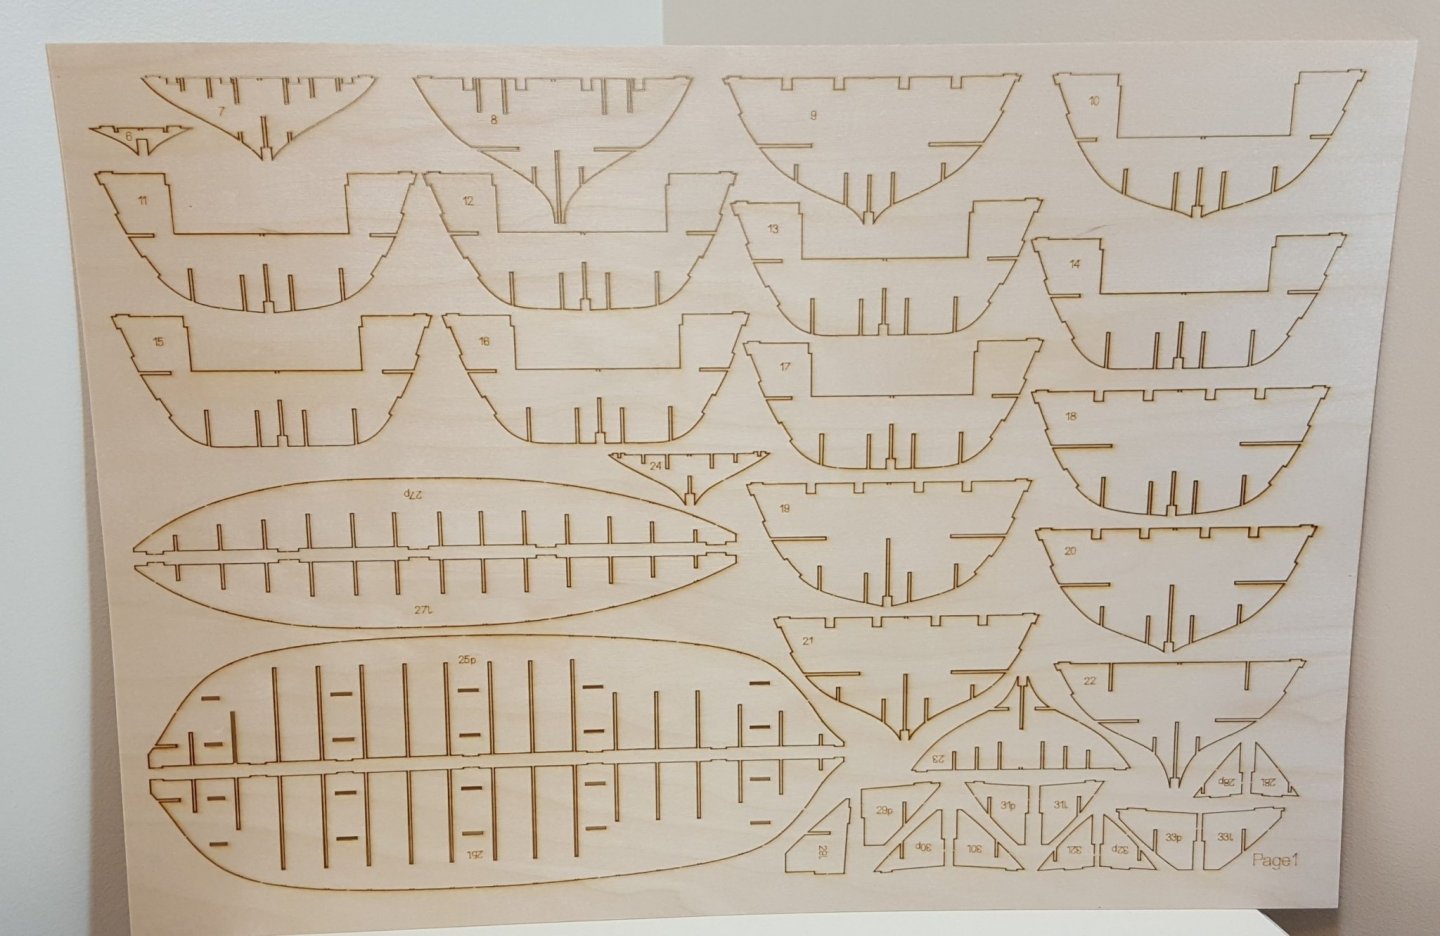
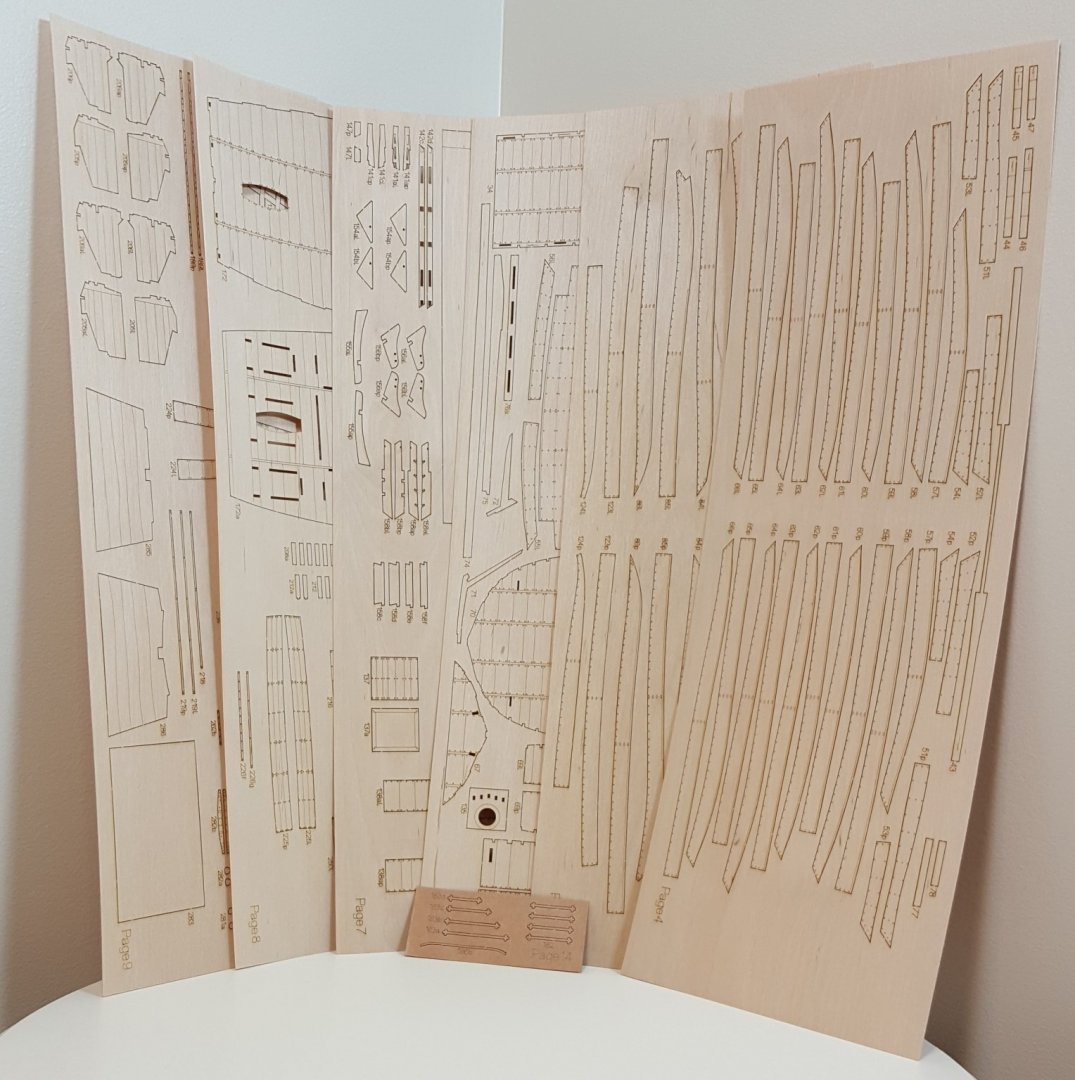
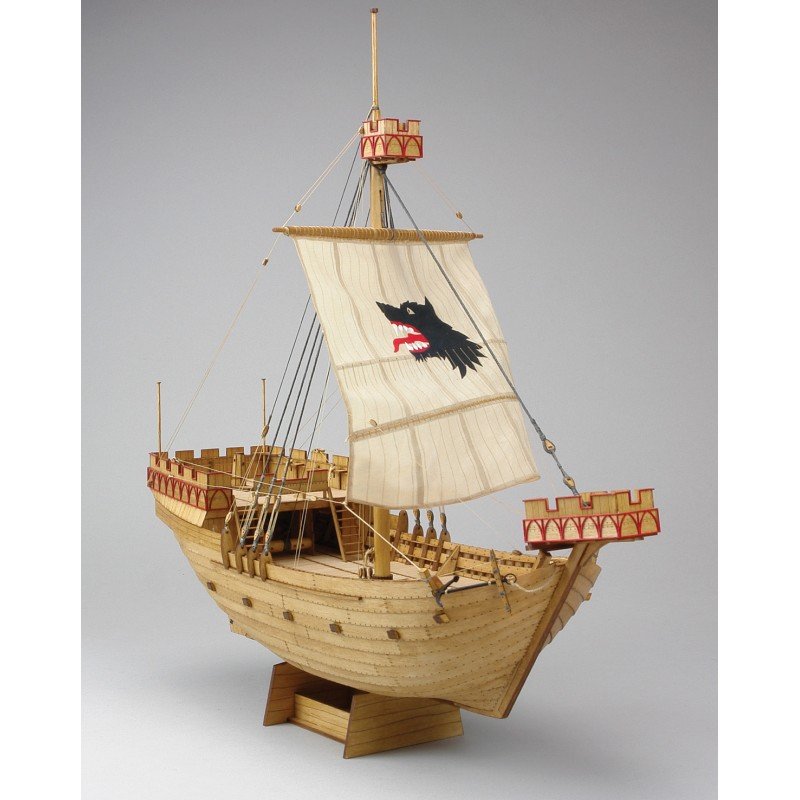
1/72nd Scale Wütender Hund - Privateer Klaus Störtebeker's Cog Shipyard **Now available as of 03/2020** (A note about this review: I am not James! Which means that I do not currently possess a slick photography setup, nor do I have photogenic hands. 😋 Judge the photos accordingly!) Polish designers have been in the vanguard of card model kit development for decades. One Polish company, Shipyard, has established a deserved reputation for high-quality card model kits of sailing subjects, usually in 1/96th scale. A few years back, they started producing what they call, thanks to the vagaries of translating Polish into English, “laser-cardboard” kits in 1/72nd scale. These kits included laser-cut parts, a set of laser-cut formers, and all of the fittings and materials—including paints and brushes—needed to finish the model (everything except glue). With the release of Wütender Hund, Shipyard have now entered into the wooden kit market as well. After all, paper is just processed wood, right? When I first read about this impending release, I was keen to find out if Shipyard’s venture into wooden kits would produce something on par with their top-notch paper kits. After a quick glance through the kit’s contents, I think that it’s safe to say that Shipyard has come up with a winner. Ready? Then let’s take a look! Wütender Hund was the vessel captained by Klaus Störtebeker, the leader of a group of North German privateers that were active at the end of the 14th century. The ship is an example of a cog, a common type of merchant vessel during the Middle Ages. The name “Wütender Hund” roughly translates as “mad dog.” When completed, Wütender Hund is 355 mm long by 316 mm high and 200 mm wide. Upon its arrival at my door after its long trip from Puszczykowo, Poland, I was pleased to find that the good folks at Shipyard had packed the shipping box very well, with plenty of cardboard to stiffen it and packaging peanuts to help it survive stops in Poznan, Arnhem, Cologne, and Liege on its way to America. Neither the kit box packed inside nor its contents were damaged in any way. The kit box itself is 500 x 350 x 50 mm in size and features bold graphics, details about the kit, and photos of the prototype model. It comes protected inside a clear plastic shell. Opening the box reveals three smaller boxes along with plans, instructions, and sheets of laser-cut parts packed in clear plastic sleeves. There was no packing material inside the box, but then again there isn’t really anything inside that could be damaged by simply sliding around. We’ll start by unpacking the mysterious inner boxes! Inside the largest of the boxes are rigging materials. Wütender Hund has a very simple rig, having only a single mast and one yard, so there isn’t a whole lot of dowels in the kit—three, to be precise (the smallest-diameter dowel is intended to be used as a glue applicator). One dowel had a slight bend at one end, but the remainder were nice and straight. (I think there's a dog hair in the photo -- I have three dogs, and one of them is a shed-o-matic!) Five diameters of rigging cordage are provided, from 0.1 to 1.0 mm. All of the rigging is left natural; tarred rigging will need to be colored. Blocks and hearts are laser-cut. Each block or heart is built up from multiple layered parts. The inner parts are smaller than the outer parts, so that the finished hearts will have a groove for stropping. (Edit: Having now built up a few of the blocks, I can say that these turn out very nicely.) Moving to the next box, we find individually bagged materials and tools. Two diameters of copper wire are provided for making various metal parts. These and the turned brass belaying pins will need to be blackened. One bag contains tiny pieces of cut plastic tubing that will be used for making gudgeons. Two paint brushes, one square-tipped and the other round, are provided. They appear to be white sable or similar. (Edit: I prefer pre-blackened annealed wire and will substitute that during construction where possible. The cut plastic tubing gets covered by the card stock during the construction process.) In the last box we find a set of four acrylic paints: black, red, white, and beige. (Edit: The paints give very good one-coat coverage.) There are a whopping 14 sheets of laser-cut parts. The laser cutting is very good, and char on the reverse sides is minimal and easily removed. Many of the parts are veneers, so their reverse sides are not even visible on the finished model. The thickest ply sheet contains hull formers. Unlike some wooden kits, these do not have fairing lines engraved on them, but since the bulkheads are thin, they will not need much work in that department. Other parts are cut from different shades of plywood (walnut is my guess), which should produce some pleasing contrasts on the model. Plank seams are laser-engraved. (Edit: After completing much of the hull, it's safe to say that the plywood quality has been very good, no matter the thickness of the sheet. There are a few blemishes here and there, which is to be expected in plywood. The plywood takes stain very well on the engraved side, but the reverse side not so well; this affects relatively few parts of the model.) The thinnest sheets contain veneers that will be applied to various parts of the model. These also have laser-engraved details, which I personally find rather remarkable when considering how thin these actually are, i.e. engraving lines nowhere cut completely through the material. The smallest sheet is brown card stock and contains parts that will need to be painted to simulate ironwork, such as rudder hardware. (Edit: I'm not sure what kind of stock is used for the iron work, but it is tough, molds to contours well, and after painting does a very passable job of looking like real iron work.) A complete suit of pre-cut and pre-printed sails (two -- whoa, nelly!) is included. The striking “mad dog” will need to be painted. As you can see, that’s a lot of parts! Happily, a complete parts list is provided, featuring labeled drawings of every parts sheet. Sixty-four pages of full-color instructions in two booklets walk the builder through the construction process. Book 1 covers hull construction, while Book 2 covers masting and rigging. (Edit: The photo instructions have been great! There have been only a few minor questions raised about what exactly to do, but so far I have been able to figure everything out. If anything, there might actually be more photos than than are necessary, but I'm not going to complain.) The instructions are almost entirely photo-based and include very little text, but the build sequence is thoroughly outlined by the high-quality and plentiful photographs. This format will feel familiar to card modelers. Two single-sided and one double-sided plan sheets are included. These include hull plan and profile views, masting and sail plan, and rigging plan. Shipyard’s extensive experience with both laser-cutting and the production of card model kits has enabled them to do a superb job of bringing to market what is essentially a card model in design that is constructed in wood rather than paper. (Edit: This extends even to having to attain proper parts thicknesses by laminating two or more parts together. Again, this is familiar to card modelers, but may be something unexpected to modelers who have only built the usual kinds of wooden models.) The quality materials, colorful instructions, and attention to detail suggest that Shipyard are sincere in their desire to bring together the best of both modeling media. Have they succeeded? I think they have, and I’ll probably find out for certain in the near future, as this kit practically begs to be started sooner rather than later. My sincere thanks go to Shipyard for providing this kit for review, and I hope that it becomes a big seller for them. For those interested in buying the kit, Ages of Sail, an MSW sponsor, is the US distributor of Shipyard products. For those wishing to stick to card models, Shipyard also offer a laser-cut cog kit in 1/72nd scale as can be seen here being built by Clare Hess and reviewed here. Cheers!


-
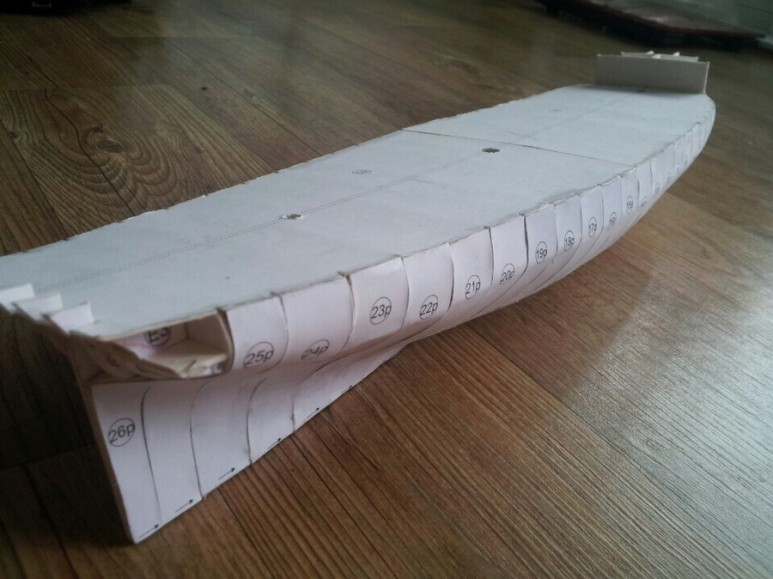
 I had a search, but couldn't find any other build logs of this model, so although I feel deeply unqualified, I thought I'd post a build log. This is the first card model I've built - in fact, it is mainly paper, with a laser-cut card frame (ShipYard also do a card version which is 1:72, and much more expensive!). So this won't be a masterclass, but hopefully the surprises and lessons learned as I go will be helpful to someone else following in my footsteps I started this model last year when I went on holiday - my main build is way too big to travel, so this one is more manageable (and a little less anti-social) - it may take me a while to finish, but hopefully I'll get there. I started by assembling the card structure of the ship. The diagrams provided are excellent, and the laser-cutting so good that this was very simple, and with a little care, it went together very nicely. I've read elsewhere that using a little superglue to wick into the extensions at the tops of the bulkheads strengthens them somewhat... I was too slow, and they got pretty mashed up. I'm hoping I'll be able to make up for that later on. So far, I've skinned the lower part of the hull, and started putting the details onto the gundeck. Here's a slightly more in-depth description of what I've learned, and done so far. Basic tools: Carpenters glue (Aliphatic) UHU glue (really really useful!) Pritt stick Superglue Lots of sharp xacto blades #11 and a handle Cutting mat 0.5, 1, 1.5, 2mm card to stick the paper onto where directed. (This was found in my local art supplies shop - I found it really hard to get online) 1. Assemble the frame from the laser-cutting. I used Carpenters glue to do this, and lego bricks to check it was all lined up... I think this was probably overkill, because with the deck on, it's pretty rigid, but it was my first attempt so I wanted to make sure it was all perfect. Sandpaper was useful to bevel the frames once put together... the card won't go over them (or have a flat surface to stick to) without this step, so it's pretty crucial. That said, it's pretty quick compared to bevel the frames on wooden models... that means it's even easier to go too far! - I marked the edges of the bulwarks with a marker so I could tell when I was not only reducing one side, but the overall outline of the bulwark. Once the frame was built, a couple of detail bits get stuck on to the lower deck (a brown sharpie was useful to edge the bits that are cut out to get rid of the white edges and make it look tidy), and then the false deck was then added... I made a mistake here by splurging on carpenters glue thinking that the paper covering would lie flat if only I pushed it down enough... not so much, it seems. It ended up looking horribly bumpy and I thought I'd wrecked the model... The answer (for me) it turns out is to use UHU, add it to the card, and then use a piece of card to scrape it and make it nice and flat, then add the paper, smoothing it as you go. This ends up in a nice flat surface... Thankfully, as we'll see, the false deck gets covered over later with a second 0.5mm sheet of card with the real gundeck pattern glued on top of it, so disaster was well and truly averted, and you'd never know I stuffed up now! Here's the first gun deck - you can't see the bumps, but trust me... they're there! More later. Rob
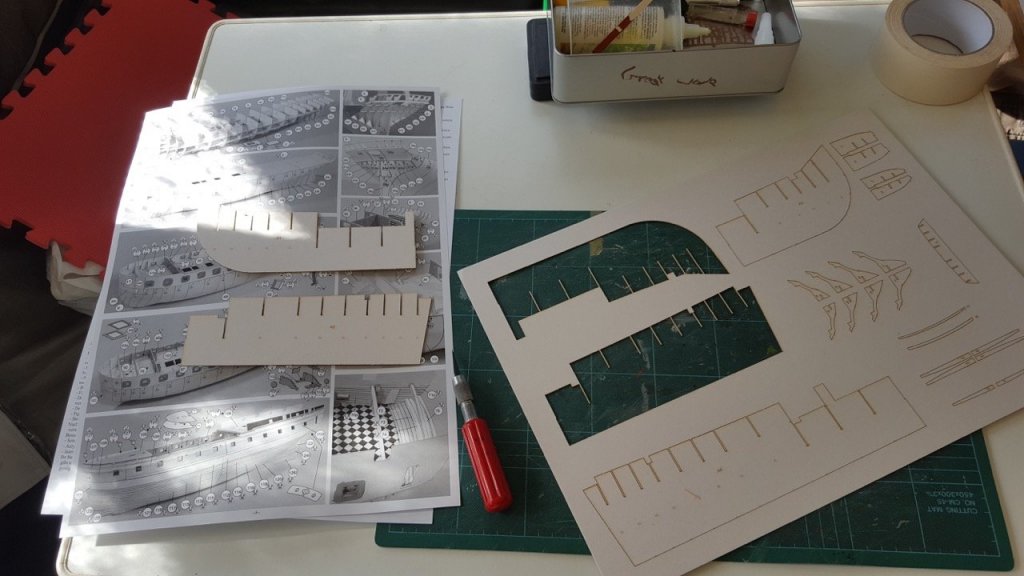


-
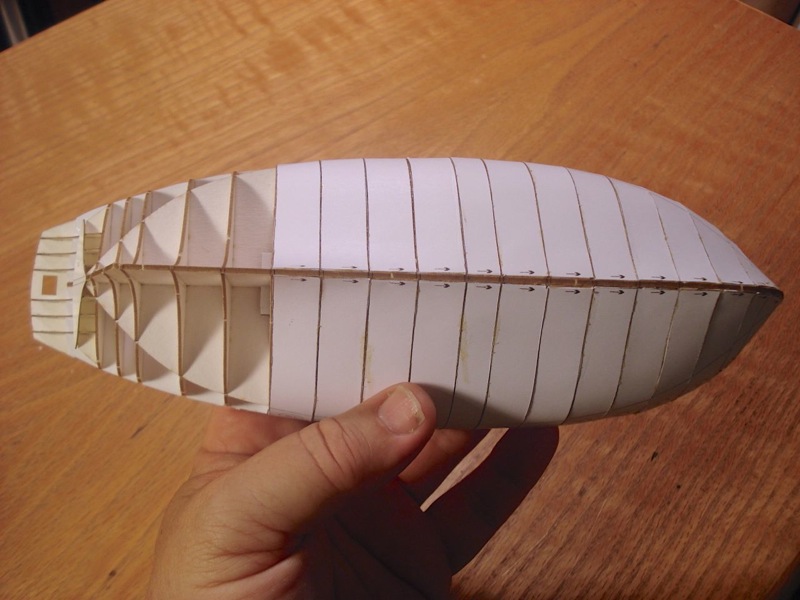
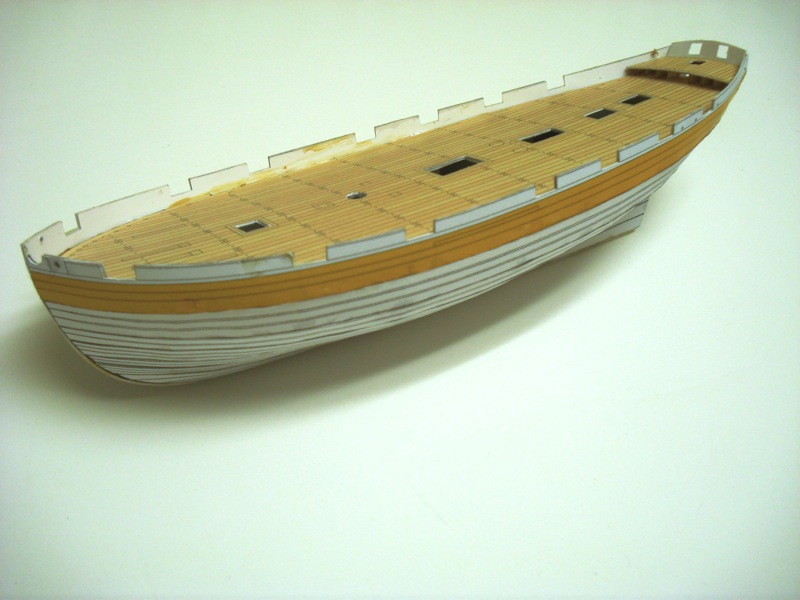
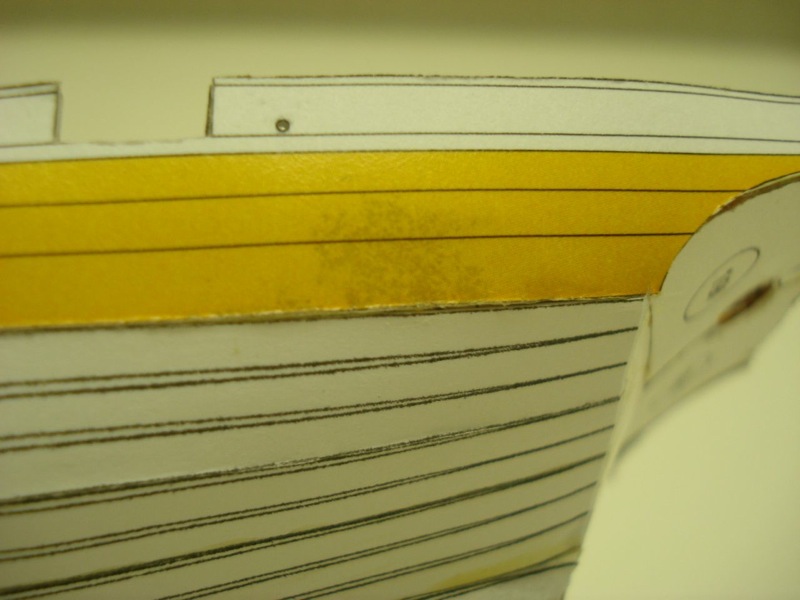
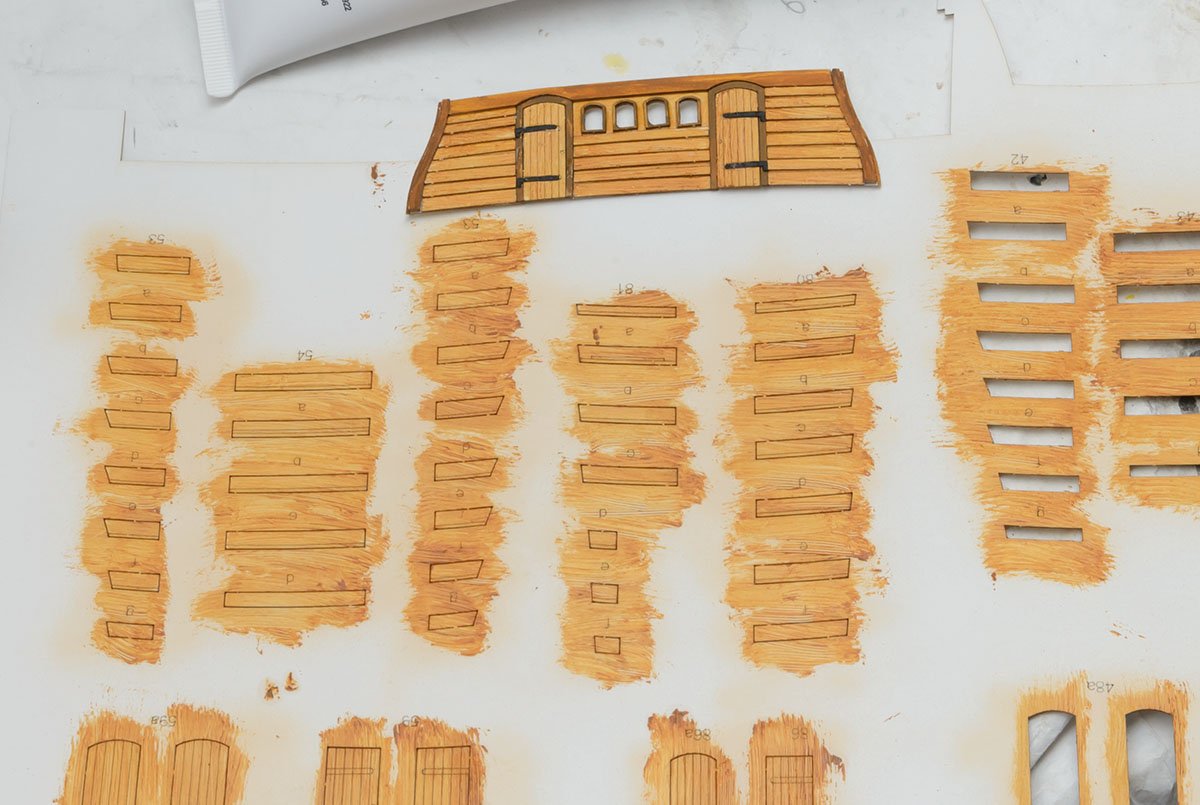
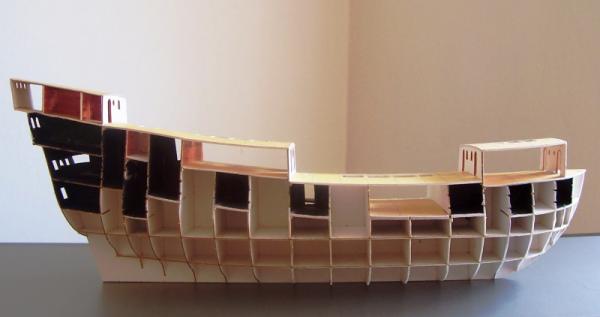
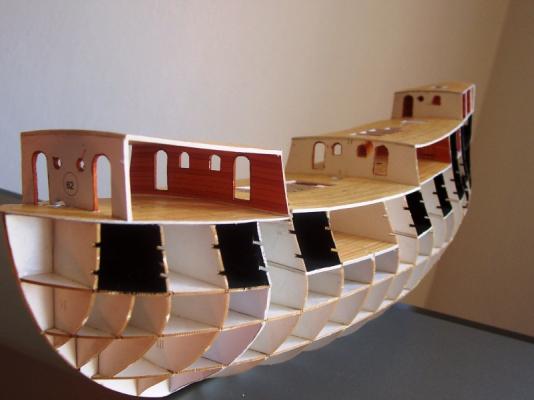
Well, I’ve done it. I started messing around with a card model from Shipyard because I was really curious about them. I didn’t mean to turn this into a real project, but I can’t help it, this thing is so frikkin’ cool! I’ve already described the kit in detail in the topic I started: here, so no point in rehashing that. I’ll just say that I’ve been distracted by this model more and more and now I might as well just get it over with and make a regular project out of it. Luckily, this card model seems to be progressing a lot faster than my wooden model projects. I think it’s because all the parts are already defined. I don’t have to figure out anything, I just have to build. So, I started tinkering with this kit back in August and picked it up every now and again to add some more to it. Now, I’m at the point where I’m spending multiple evenings in a row on it. At this rate, I don’t think it’s going to take all that long. I'd better really get working on this or I'll never get back to my other projects! Here’s where it all started... Framing was easy using the laser cut parts included in the kit. Note that not all of the shipyard paper models include laser cut framing. Instead, they give you the parts printed on standard paper and you are required to laminate that paper onto layers of card stock or plain paper in order to build the part up to the proper thickness. On a model this size, the frame density and the stiffeners seem to make the hull enough to work with The first layer of the hull covering is made up of thin pieces that fit nicely across the bulkheads. It's hard to avoid a little overlap, but I found it important to try, otherwise it creates a wavy surface for the planking. With the layer of stiffners in place, the first layer of hull planking is laid. There are two layers of planking, so I guess you can consider this a double-planked hull. The first layer consist of belts of planks. It's nice that these are printed with properly shaped planks. This makes this model more accurate than 90% of the wooden ship models kits out there, at least in terms of hull planking. The first problem I ran into was the in determining the proper positioning of the bulwarks piece. But, that looks like it will work itself out okay. The second problem is shown here with the laying down of the planking belts. This is a 2-D object laying down on a 3-D surface. The belts are relatively narrow, but not narrow enough to avoid creating a wavy surface along the edges. Fortunately, there is another layer of planking to go over this, so maybe I was worrying about it too much. But, what I found was that after the glue set, I could wick a tiny amount of CA into the edge and then push down on the bumps to flatten them out a bit. That has it's own hazzards as you can see here the glue fingerprints that I haven't seen since my early days of plastic model building. This is the point where I decided to try painting the surface of the hull using paints sold by ShipYard. Clare


- 121 replies
-
- 10
-
-
 Hello friends, I'm starting a project here is mixture of research and building. As I came from the plastic kit bashing side of the modelling society I'm fed up with the chequebook modelling destroing any creativity. So as I'm in a new less payed job I changed my mind to a more creative and less expensive theater of the hobby: cardboard modelling. The scale fits to my flat's size. Sorry for my bad English - I'm not rearly far away from my school standards 30 years ago. Base of my project is the early Shipyard plan of Le Coureur the French lugger in 1/96. The little ship that was taken 1778 by HMCutter Alert - and what a nice and heartwarming thing it is that due to this find we have got the plans in the NMM. It is the basis of the Bourdriot monographie. The are three important sources of knowledge for me strating in the modelship's world: A. Petesson - Fore and After Rigging B. Bouriot - Le Coureur Monographie C. Friends of the Navy Museum - Plan (1960th?) (D. a www-copy if the NMM-plan) The Peterson shows the rigging of a bigger and in some details differing lugger from the same timeframe. The monographie is very good and well detailed - I decided to take the save route and ordered a new issiue at www.ancre.fr so the money was directly. with the drawer. And I was shure to get a complete set of plans. The Paris Museum's plan is based on the Admirals Pâris drawings and showing a simpler rigging with a diffrend decks layout. The NMM plan shows a superstructure in red on deck - the Shipyard kit shows hatches. Boudriot draws his particular part in dotted lines in one deck's sideview. I decided to trust in the NMM plan and in Ancre, too. So I've figured out the kitmakers at Shipyard followed the plan of the Paris Naval Museum. The similarity of the stern decorations are also evident. So the list of errors, carenesslesses and force to construct a buildable cardboard kit've born an intersting fundament of a nice little ship. As I'm not a francophone person, I have got my. problems with the texts in the monographie. But from all the three sourced it seems to be the one of the highest quality. So here some first impressions for you about the similarity of the kit and the Paris Plan. 1. The sternview of the ParisPlan 2. Some picture from the Shipyard manual showing the missing badge 3. The “KateWinslet leaving step“ in the topview 4. same area in the manual 5. my hobby ship yard. These as some first impressions for you. At the moment I'm struggling with the lasercut cardboard hull and its plywood filling I've get tip in a German forum.
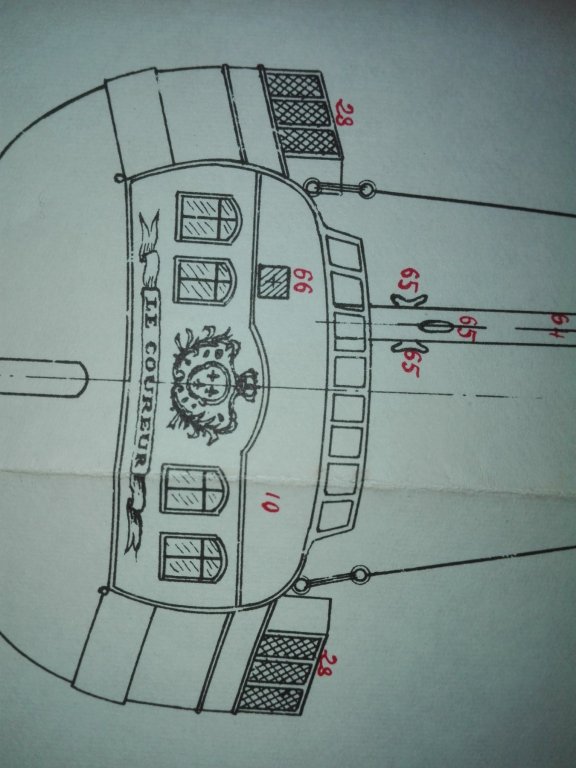
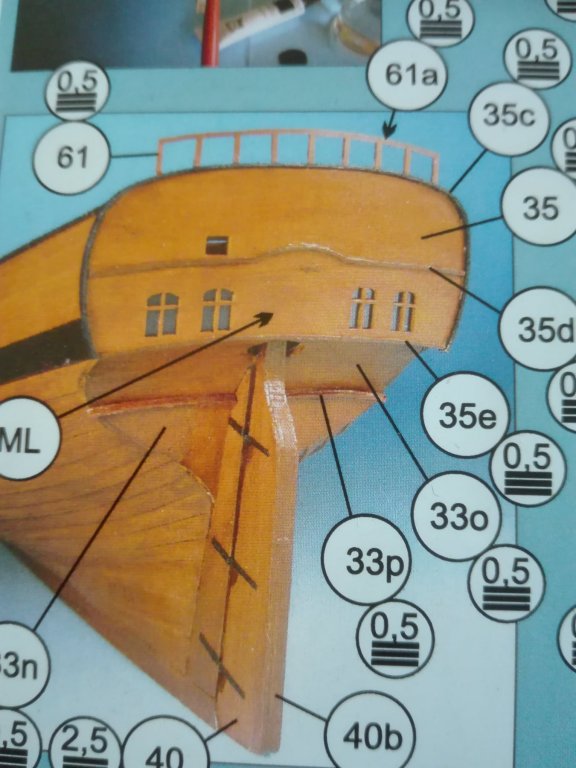
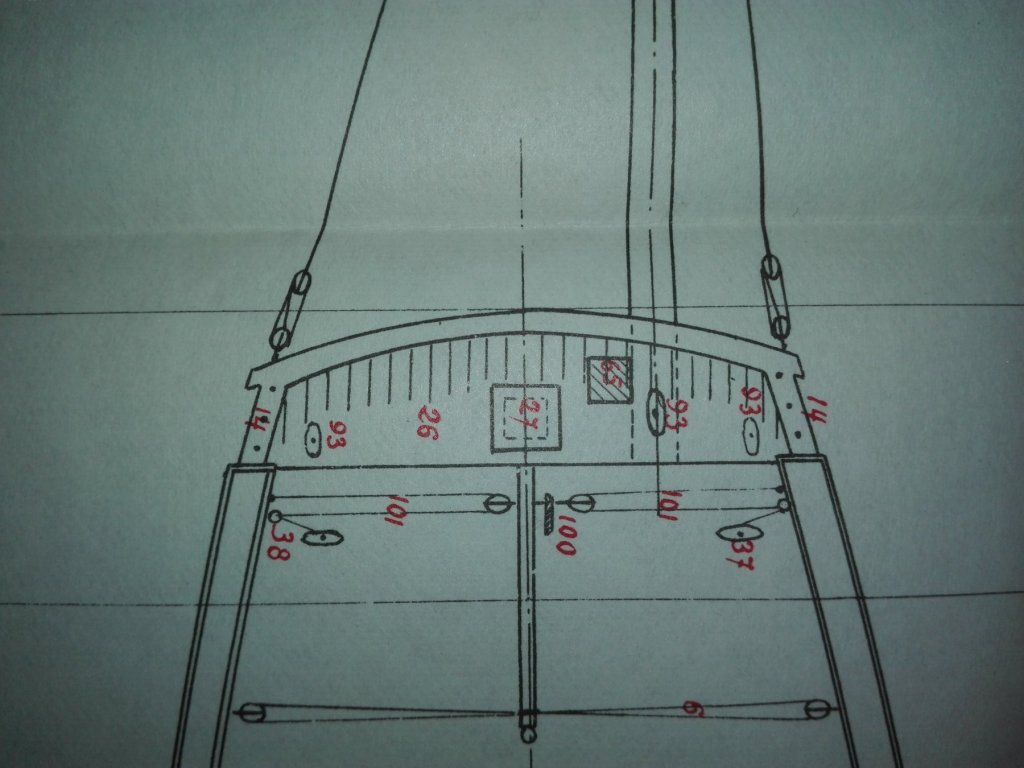

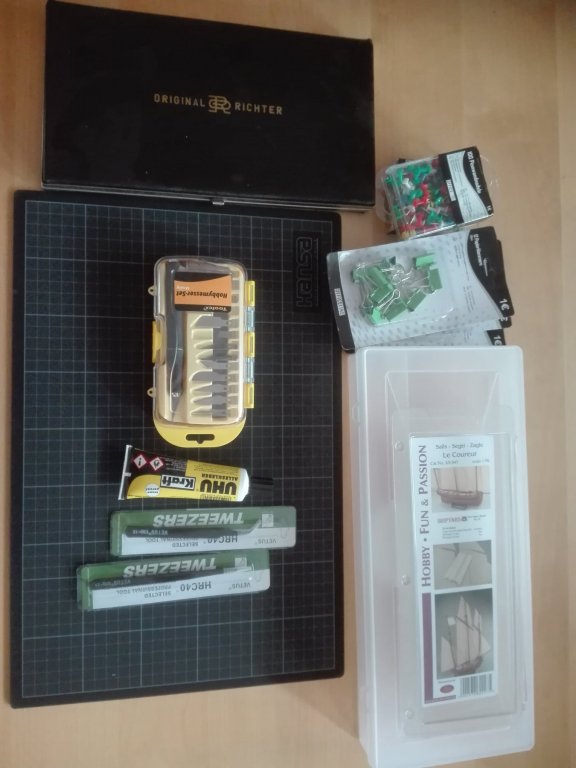
- 21 replies
-
- 3
-
-
- shipyard
- le coureur
- (and 1 more)
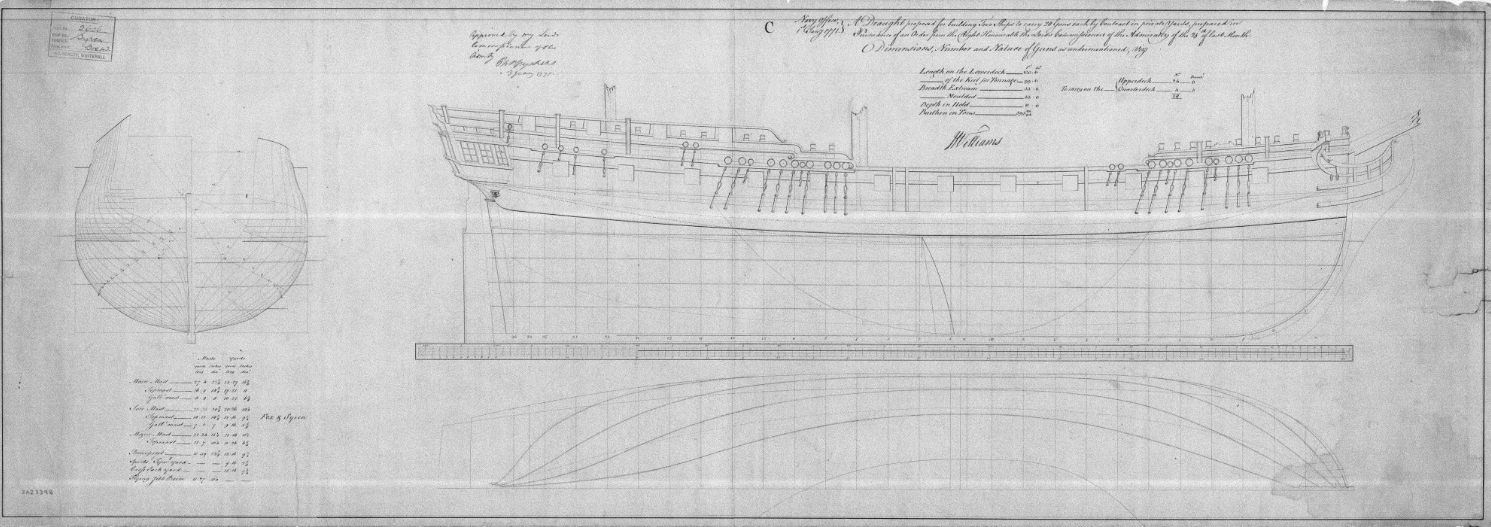
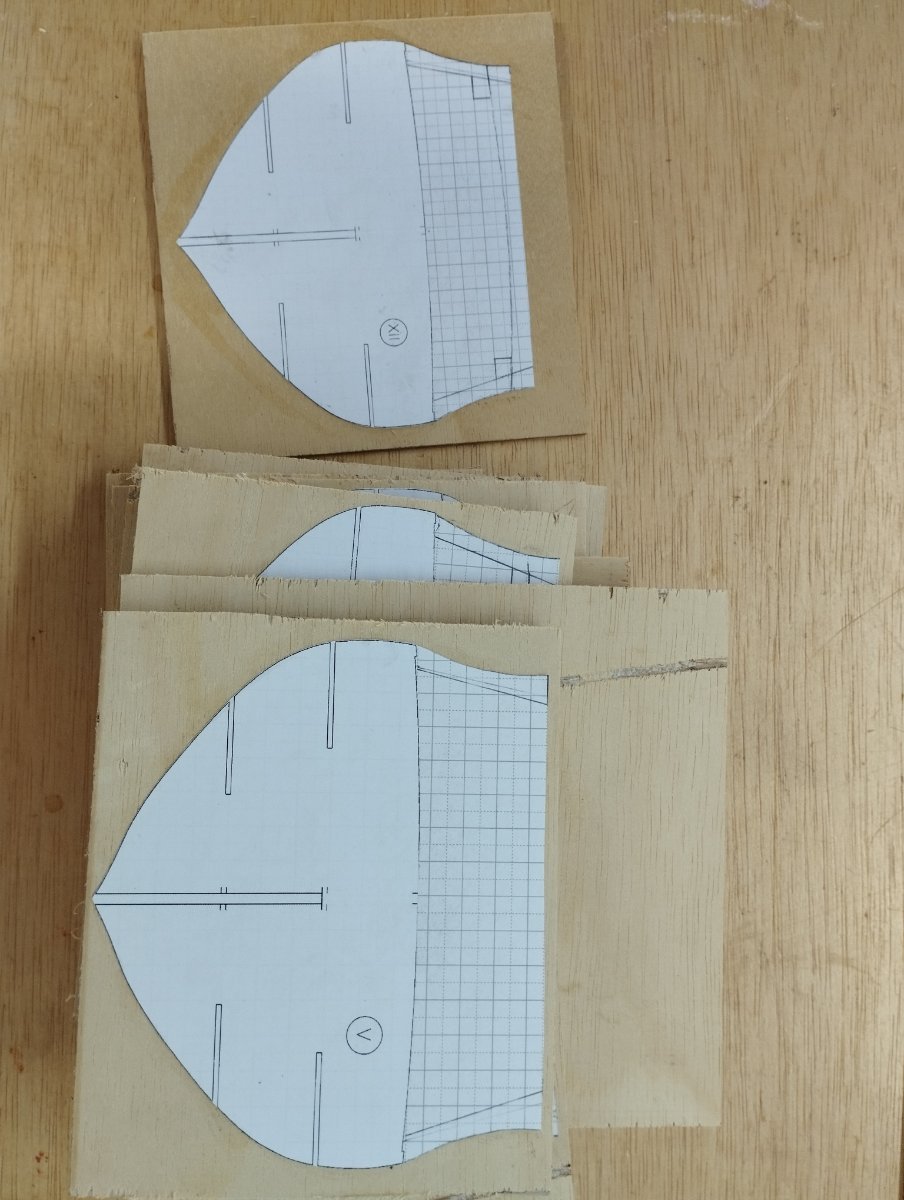
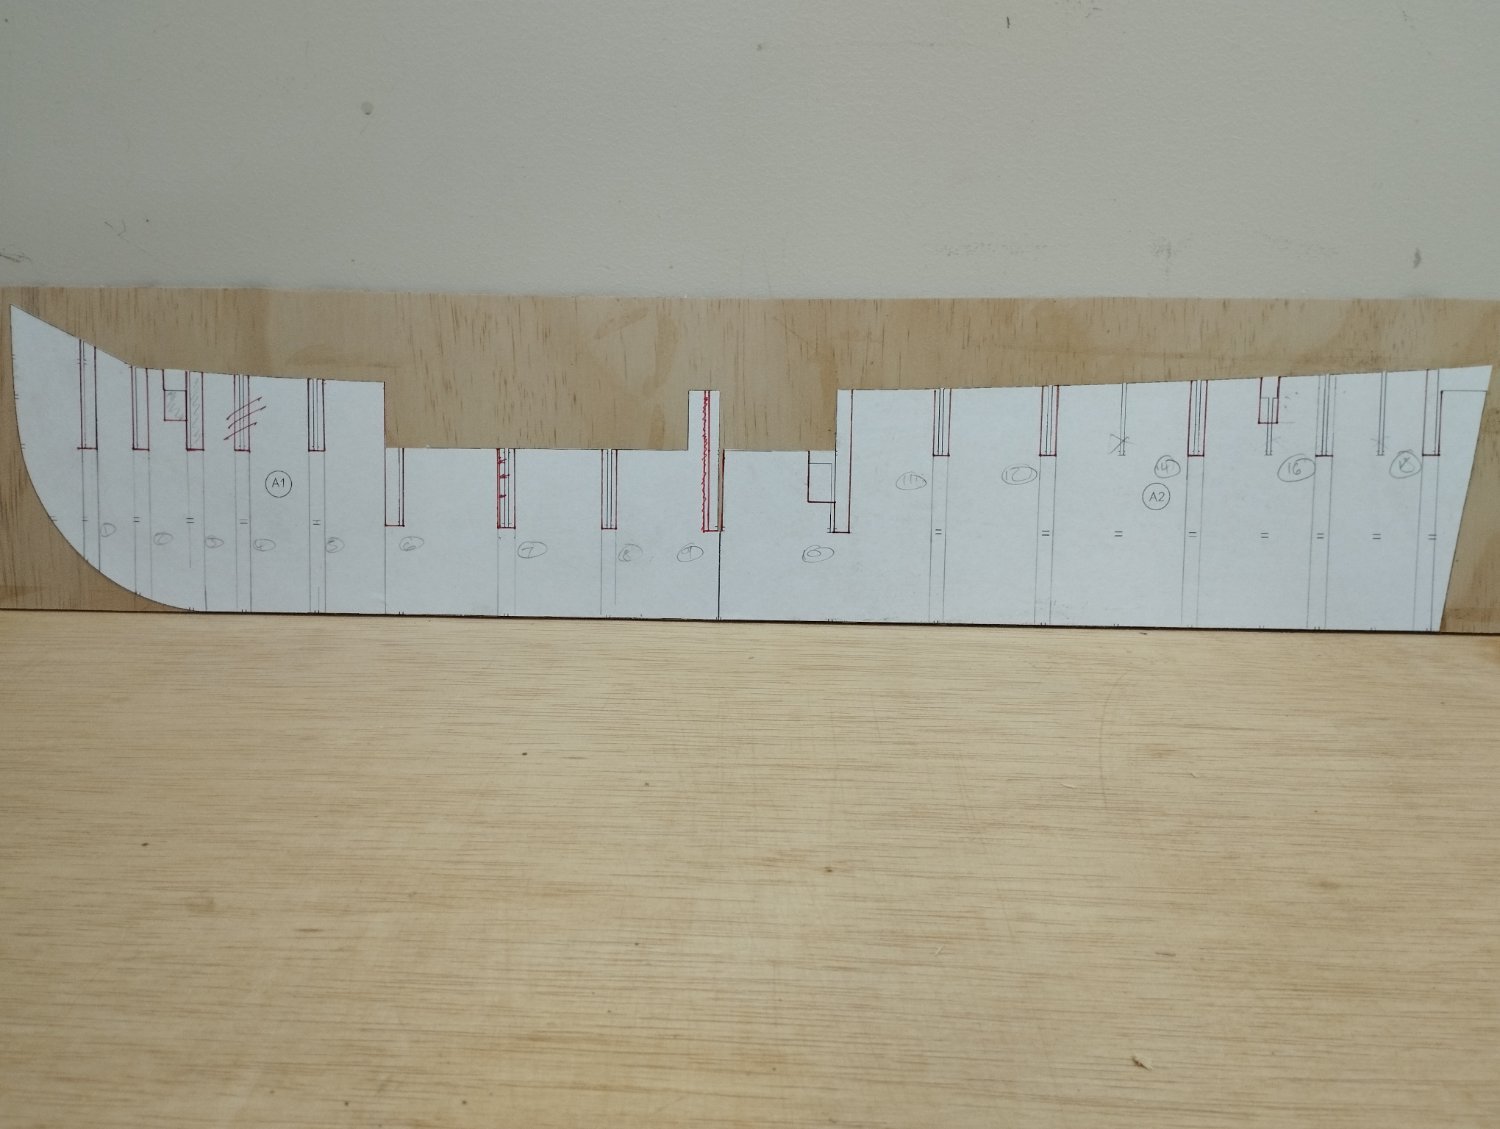
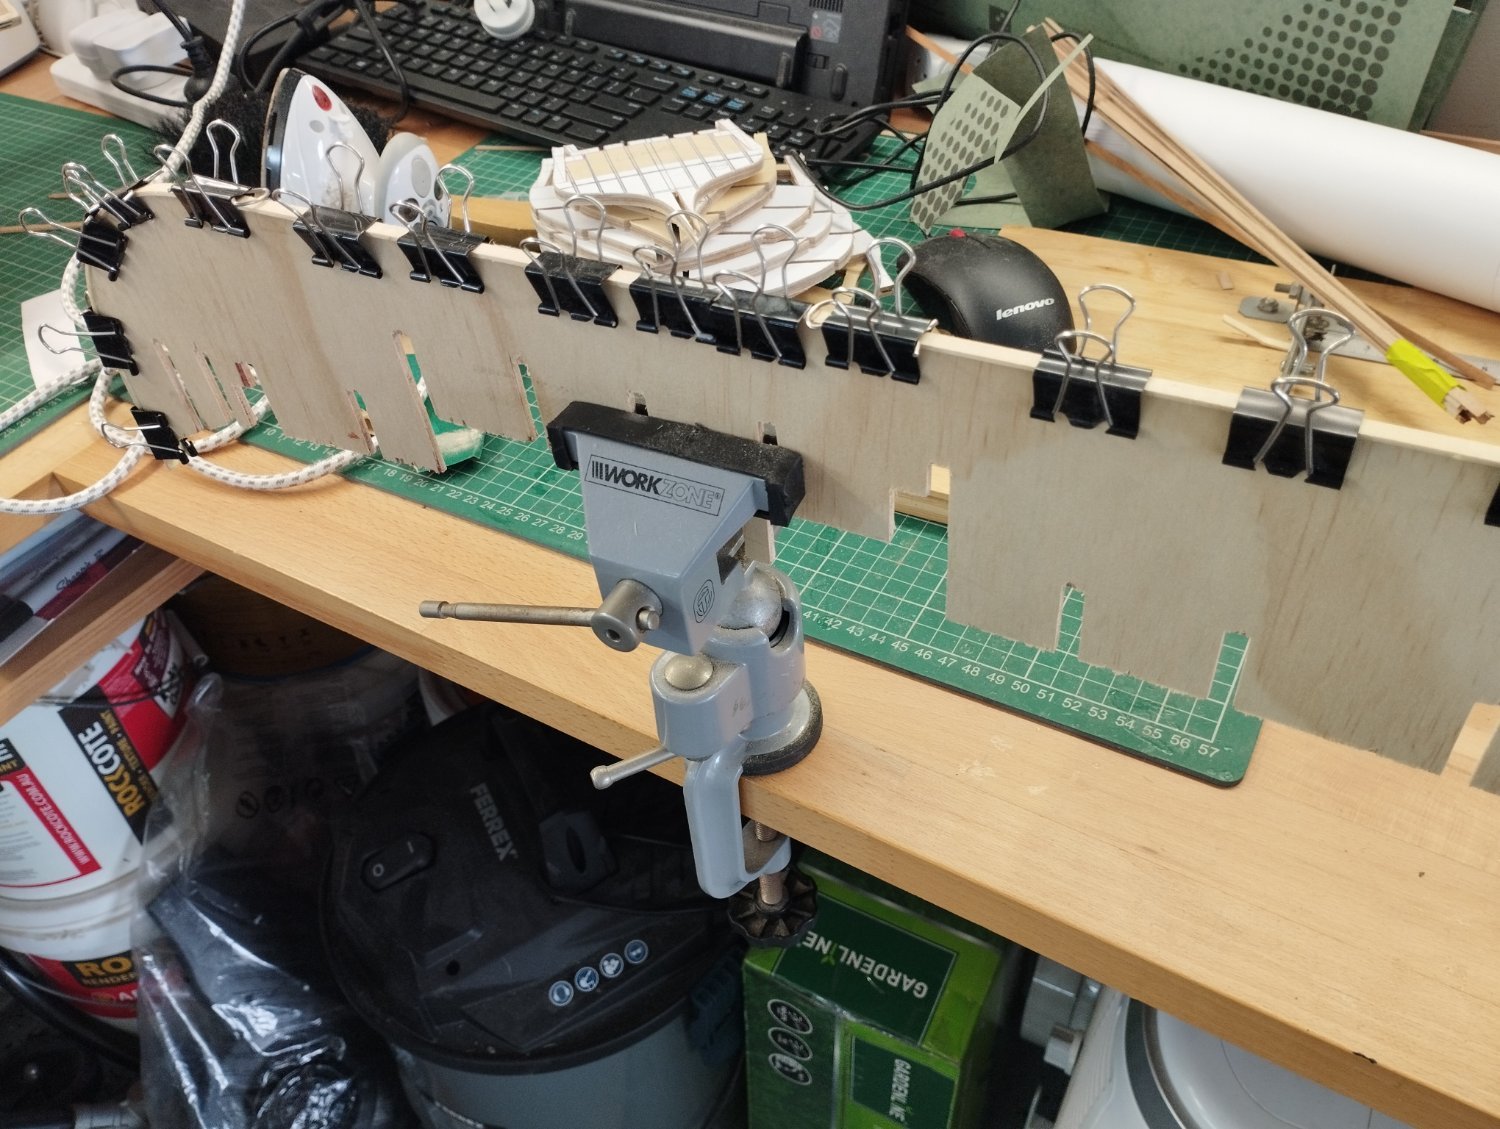
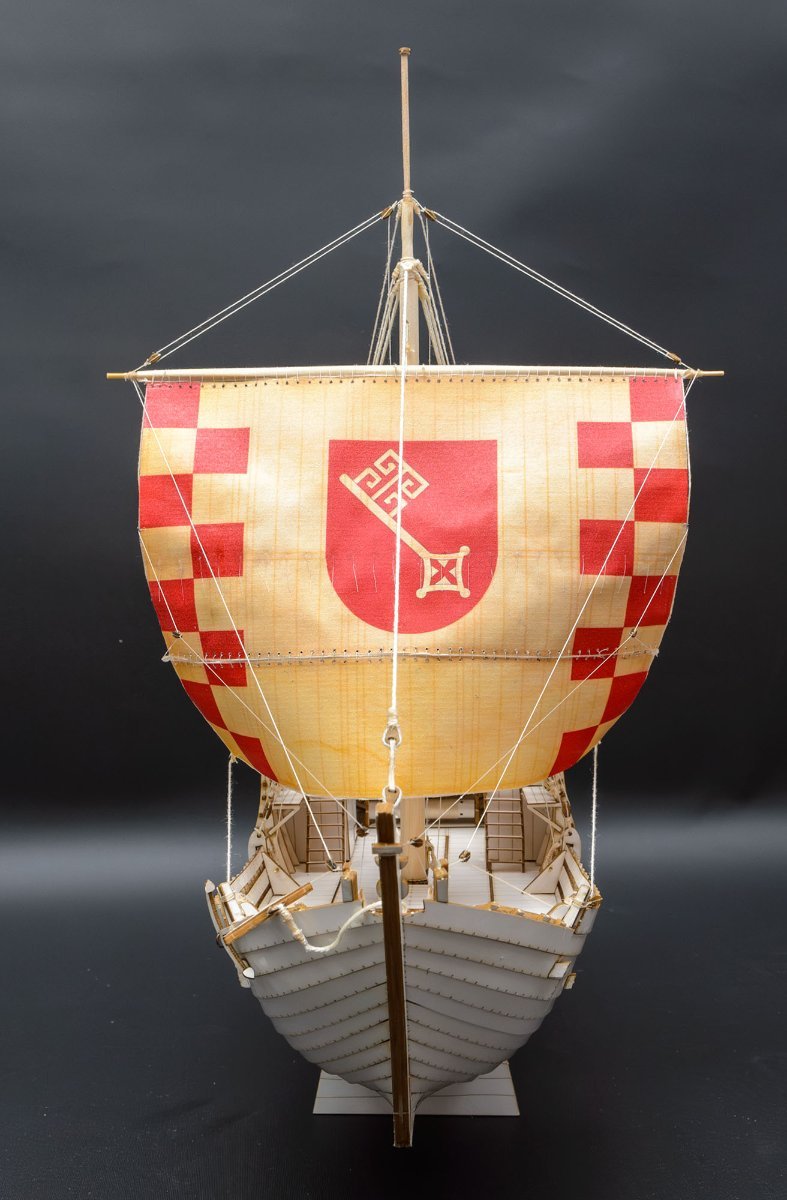


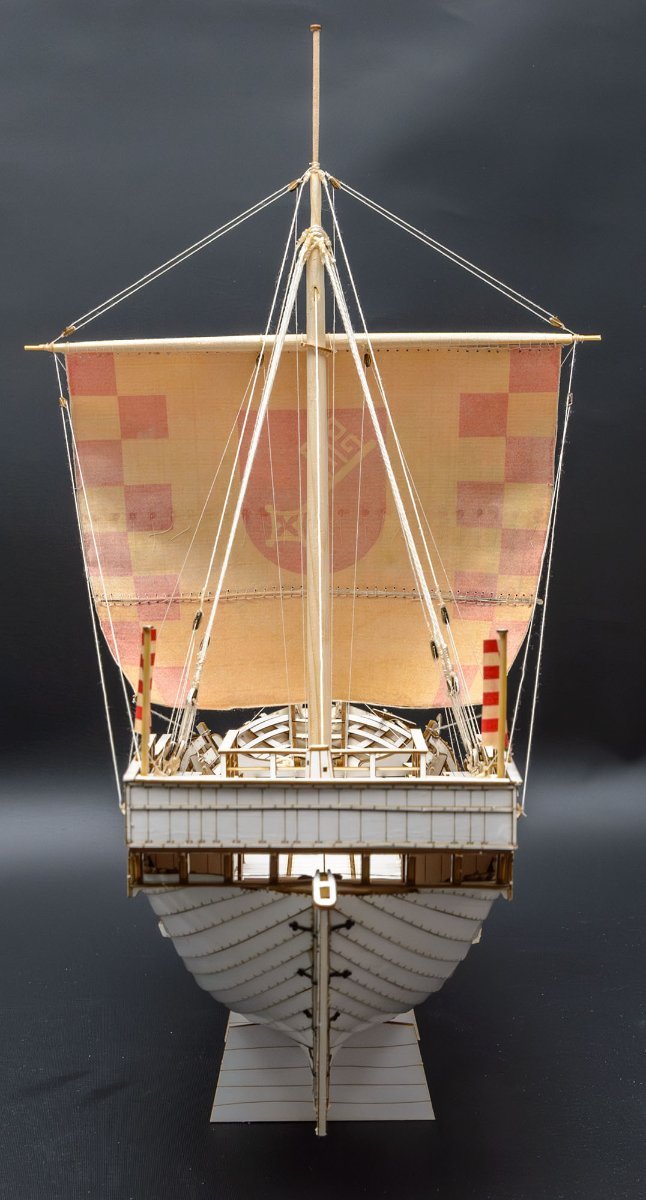
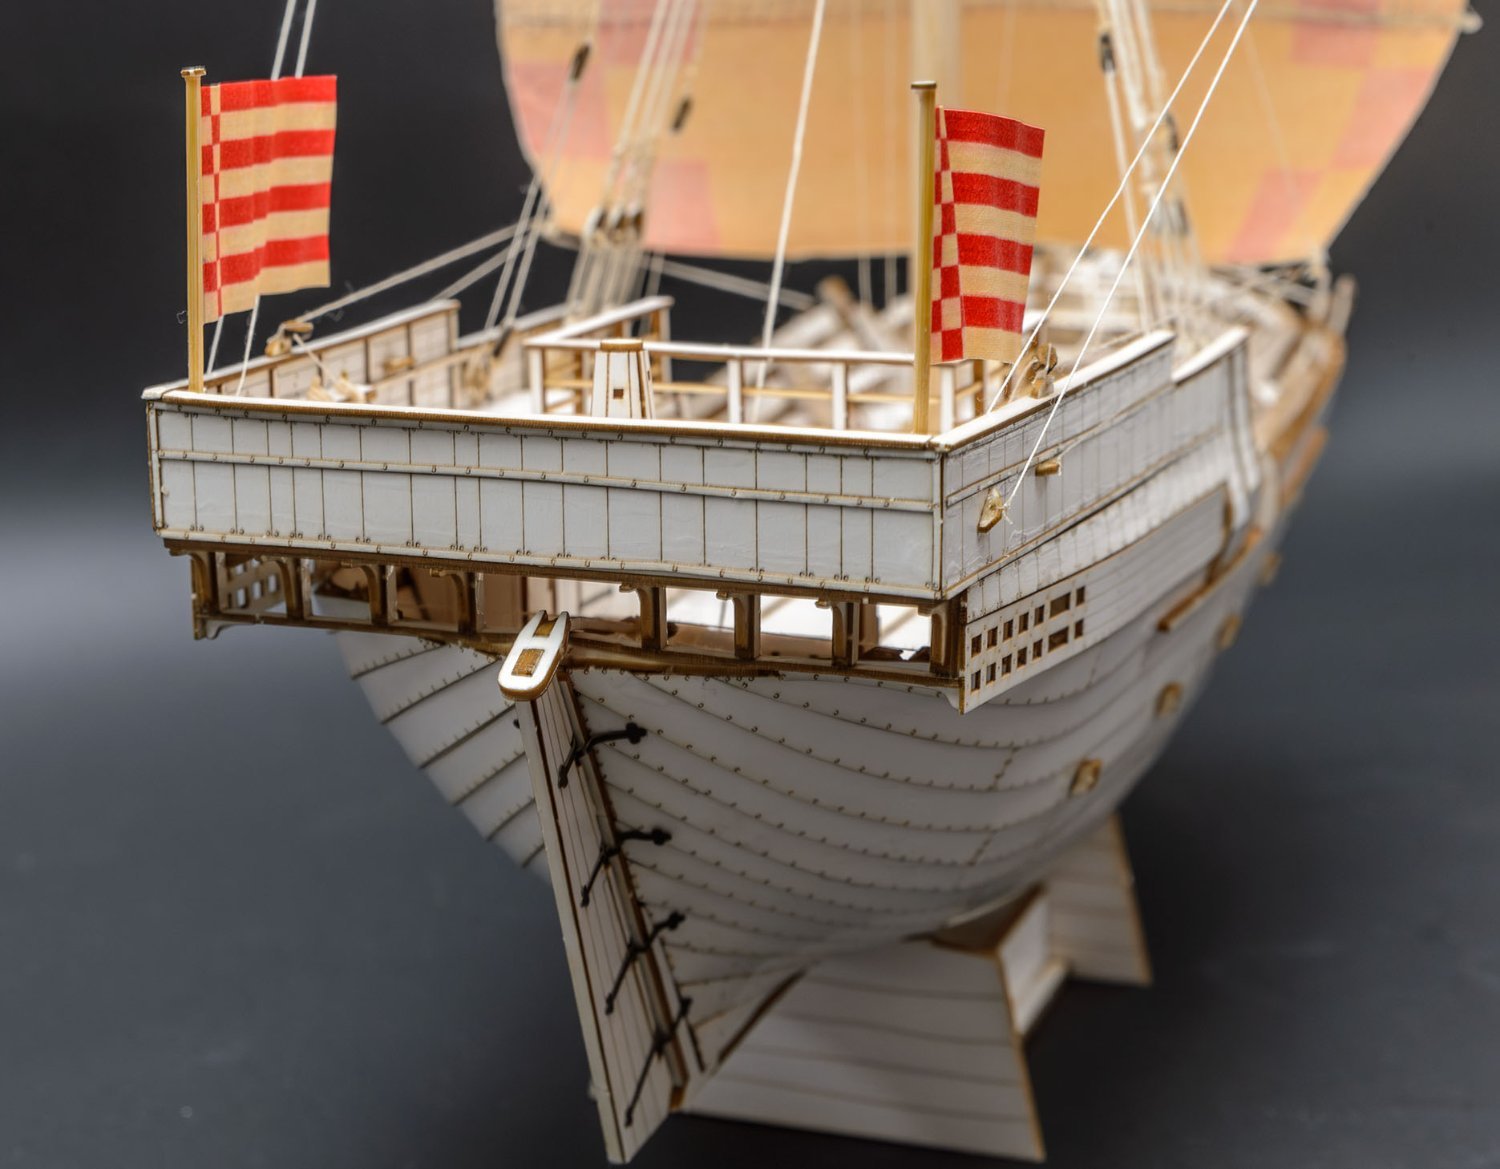


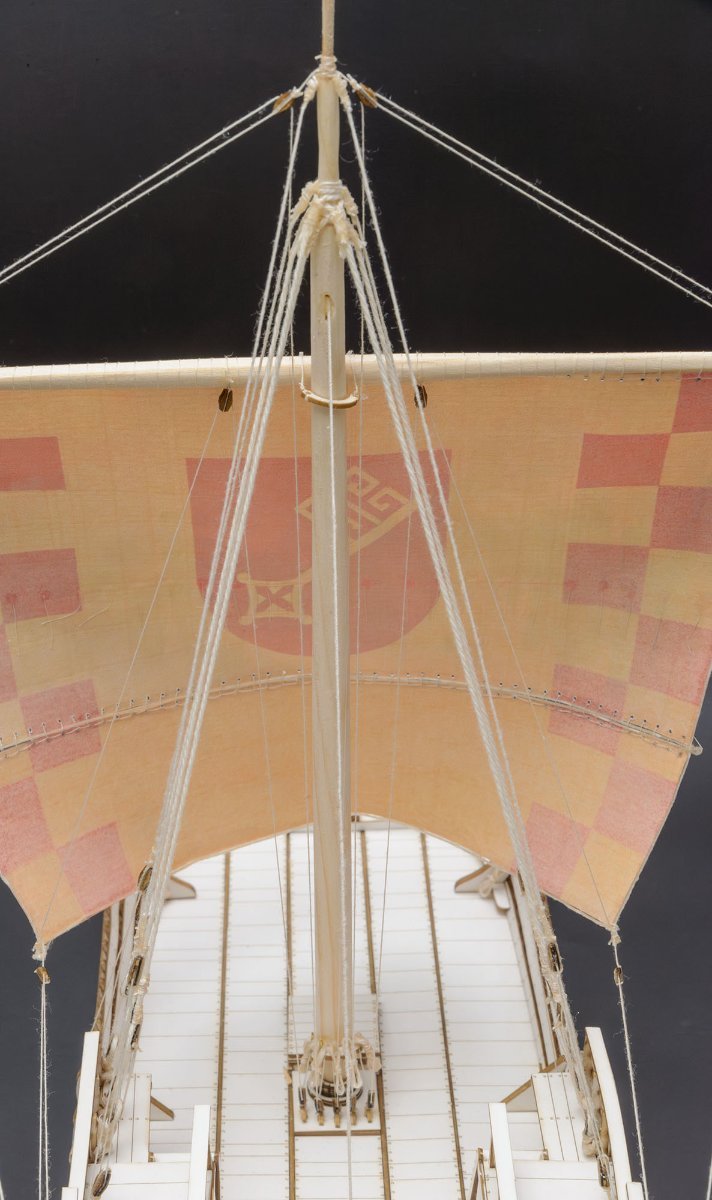
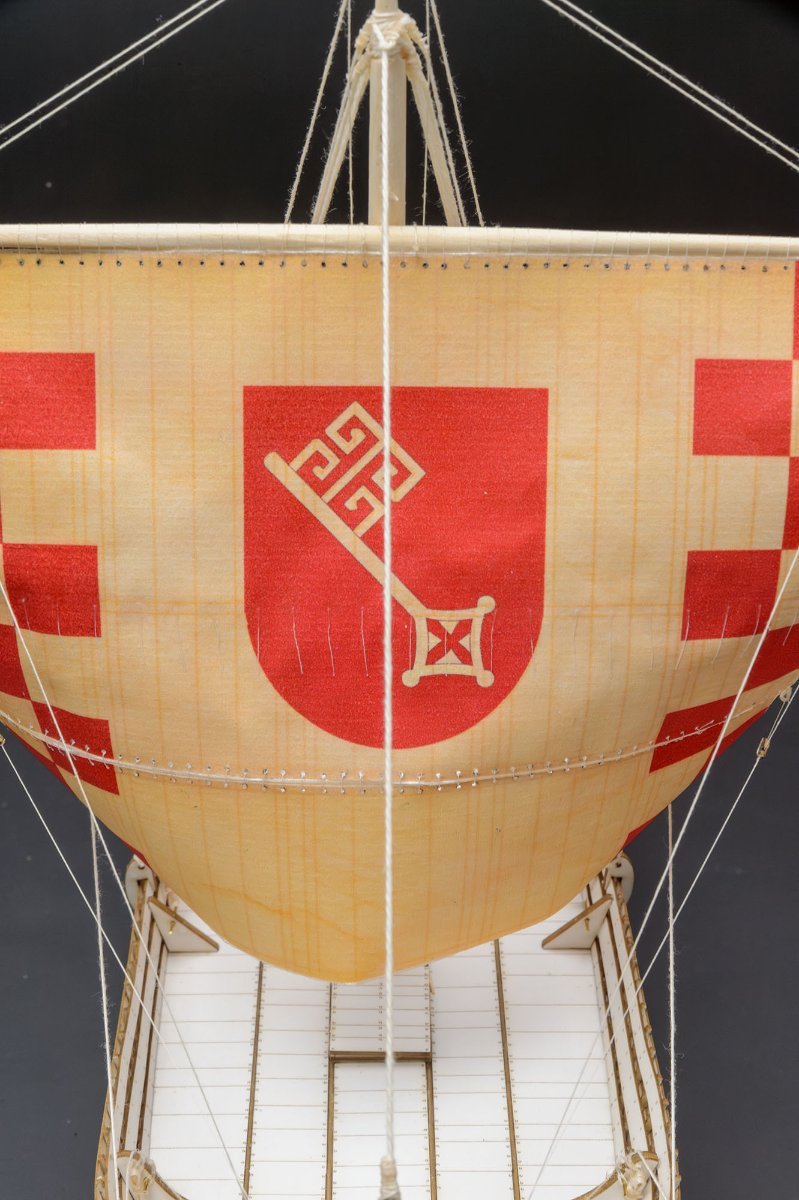

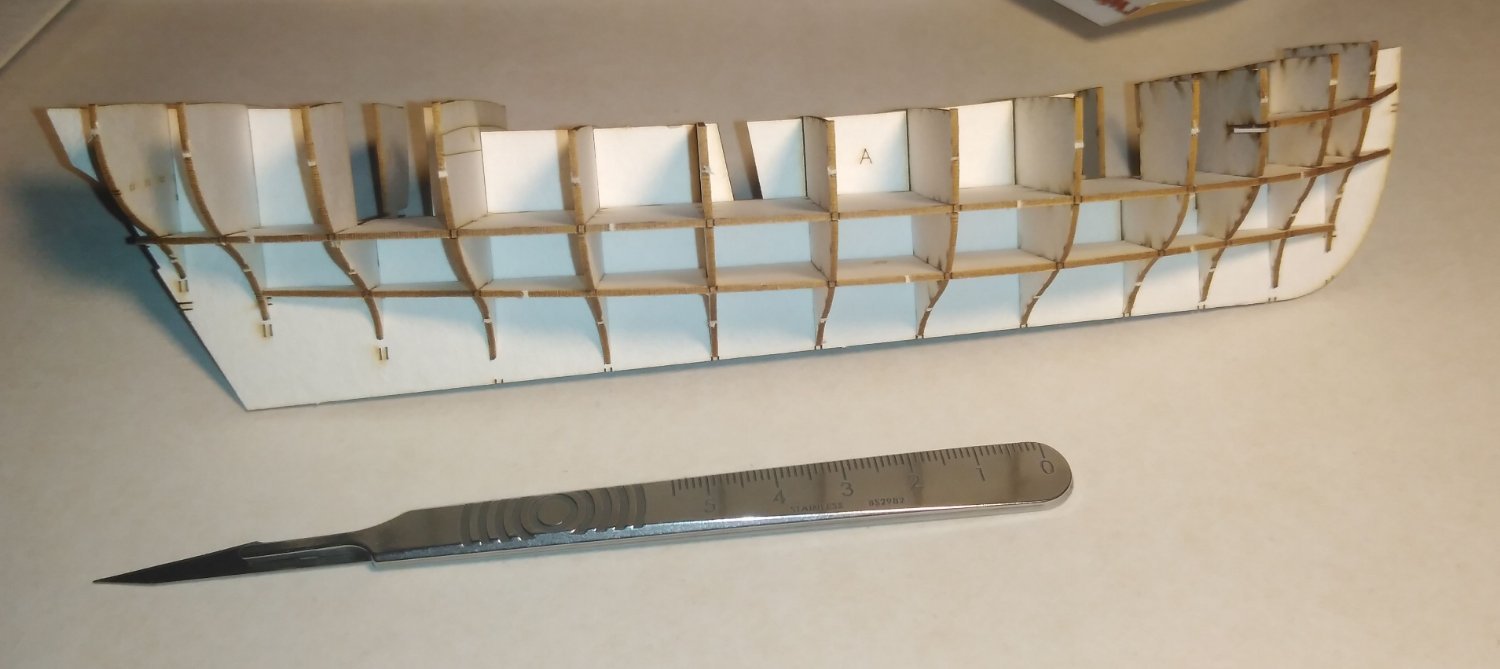
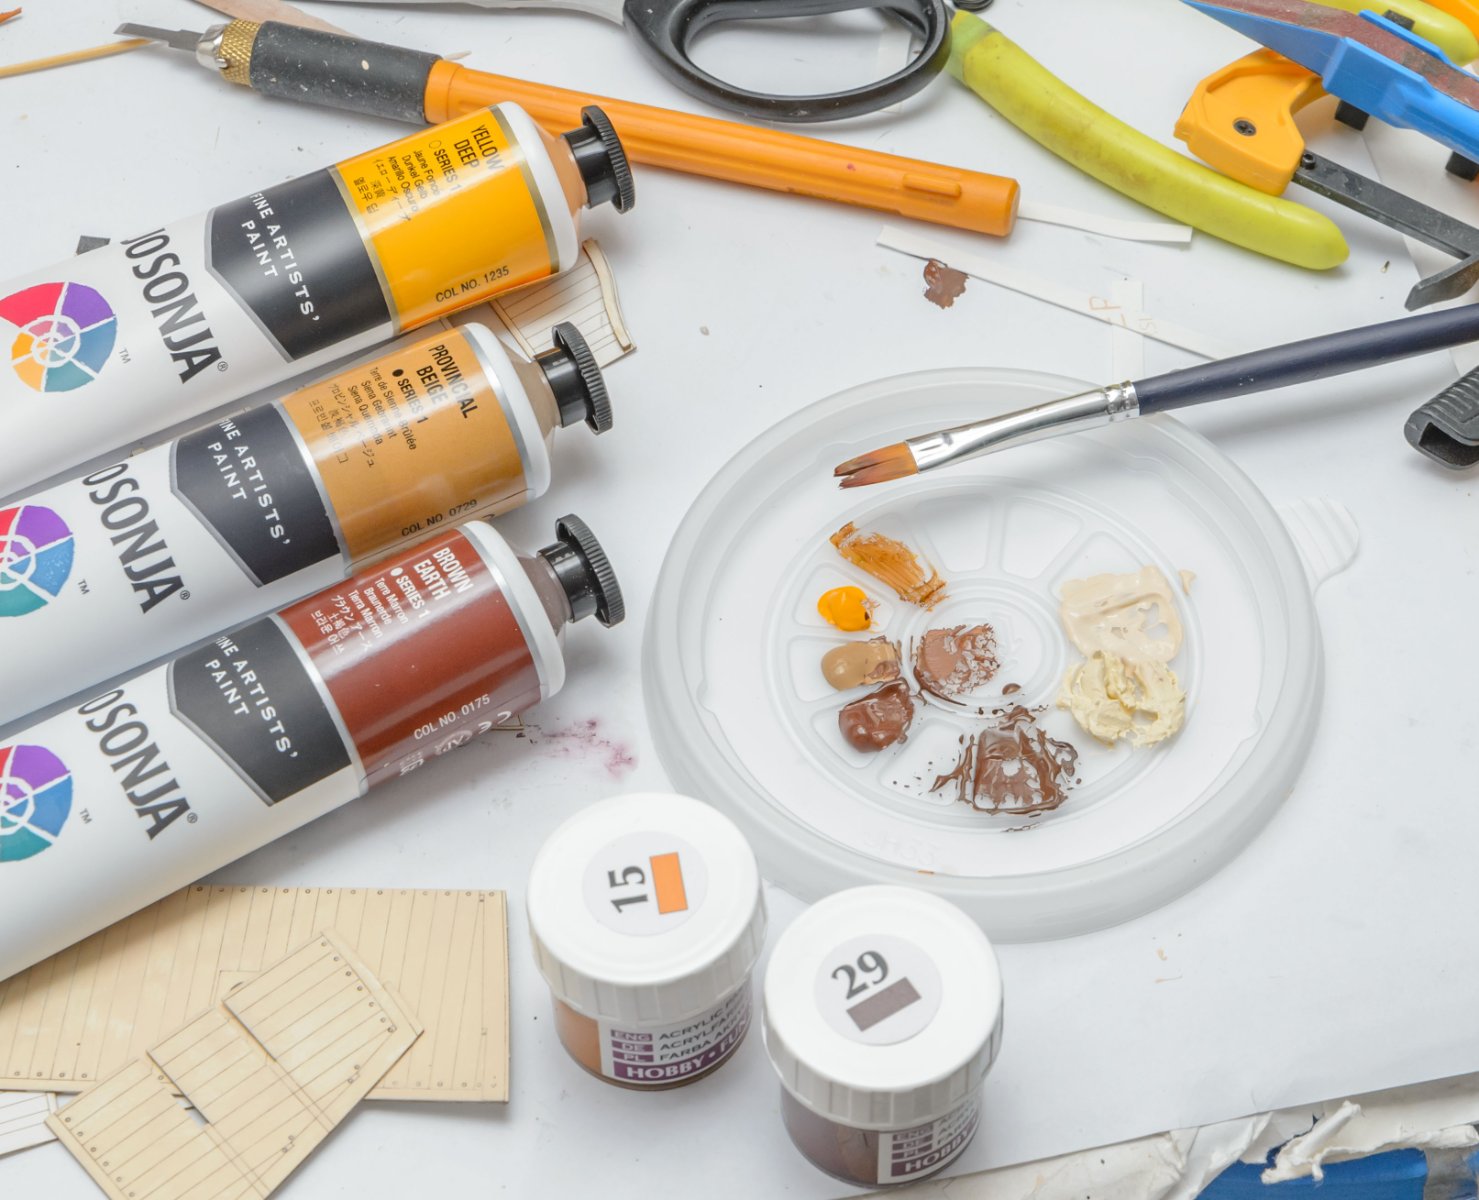

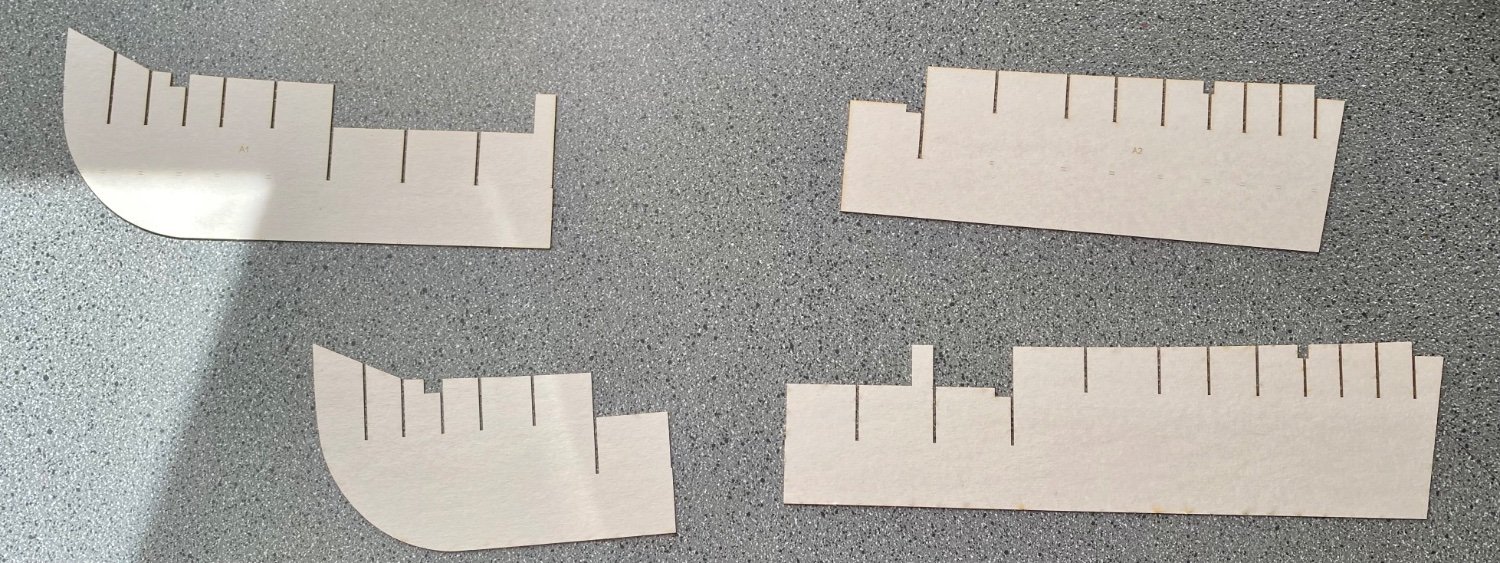
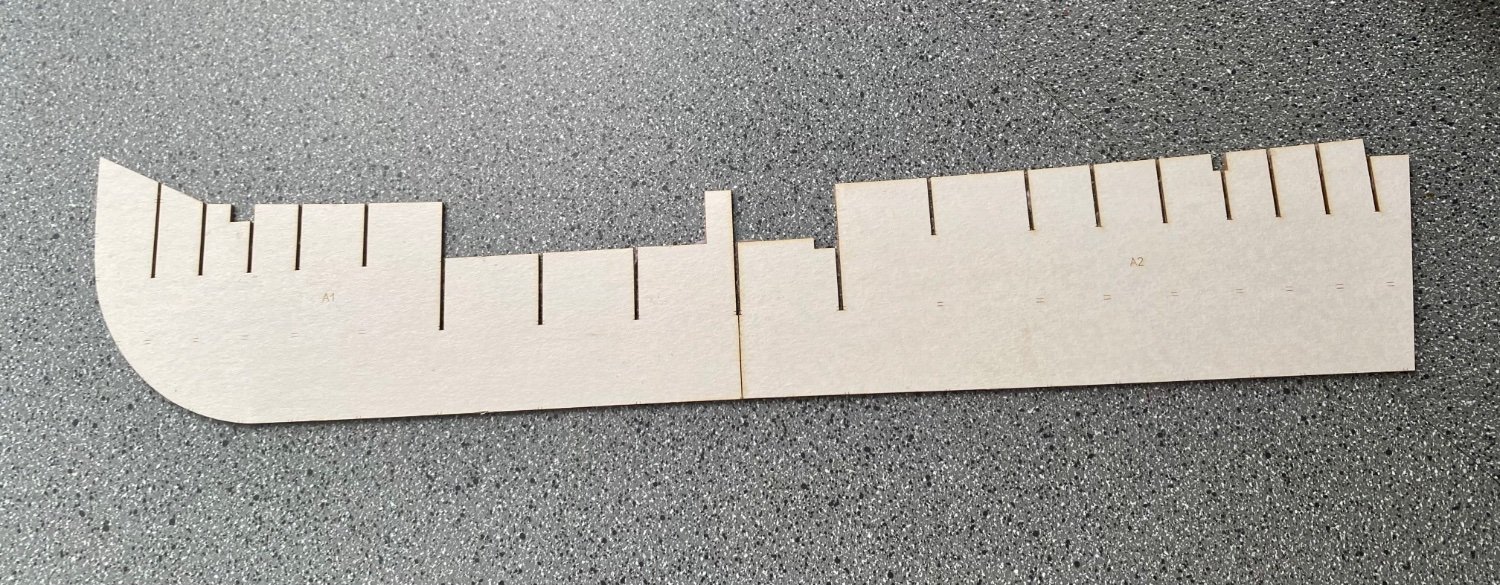


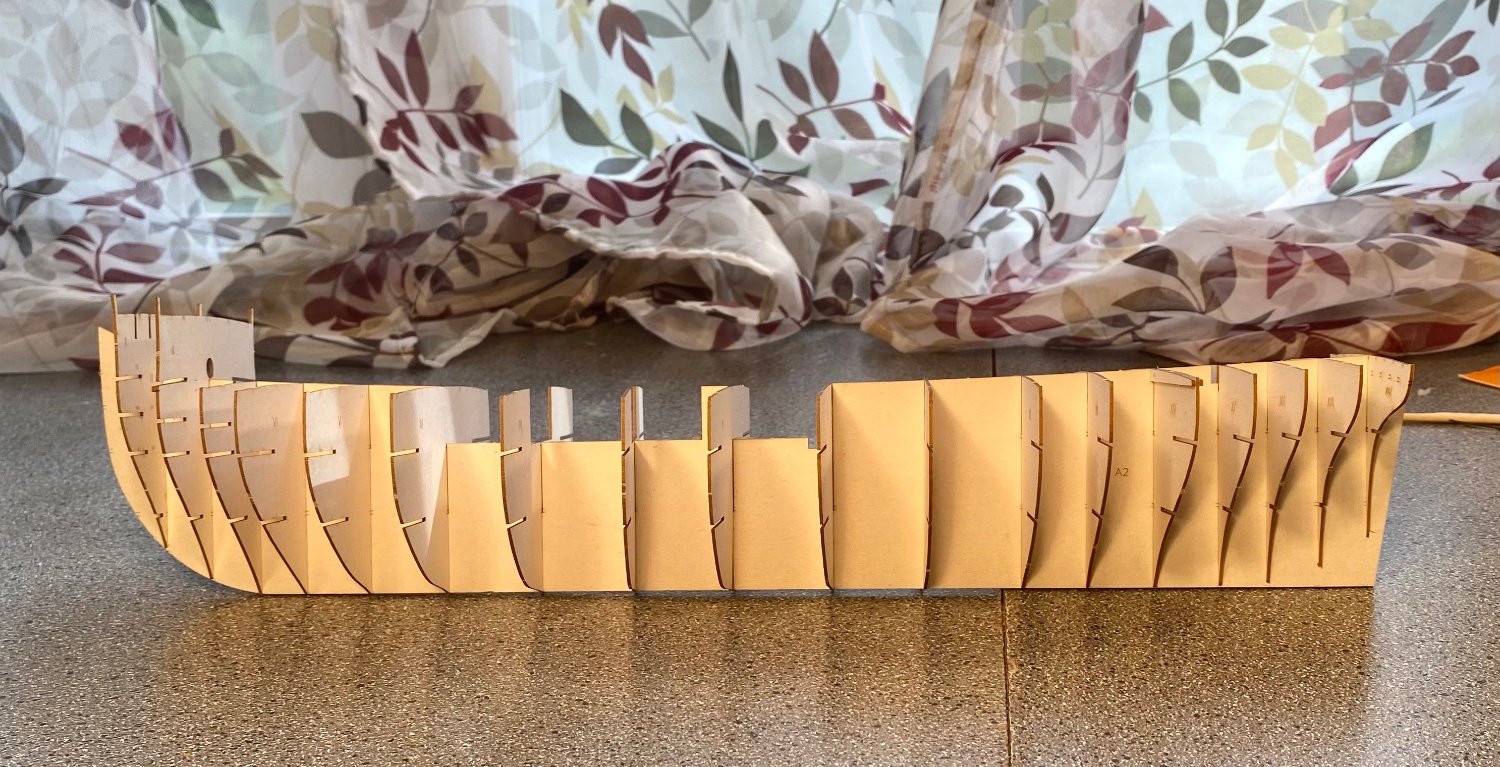


.jpg.84dcc2c4da9aaf2cc9a732c04b2c5ed3.jpg)
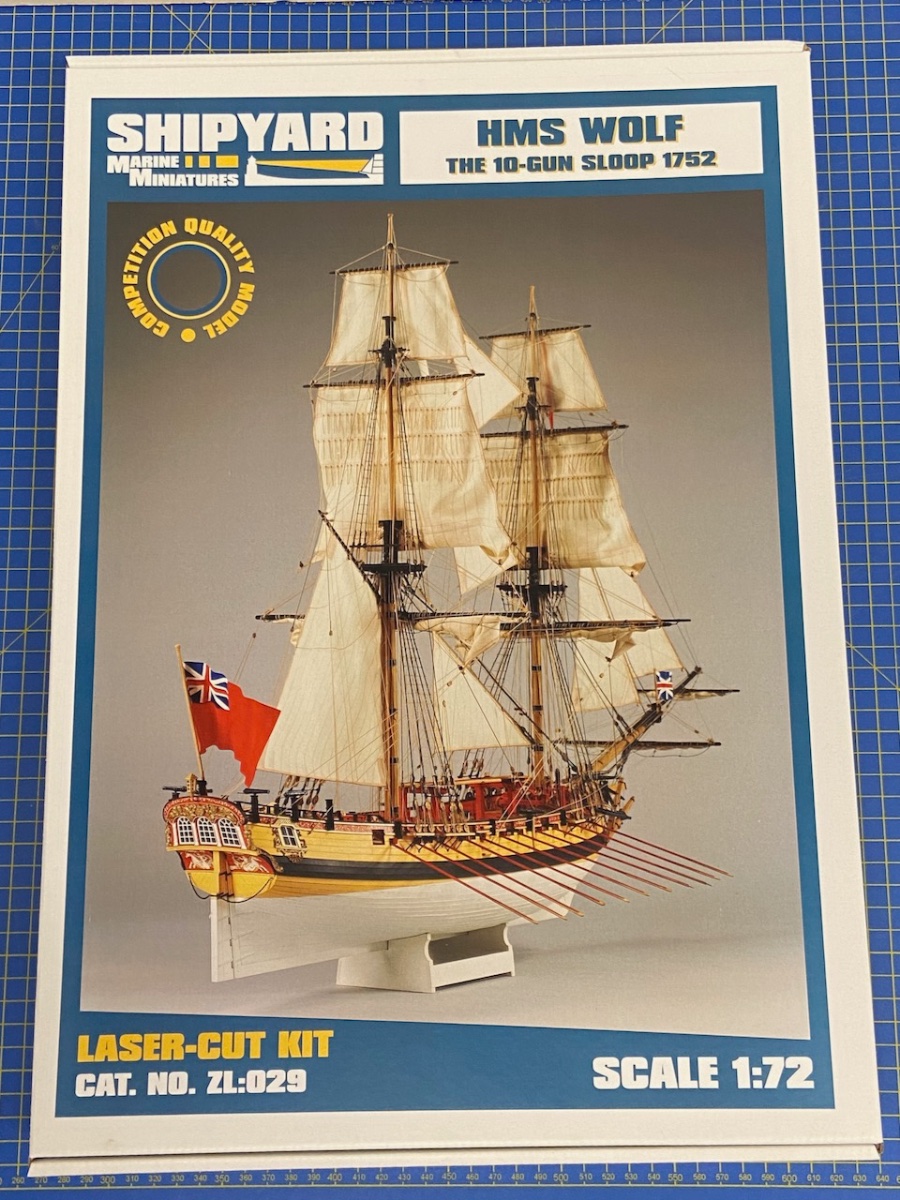


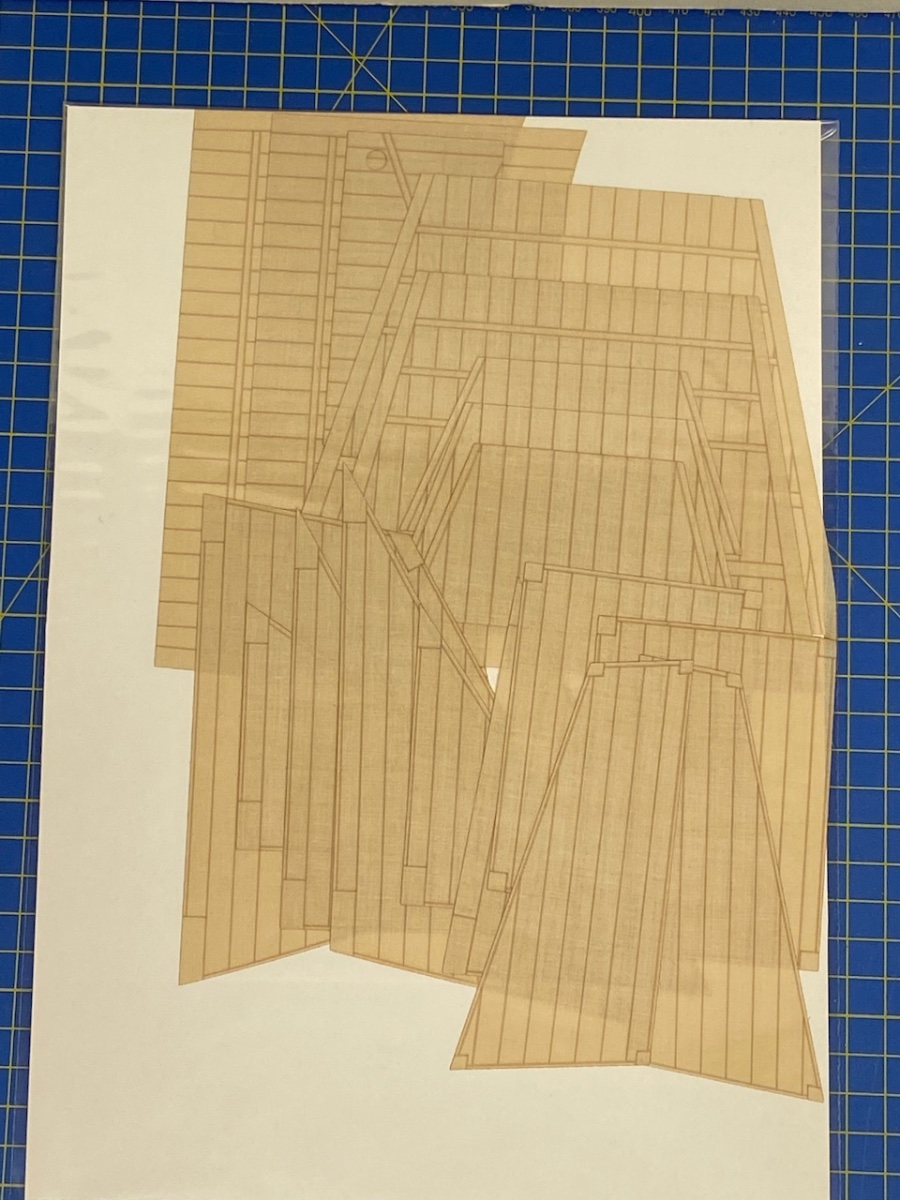
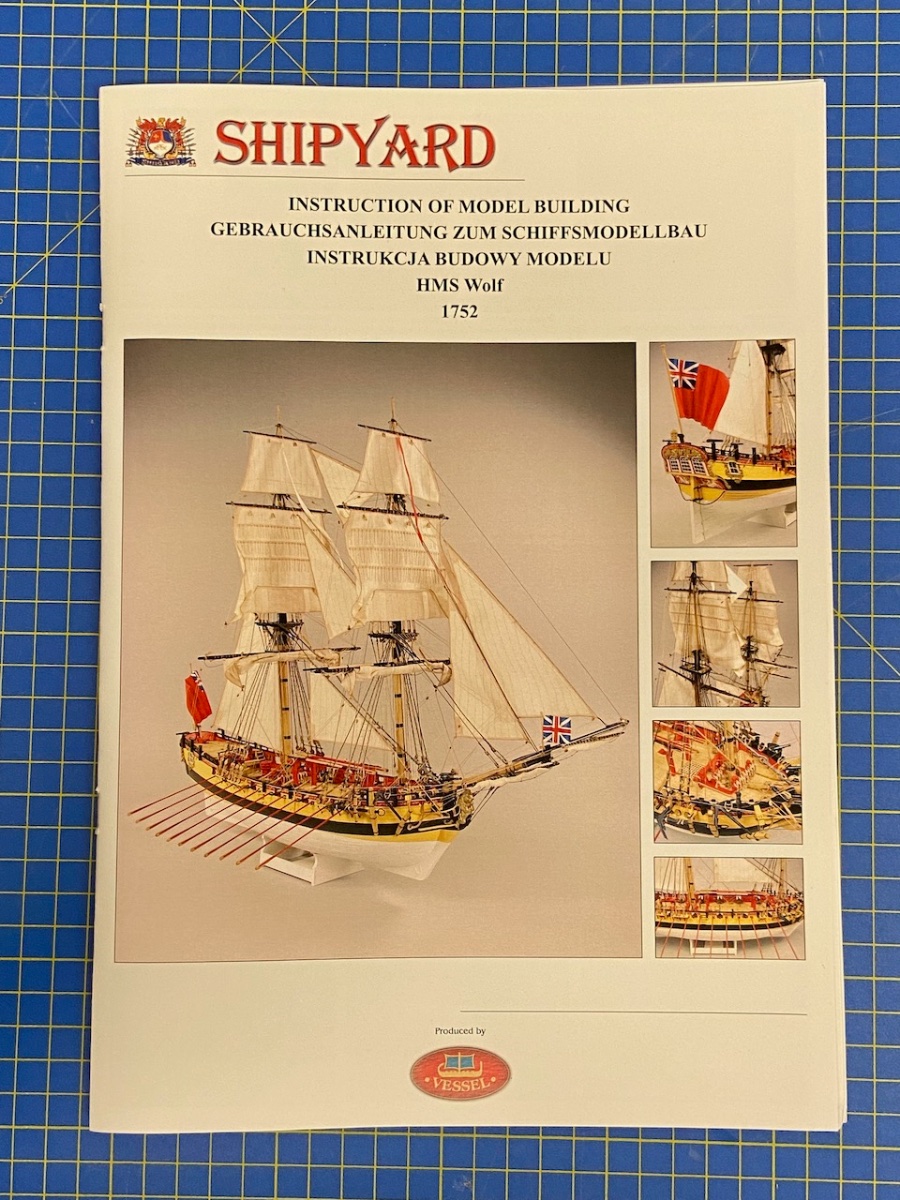

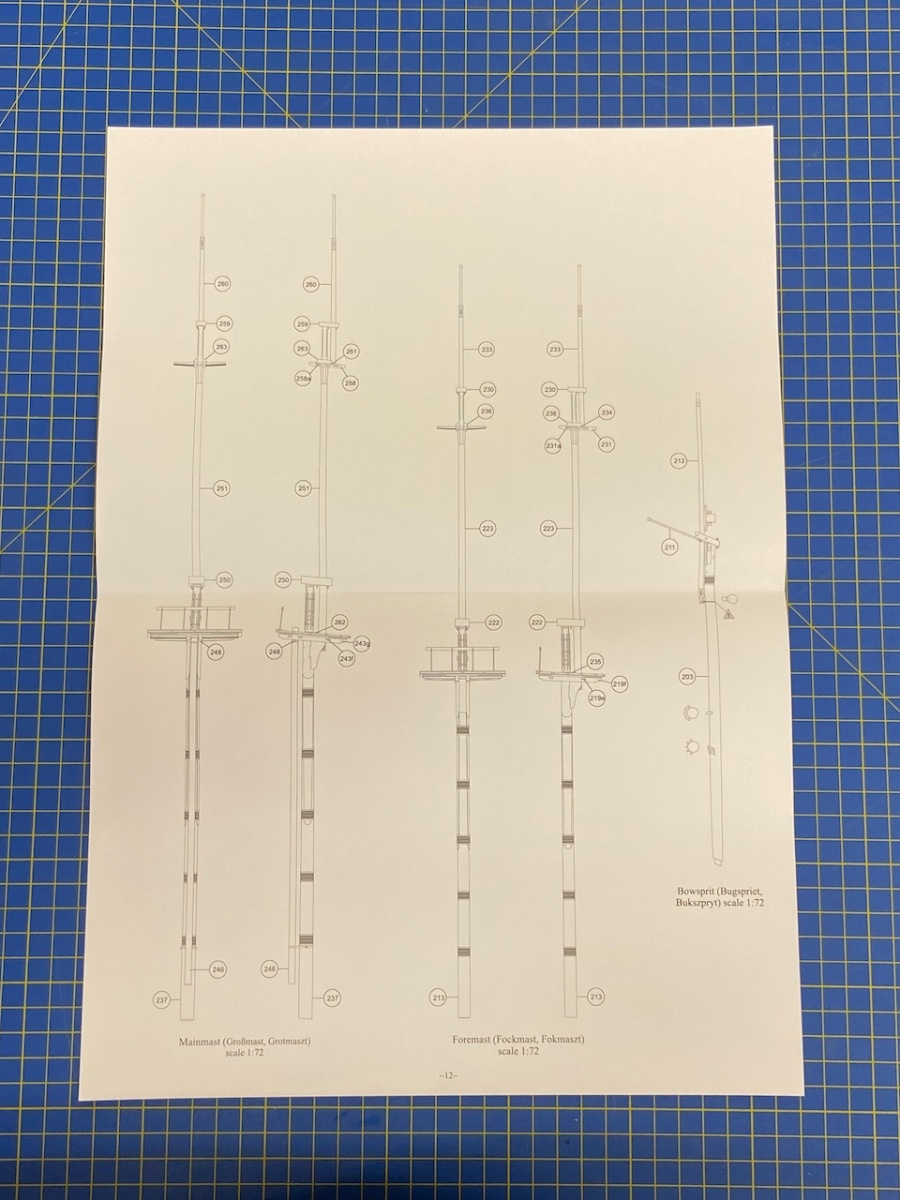
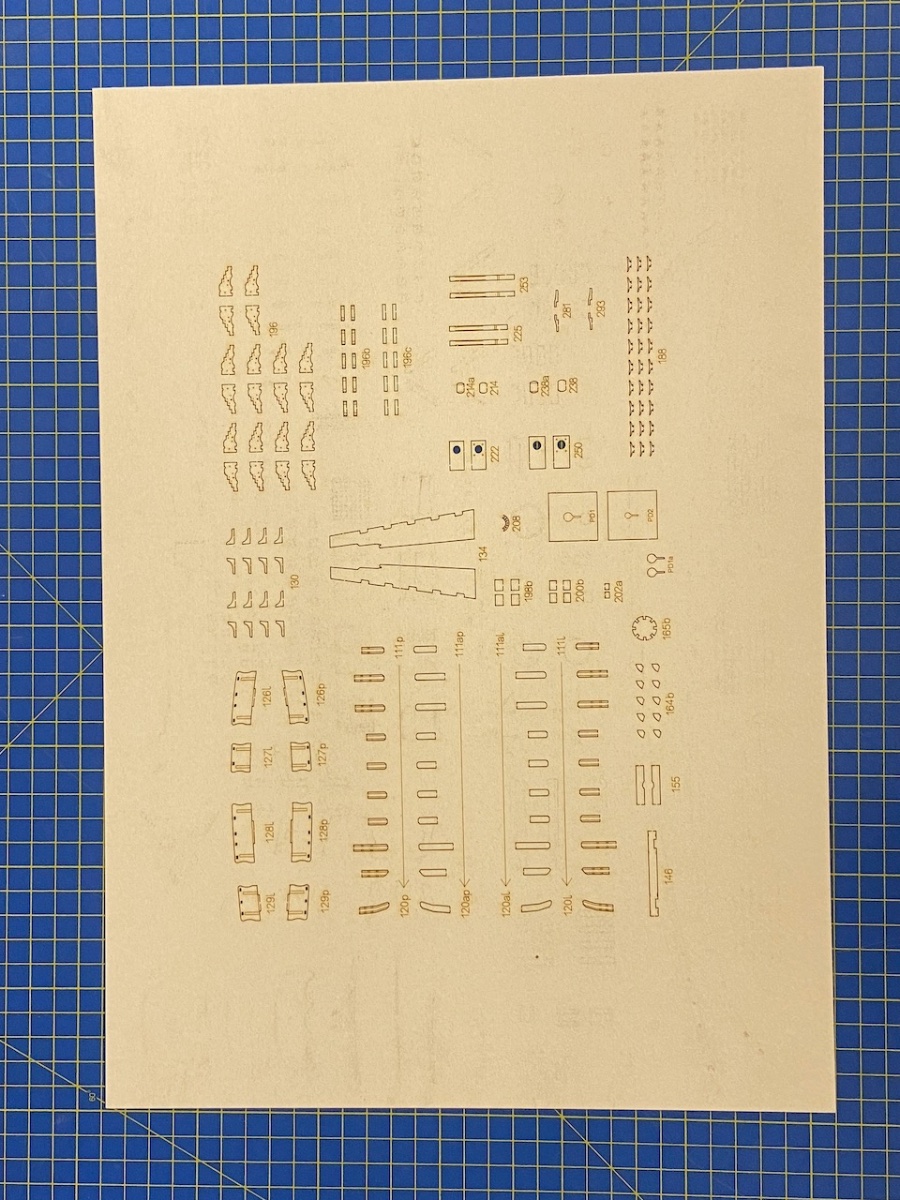
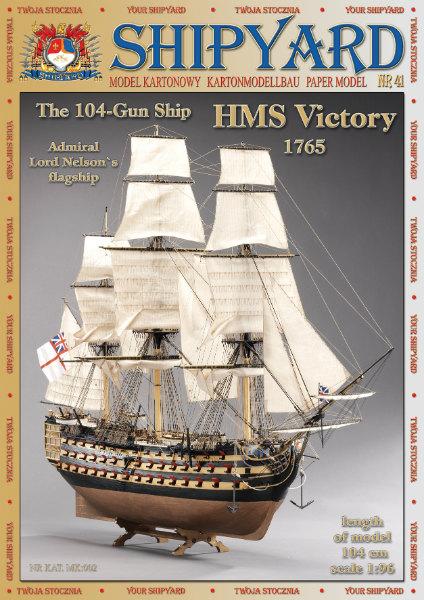
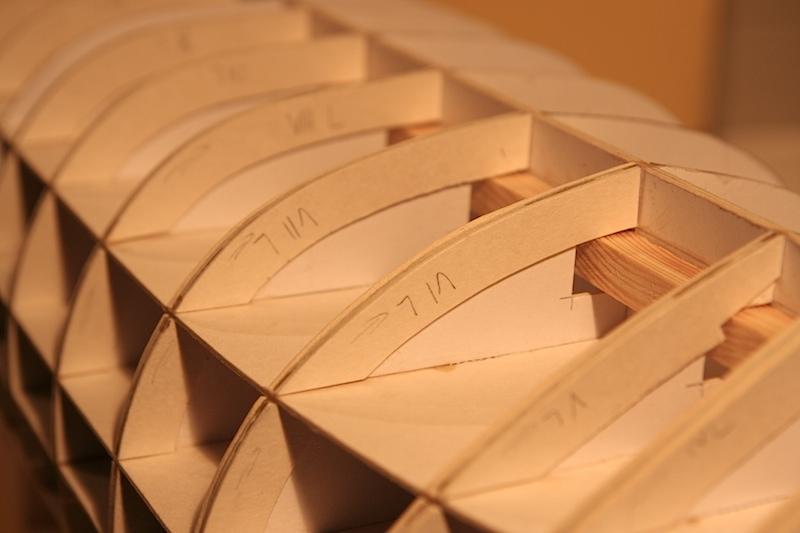


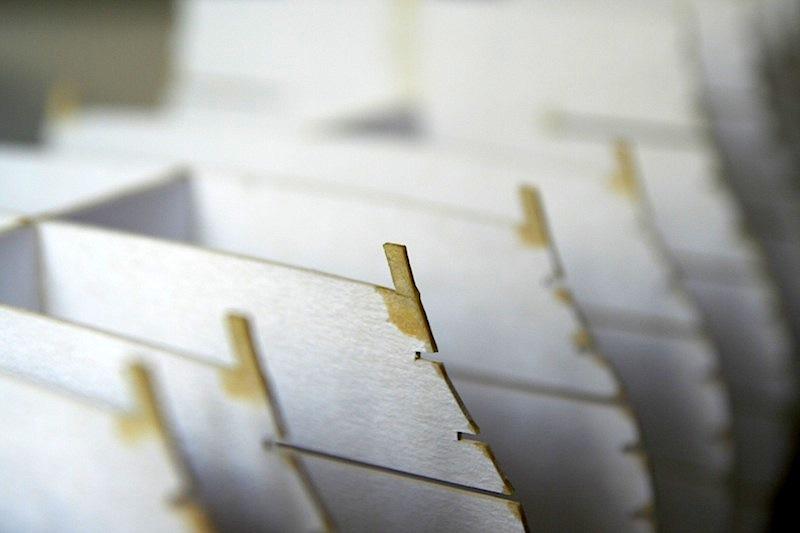
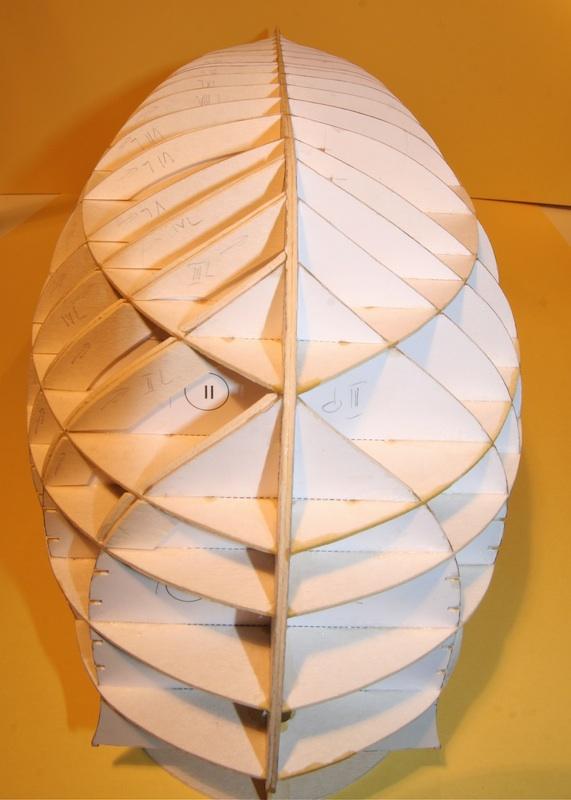

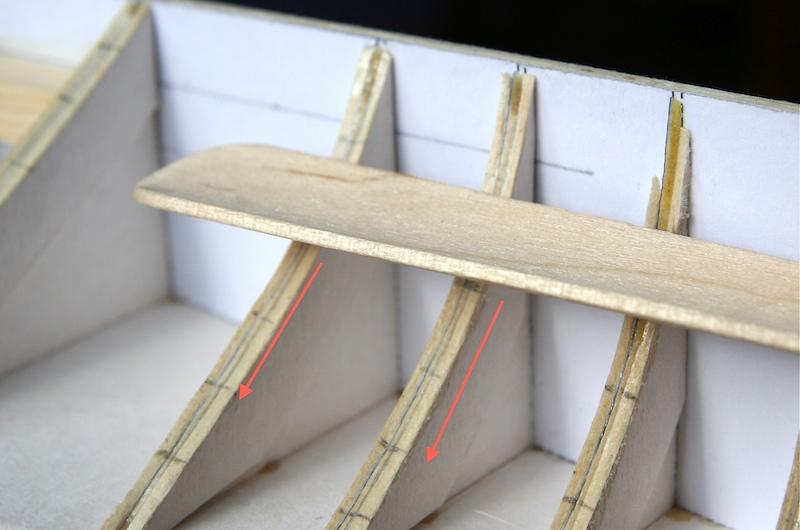
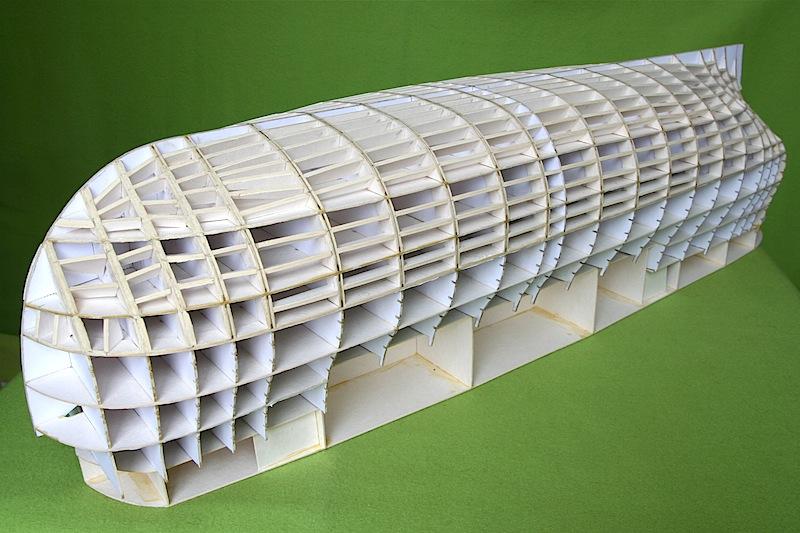


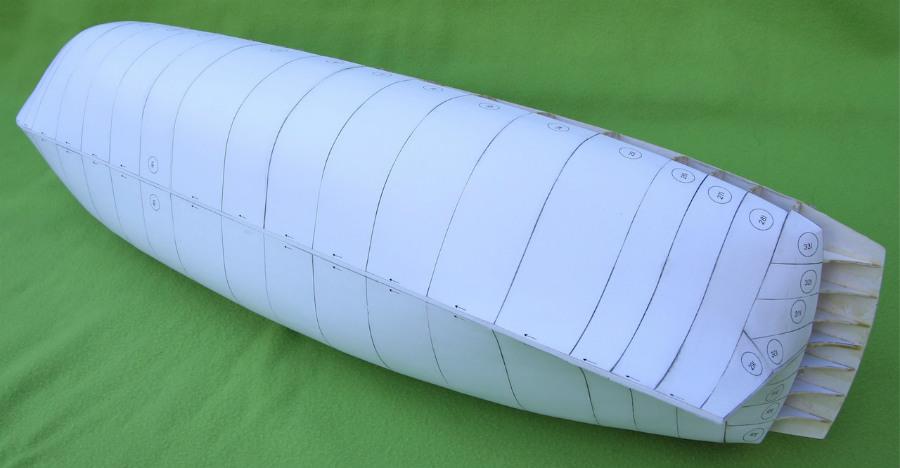

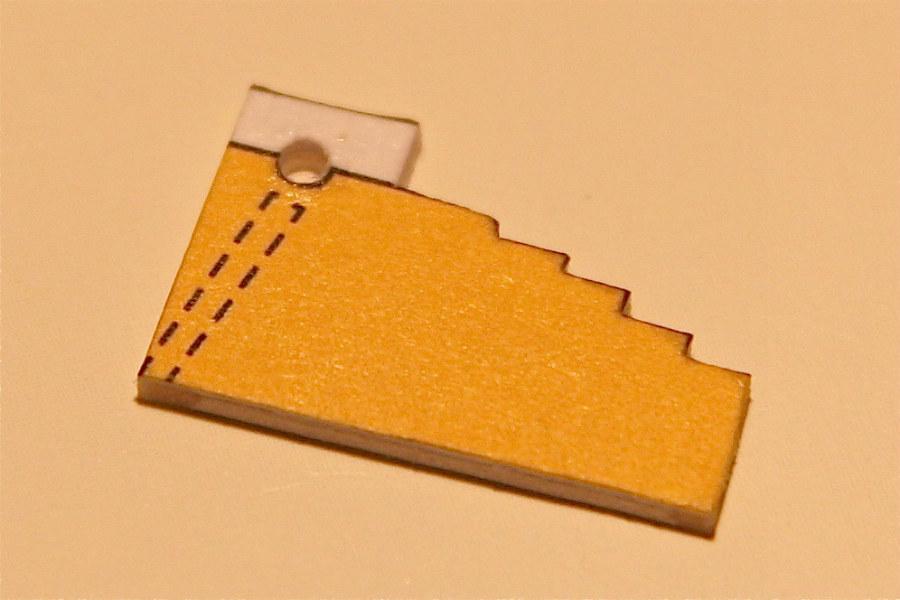
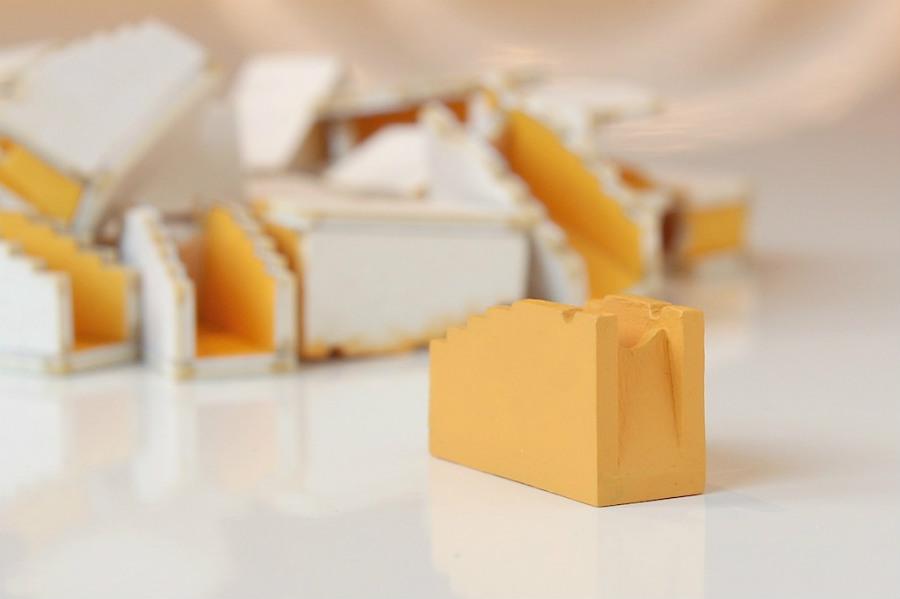

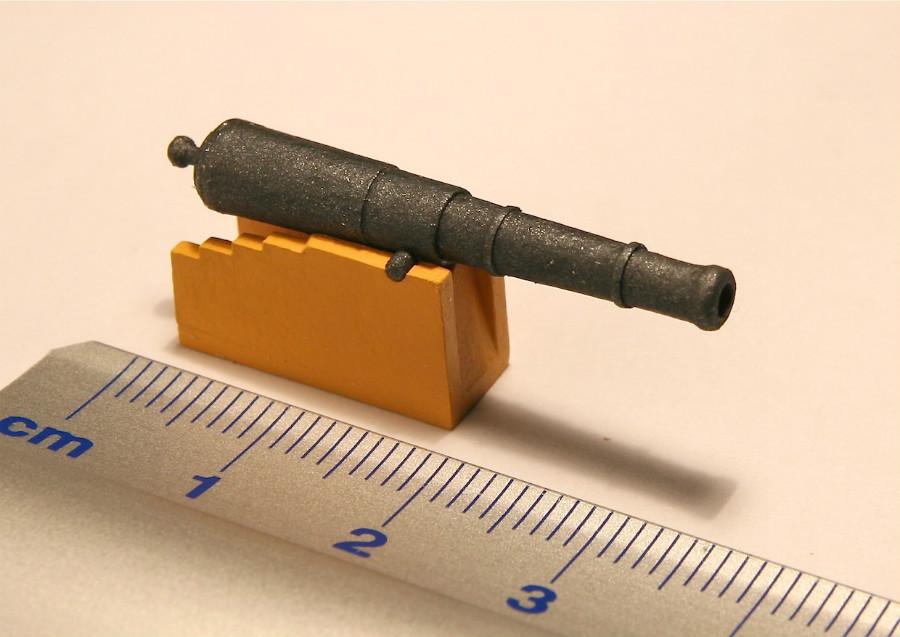

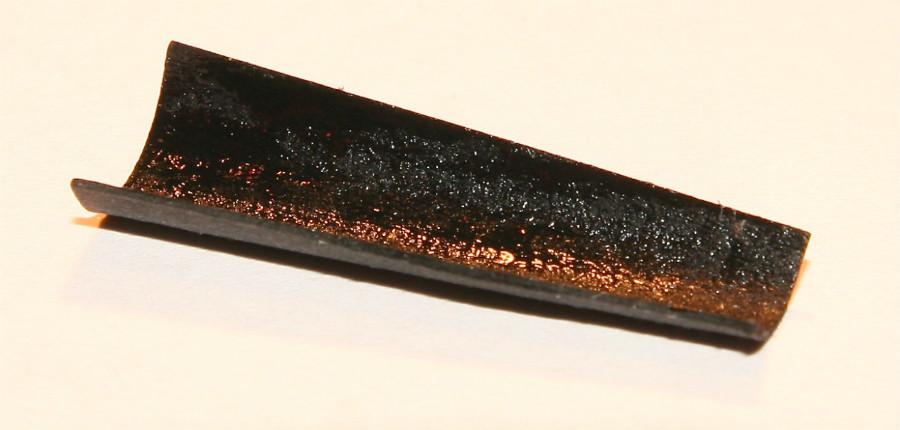
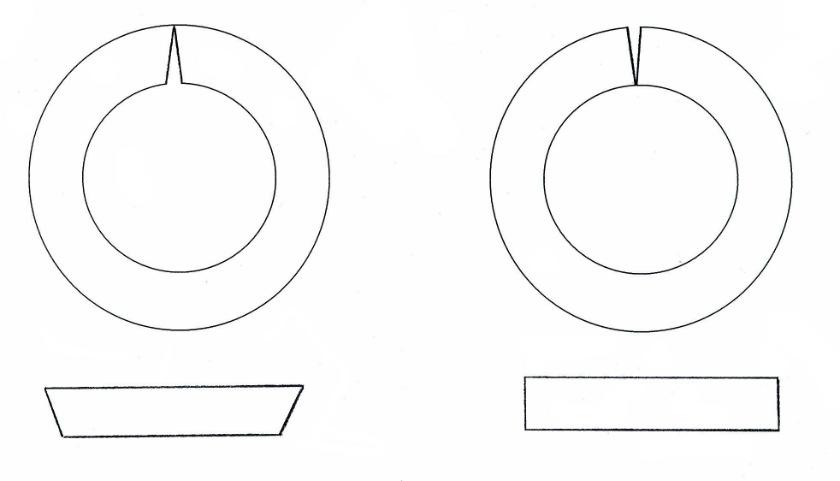

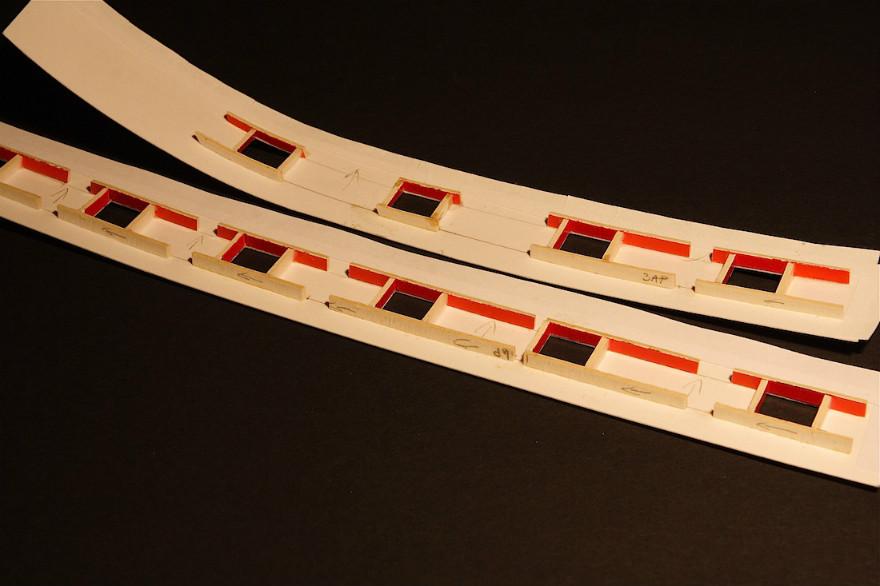
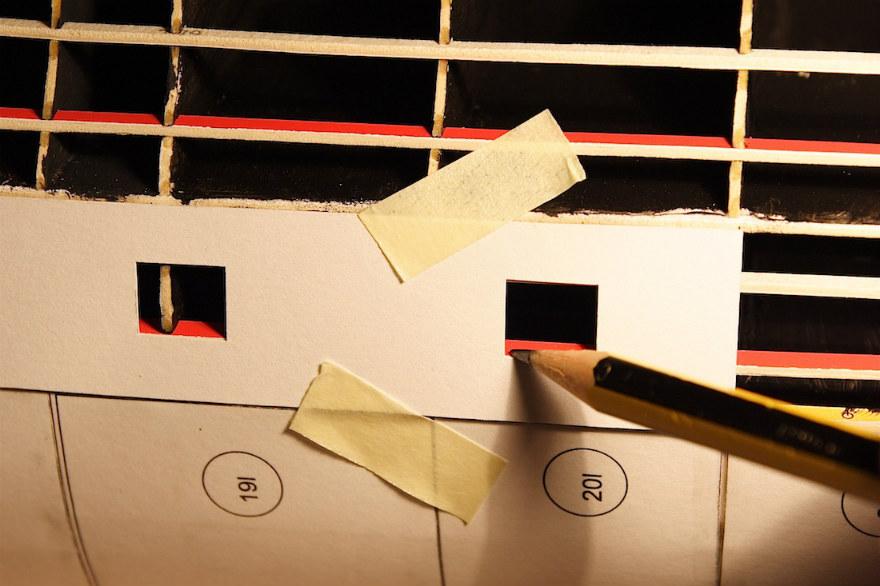
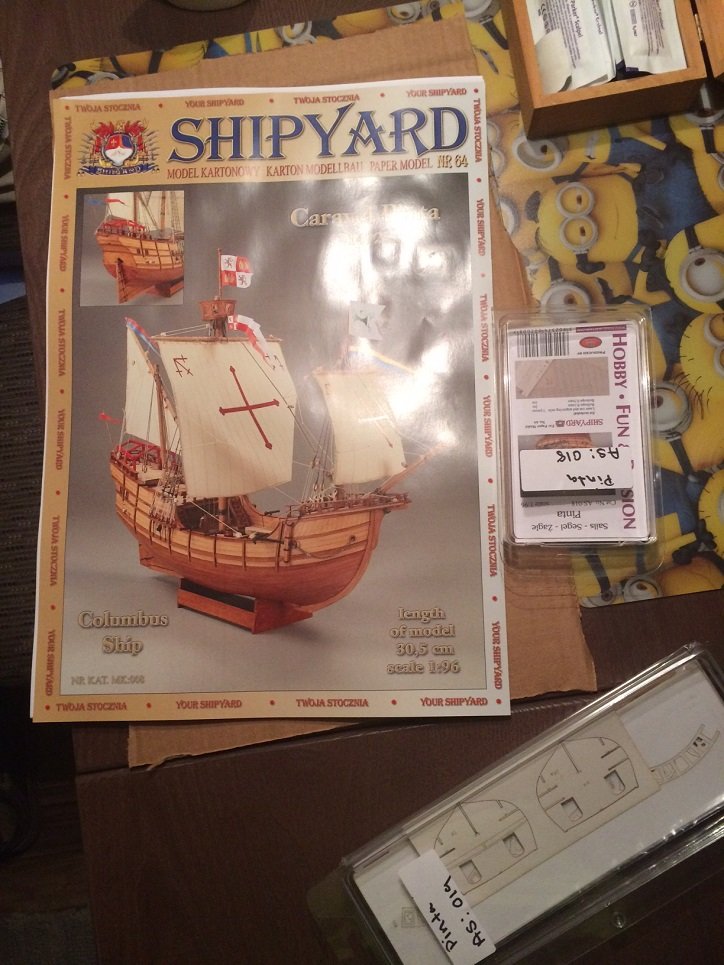
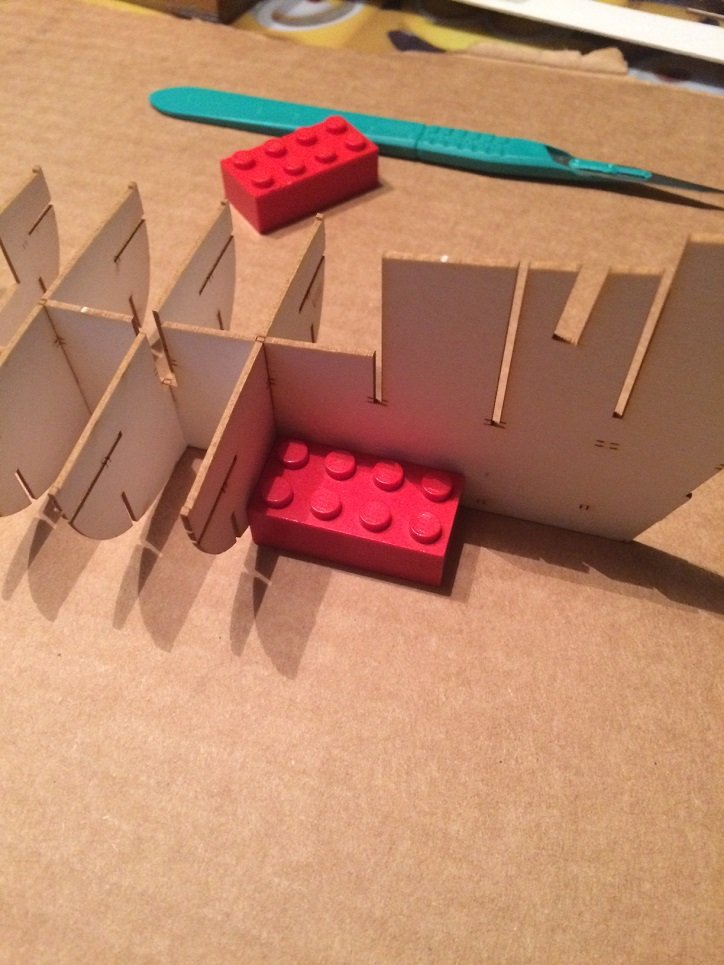

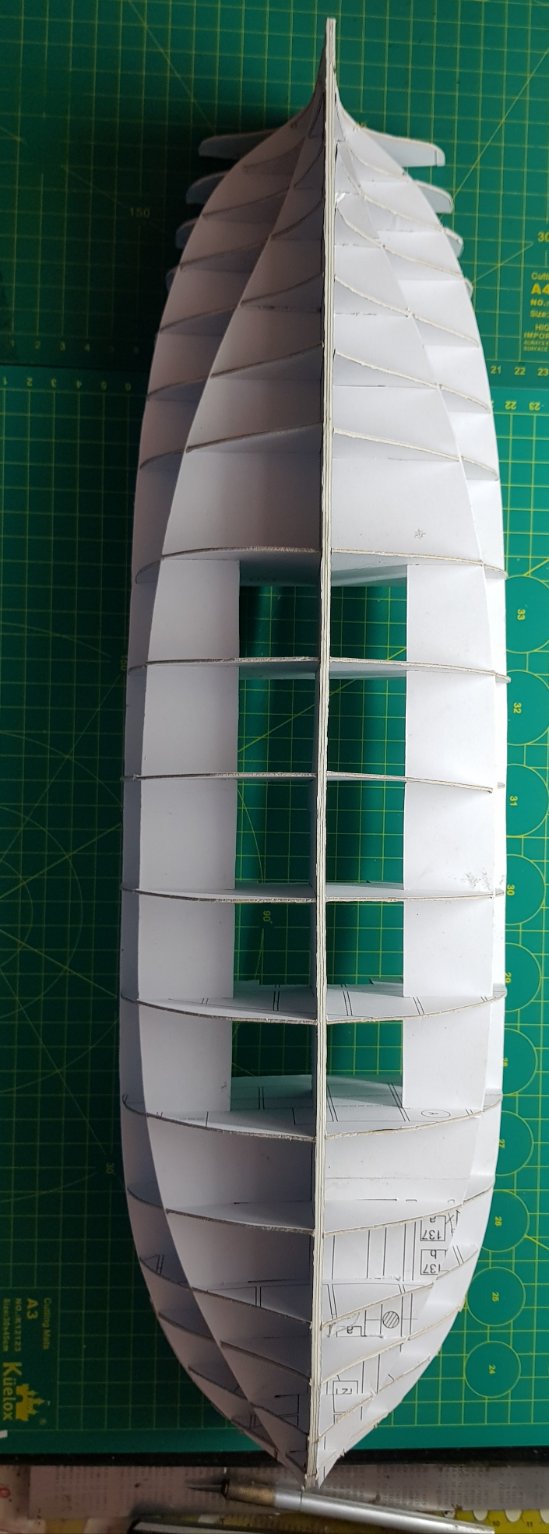
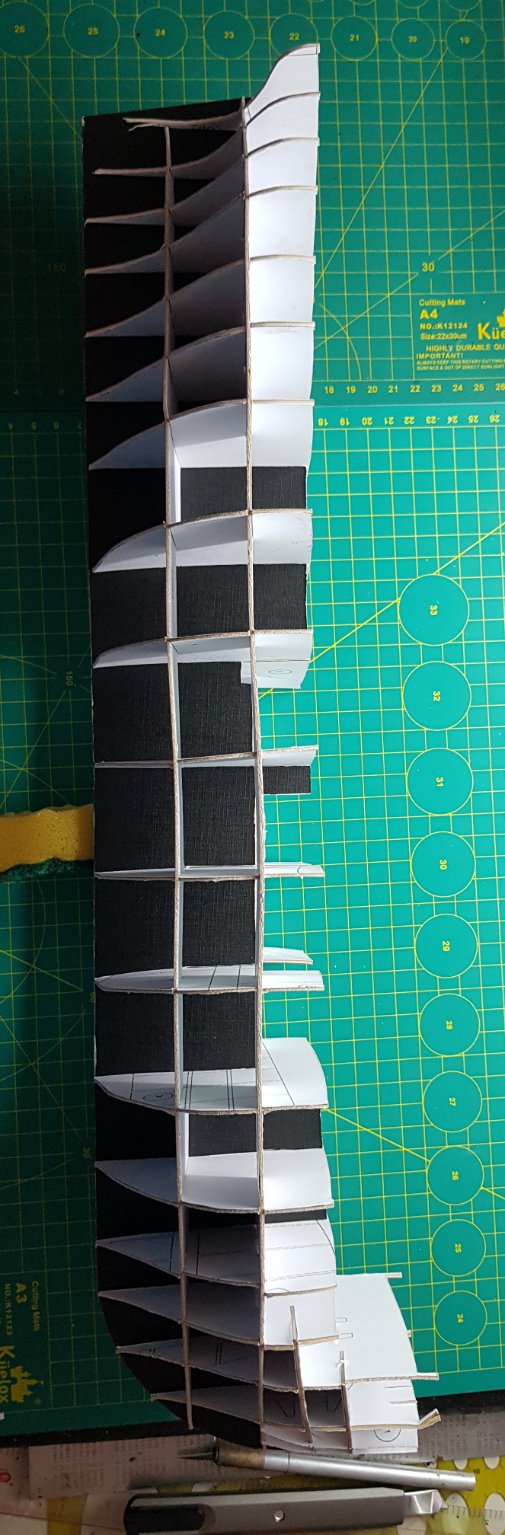
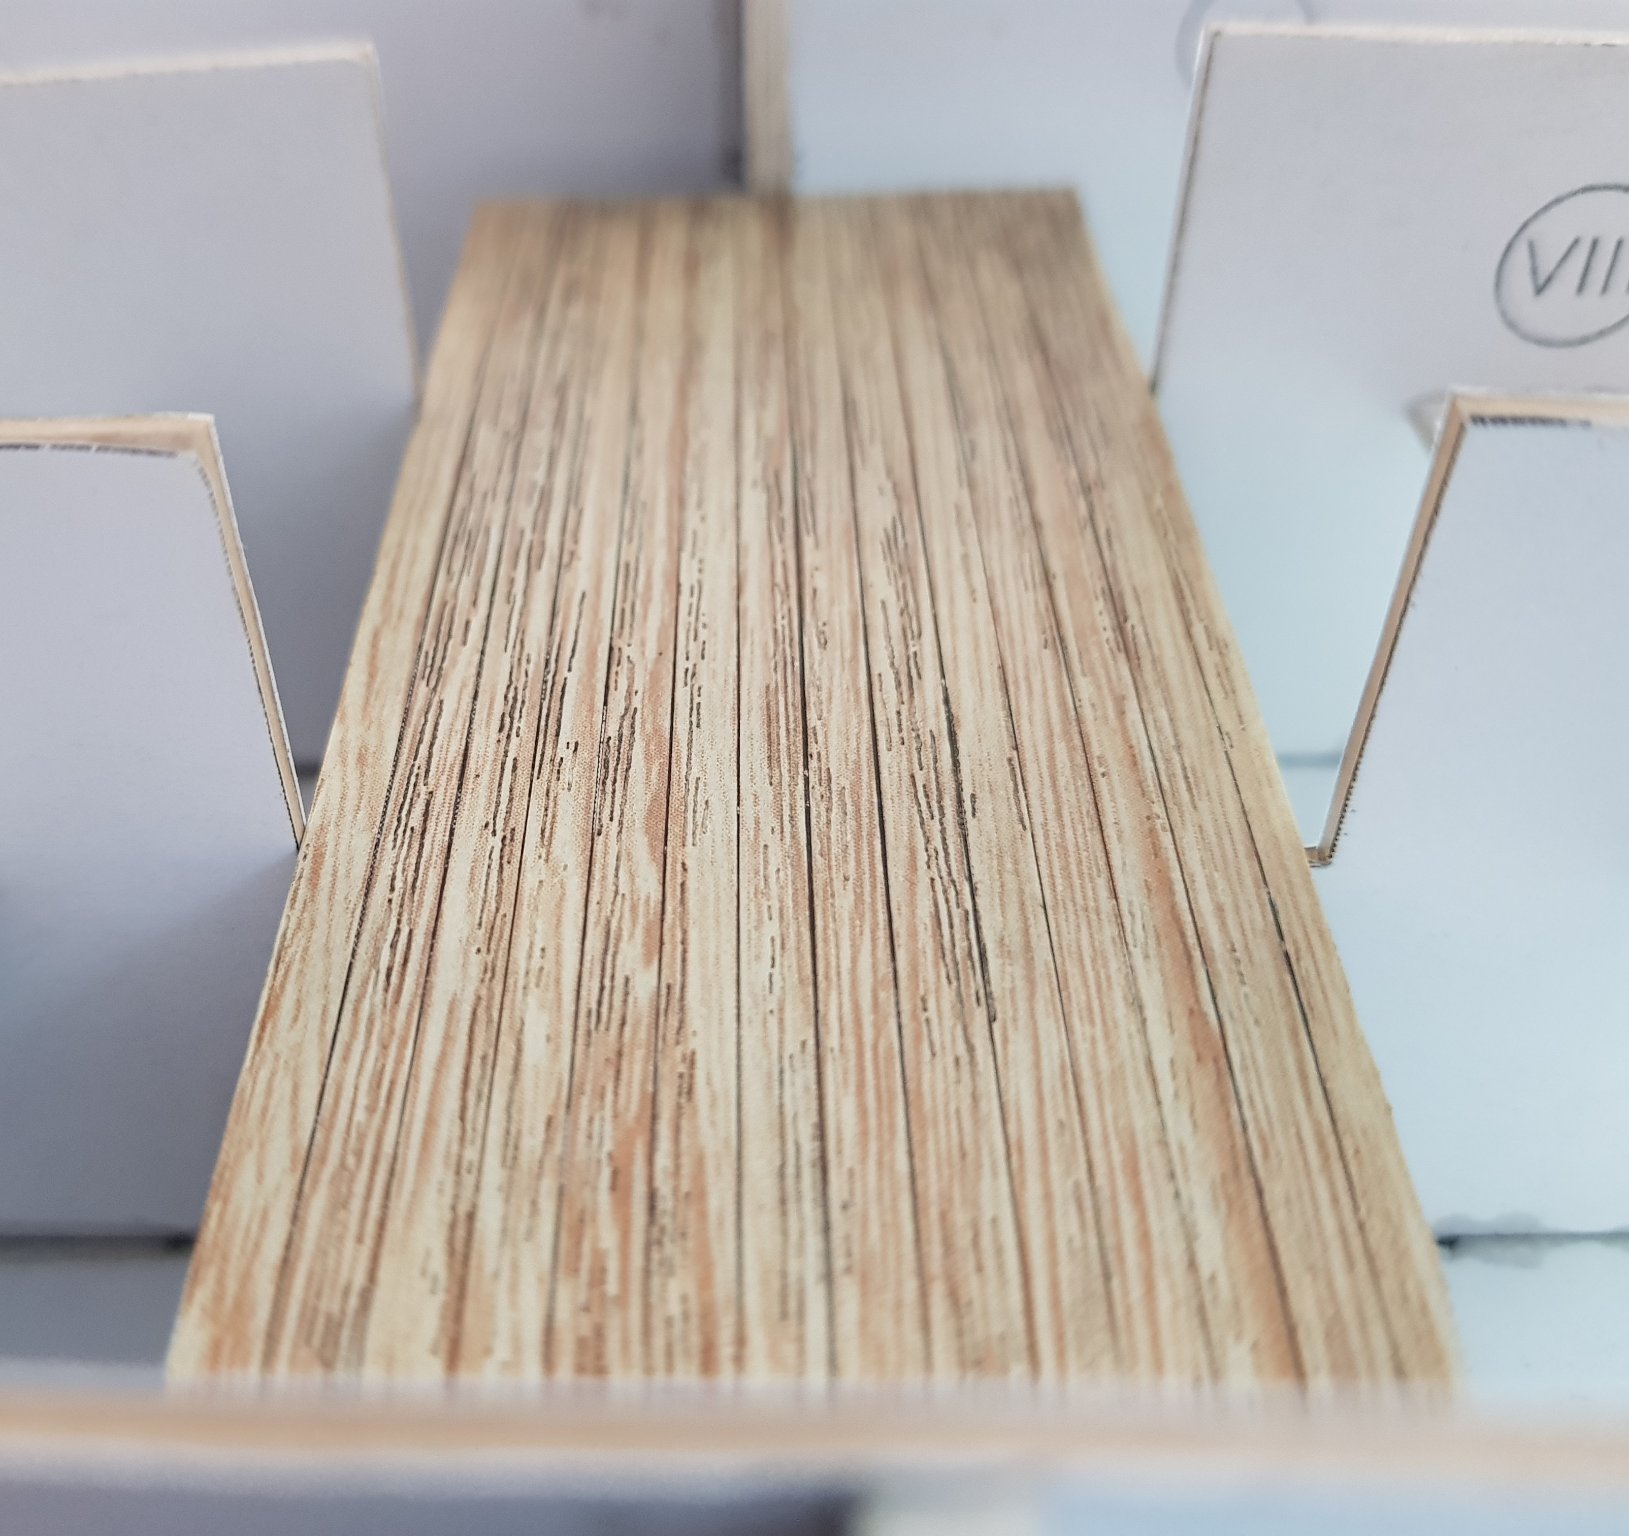


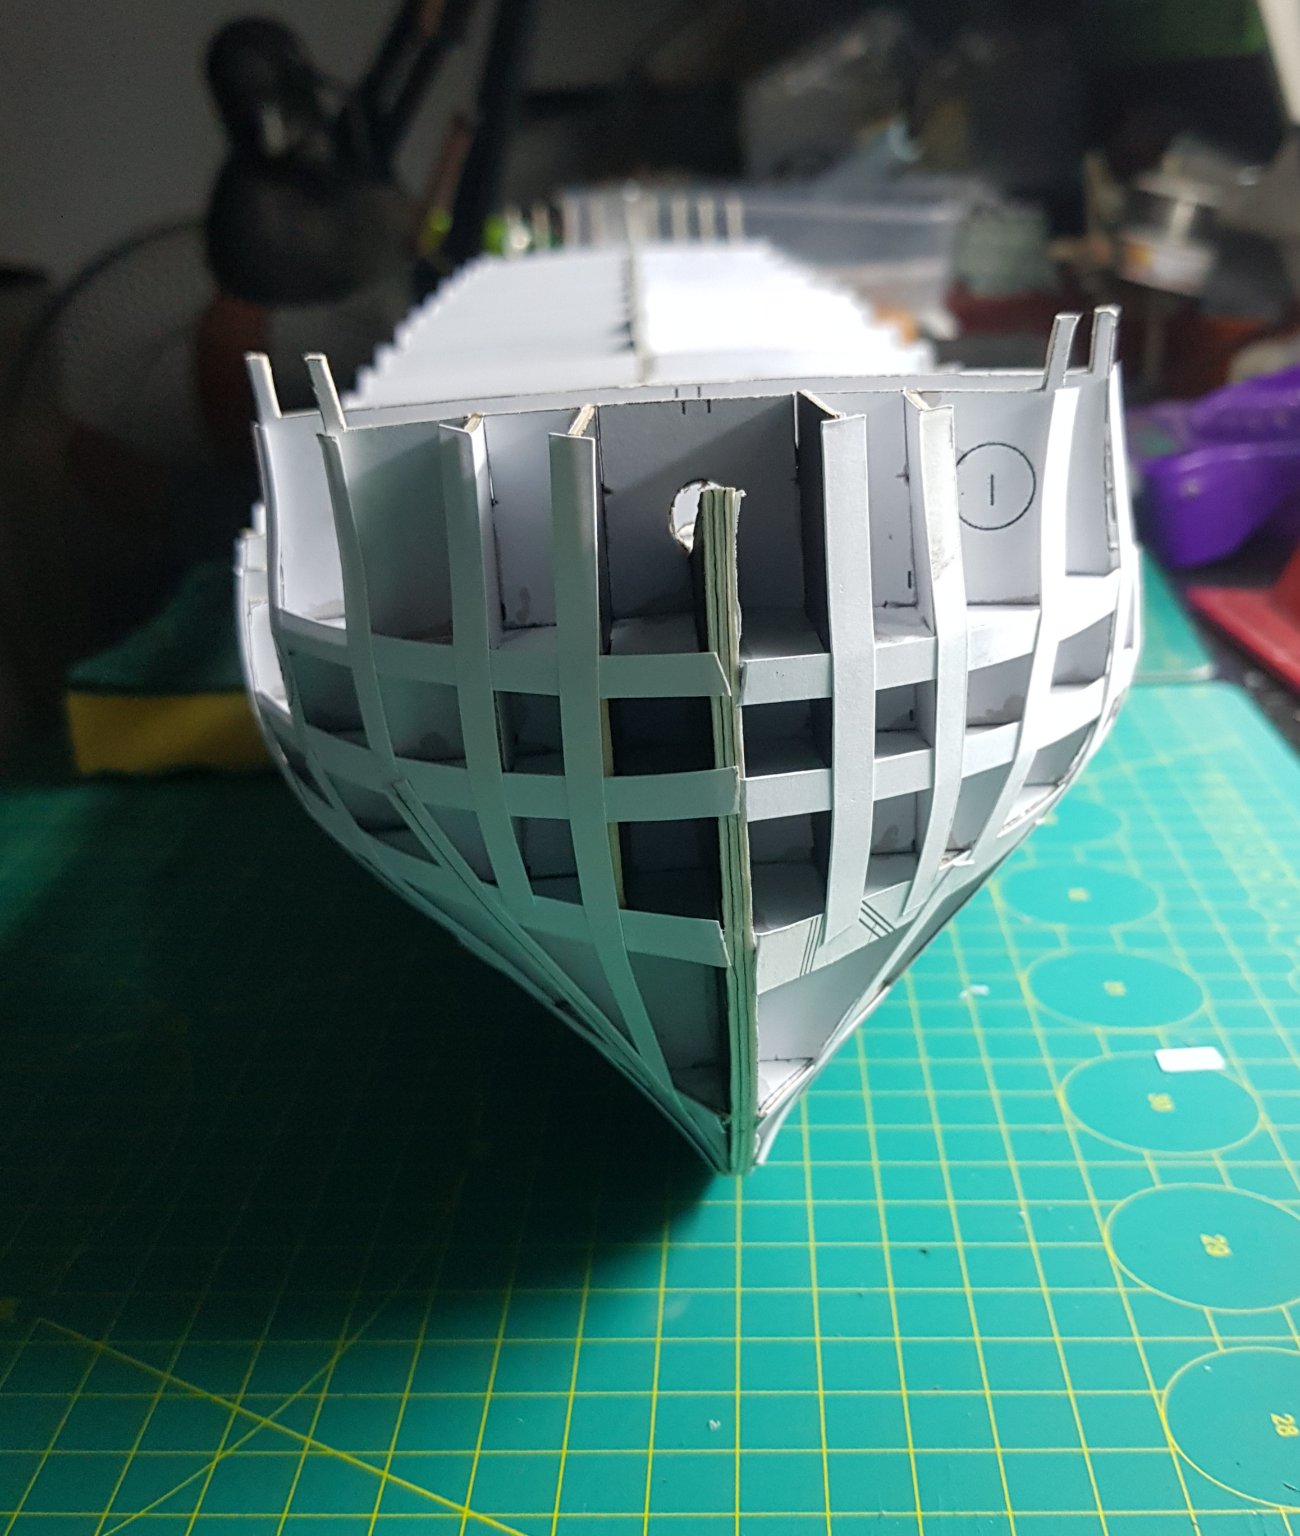

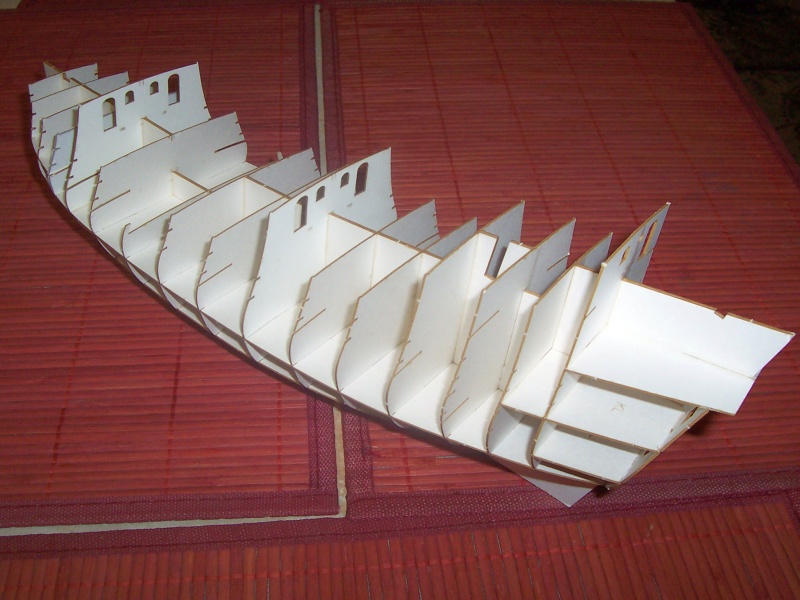

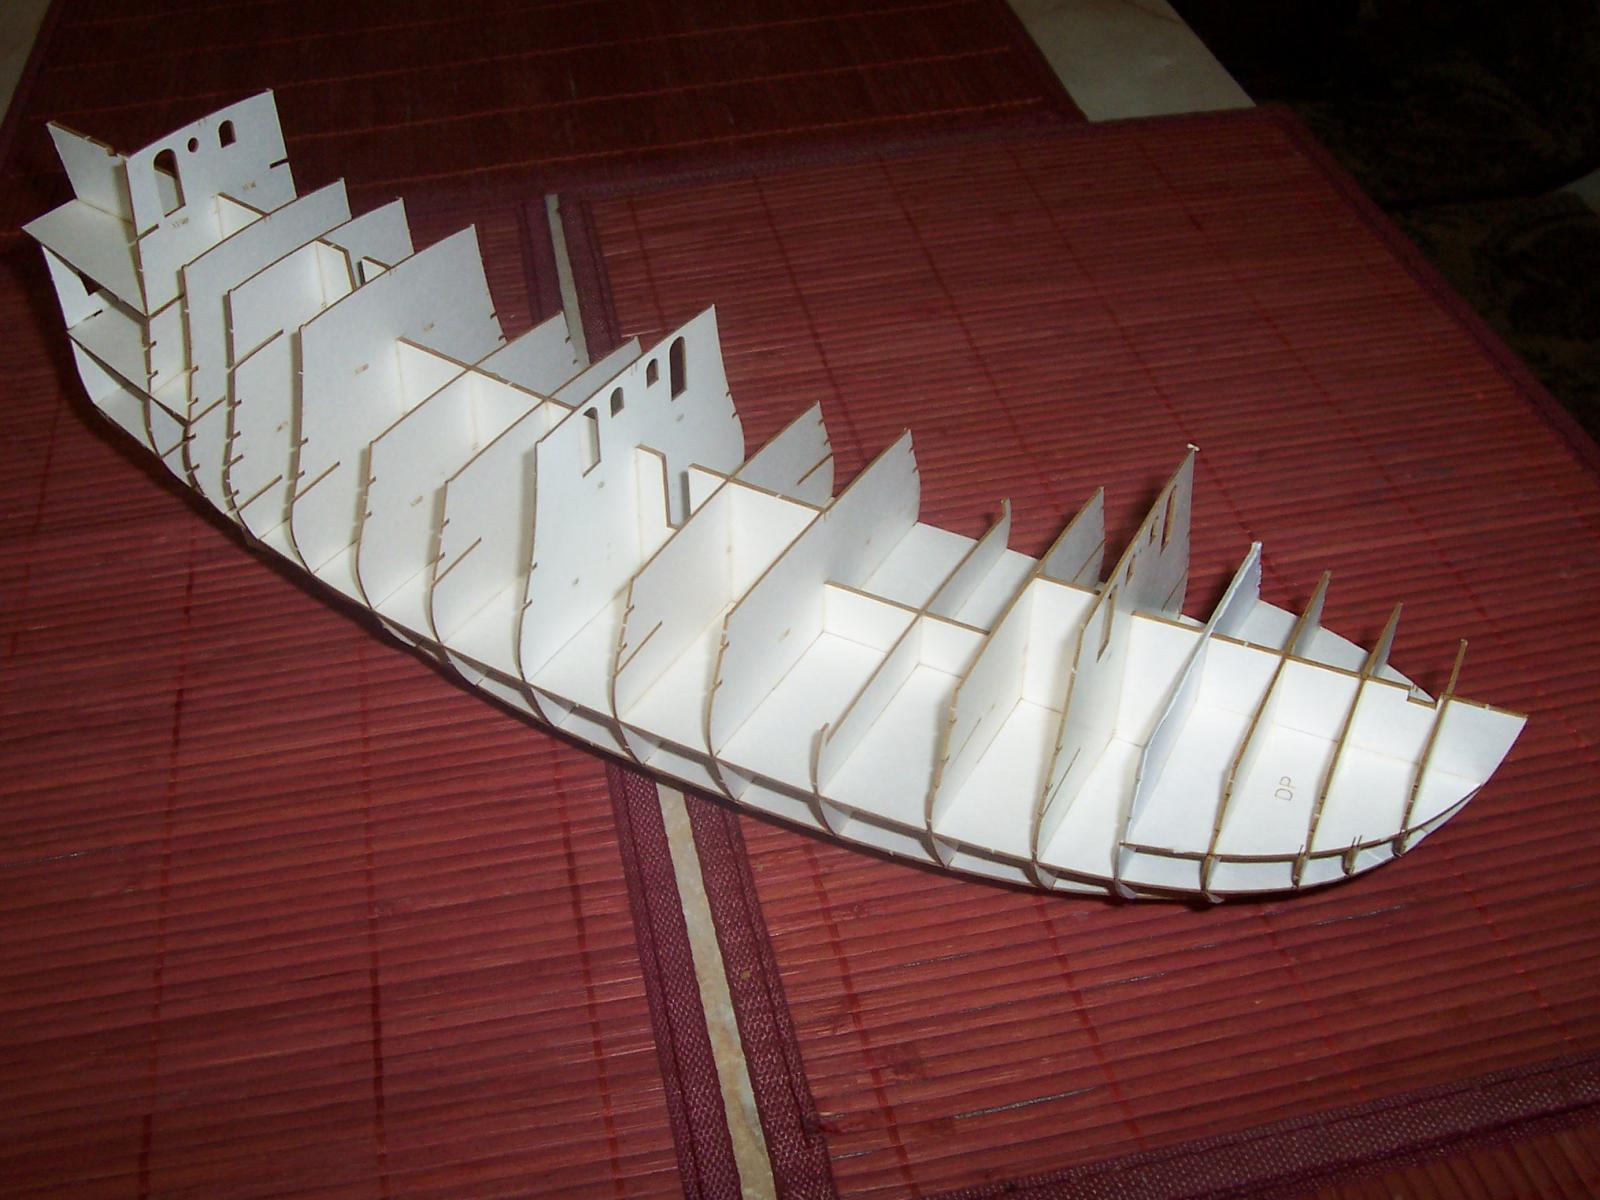
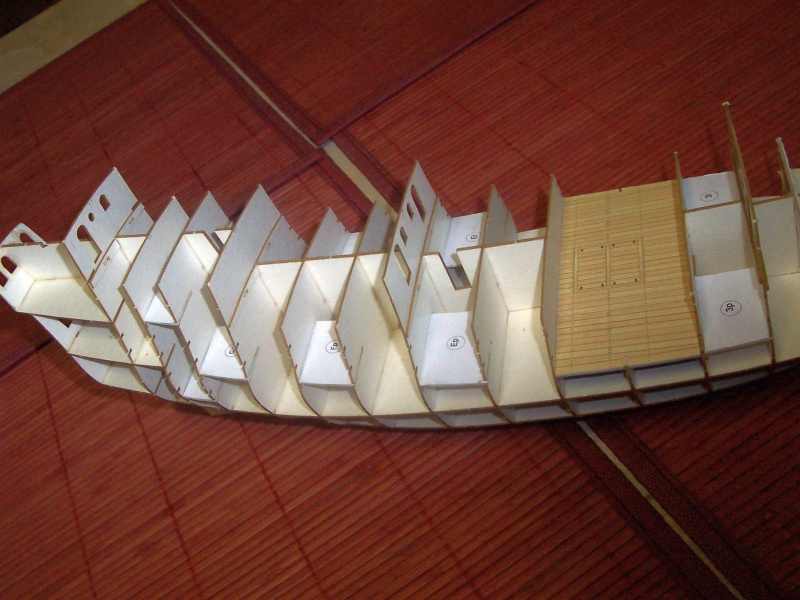


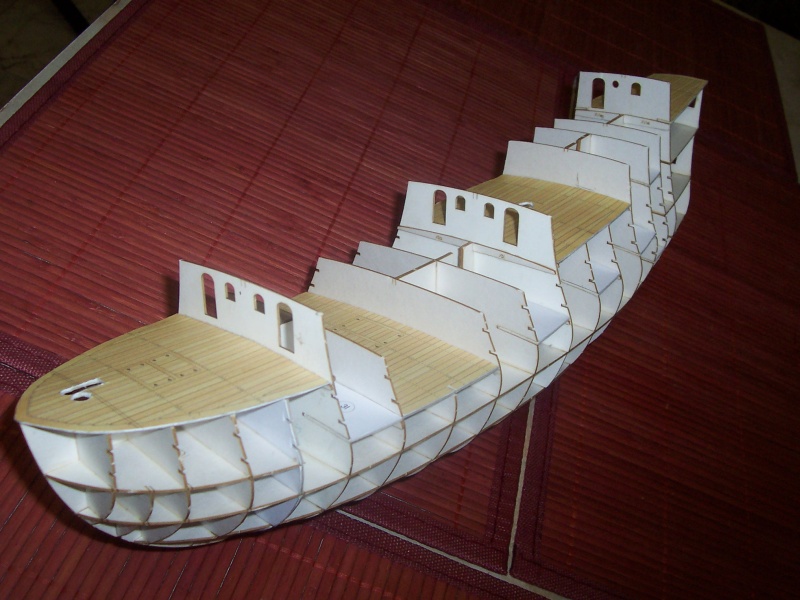

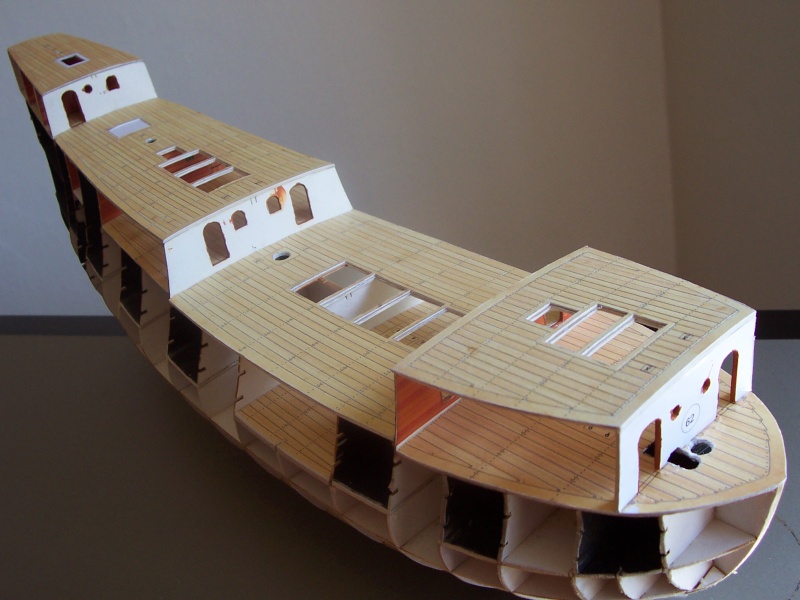


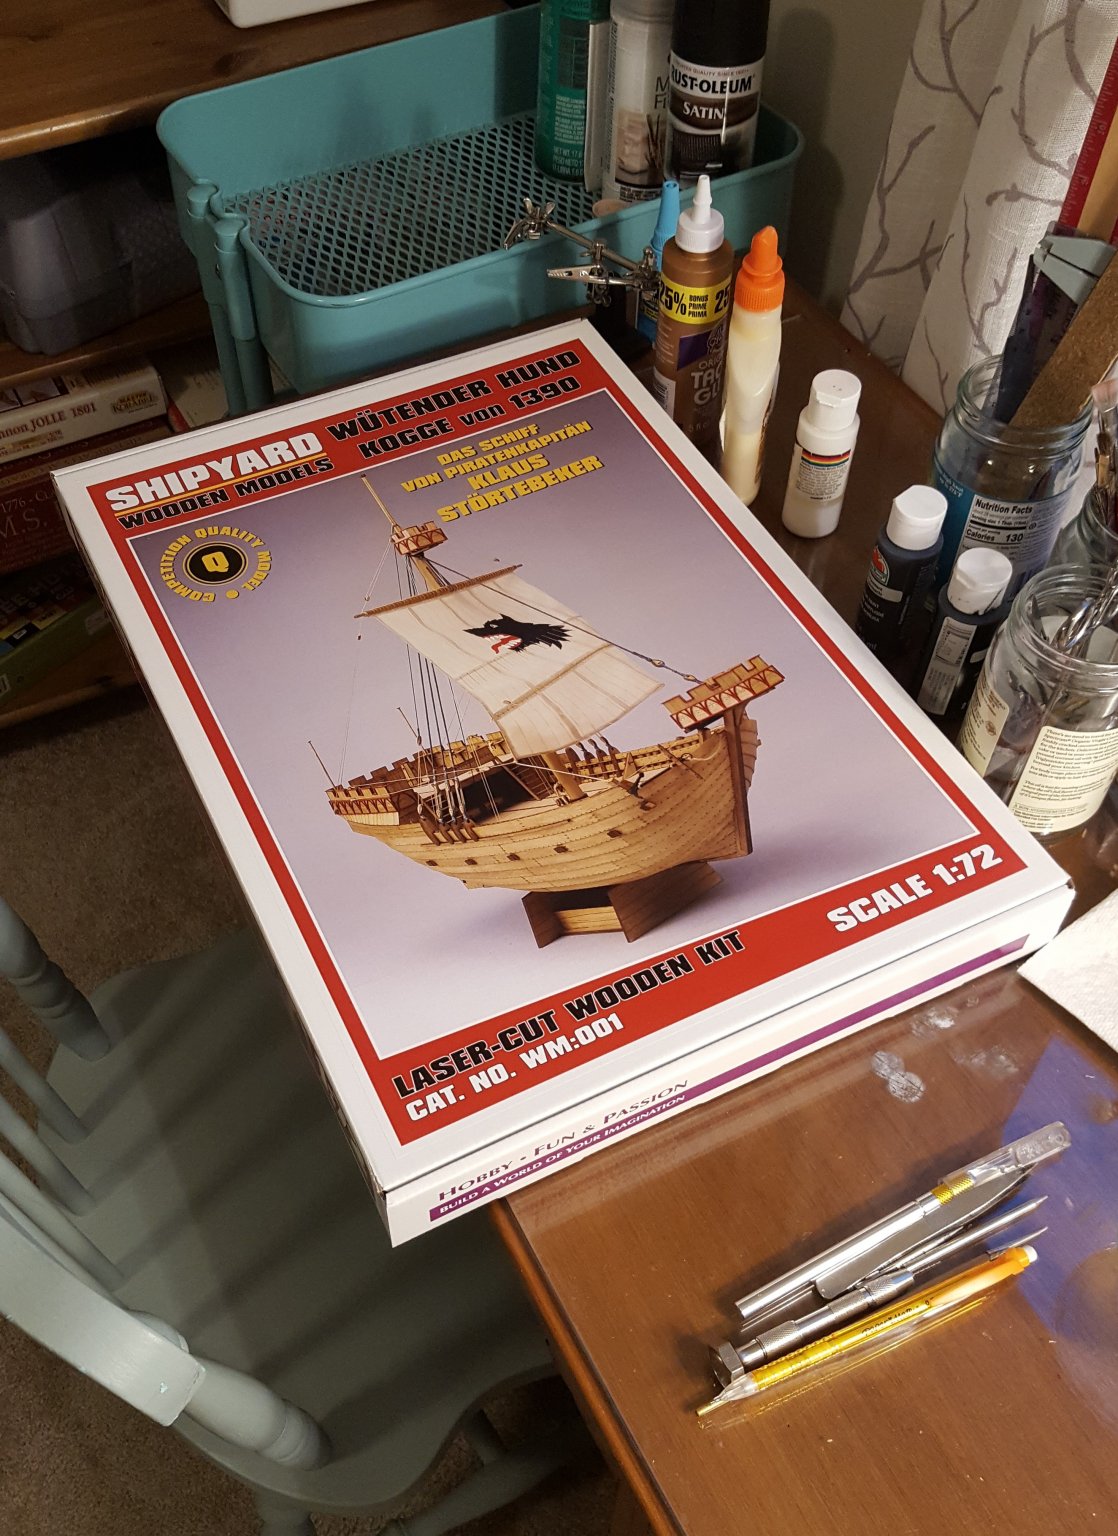

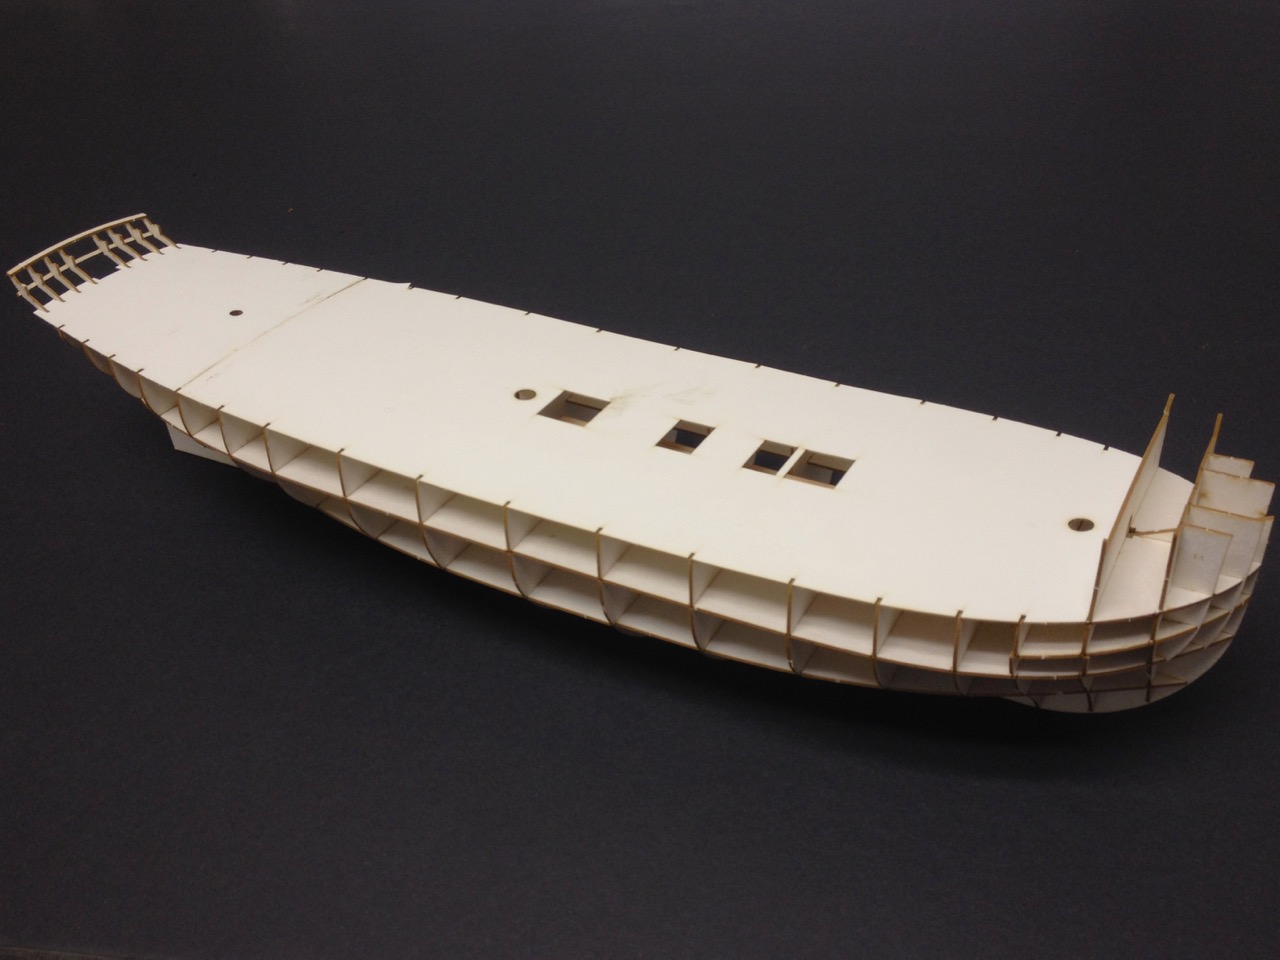
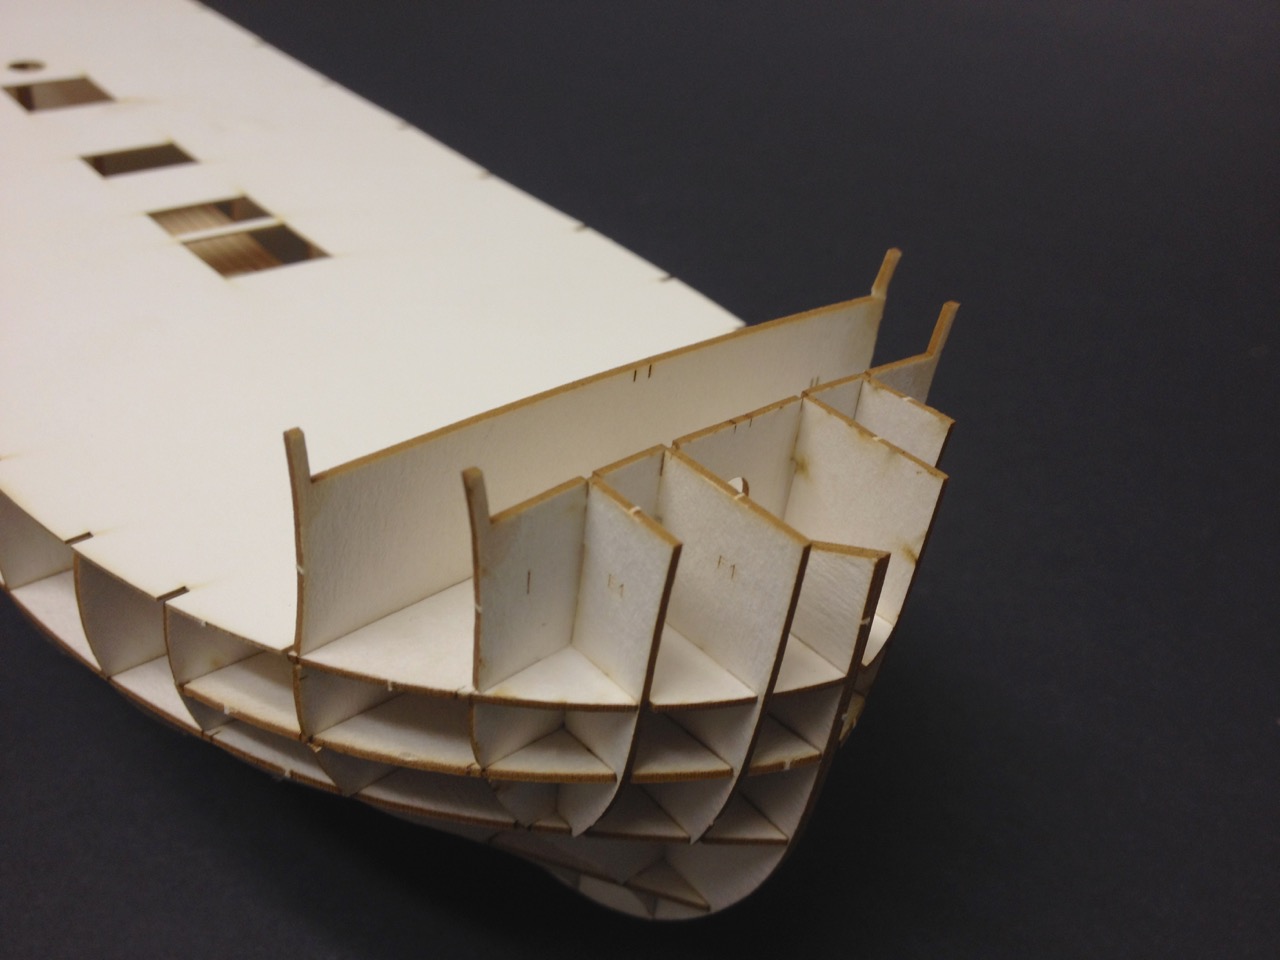
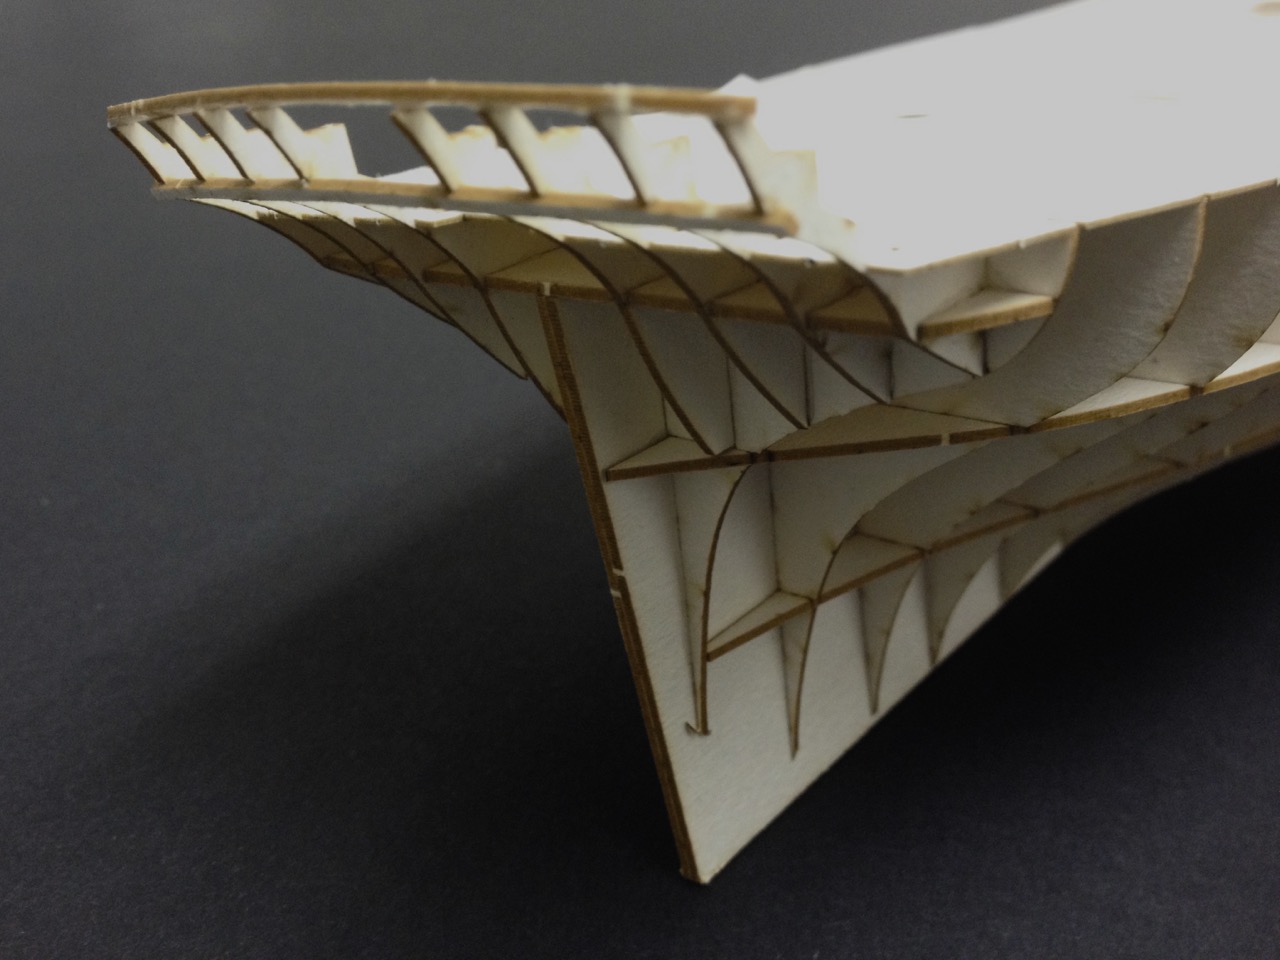
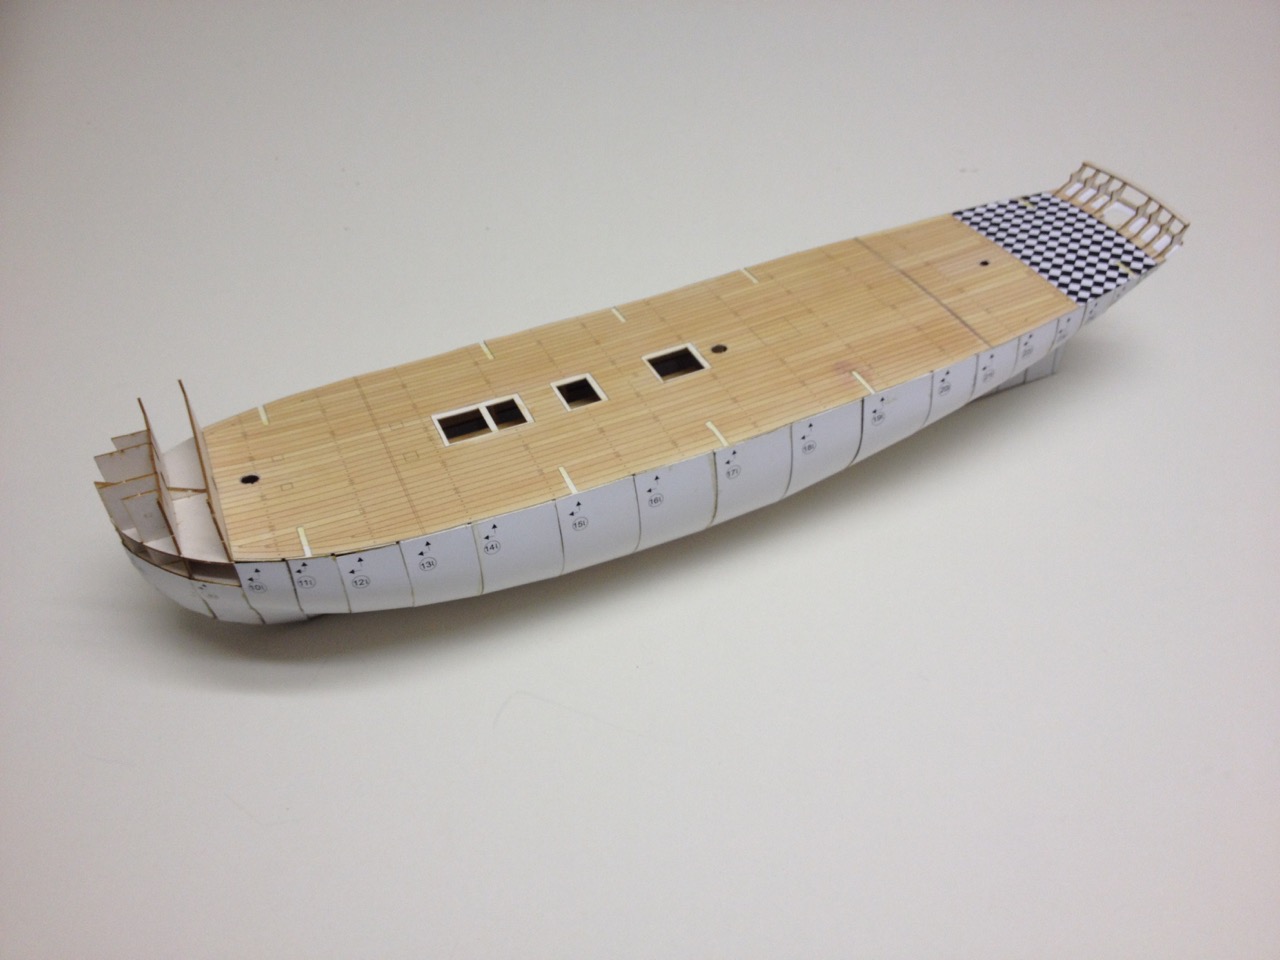


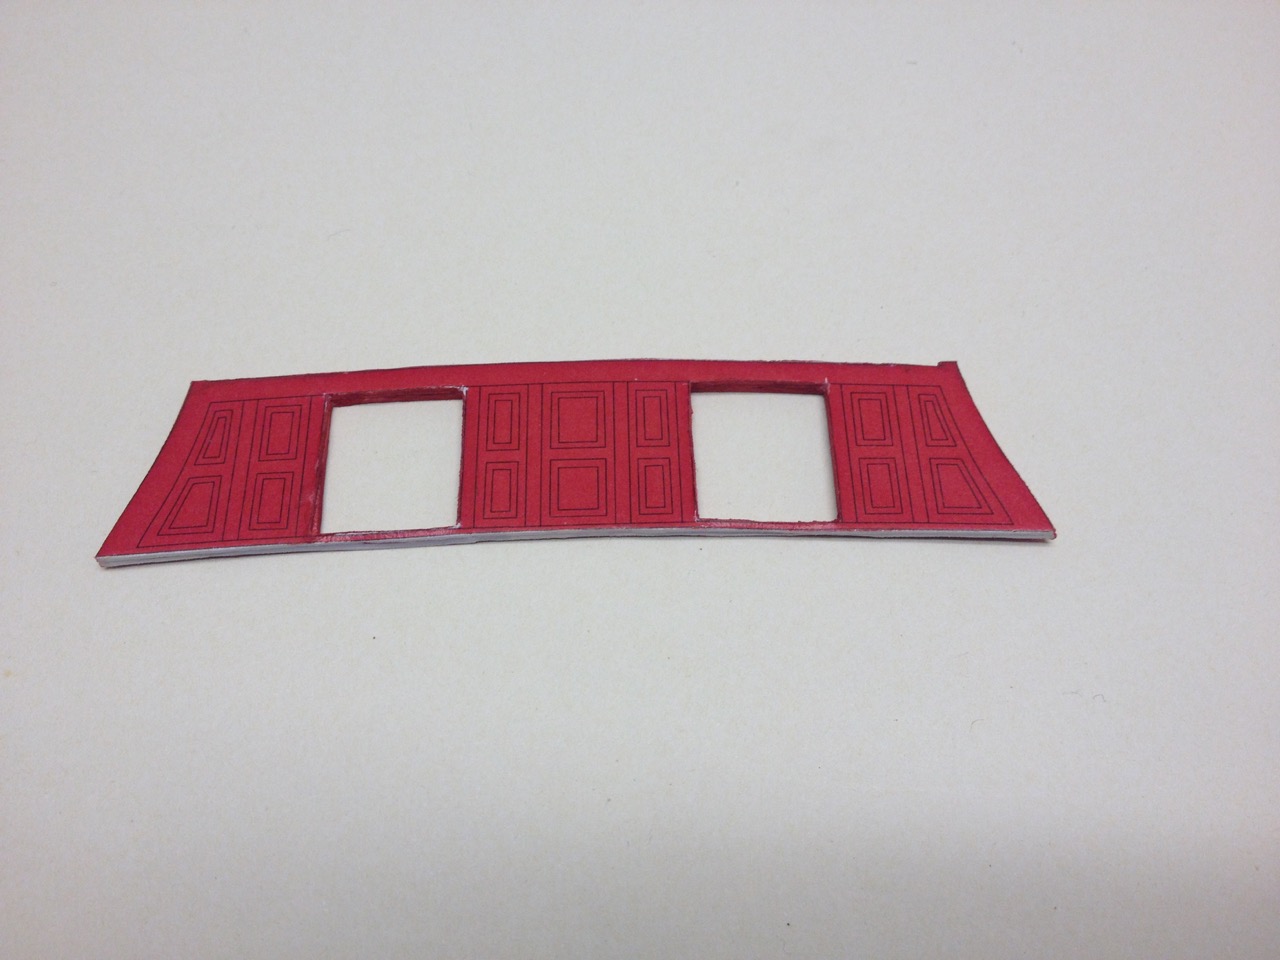
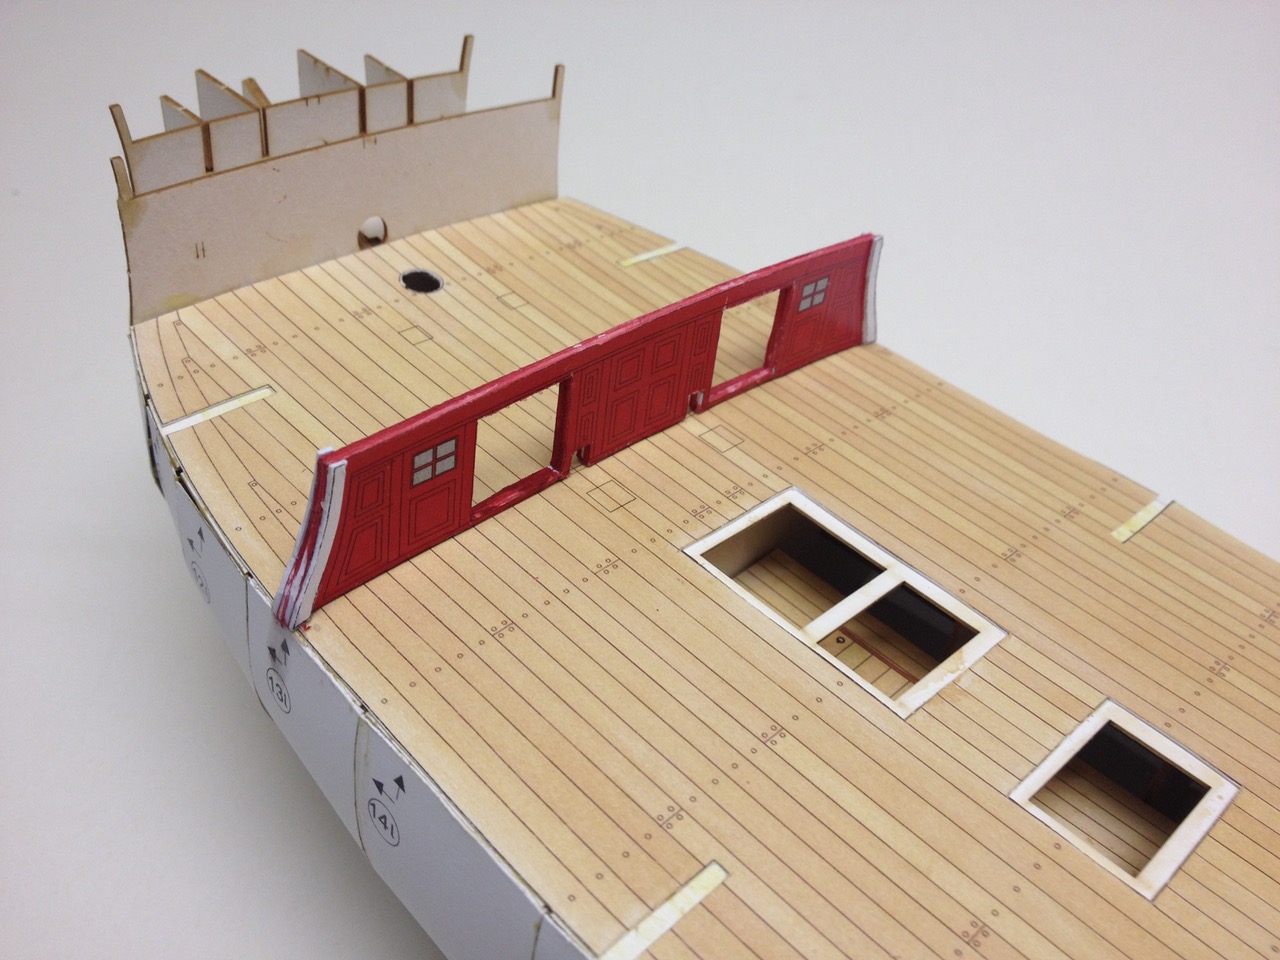

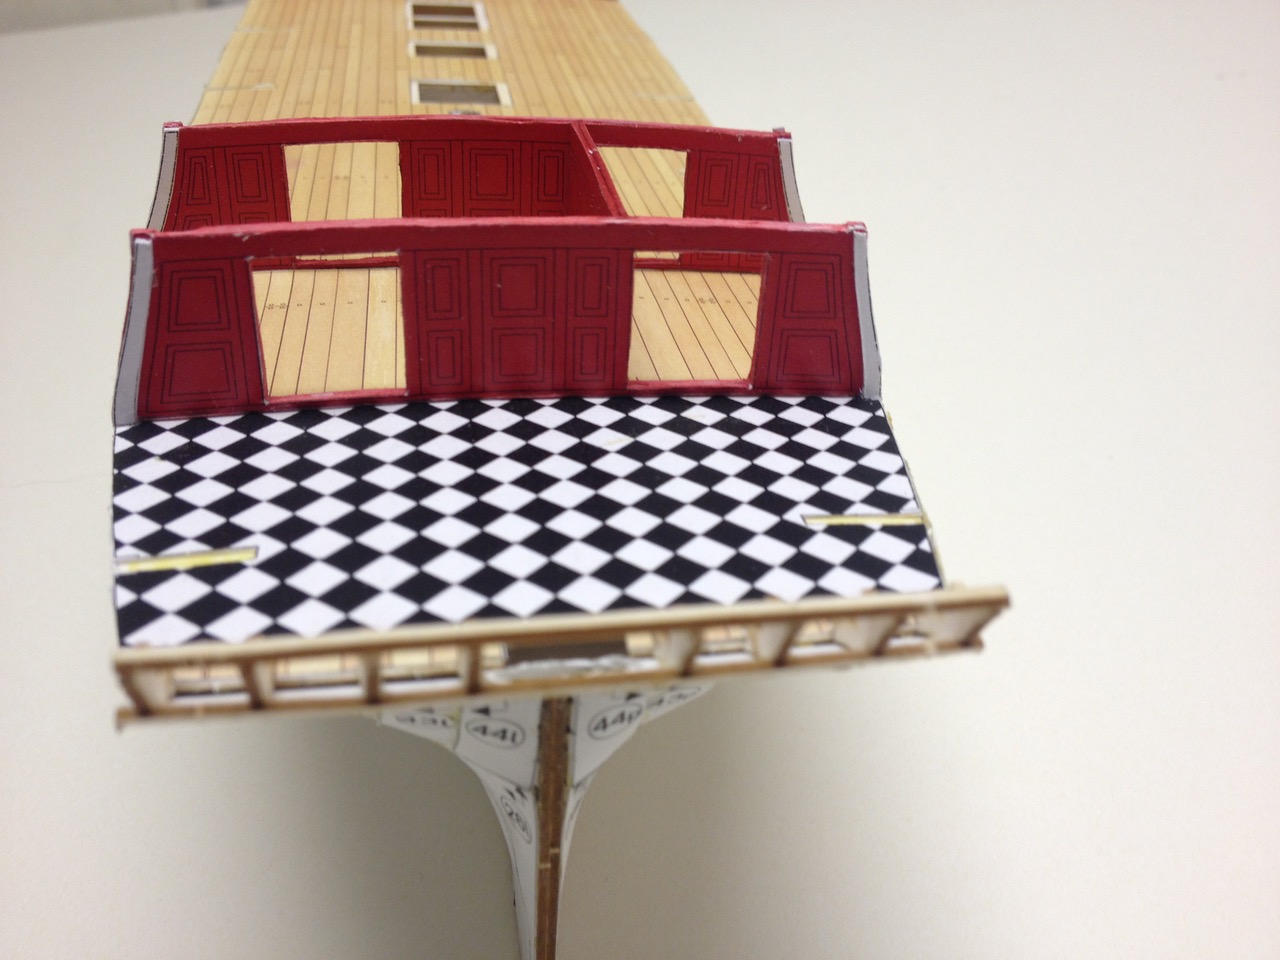
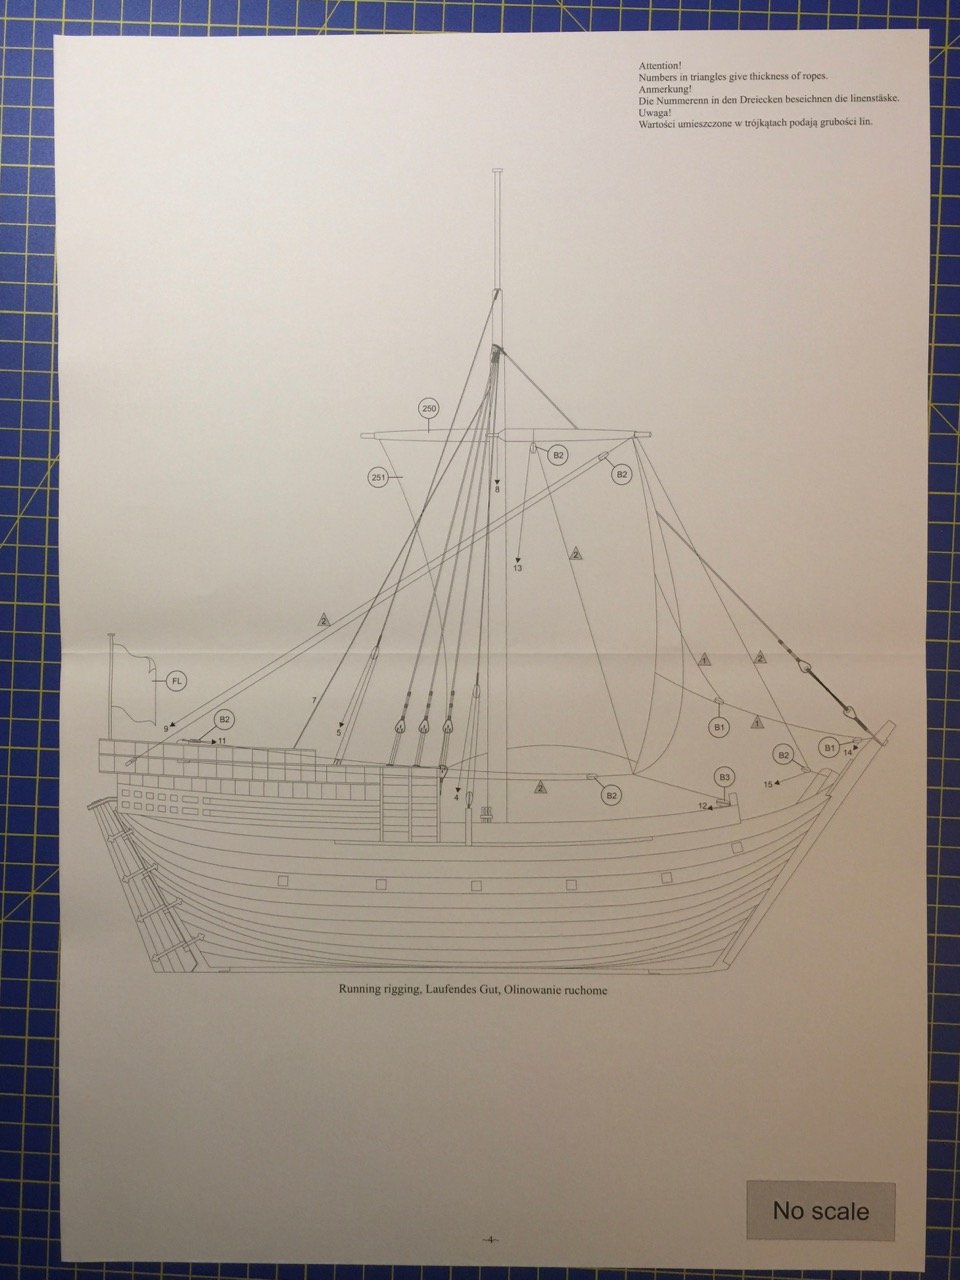


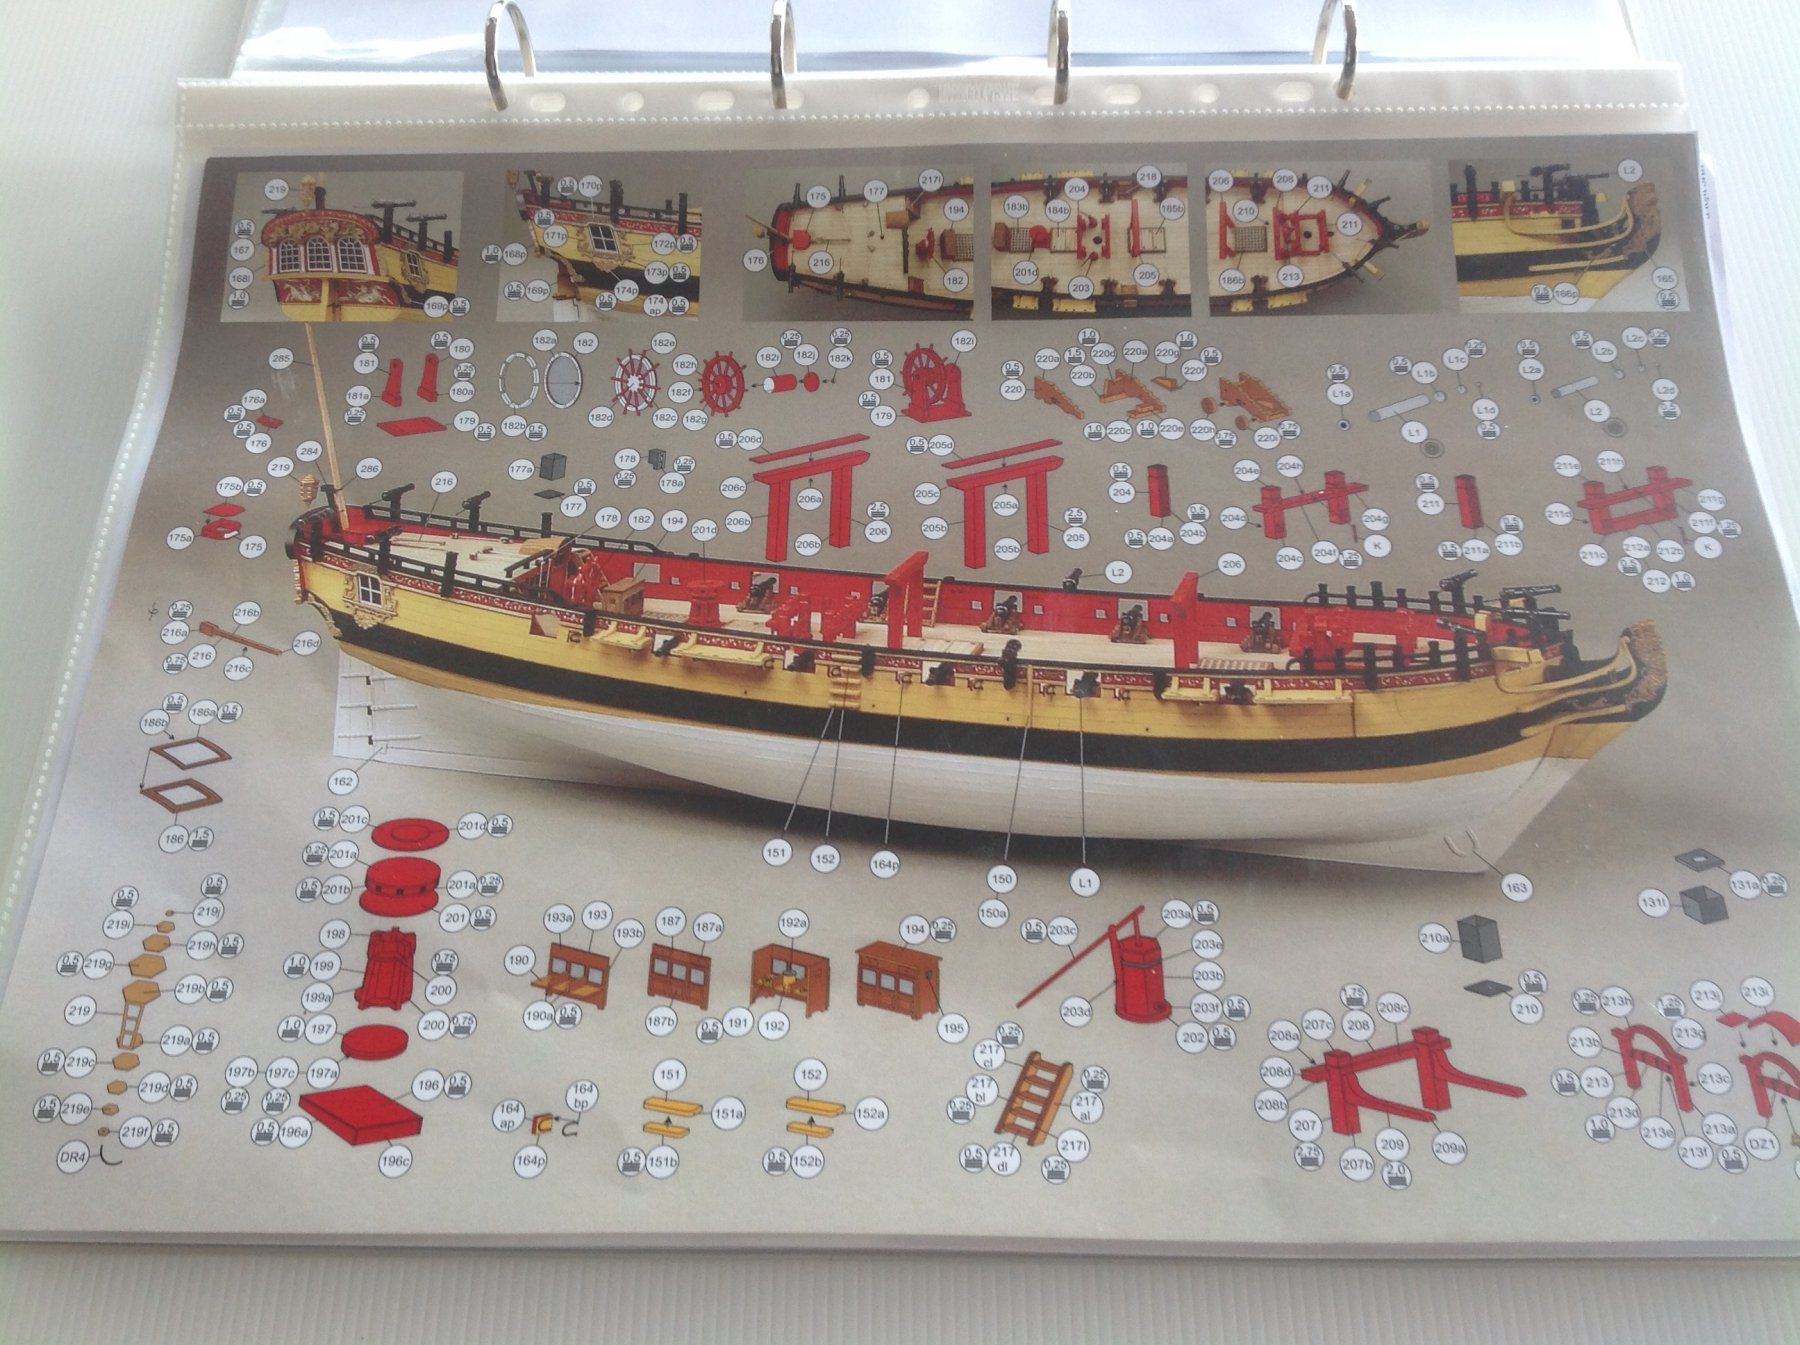
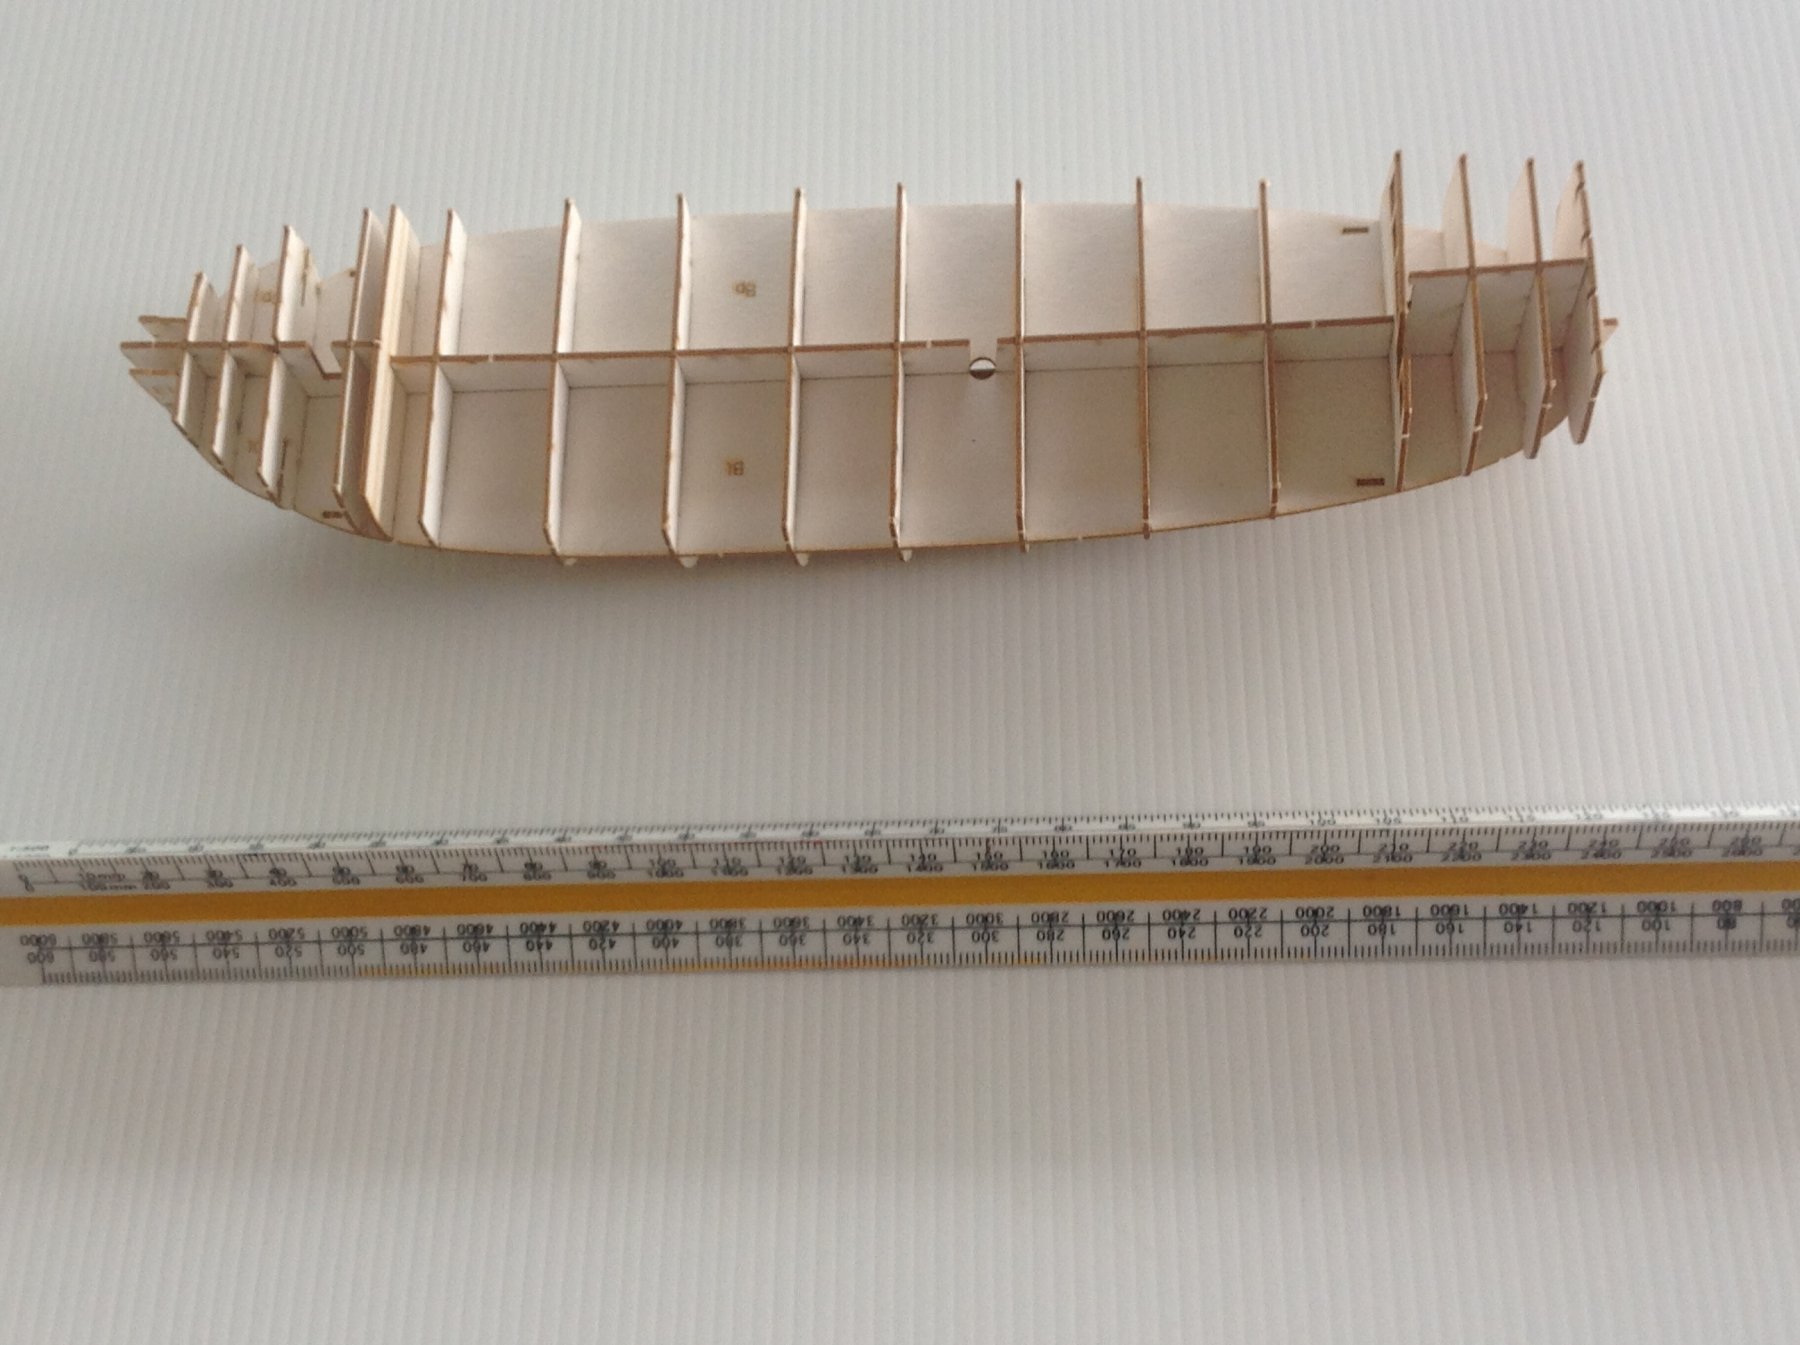

.JPG.eee6ad2ce866798c49cdb4282e72baa9.JPG)