


James H
-
Posts
5,964 -
Joined
-
Last visited
Content Type
Profiles
Forums
Gallery
Events
Posts posted by James H
-
-
6 minutes ago, Vane said:
Sorry for being a Besserwisser, but I just noted an anomaly on your webpage when checking out the latest releases.... instead of "HMS Flirt - 1782" it has been listed as "Order 1:64 HMS Flirt". And it also has a odd price range since you could order block through it.
Order 1:64 HMS Flirt – VANGUARD MODELS
I know you are a perfectionist so I thought I would point it out 😛This is because the product has more than one main kit variable (usually Master Shipwright kit editions). All variables can be ordered from one page instead of having multiple pages.
- mtaylor, chris watton, Canute and 1 other
-
 4
4
-
That really is looking so pretty. She's a beast!
-
-
There's a PE 'horseshoe' to add there. You'll see something similar towards the stern where a 'fishplate' will fasten.
These were for strengthening the timber joints on the real ship.
- Ryland Craze, mtaylor, schooner and 1 other
-
4
-
5 hours ago, GrandpaPhil said:
From what I understand the San Felipe of 1690 did not actually exist.
Why not release a kit of a Spanish 3-decker from that time period that actually existed?It apparently did exist, but much of what you see in that design, is based upon Panart's interpretation of the vessel.
- thibaultron, GrandpaPhil, Canute and 1 other
-
3
-
 1
1
-
In light of the other SF kit announce, it's nice to see one of the Panart being built.
-
It's definitely the same kit that was out a good few years ago, sold as a magazine part-work by DeAgostini.
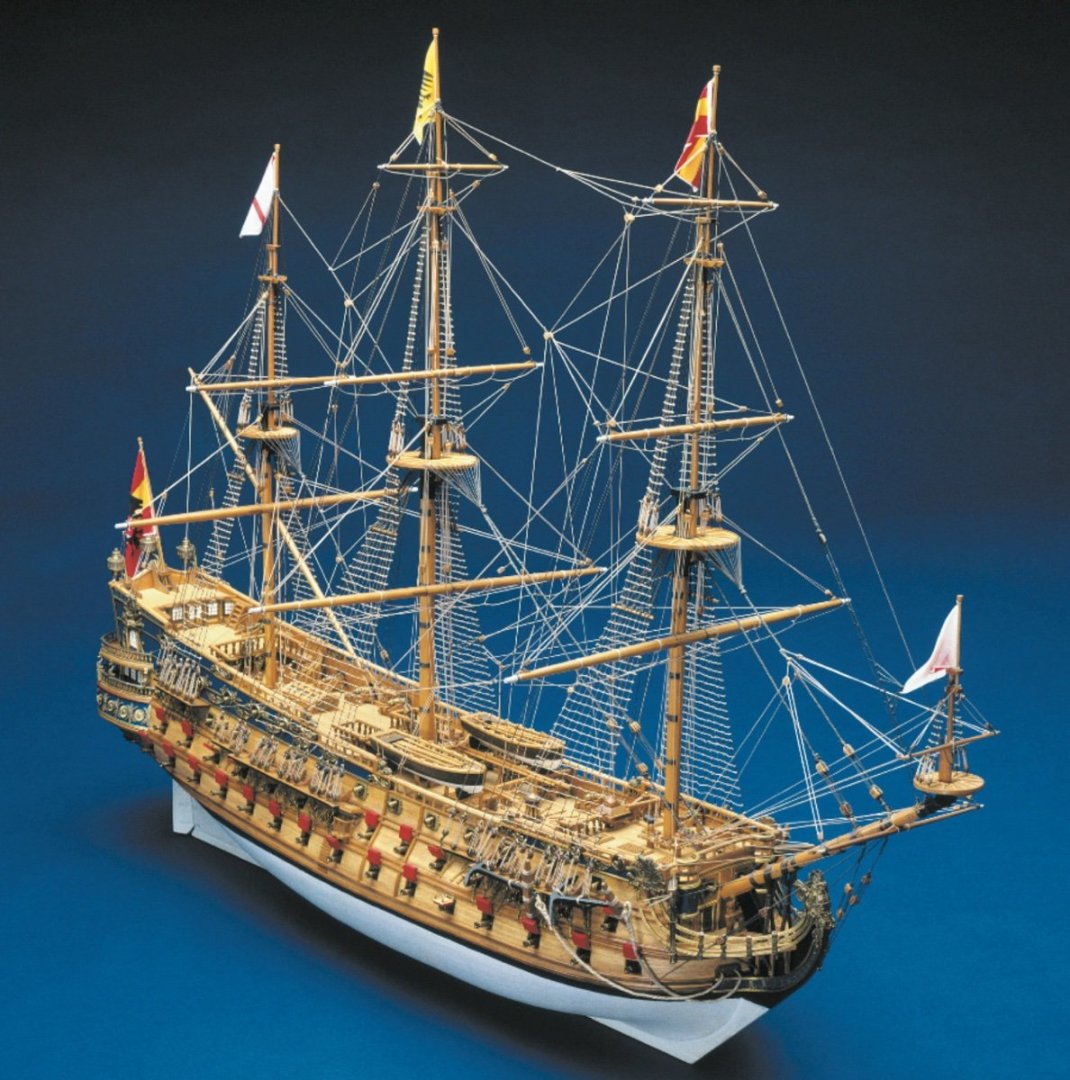
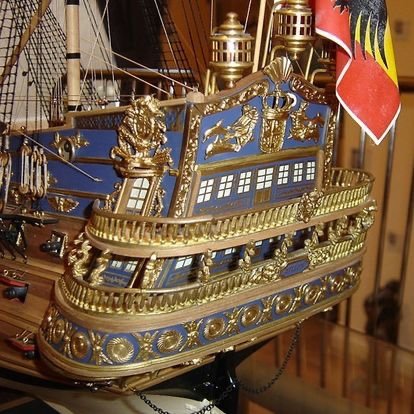
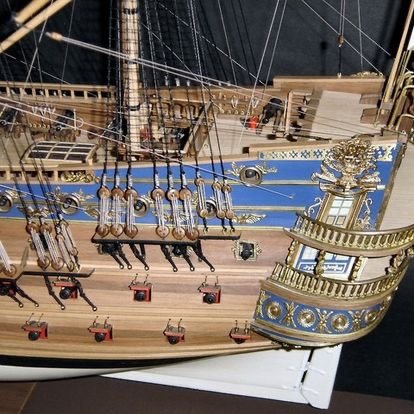
Not exactly a 'new' release either. It's around 130mm shorter than the Panart kit, so that might be attractive to those who can't house the 960mm Panart kit, but there also appears to be quite a few trade offs too. Panart's kit layout is generally excellent, with things that appear to be in proportion to the vessel, and in positions that appear to be practical. I do know there have been some changes to Panart's kit in the past years, some for the better and some for the worse. Here's what I see with the OcCre kit.
- There is rig directly in front of gun openings.
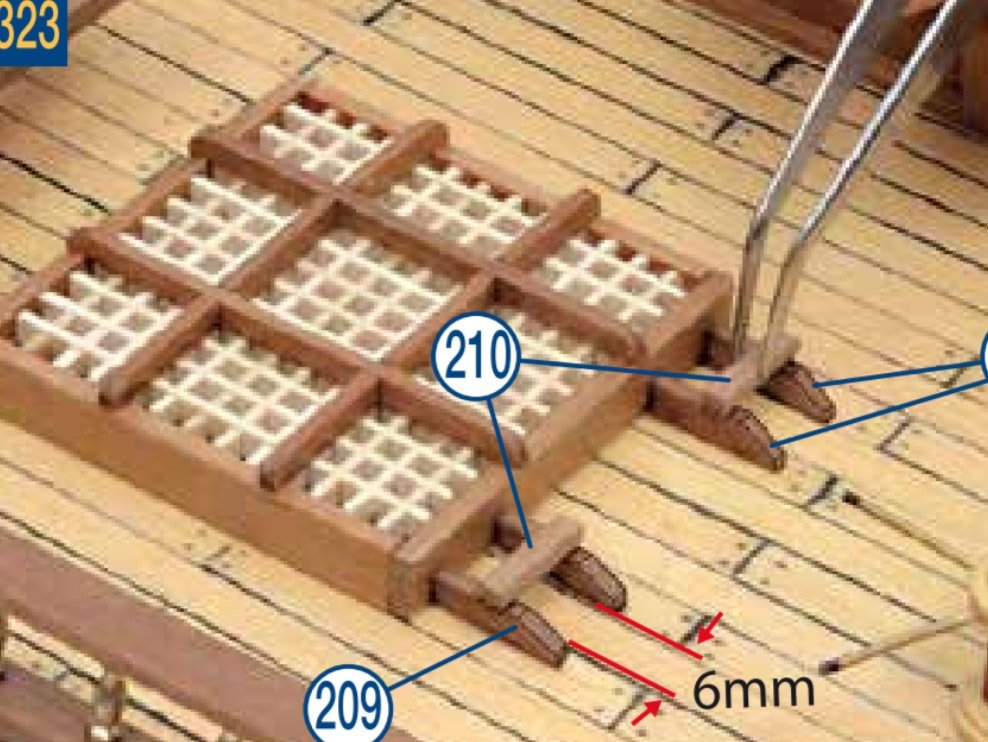
- Clunky, oversized grates.
- Some cannon sit right in front of those oversize grates, so no chance for the recoil roll after firing.
- Unrealistic antiqued metal hinged port lids that were commonplace on kits from 30 - 40yrs ago.
- Strangely proportioned stern where the decor looks odd.
- Out of scale deck planking.
- Strange shaped metal cast boats with bizarrely wide gunwales, and thwarts that are sat way too high in hull, directly under those gunwales.
- That thin veneer style planking used on the external layer, as opposed to actual planks.
- etc. etc.
I know that many will get some real pleasure out of the new OcCre kit, and I wish them all the best with it, but overall, the kit seems to already look like of of the most aged legacy kits, in a time where we can do so much more. The price probably reflects the overall standard of materials and parts supplied....possibly.
It's rare that I'll pass comment on a new release like this, without actually seeing the kit at first hand, but as I knew the Panart kit so well, I felt compelled to reply.
OcCre:

Panart:
-
51 minutes ago, chris watton said:
I saved up for months back in the early '90's for the Sergal Sovereign of the Seas, (back then, it was very normal to save up for what you wanted) it cost me £550. Taking into account inflation since then, that comes to around £1150 today.
I bought my Panart kit in Lido di Jesolo in 2002/3 for the equivalent of £350. The kit at the time was nearer £450 in the UK, so it was a bit of a bargain. I only needed 2 or 3 hotel towels and bin bags to wrap it in for the flight back 😆
The kit today is £740.
- chris watton, thibaultron, ccoyle and 2 others
-
5
-
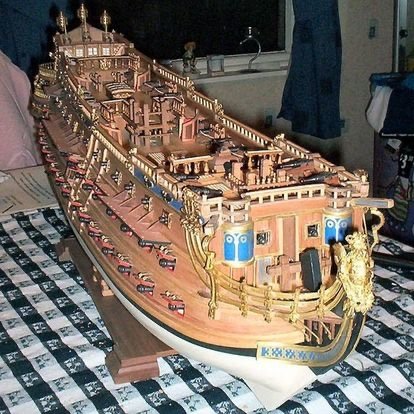
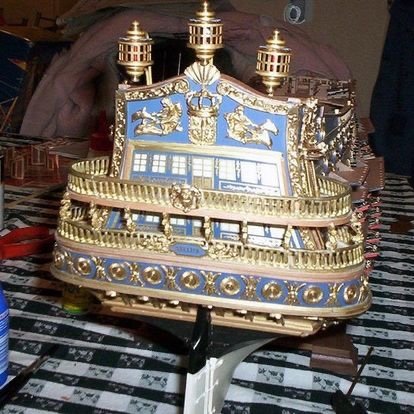
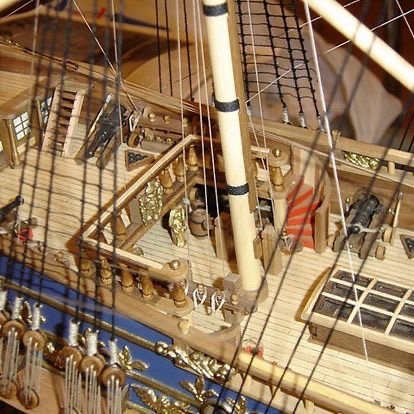
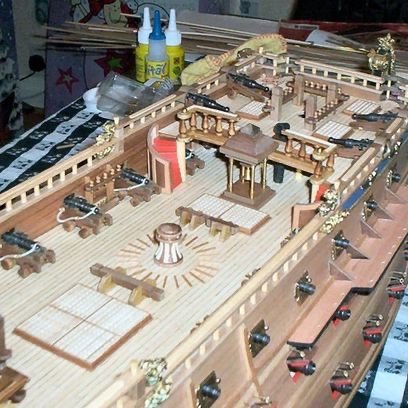
I built the Panart about 20yrs ago.
Let's just say that if I could make a choice today, I'd stick with the Panart.
This was mine. Please forgive me for the poor quality photos. This was an old Sony point and snap camera. Look at the proportions of the stern decor to the area they sit in. Compare to the new kit.


-
The answer is simple.
Contact me by the form at the bottom of the site and I can give you the new password to use across all your devices.
-
14 minutes ago, scheepsontwerper said:
OK, since nothing else worked, I registered again with a new name and different email address. that was very fast. I waited in vain for the email for a new password.
what is that about?
Why did you register a new account?
You only needed to ask me to reset the pass on the original, as I asked you to. I will delete the new account. Please use the contact form so I can do this away from the forum, as a change in password will mean you will need to login on your primary device and not access any PM I sent you.
- mtaylor and Ryland Craze
-
2
-
Resetting your password will affect your login on your computer too.
Contact me via the form at the bottom of the website, and I will fix it. You will then need the new pass to login on both devices.
- Ryland Craze and mtaylor
-
2
-
-
-
Lag still exists.
I'll look at this sometime this next week. As emails are still getting through, and some major email settings have been changed in WHM server panel, I'll add this to my list of jobs.
-
ok, can someone reply now?
-
-
I think this is server side. Looking into it now.
-
Please can you reply again to this?
-
We have had a recent core software update (a couple of days ago). Just checked notification settings and I didn't see anything unusual, except the auto-notification to a member who starts a topic. That was unchecked. I've now corrected that.

We've also had an update to the site's mySQL/MariaDB. As this site is driven by database queries, it could be that, but I would've thought it very unlikely.
-
-
MSW Spring Donation Pledge
It’s that time of year when we ask our MSW members to help support the MSW website. This great website serves over 45,000 ship modellers, historians, and enthusiasts! The bills never stop and neither do we. All donations are appreciated, but to sweeten the deal, if you donate $10US or more, we will send you 2 MSW stickers as a thank you for your contribution. To receive your stickers, we will need your real name and address so we know where to send them. You can add your information to your PayPal payment, or contact Mary Van Dahm in the NRG office at nrghomeoffice@gmail.com if you prefer not to let PayPal have your information. If you have any questions, either send a PM to @ferretmary1, email nrghomeoffice@gmail.com or pop a PM to me. THANK YOU FOR YOUR CONTINUED SUPPORT!!
-
On 12/18/2023 at 11:45 AM, Blue Ensign said:
The trickiest part of this exercise will be fitting the frames without marring the ‘glass’ with glue smears.
I 'glue' the frames over the acrylic windows with Klear floor polish. It's acrylic itself, dries rock hard and is commonly used in plastic modelling for fitting some PE parts. I've been using it for years with no issue. If it gets on the clear pane, then it's no problem.
- Kevin, mtaylor, jpalmer1970 and 7 others
-
10
-
10 minutes ago, ir3 said:
Thanks James, easier said than done. I now have a crack going halfway down the deck from the stern. When flexing the deck to set it down one is pretty lucky if the deck doesn't split. So, now to repair the crack and try again. Easily said on paper but not so easy to accomplish.
This is the same method used on all of the VM range, from the fishers, right up to Indy. I must admit that I never had any problems when building those prototypes and writing those manuals, including Sphinx.


Chris Watton and Vanguard Models news and updates Volume 2
in Traders, Dealers, Buying or Selling anything? - Discuss New Products and Ship Model Goodies here as well!!
Posted
It is. This was one of the first kits I added to the site, after the site was initially built. The guy who set it up initially, created a rat’s nest of illogical decisions. At that point I had to continue until the site was totally rebuilt. That is a legacy page now as MS kits aren’t offered now. One day, when I have time, it’ll be reworked.