


James H
-
Posts
5,964 -
Joined
-
Last visited
Content Type
Profiles
Forums
Gallery
Events
Posts posted by James H
-
-
-
-
-
-
MSW is accessed through a proxy. When you ping MSW, you're actually pinging our proxy. All traffic here is routed through that.
It is very possible that our proxy could have been slow, or your route to MSW was slow. For me, I've not noticed any difference in access time, but I'm in the Uk and not Aus.
- Ryland Craze and mtaylor
-
 2
2
-
That's not too shabby at all. And of course, you can just paint the hulls as you're doing.
-
On 9/15/2023 at 12:15 PM, Artesania Latina said:
Dear friends,
We're happy to announce we have some important news today!
We're releasing a 100% new Santisima Trinidad model, with the configuration and appearance it had at Trafalgar. You can discover this astonishing new model, faithfully reproduced, at last, here:
I'm very pleased to say that Artesania Latina have been kind enough to offer me a sample of this new release for review on MSW, and I look forward to taking a close look at it.
-
-
-
-
I built the Mantua kit about 20yrs ago and thought it was pretty good.
But that was a long time ago. I also installed a low voltage fluorescent tube inside to light up the portholes, windows and the glass ceiling for the Grand Staircase.
- Canute, chris watton and mtaylor
-
3
-
Looking sweet, and that's a lovely copper job, even if the rudder took an age!
- Kevin, mtaylor and Ryland Craze
-
3
-
That is so nice, and good to see it with different colours too.
- modeller_masa and mtaylor
-
1
-
 1
1
-
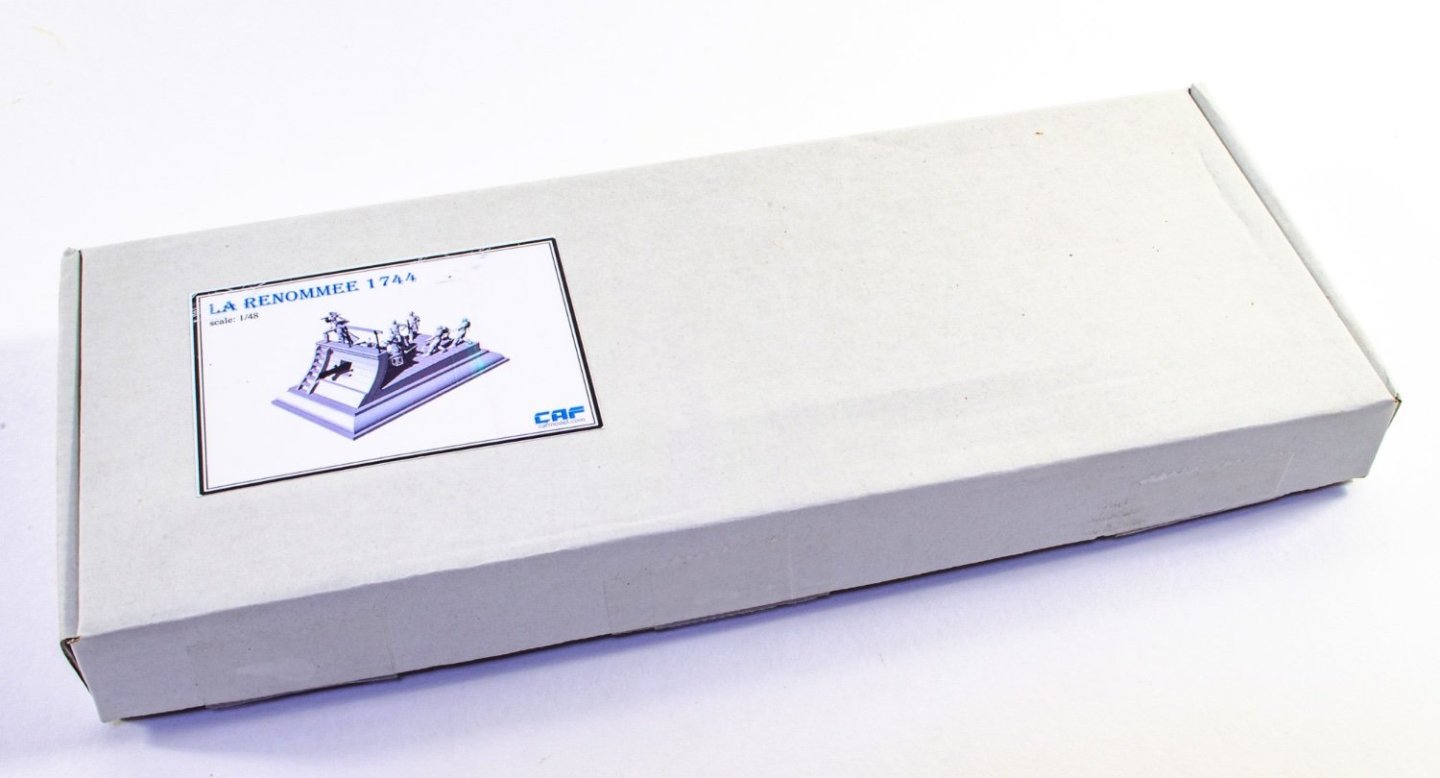
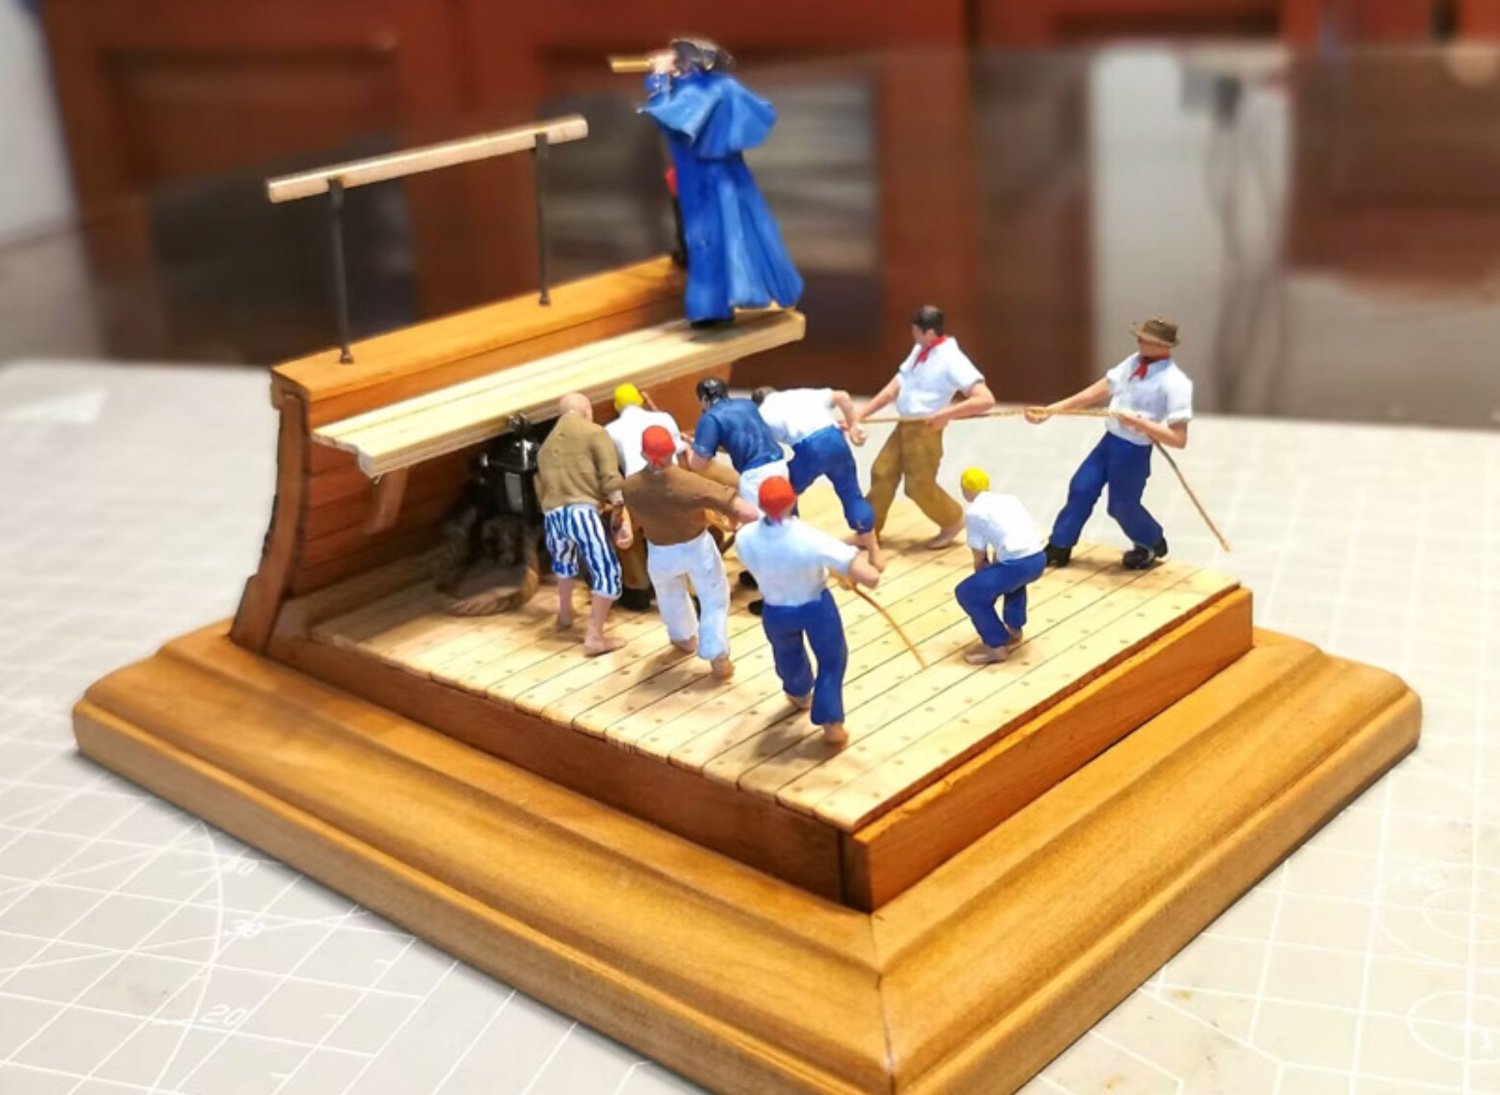
1:48 La Renommée section - CAF Model
Available for $79.00 from CAF Model
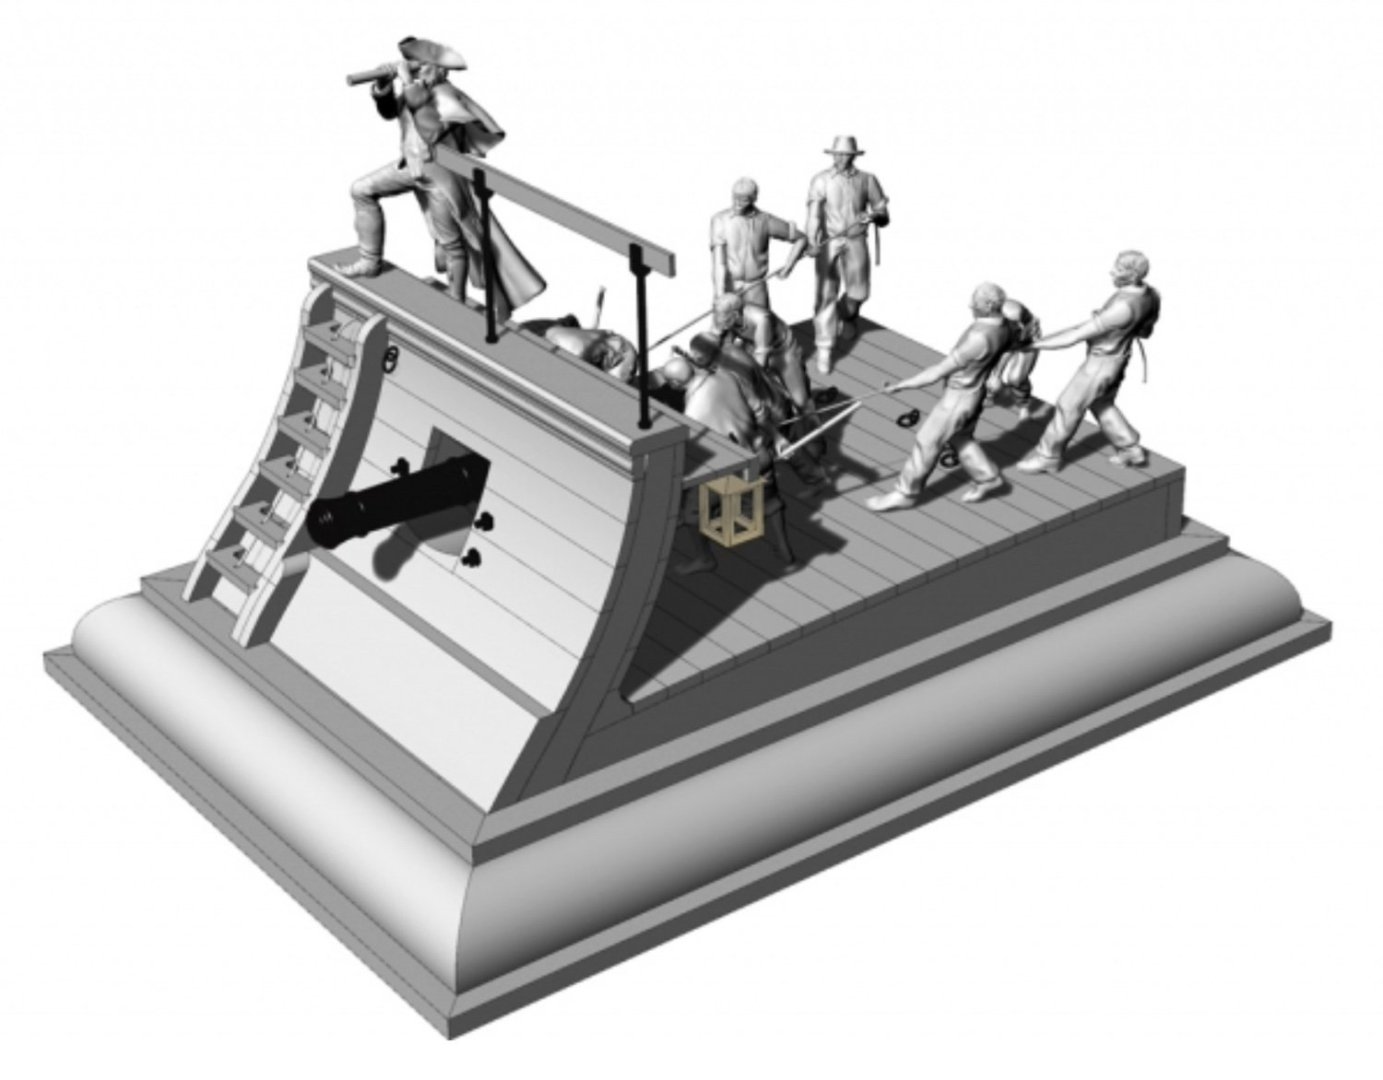
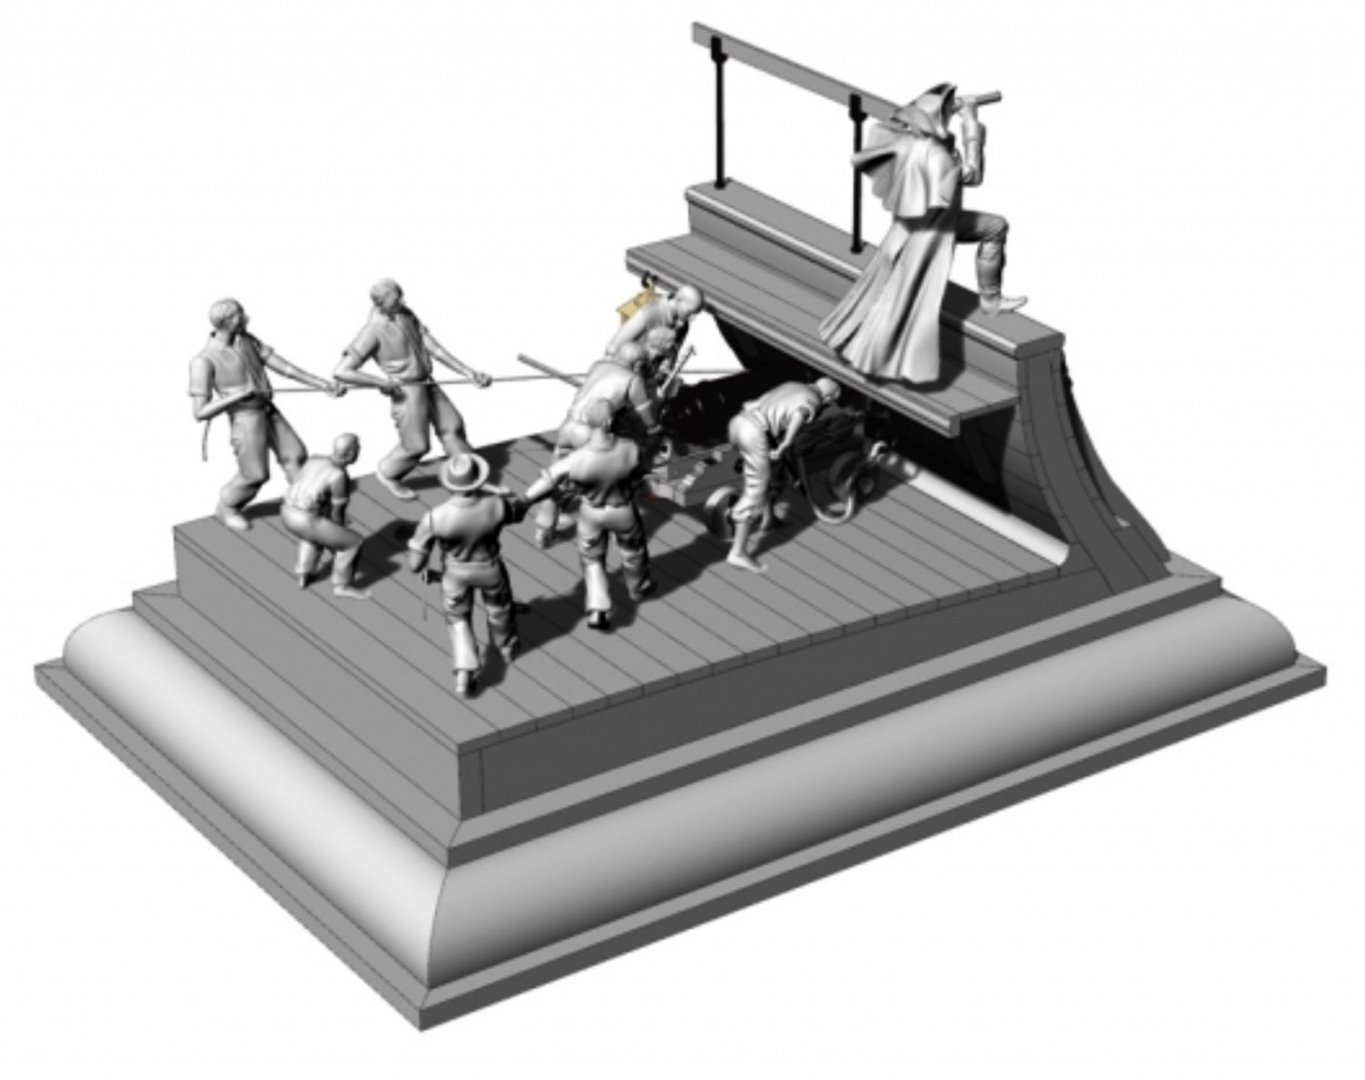
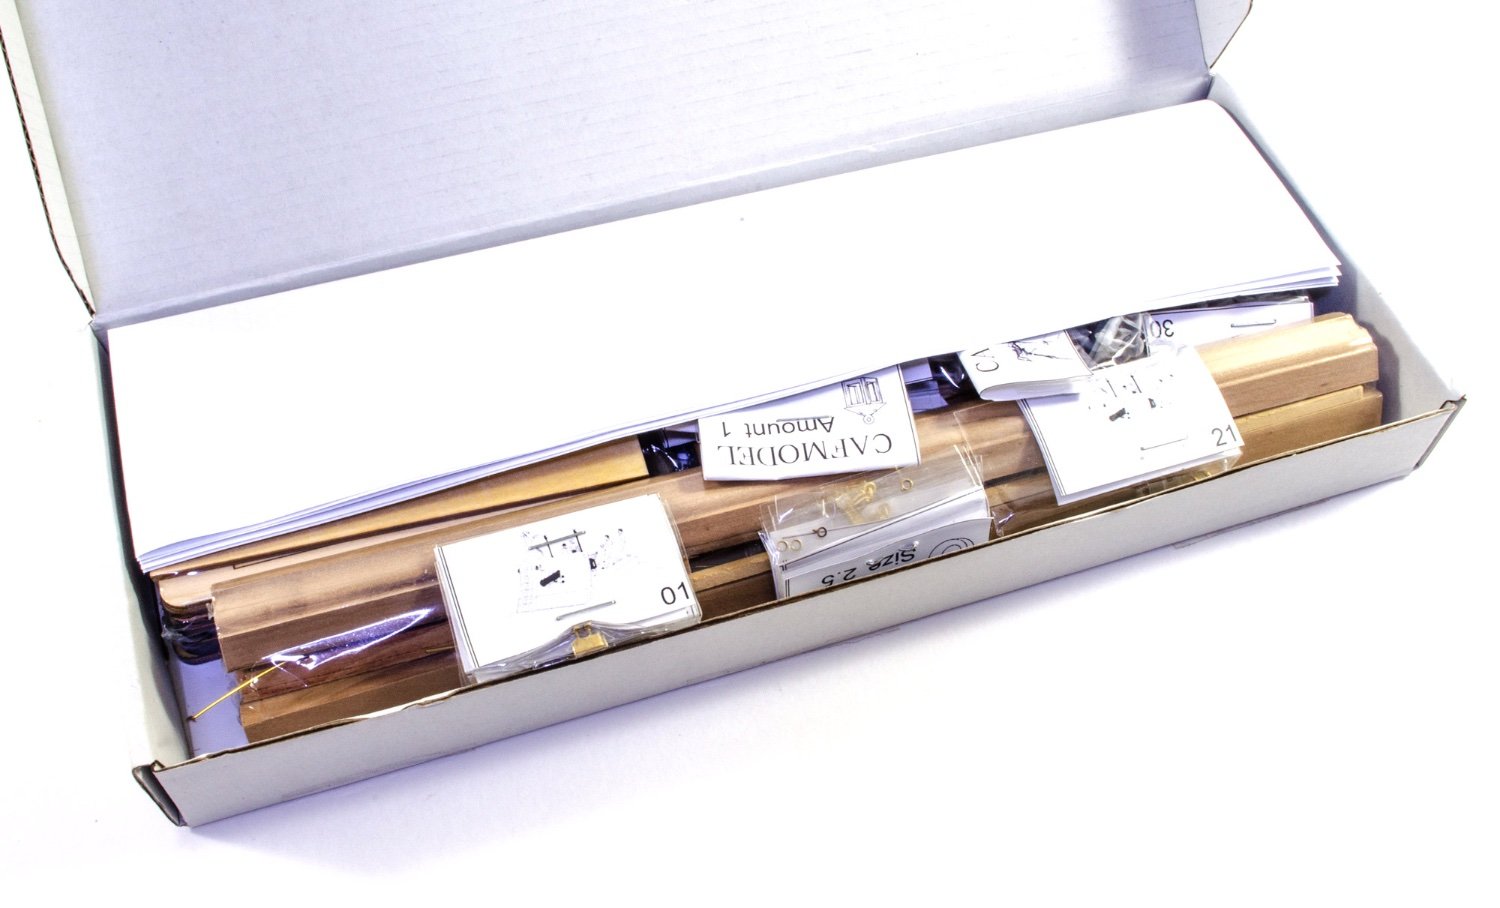
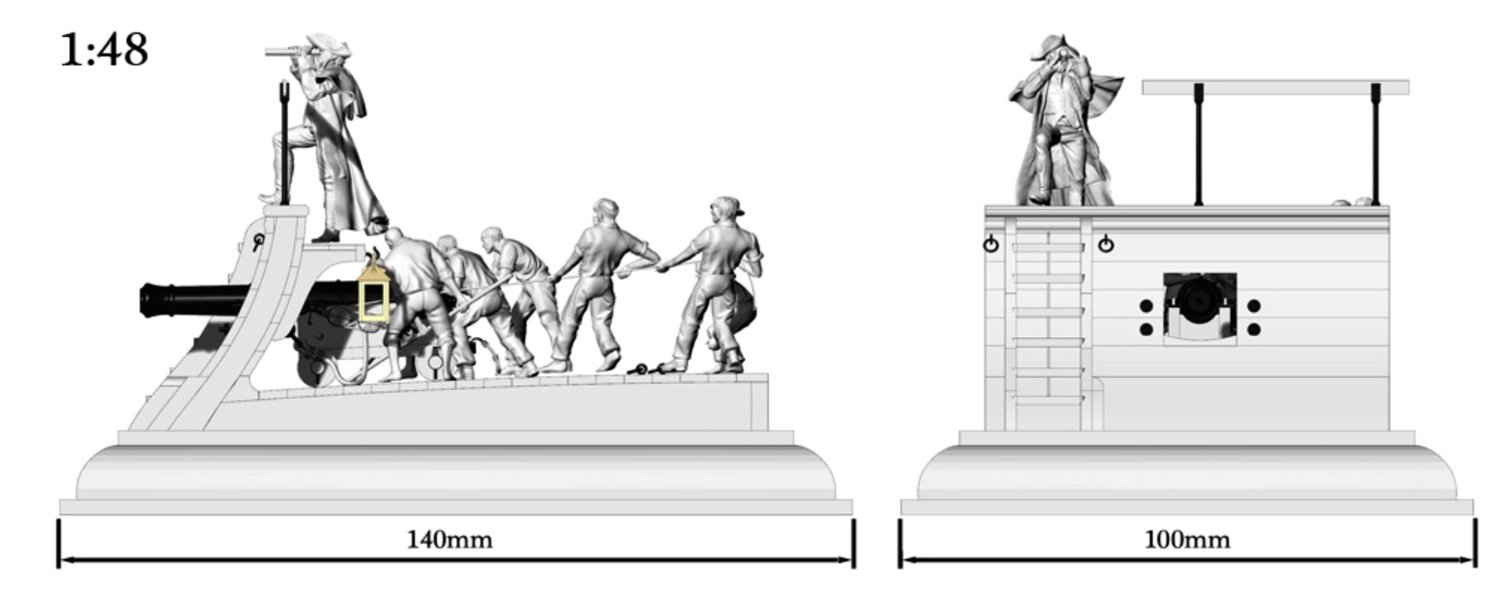
This one was quite a surprise when it came with the Postie on Monday. Not a full kit, but this time a small deck section in 1:48. The kit comes in a narrow, slender box with a product label on the lid. It's also another of those kits that when you take everything out, it's not very easy to get it all back in again...especially when you remove the stapes that are used to clip the many fittings bags together. Although in 1:48, the finished project is still quite small too, measuring 140mm x 100mm on the base, and less than 100mm tall, with figure stood aloft. The kit itself depicts a single gun section of La Renommée, complete with full gun crew and someone I can only presume is an officer. I'm sure those with better knowledge of French naval ranks.


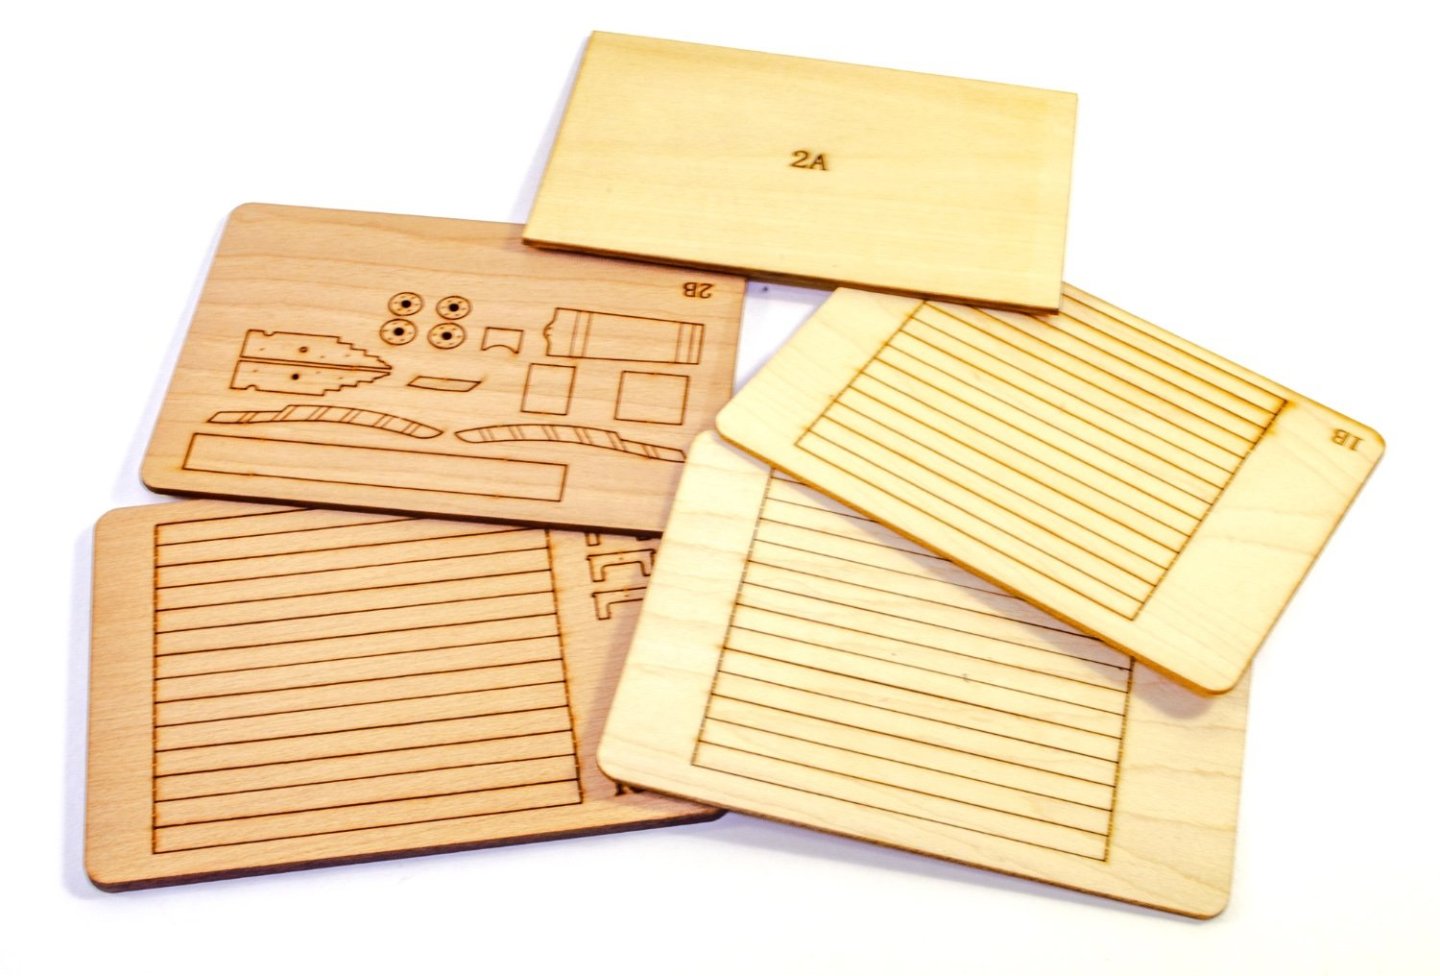
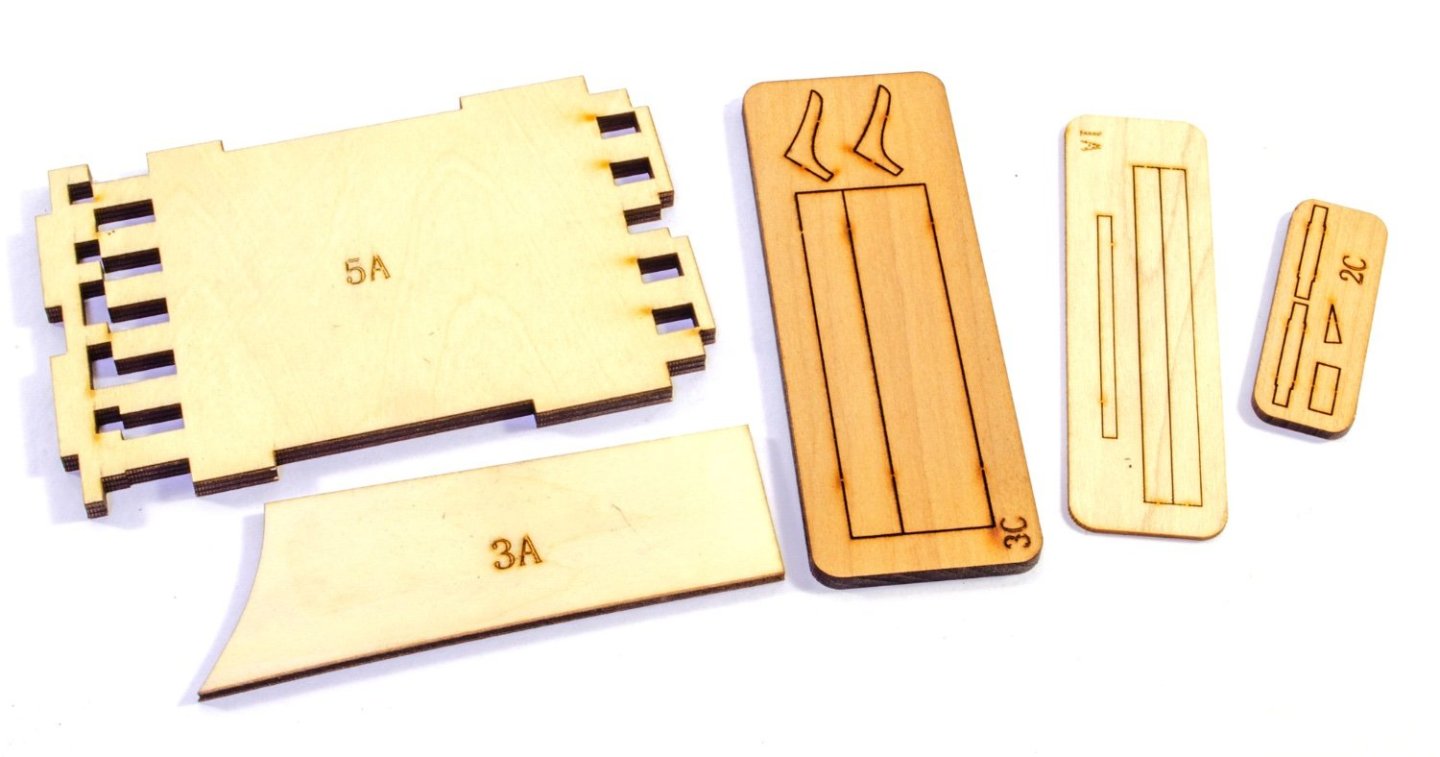
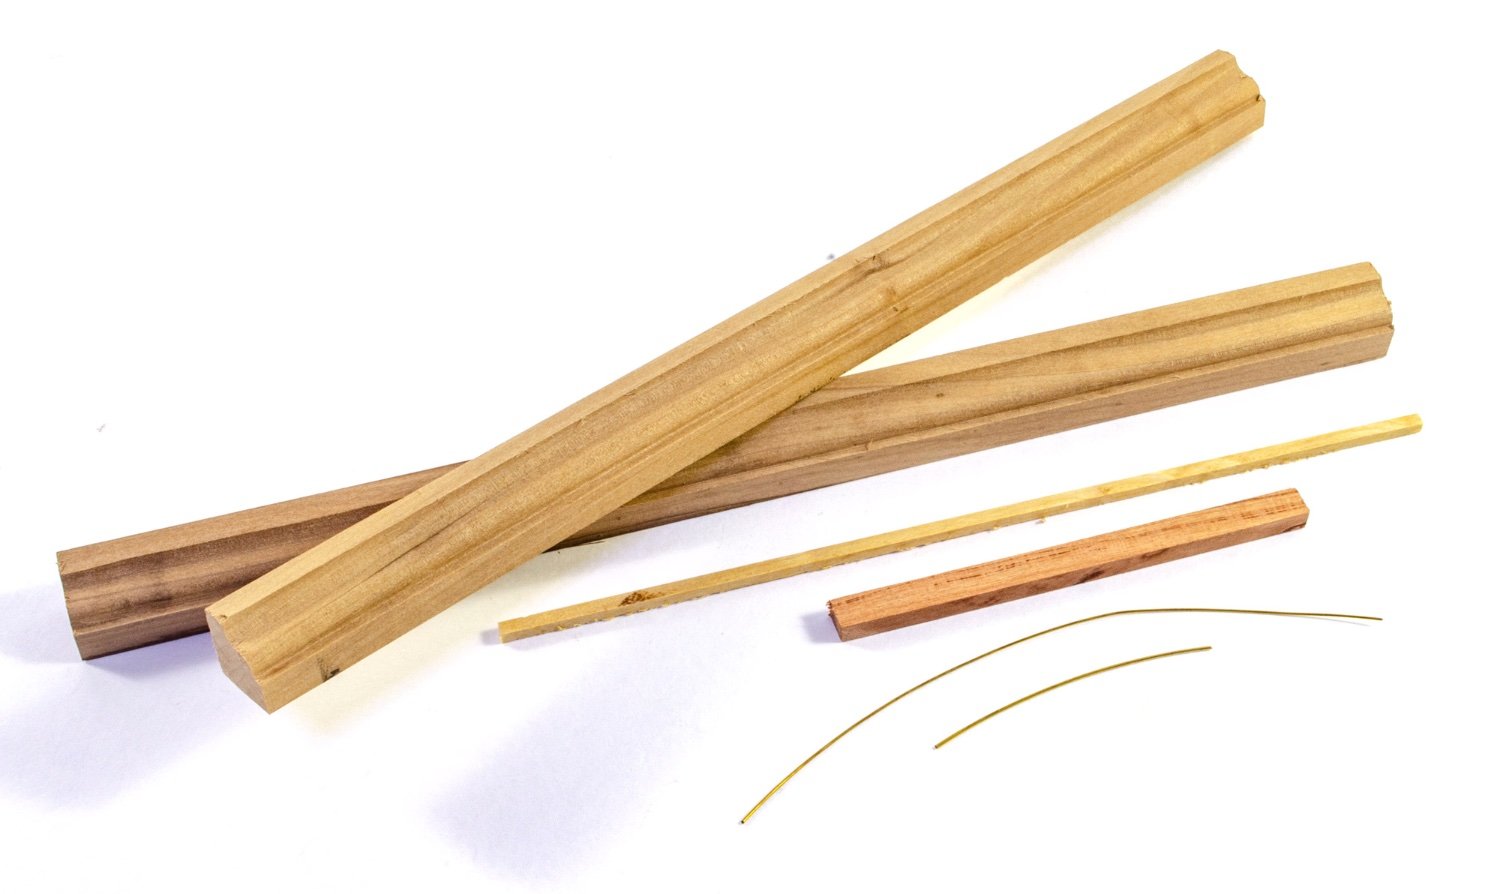
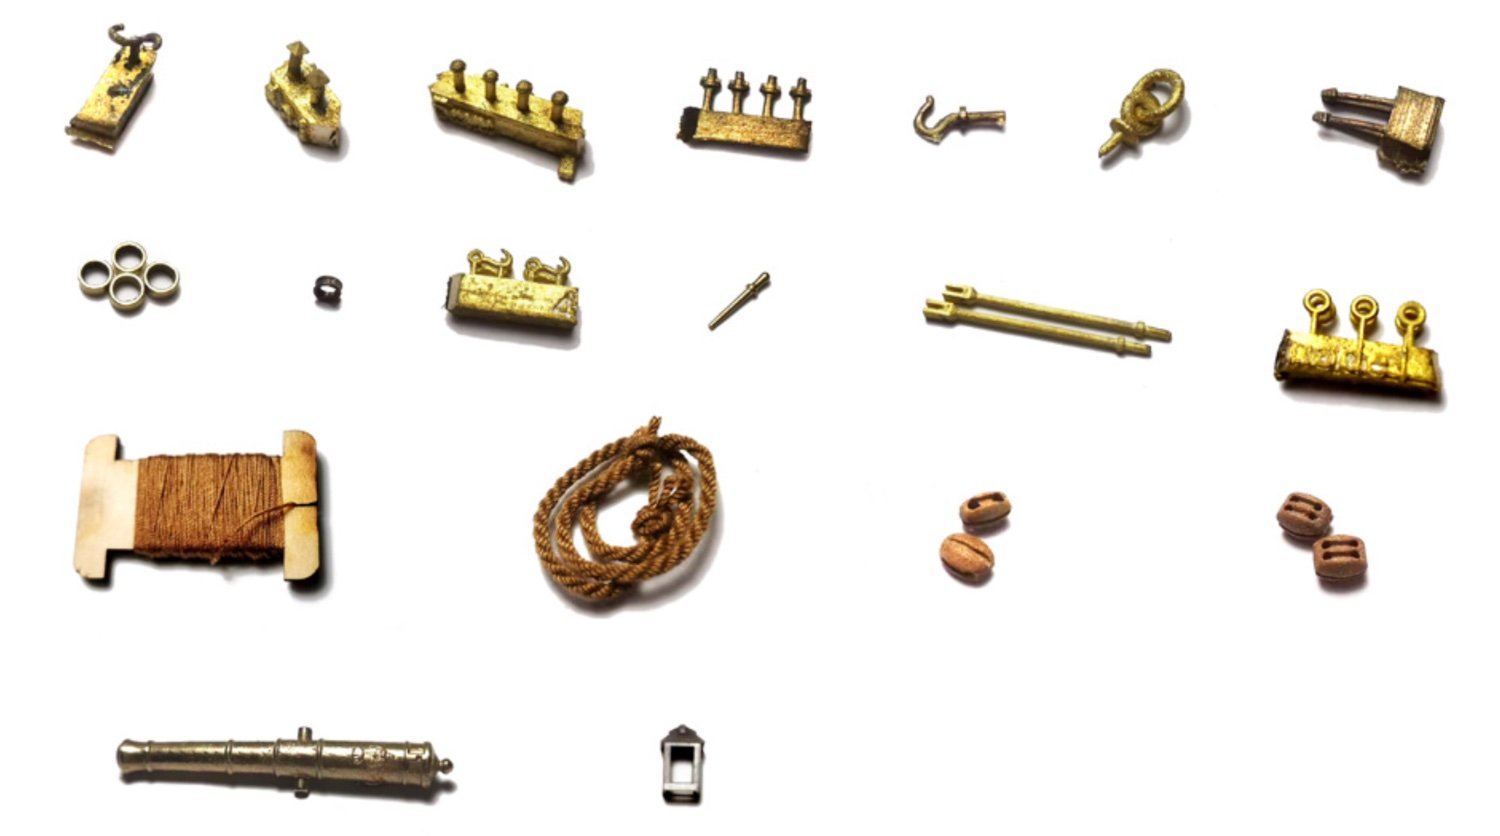
There isn't too much strip wood in this kit with the majority of the timber here being the moulded wooden edges to the plinth you will make. You will need a mitre tool for this too. Two short lengths of brass wire are also included.

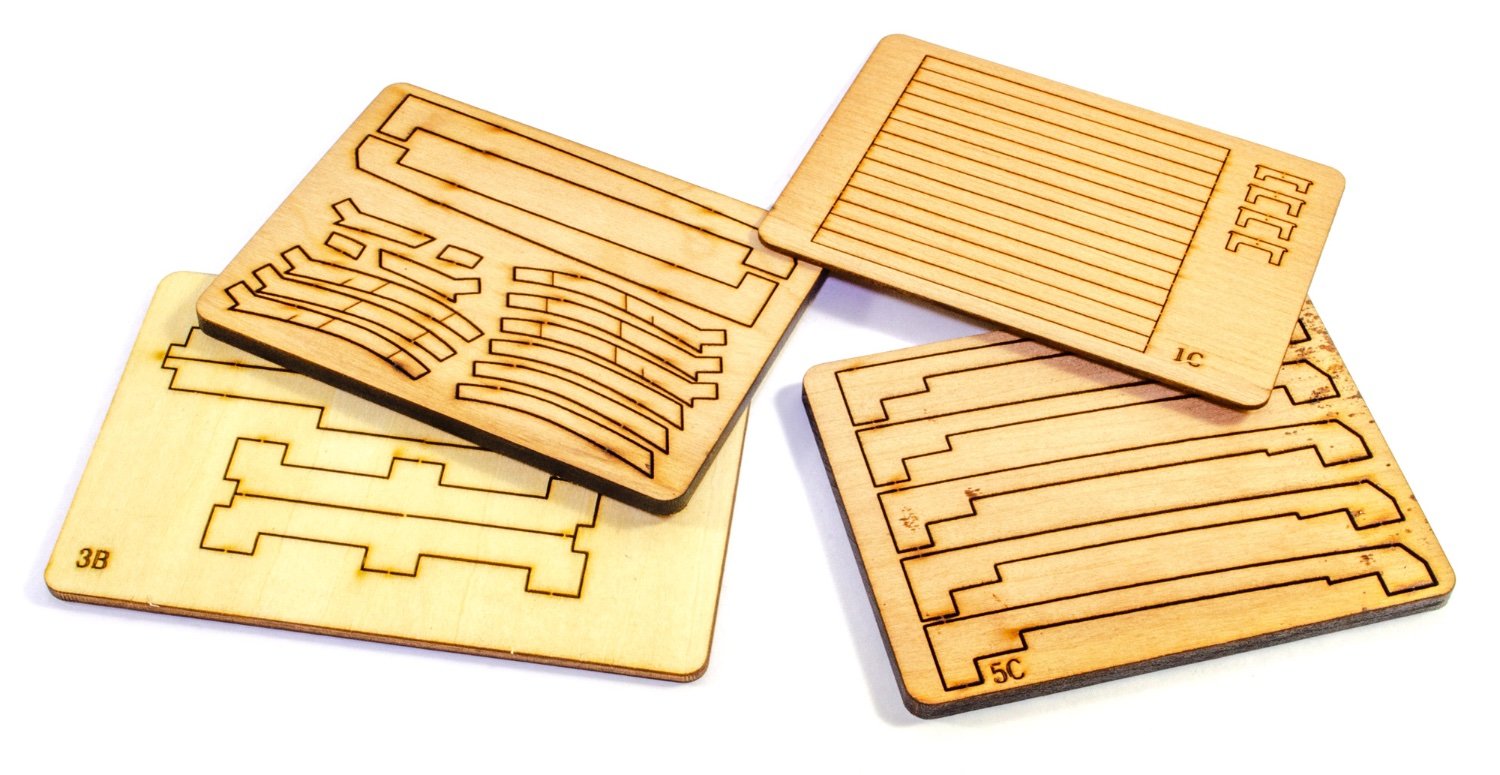
The timber sheets are quite small too with parts laser-cut in both pear and ply. The pear of course, is for making the exposed frames that you'll see on the open ends of the section as well as the regular hidden frames, the cannon carriage, and the ply for the core of the base. You will also see a part (3a) than is used as a template/gauge to ensure that the internal frames and angles of the bulwarks are set correctly. Note also the deck planks (pale strips) that you may well be able to use 'as is', with the laser cutting simulating the deck caulking.

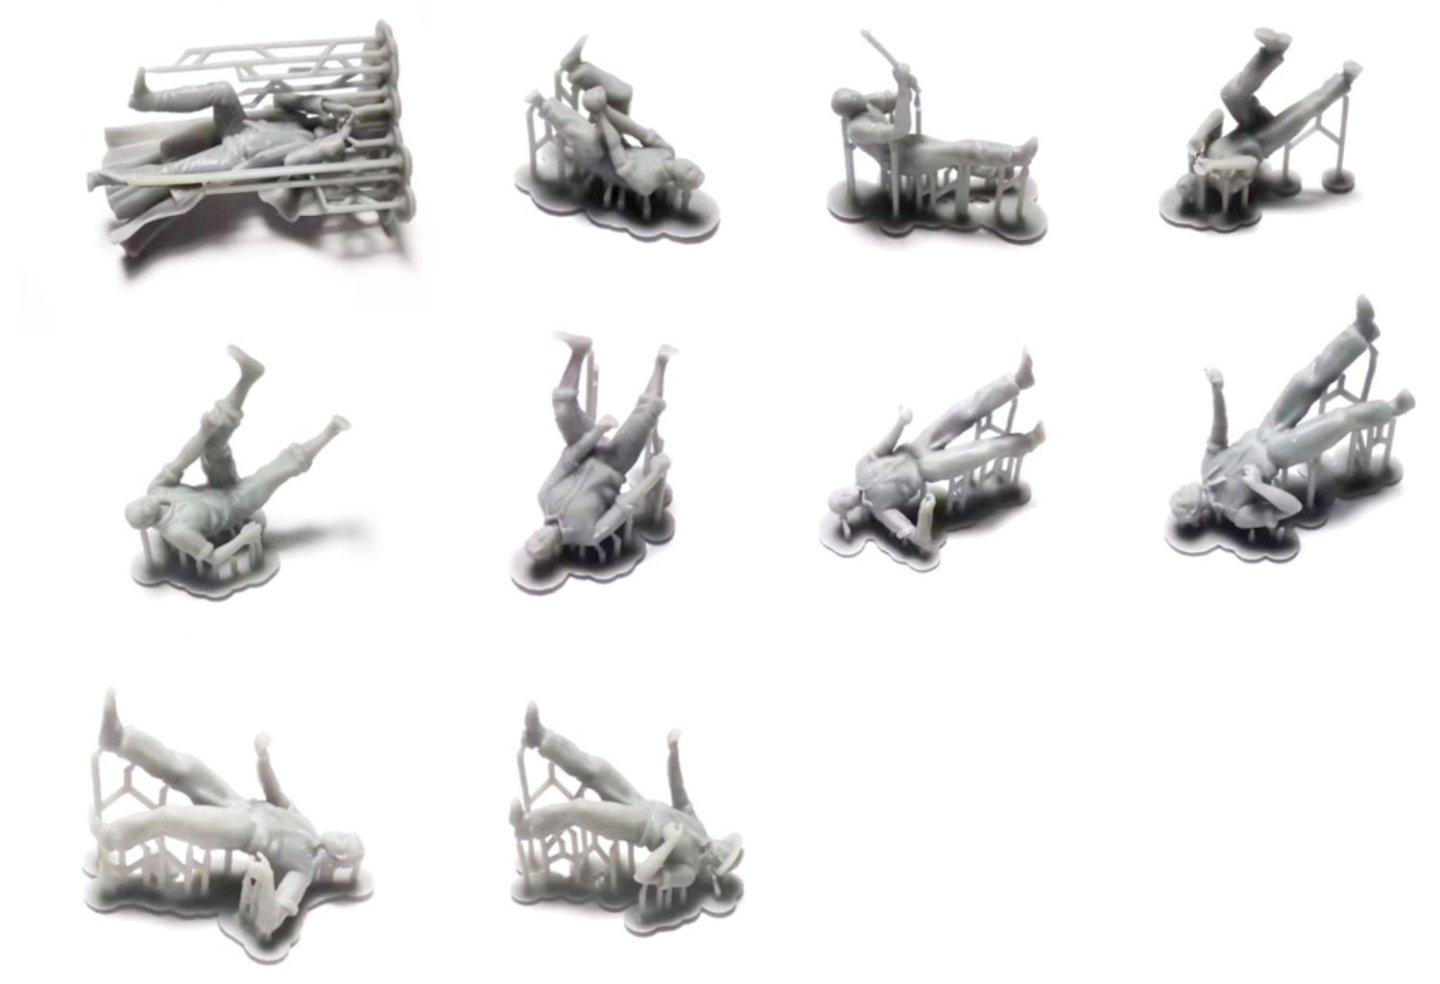
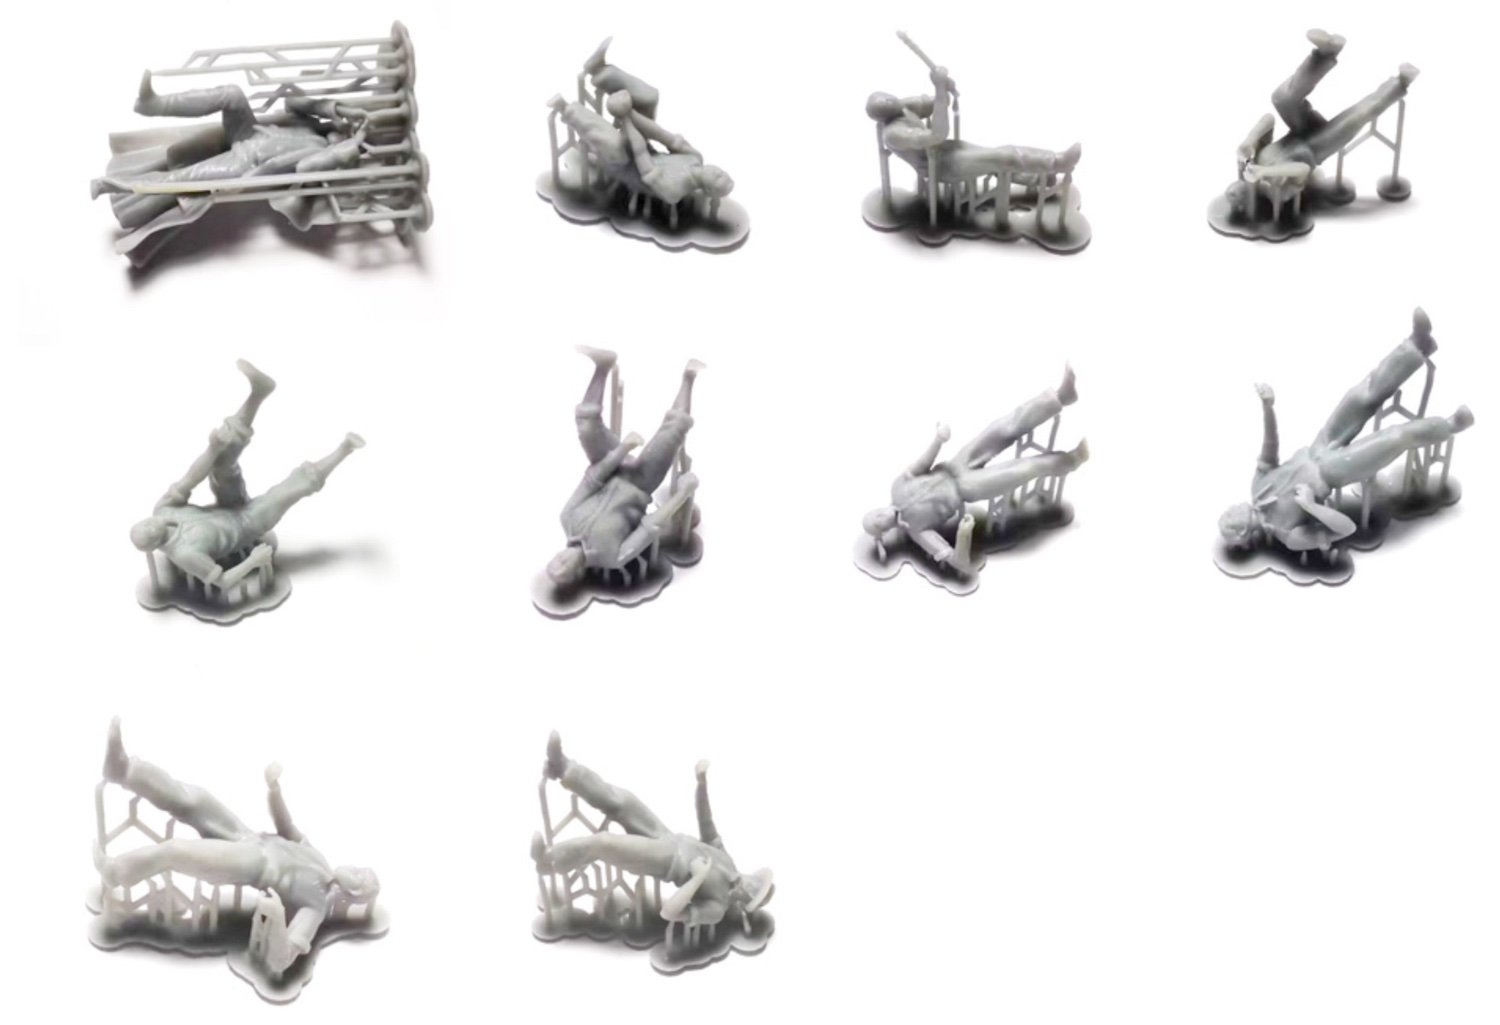
A big feature of this kit are the numerous gun crew figures that you will need to clean up and paint. These are provided as 3D-printed parts and you will need to carefully and cleanly remove the support structures from the printing process. These need to be cut back to just before the figure and then carefully trimmed/sanded flush to the part. With 3D-prints, never snap those supports off at the part as it can leave a small divot in the part. All figure types are individually packaged and numbered for reference.

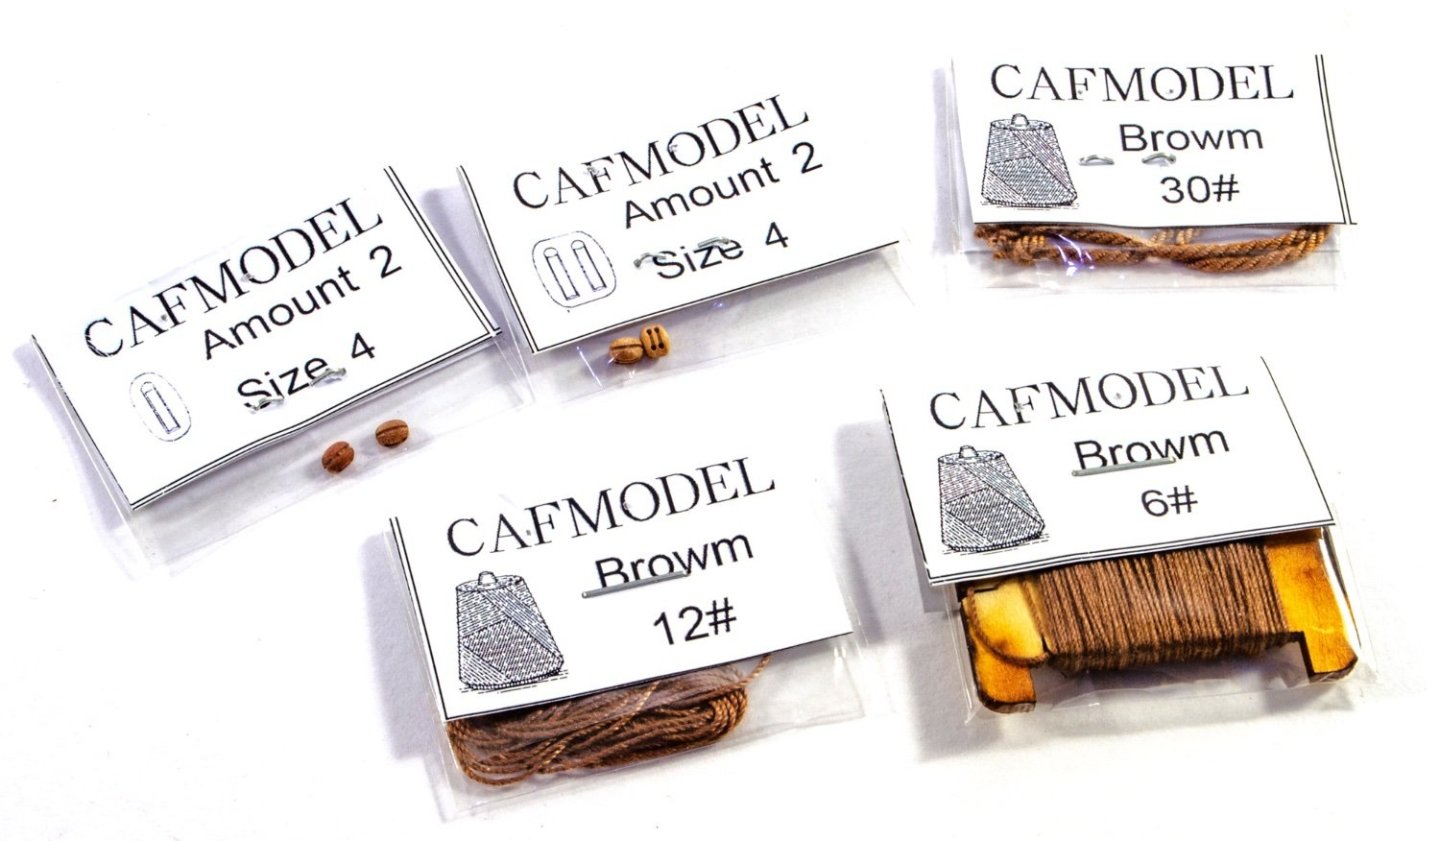
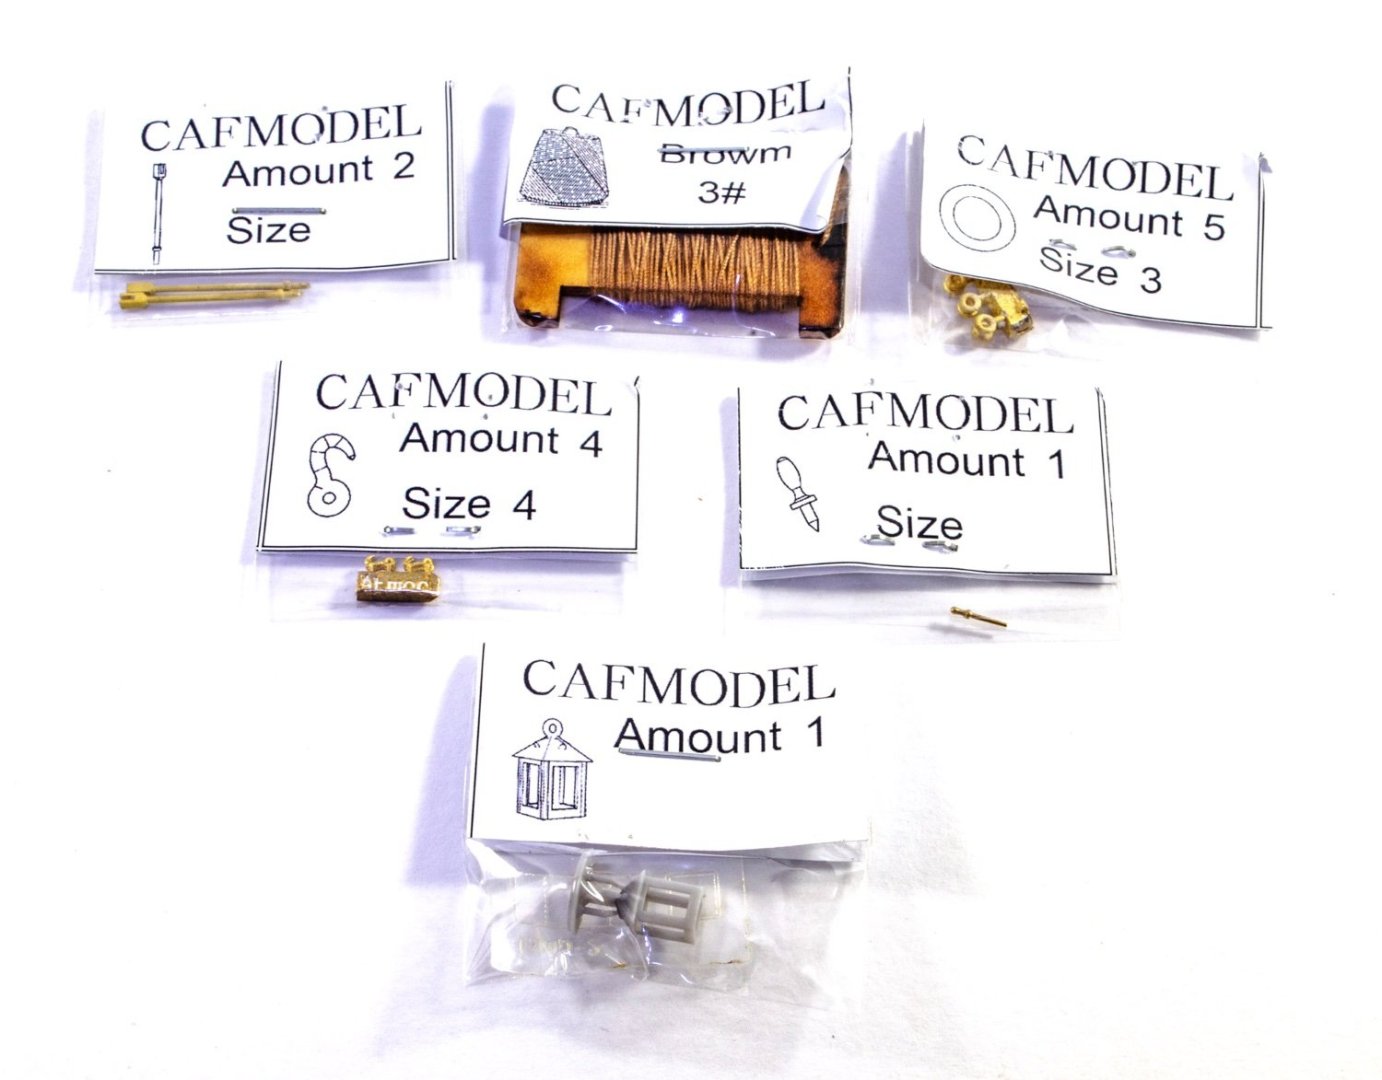
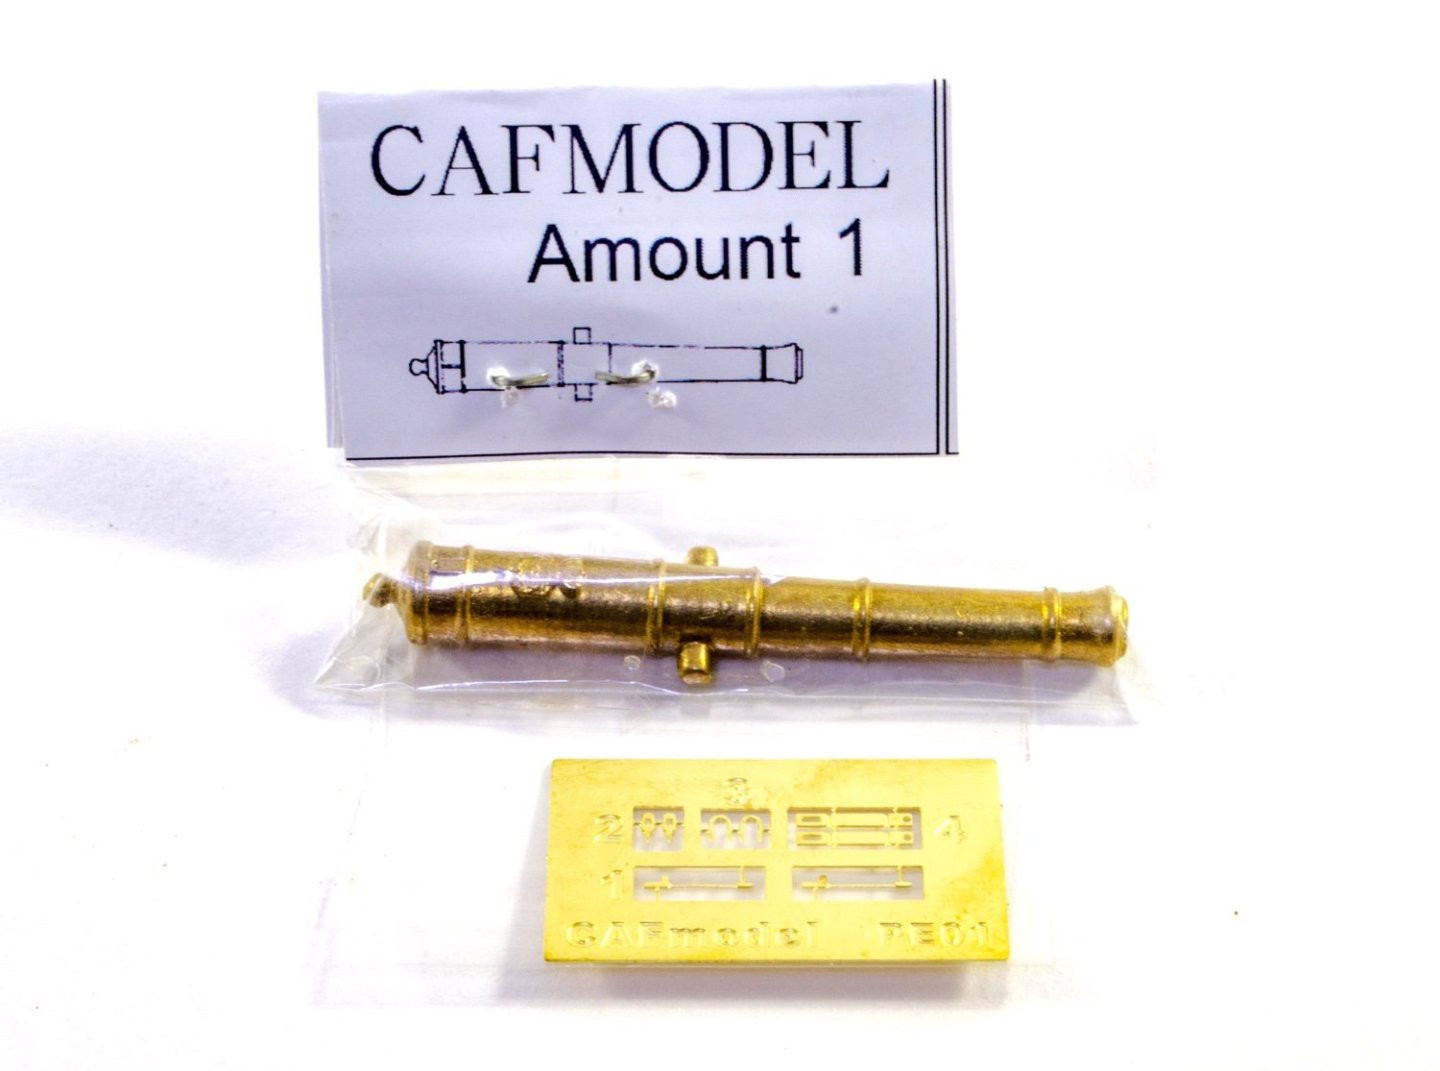
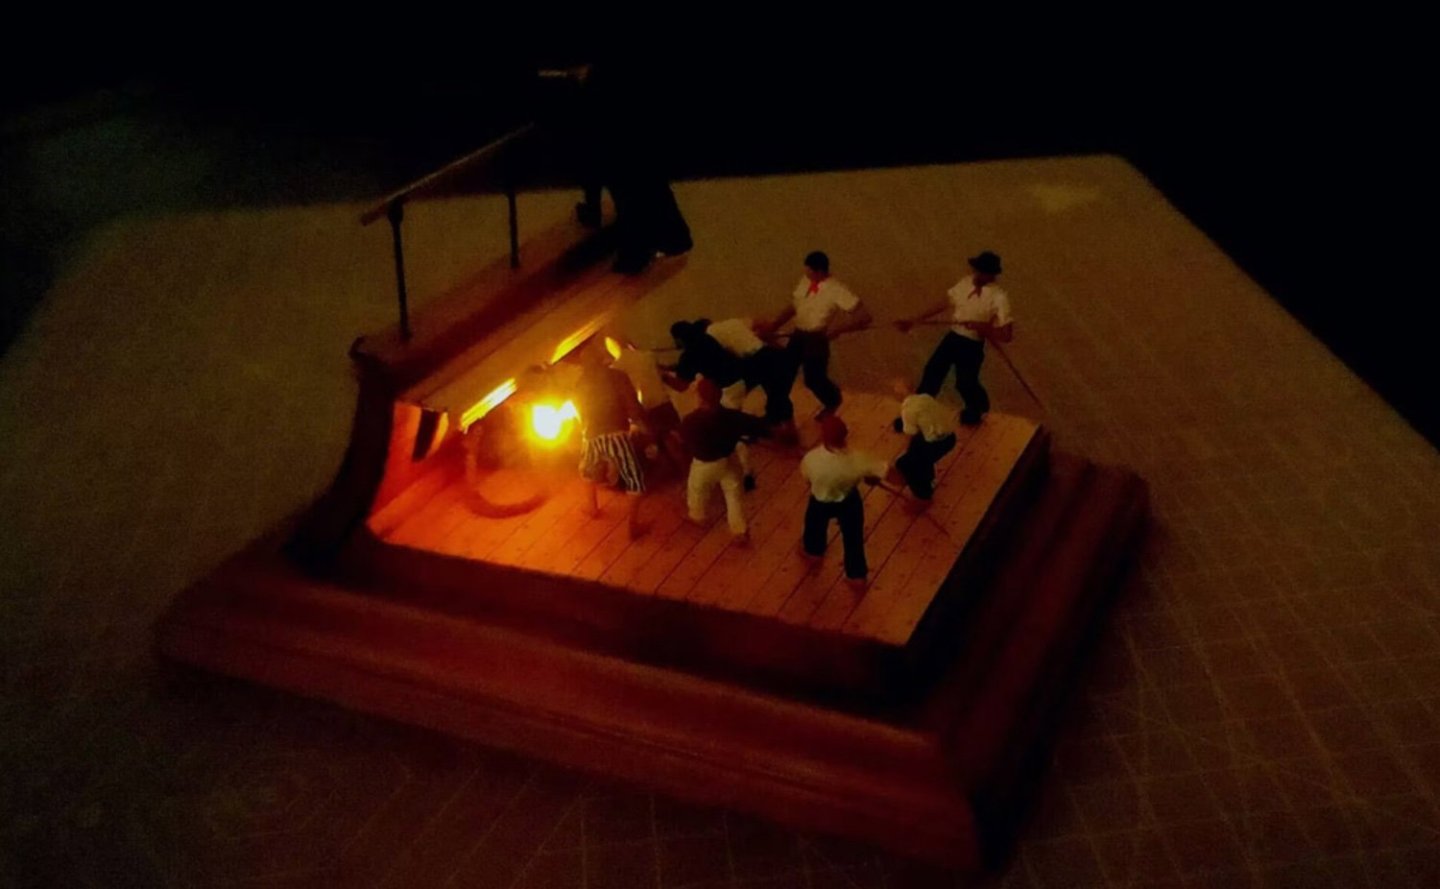
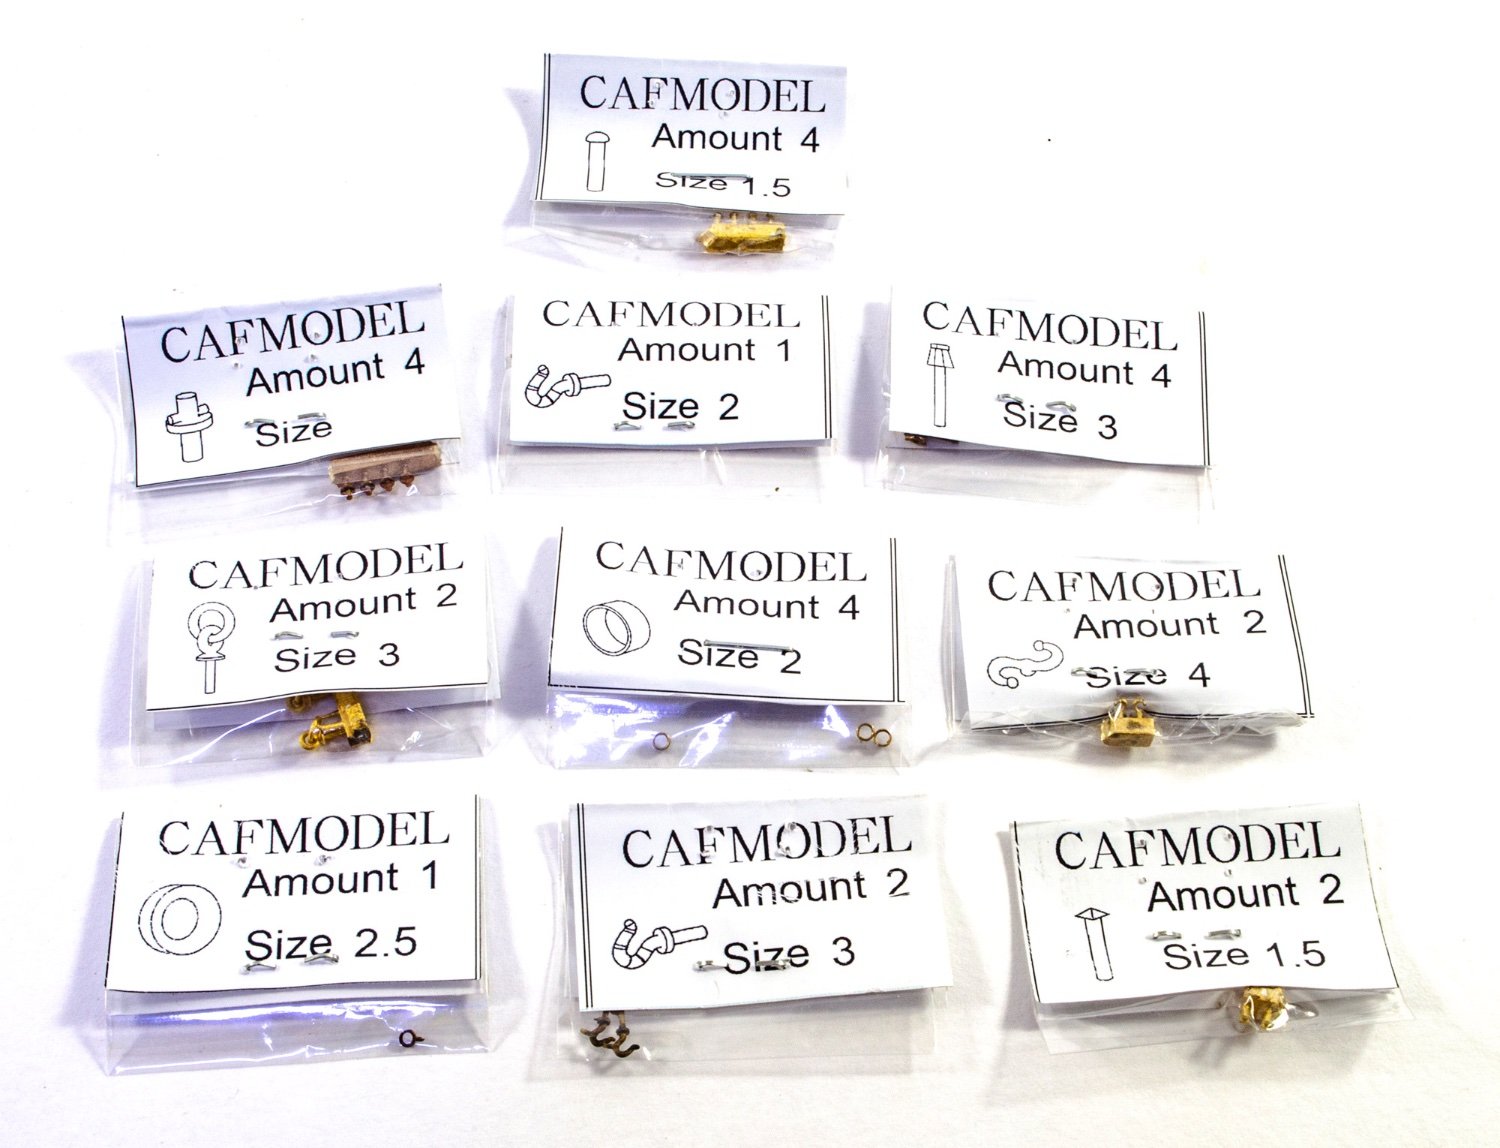
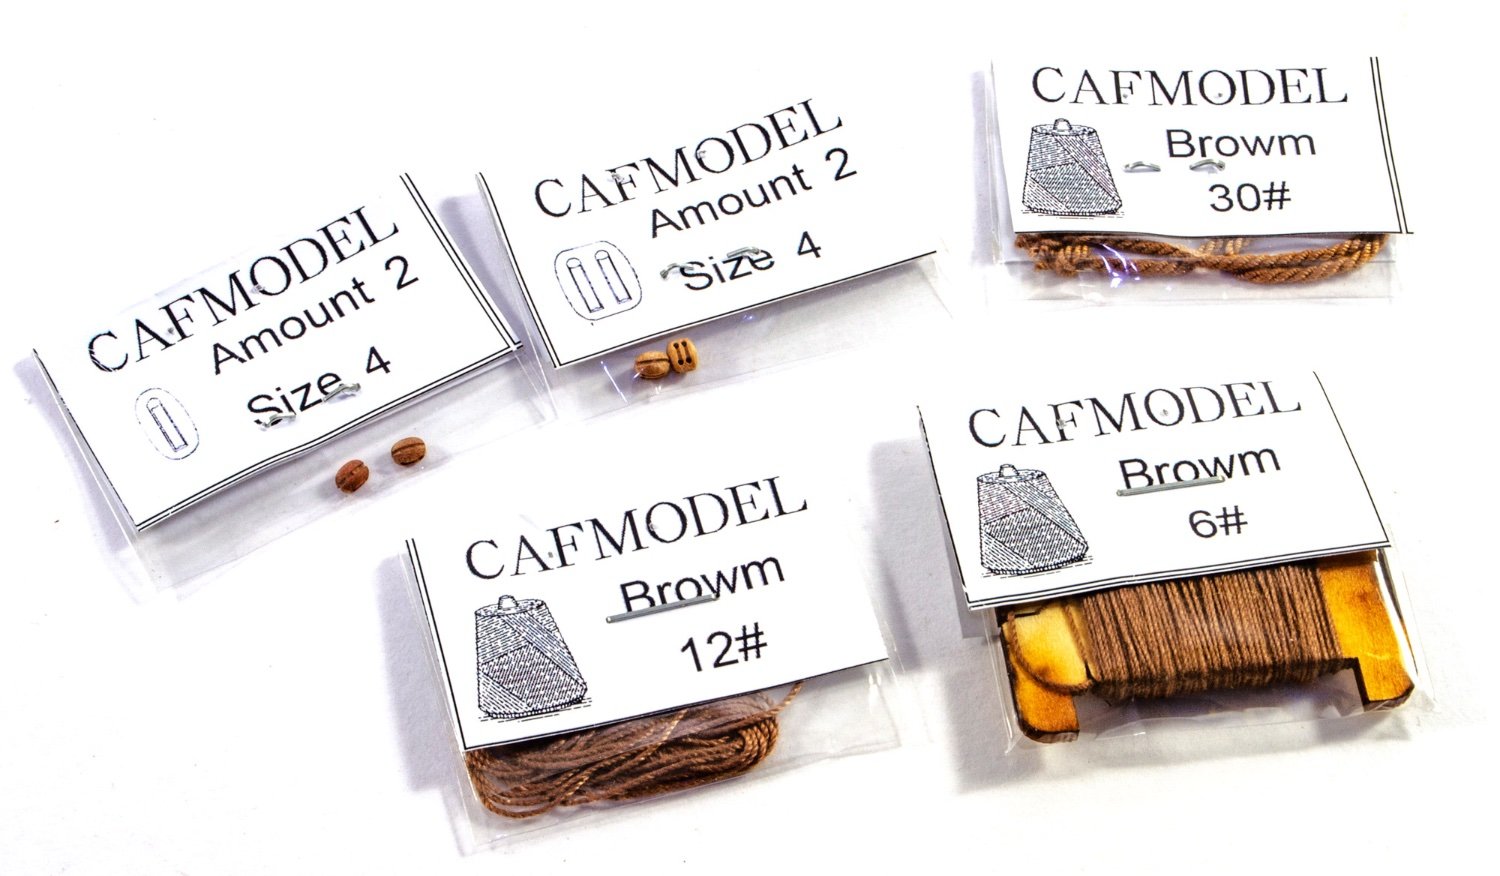
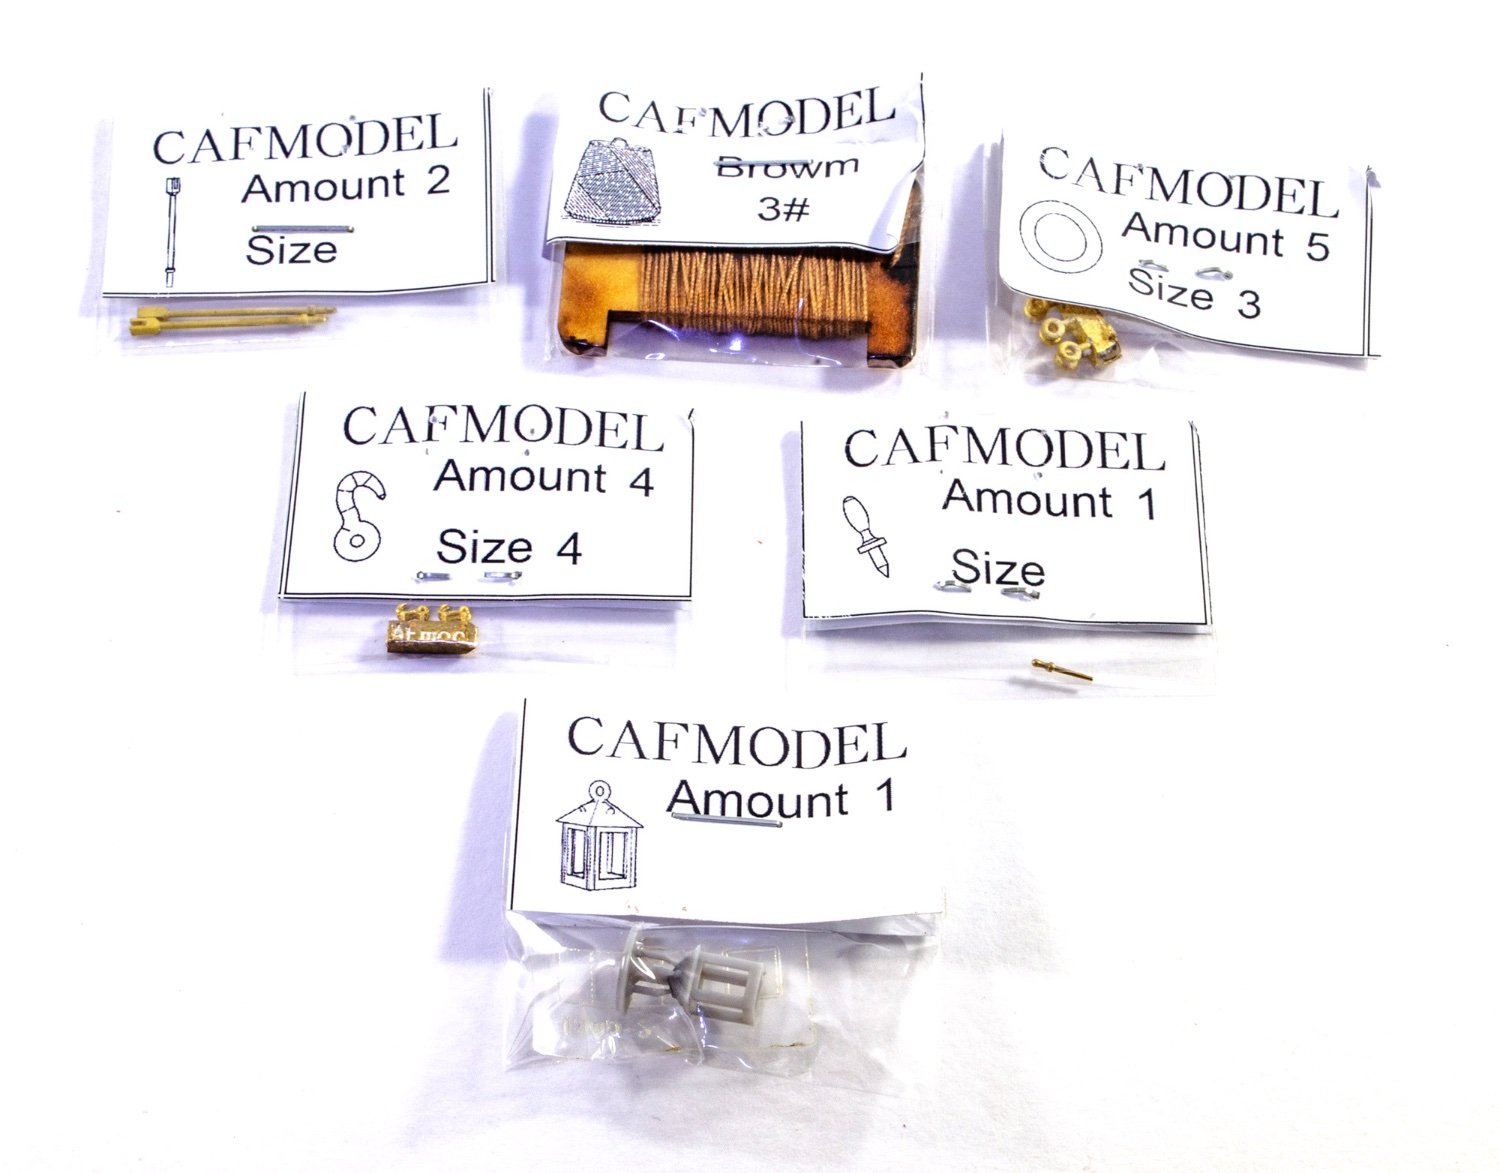
There are a LOT of small packs of fittings which include all the hardware for the gun, eyelets, stanchions etc. and again, these are all individually bagged and the part depicted on the seal, plus the part quantity. Some parts are cast onto brass blocks and you will need a small jeweller's saw or similar, to release the parts, and some fine files to clean them up. Also included is rigging cord in various sizes for the gun, rigging blocks, etc. The cannon is either cast in brass or bronze. I'm not too sure, but the detail definition is very good indeed and supplies quite a bit of weight to finished model. One thing of note here is the tiny lantern. CAF say this can be lit with an LED, but you will need to source those parts yourself.


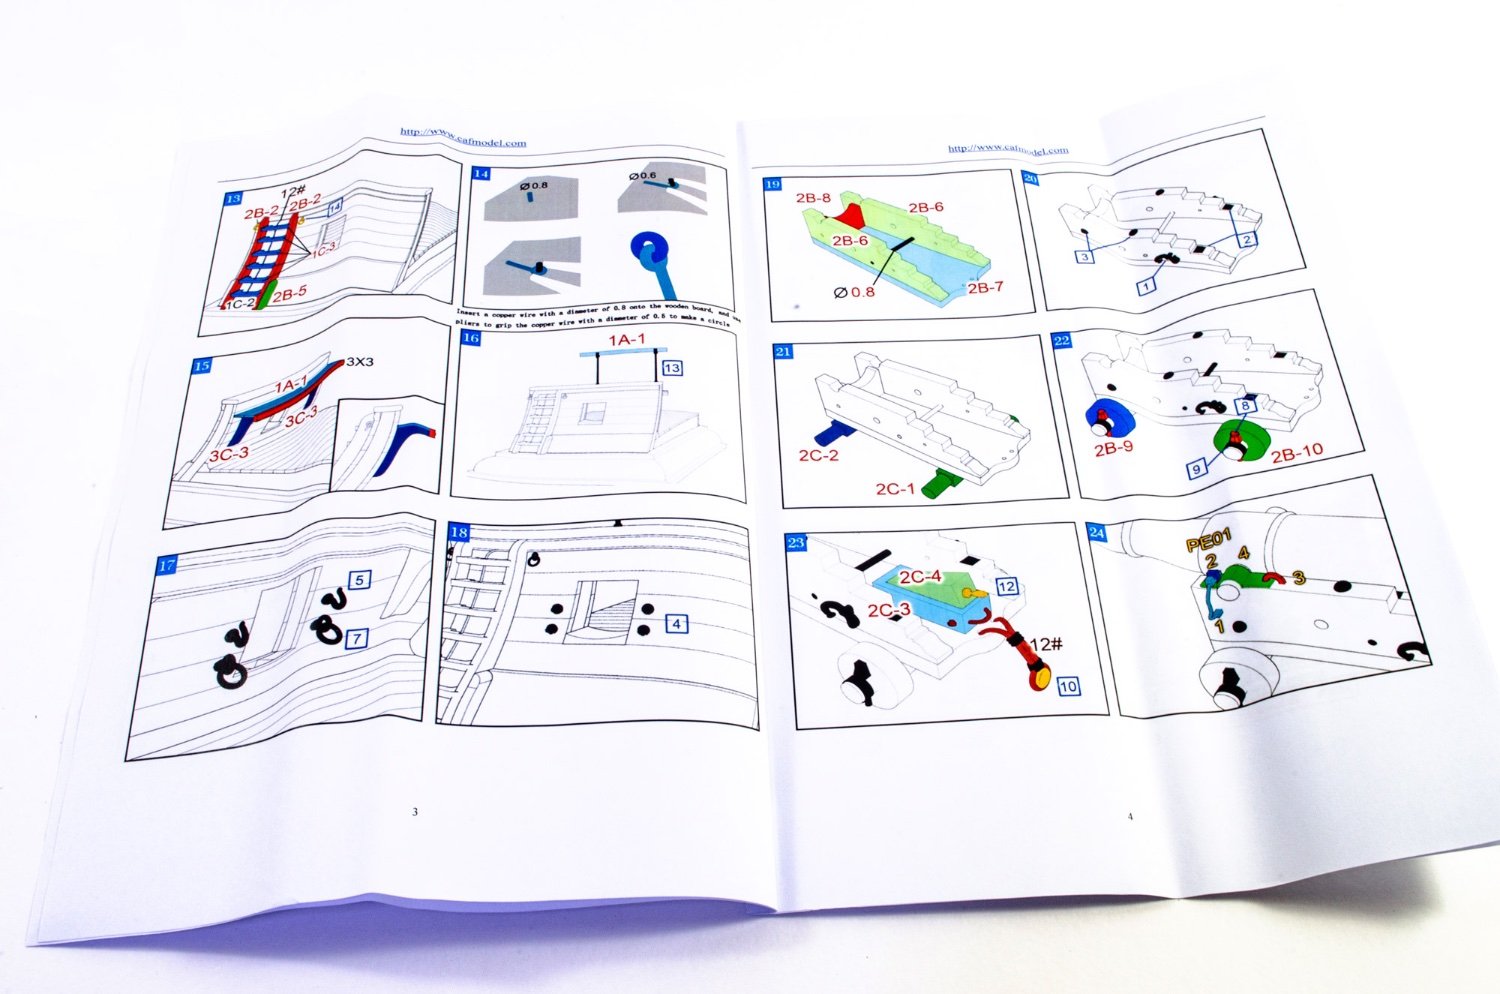
Instructions
These are a simple affair, spreading out over 6 pages, in full colour with parts annotation being clear and overall, the whole model looks simple to build up. Also included at the rear of the instructions are two pages showing the part sheets and corresponding part numbers.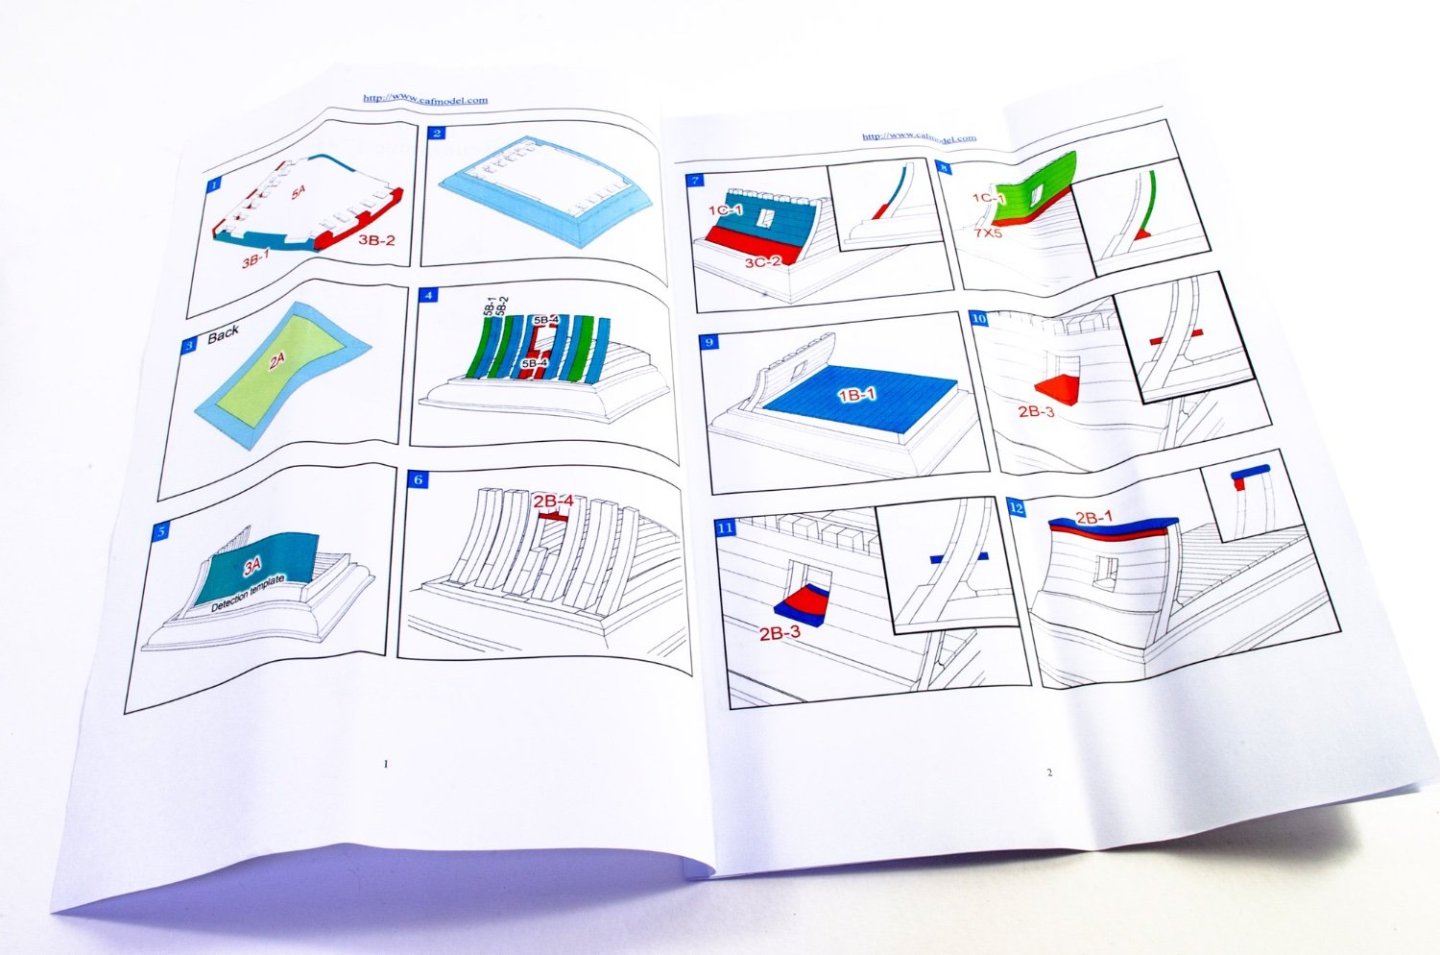


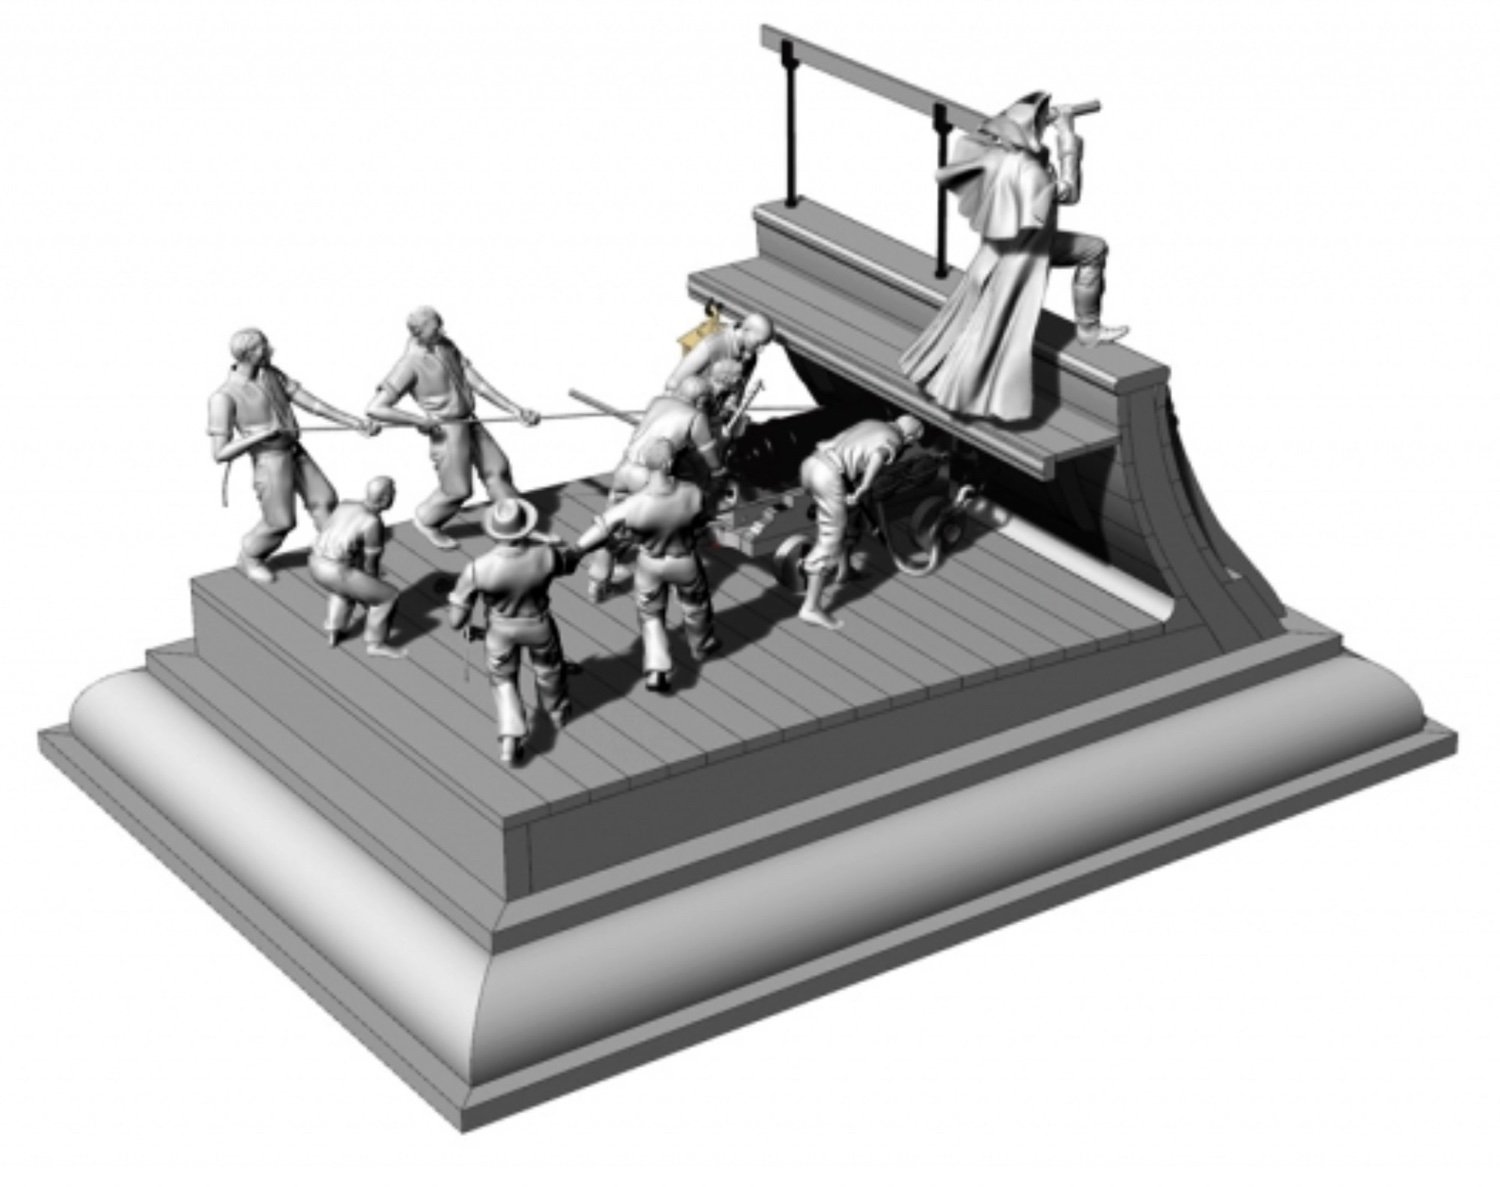
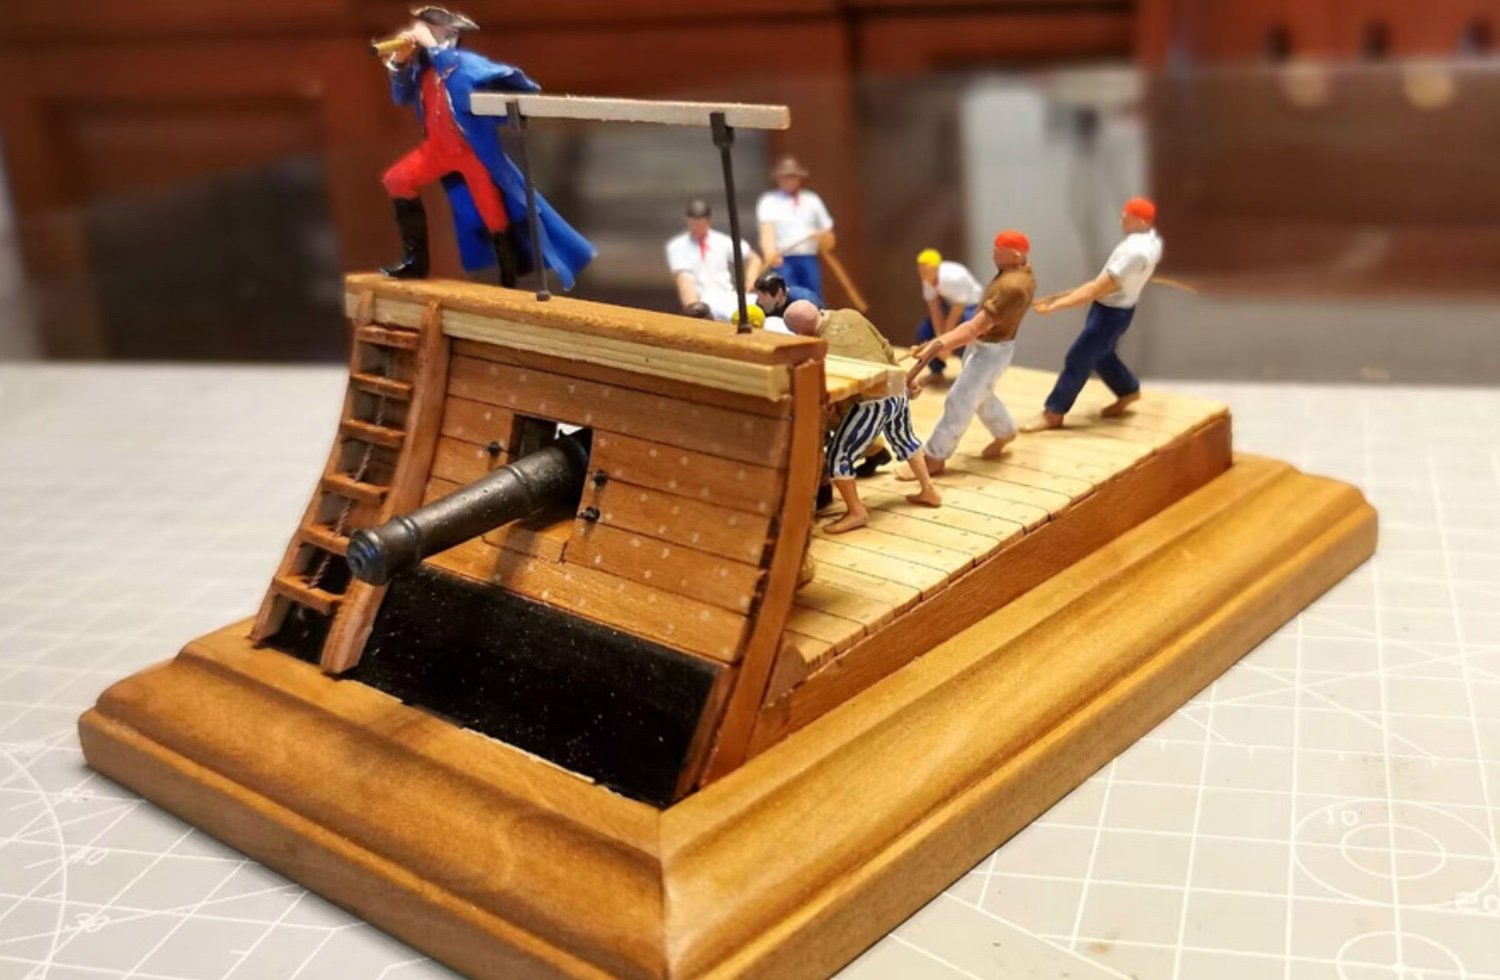
CAD and finished model images
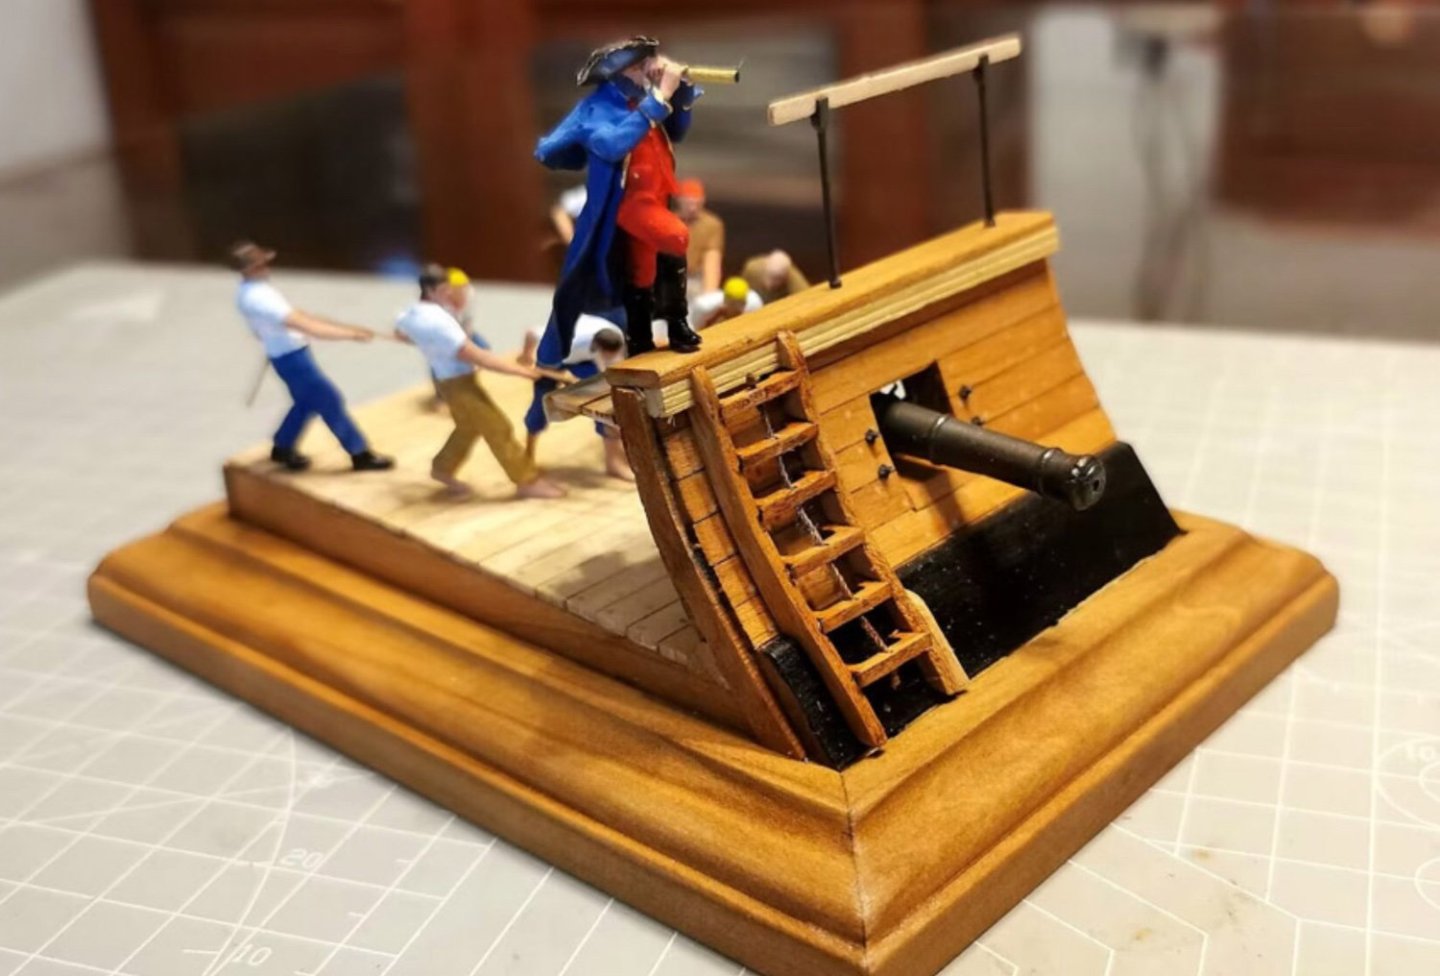


Conclusion
This has to be a nice little 'between projects' project! It's very simple to build, the materials are very nice, albeit some char will need to be removed from part faces in some areas, and there's plenty of parts to keep you occupied. One thing I'd like to have seen is the inclusion of a 'grain of rice' LED and some wire and battery clip for illuminating the model as shown, or even a requirements list and illustration as to how the prototype was tackled. That' not even a gripe though...more just me thinking it would've been a nice touch. This is quite an inexpensive model for what you get, when you look at all those 3D-print figures etc. I don't really see too many new kits like this these days, so this should perhaps be something to consider if you fancy a small diversion.
My sincere thanks to CAF Model for sending this kit over for review on MSW.

-
Welcome to MSW. Always nice to see another Scot here. I had family from both Highlands and Lowlands.
A beautiful place.
Looking forward to a build log.
- mtaylor and Swordfish073
-
1
-
1
-
For my Indy, I wiped down the hull with ethanol to remove any grease and then used 0000 steel wool to polish to a shine.
Then I applied a matt varnish with turns it slightly pinky orange in colour.
- mtaylor and Ryland Craze
-
2
-
35 minutes ago, Blue Ensign said:
Nice Job Kevin, but the sight of that flying jib boom makes me very nervous, you've just doubled your workspace requirement.🫤
It's for that precise reason why Im masting, shrouding and rattling mine BEFORE the bowsprit is fitted 😆
- mtaylor, Old Collingwood and Oboship
-
3
-
29 minutes ago, DB789 said:
I’ve donated too. This is a fantastic resource and much appreciated. Thank you. Dan
Much appreciated. One thing MSW will never do is monetise by way of restricting areas that are currently public, nor will we inundate anyone with spurious popups or nonsensical content in order to monetise, as you see on many sites....with Amazon links and video popups advertising breakfast cereals!. Donation drives are the best way of doing this.
The only areas that have to be paid to access are the downloads to projects such as Winchelsea, Triton etc.
- Ryland Craze, BenD, allanyed and 6 others
-
9
-
-
Beautiful! Those chainplates easy enough?
- Old Collingwood, Kevin and mtaylor
-
3
-
Ok folks, this is now up to Volume 50.
That's some heavy work. Go grab yourself an article and have something to read with that beer tonight!
https://thenrgstore.org/collections/articles
- trippwj, Ryland Craze, hollowneck and 3 others
-
6
-
7 hours ago, allanyed said:
Thanks Alan, but I am still not getting it. This is on me, not you, for sure. The long bolt passes through top, middle and bottom block as well as what looks like a metal bracket. What part is anchored and where is it anchored so the carriage can pivot on this pin? If anyone has a top view that would really help. Looking at several modern photos, they look nothing like the contemporary drawings, but surely there are some that are accurate reproductions if complete drawings are not available.
Thanks again Alan, MUCH appreciated.
Allan
Let's not turn a build log into a debate, like the diminishing wales thing.
Feel free to open a topic on carronades that can be used for reference. That's the best way to expend this thirst for knowledge. Please use this topic to enjoy Glenn's ongoing work on Indy.
- allanyed, Esap, chris watton and 2 others
-
5
-
When I painted the internal walls, I didn't use the VM paint as the sets weren't ordered.
What I used was an equivalent colour from Gunze, and airbrushed it on. In hindsight, I should've prepped those areas with Tamiya aerosol white primer as that covers the engraved colours far better.
-
I'd go with a gentle sanding of 400 or finer grit, and then use a soft brush to remove dust from the engravings.
- Mr Whippy, Ronald-V, FrankWouts and 1 other
-
4


MSW is extremely slow
in How to use the MSW forum - **NO MODELING CONTENT**
Posted
Instances of slow speed seem to generate in the Antipodes, so likely a routing/traffic issue.