


James H
-
Posts
5,613 -
Joined
-
Last visited
Content Type
Profiles
Forums
Gallery
Events
Posts posted by James H
-
-
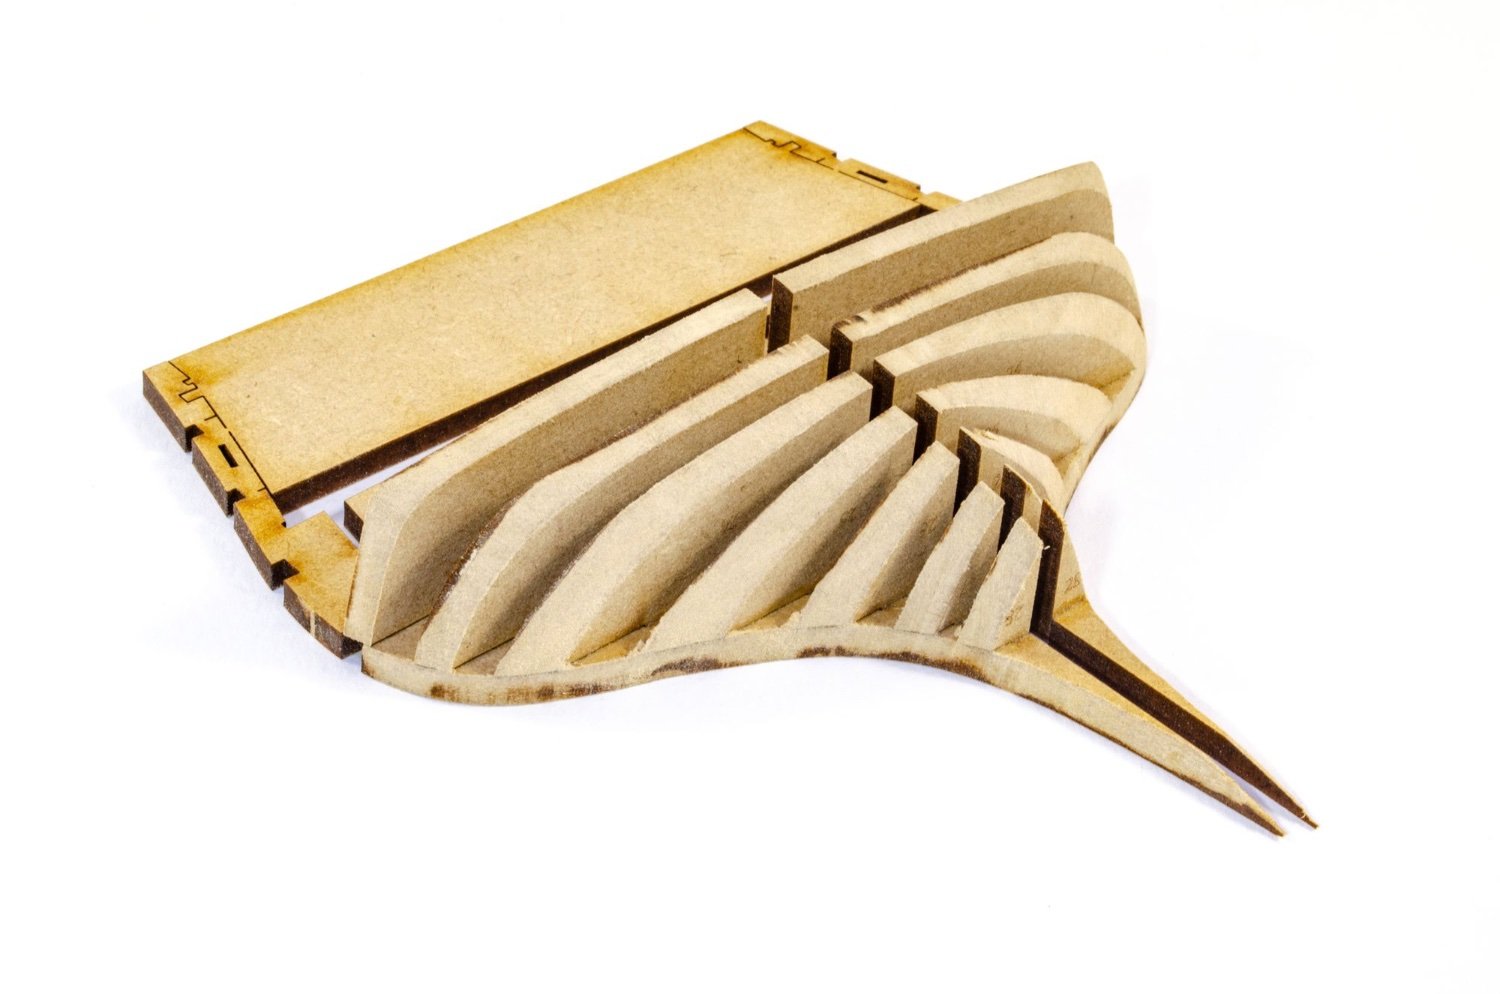
Small update as I hated leaving it without a bow and stern from the last update 😁
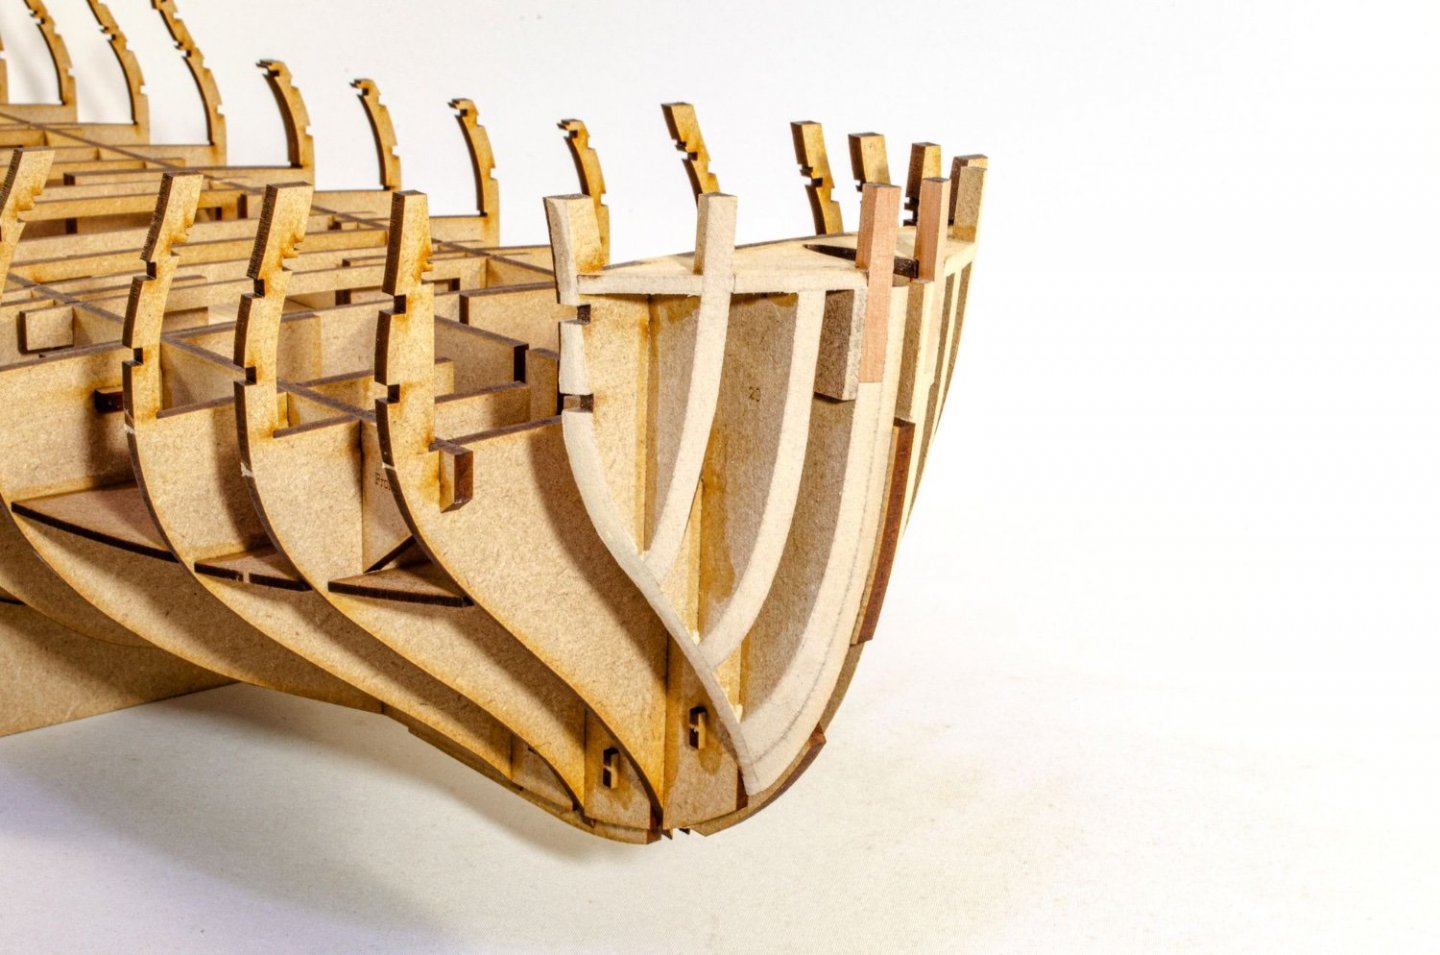
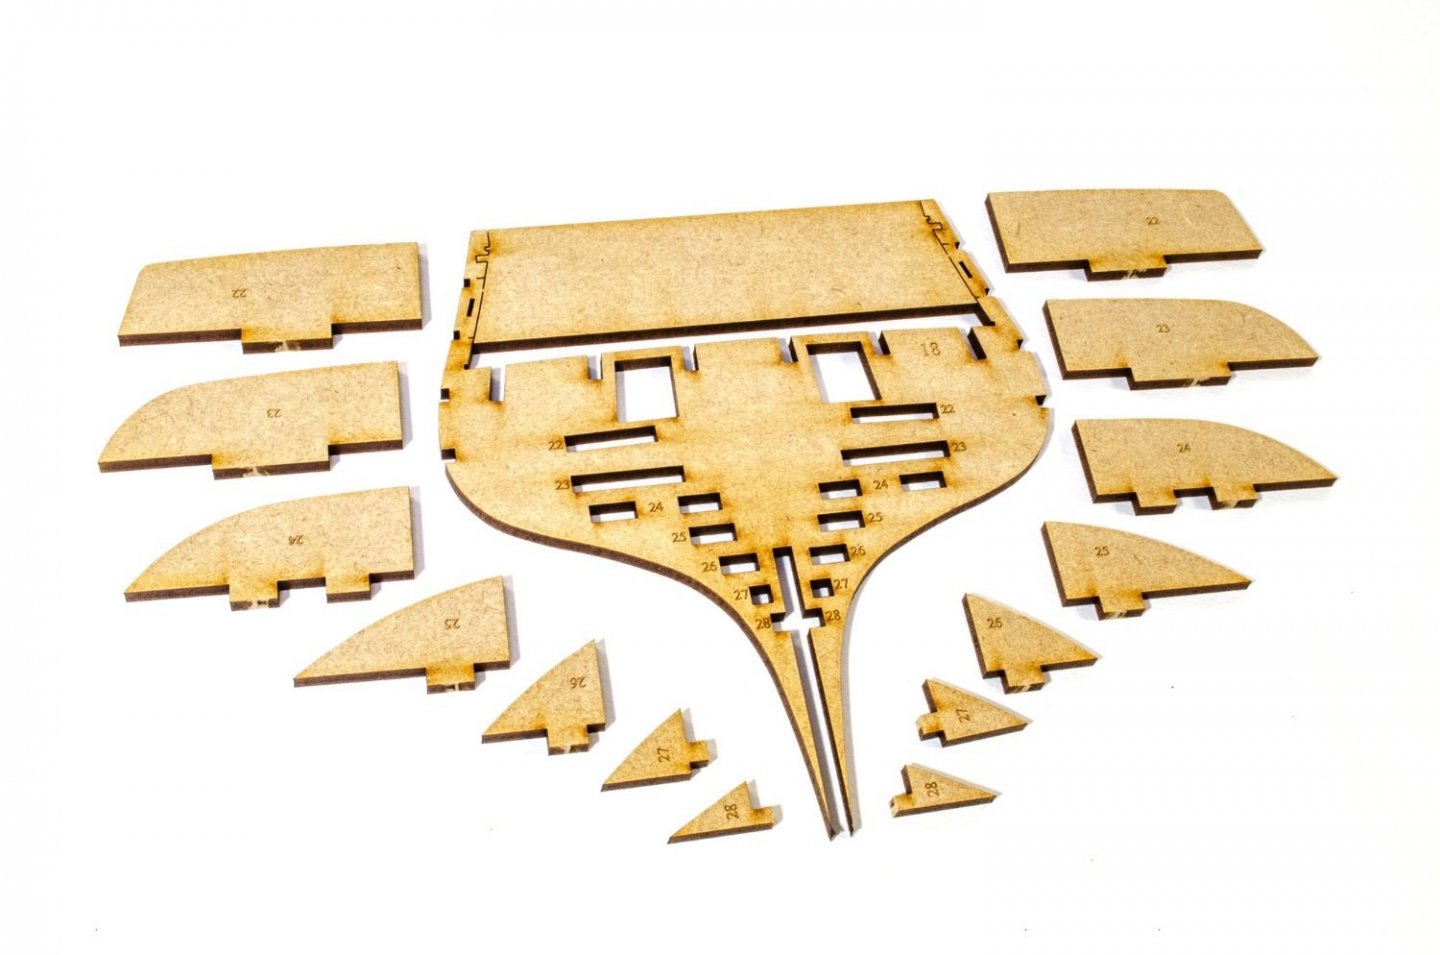
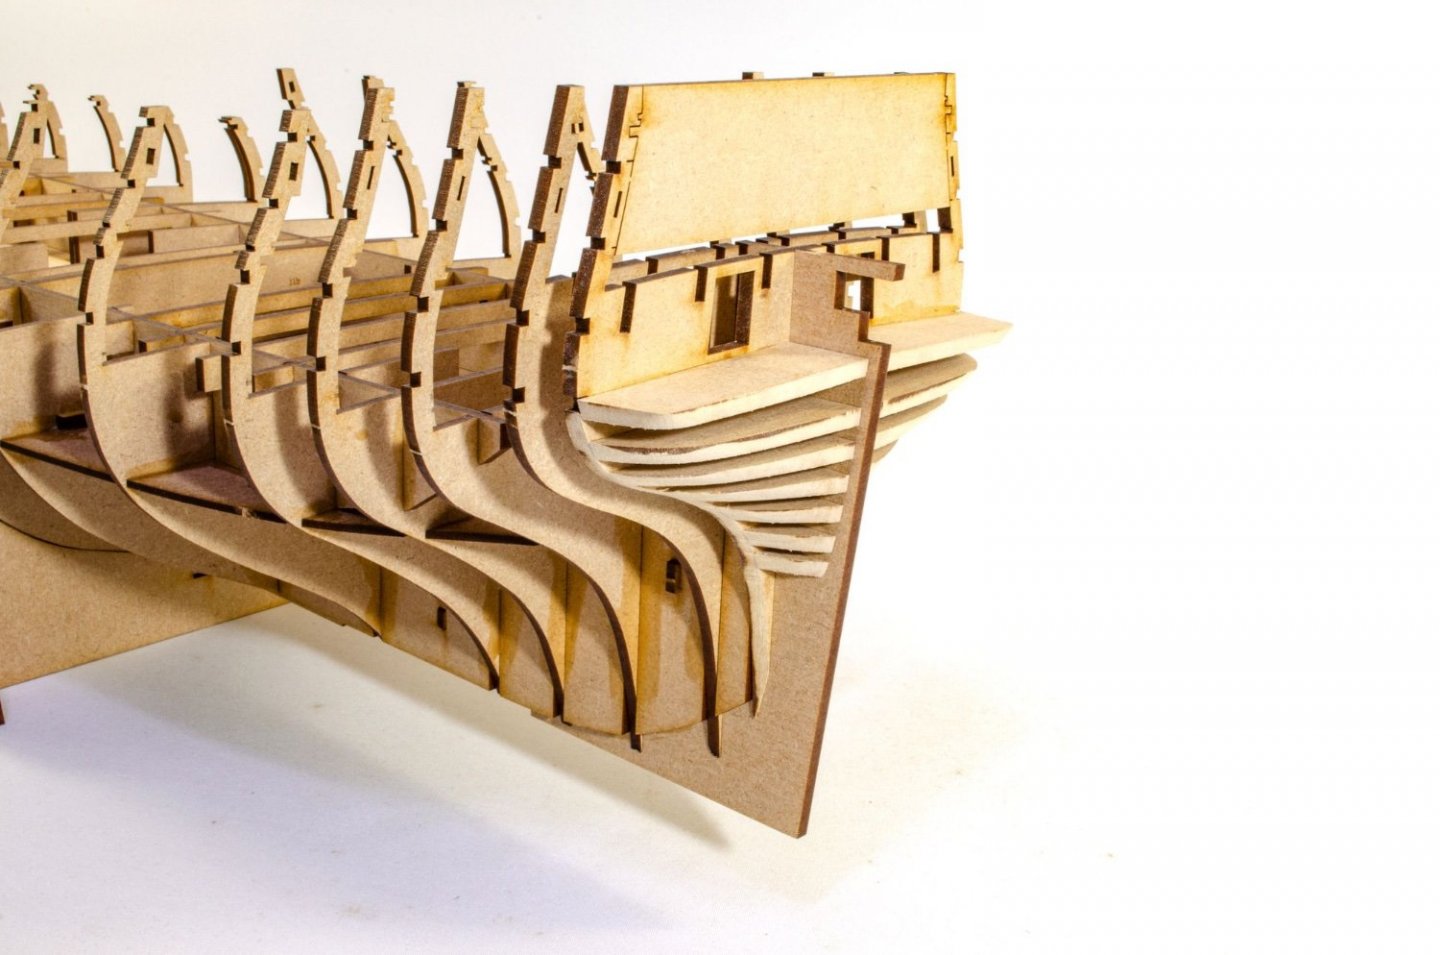
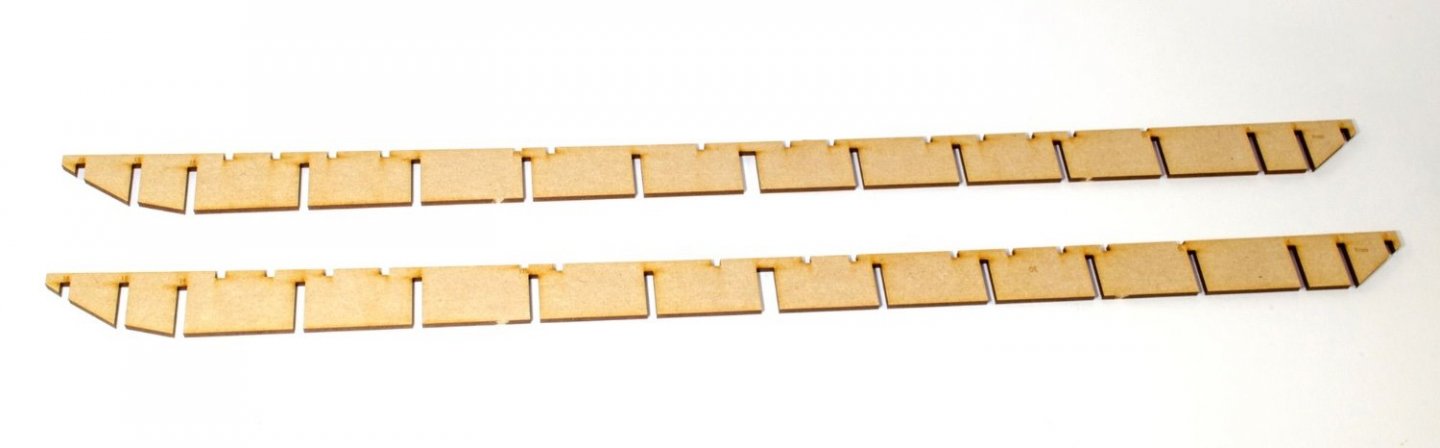
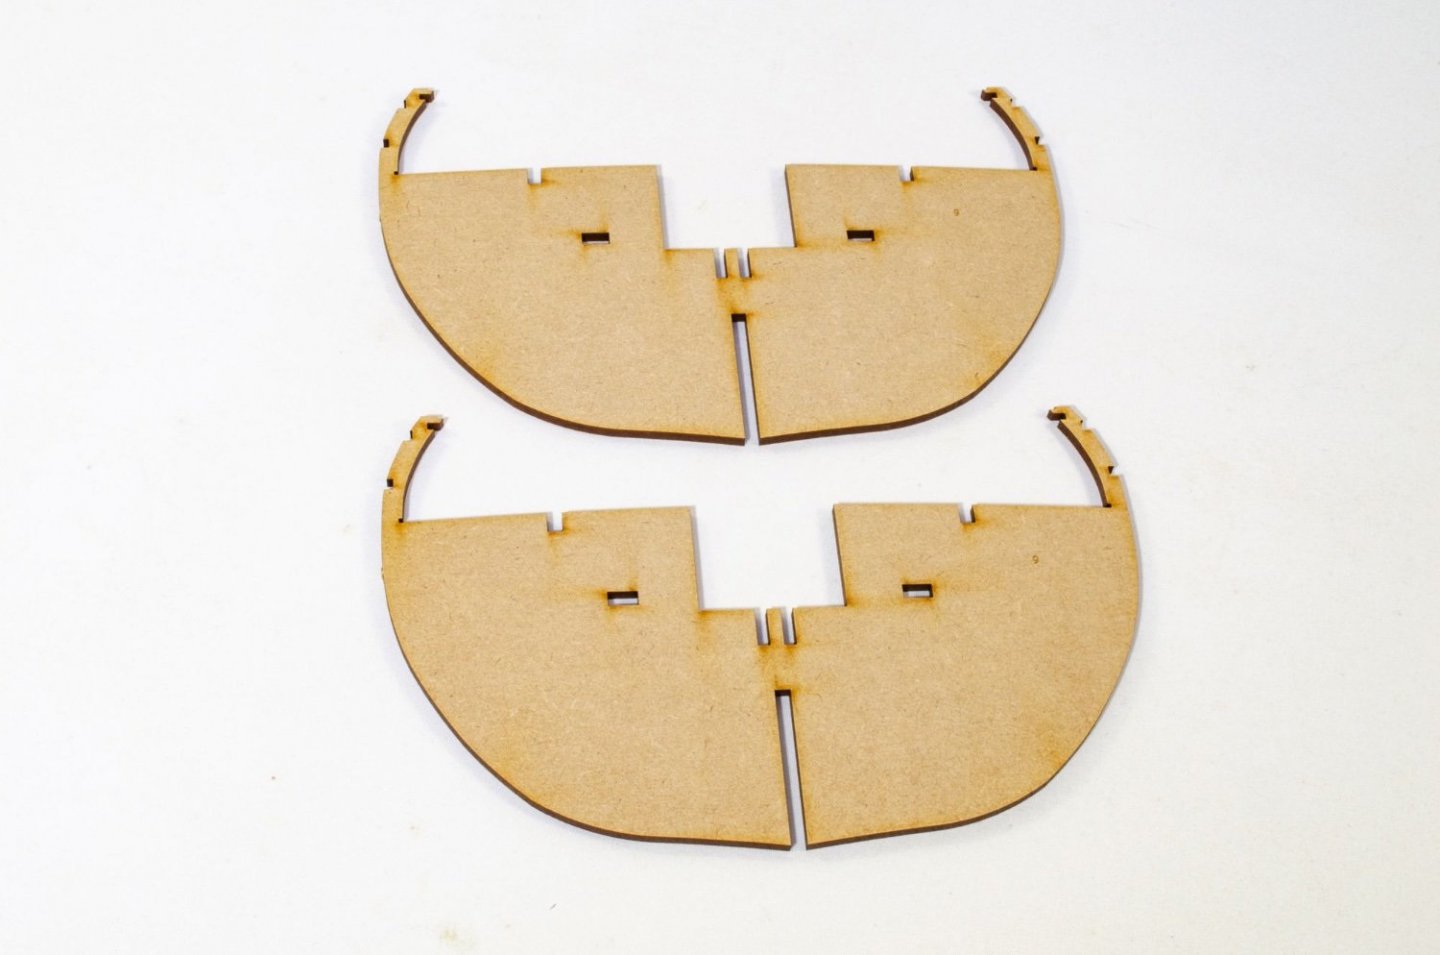
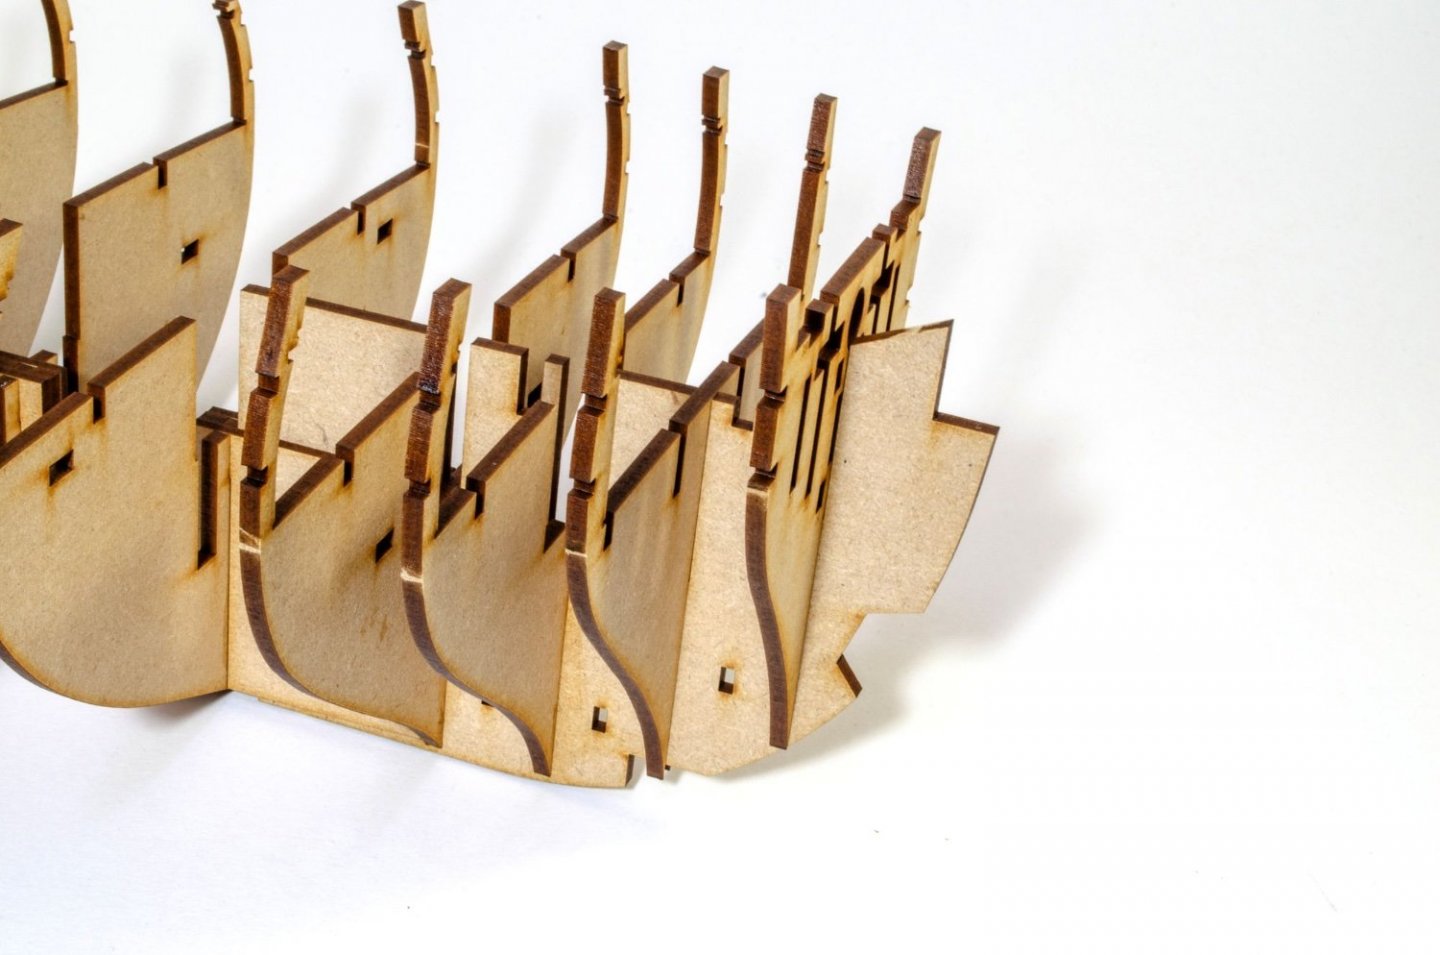
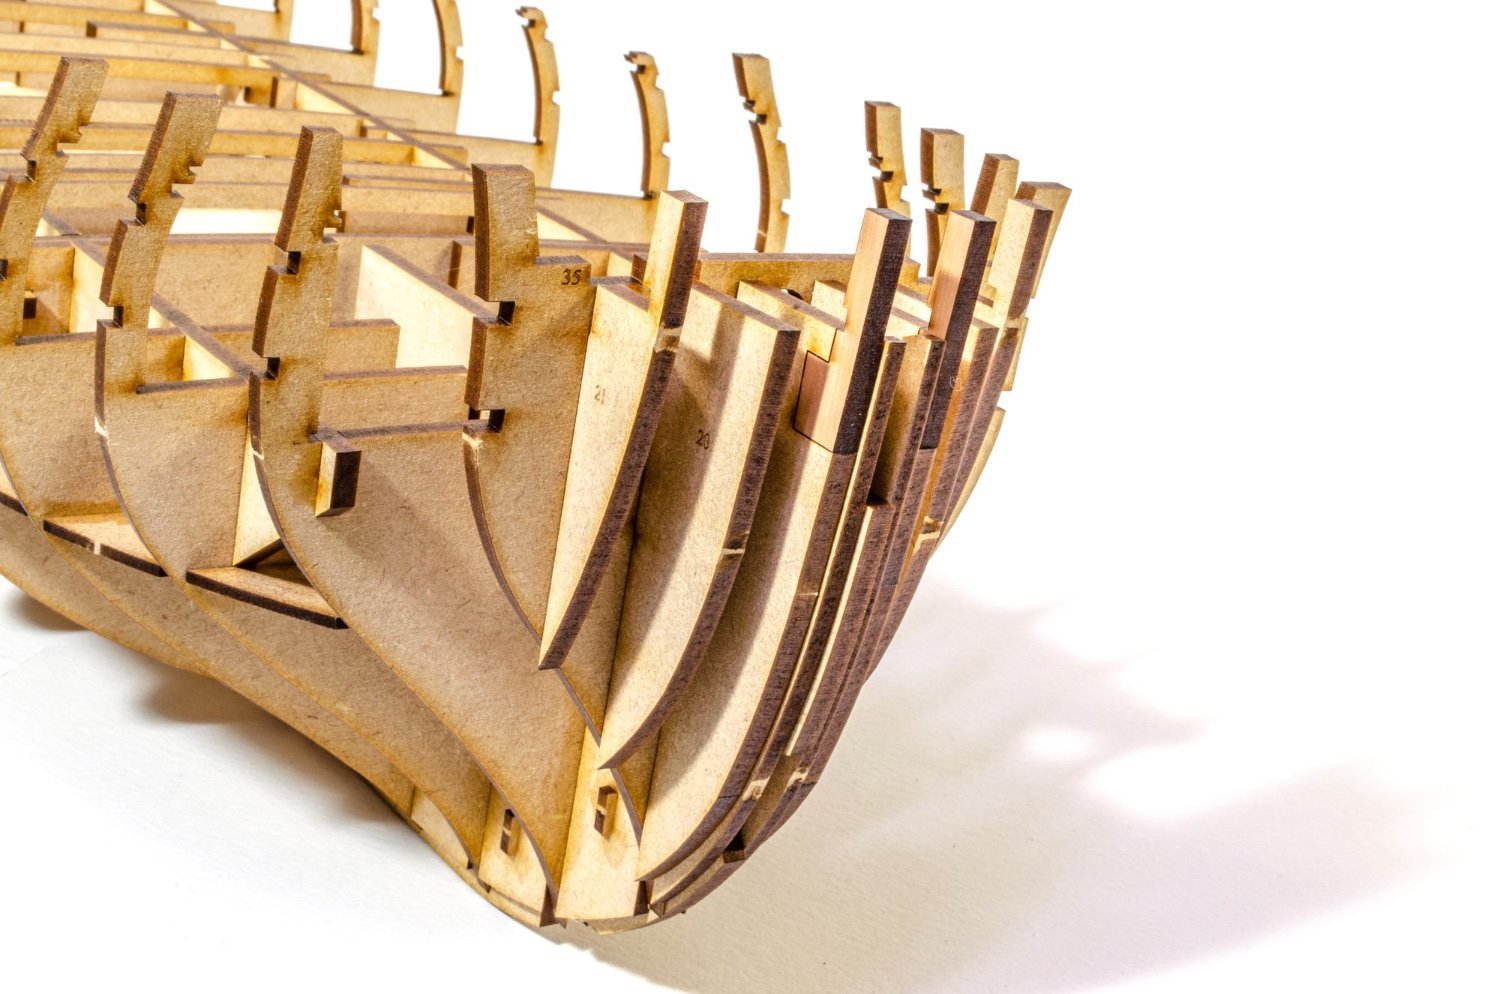
First, the bow. The foremost 'timberheads' near the prow are pear inserts to the MDF former so there's lots of strength up front when later work is carried out. Bulkhead #1 is temporarily fitted to the hull and then the formers are fitted in. The reason for doing this on model is so I can get the innermost formers snug against the keel. All these parts are numbered and the relative slots on the bulkhead are numbered too.


The assembly is now removed from the hull before the outer formers are set and the upper parts (35) are glued into place as seen here. Too stiffener pieces are also glued to the exposed side of the pear inserts. The assembly is now left to properly dry.


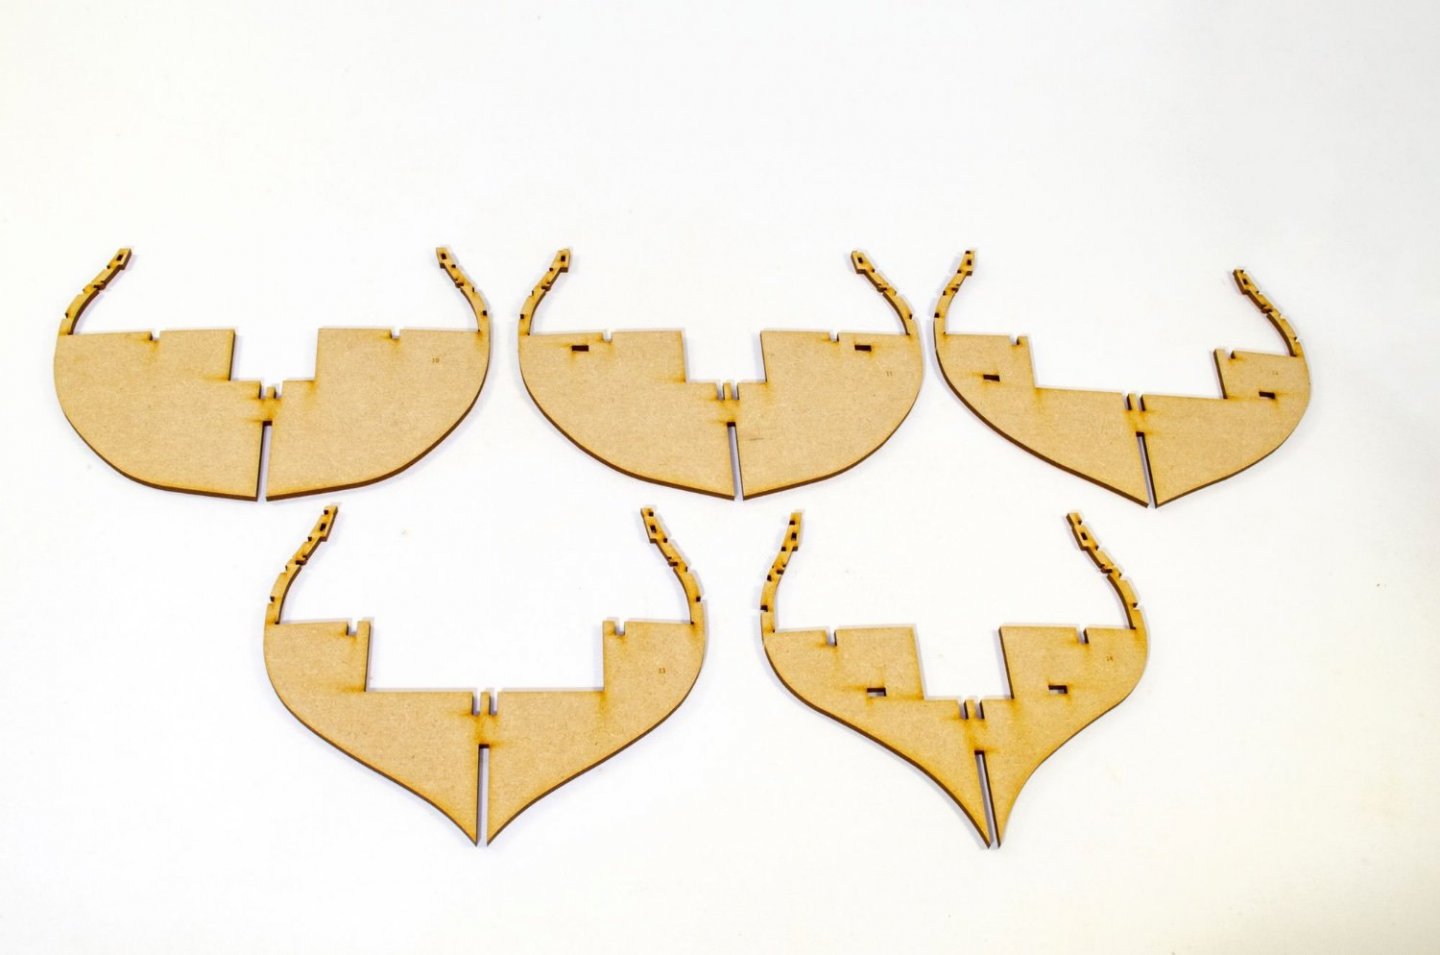
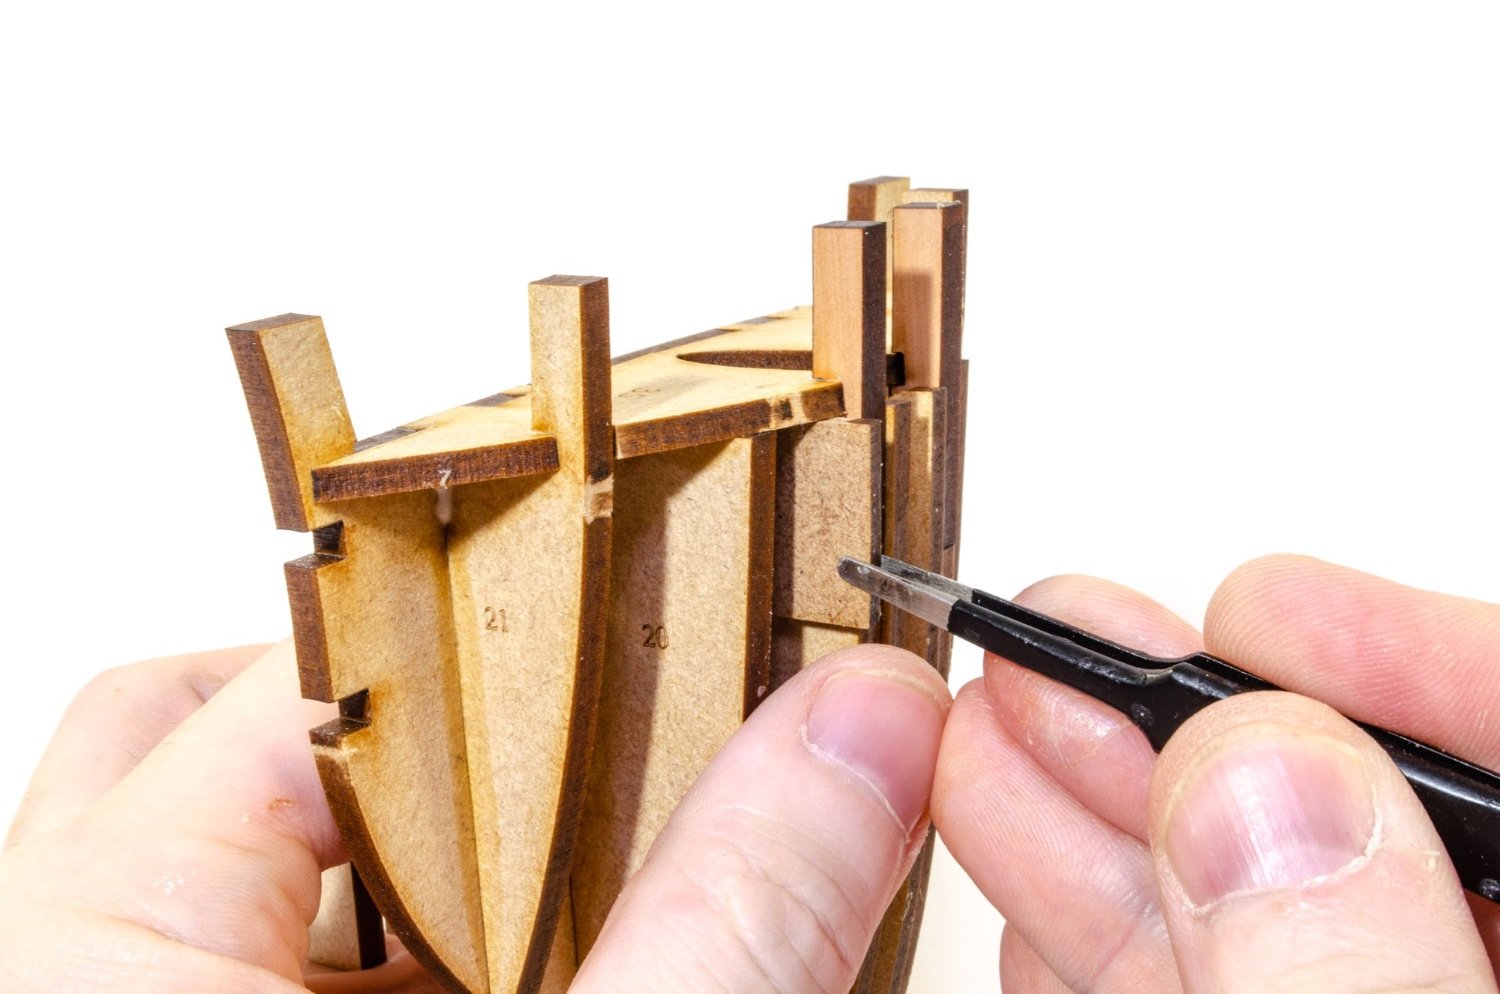
A sanding block is now taken to the bow and the whole lot is sanded and shaped in readiness to fit to the hull. The back side of this also hooks onto bulkhead #2. When I was happy with this, it was glued to the hull.
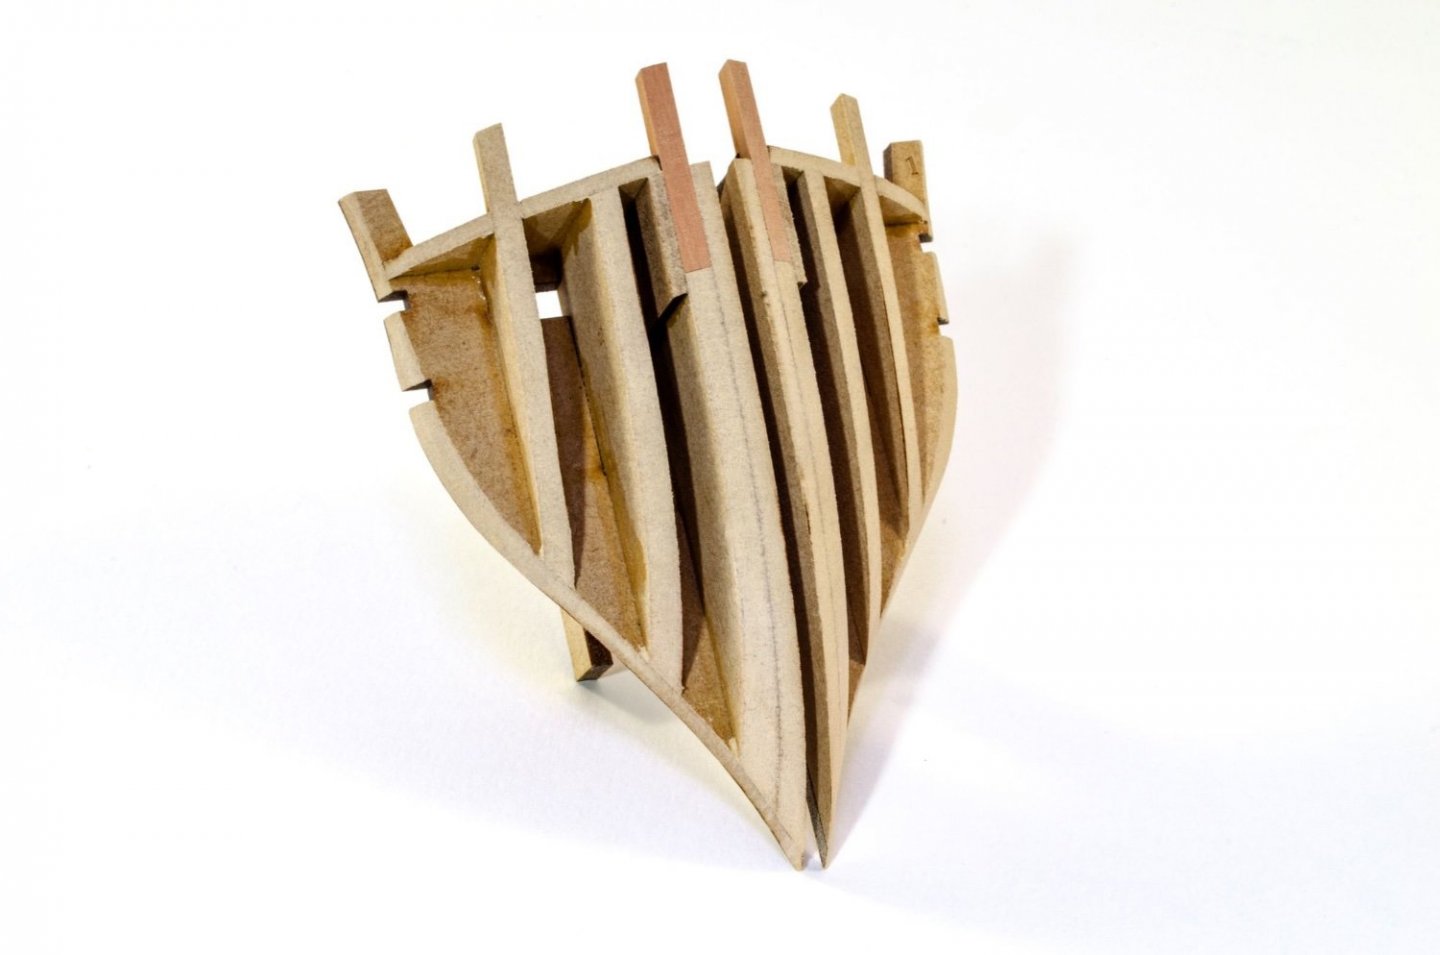
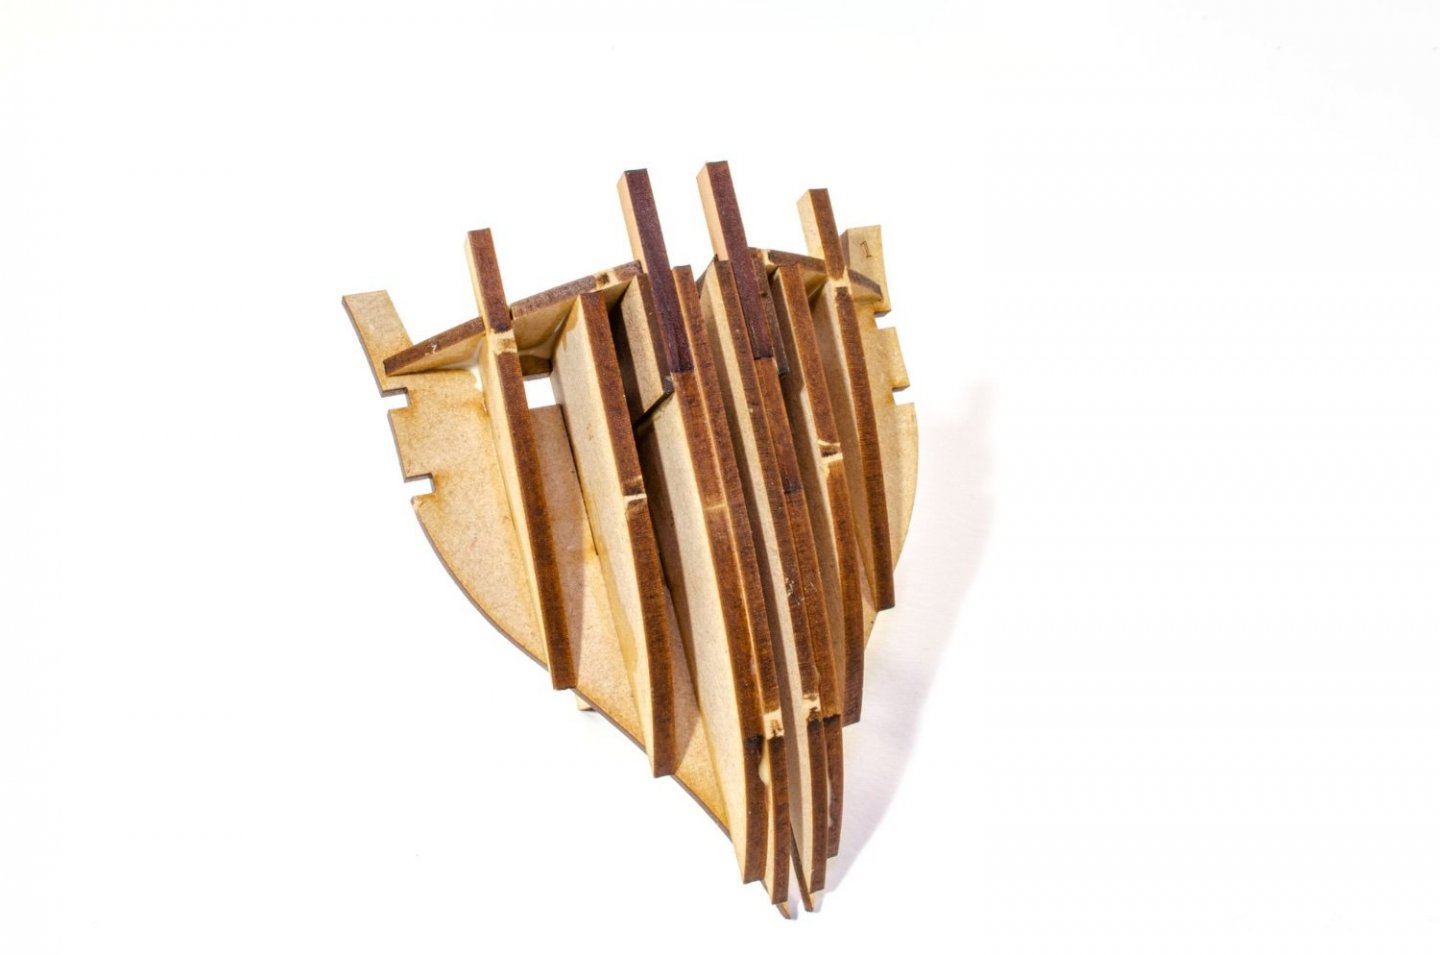
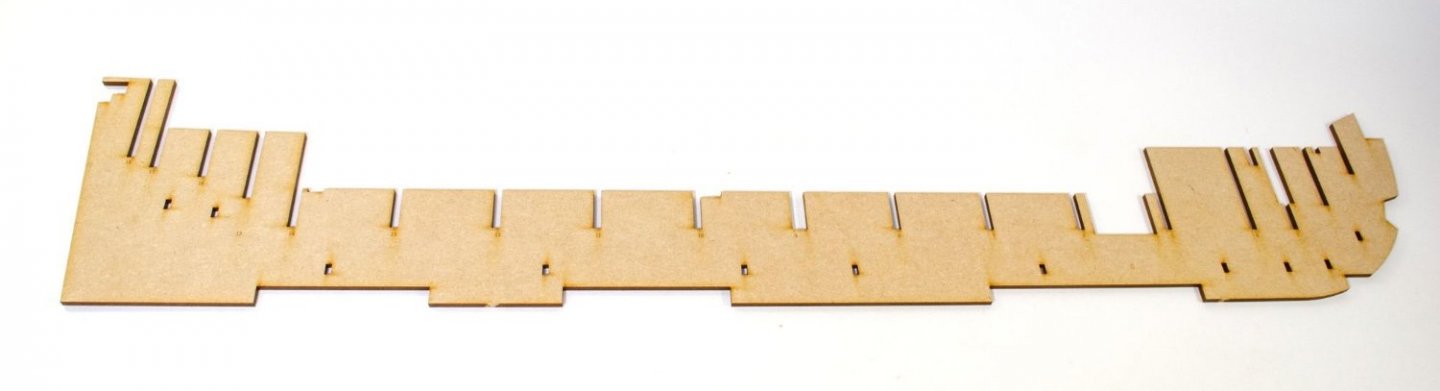
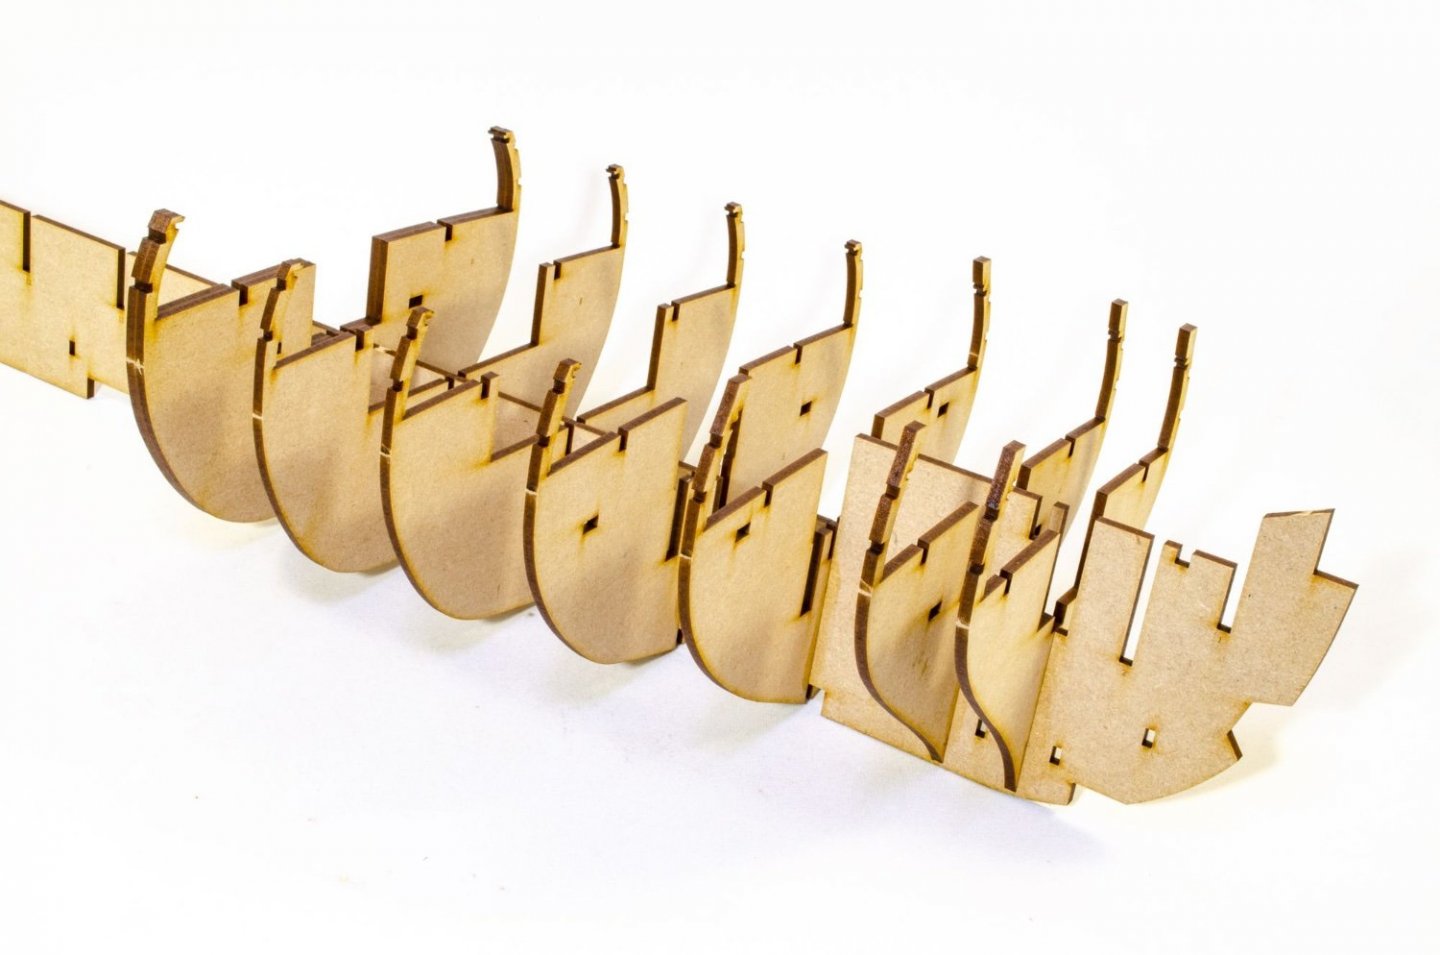
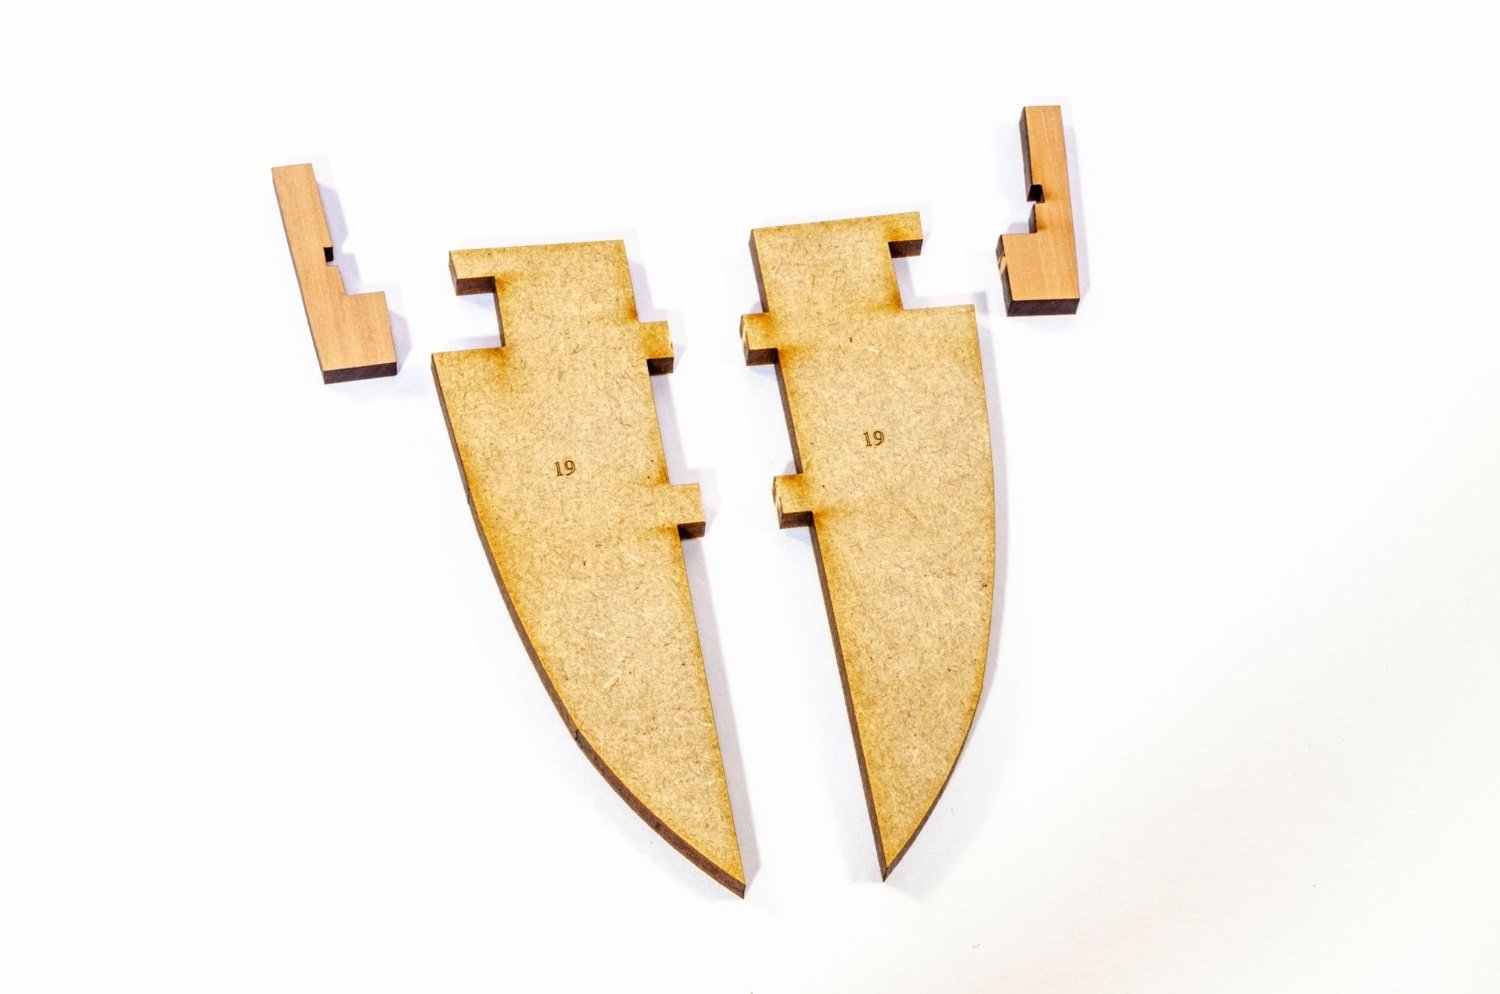
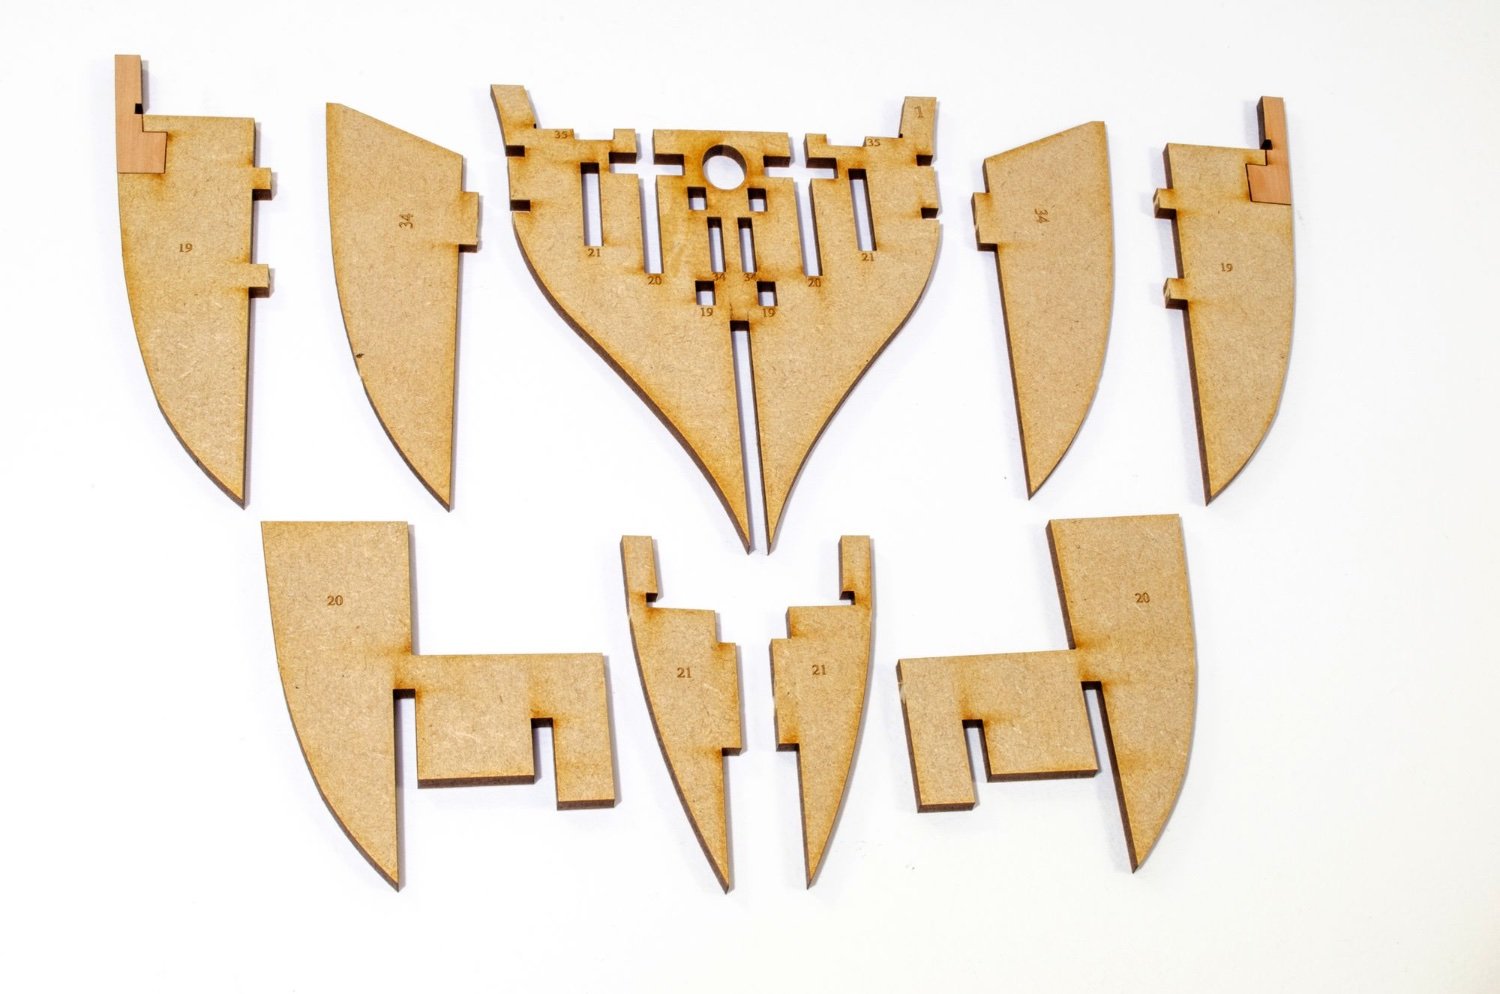
It's now the turn of the stern and fitting out the final bulkhead. As with the bow, this is fitted with a series of formers that are numbered in relation to the bulkhead slots. It's a no-brainer!
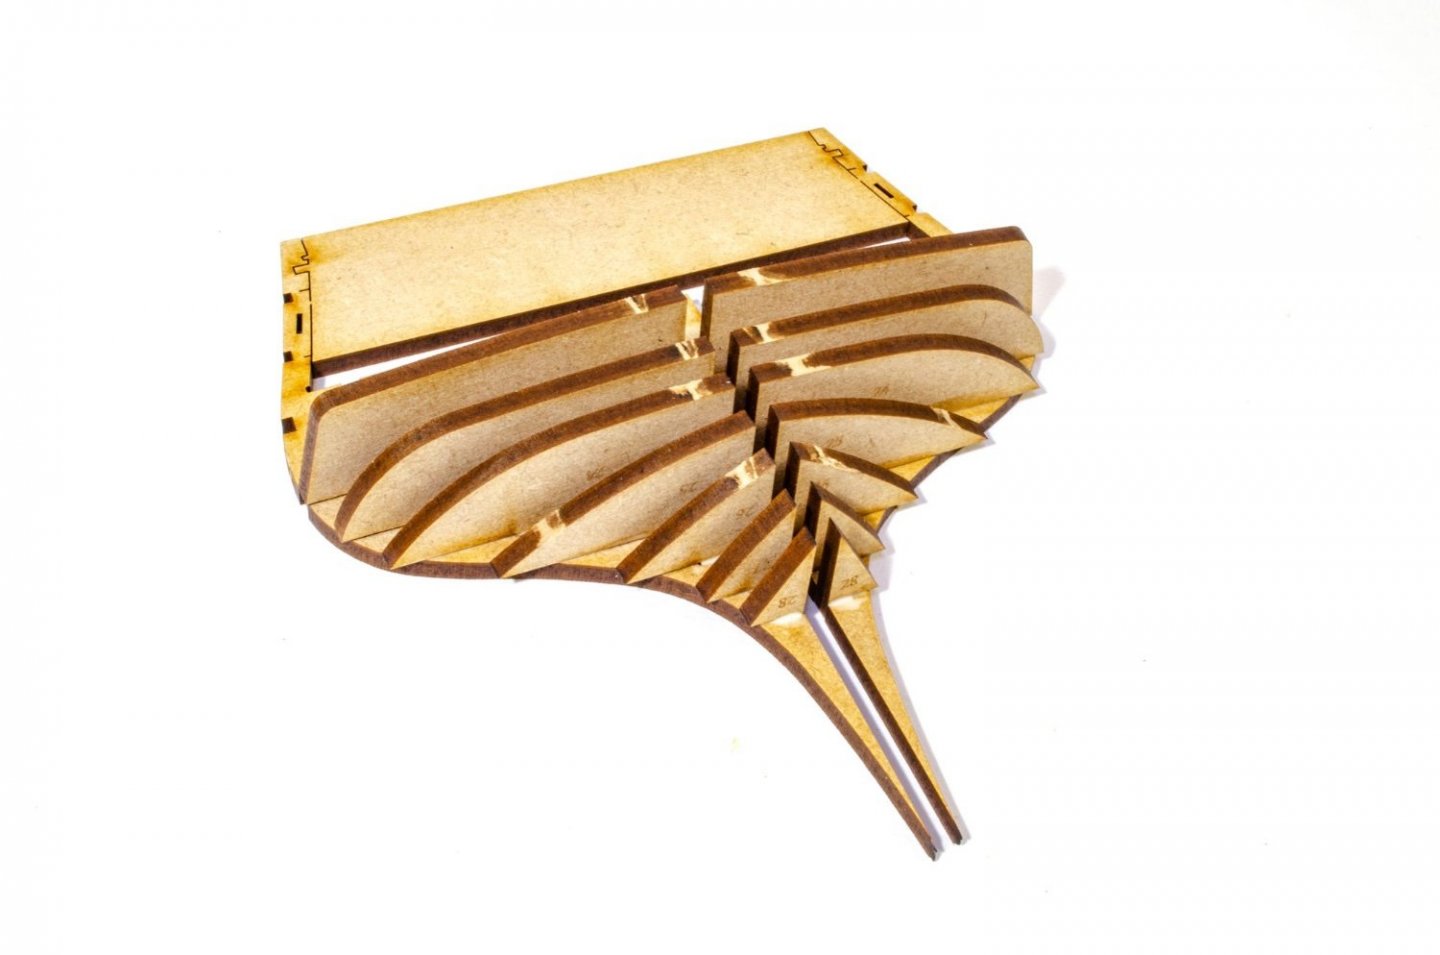
This is now carefully sanded to shape. It will doubtless be refined later when it comes to fairing the hull. Once happy with it, it's glued onto the hull.

Until later!
-
I'm not missing the chat here, but I'm also working as flat out as I can with some respiratory problem I have.
No update yet, but proof I'm not idle.
-
-
Rope and rigging blocks - various sizes
Syren Model Ship Company
Available from Syren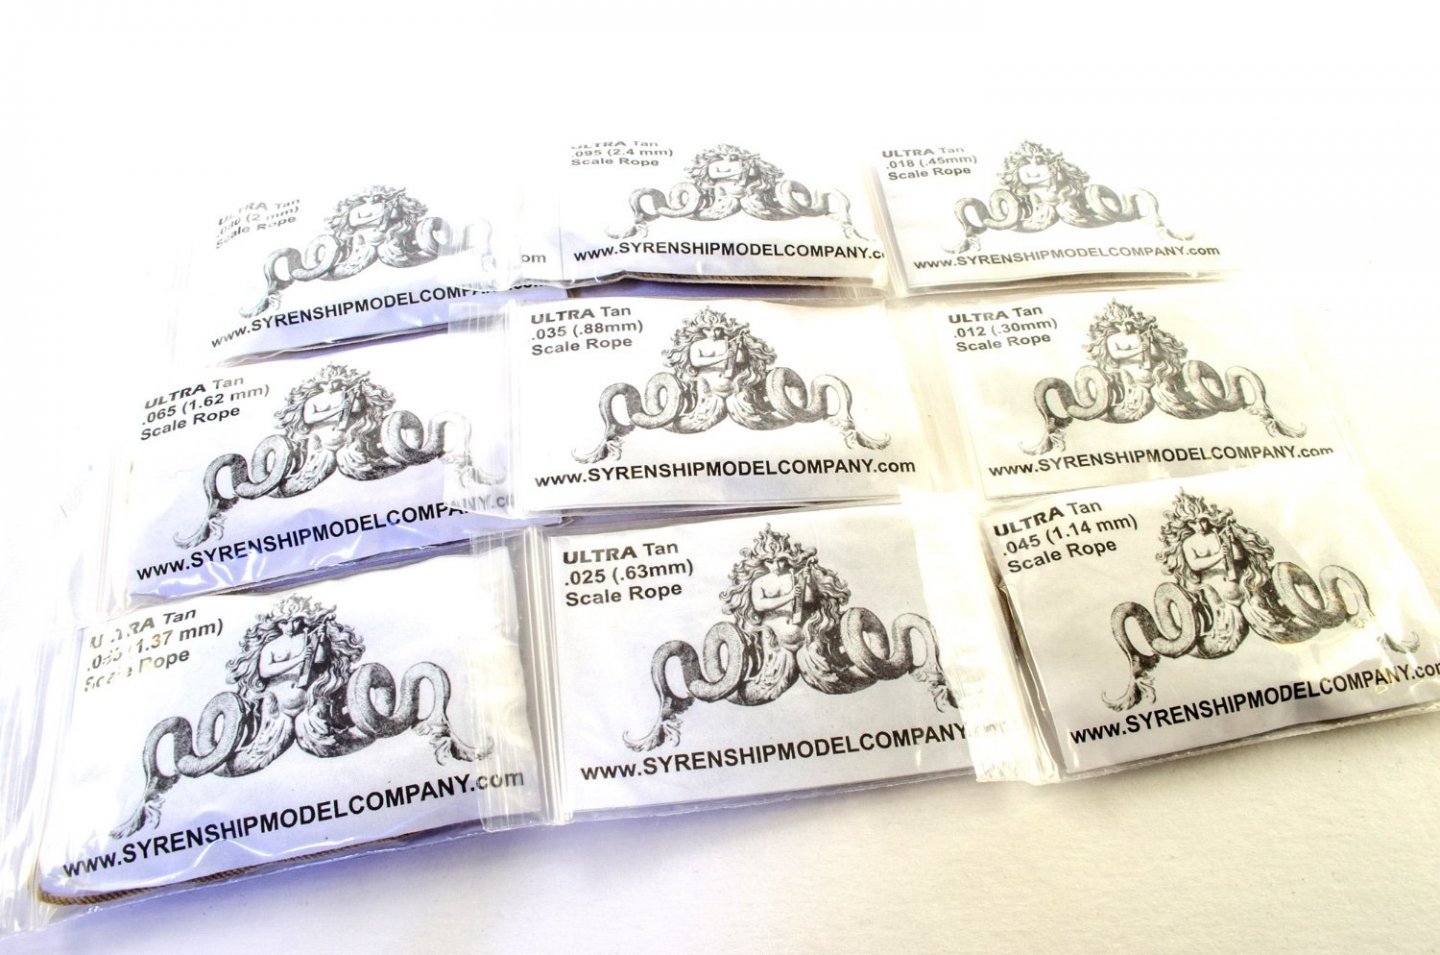
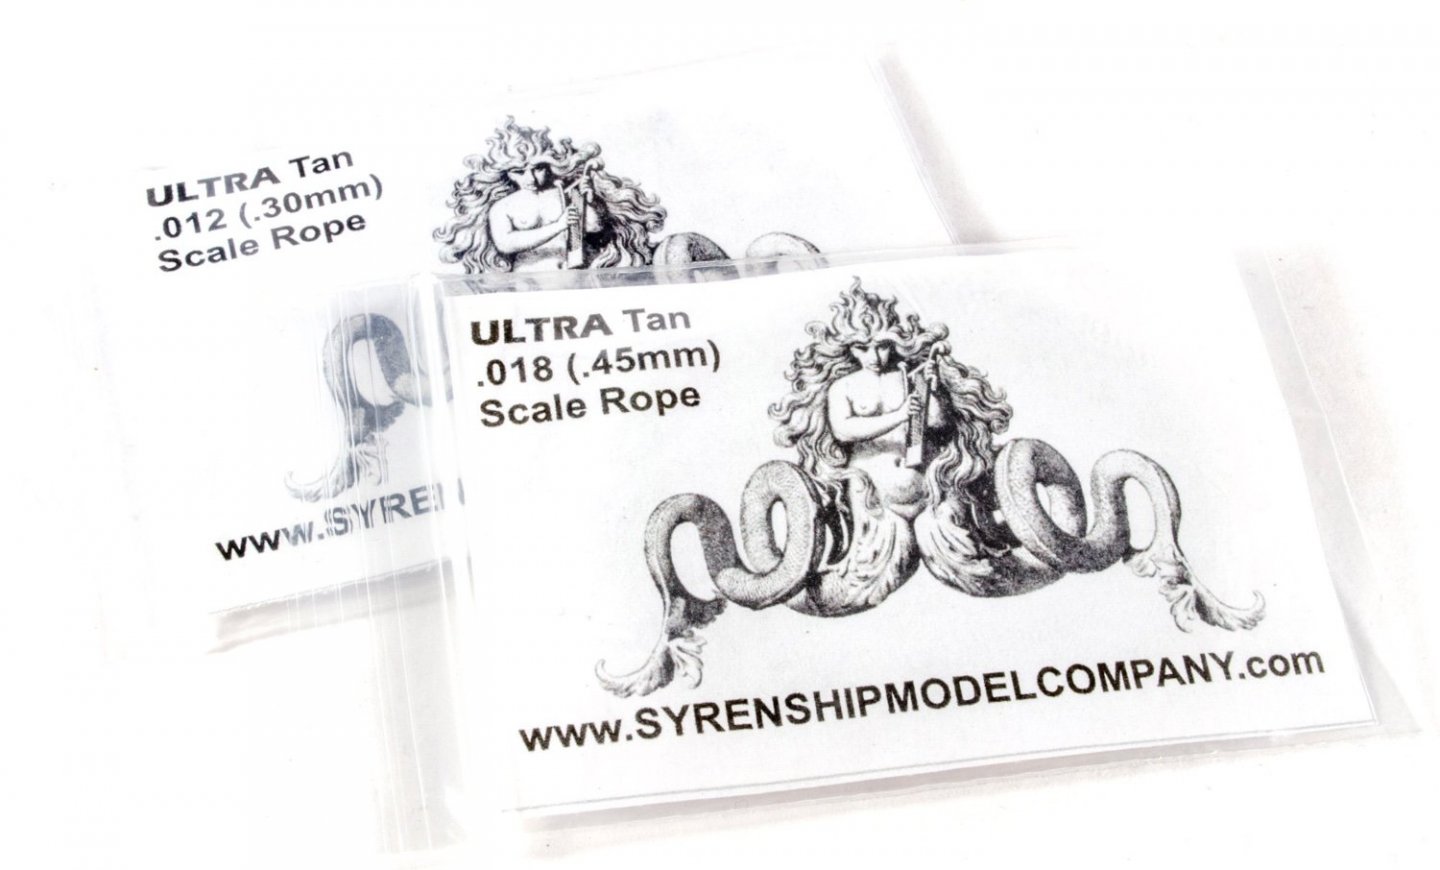
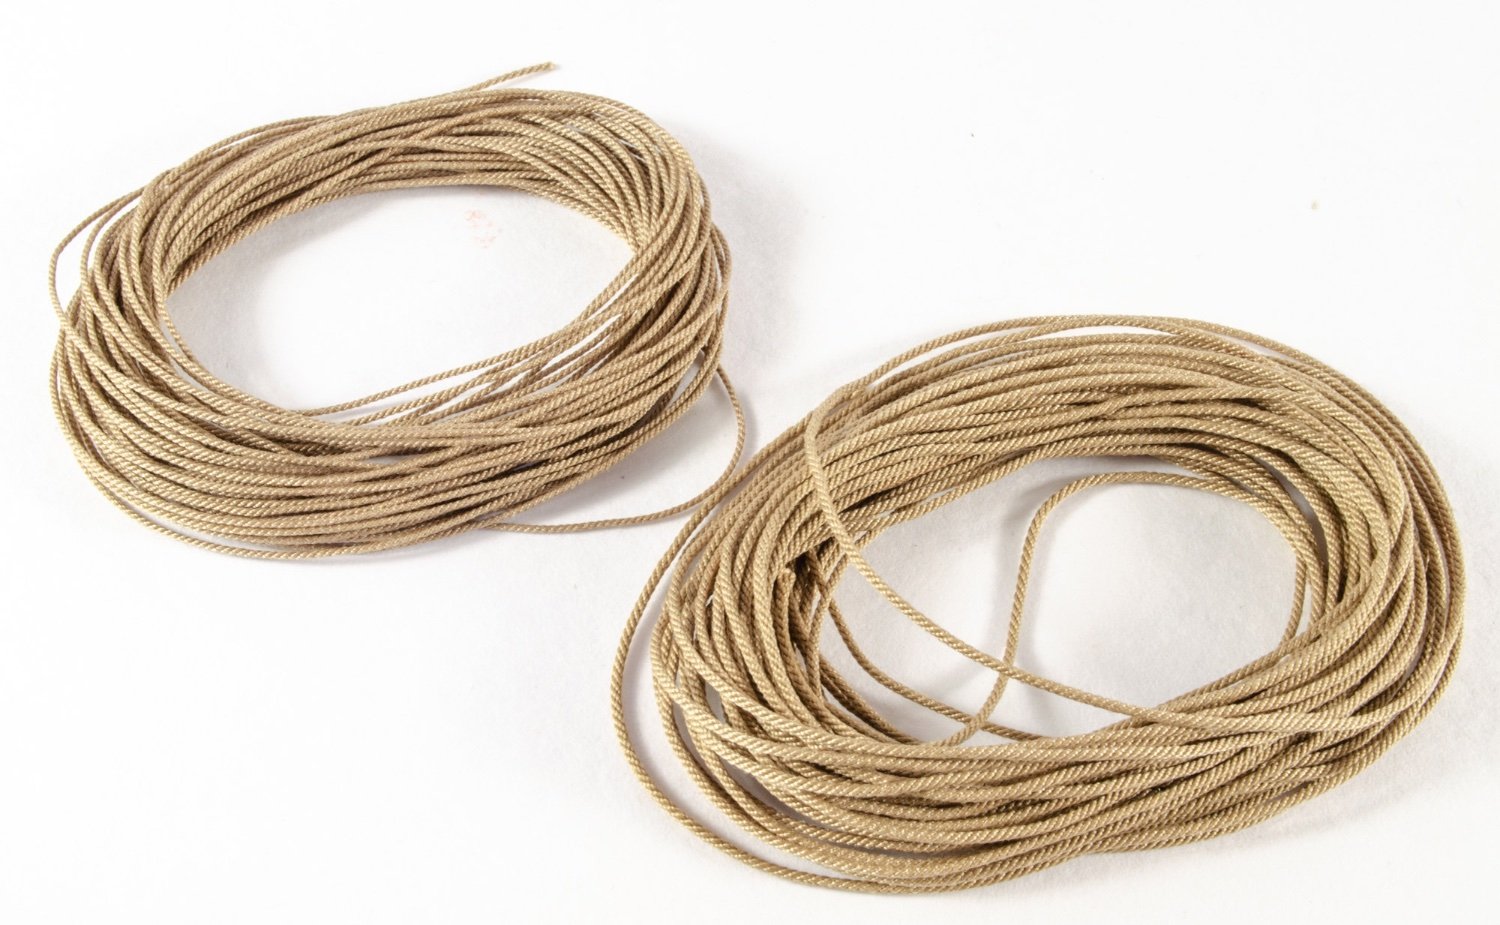
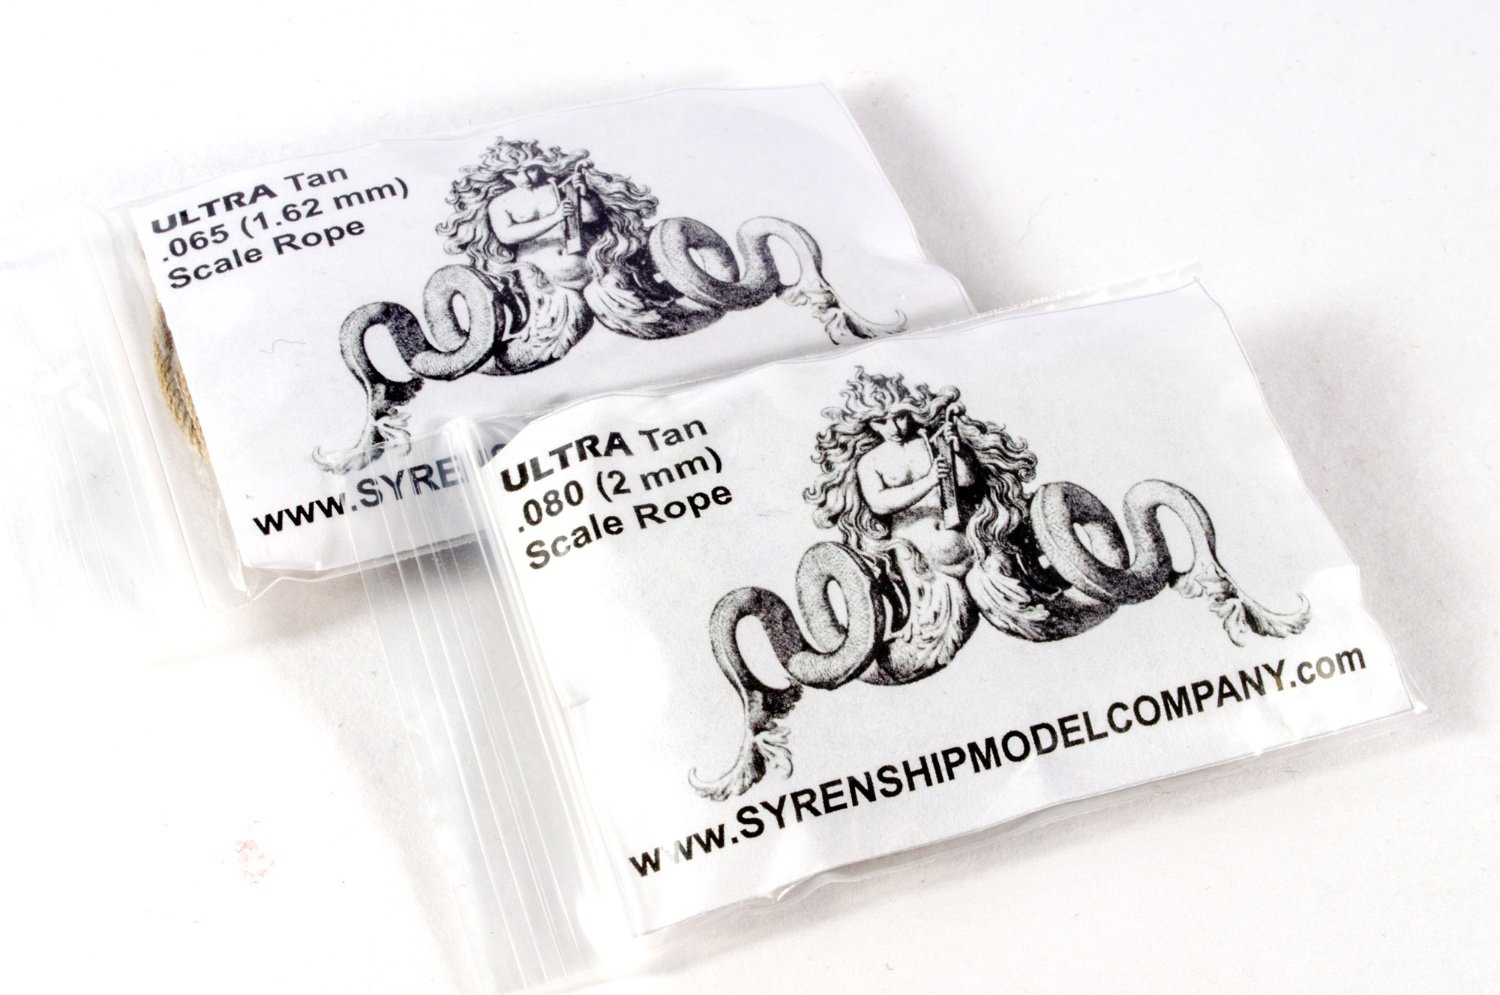
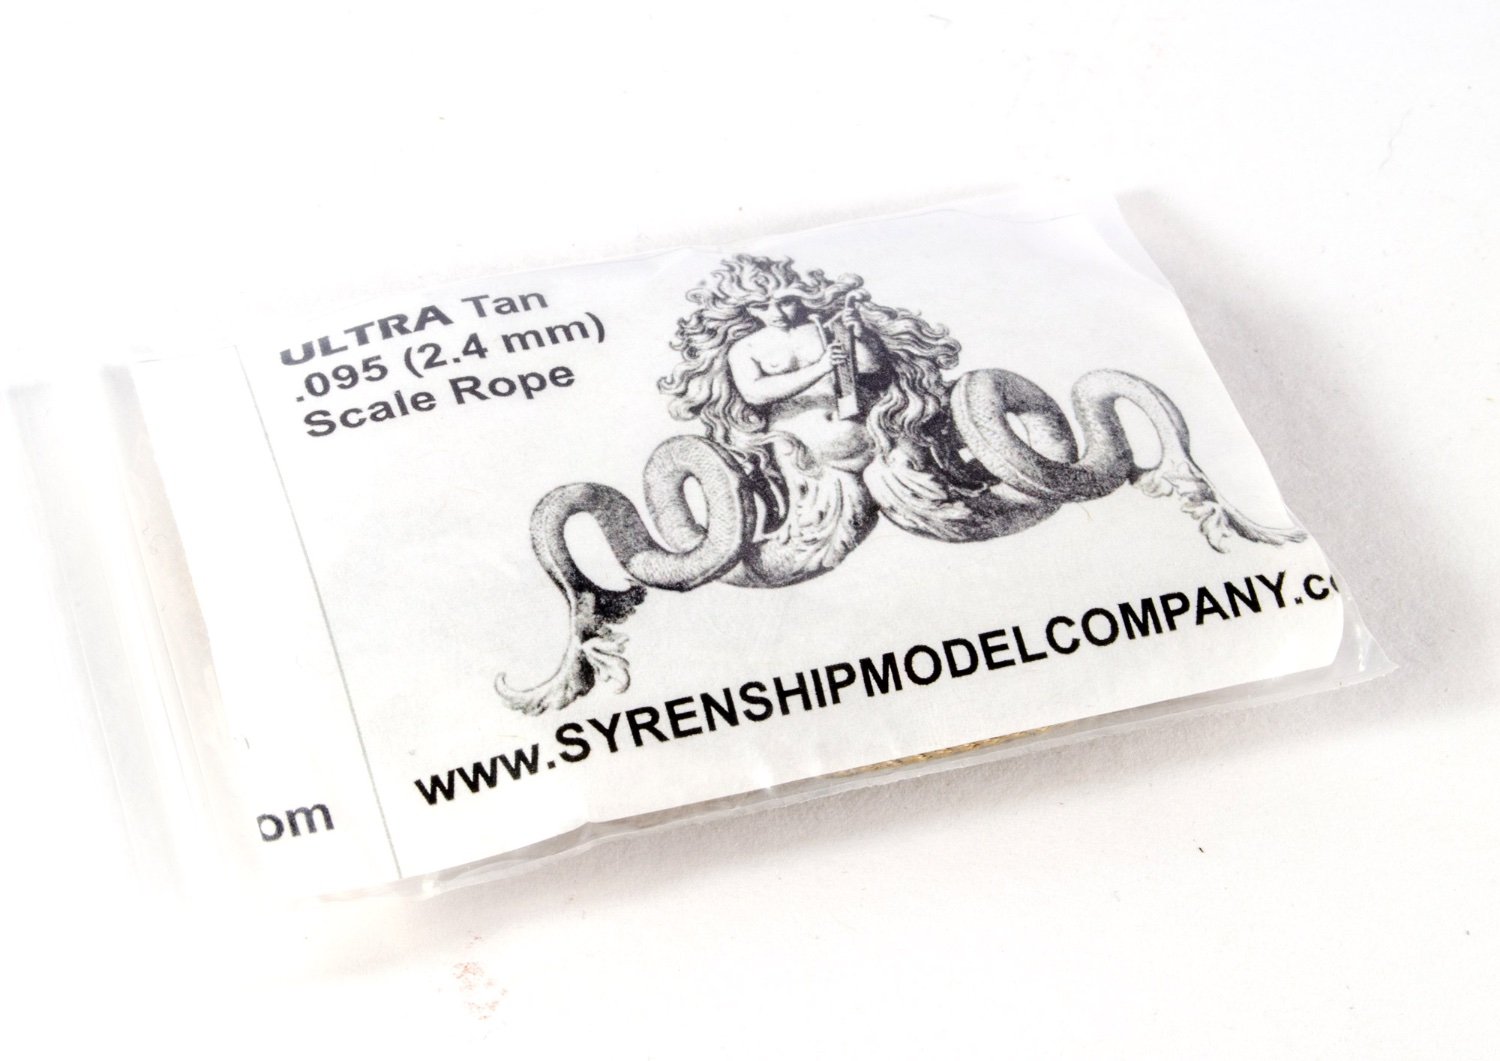
I had a little package arrive from across the pond last week, from Syren. This bubble pack envelope took just six days to land with me in the UK, which is quite astonishing as regular post items from the US can usually take over two weeks, if lucky. This pack contains both rope and blocks from Syren's new range - Ultra Scale Rope and Boxwood Blocks.
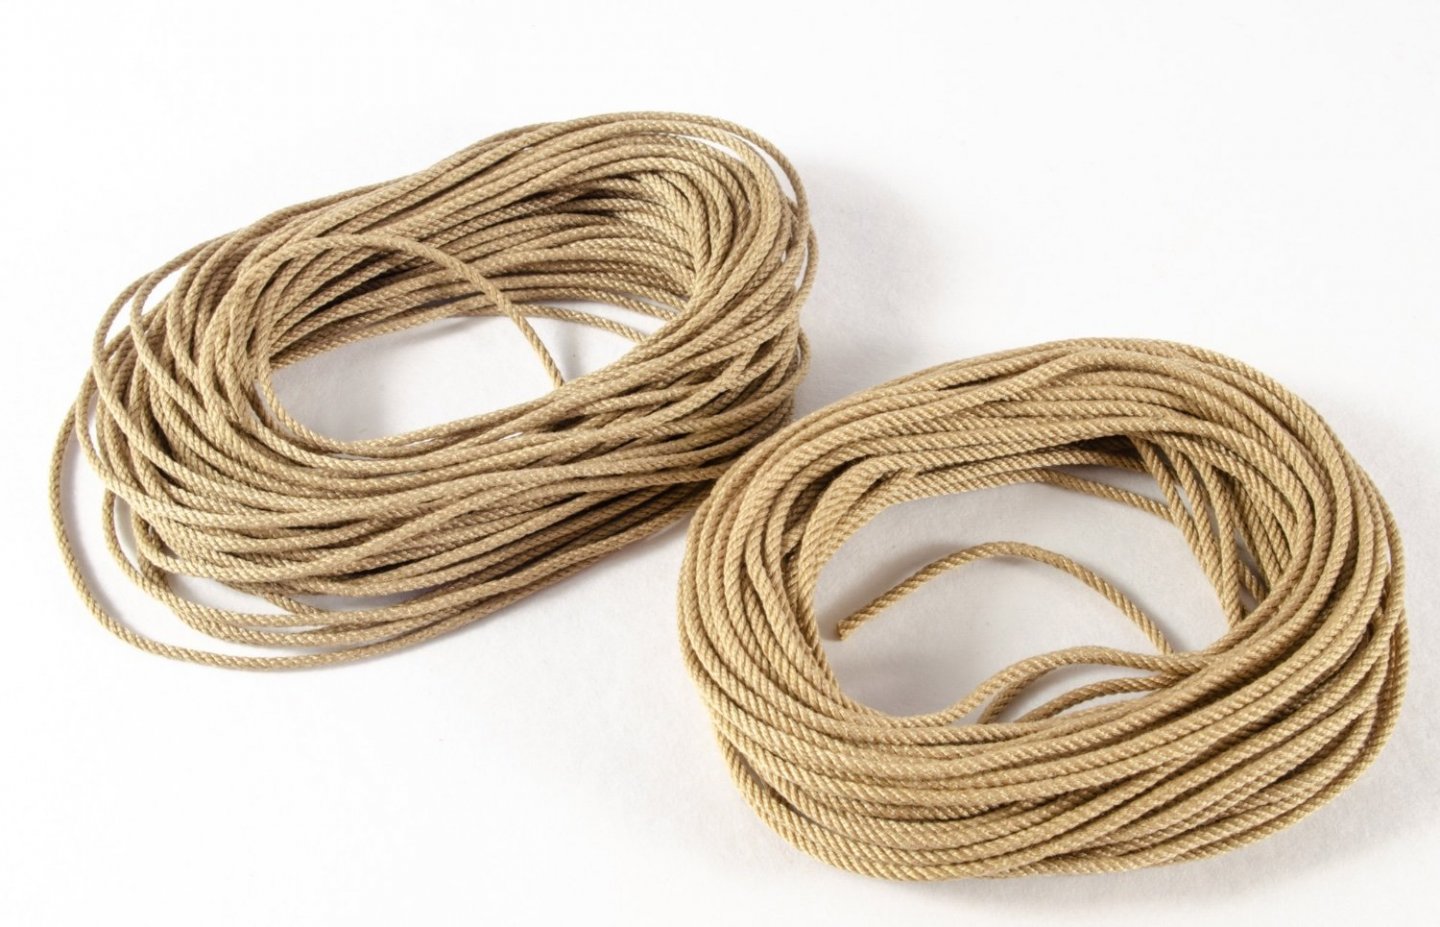
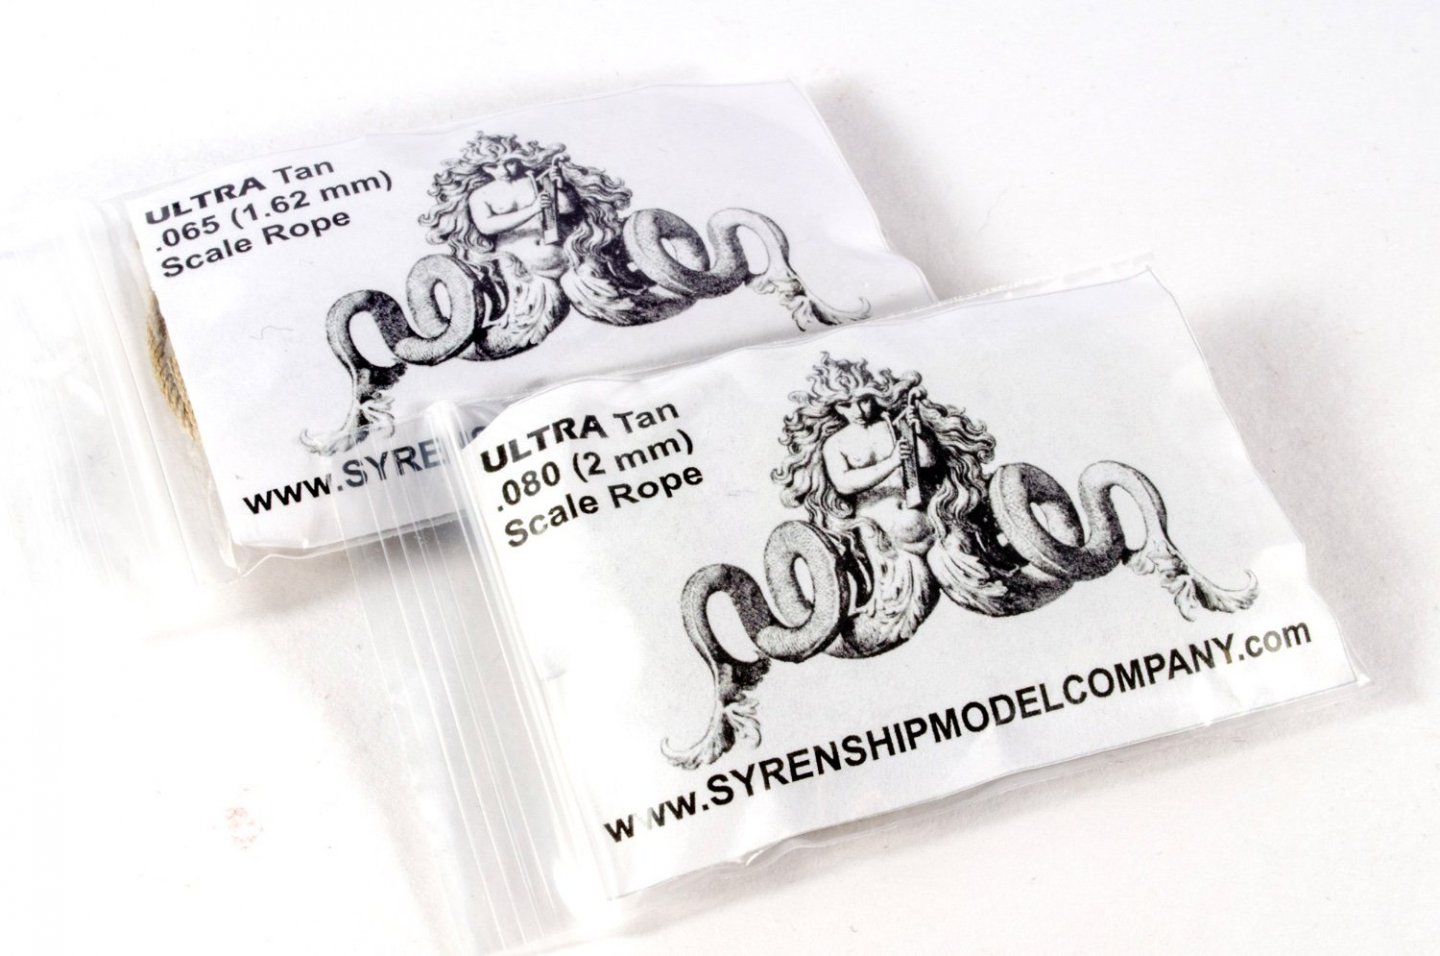
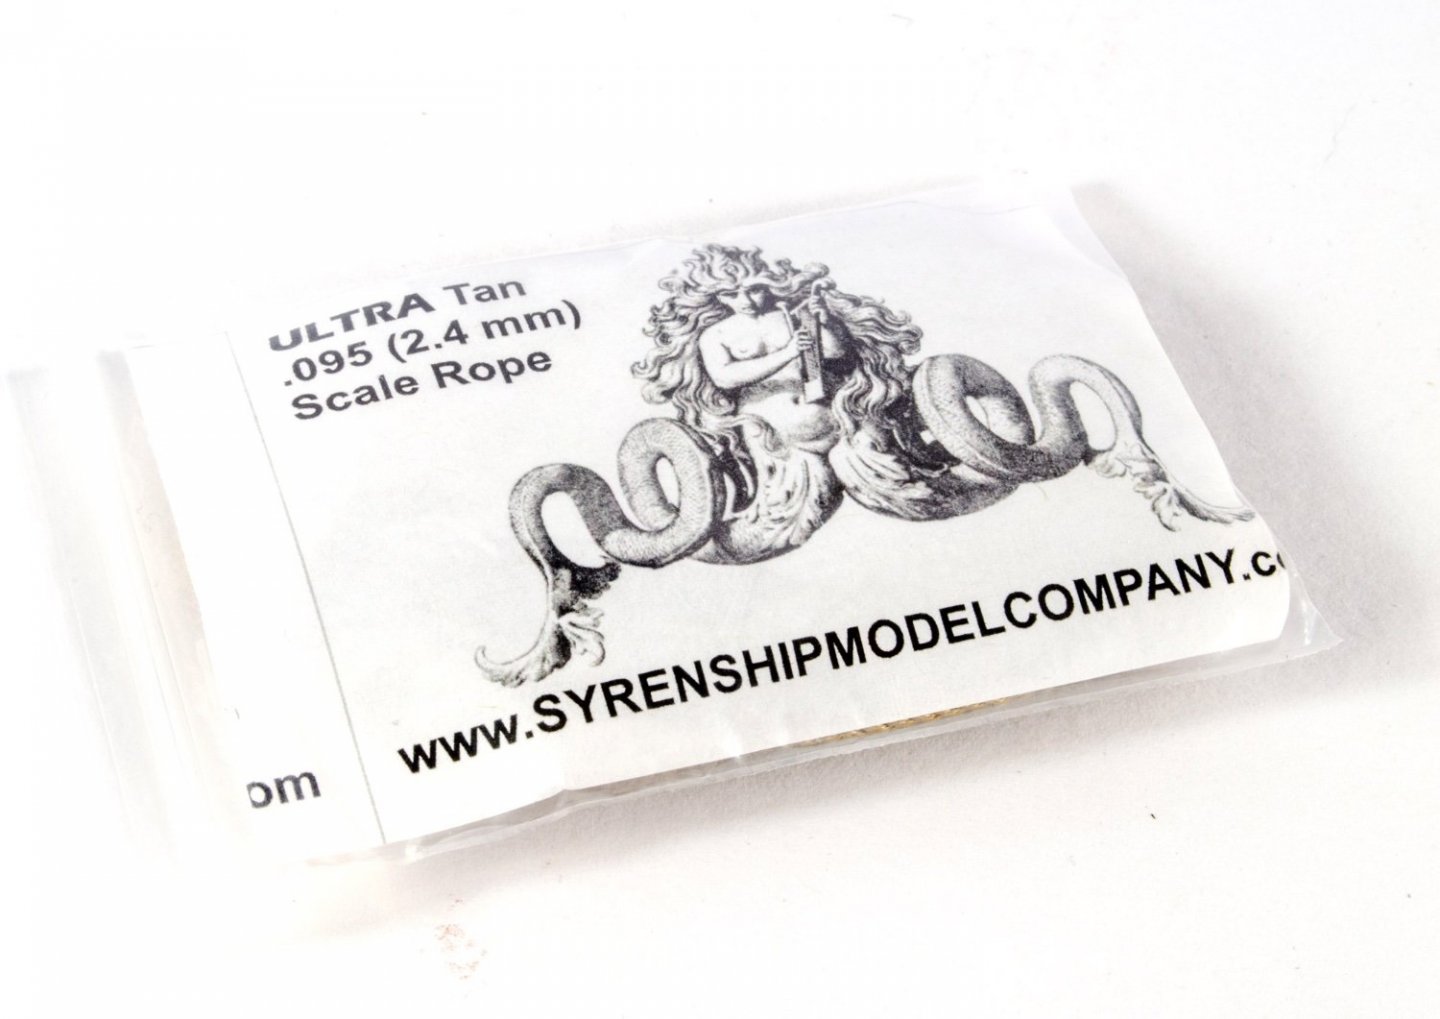
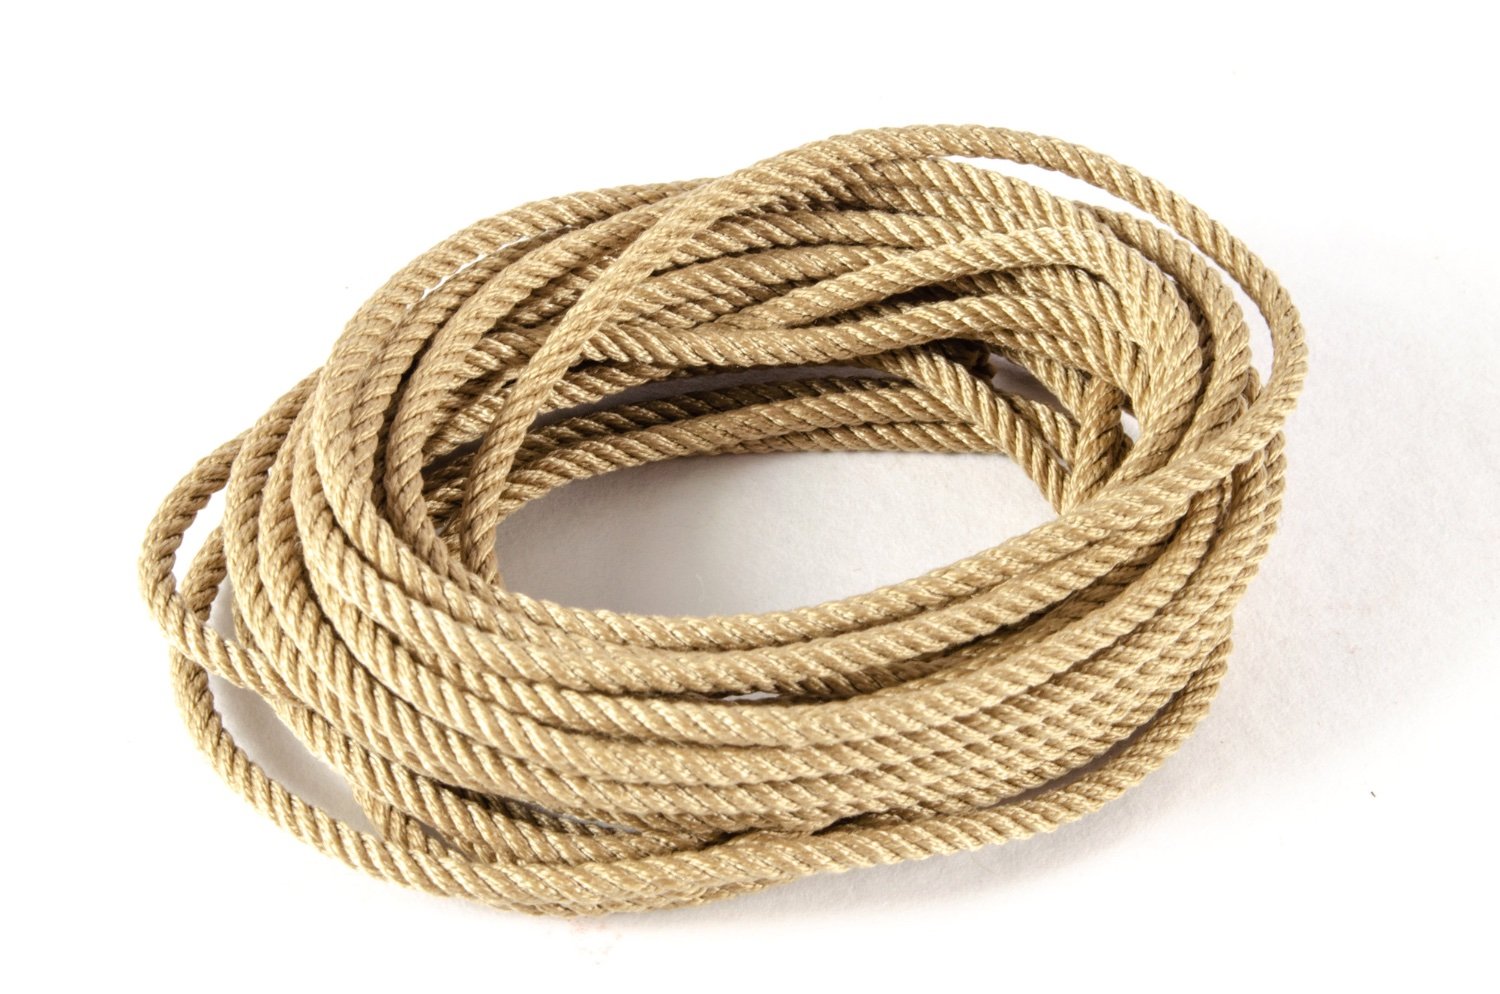
Ultra Scale Rope
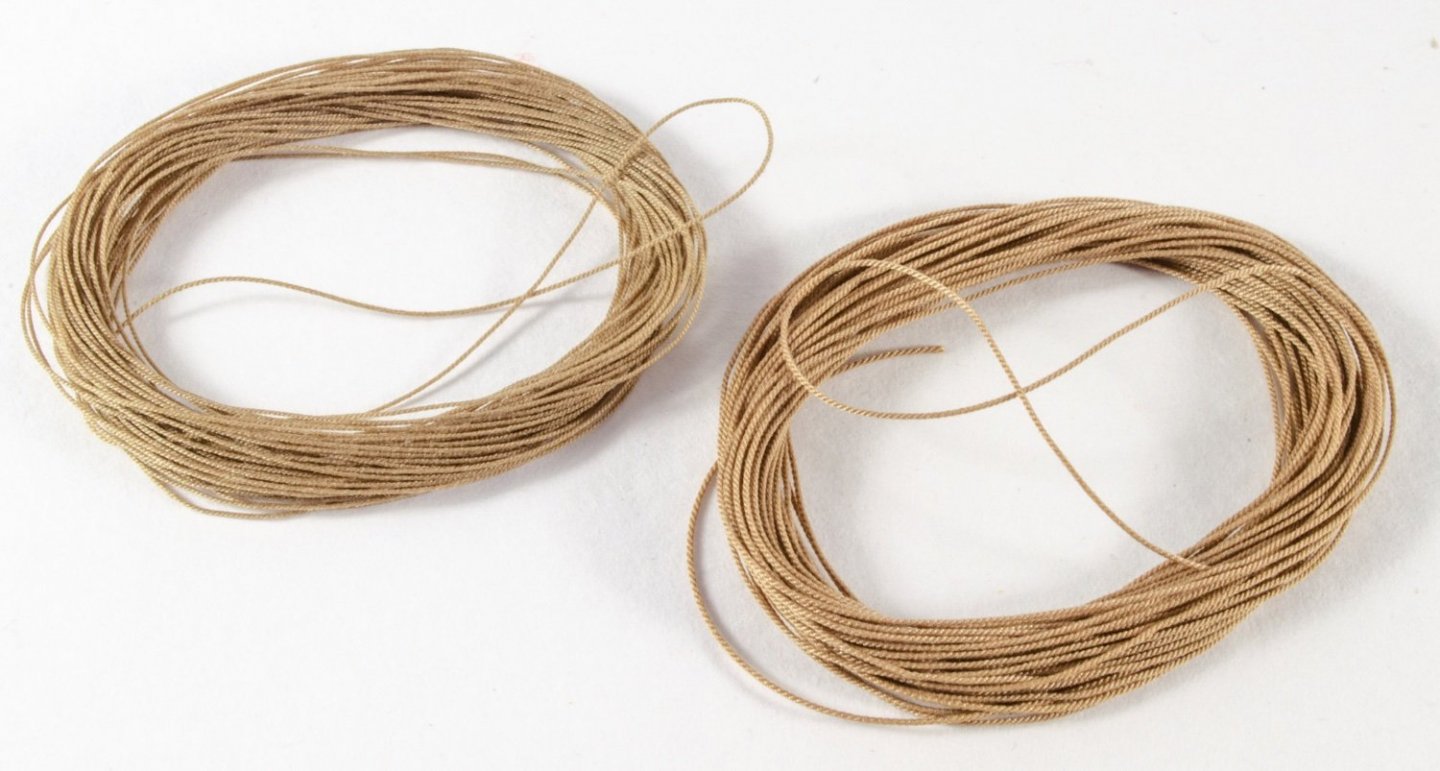
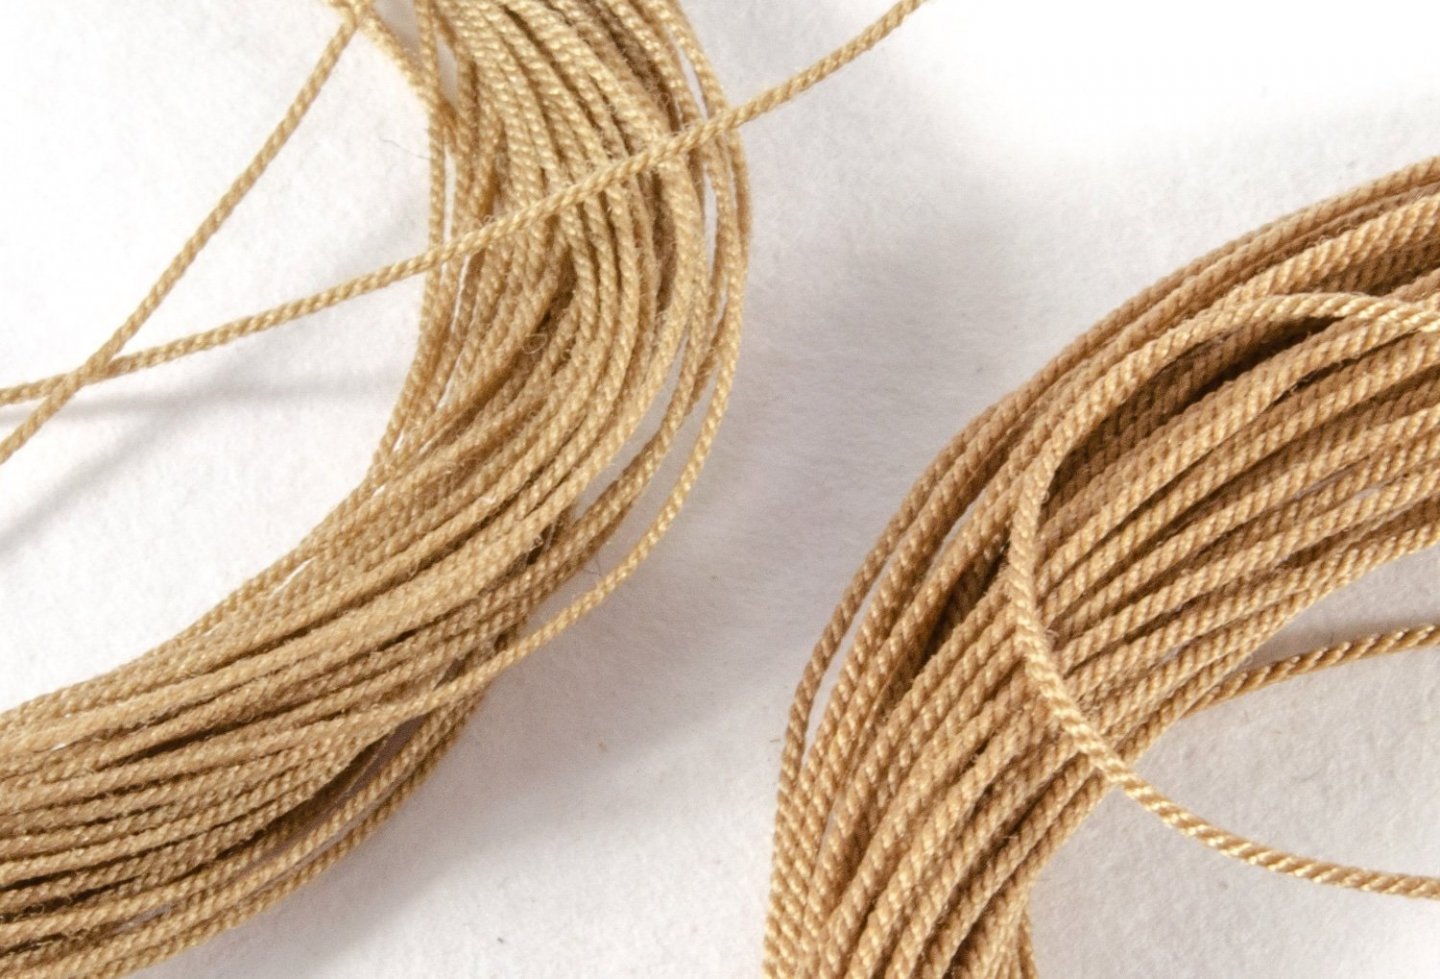
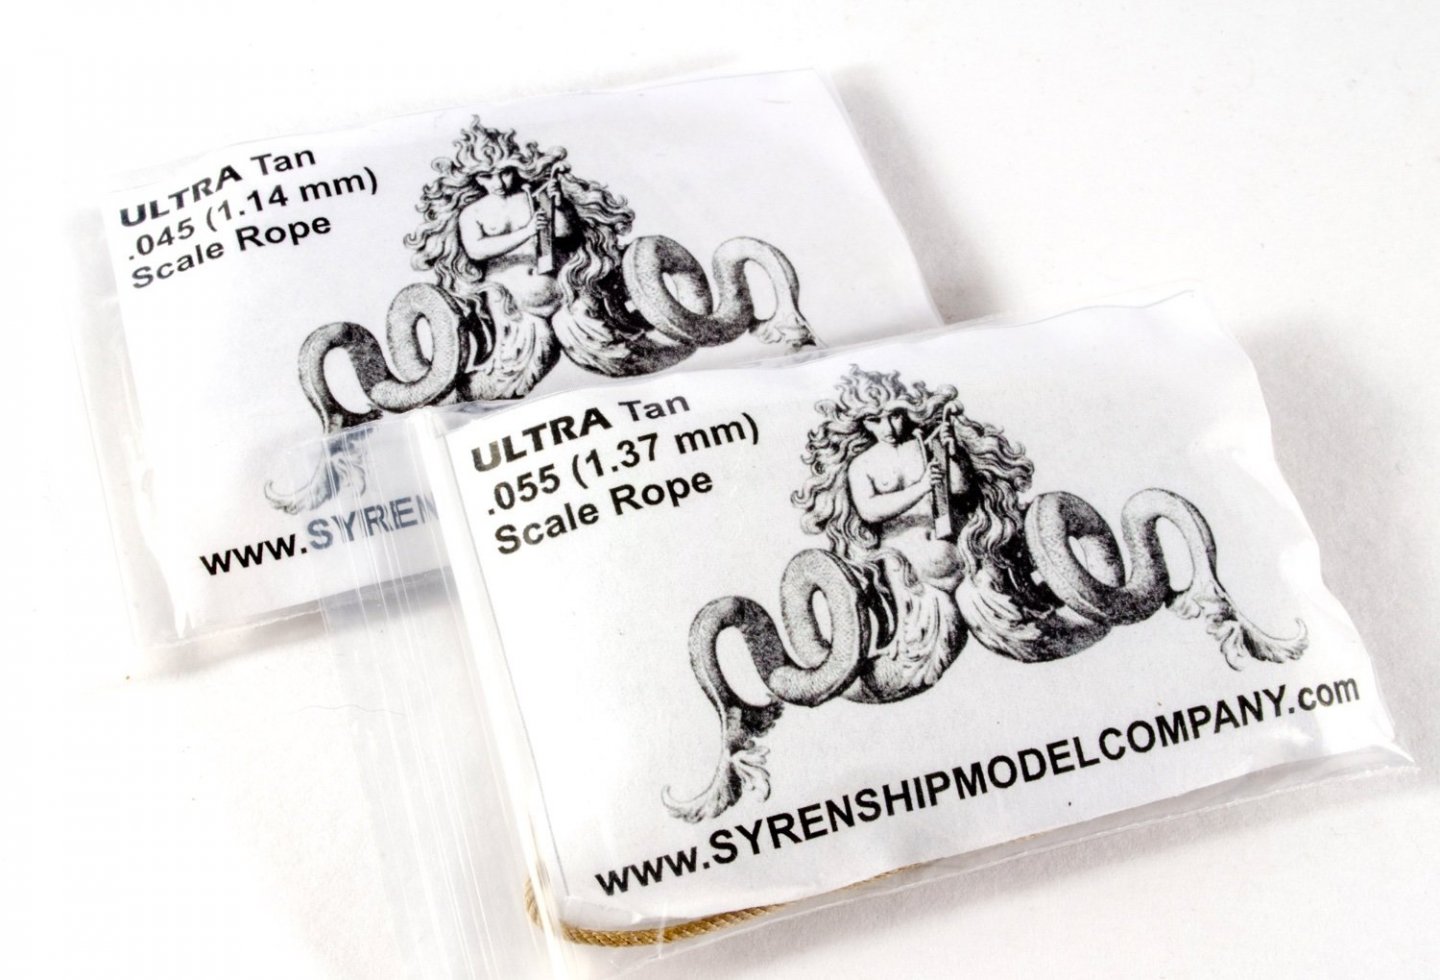
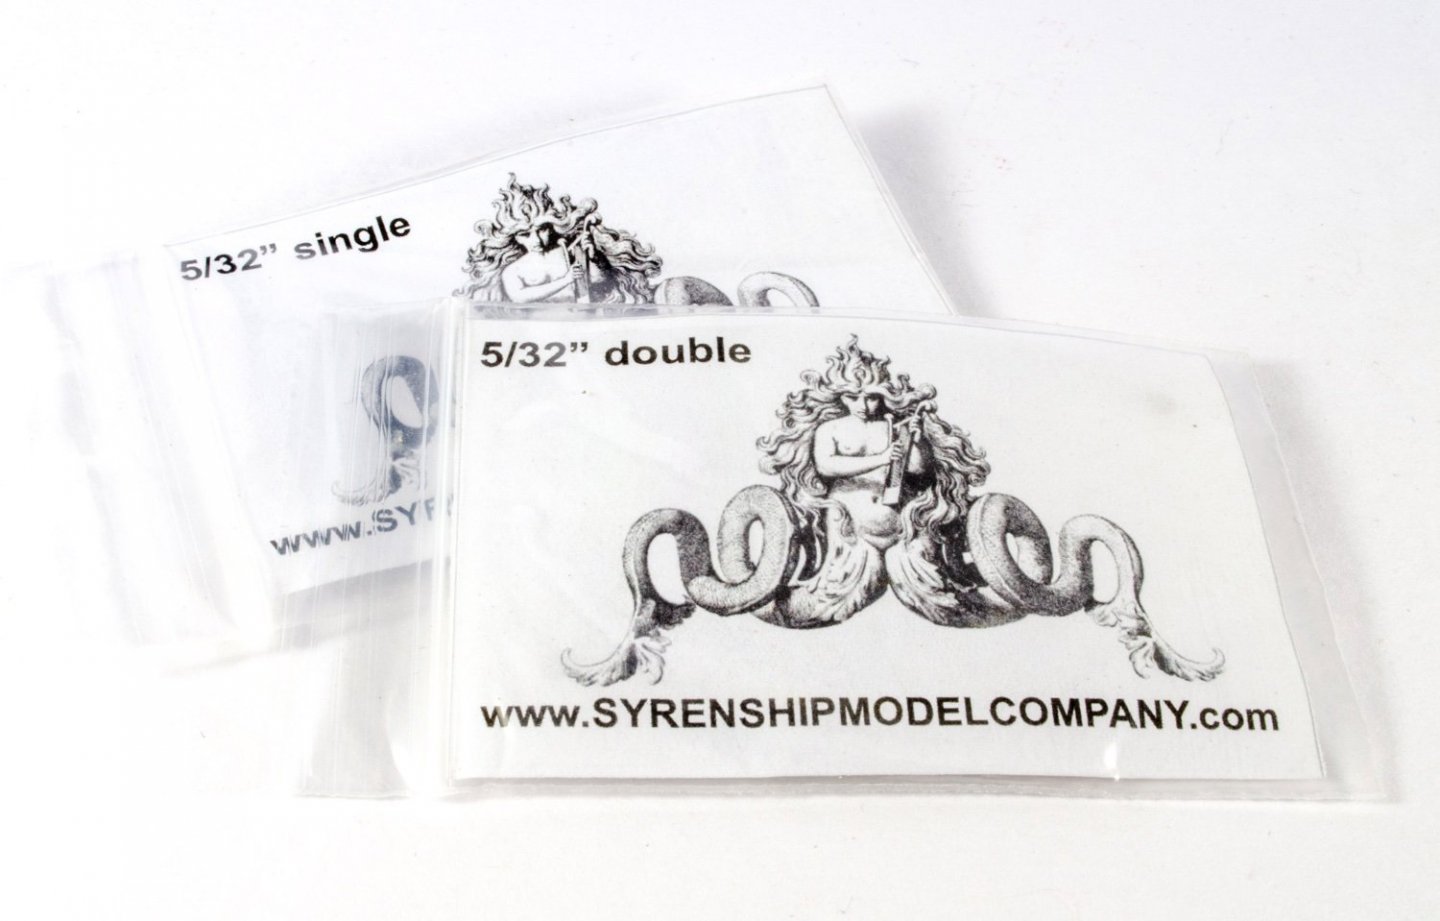
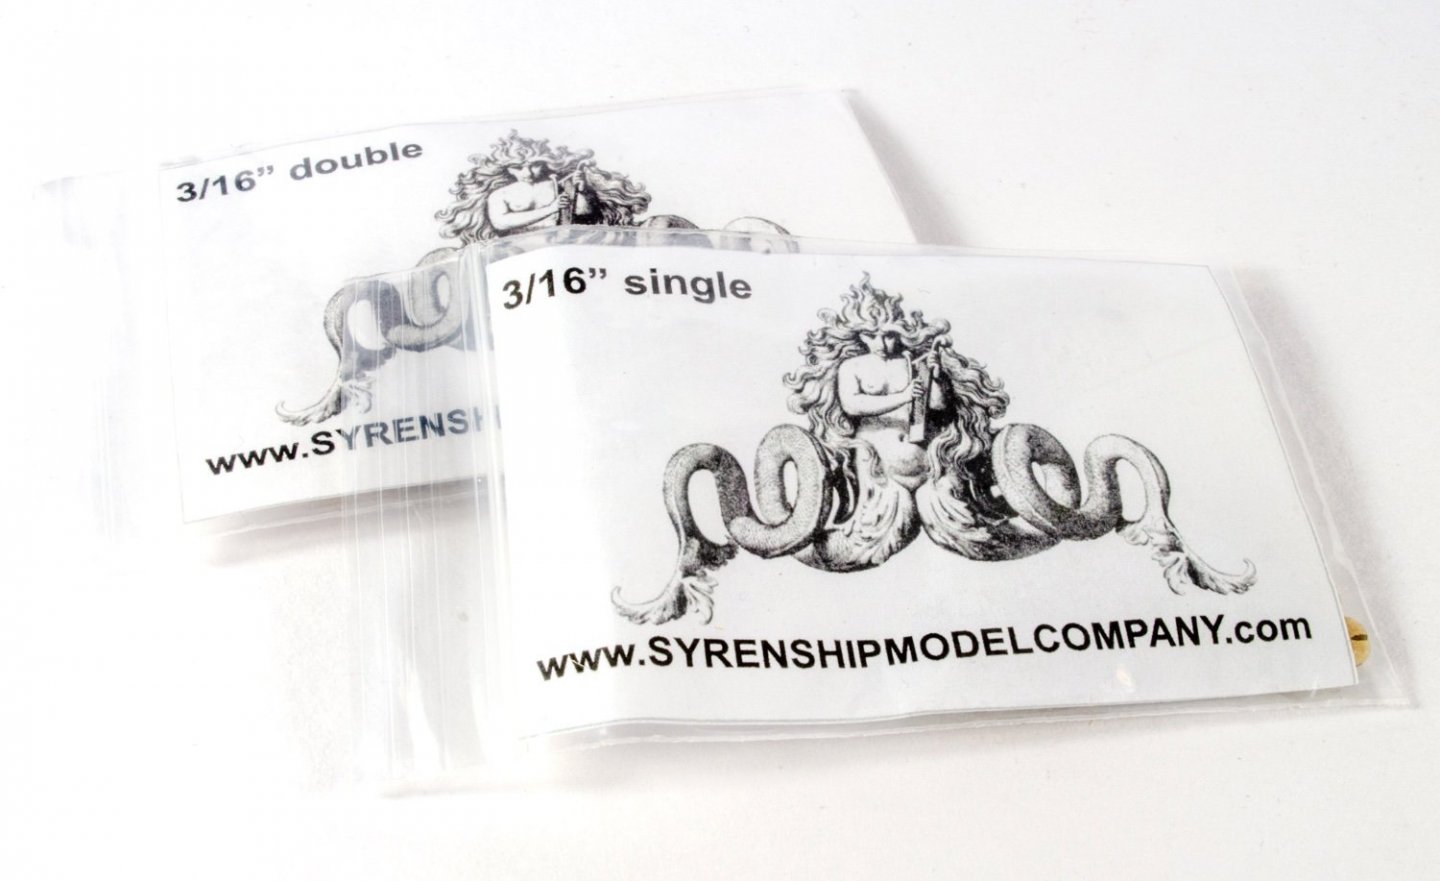
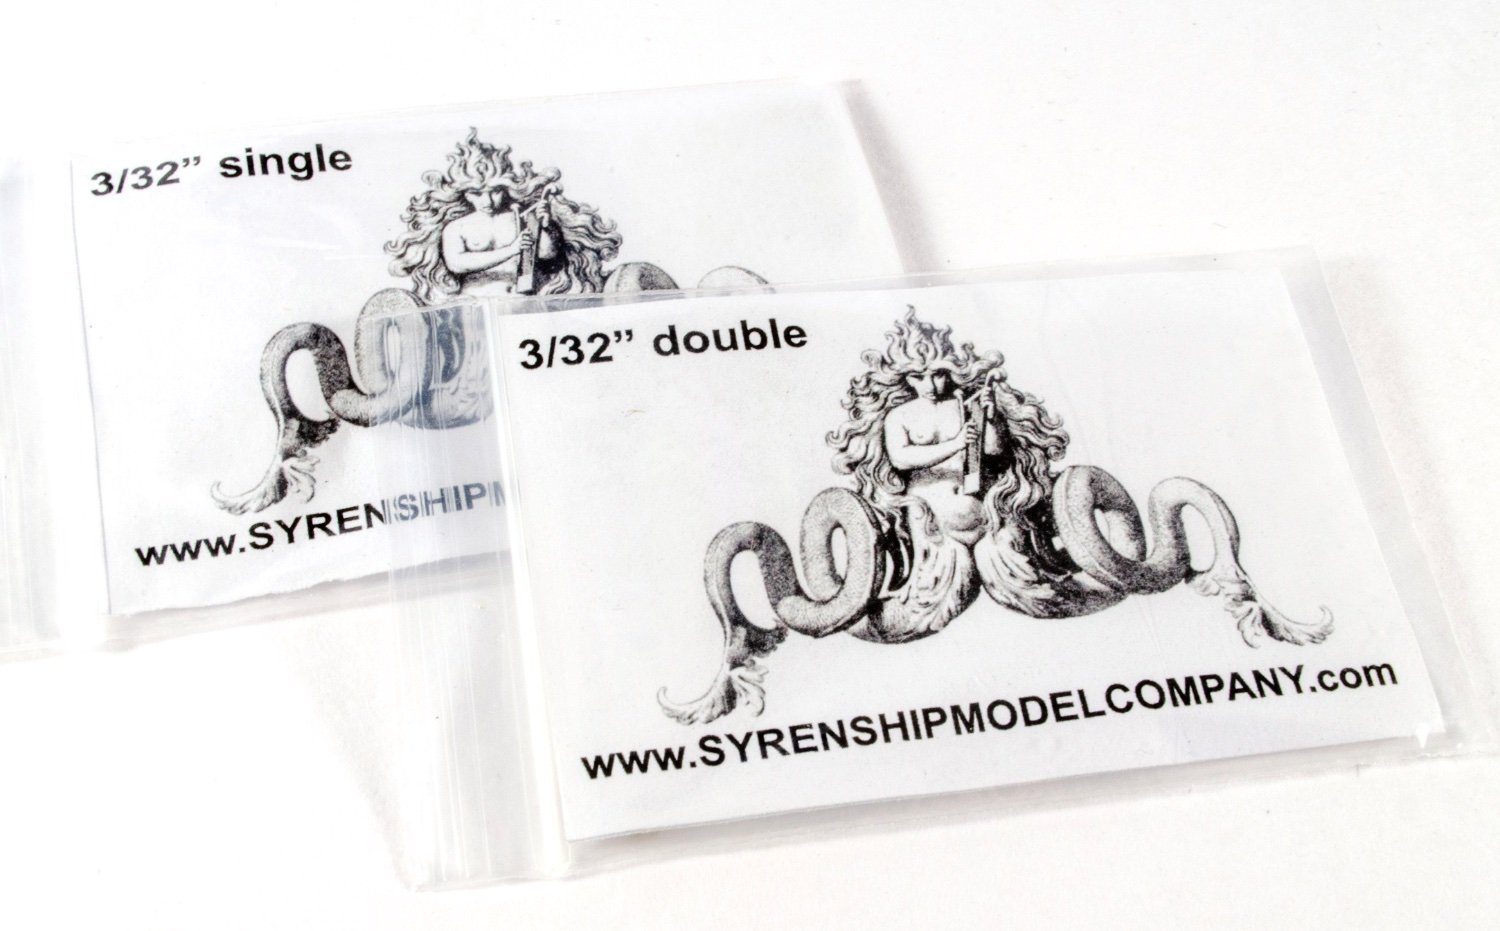
These ropes are poly-cotton and tightly laid, yet remain beautifully supple to handle. You also won't have any problems with kinks etc. I've had a play with both the thickest and thinnest of these and absolutely love them. The colour of all these samples is tan, which is suitable for all of your running rig requirements and the shade looks great for this purpose. These are all delightfully fuzz-free too. I hate fuzzy line as it really zaps enthusiasm in the latter stages of a project, so if you are in need of replacing your kit ropes, then this is ideal. Syren also produce these in dark brown to represent Stockholm tar for standing rig. Each pack, except the 2mm and 2.4mm, contains 20' of rope, which equates to around 6.1 metres in metric. Those thicker ones contain 9' (2.7 metres). Here are the photos of each packet, complete with a close-up of the rope so you can see the quality for yourself:


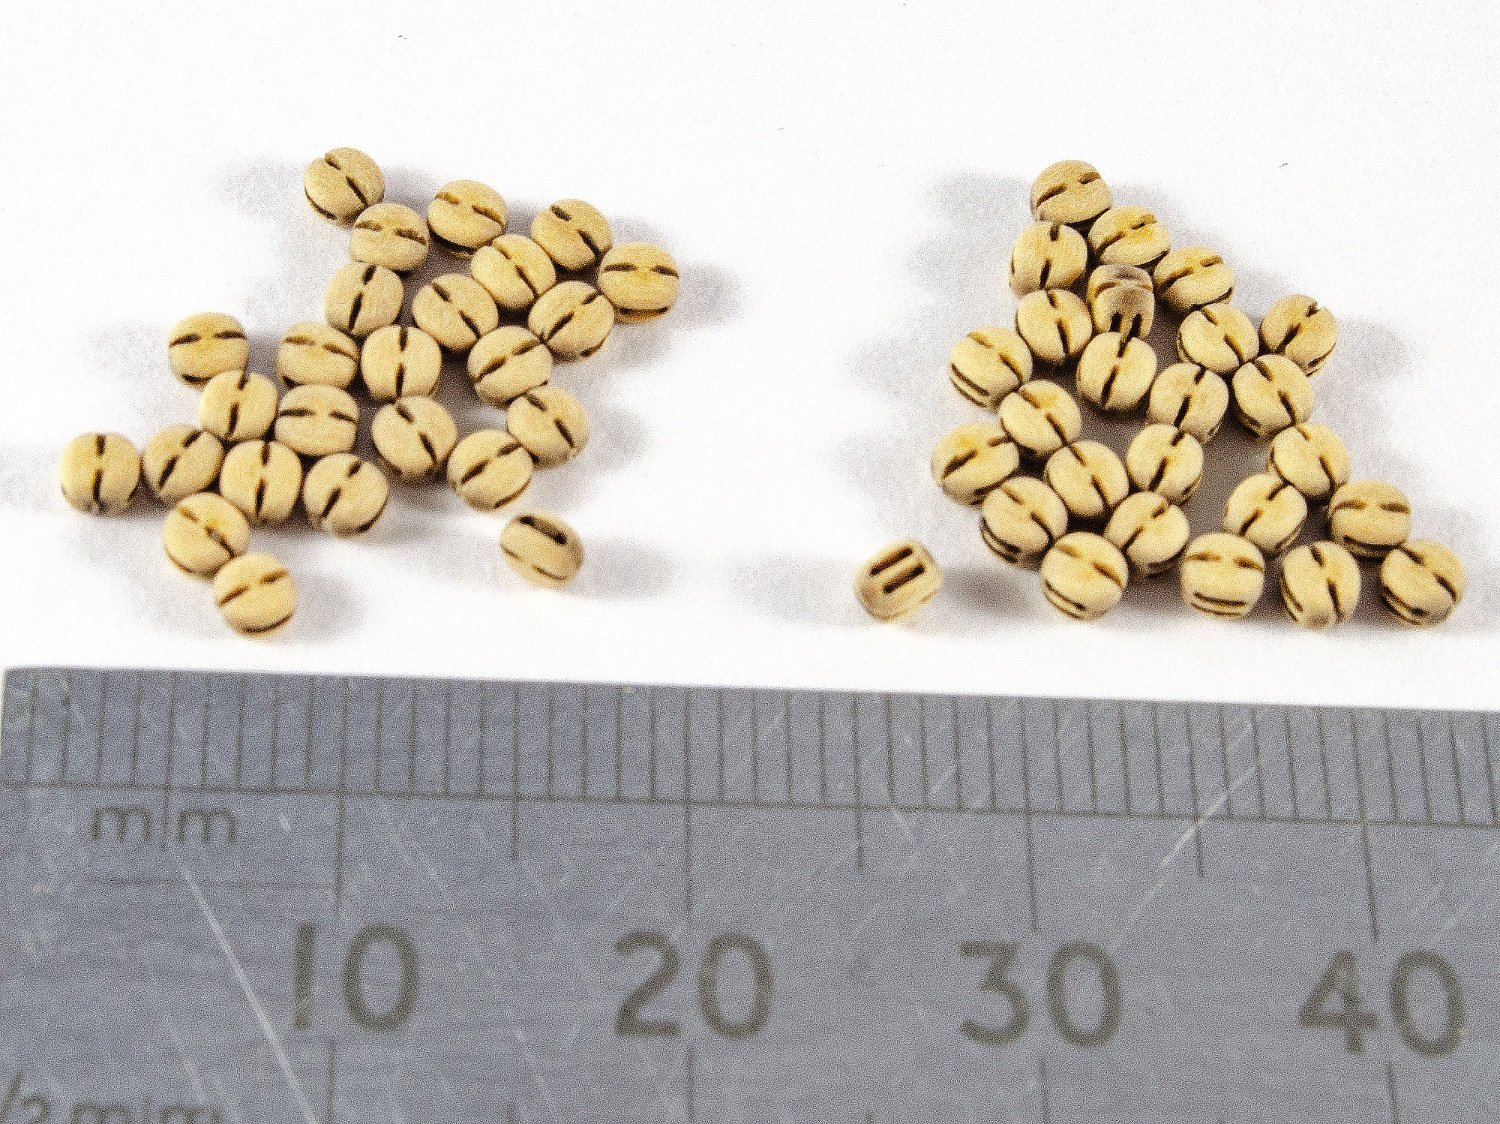
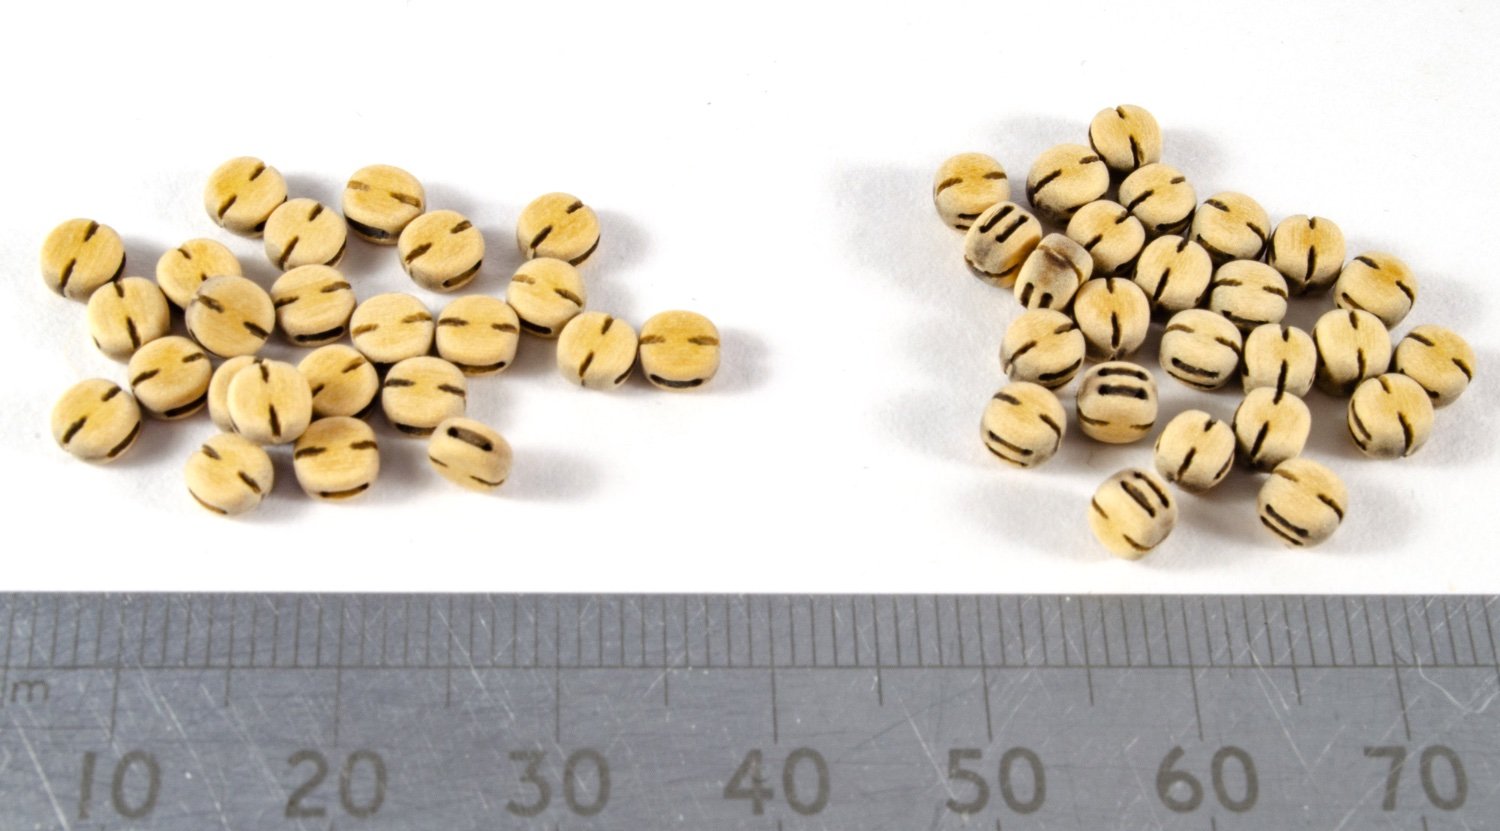
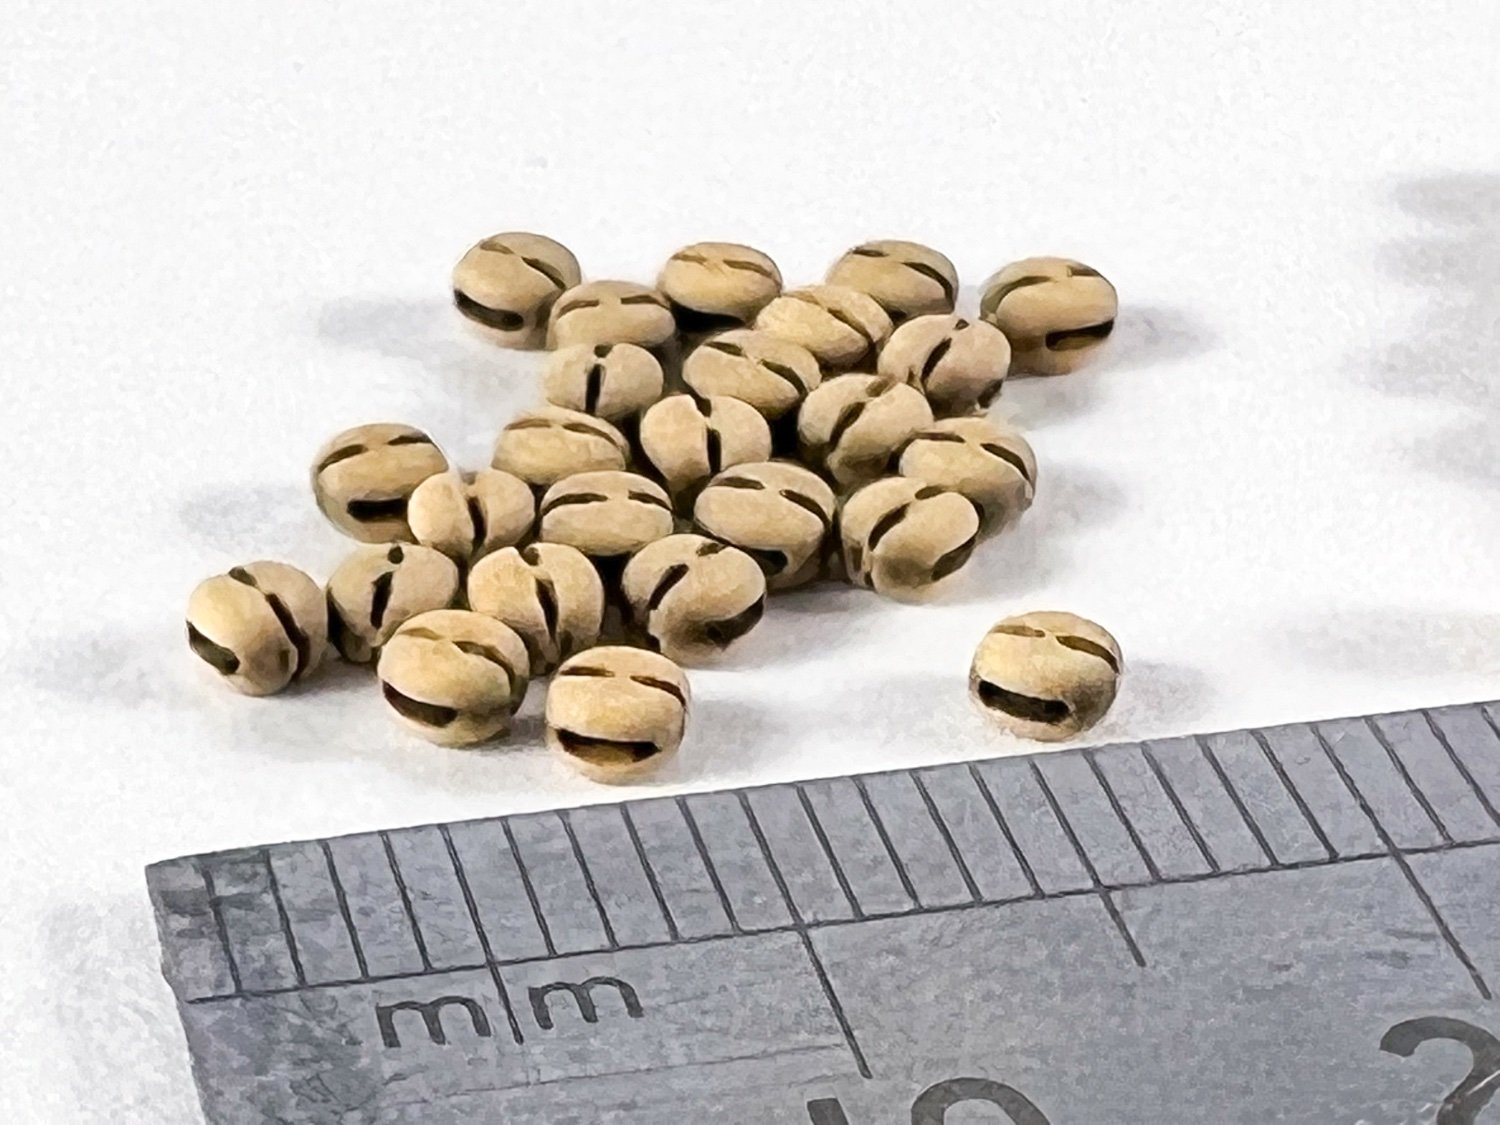
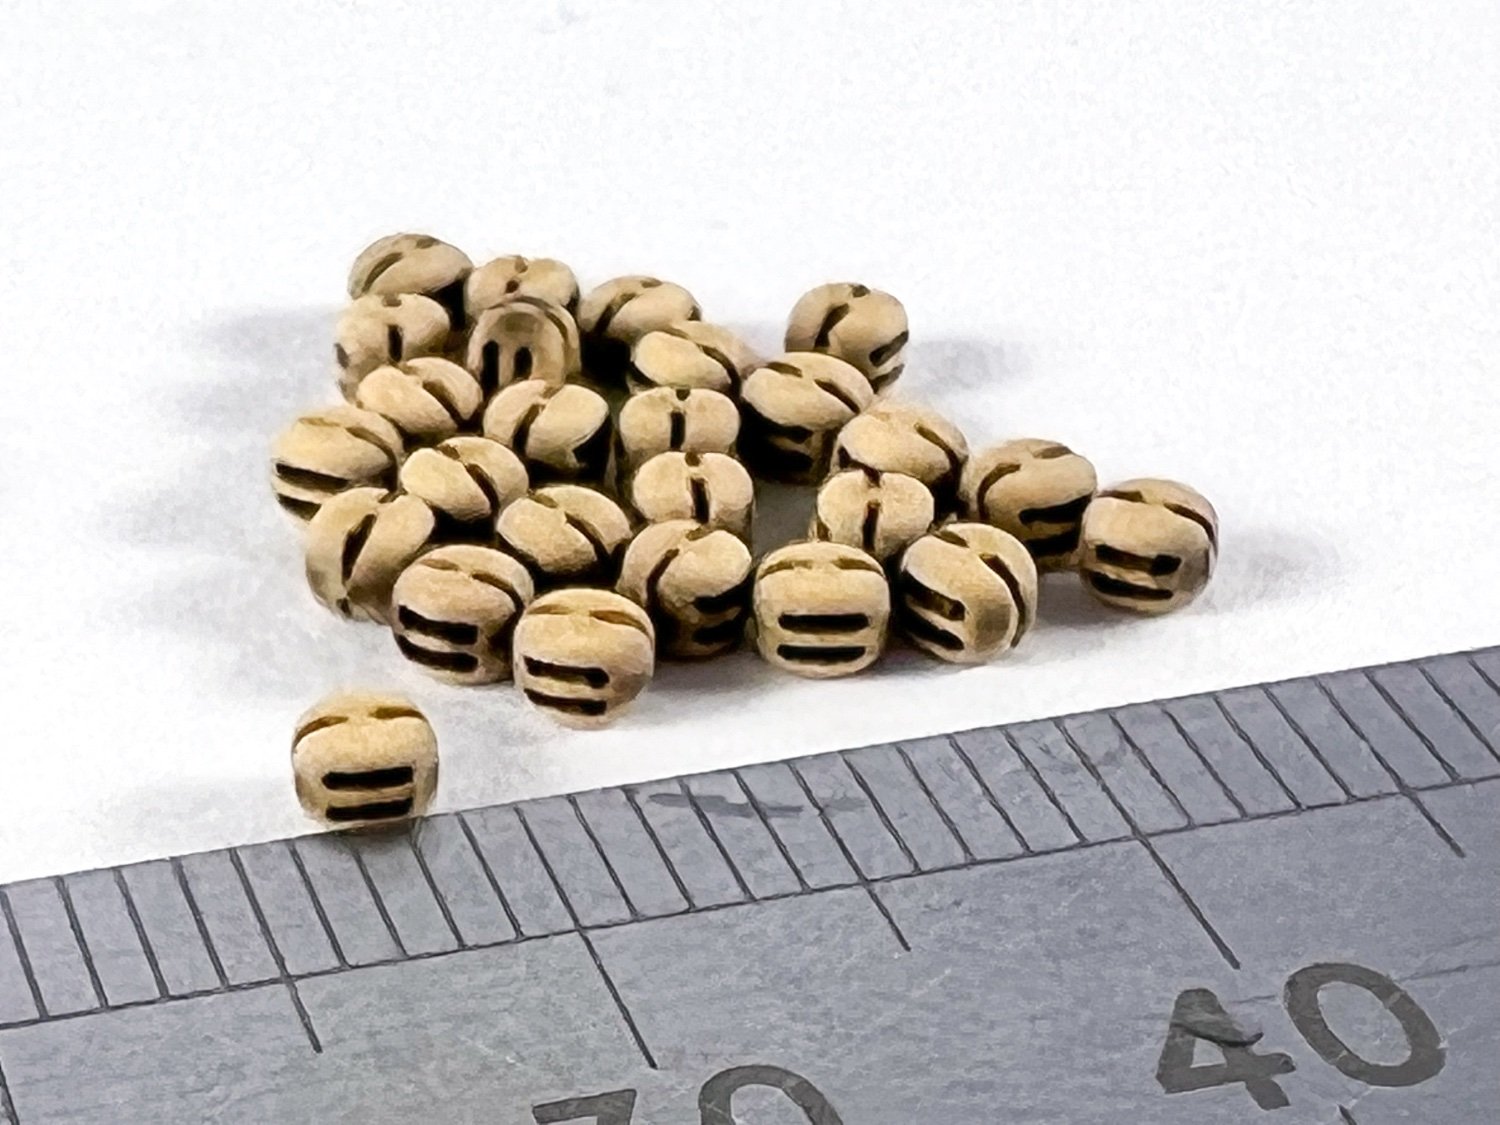
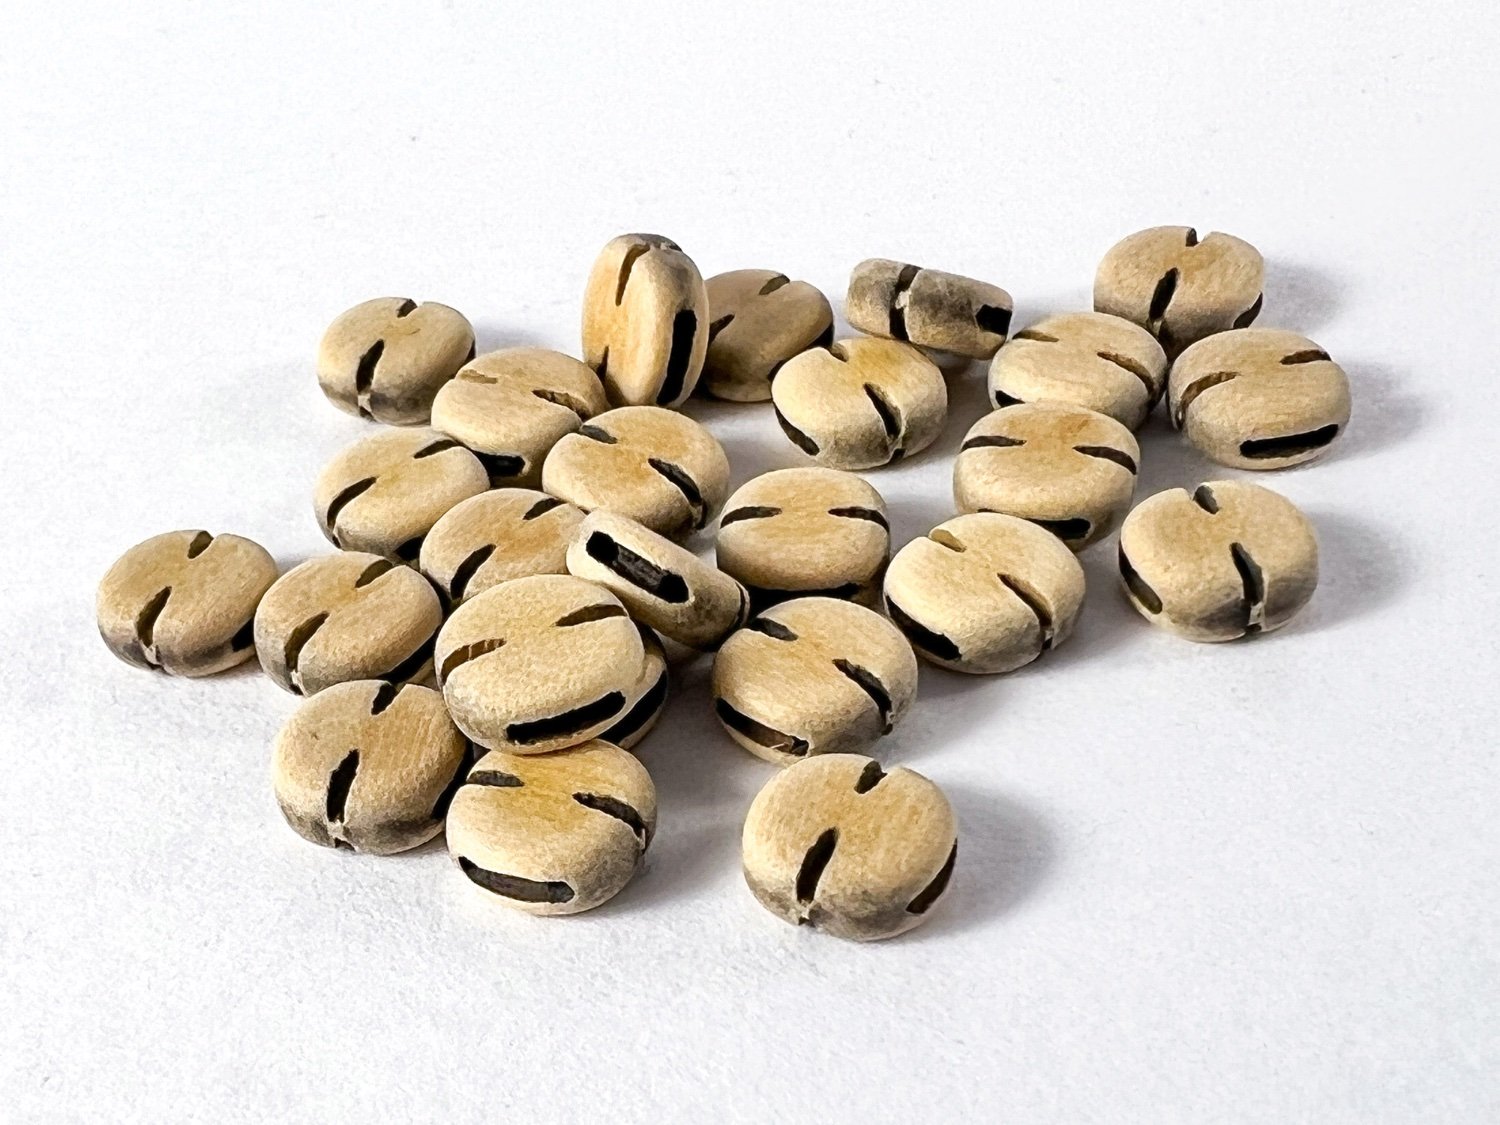
Boxwood Blocks
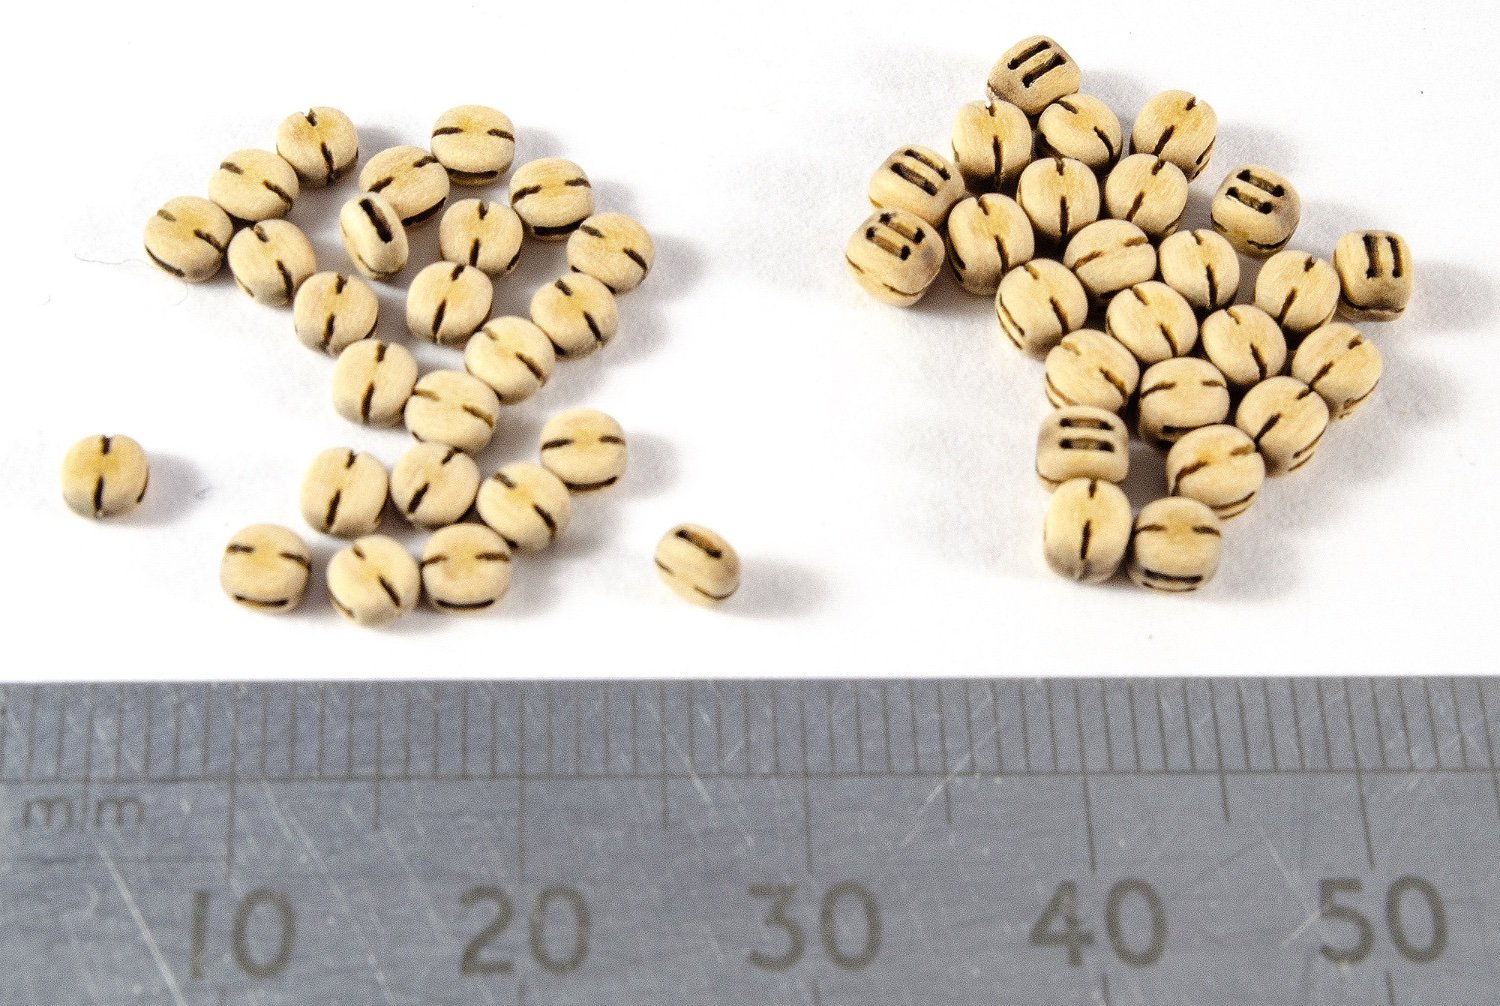
Syren's boxwood blocks are a very nice, milky brown colour and consistent throughout each pack I've been sent. All blocks are CNC-produced and

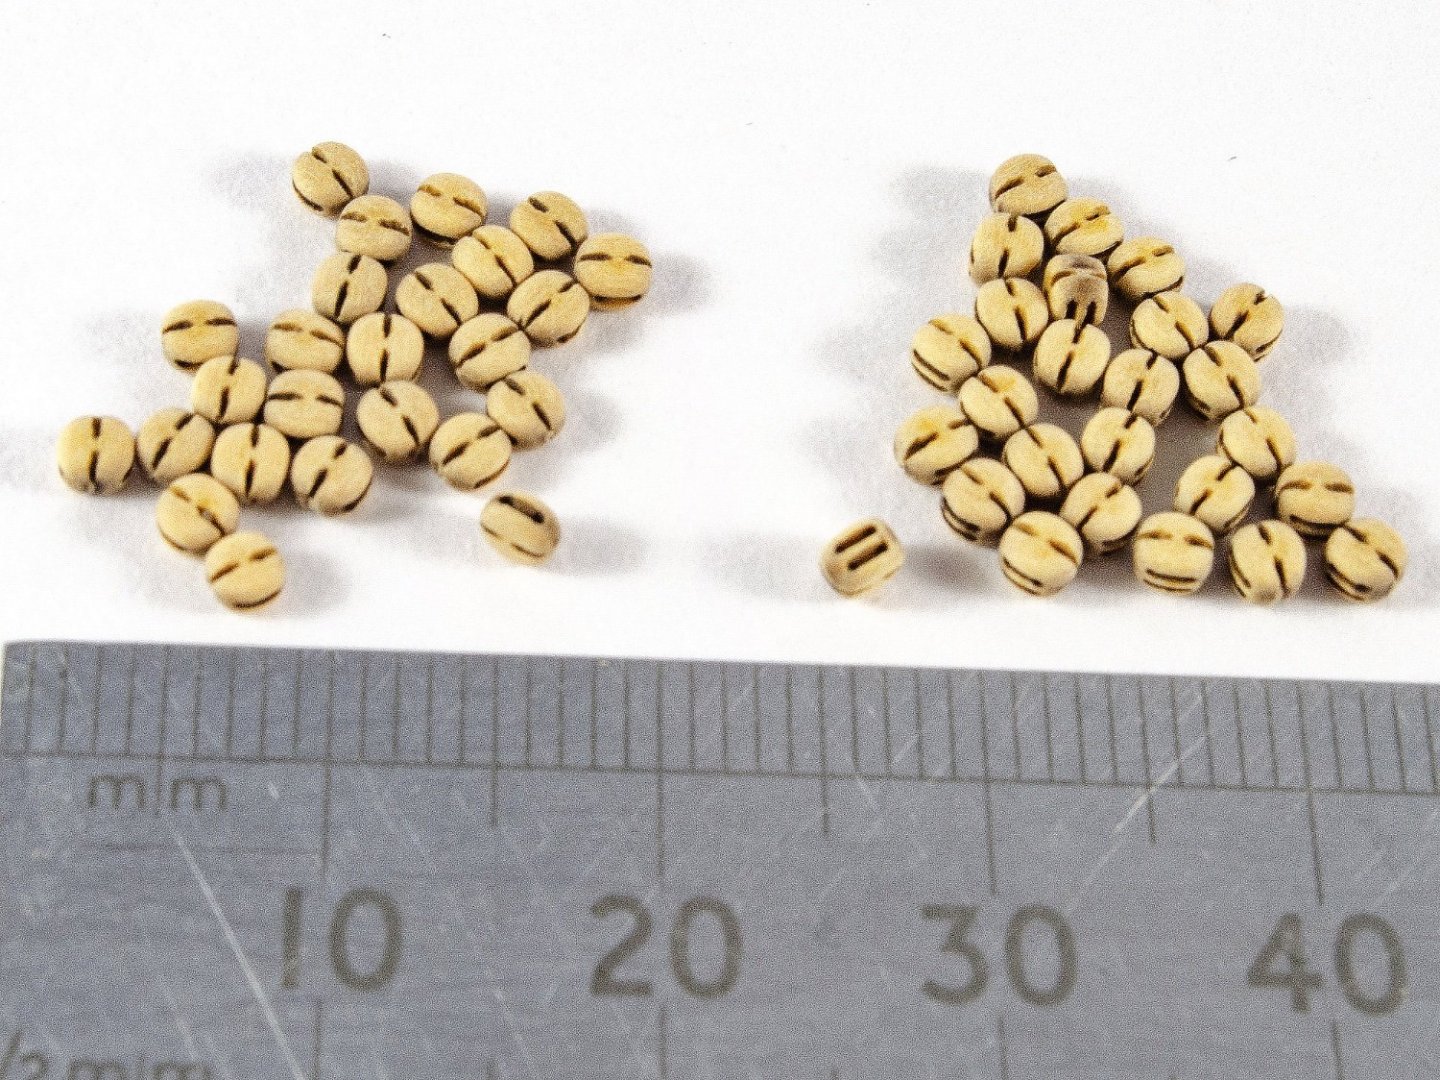
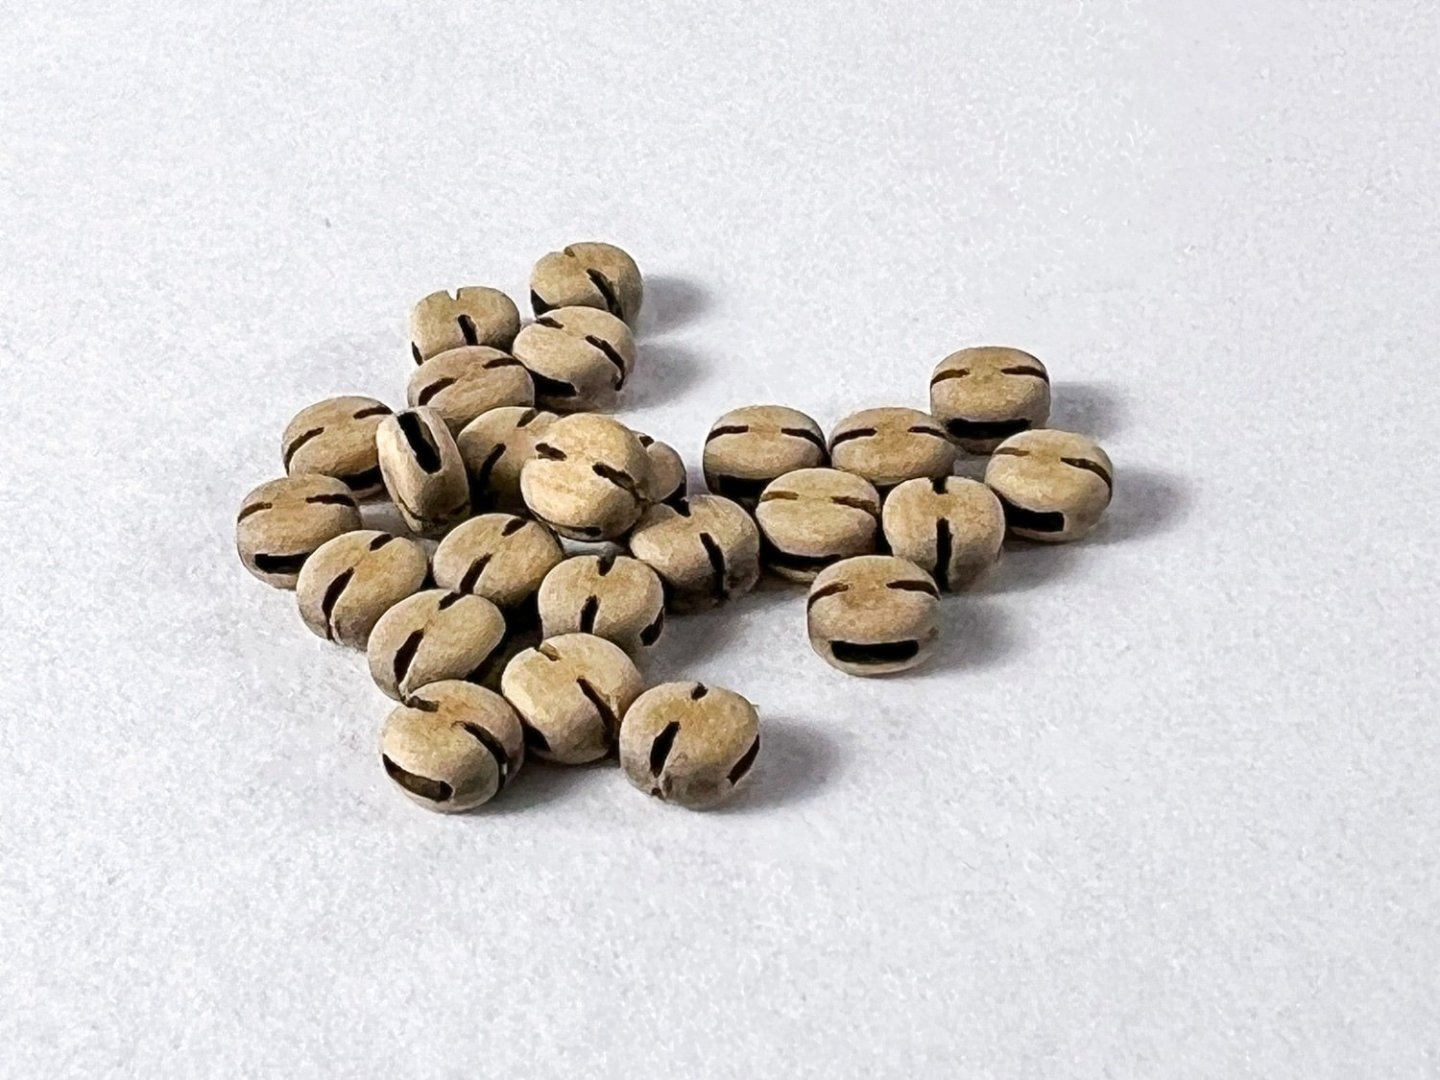
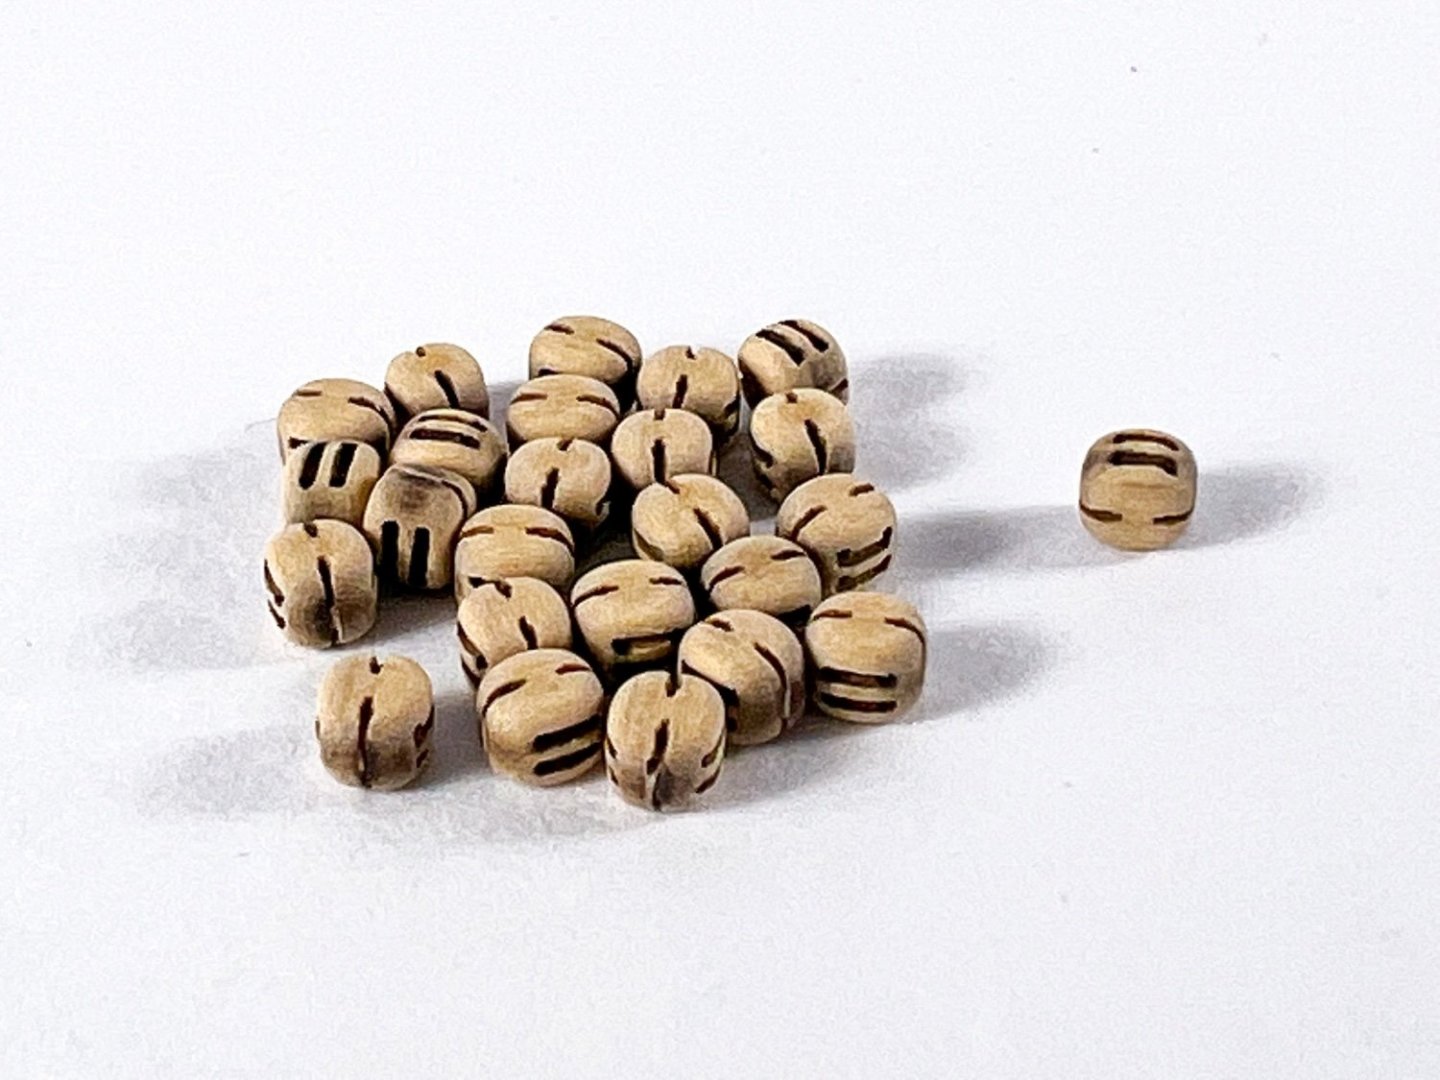
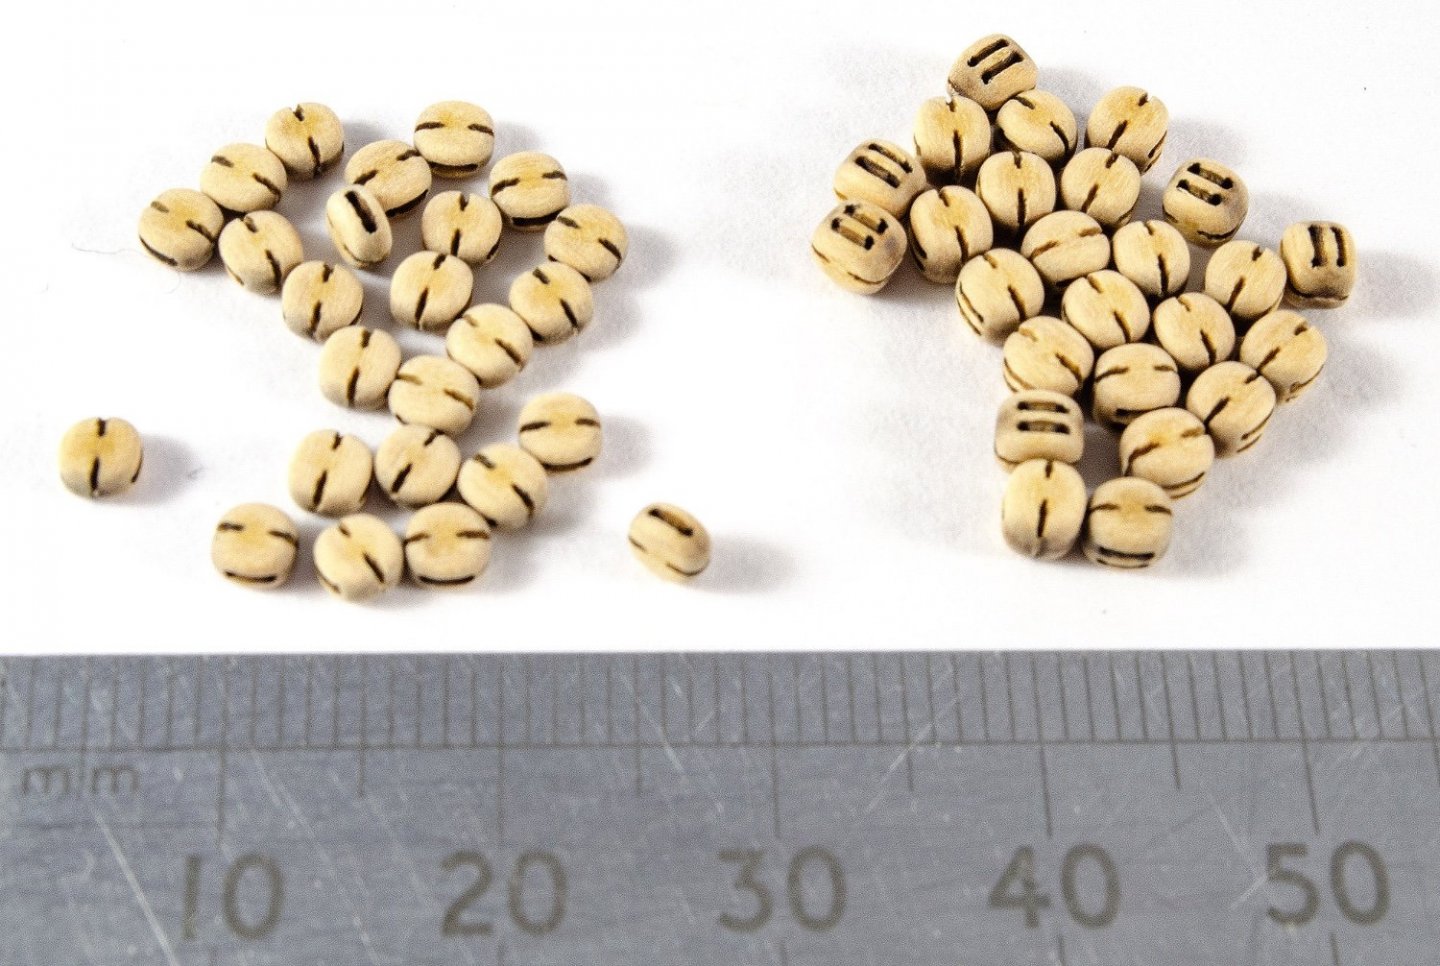


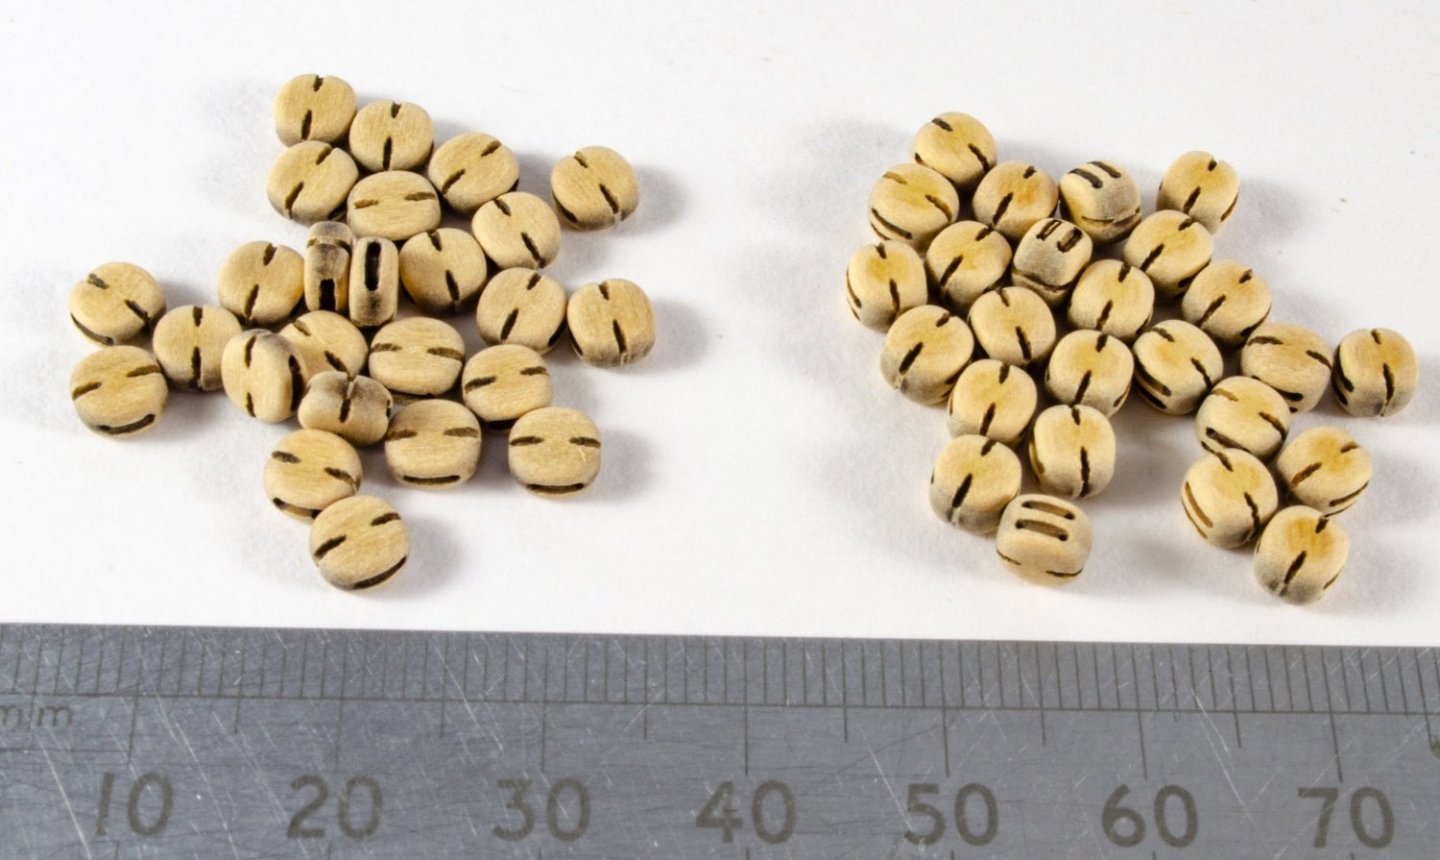

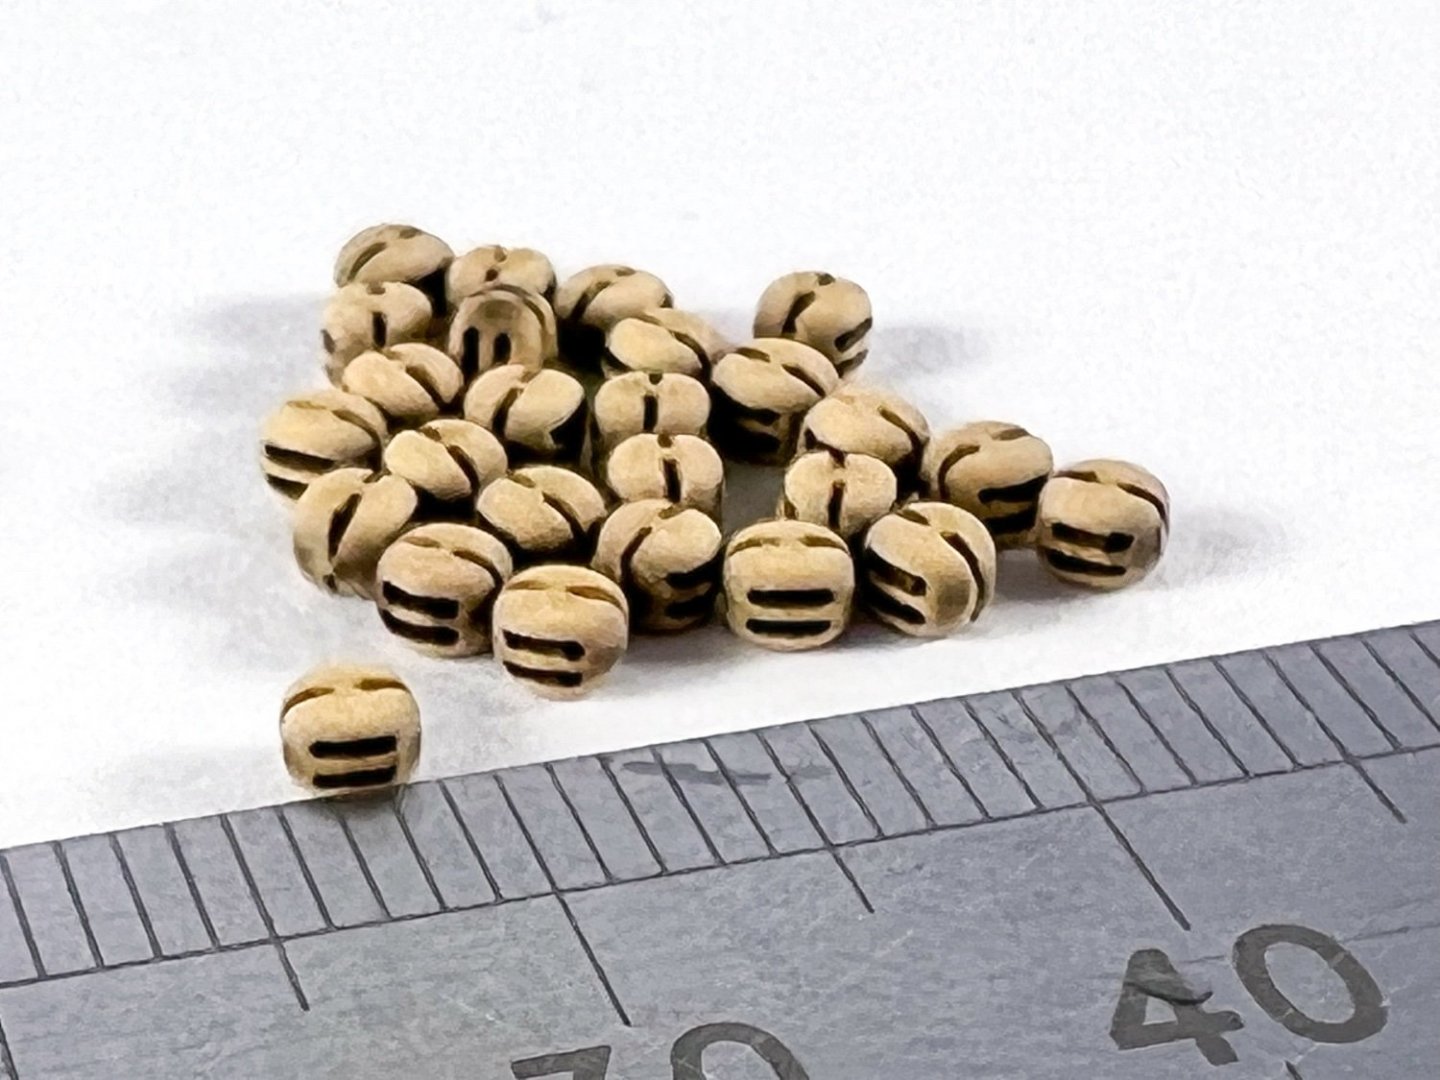
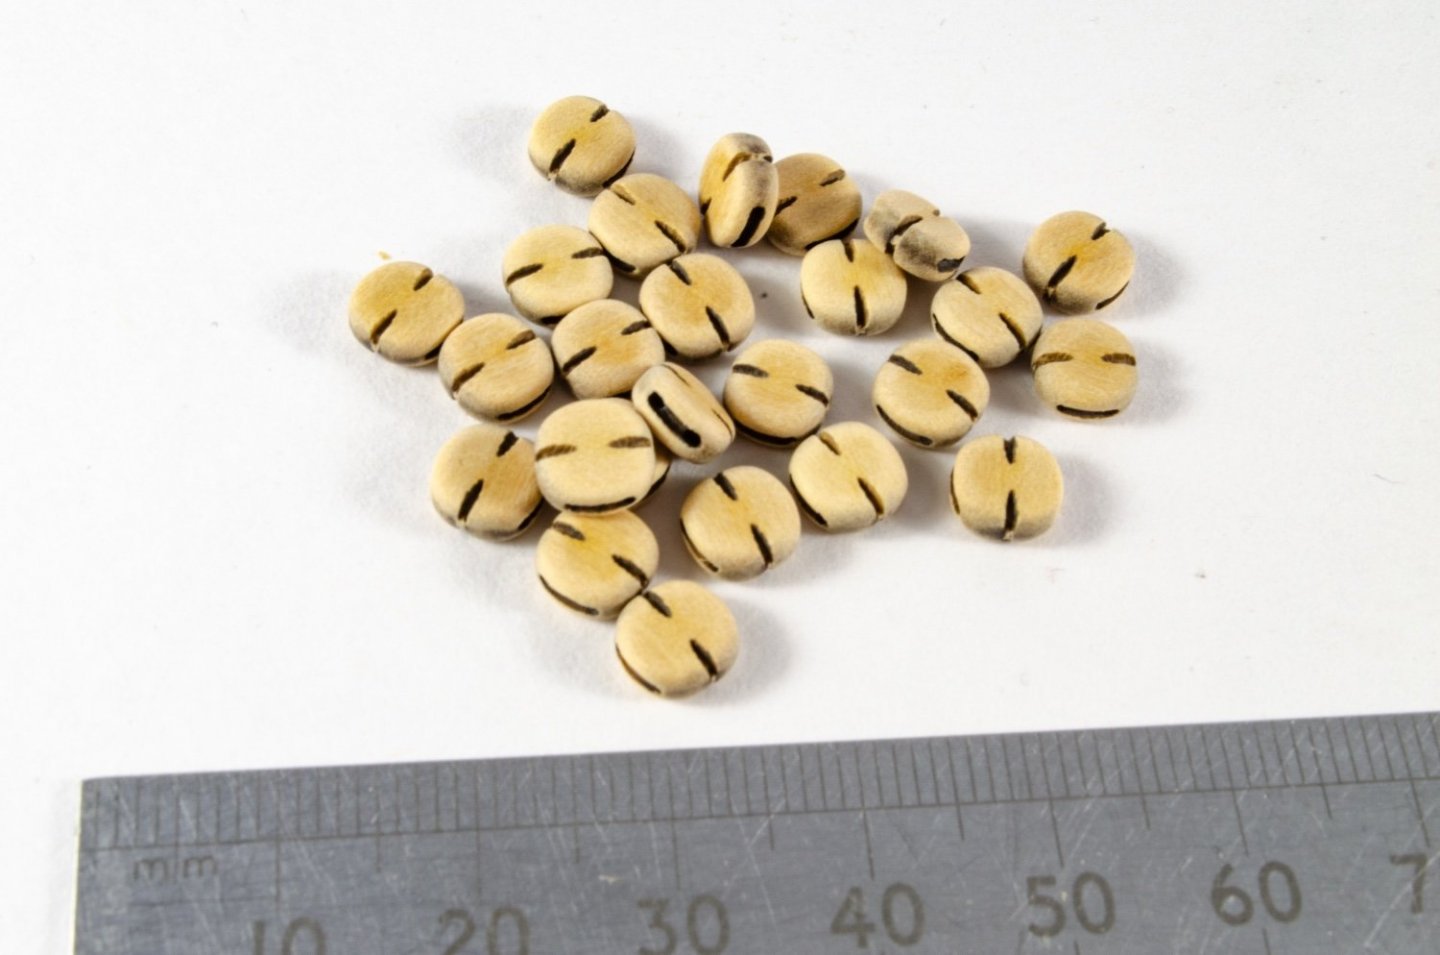
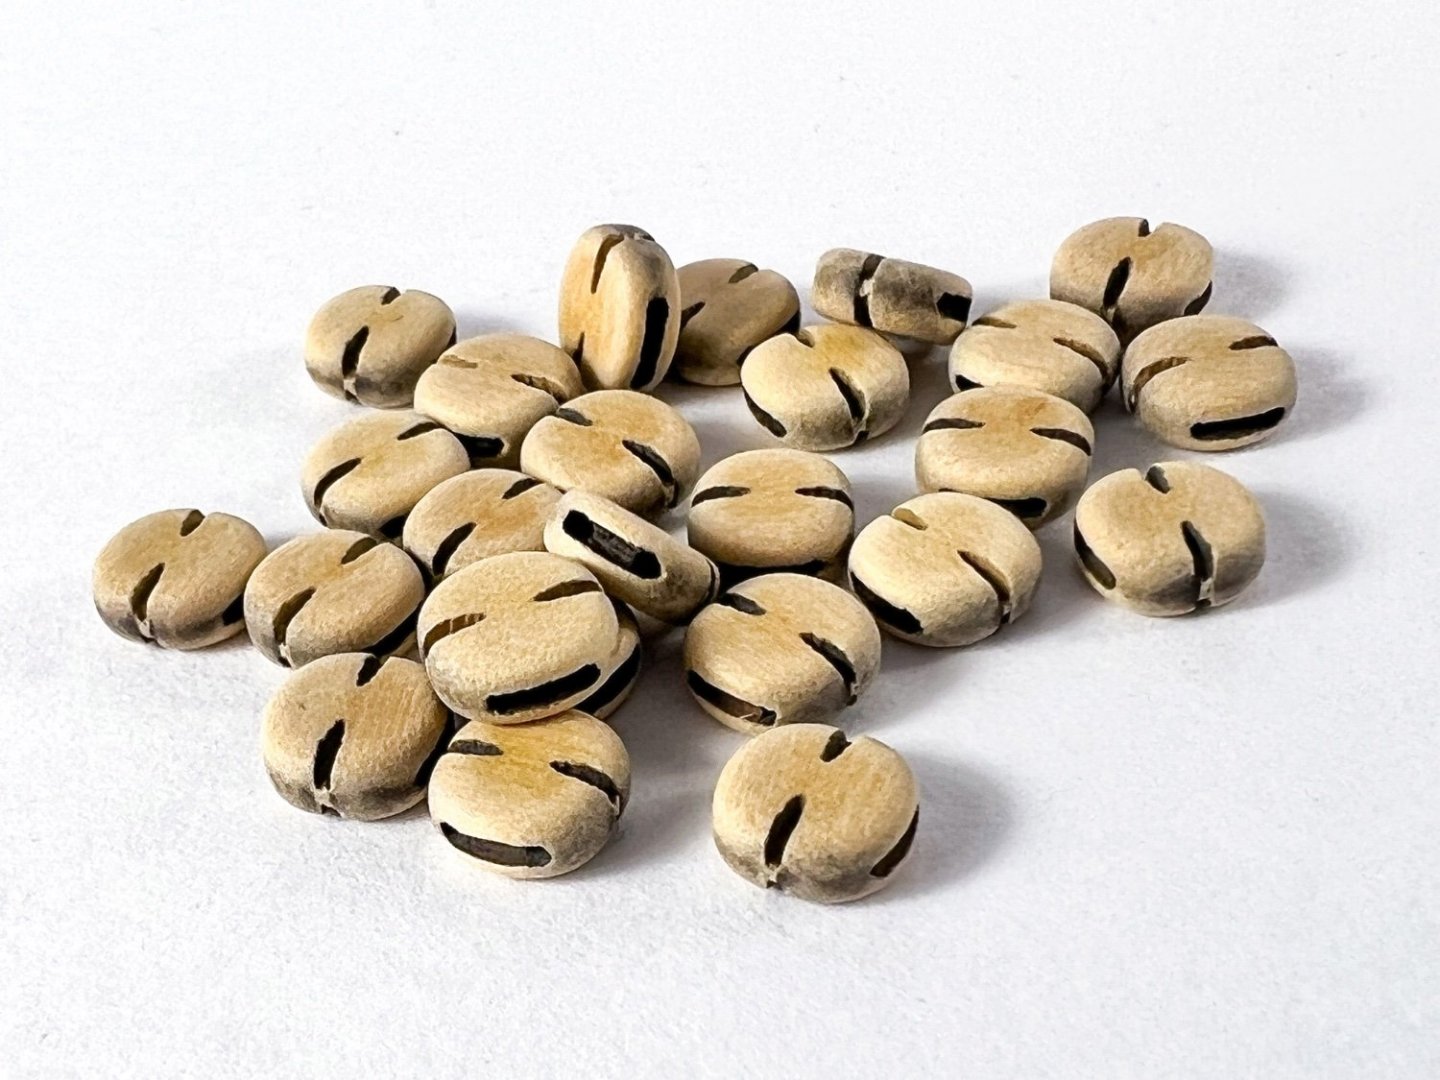
Syren also supply blocks in pear. Again, these are made using the same production method and look great. All of these close-up pics are via my iPhone so please excuse any problems with definition.

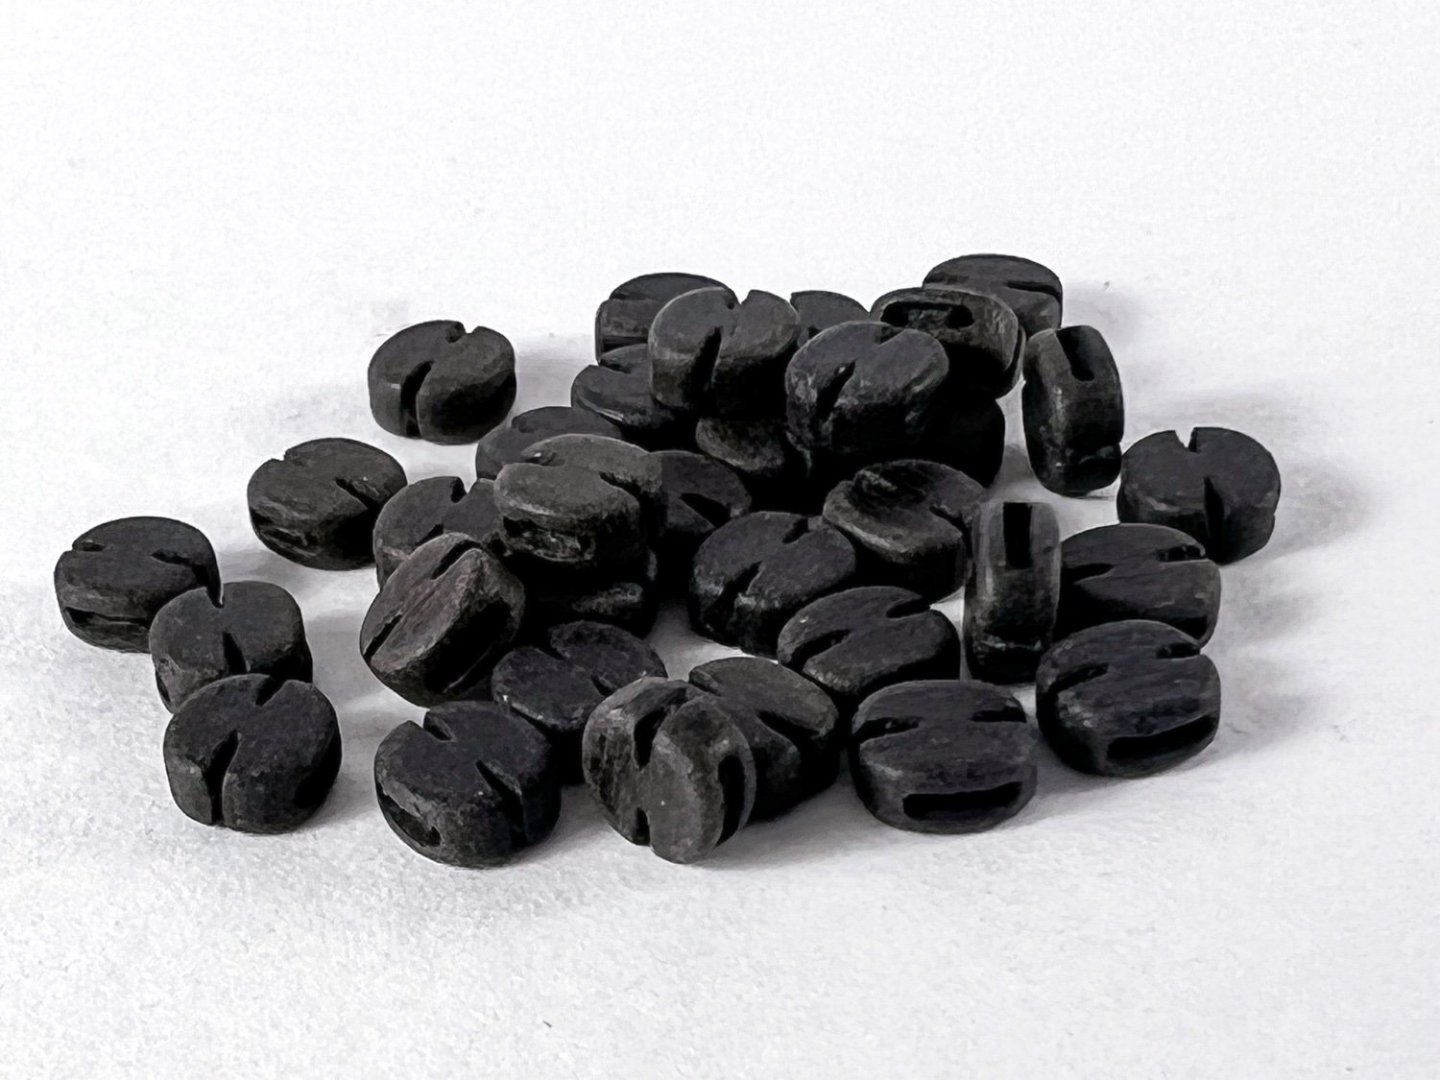
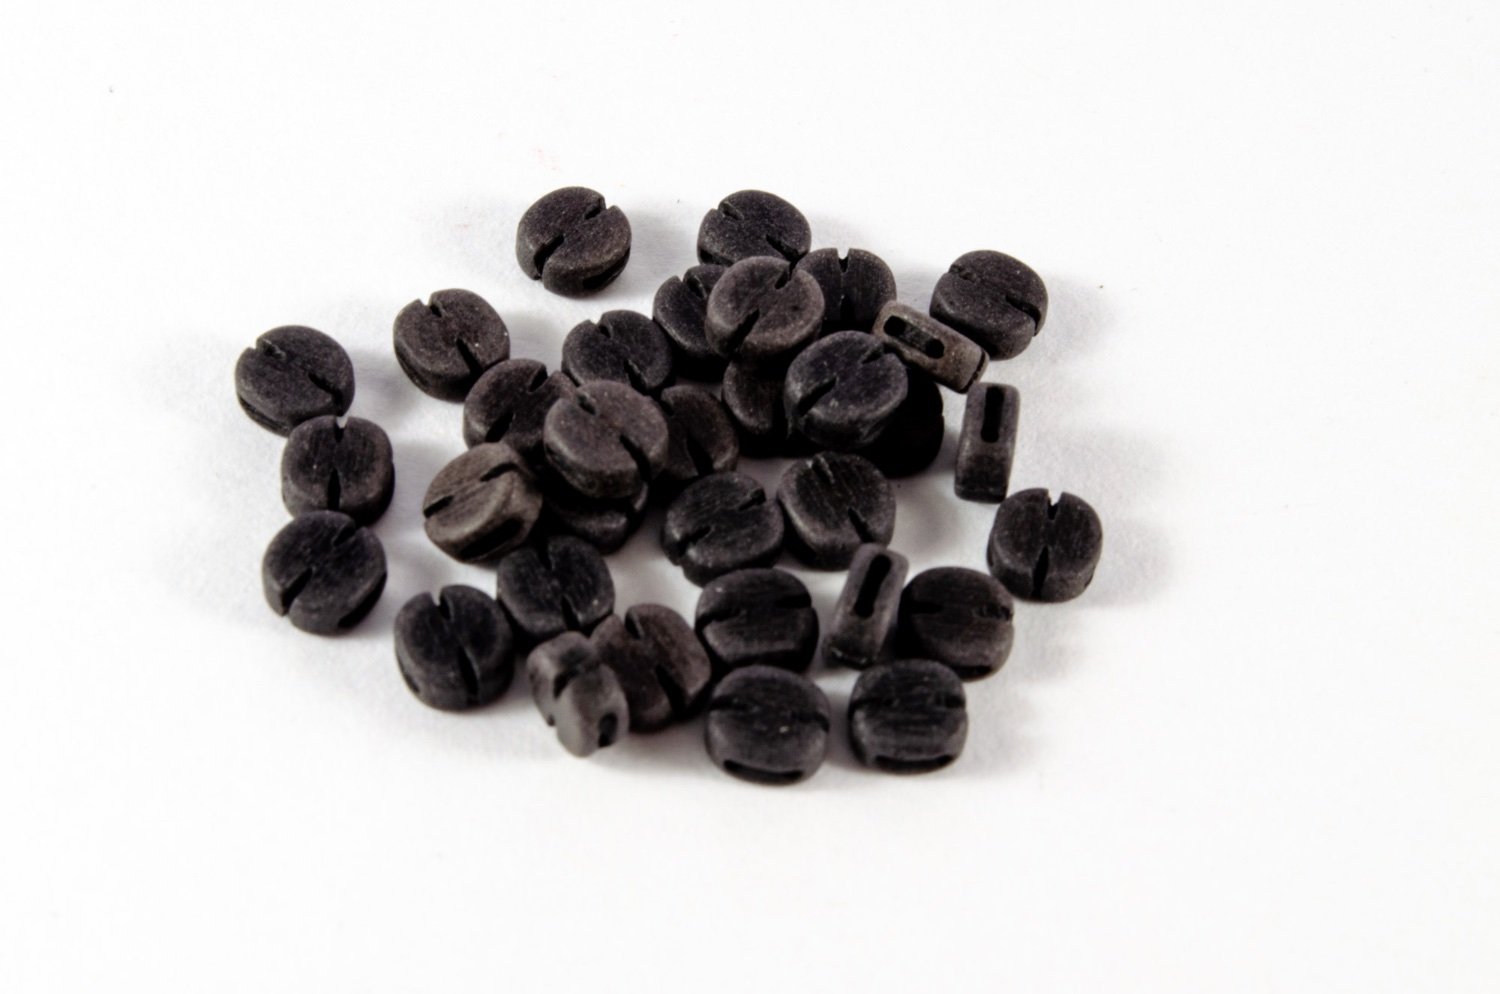
Syren can also produce blocks in black hornbeam to simulate tarring etc. These are some samples that Chuck put in the packet. It's so difficult to photograph black on white so I hope these look ok to you. In reality, they are beautiful rigging blocks and I will definitely find a use for these eventually.
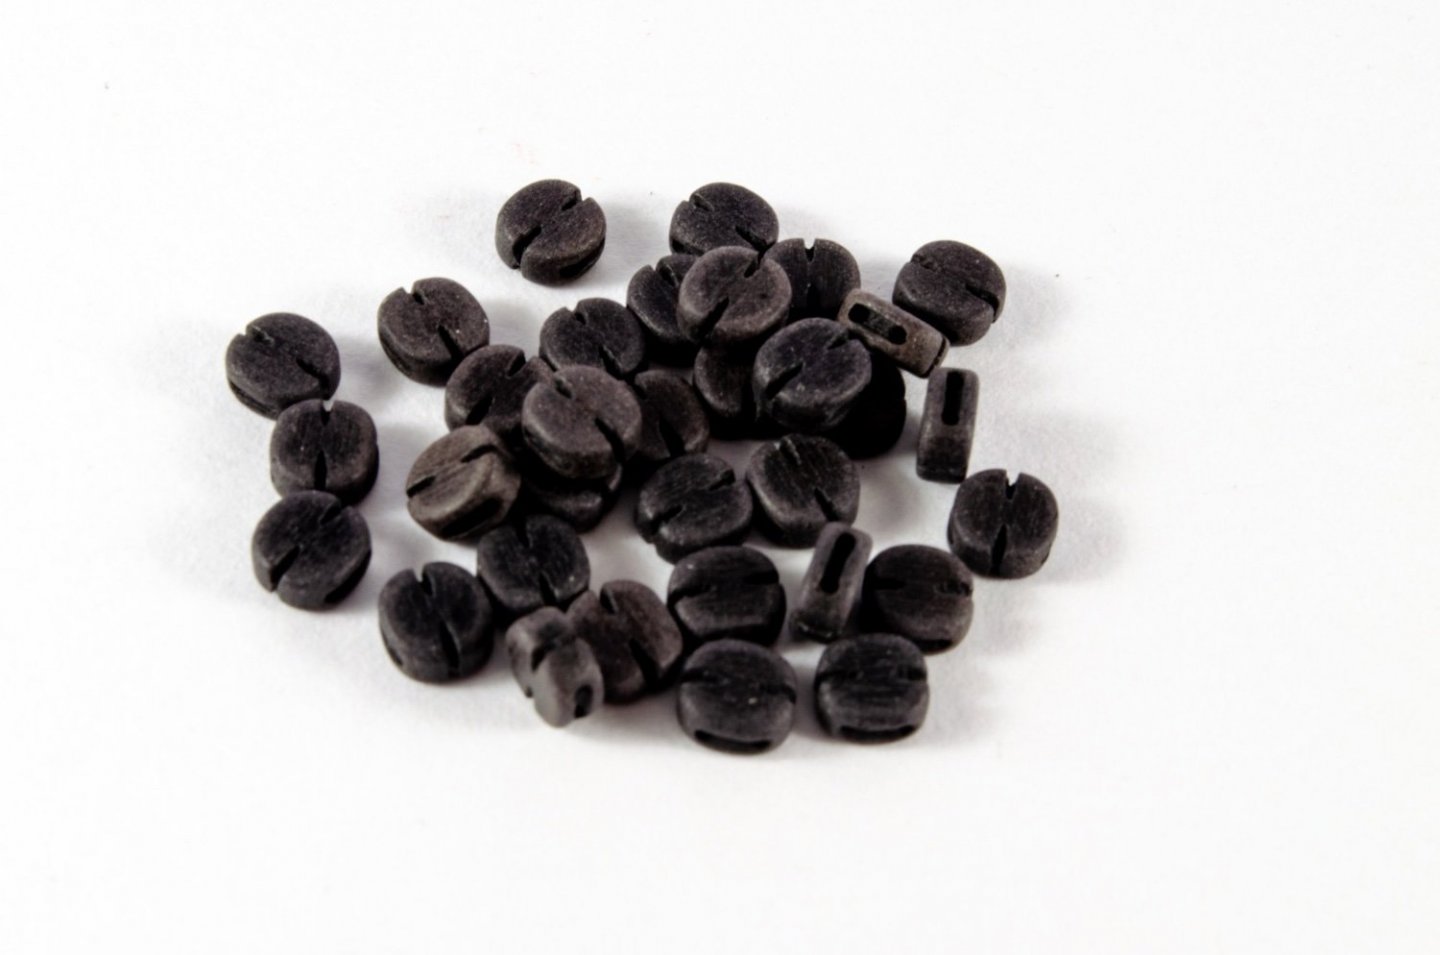
We have some wonderful vendors who support MSW, with Syren being one of them.
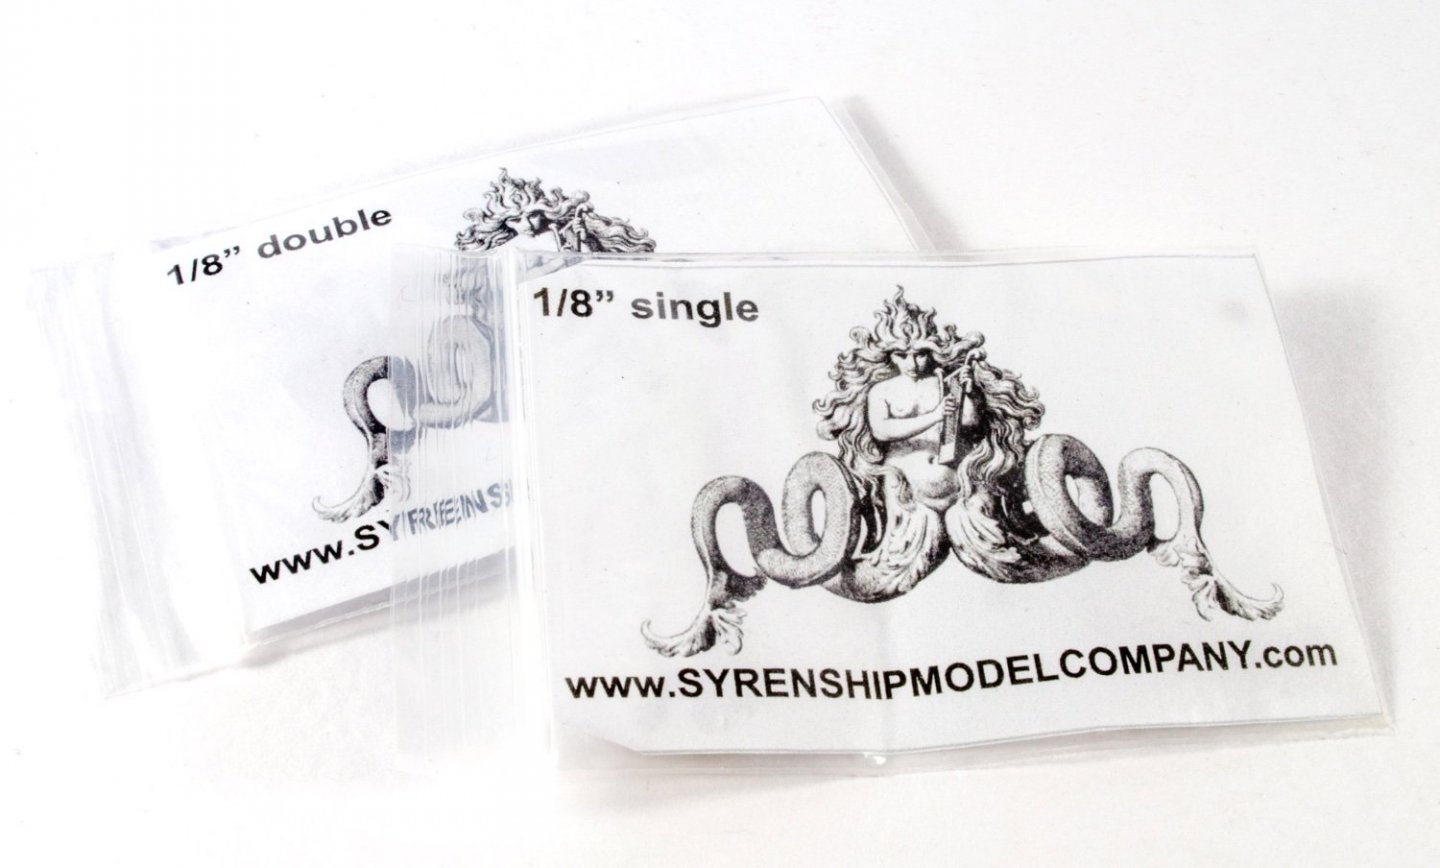
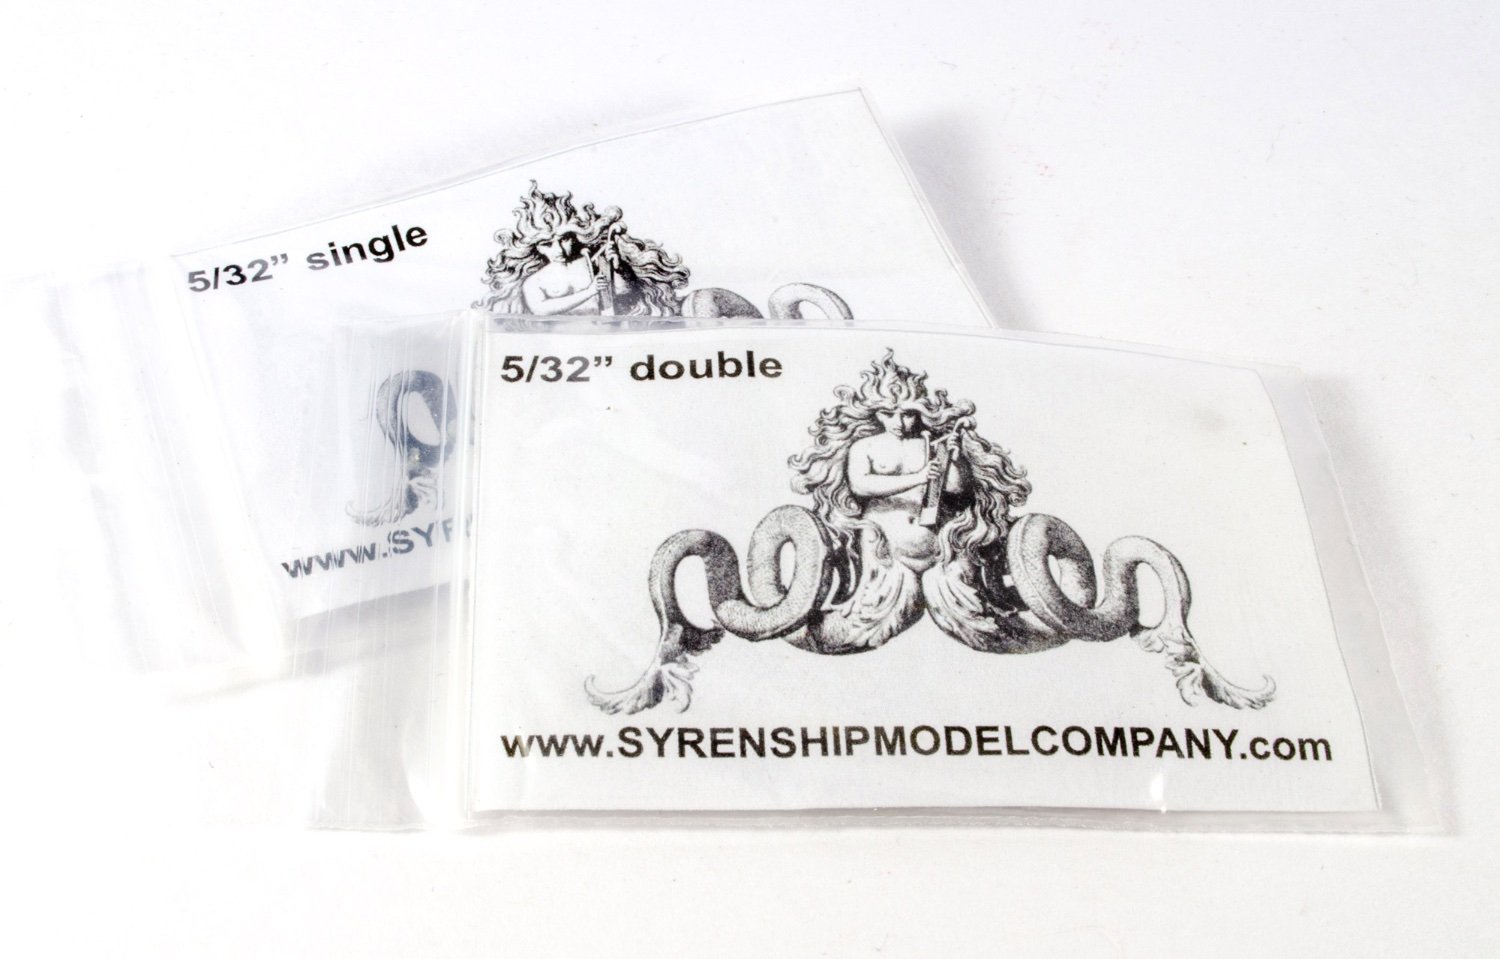
If you are in the market for any of these products, then them out and tell them you saw this topic here on MSW. If you check out their web page, you'll see that other types of blocks are available as well as the singles and doubles you see here, such as open and closed hearts, fiddles, and internally strapped single sheave bocks. A few of these products are assembly type, but all produced from the same grade of boxwood you see here.
Sincere thanks to Syren for the sample packs you see here on MSW.
- Jack12477, chris watton, Archi and 11 others
-
 14
14
-
2 minutes ago, Oboship said:
This build will be another Chris W / James H masterpiece!
I'm just the monkey.
Chris is the organ grinder. 😄
- CaptnBirdseye, Oboship, mugje and 7 others
-
 10
10
-
1 minute ago, Craigie65 said:
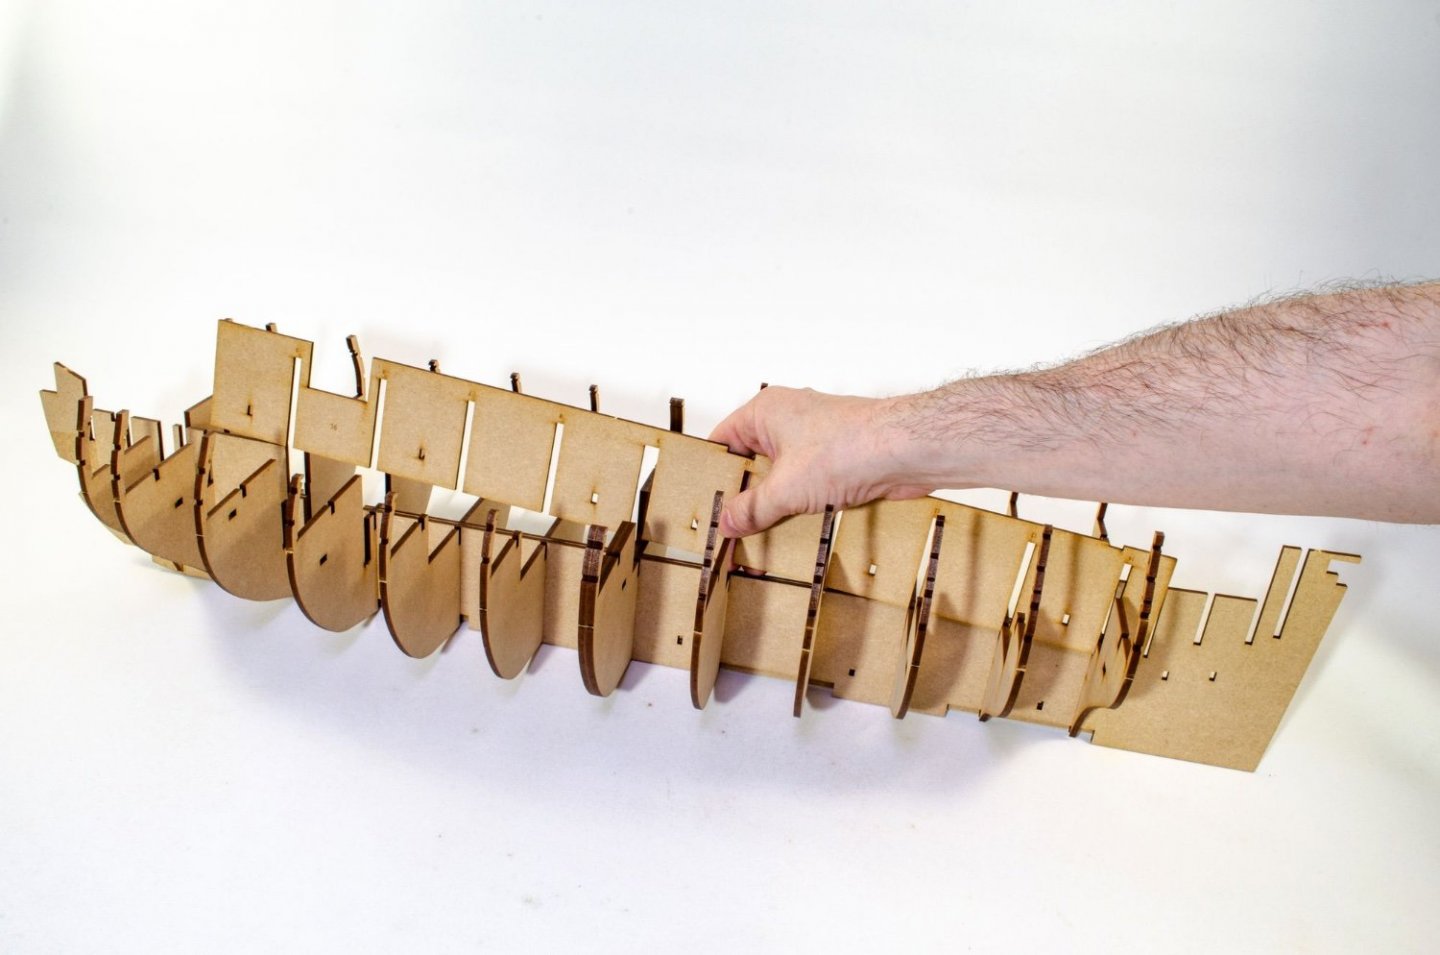
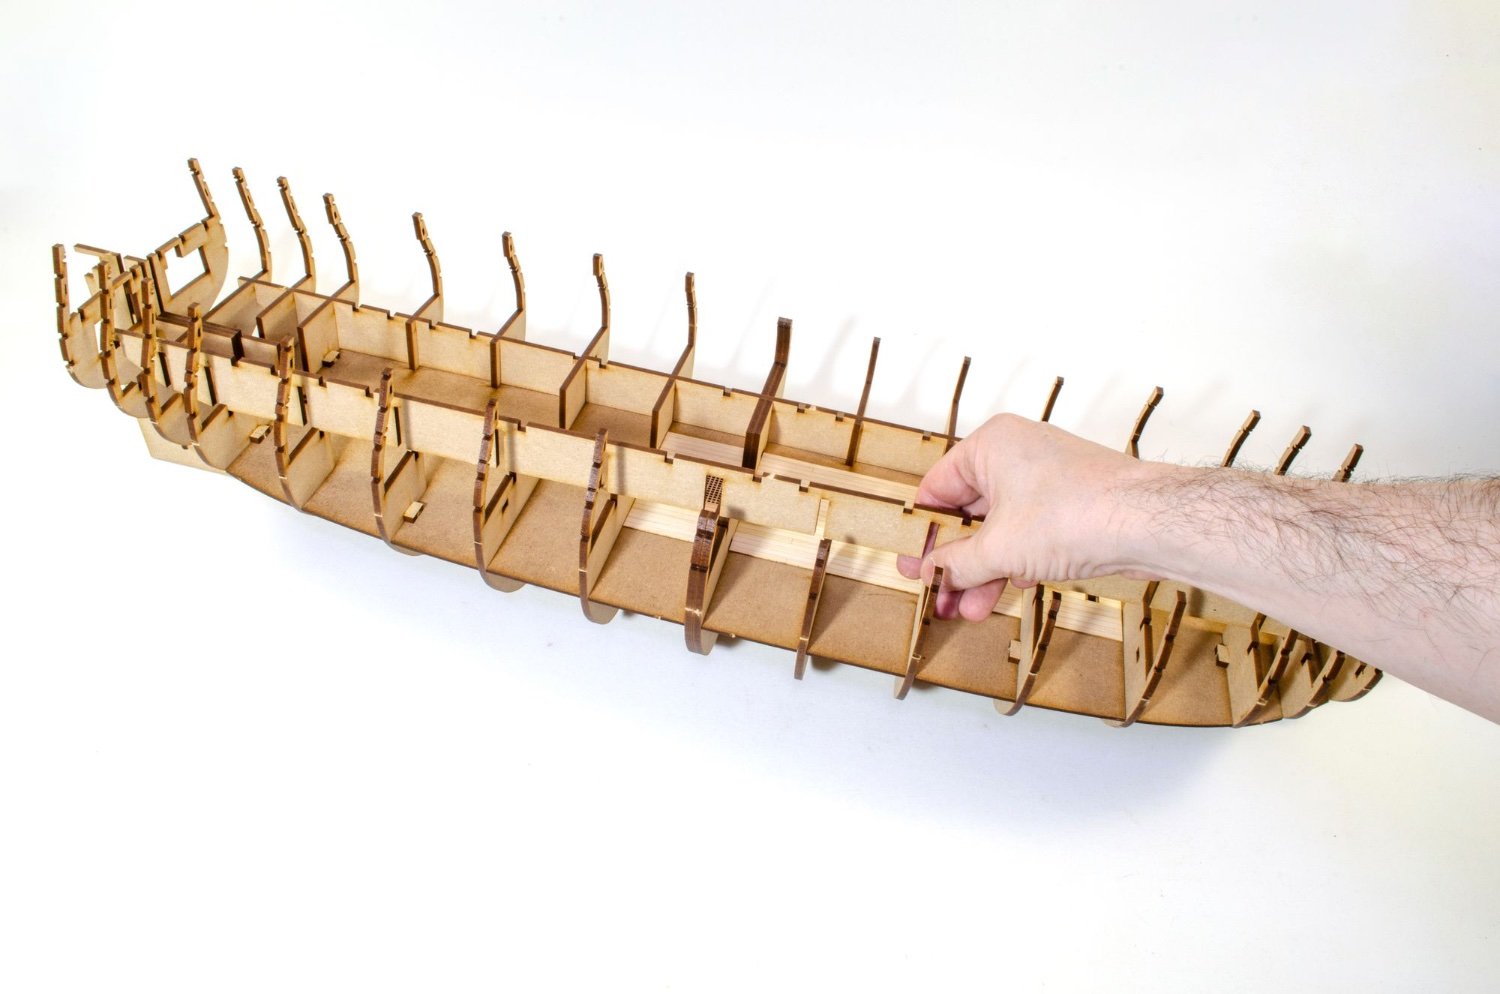
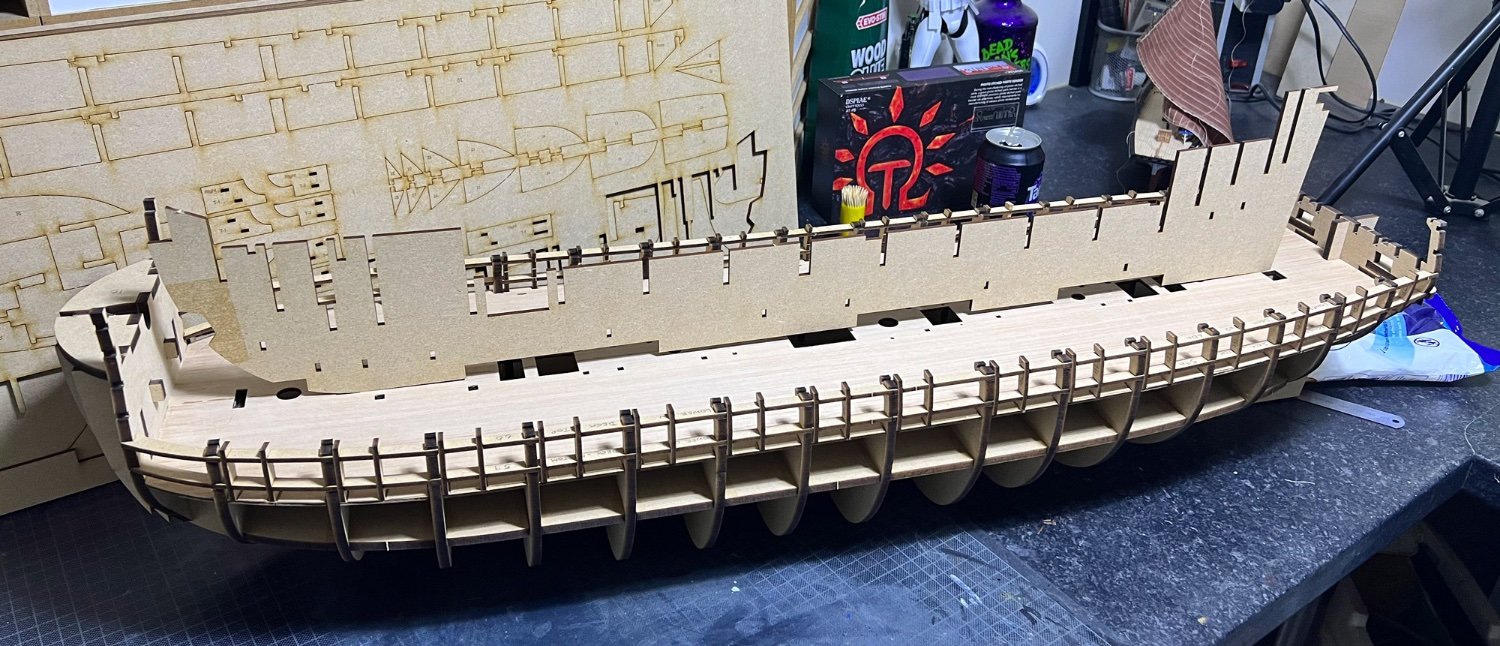
Wow you really get a sense of her size with the shots of the sub deck and your arm!
I was going to do these with just my hand at the end of the hull, but thought these gave a better sense of proportion!
-
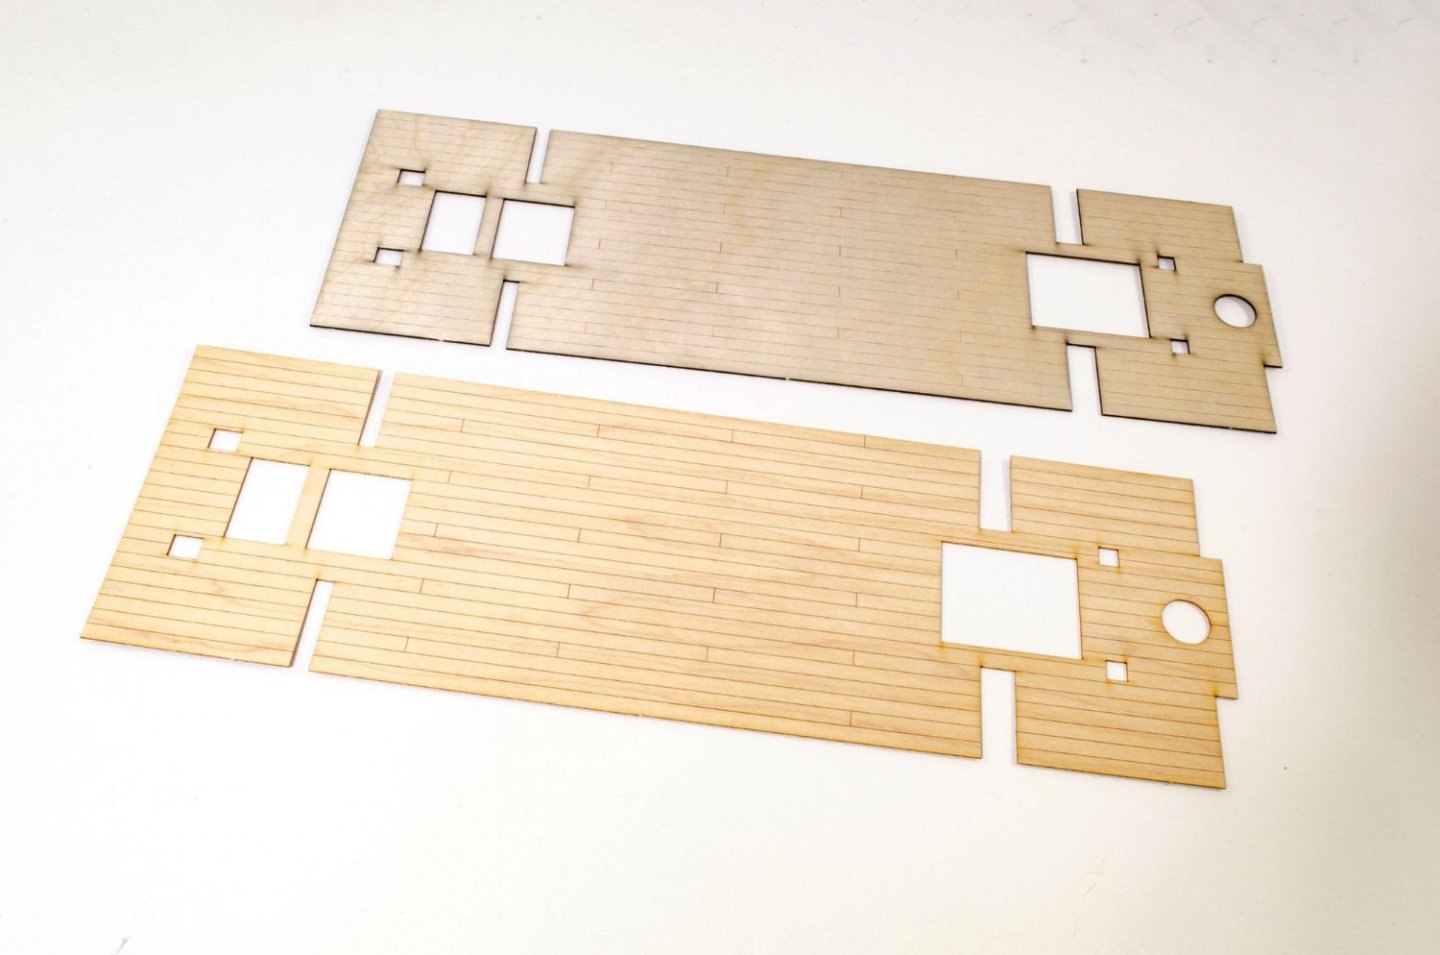
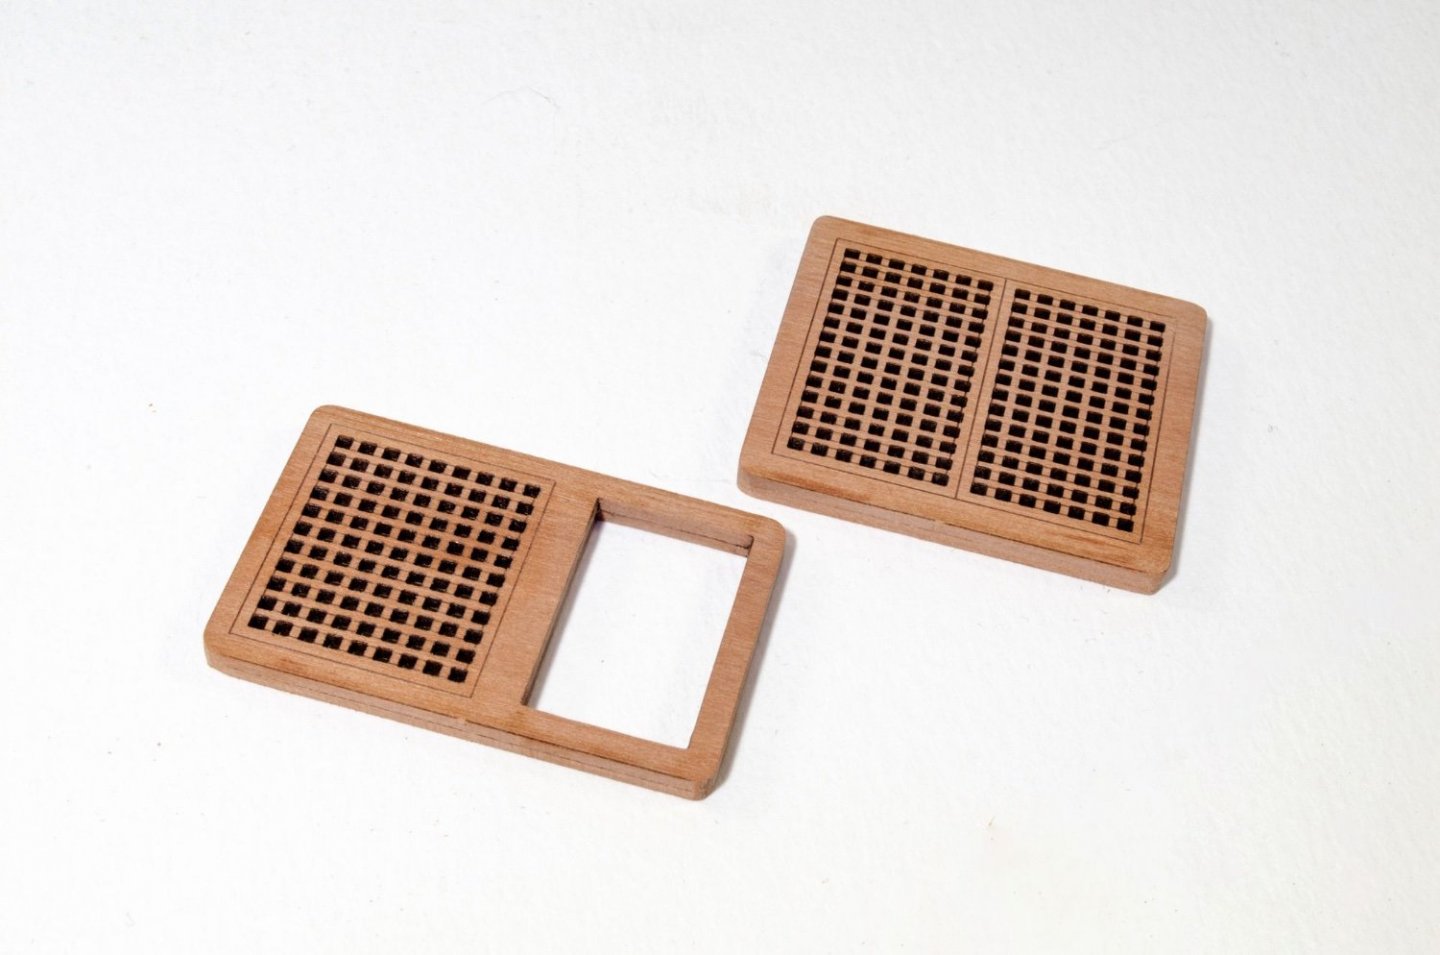
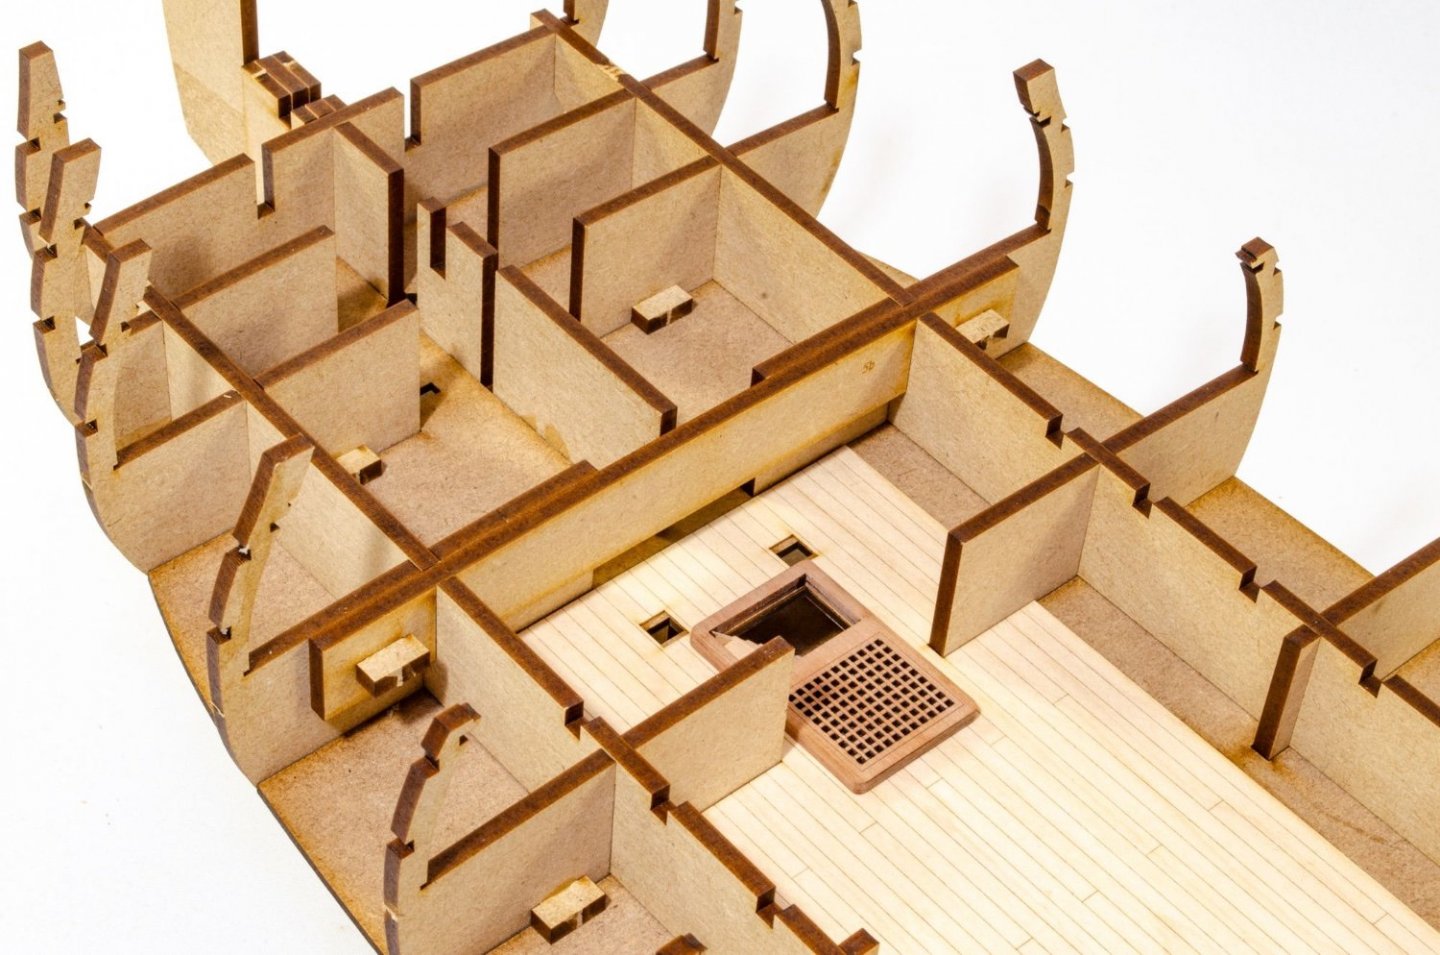
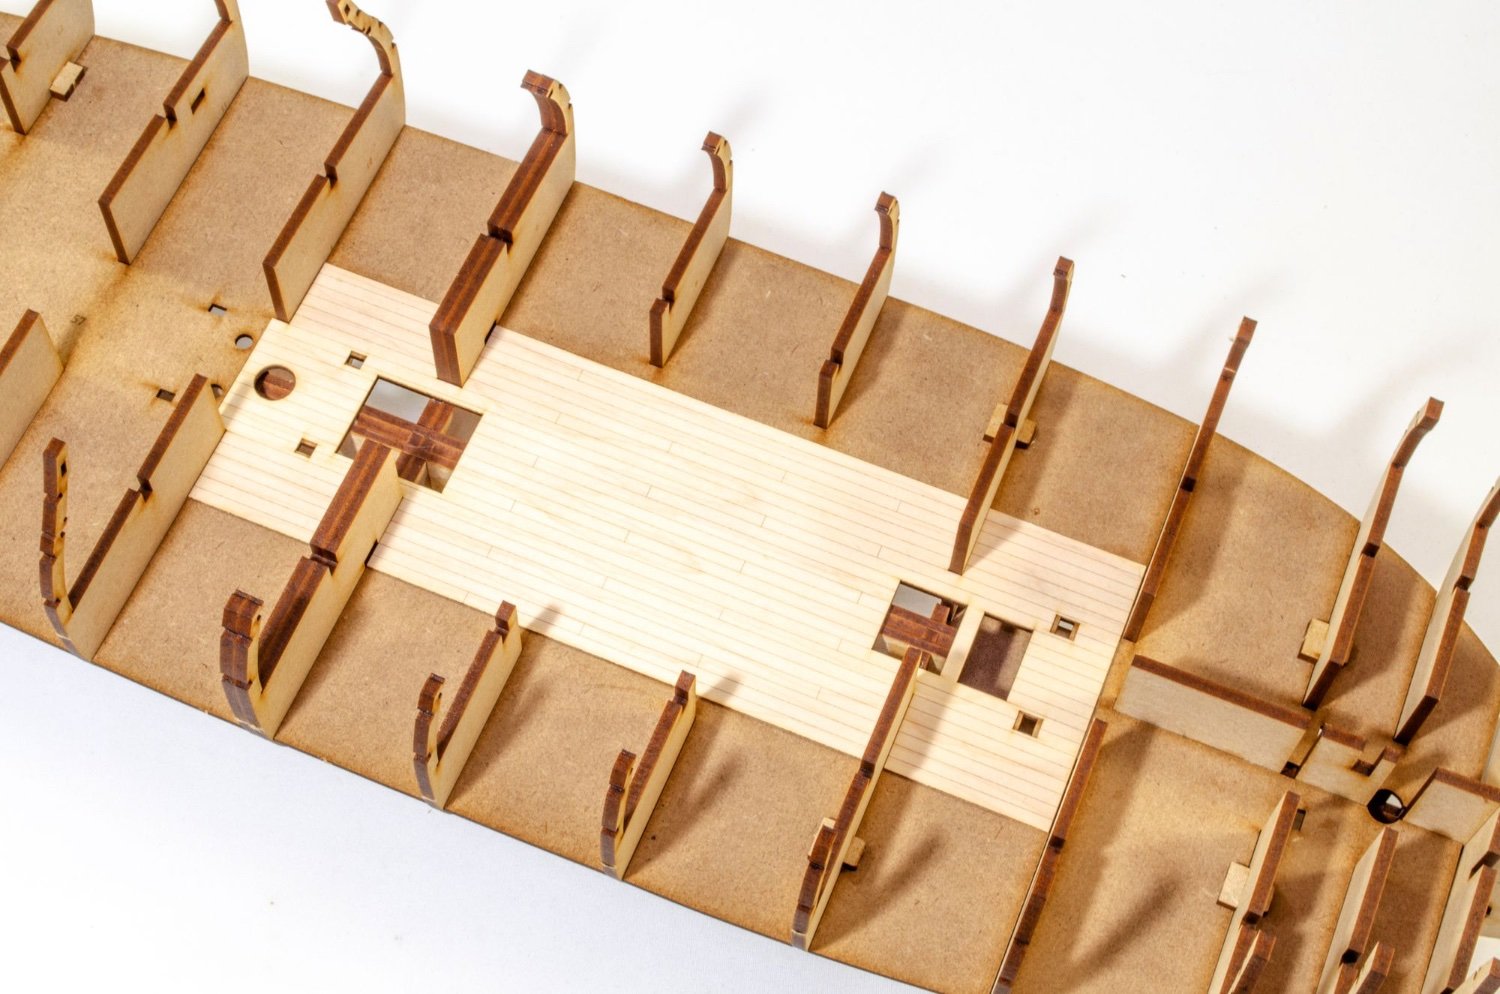
This photo shows the standard ply engraved section for the lower deck. As I've said, you'll be hard pressed to see this stuff, unless you're an ant that's crawled in. But in case you are, or have that endoscope I mentioned, the detail is there in part. Here you see the ply engraved part along with the optional maple deck section which I have opted to use for this build.
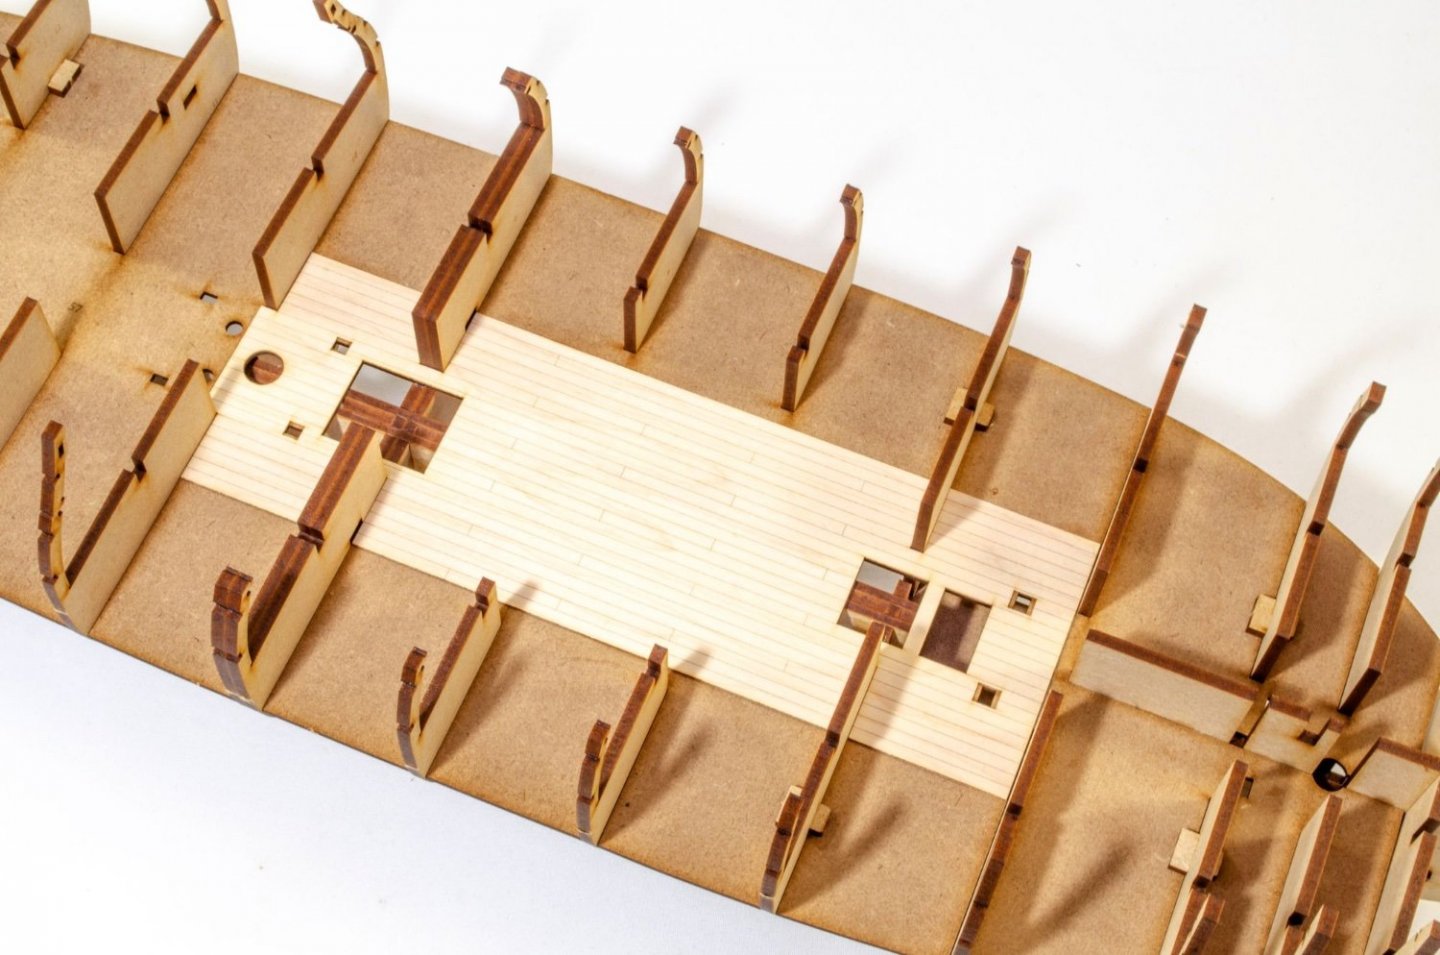
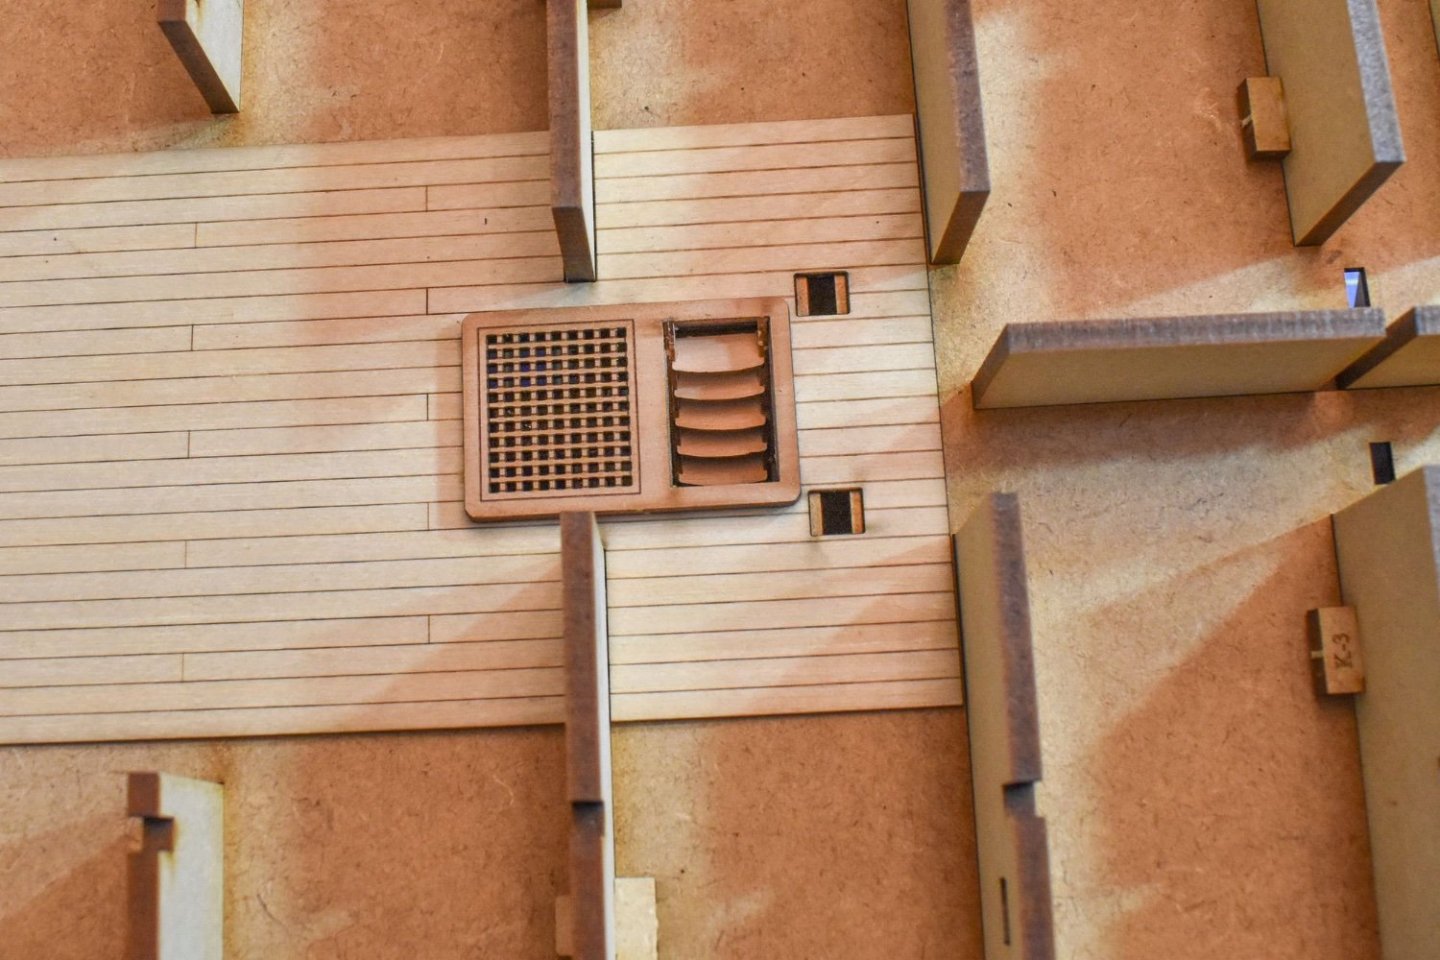
The deck section is now glued into place.
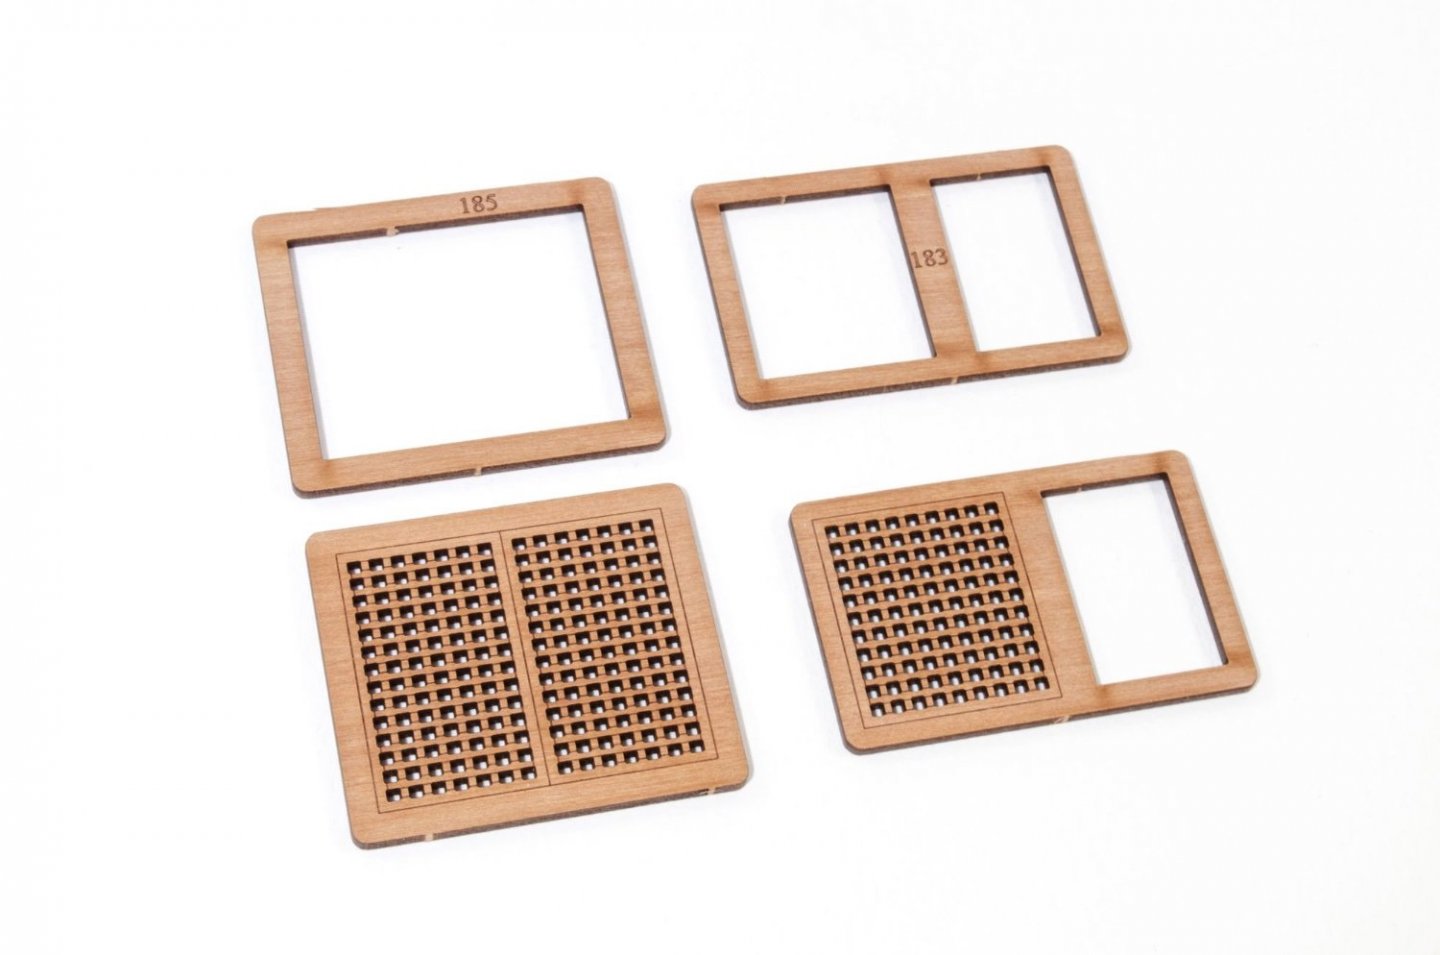
Two, 2-part grates are now built and added.

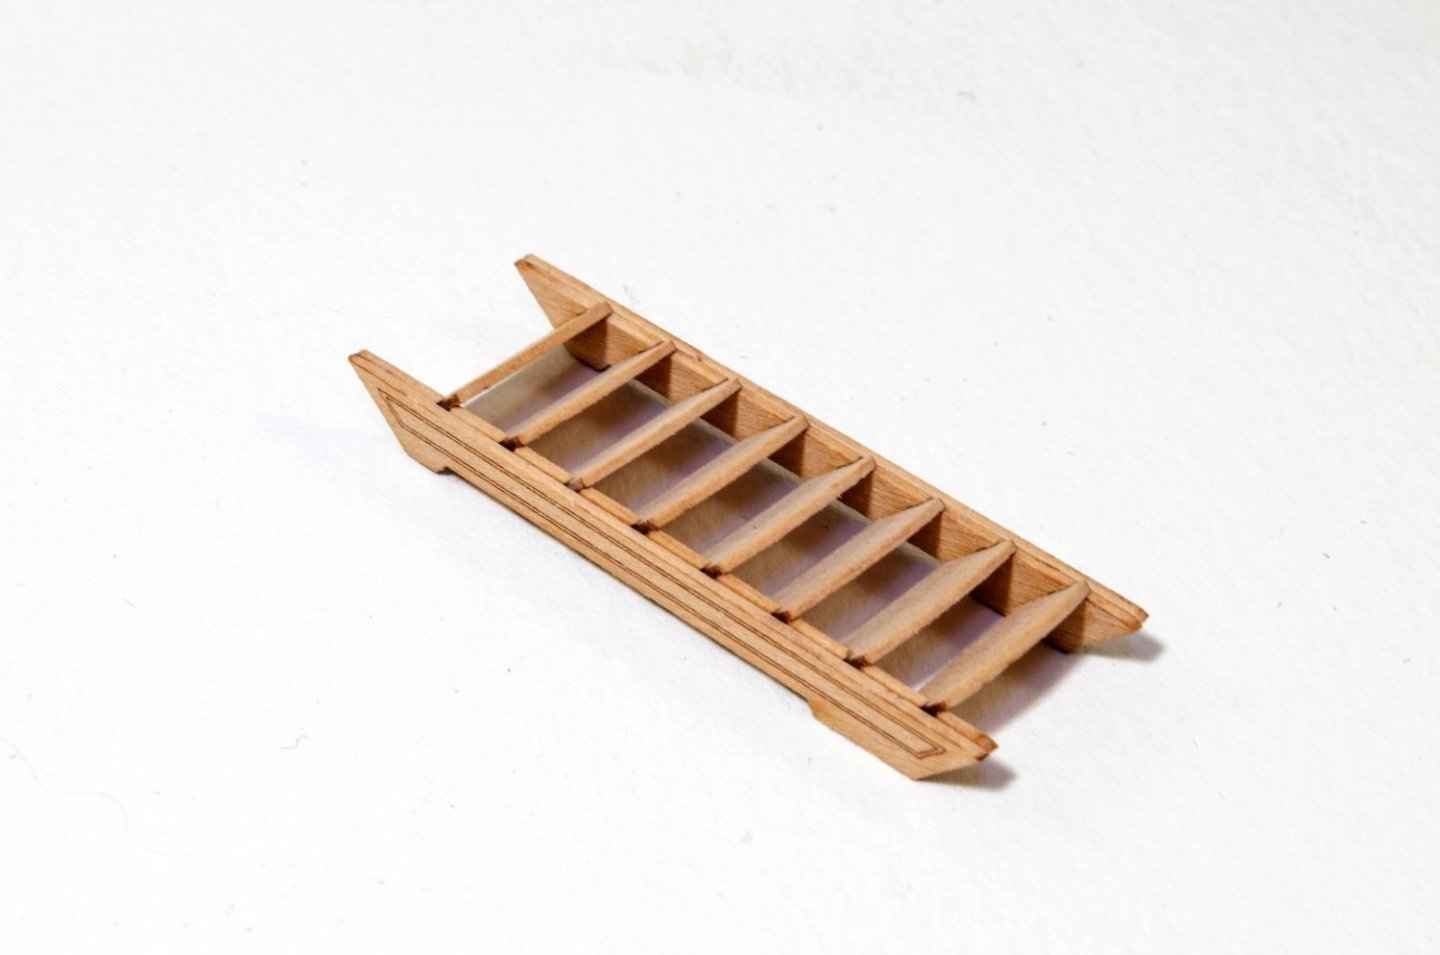
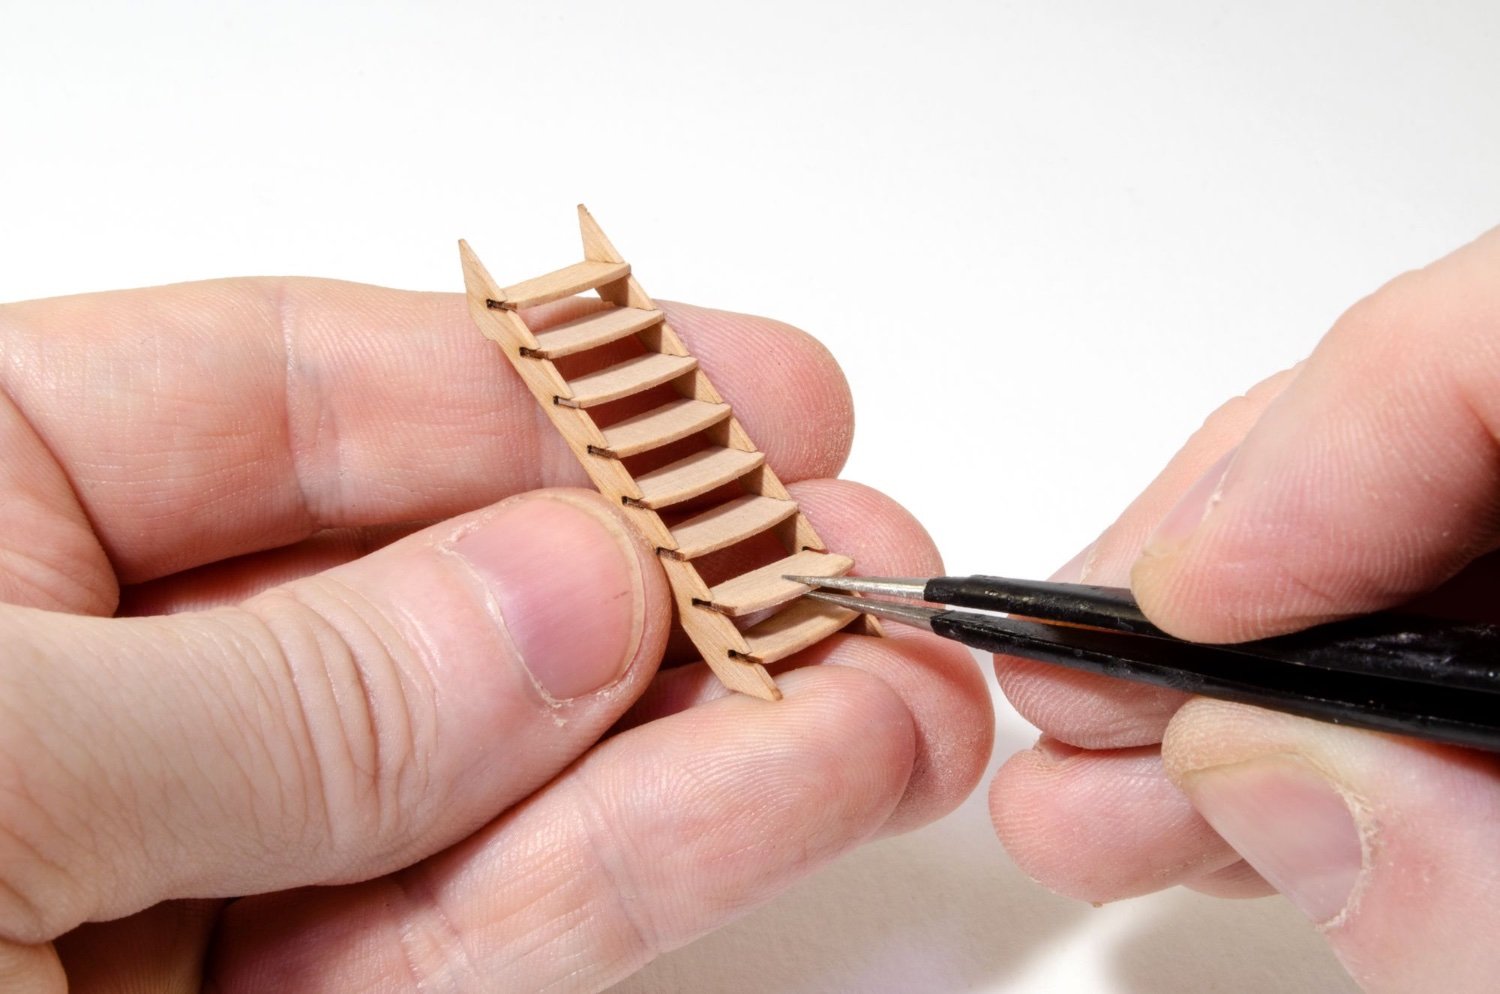
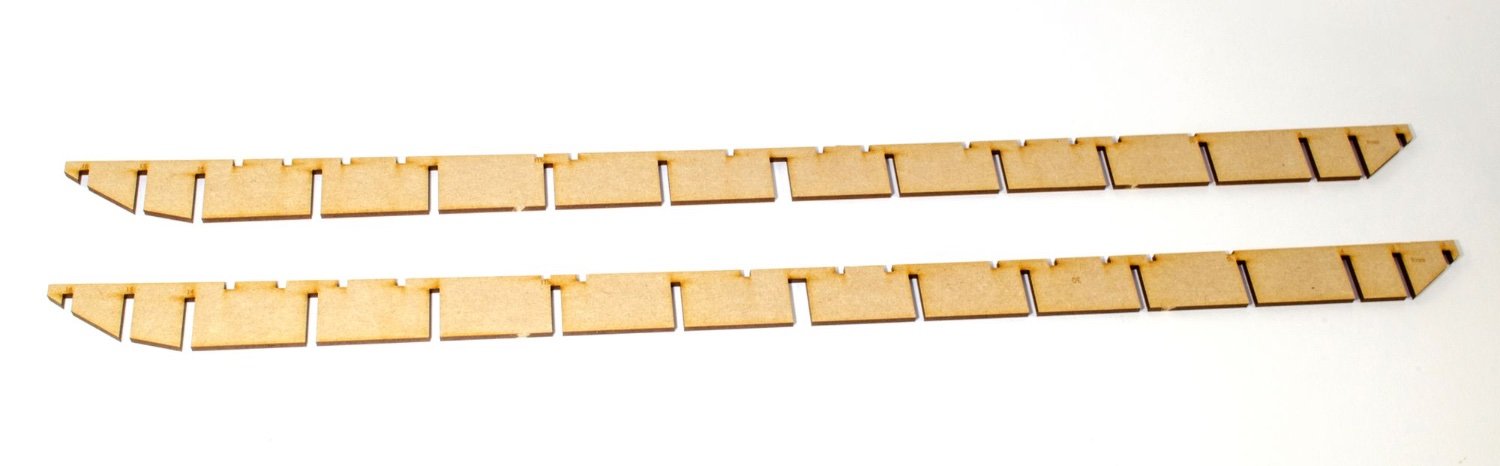
And of course, you'll need some steps down to the dinky orlop deck.
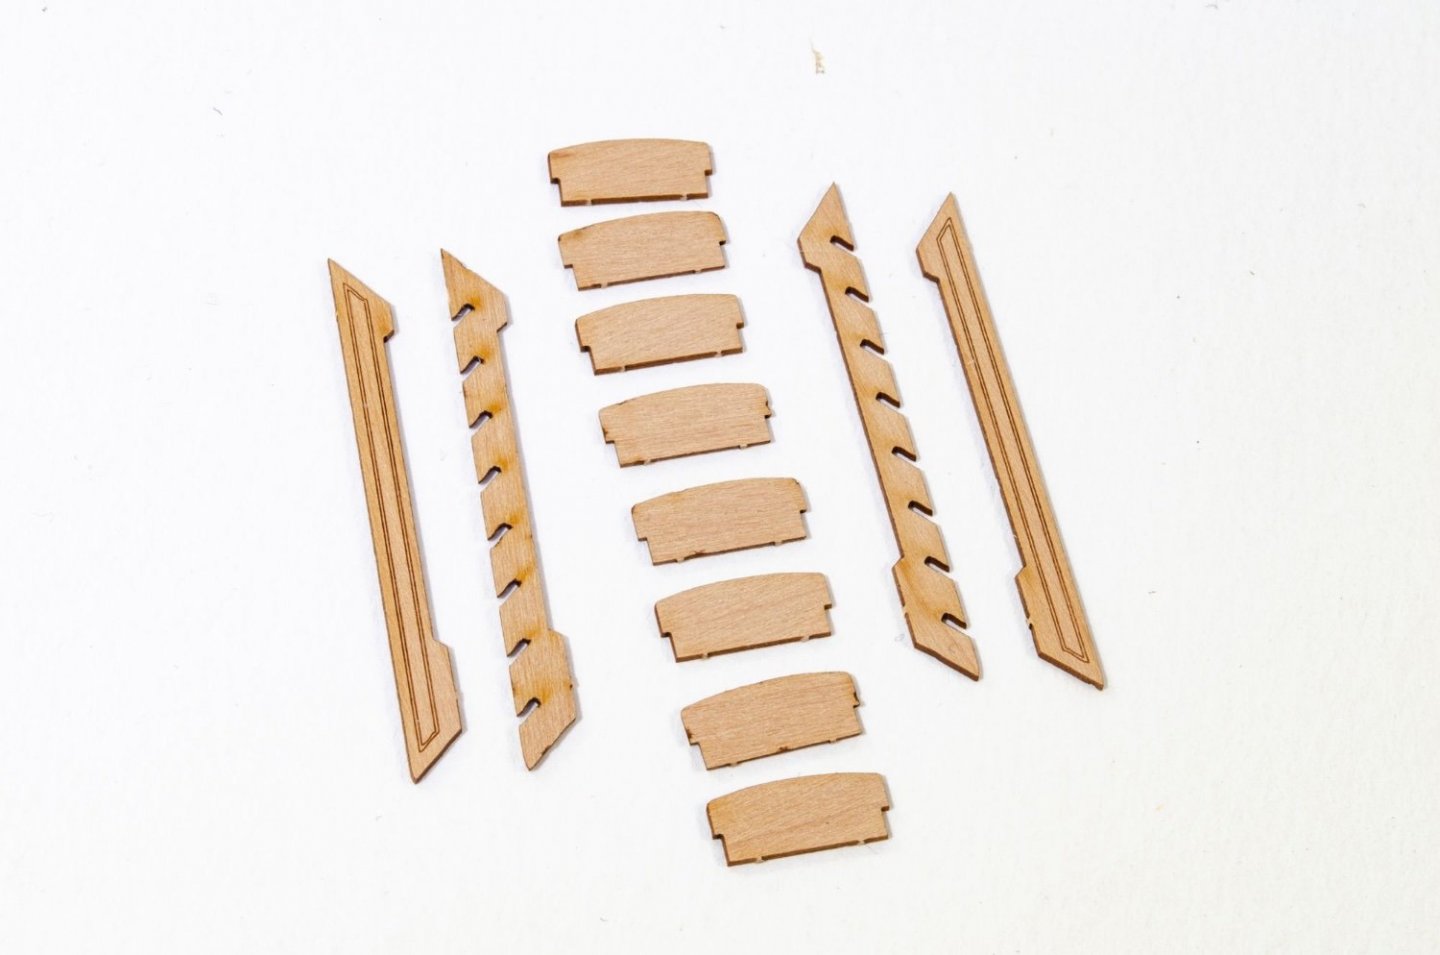

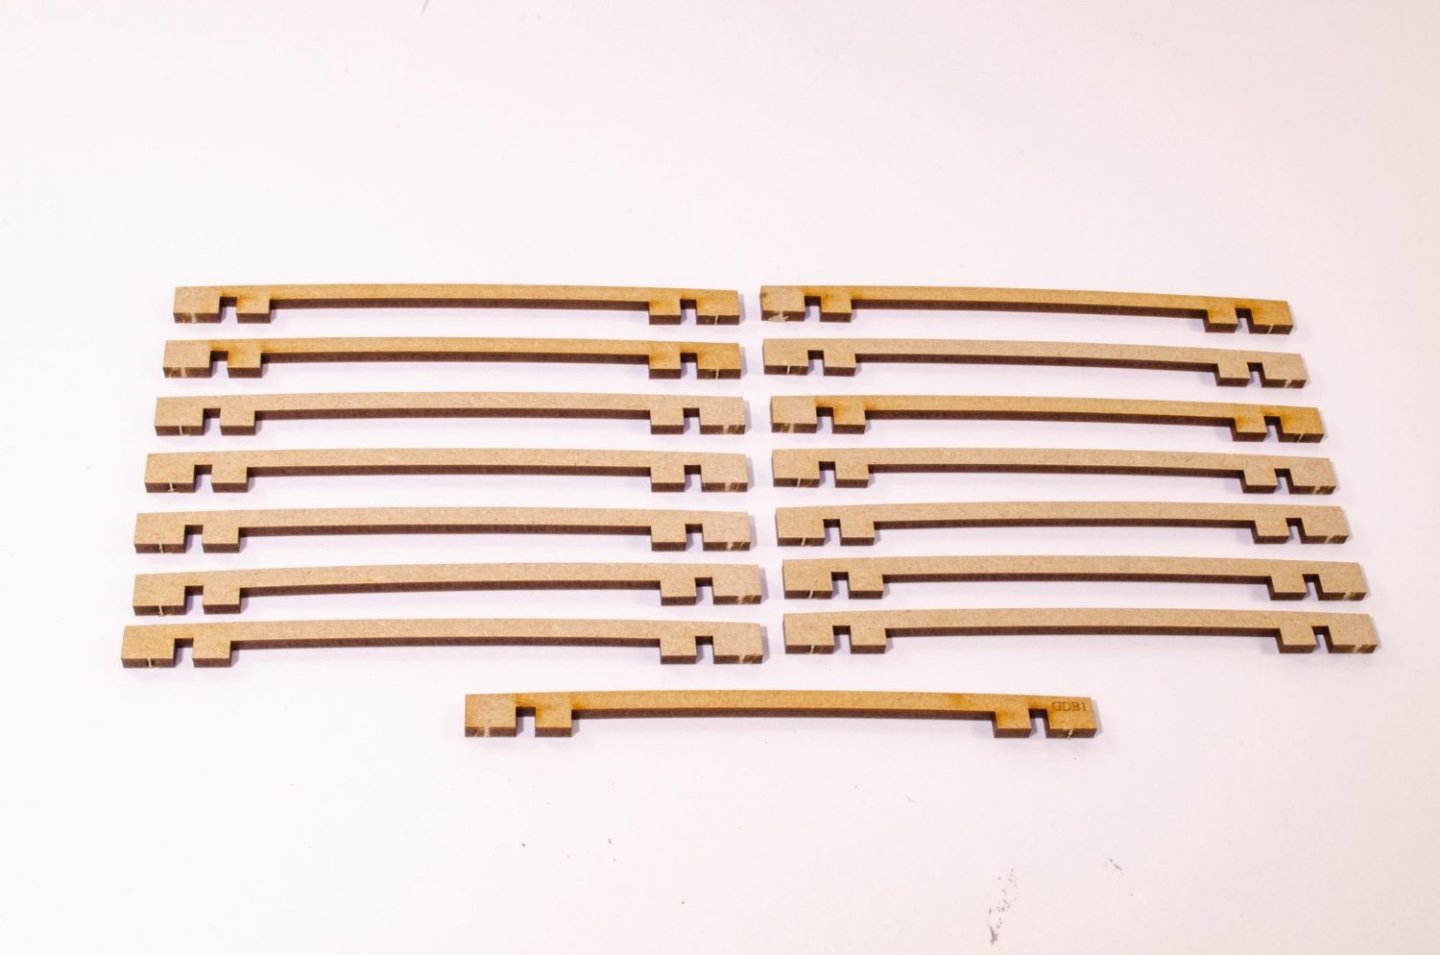
These two beams are now added, again without glue.

These two beams hole them firmly in place and are located with two pegs each, glued into the slots.
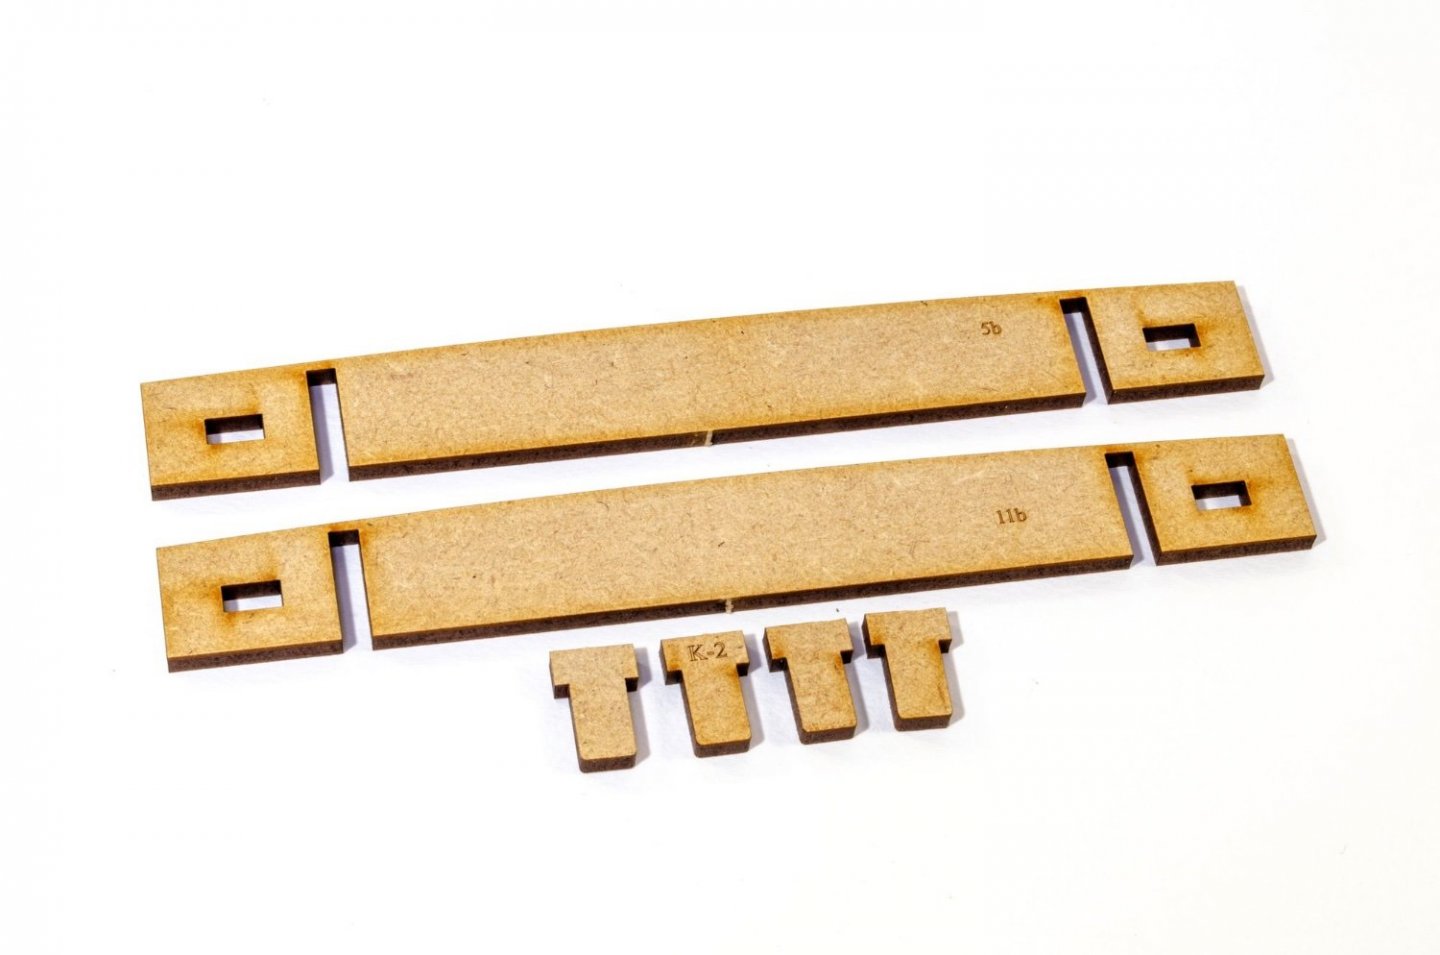
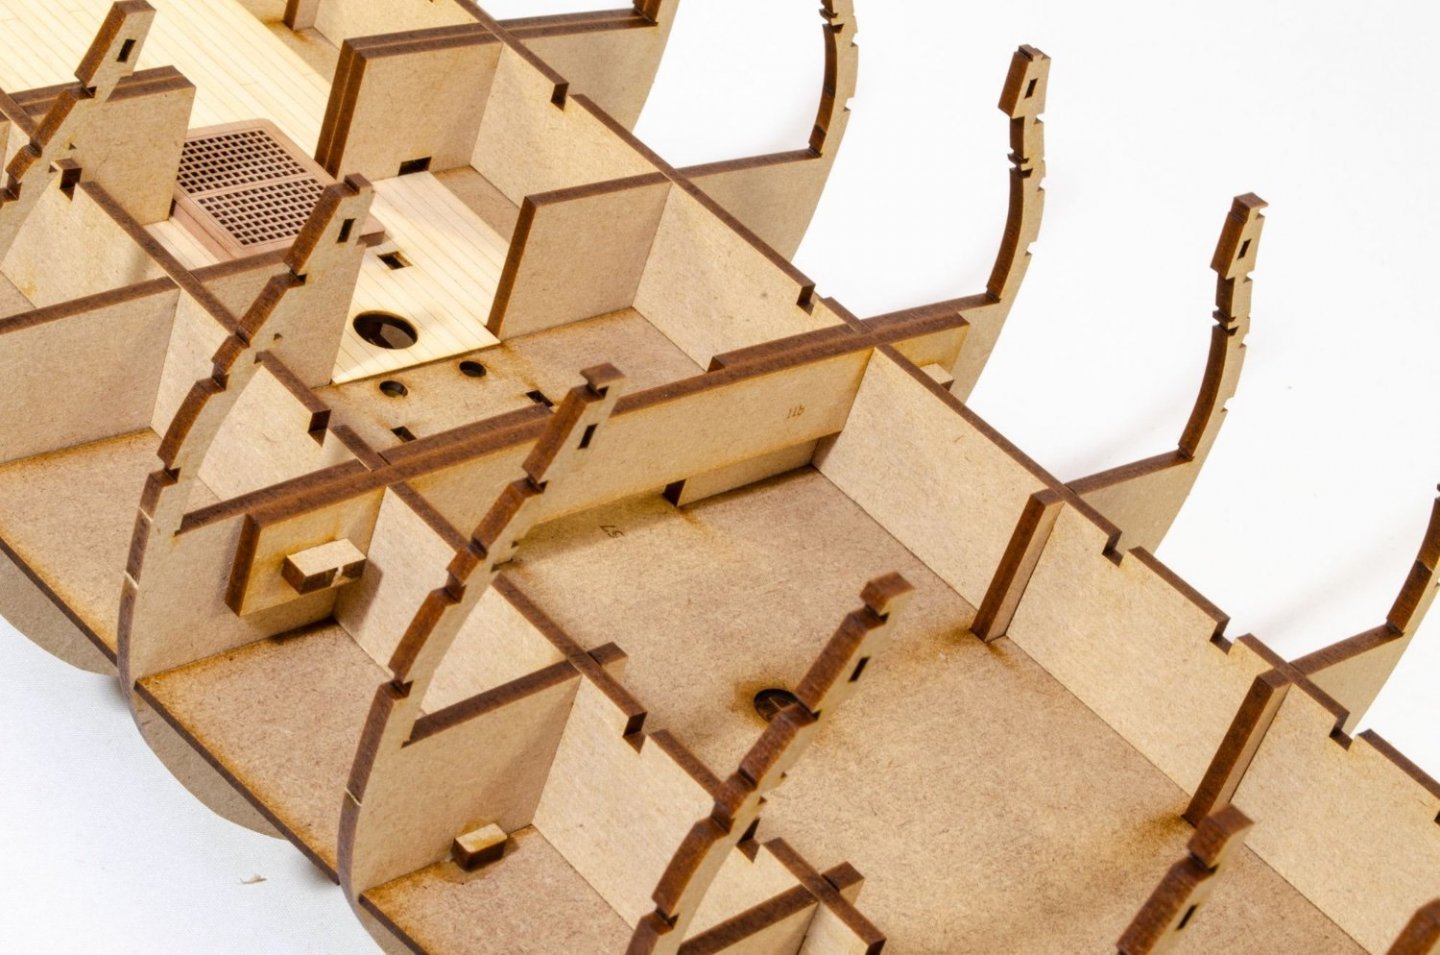
And lastly for this update, a whole raft of deck beams are fitted between those two longitudinal parts.

Until next time!
-
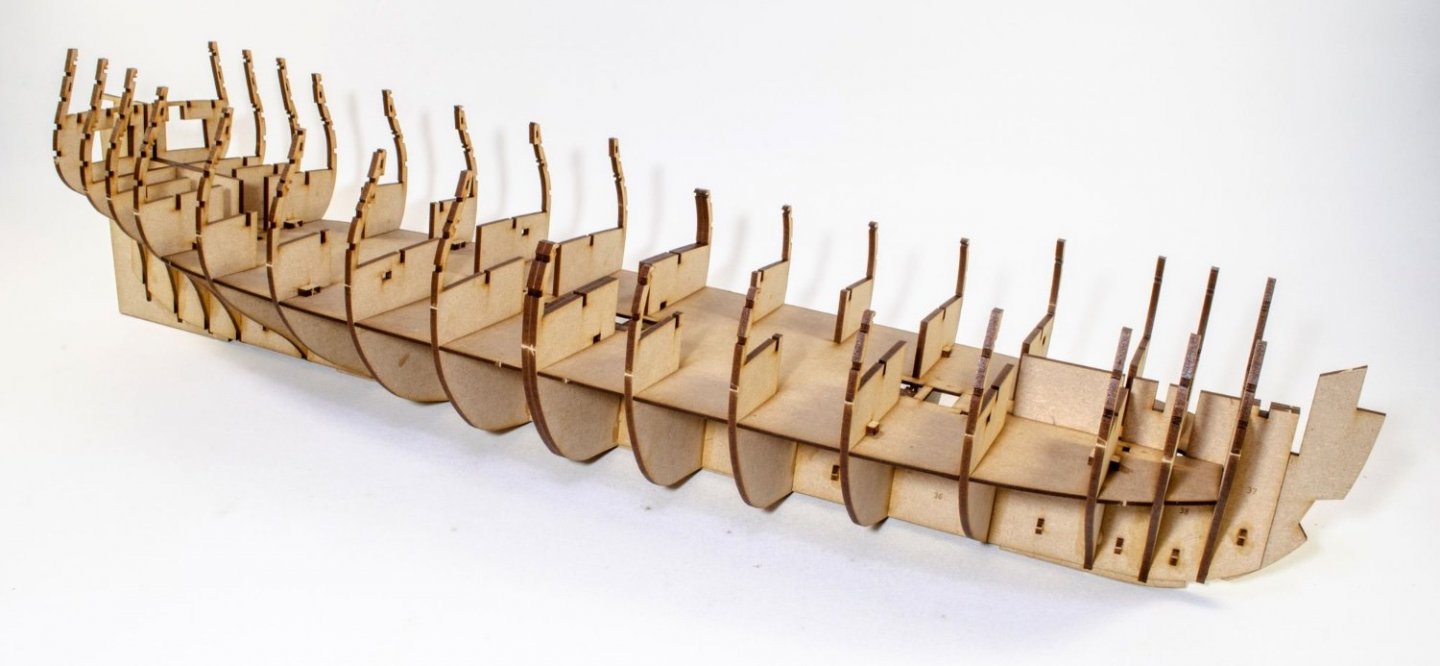
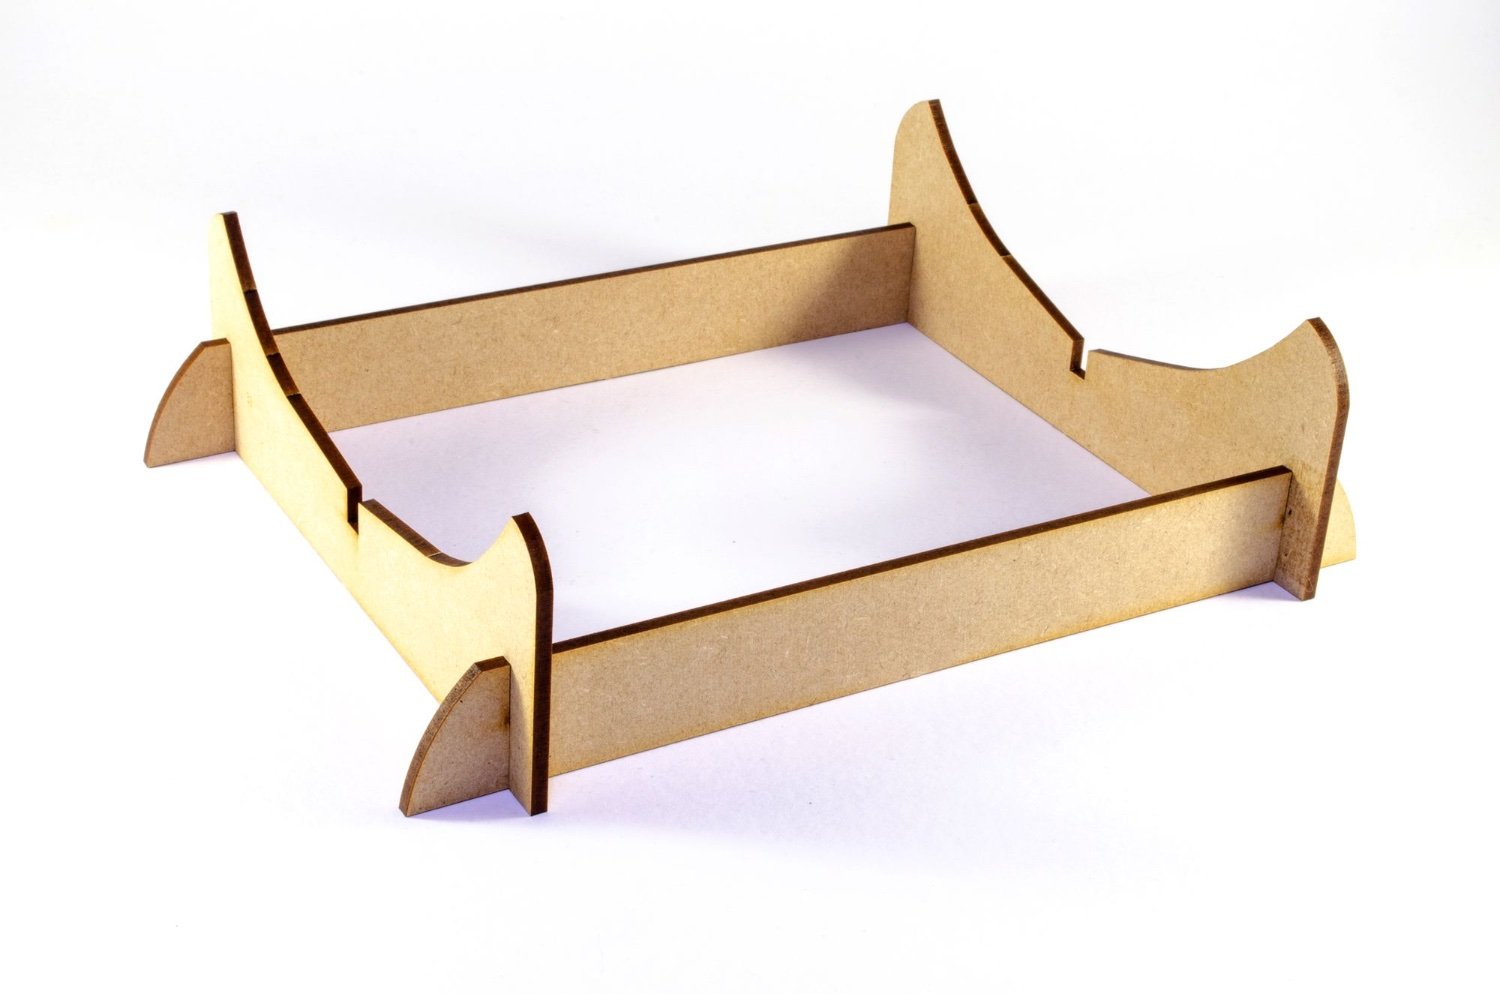
Work has now begun.
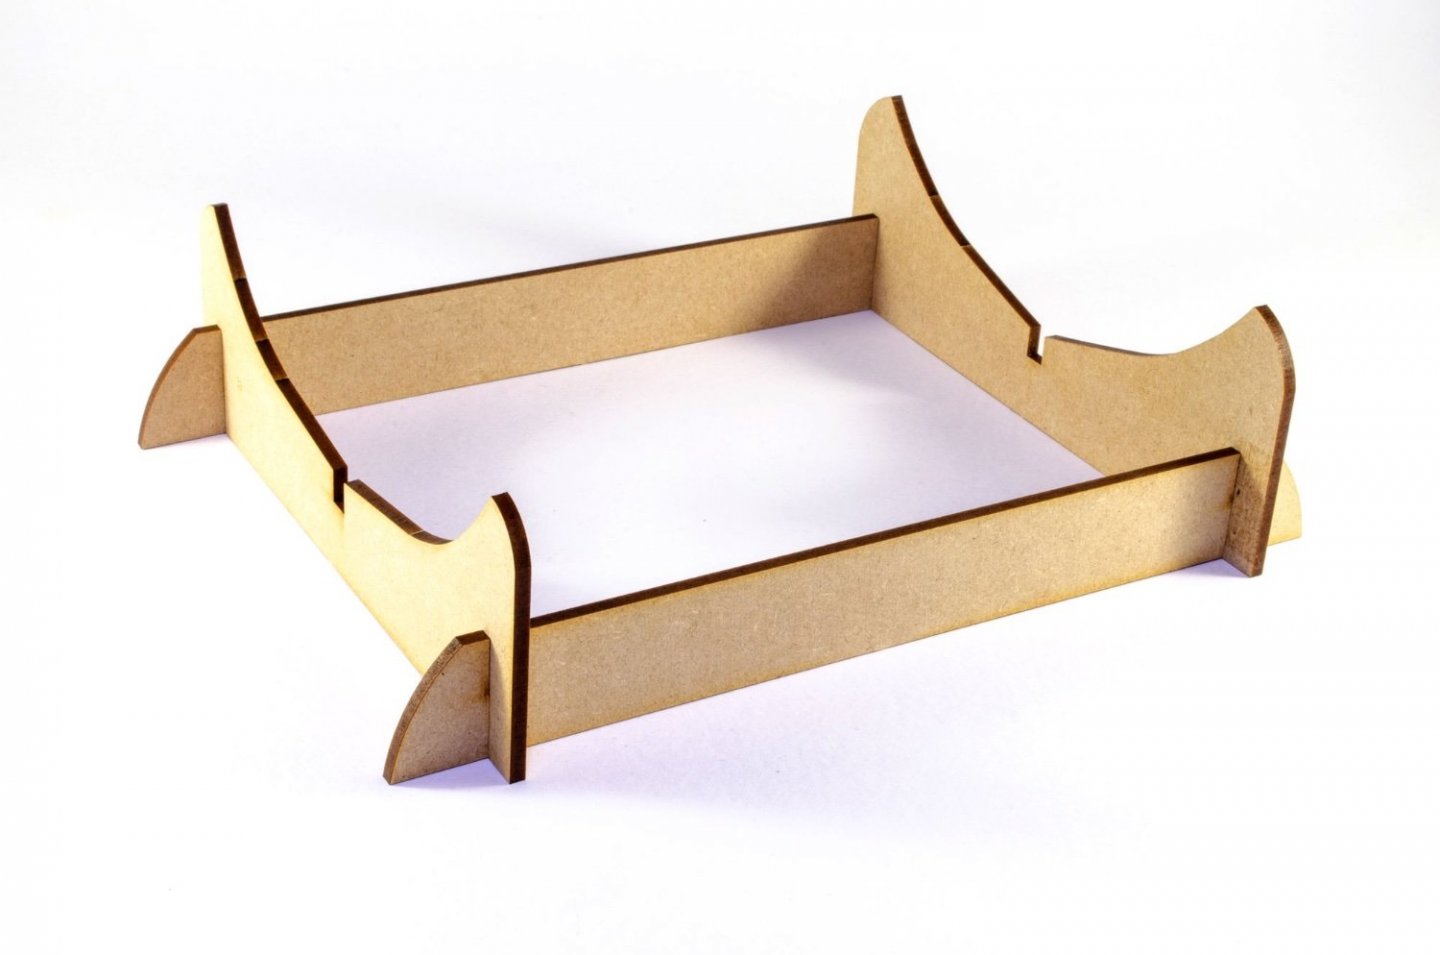
First, the obligatory disposable cradle shot 😃
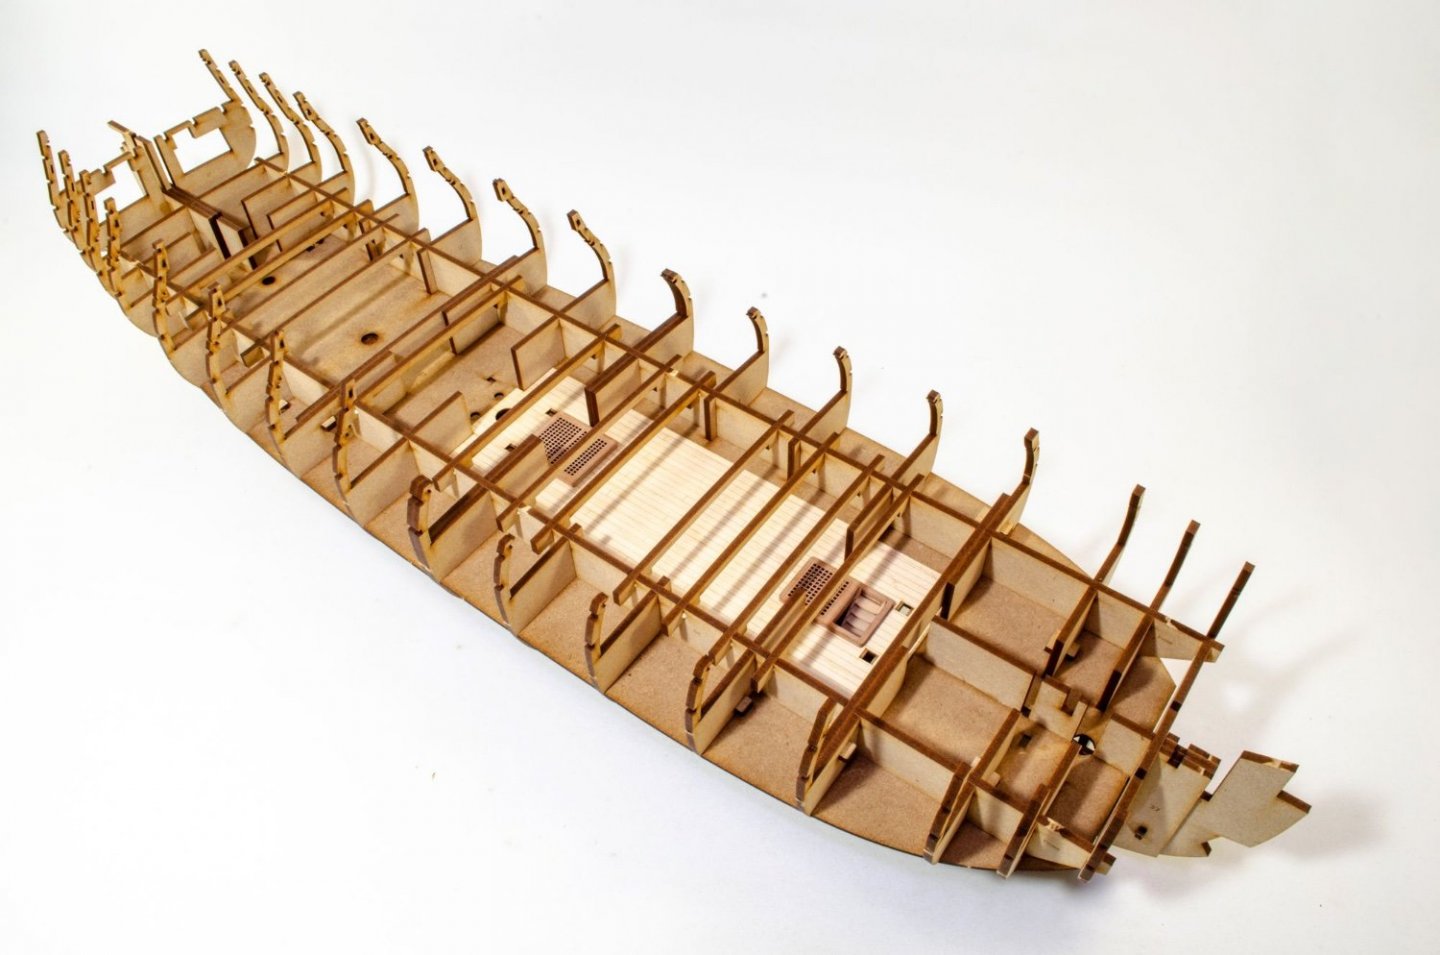
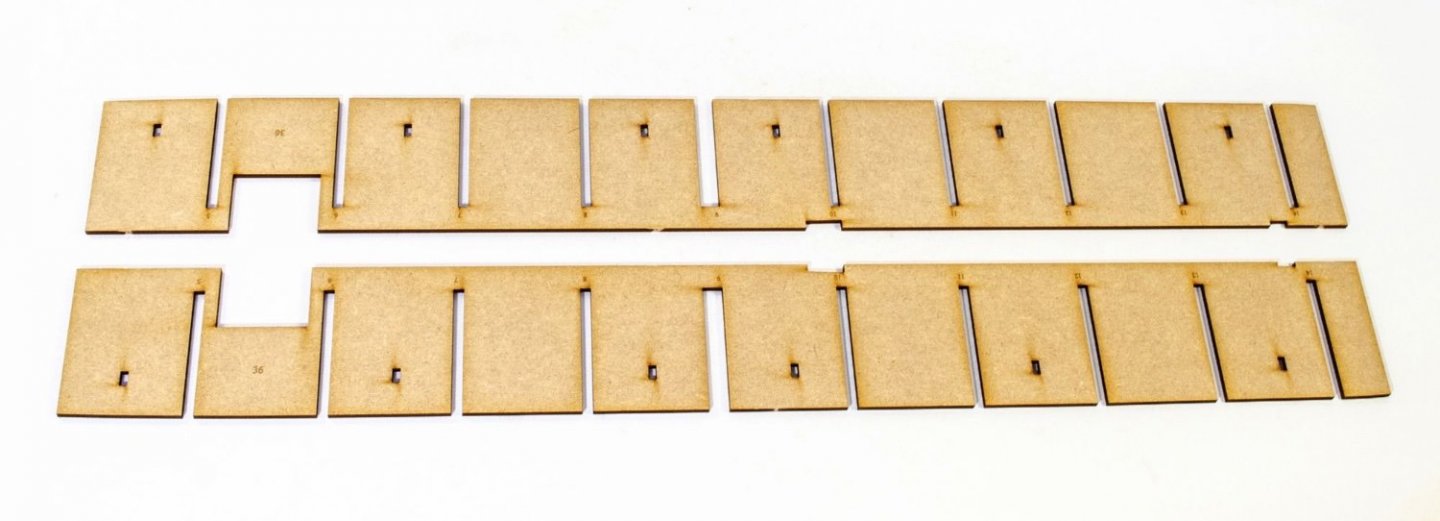
Indy certainly isn't short of bulkheads. There are 18 in total, with #9 midships being a double layer bulkhead. There are no bevel marks on Indy. They simply aren't needed for a kit of this level. Fairing will be an easy task. All bulkheads are 4mm MDF, as is the keel.
The keel slots are numbered too so you get things in the right place.
Indy is a strange build in that practically all you see in this update, with the exception of lower deck/orlop detail, can be assembled initially with no glue. All bulkheads you see being added here are put into position as such.
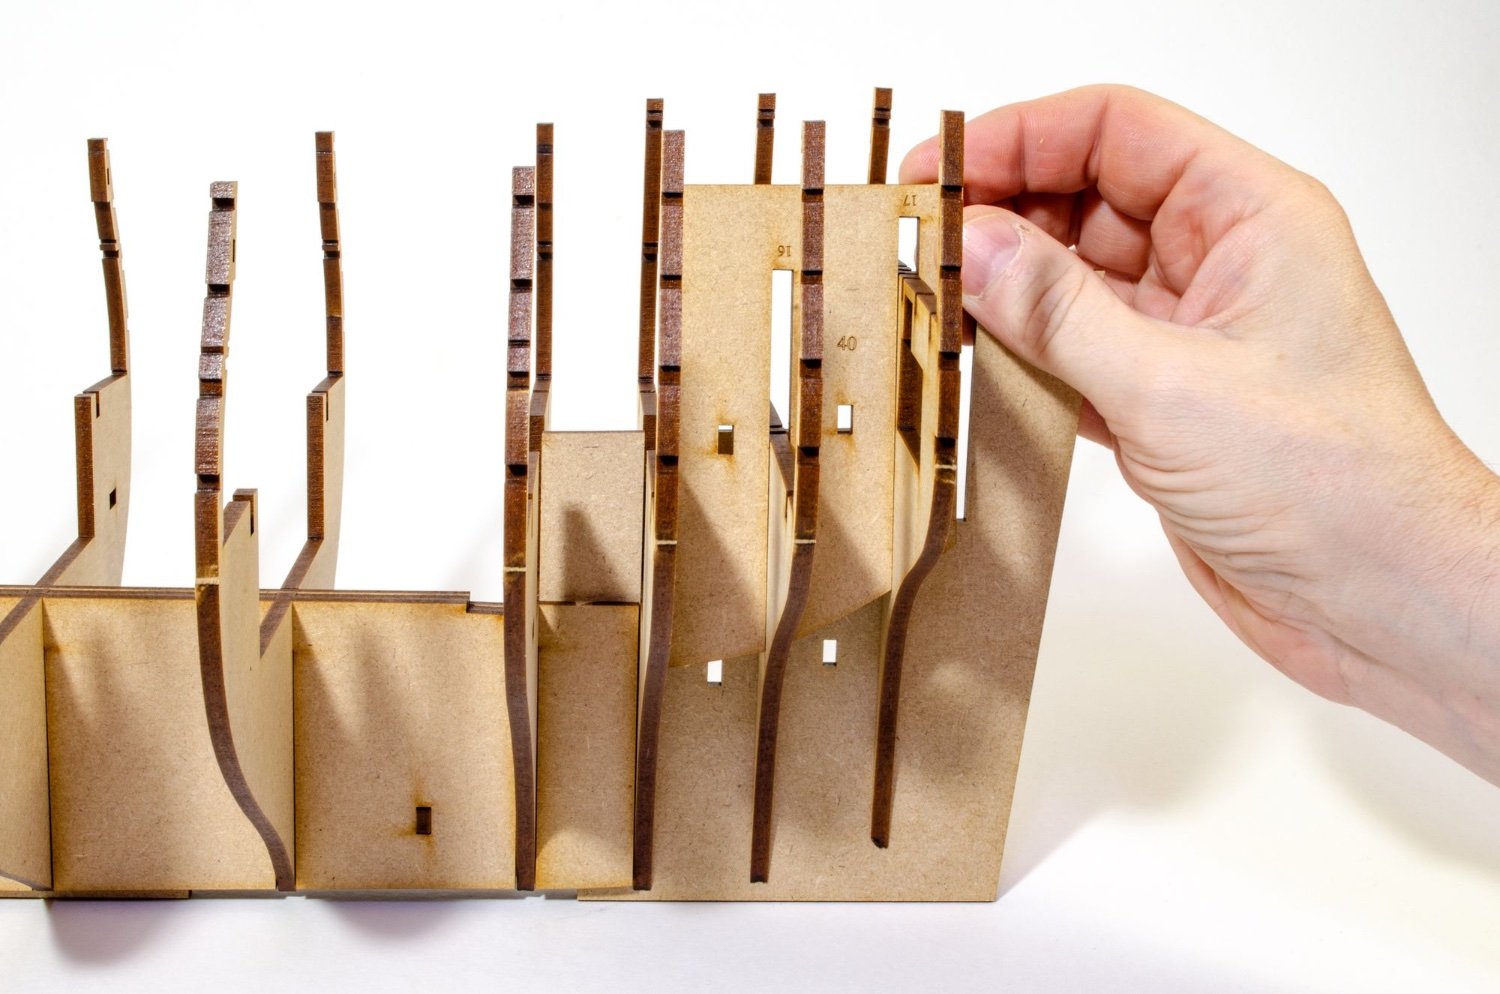
Now this is where the magic happens. Once all bulkheads (apart from #1, #2, #15, #16, #17 and #18 because they aren't needed yet) are slotted into their position, these keel doublers are added, bulking out the keel to 12mm! What these do is to hold the bulkheads in their exact position. while pegs slot through the holes to lock everything into position. Zero glue apart from the pegs themselves.
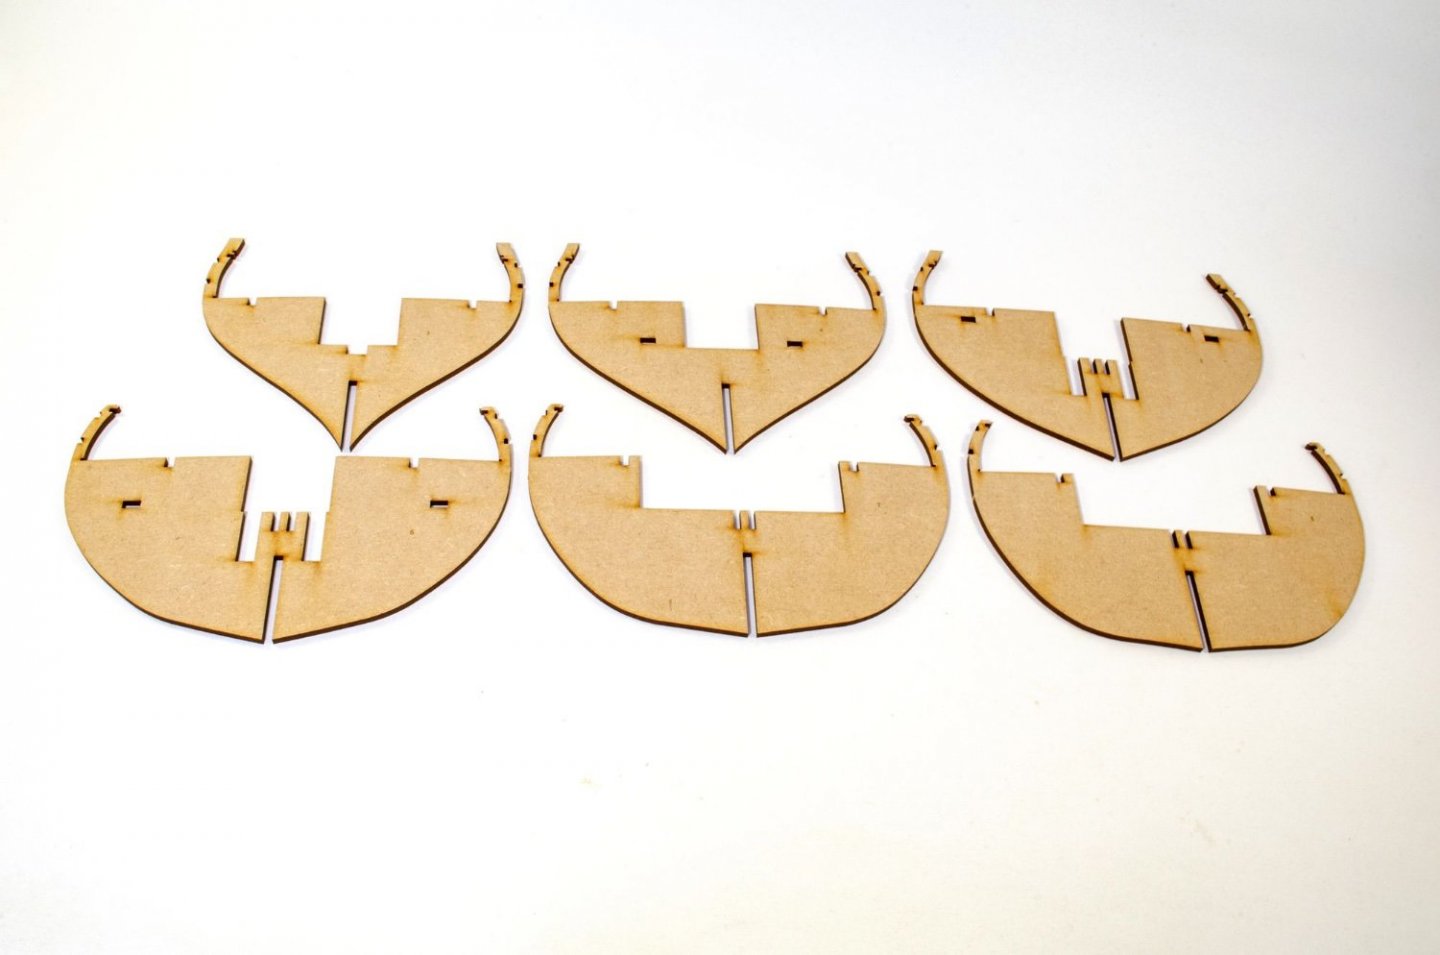
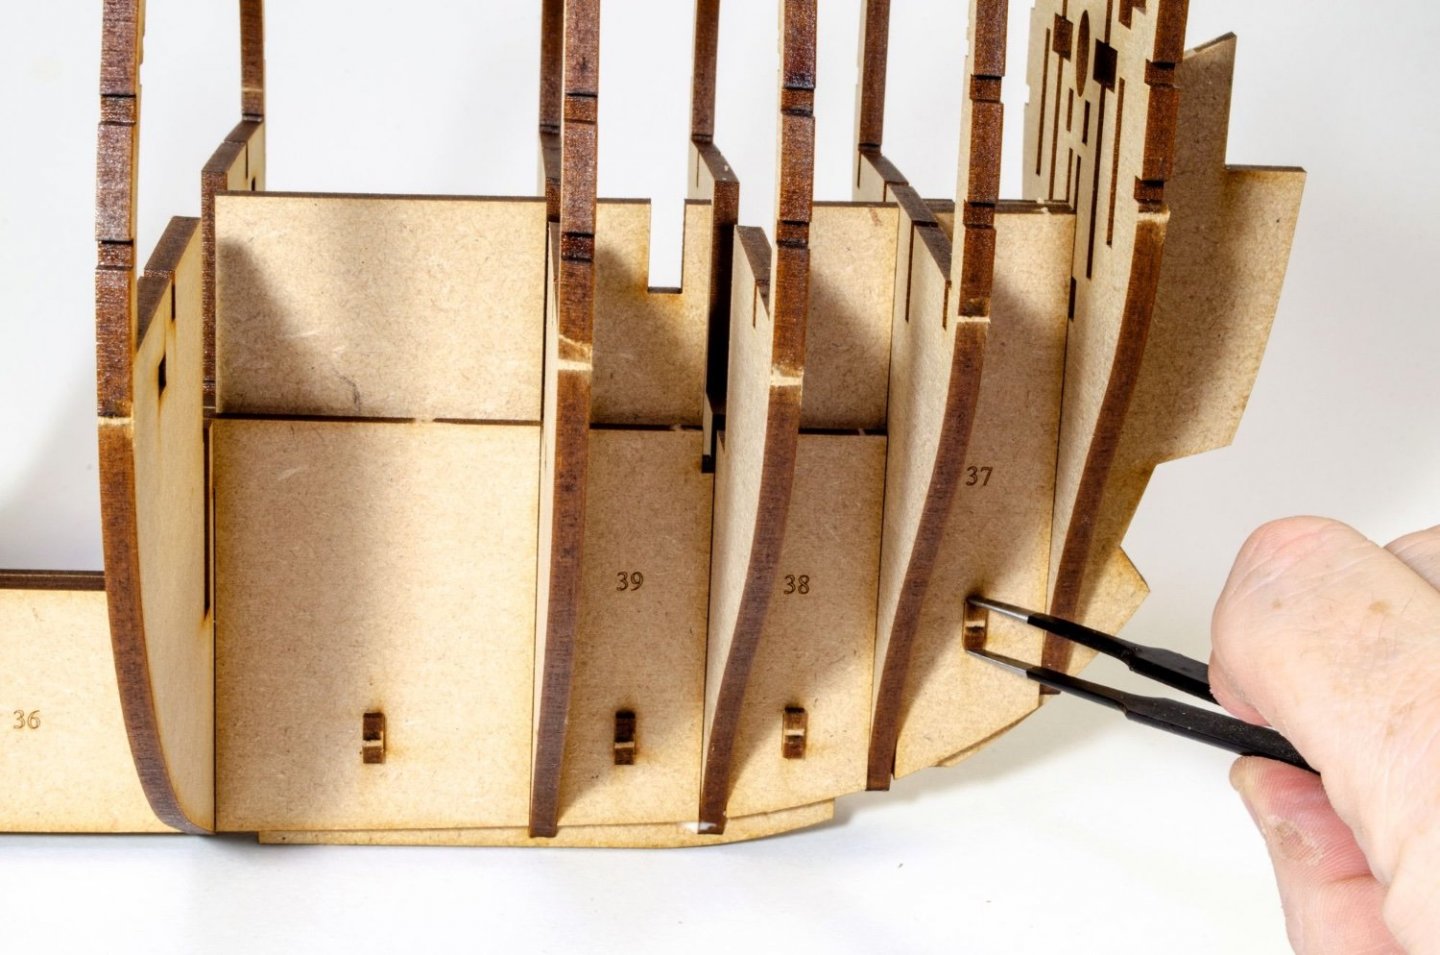
Bulkheads #15, #16 and #17 are now added because the fairing parts will now lock them into position as with the other bulkheads.
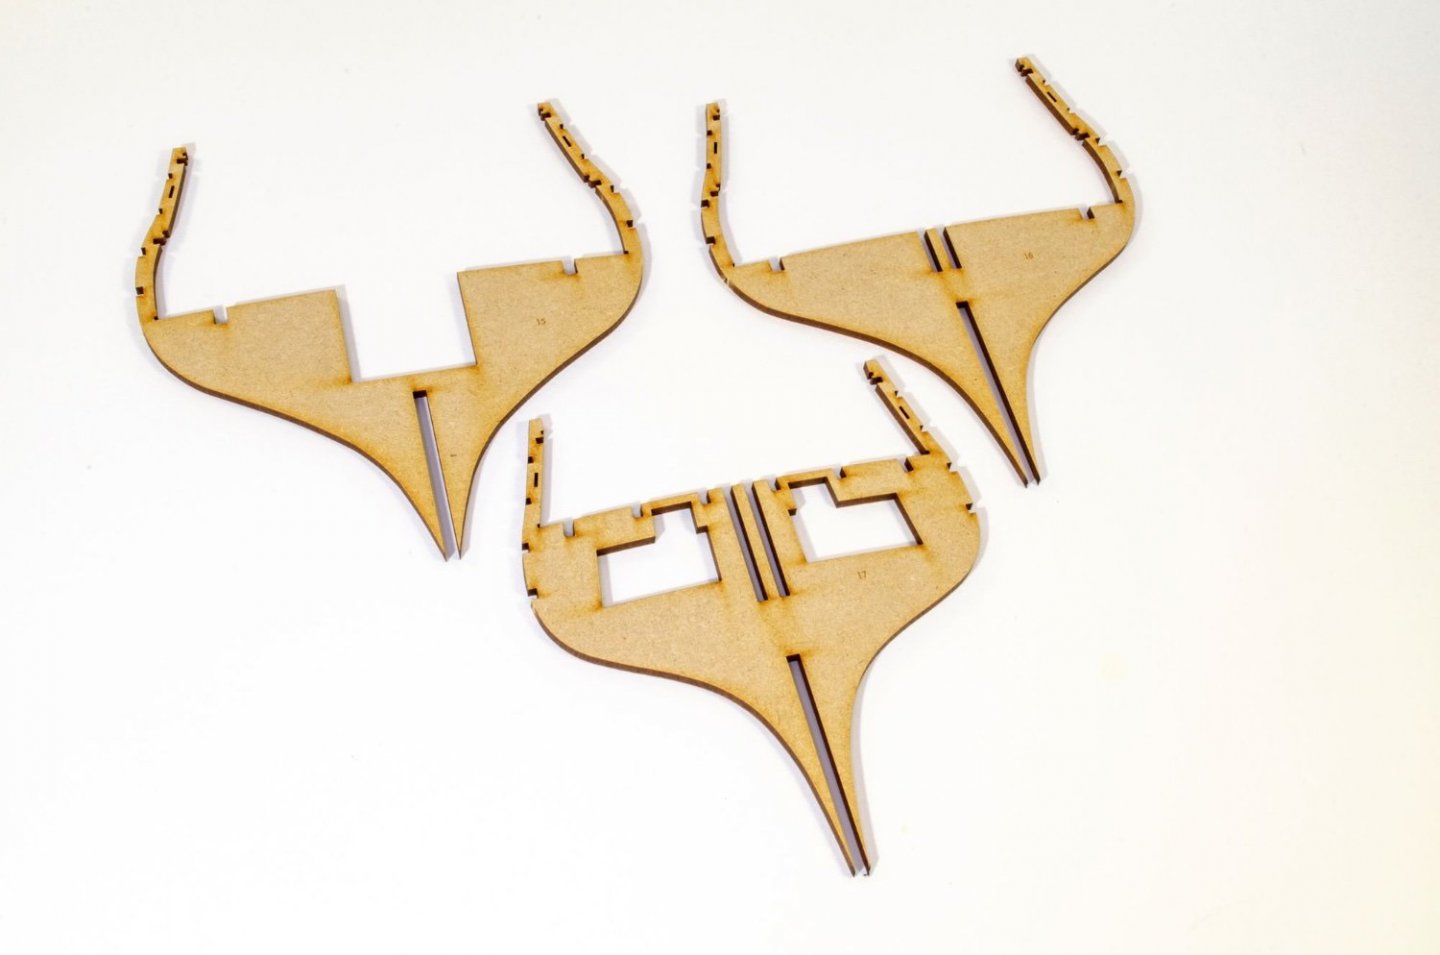

Bulkheads #1 and #2 are now fitted, but NO GLUE at this time. The fairing patterns are now added. You will see these as No.s 37, 38 and 39. Like the others, these are pegged into place.
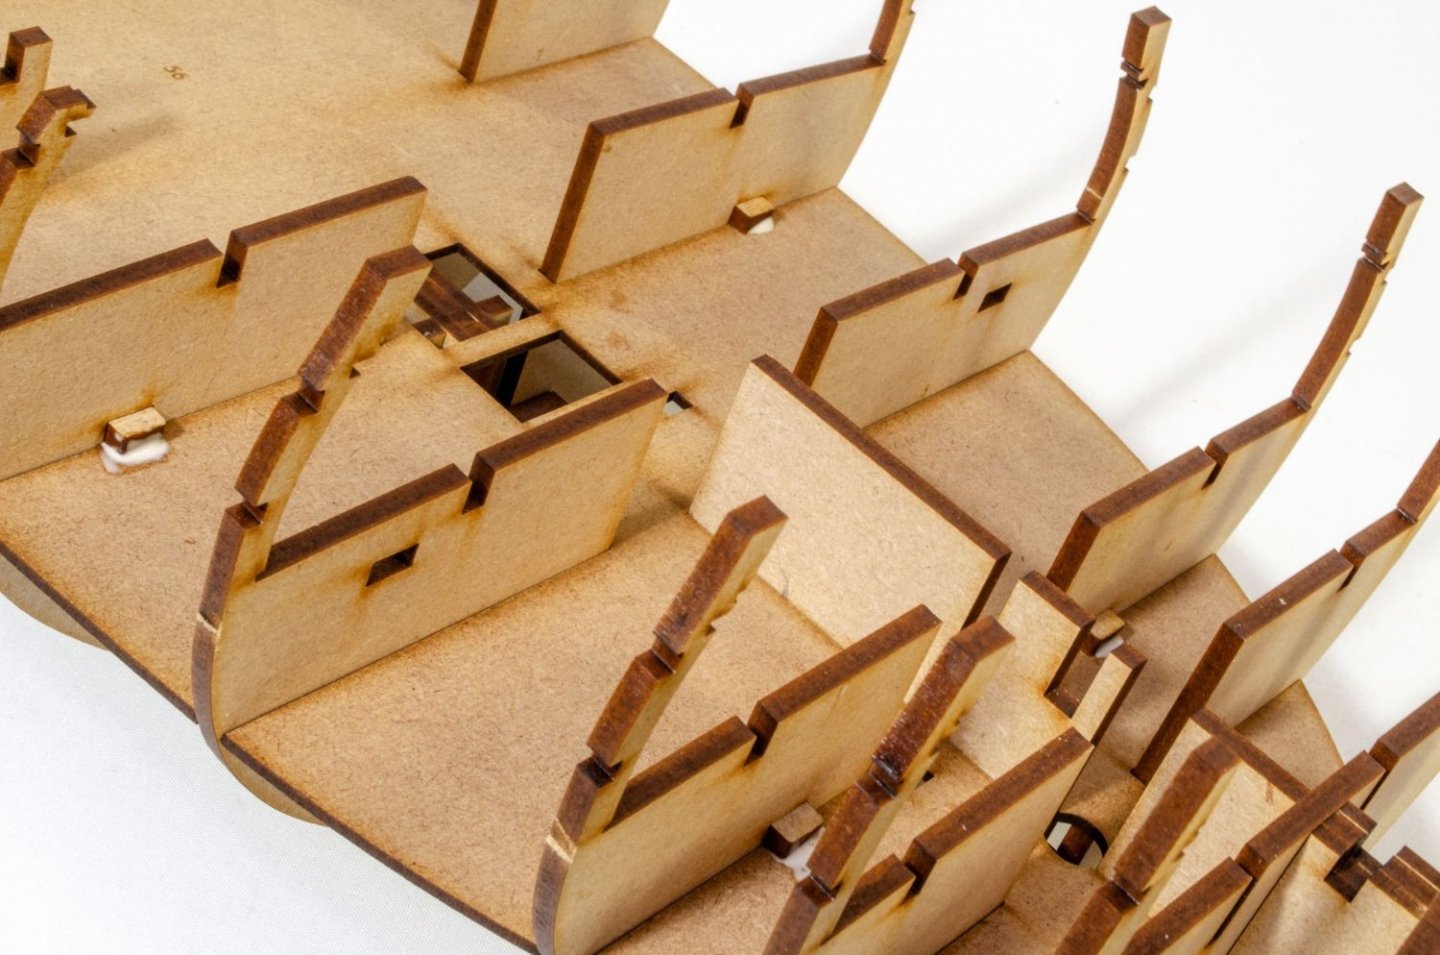
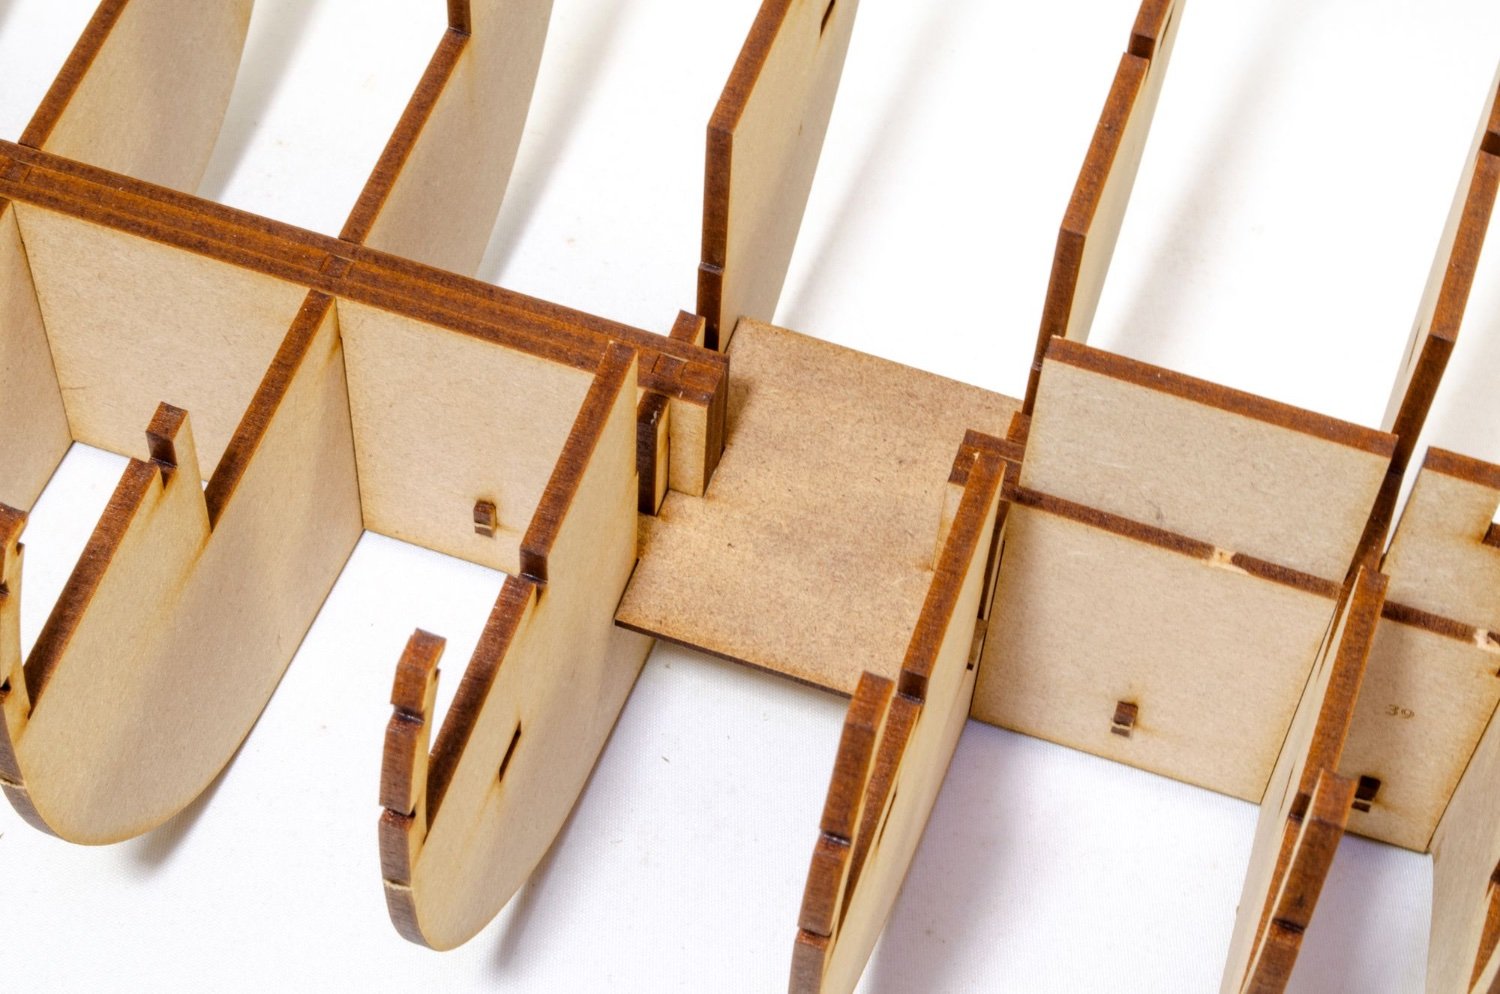
Is there an orlop deck? There certainly is. This is it 😆
Nothing more is needed. In fact, you'll probably not even see this without an endoscope. This part is glued into place.
The 3mm MDF sub deck is now fitted. Care needs to be taken around the bulkhead ears. You should have no problem....just don't go charging in. To fit this, I ran some Titebond down the 12mm wide keel centreline. Nothing here needed to be weighted down or pinned. It fit perfectly with a reassuring push.
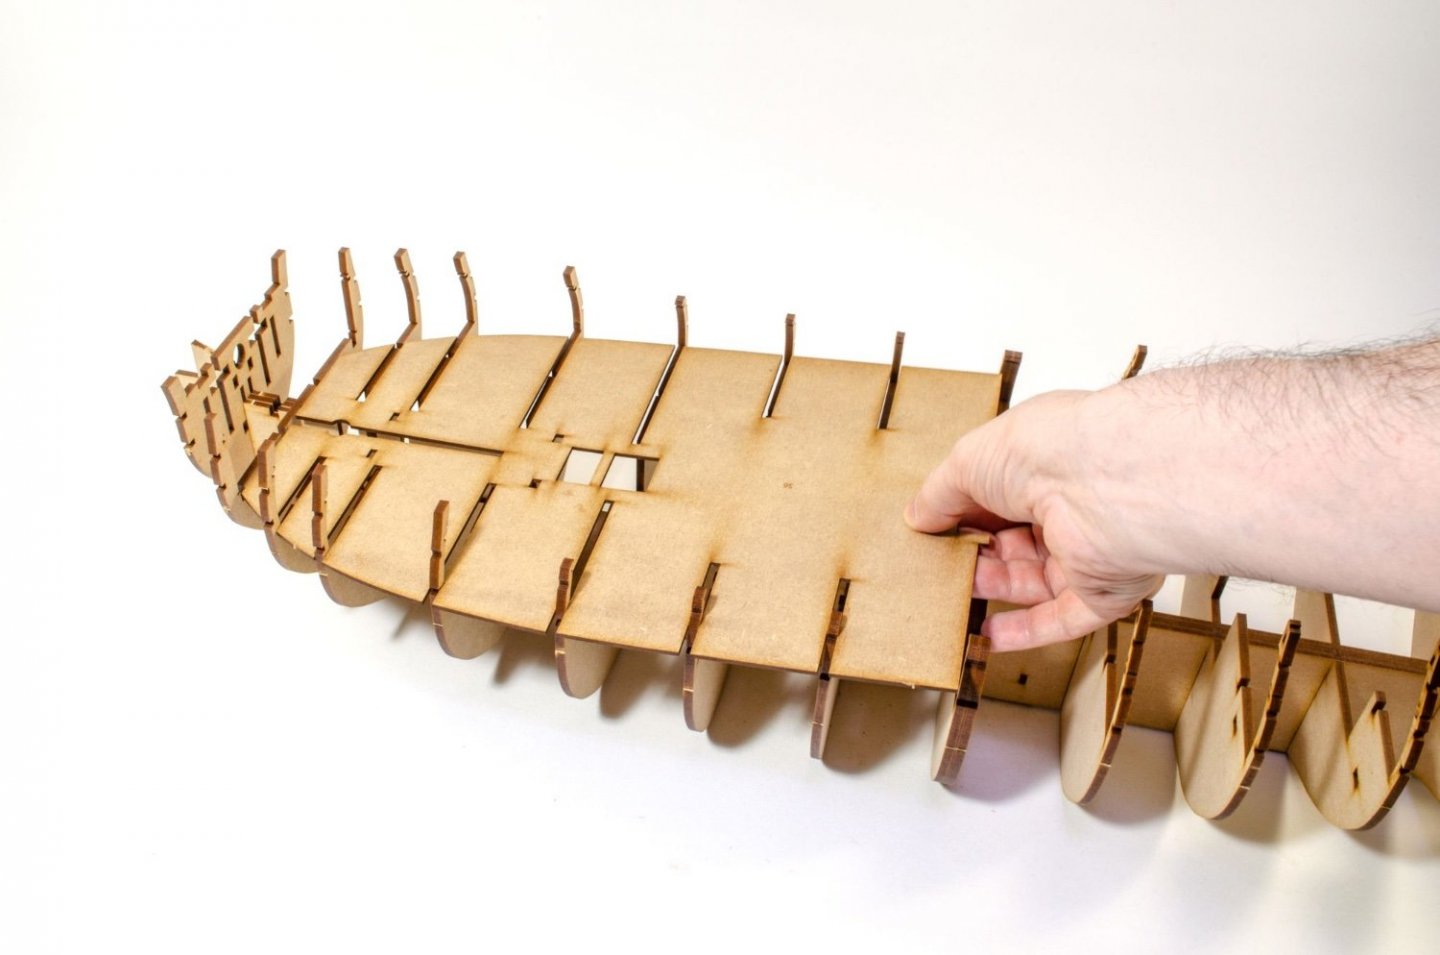
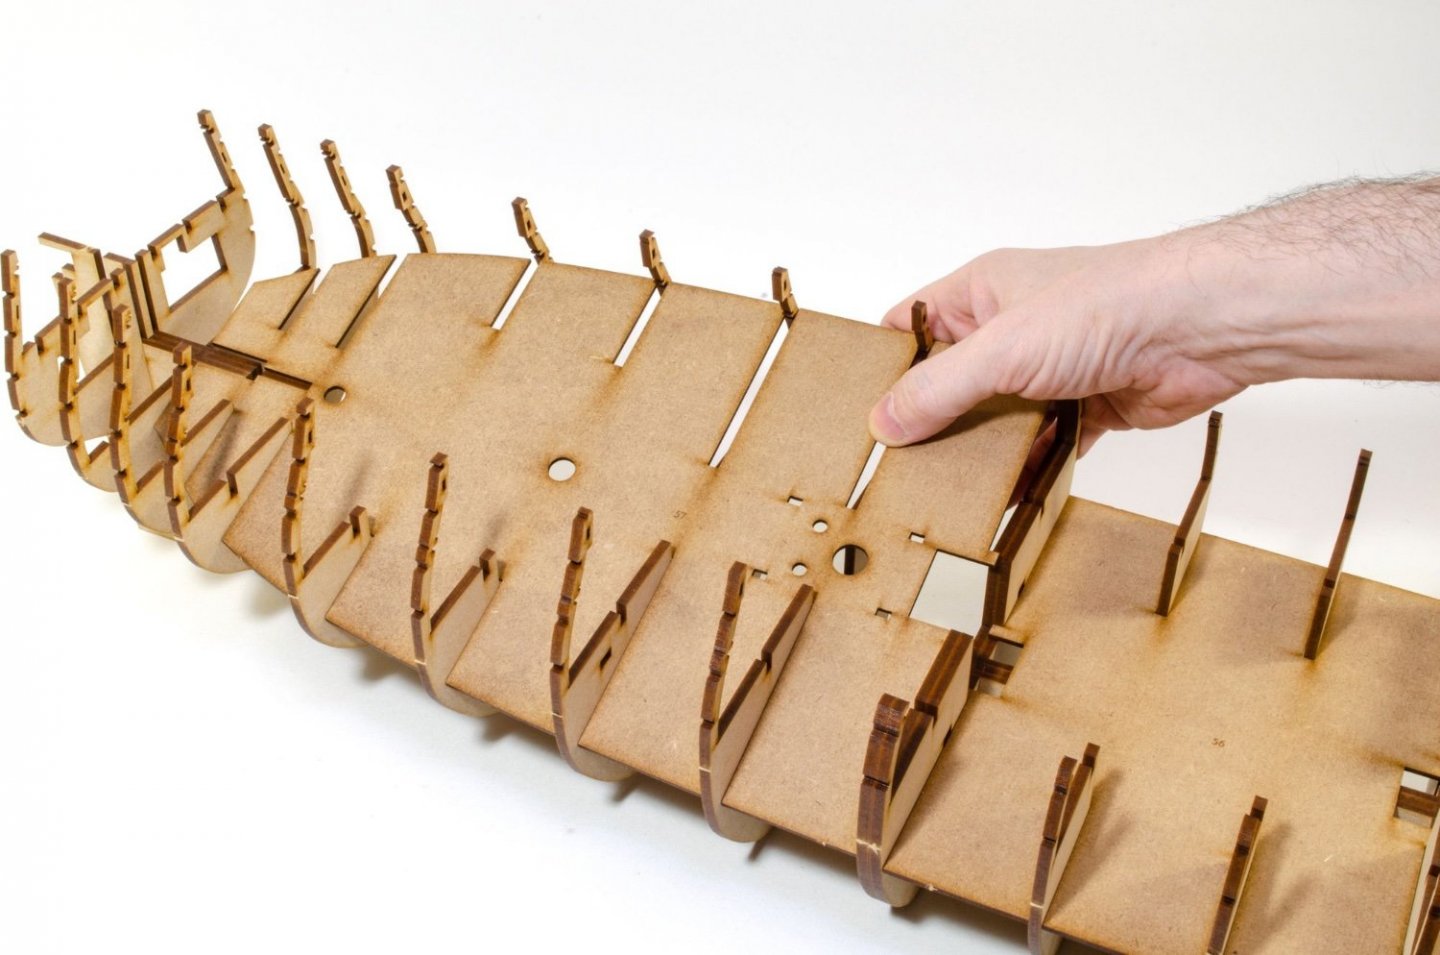
Pegs are now pushed into position which give a further aid to making sure everything is level.
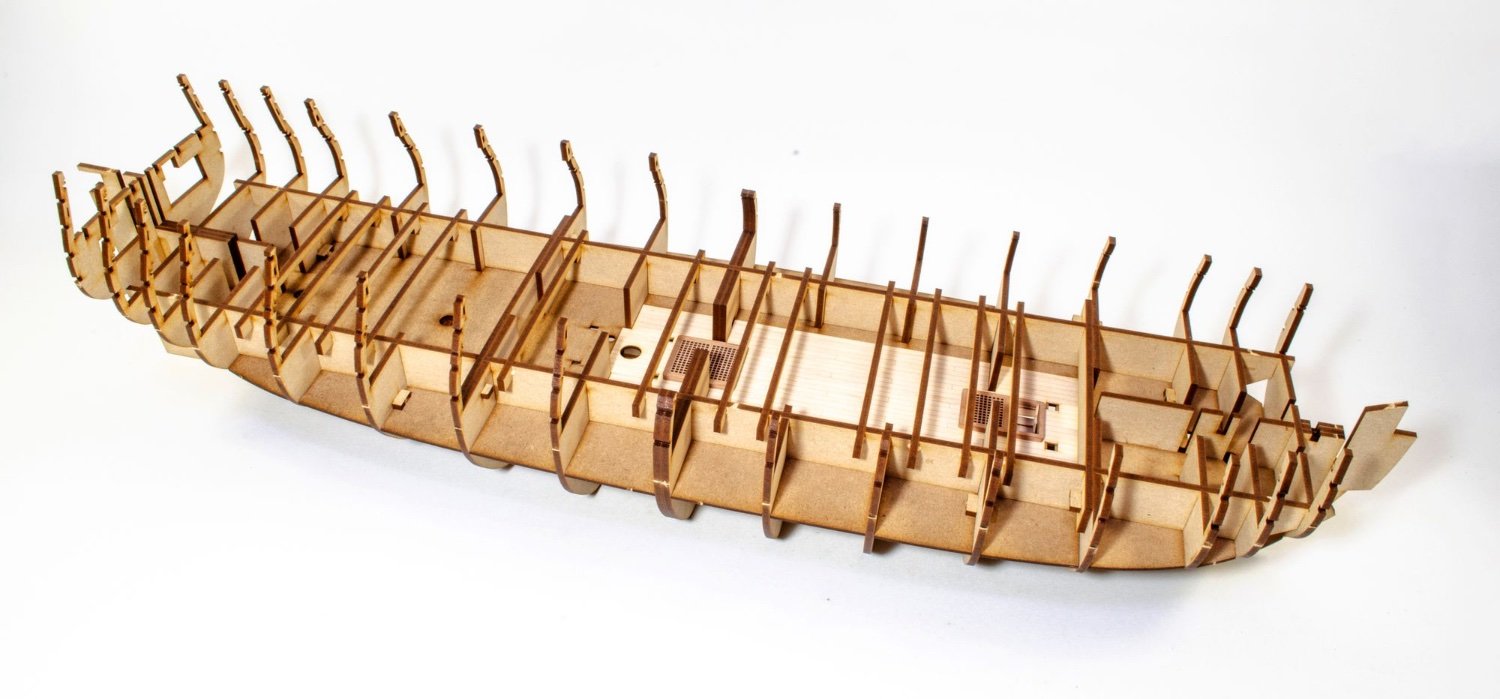
At this stage, things look like this:
- Oldsalt1950, KentM, Ryland Craze and 36 others
-
31
-
 8
8
-
-
-
1 hour ago, Prairie Sailor said:
James, I'd love to see a photo of the full fleet of fishers!
I will do some day, but they are all in attic storage at moment and its more effort than I have strength for at moment.
-
Ok.
We've had no system software changes at all for a while now, and as this seems to be very unusual, I can only surmise that the problem lies at your side.
Please try to clear your browser cache and cookies, then restart your browser. This will force MSW to reload for you and not from a copy stored on your computer. Give that a try and see if it works.
-
I think you should definitely include that. It looks great 👍
- mtaylor, Blue Ensign, hollowneck and 3 others
-
5
-
 1
1
-
Use whatever works for you. There are no rules.
If you use CA on stuff that has tension etc., just use regular viscosity so it seeps into the joint. Use sparingly so the majority soaks in and doesn't look rough. If you get any residue etc., then use a little black acrylic to touch up and hide.
- thibaultron, Dave_E, mtaylor and 1 other
-
4
-
2 minutes ago, RockinBudgie said:
Chris, with the Indy costing around the suggested £1k mark, is there any way you can afford to sell it on PayPal’s ‘Buy in 4’? Just that that would make a massive difference for us who are ‘financially challenged’ lol. Really, really, really want this one 🤗 and can’t wait for its release 🤞
That's PayPal who do that, and not Chris. Depending on your region, that option WILL be available to you.
When you choose that option, Chris is paid in full, and your contract is then with Paypal.
- hollowneck, mtaylor, BobG and 6 others
-
9
-
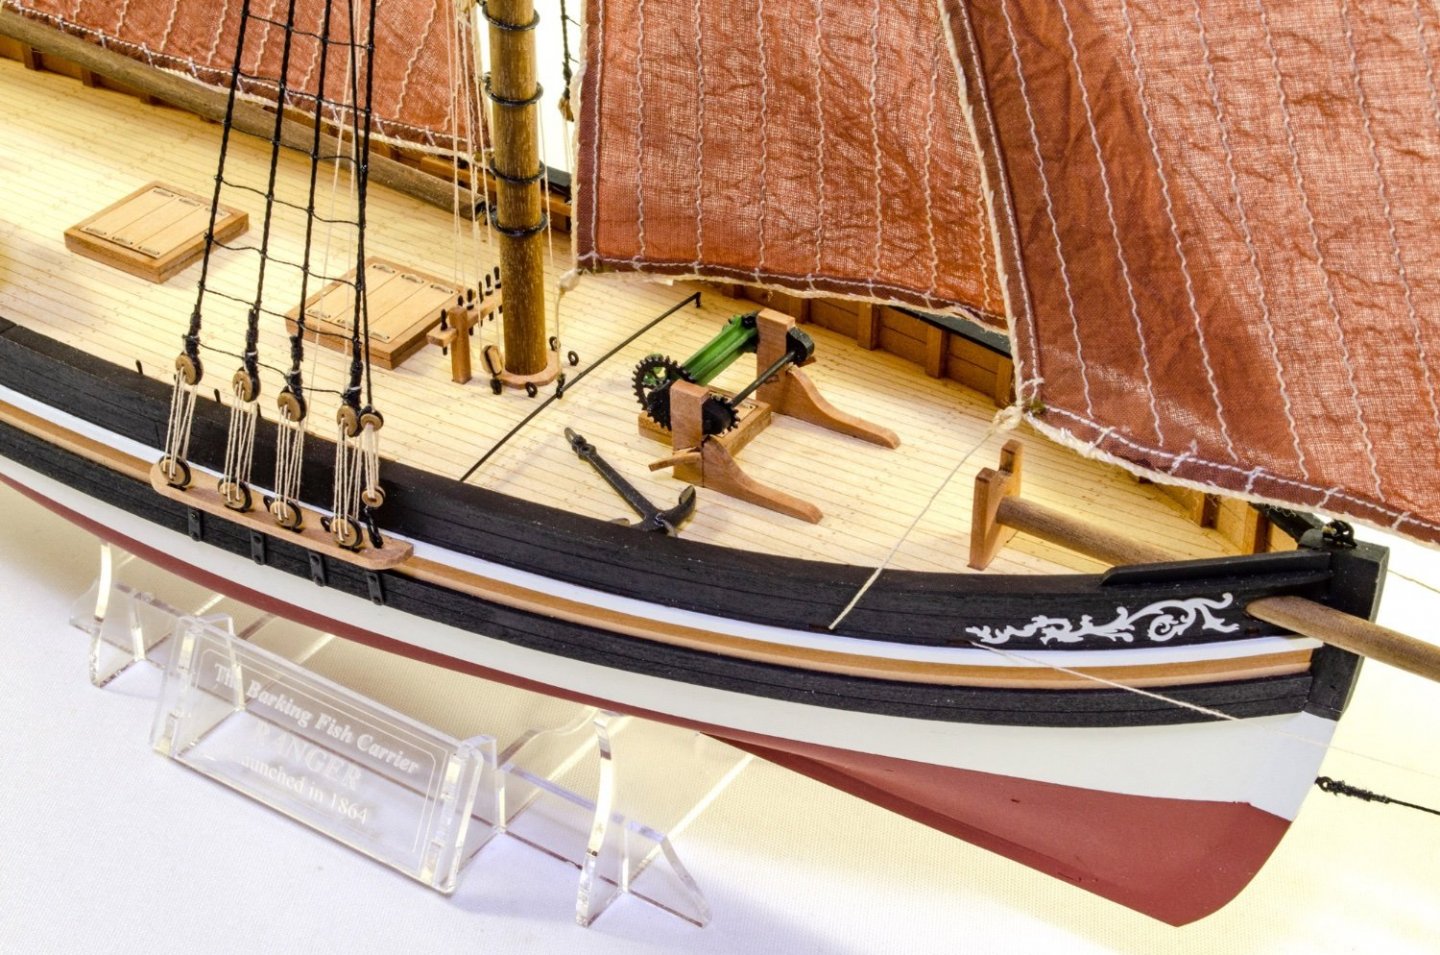
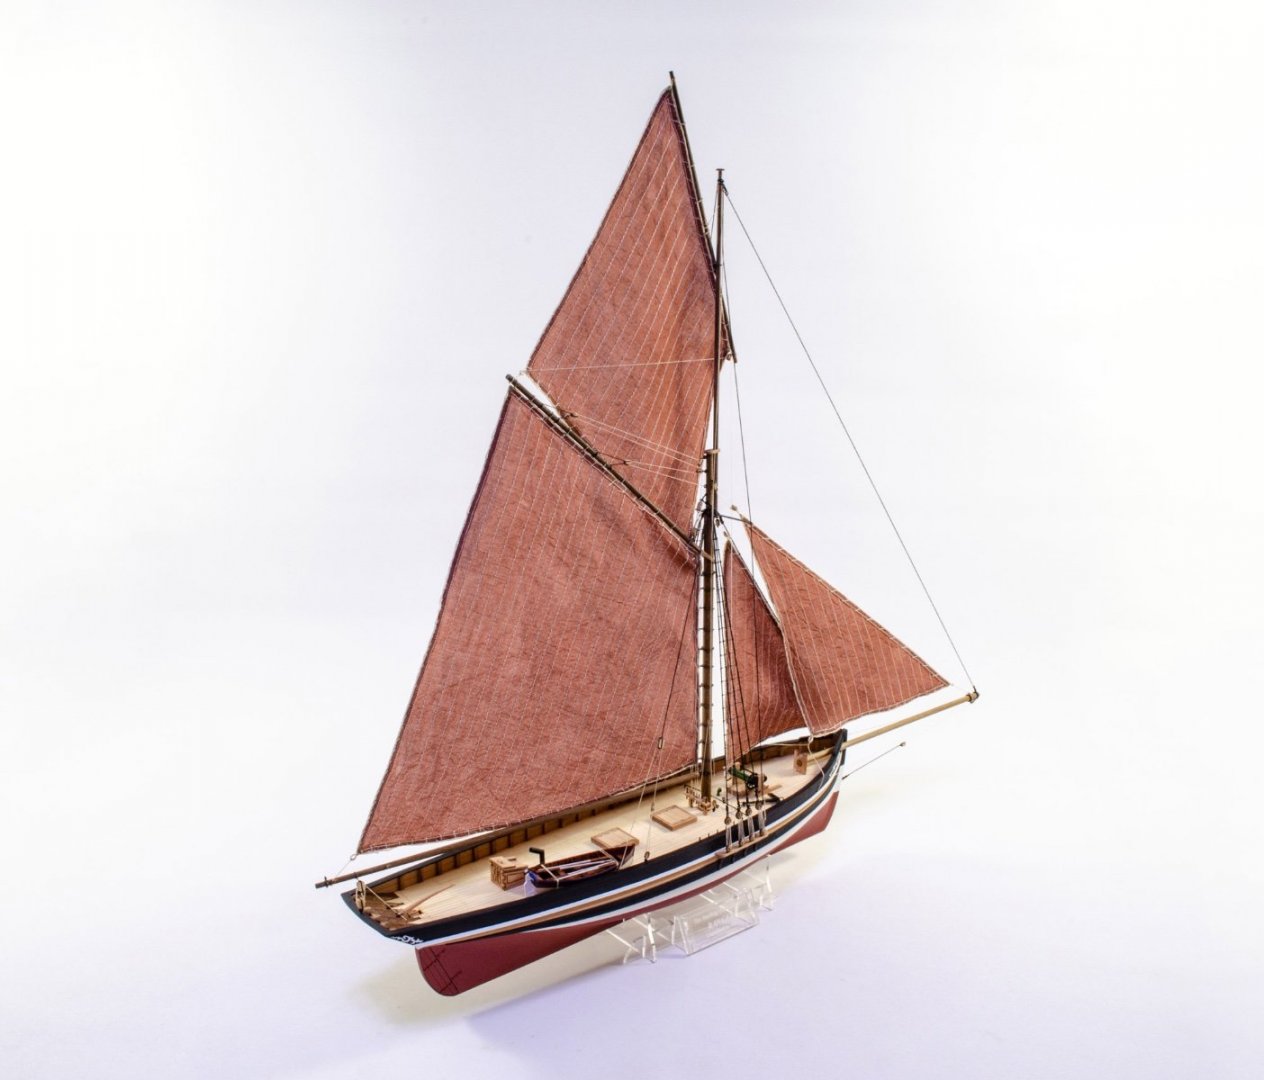
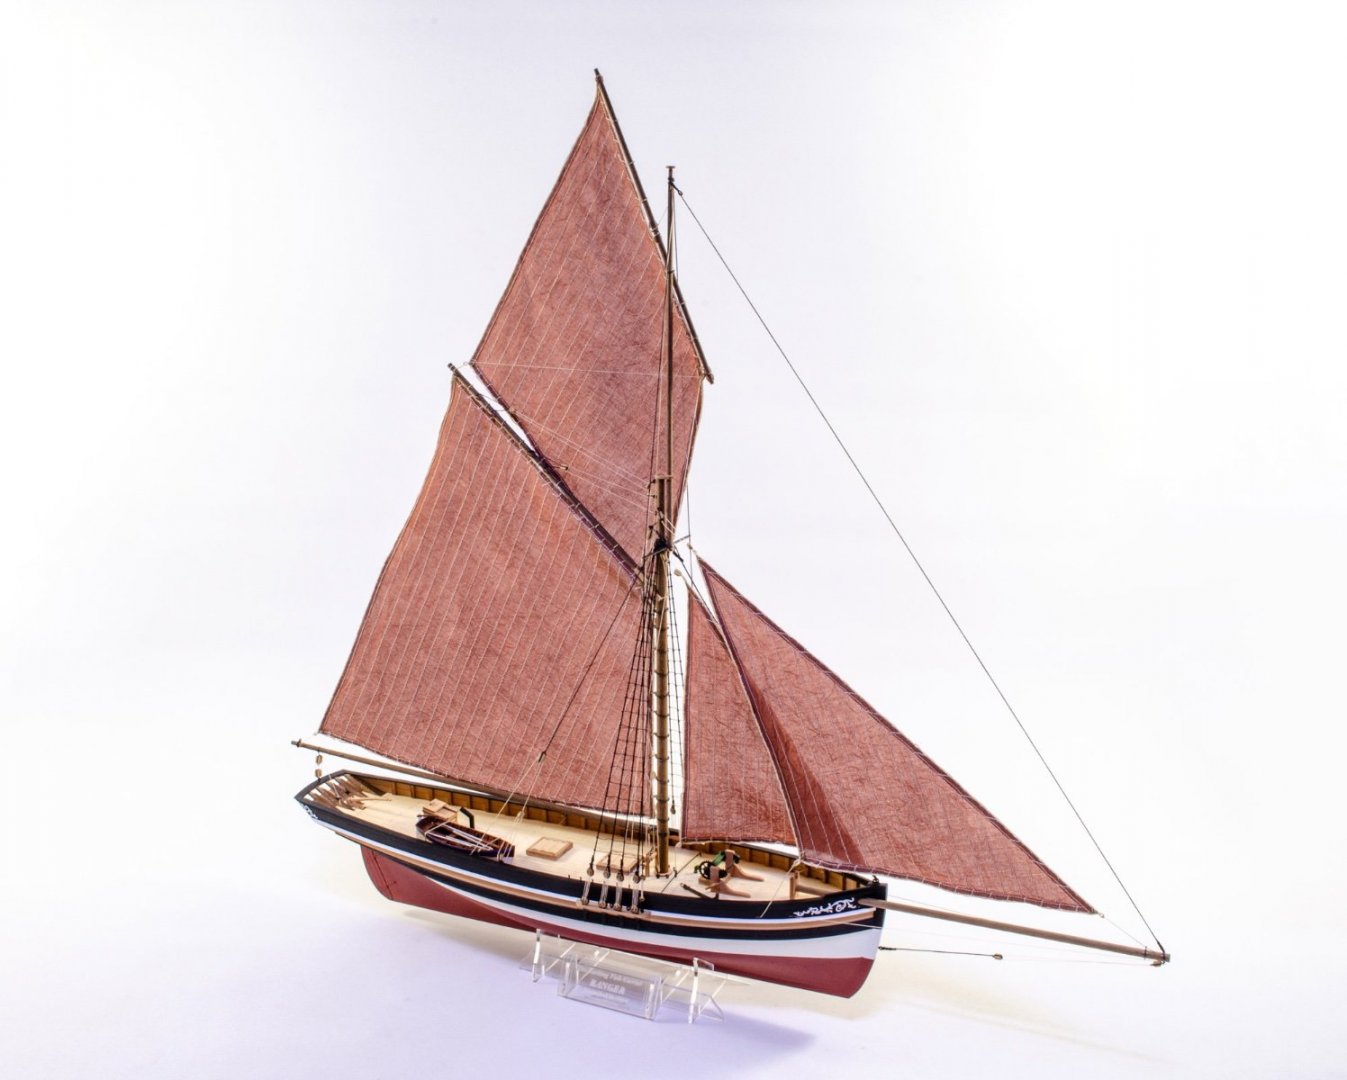
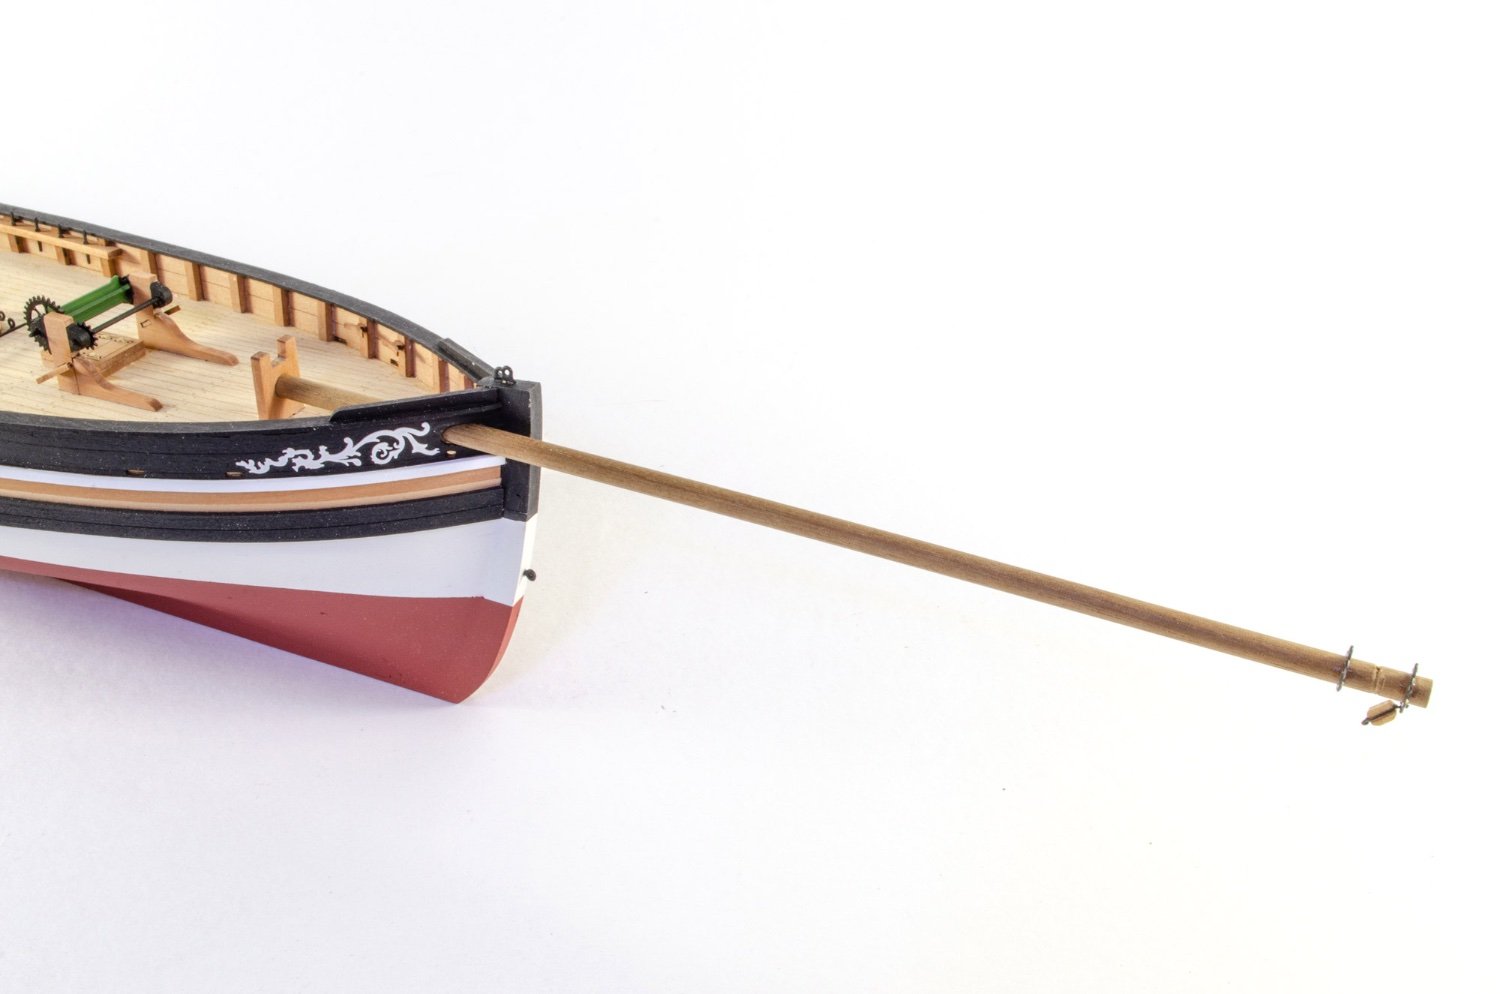
Ranger is now completed. It's taken me well over 2 weeks longer than I expected due to illness, hospital etc!
This has been a beautiful model to build and very, very easy. Nothing here is at all taxing and she's perfect for anyone who's never built a model before, as are all the fisher kits. I do very much like this one though. I do find them easy after doing six of the fishers though! Anyway, here we go. These photos are very self-explanatory.

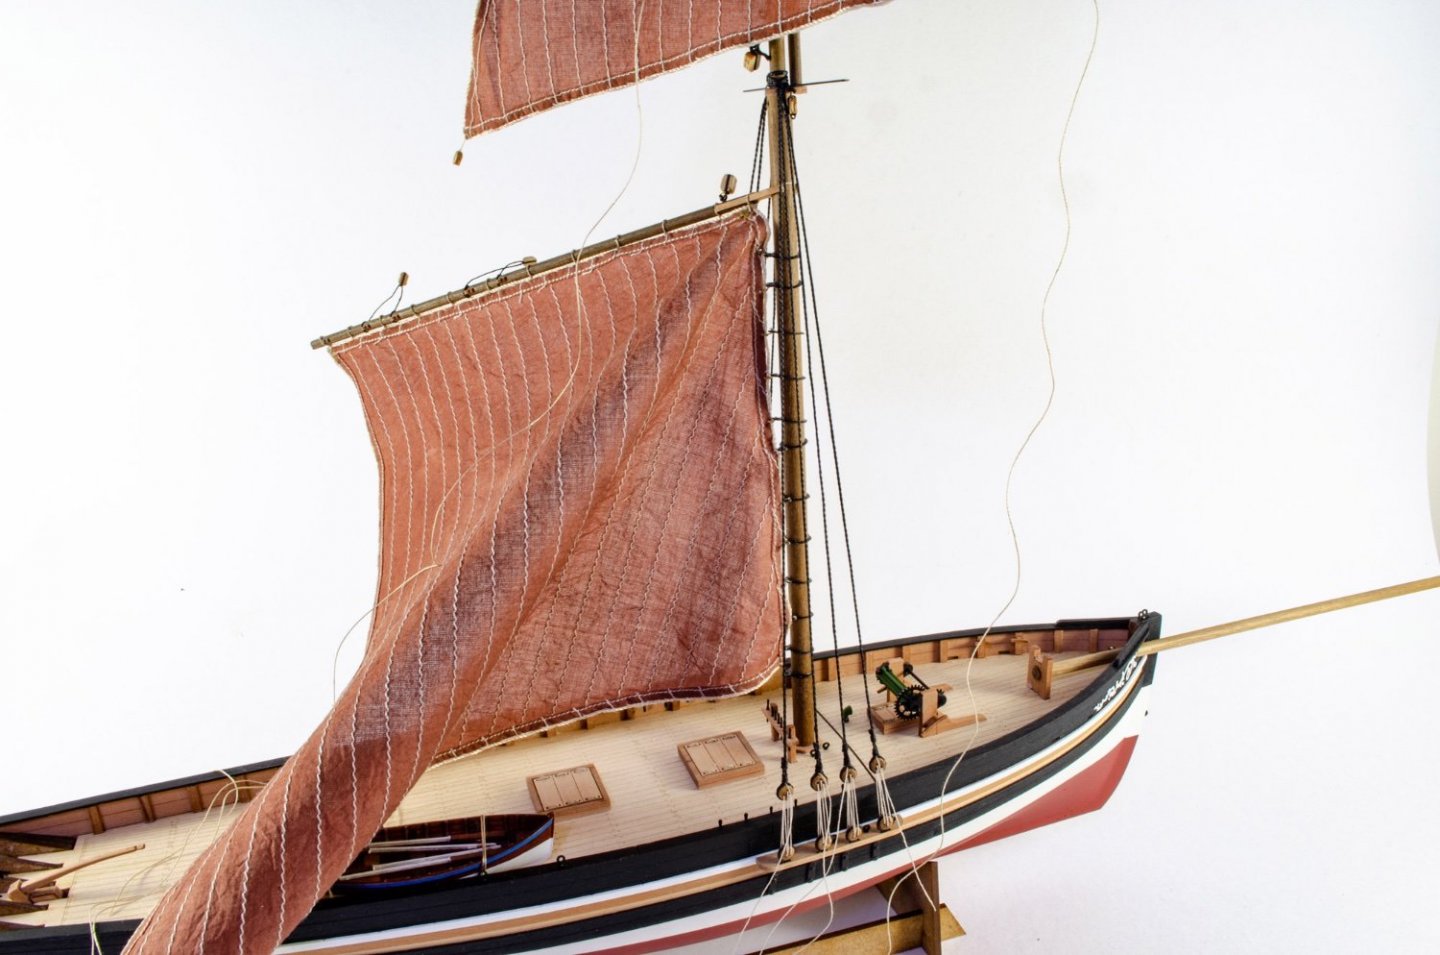


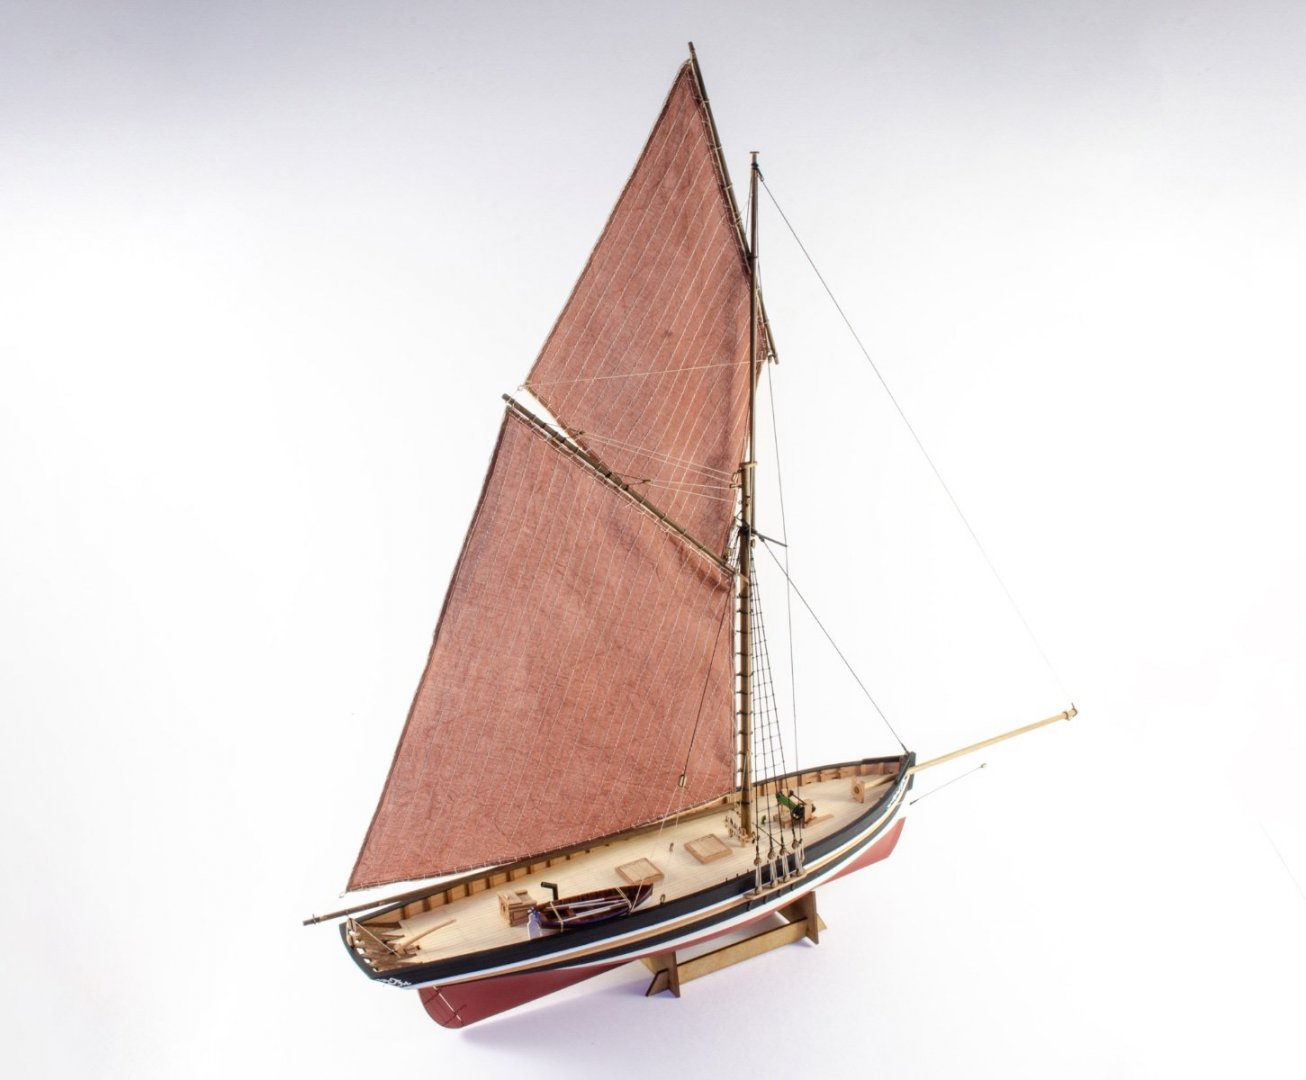


Here she is, now finished. The little boat on deck does come with the kit too.
-
-
Also remember, the decor, pillars and relief will be ochre on a black background.
- mugje, Ryland Craze, Dave_E and 10 others
-
13
-
7 minutes ago, mtaylor said:
Interesting thoughts about doing the model and a separate rigging kit. Looking at the Sphinx, there's not that much in the box but yes it could be a "part 2 of the kit" thing. I'm looking at this from a builder perspective who's display area is limited and thus, masting and rigging from here on is out of the question. But, if for manufacturing, packaging, etc. reasons it's included, so be it. I'll just stash those things for now and if the time comes I have more room, I'd consider adding the masts and rigging. I learned a long time ago that there's such things as a "build and forget" model.
Out of a potential 16kg pack, the mast/rig stuff isn't going to make much of a dent in things.
- Glenn-UK, hollowneck, chris watton and 3 others
-
6
-
1 minute ago, Vane said:
I was just thinking about all the new techniques and materials you have introduced in the Vanguard models. Most manufacturers seem to stick with ply, walnut and white metal etc. Has there been some kind of resistance to use new materials in woodship building?
Using resin for canons instead of moulded white metal or lathed metalbarrels significantly improves the details and quality. But do people argue its not "true" if not everything is done in the traditional materials?
A couple of years ago I started building plastics again and discovered that there is alot of useful stuff that would could be used to improve the quality of woodenships if not everything is done in "wood". The world of plastics has evolved significantly over the years with different paints, resin, 3d printing, wheathering techniques etc.You'll see a few new techniques in Indy too, such as for the construction of the cathead knees. You'll see more when that time comes
")
- mtaylor, Dave_E, thibaultron and 8 others
-
11
-
-
9 minutes ago, Ouija2006 said:
Many thanks
")
No probs, John.
- chris watton, hollowneck, mtaylor and 2 others
-
5
-
12 minutes ago, Ouija2006 said:
What is it's length in millimeters?
Thanks!
Hull length is around 880mm, I'm told. (minus bowsprit)
- Ouija2006, Old Collingwood, mtaylor and 3 others
-
6
-


HMS Sphinx 1775 by Glenn-UK - FINISHED - Vanguard Models - 1:64 - V2 Kit by Glenn Shelton
in - Kit build logs for subjects built from 1751 - 1800
Posted
This is coming along very nicely indeed!