


James H
-
Posts
5,616 -
Joined
-
Last visited
Content Type
Profiles
Forums
Gallery
Events
Posts posted by James H
-
-
1 hour ago, Jasseji said:
yes but Chuck mentioned something about "technique with very little sanding required" in regards to Char removal, i was wondering what he meant by that
")
As well as removing char, you also need to smooth out the rough surface that the laser creates. I can't see anything other than sanding or scraping which will magically reduce any workload on char removal. Even if you could dissolve the char, the rough surface would still remain.
- chris watton, Gregory, mtaylor and 1 other
-
 4
4
-
18 minutes ago, Jasseji said:
Boring Conference Calls can be used for other stuff as well:
Unfortunately Chargate has it's Victims too (repairable tho)
@Chuck in UK Glenn's Thread you mentioned about some technique which requires very little sanding
Just use a 15cm steel rule (or similar), wrapped in 400 grit paper. Take your time.
-
29 minutes ago, Jasseji said:
I would never ask for the files and i didnt, my question was more about ordering it ready-made but in pieces
Anyway, i will try to correct that, i do have another idea tho for the future if it doesnt turn out the way i'd like to
These things are ordered as single pieces after the 3D guy sculpts it, then moulds have to be prepared.
To create a set with separate parts would probably cost you more than a Sphinx kit due to the work involved, all the separate moulds and also the casting.
-
-
Only just stumbled on this build, so now following along.
Outstanding craftsmanship and subject. A large model too. 😵
-
Nice, tidy job.
I hate filler, so I know what you mean.
- David Lester and BobG
-
2
-
2 minutes ago, Tankerman said:
Just before I read your post I had been fitting my interpretation of the frieze decoration to my model of H.M.S Sphinx.
Reading from various sources about ship decoration during the Georgian period I was not convinced that a small 20 gun frigate would have had that much gold gilt work and the frieze was more likely to have been painted in yellow or ochre paint if indeed it was decorated at all.
As I wanted to include all the exquisite etched brass pattern that Chris W. has provided I decided to use a white primer followed by a coat of light yellow acrylic colour by Vallejo. When dry this was then coated in Humbrol Clear gloss varnish. The detail on the etch is then highlighted with a wash of Seraphim Sepia from the Citadel range of washes called "Shades".
The photo shows the fitting of the first row of decoration on my model and I am very happy with the result. Over the next couple of days I will apply the the rest of the decoration.
I hope this gives you some idea of the possible alternatives.
Chris

That looks real nice.
- mtaylor, hollowneck and BobG
-
3
-
-
56 minutes ago, Jasseji said:
Guys really, let's Calm down.
@Chuck's comments and tips are valuable but they might come down as bit harsh, especially when they are written on a forum which sometimes doesnt properly convey the poster's intentions...
So, Please tell us your Char-removal technique, i am curious.
And honestly everyone, it's a hobby, i know @James H that we should thrive for perfection but for some of us there is a sanity-limit as well as a time limit on how much we can dedicate for it.
I believe @glennard2523 conciously rushed the further steps after having reslised that he has made an unrecoverable mistake.
So please, let the comments flow
Nope, I'm not thriving for a level I can never achieve, and nowhere have I ever stated that.....ever. My aim is to do the very best I can and not to cut corners if it can be helped. That's just making the most of our own skills and learning some new ones to better the outcome.
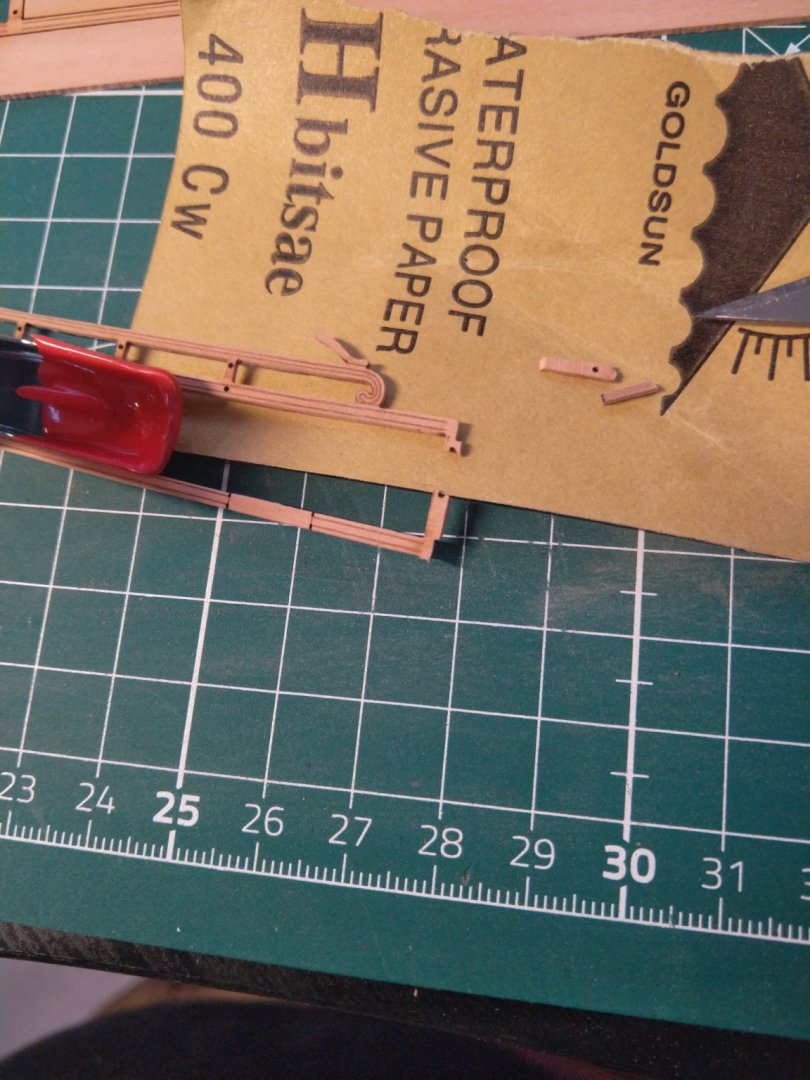
For char removal, I use a combo of sanding sticks, sanding sponges and a 6inch steel rule with 400 grade paper wrapped around it.
For the record, I don't think anyone needs to calm down. I can't see anyone getting angry at the moment. Just crack on with your builds!
-
25 minutes ago, glennard2523 said:
I did not find @Chuck comment supportive as it appeared to me to belittle the efforts of the different Sphinx builds and not something I would expect from the Admin team. Yes point out if something is not fitted correctly by all means, but please not imply that I'm a bad model builder.
Hi Glenn,
I think Chuck's comments are more borne out of frustration that you could all make your models so much better looking with almost zero extra effort. It's not a case of using advanced skills. These are very basic skills, and I have to admit that I can't understand those who wouldn't want to use those very basic skills. Yes, it's a hobby! But why shouldn't someone want to do their very best in that hobby, even if they know they won't ever produce museum quality models. I know that I never will, but would hate to think I spent my free time creating something I knew could be better with no extra skills needed other than the very basic. Why shouldn't we do our very best.....even in a hobby? Because it's a hobby, it doesn't mean we should ever be tardy in our efforts, or cut corners in some mad rush to get to a finish line. If I only ever built one model again, I'd rather it was the very best I could achieve, than a dozen I was less proud of. I should be proud of showing my work, even if only average, to anyone who wanted to see it....including visitors to my home.
Please take Chuck's words as more an effort to nudge folks into using the very basic skills, and not jumpstarting you into becoming the next David Antscherl or Harold Hahn. That wasn't the intention. He certainly wasn't there to belittle. Some things are so glaringly obvious that I have to ask myself sometimes why they were left in all their non-glory.
As a member of said 'admin team', and someone who helped Chris with this development, I feel I had to reply. Until now, I've kept quiet publicly.
-
-
Maybe a half plank strip top and bottom of that 'inner' part?
- hollowneck and mtaylor
-
2
-
Just now, Jasseji said:
awww crap, i used CA to glue the Stern Fascia.........
also, i already glued one gallery before noticing that.
I'm used to follow instructions step by step, and the note about the 2-3mm is on the next page 😕
It's no biggie. You can (possibly) extend lower counter, or scrap it and build from planking strips.
-
-
-
1 hour ago, Jasseji said:
Thanks @chris watton and @James H i will try again to soak and bend, if it doesnt work with just the provided pinholes, i'll add more (although i was hoping to avoid those ugly holes)
I used the holes on mine, and also added more, so don't worry about it. A lick of filler in each hole and a 2 second sanding is all it needs to totally hide them. Remember though, some holes are for scuppers.
-
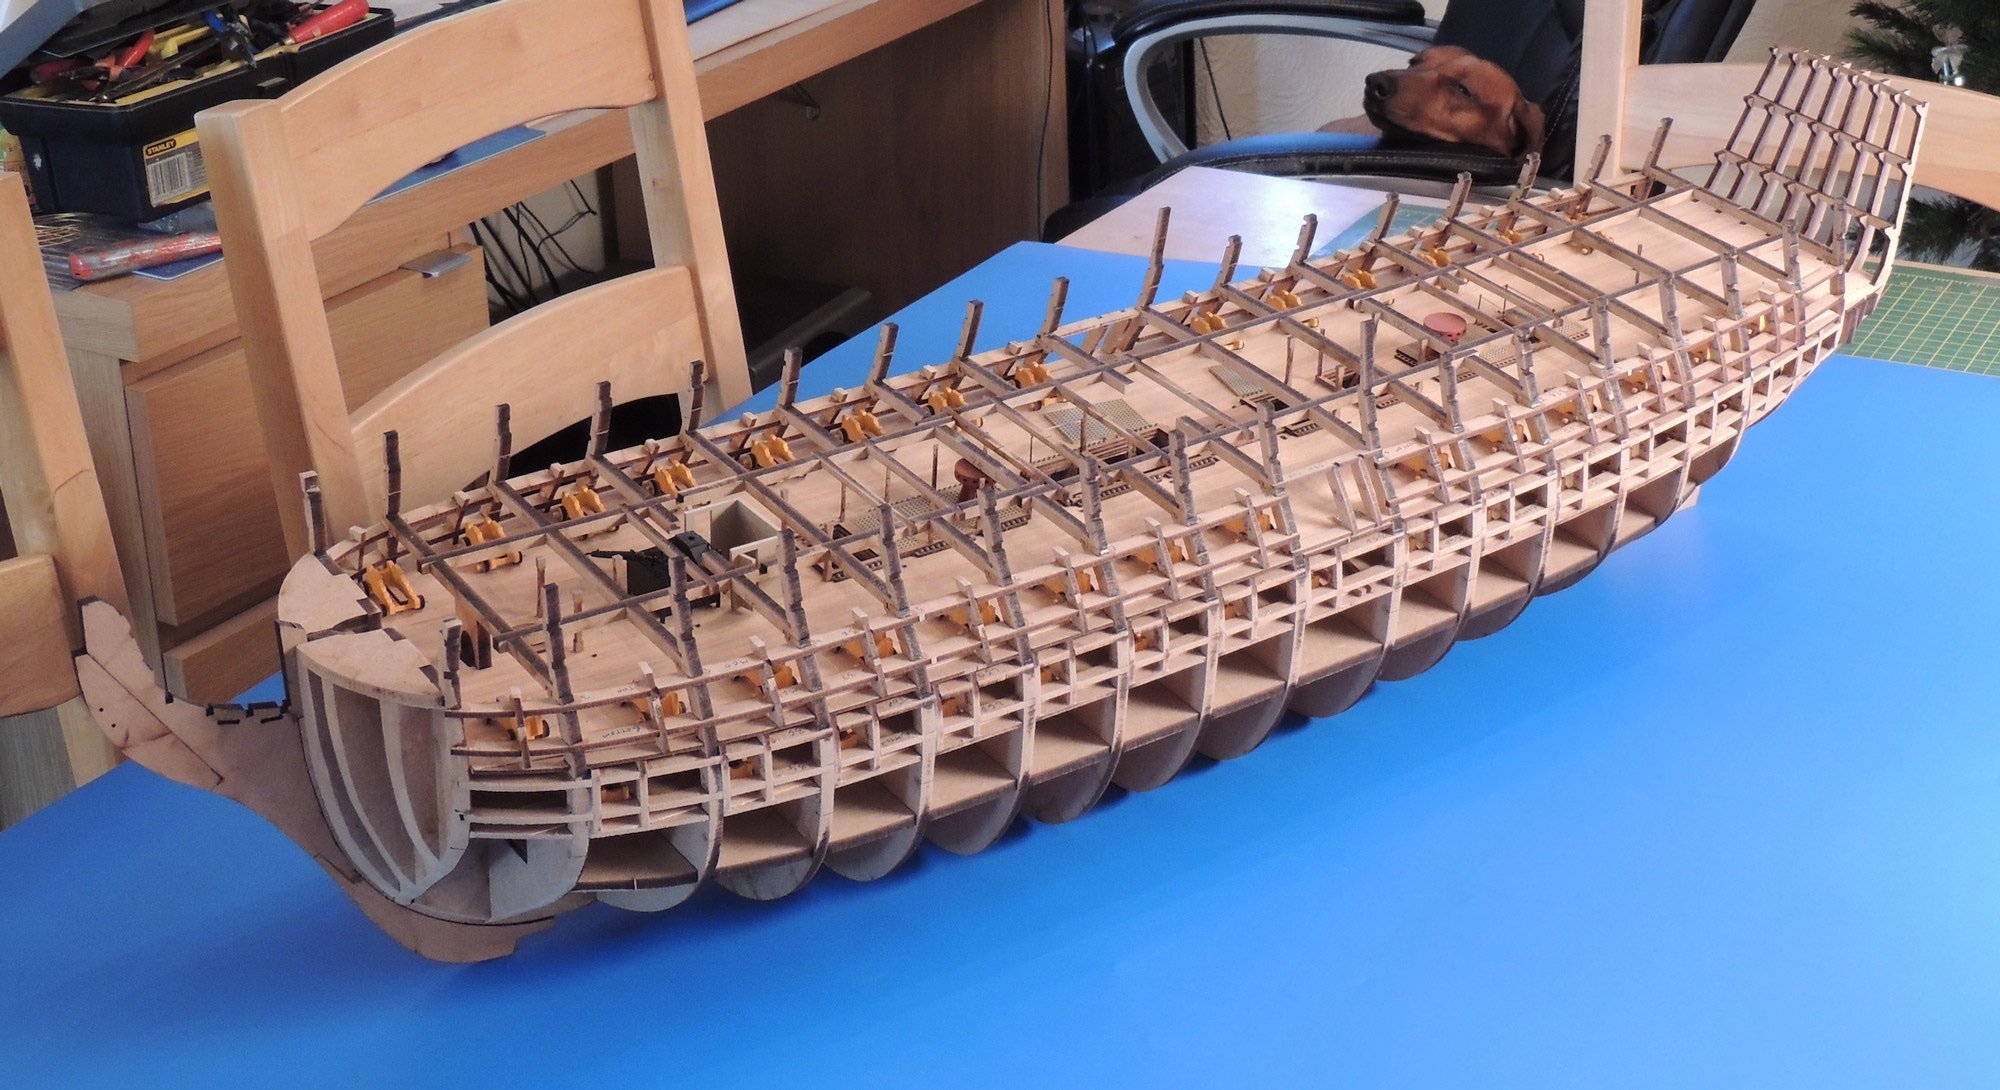
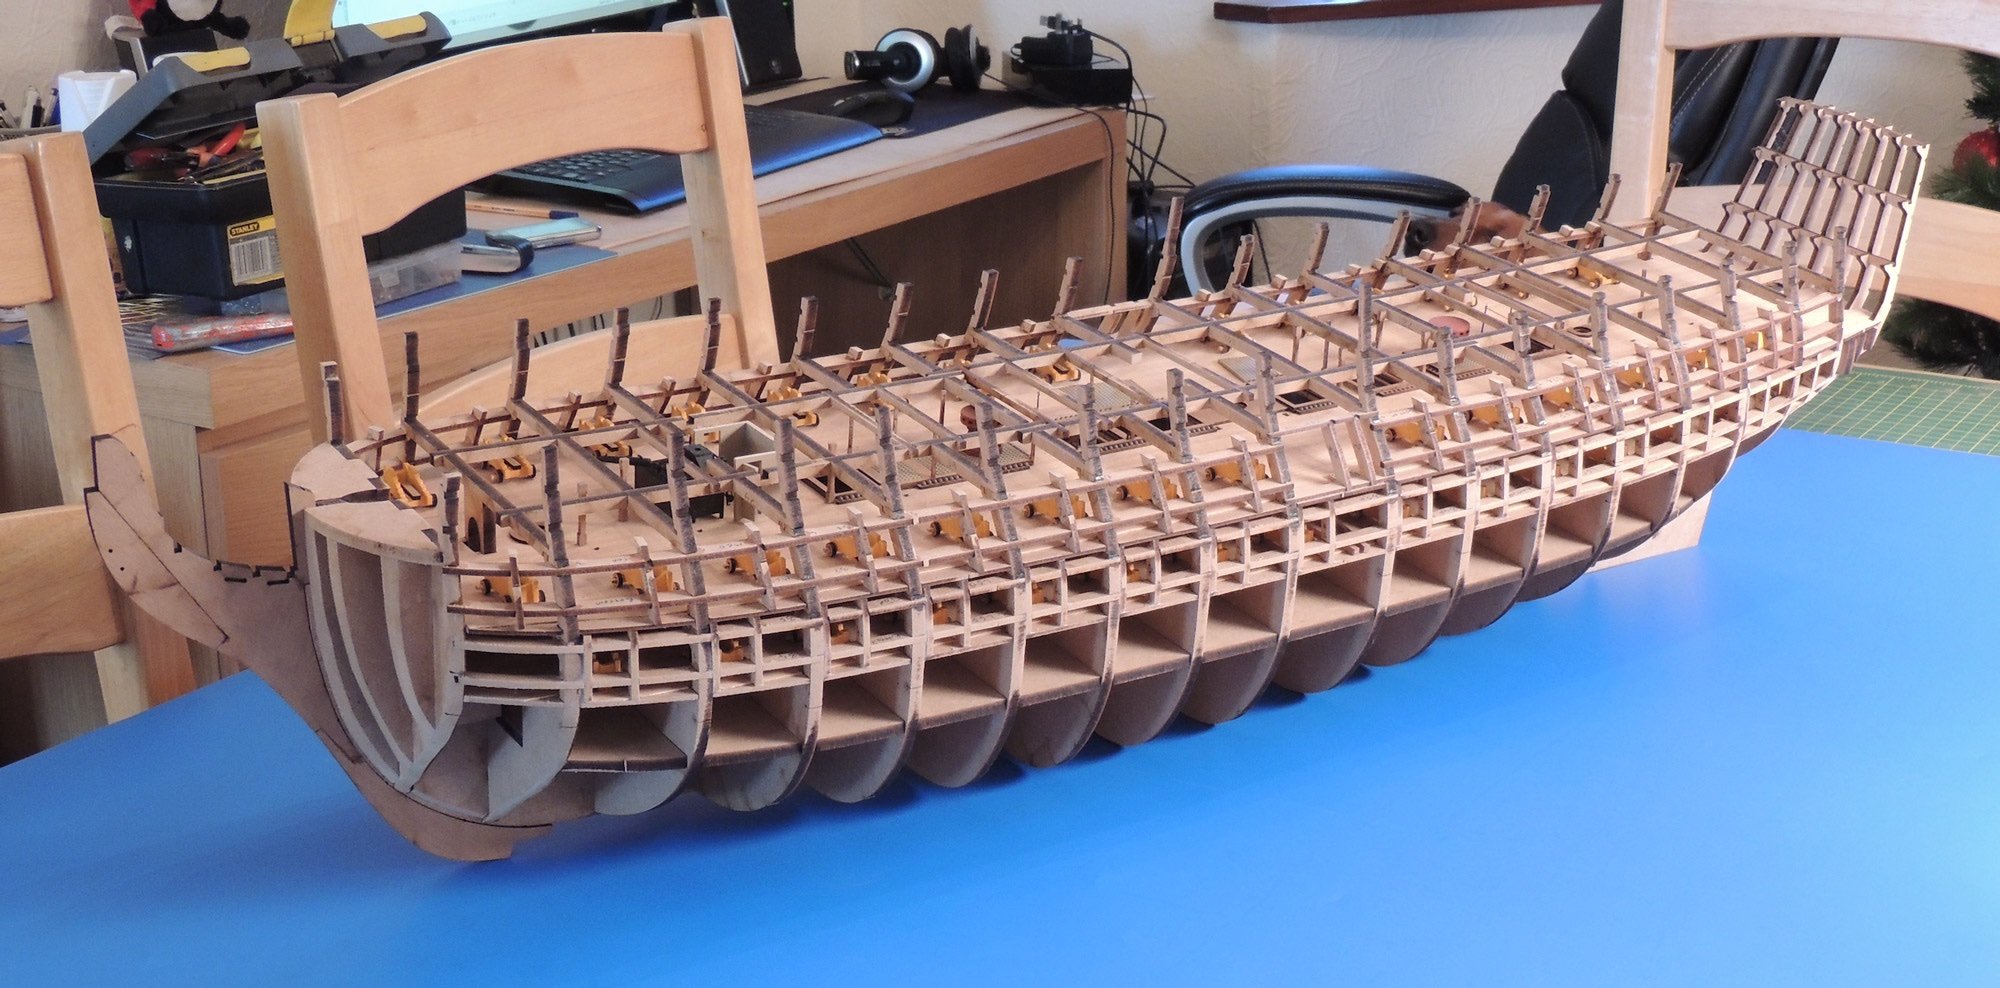
At this stage, I envisage it being new year before any further work can start. That's fine with me as it gives me a small break after my Vanguard Models stuff, before I dive back into this. I was looking through my files tonight and found 3 pics that Chris did of the original prototype. I'm not sure if these have been seen before, so I'll add them to my log so you can see what to expect as this progresses.


- hollowneck, Old Collingwood, egkb and 20 others
-
17
-
 1
1
-
 5
5
-
-
-
2 hours ago, Blue Ensign said:
In a funny sort of way, Chris's design with so many pre-formed parts almost encourages a clik and fit quick build mentality, a fairly finished look can be achieved in a short time. It's not that easy, there's a lot more to the kit than that.
That's a perfect summary.
- mtaylor, Blue Ensign, glbarlow and 1 other
-
4
-
1 minute ago, glbarlow said:
Sorry James, I doubt it does. I think The Z mirrorless (both my Z7 and Z7II have it) but perhaps only D850 and above in DSLRs. Time for a camera upgrade?
That's quite possible. What would be the next step from a D5100 that would include such a feature.....but won't bankrupt me? The D850 you mention? That's probably more than I can stretch to.
-
-
Just now, BikerMart said:
Hmm. I'd better start saving then.
The Amati HMS Victory situation reminds me somewhat of an Alan Gibson Somerset and Dorset 2-8-0. This was an 'O' Gauge etched brass locomotive kit. When asked, it was always just a few weeks away from being ready.
I'm building the prototype for the manual.
This kit has been knocked back by over 12 months because of Covid. Italy was particularly badly hit to start with and all Amati's operations were put on the back burner....including those were closer to release such as Bismarck. No one could have foreseen what was going to happen, and we can't blame Amati for the delays.
If you want to see this built, then check out my build log, and when it restarts again. This is the only site where you'll be able to follow along.
- BobG, CaptnBirdseye, Canute and 1 other
-
4
-
59 minutes ago, glbarlow said:
Speed isn’t a factor in this hobby, nor is it a sin to correct mistakes however long it takes. My Cheerful has two sides, I’m pretty sure I planked four my the time I was done, removing and replacing until I had it done right. The timing of my next long post doesn’t drive my building.
Not many know that I actually tore the whole stern out of HMS Sphinx when I was building her for VM. I had to carefully remove all my painted resin and PE and then git the back end to rebuild slightly for the manual. Despite that work, it still only took a couple of days, and that's not rushing. Fixing stuff up can be quite an easy and relatively quick affair, and it's always worth doing if you have the luxury of time on your side.


Minefield
in New member Introductions
Posted
I did the instructions for Lady Eleanor. That is a very simple kit which you would find to be a nice subject to cut your teeth on. Timber is also pearwood, hence the relative pricing. A very sweet kit indeed.