


James H
-
Posts
5,613 -
Joined
-
Last visited
Content Type
Profiles
Forums
Gallery
Events
Posts posted by James H
-
-
40 minutes ago, grsjax said:
The question is, does CAF still sell the kit. Another question is it a legitimate kit that can be here on MSW?
CAF are legitimate.
In fact, we'll have a review for Parts 1 & 2 of their 1:48 HMS Granado POF on MSW very soon.
-
12 minutes ago, glbarlow said:
James could advise you better.....
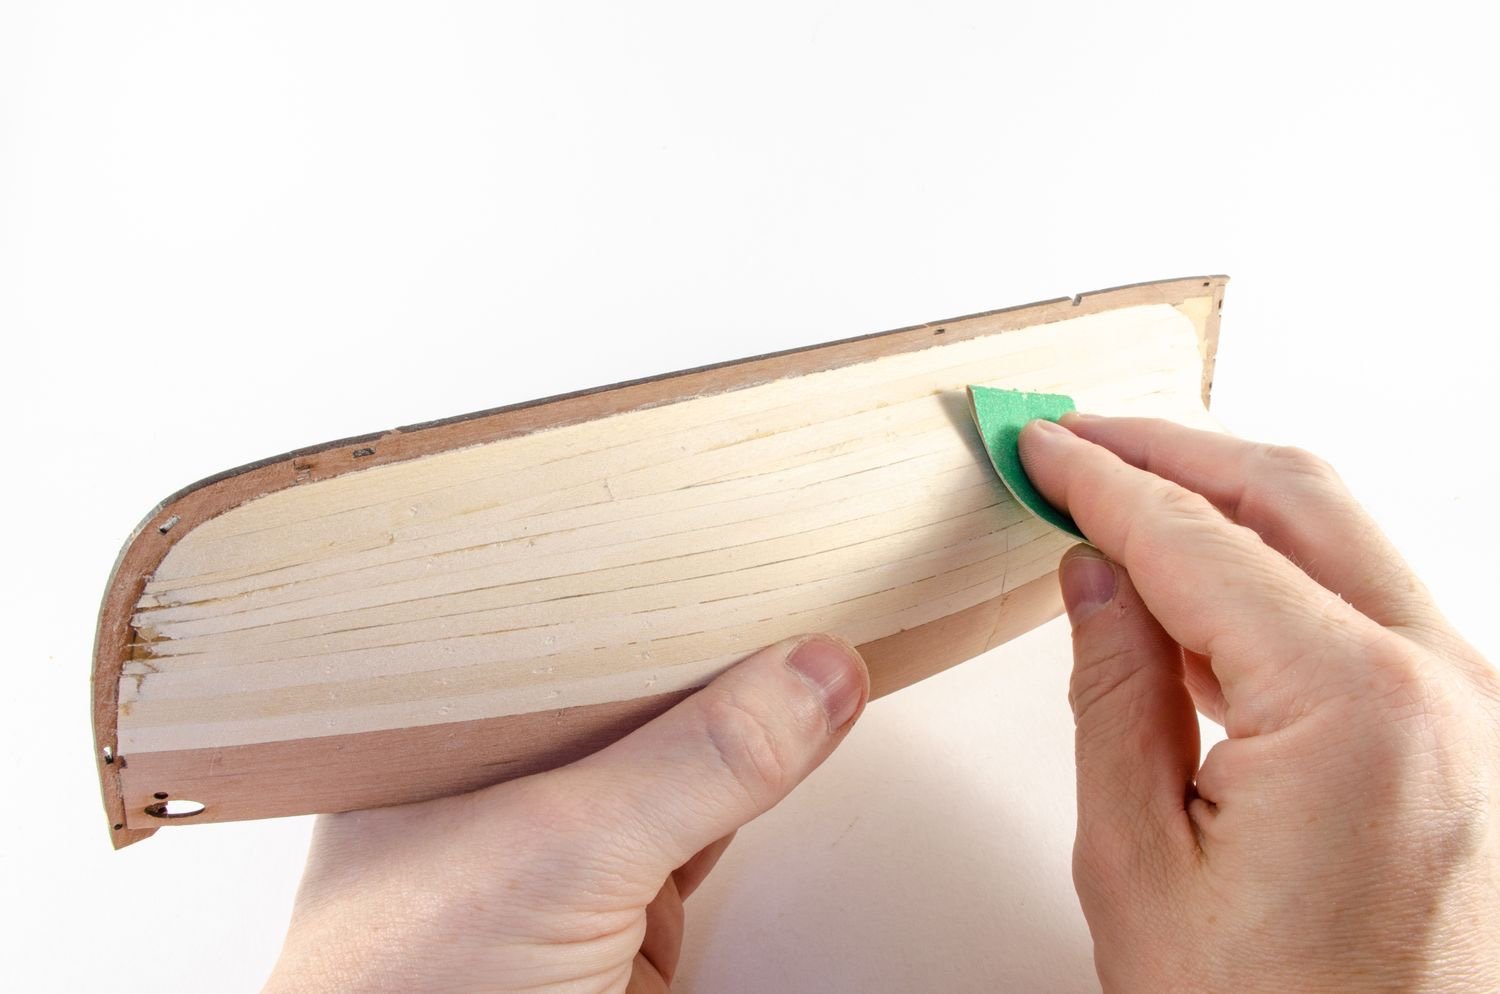
To be honest, I'd struggle to, any more than I did for Flirt, Duchess etc. They are all very similar in execution, especially Duchess which as the same tuck at the stern. Sphinx is no different to fair than most any other similar ship. I just have a plank I lay around at various positions to see how it meets up with the bulkheads. For the stern, curl a plank at the end and again, test the flow around the tuck etc. Out of all the models I've built for VM in the last 2yrs, Sphinx has probably been the very easiest of them to fair, probably even more so than Duchess.
-
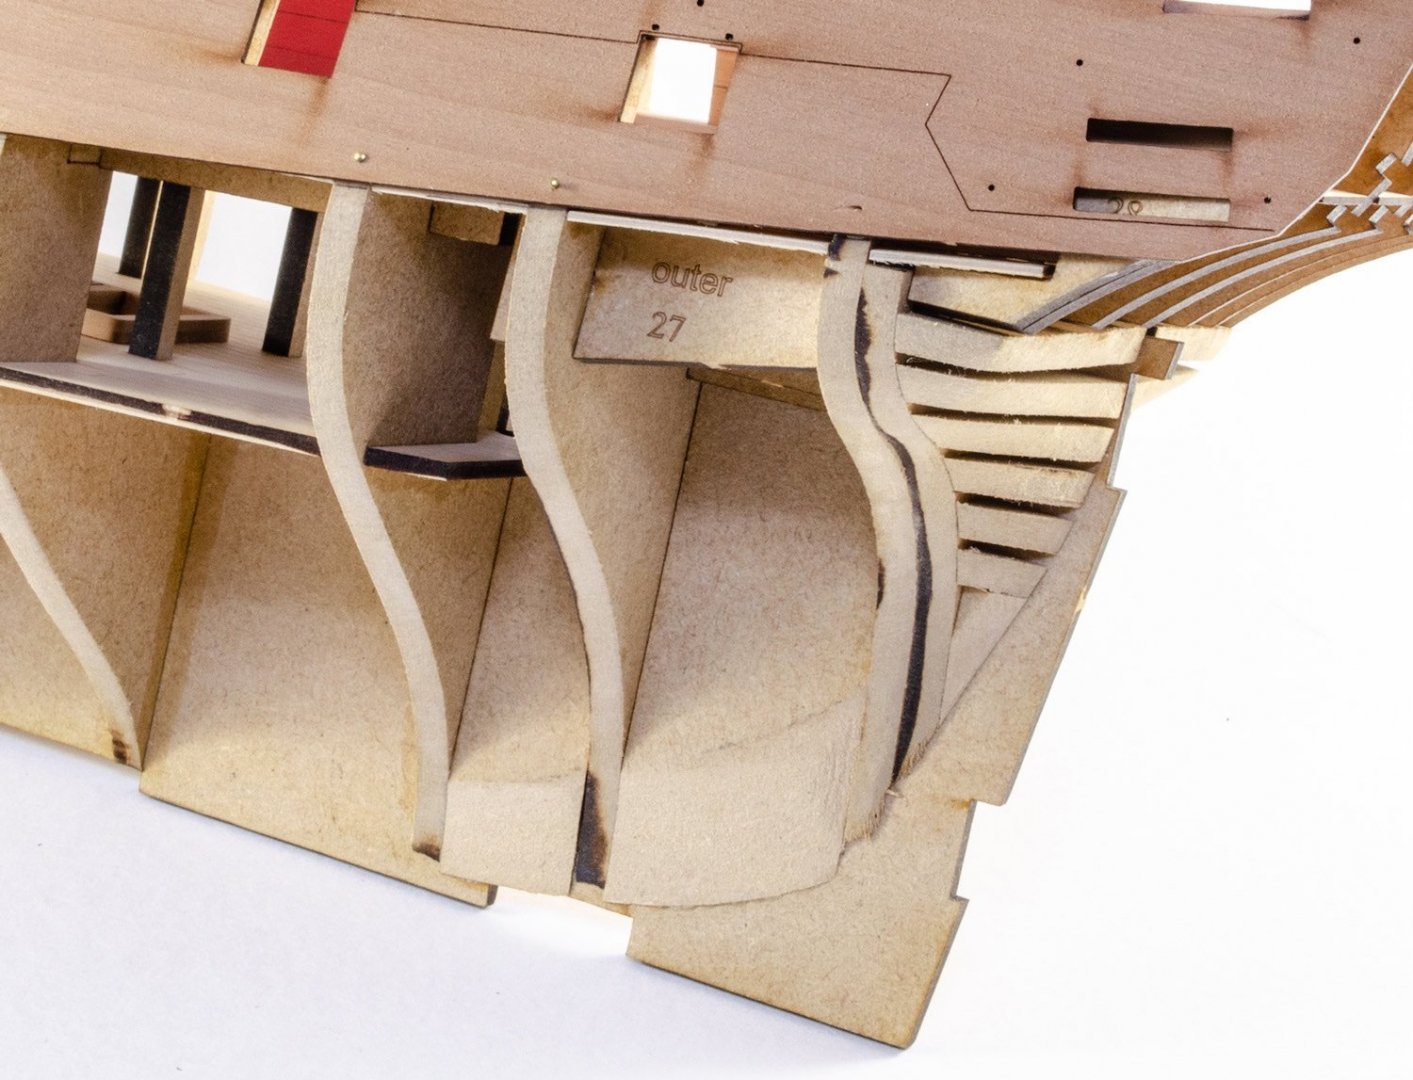
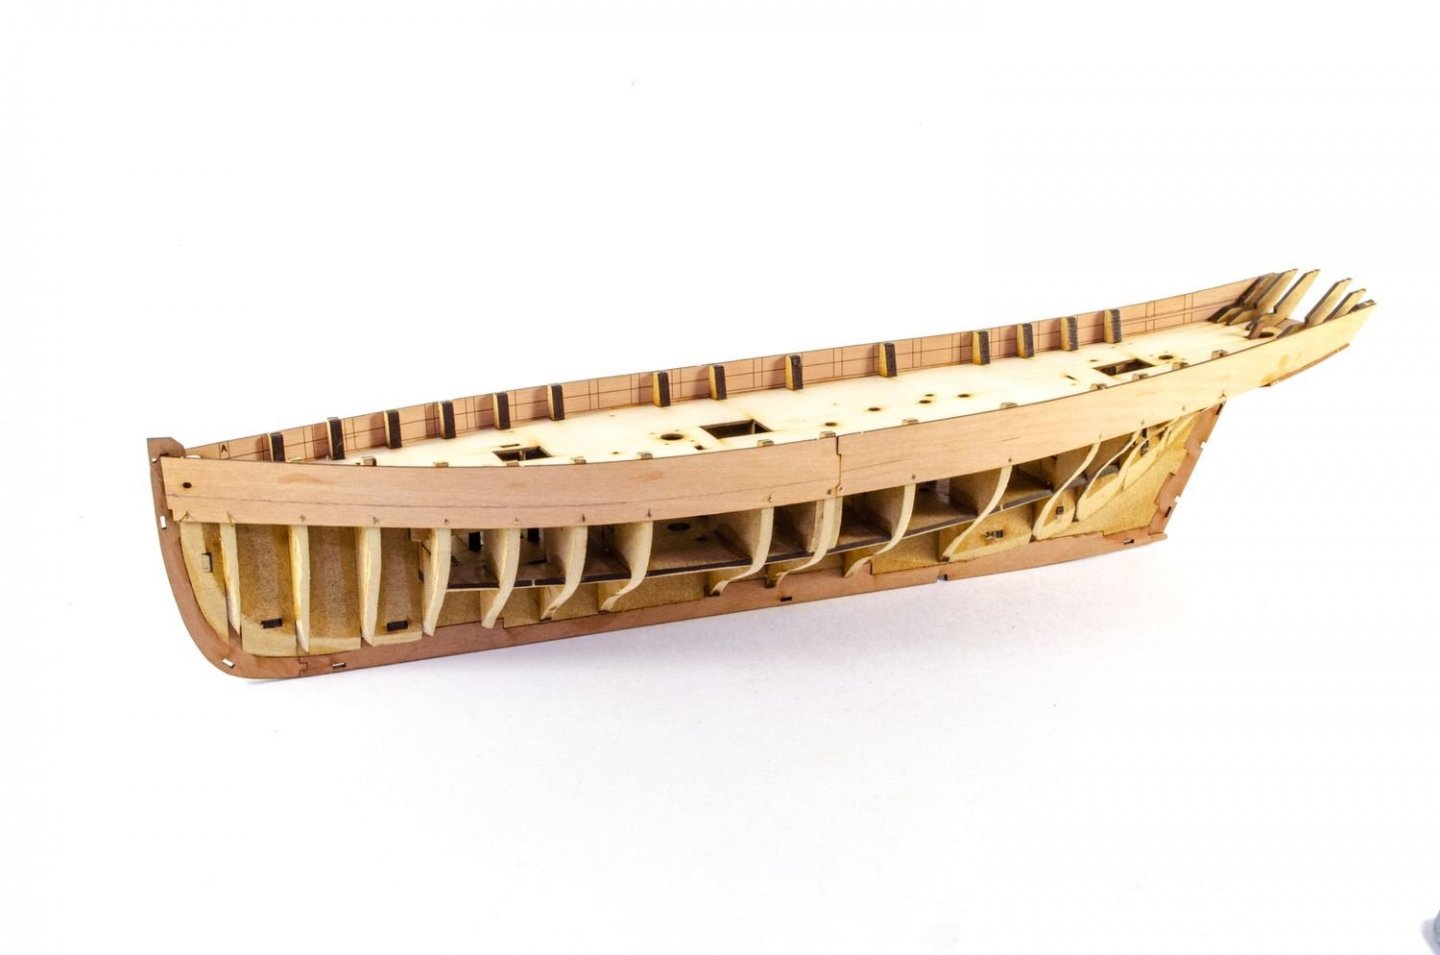
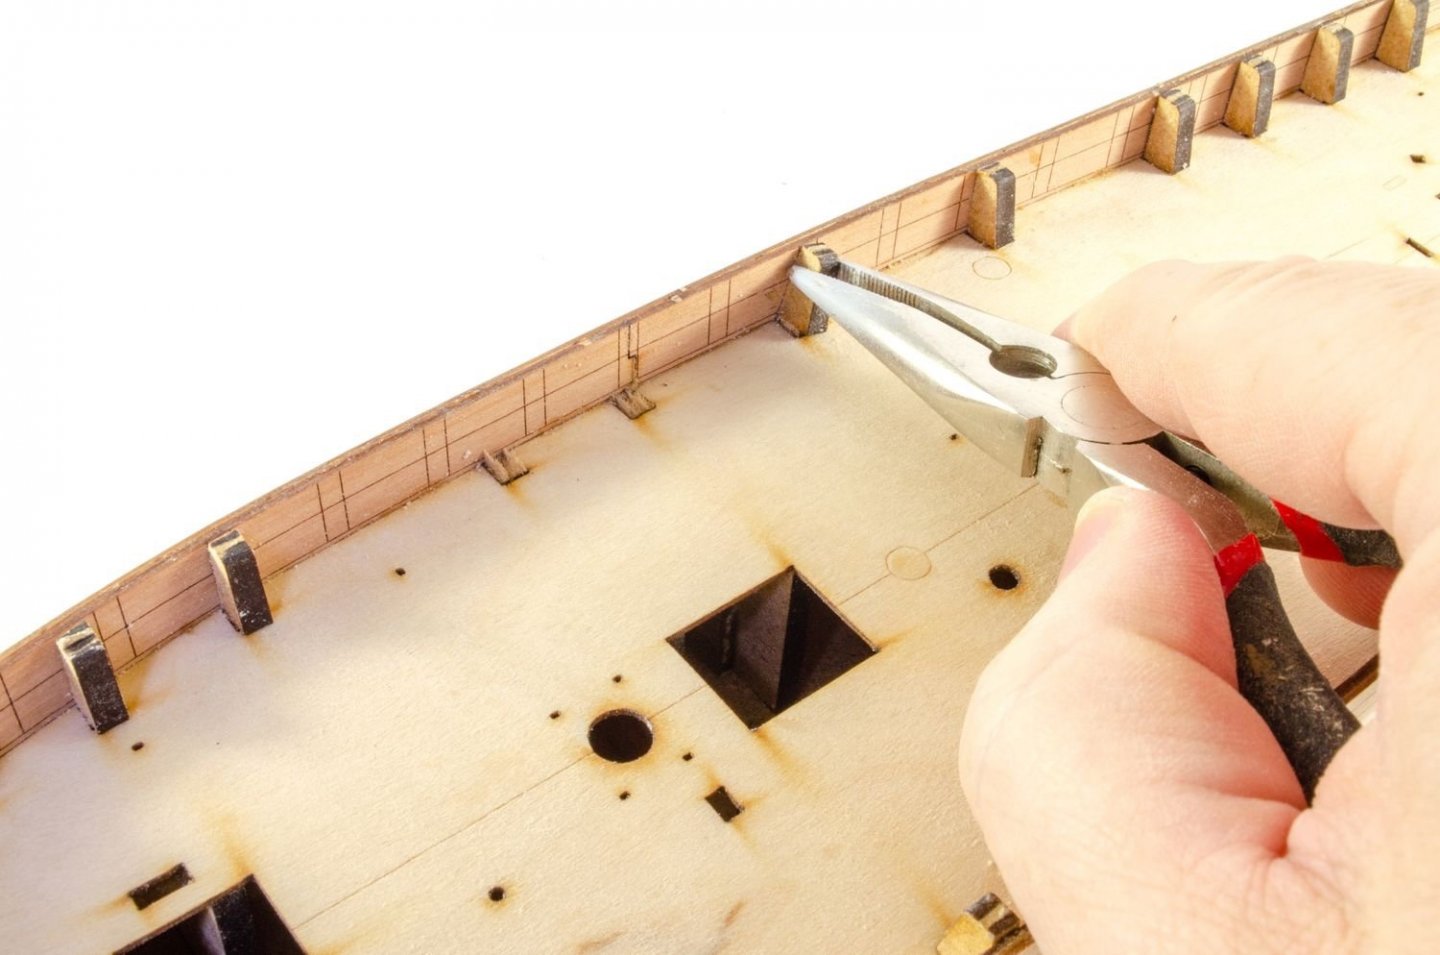
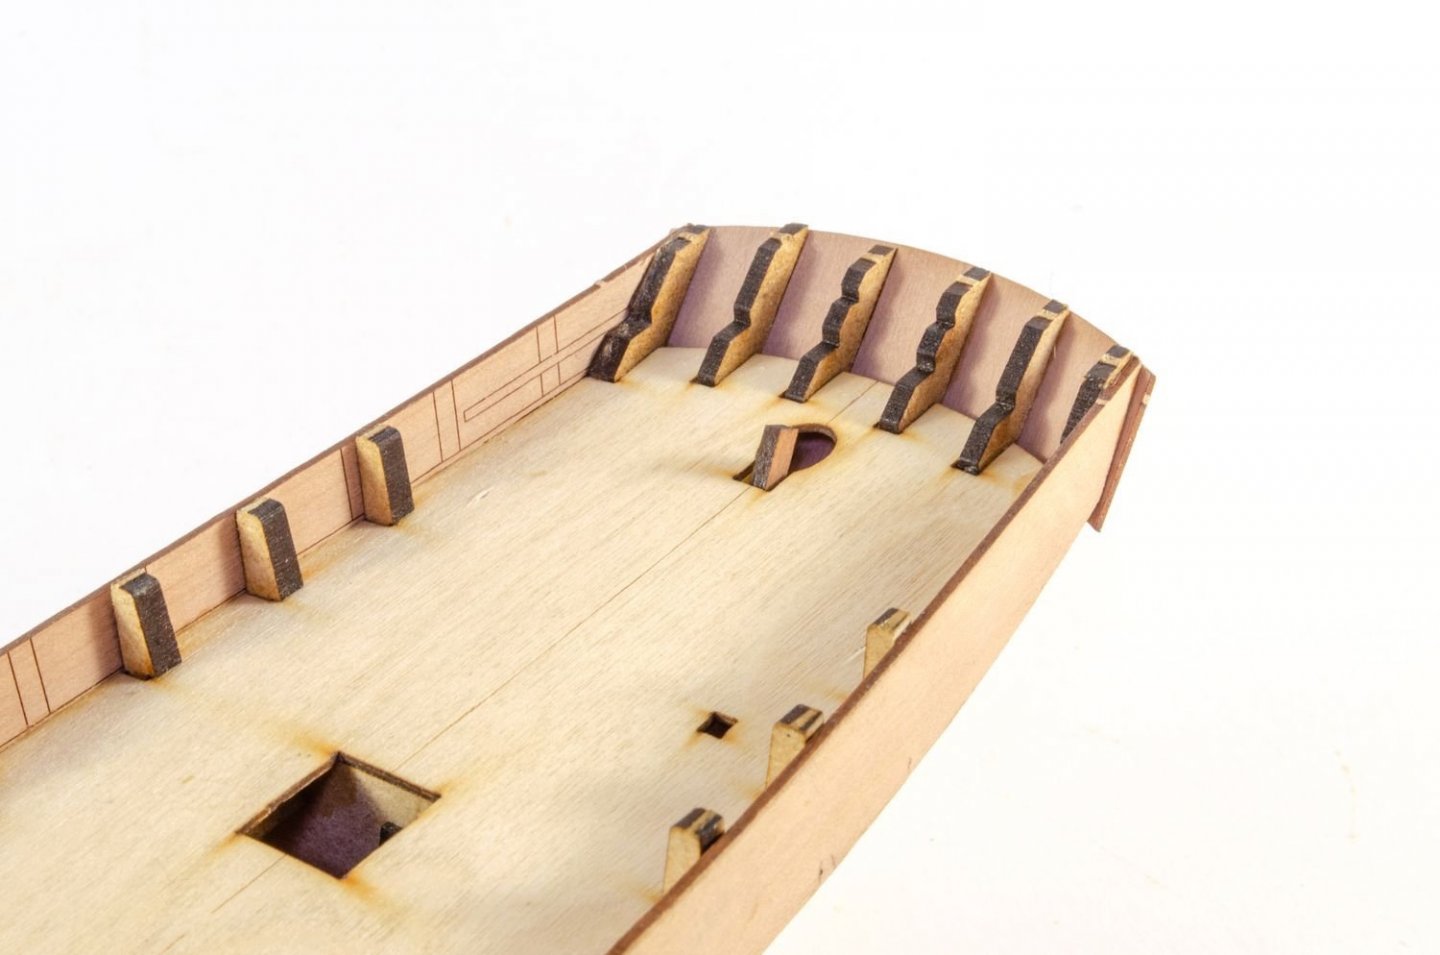
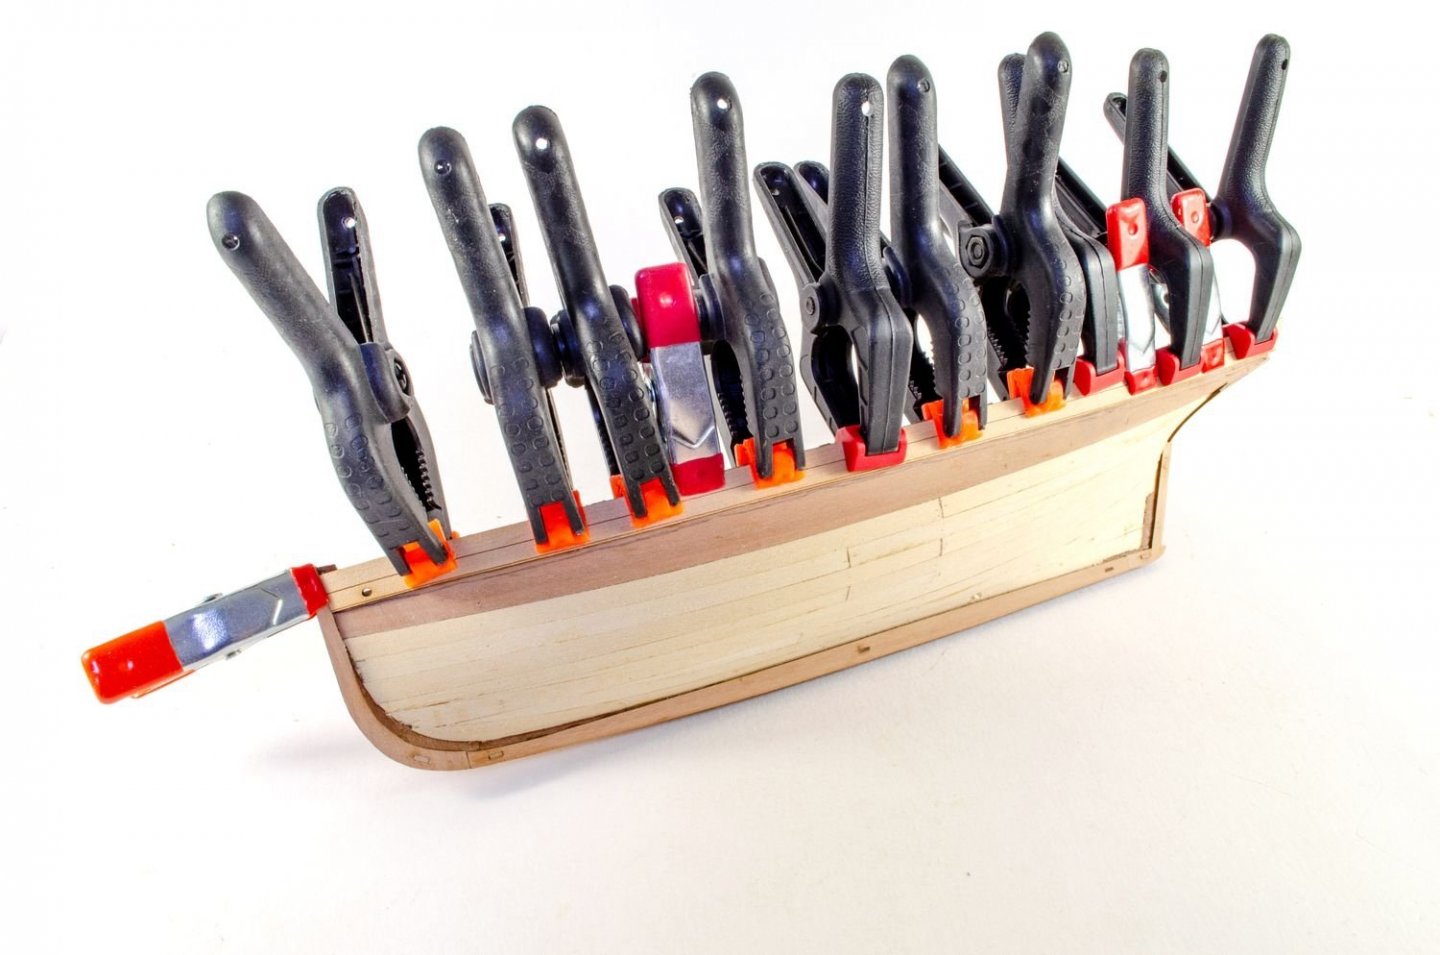
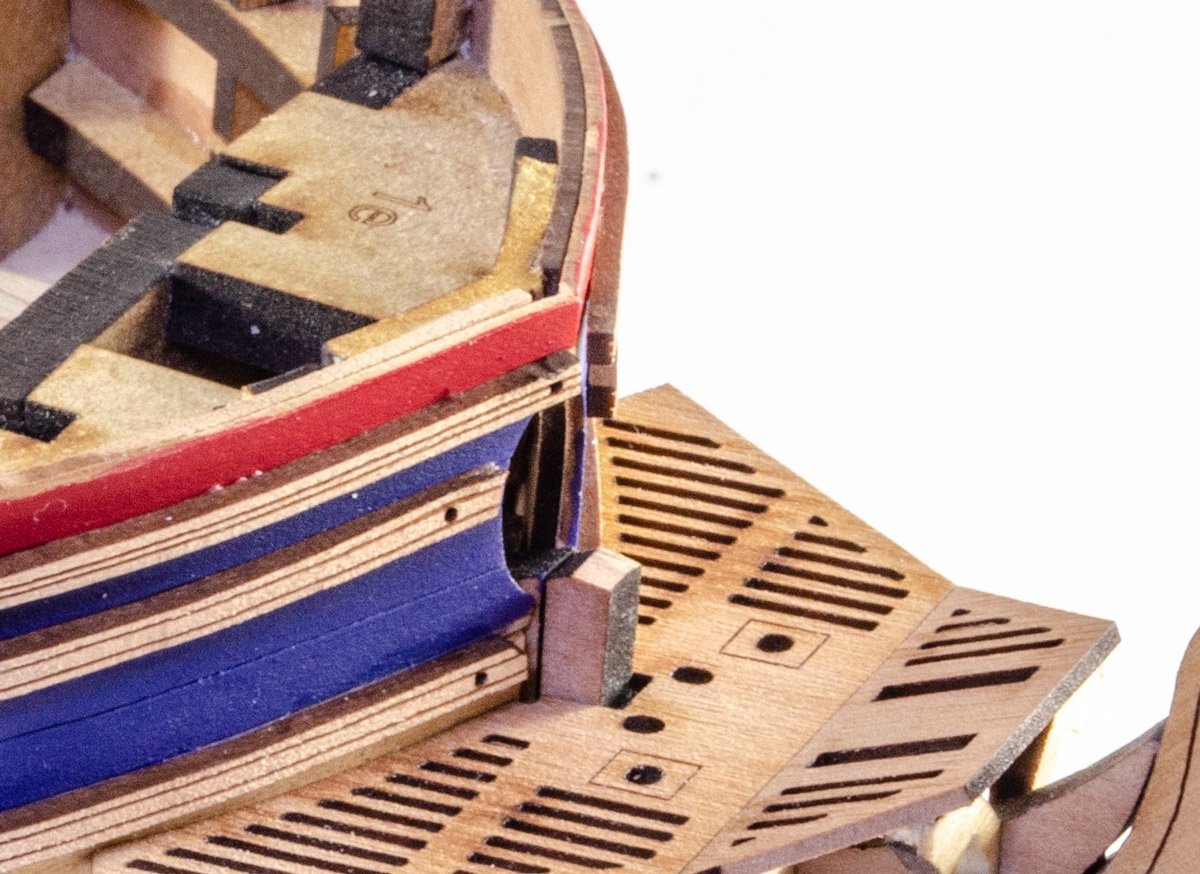
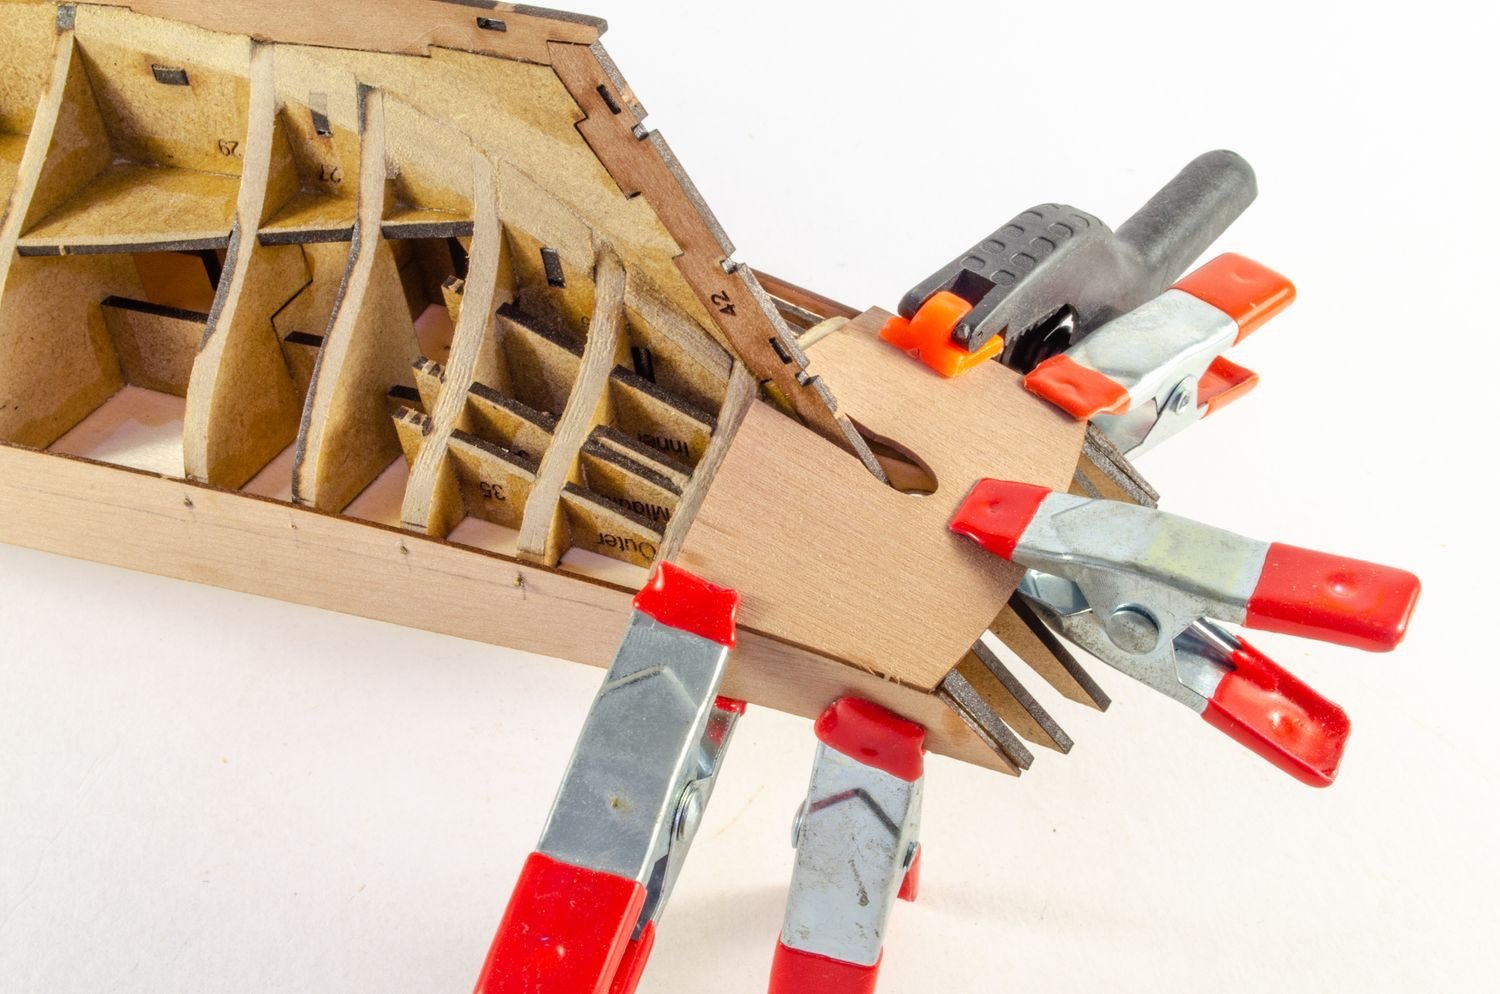
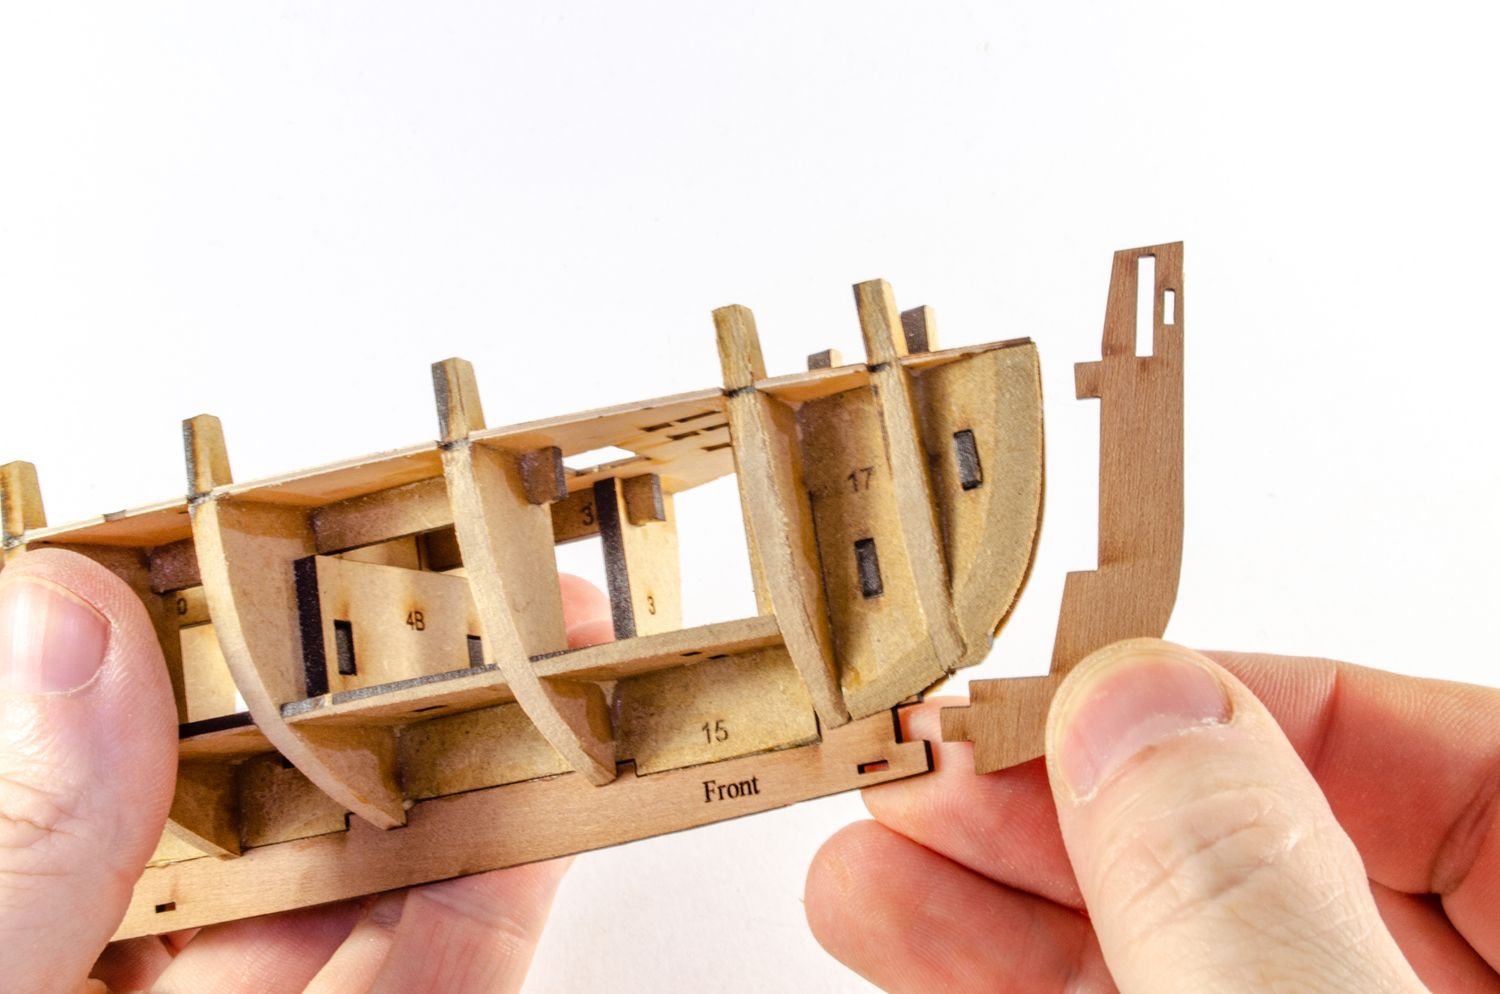
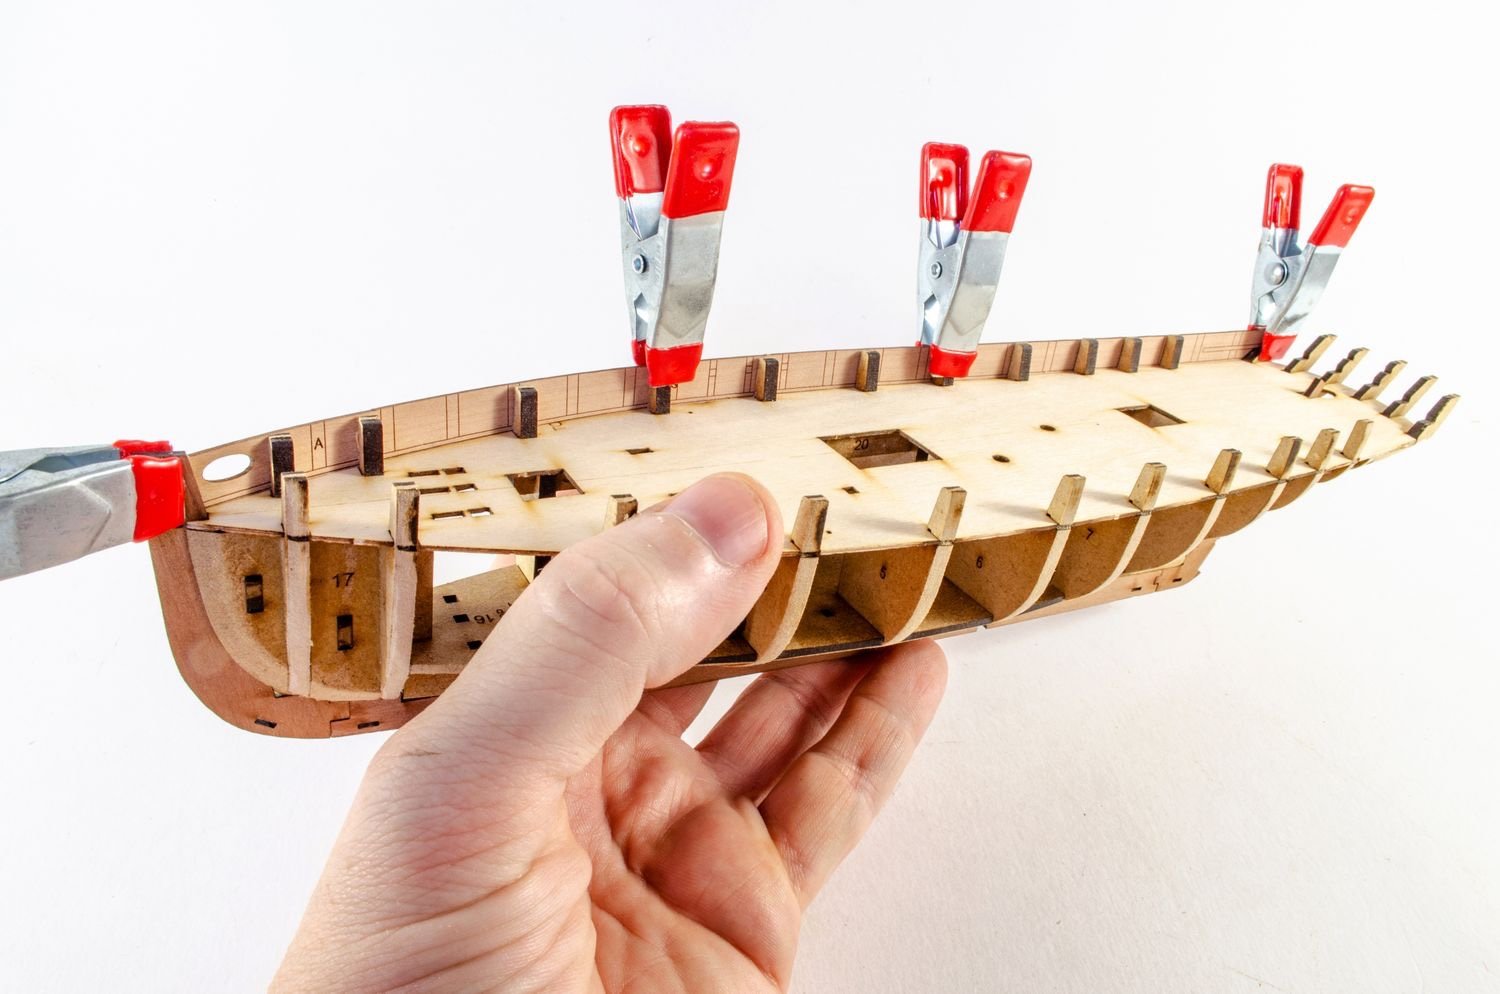
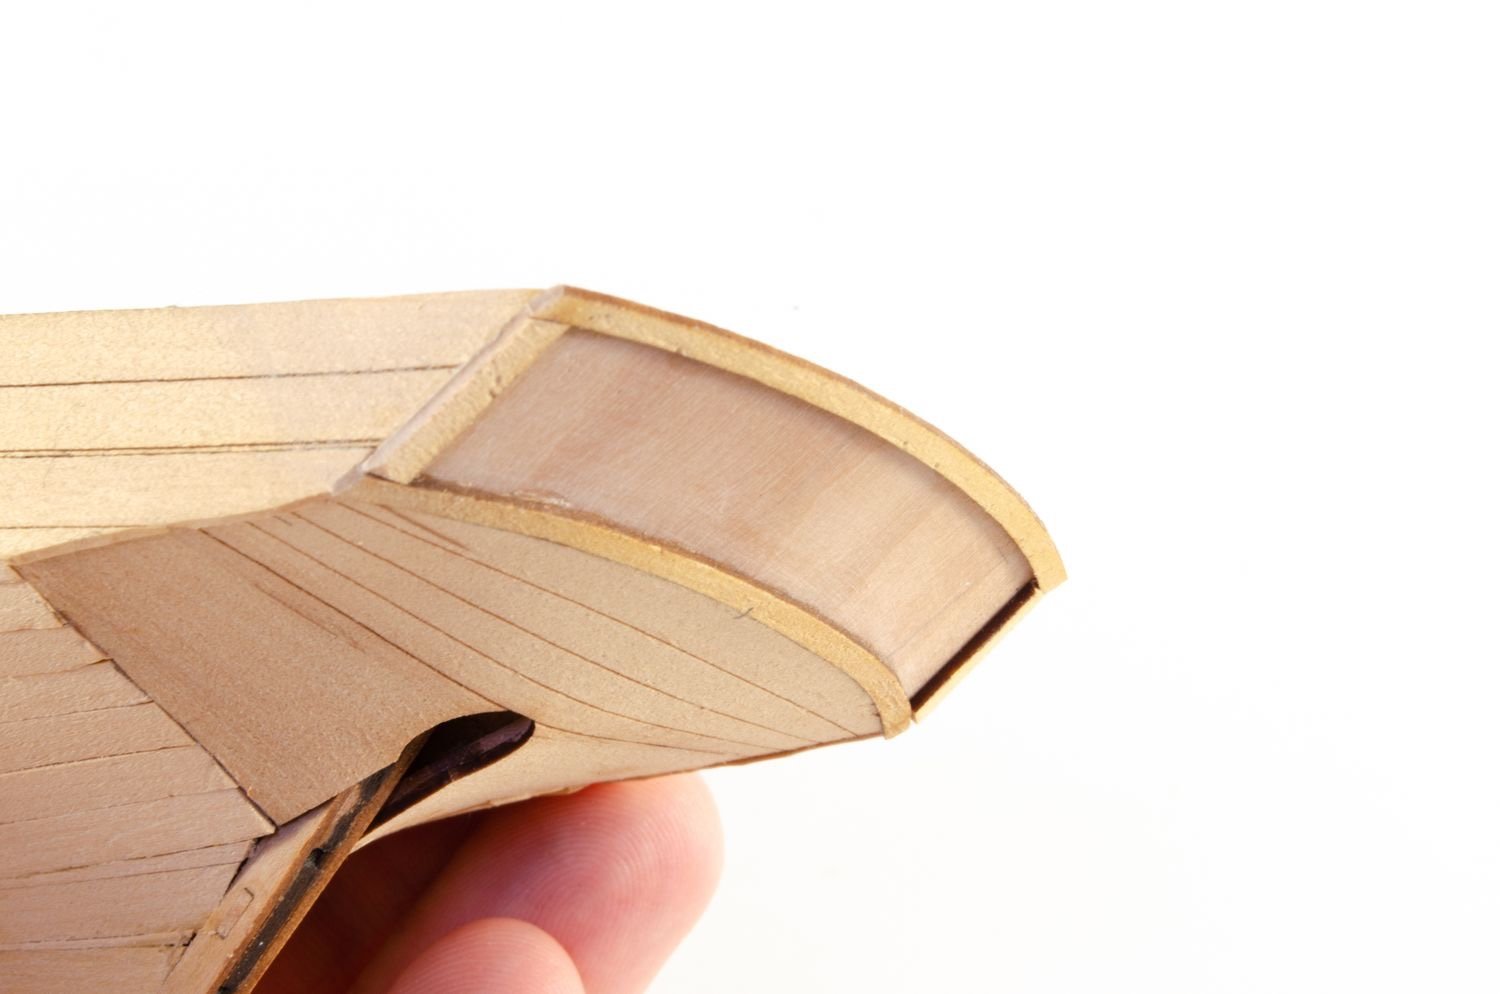
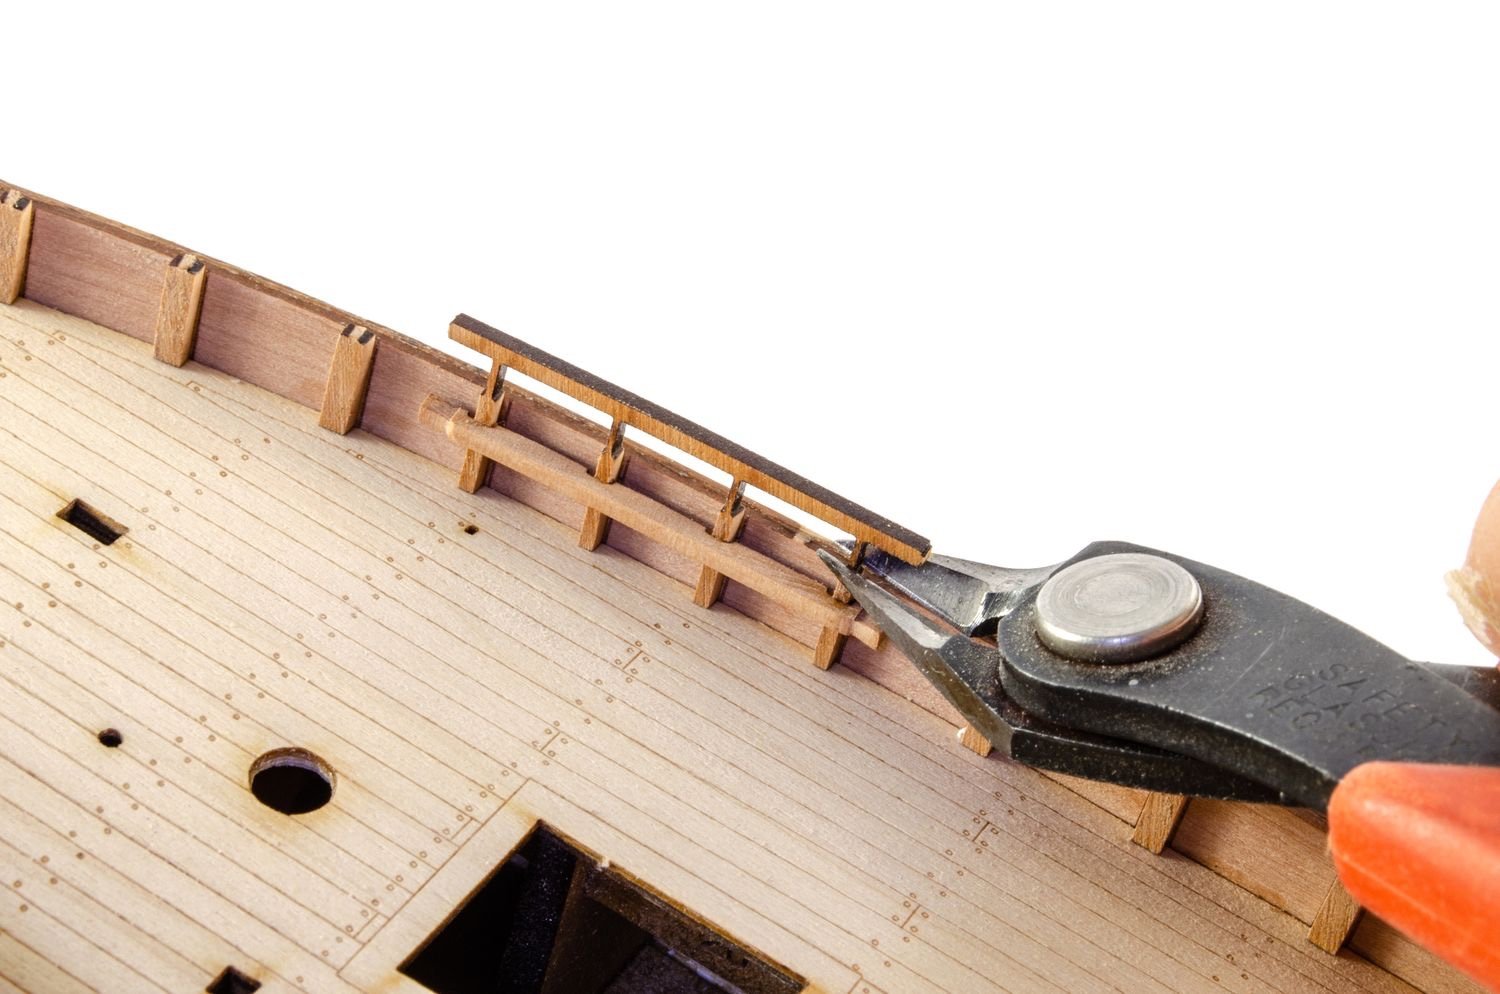
It looks like you need to fair those rear bulkheads more, without doubt.
Also, I note you faired without adding the inner bulwarks first. Those bulwarks provide some real strength to the frames, prior to sanding the exterior which will inevitably reduce the thickness a little. Those bulwarks also reduce any chance of snapping or flexing of the frames.
Was there a reason for your sequence?
Also, this image from the instructions shows the fairing of those rear frames:
- GrandpaPhil and mtaylor
-
 2
2
-
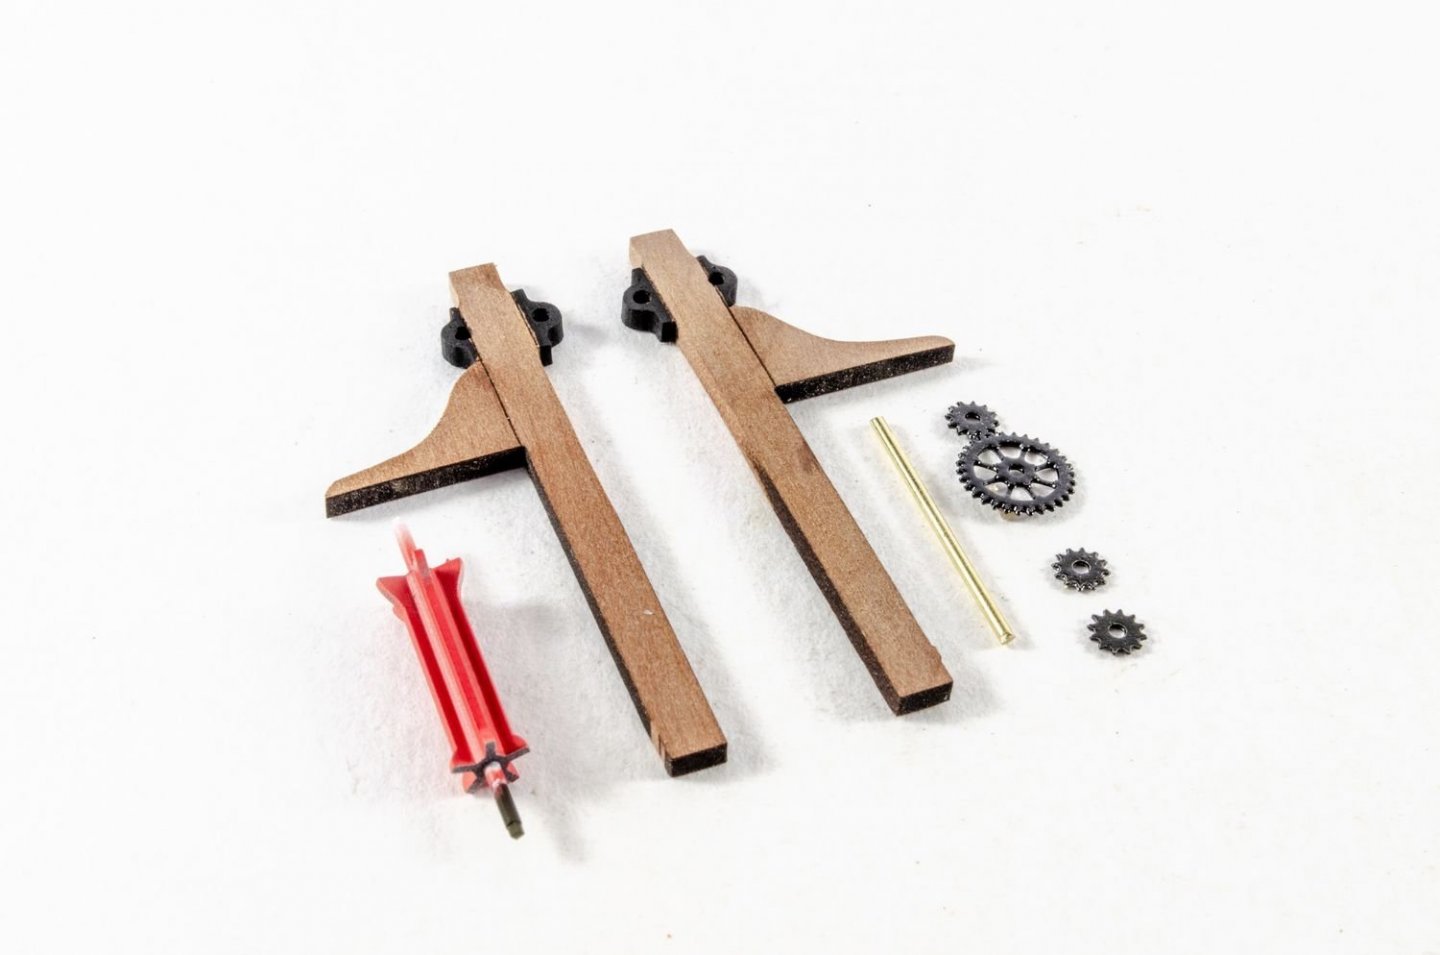
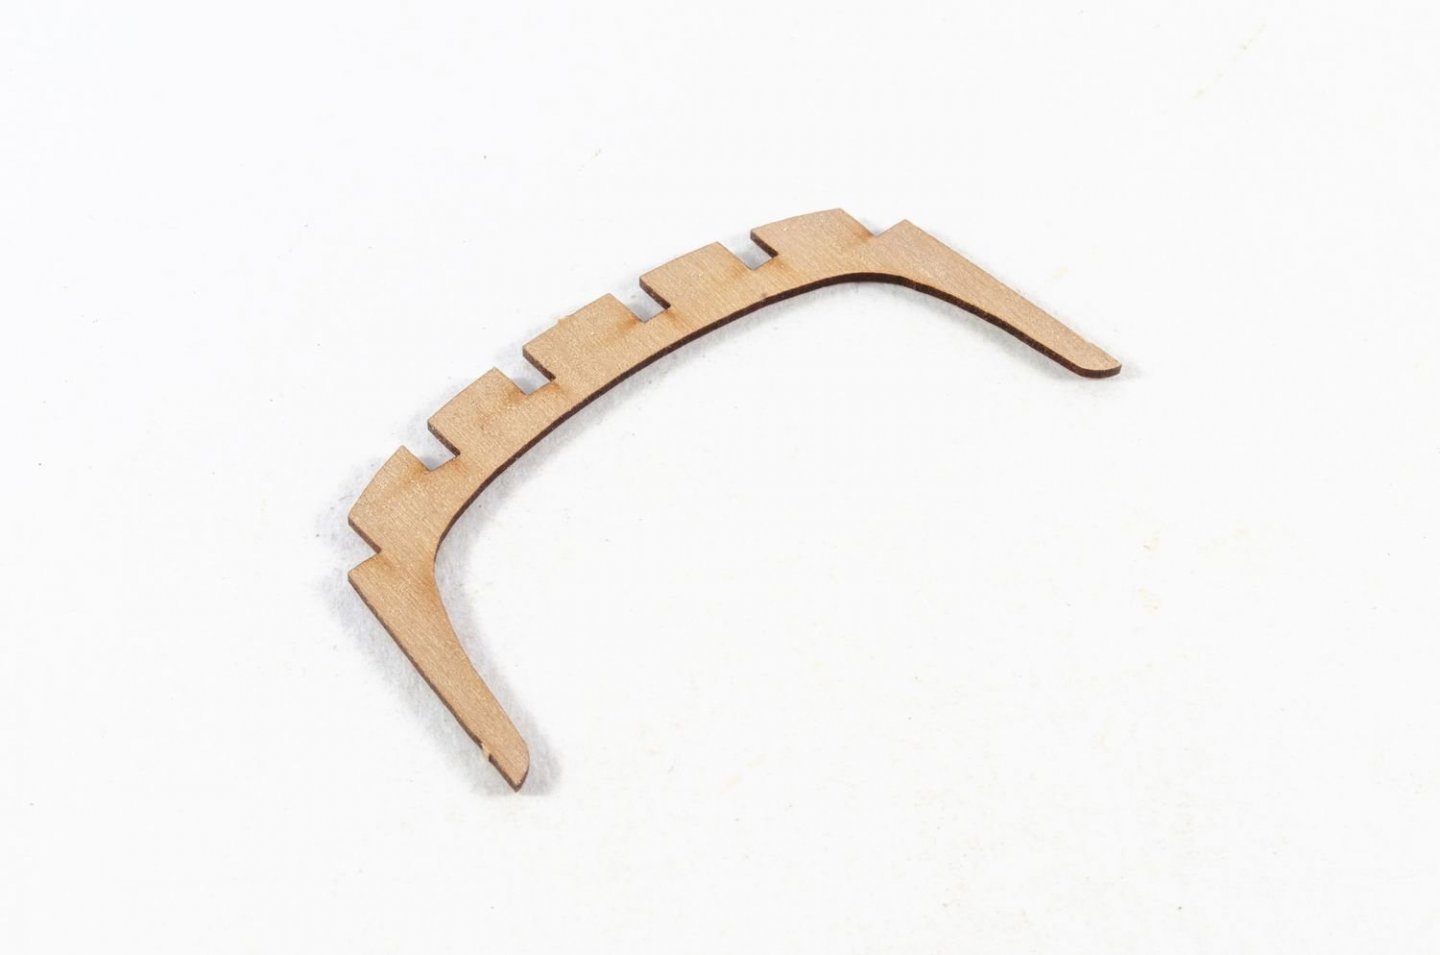
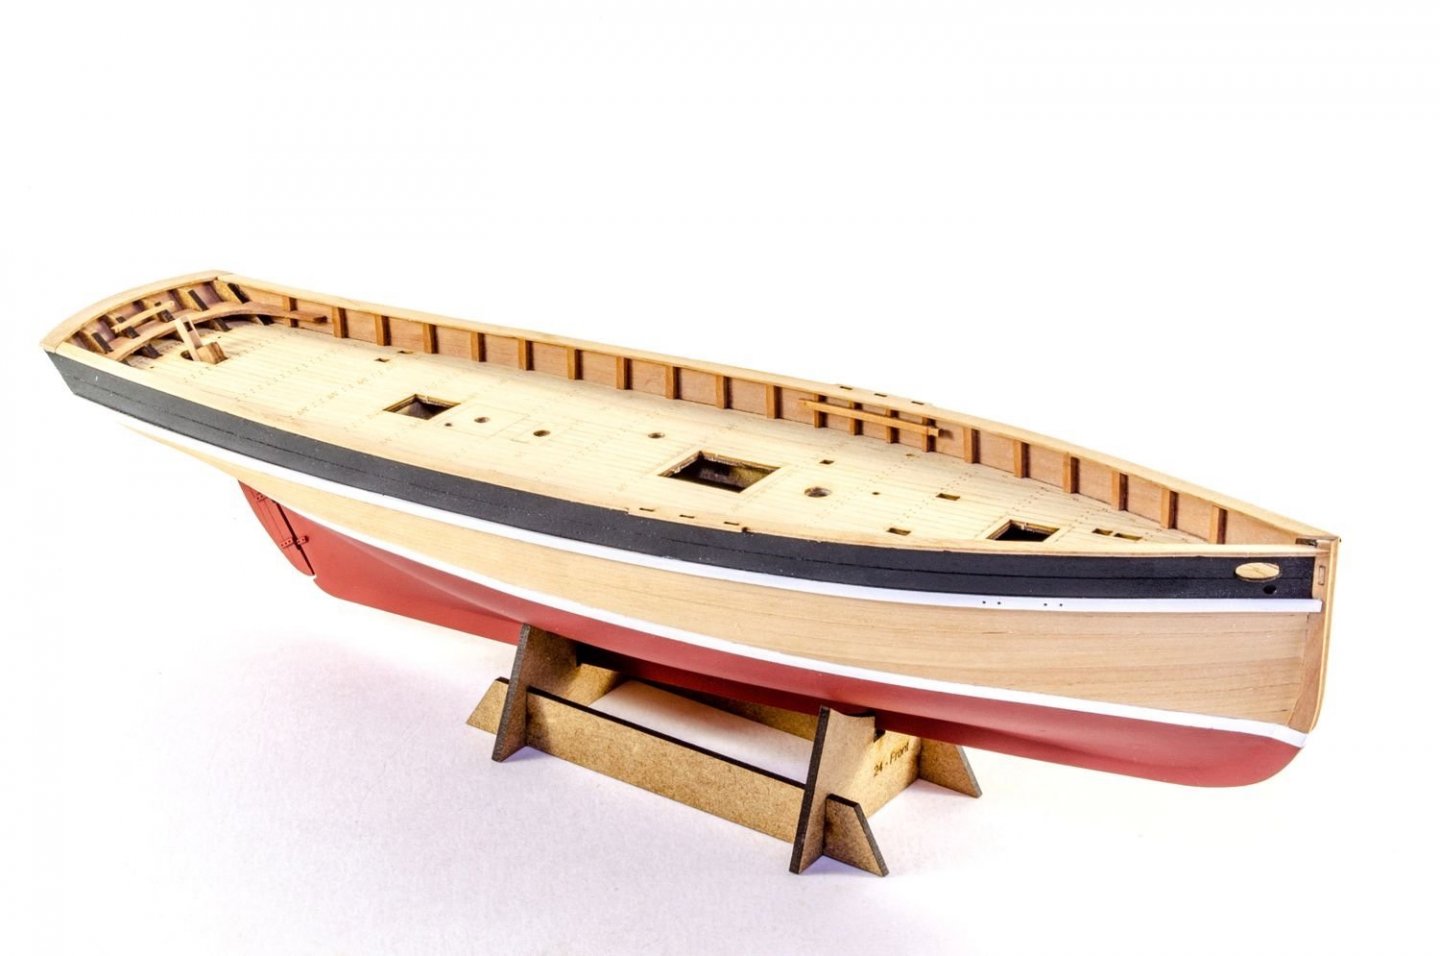
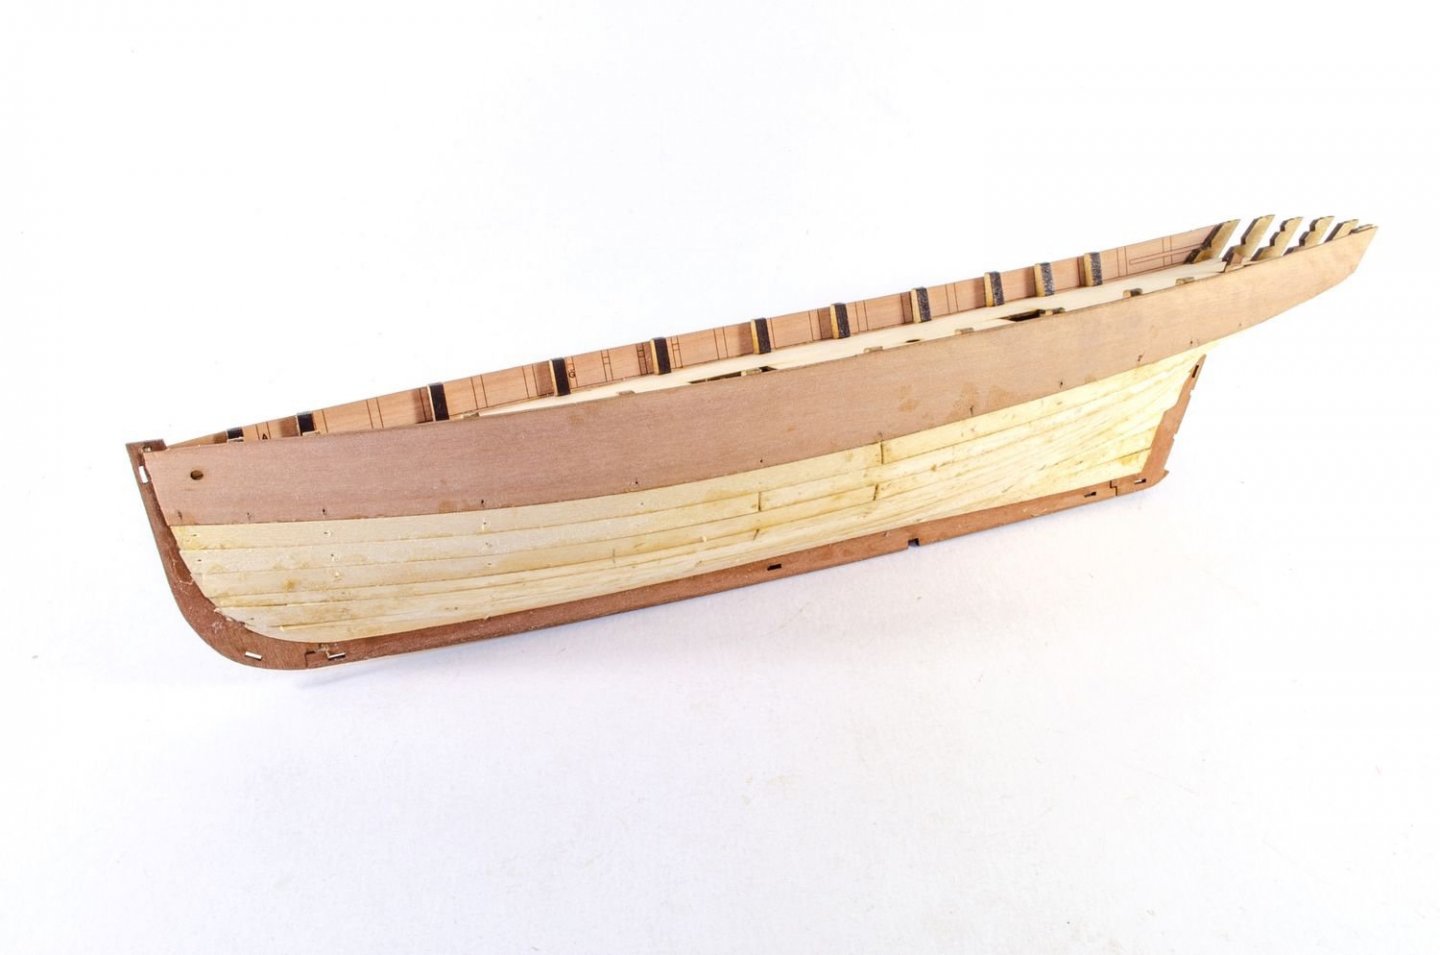
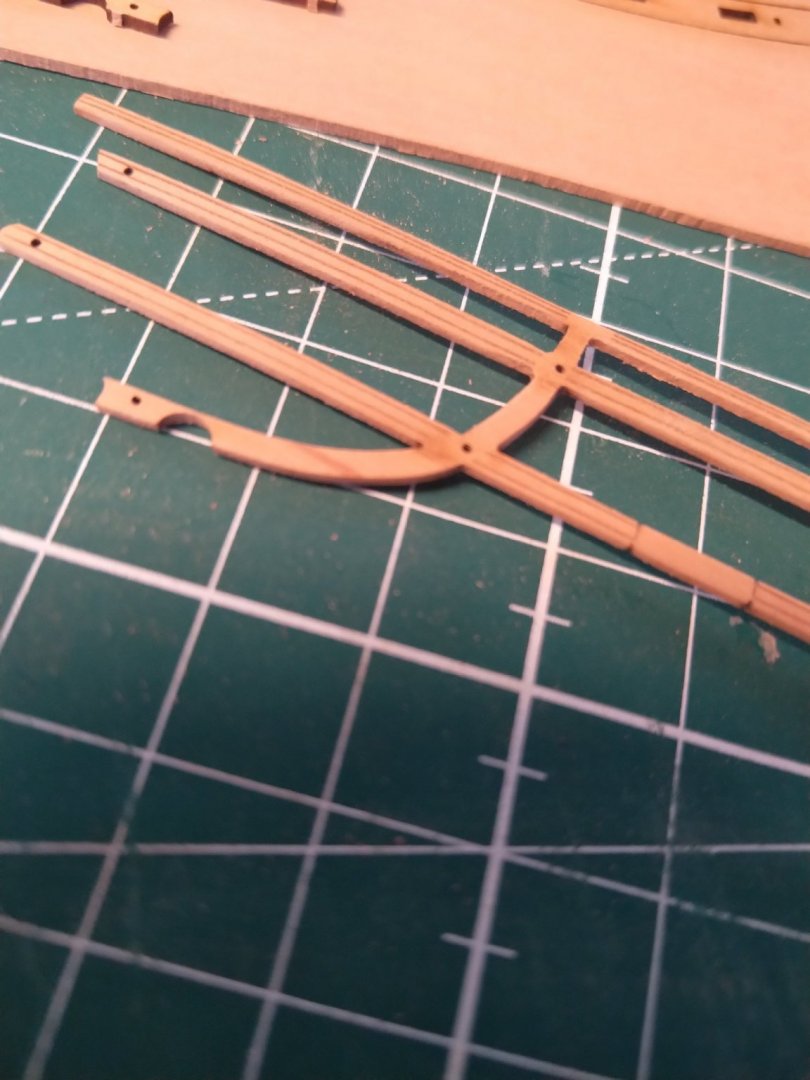
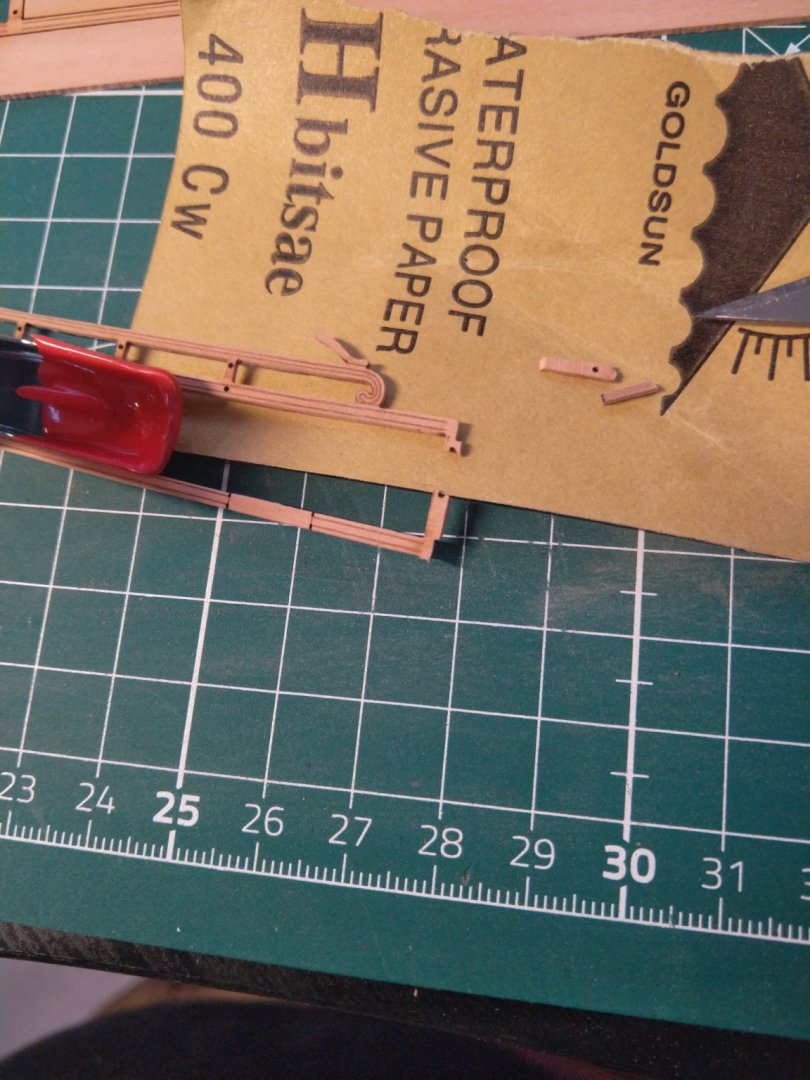
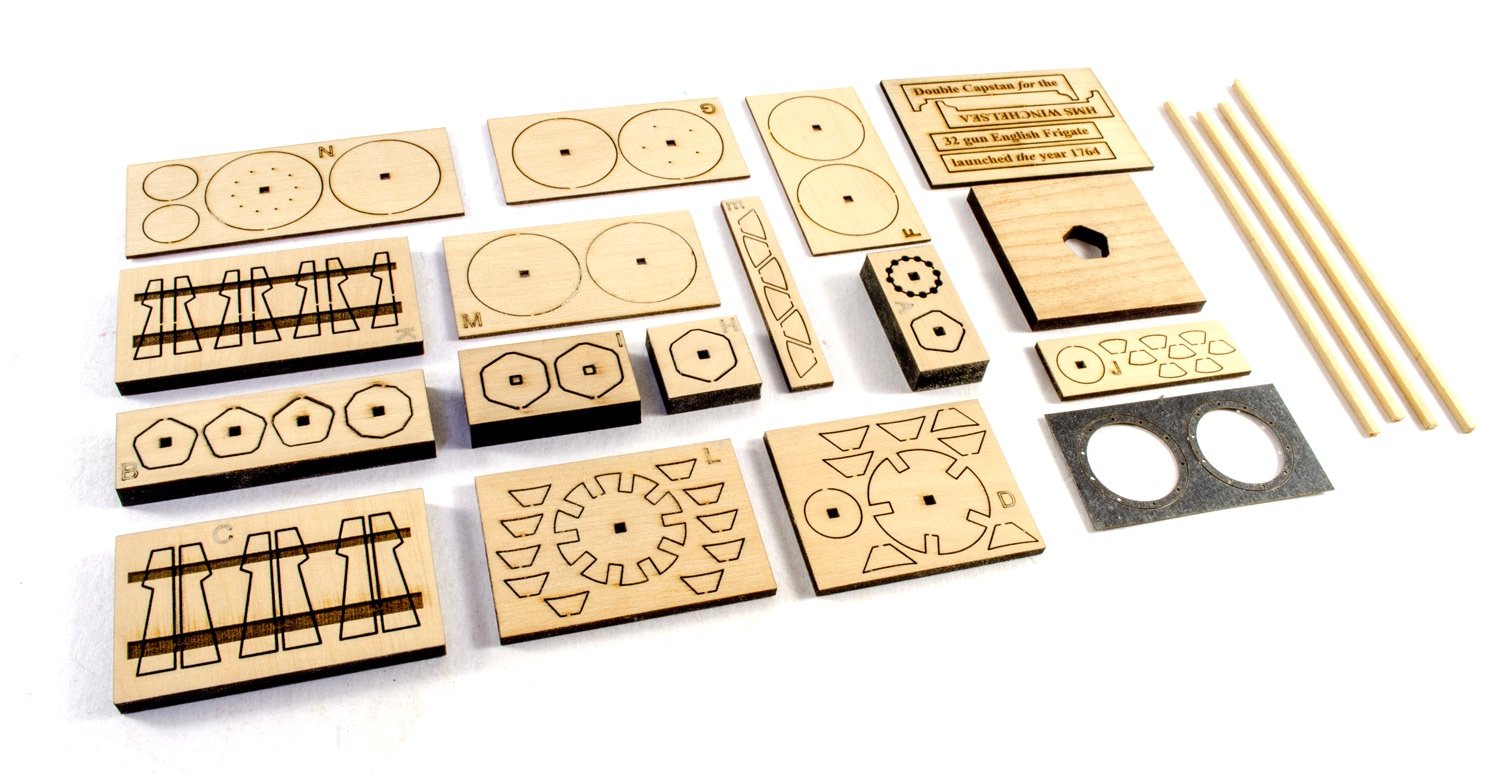
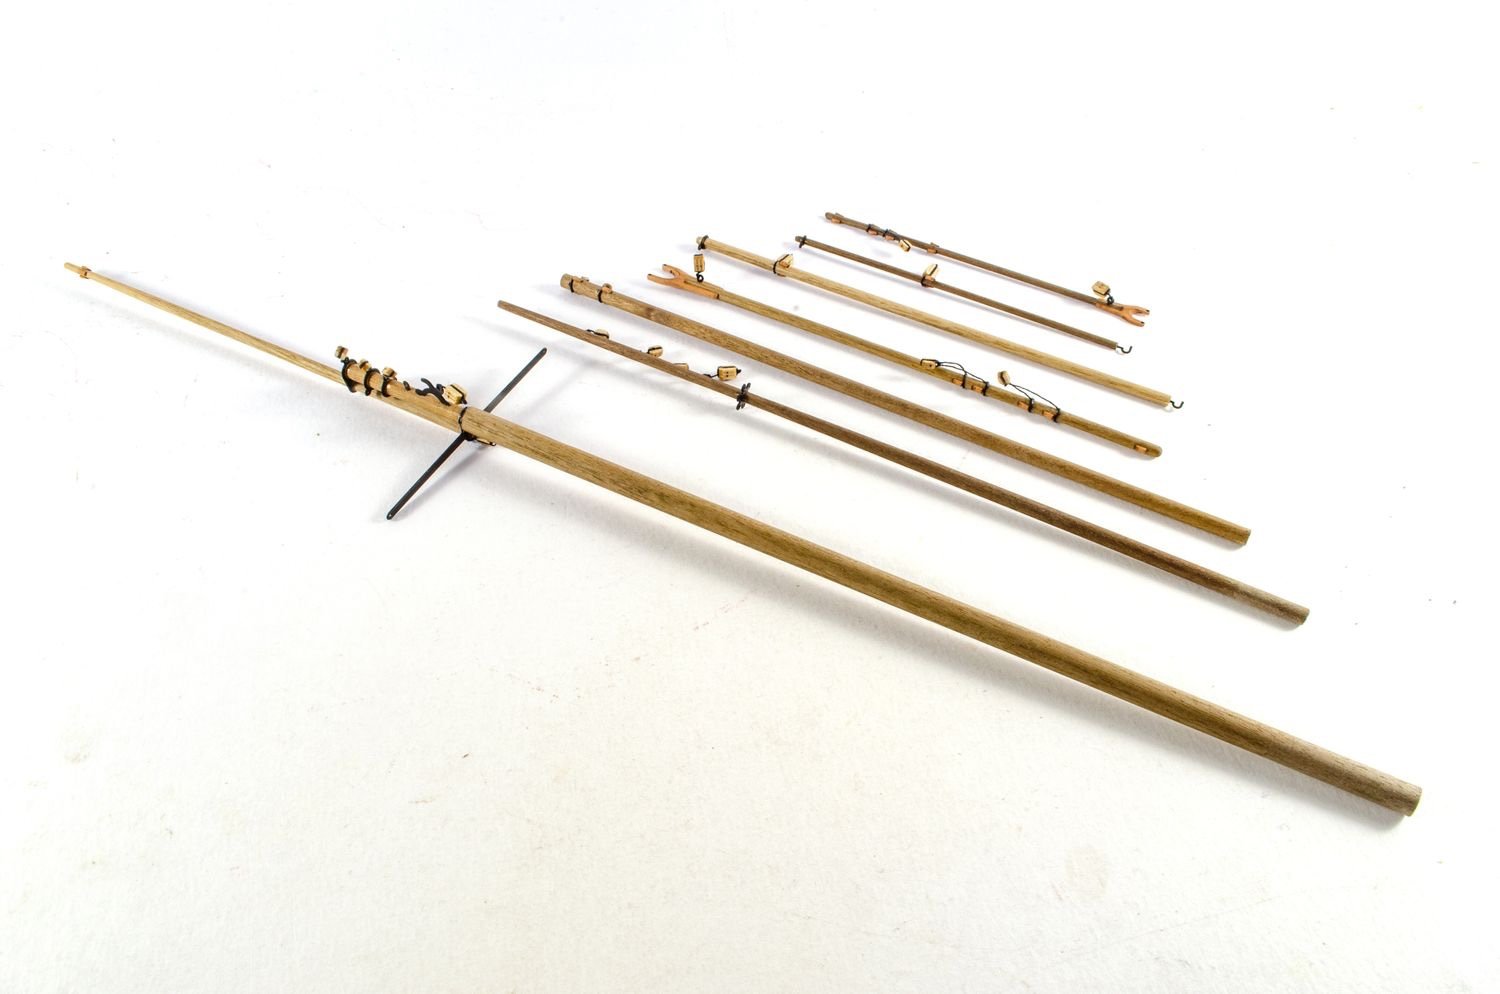
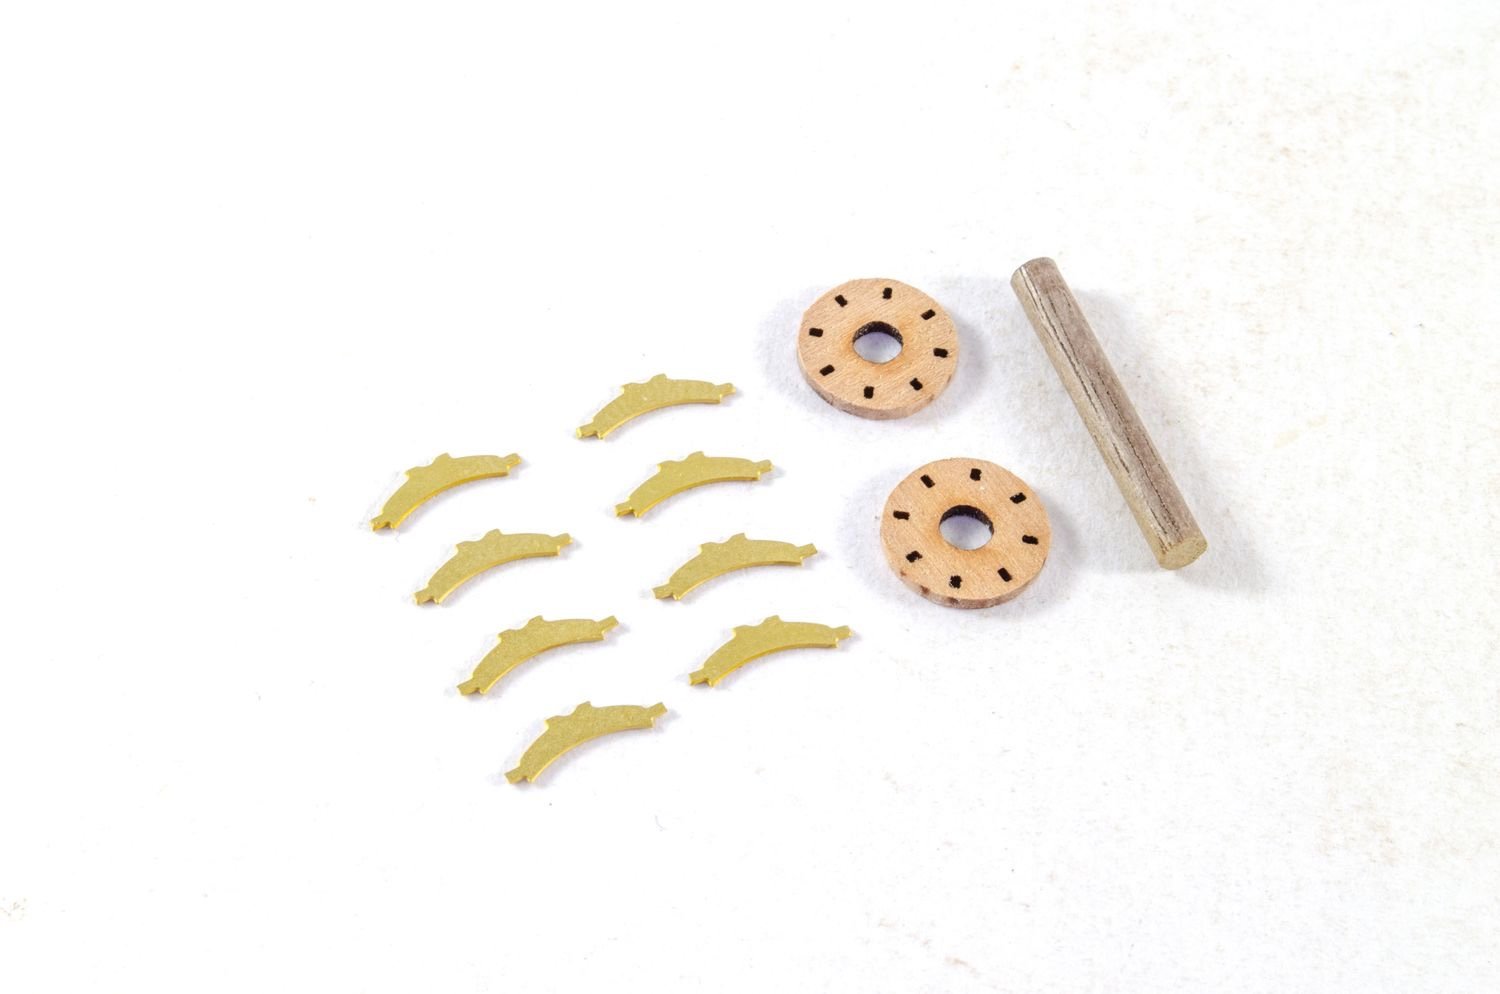
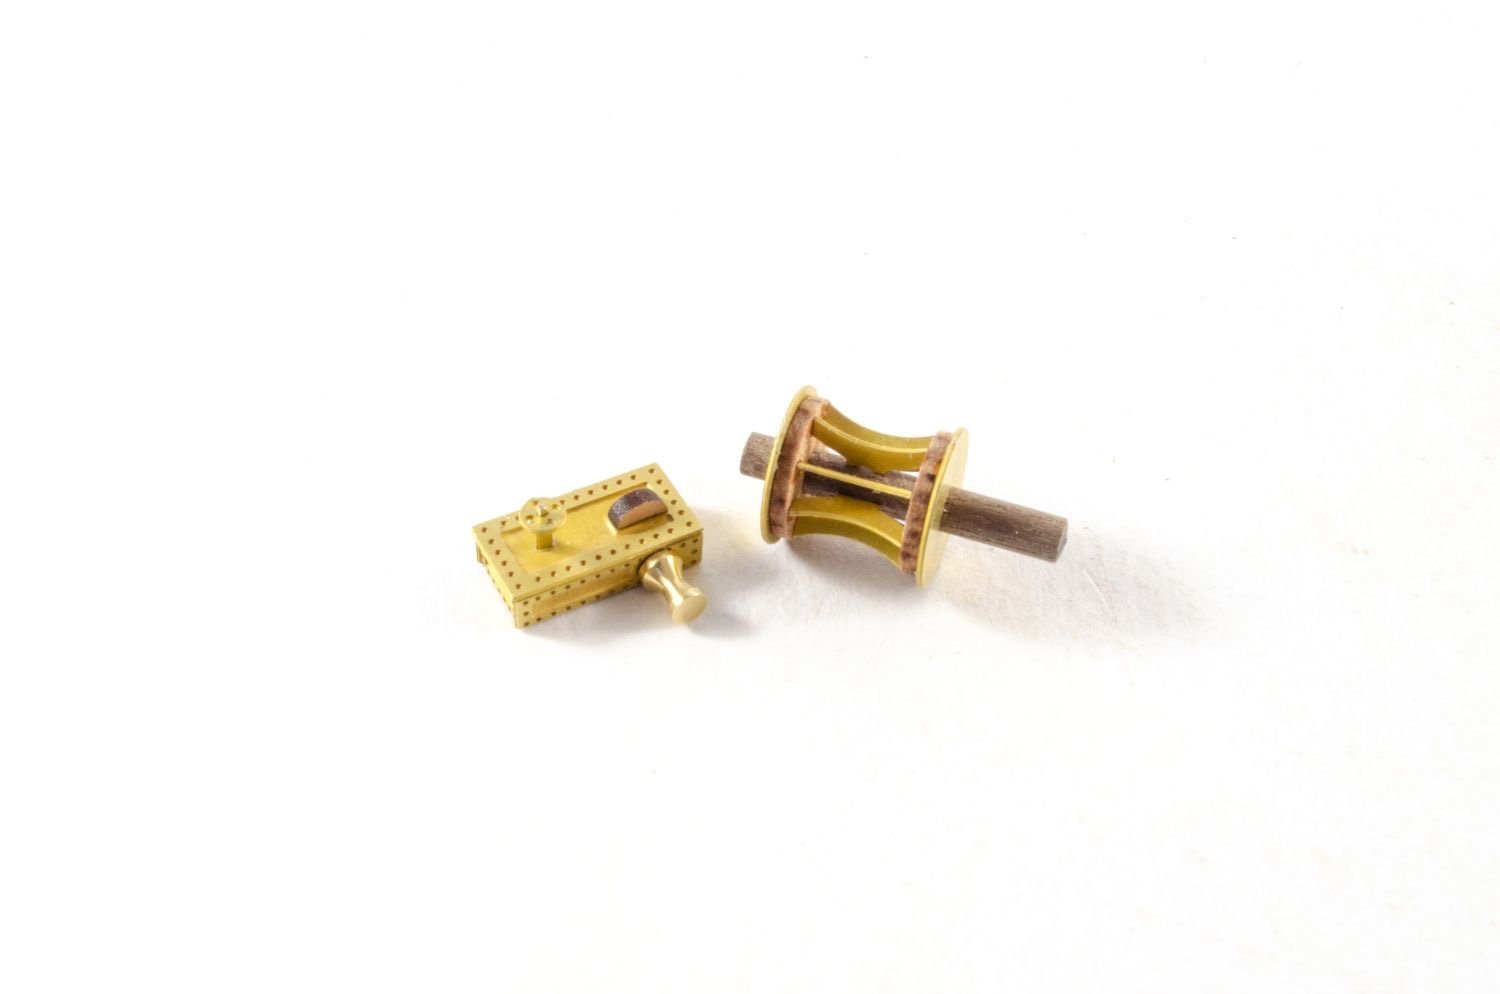
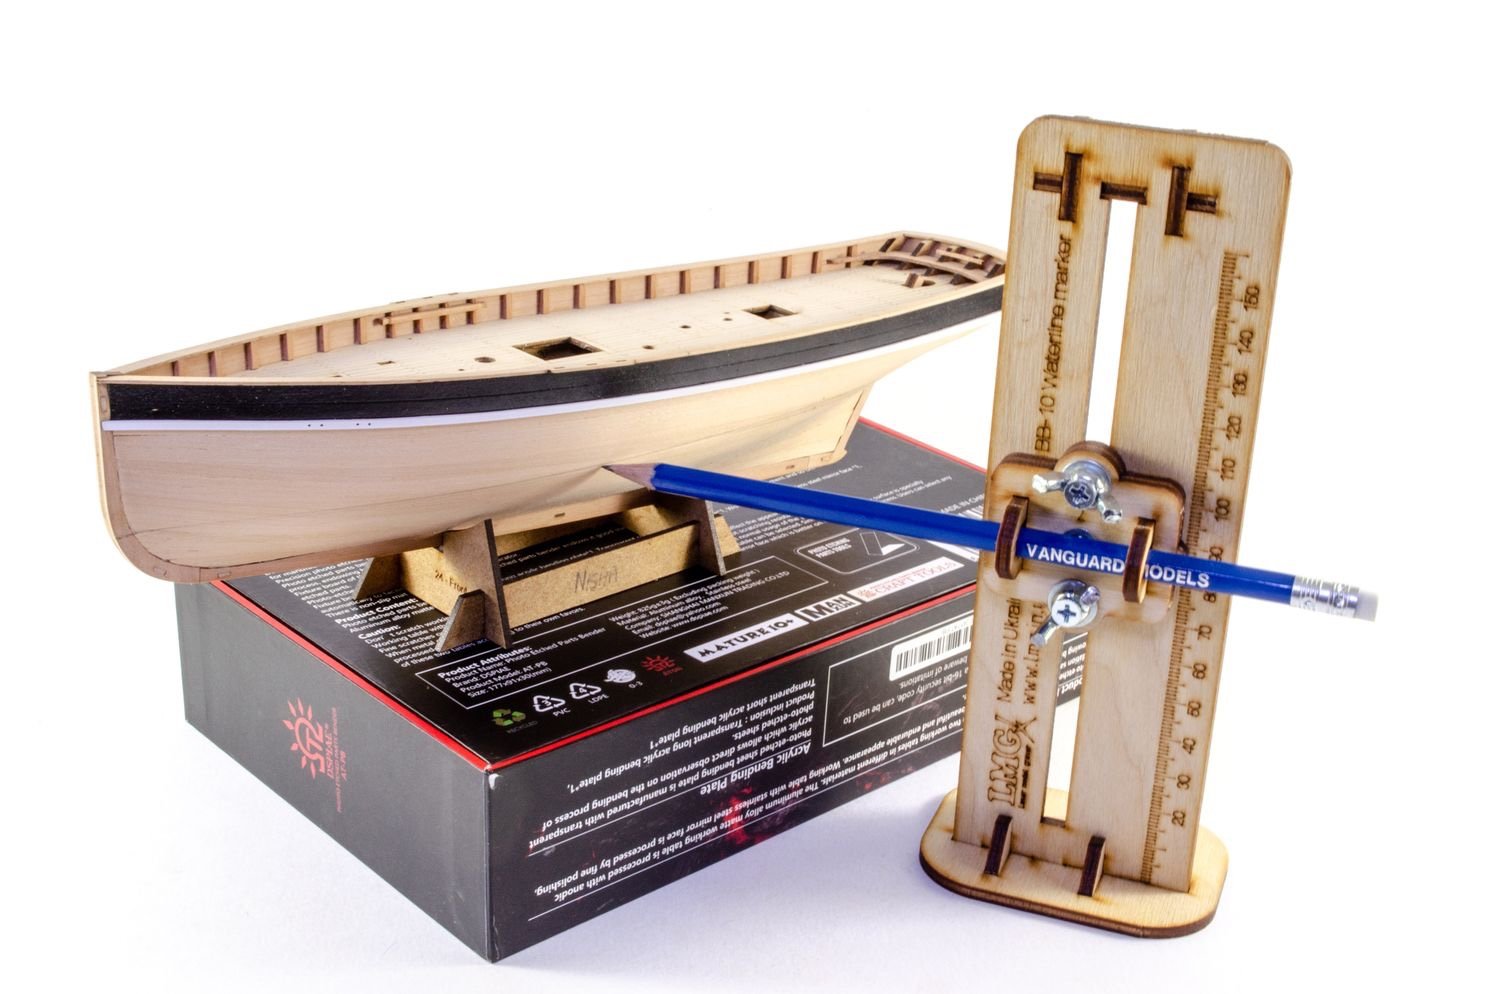
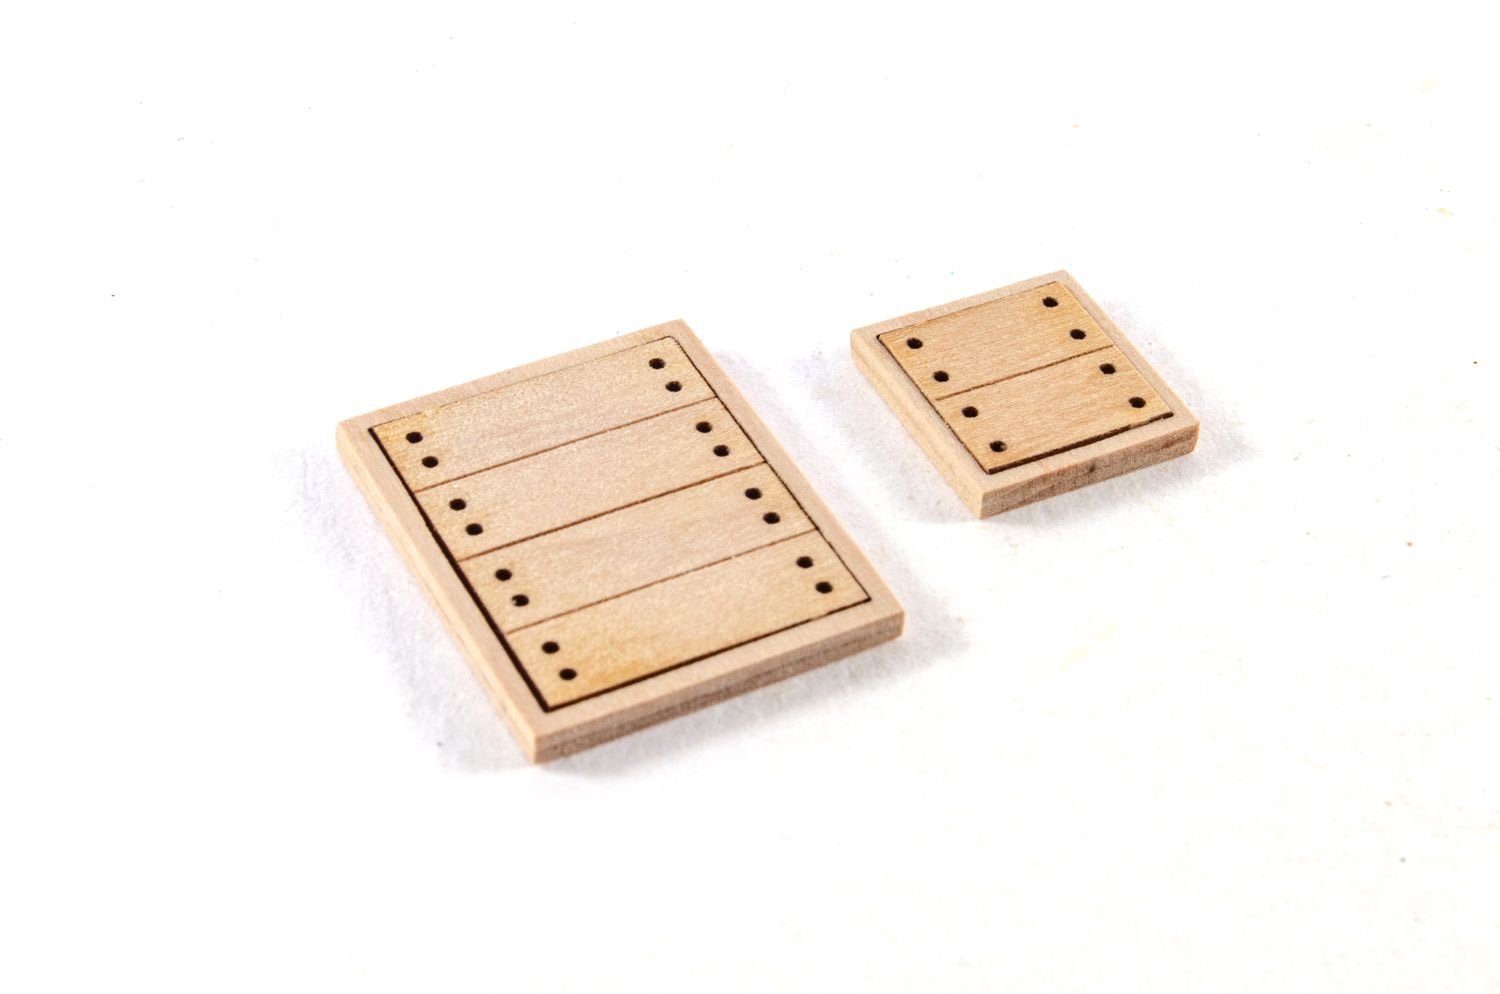
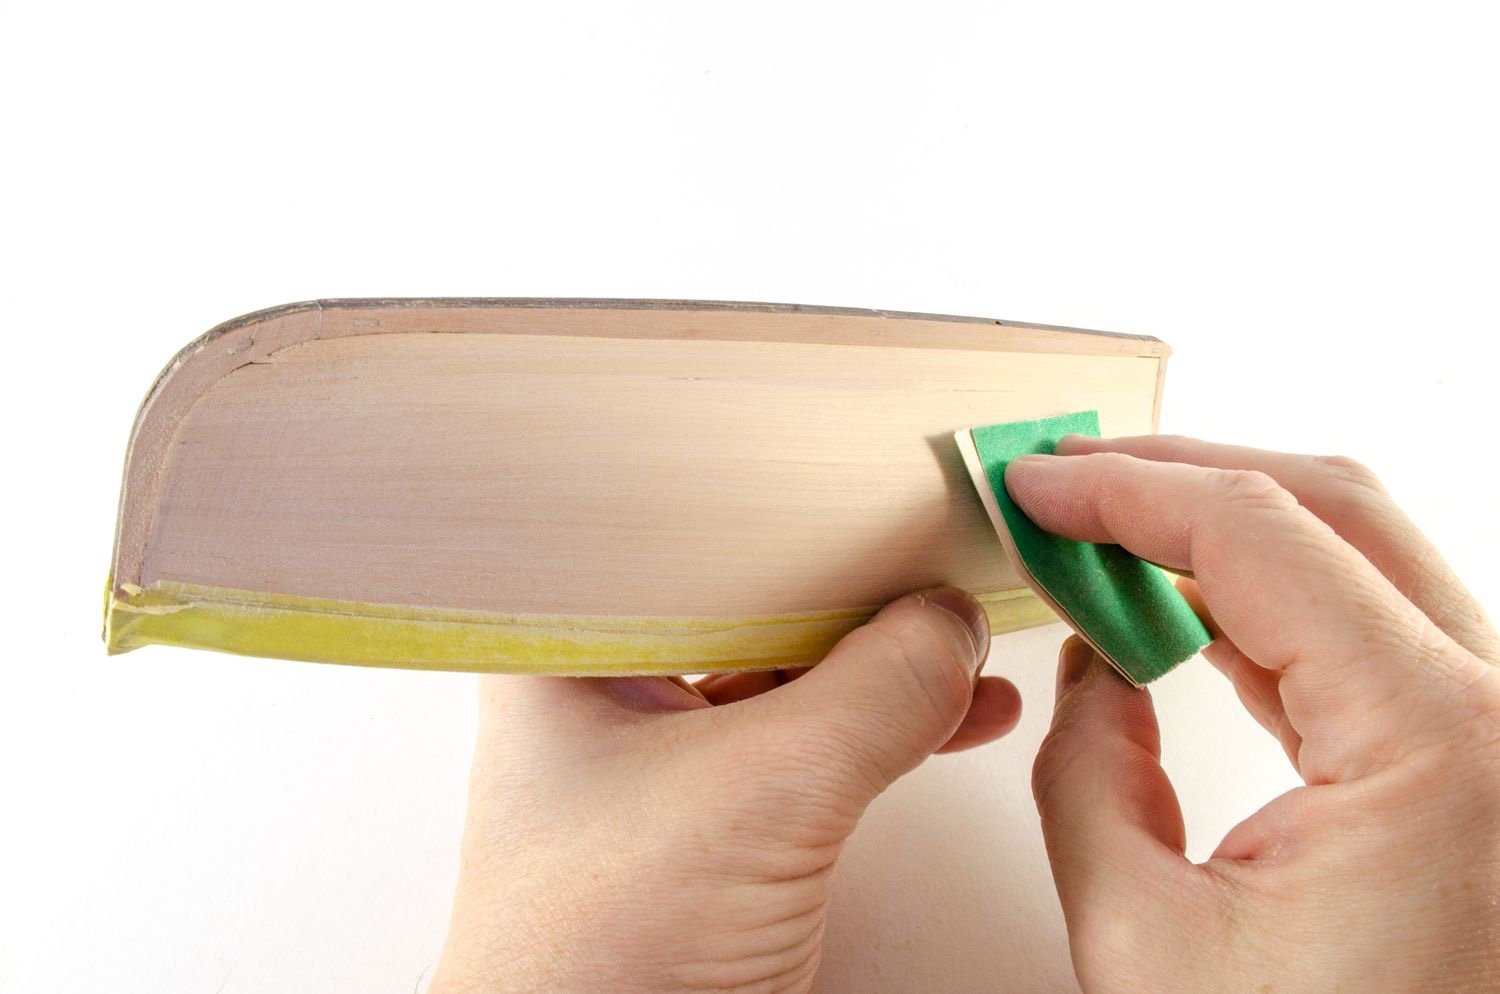
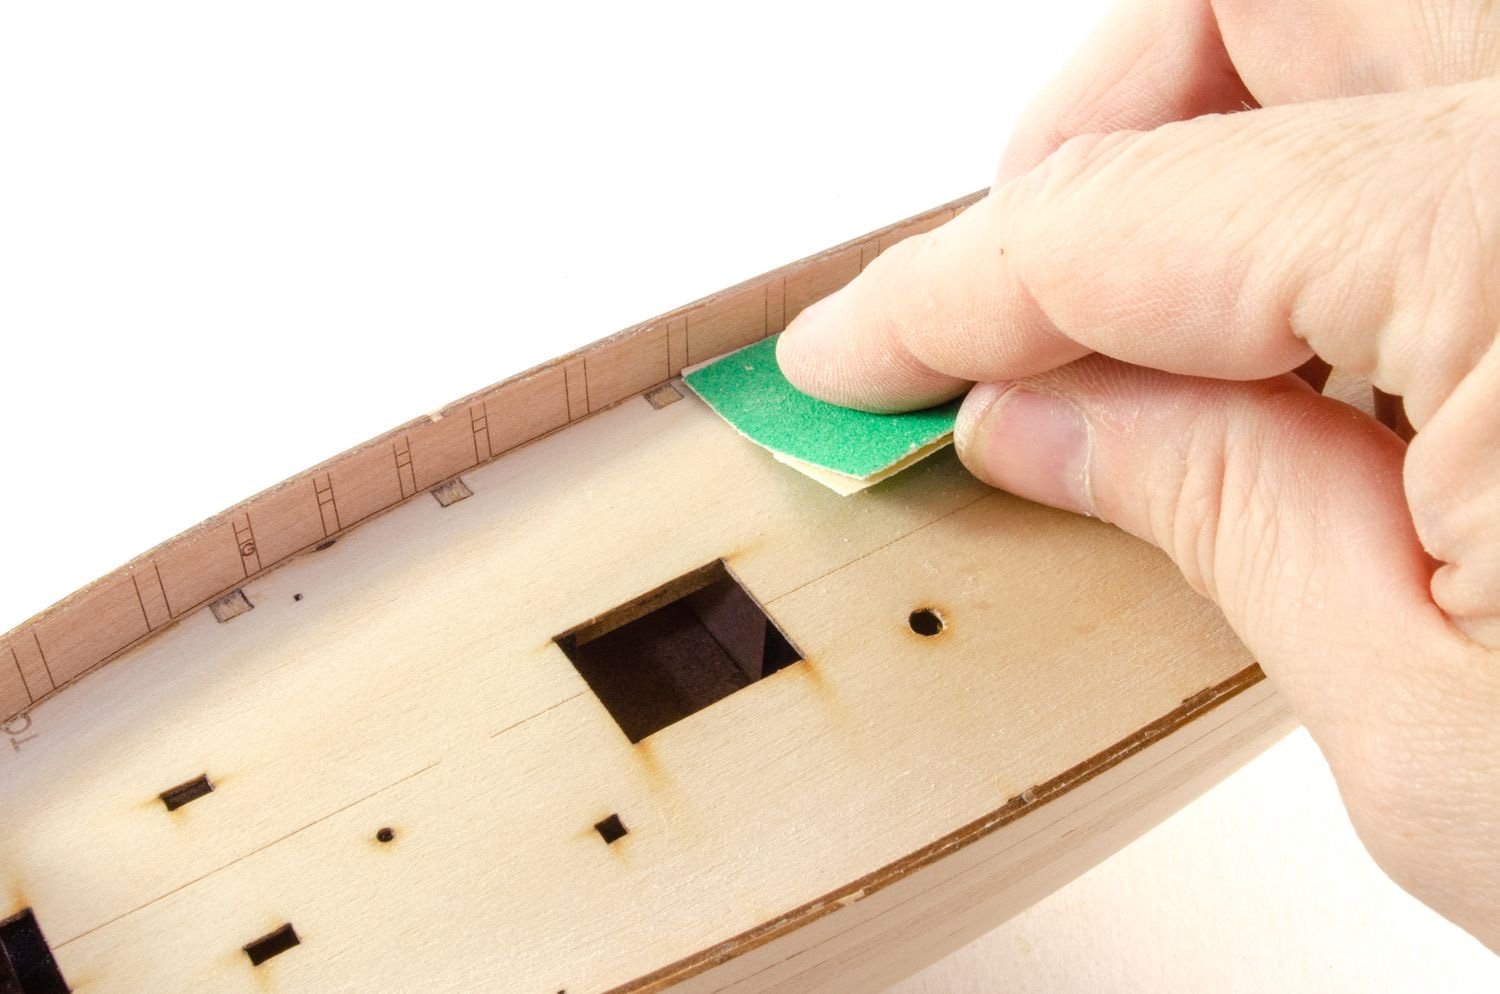
As I'm now on a brief respite from my usual stuff, I thought I'd fill in a little time with the HMS Winchelsea Double Capstan kit that I got from Syren a while ago. I'll work on this between killing aliens on my PlayStation and other important daily stuff 😁
This is a pic of the kit contents, minus the black filament that is used for the bolt heads. The first task was to gently clean up any surface scorch from the laser. Thankfully, there's very little, and I used both 320 and 400 grit paper to finish the surfaces.
I'll be working on this over the next days and weeks.

-
1 hour ago, PeteB said:
Hi Guys
Just went to make a donation and the donate button opened a new page being Paypal with a banner that reads
"This organisation is currently ineligible to receive donations."
any ideas ??
Cheers Pete
We'll check that out. Thanks for the heads up.
-
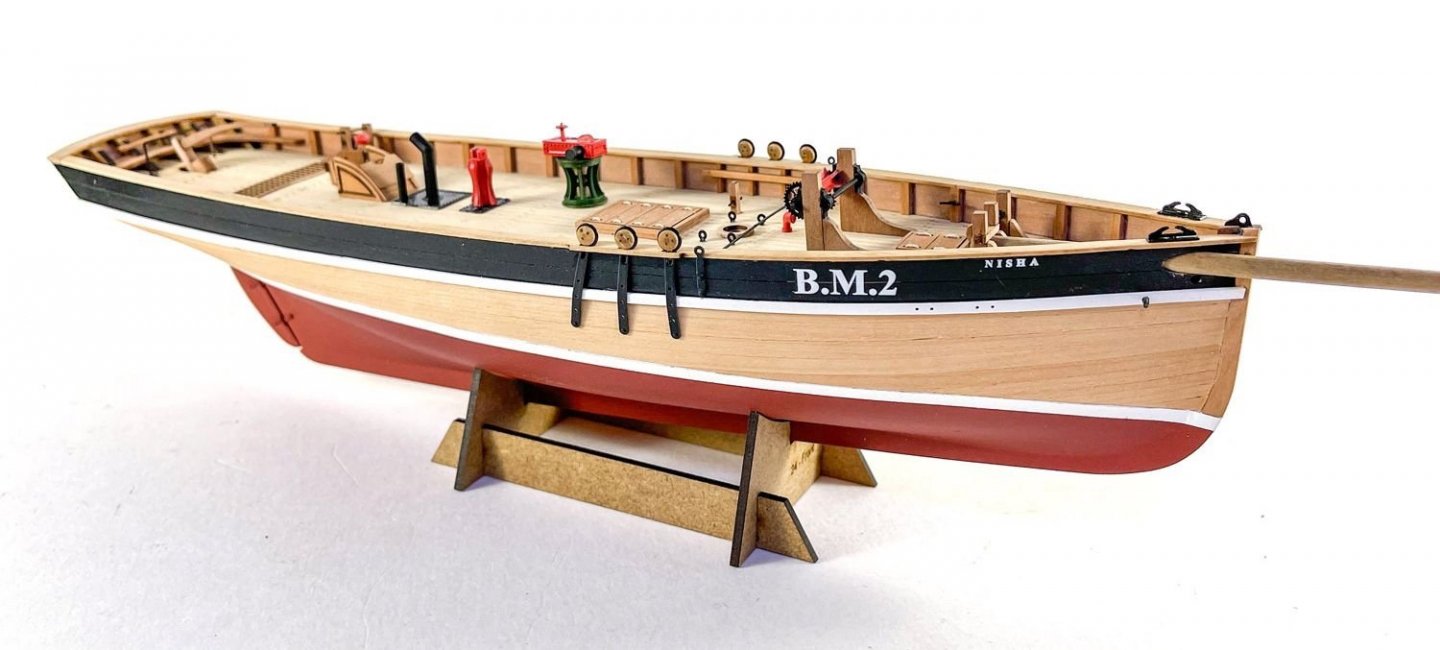
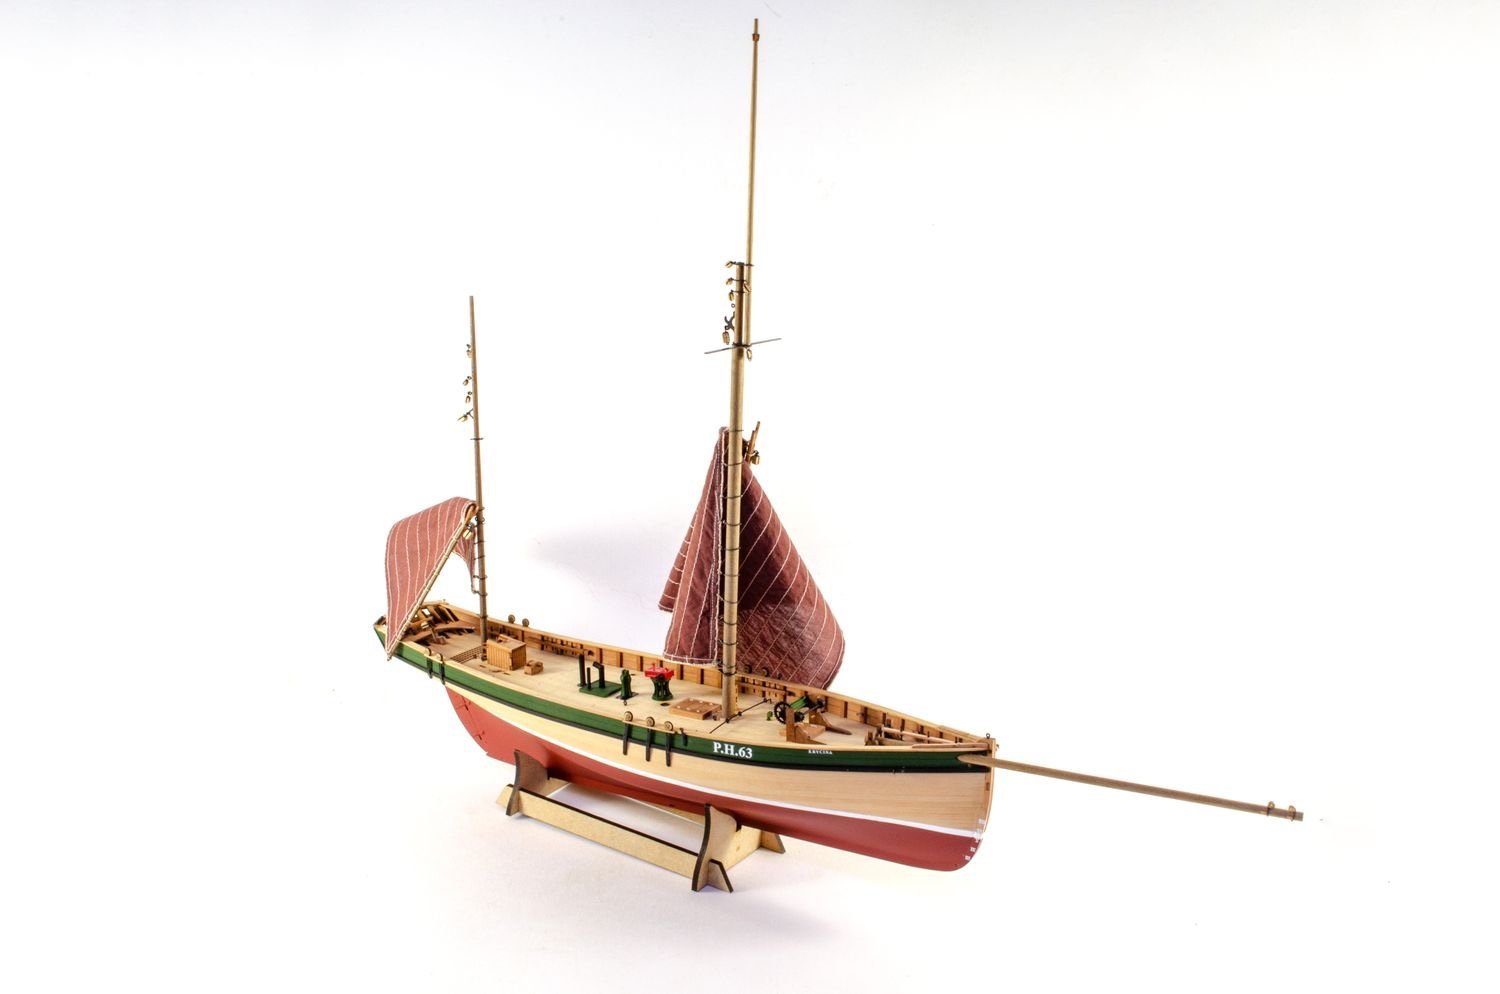
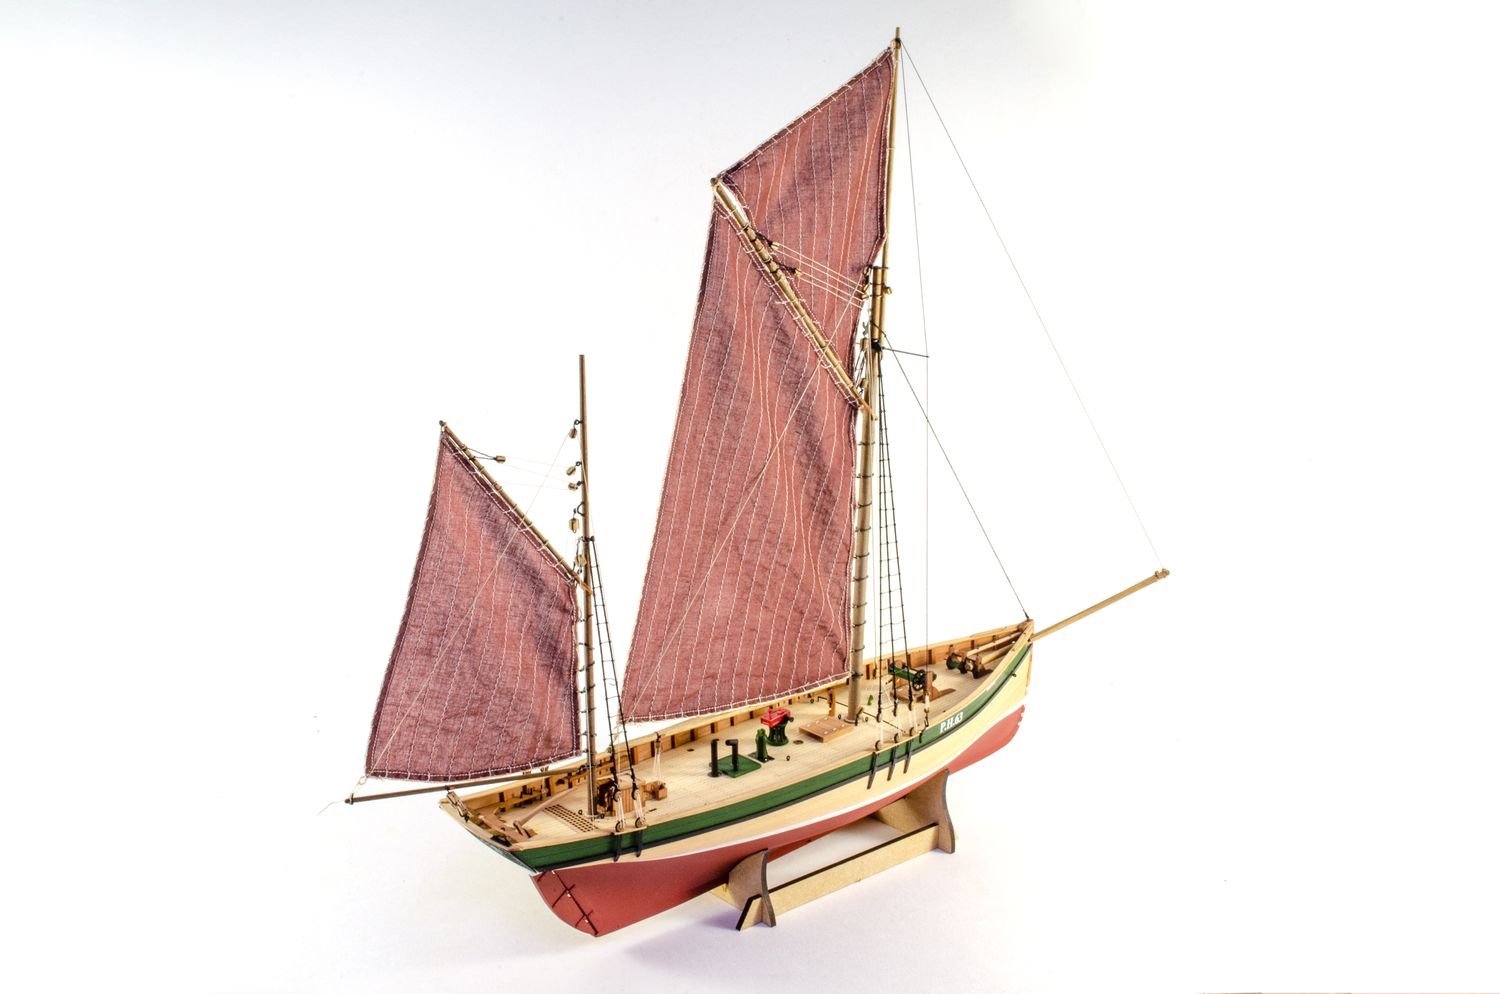
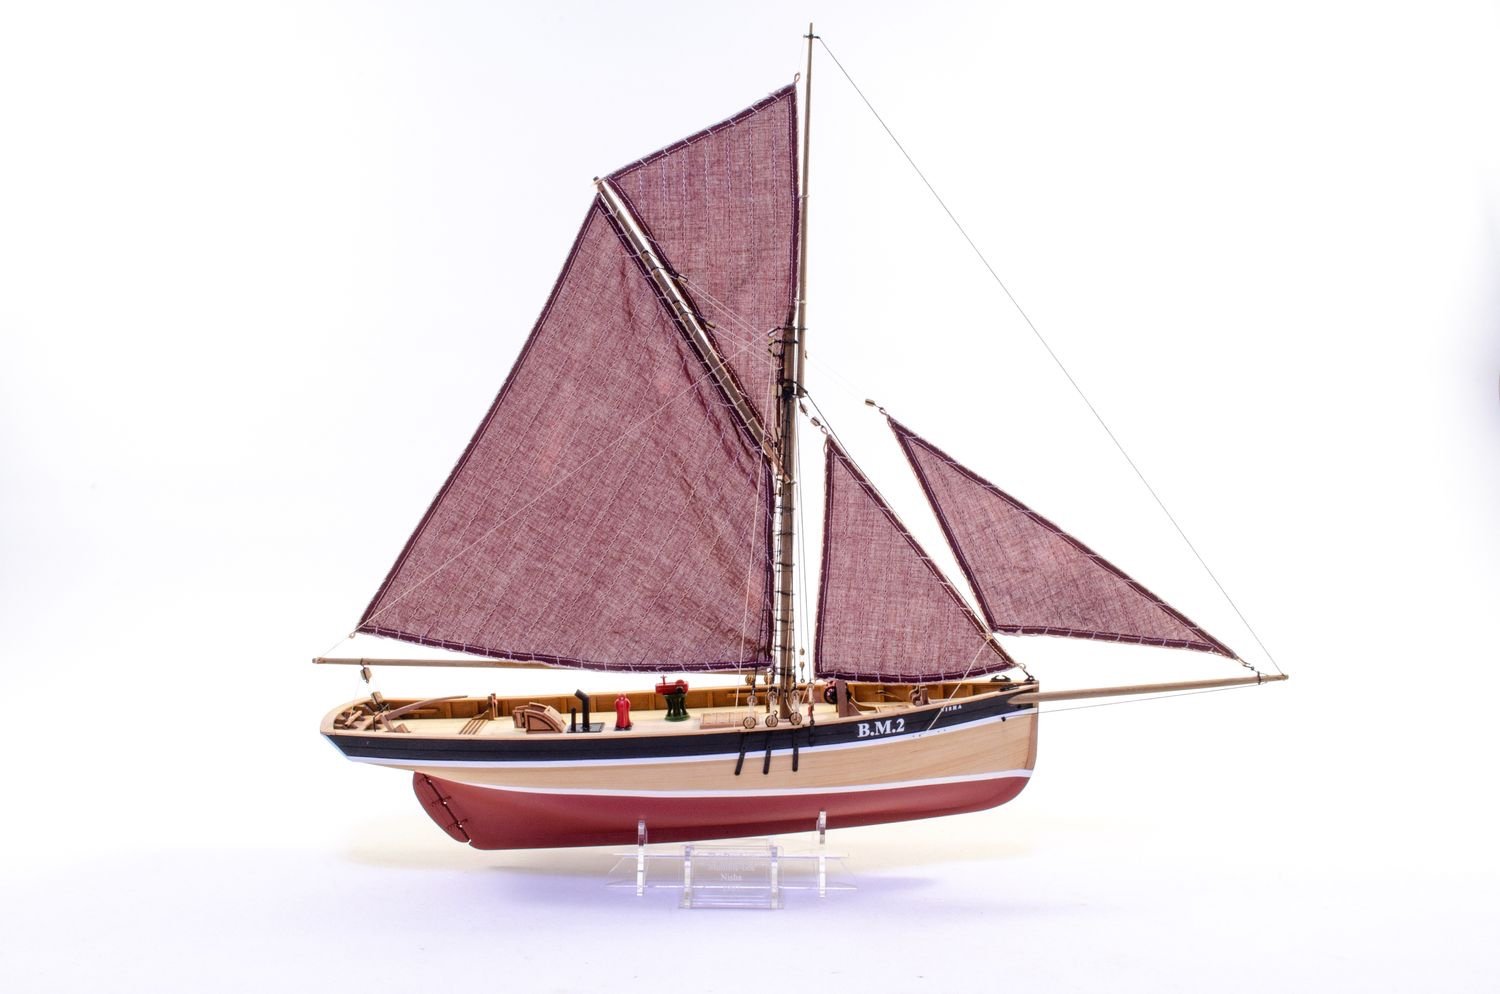
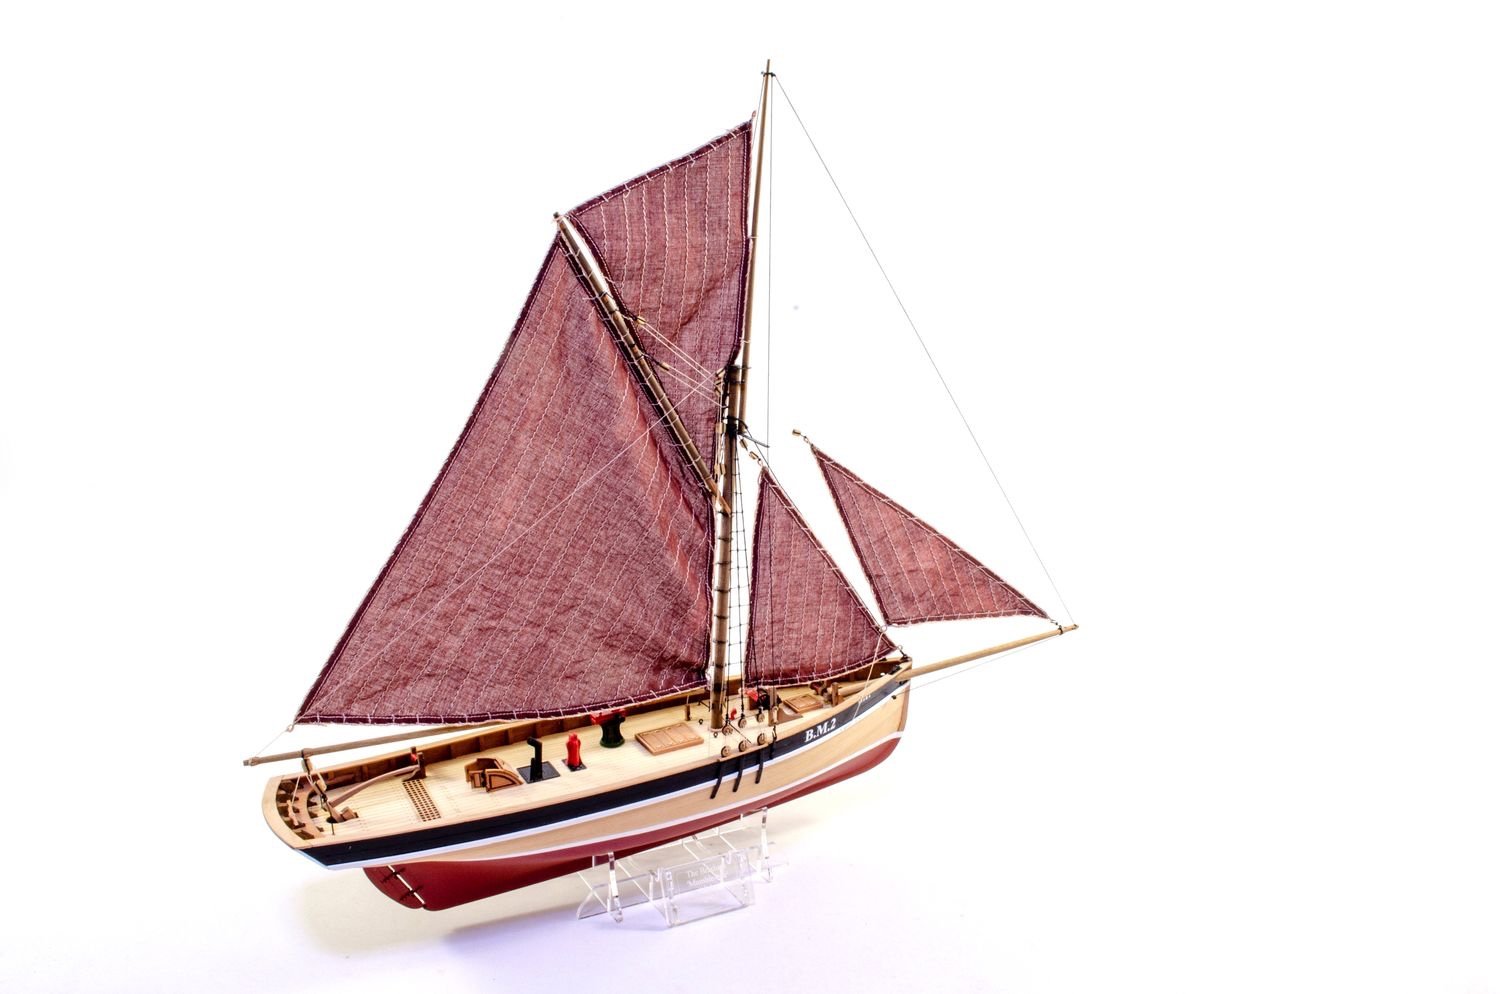
And now the swan-song for this lovely little build. These will be released within a couple of weeks. It's as close to giving birth as I can get 😆
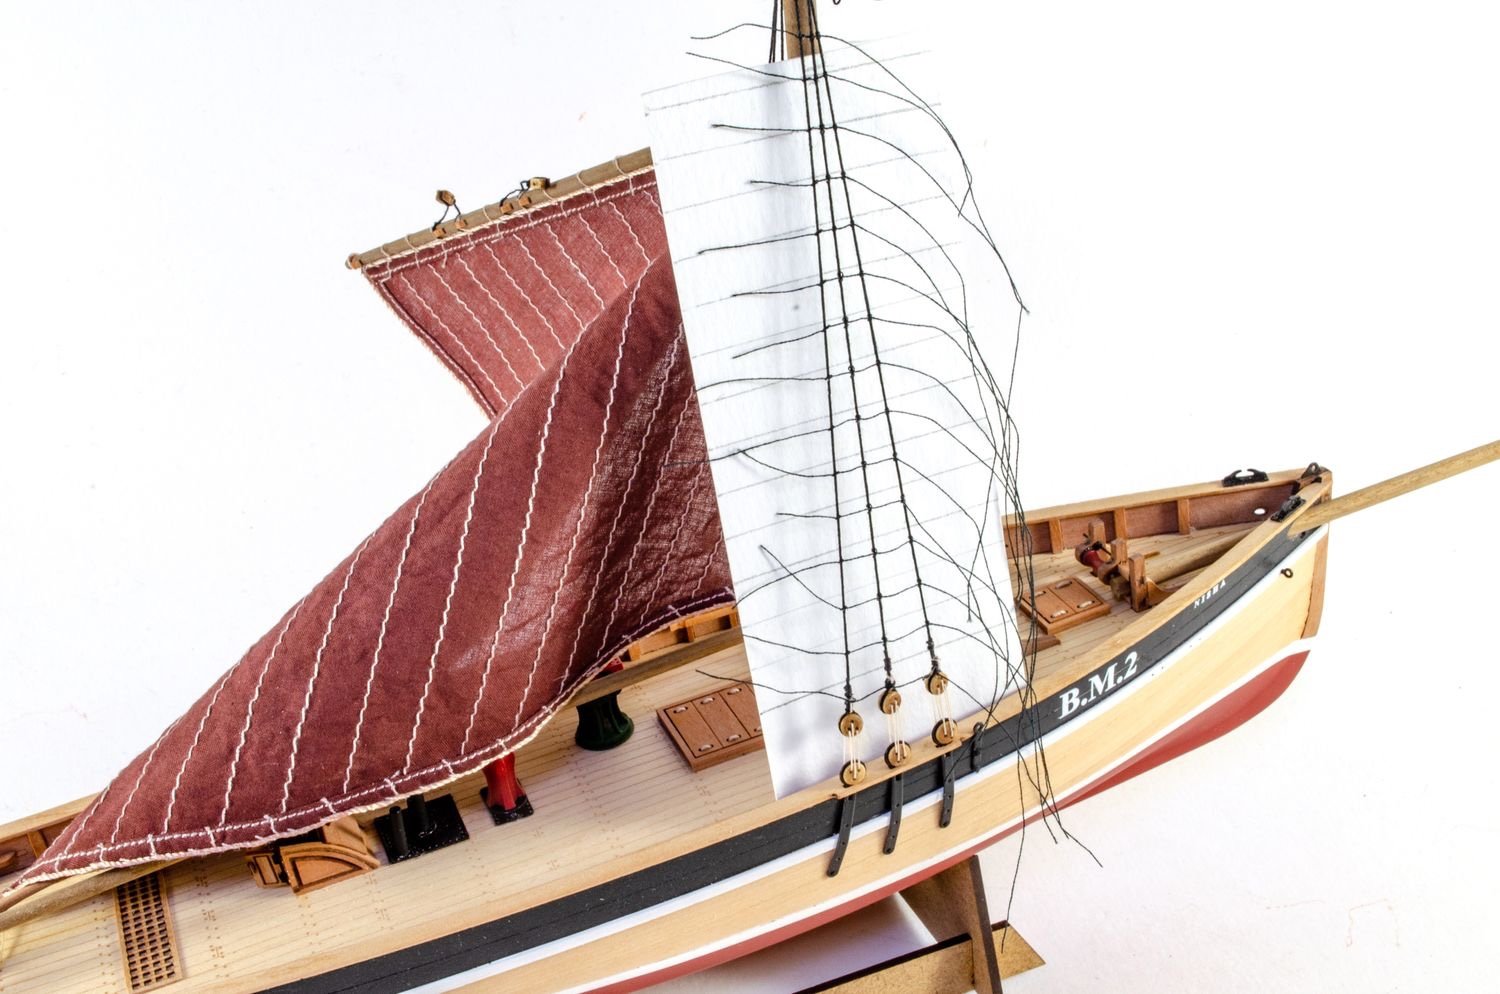
Unlike Nisha, there are two masts to make here, but the mizzen is just a single piece of tapered dowel. The only difference between this and Nisha is that the mizzen carries another sail and also needs some simple shrouds and rats installing.

To fit the bowsprit, the opening needs elongating. I used some 3mm dowel wrapped in 180 grit paper. This was tested until I got a nice fit with the bowsprit.

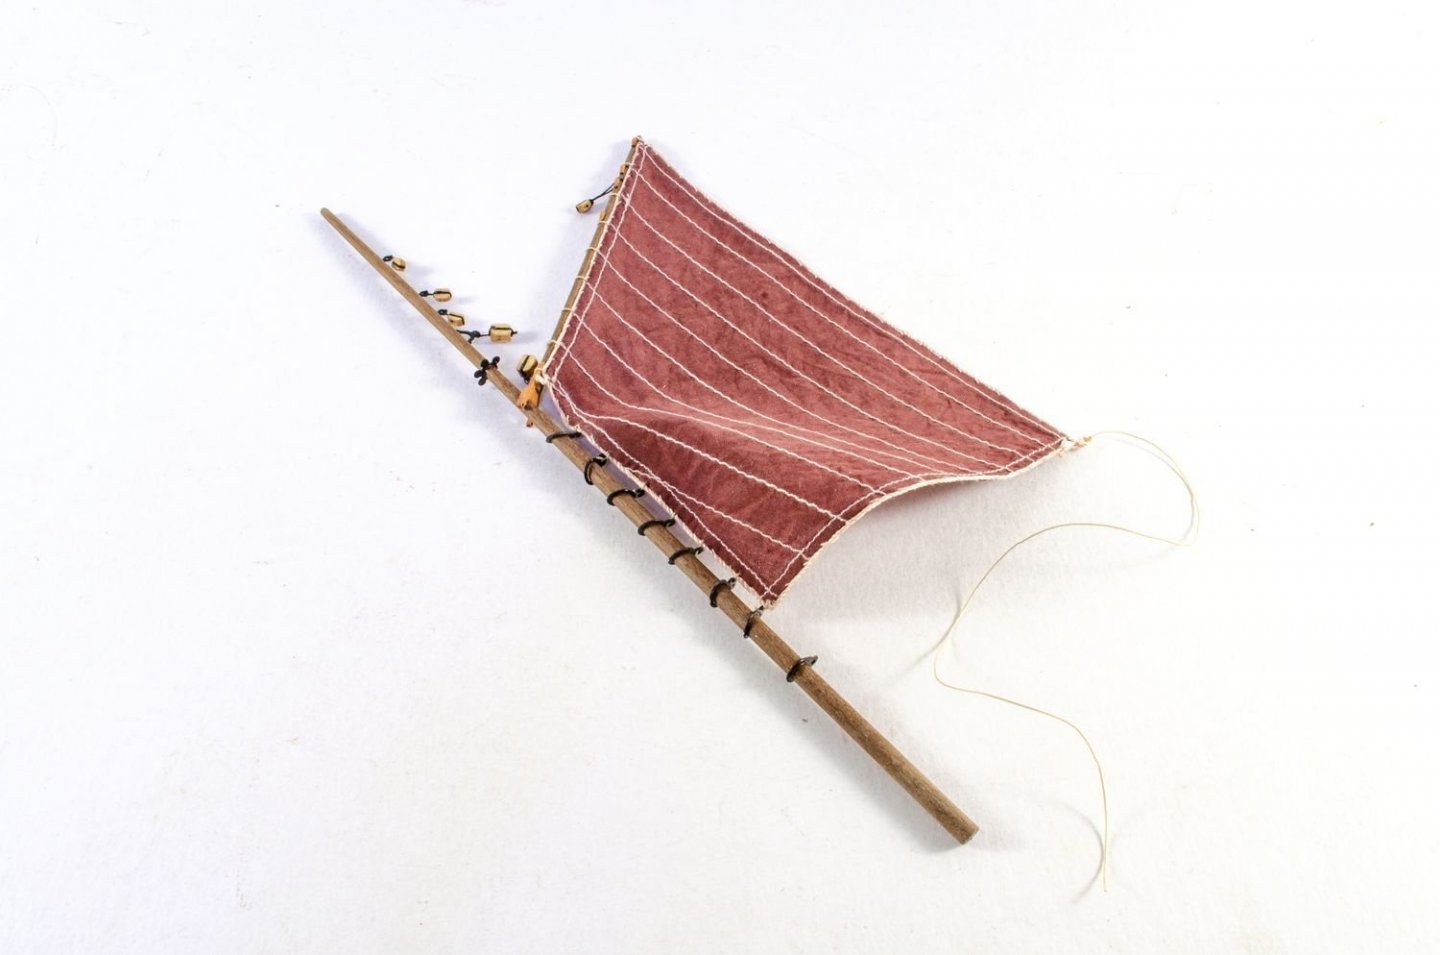
If you buy the optional sail set, you will need to fit the sails before masting. Note that I dyed the sails in dark brown, which was quite typical for a working vessel of this period.

Those shrouds and rats are so easy, as you can see. A ratline spacing template is provided on the plans, making this a whole lot easier for you.


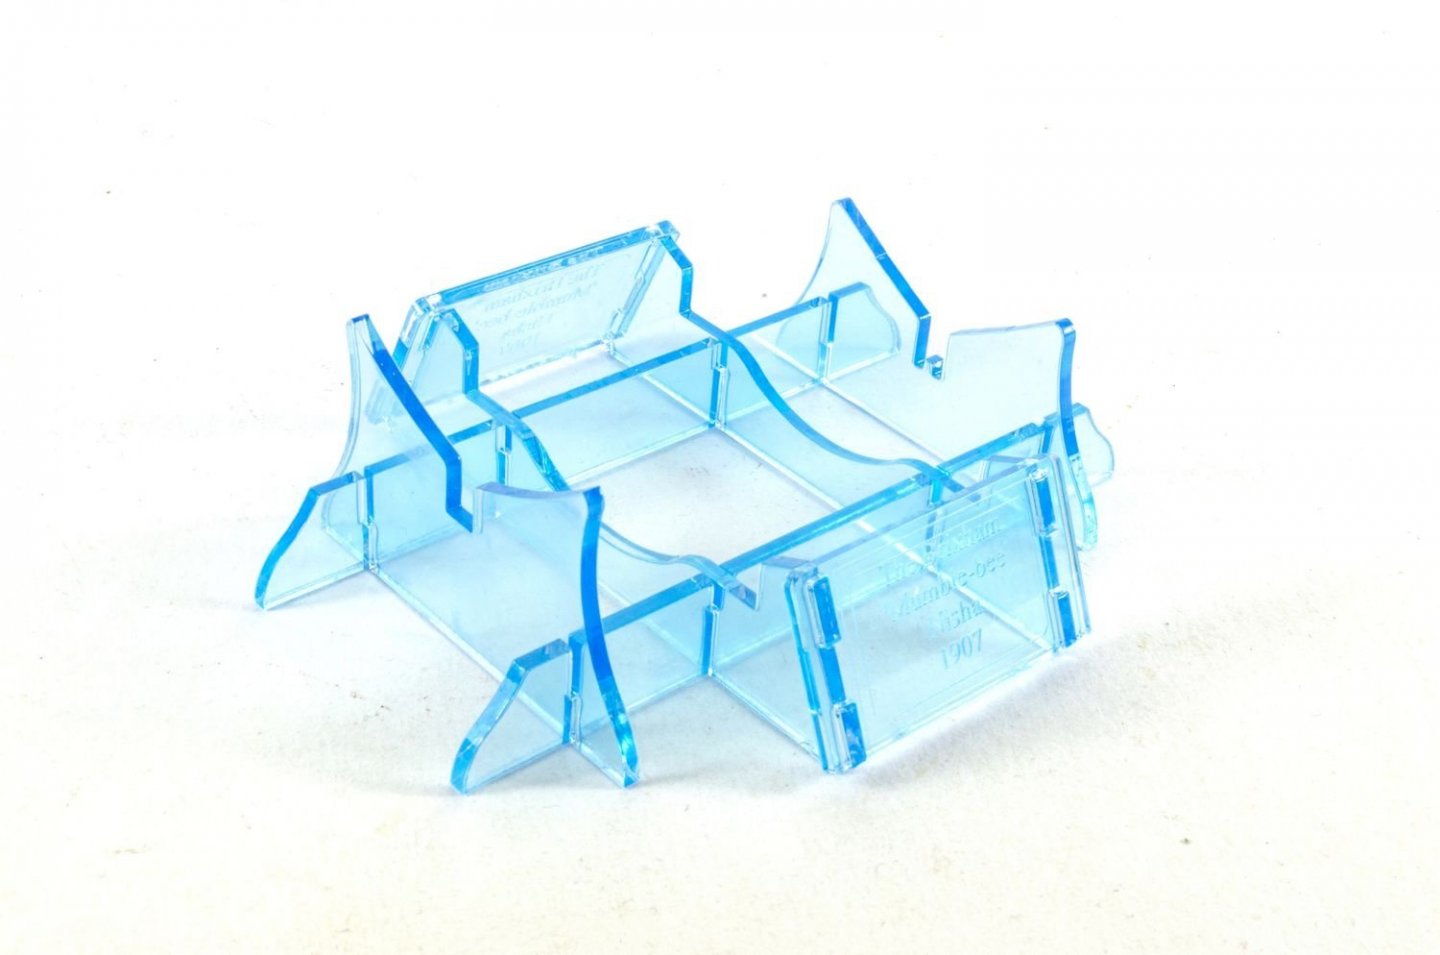
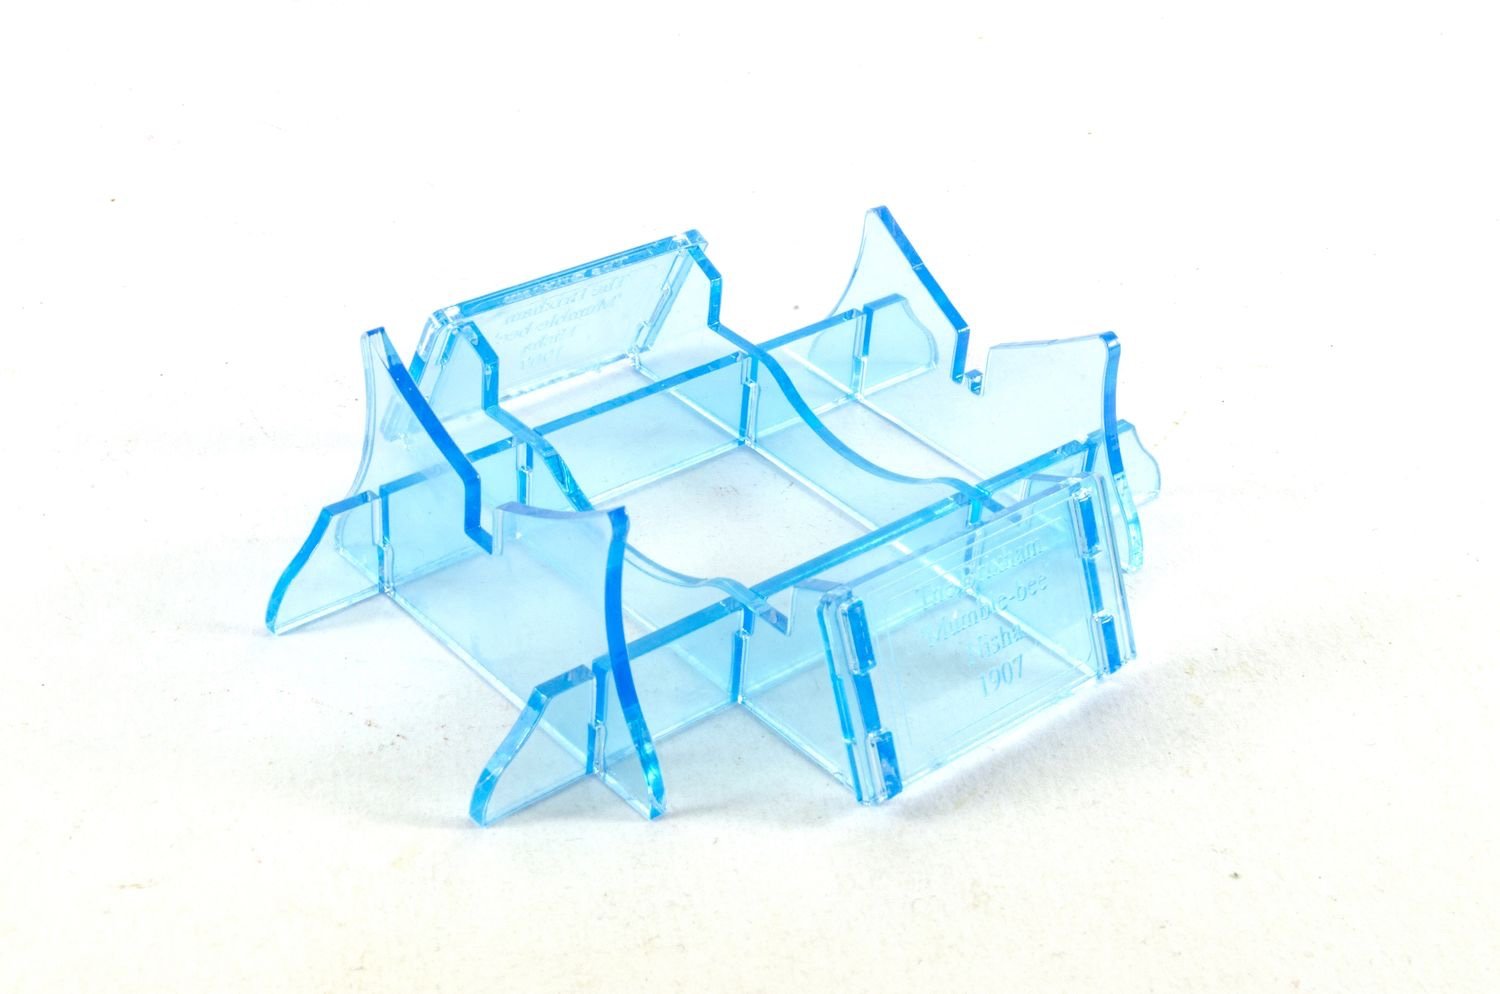
No one wants an MDF stand when the acrylic is far nicer. Here is the stand, complete with keel plug to make sure the model is properly aligned to waterline for display.

And the finals!
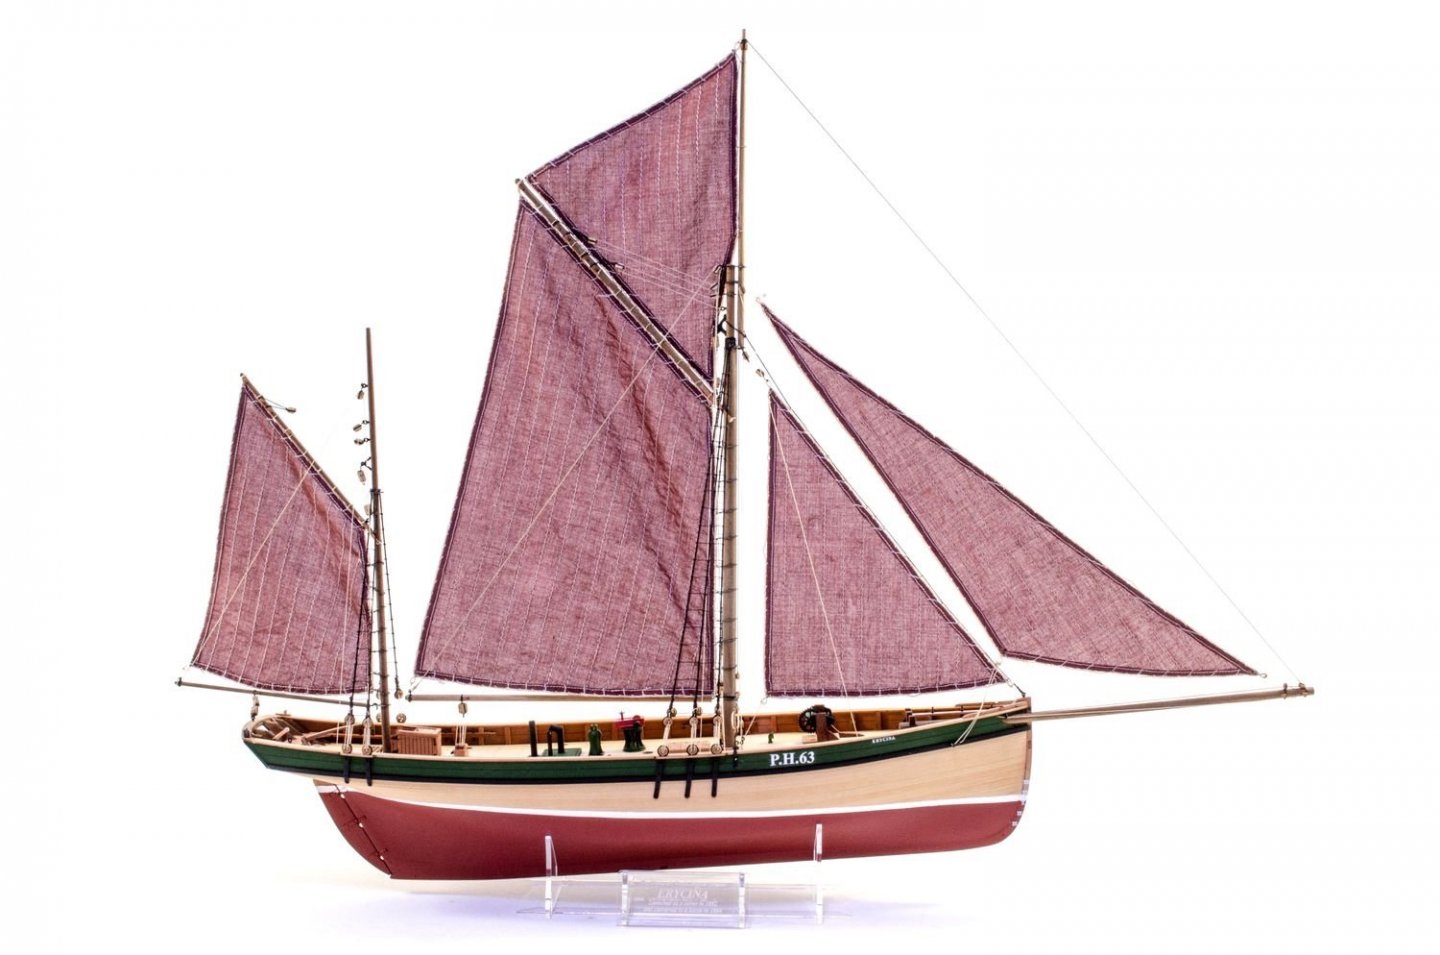

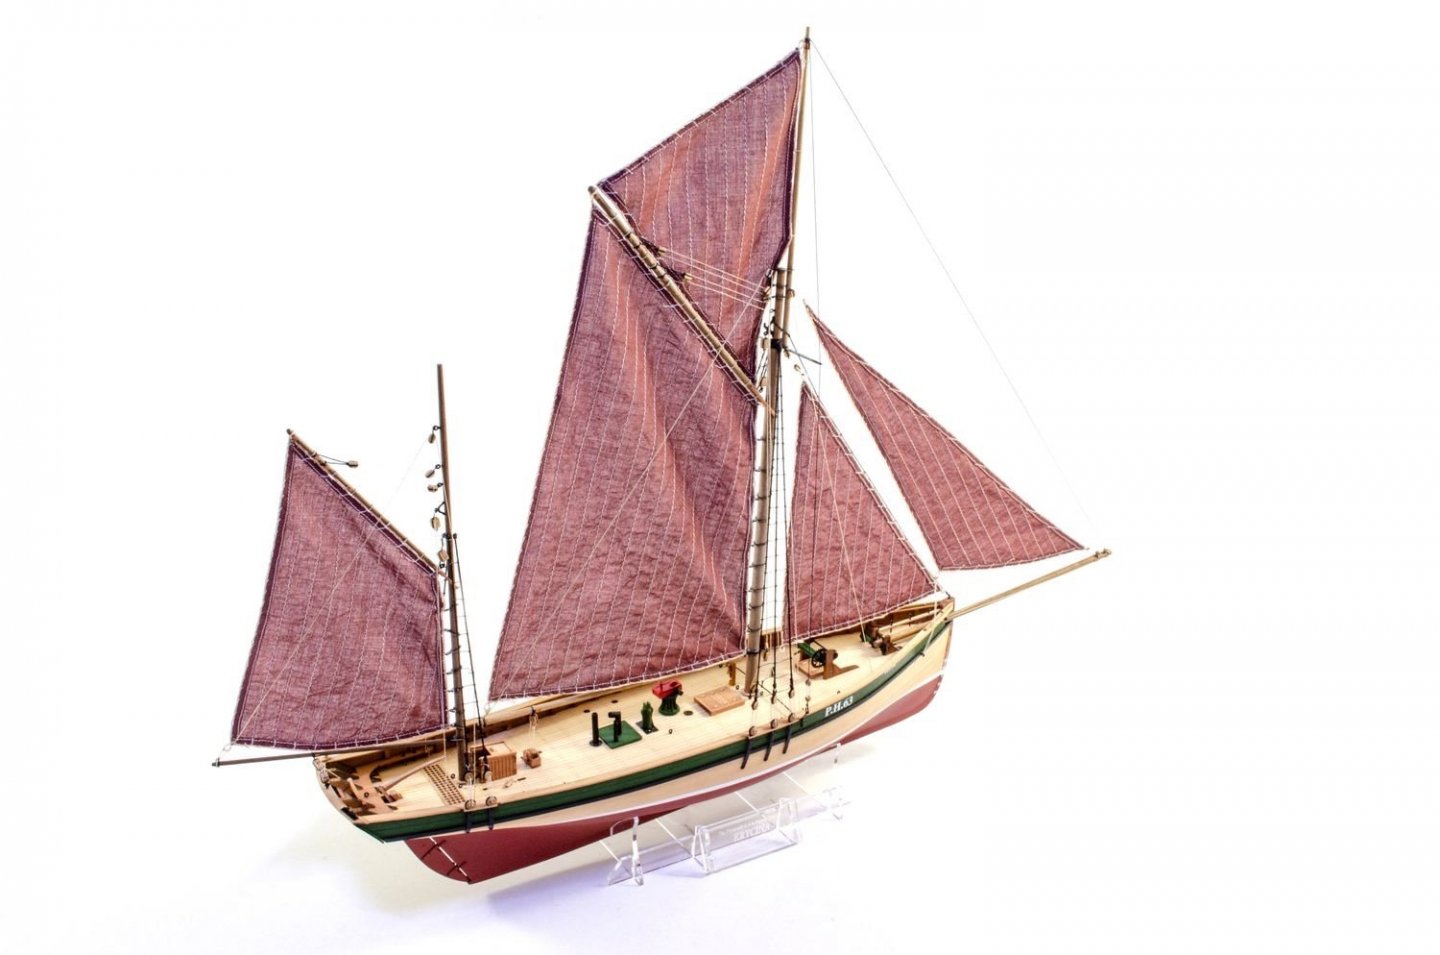
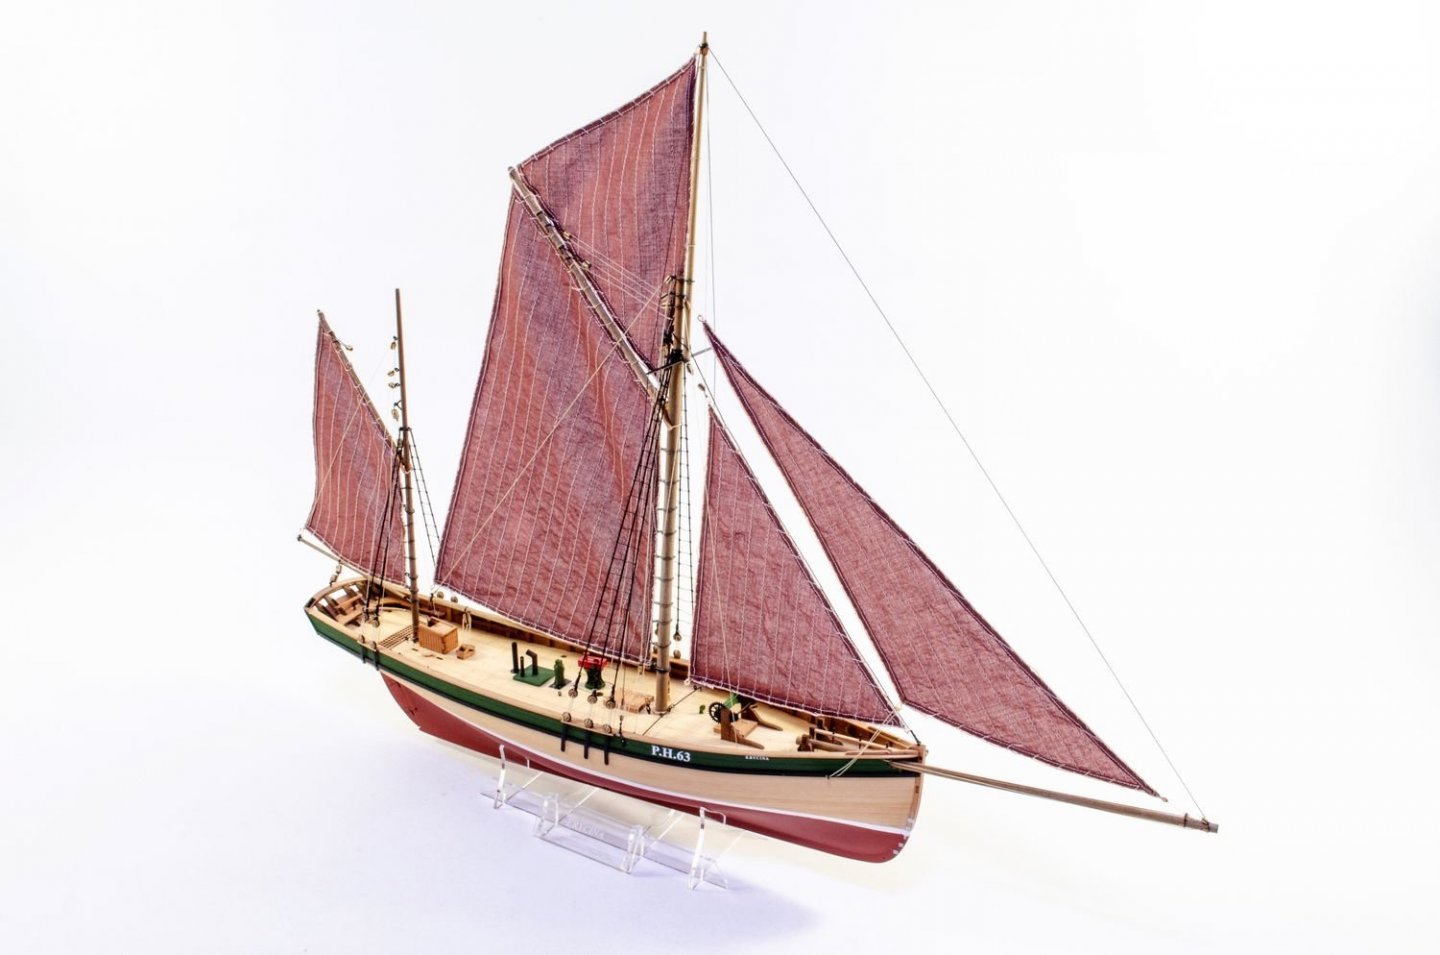

Thanks for checking in. Watch out for release very soon.
-
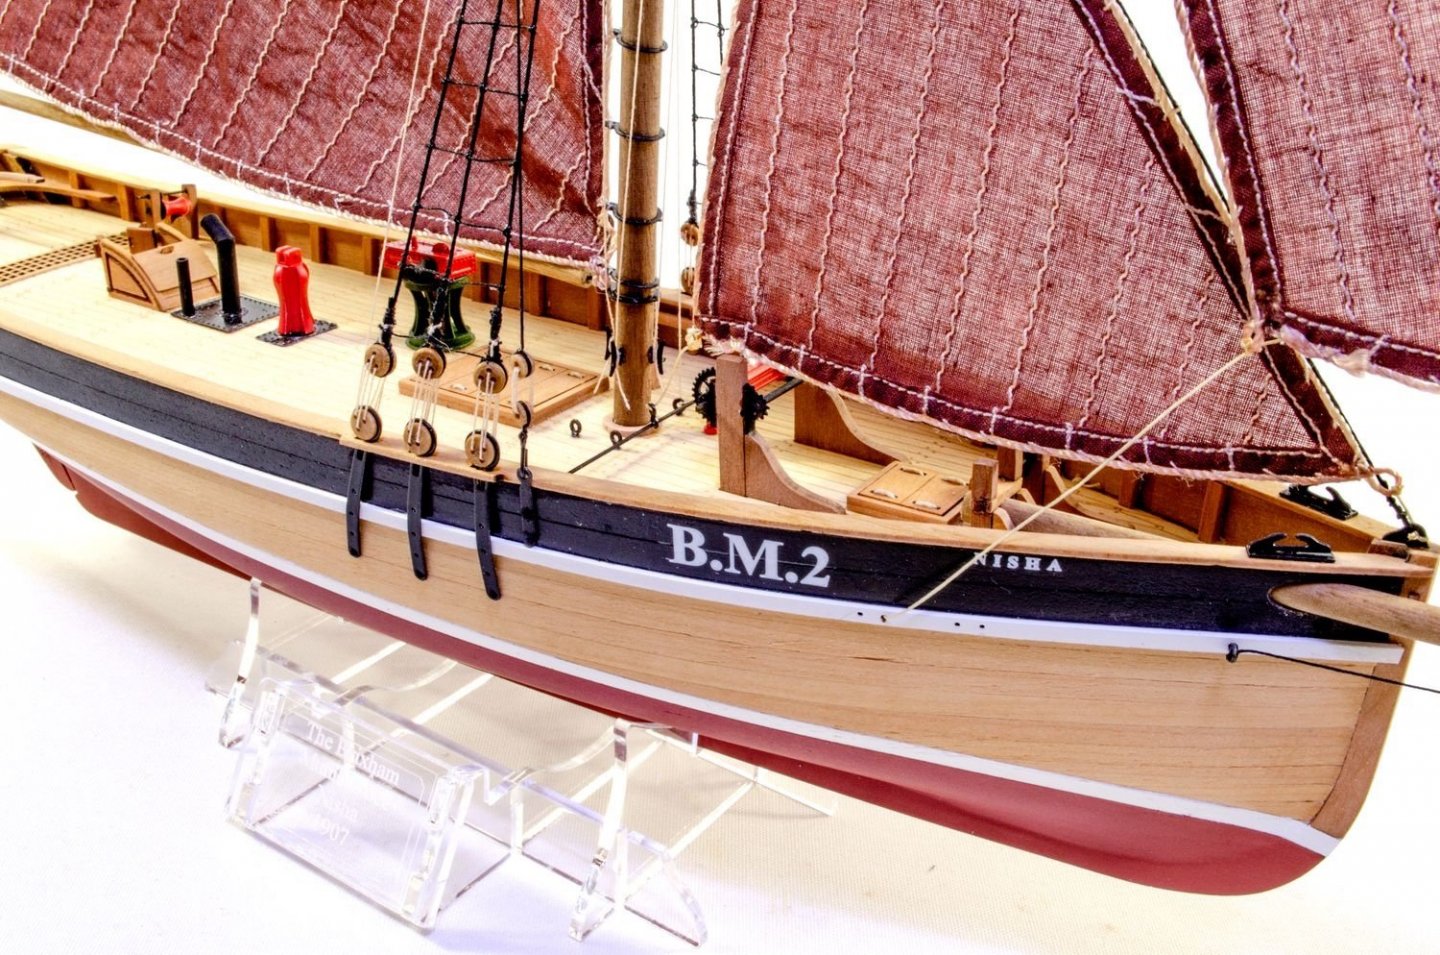
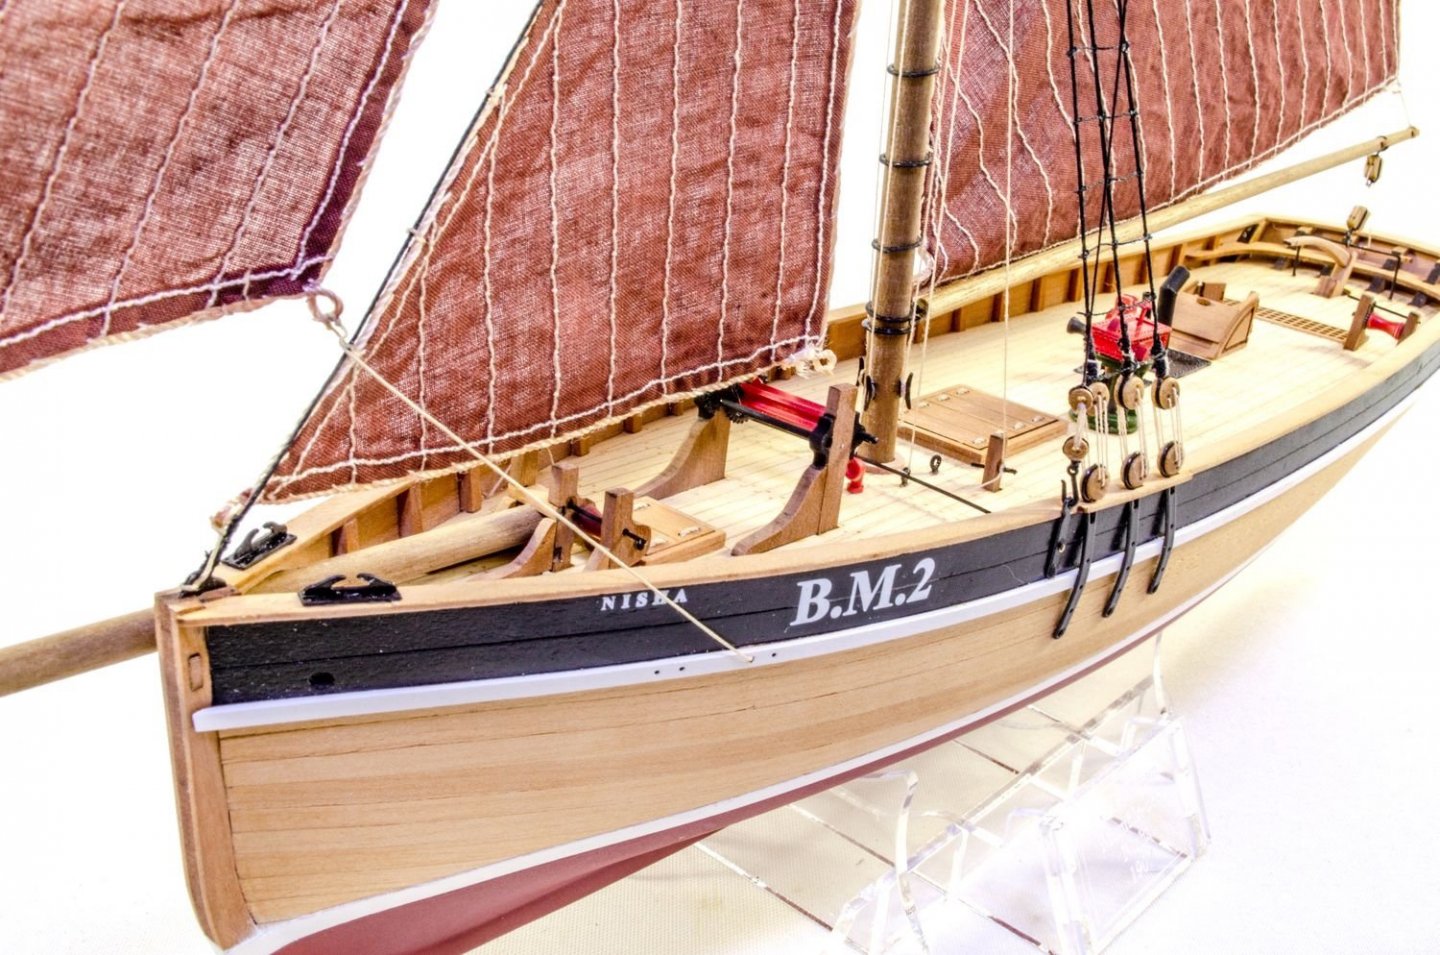
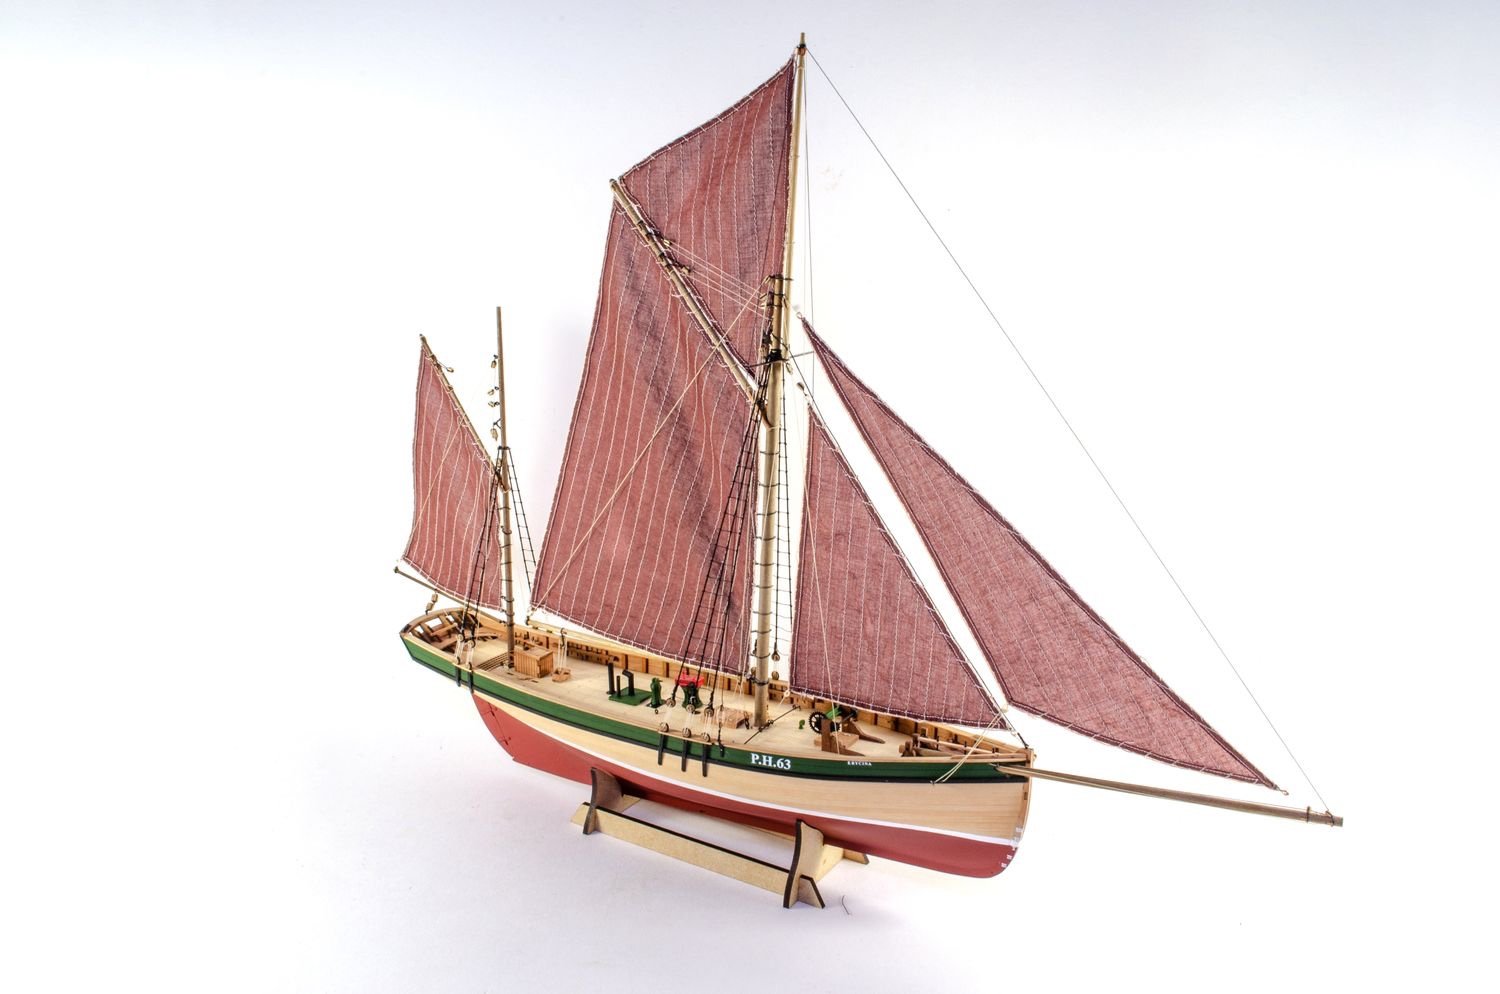
As you've possibly already seen, Nisha is complete, so here are the final pics as the kit is now nearly ready for release.
Building the masts for this is so easy....as there's only ONE 😁 There is a little stepping in diameter to be done, but only a 30 minute job. The mast is then fitted out with blocks, ready for the sails to be added before masting to hull.
Of course, the bowsprit opening needs elongating. I used some 3mm dowel, wrapped in 180 grit paper. Worked a treat.

The sail set is optional, and I dyed this is RIT dye, using more more than I did for the previous fishers.
Time to mast!
Yes, there are some shrouds and rat here, but they are just so very simple and perfect for a newcomer to tackle. The plans also include a template for ratline spacing. Just paste to some card, and you're good to go.

Here she is, all complete. Just the acrylic stand to build.
And....my final pics!

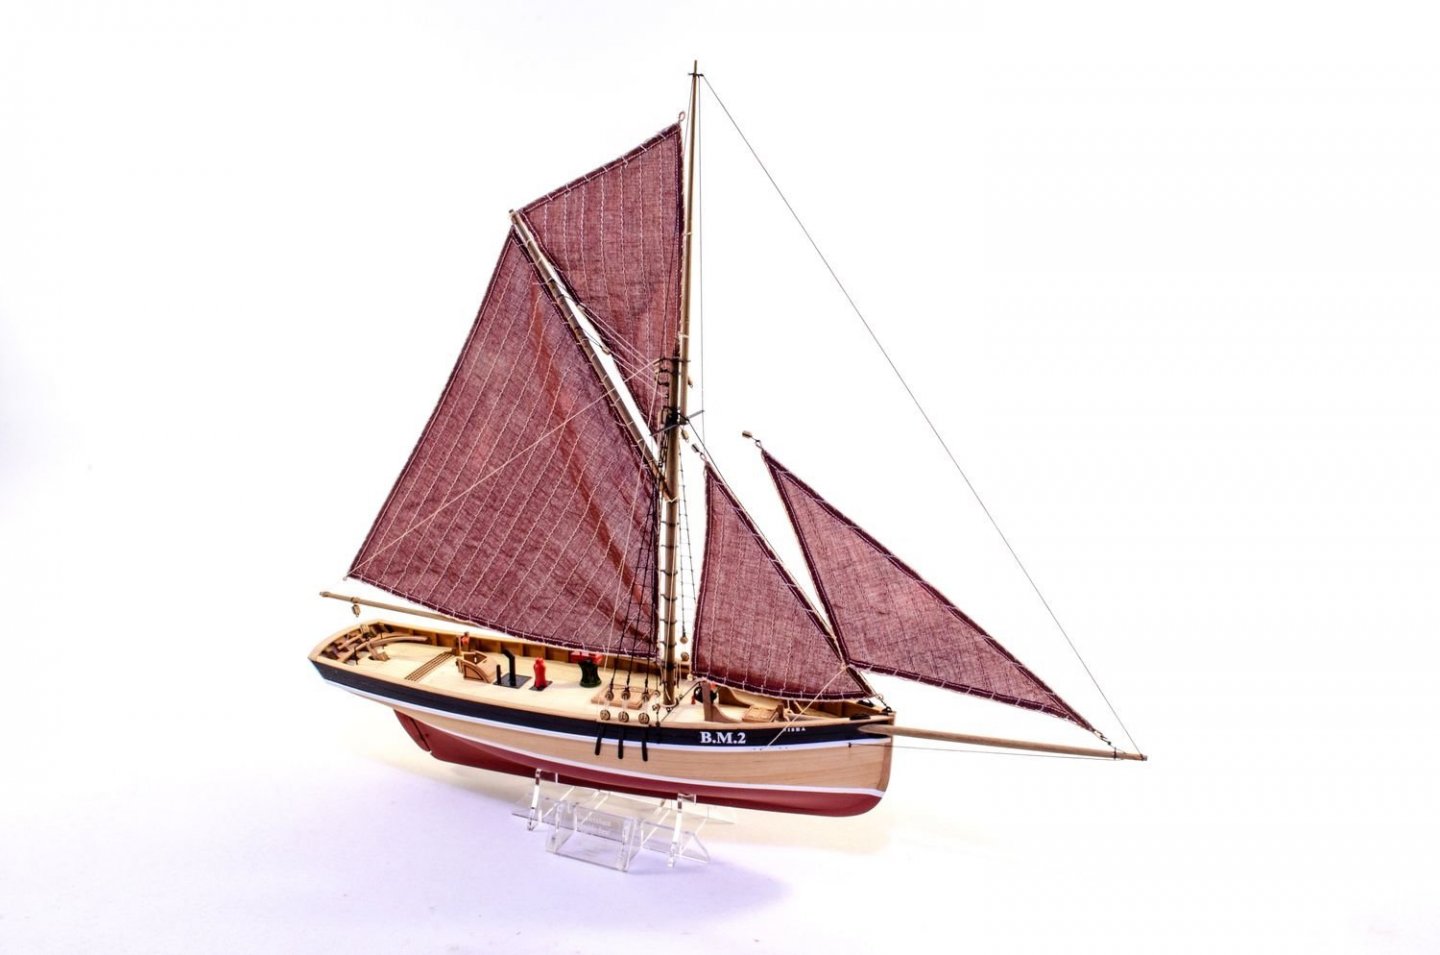


Thanks for watching. Nisha will be released within the next couple of weeks.
-
7 minutes ago, glennard2523 said:
This is a spare cradle, I ordered some spare sheets, which gives me the scope to build a practice hull to work on improving my building skills.
The finished painted cradle will have a WOP finish which should lock in the paint.
Not using the acrylic one?
It's a million times better than the MDF 🤣
- hollowneck and mtaylor
-
2
-
28 minutes ago, glennard2523 said:
I am just using the cradle to experiment with the WOP / Paint method. I am hoping to see a much better painted end product. I will post some pictures of the painted cradle on Sunday or Monday.
Remember that adding any paint to the cradle at this stage risks it coming off on a painted white hull, whilst you are needing as solely a building aid.
-
The kit, I believe, is supposed to be based on Hahn plans. It's also produced by Unicorn, who are known IP thieves, so the subject matter is irrelevant.
I'm afraid that if you openly buy that kit, then you will lose your MSW privileges/membership.
- Ryland Craze, bruce d, Canute and 1 other
-
4
-
-
5 minutes ago, niwotwill said:
Great work James. The finish you did with the planking is amazing. Airbrush painting without planking lines and imperfections is an art you've mastered.
Couple of questions:
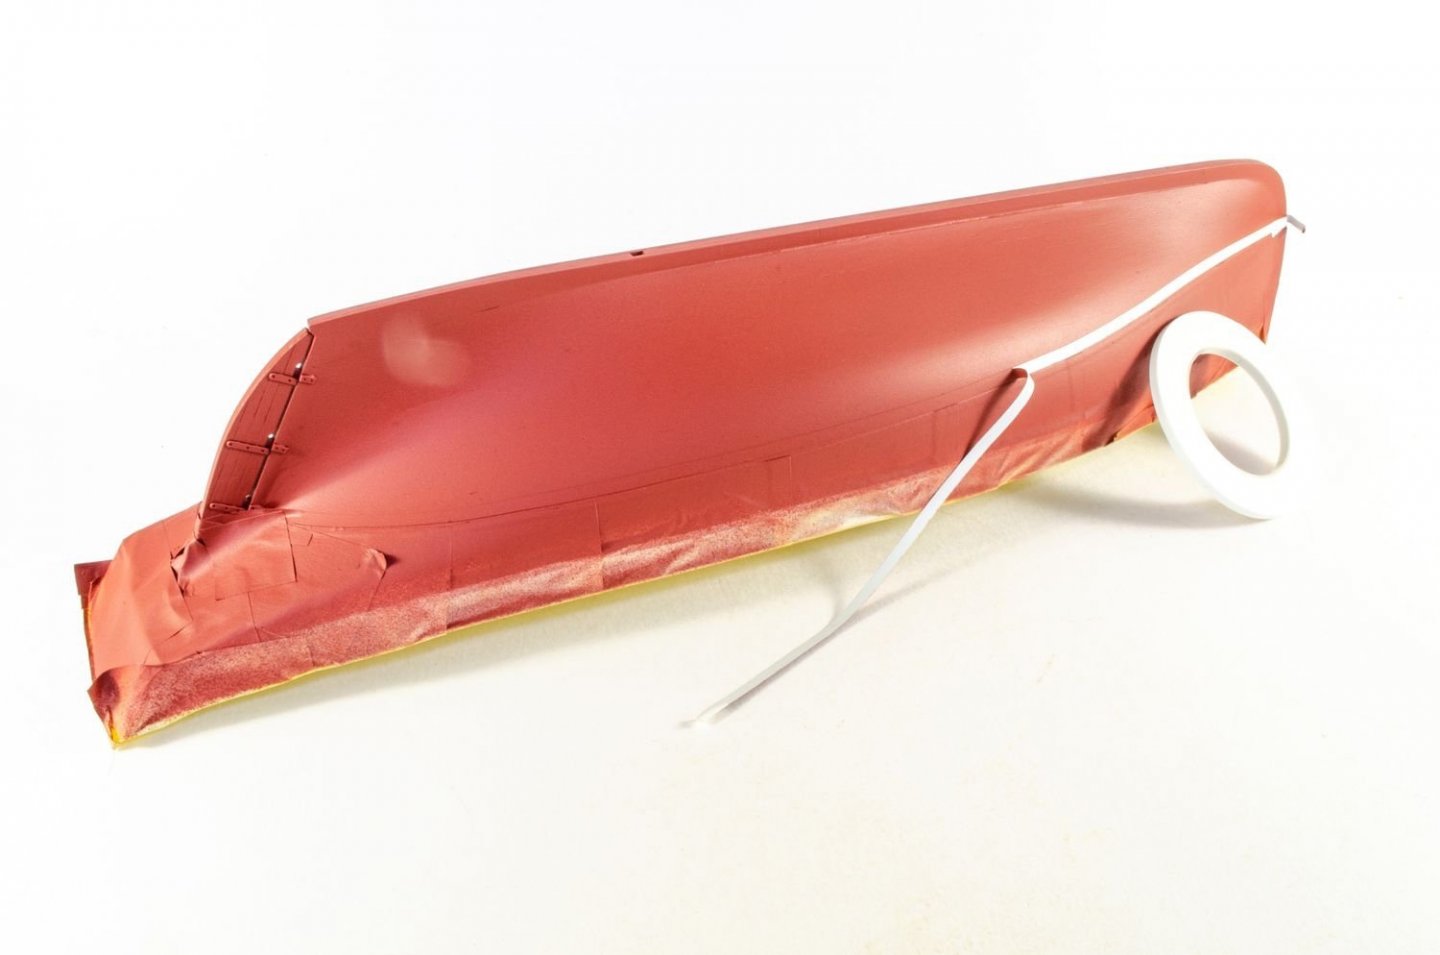
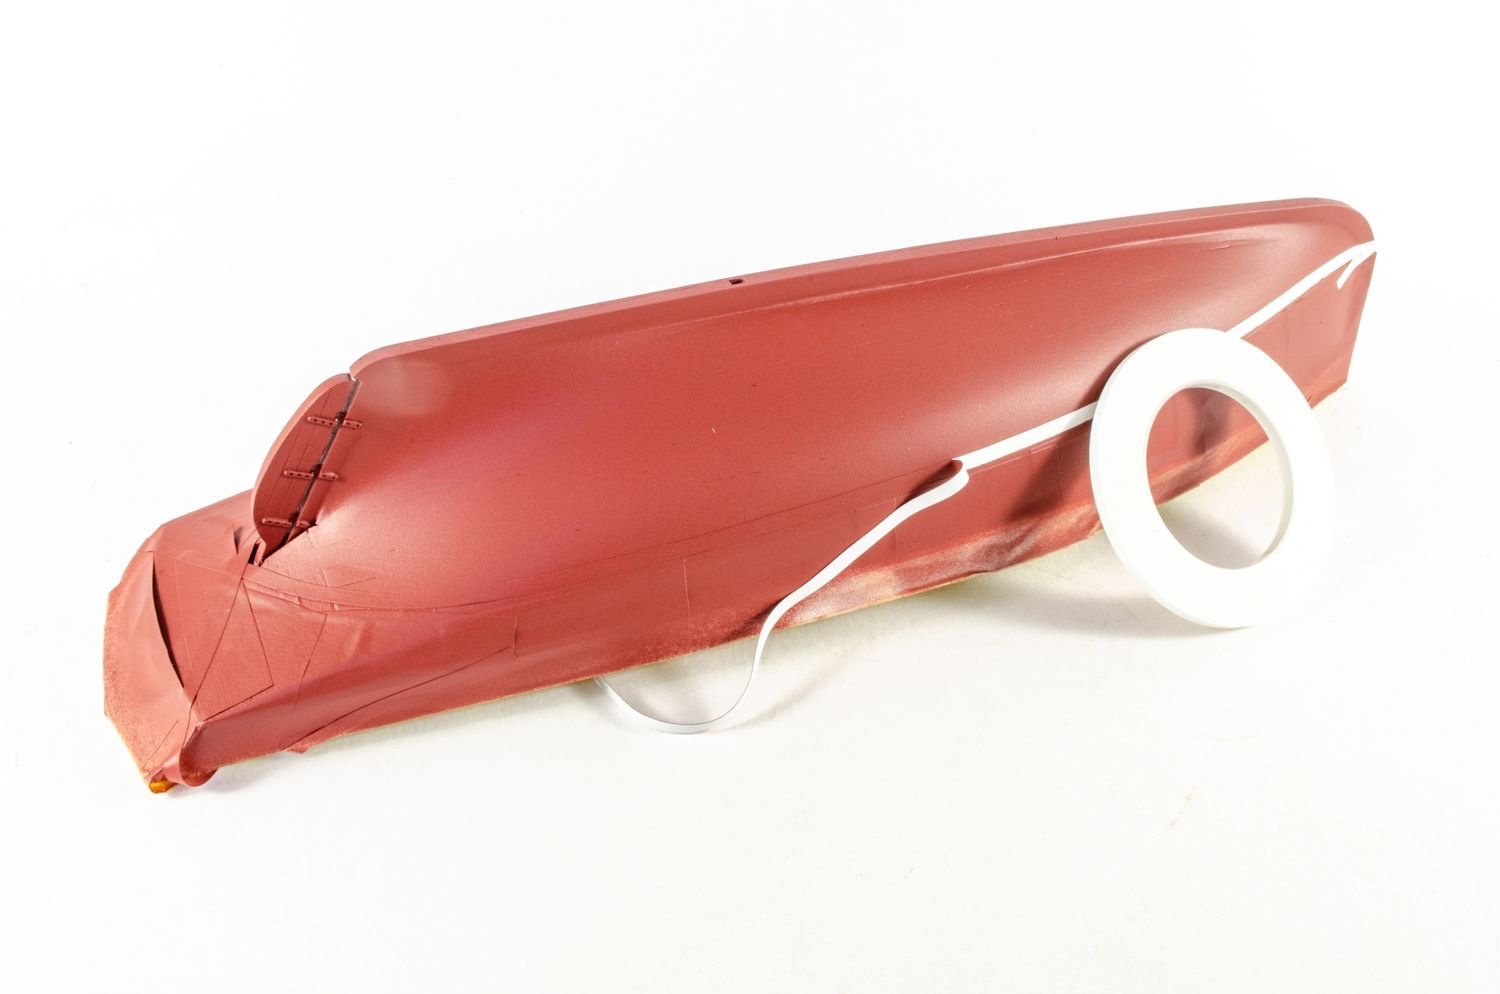
Before we splash some real colour onto the hull, a waterline is first added which runs along the top line of the white boot. I'm not familiar with the term "white boot" help please
When masking for the red oxide did you first use 3mm flex tape to follow the waterline and then sections of wider tape to cover the balance? After that did you add 3mm flex tape adjacent to the earlier 3mm tape to create the white waterline stripe?
Your technique is very impressive and the results are amazing.
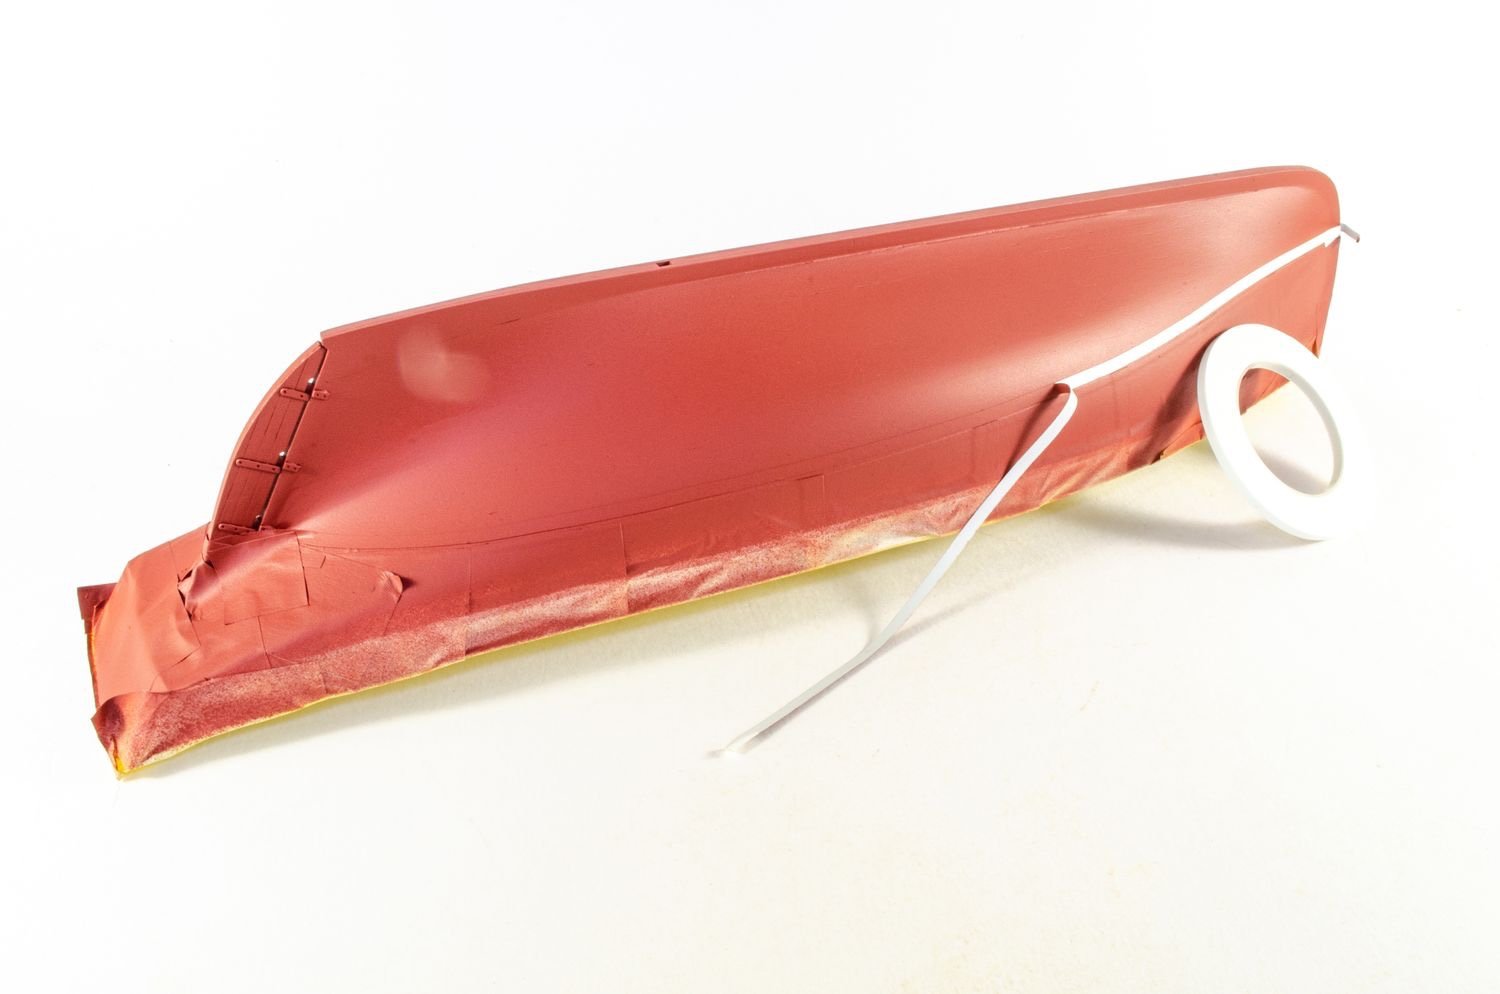
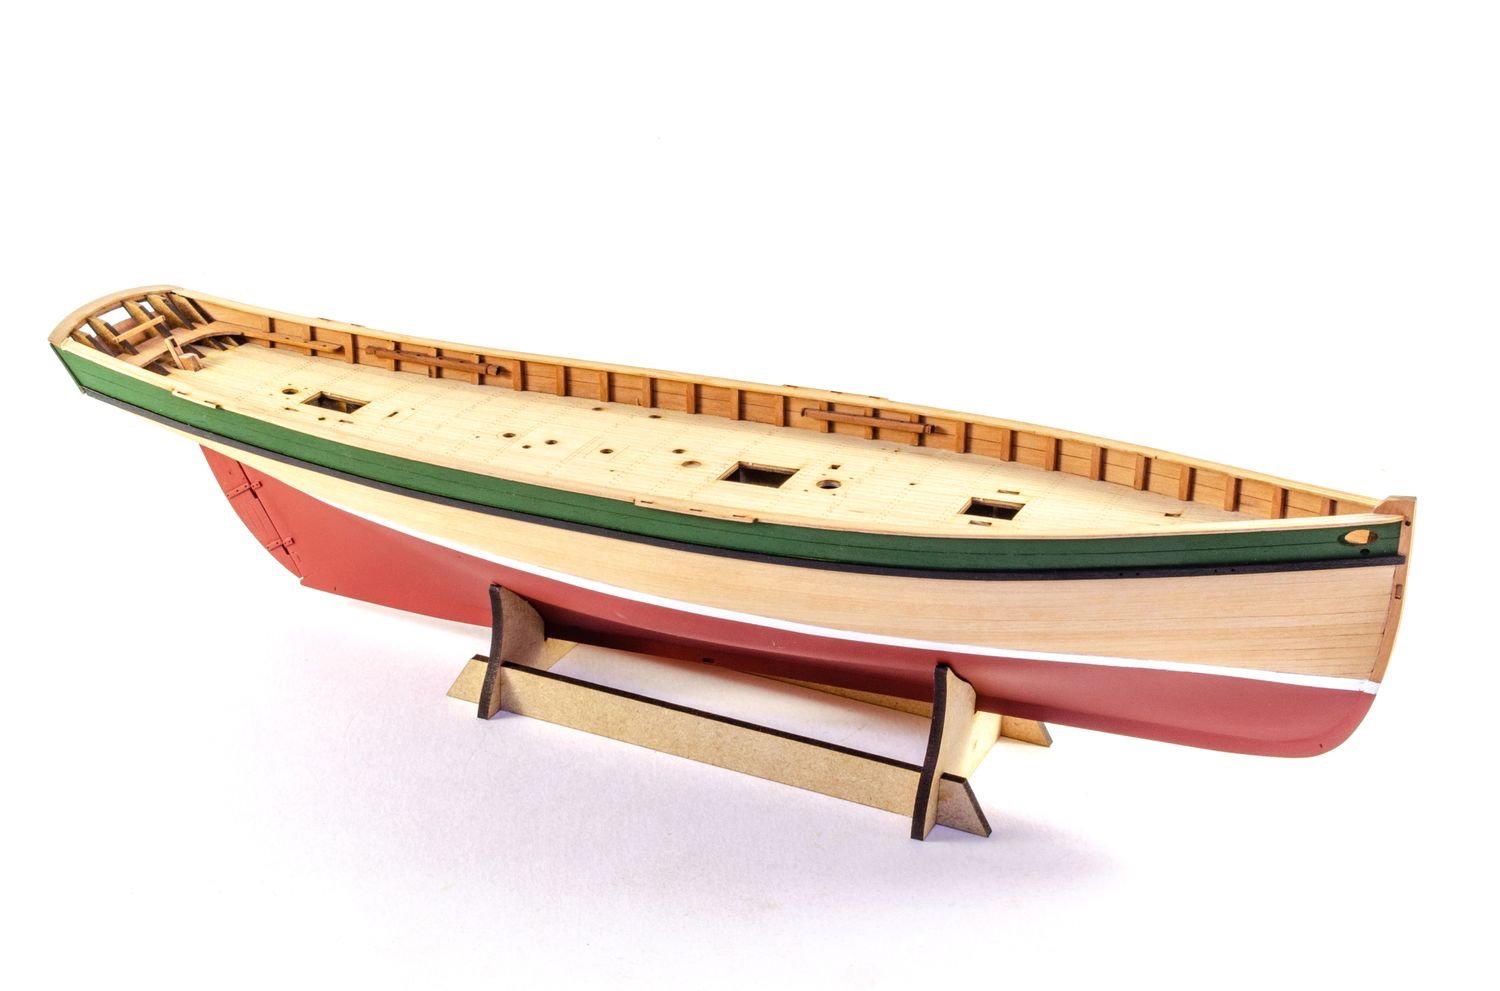
Yes, the hull was primed and painted white, then the flex tape was run along the waterline, just under the masking tape. That kept the strip white while I sprayed red oxide onto hull.
- thibaultron, Ryland Craze, BenD and 2 others
-
5
-
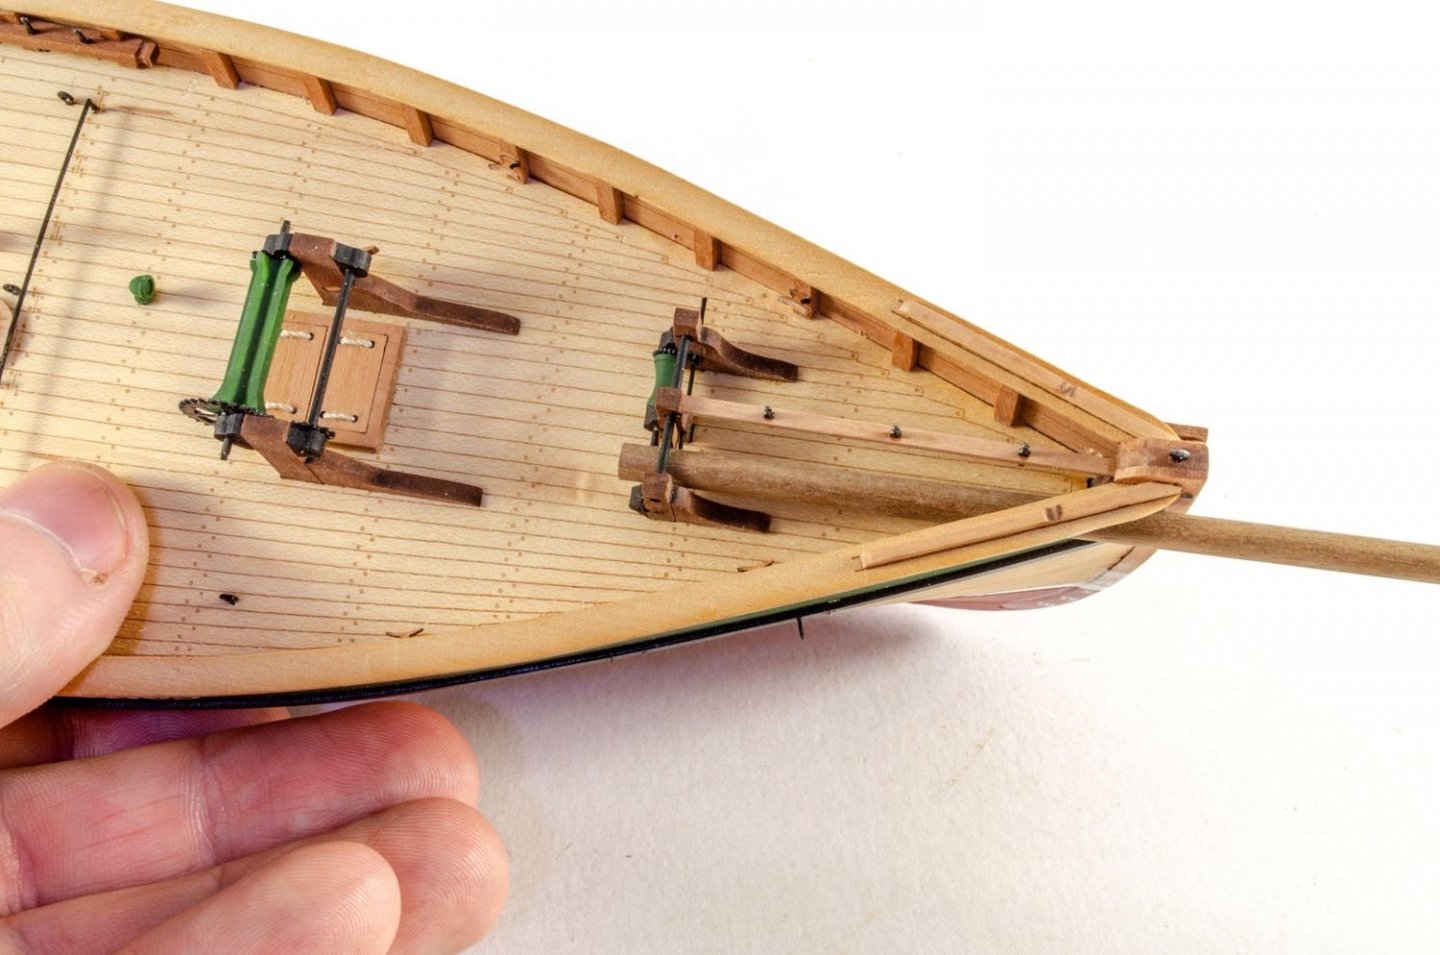
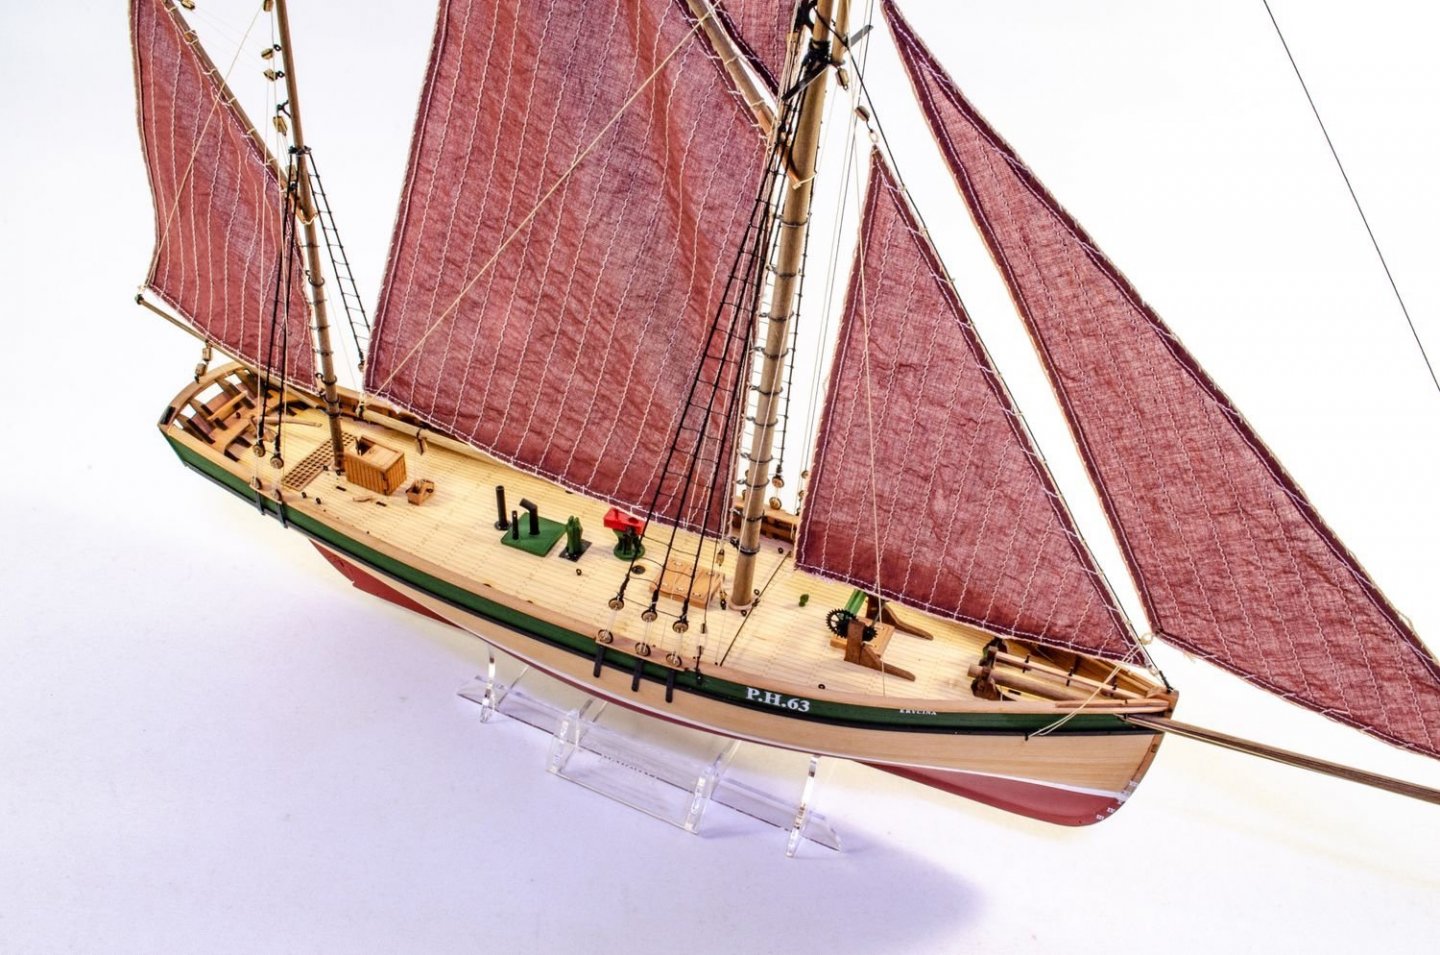
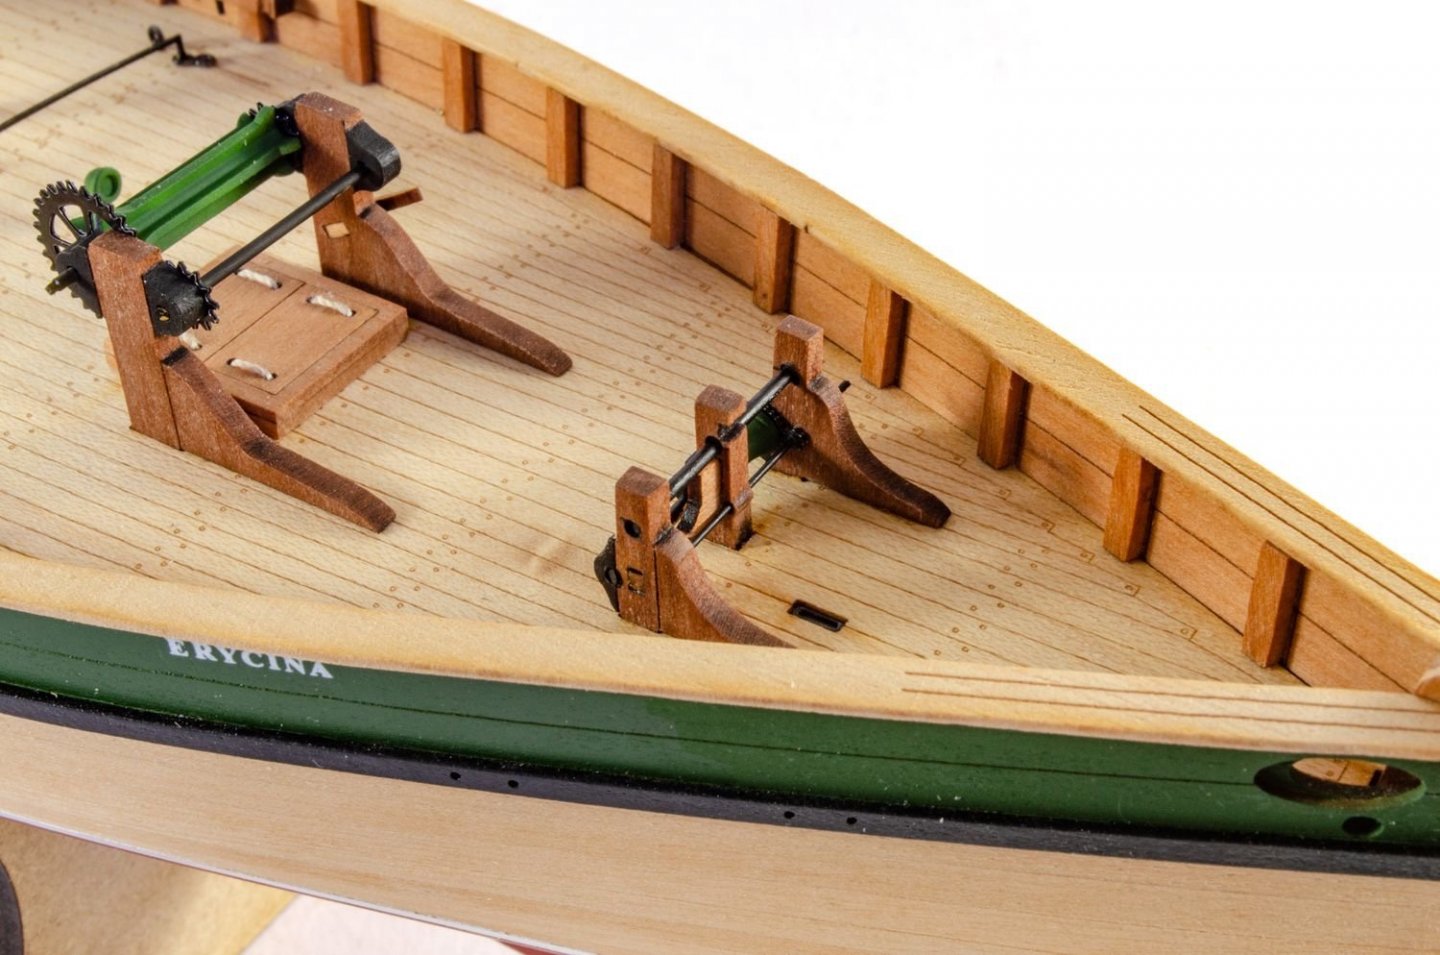
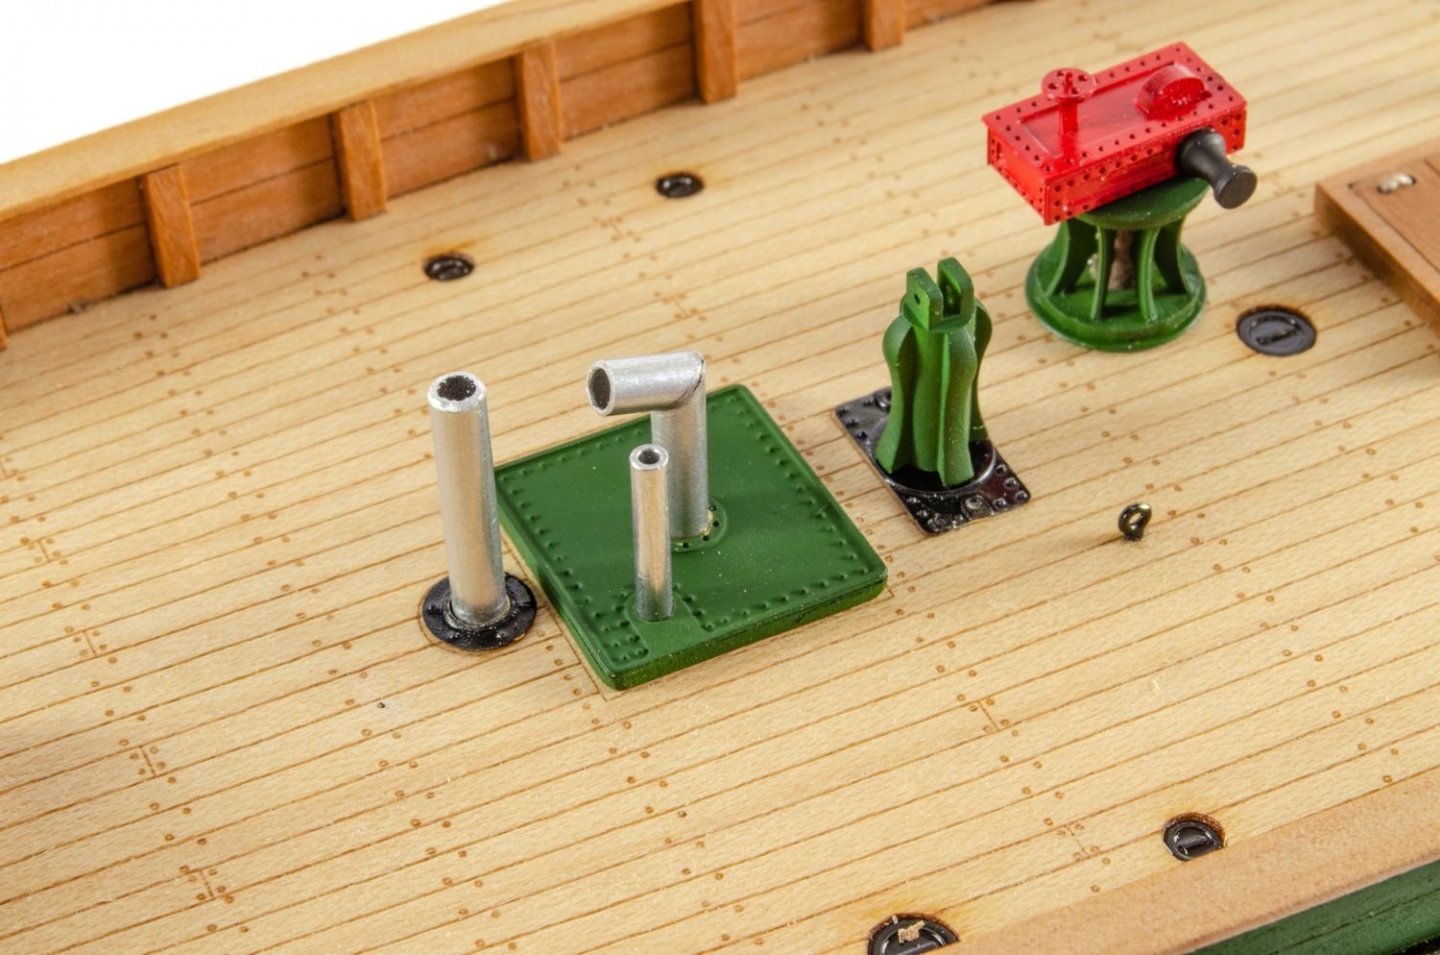
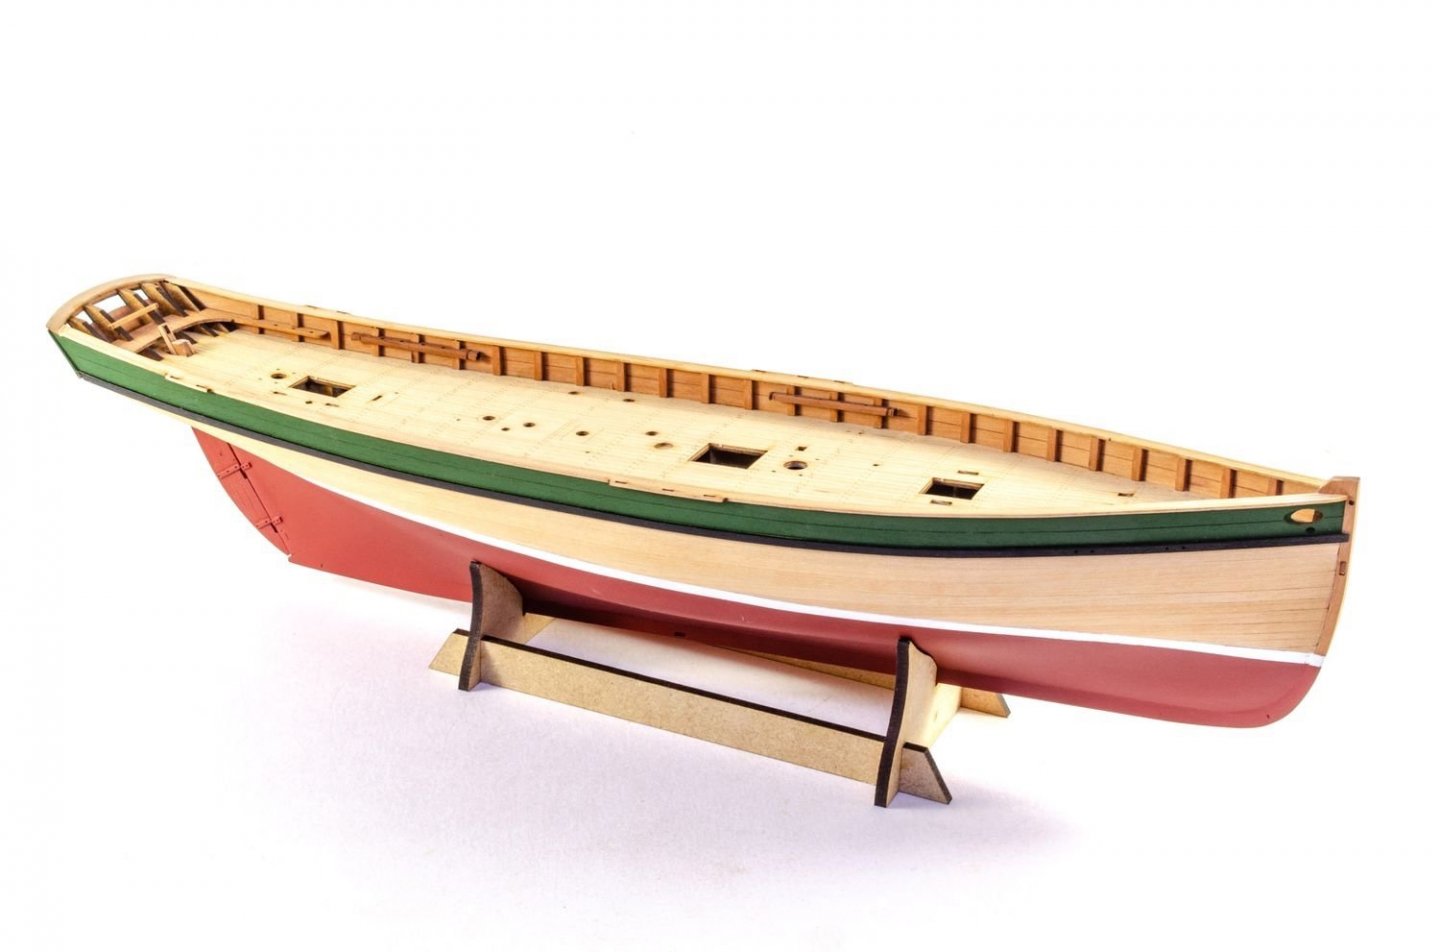
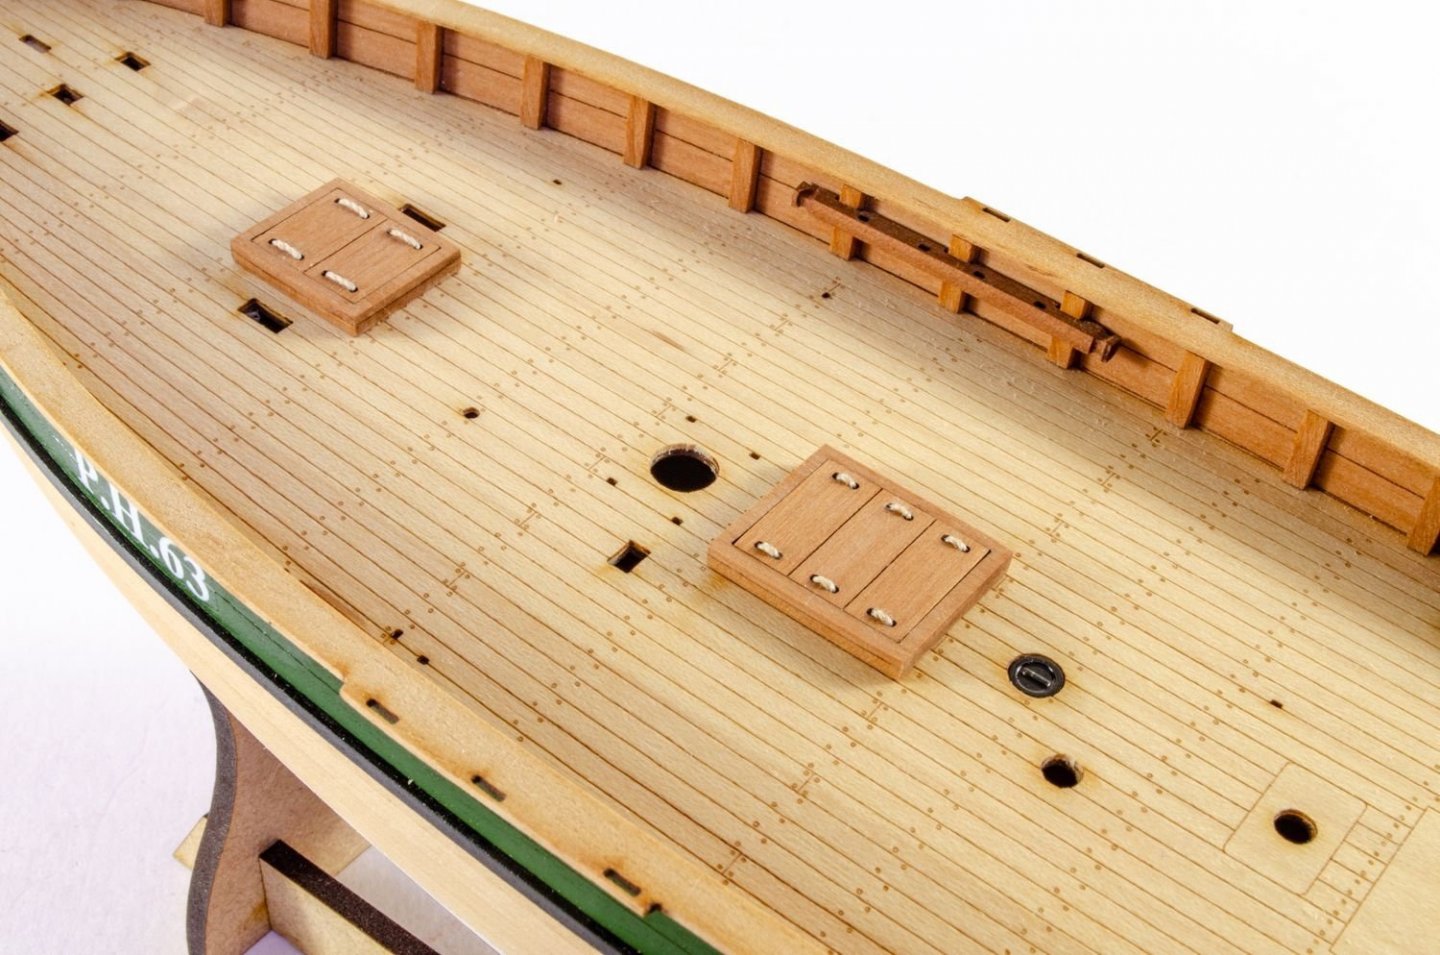
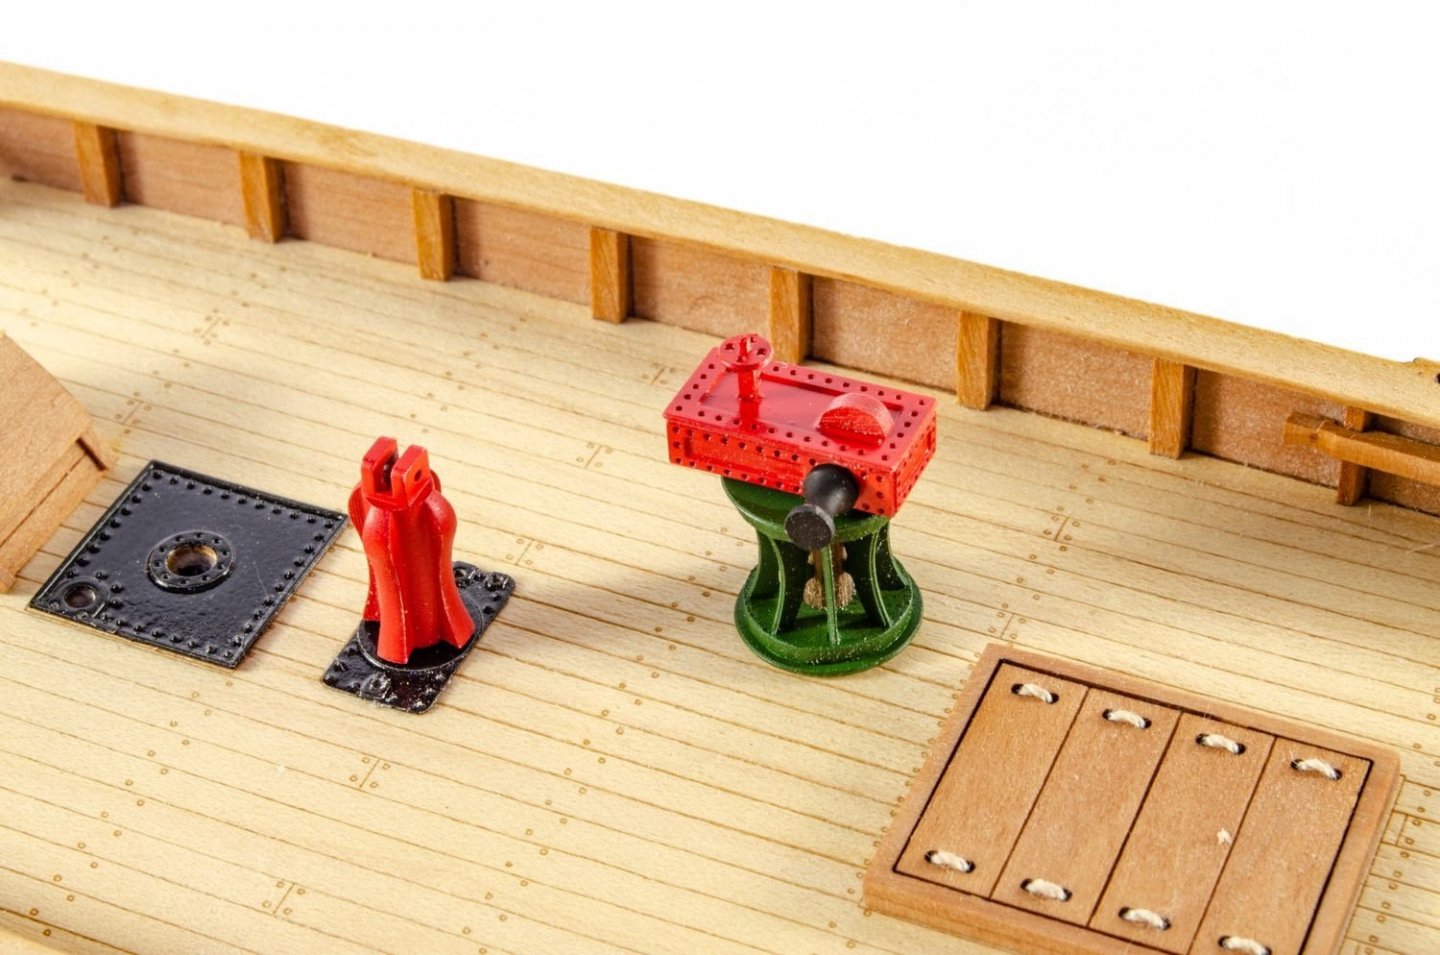
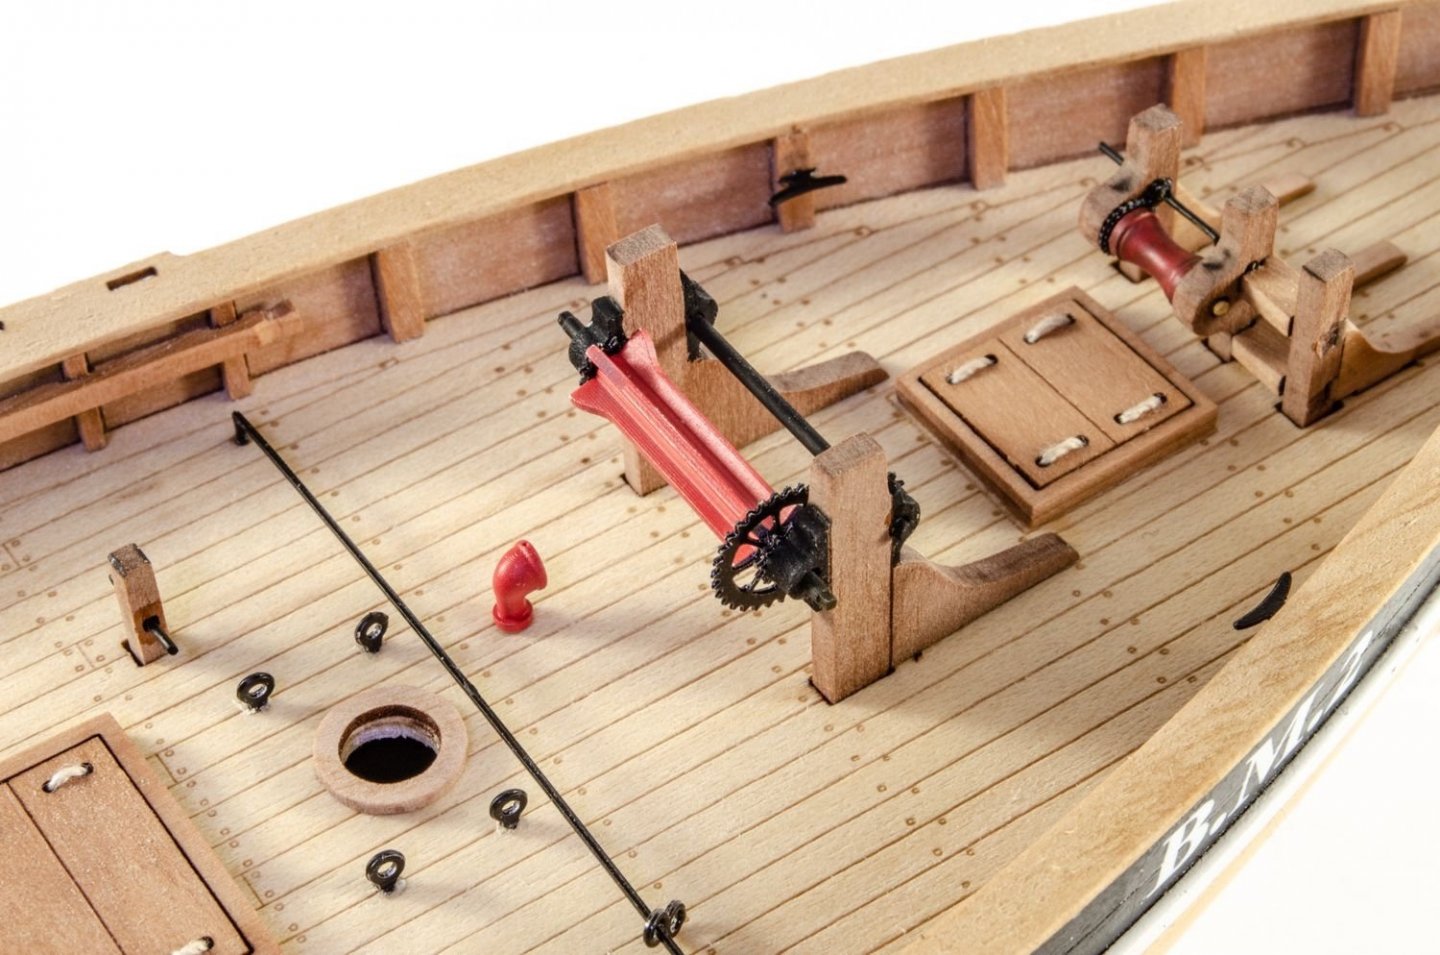
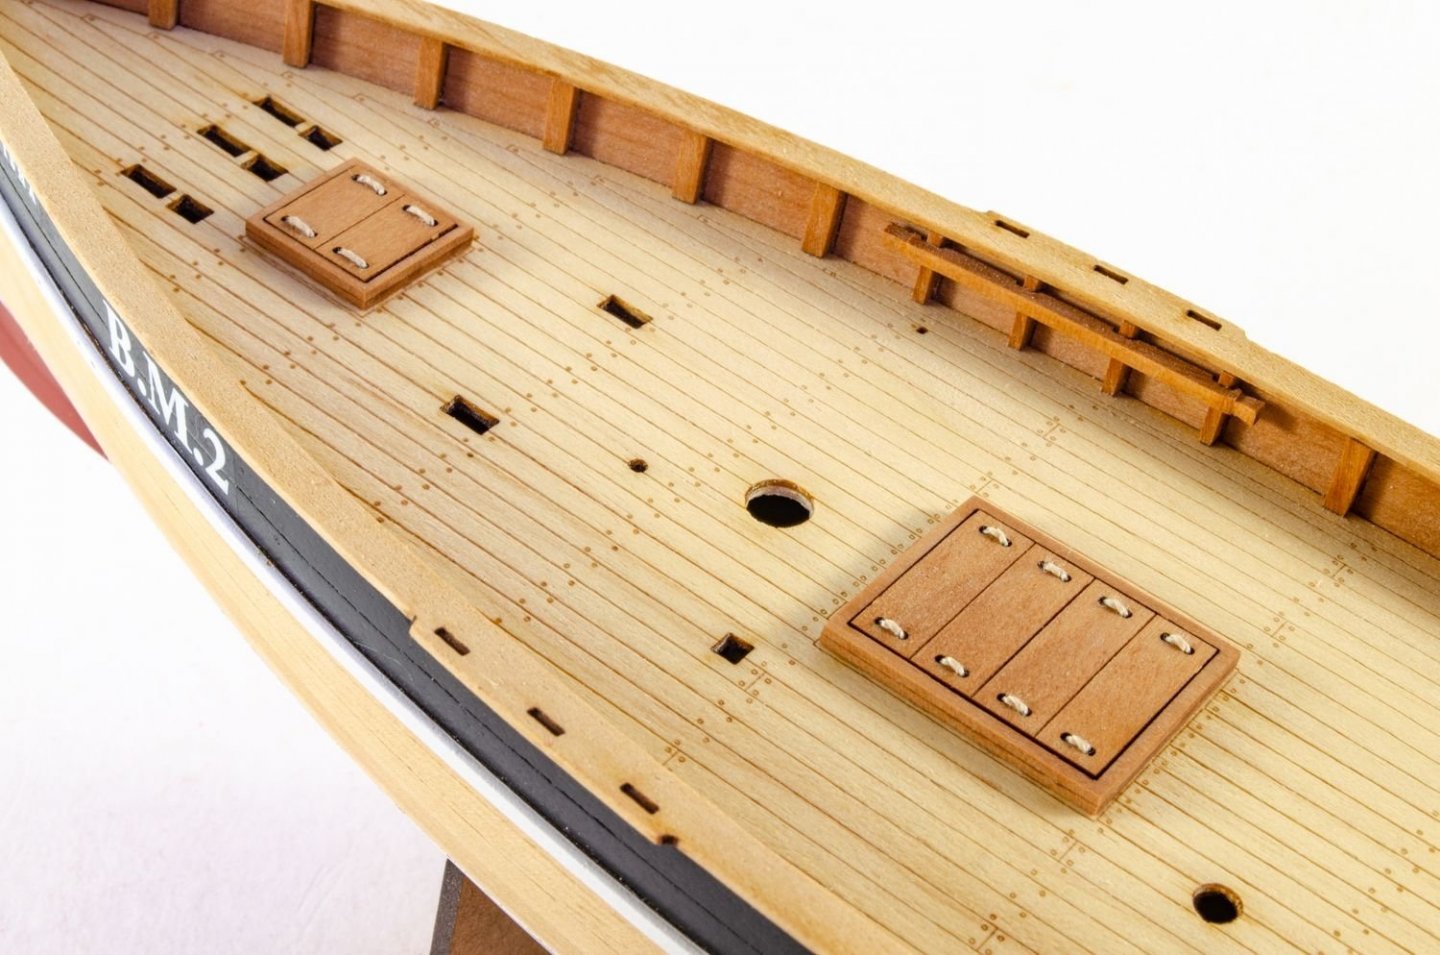
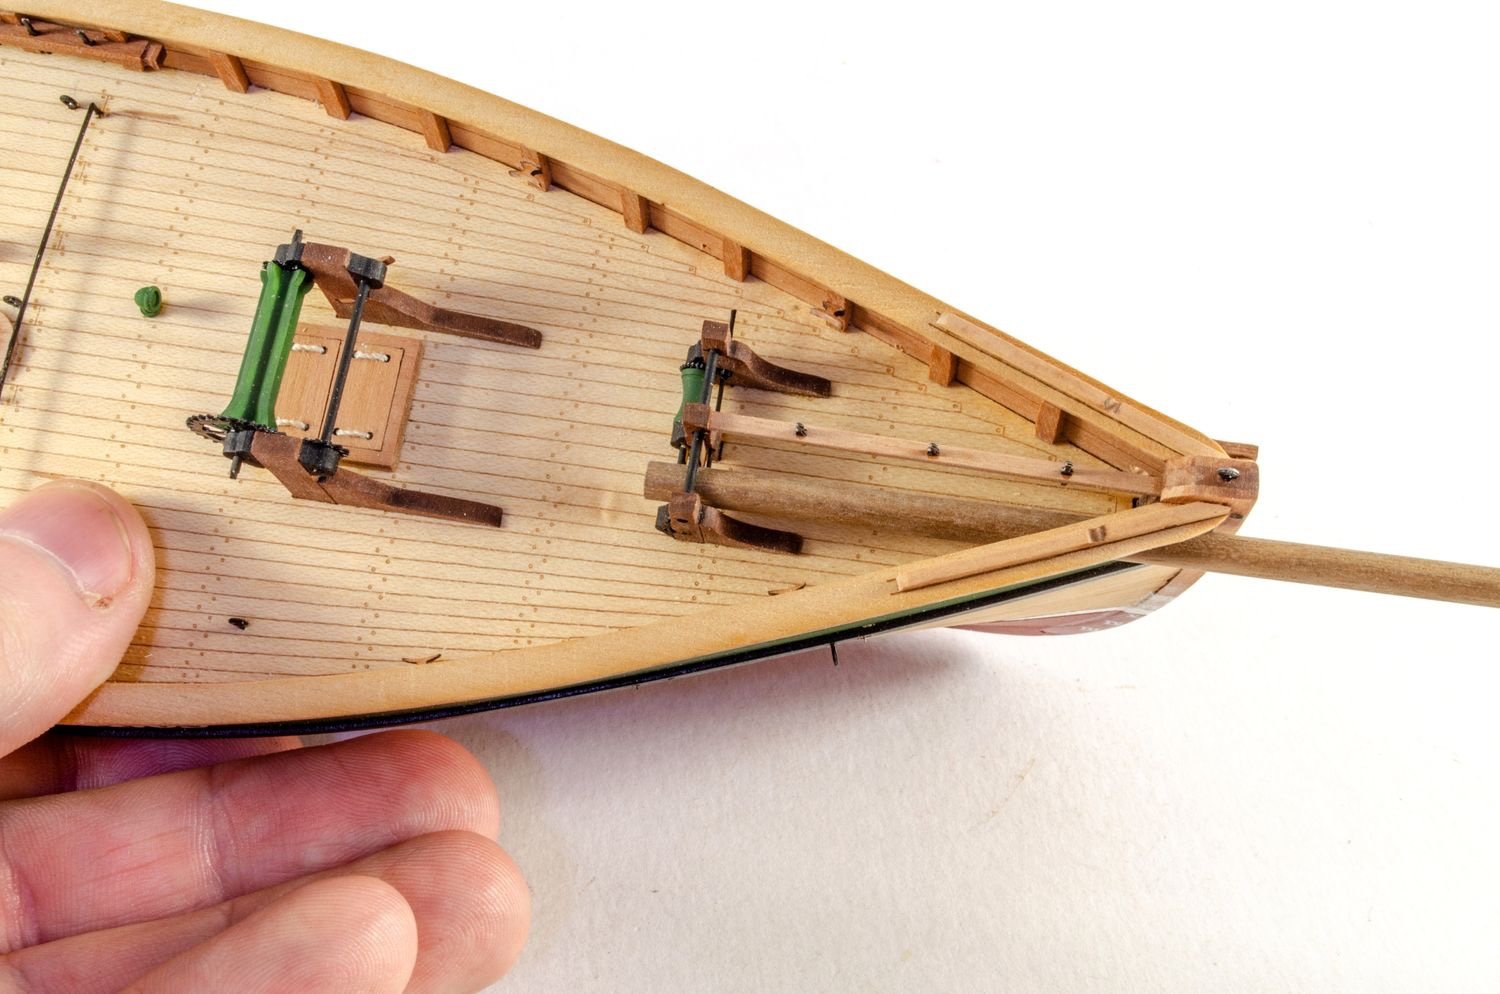
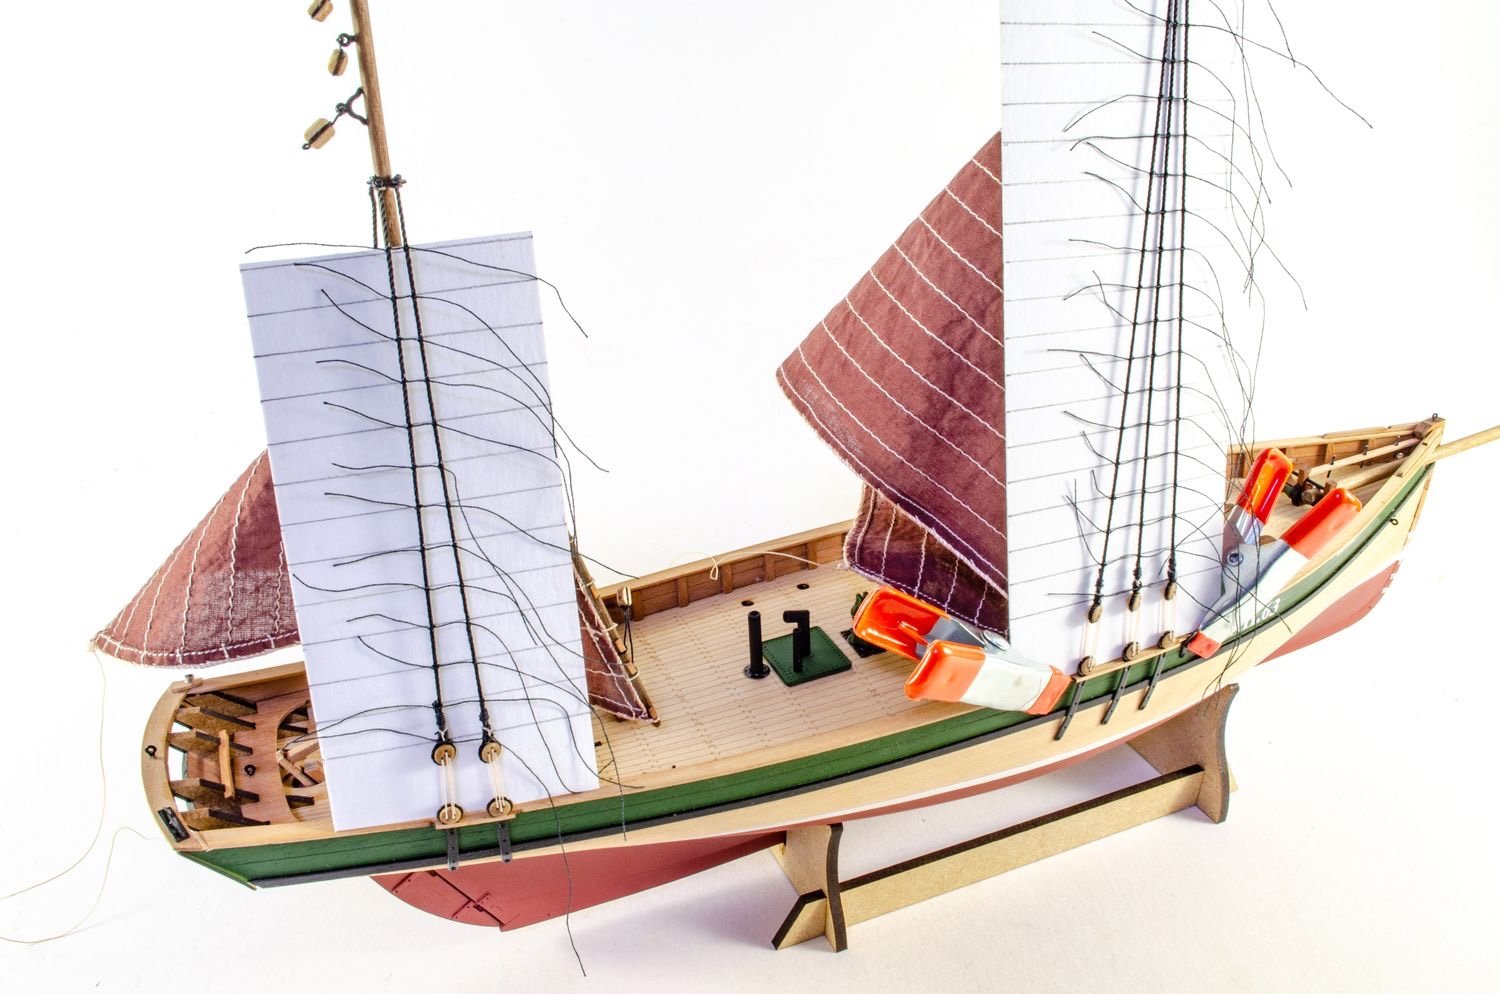
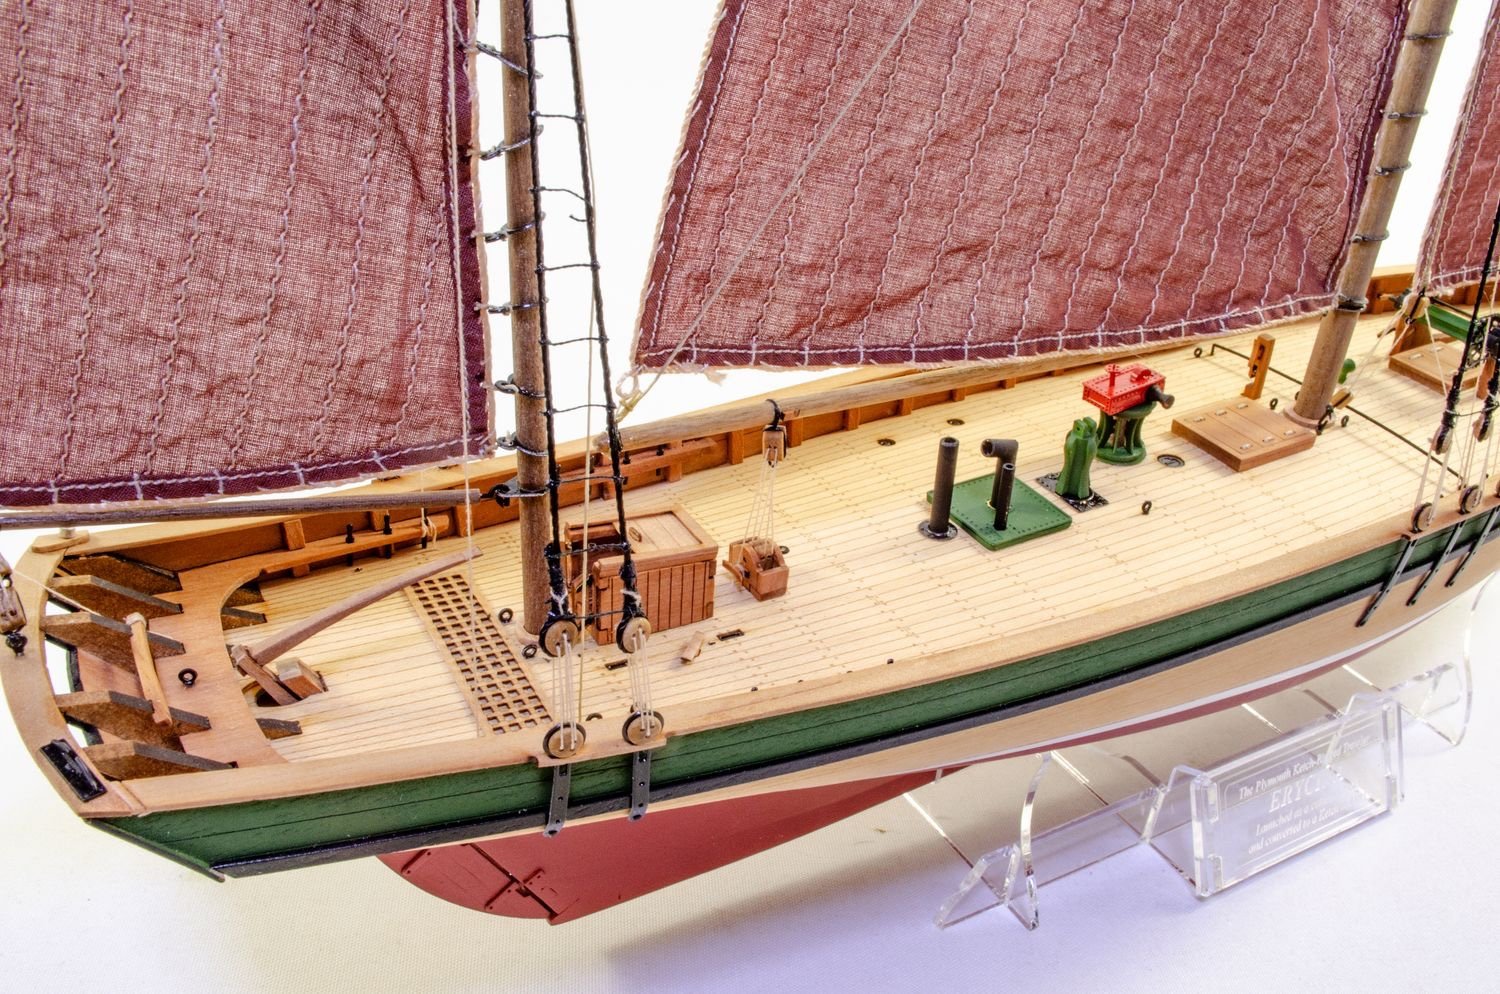
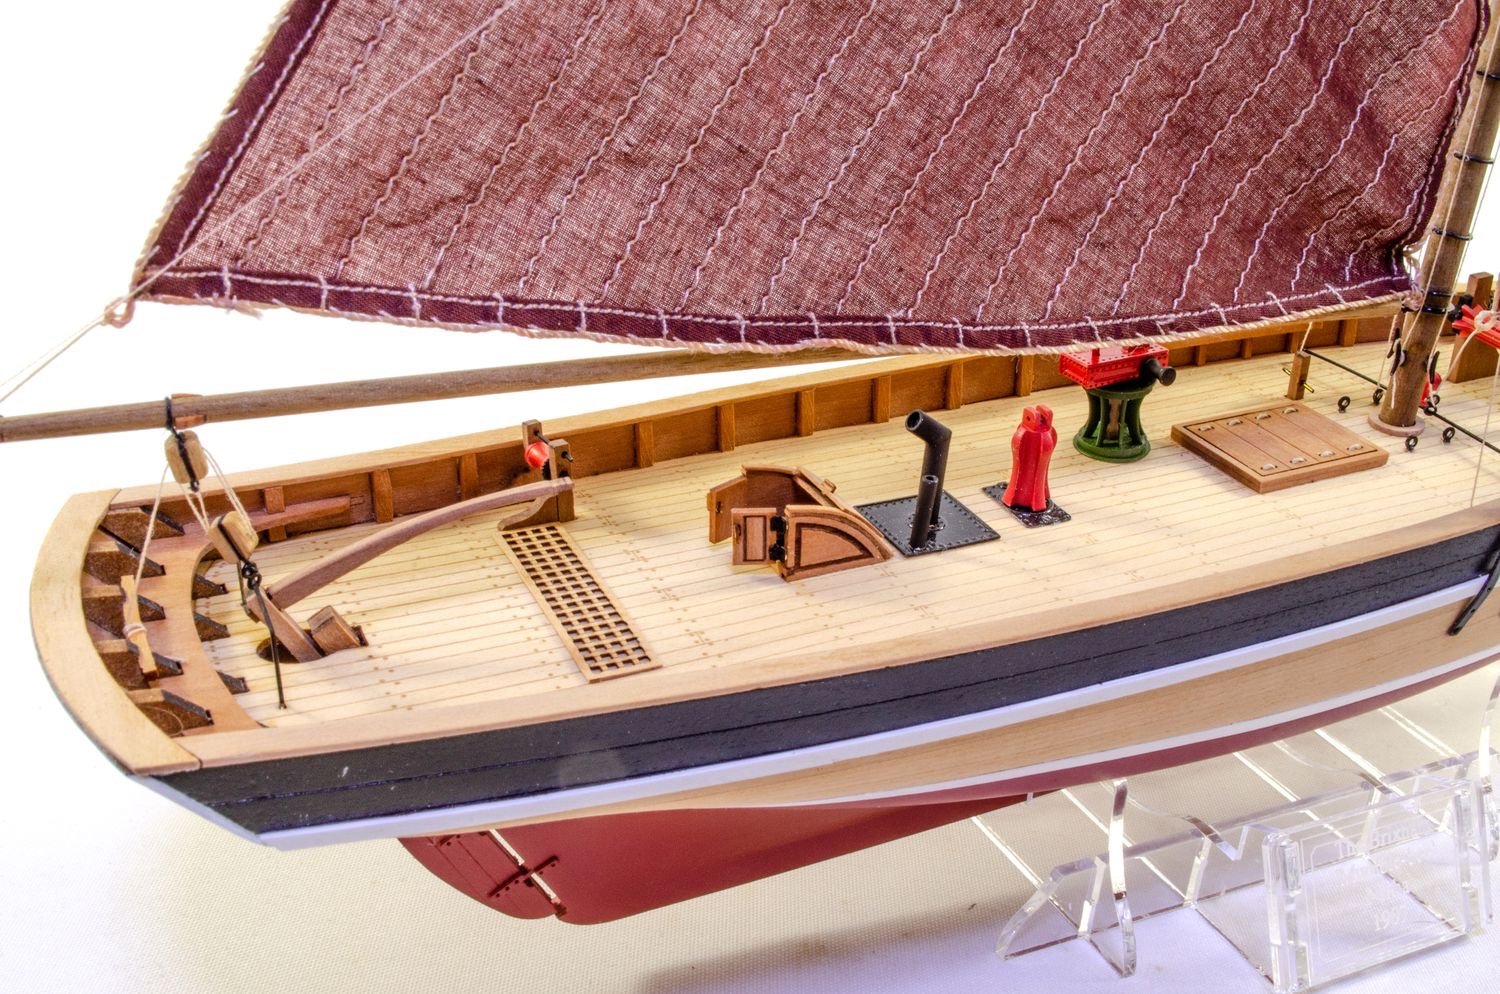
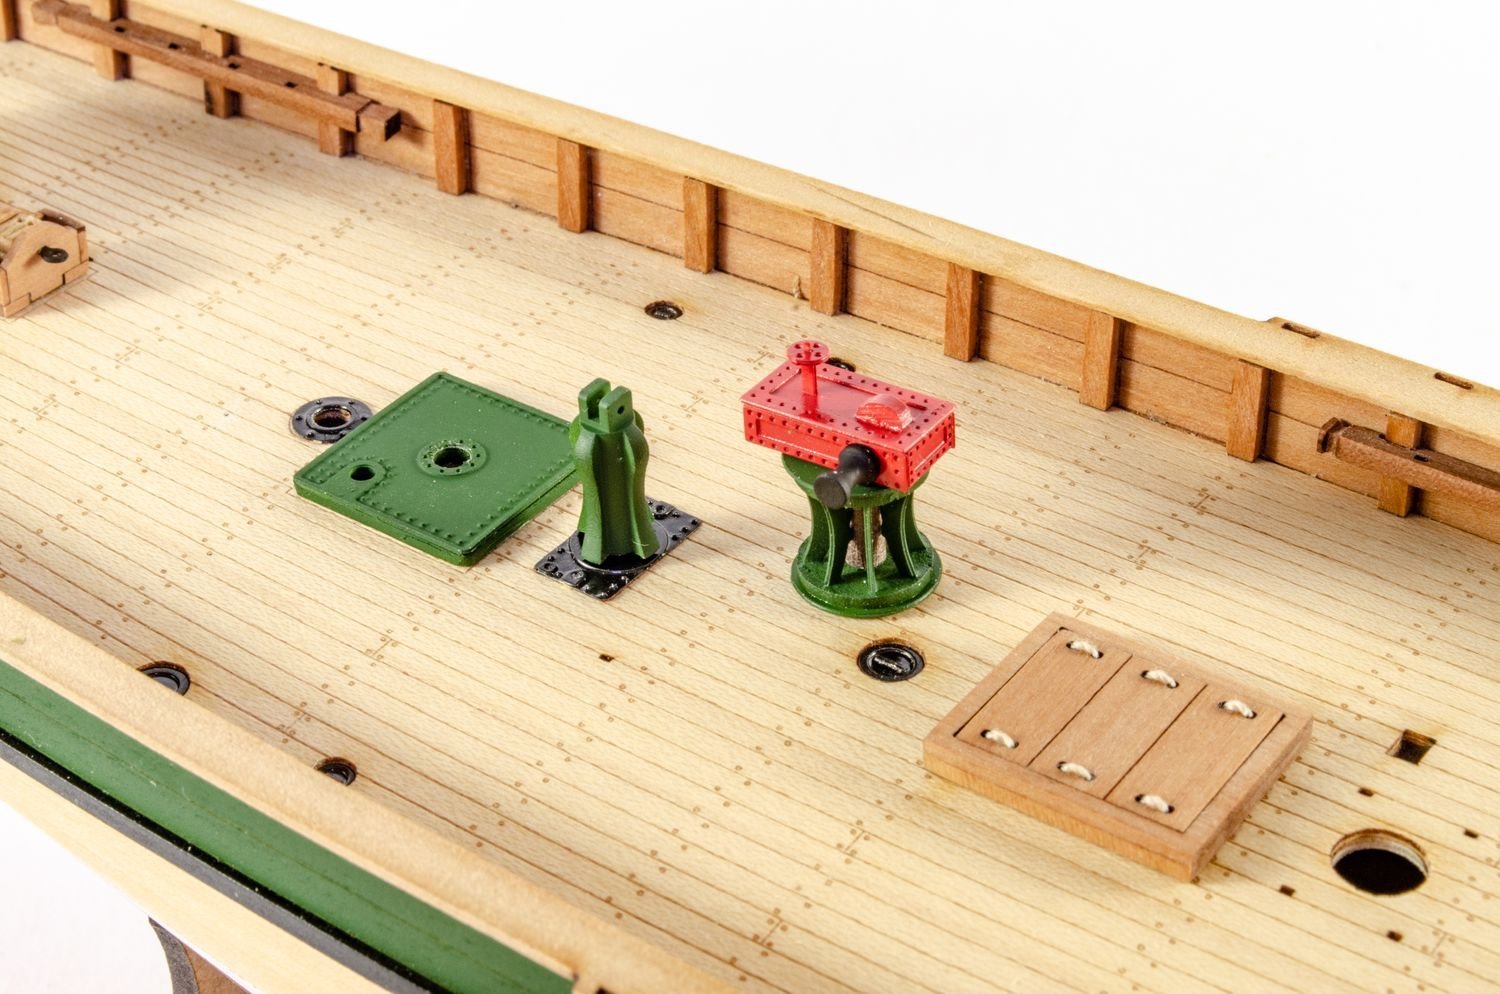
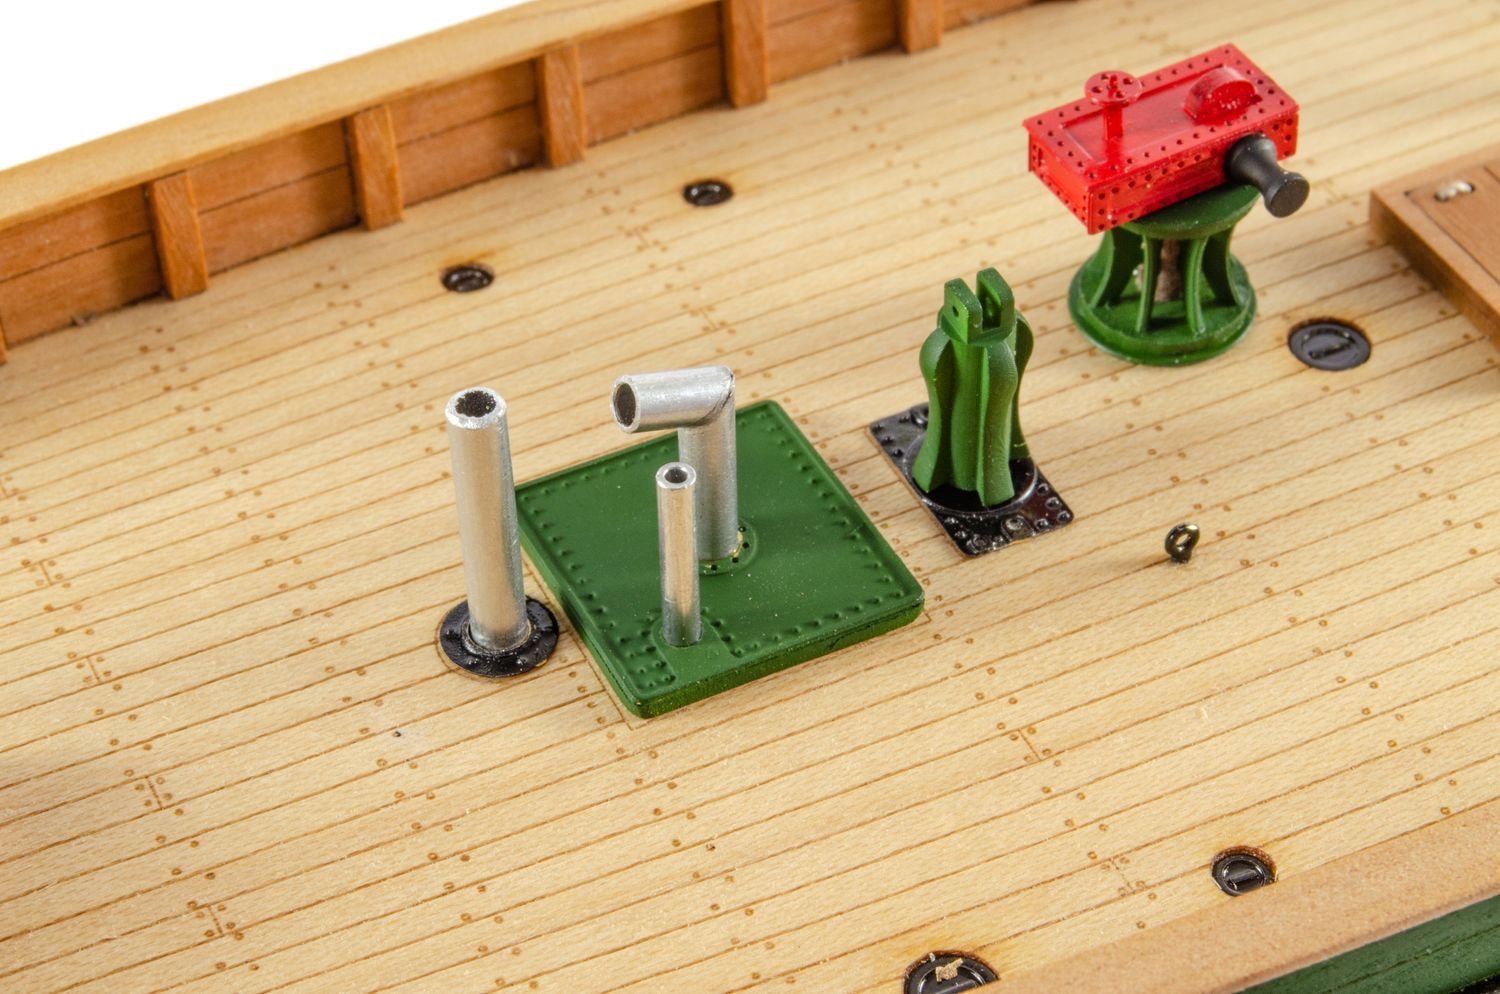
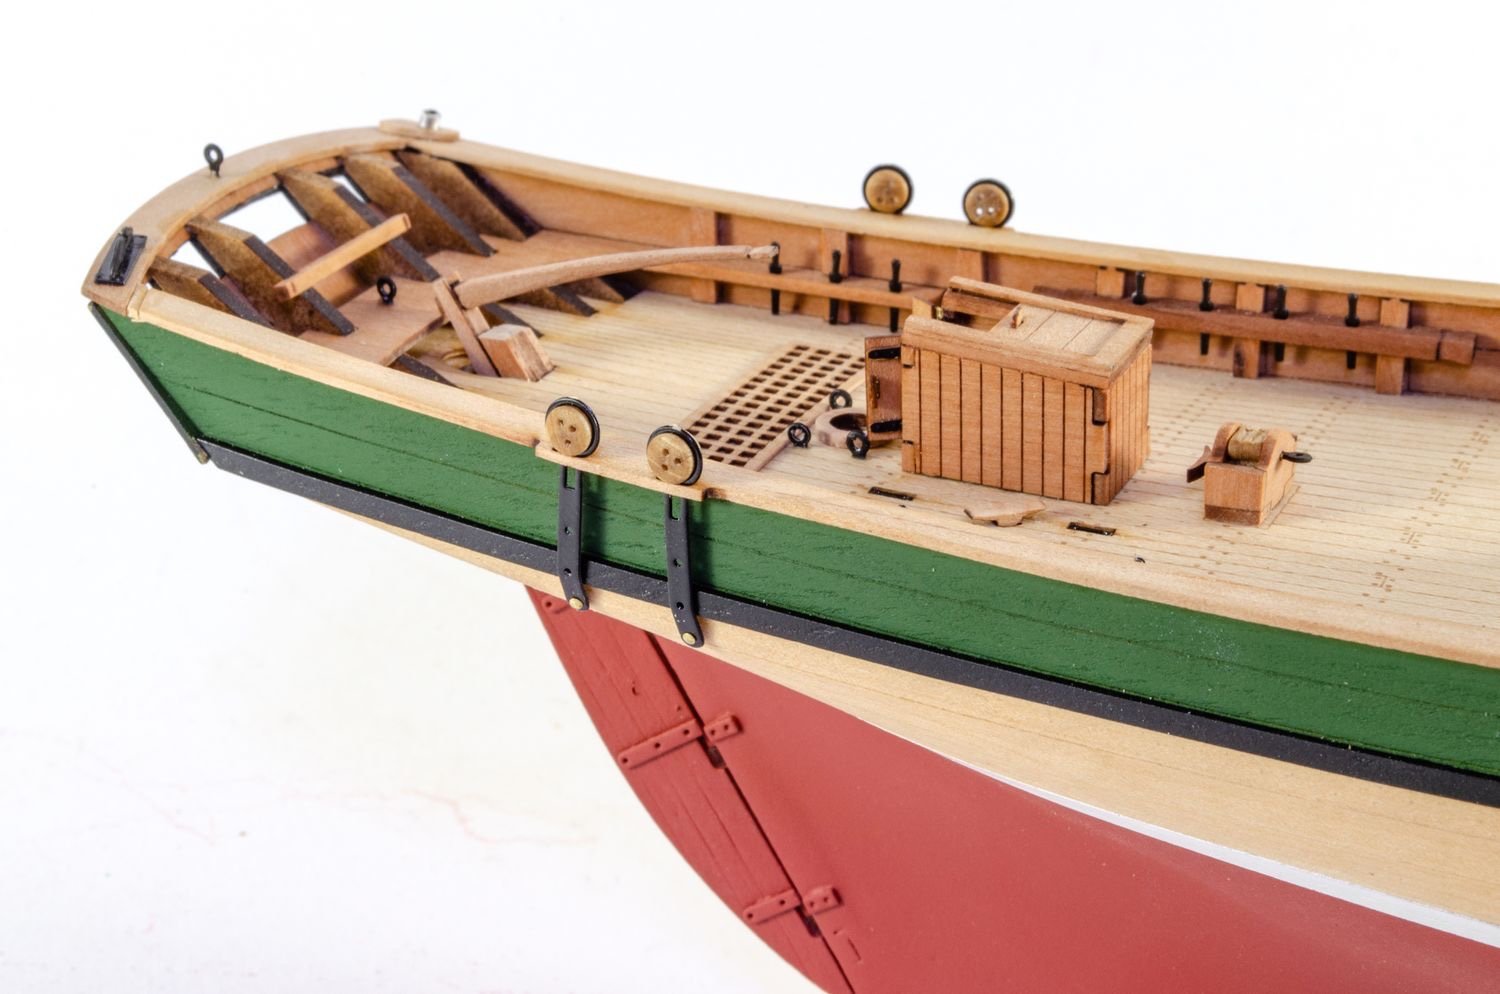
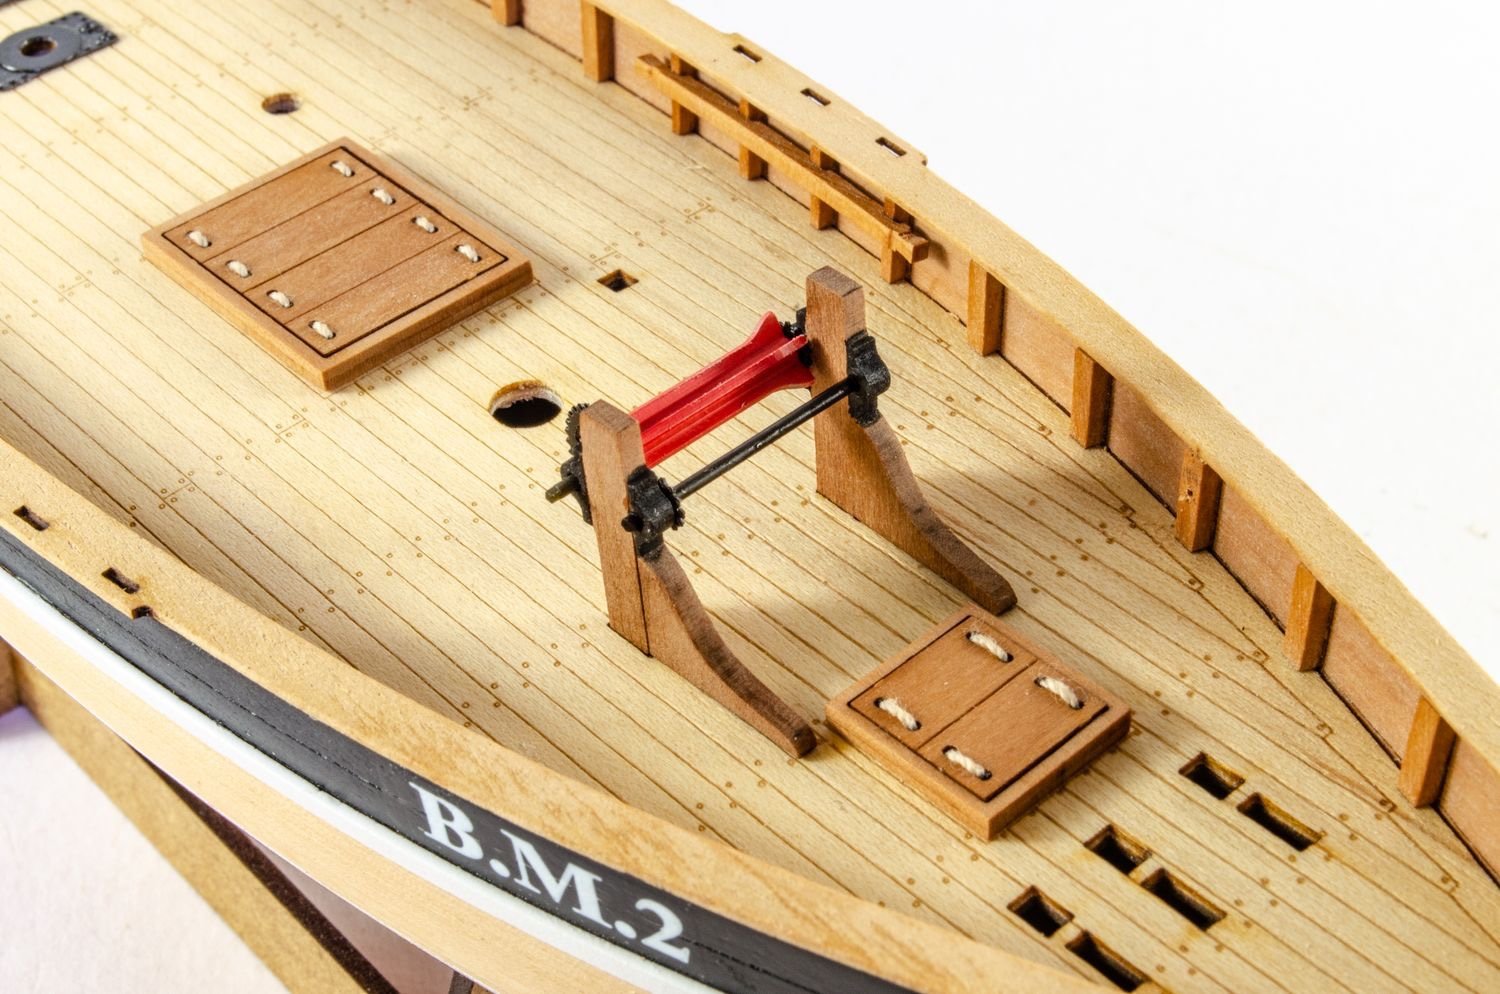
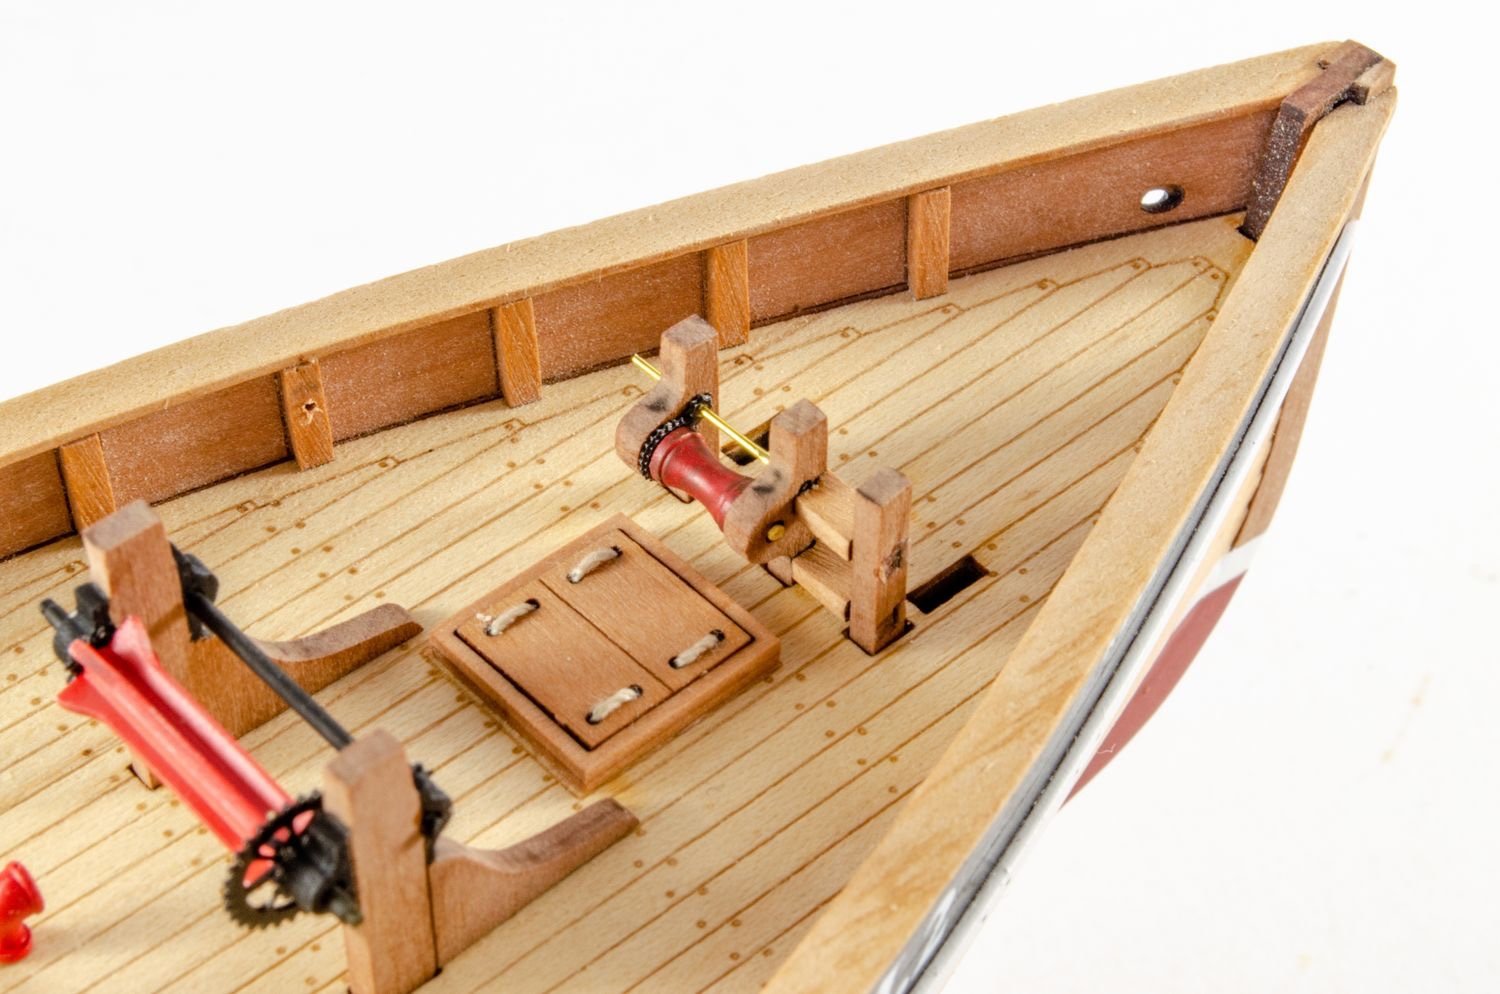
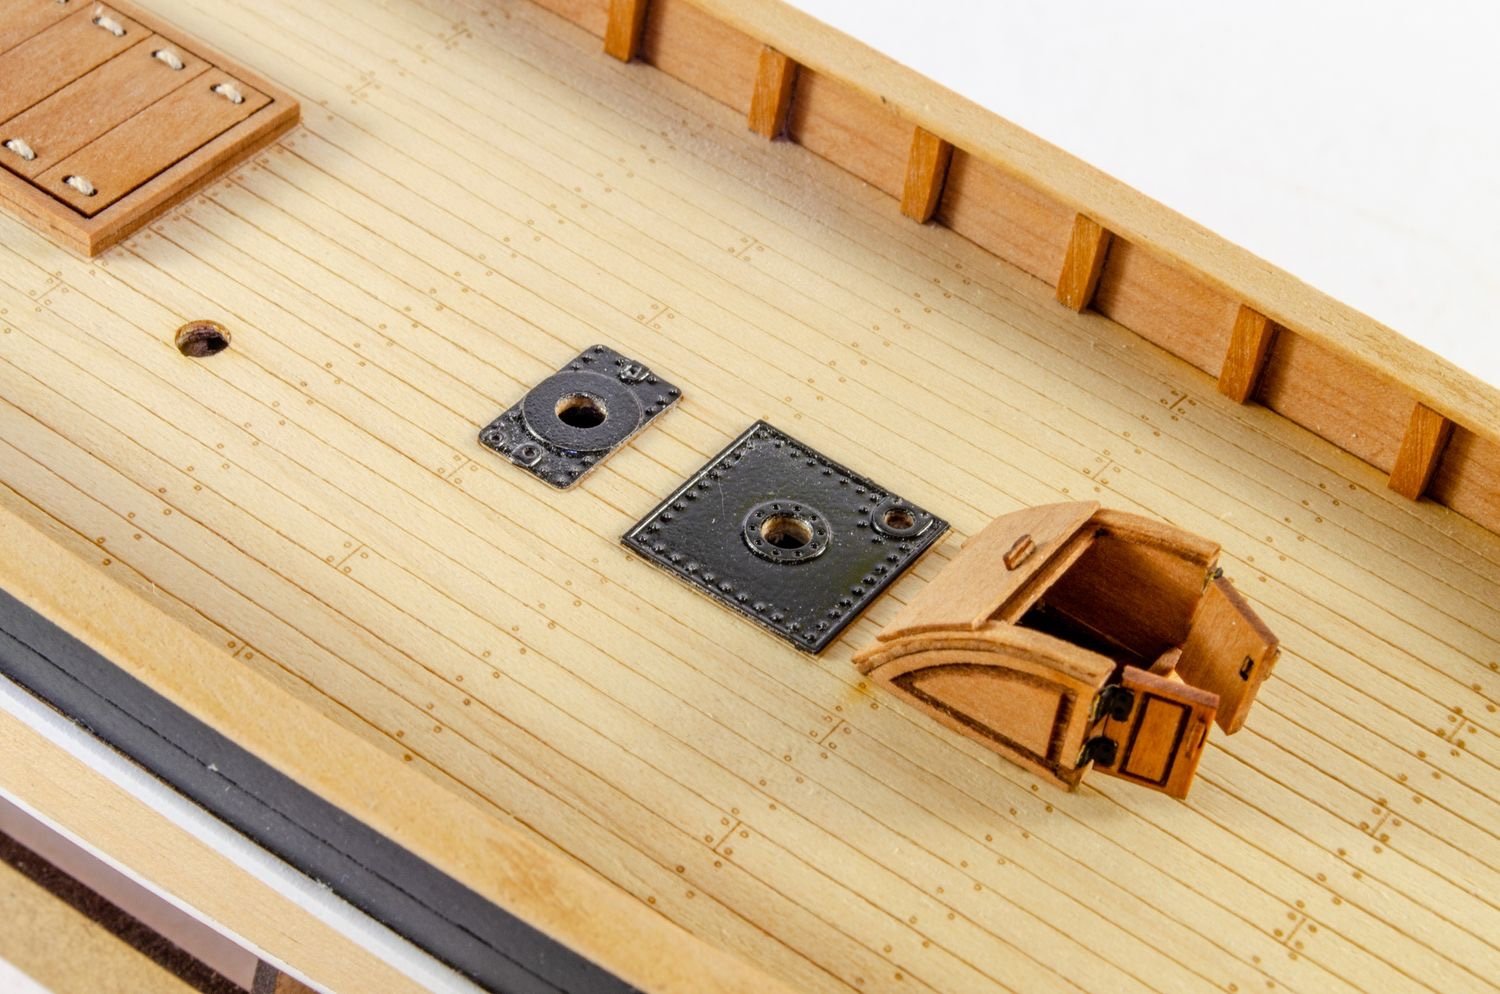
The main sail housing is now fitted. All of these items have either engraved lines or slots for fitting.
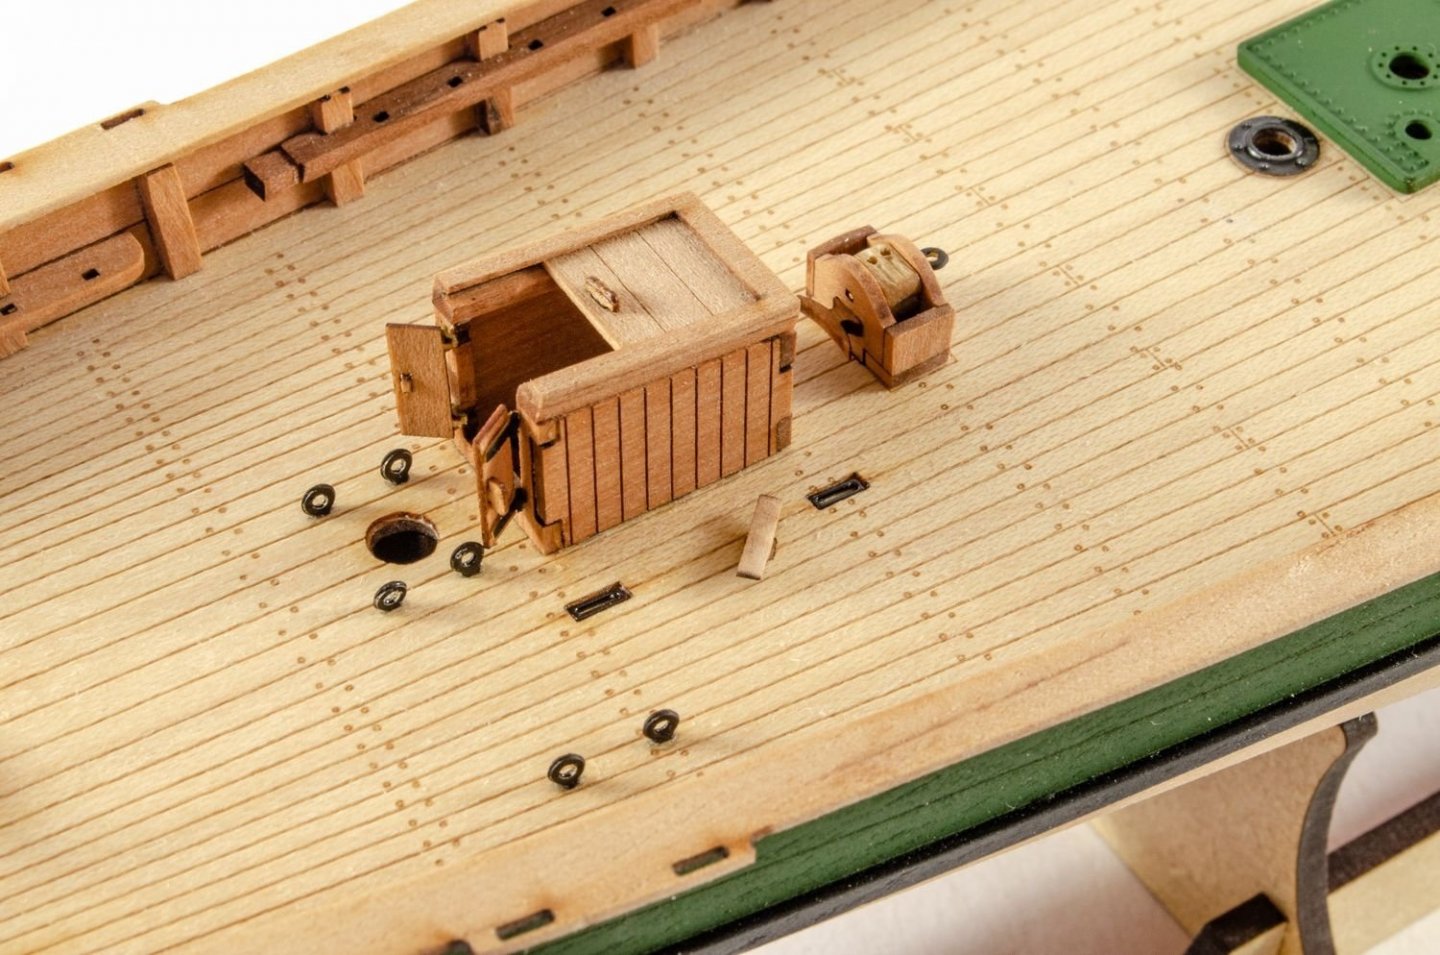
After priming, all the 3D parts were painted in green, to match Erycina's outer bulwark. You can use whatever colour you like, but this sort of green was quite common for the period.
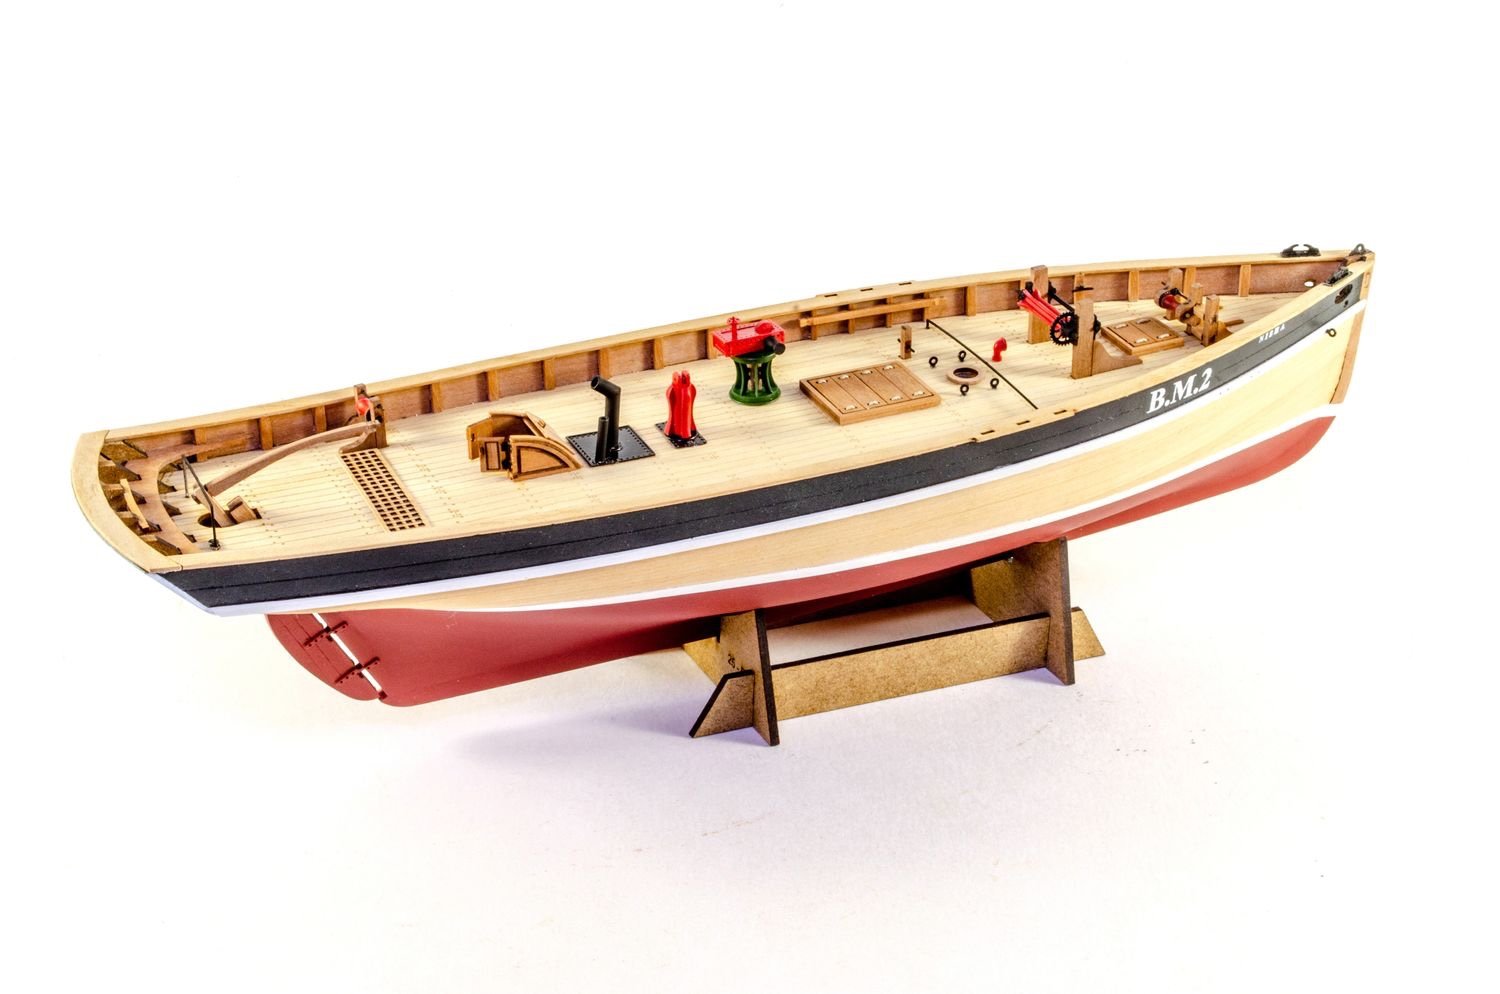
And of course, the steam winch. This is exactly the same sort fitted to Nisha.


Deck fittings ongoing.


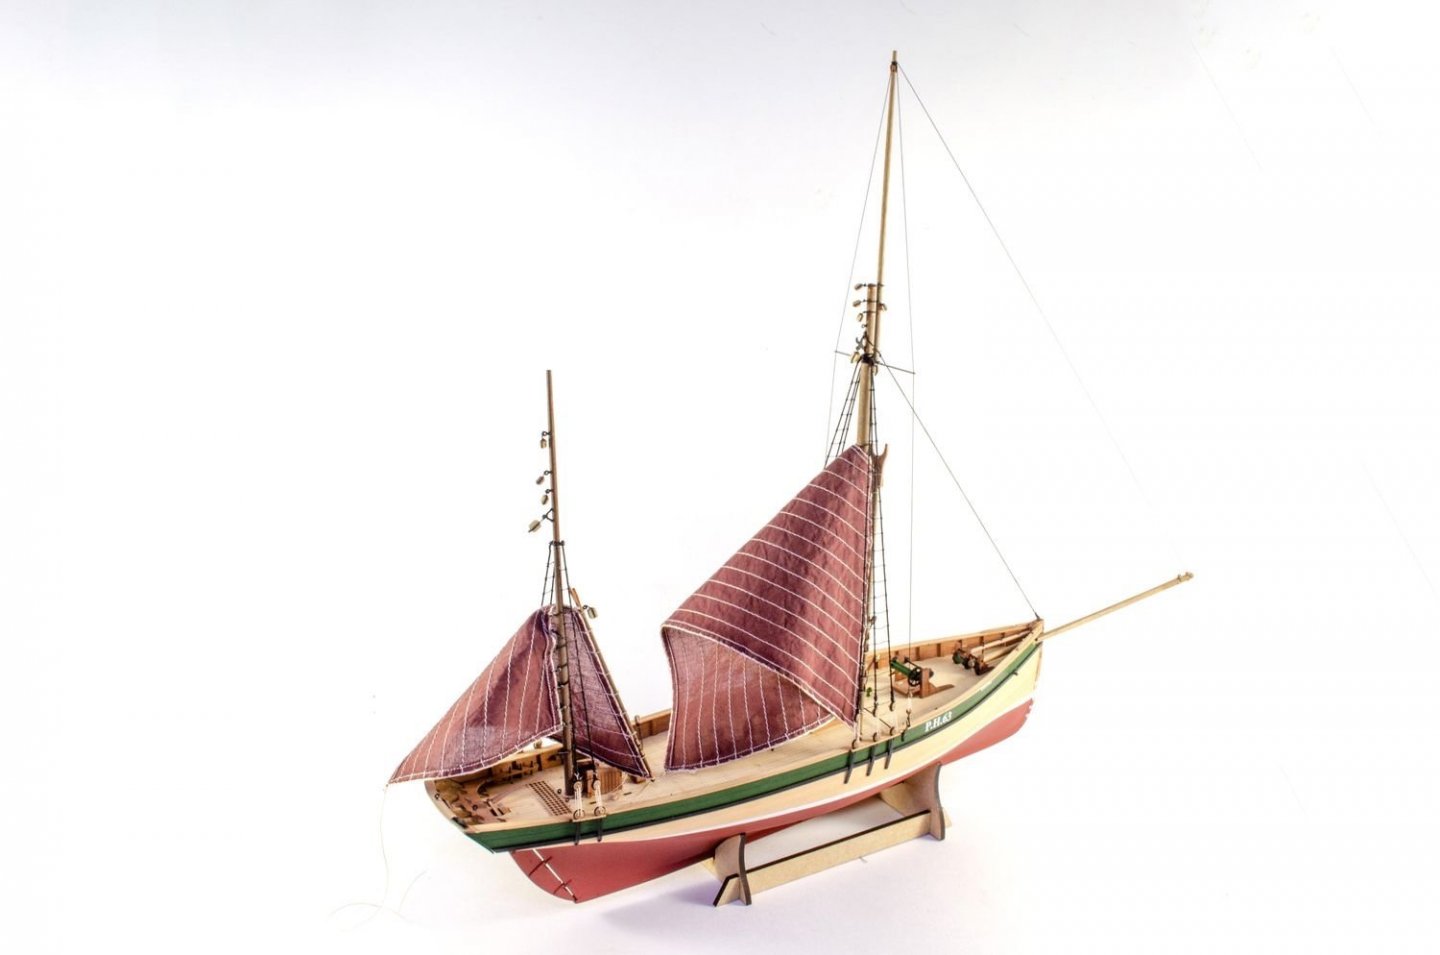
Three chimneys on this one, as opposed to two on Nisha. This one is quite a bit larger than Nisha, and looks more purposeful, in my opinion. Both are quite beautiful though.


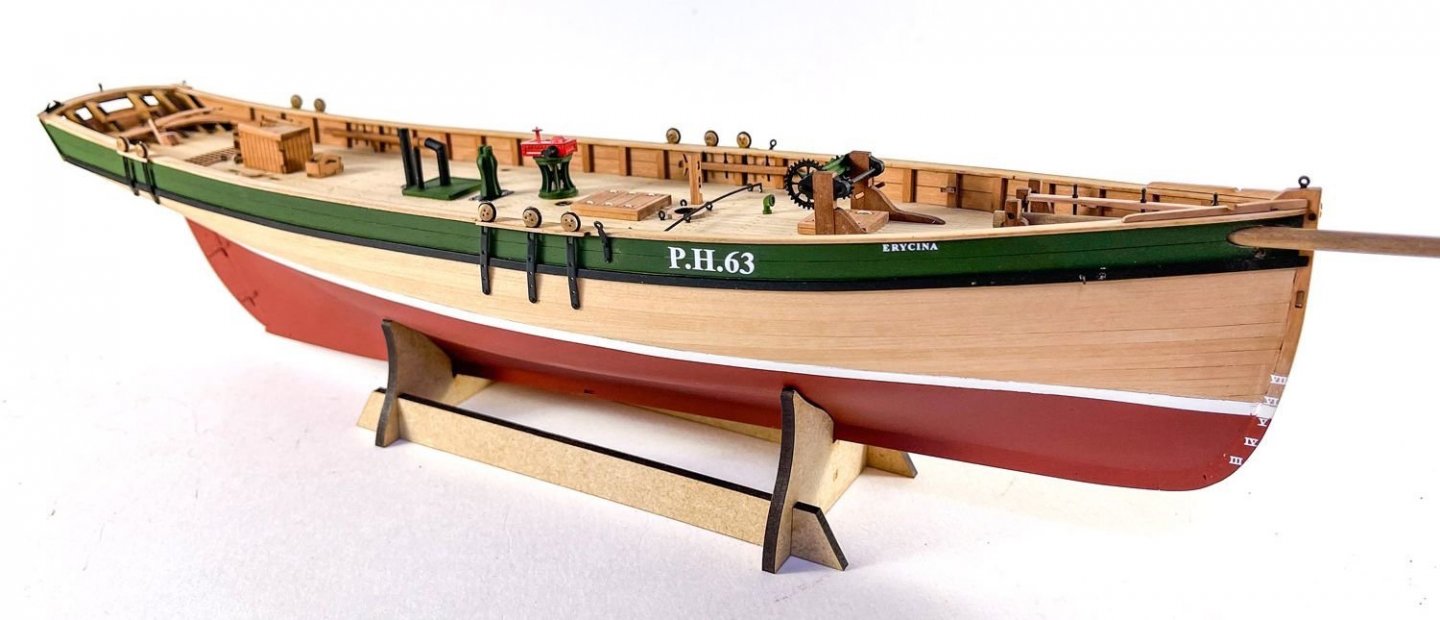
The next log entry here will be the last for Erycina, in around a week.
-
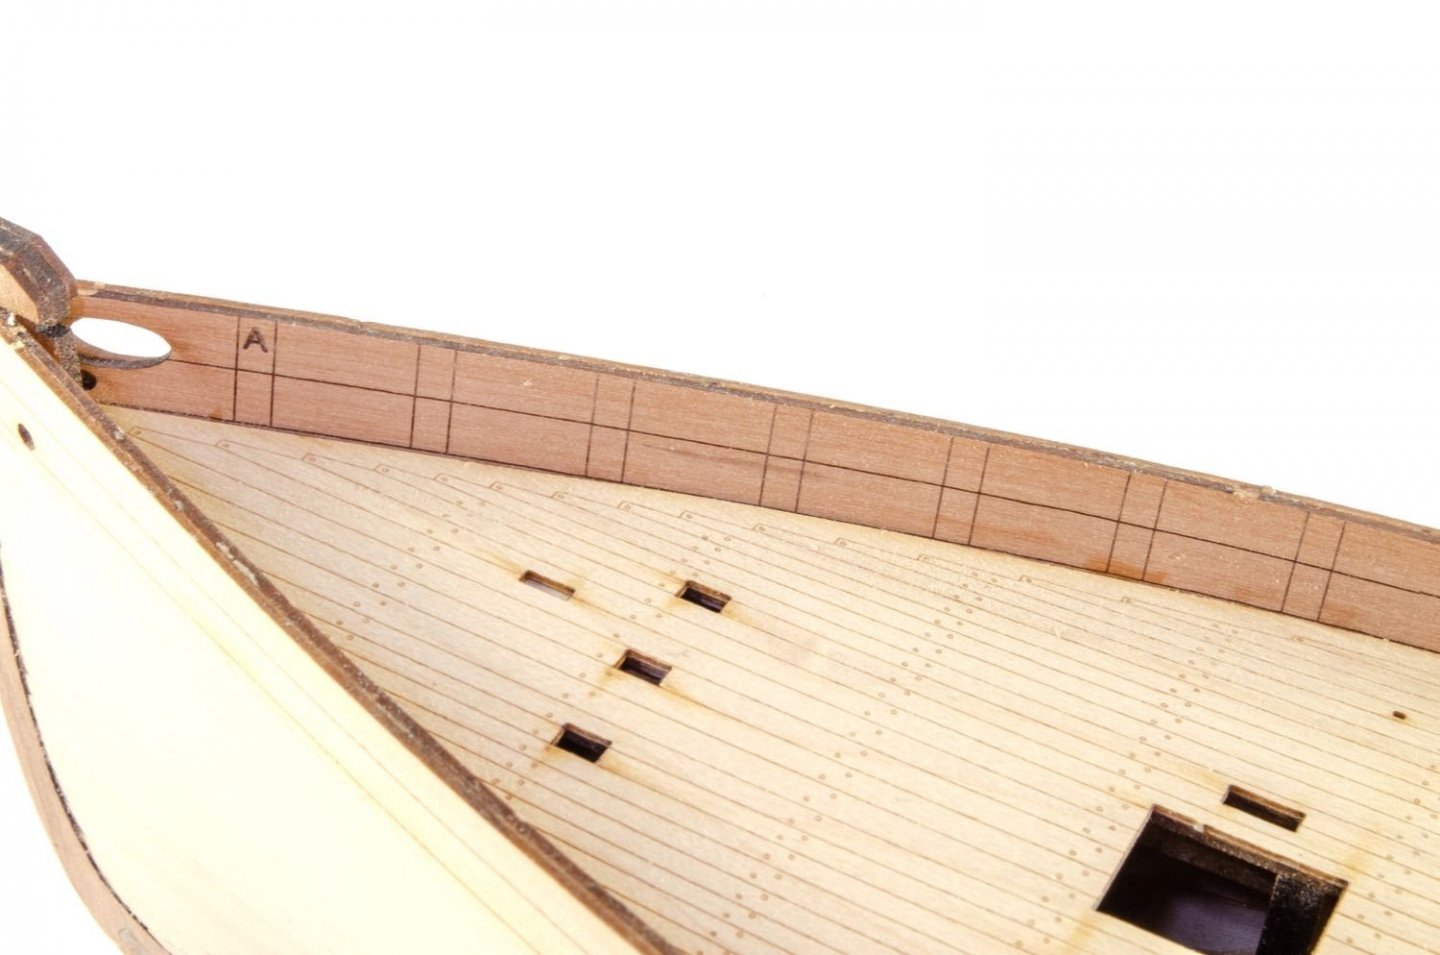
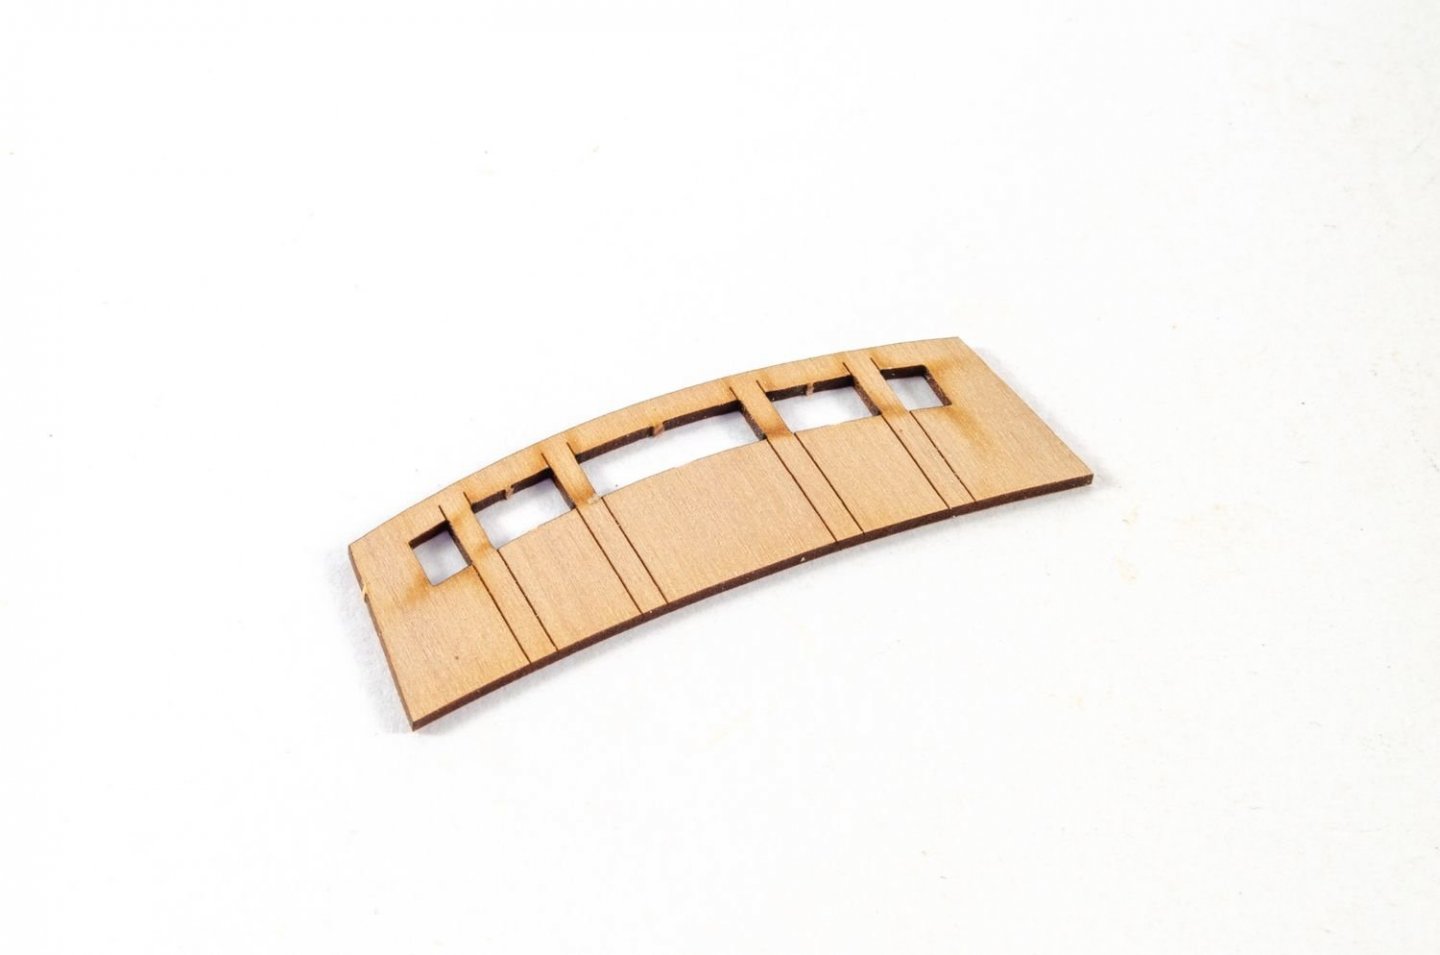
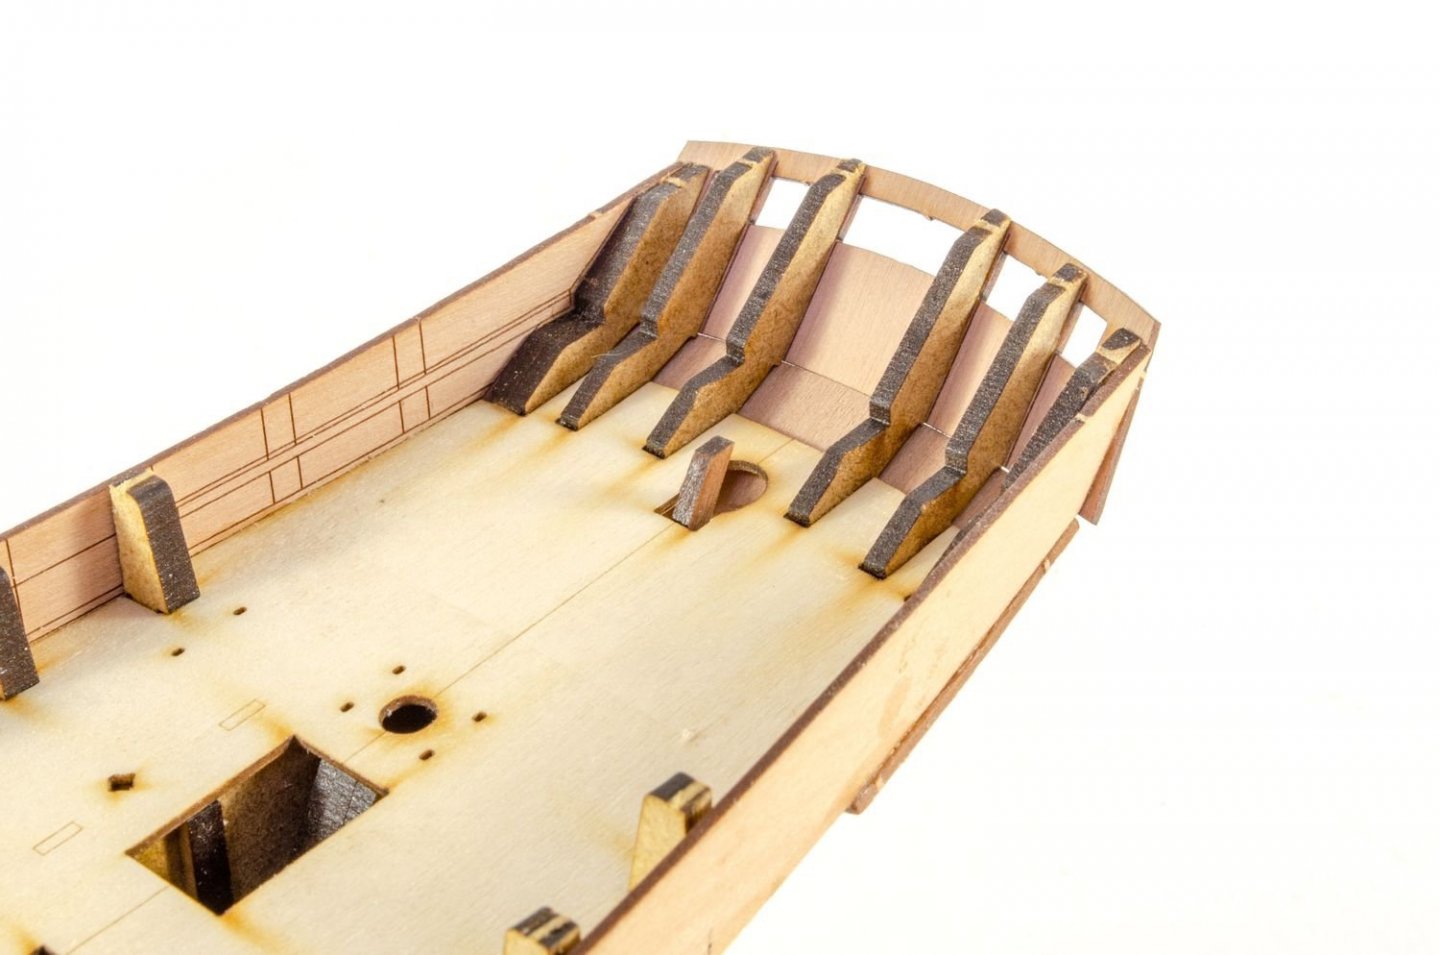
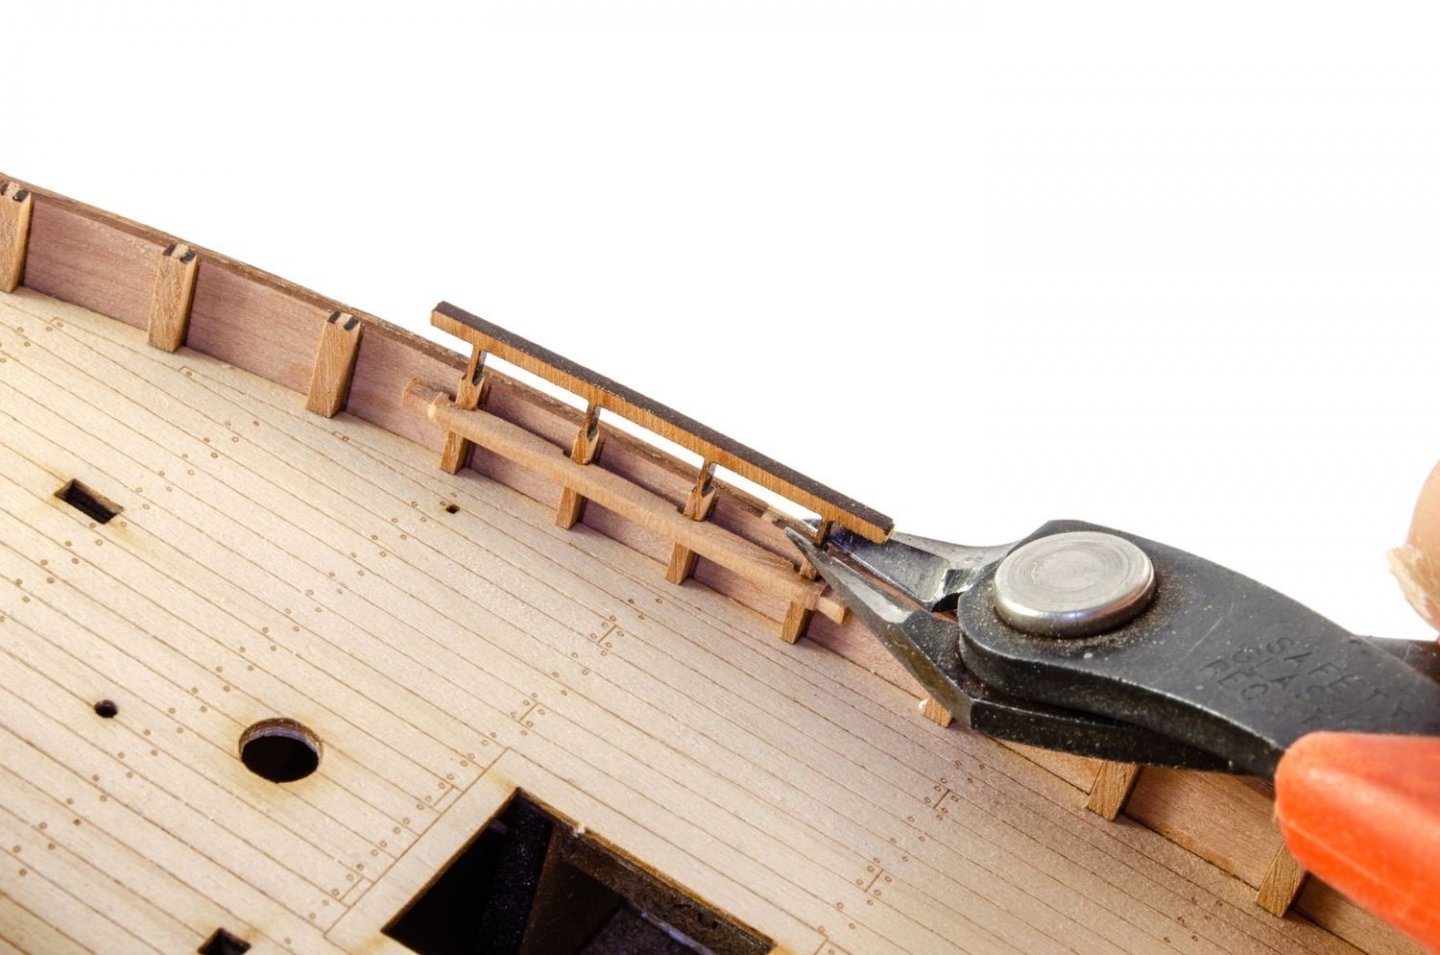
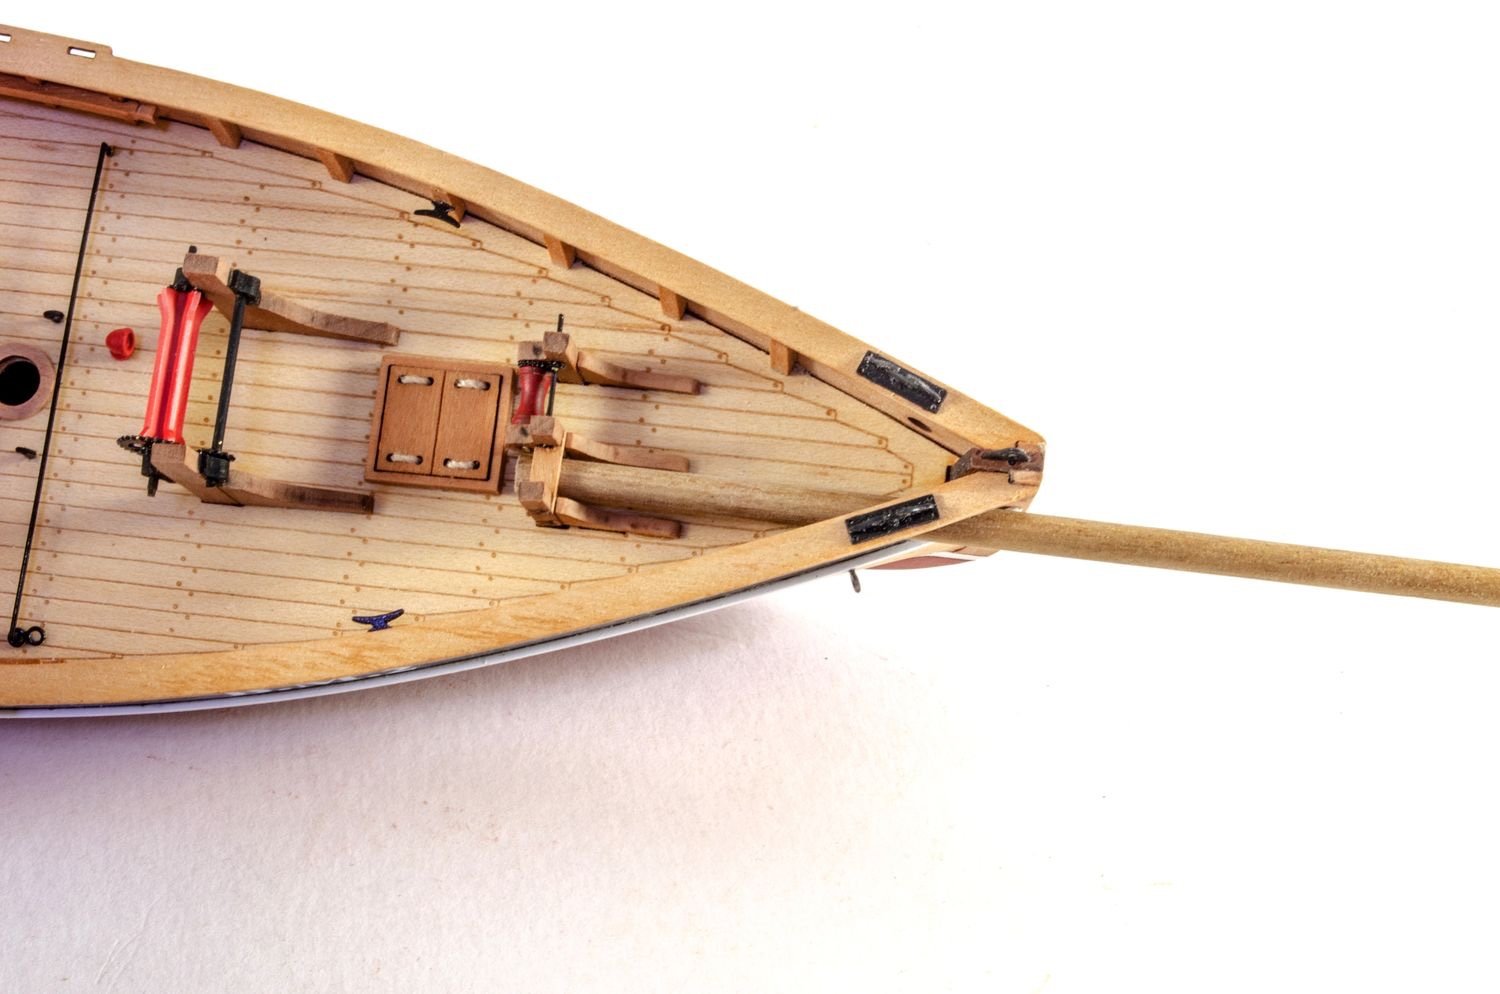
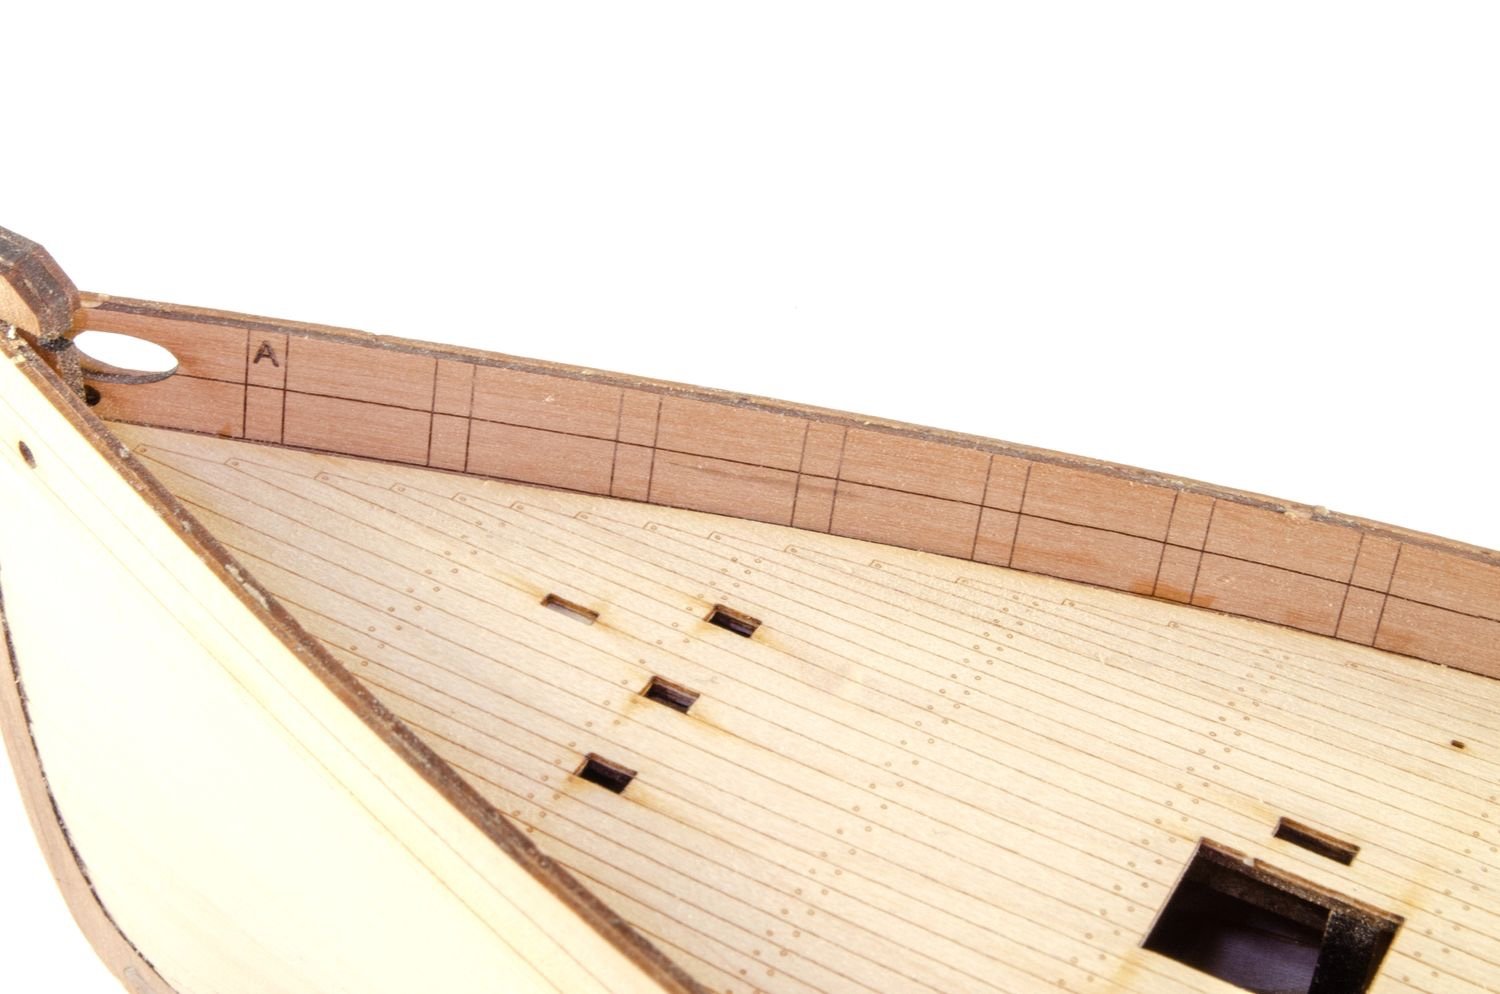
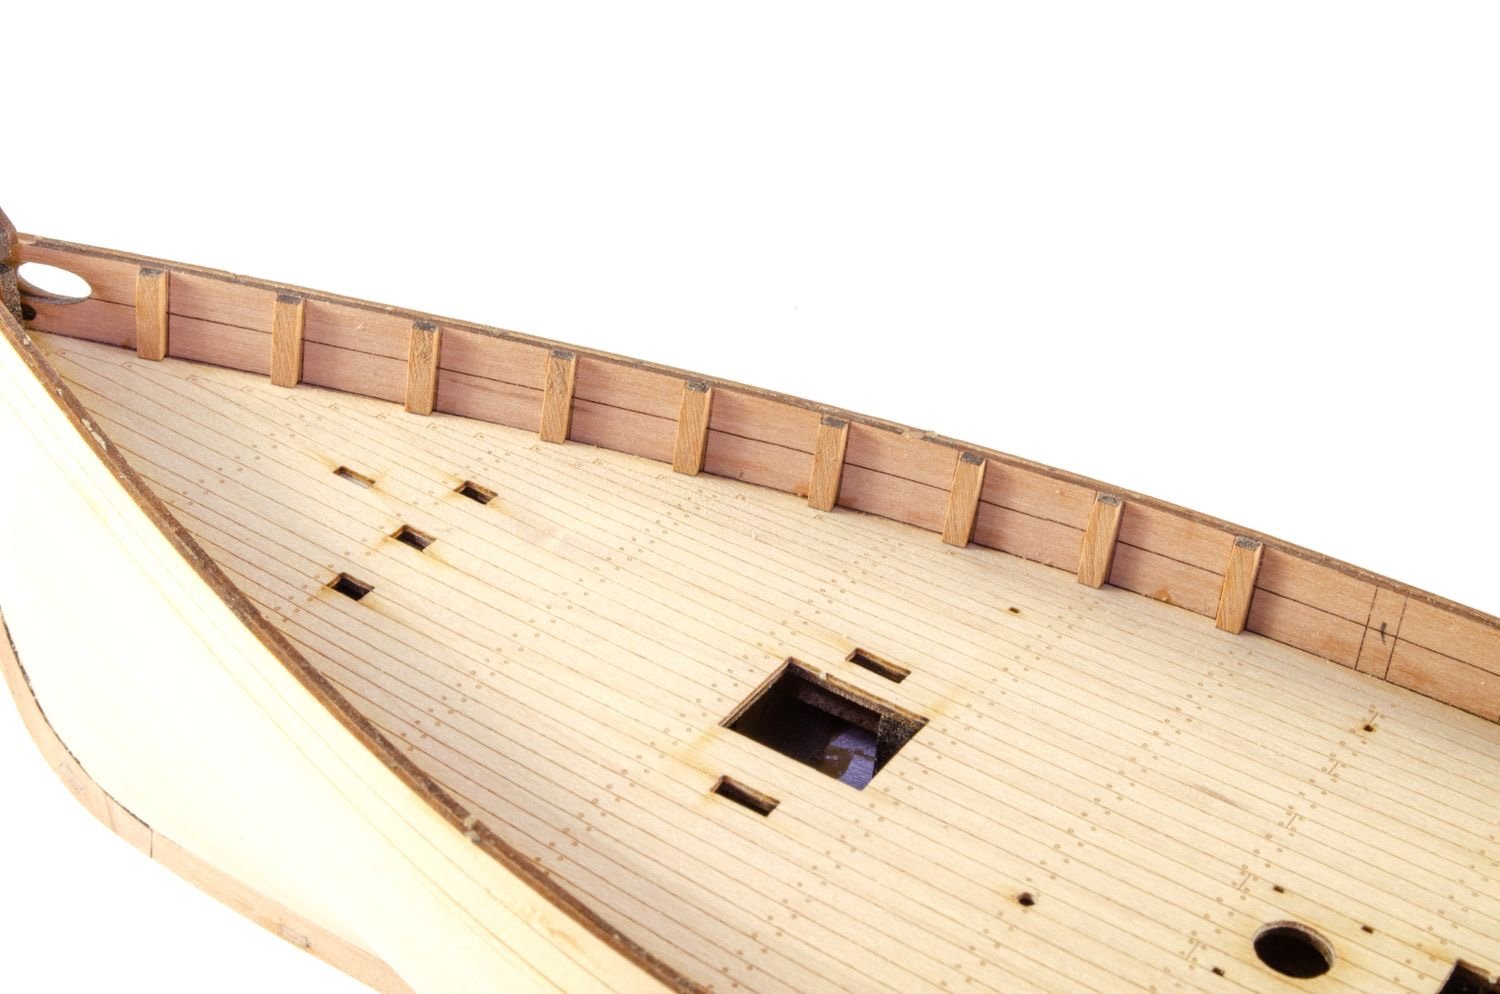
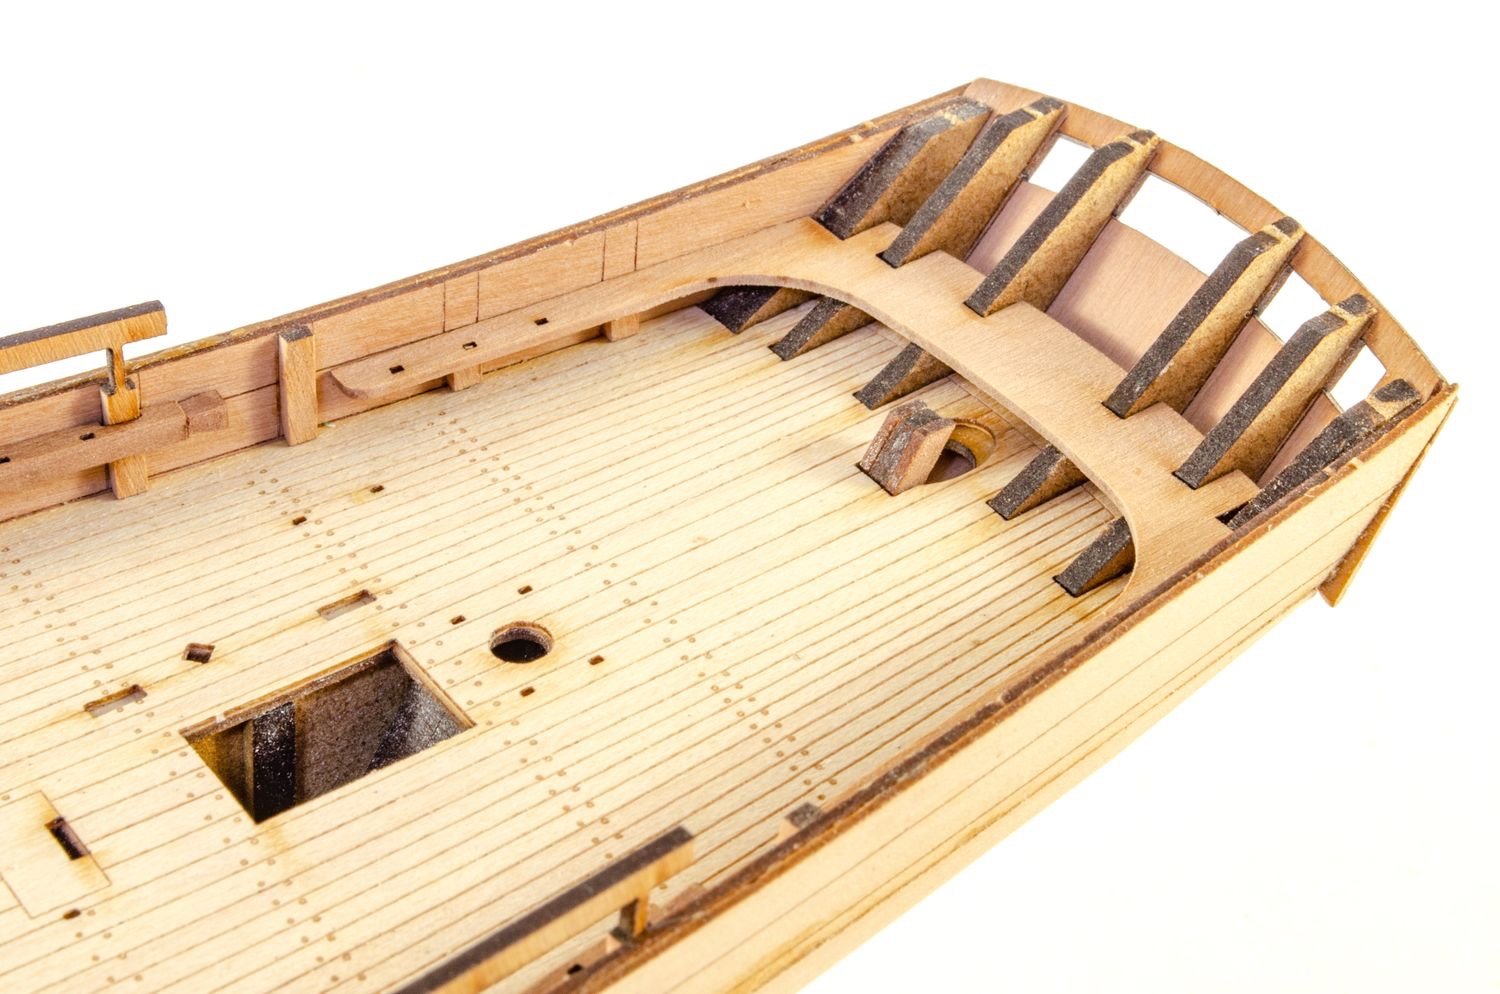
As with Nisha, the inner bulwarks are engraved with timberhead positions, with the first being 'A'. The pre-cut timberheads just need cleaning up and the bottom bevelled accordingly.

More fitting out as the stern 'bench' is fitted.

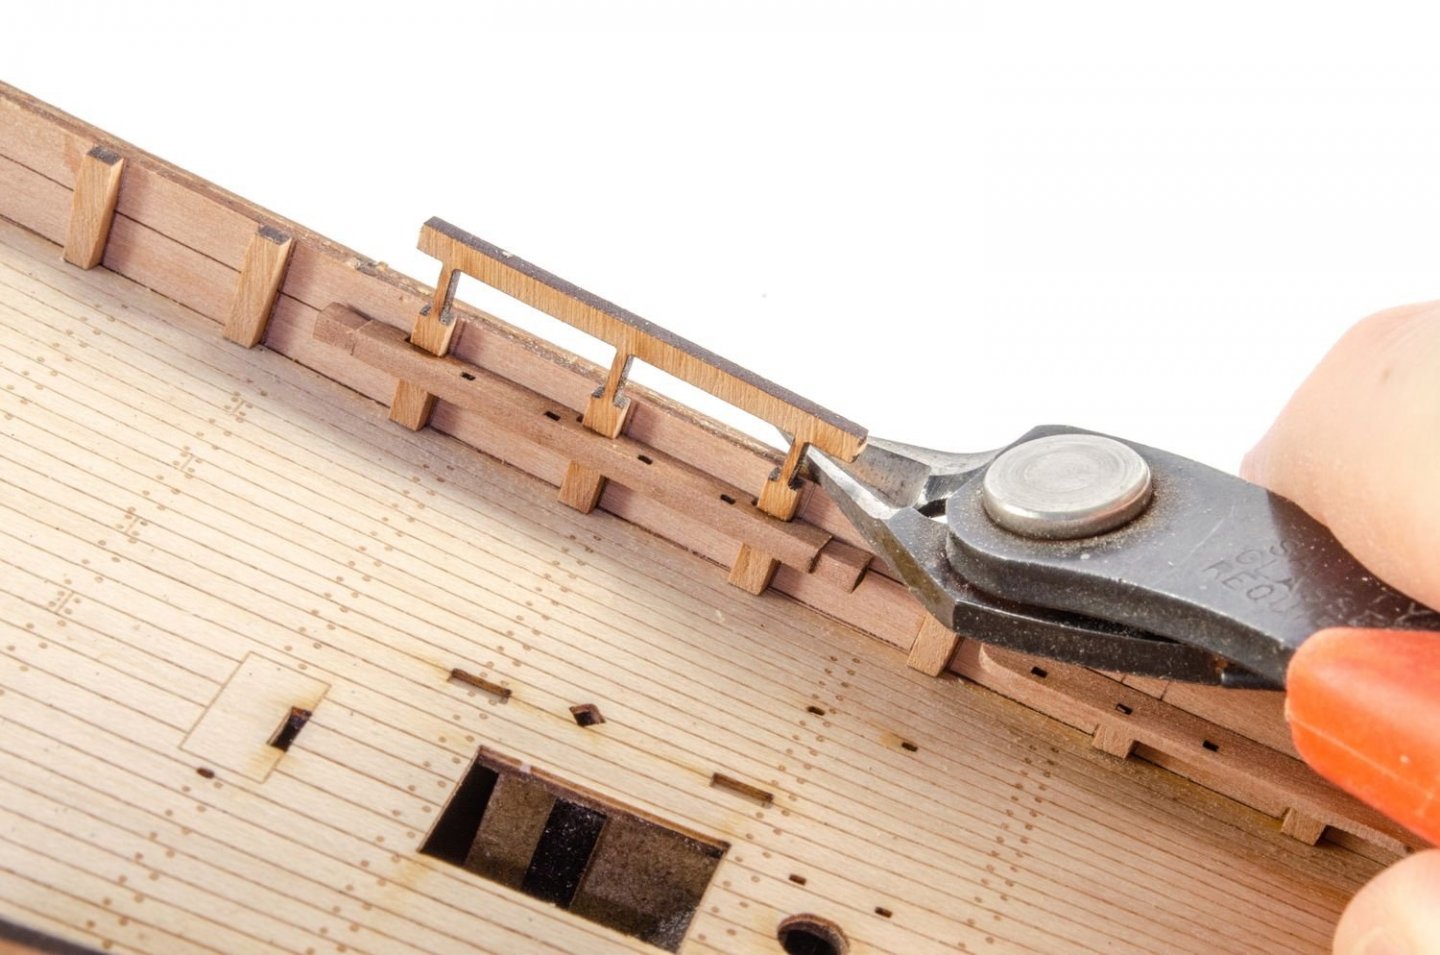
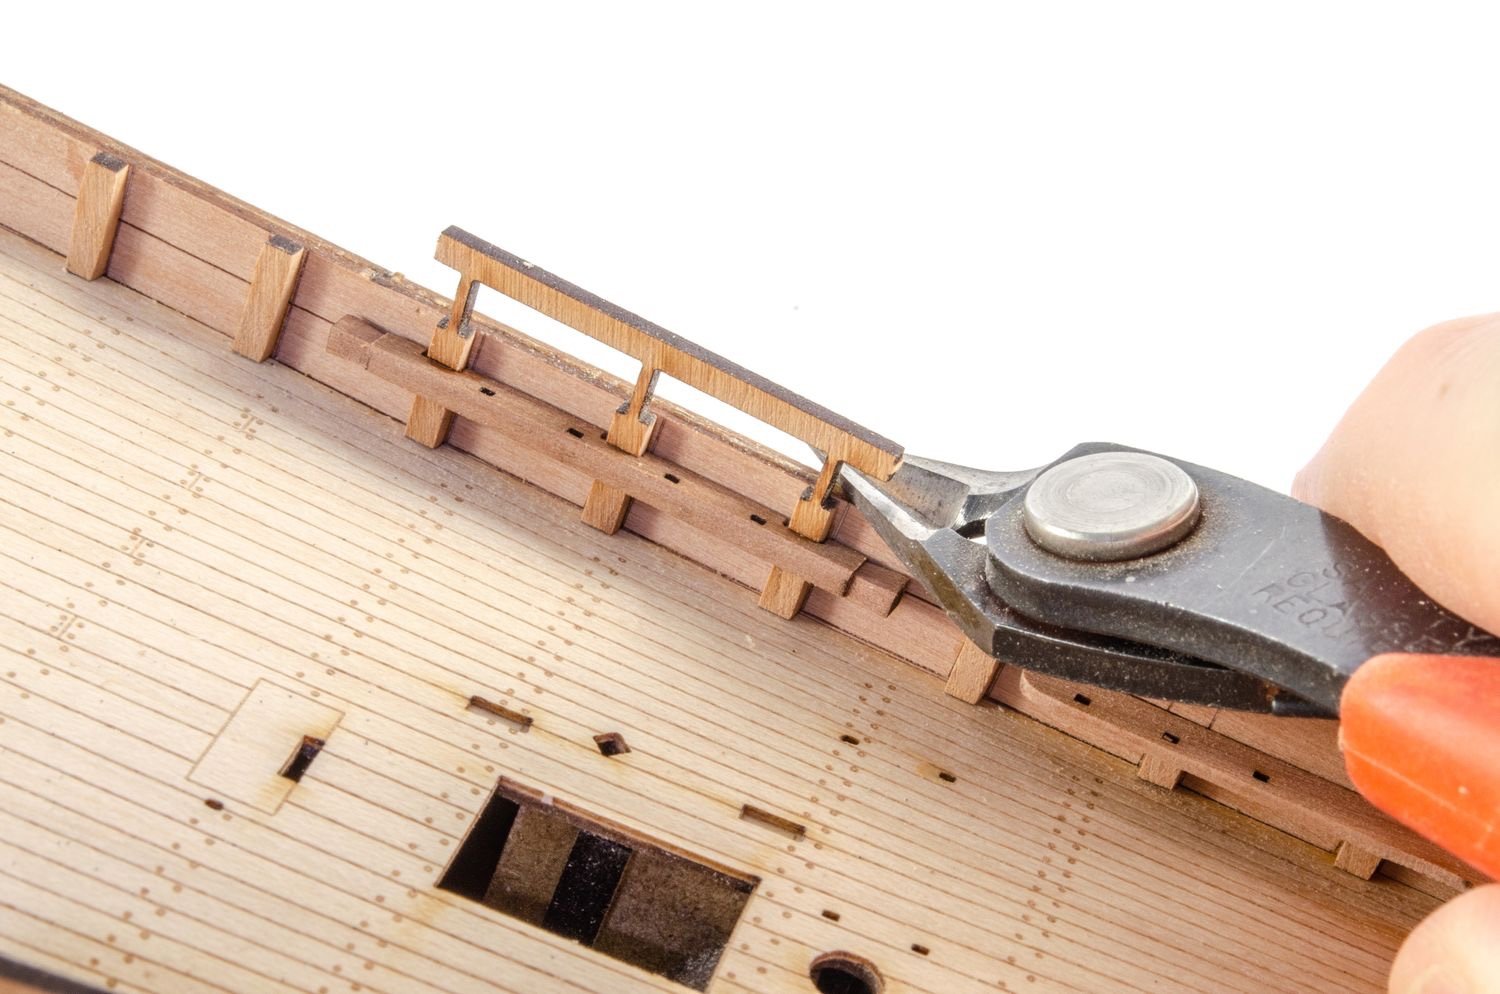
Where timberheads are fitted with a rail, they are adjoined with a temporary beam which makes sure the spacings are correct for these. Once in place and dry, the beam can be snipped away.
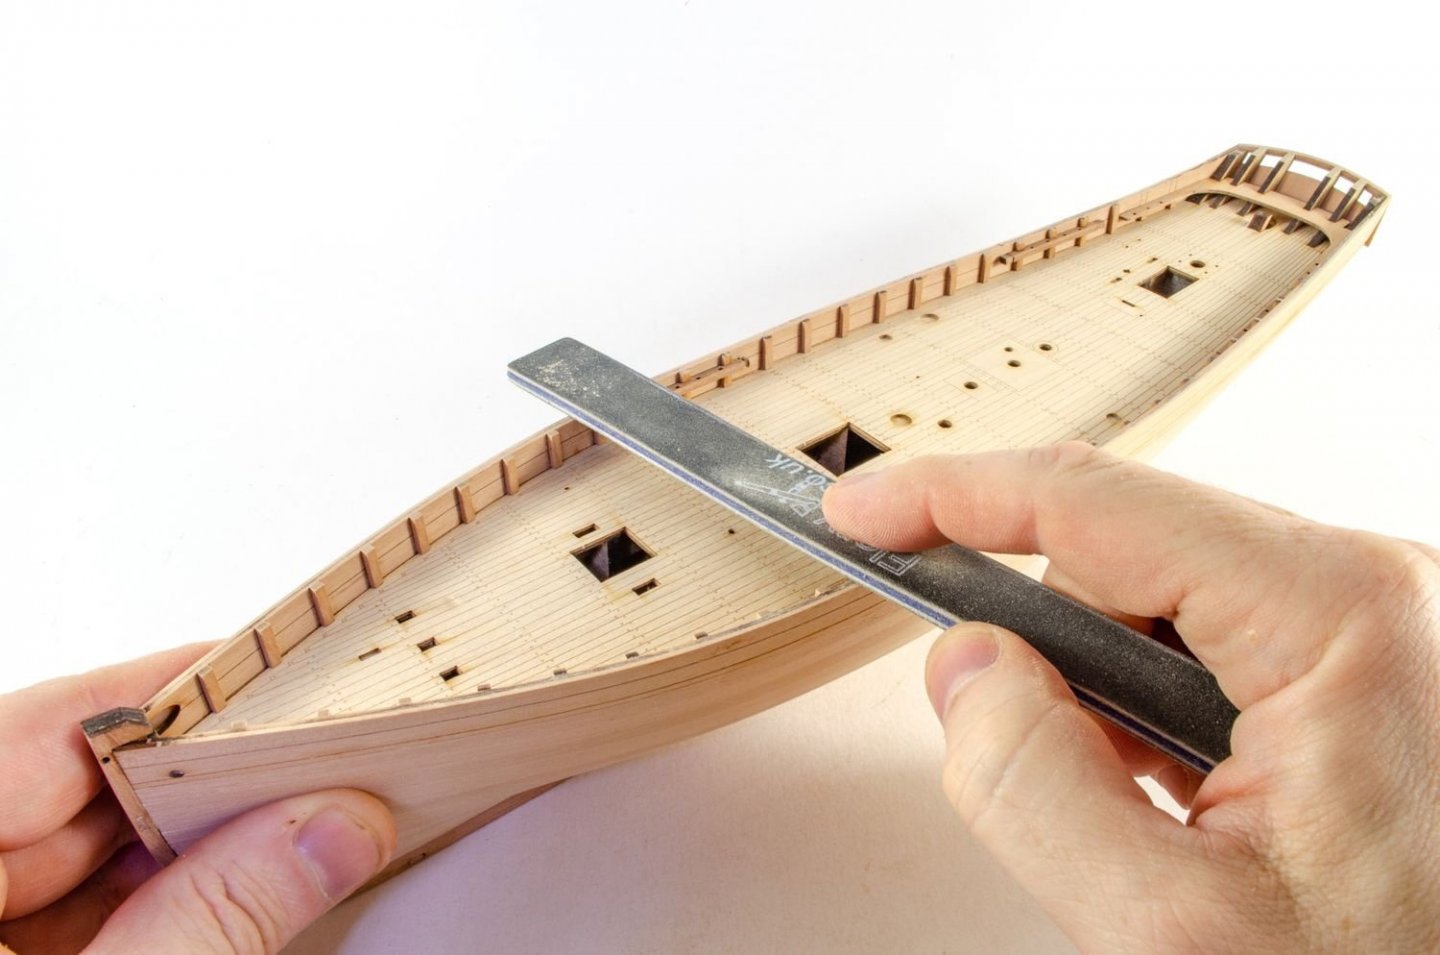
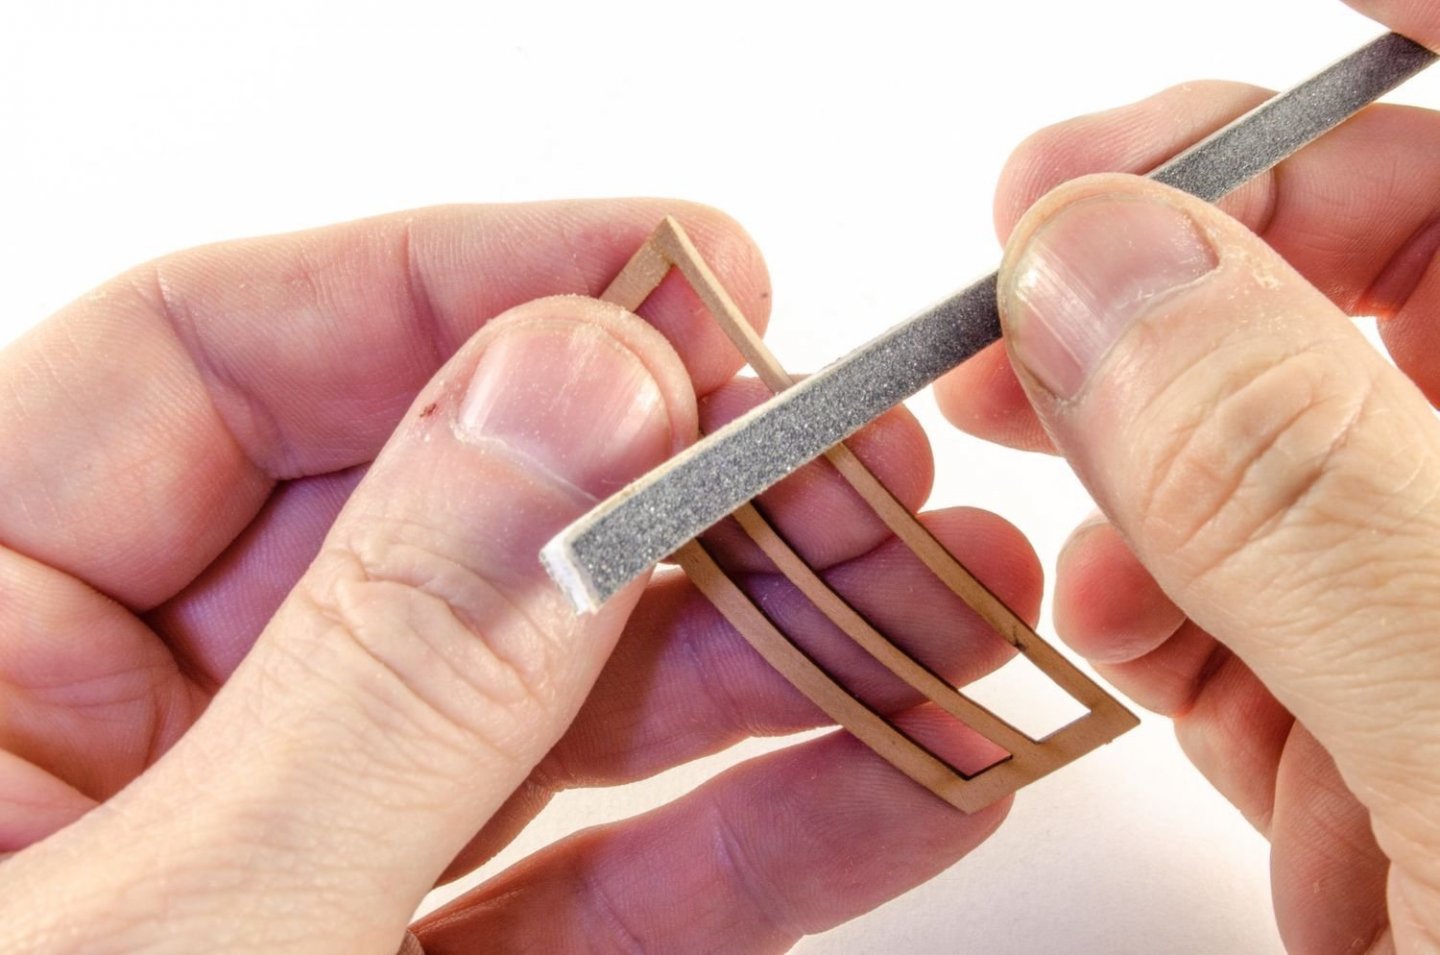
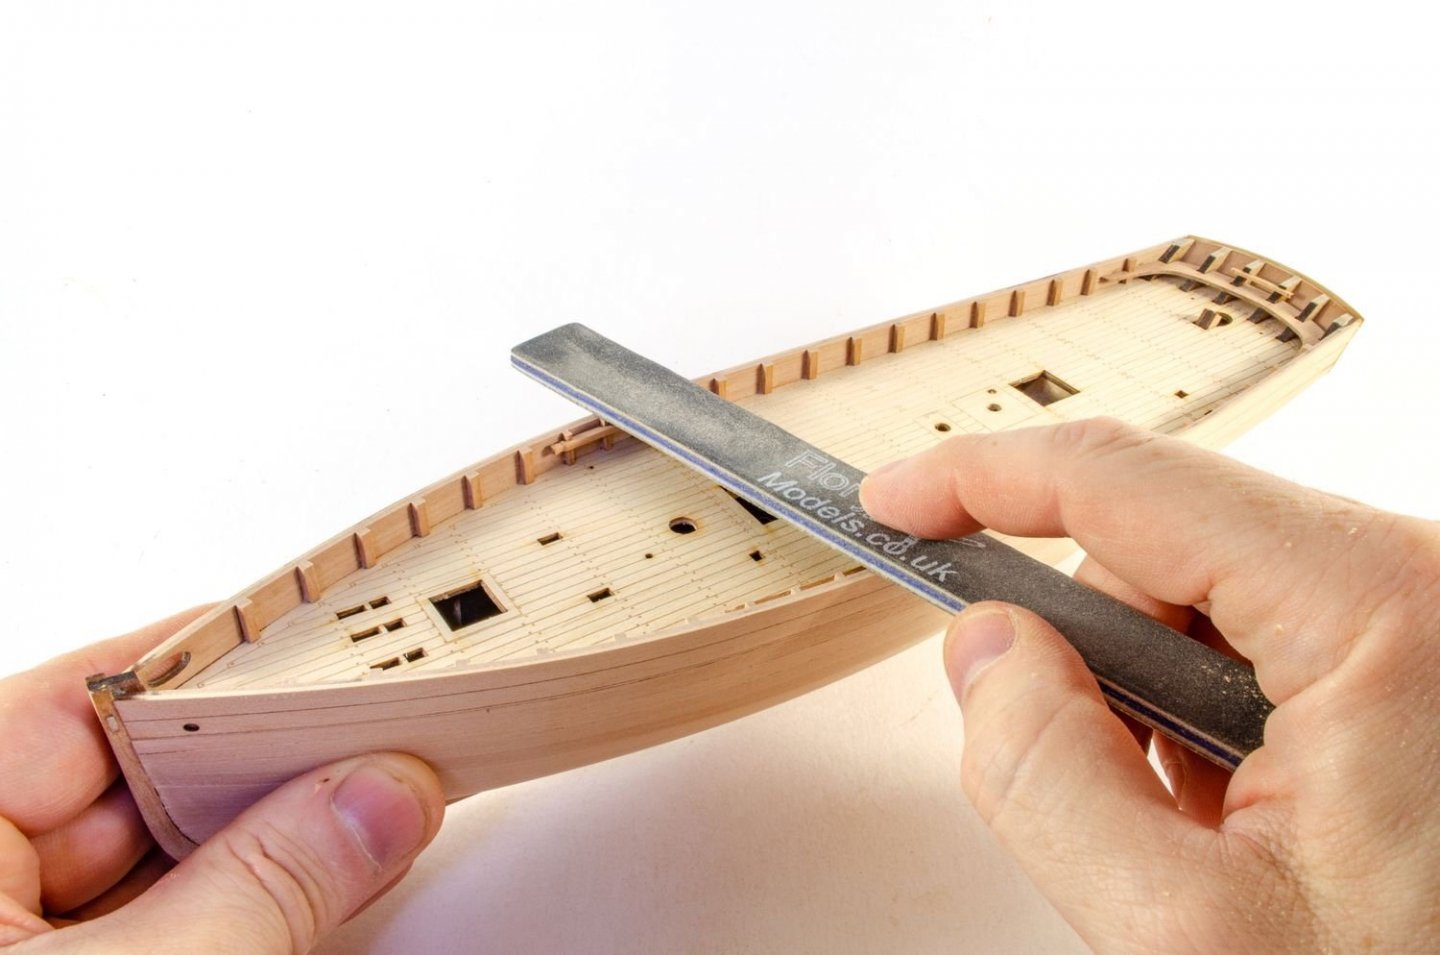
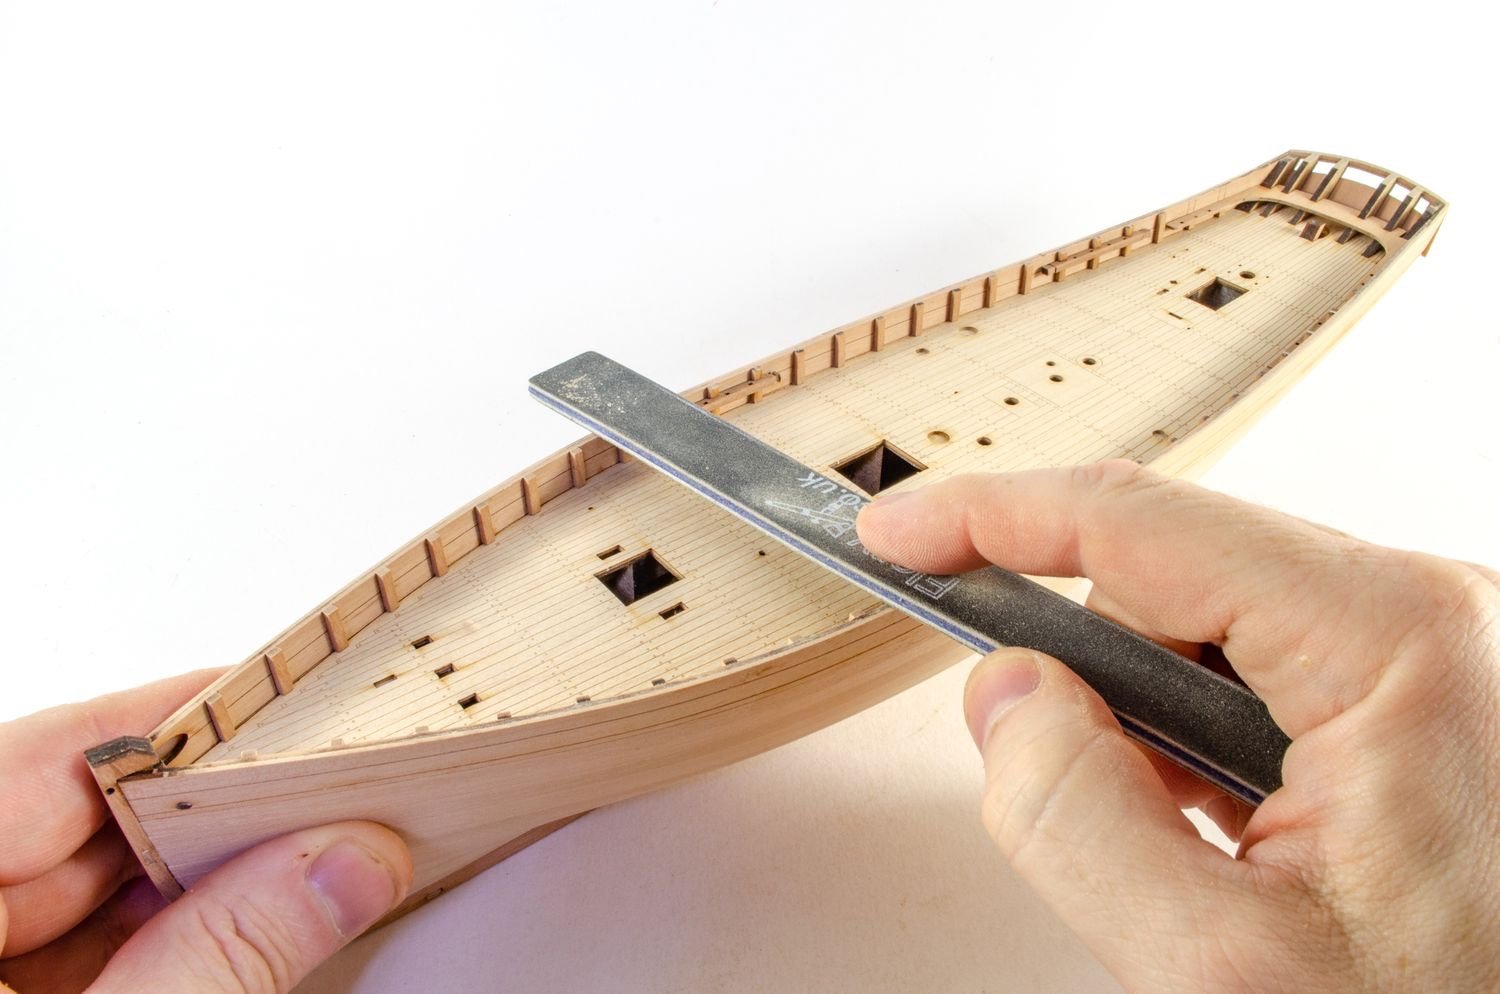
A sanding stick makes short work of neatening up the tops of the bulwarks, levelling them in relation to each other.
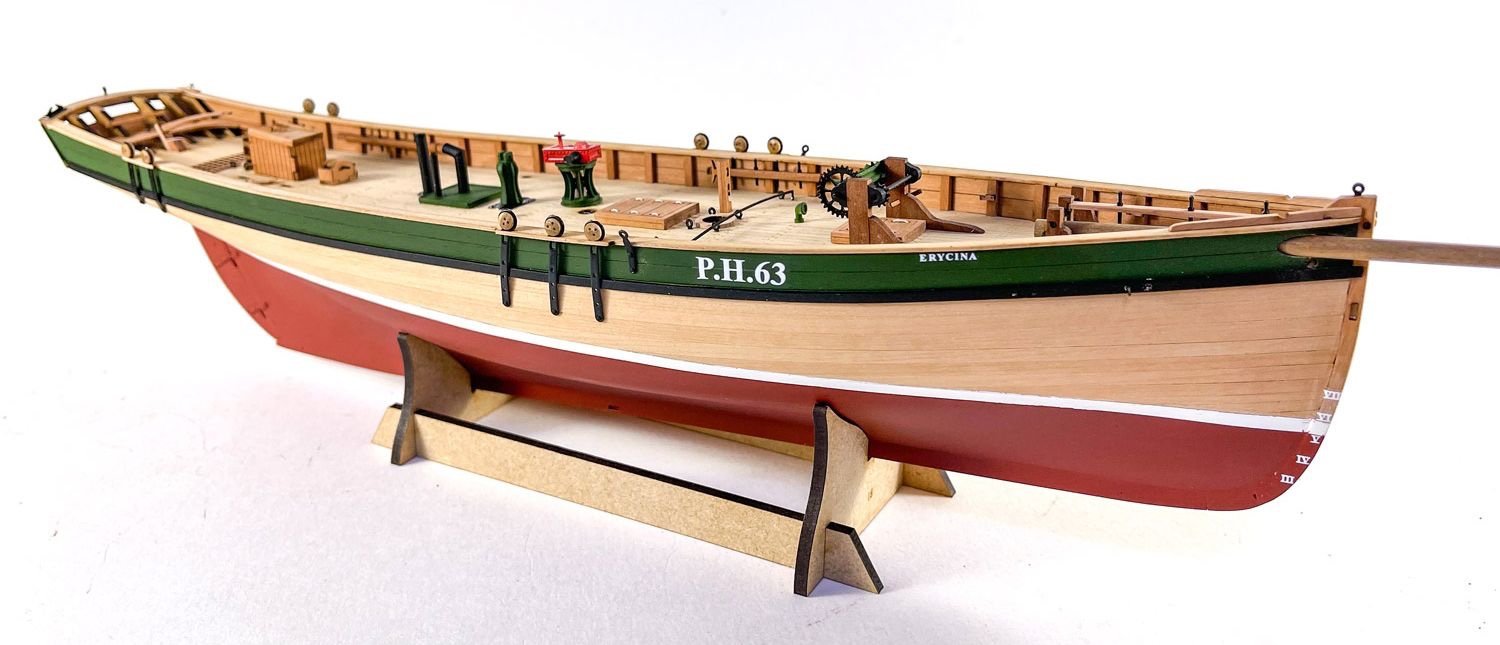
Before the gunwales are fitted, the model is masked and the upper bulwarks airbrushed in green.
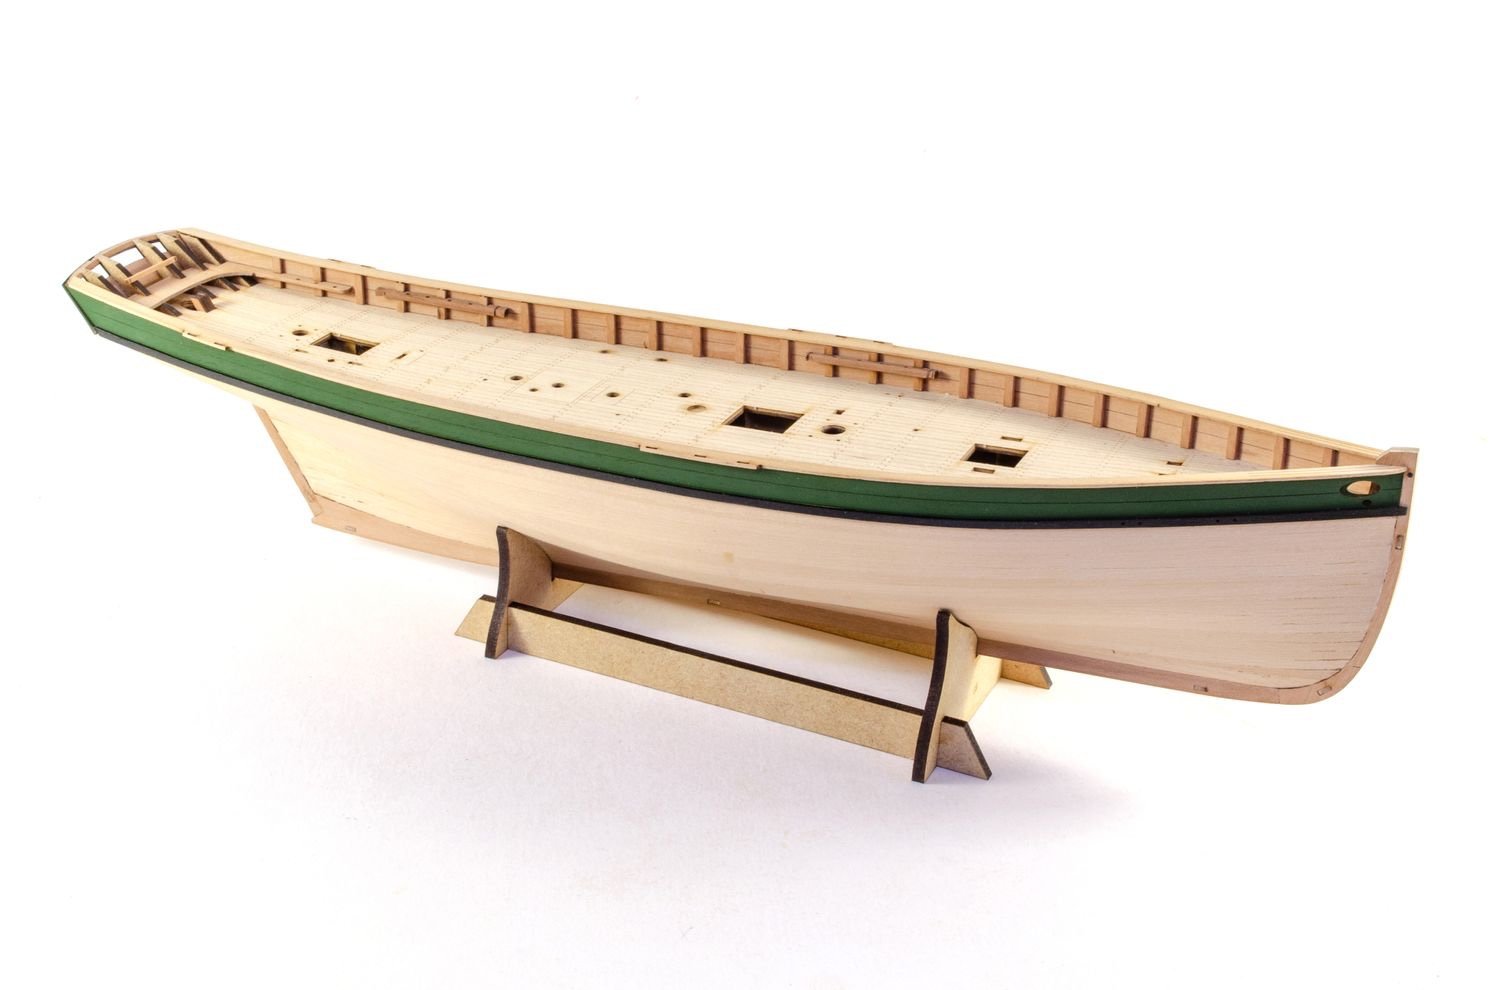
Gunwales now fitted.

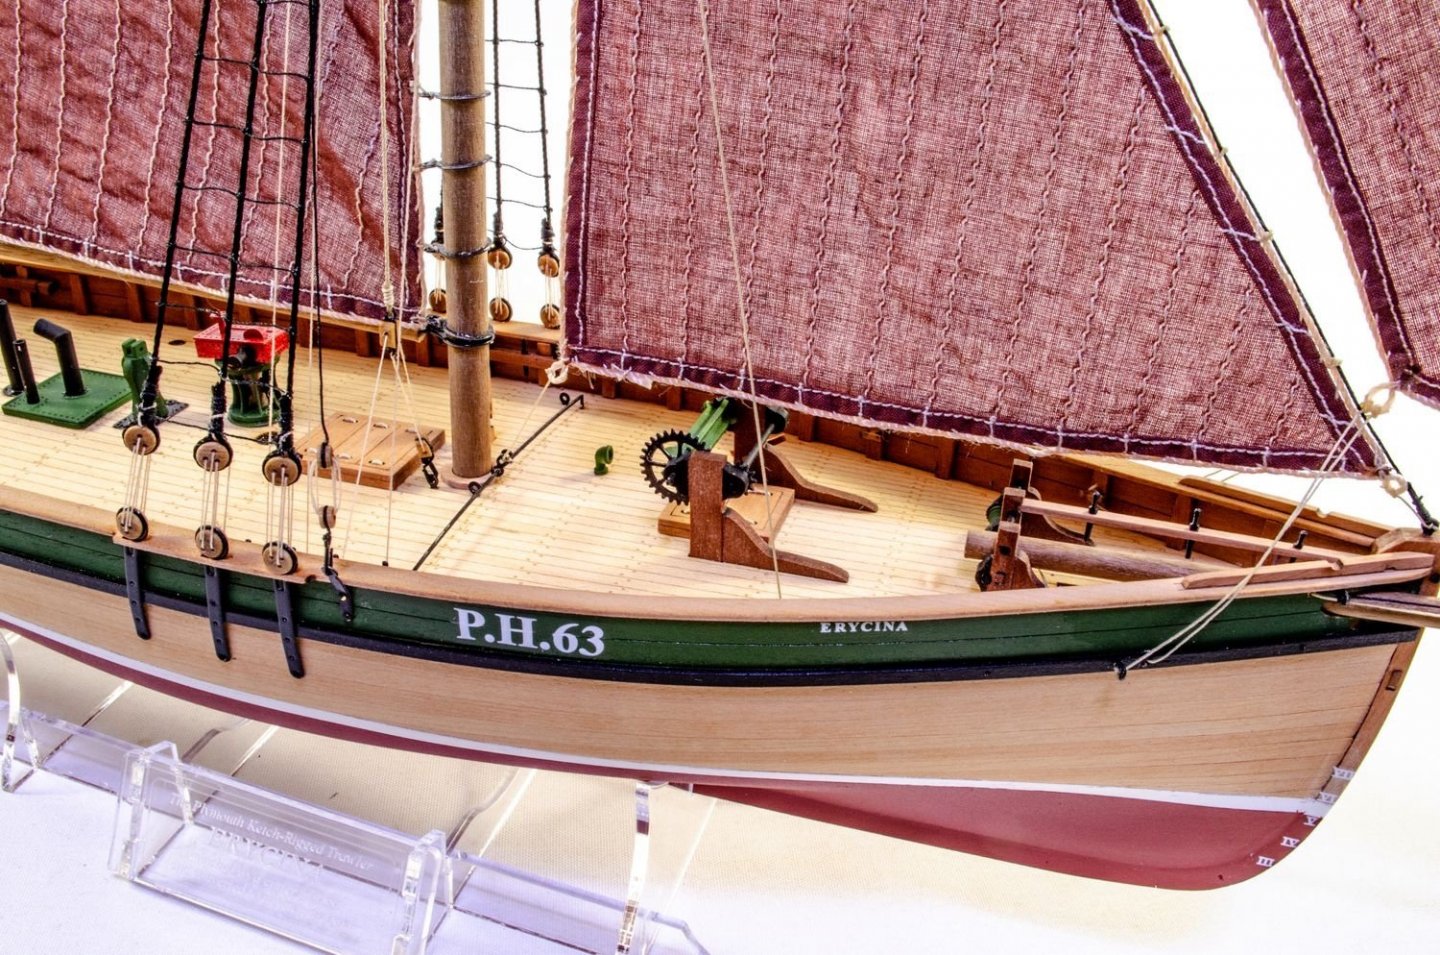
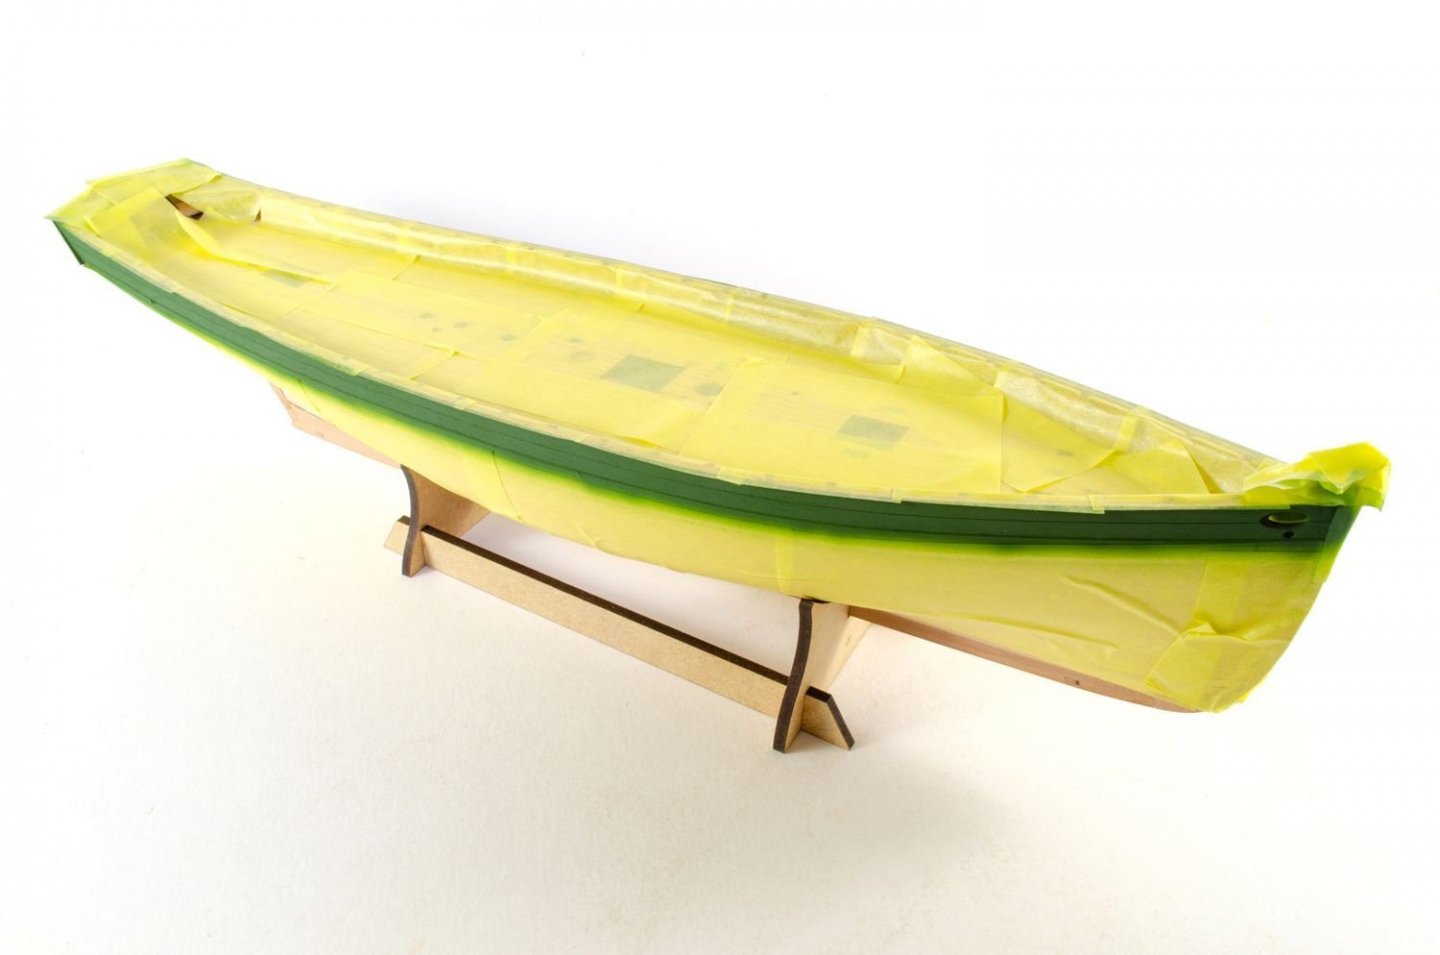
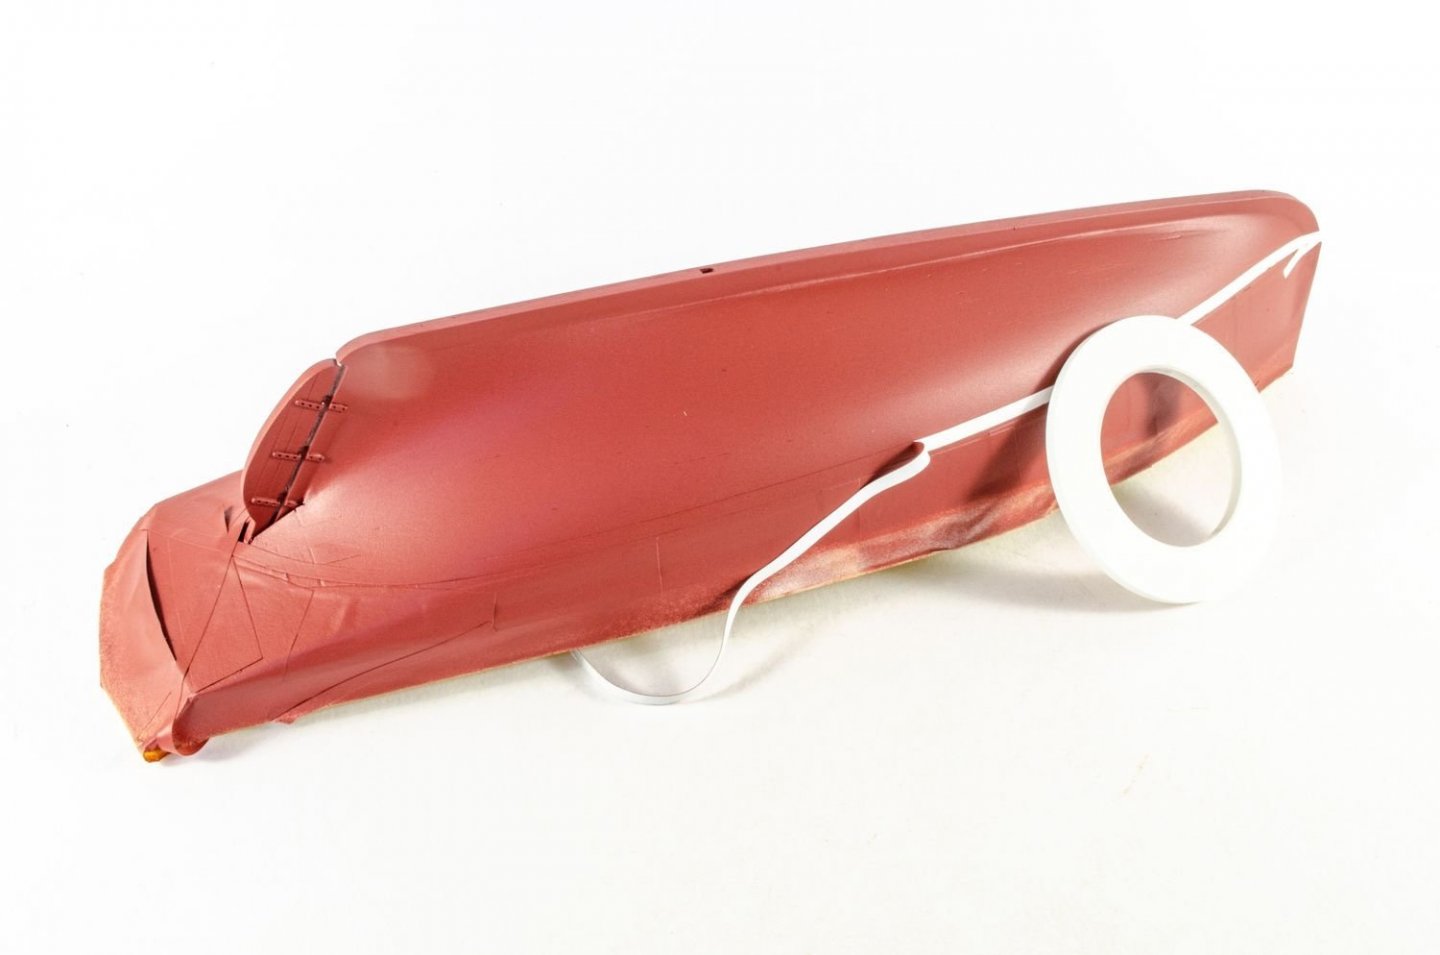
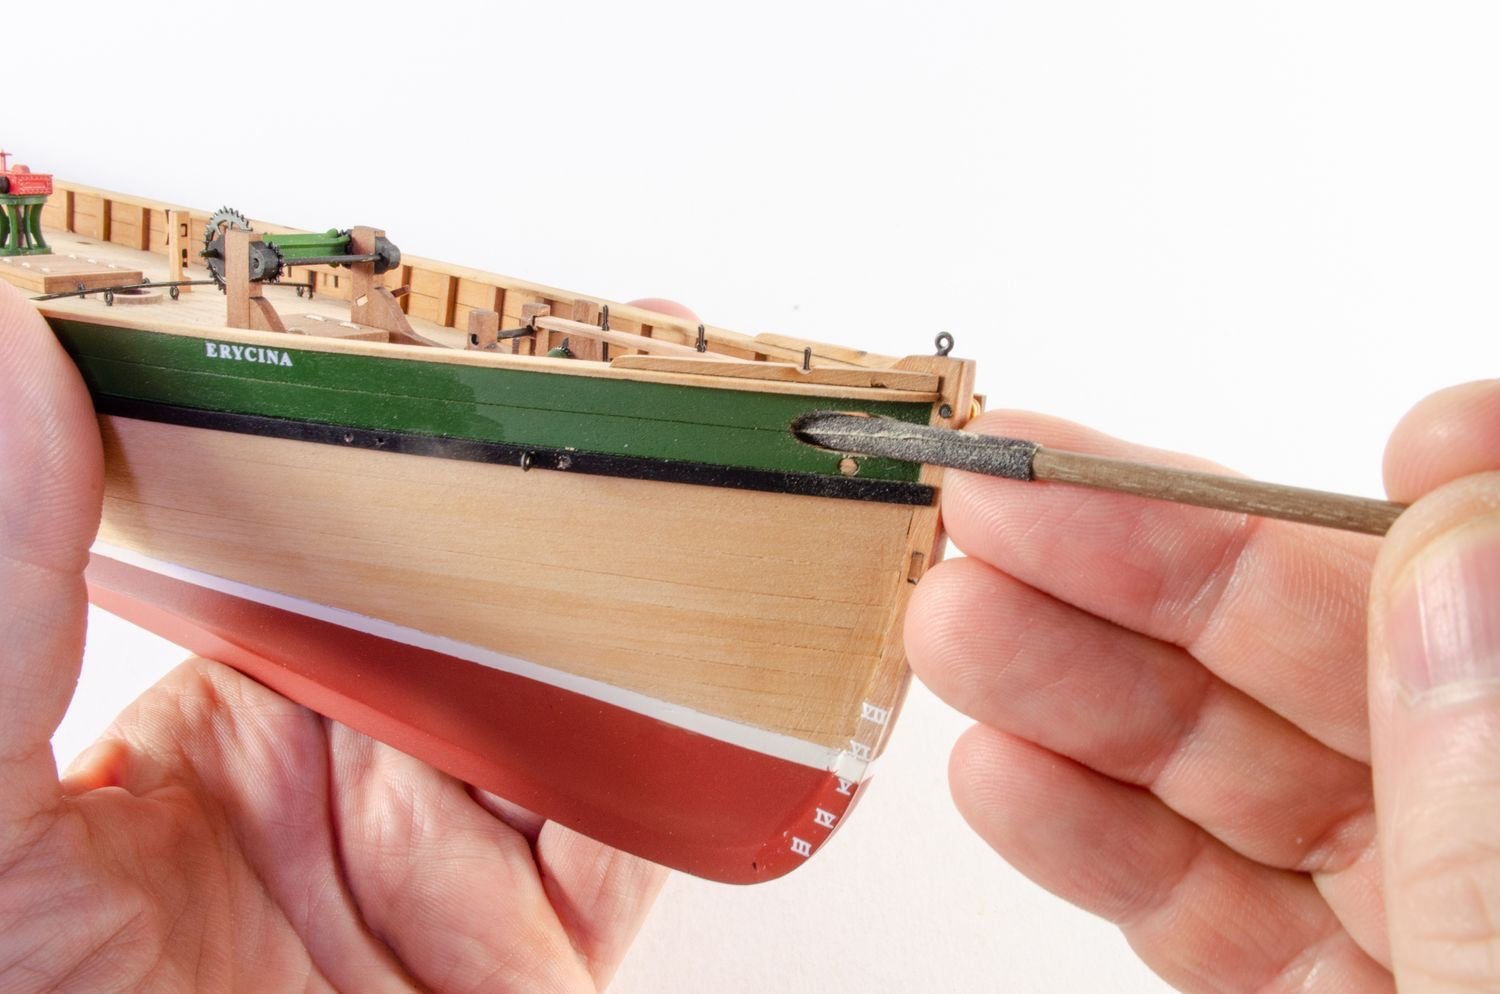
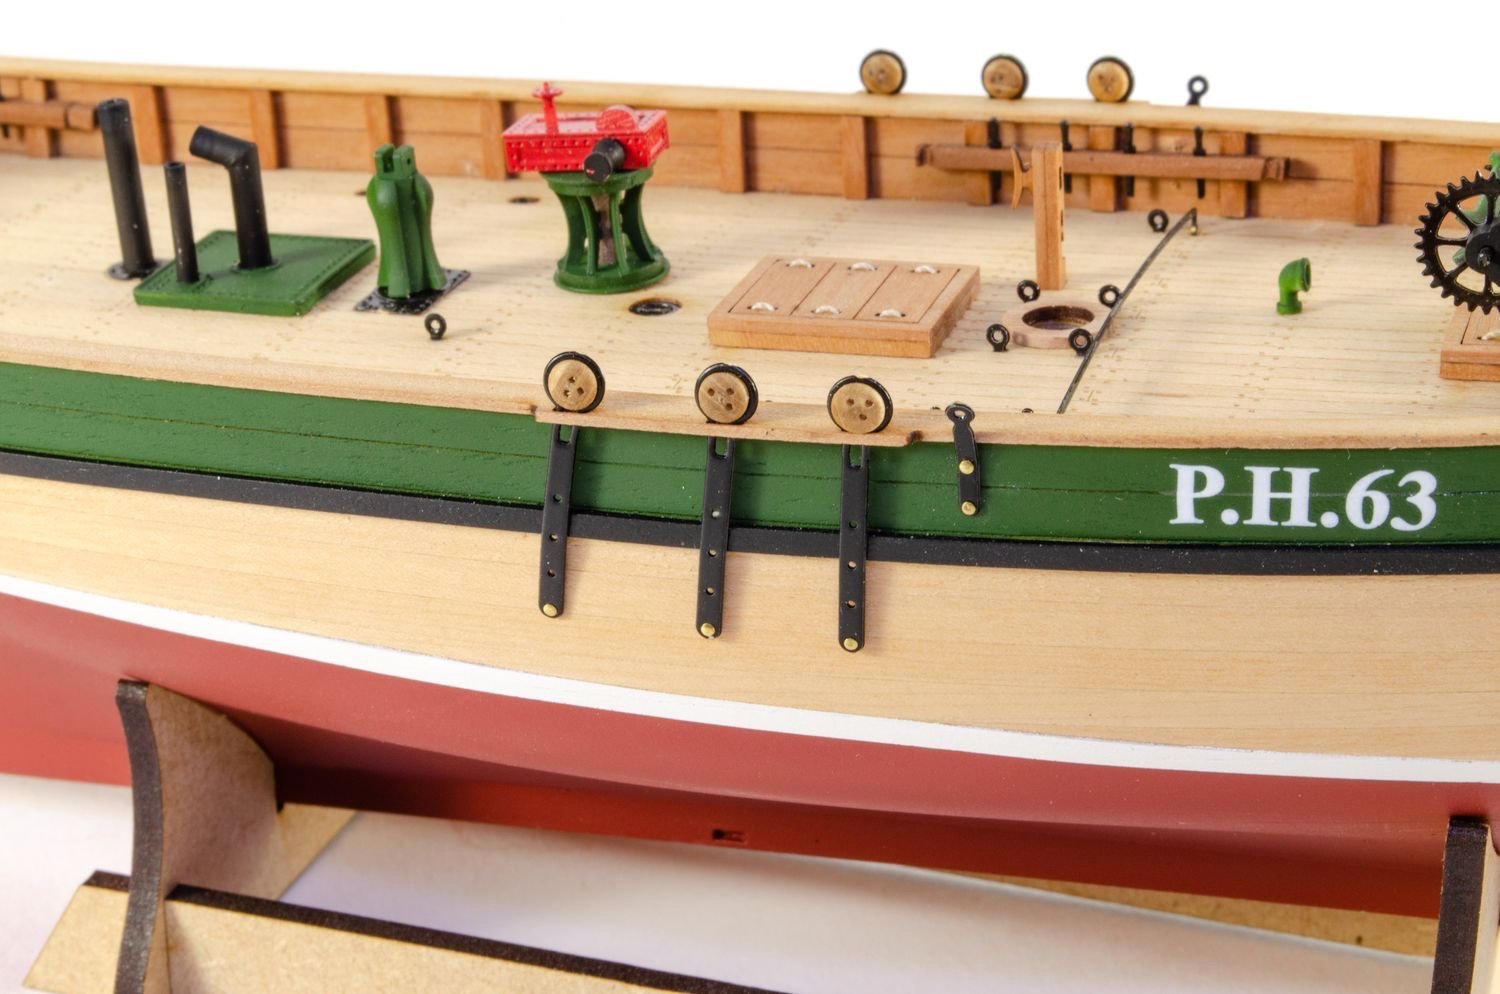
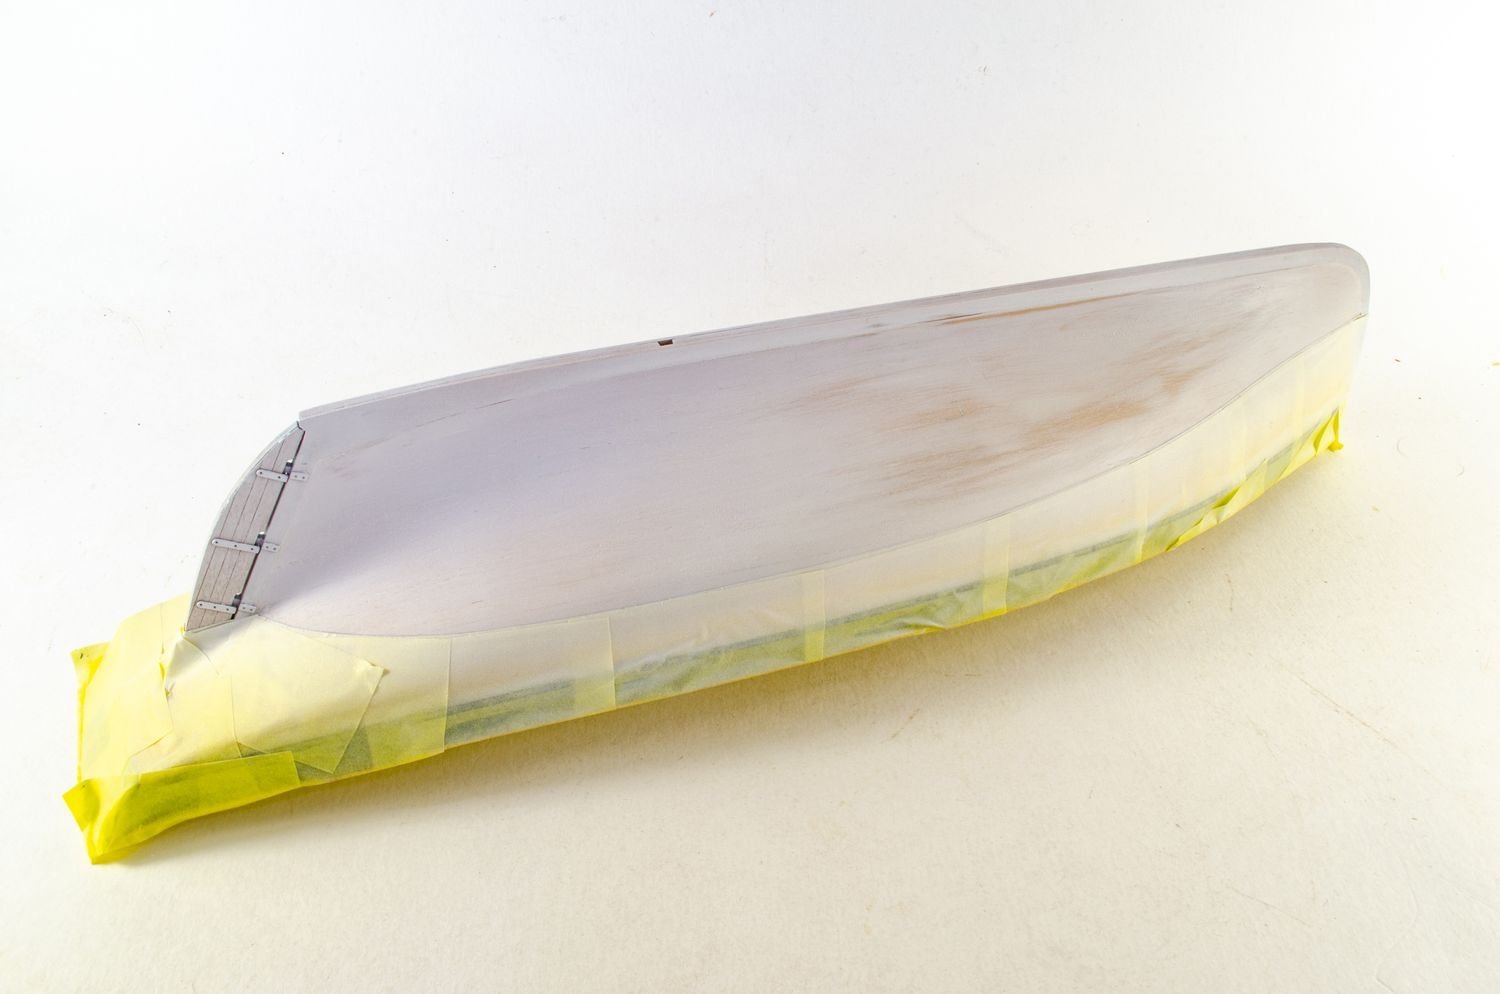
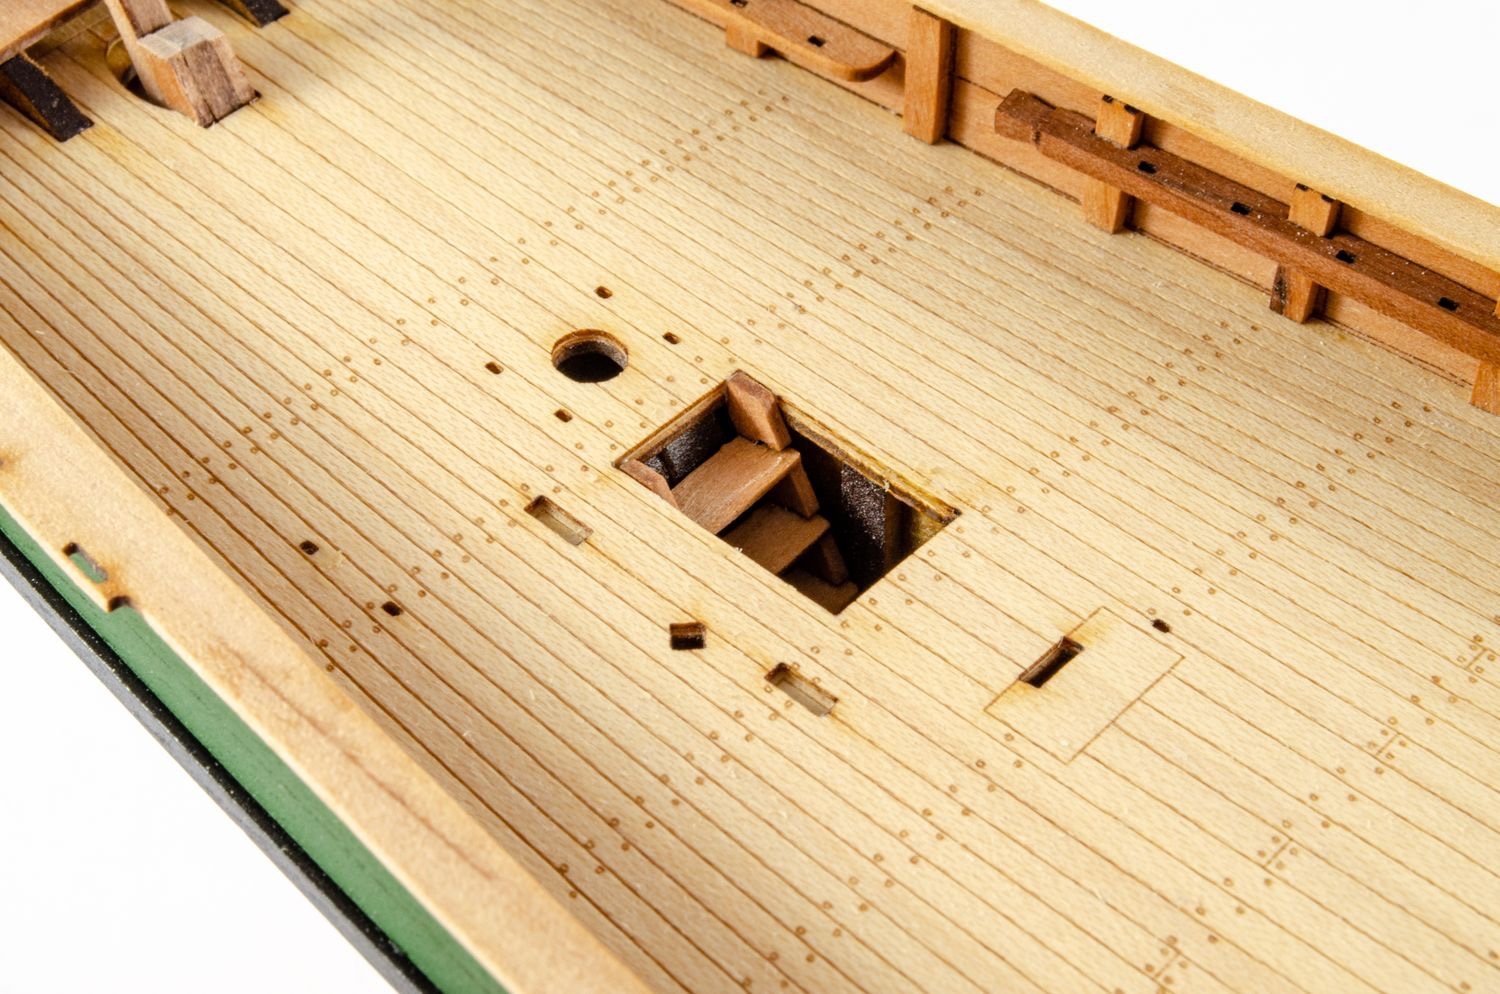
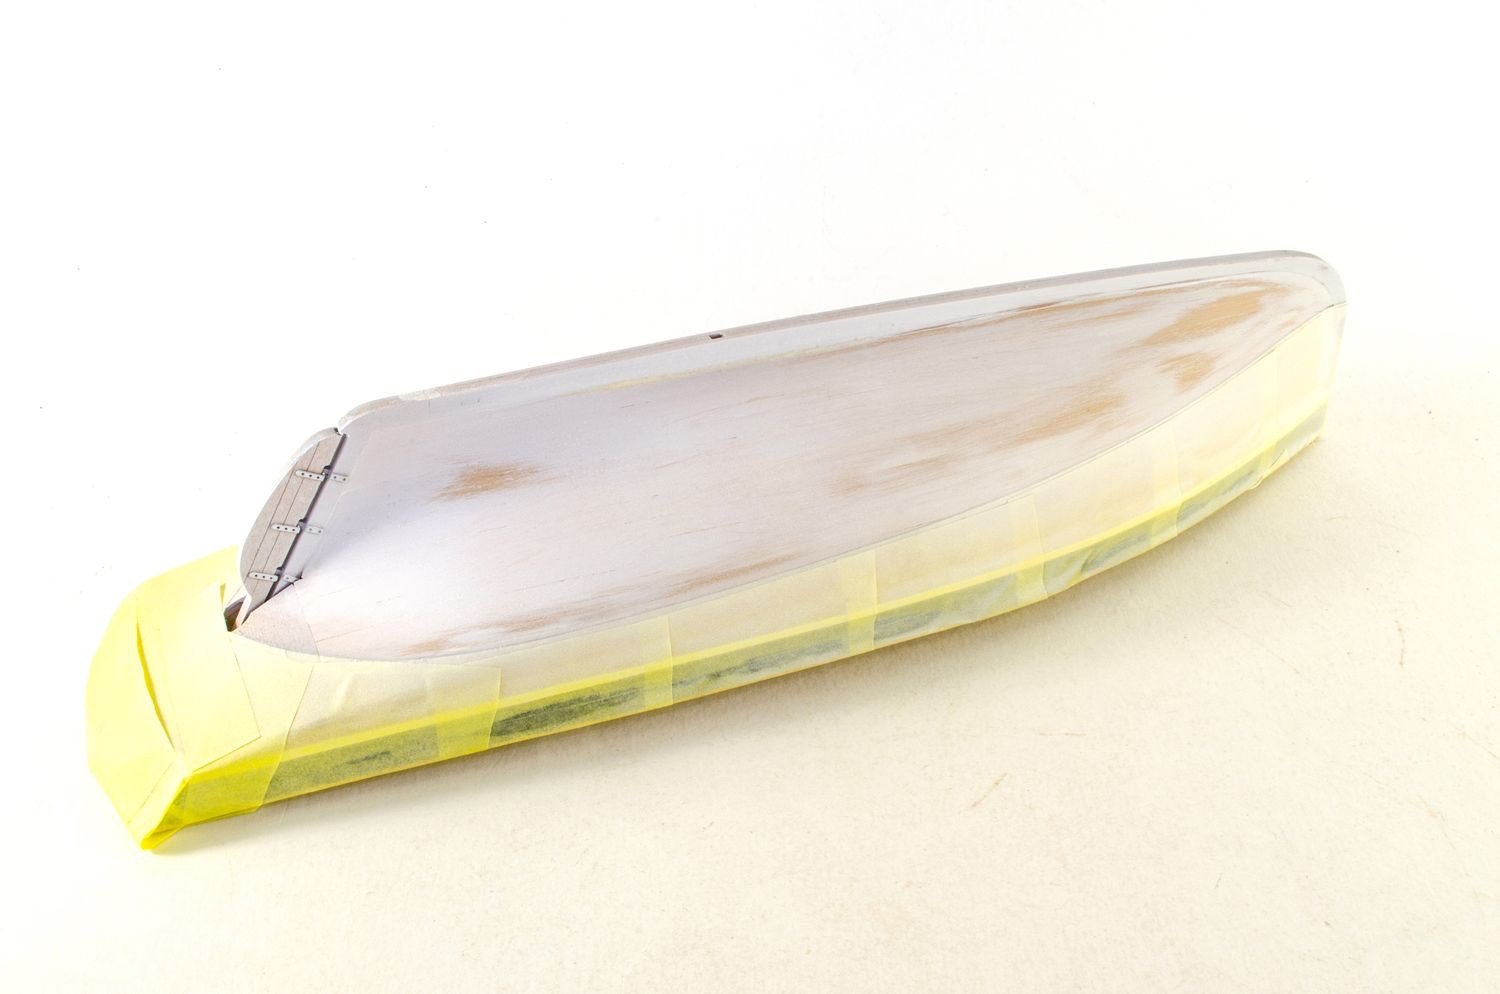
Before we splash some real colour onto the hull, a waterline is first added which runs along the top line of the white boot.

Prep is king here as the hull is filled and sanded. Any imperfections are fixed. A coat of primer is added and it that shows anything further, that is also fixed until I'm happy with the result. This could take all day to do but it's worth the effort.

After a final coat of white, 3mm flexible tape is added along the edge of the masking and the hull then sprayed in red oxide. When even and dry, all tape is removed.
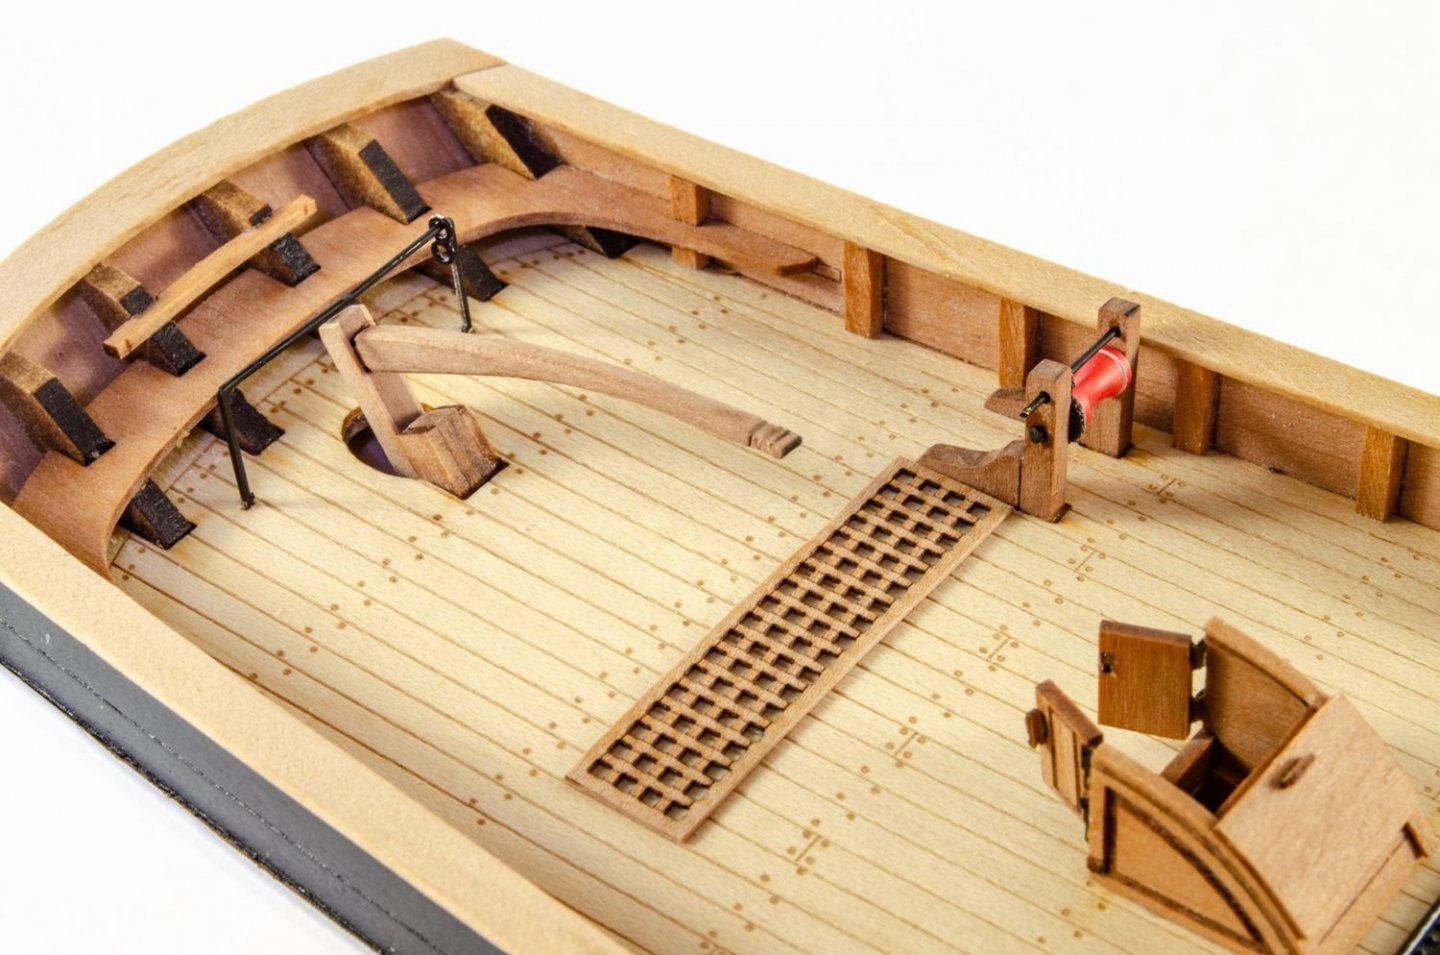
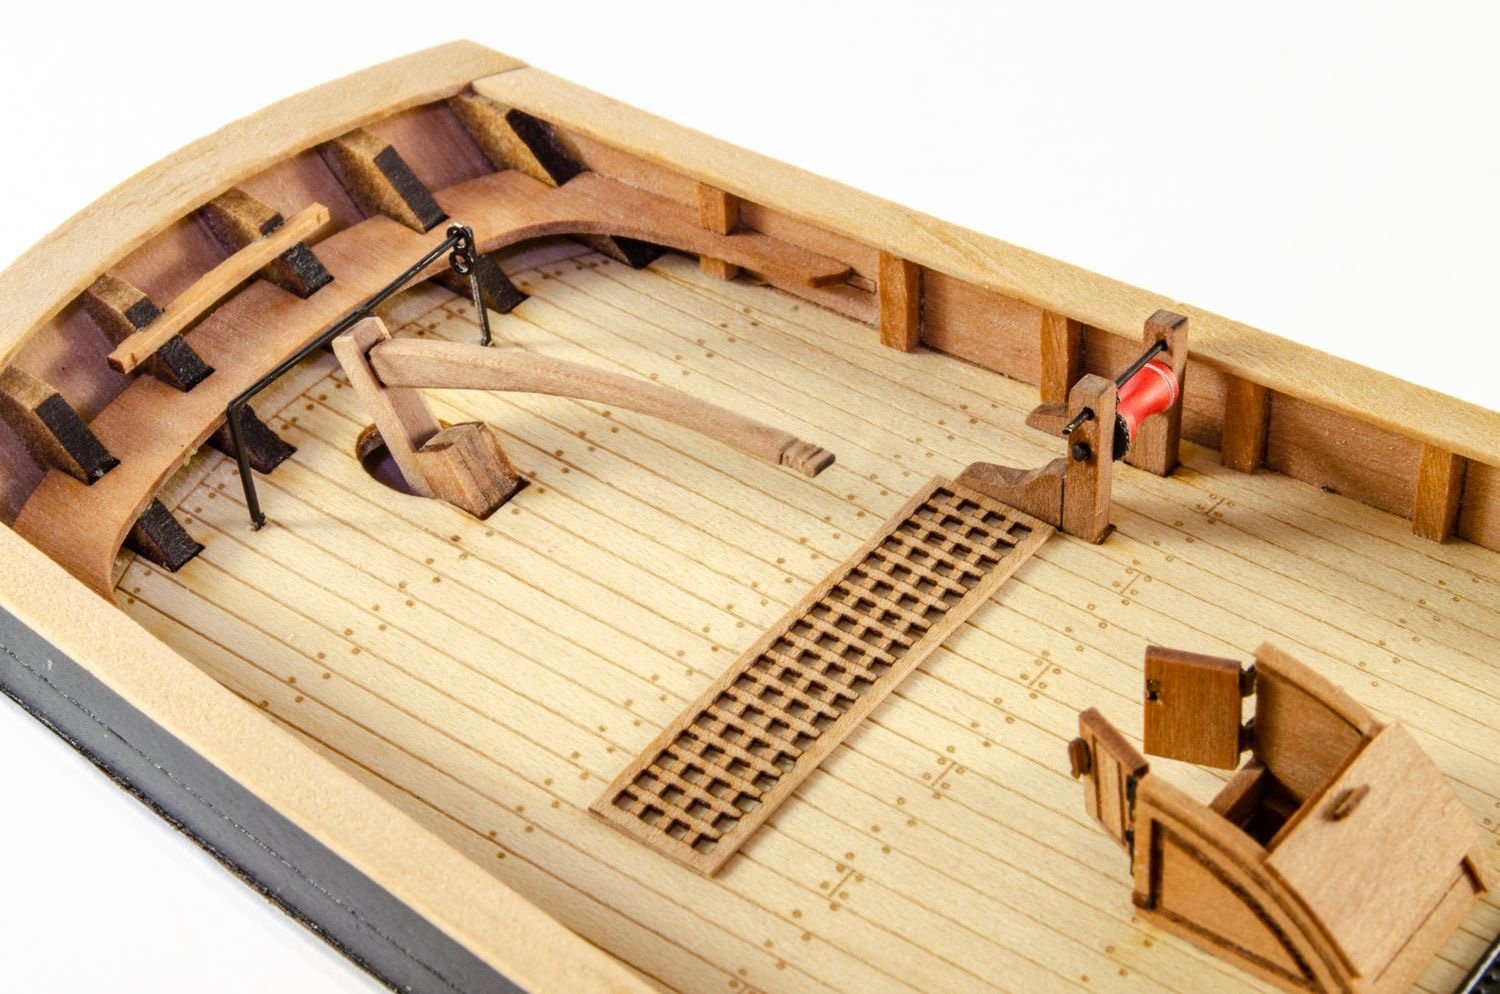
🐟 enter here ➡️

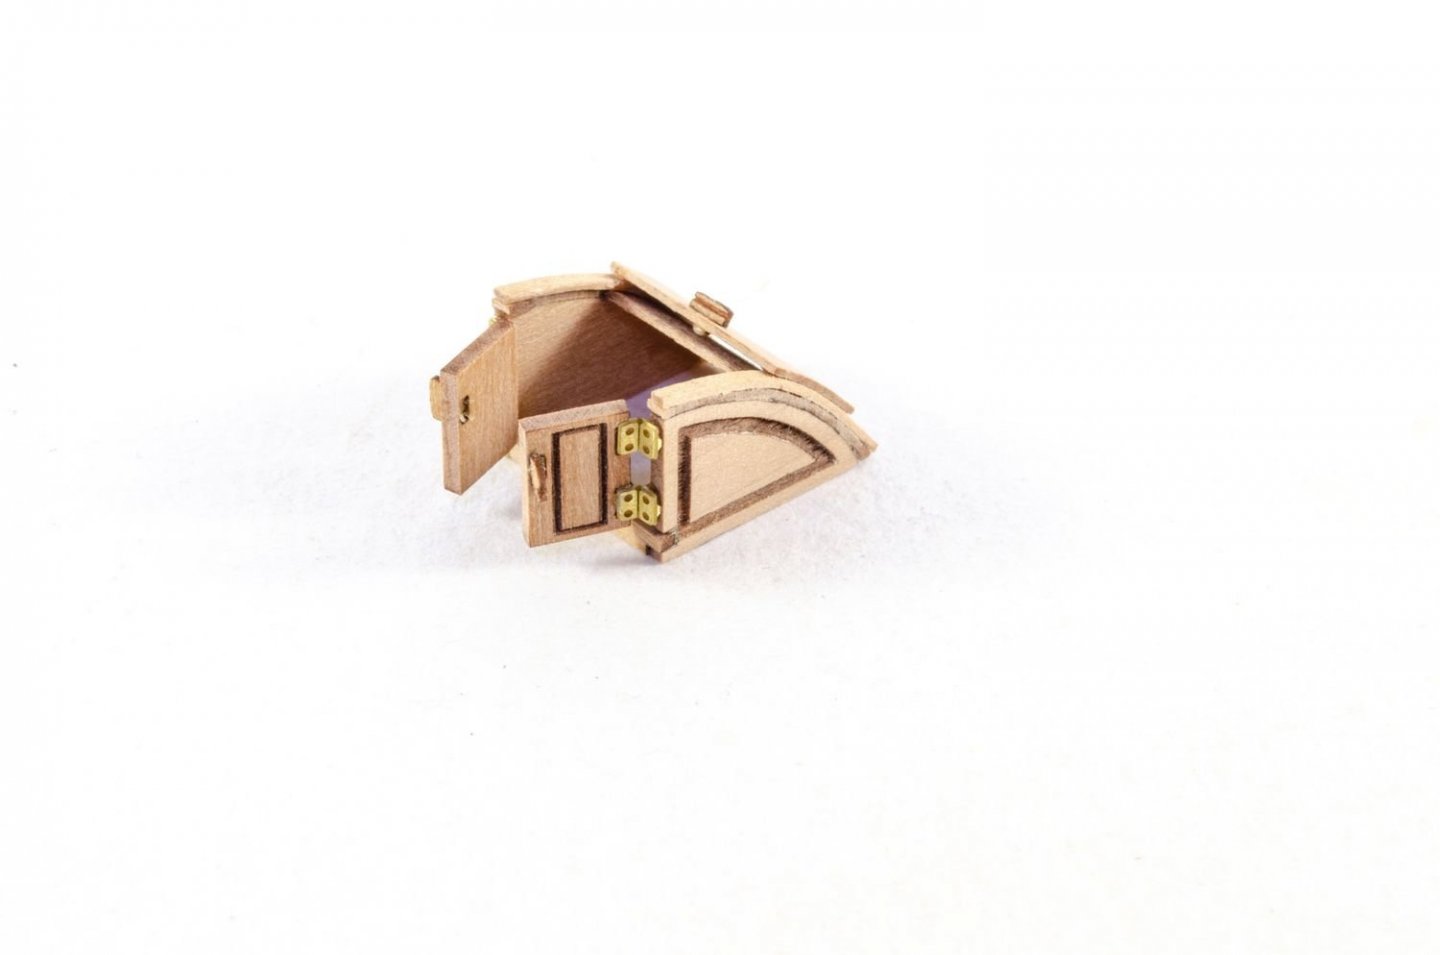
Stairway to heaven.

And a nice companionway to gimme shelter.

Main sheet housing assembly.
- Ryland Craze, Rik Thistle, AJohnson and 14 others
-
15
-
 2
2
-
Work has been ploughing on with Erycina, alongside Nisha. The masts for both are actually built, but I'll post those on the next and final update for both logs.
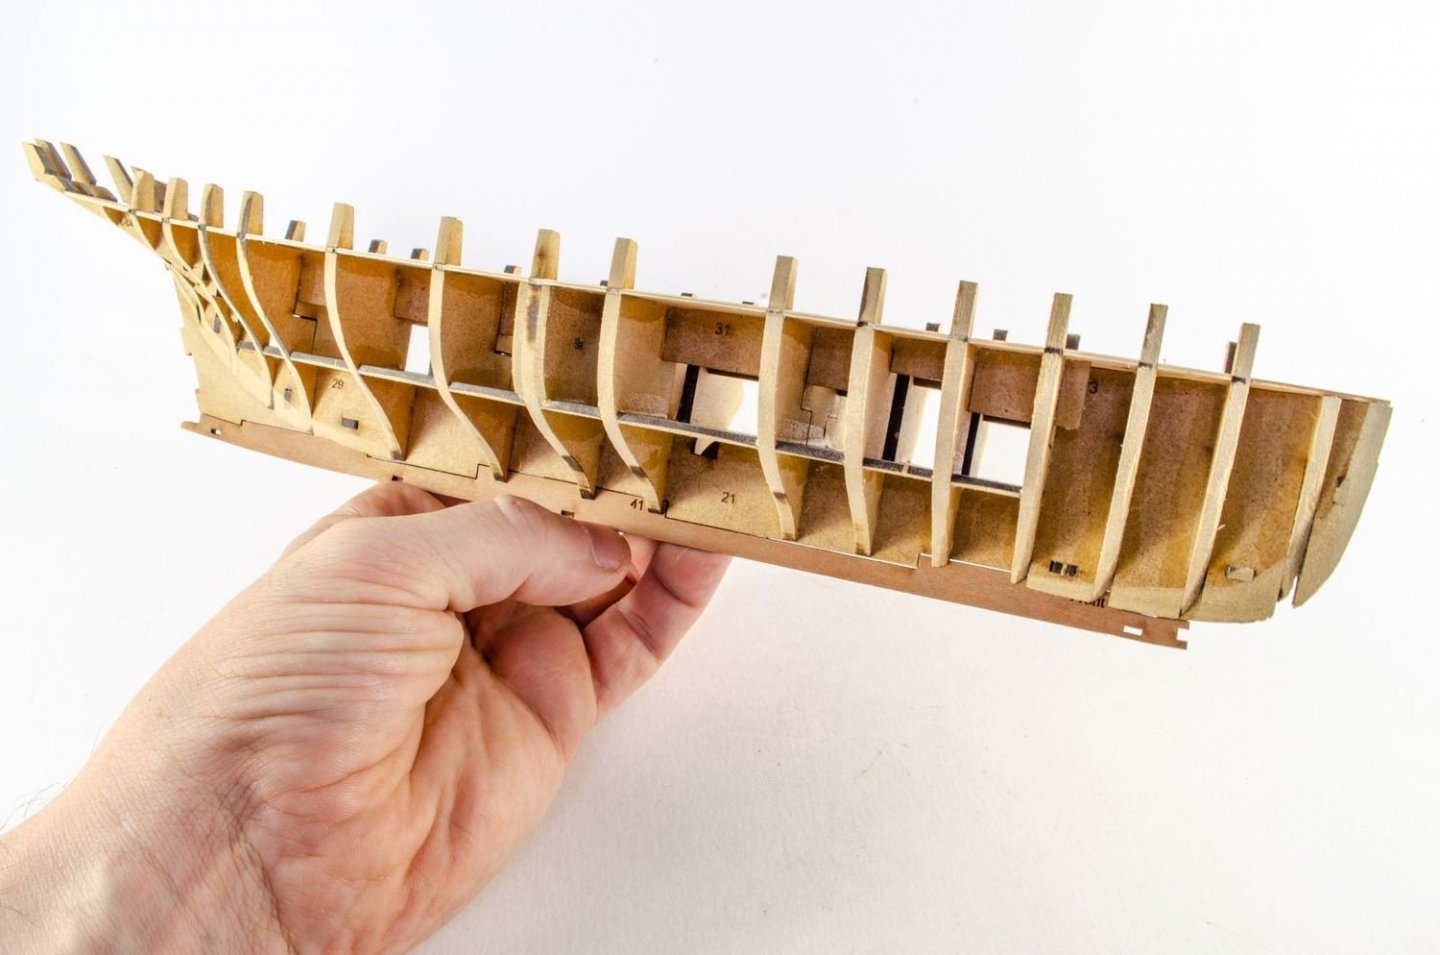
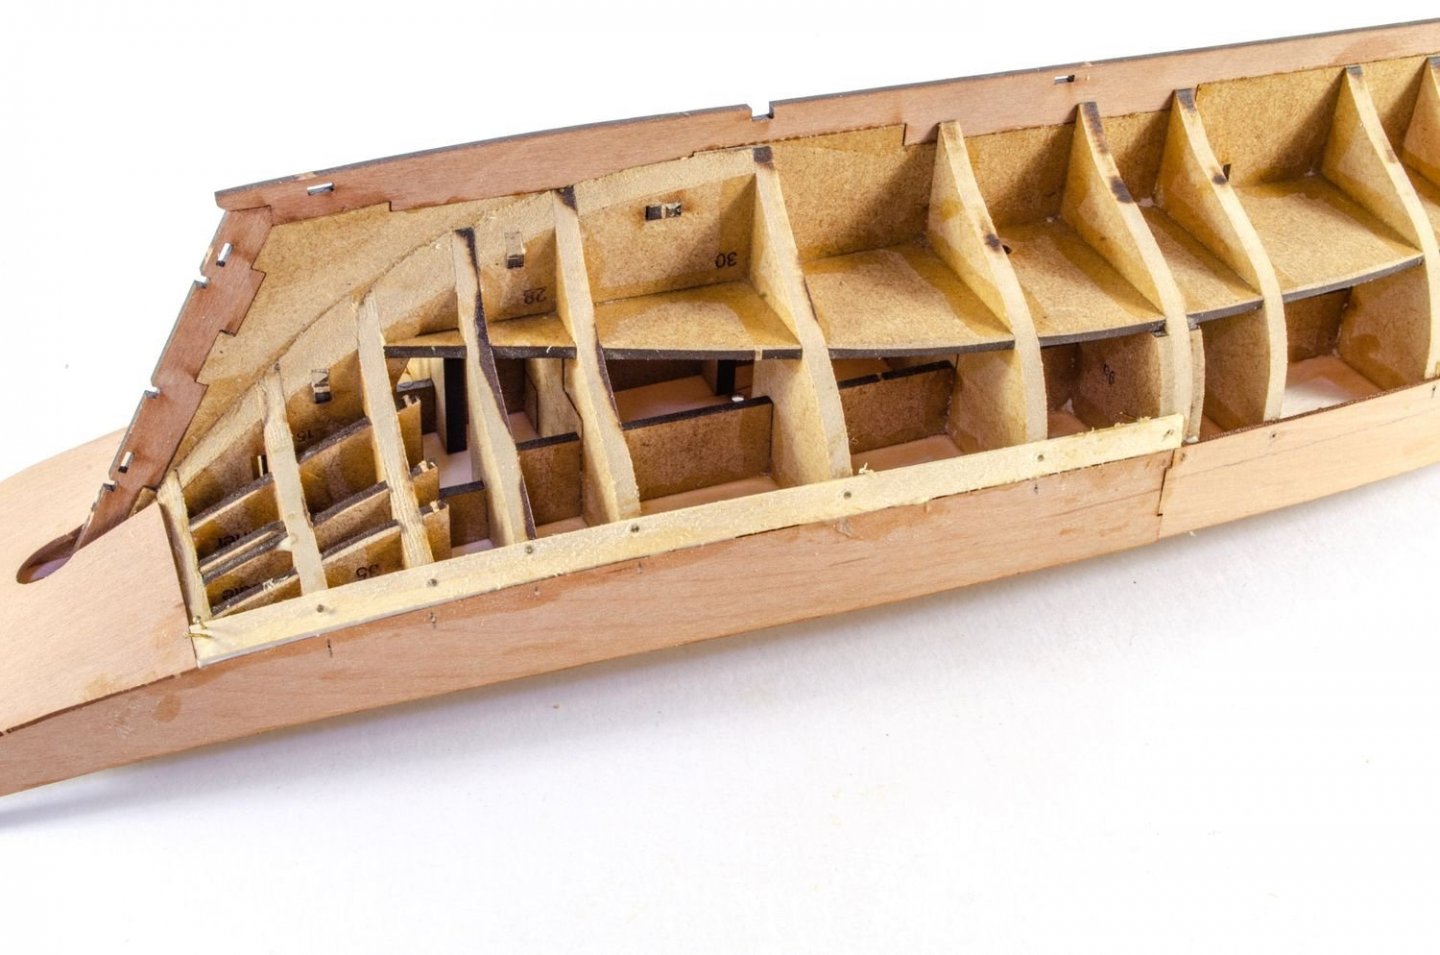
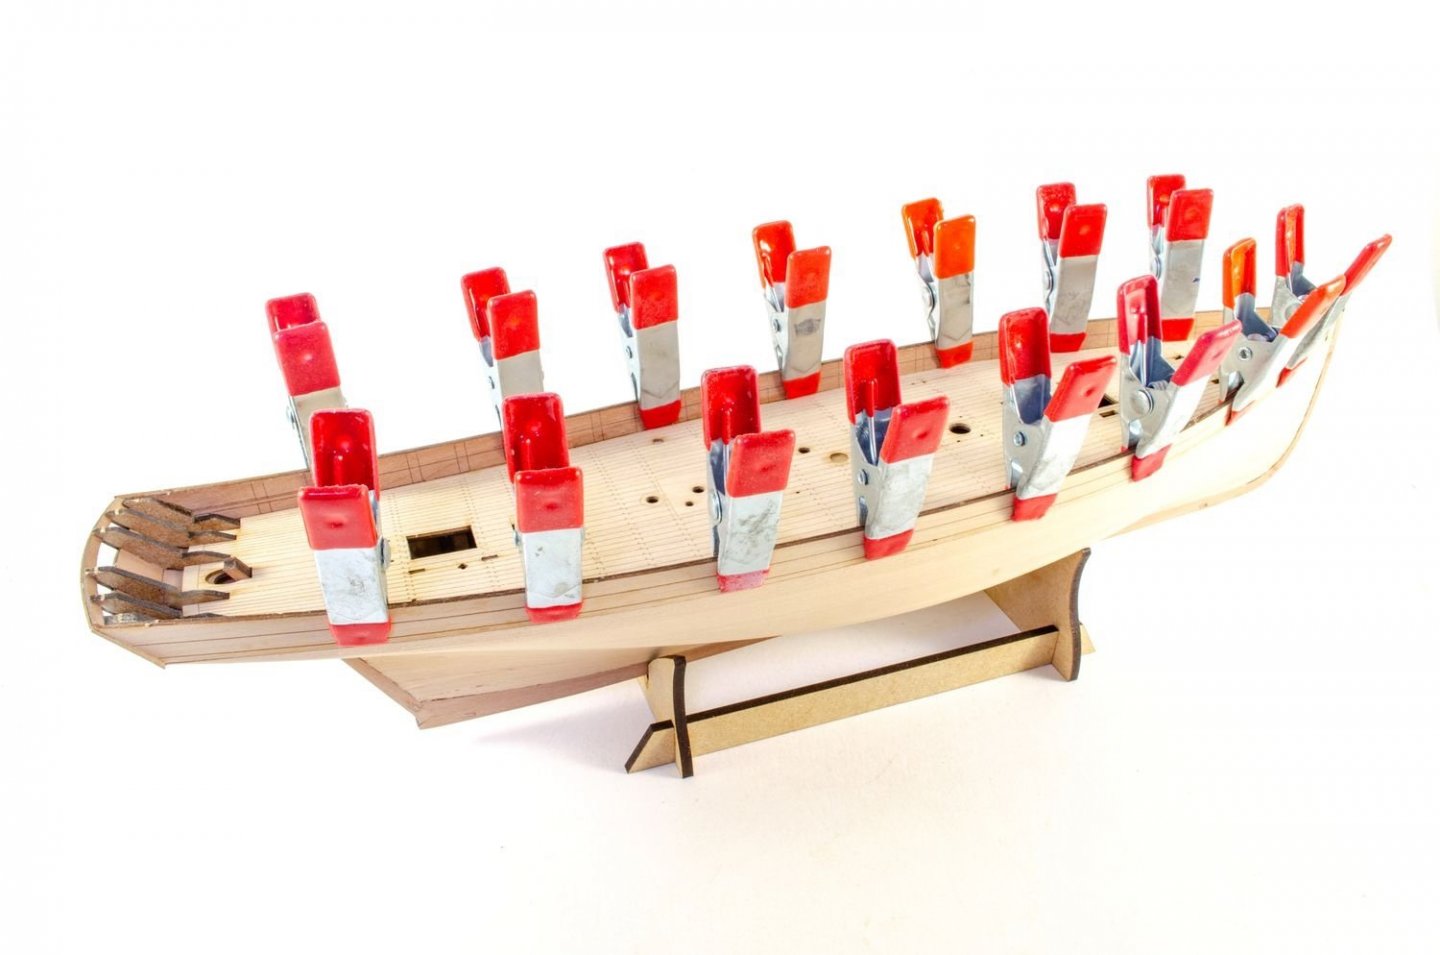
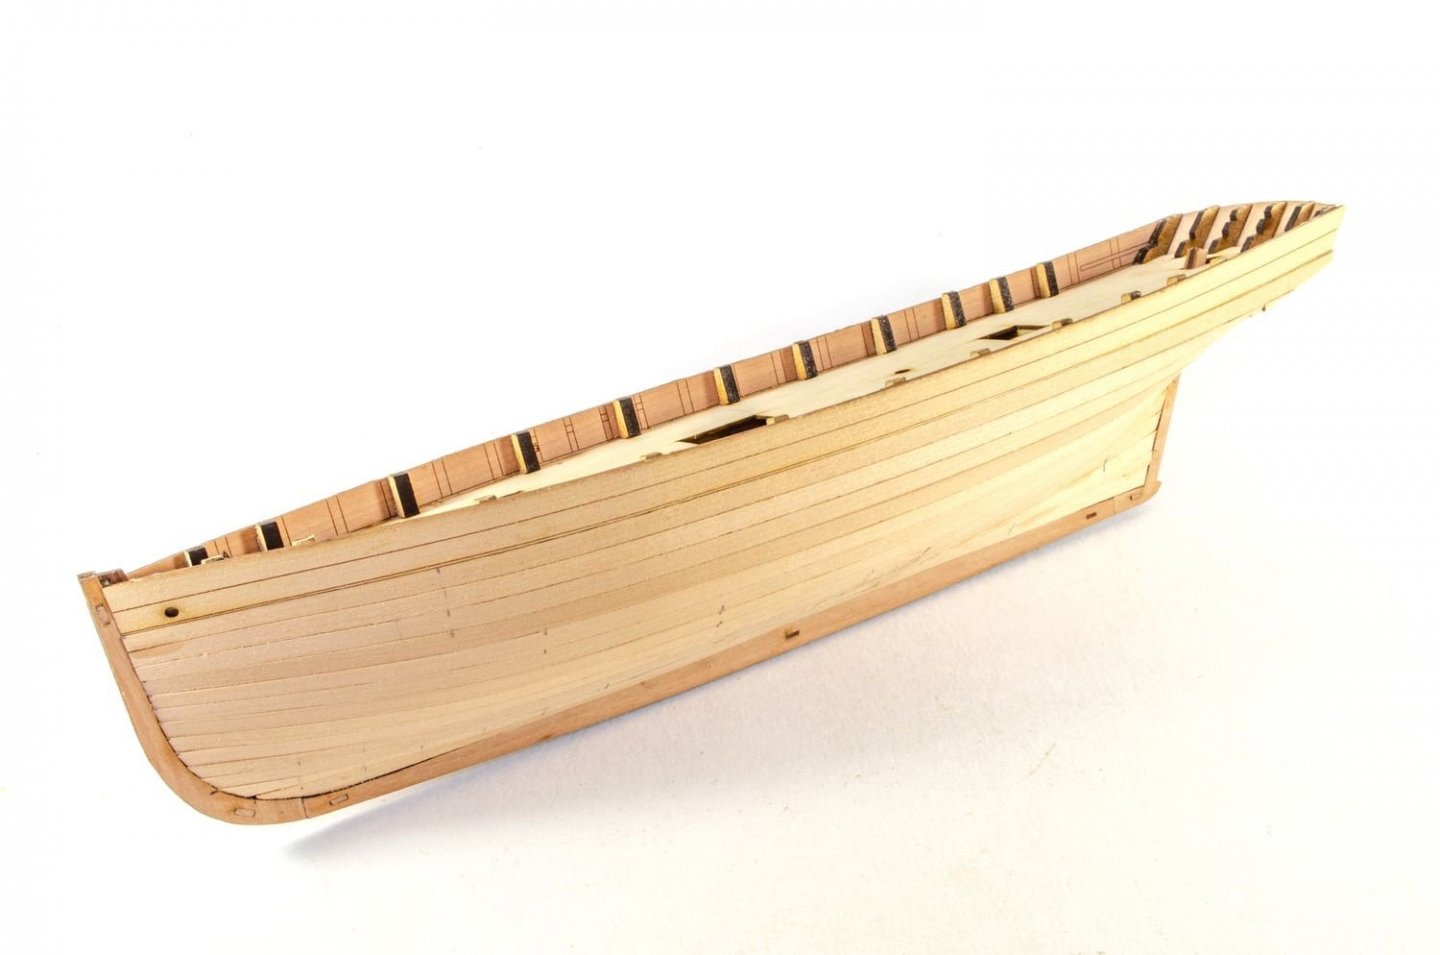
Again, fairing the hull is one of the single most important prep stages. Take time to get this right! Erycina has 16 bulkheads, so there's plenty of real estate for your planks to plonk onto.

The three part inner 2mm keel is now fitted.
Erycina's bulwarks are in halves, and this makes them nice and easy to fit. Align the bulwark so the lower engraved line is at deck height. Add all 4 sections and let dry.

Like Nisha, a lower counter is used to attain the shape needed for this nippy little boat.

All planking that butts up to the counter, is added as halves. It's just easier that way so you don't get any gaps.
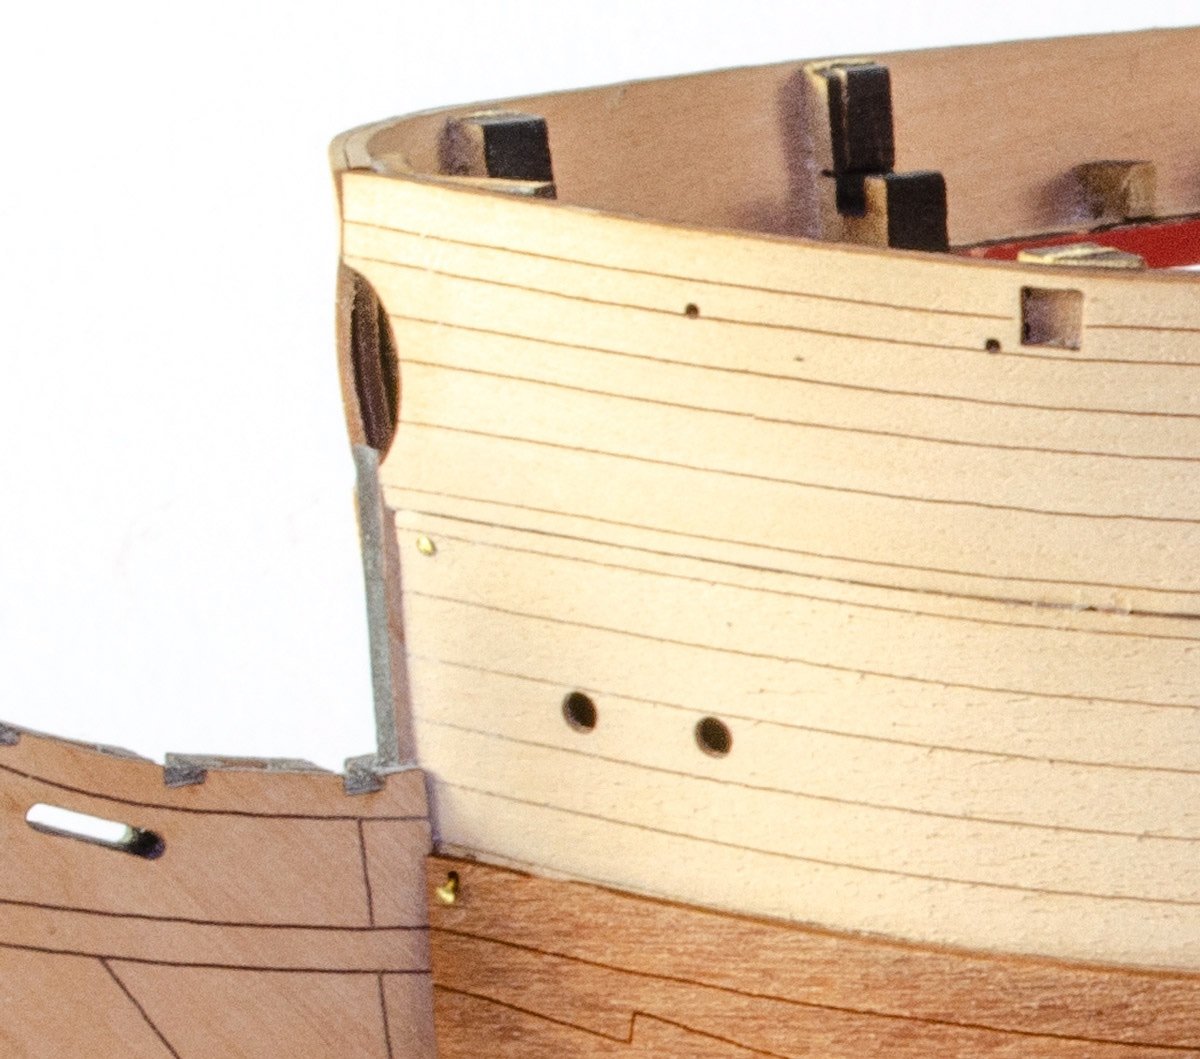
The stern board is added. Note the engraved lines which perfectly line up with the stern timbers.
Preparation is ALL!

The outer counter is now fitted, and the outer keel facings fitted. The latter creates the rabbet for the second layer of planks.


The second layer starts with the outer pear bulwarks. With these in place, the lower hull can be planked.
A small bevel to the lower underside of the stern frame, and it fits great!

Time for those MDF bits to go. These are twisted off and sanded flush.
The only thing I needed to do to get the laser engraved deck to fit was to remove the edge char. It was then glued into position.


-
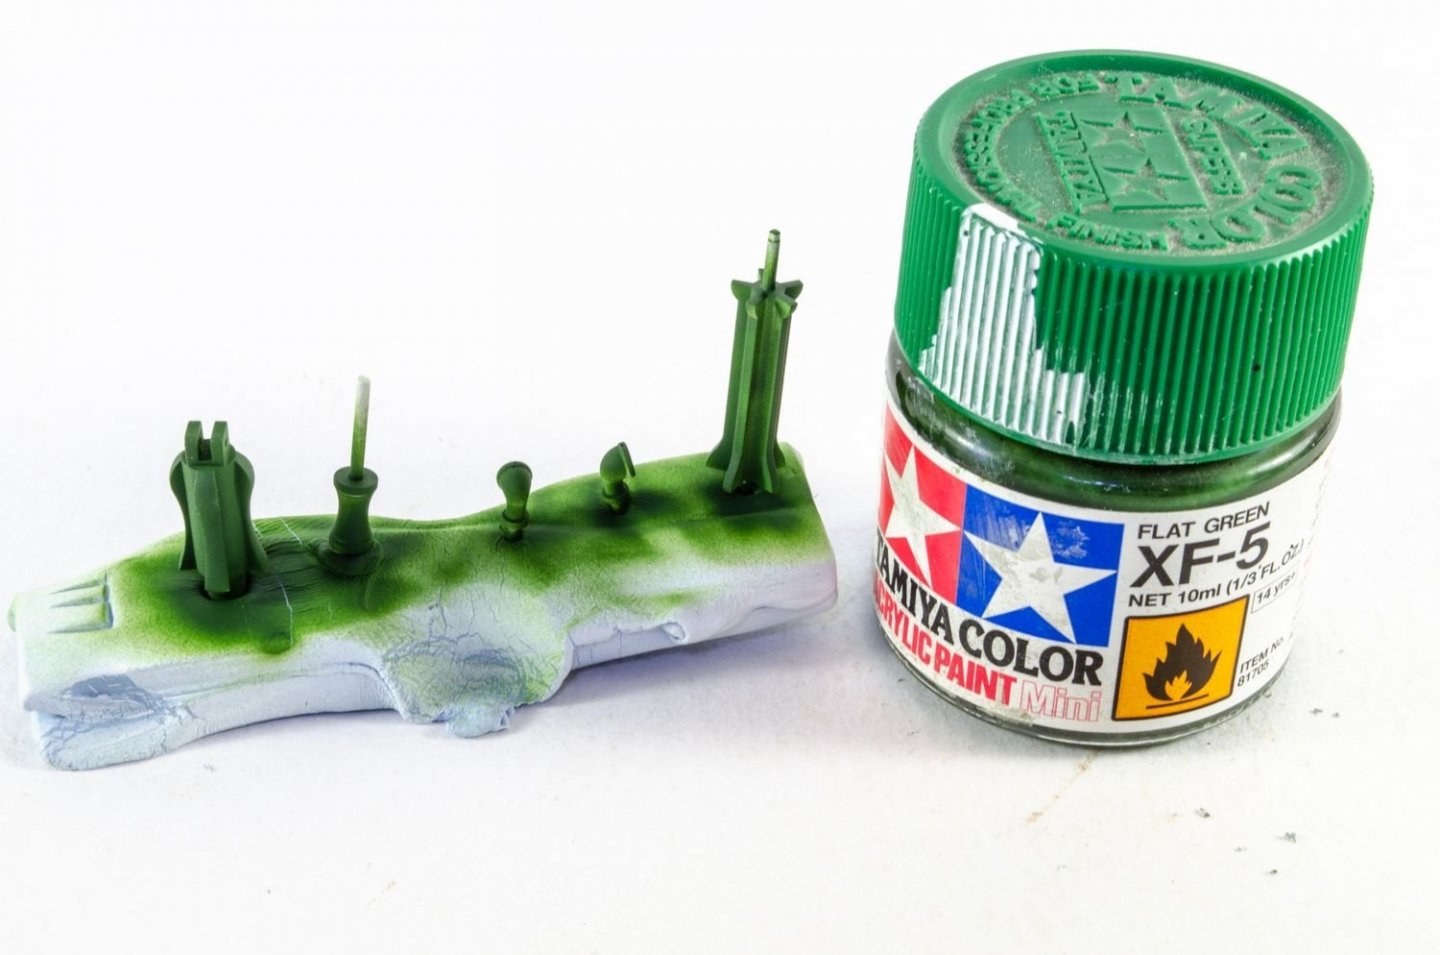
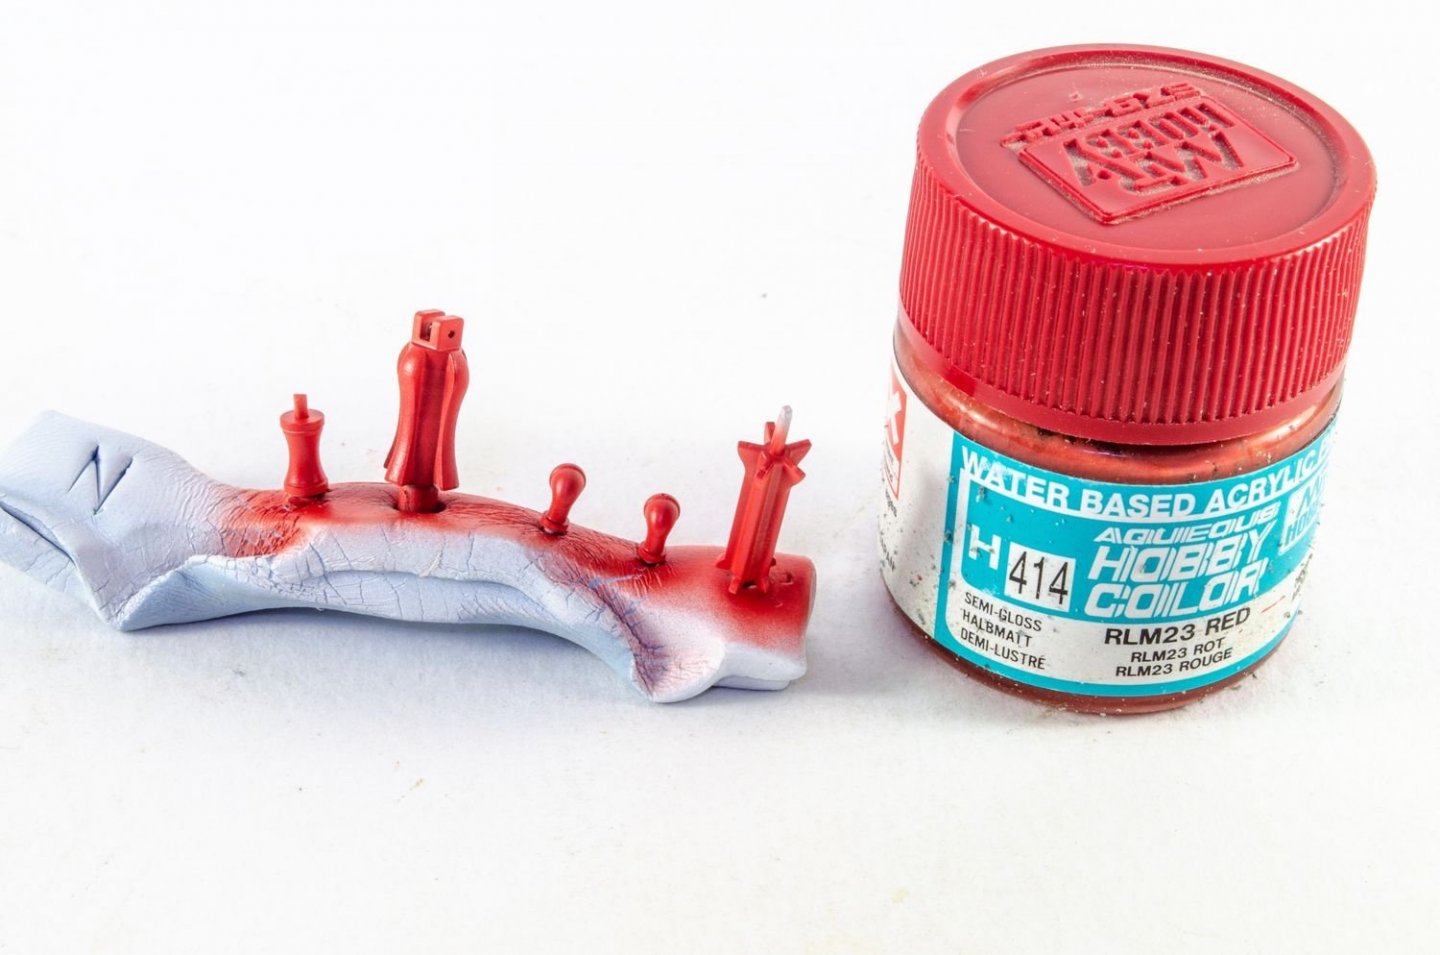
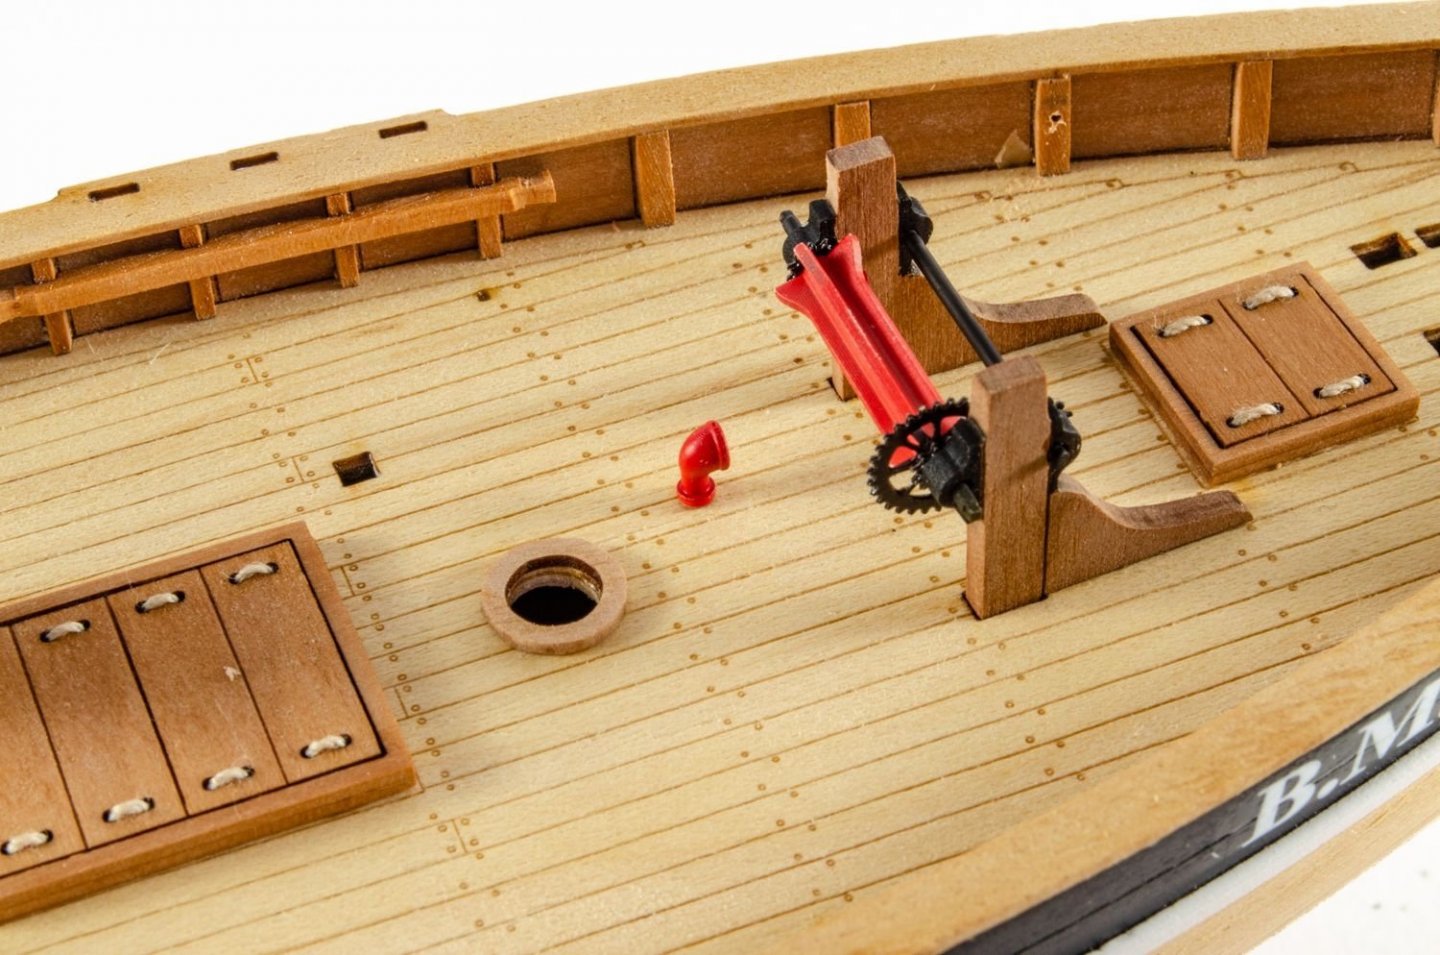
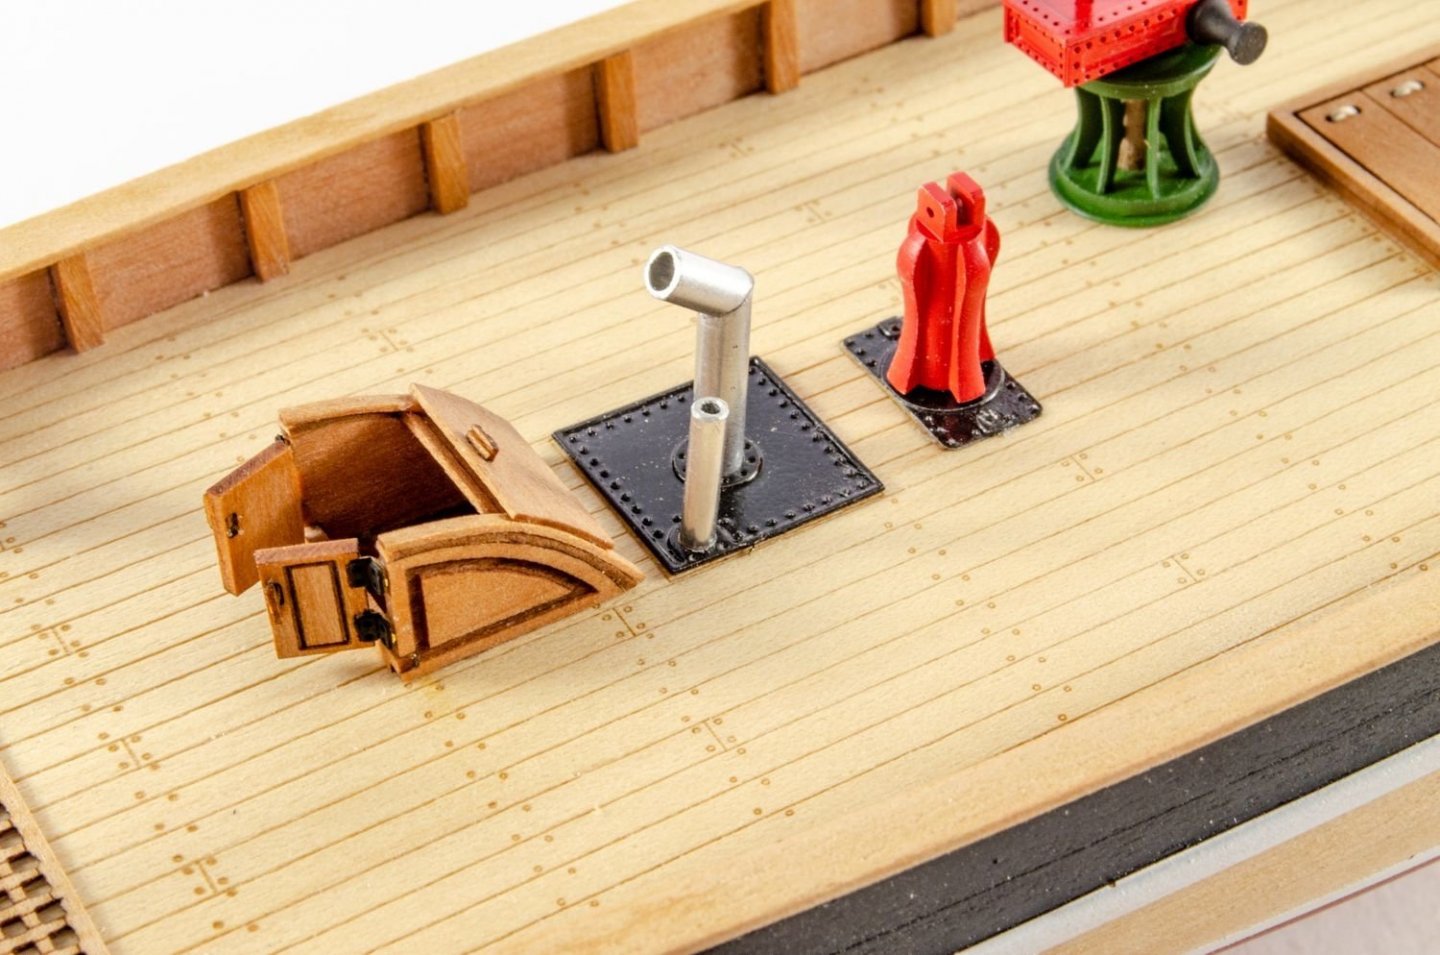
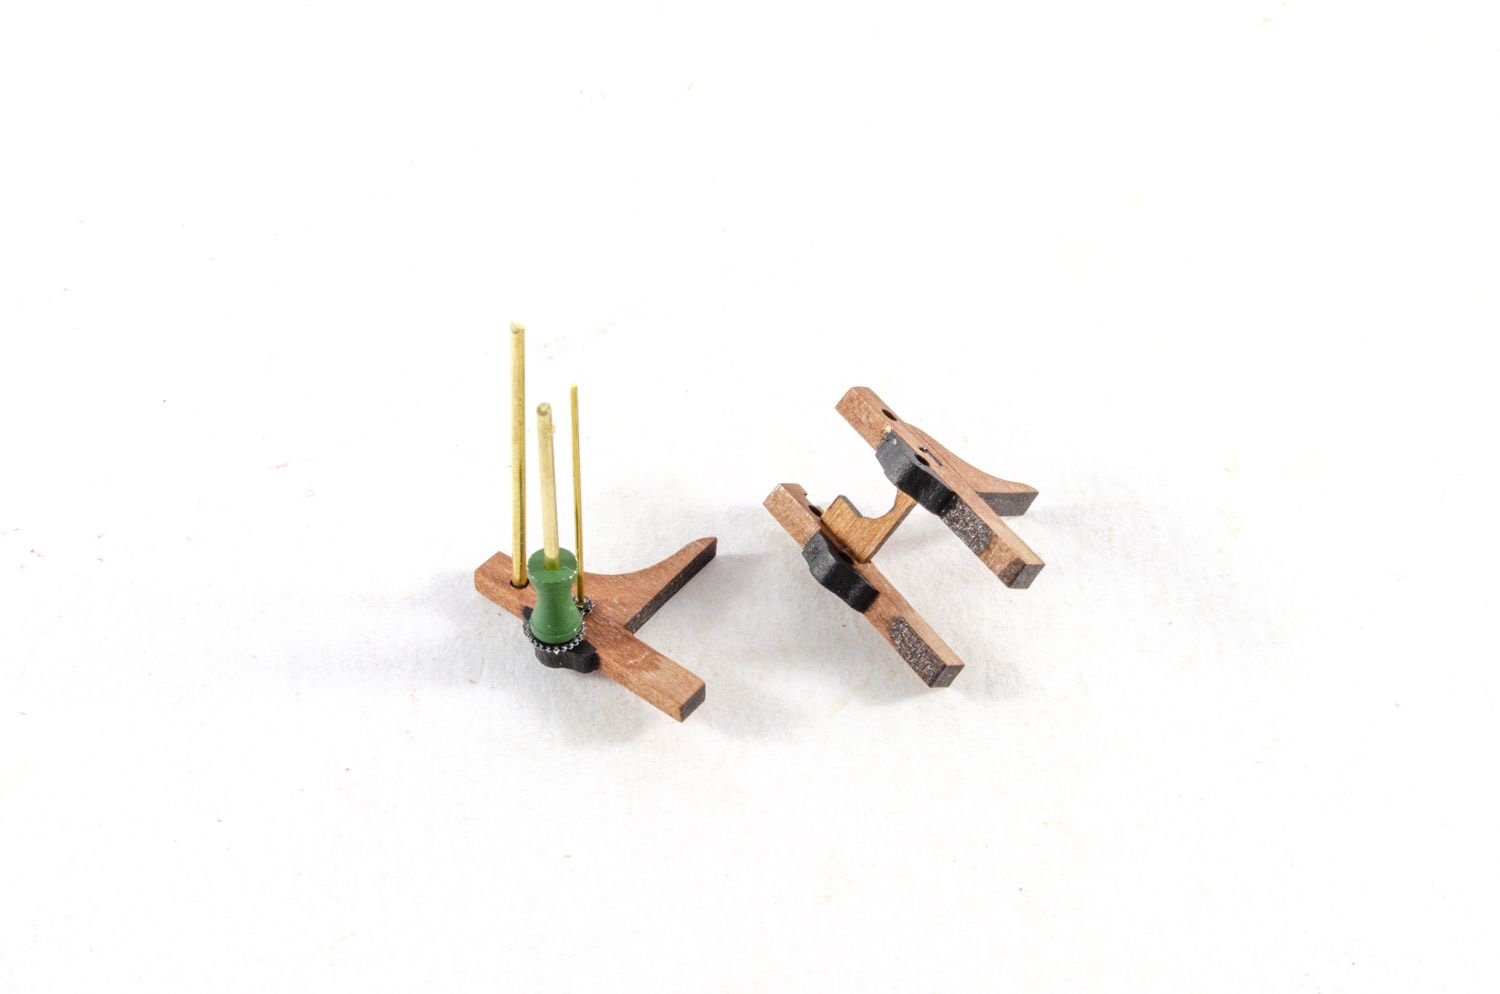
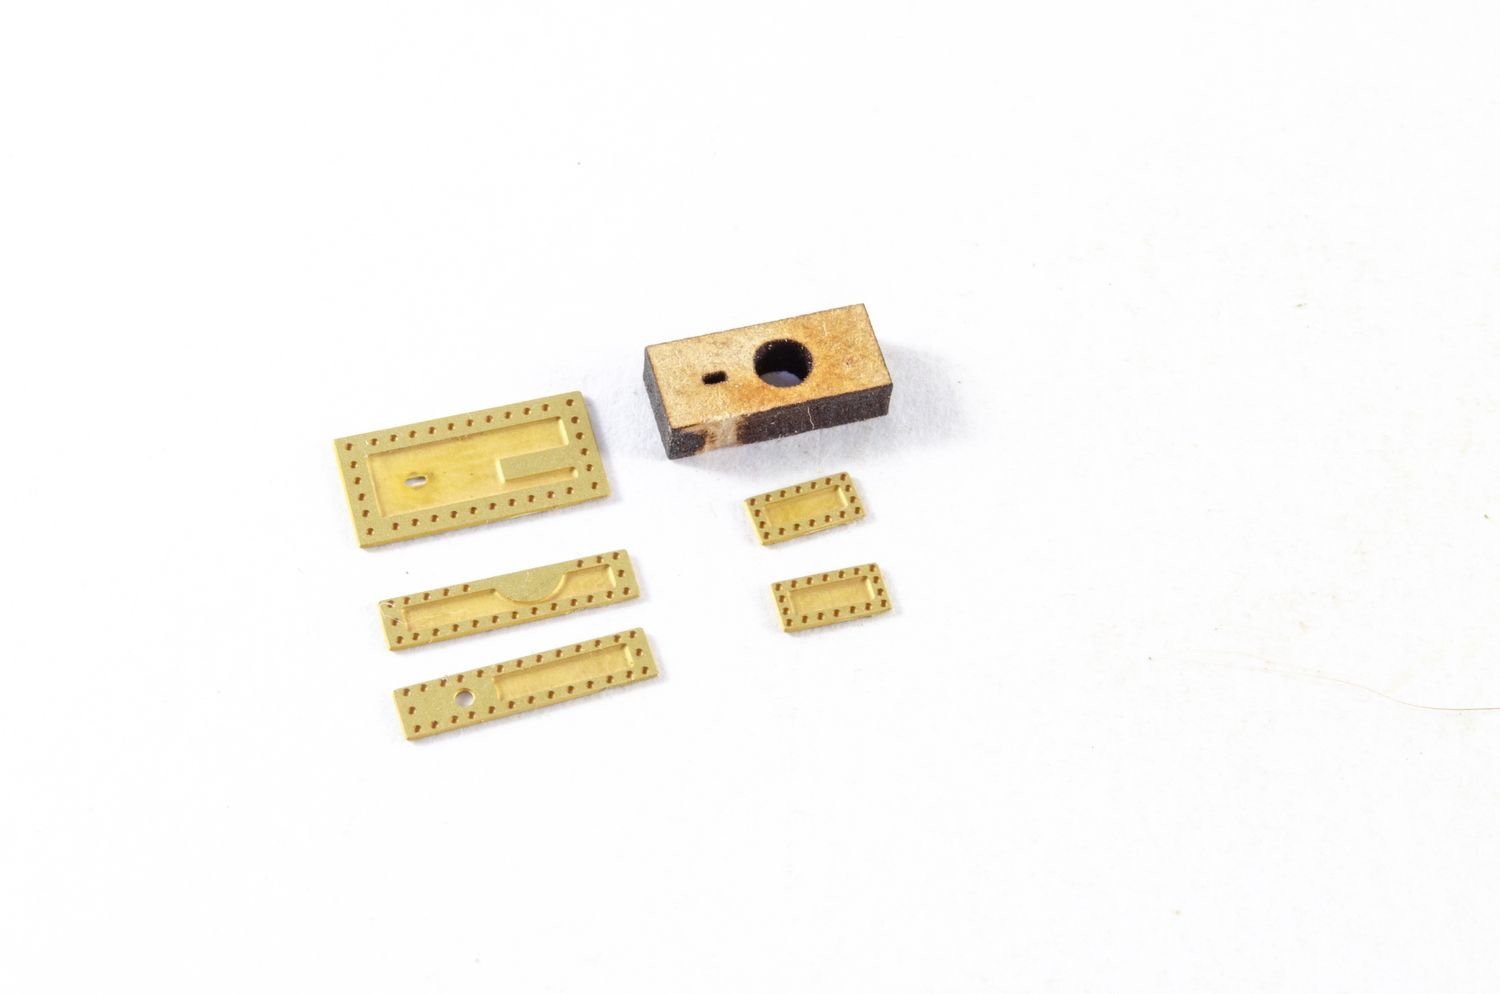
Nisha has a number of brass and 3D printed parts. These are first primed and then airbrushed in red. I use this specific colour as I didn't want anything too bright. RLM23 is a WW2 German Luftwaffe colour.
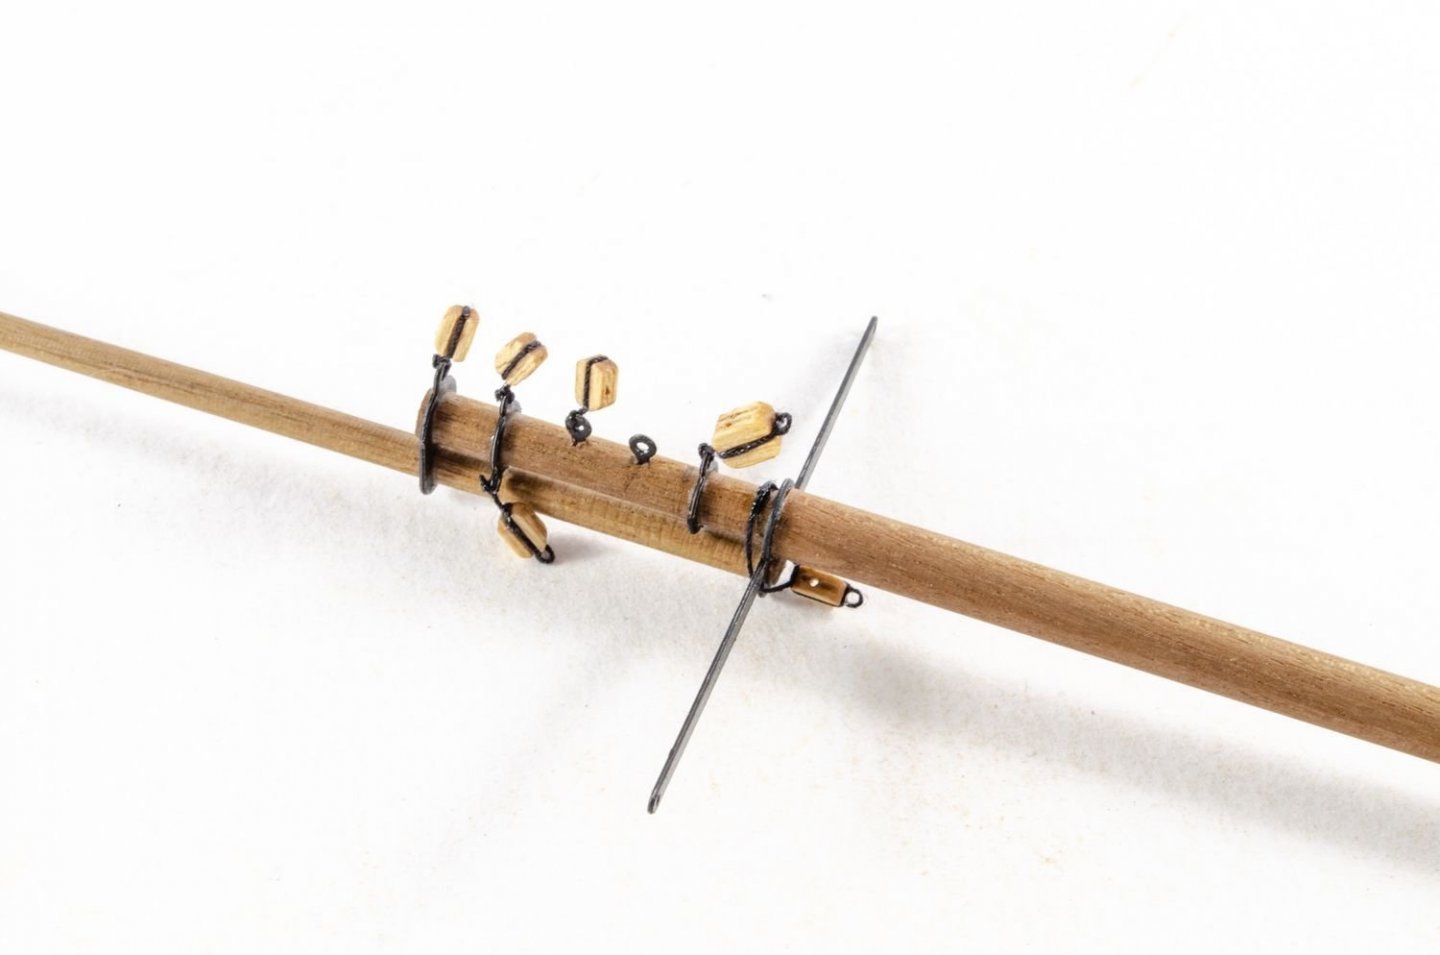
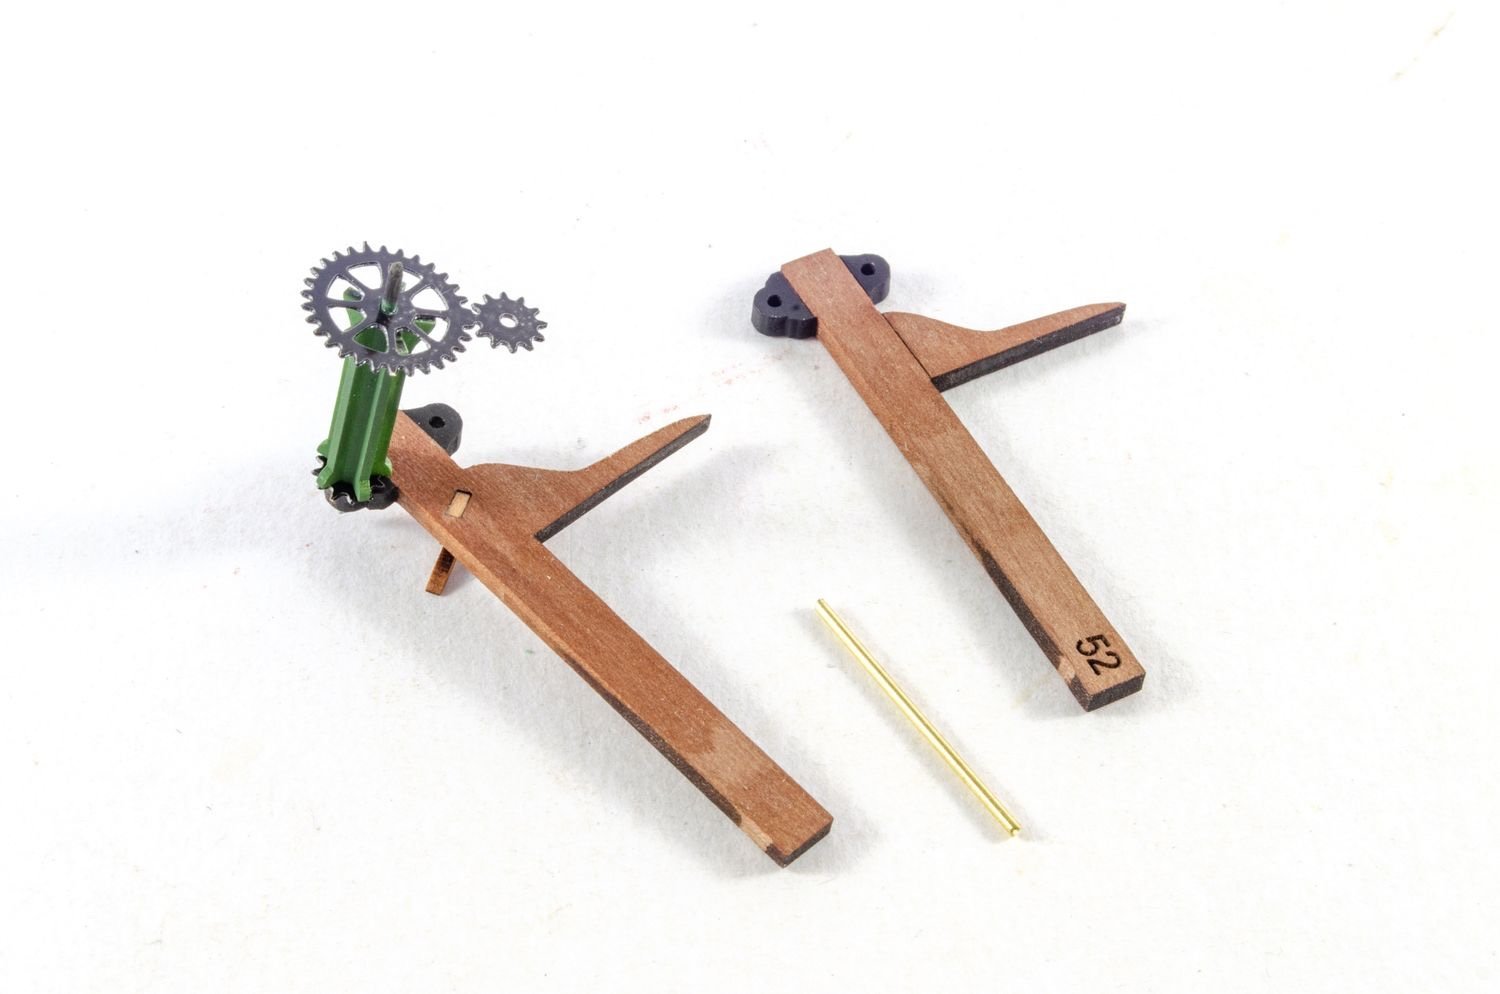
The wonderfully named 'dandy wink' is now built and fitted.
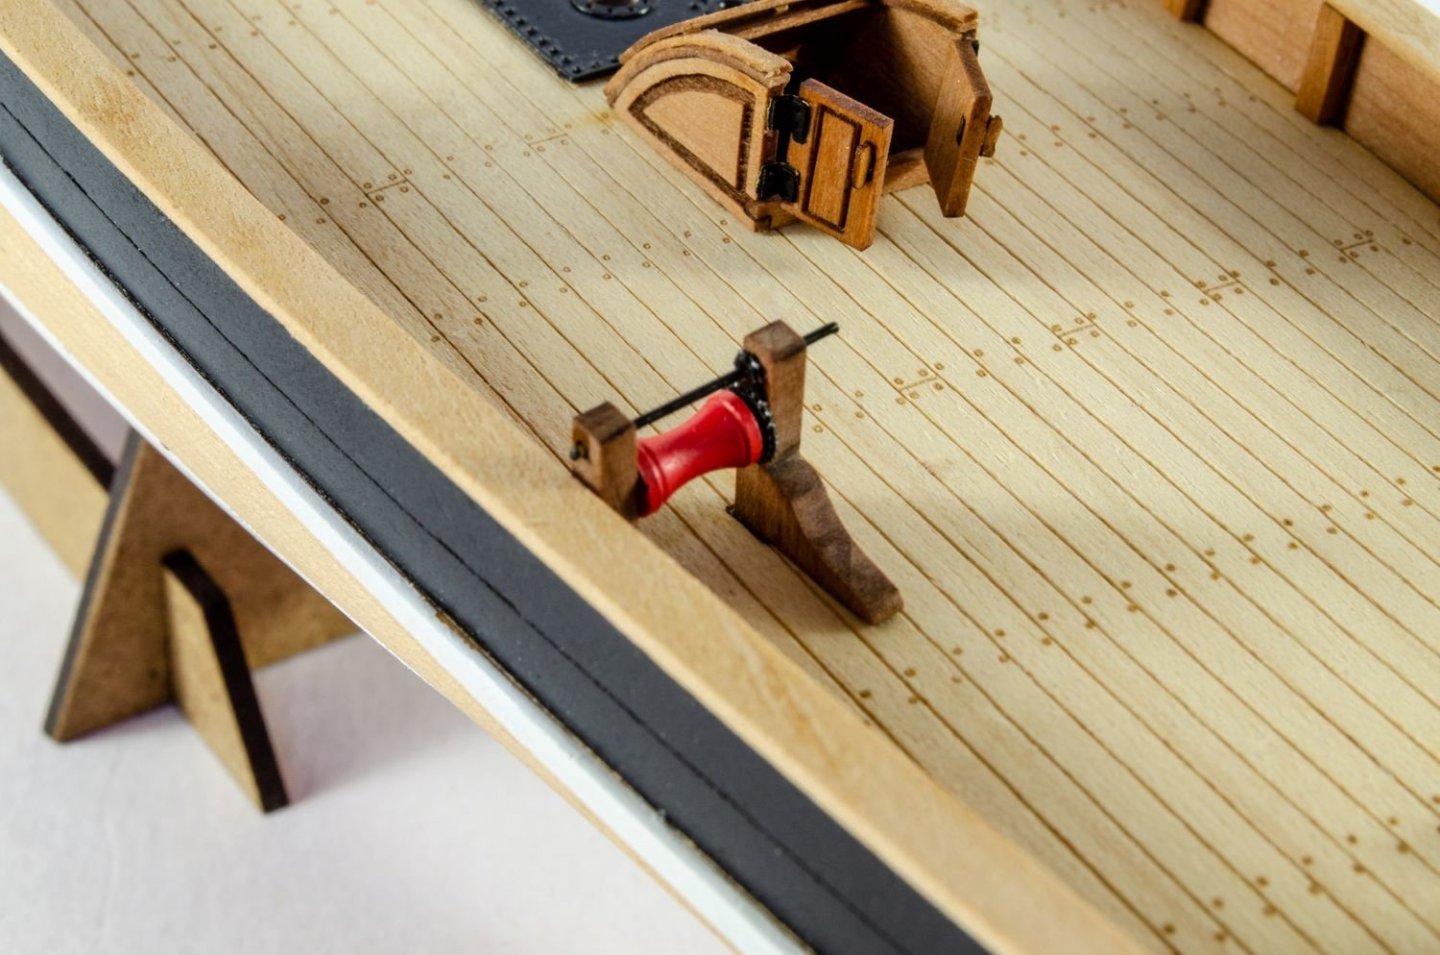
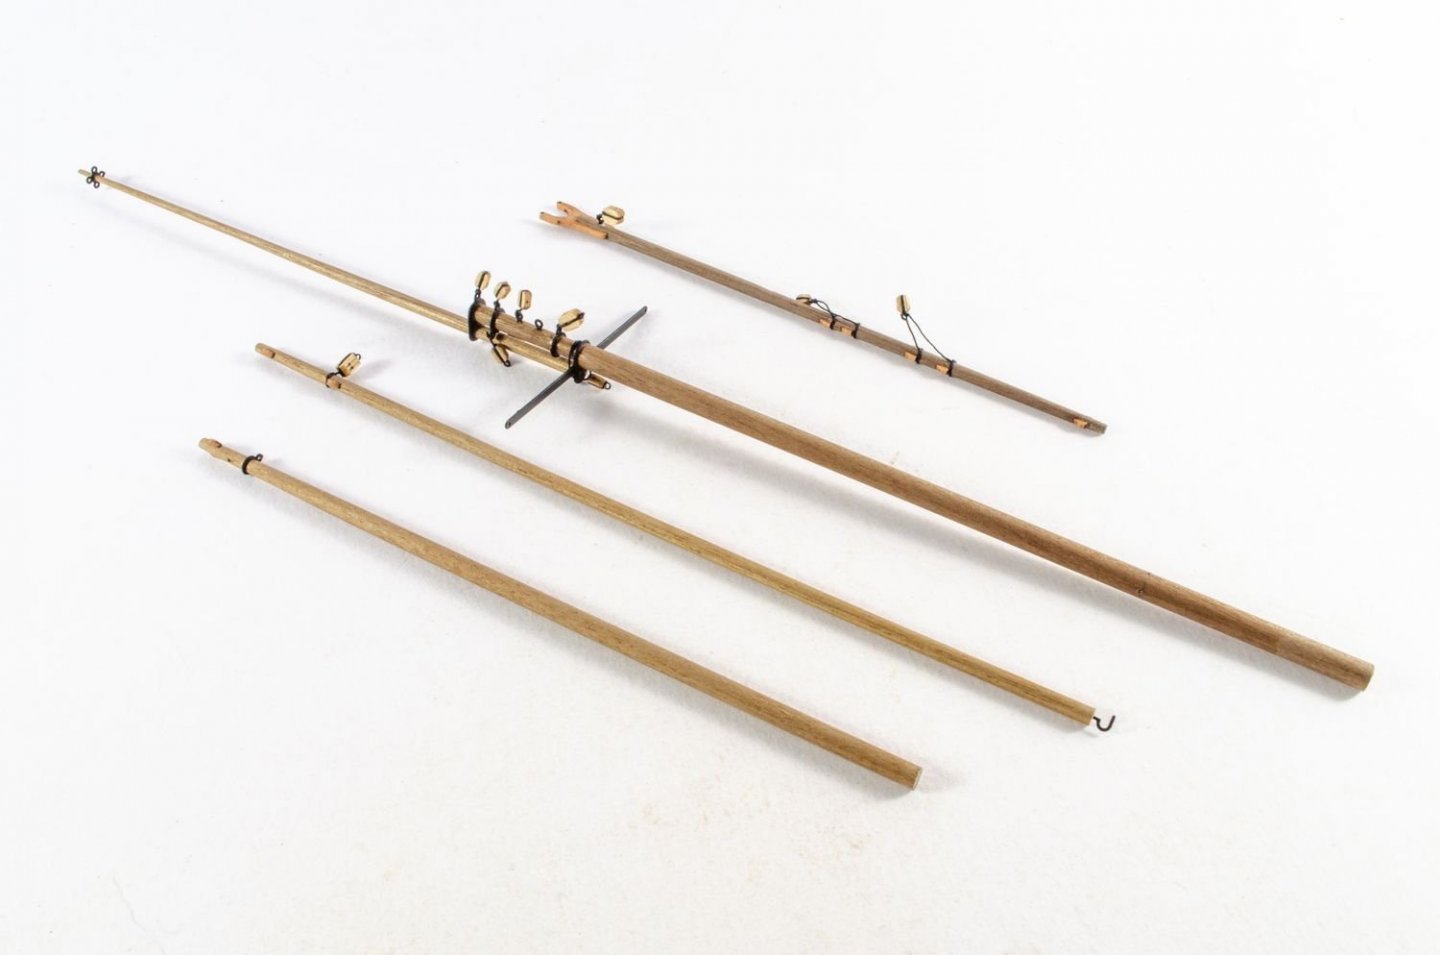
More deck hardware...

A steam winch also finds a home on Nisha. All parts are primed with Tamiya Fine Surface primer before airbrushing.


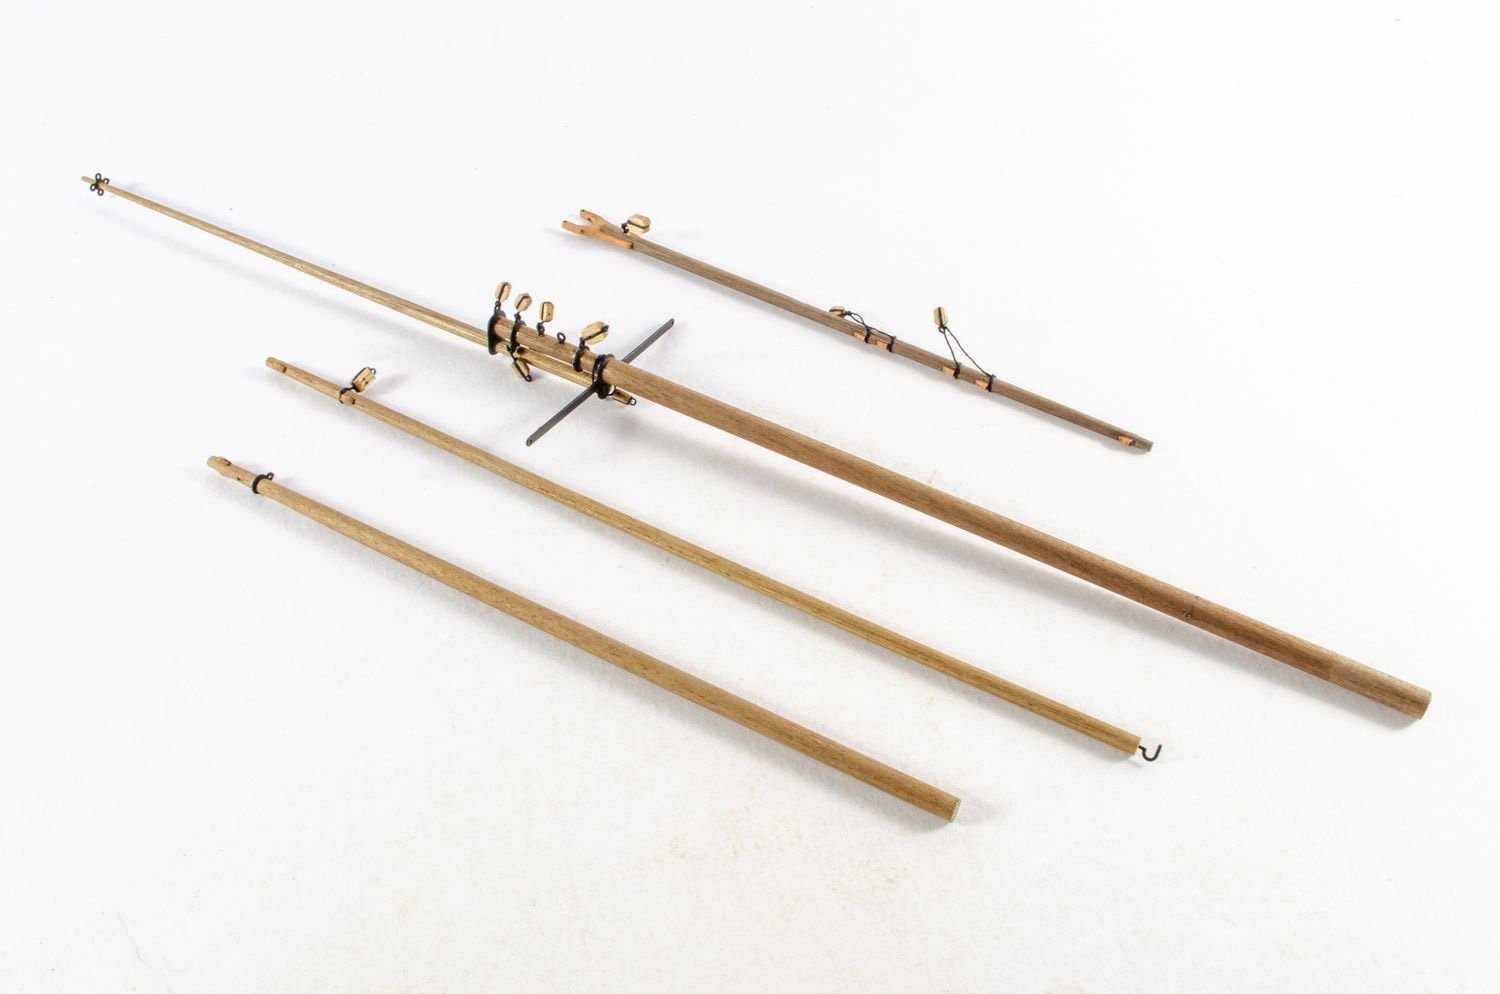
A little bit of metalwork is required for the chimneys.


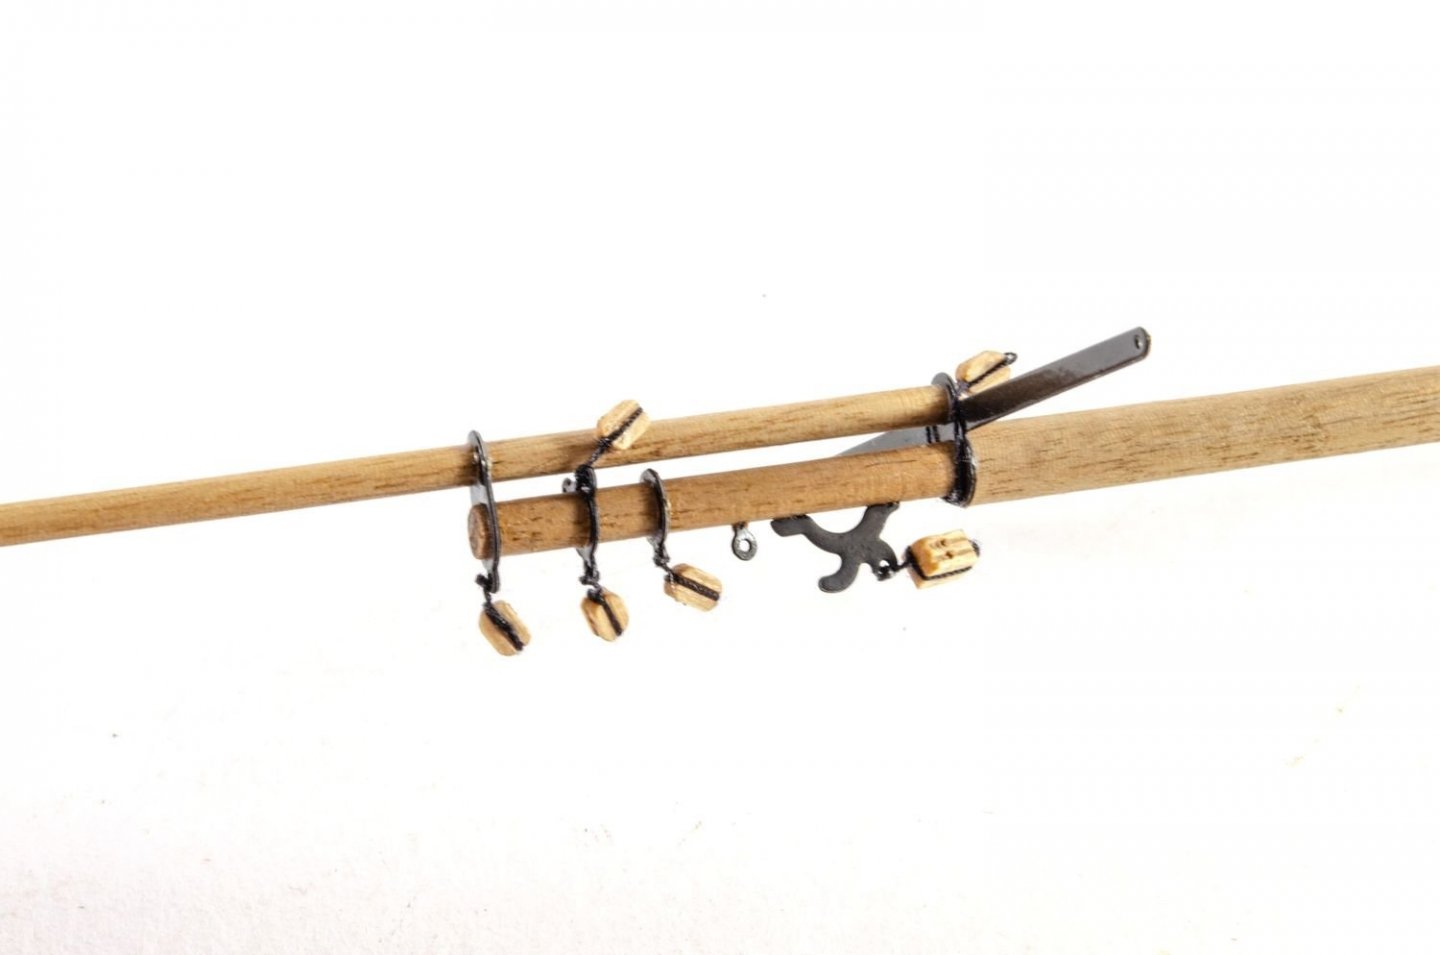
Yes, this one has some shrouds and rats! Very simple stuff though and it'll take almost no time.
 \
\
That's it until next time!
- clearway, longshanks, Blue Ensign and 19 others
-
22
-
I can't recall the name part at the moment so always call it the 'bench'.
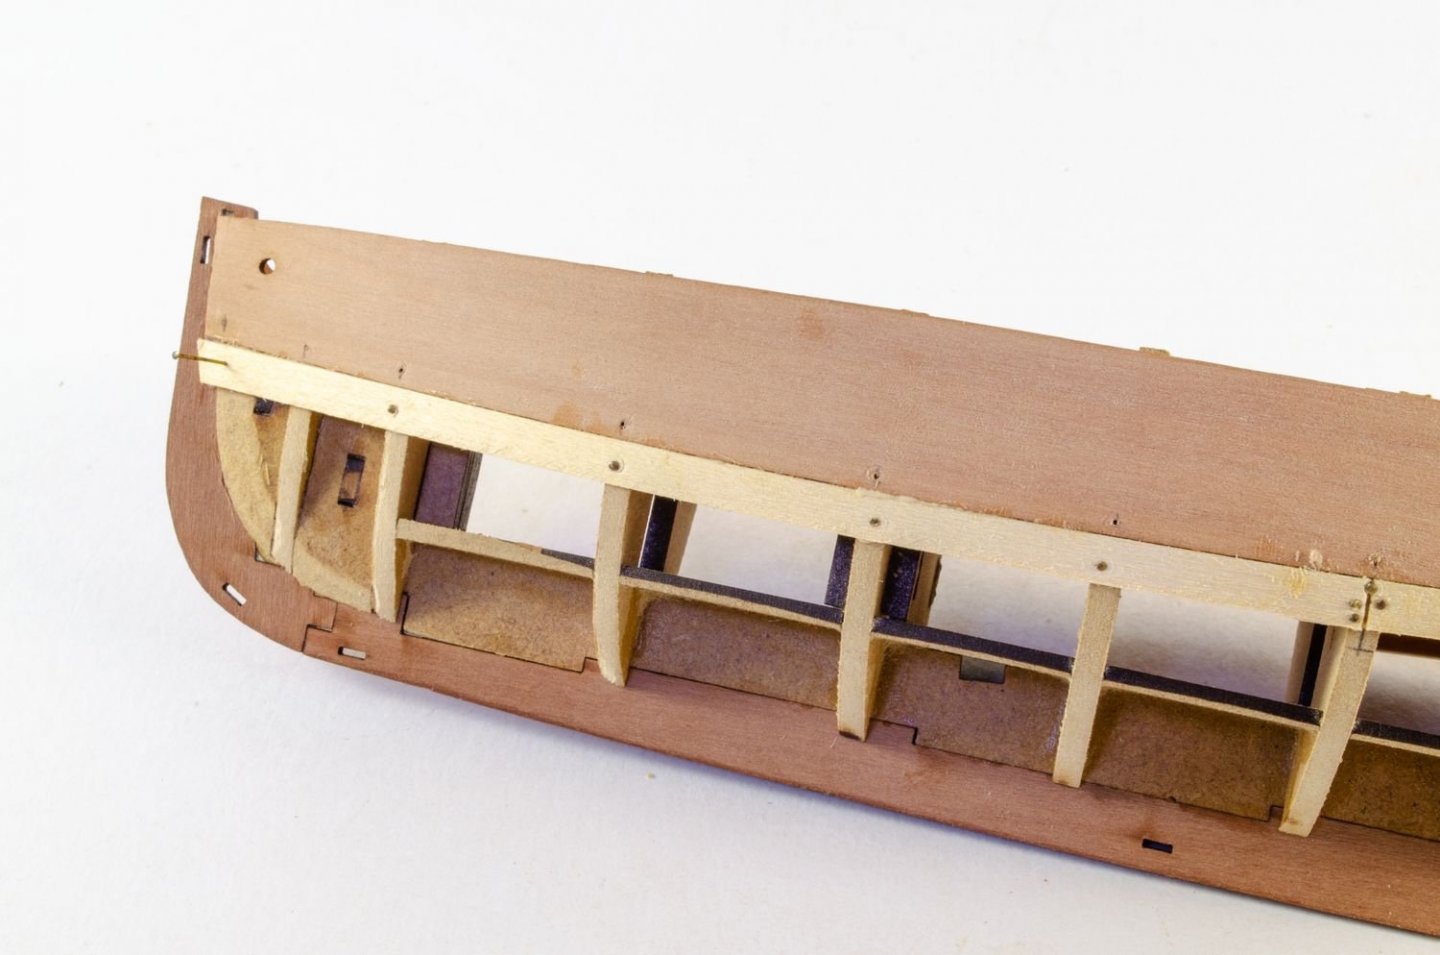
This is now fitted into the stern, and it sits in the notches in stern timbers and on the lower timberheads. An engraved line shows the absolute position.

I use a rigid sanding stick to draw across the bulwarks to make sure they are level to each other. A good surface is needed here for the gunwales which are fitted after painting the outside bulwark in black. The lower rail, now fitted, is in white.
A waterline mark is now added to coincide with the to top of the white book line. The hull is then masked from that line, upwards. Filler is applied to the exposed area and then sanded. White primer is also now sprayed and any further imperfections filled and sanded out. This is a tedious task that will take a good day or so to get right, but it's important it's done if you want the lower hull to look neat.


After painting a finish coat of white, a 3mm flexible tape line is run around the edge of the current masking, and then the hull is sprayed red. When dry, all tape is removed.
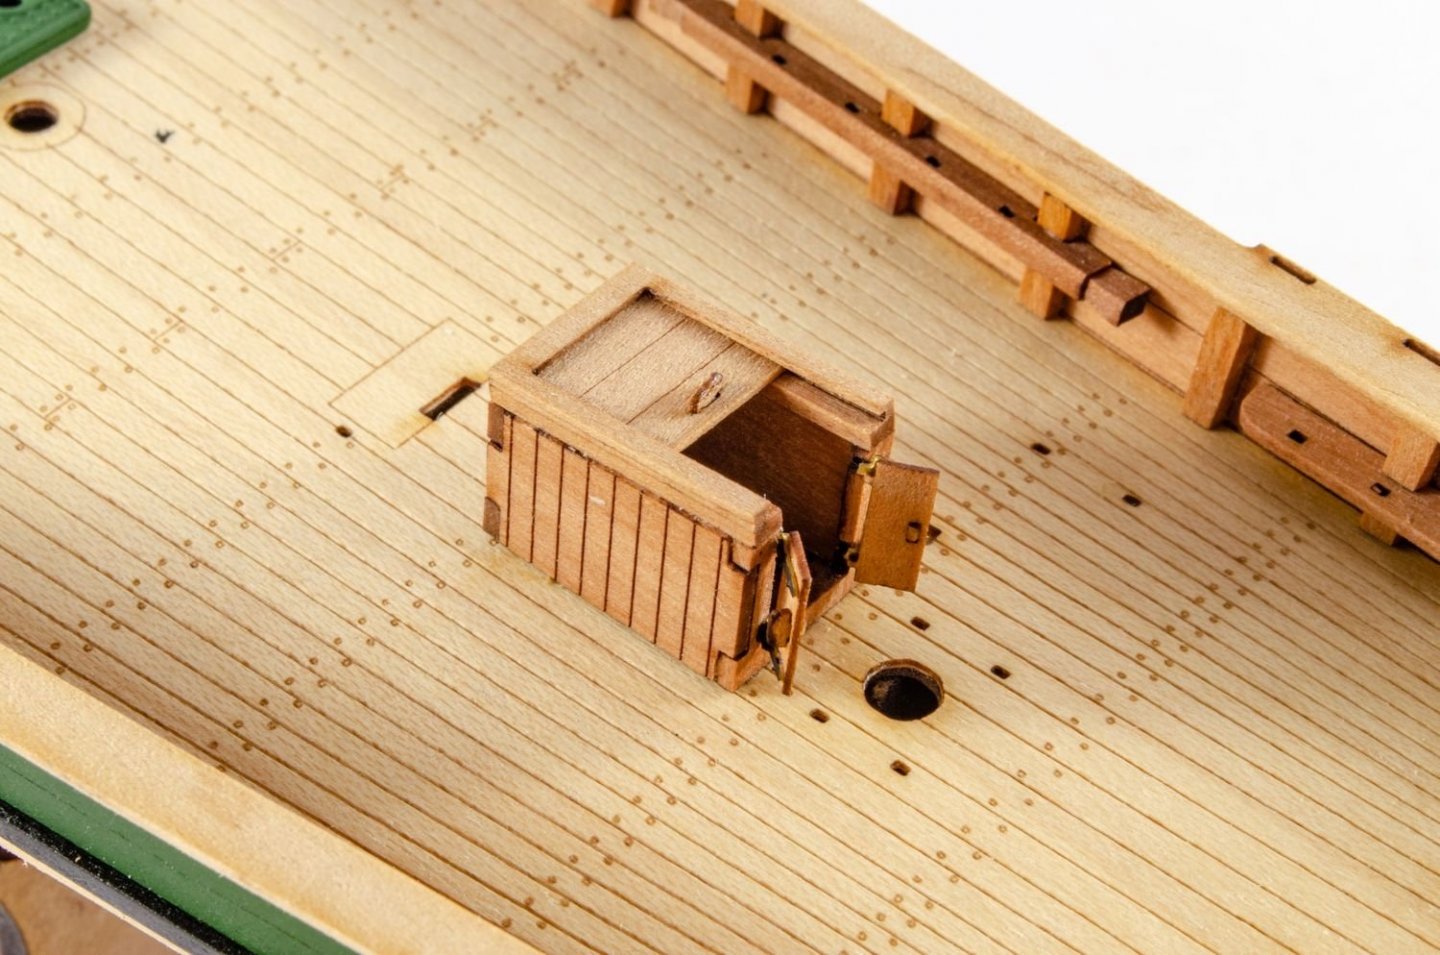
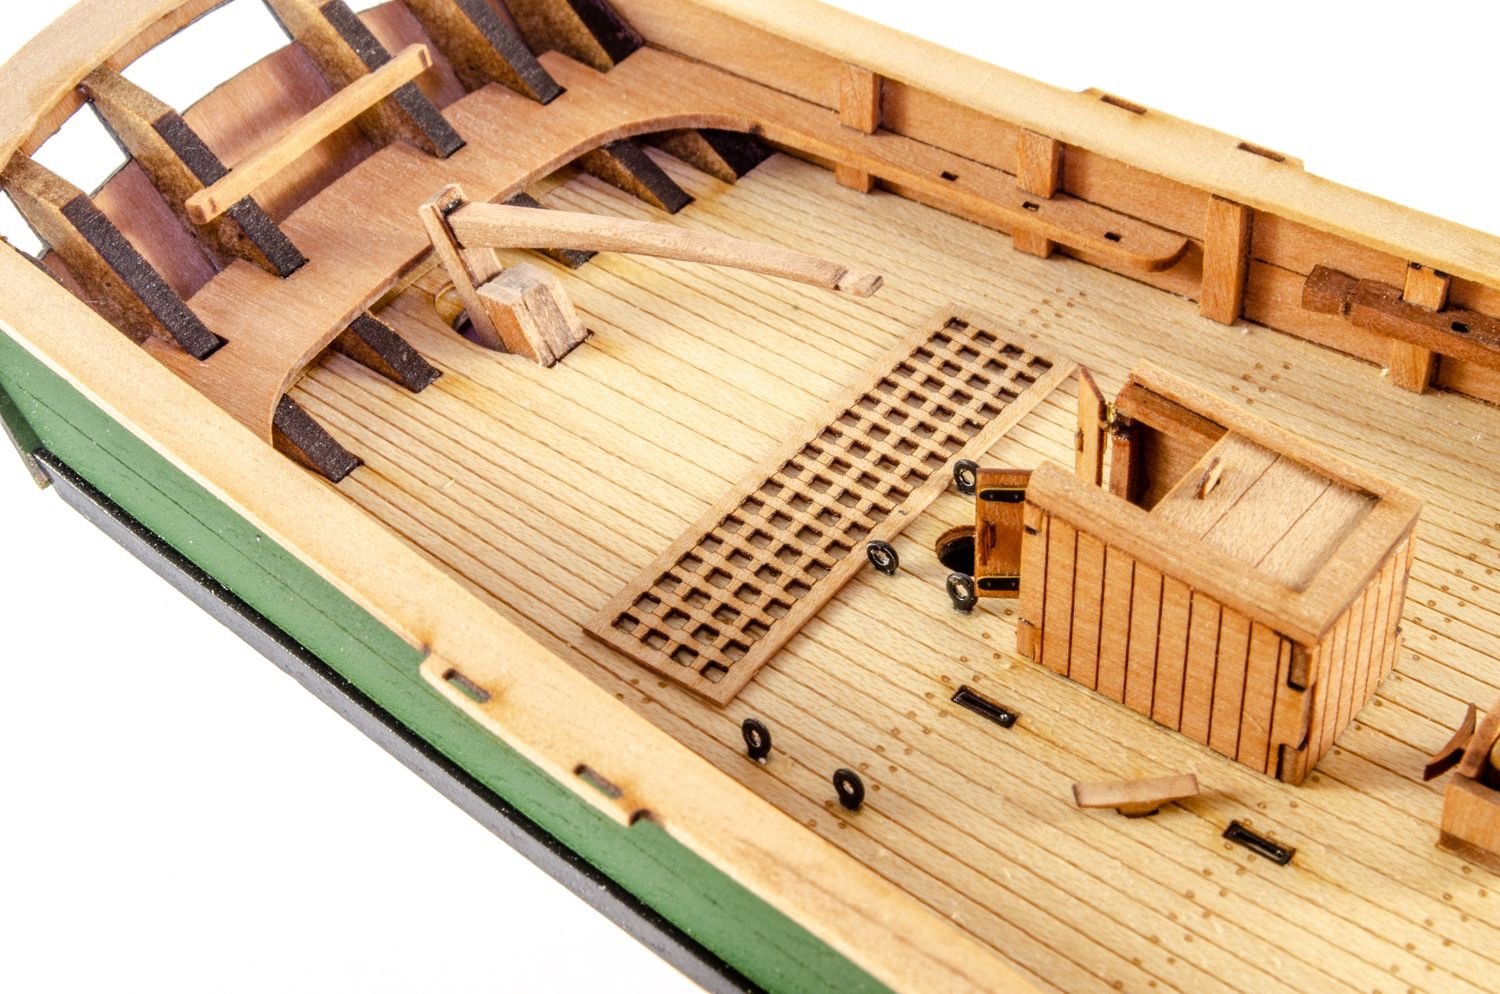
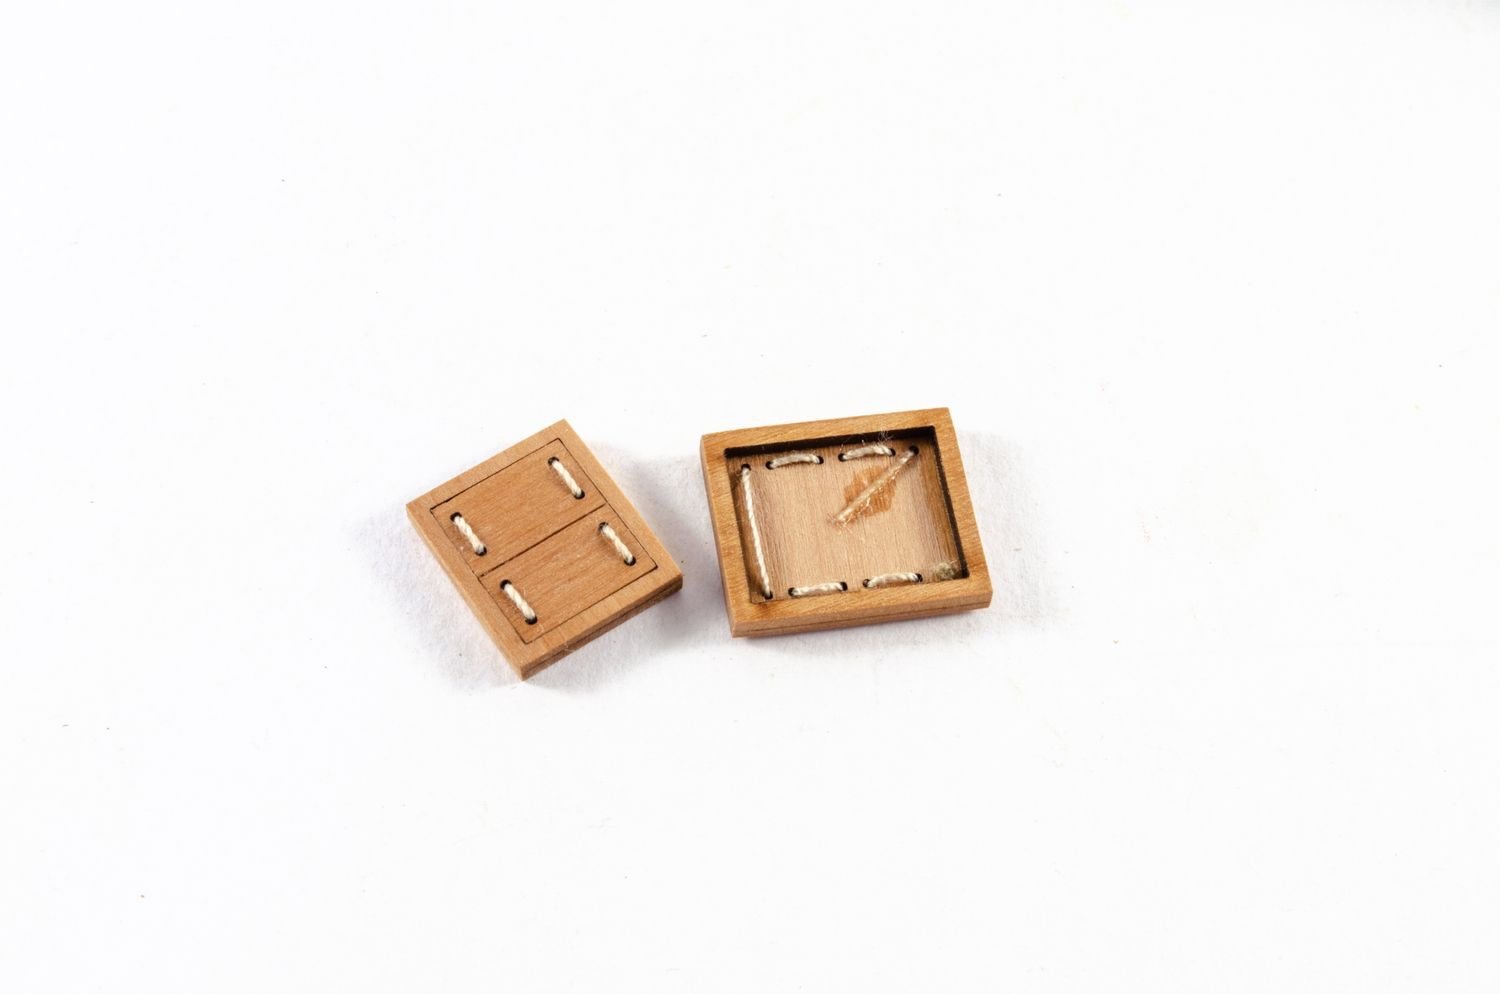
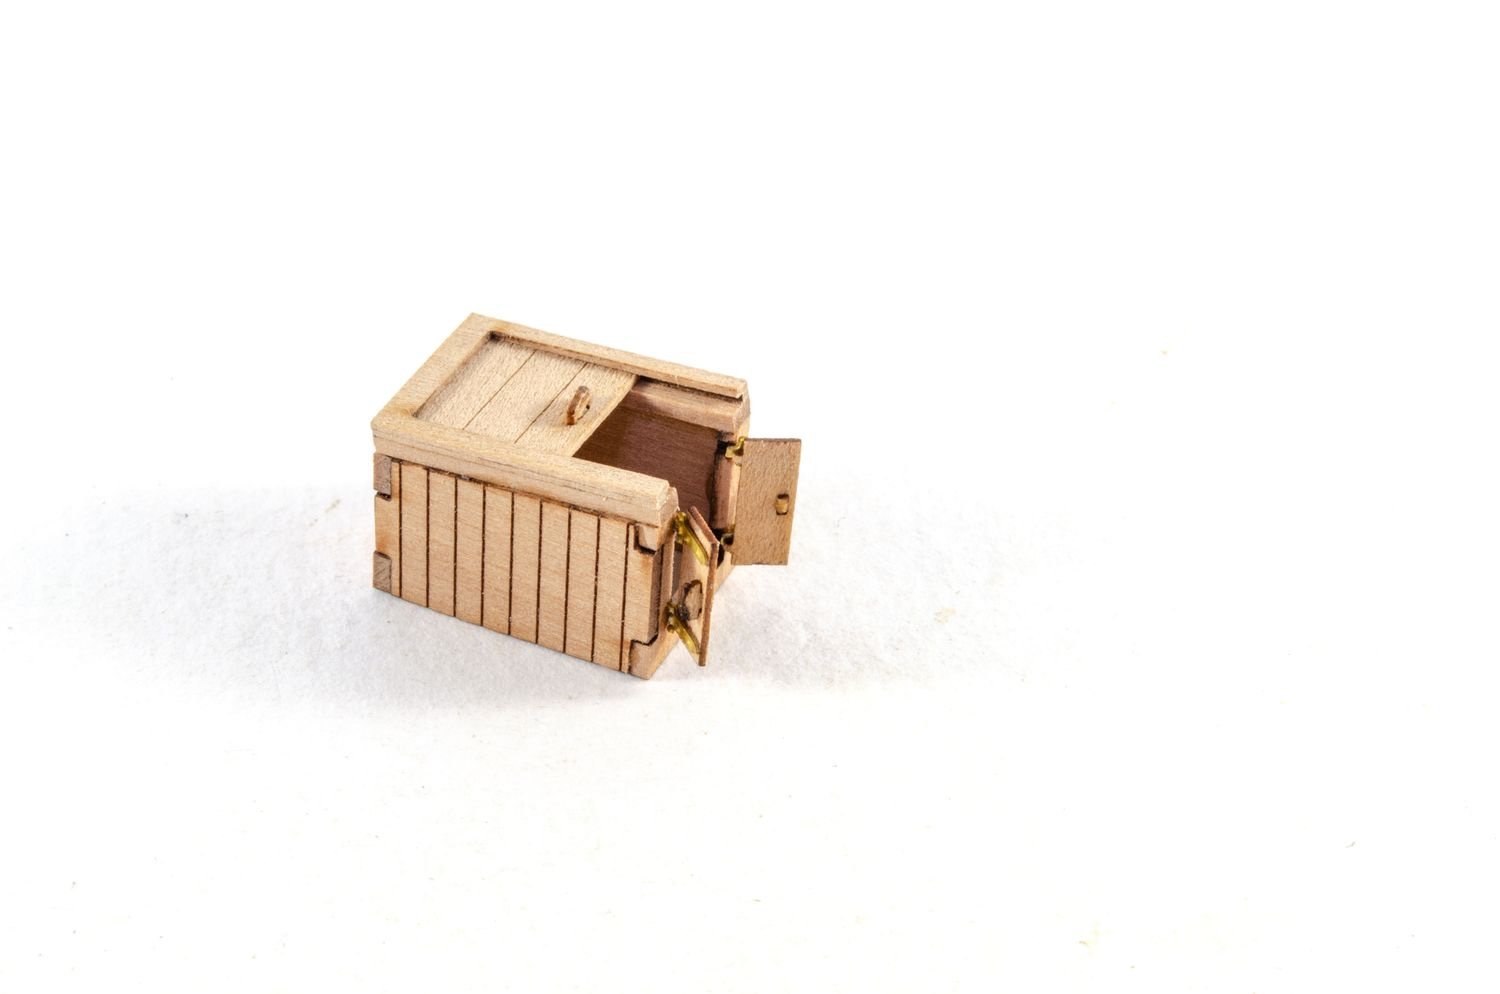
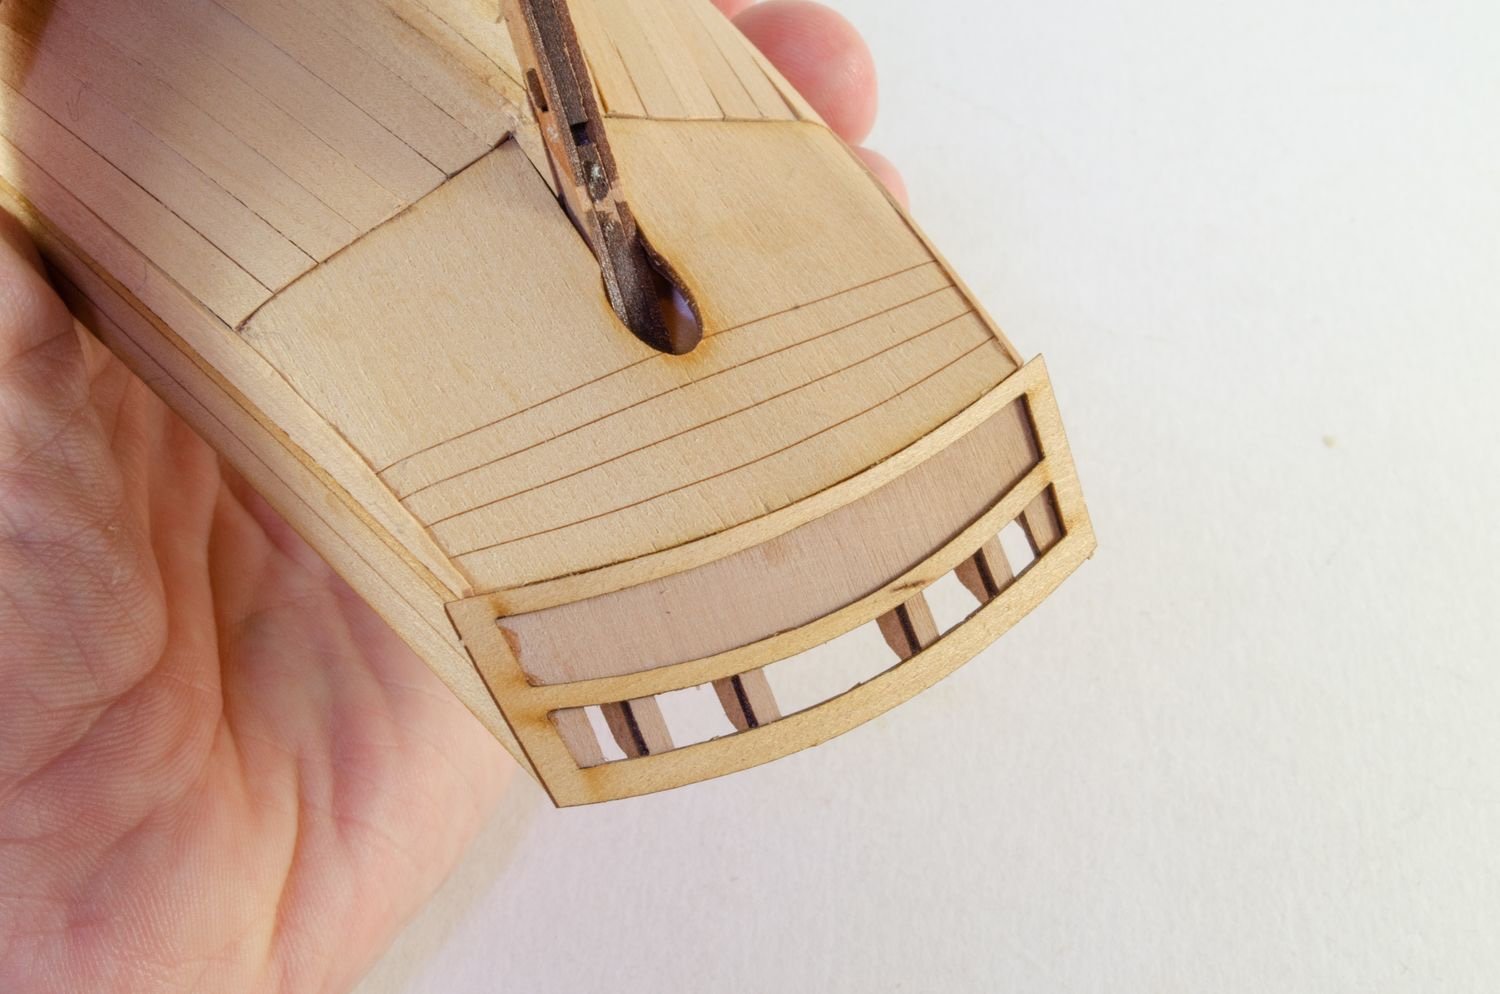
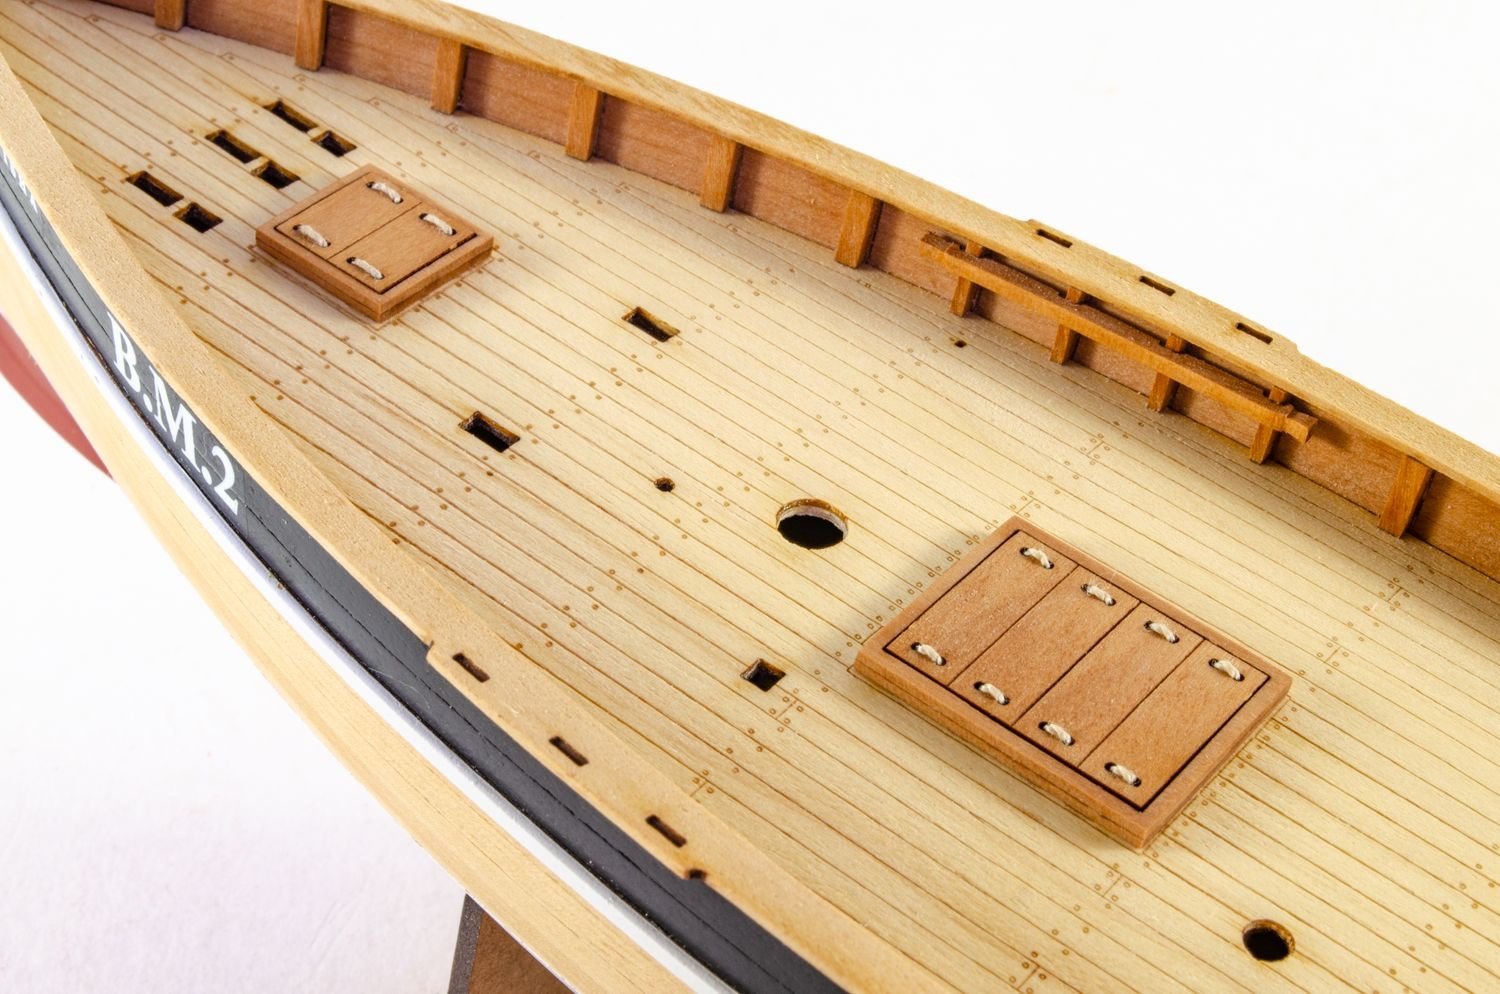
Fishers need hatches. These are made and then fitted.
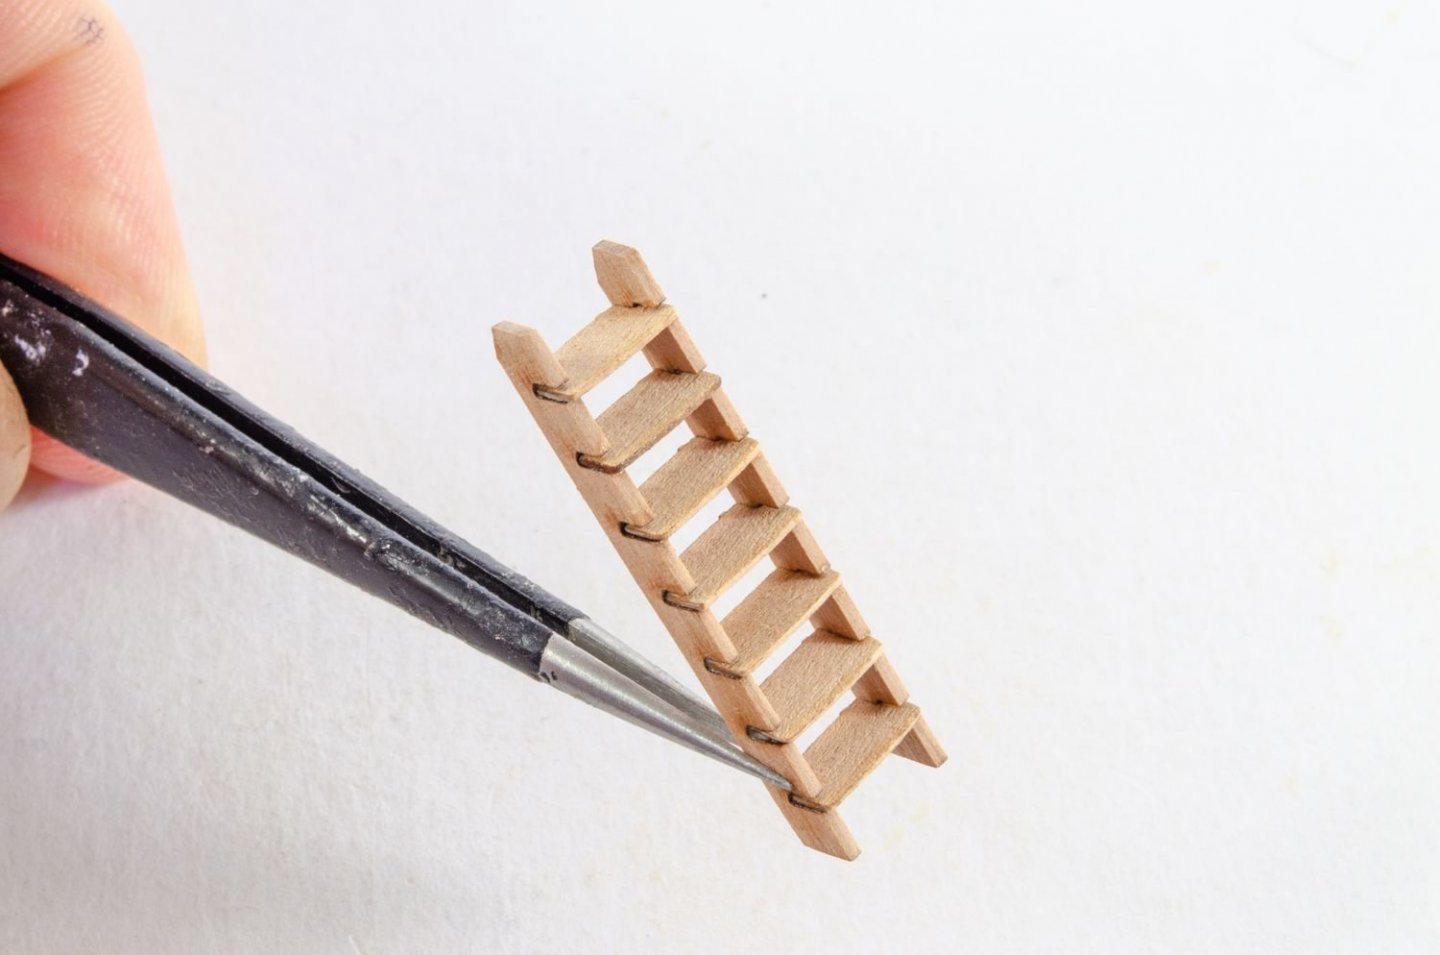
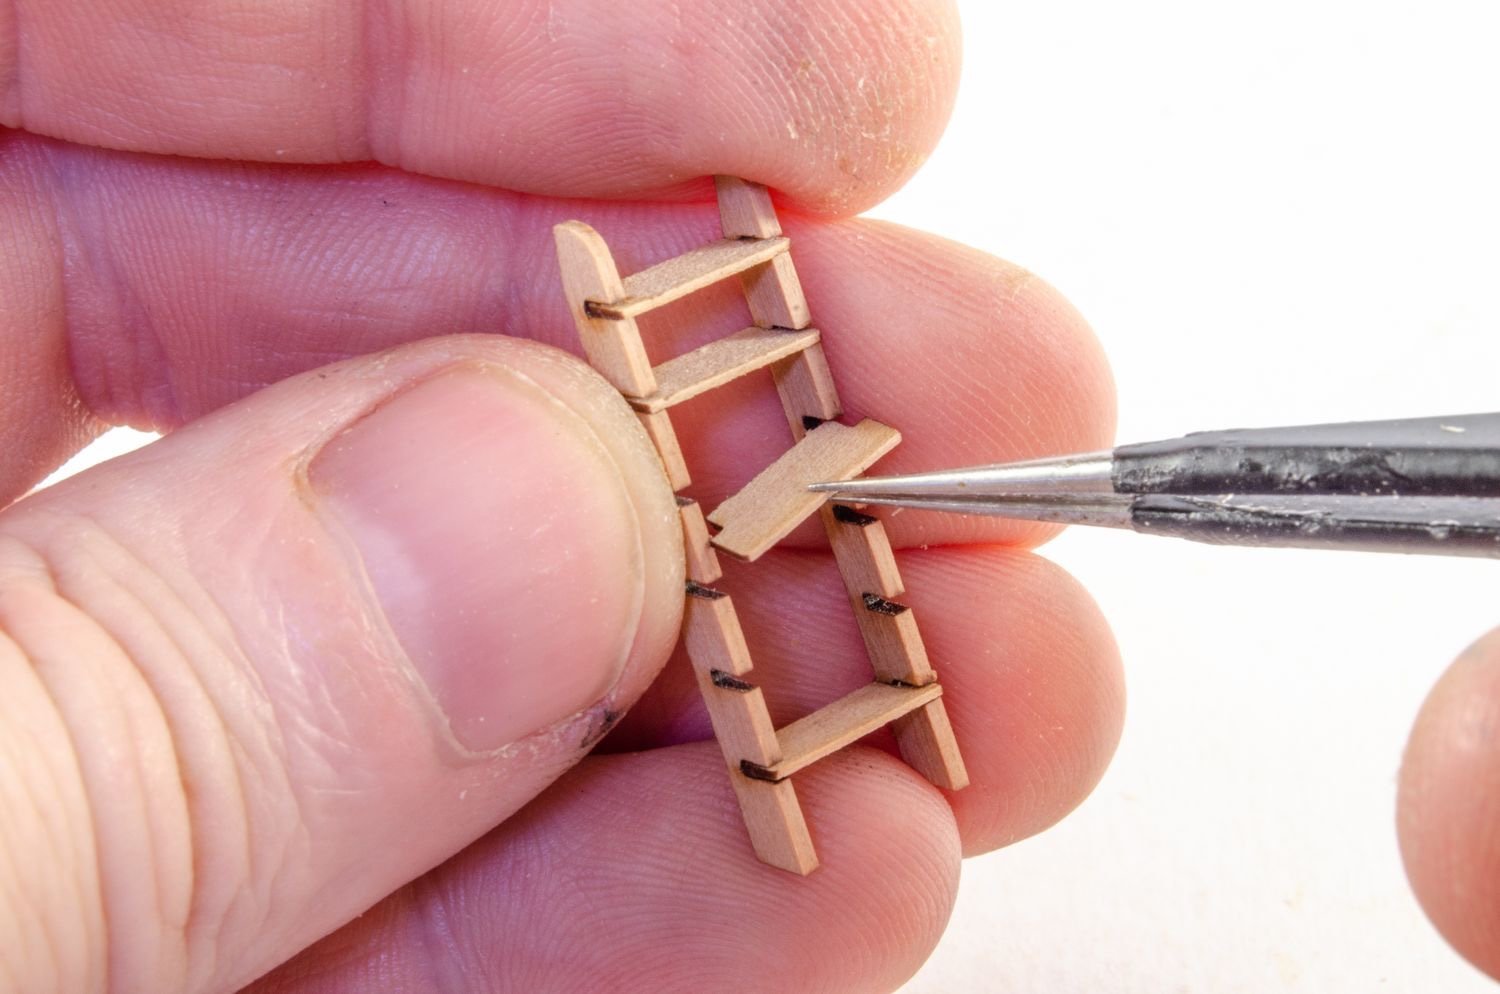
Same with ladders.

A jig is provided to build the curved-roof companionway. Here you see the assembly still sat on the jig, with the curved roof part clamped at rear with glue, before curving over the sides.


- BenD, thibaultron, Rik Thistle and 9 others
-
12
-
Has it really been almost 2 months since my last update?
I suppose I have done a lot of work, and on two vessels. This update will be in 2 or 3 posts due to all photos.
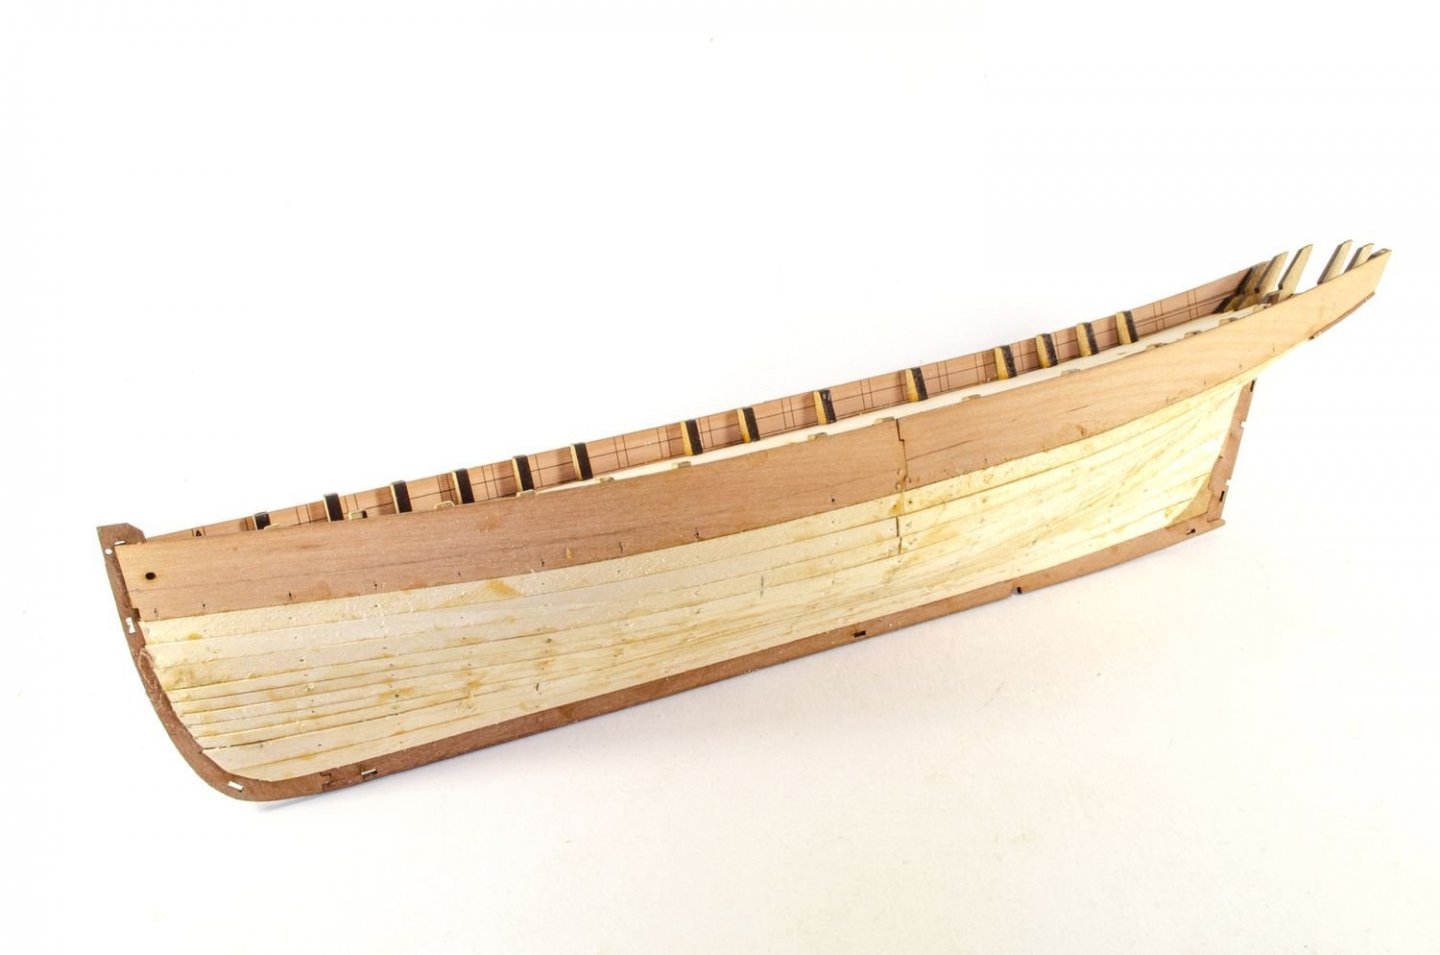
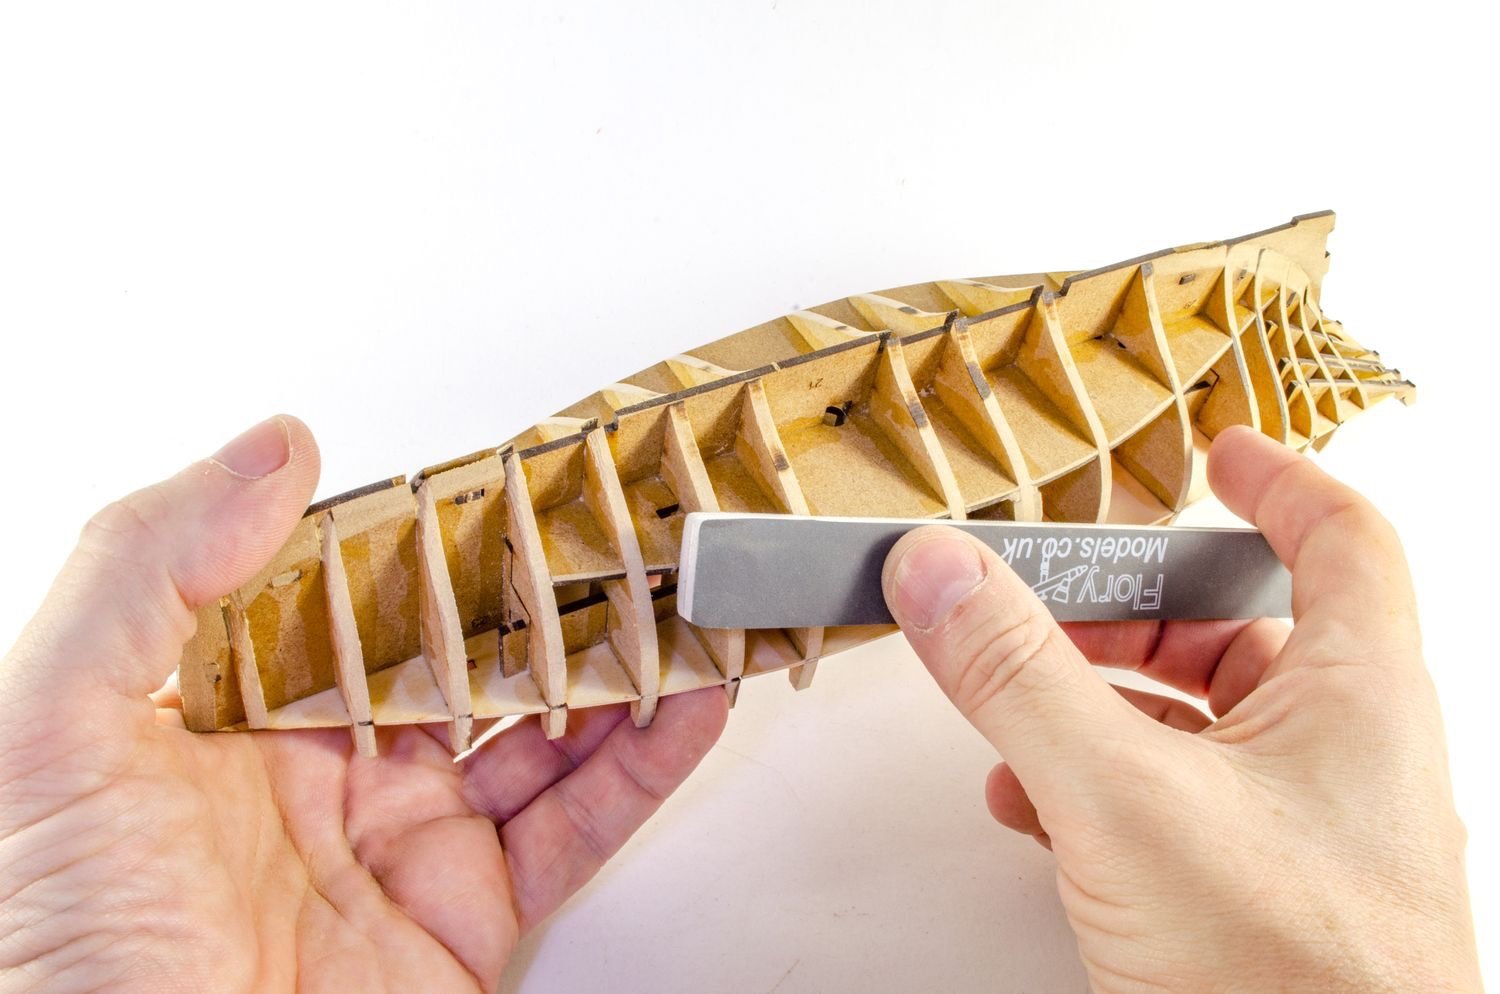
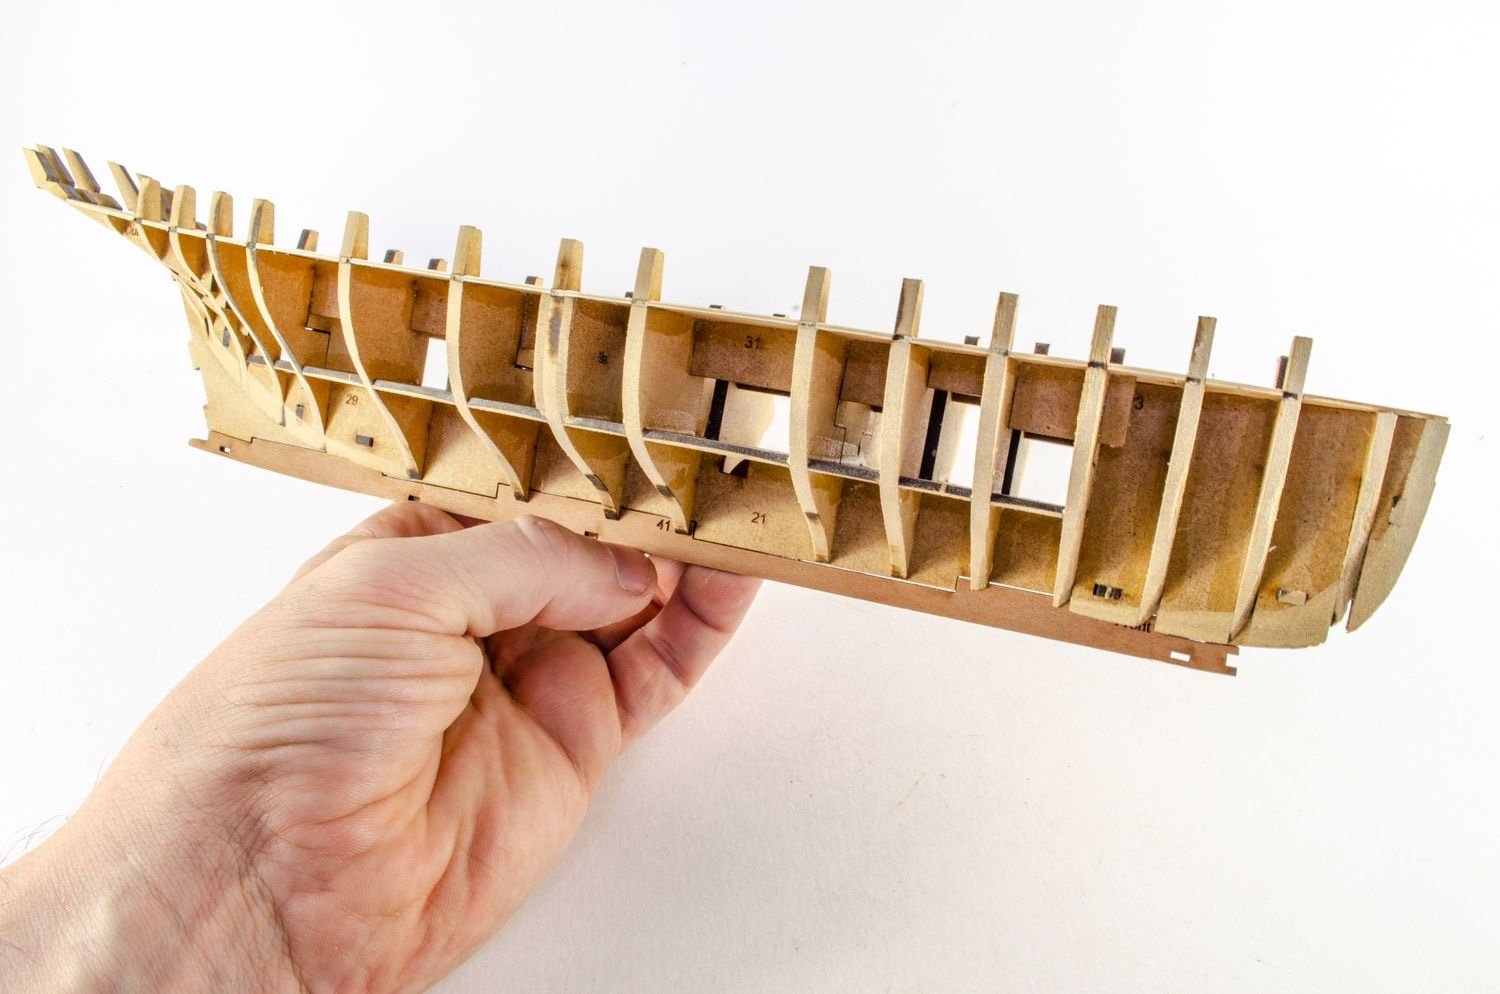
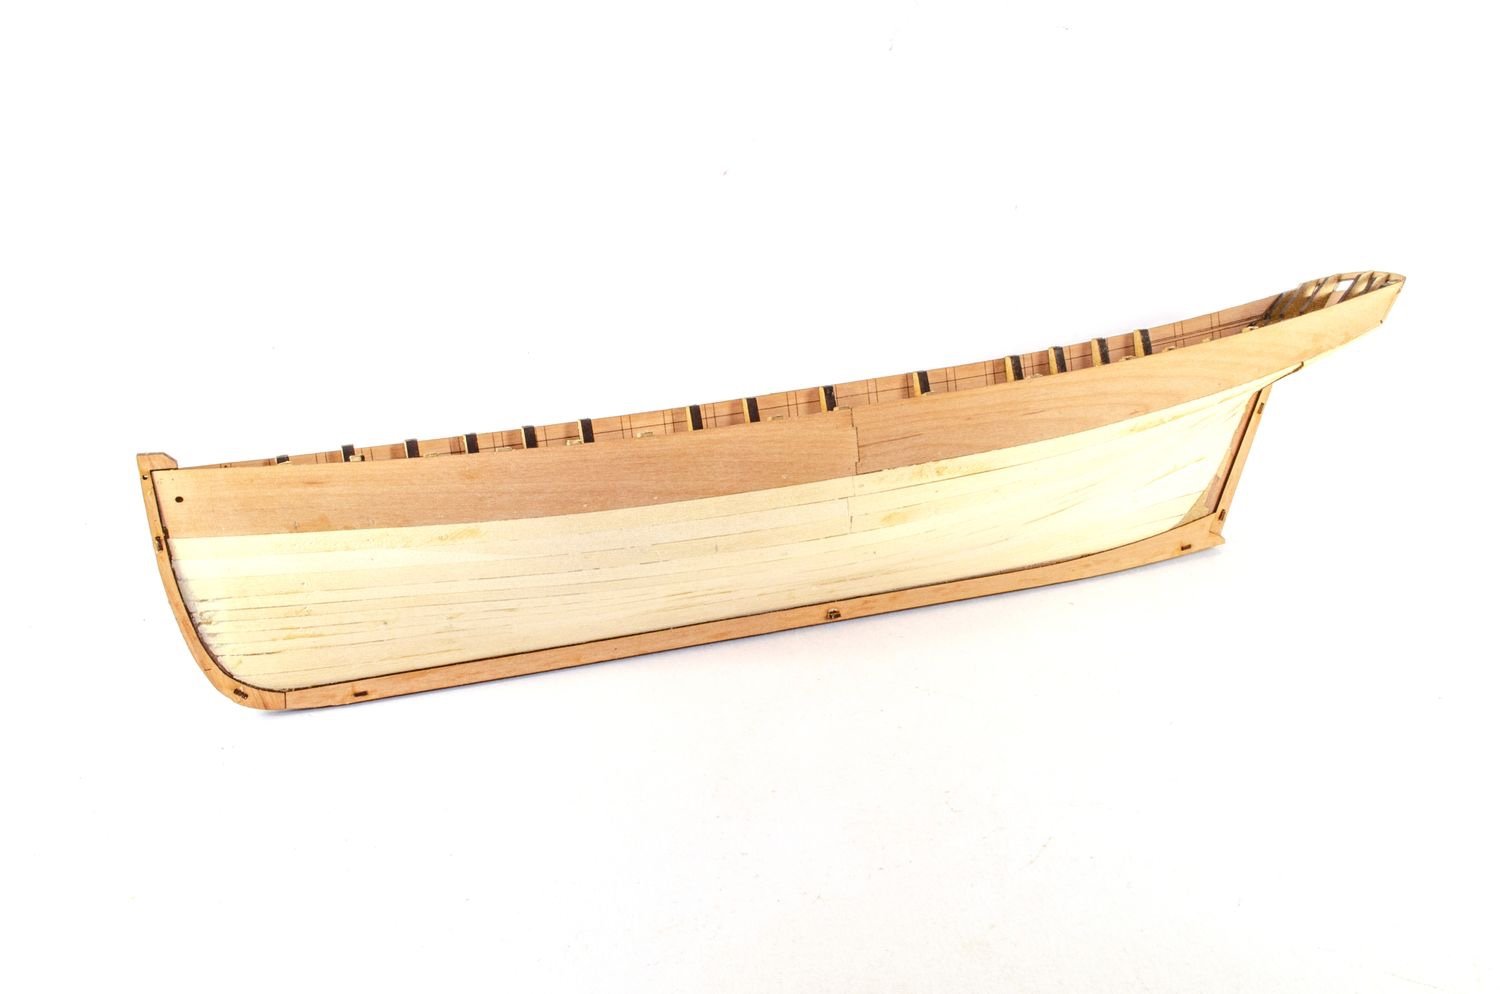
Work on Nisha continued with hull fairing. This probably took no more than about 30 minutes due to her size. Always remember to run a lime plank along the lines to make sure there's no nasty surprises later on.
The multipart pear keel is now added. All fits perfectly.

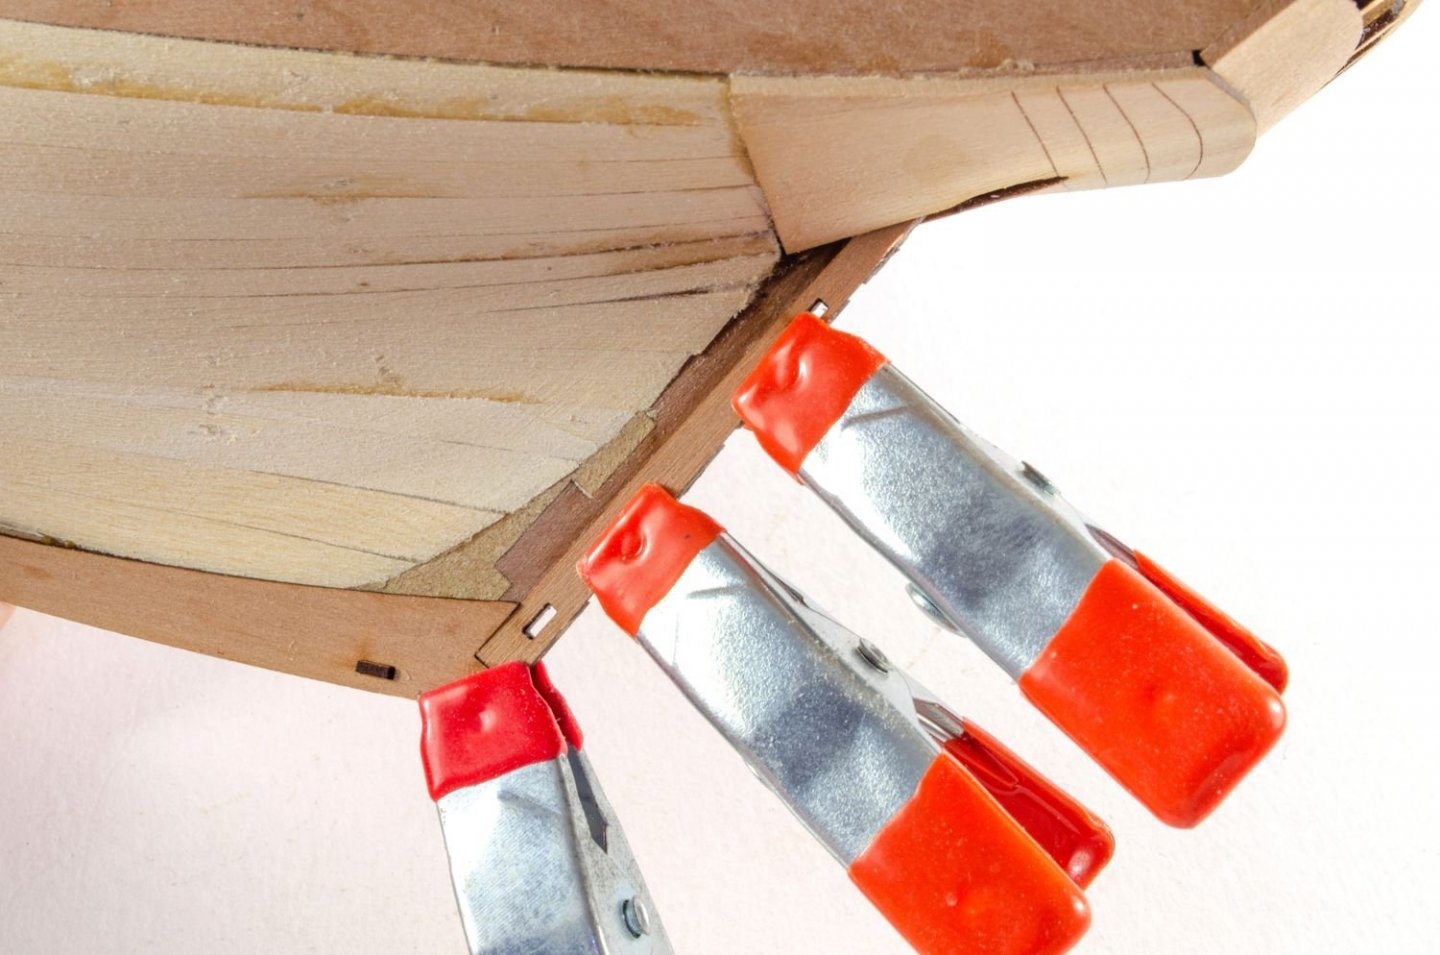
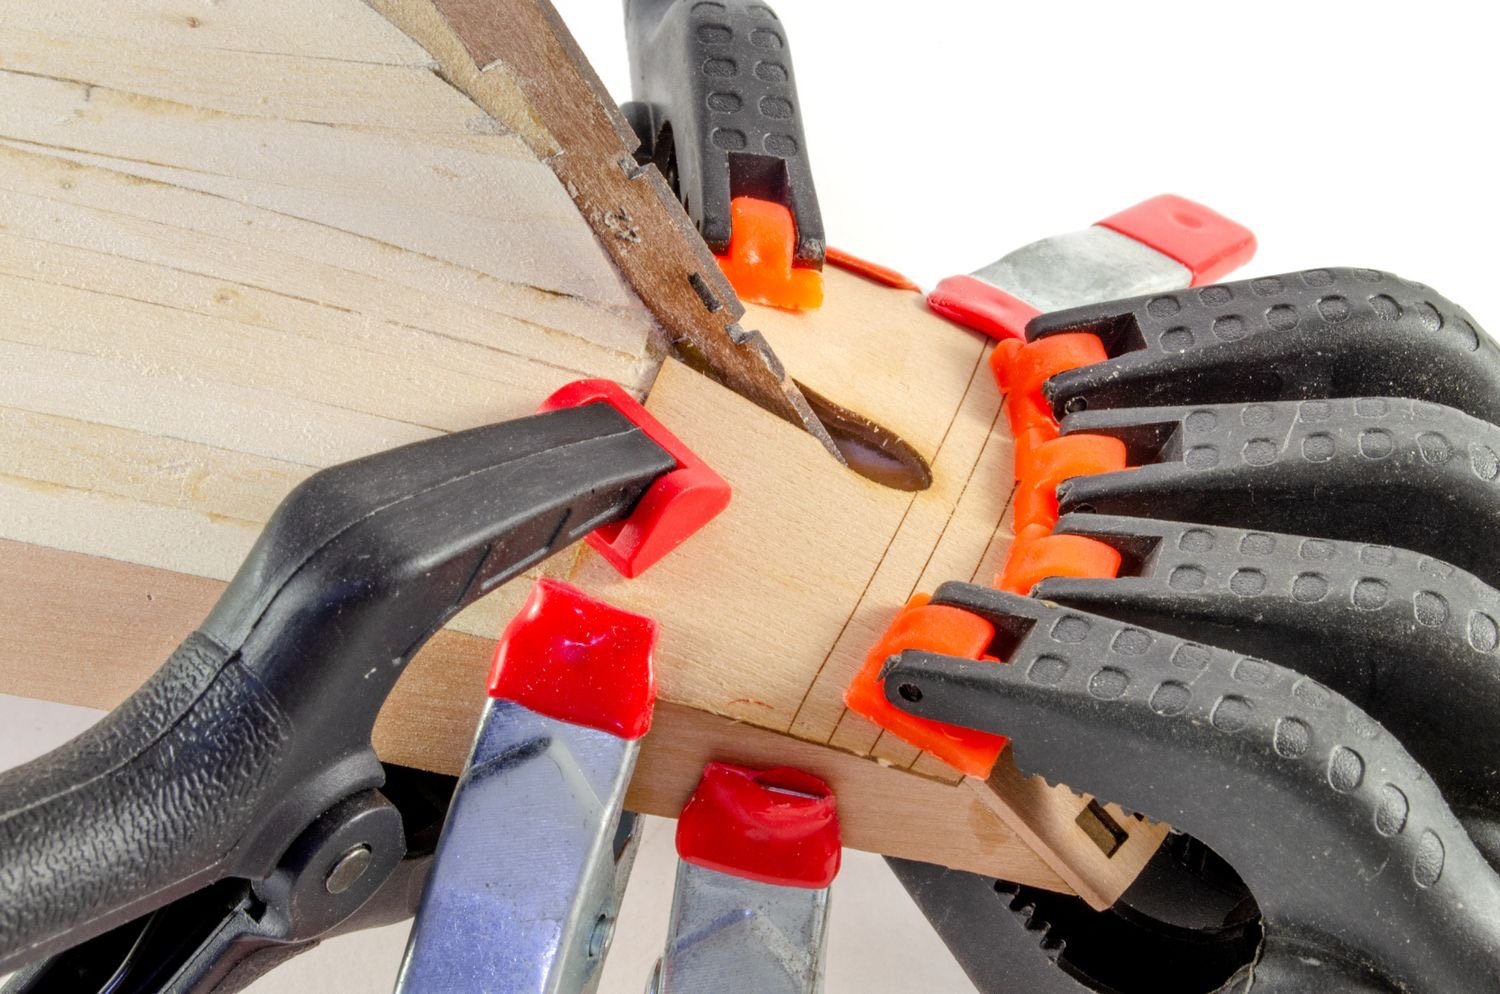
The stern is tackled in a different way to normal with a single counter piece that deals with what would've been the hardest element of Nisha. This is the part for the first layer of planks, glued and clamped. This was also soaked to help it conform to the curves.
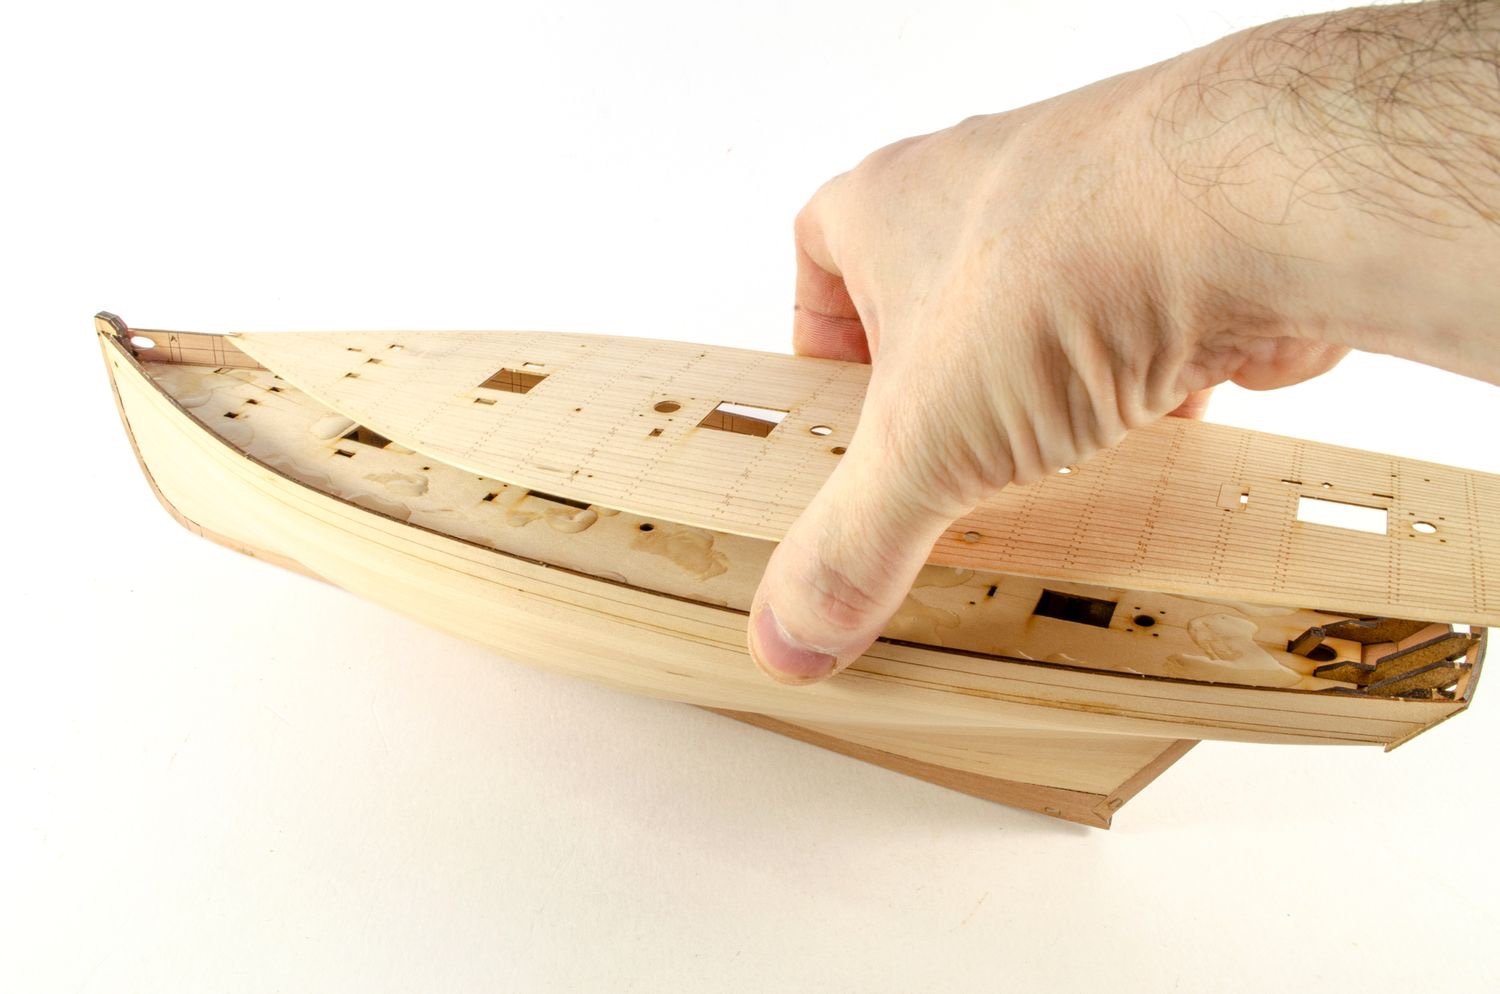
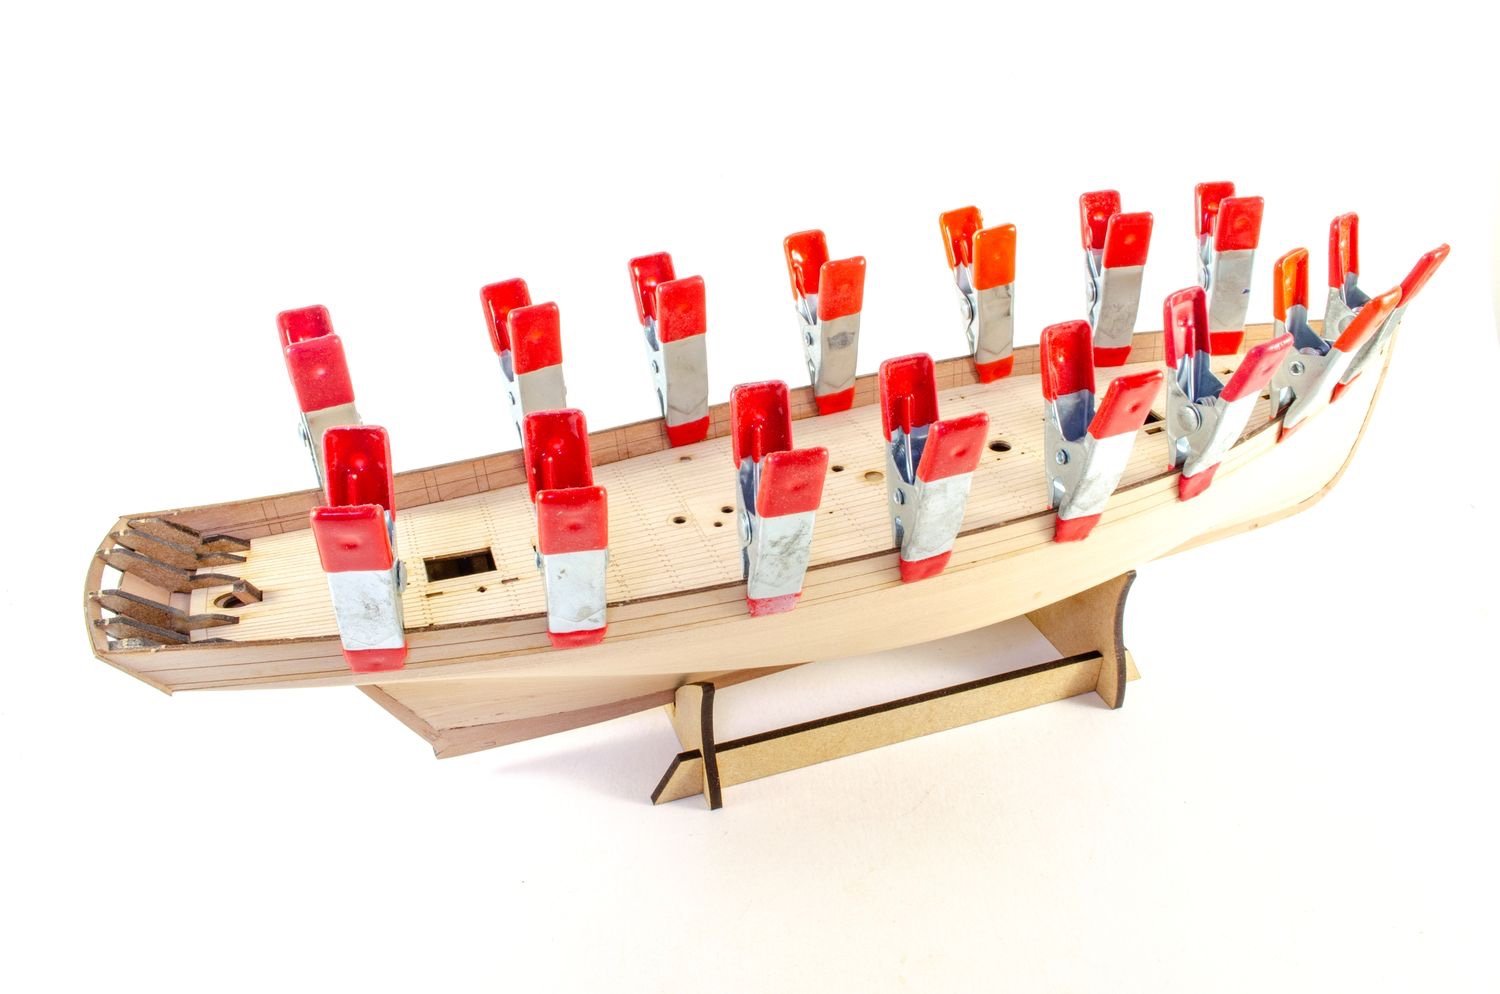
On with the inner bulwarks. These are a doddle to fit, with no ambiguity. Just make sure the ply deck hits the lower engraved line on the bulwark. Clamps and pins hold things while the glue dries.


On the first layer, we have the option to plank this is sections, so this is what I did with the lengths of lime that butt up against the counter. Not many planks are needed for this one and it planks real quick.
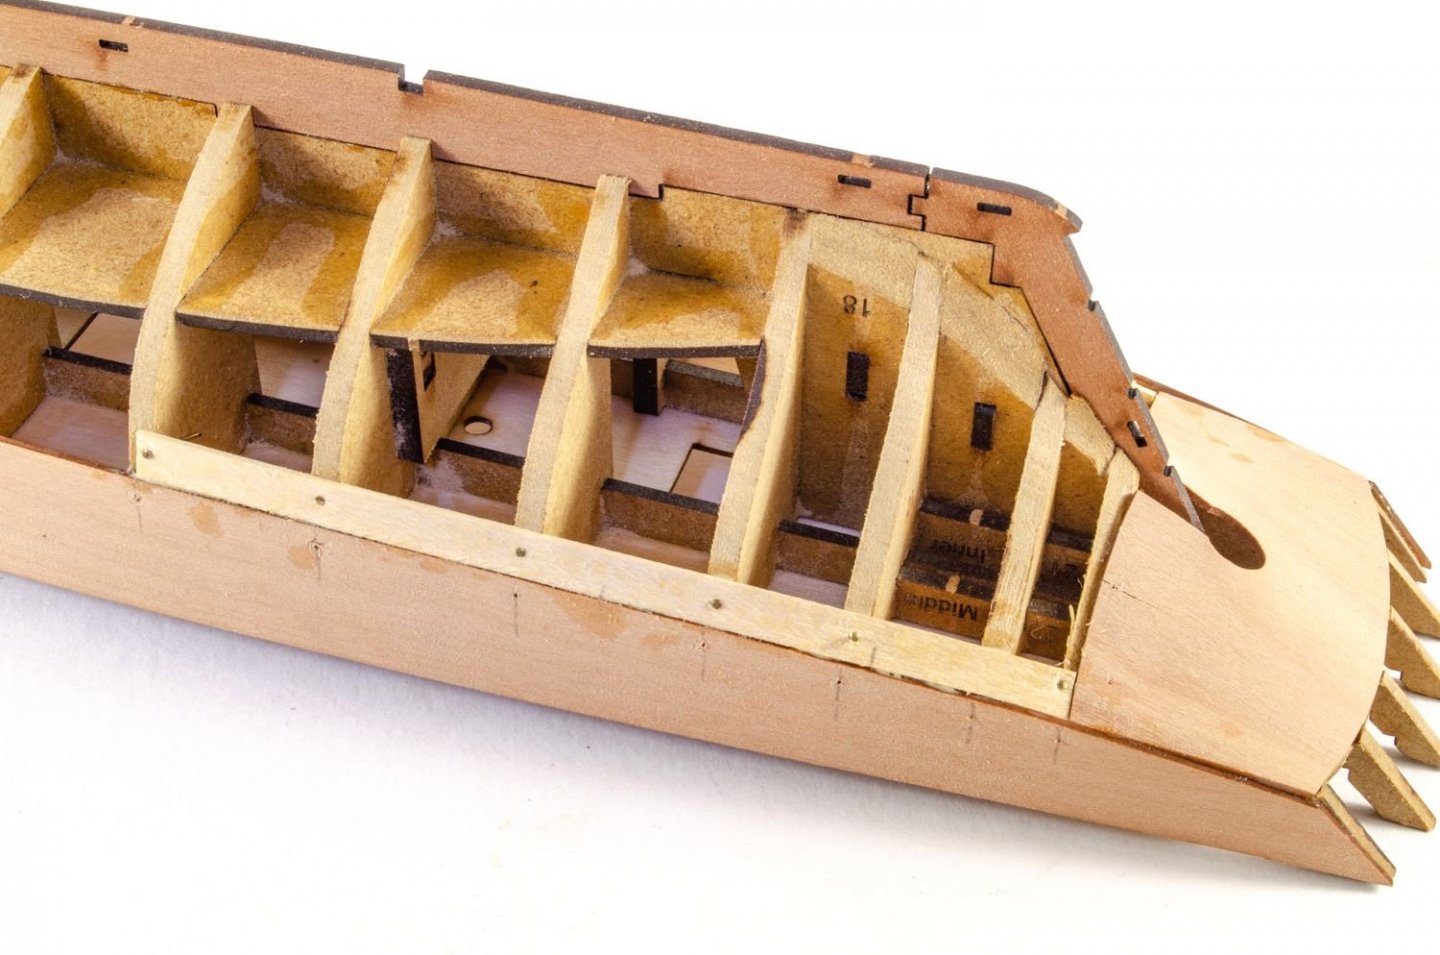
The stern board is now fitted. This is engraved with the timbers position so it's not ambiguous.
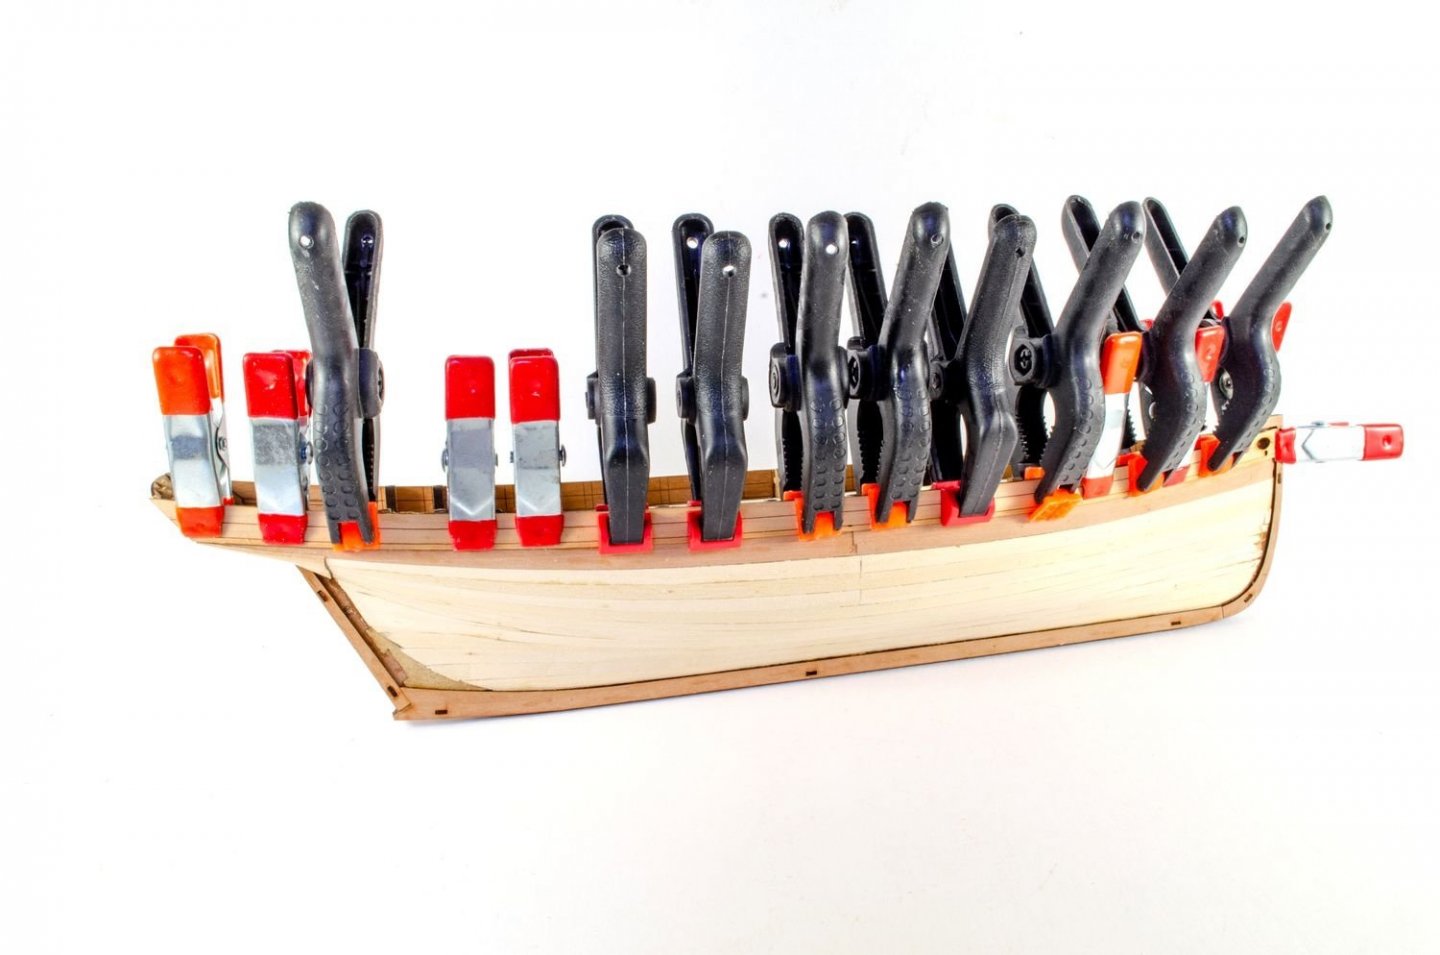
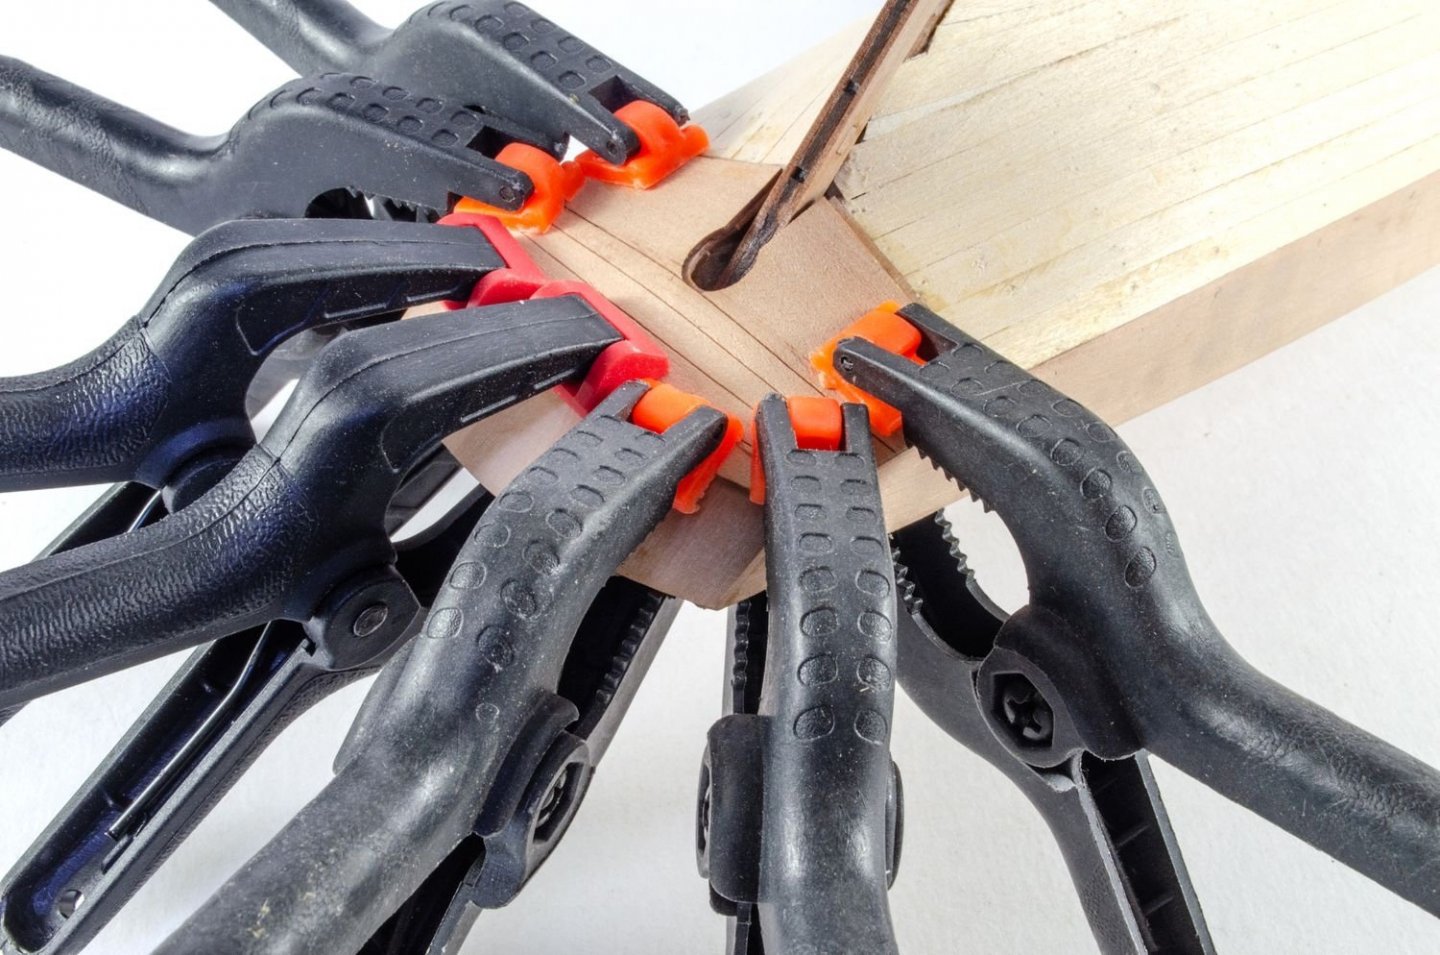
If you've built a VM kit before, you'll know the format of the keel with the outer facing parts that form the rabbet. All sections are now fitted and clamped.
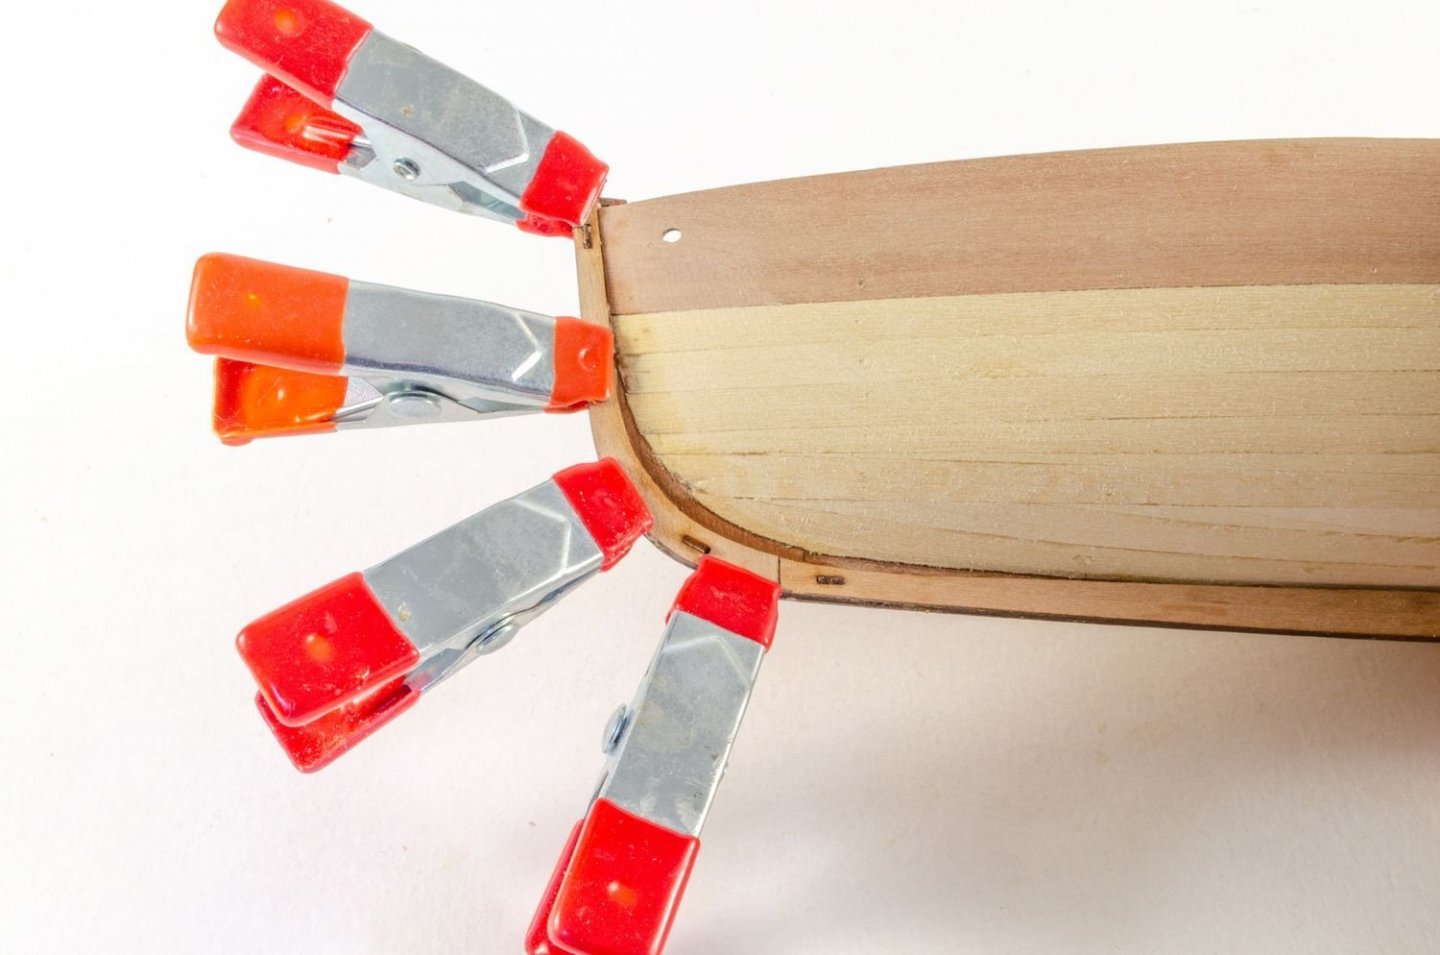
The outer stern counter is now glued. You can never have too many clamps...
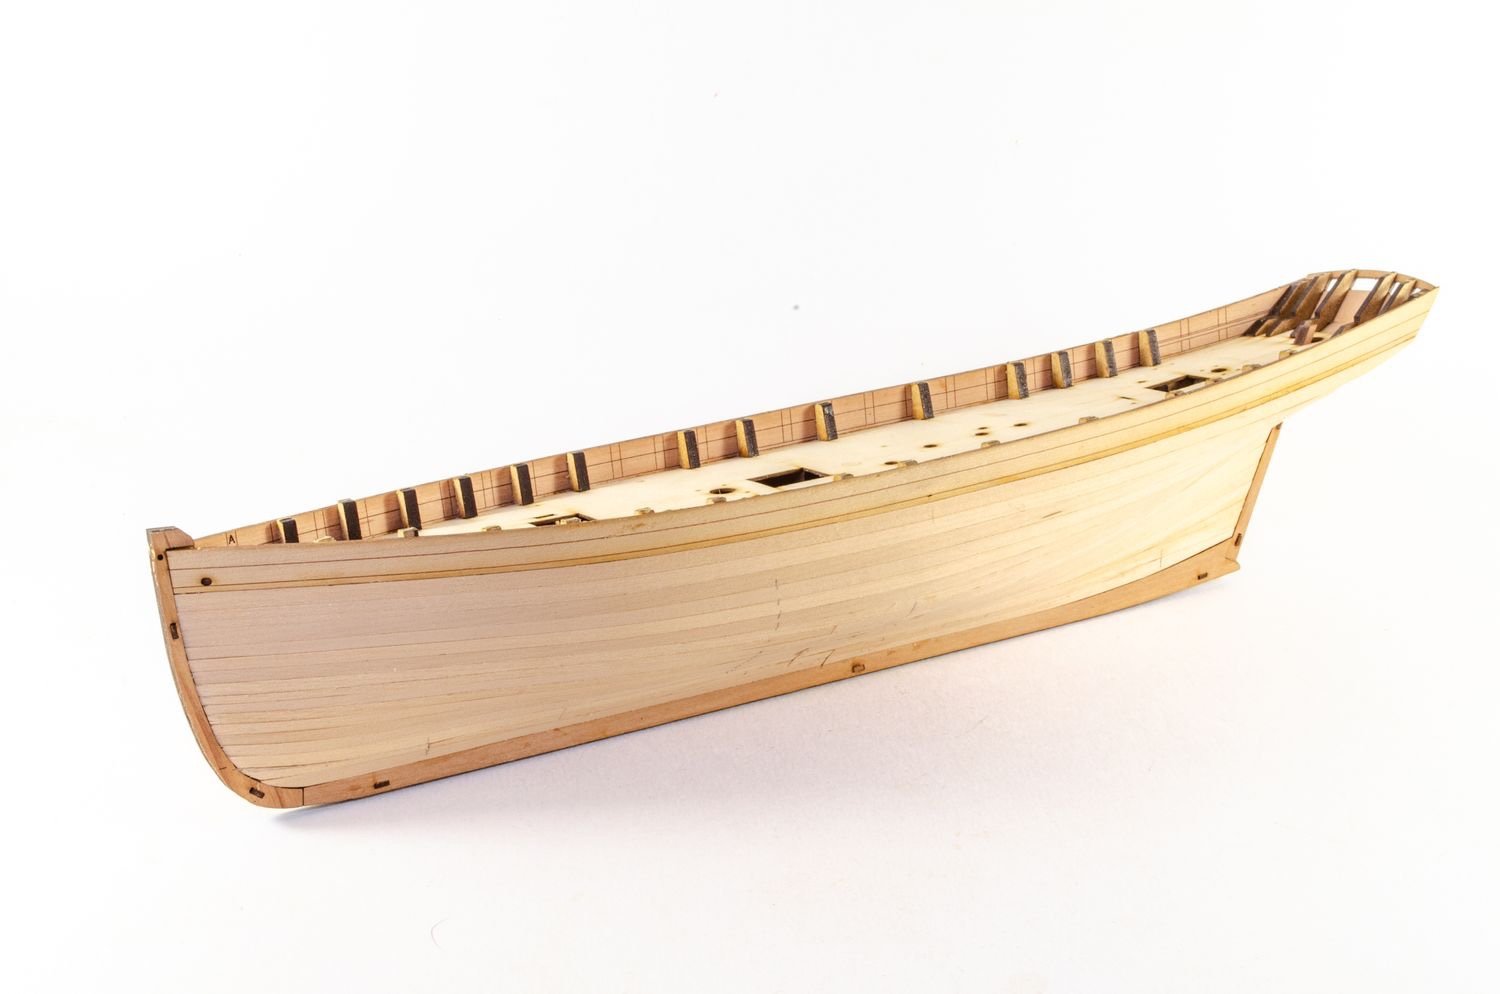
Both outer bulwarks are now fitted. This also has a lower engraved line near the bottom. That is the indicator for where to fit the lower rail. That rail covers the joint between bulwark and regular planking. The hull is then planked in pear and the stern board frame added.

Always check your hull to make sure it's sanded nice and smooth. Touch is definitely as useful as the eye when it comes to this. In fact, I rarely look at the lower hulls for smoothness and instead feel for unevenness.

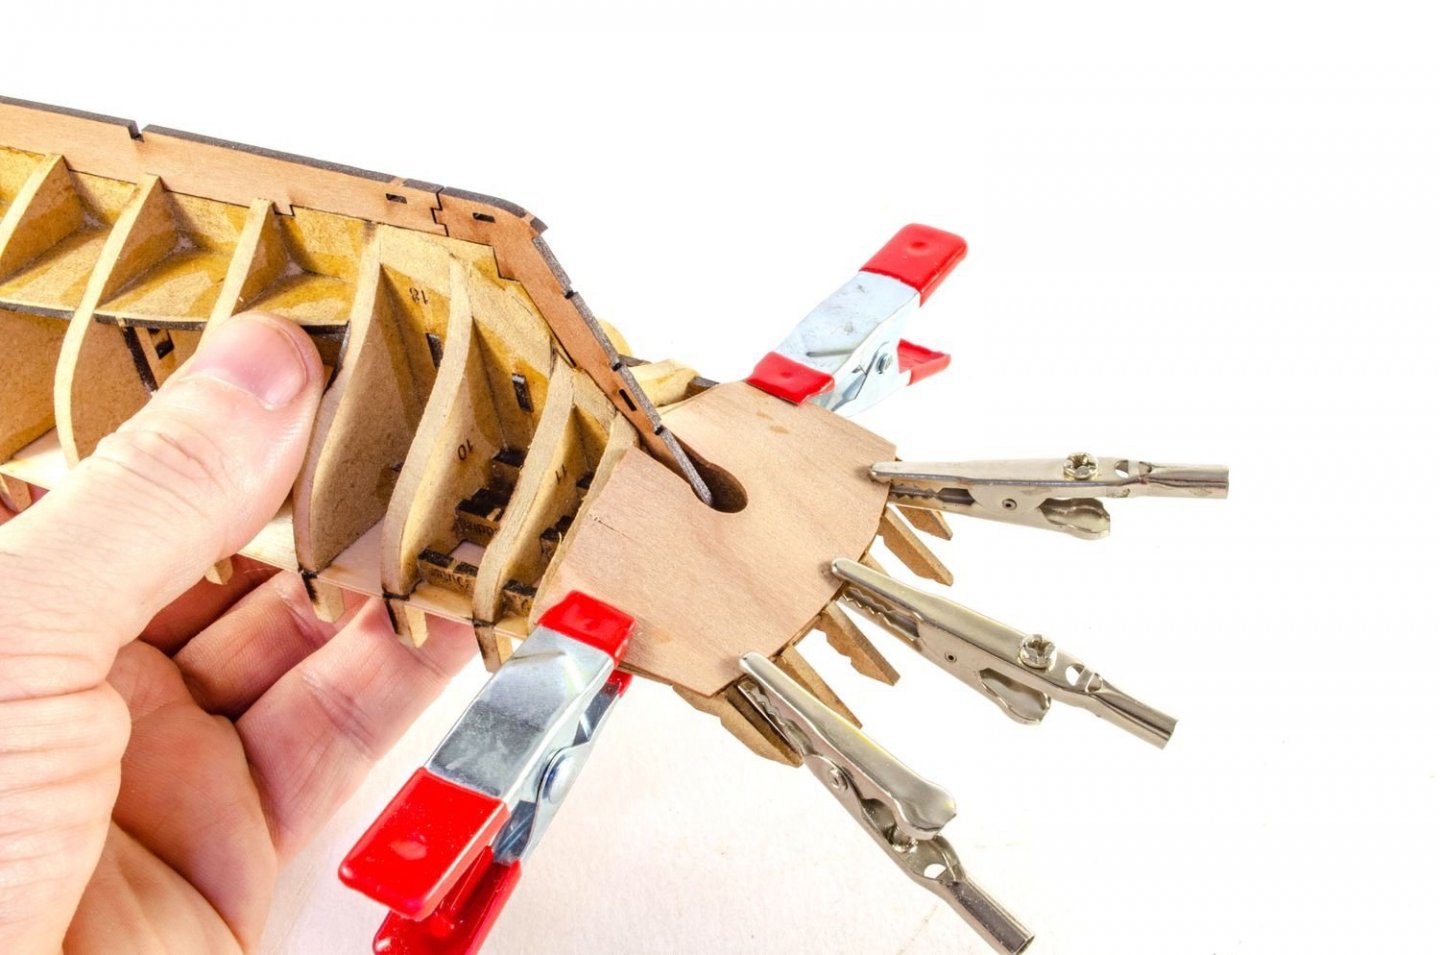
MDF bulkhead ears are now removed and the area sanded flush to deck.

Talking of decks, the engraved deck is now fitted. This was a precise fit that only needed the char edge removing.

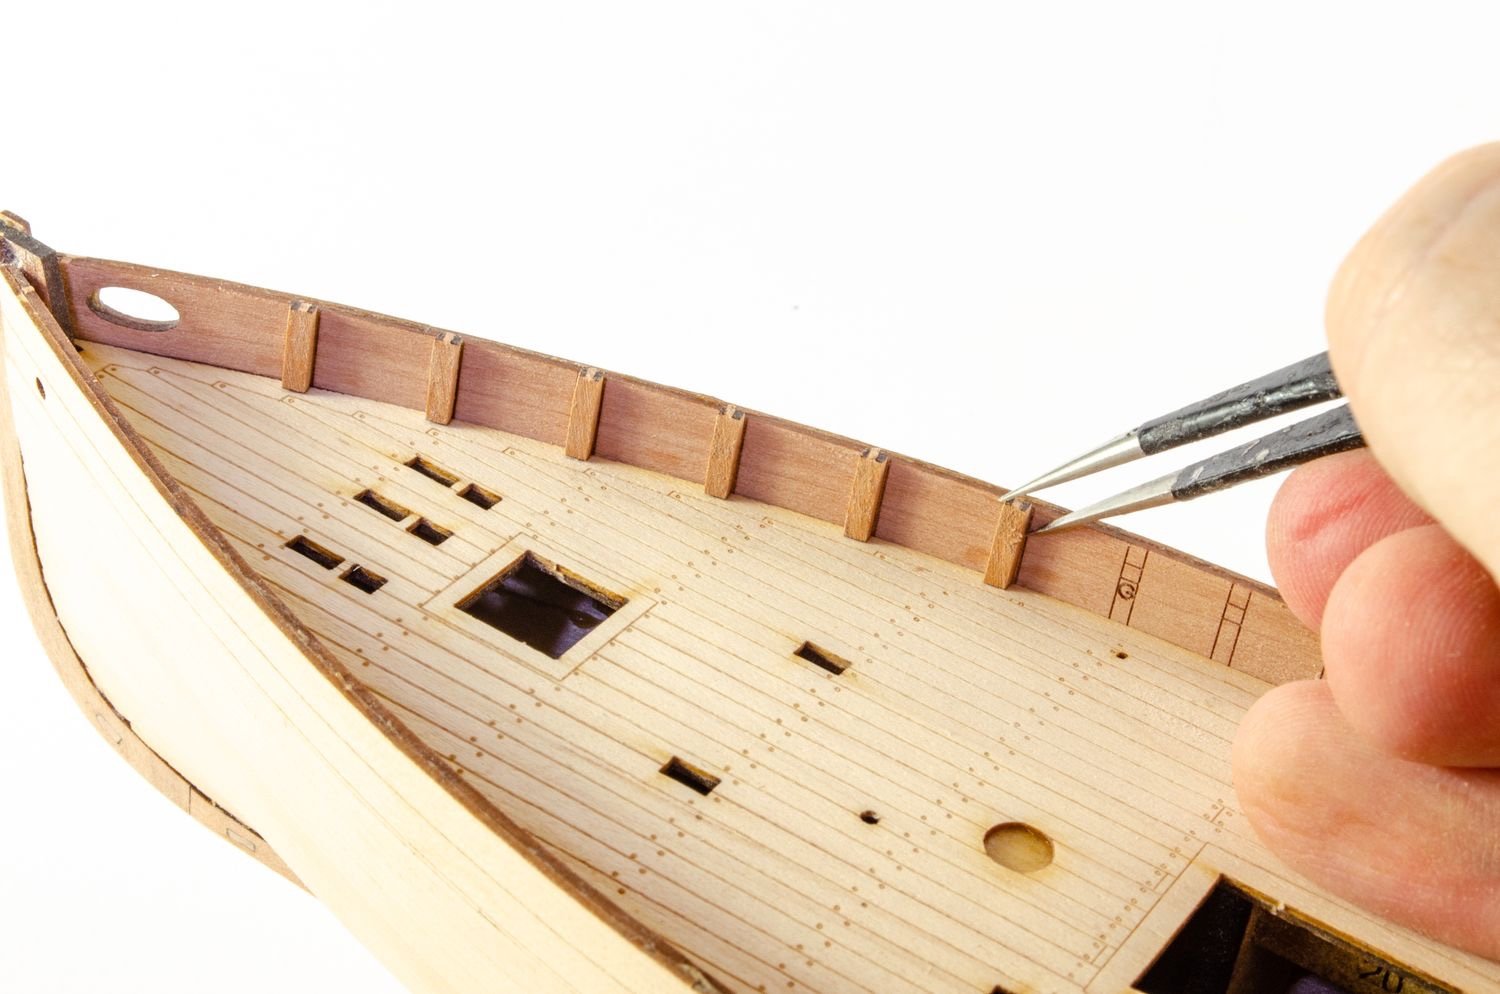
All timberheads are fitted. These are identified from 'A' at the bow, working backwards. Only a little bevelling is needed at the bottom in some areas. Some timberheads that have a rail fitted, are installed as a single piece to aid proper spacing. The spacing rail is then snipped off afterwards.

-
On my Mac. Both themes. Check the colour.


- Ryland Craze, chris watton and mtaylor
-
3
-
16 hours ago, Dr PR said:
...Aside from being an asinine choice and extremely user hostile, this choice of colors makes it much more difficult to control the movement of screen content up and down.
...Is there some way that we can defeat this extremely irritating color scheme and just get the web page to use the Windows default color scheme for the scroll bar?
Could be a theme thing, but no, we don't go out of our way to make things difficult for you.
It could be the way your own browser interprets our theme too. There are no colours or settings that we have ever changed that alter the colour of the scroll bar. Period.
Also remember, Windows is the system you operate. For others, like me, it's MacOS. There are no specifics for changing stuff like this to some Microsoft standard.
Try MSW on a different browser, just to see if it looks different. Either way, we can't change what you experience on your computer with your system/installed software.
I don't also take too well to people calling any choices perhaps made as 'asinine'. Perhaps your rhetoric needs changing instead of a scroll bar colour.
-
Looking real nice. Noted your fix at the front too, so that'll be a help if anyone experiences that.
I worked to the last production prototype that was changed for parts that were amended, and this was my build in that area. Some things are unfathomable 🤣
- Ryland Craze, chris watton, mtaylor and 2 others
-
5
-
1 hour ago, Steve G said:
I am considering the Lady Eleanor, I don't know what you guys think, but it's important for me to be able to make a decent fist if the job as I know that if I start to cock it up it'll go in the bin, and this model looks doable. Your thoughts would be very welcome.
I did the instructions for Lady Eleanor. That is a very simple kit which you would find to be a nice subject to cut your teeth on. Timber is also pearwood, hence the relative pricing. A very sweet kit indeed.
-
1 hour ago, Jasseji said:
yes but Chuck mentioned something about "technique with very little sanding required" in regards to Char removal, i was wondering what he meant by that
")
As well as removing char, you also need to smooth out the rough surface that the laser creates. I can't see anything other than sanding or scraping which will magically reduce any workload on char removal. Even if you could dissolve the char, the rough surface would still remain.
- Gregory, chris watton, mtaylor and 1 other
-
4
-
18 minutes ago, Jasseji said:
Boring Conference Calls can be used for other stuff as well:
Unfortunately Chargate has it's Victims too (repairable tho)
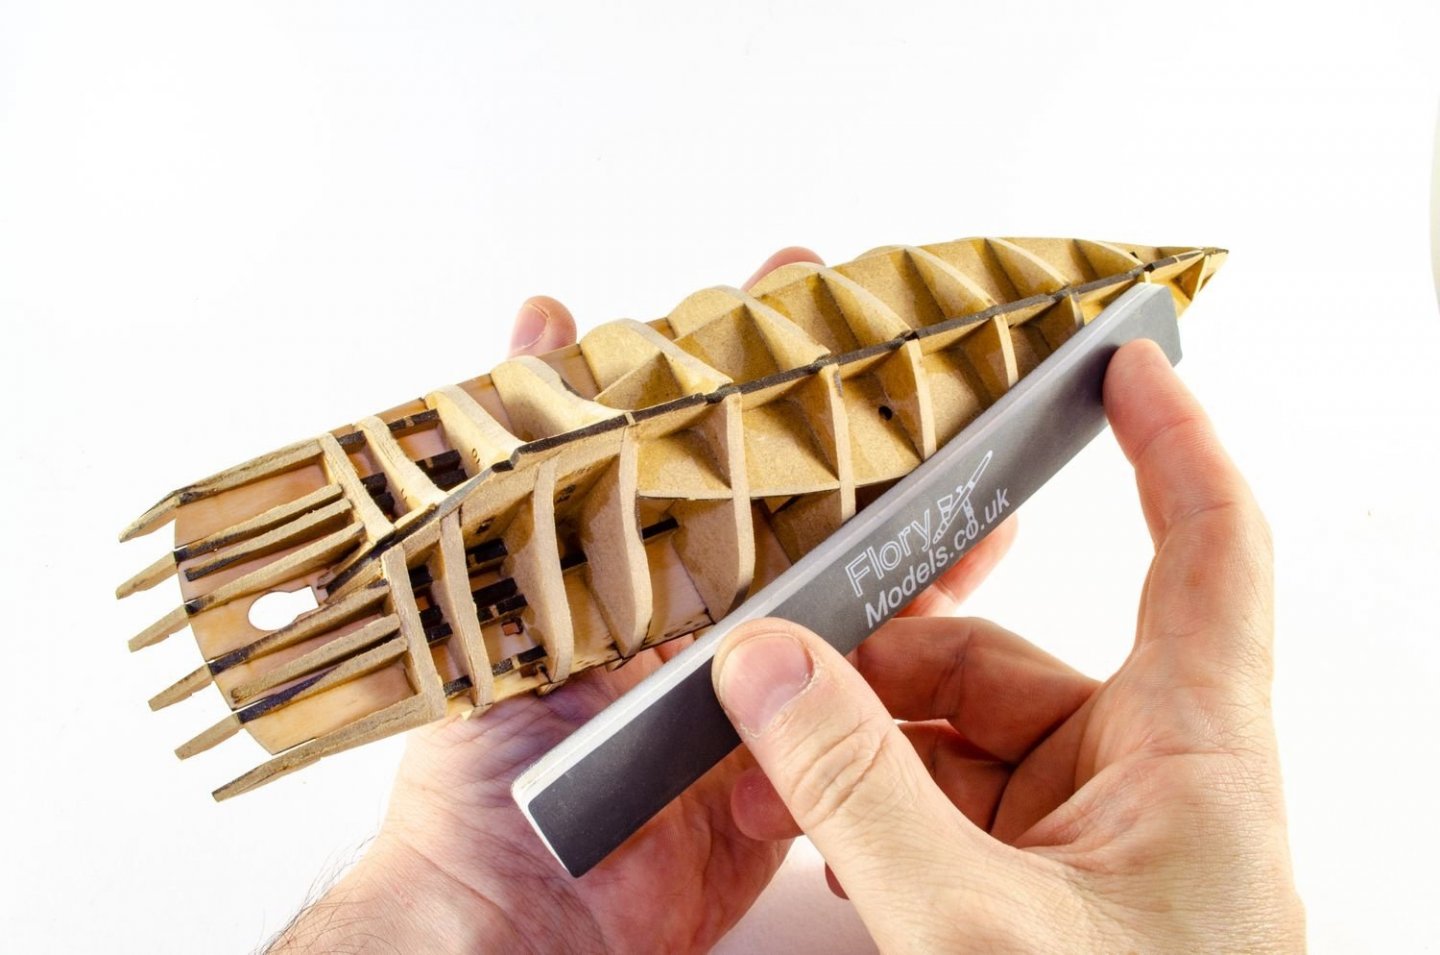
@Chuck in UK Glenn's Thread you mentioned about some technique which requires very little sanding
Just use a 15cm steel rule (or similar), wrapped in 400 grit paper. Take your time.


HMS Sphinx 1775 by Blue Ensign - FINISHED - Vanguard Models - 1:64 scale
in - Kit build logs for subjects built from 1751 - 1800
Posted
That's looking spot on, Maurice.
Don't worry too much about accidentally filling the engraved lines when painting. I did mine with a rattle can and you can still very clearly see the lines.