thibaultron
-
Posts
2,952 -
Joined
-
Last visited
Content Type
Profiles
Forums
Gallery
Events
Everything posted by thibaultron
-
 Just a note on the sign. Never use RTV to mount the board like shown! The agent that sets normal RTV is an acidic compound, hence the vinegar smell, and will, over time, corrode that board. When building water tight boxes for my RC ships, I used aquarium grade RTV, which uses a non corrosive action. Even then I would mount the components with screws, and use the RTV only as a thin seal for the removable cover, and let the RTV set for a week or so, before closing the box.
- 133 replies
-
- 1
-

-
- alert class
- tugboat
- (and 1 more)
-
Frank, I think that the figure "8"s are not rope knots, but twisted rings. See the enlarged section of your photo. What is the address of this picture, I'd like to look at the site.

-
There is/was one on Ebay, this morning, at least.
-
Great job, and congrats on an unusual model!
-
I have two of these models, to be used on my railroad layout which will be a port scene. along with a Shell tanker. All are way small in scale, but should look OK alongside the layout. The layout is based on one I saw in a magazine, but slightly larger. The author toted it as a 2X10 design, to enter it in a contest. After CADing it out, it became apparent that the one he showed in the photos that he actually built was closer to 2.5X12! So I had to enlarge the design. The ships in his pictures look good in the scenes. Trying yo fit even a single HO scale freighter in a reasonable sized layout would be difficult, let alone three or four. They have to be low models, also, so you can reach over them to uncouple the cars, or re-rail them.
- 7 replies
-
- 4
-
-
- northsea fishing trawler
- revell
- (and 1 more)
-
Shop Safety and Oops Repairs
thibaultron replied to BETAQDAVE's topic in Metal Work, Soldering and Metal Fittings
The more I get to know people, the more I like my cat! -
Shop Safety and Oops Repairs
thibaultron replied to BETAQDAVE's topic in Metal Work, Soldering and Metal Fittings
Hope it heals well. You might want to have that looked at, you may need a stitch or two. -
Welcome to the forum, and thank you for the service you provided!
-
My Spray Booth Construction
thibaultron replied to thibaultron's topic in Modeling tools and Workshop Equipment
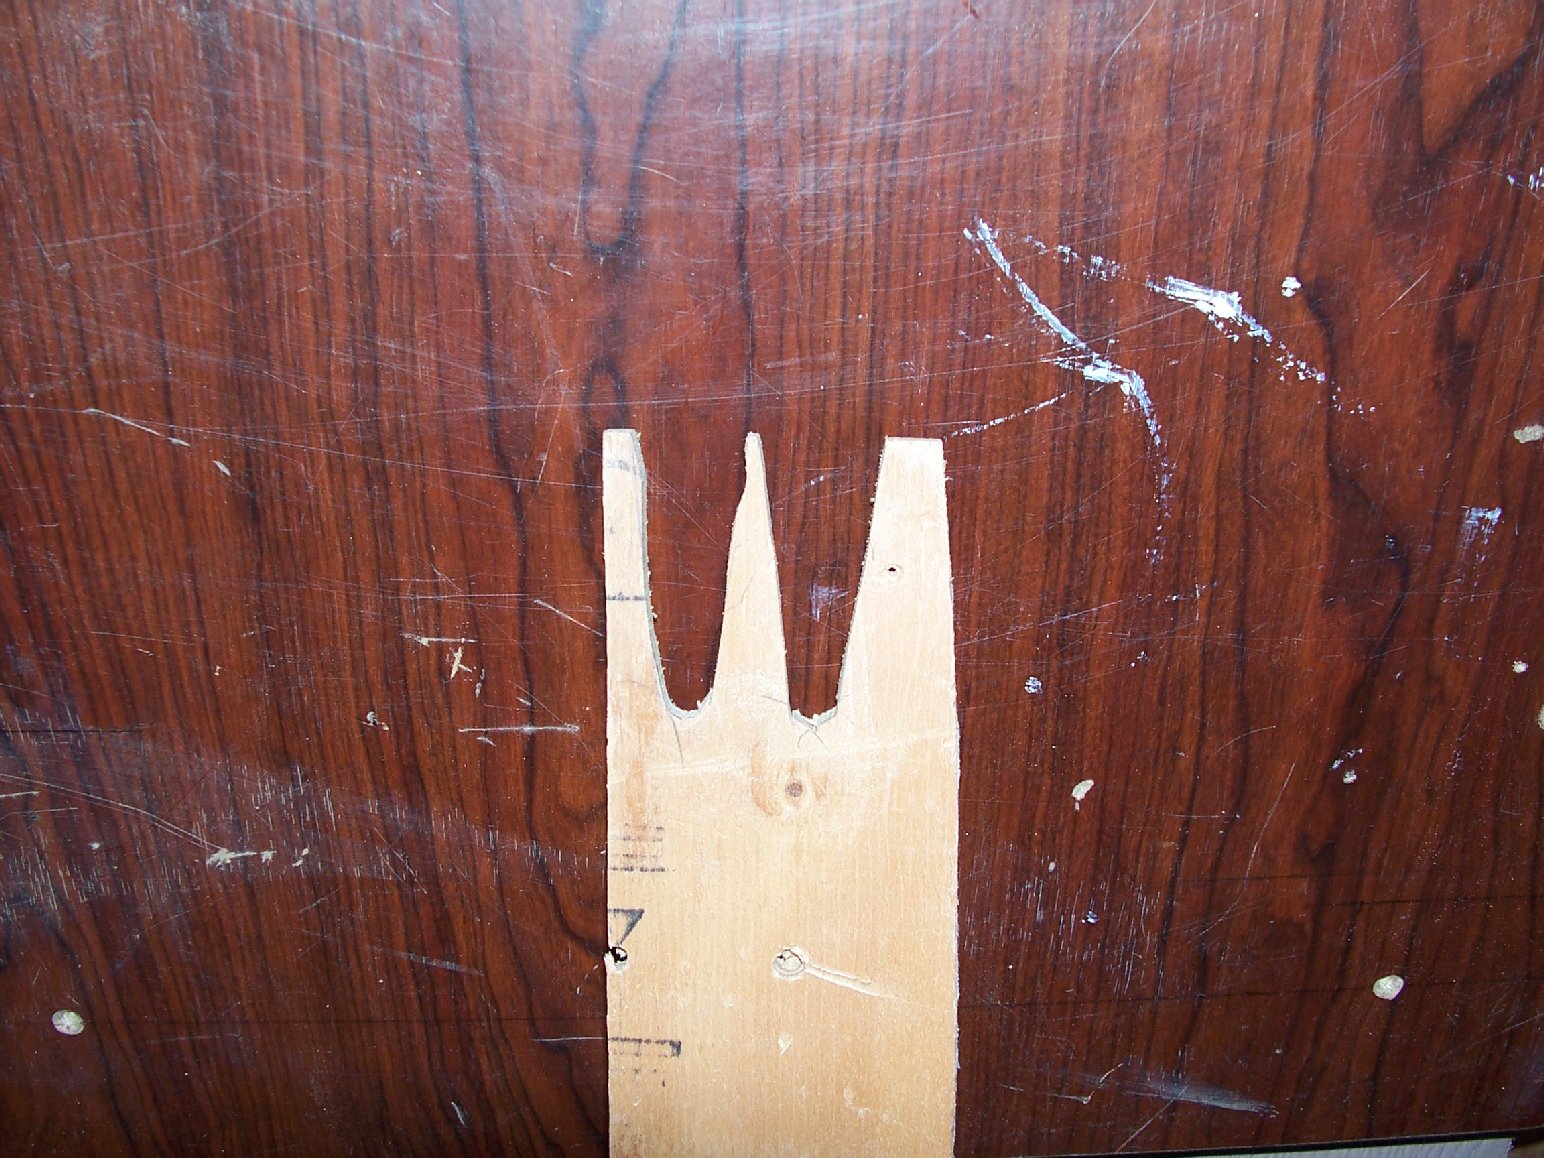
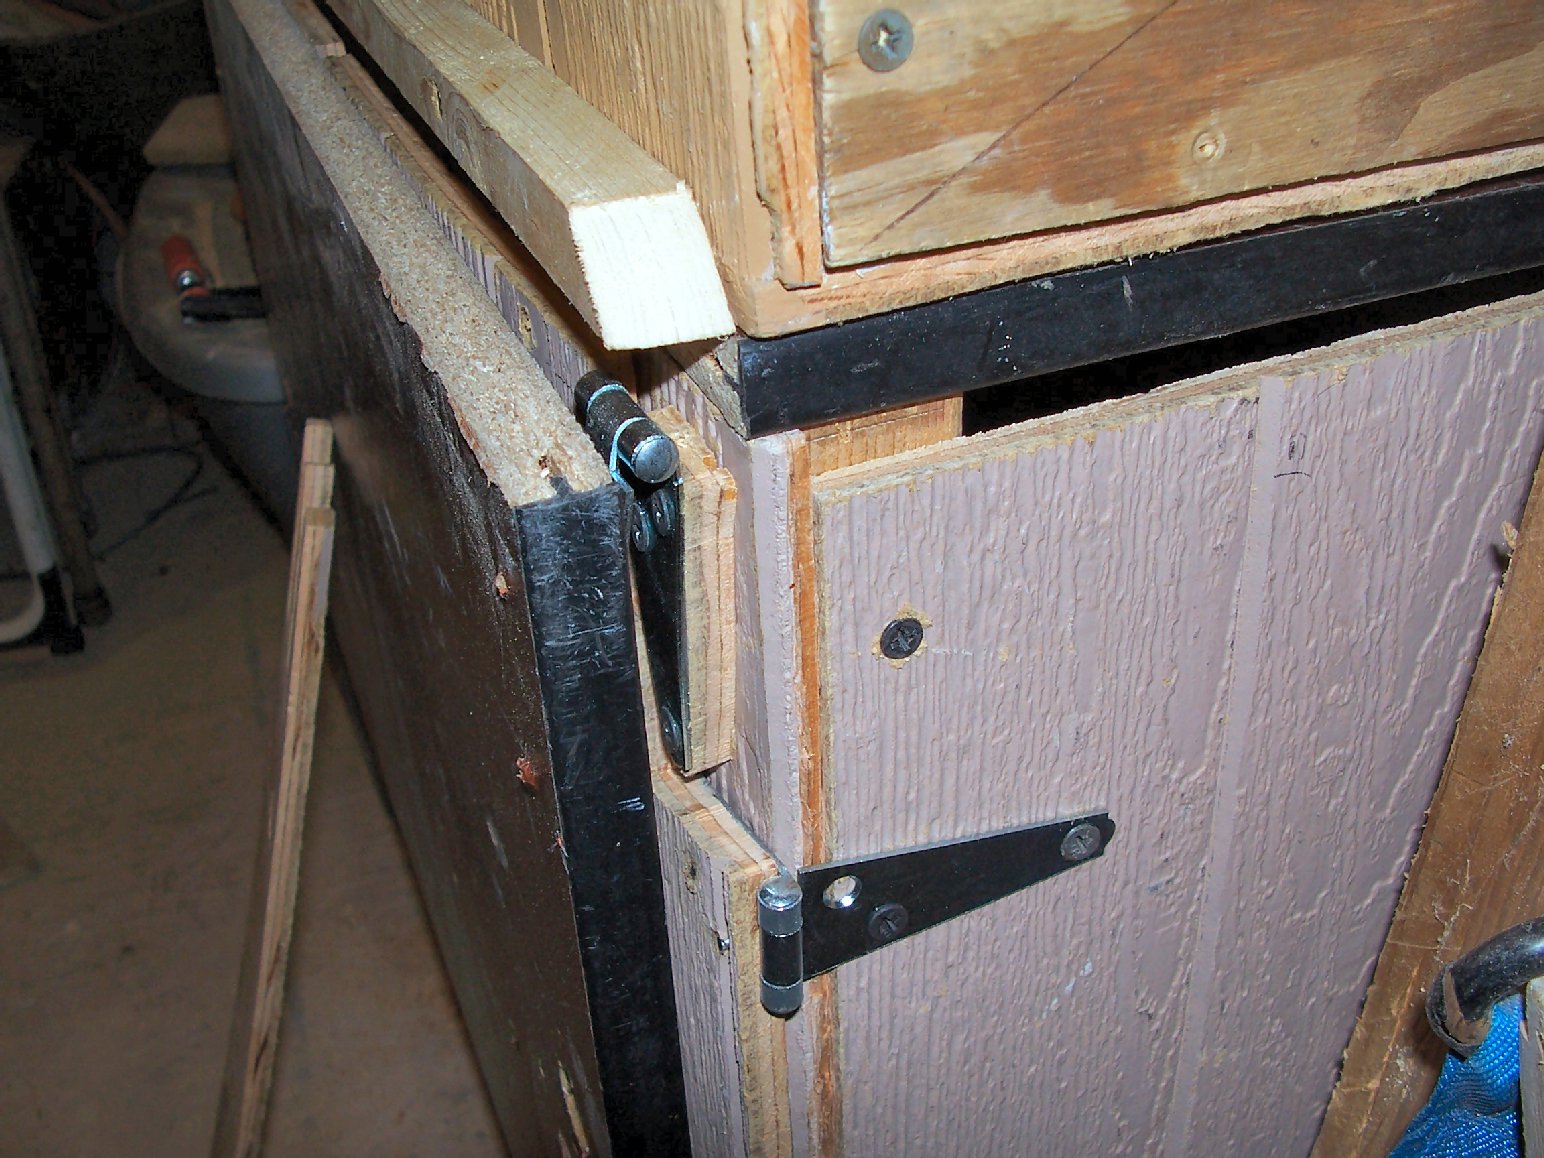
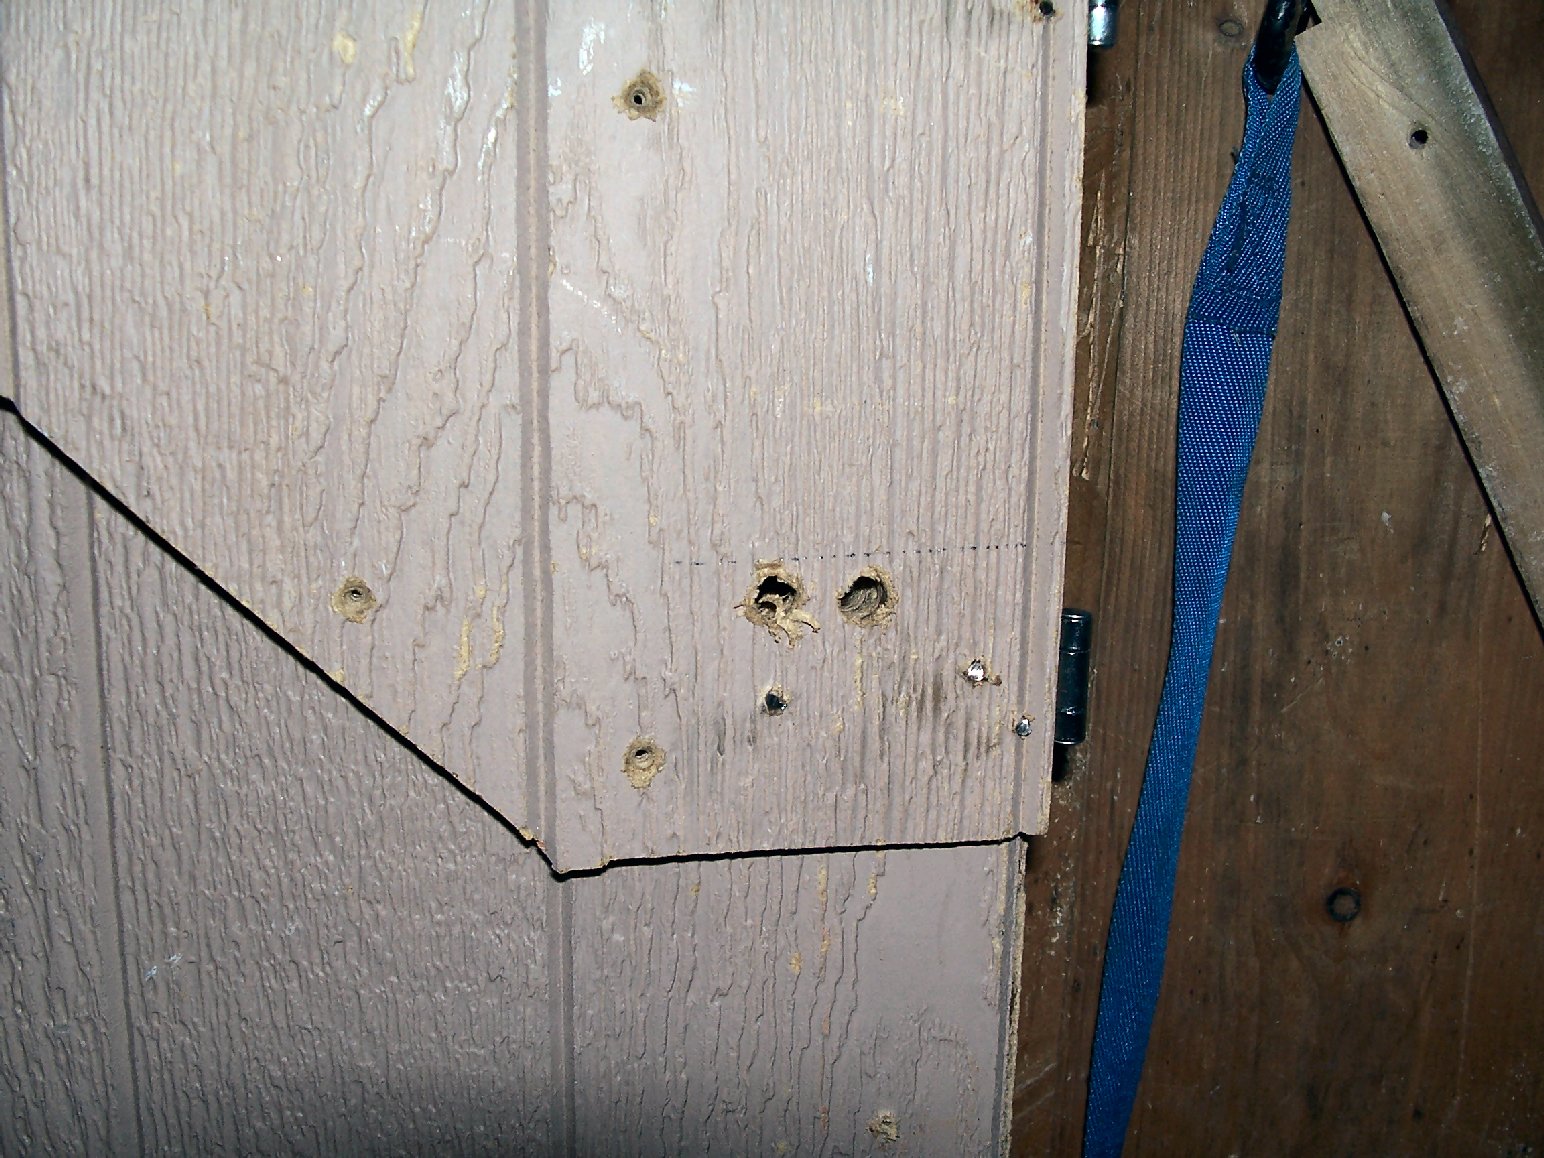
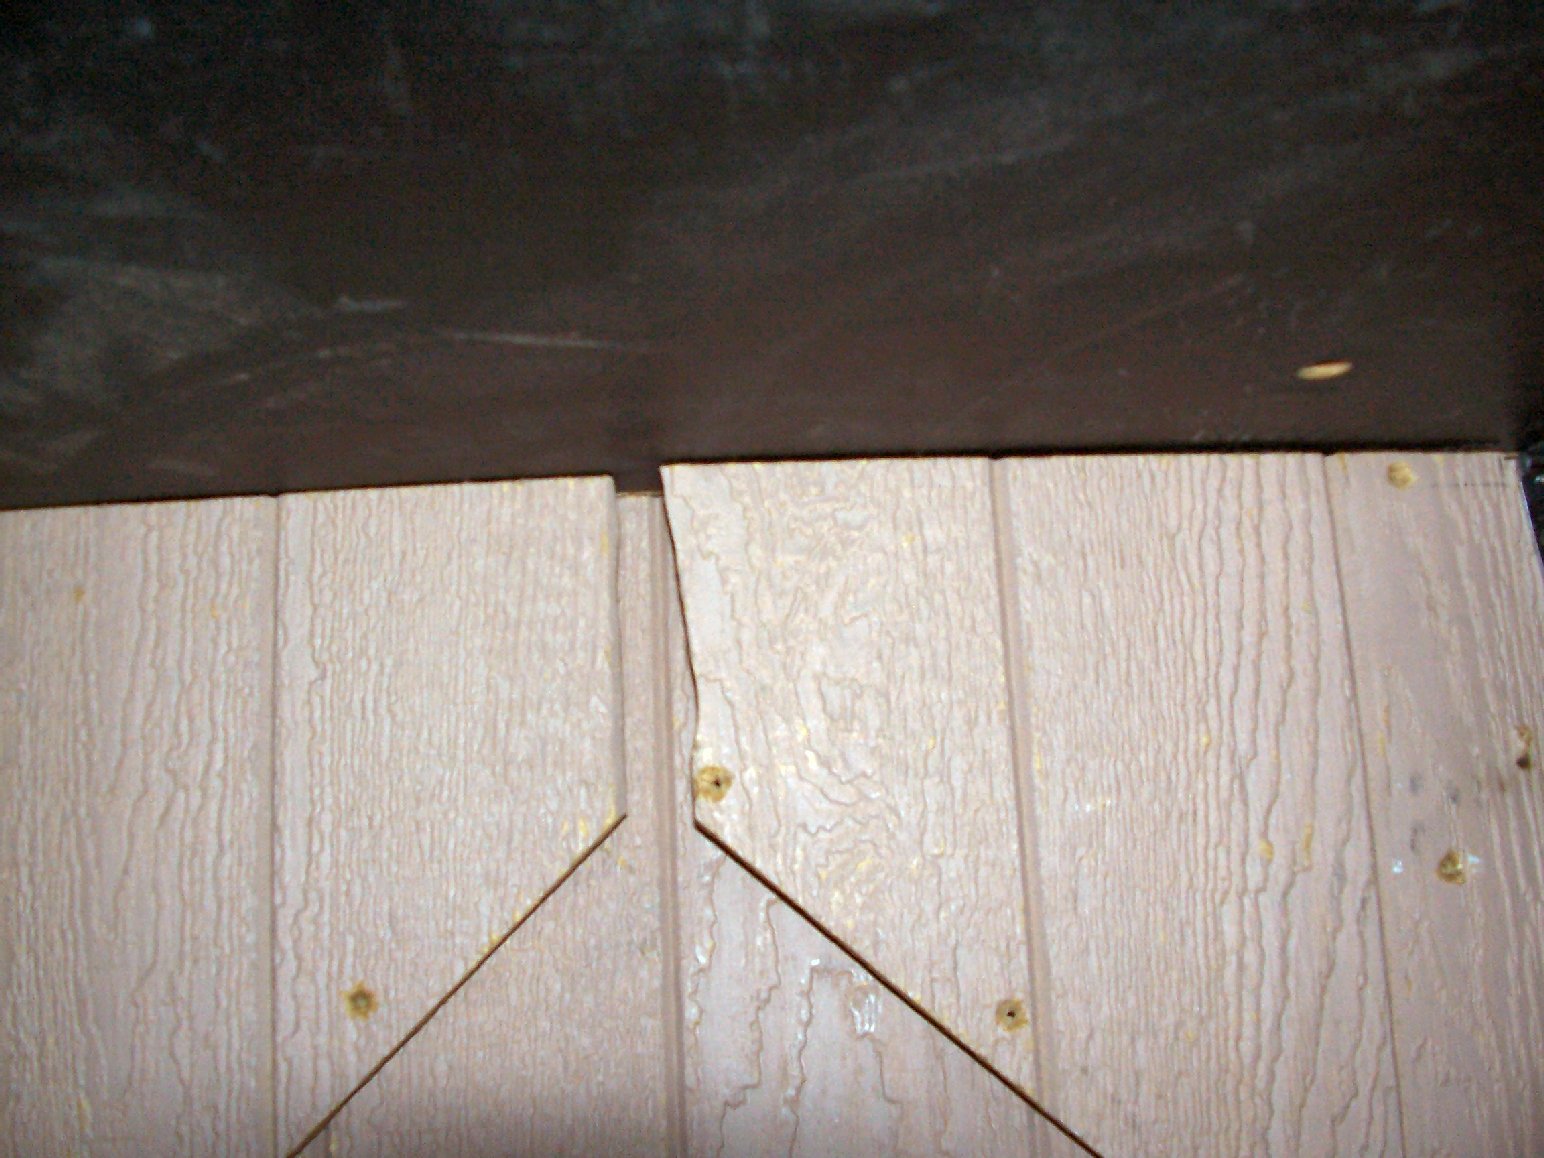
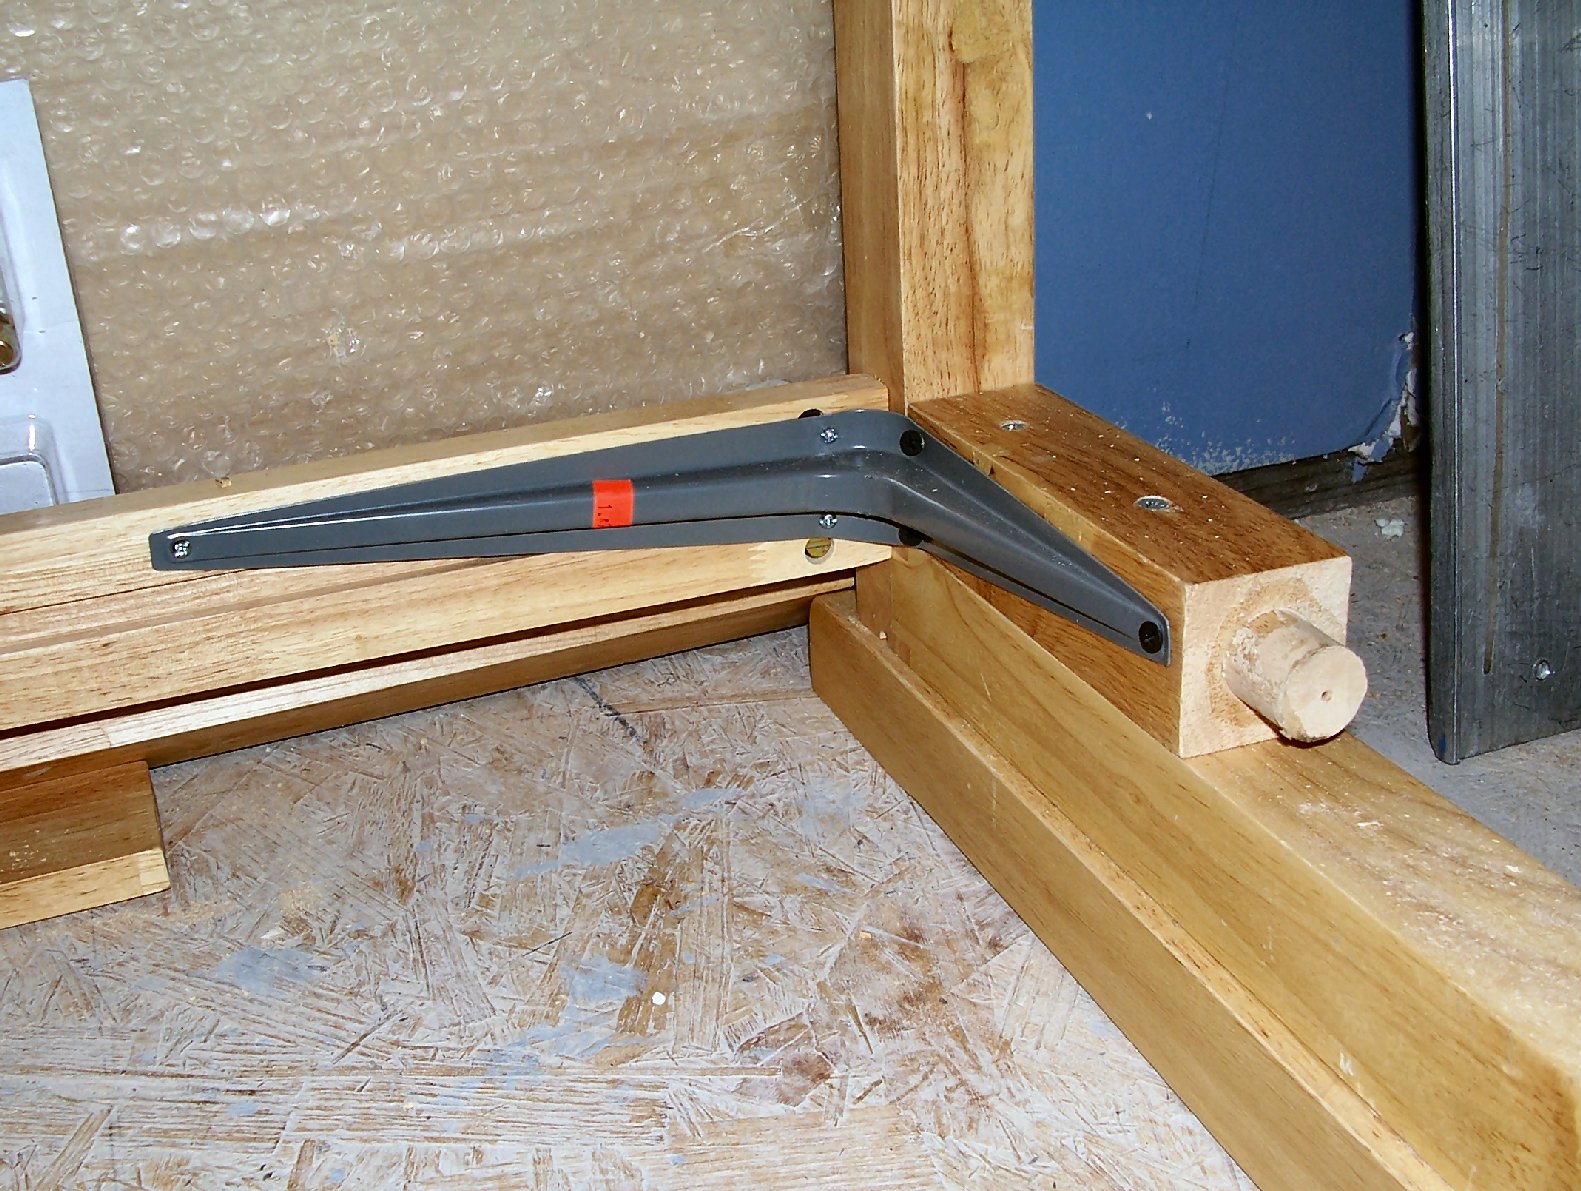
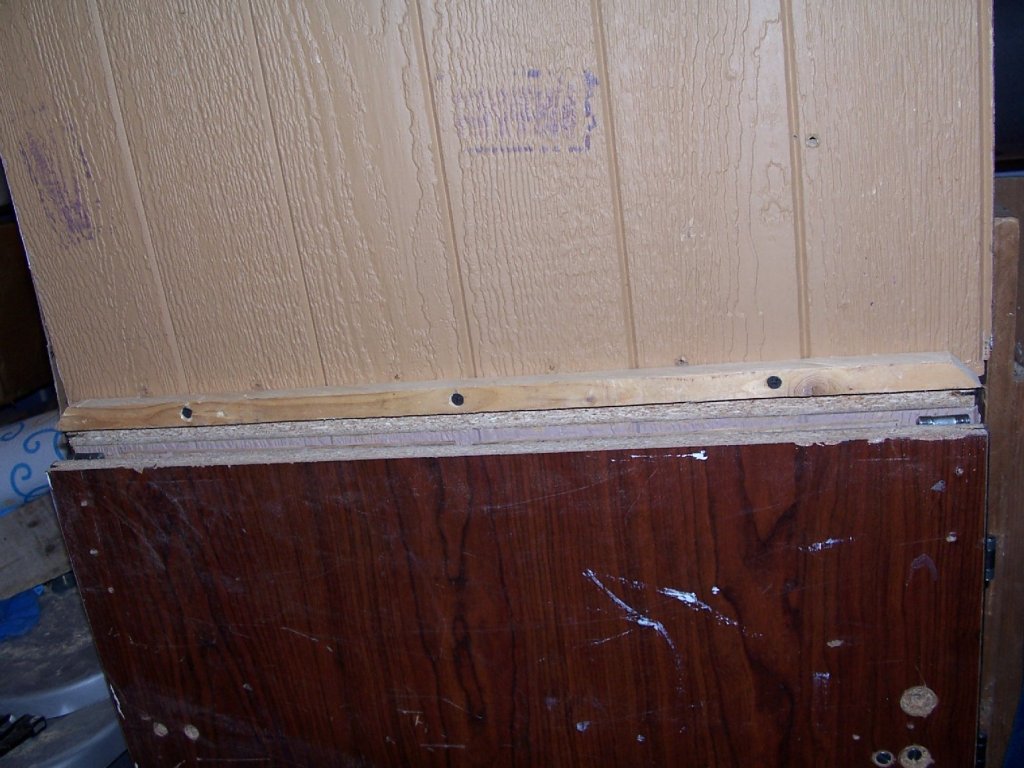
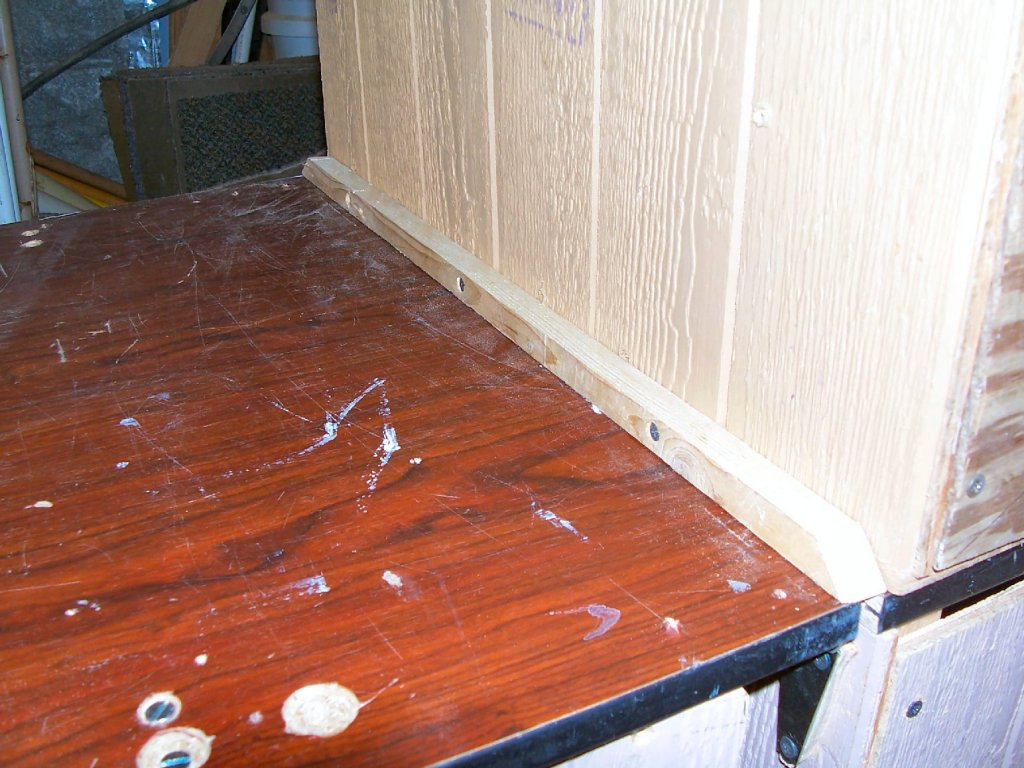
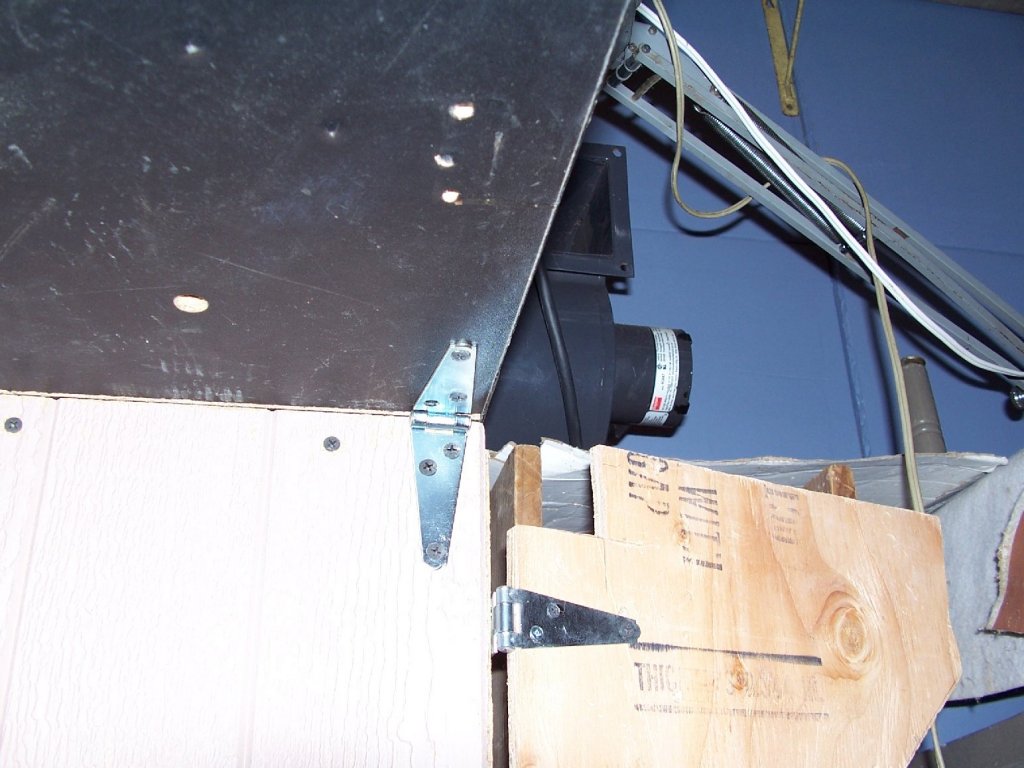
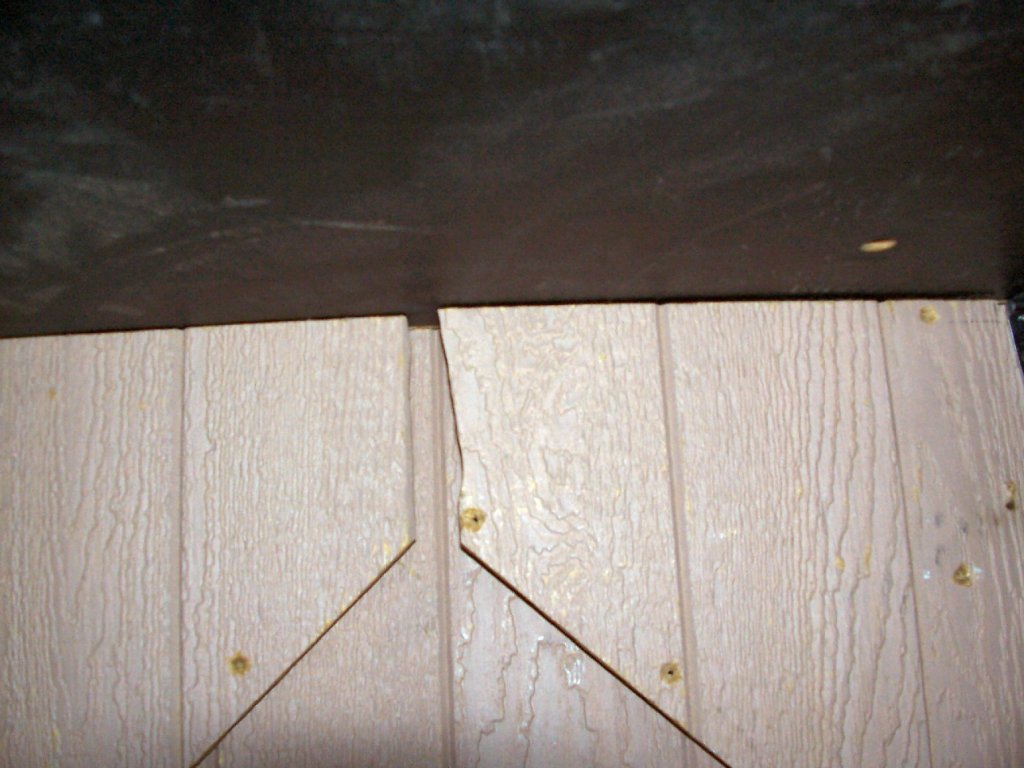
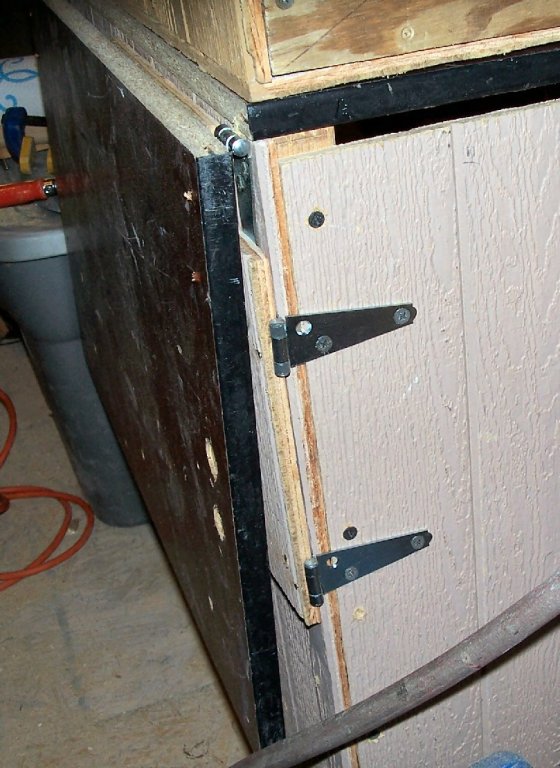
Part 13 I finished installing the drop leaf today. I discovered that one of the supports was warped, and there was no way just adding a washer or two behind the hinge was going to let the leaf swing down fully. This shot shows the warped leaf, on the right, if you look closely. This is after I added the plywood washers (see below). I cut two hinge leg shaped washers from the last scrap piece of the plywood I built the booth out of. This shot is of the piece, after the washers were cut out. I’d already installed them before I thought to bring the camera out. I drilled out three holes in the washer. To match those holes in the hinge leg. I drilled these the same size as those in the hinge, as in a metal washer. Then I removed the hinge screws and installed the ply washers between the hinge and the side of the booth stand. You can see it in the middle upper of this picture. With the thick washer in place I had to trim the corner of the supports a bit more, to clear the bottom of the hinge leg. To capture the supports when the leaf is up, and prevent them from being accidentally knocked back to the folded position, I put in two #10-24 flat head screws into the table. A number 6 or 8 would have been sufficient, but I reused an existing hole, so had to go with the #10s. I counter sunk the table for the screws, and secured them underneath with a nut. The support is swung out and placed with the screws on either side of it, preventing it from being knocked in either direction. The leaf lifts up high enough for the support to clear the screws when positioning the support. The picture below is way out of focus, but you can make out the screws and nuts. I drilled a 3/8” hole in the folded in supports and the side of the stand, to clear the screws when the leaf is folded down. Adding the ply washers, of course, moved the edge of the table away from the booth by 3/8”. To keep little “things” from rolling down that slot, I added a ¾” square batten to the side of the booth, that seals the gap, with the leaf up. Adding it to the table would have been better, but there was not enough “meat” at the edge of the leaf to hold screws. I would have had to go with a wider batten, to attach it to the table. I chamfered the ends of the batten, so that there was not a sharp corner to hit. I still have to replace various hinge screws with #8-32 flat head machine screws, but I don’t have any, at the moment.


-
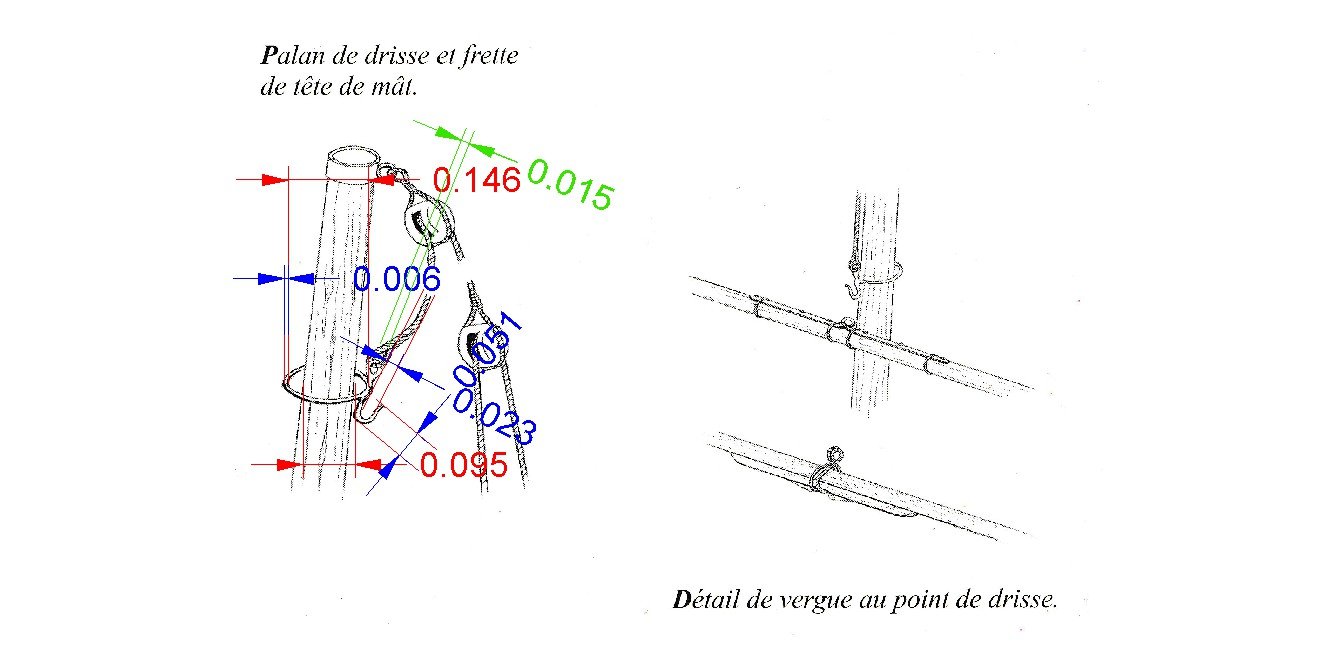
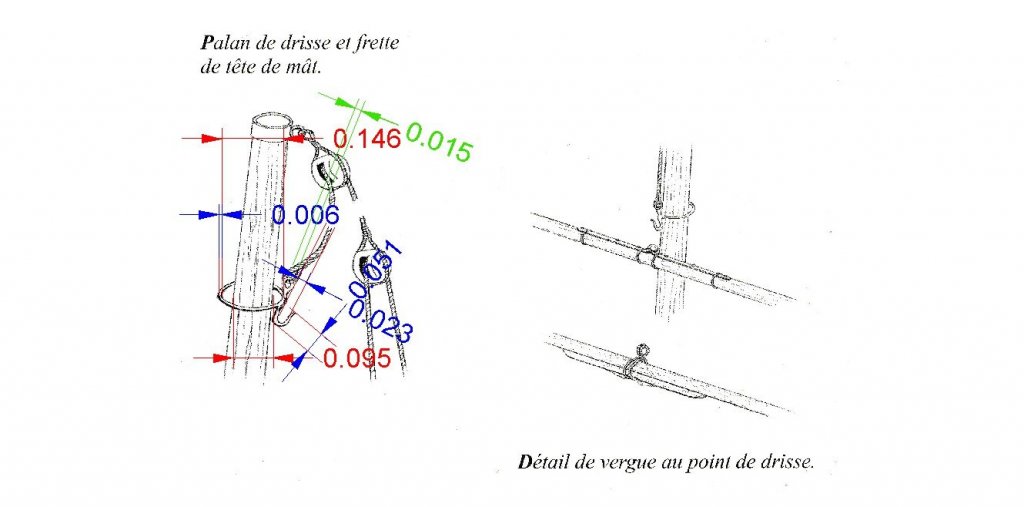
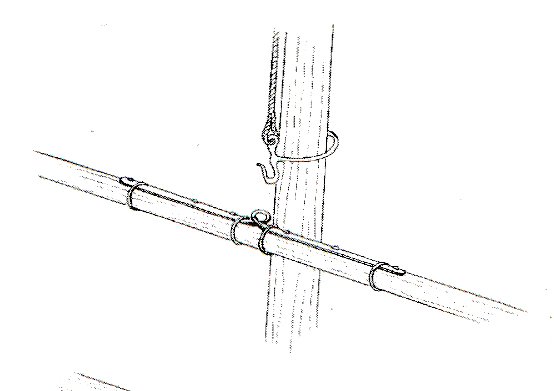
Ordered some .008' copper wire, as well as .010 half hard and dead soft brass wire to make the hoist rings from. Here is a dimensioned drawing from the book. I hope that at least one of the wires will be strong enough to hold up after i make the fitting. It will not have to support the yard, That will be glued to the mast, as per the kit design, but it will have to withstand my fumble fingered installation! I estimated the sizes by measuring the actual diameter of the masts at the ring height, and used that as a basis for the other ones. CAD is great! The final diameters of the ring may be slightly larger than in the drawing, as the base of the masts are 0.115", and the ring should be able to rest on the deck, I would think. The drawing is quite busy, but it has all the dimensions I need.
-
Found this link on home 3D printing. he has 3 videos in the play list.
- 133 replies
-
- 1
-
-
- alert class
- tugboat
- (and 1 more)
-
Try water in the bottle instead of paint. Water is what they use at Badger to test every airbrush, before shipping. If it will not even spray water, there is something very wrong with it.
- 133 replies
-
- 4
-
-
- alert class
- tugboat
- (and 1 more)
-
I understand Badger also has great customer service, give them a call.
- 133 replies
-
- 2
-
-
- alert class
- tugboat
- (and 1 more)
-
My Spray Booth Construction
thibaultron replied to thibaultron's topic in Modeling tools and Workshop Equipment
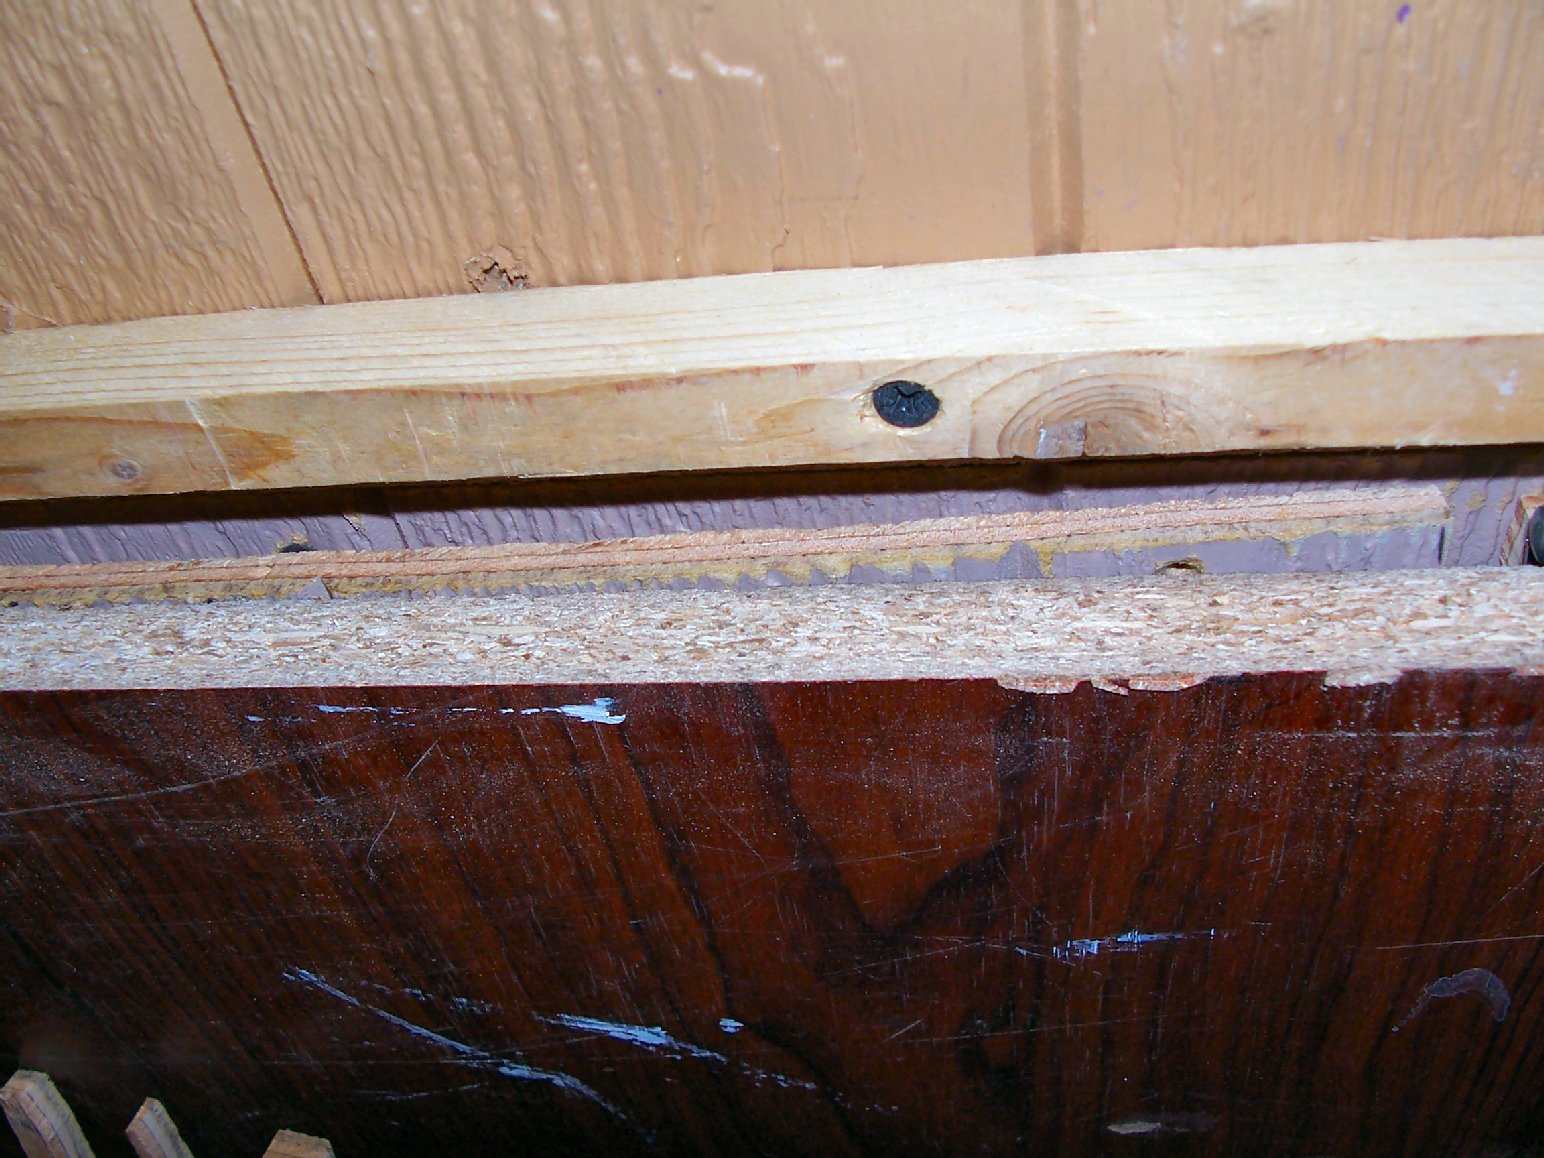
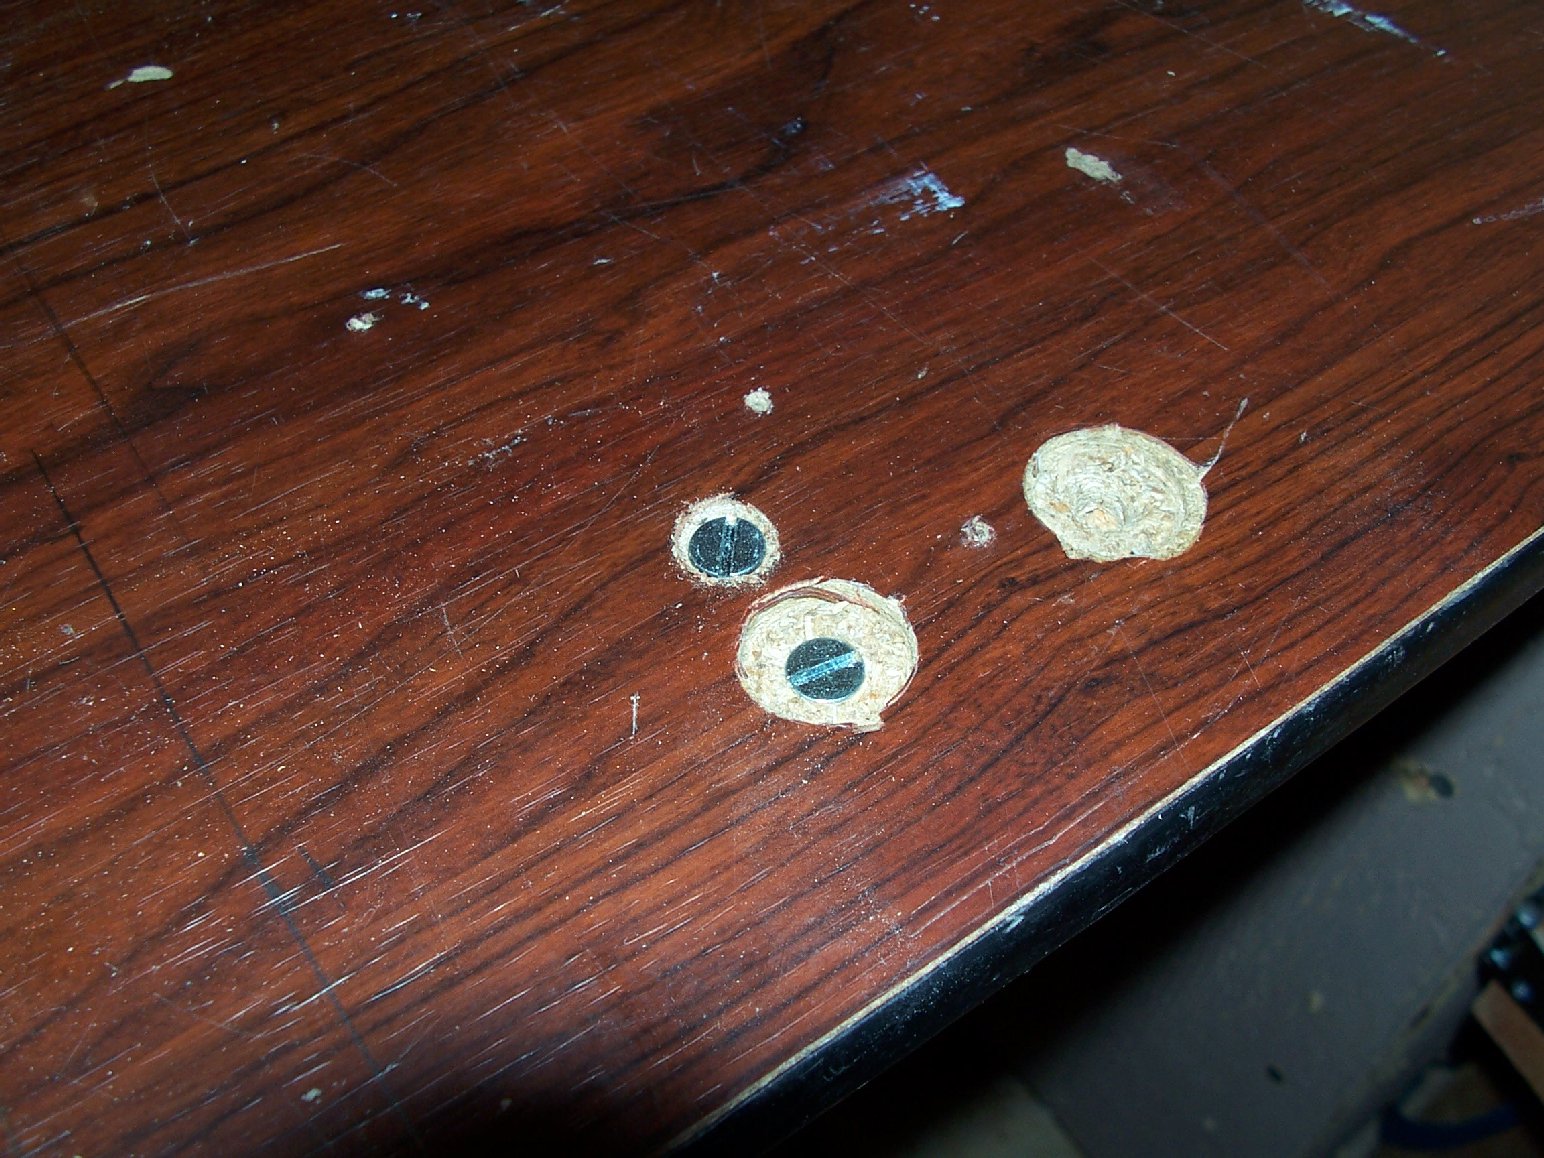
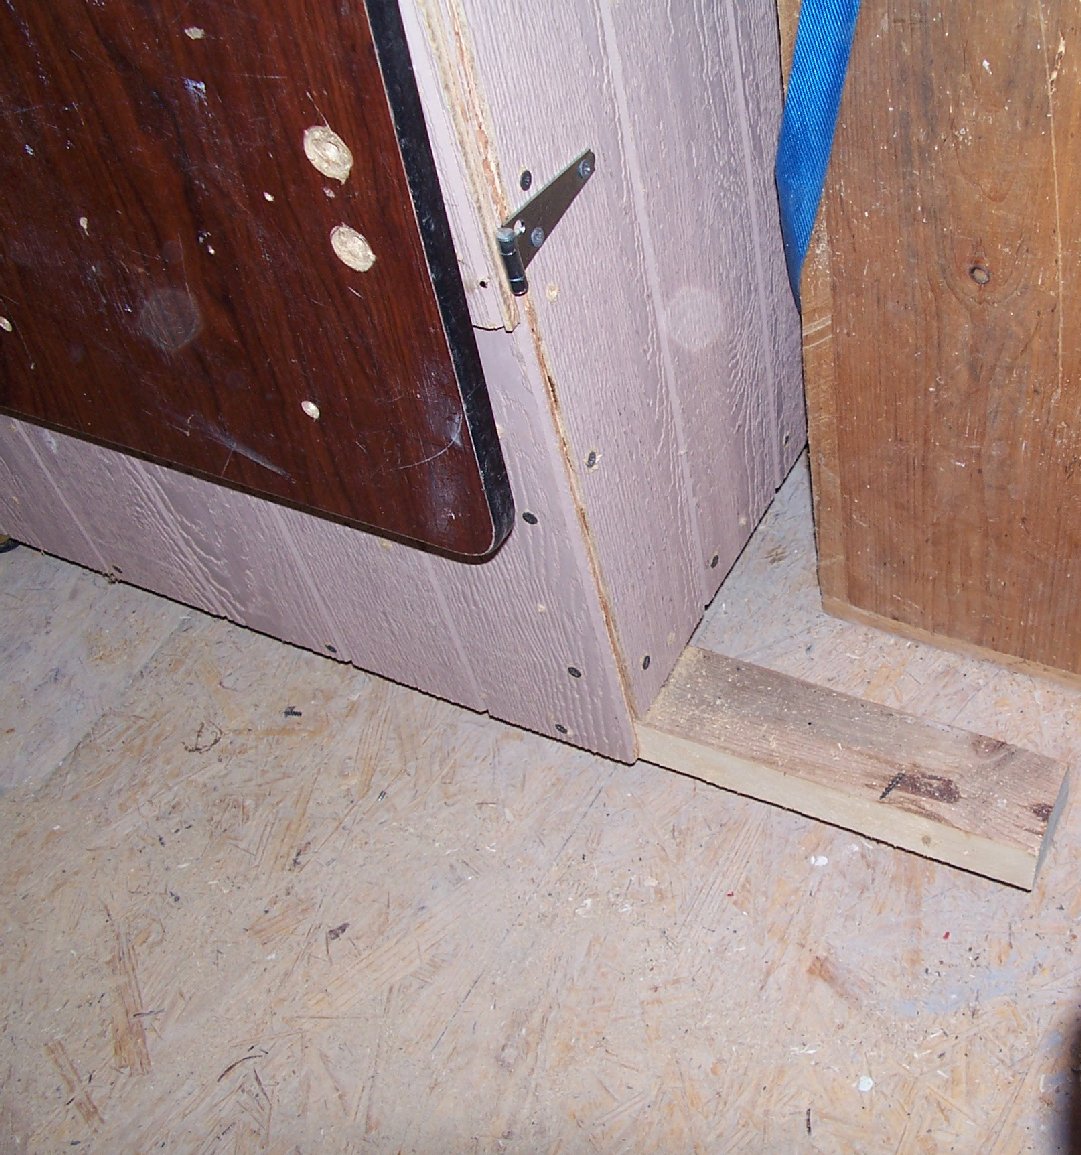
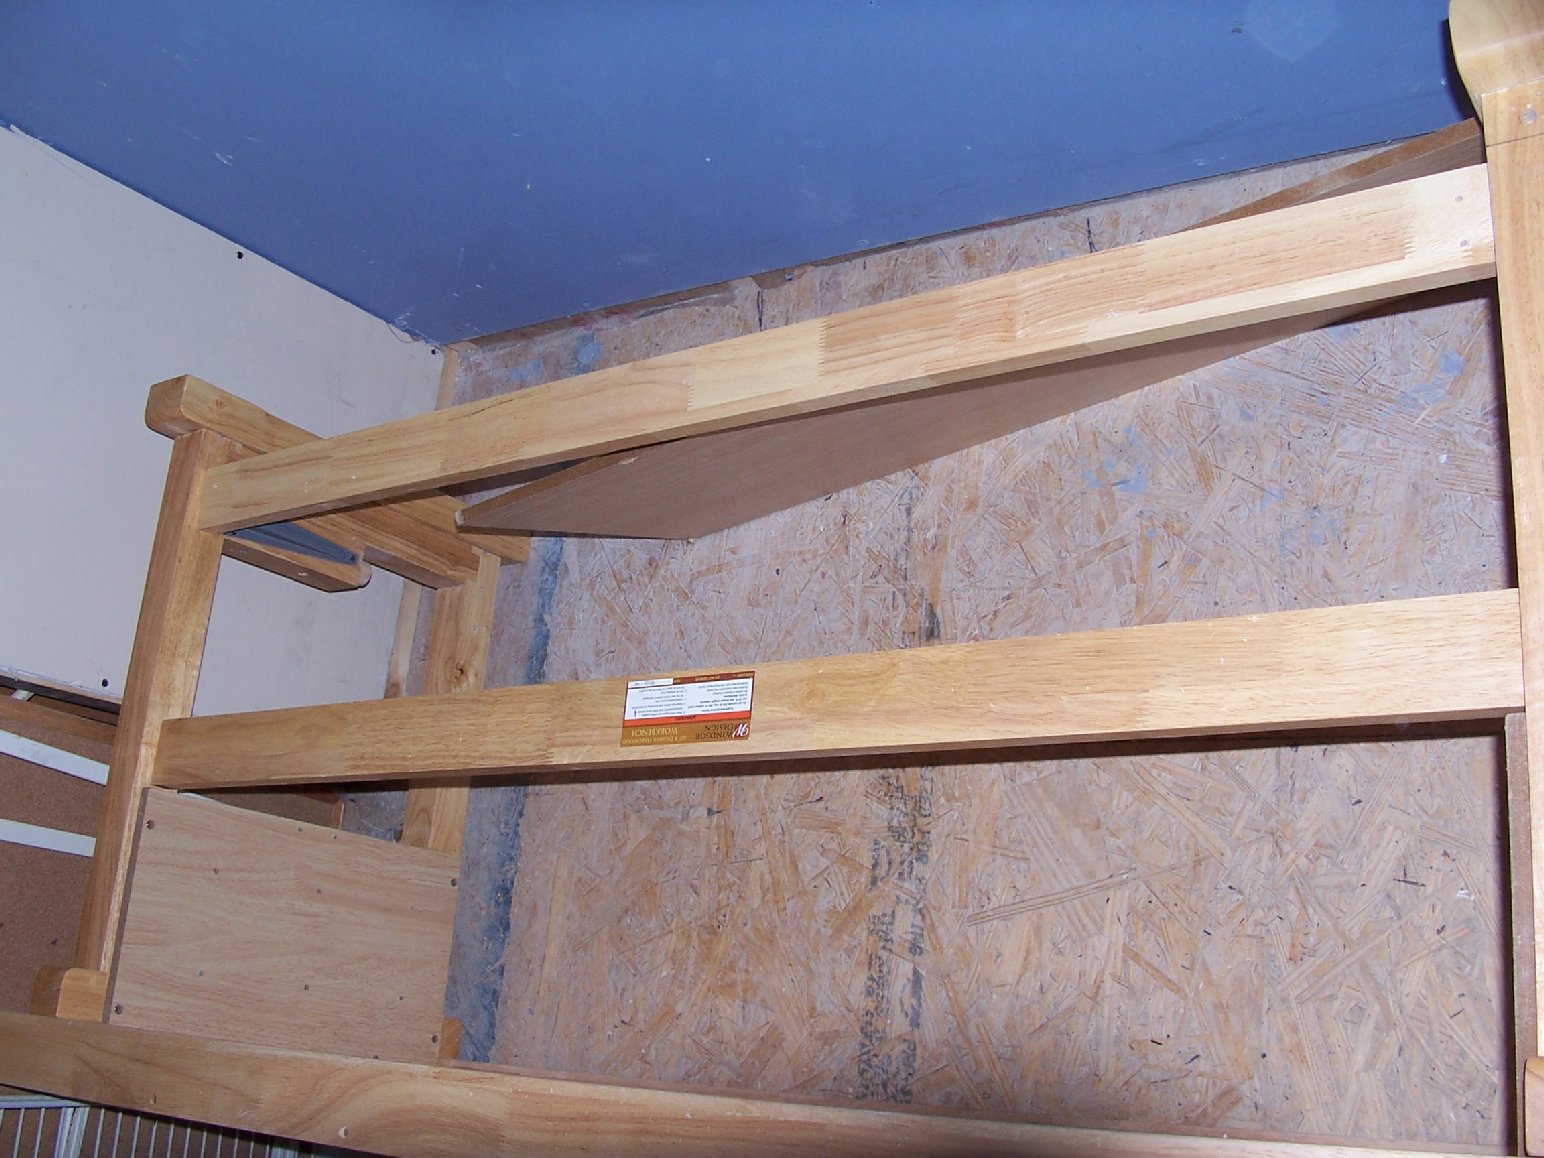
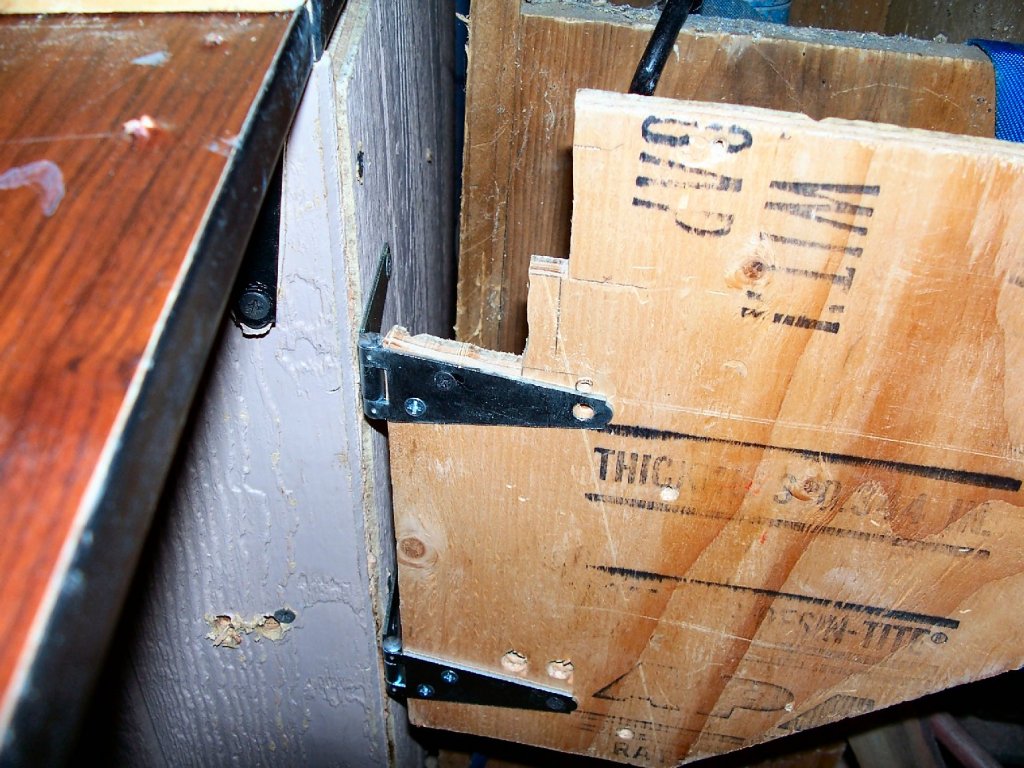
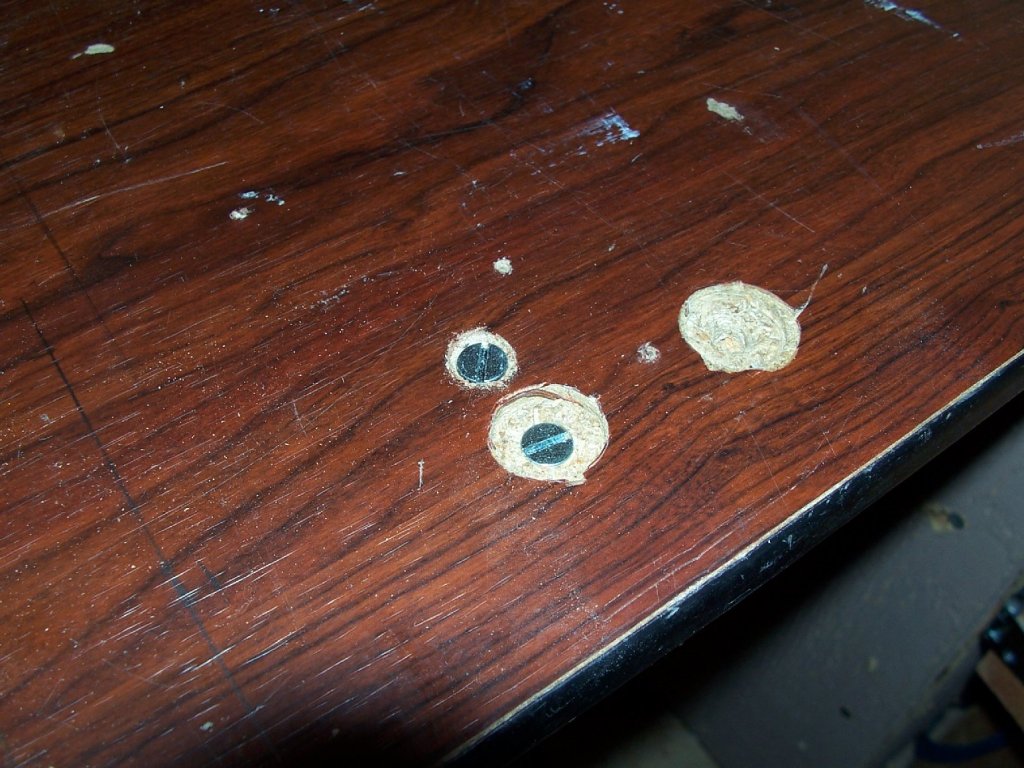
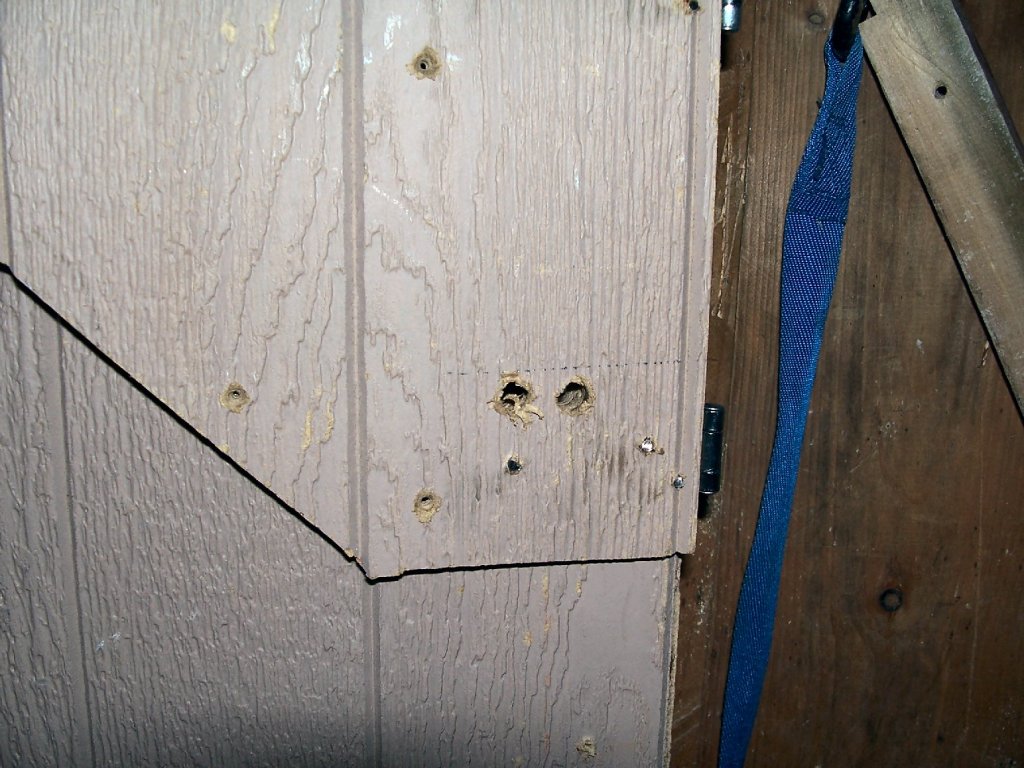
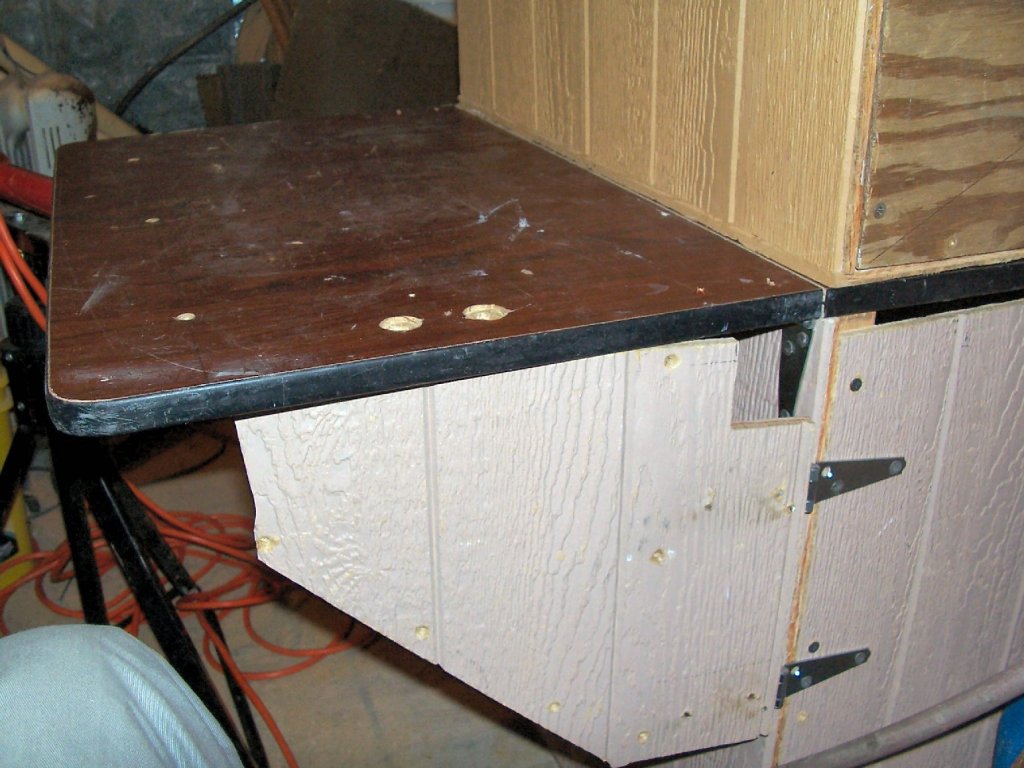
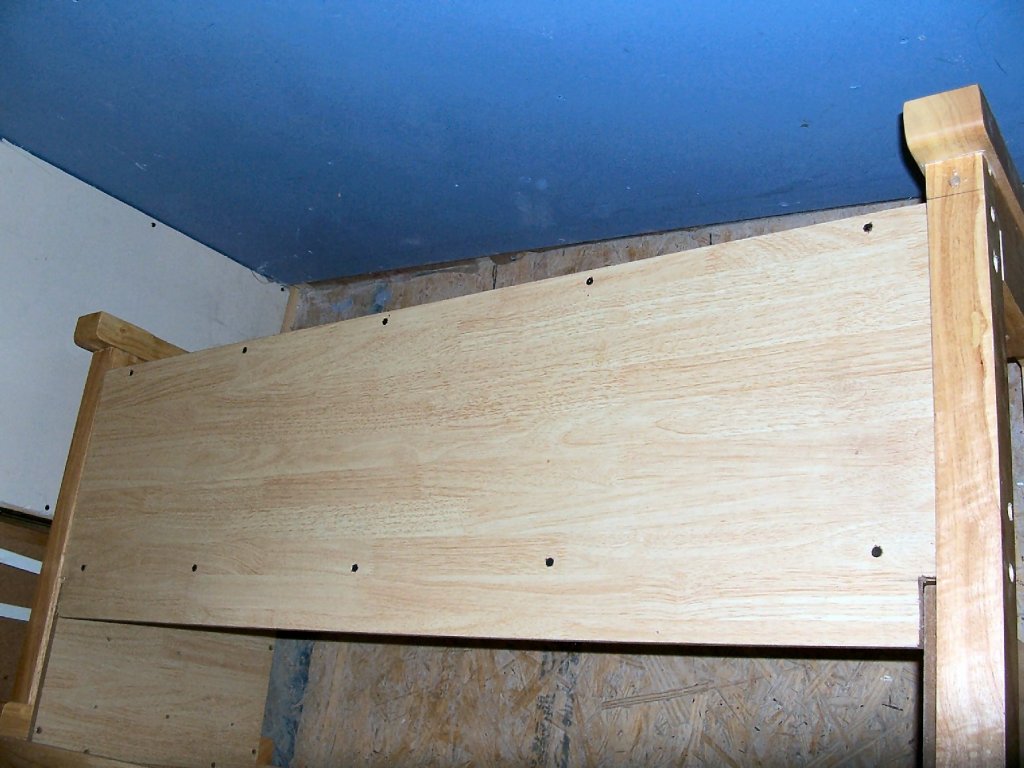
Part 12 I added a drop down leaf to the side of the booth today. I used the end of the original table I cut off when I reduced the stand width to 24 inches. I used two strap hinges, one on each end. For now the hinges are screwed to the table. When I’m done I’ll install some machine screws in their place. The screws I put into the stand itself will stay, they are in the vertical corner stud inside. While I was adding the supports, I blocked the leaf up level, so I could position the parts with both hands. You can see, from the multiple extra holes, that this table has been used for a couple of other tasks in the past. Never throw anything out, until it is too small to use again! Also it drives the Admiral nuts. 🙂 If you look to the right bottom in the picture above, you will see a triangular end at the bottom of the stand. I removed these to make the table supports. At some time in the future I’ll replace them, but the only 3/8” plywood I had is a full 4x8 sheet of the same material, which would be better used on the outside of the shed. The only purpose they served was to keep me from tripping on the exposed stud. The extra stud length is needed to balance the fan that hangs off the back of the booth. Now the booth backs onto another desk, so there is no tripping hazard. I cut a relief on the corner of the triangular piece to clear the table hinge, and used two more straps to hang it. I also cut the end of this panel, as well as the one for the other side, so that the panels will sit flush against the side when the leaf is folded down. Yes the cut is ugly, opps! I placed the support hinges as shown so that the support will lay as close to the side of the stand as possible. The screw at the far end of the hinge will also be replaced with a machine screw, as there is no stud behind it. Right now the support panel is also screwed to the hinge. To strengthen this I’ll replace them with “T” nuts and machine screws. I don’t want the screws to rip out, when, not if, I fall against it! Never tempt Murphy! This is a shot of the table and support hinges on the inside of the assembly. On the other side, the front of the booth, the strap hinges stuck out past the vertical corner stud, so I took a hammer and bent them around and screwed the bent end to the inside of the stud (I didn’t think to get a picture of that). This is shot is the two supports folded in. Notice I did a better job trimming the end of the second support. Here is the whole thing folded down. I will have to add washers under the table hinges, to let the leaf hang freely, there is a bit of interference from the supports right now. And I managed to end up with the leaf sitting square to the booth when up. Next I have to add the blocks and pins to hold the supports in place, when the leaf is up.

-
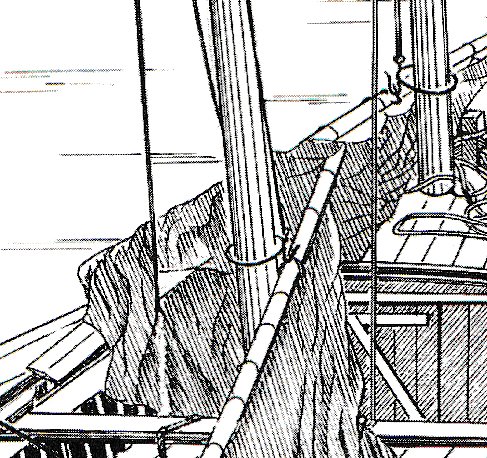
Well after 6 months of scanning, OCRing, spell checking in French, and translating electronically into English, I finally have a semi-readable version of the Sinagot book! I've reached a point in the shop renovations, that I can now do some actual modeling. Next I'm going to try making the hoist assembly for the spars. instead of attaching the hoist to the spar, there is a ring assembly that the spar is hung off of. This replaces jaws and parrel beads standardly used. Hoist Fitting_01.tif
-
The Santa Fe Railroad had a complete series of formulas for all their paints. Unfortunately, none of those formulas for all but the latest years were preserved! After a few years all the colors faded anyway.
-
Do you have a filter or water trap in the system? If so, it might be clogged. Do you get adequate flow through a different brush? Have you used this airbrush before? How big an area are you trying to cover? If you are trying to cover a large area, an external airbrush would be better. Internal mix brushes are made for detail work.
- 133 replies
-
- 3
-
-
- alert class
- tugboat
- (and 1 more)
-
Your welcome! Some day I hope to get one of those smaller compressors. Right now I'm using a 3 gallon Harbor Freight one, and man is it load! I plan to put it in another room of my shop, and run a hose to it, so the noise is reduced.
-
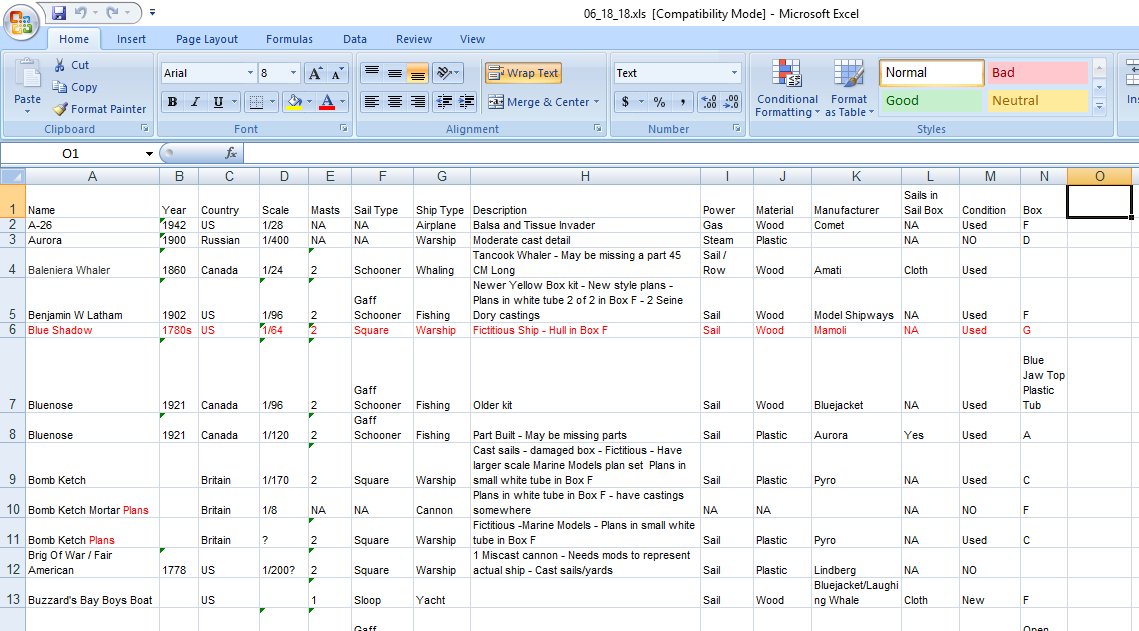
I only showed the beginning of the list, there are 170+ entries! Some of them are plans, or partial kits.
-
Part 05 I did some more work on the workbench today. I decided to use the bottom shelf attached to the back of the legs to stiffen the bench. I was going to buy some plywood for this, but decided that the hardboard shelf would serve the purpose, and save some money. First I used the jig I made when I changed the rear shelf support holes, to drill new holes for attaching the former front shelf support to the upper part of the back legs. The support was fit just under the side panels. Next I trimmed the shelf to clear the side panels, and attached it with the bottom, even with the bottom of the lower support. I could have placed the shelf to fit all the way to the floor, but thought that some part will fall behind the workbench, then I would have to move it to get the part. This way I can still get behind the bench, if this happens. I only had 1 5/8” screws, while the two parts are only 1 ¼” thick, so I will have to go back with a cutoff wheel, to trim them on the footwell side. I will also have to get a handful of 2” 6-32 machine screws to re-attach the shelf brackets, I put in last time. 1 ½” screws were not quite long enough to fit thru the brackets, support, and back board.


-
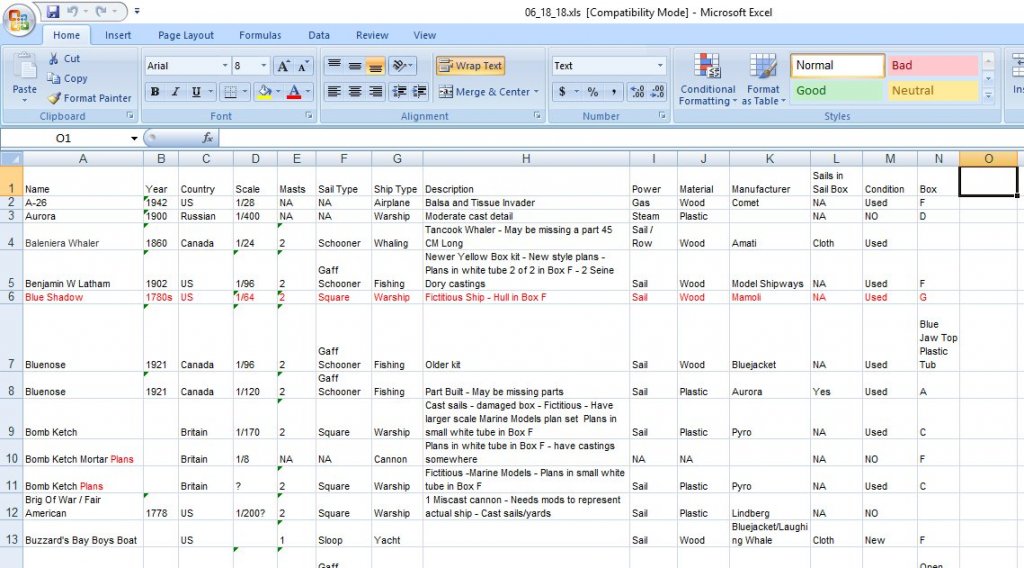
For my ship, wood, and metal kits, I created an Excel spreadsheet. Now I have to do the same for my plastic kits. The "Box" column is no longer valid. I originally had them in packing boxes, and plastic tubs.
-
Another good link on airbrushes is The wargamers site also has several good videos on airbrushes.
-
Great looking model! Well done!
-
Filler Blocks
thibaultron replied to olopa67's topic in Building, Framing, Planking and plating a ships hull and deck
The extruded foam does, however, have an issue with temperature changes! As the temperature changes, the foam expands and contracts, and when it re-expands after contracting, it does not return to its original size. It can end up, over time, as much as 2% smaller overall. Yes, this is documented in the manf. data sheets. This was pointed out in a Model Railroad forum, as many build their layouts out of this material. I measured some old sheets that I was given, and they are indeed 1/4" shorter than the original 96". These sheets came out of a Southern USA garage, and probably spent 20 years sitting in there, with the large temperature swings that would be expected. This would probably not be a big factor in our models, but I did want to make you aware of it.