thibaultron
-
Posts
2,952 -
Joined
-
Last visited
Content Type
Profiles
Forums
Gallery
Events
Everything posted by thibaultron
-
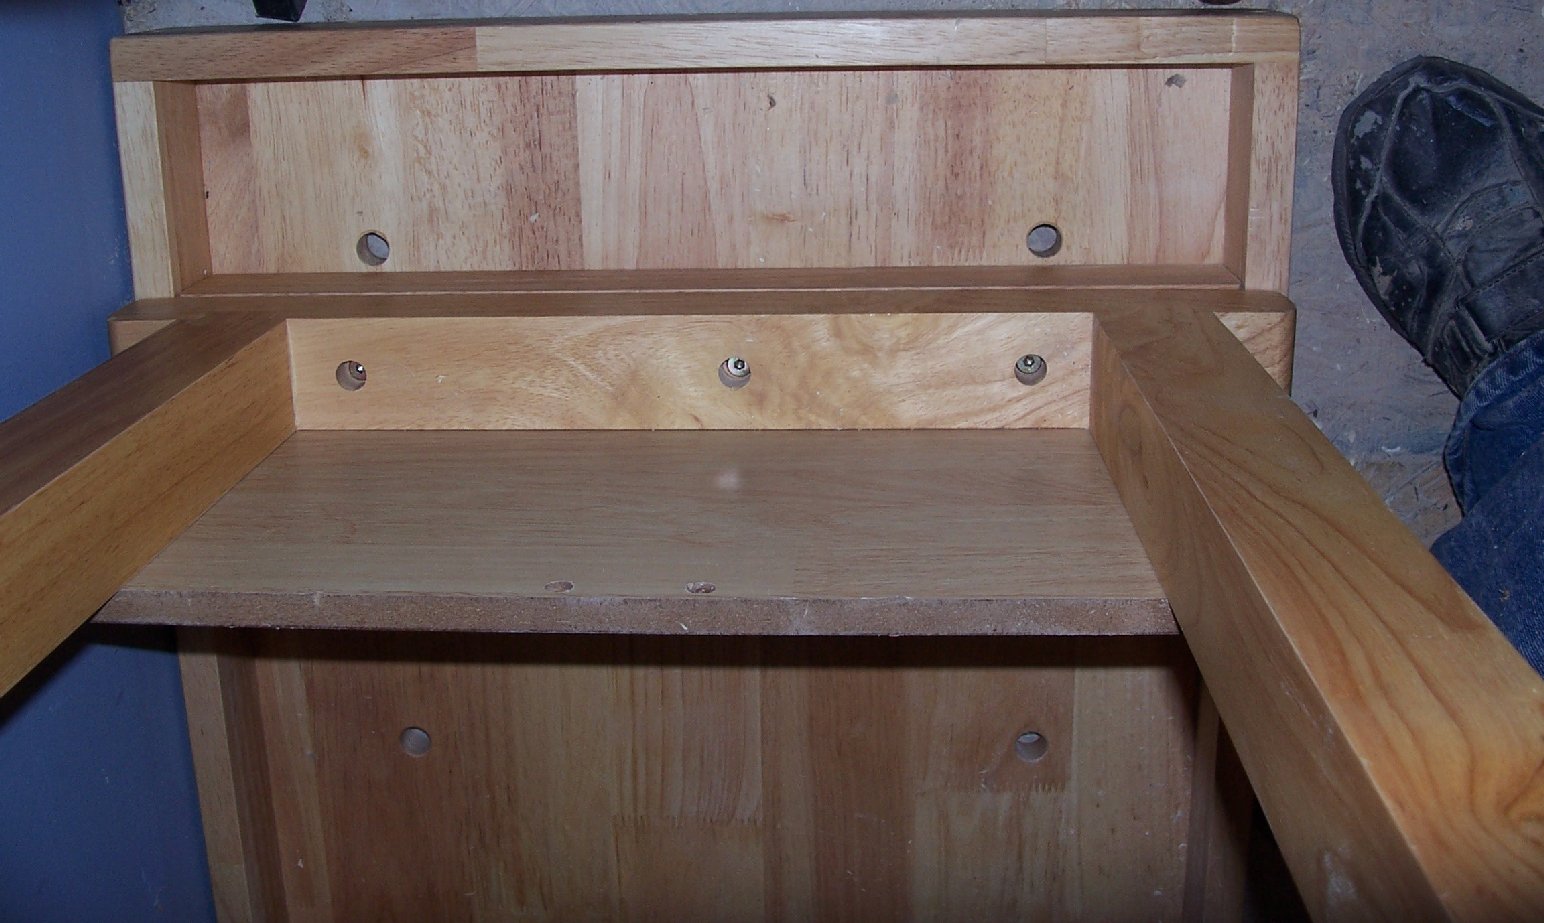
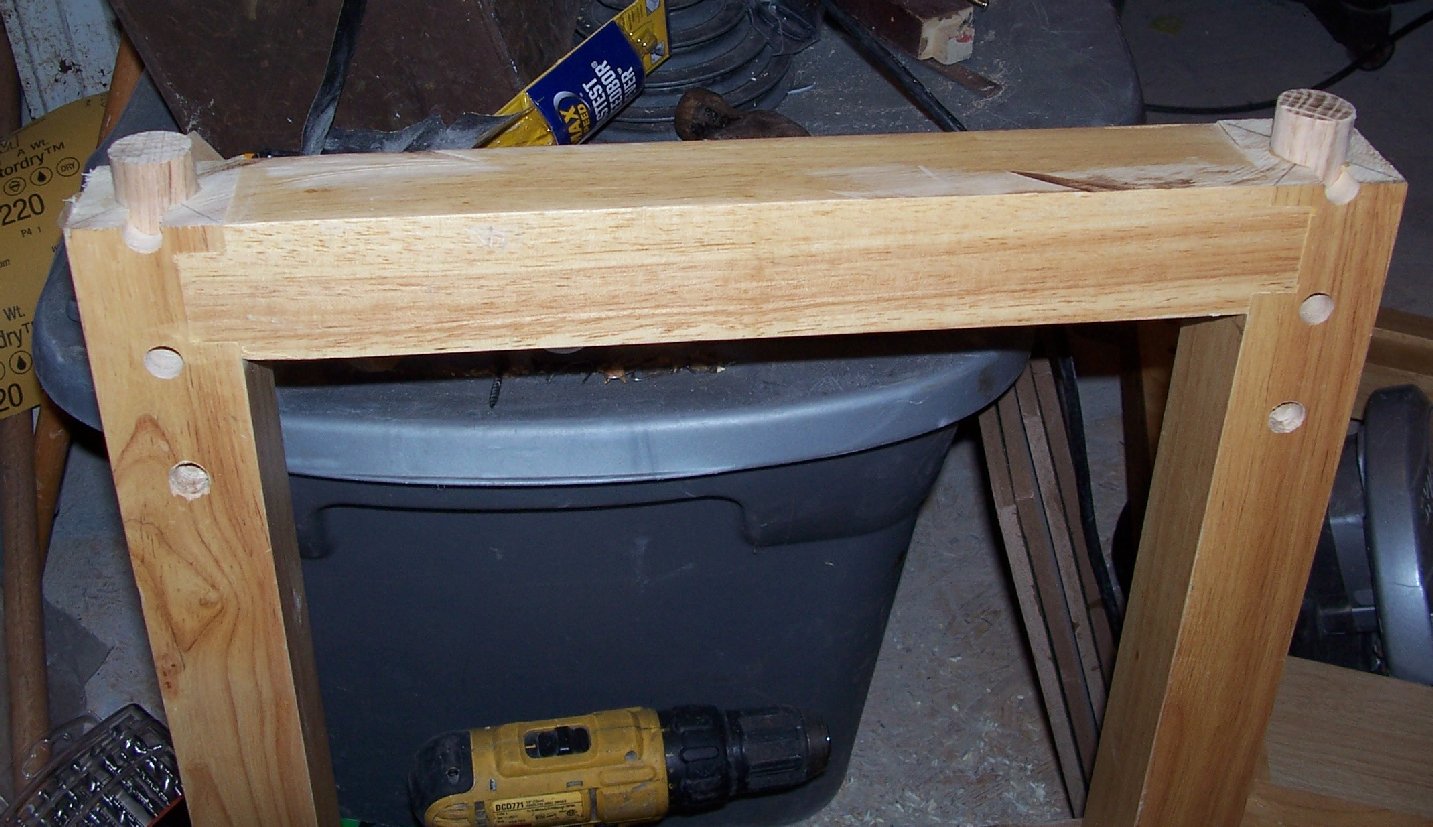
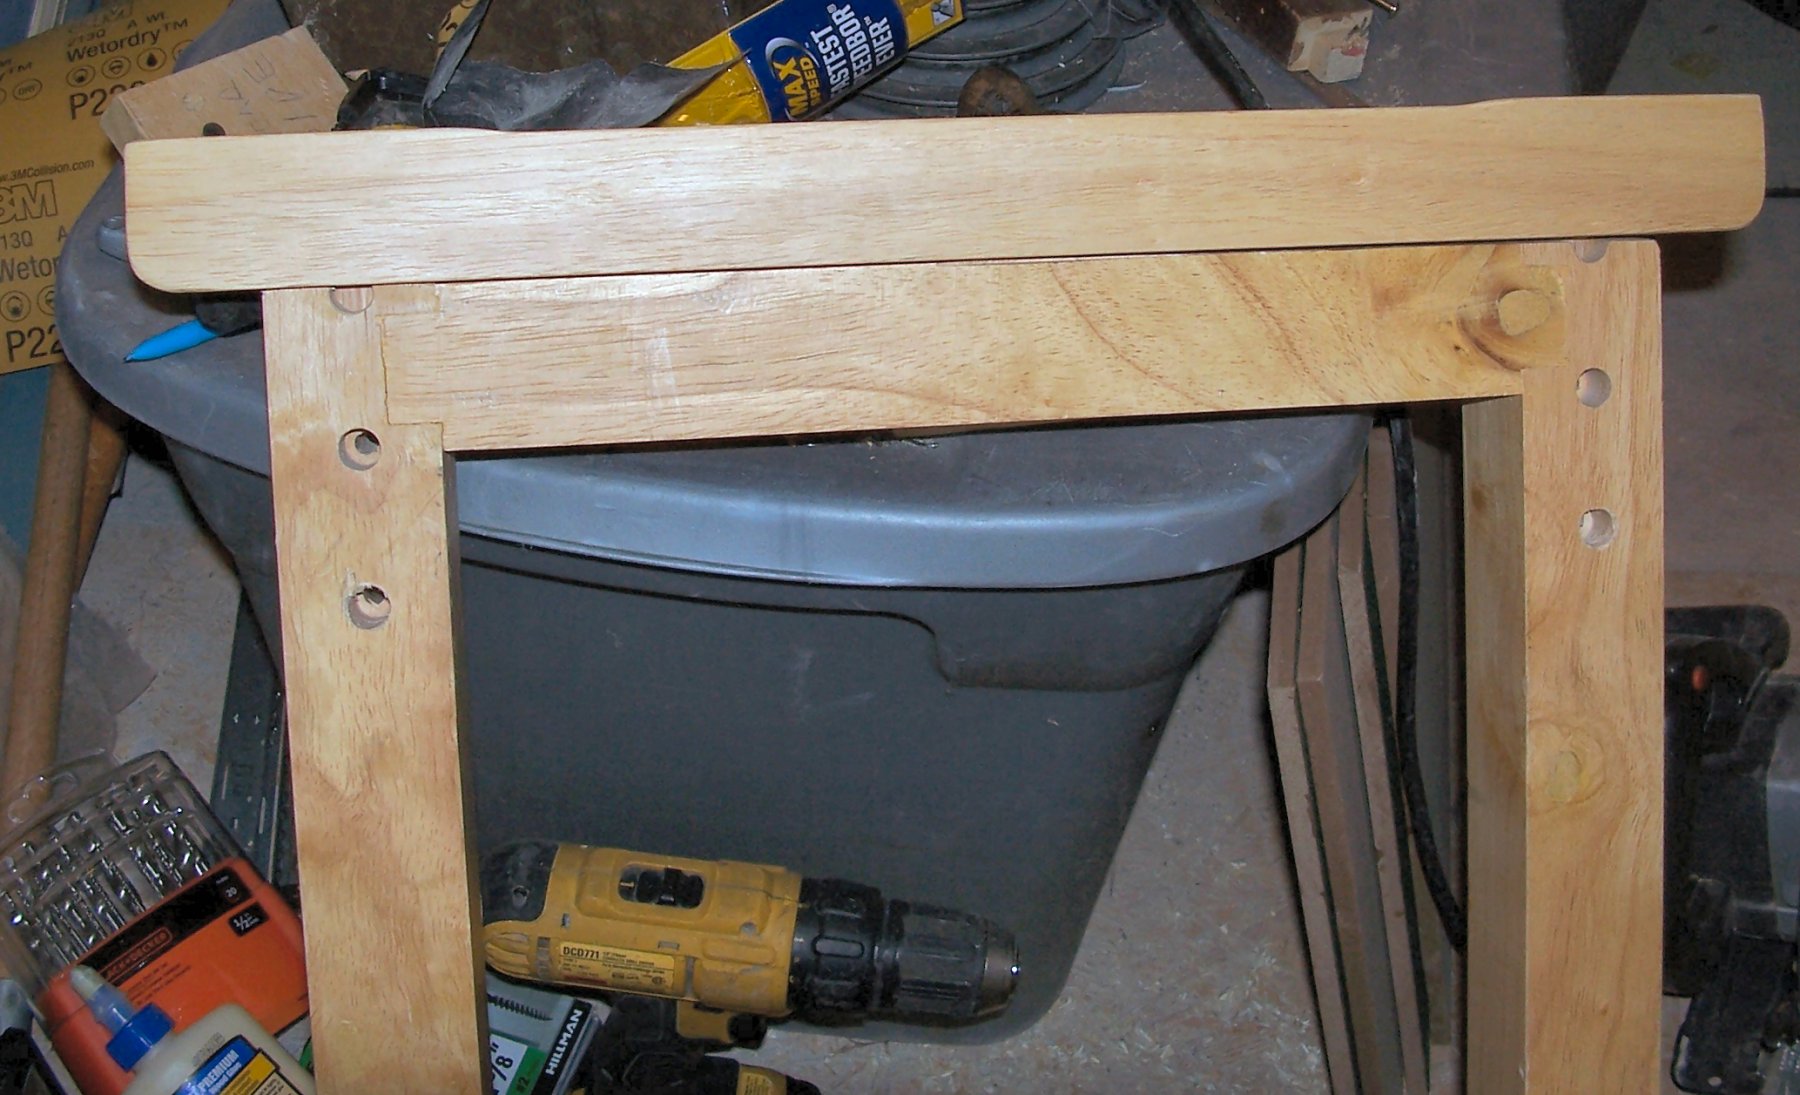
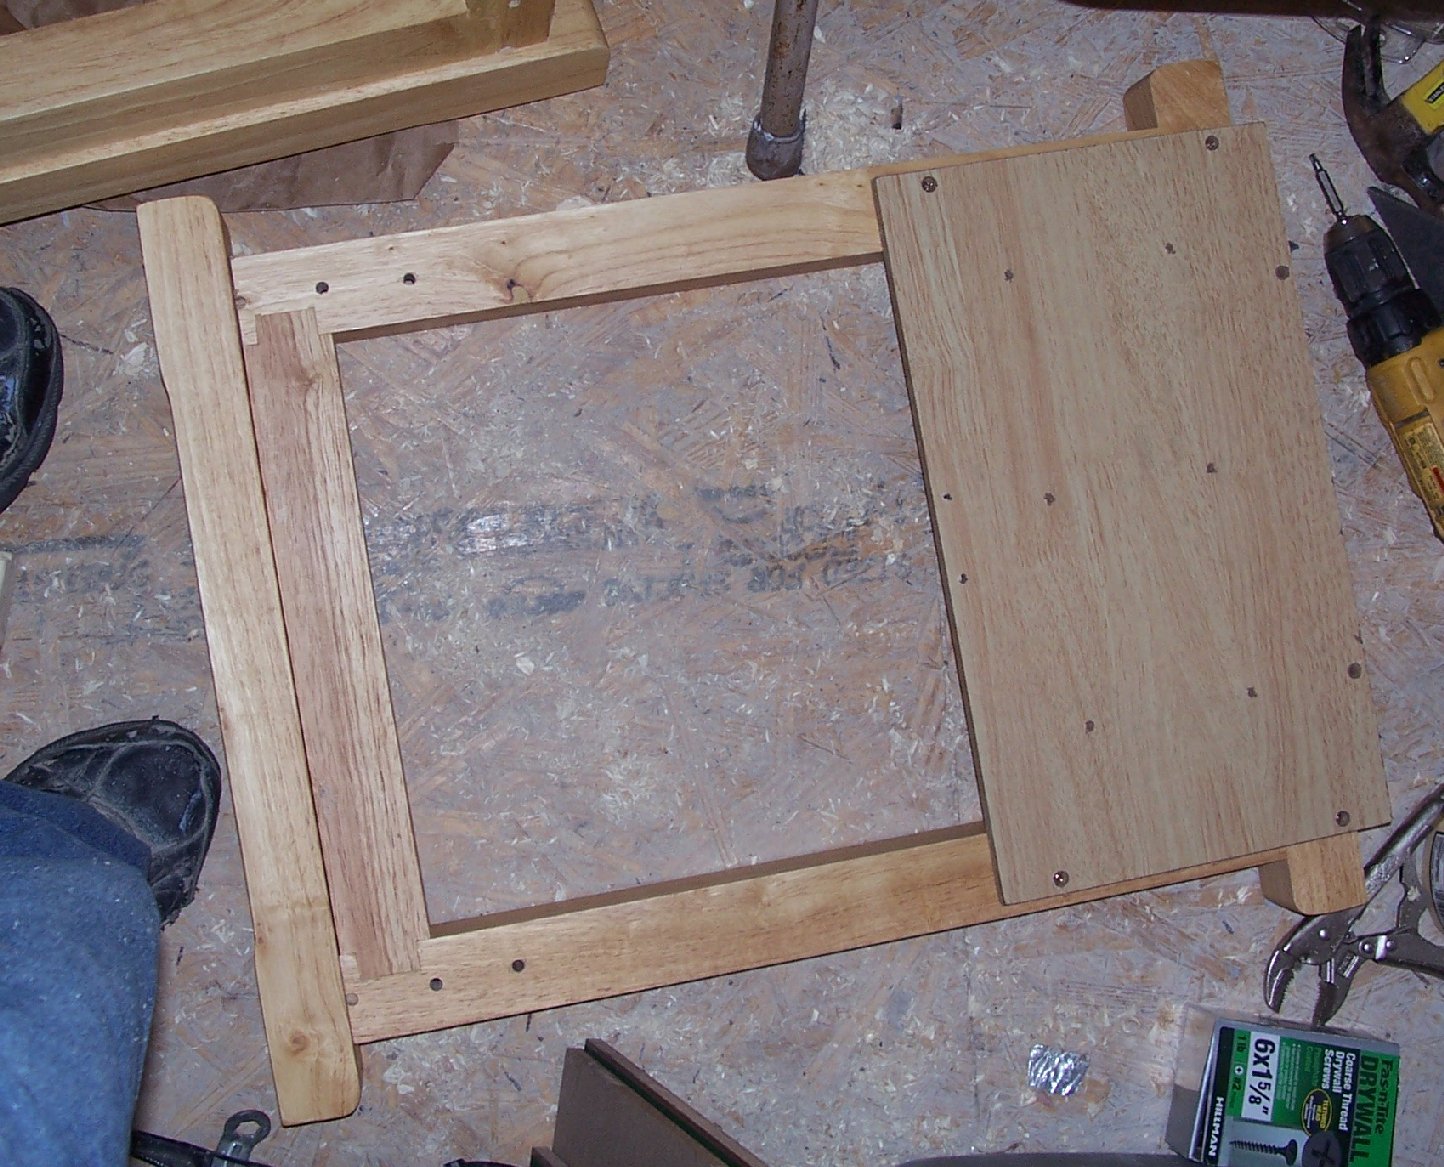
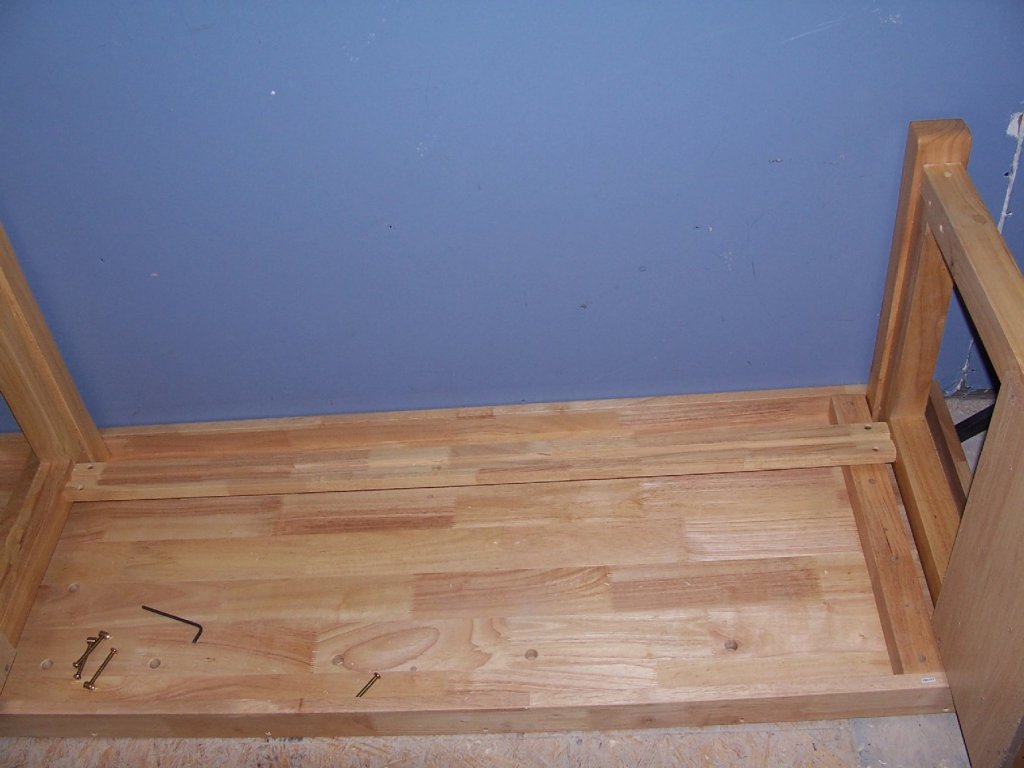
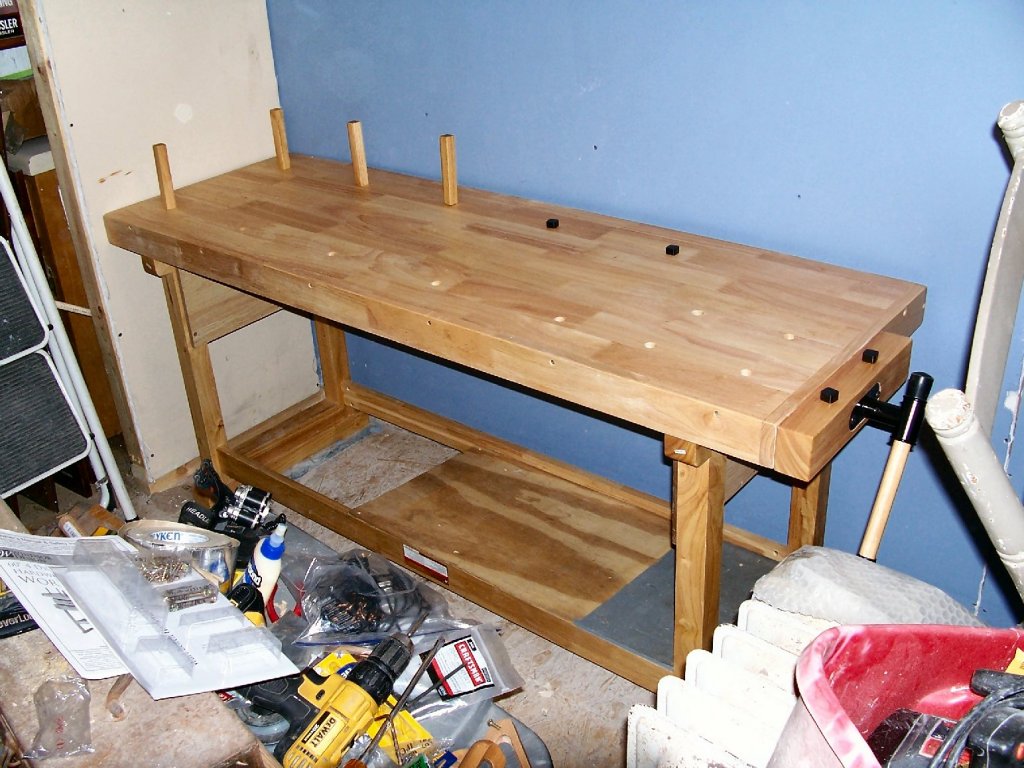
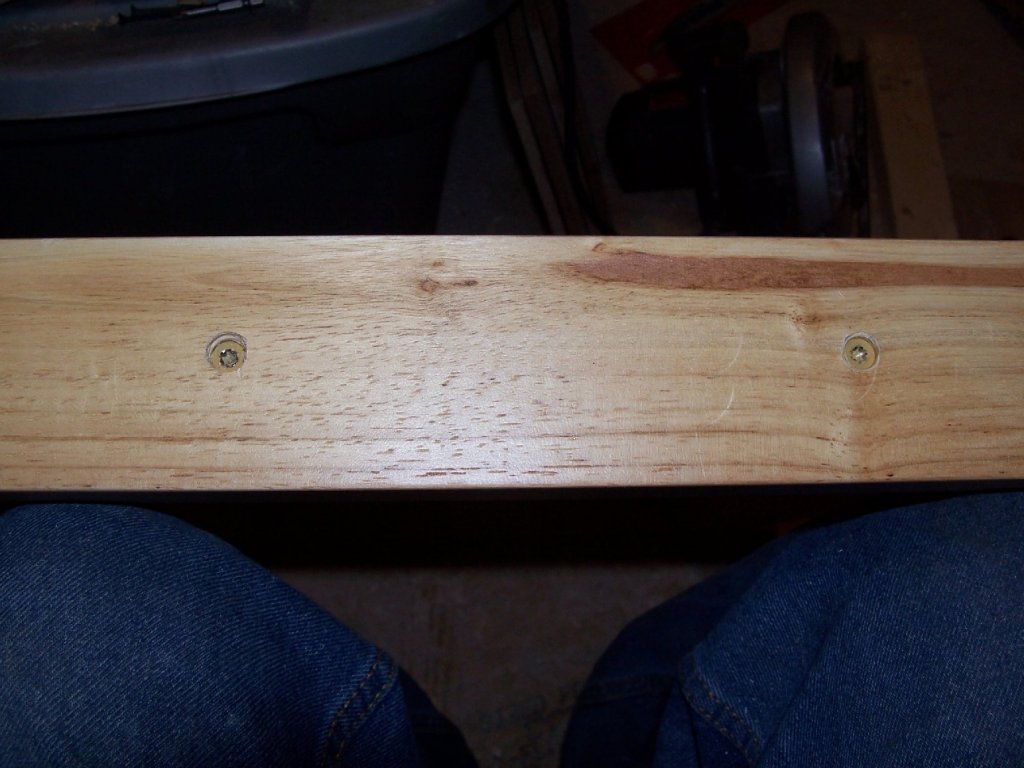
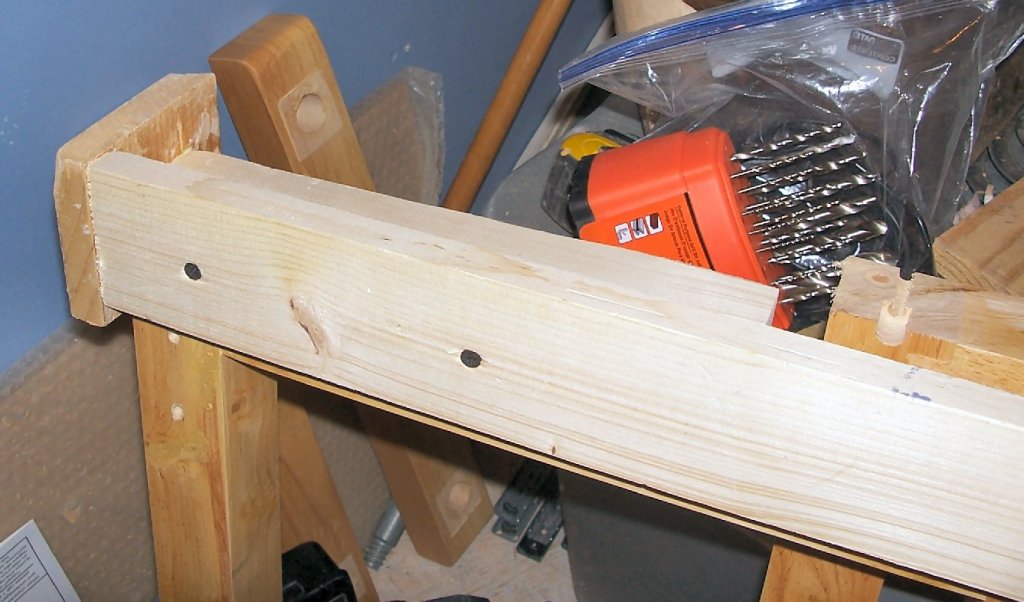
 Harbor Freight Hardwood Workbench Kit bash Part 04 I added the shelf bracket braces to the bottom of the workbench. I had to use two of the pieces of the legs I cut off so that the brackets would meet the back cross piece. I used 3 inch deck screws to attach the leg pieces to the side cross braces. I think I’ll buy a handful of 3 ½” screws to replace them, as the legs are 2” thick, and I want more than 1” of engagement. I’ll flip the bench and replace the 3” screws I used to attach the feet, also. I used 1 5/8” drywall screws to attach the bracket to the side pieces. The screws in the corner are driven in at an angle to also go into the leg itself. To attach the bracket to the rear crosspiece, I used #6 machine screws and nuts, as that part is only ¾” thick. On the side shown in the picture I was able to get 2 machine screws in the corner, by angling the holes a little away from the nuts in the crosspiece. On the other side the bracket was not as well placed, and I only got one screw in. I may cut the tenons off the added pieces later. I tested the work bench and will follow Dave’s suggestions of adding the former front cross brace to the back, and also adding a piece of 3/8” ply across the back of the rear legs. I’ll probably put the front brace at the top of the plywood, and screw the ply into both braces. The workbench does not move much side to side, but may after a few years of use, so I’ll fix that problem now.
-
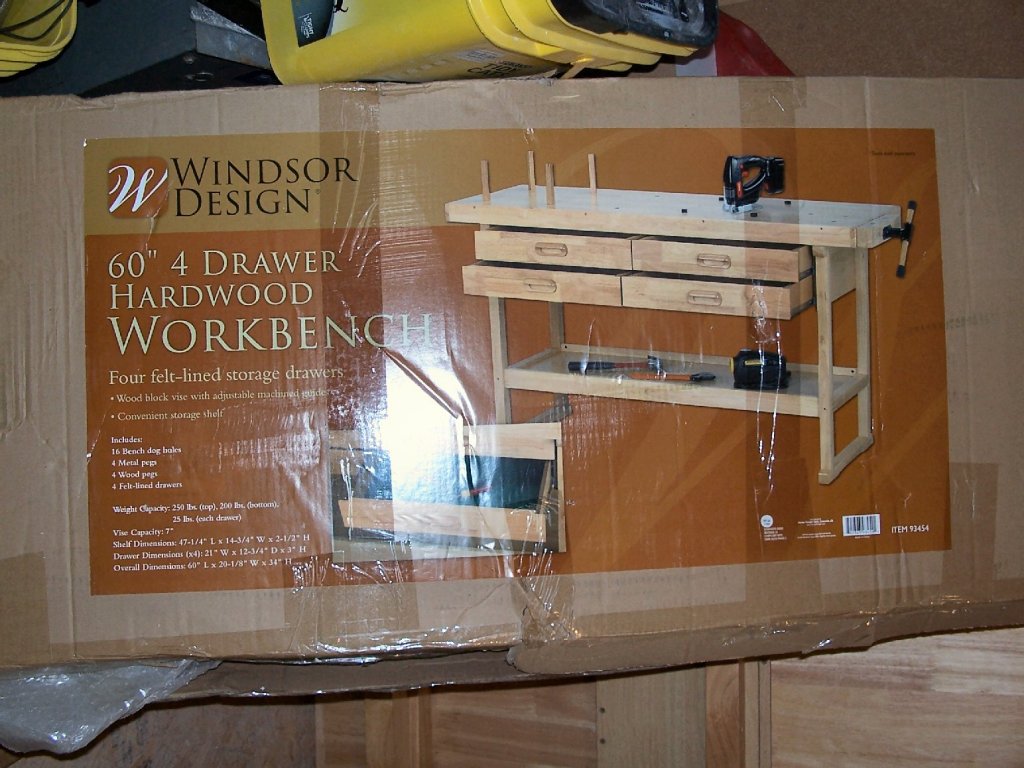
Ed the box says that the whole bench, as delivered, goes about 100 pounds, I'd say it is about 60, as I've modified it, so far.
-
My Spray Booth Construction
thibaultron replied to thibaultron's topic in Modeling tools and Workshop Equipment
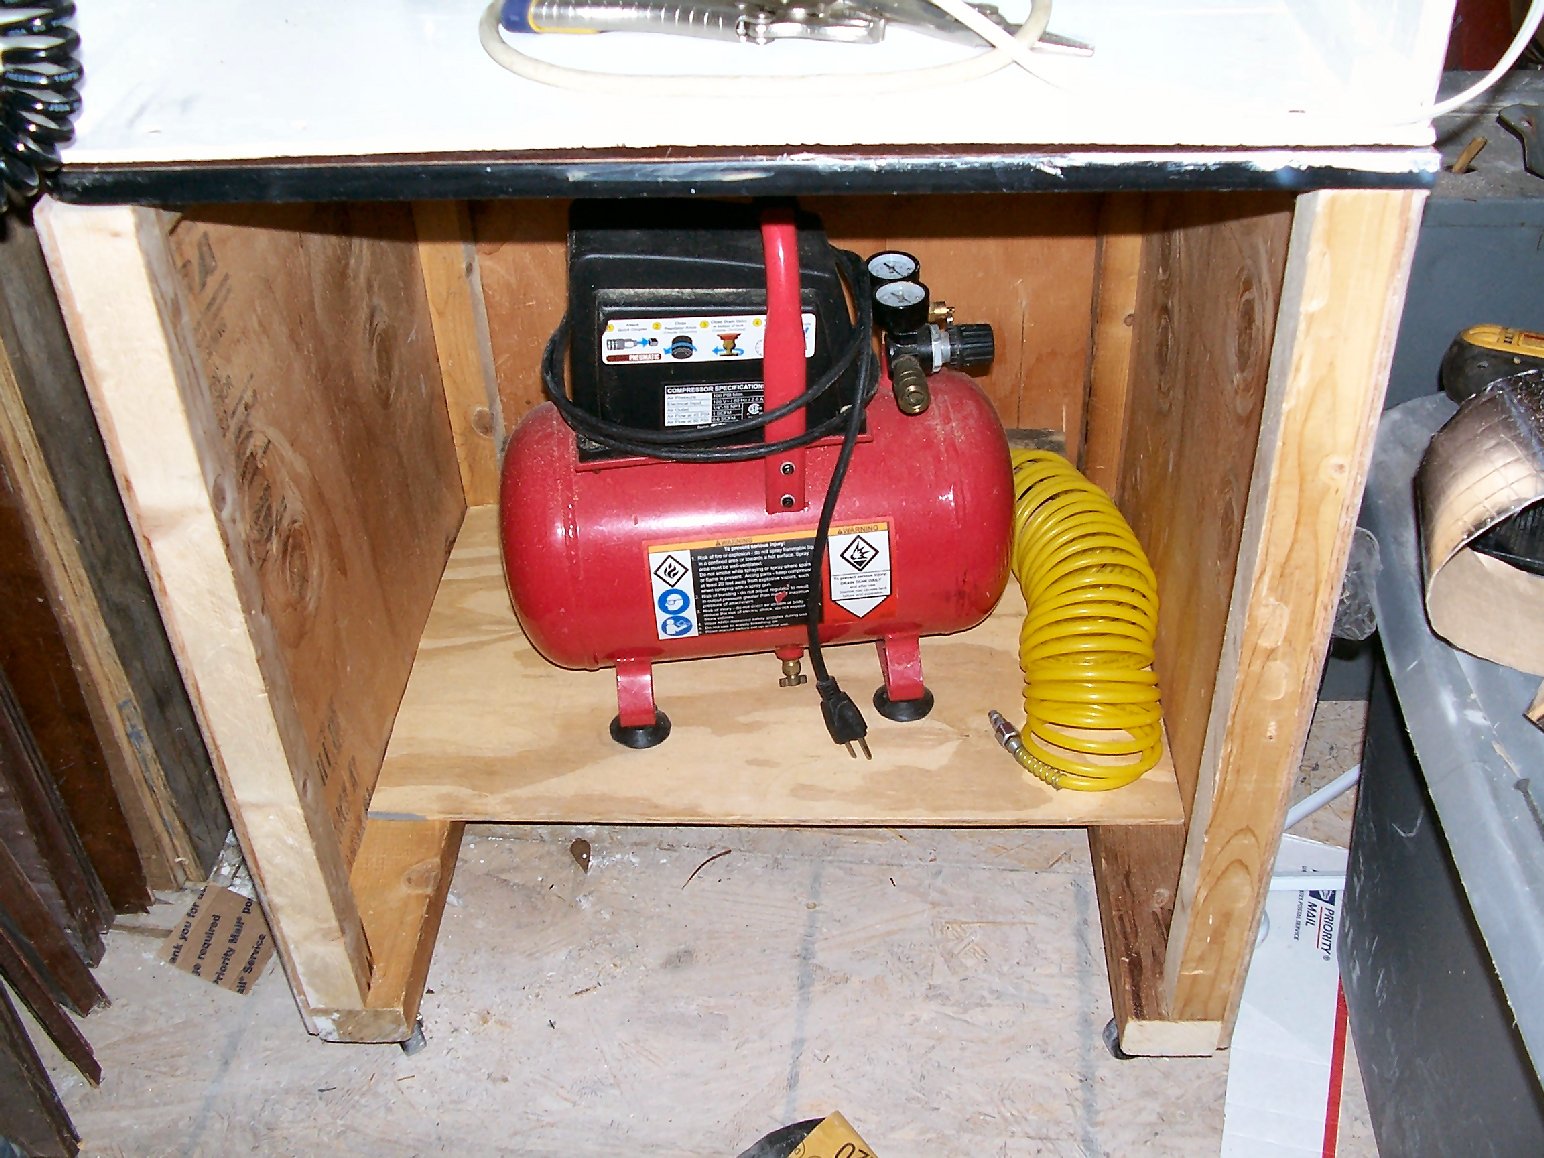
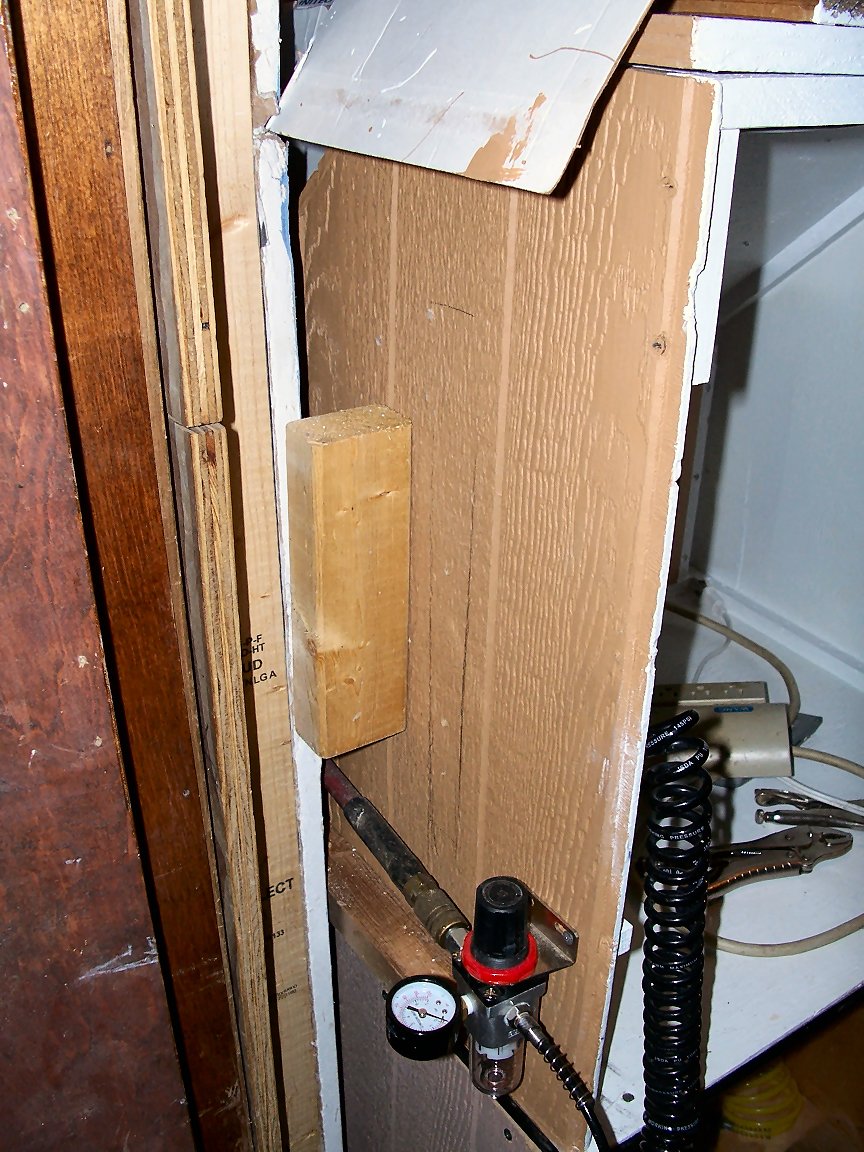
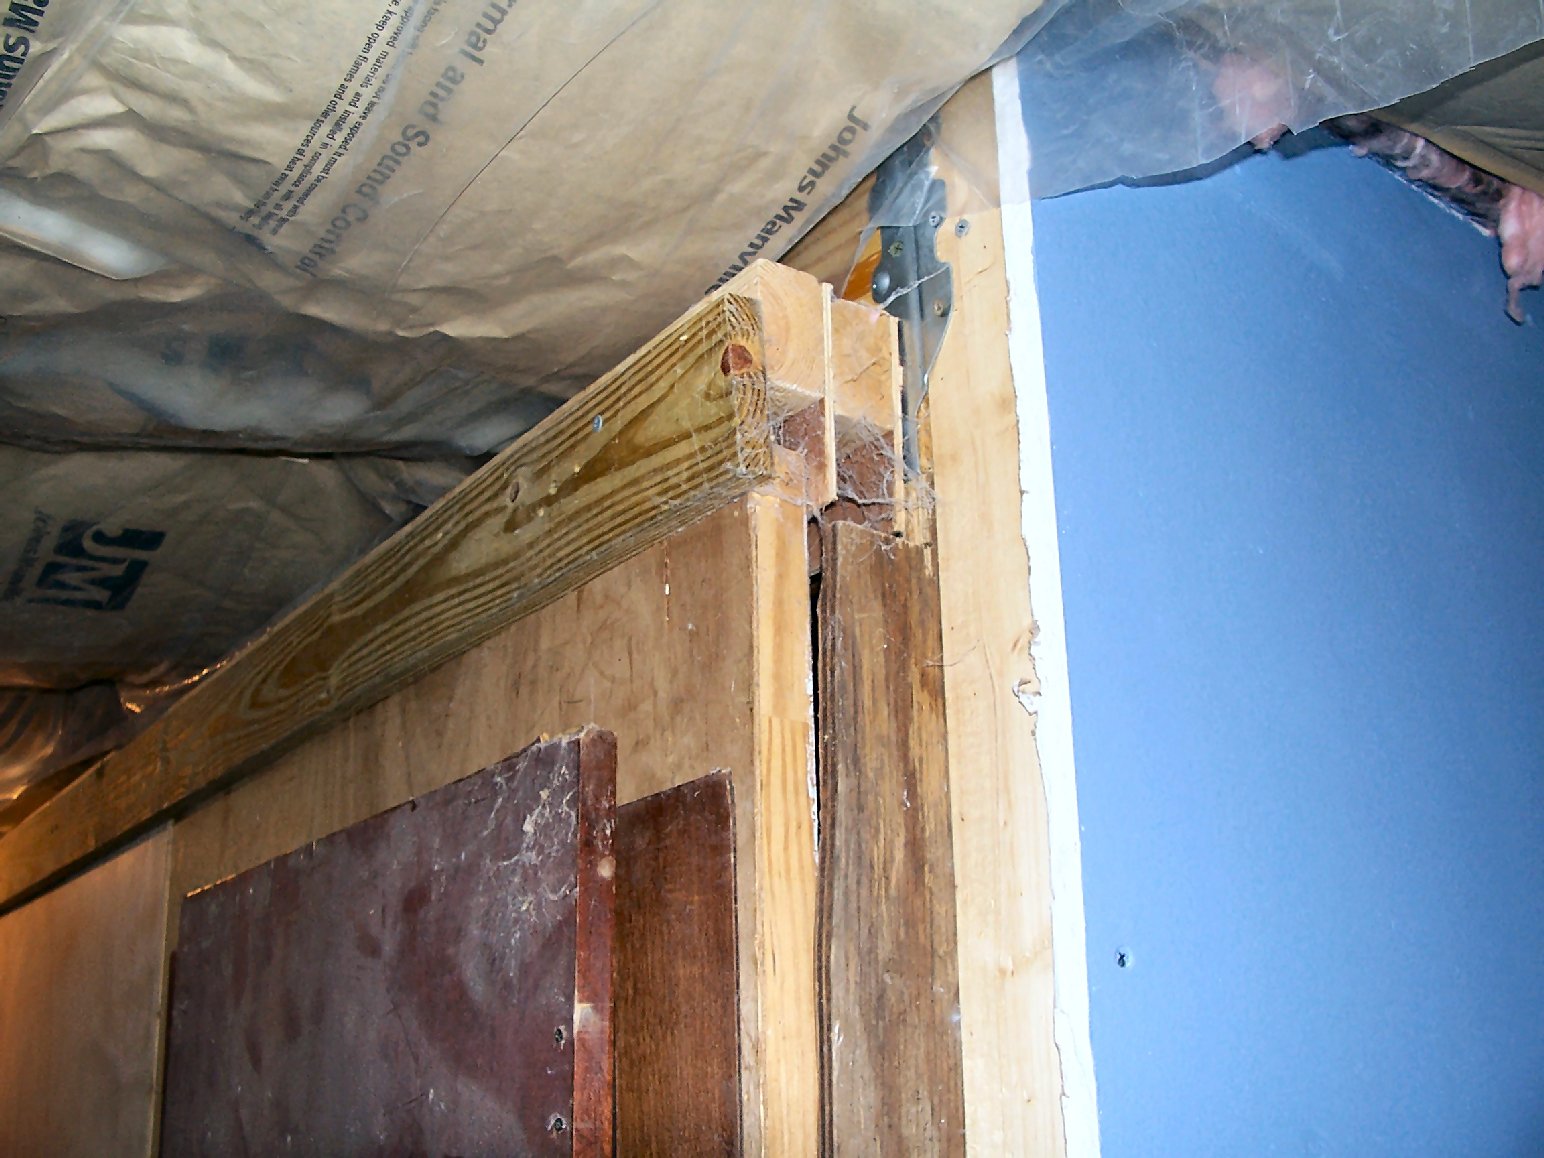
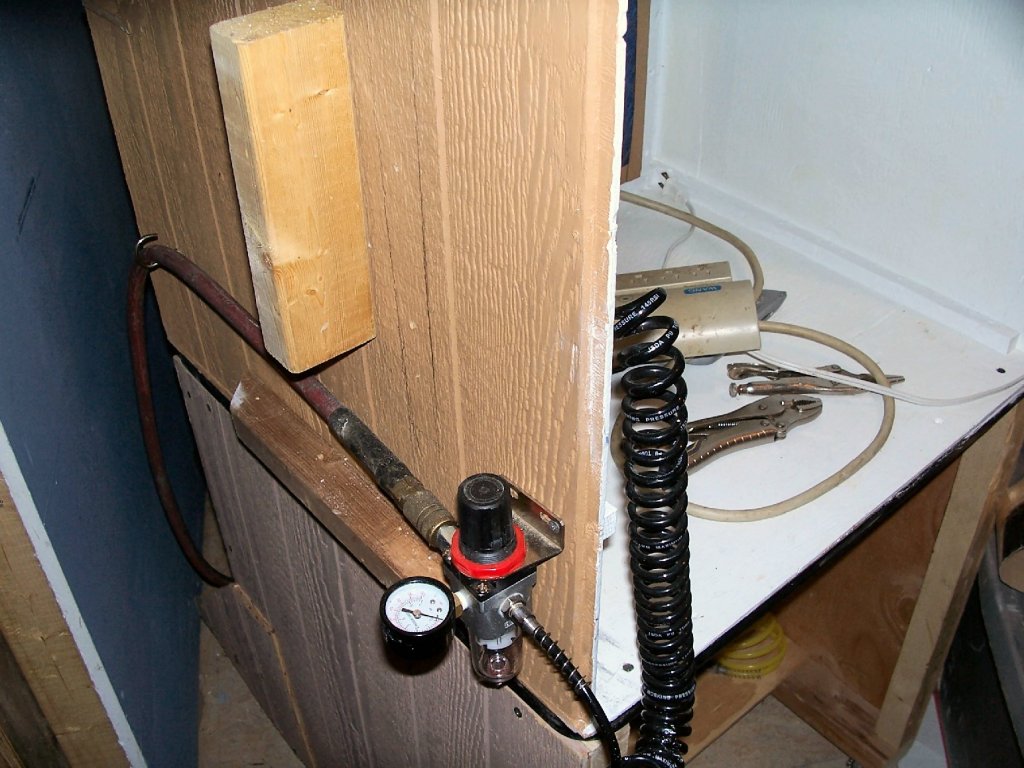
I removed the triangular plywood braces at the bottom of the booth stand, at 24" wide my feet kept hitting them. I'll put in a couple of metal shelf brackets in their place, like I did for my workbench. I added a removable shelf to the base to store the air compressor, when the booth is not being used. I also added a couple of wood blocks to protect the regulator, now that the table does not stick out of that side. The vertical block catches the corner of the wall, so I don't push the regular into it. The corner is recessed a bit as the sliding doors sit on that side of the wall.


-
Cab is the right term, for the "House" over the back of the boiler. White gauge faces, brass knobs, piping black, as brass pipe will leach out the zinc and fall apart over time, when constantly exposed to water.
-
Something that has not been mentioned, is cutting oil, at least for metals. Any time you are cutting threads in metal use a good cutting oil. For steel, brass, etc. a regulator type will work. For aluminum, use a dedicated AL cutting fluid. When tapping after the tap has been started, turn it a quarter or half turn, then back it out a quarter turn, go back until it bites and repeat. Remove and clean the tap frequently! For tapping with small taps, a block drilled with the clearance sized drill, set on the part, can be used to keep the tap perpendicular. When tapping on the lathe, the chuck, or the chuck with the chuck key inserted can be used to turn the part by hand. For cutting external threads, the die can be held against the tailstock ram, and pressed to the end of the part. This keeps the die perpendicular until the thread is started. Lock the lathe and turn the die by hand until the thread is started, then back off the tailstock, and either continue turning the die, or unlock the lathe and hold the die while turning the part. Remember, taking time cutting the thread is much better than breaking the tap, and m, having to make a new part!
-
Yes, the grab irons were generally the same color as the engine/cars.
-
My Spray Booth Construction
thibaultron replied to thibaultron's topic in Modeling tools and Workshop Equipment
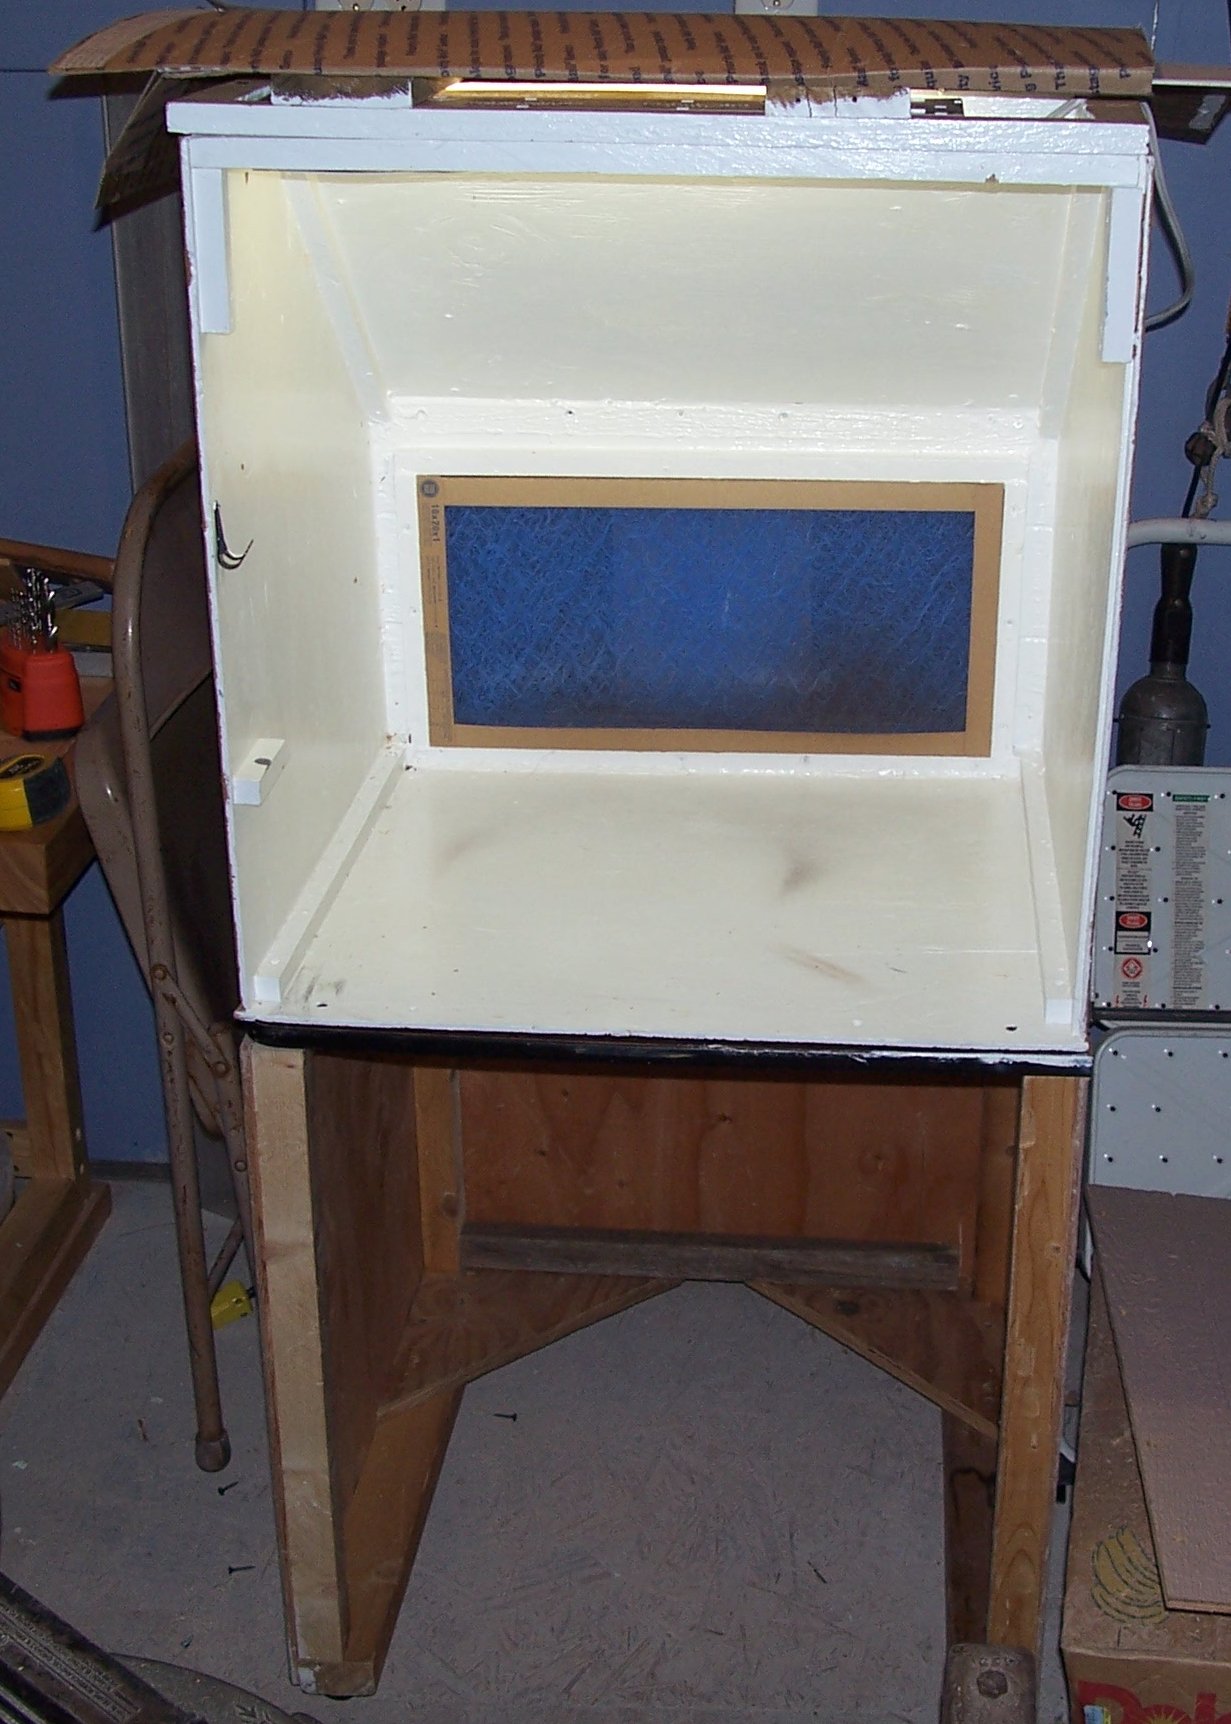
Yesterday I modified my spray booth. When I built it I used a 36" wide table for the base. The booth itself is 24" wide. in the new section of the shop, the base is too wide, so I cut it down to 24' to match the booth. Once I get the shop arranged, I'll hinge the other 12" of the table to the booth, with a support, so I will have that surface, when I am using the booth, but it will be out of the way otherwise.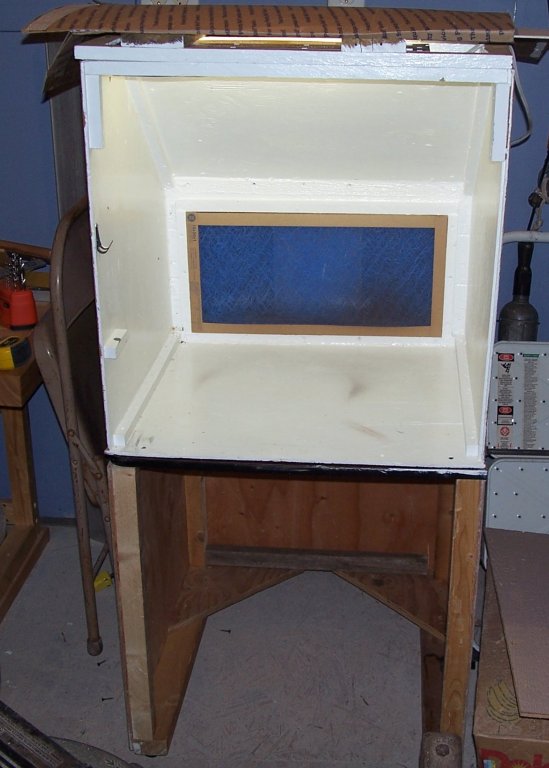
-
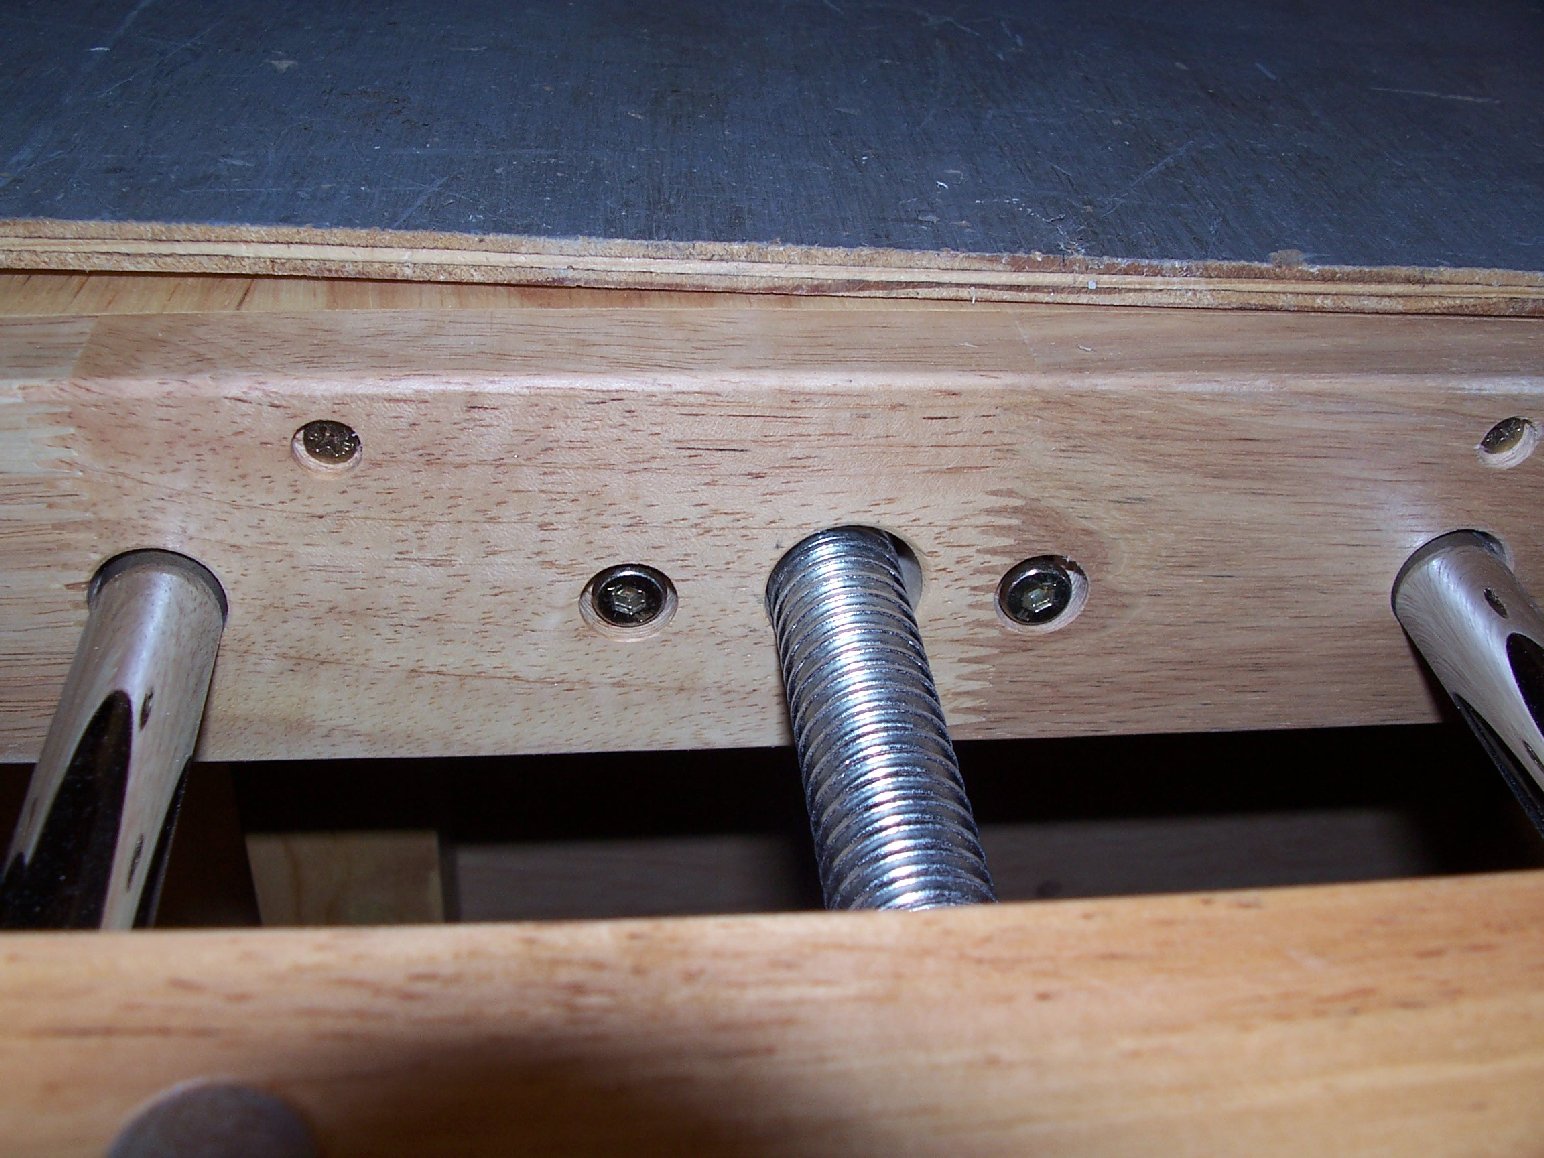
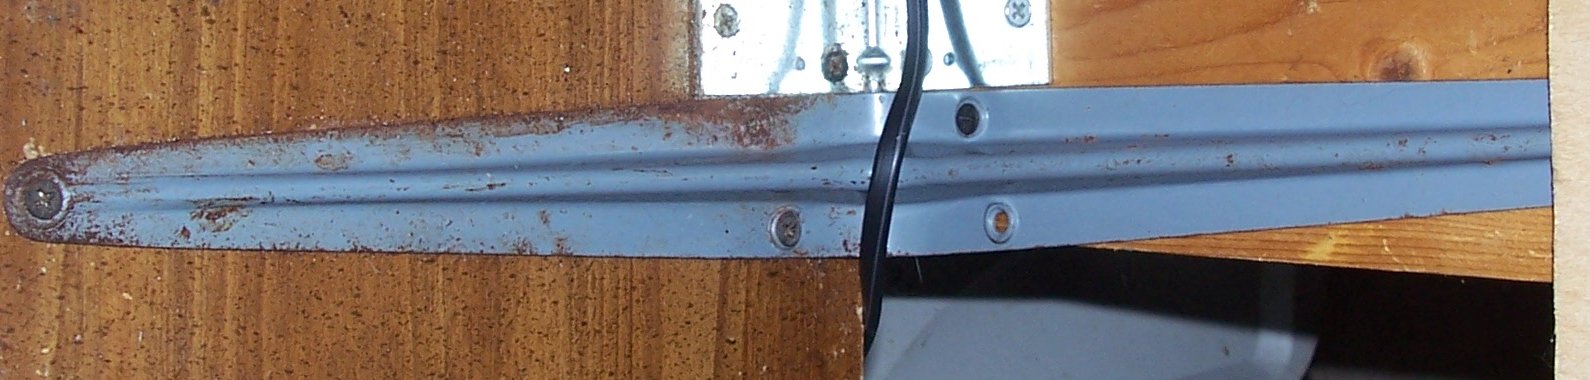
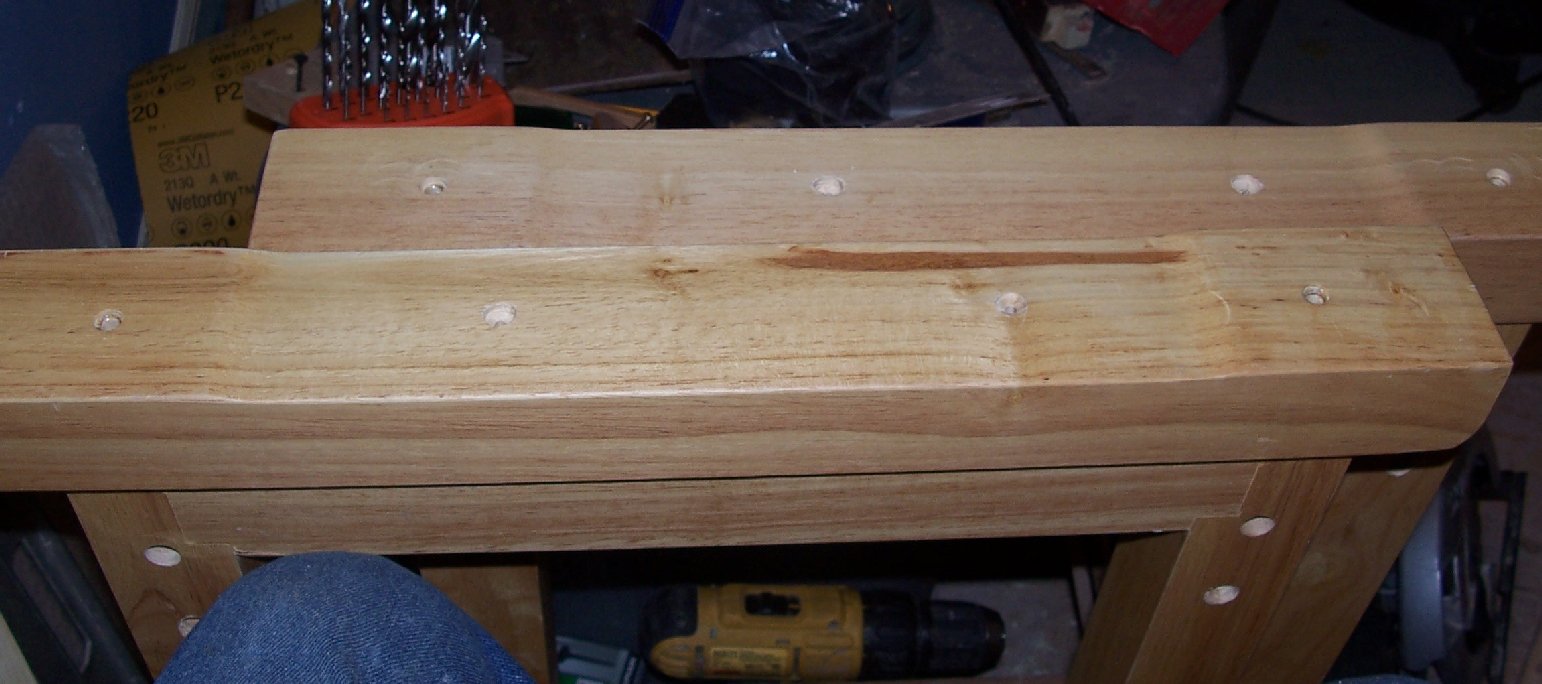
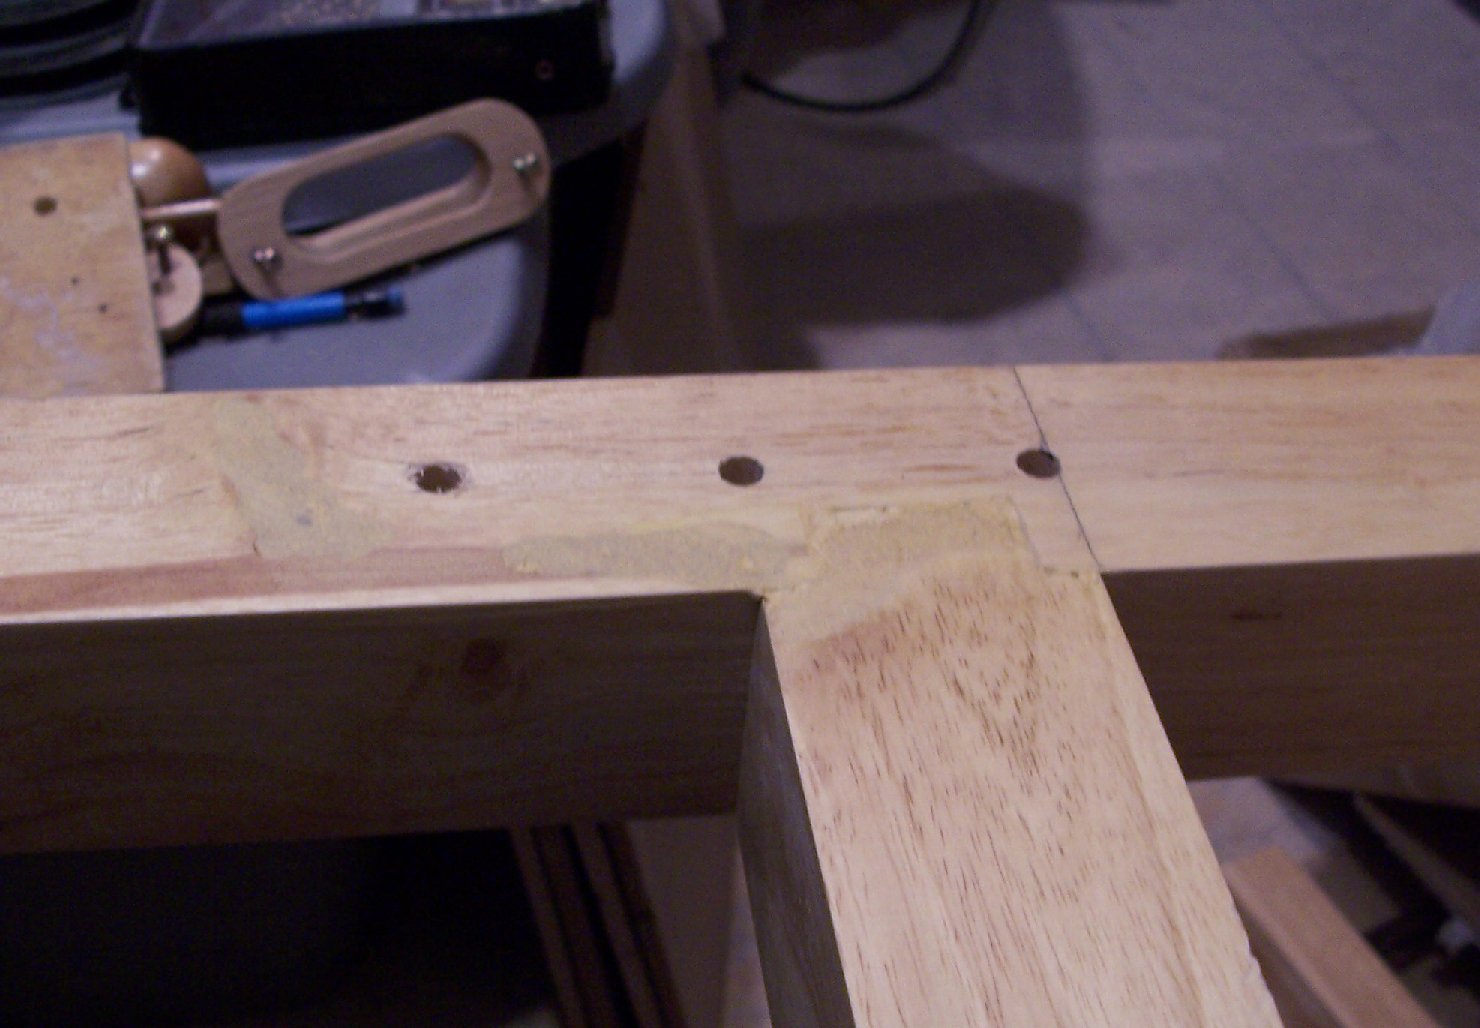
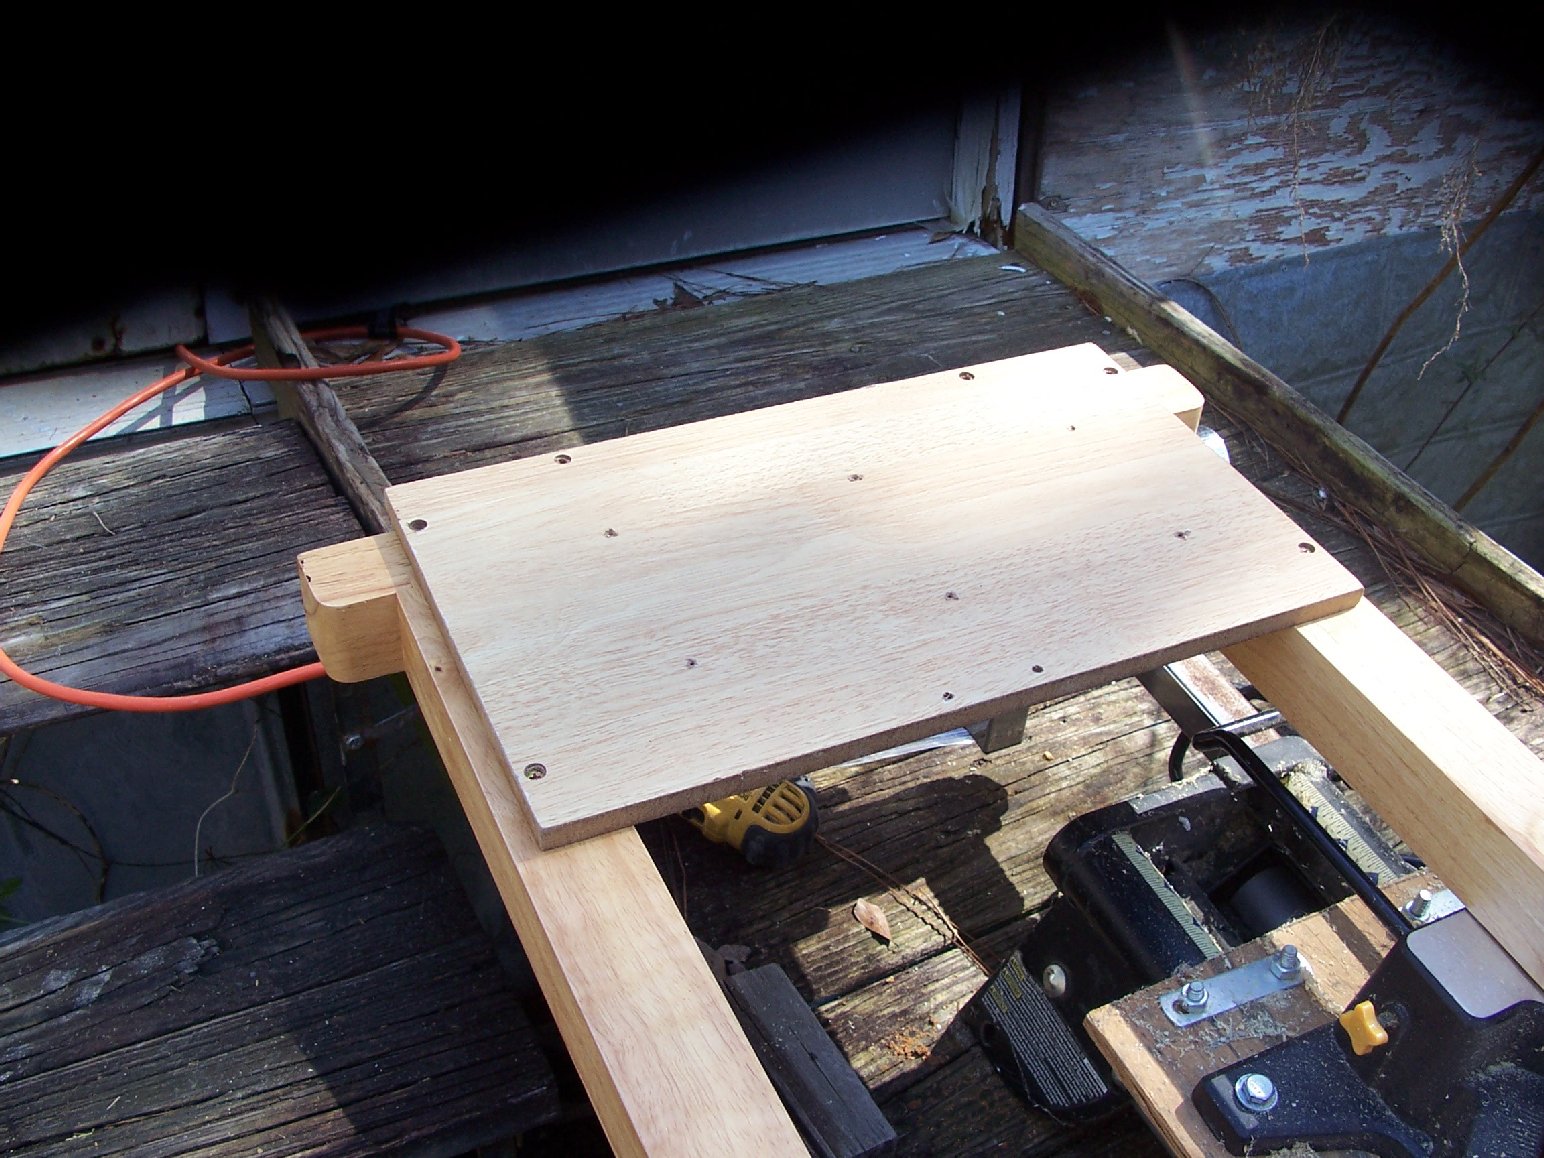
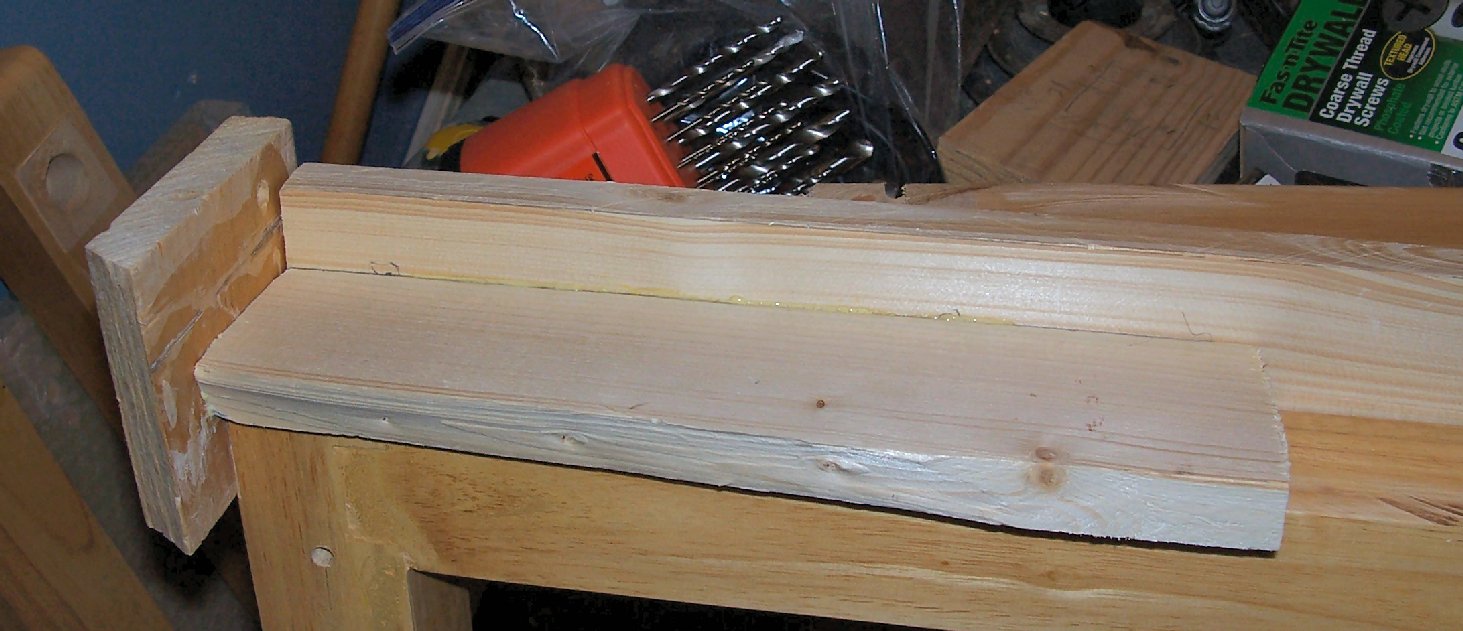
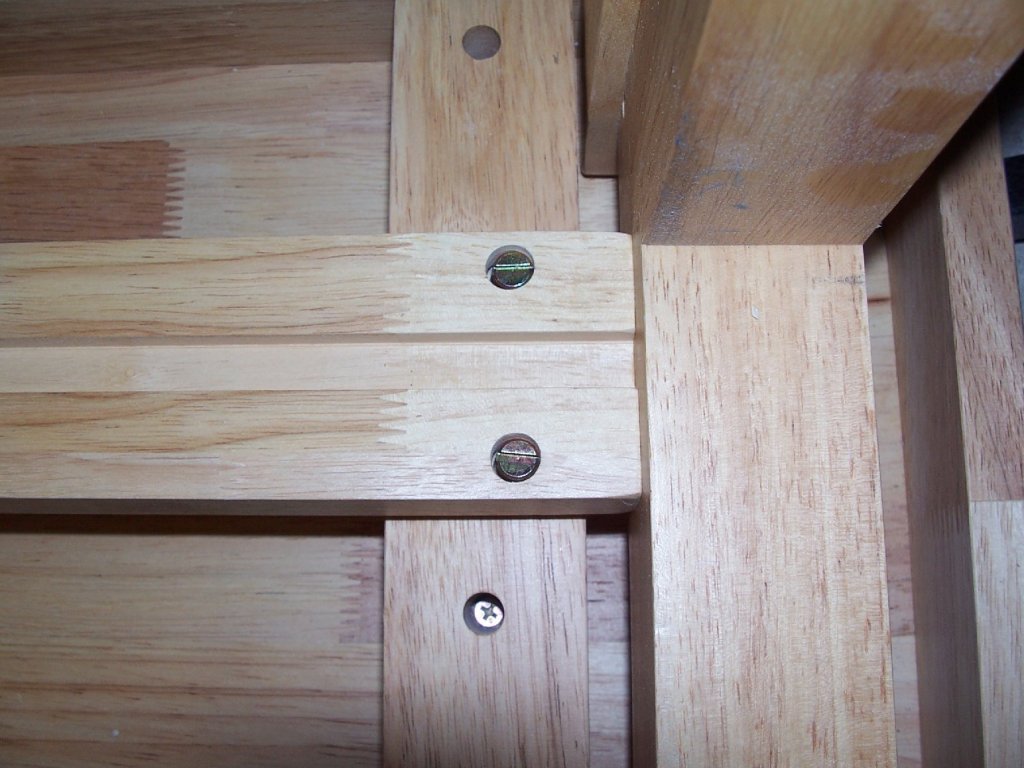
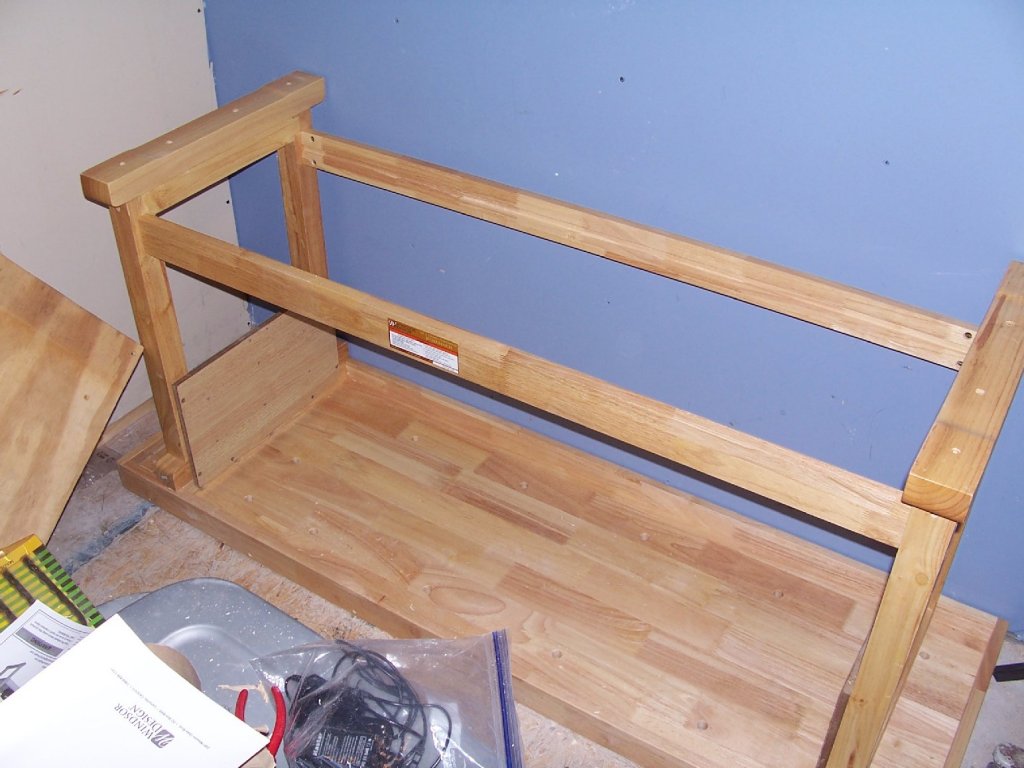
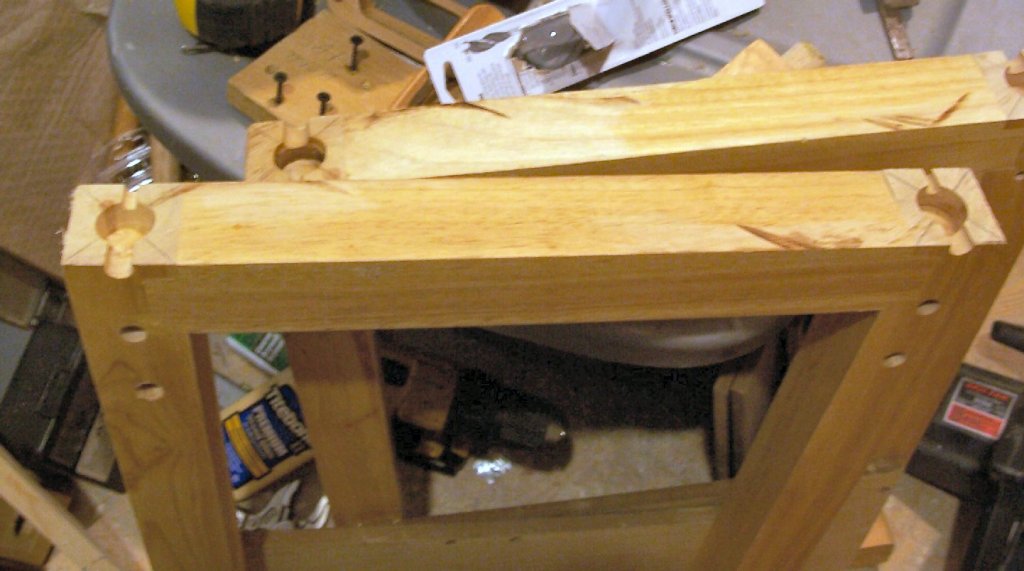
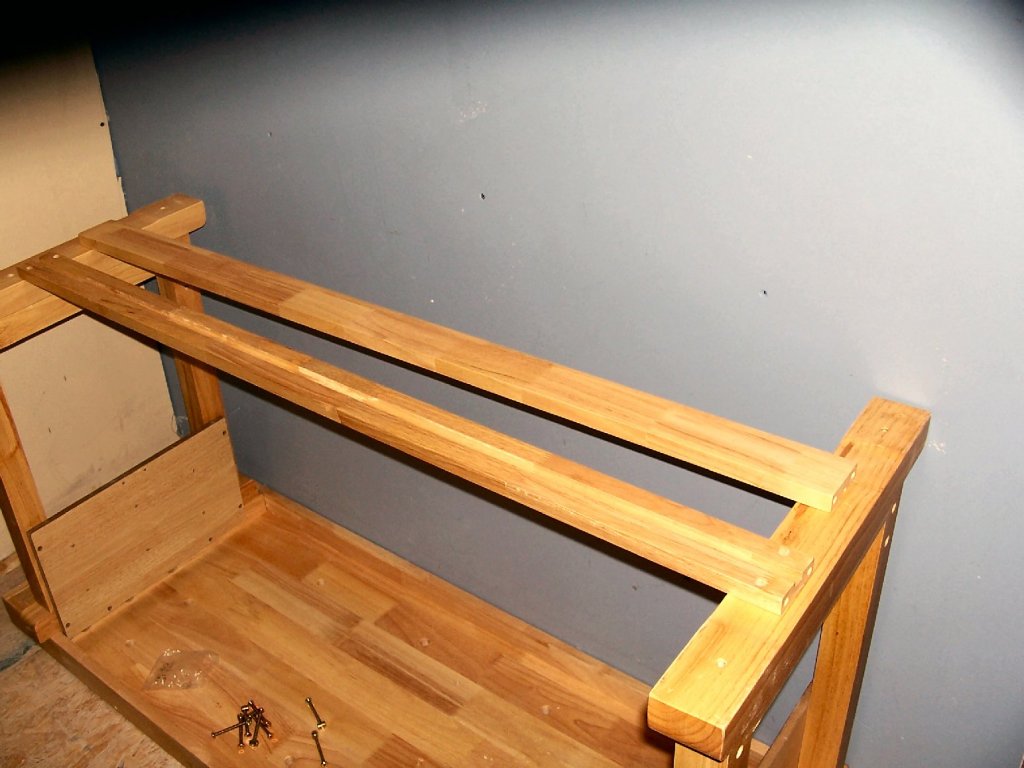
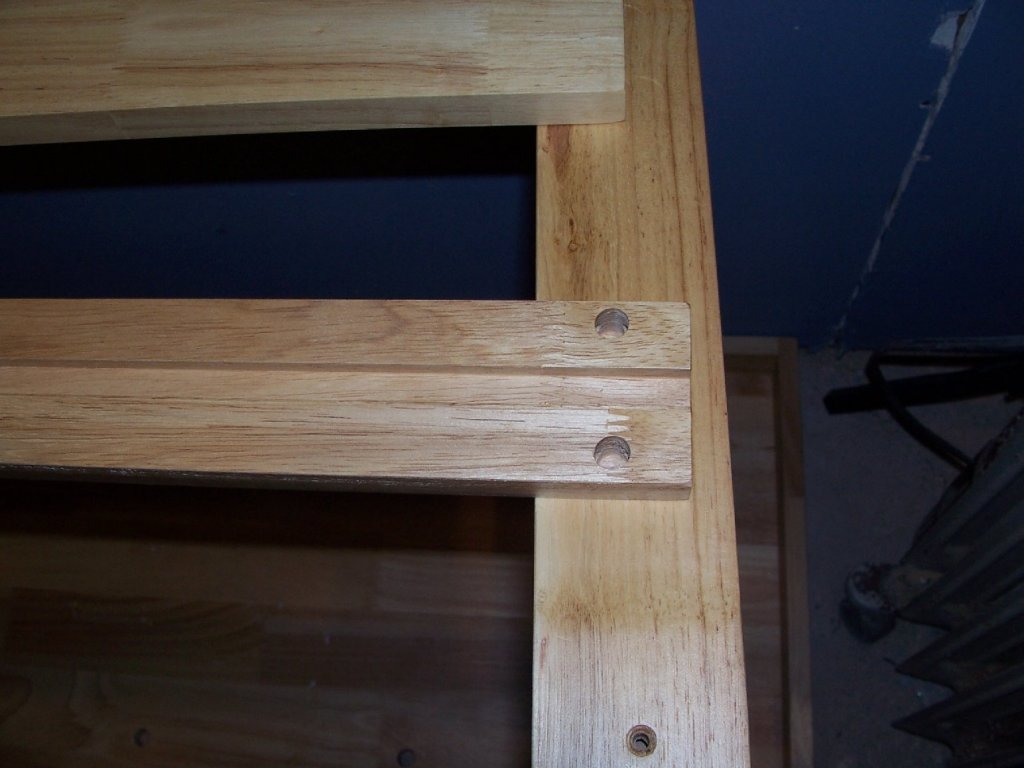
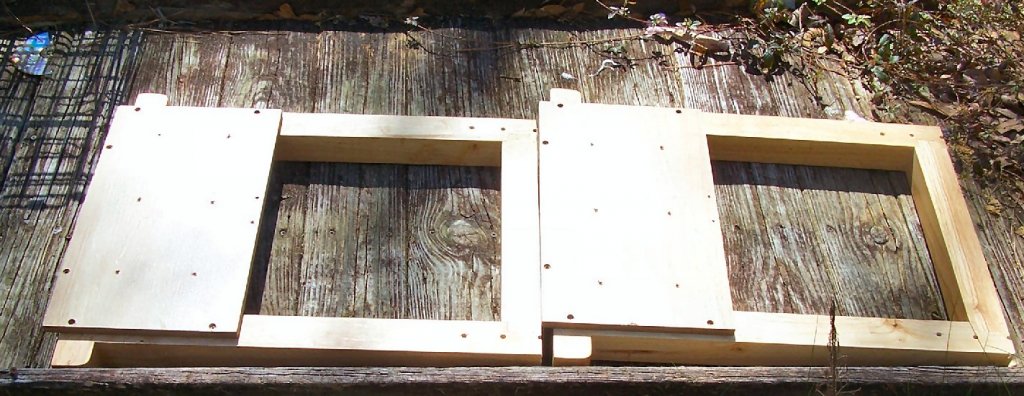
Part 03 This is what the finished joint looks like. After attaching the support to the other leg, it is time to assemble the legs to the bench top. The legs and bench top are both marked with “Front” labels, so be careful at this step. The screws that hold the legs to the top, are long and quite a tight fit. This is where my extra long Allen wrench came in handy. The extra leverage was welcome! Lining the legs up to match the pre-drilled holes in the top, was tricky. I used a flashlight shining in the gap to help spot the first screw/hole alignment on each leg. There are 3 screws used for each leg. The blister with these screws, is where the supplied Allen wrench is, by the way. After attaching the legs, I temporarily installed the front shelf support, to stiffen the whole thing while I finished building the workbench. Next, the vise is installed. First you remove the stop screw and washer on the end of the vise handle thread. The vise is then screwed in half way, and the bolts holding the vise nut onto the bench top are tightened. After this the vise is screwed all the way in and the vise stop screw and washer replaced. The stop bottoms out on the inside of the shelf slide piece of wood, limiting the vise opening. I may drill this hole larger, to allow me to open the vise more, though this would, of course, make the vise a little more unstable when it is opened that extra width. This is the workbench at this point. I tried it out with a chair, and it was just the height I wanted! The piece of plywood laying across the shelf supports was going to be used to make two triangular braces between the back support and the legs, to replace the stiffness the original shelf would have provided, but I decided to go a different route. I think that I would keep banging my ankles on a horizontal triangular brace. Instead I’m going to use right angle shelf supports, like one shown below. I think I have a couple extra ones, if I can find them. I’ll screw them into the leg cross pieces, and use through bolts to attach them to the thinner back shelf support. After these are installed. I’ll remove the front shelf support. On a side note, I was somewhat disappointed to find that the actual butcher block work surface, is only about ½” thick, but as long as it stays flat over time, it will be OK.


-
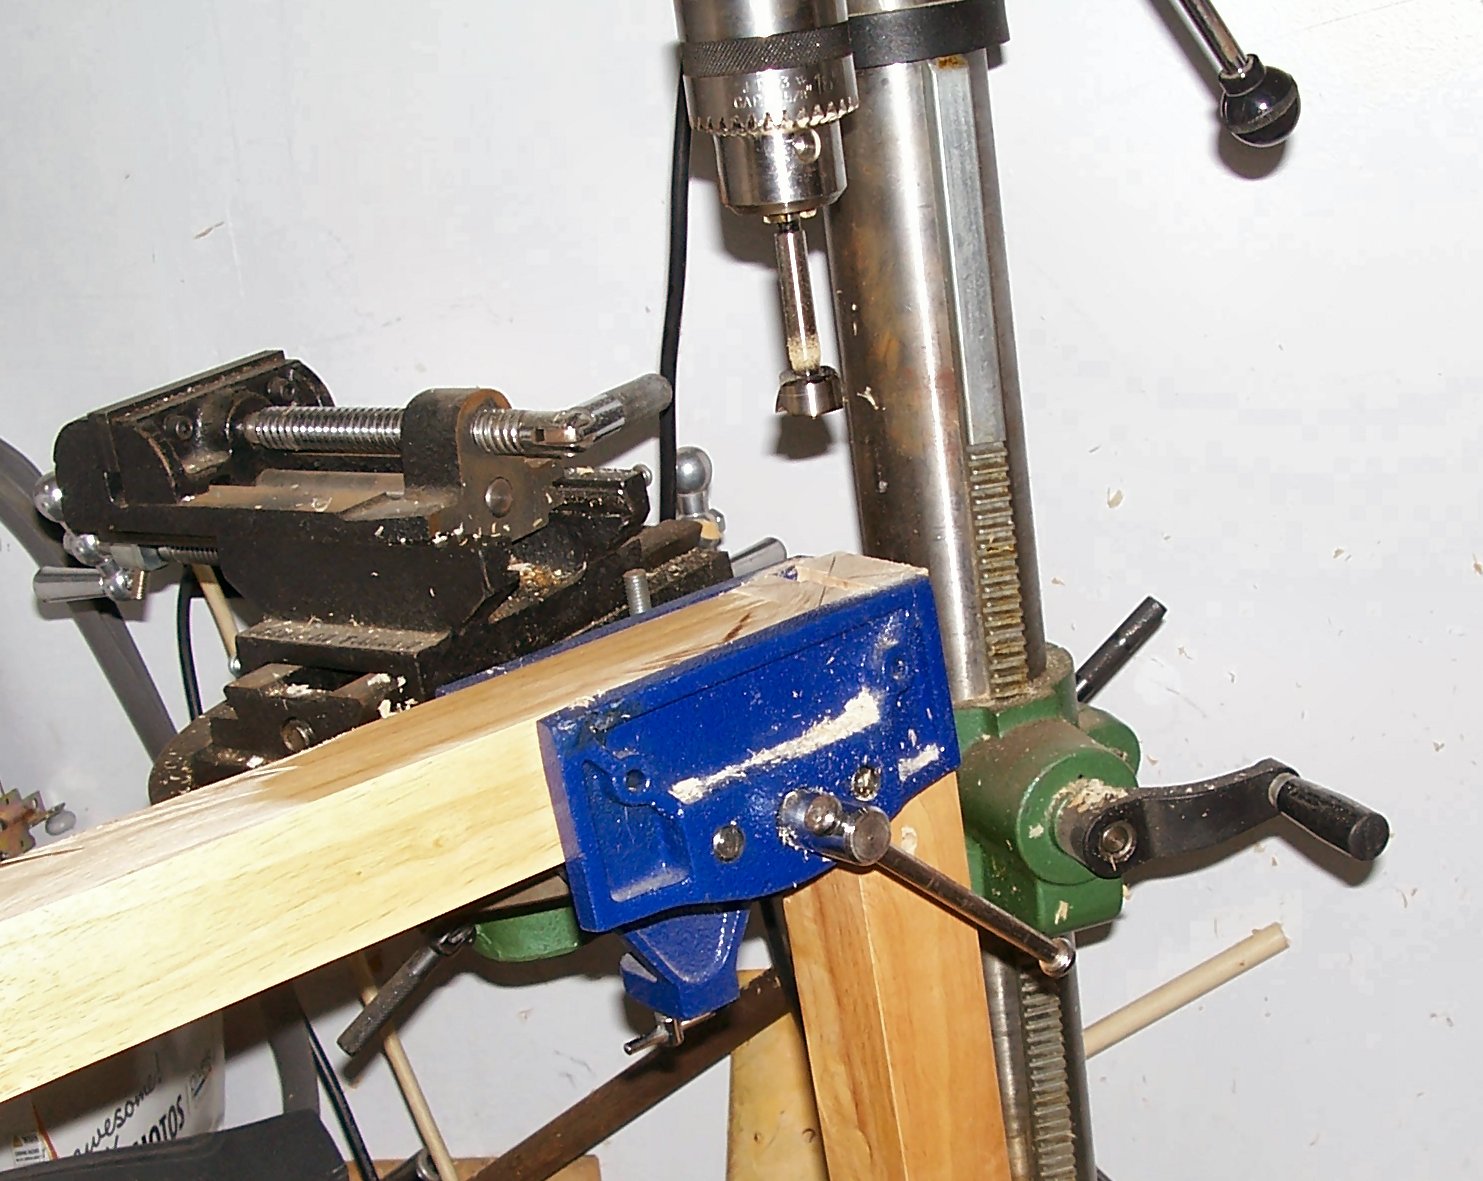
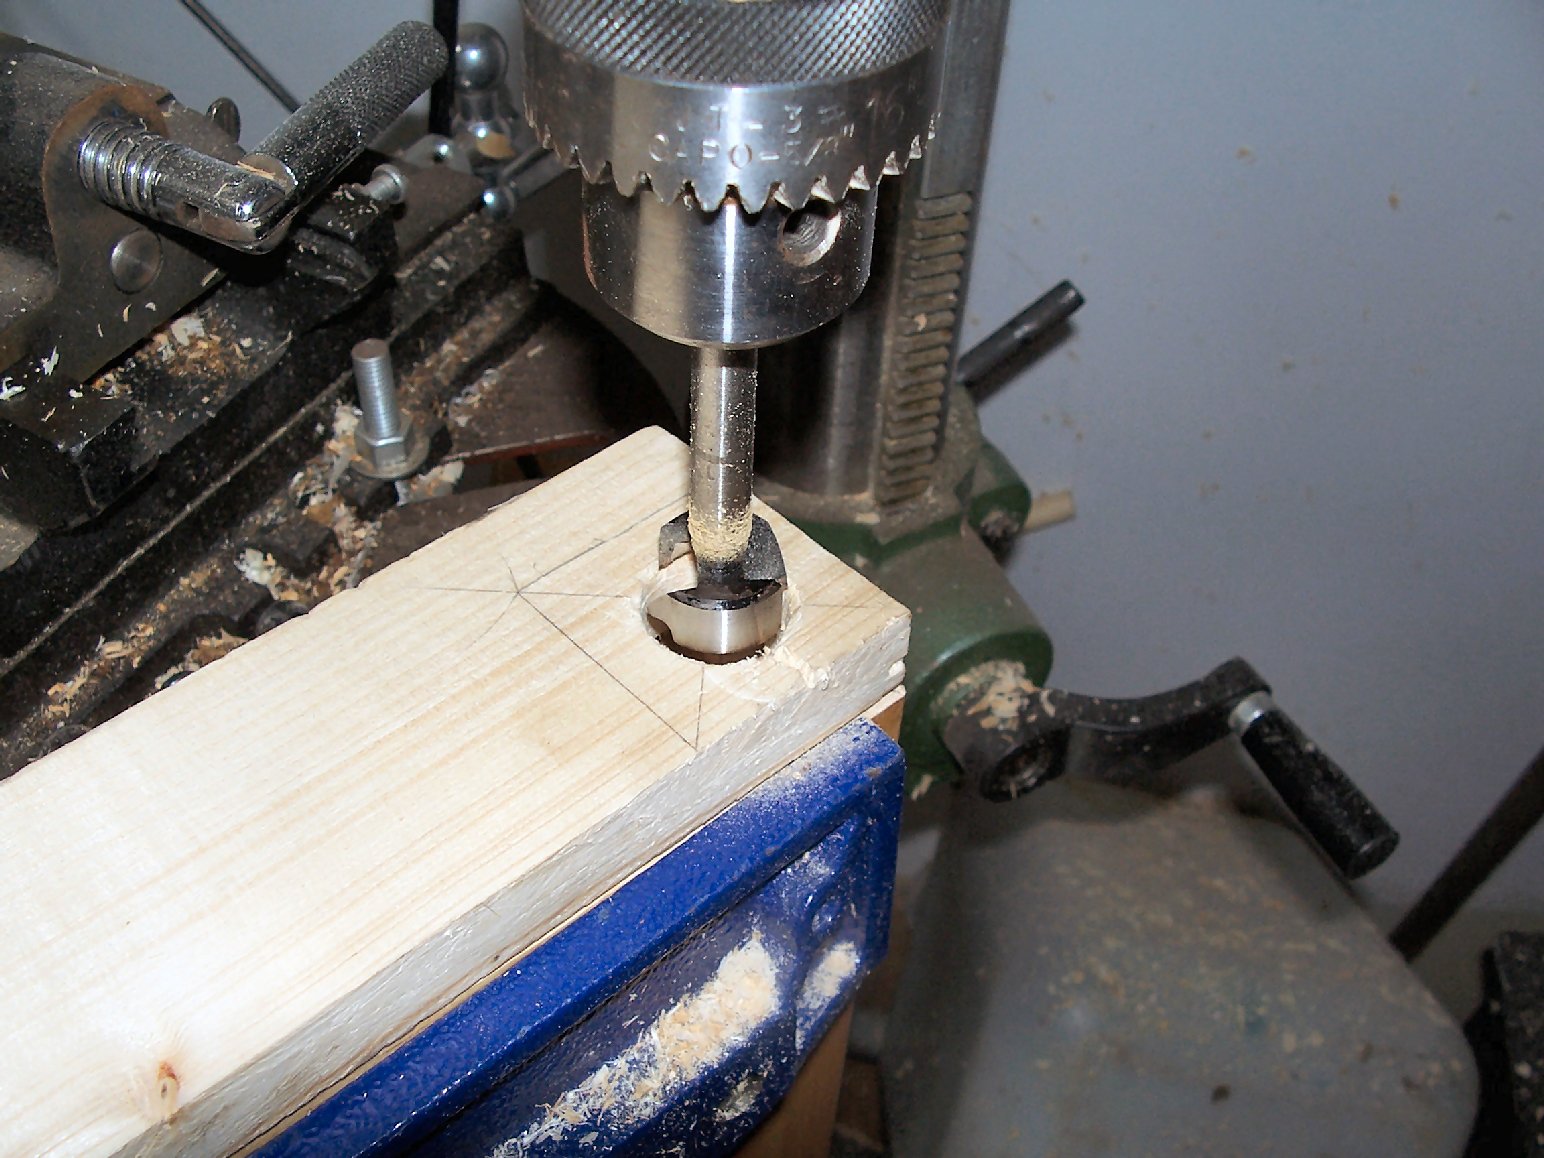
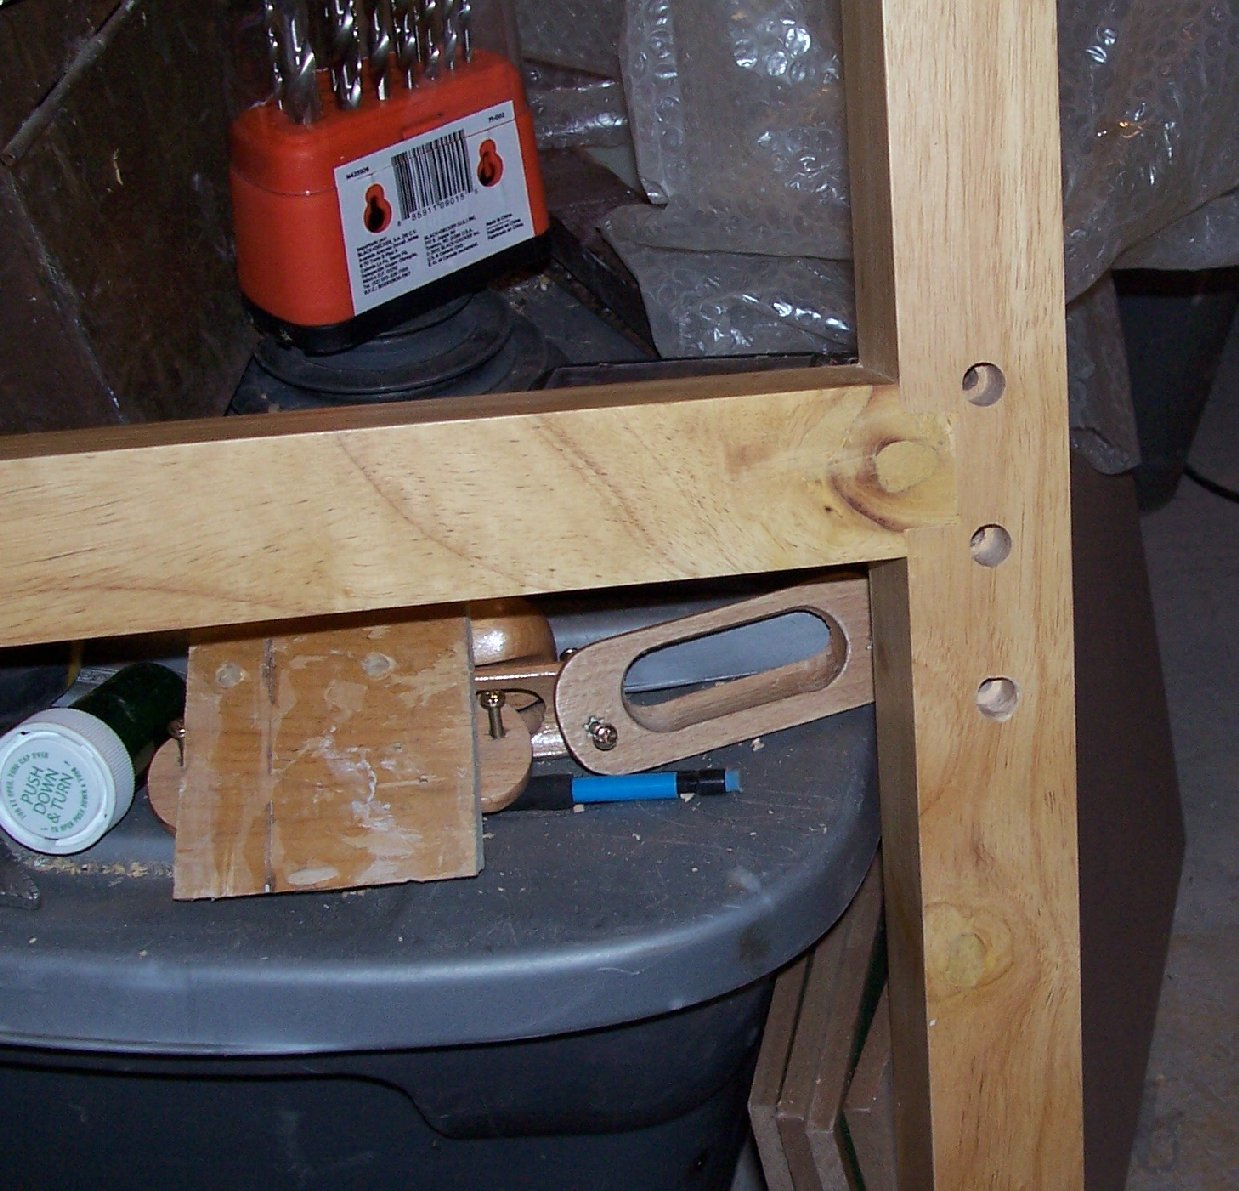
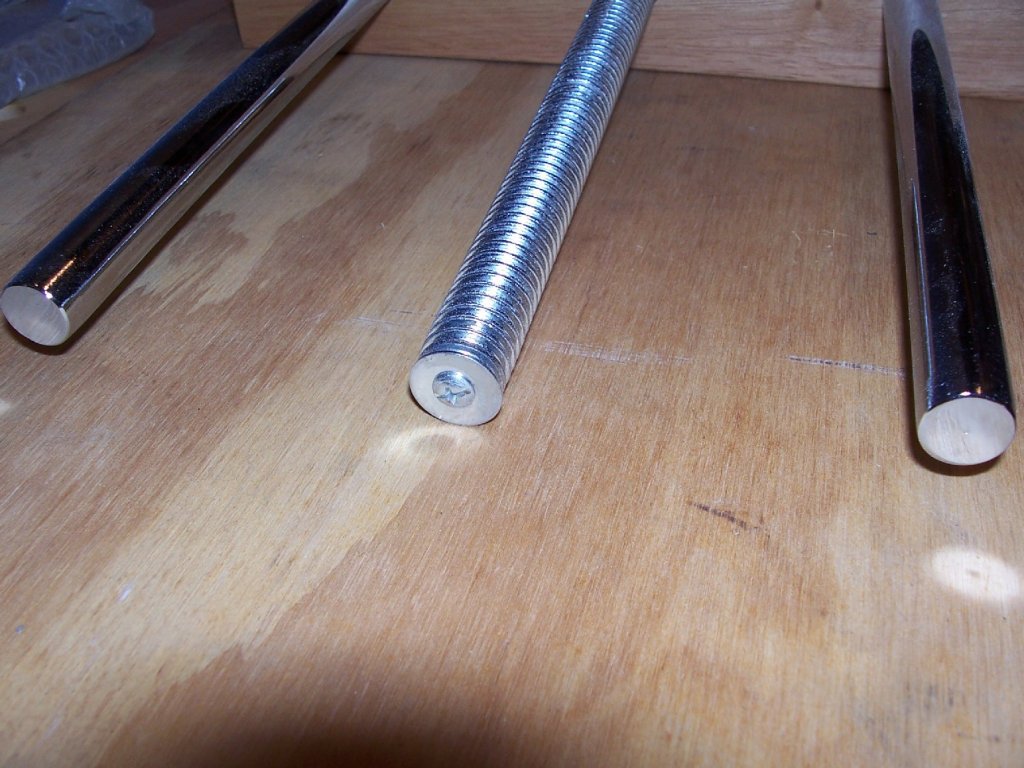
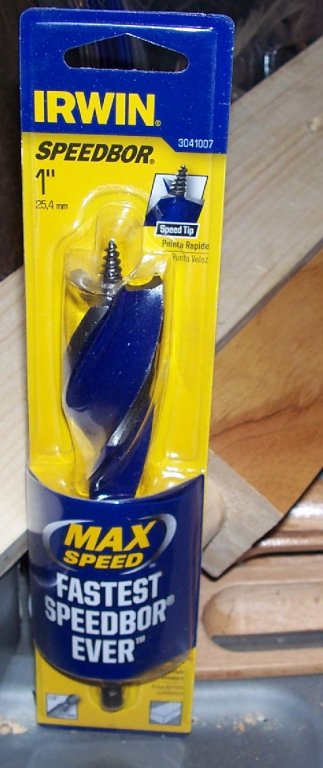
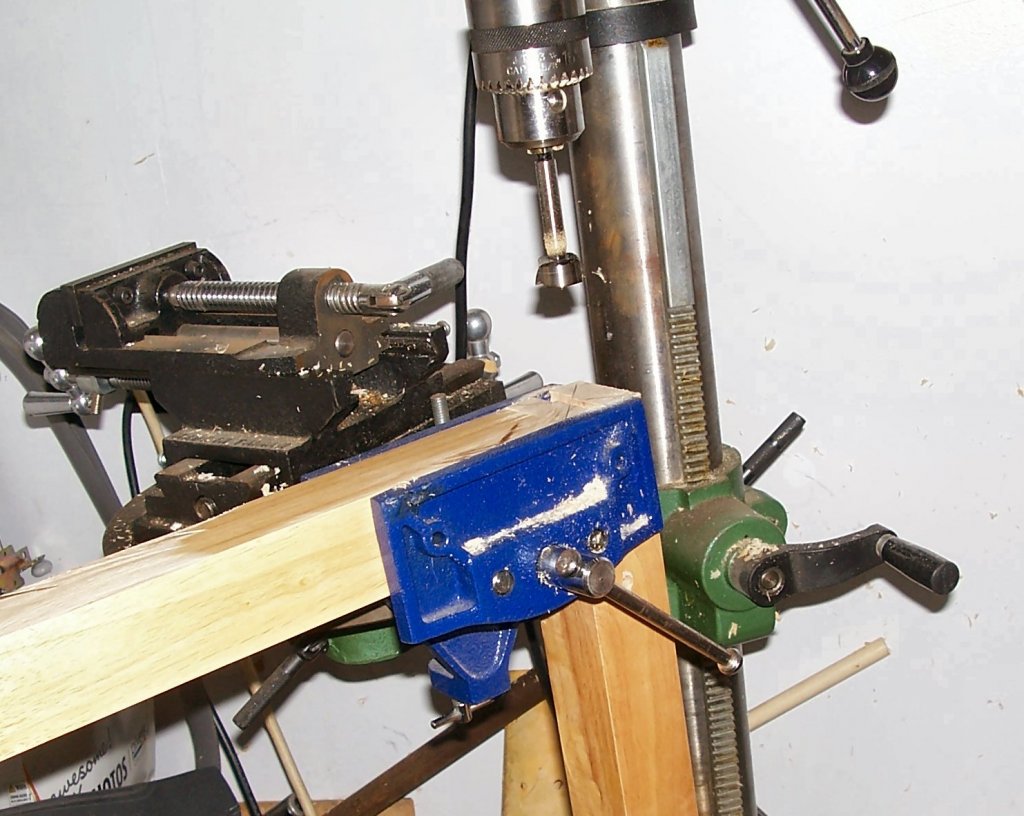
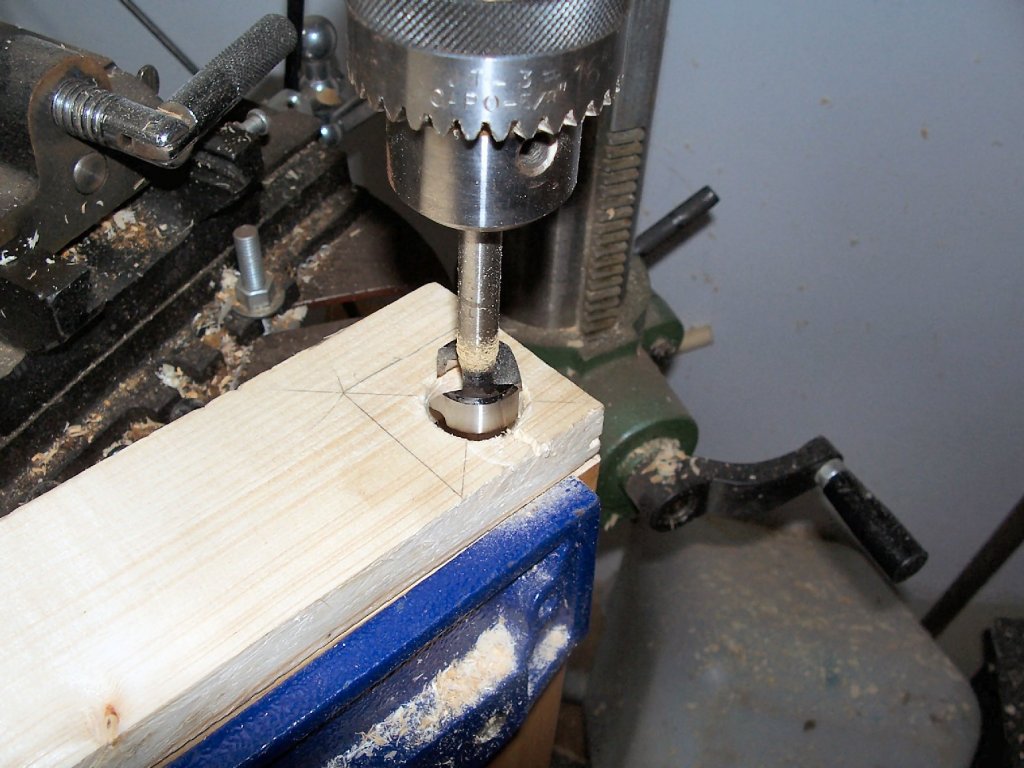
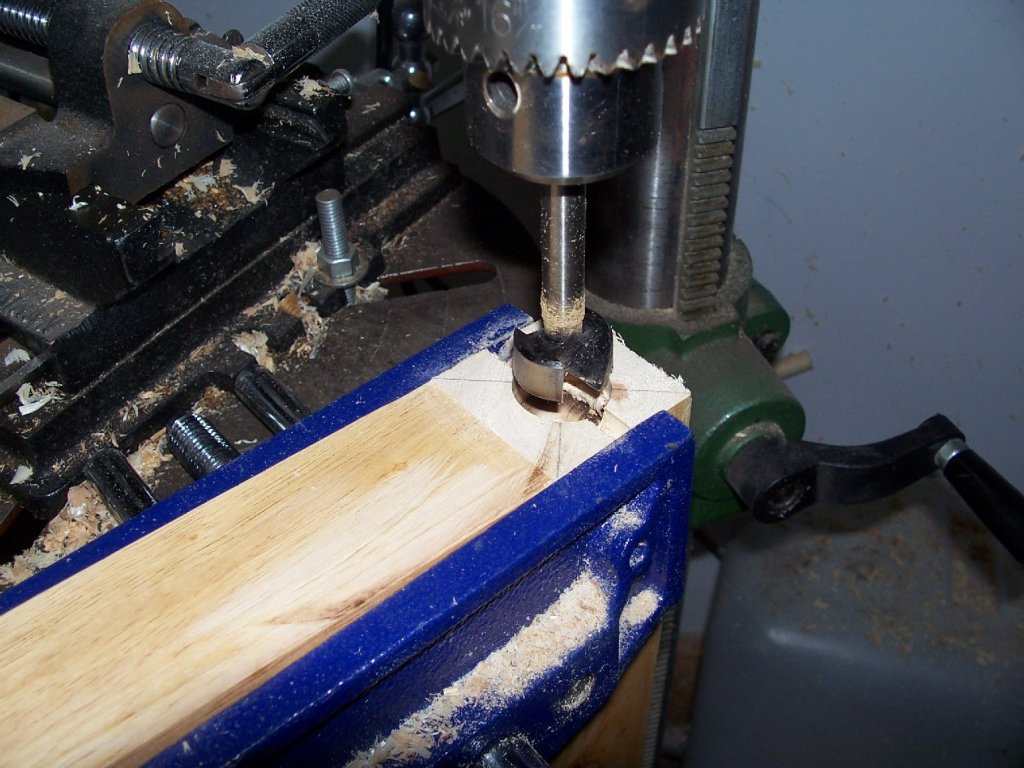
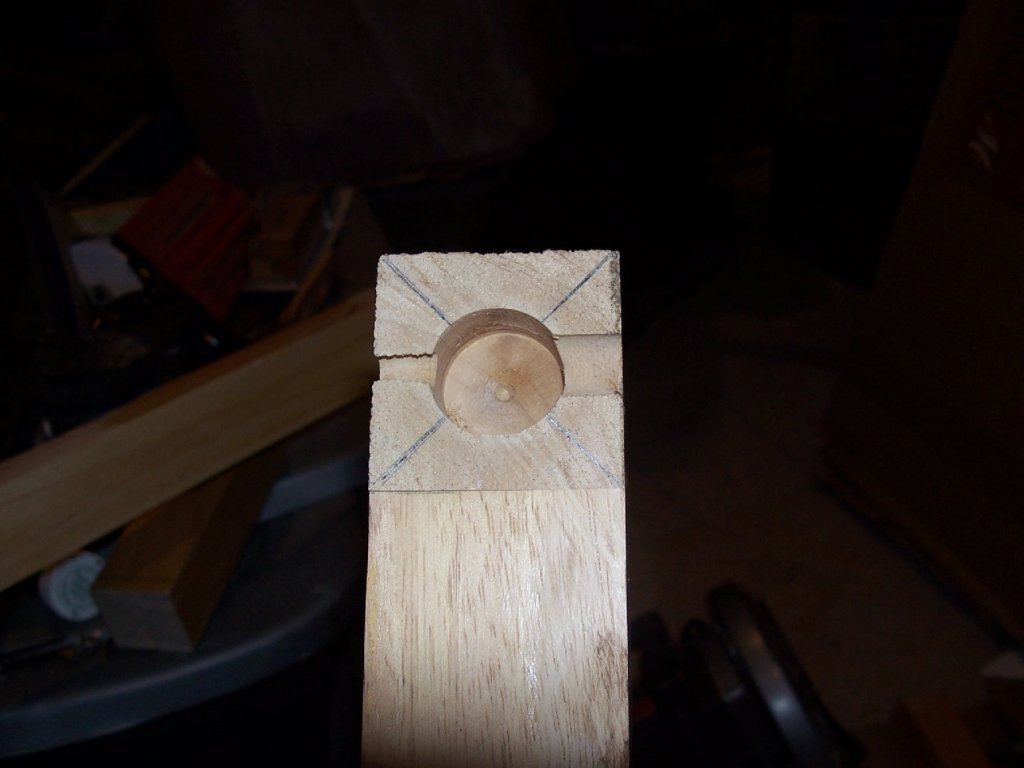
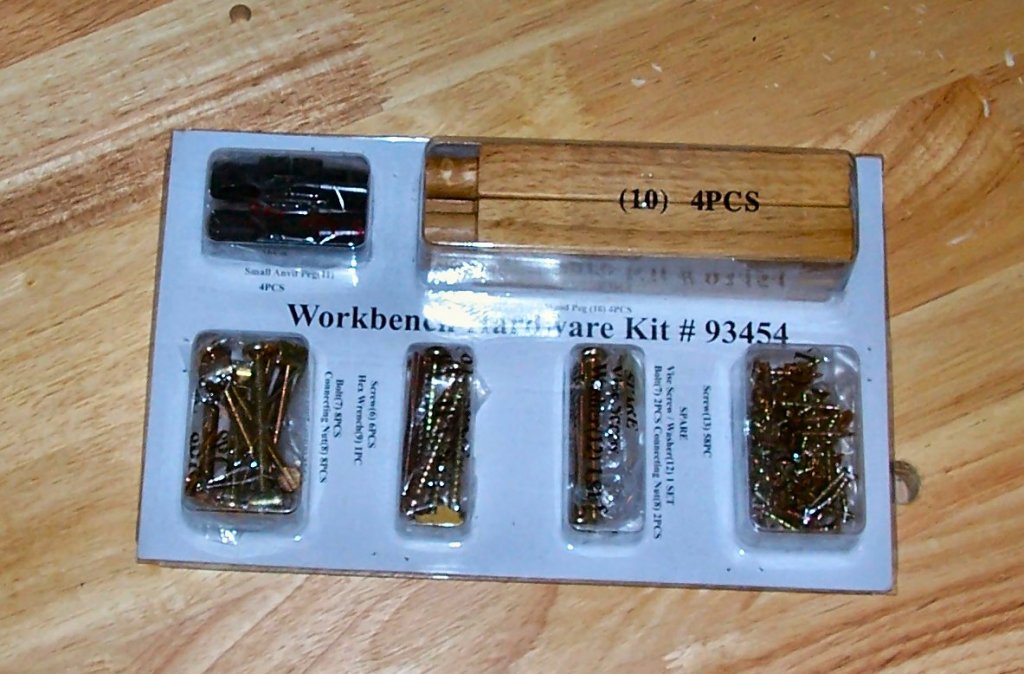
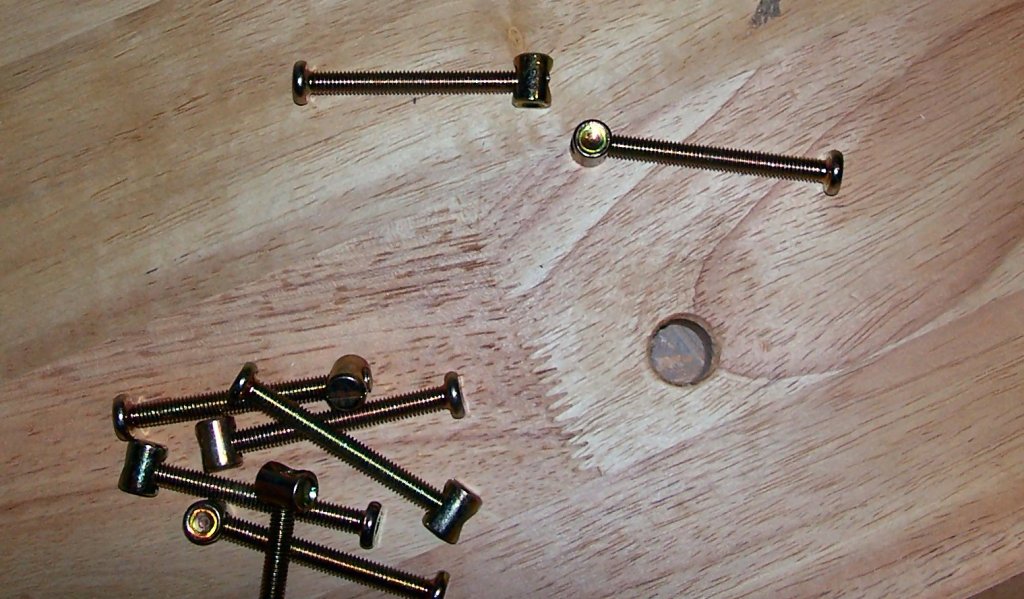
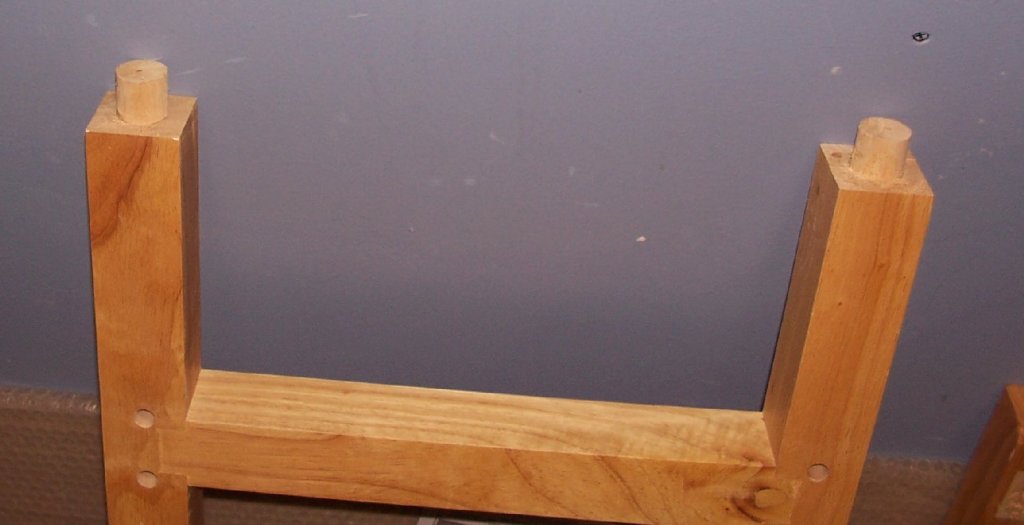
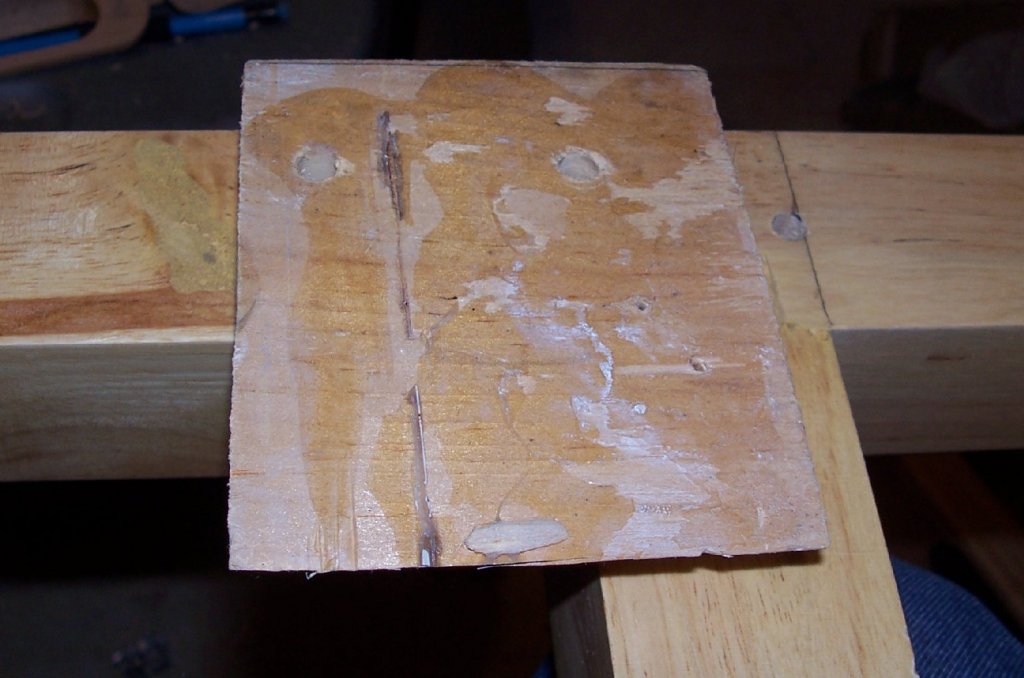
Part 02 I bought the new drill and the 1” dowel yesterday. There is a major problem with this drill though, when they say “Fastest Speedbor Ever” they mean it! If you need to drill a 1” hole through your log cabin wall, a stud, the side of your wood hulled clipper ship, etc., this bit is what you need! Subtle delicate hole drilling is not its forte! The screw tip pulls it trough the wood, with little control. So I had to rethink how I was going to drill for the dowels. I went back to the slightly dull Fosner bit, and setup to use my drill press. As it was buried by the stuff I’d moved to do the shop renovation, this took a while, and as you will see, the pictures will show a lot of clutter still around it. Here is the basic setup. I attached my wood vise to the table and rough clamped a leg assembly into it. Once everything was lined up I placed the jig onto the leg, to do the fine alignment of the hole position. Next I used a level to level the leg and assure that the hole would be straight into the leg (no picture). I then drilled the hole 5/8” deep. At the present time the bit is still in the drill press, as the chuck key got knocked into the clutter, and I can’t find it! Oh, well it will turn up when I get the shop cleaned out. This is a picture of the drilled leg. I only drilled the hole 5/8” deep, as the dowel will only be a locating piece, and I did not want to disrupt the glued crosspiece joint any more than I had to. Here is a leg assembly drilled and with the dowels glued in. As I had figured when I installed the screws that had originally held the feet into the original doweled legs, they pulled right out of the 1” dowel pins. I guess Lowes dowels are a lot softer wood than the workbench’s. To attach the feet I used 3” deck screws through the bottom of the foot and into the cross piece. I predrilled the feet with a clearance hole for the screw, and a counter sink to get the screw head below the foot surface. I did not glue this joint. This is a completed leg assembly. Now I could start actually building the workbench! Harbor Freight has a nice blister pack for the workbench hardware. Note that the Allen wrench you use to assemble the bench, is in the blister with the screws for the second step! As it turns out my extra long Allen wrench came in handy for the later steps, so digging it out for the first step, came in handy. 🙂 The first step is to attach the back shelf support, the one that holds the lower shelf in place. HF supplies bolts with a threaded pin for this purpose. These are the two shelf supports. There are two attachment holes at each end, and a grove on one side for the shelf. Getting that first bolt in is tricky! You have to hold the leg and support together while feeding the bolt in, lining the pin up so the bolt will engage, and screwing in the bolt! A second person comes in handy for this. Unfortunately I didn’t have one handy! The pin has a slot on one end, so you can use a flat blade screw driver to help align it with the bolt. I’ll continue in Part 3.


-
I'm going to use some shims for leveling. More on the mods coming. I do plan to reinforce the legs, again in the coming mods. I may add a plywood back later, will see how the stability is as I begin to use it.
-
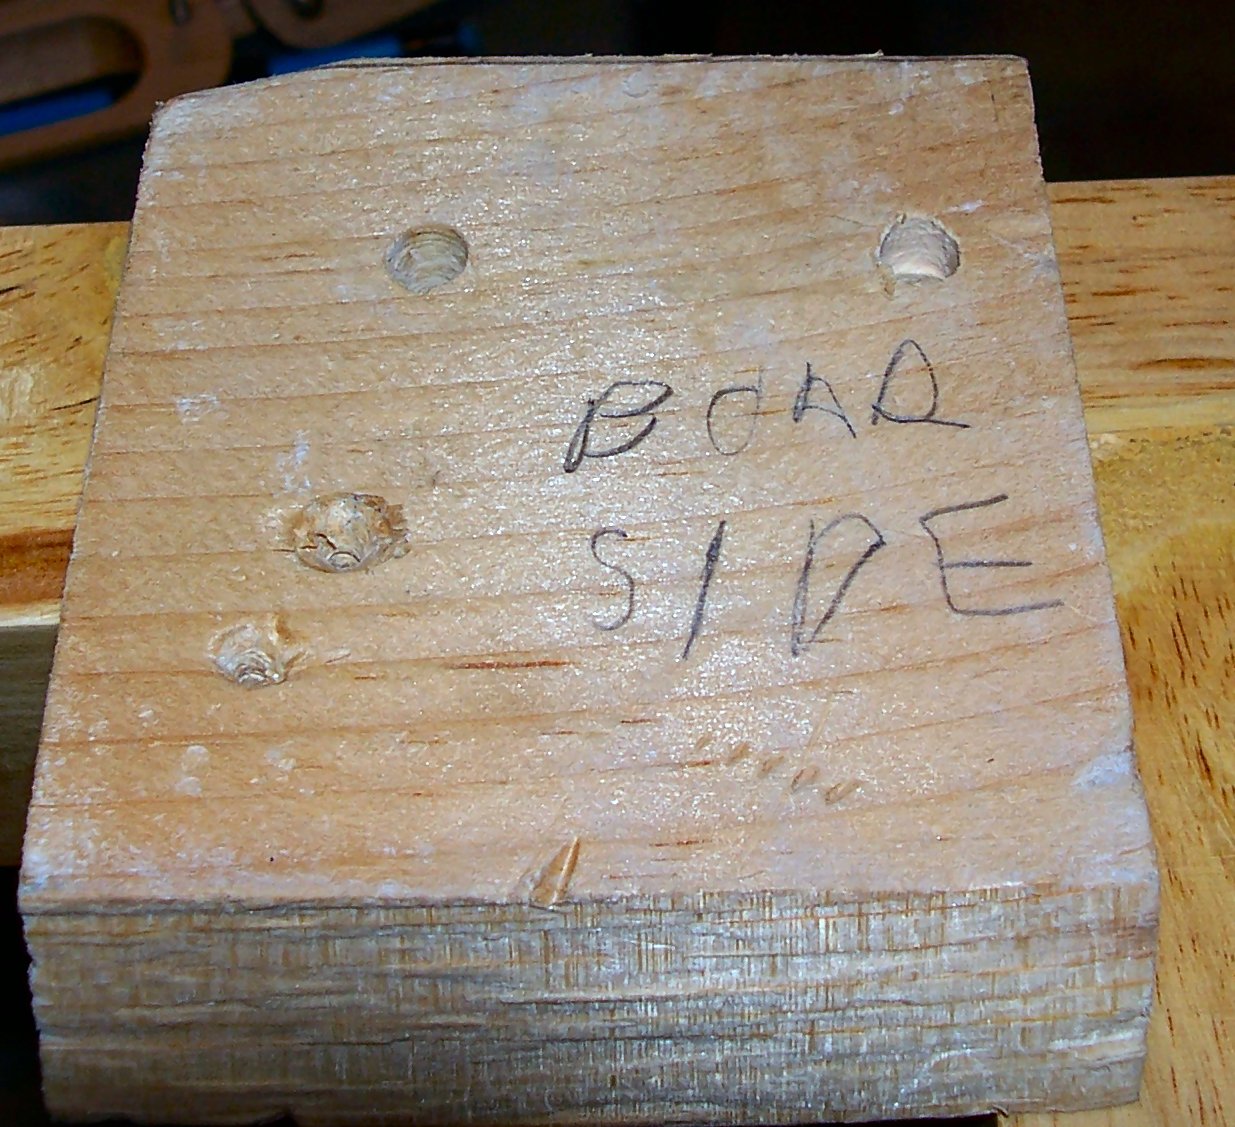
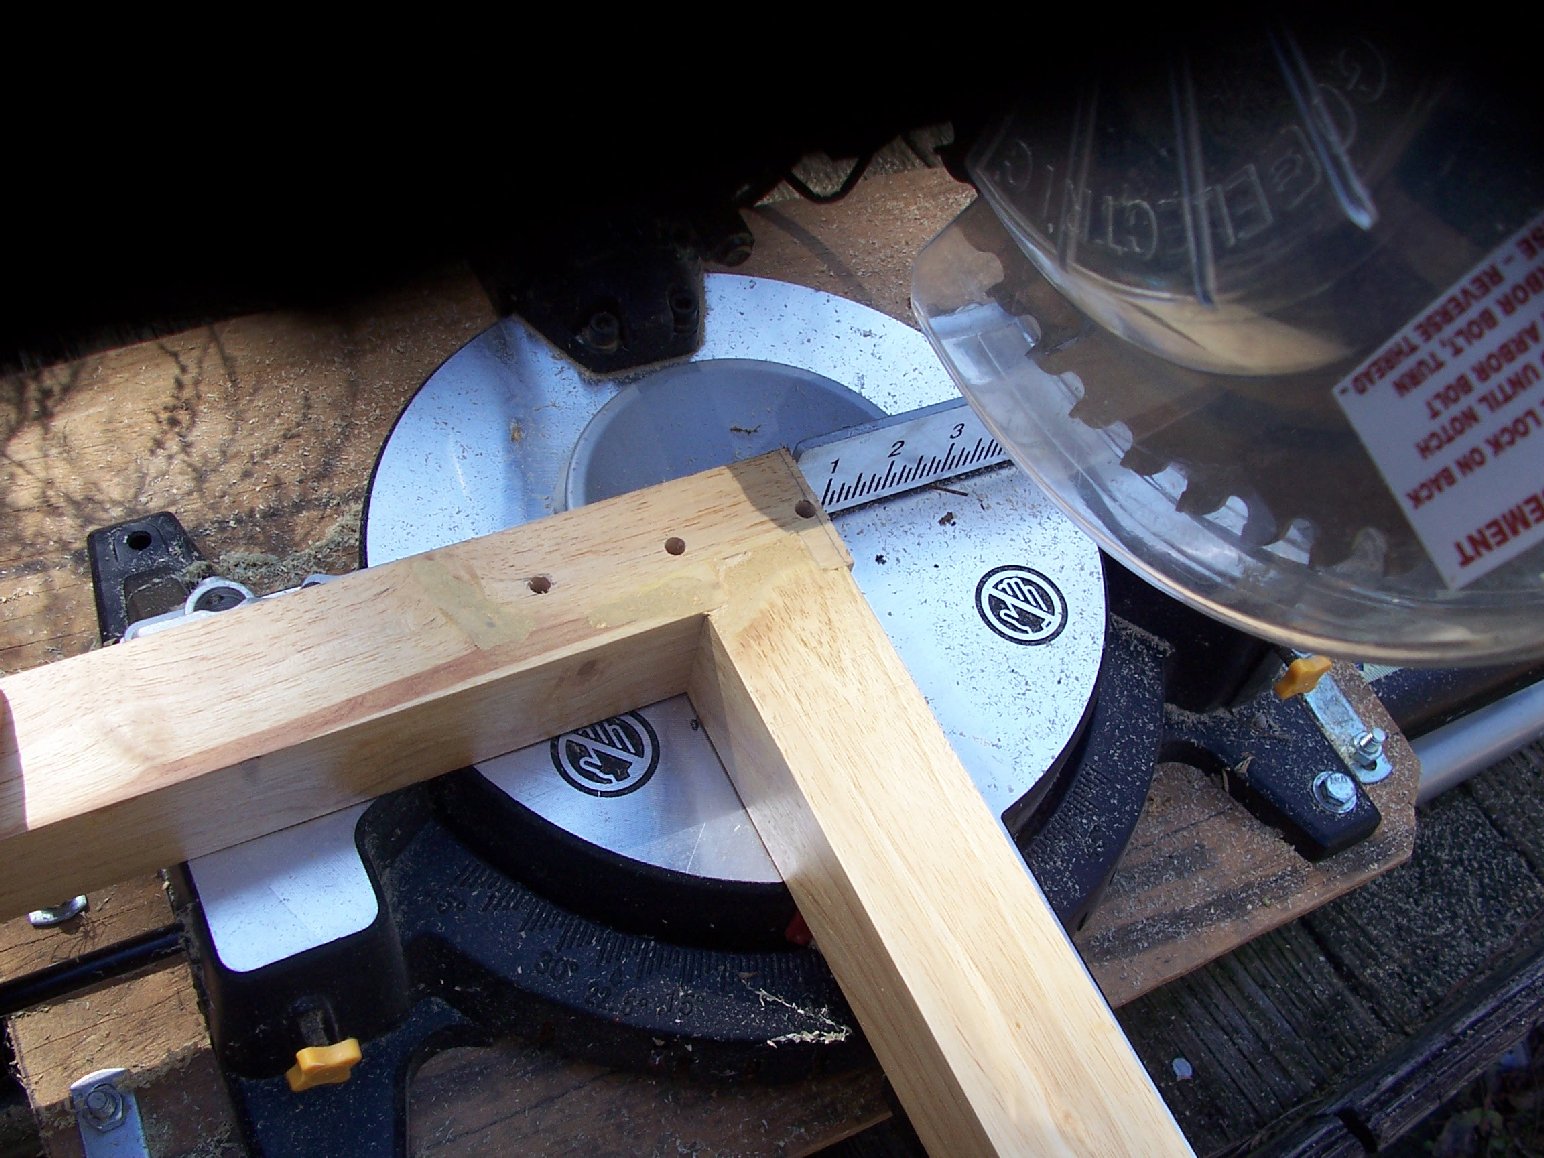
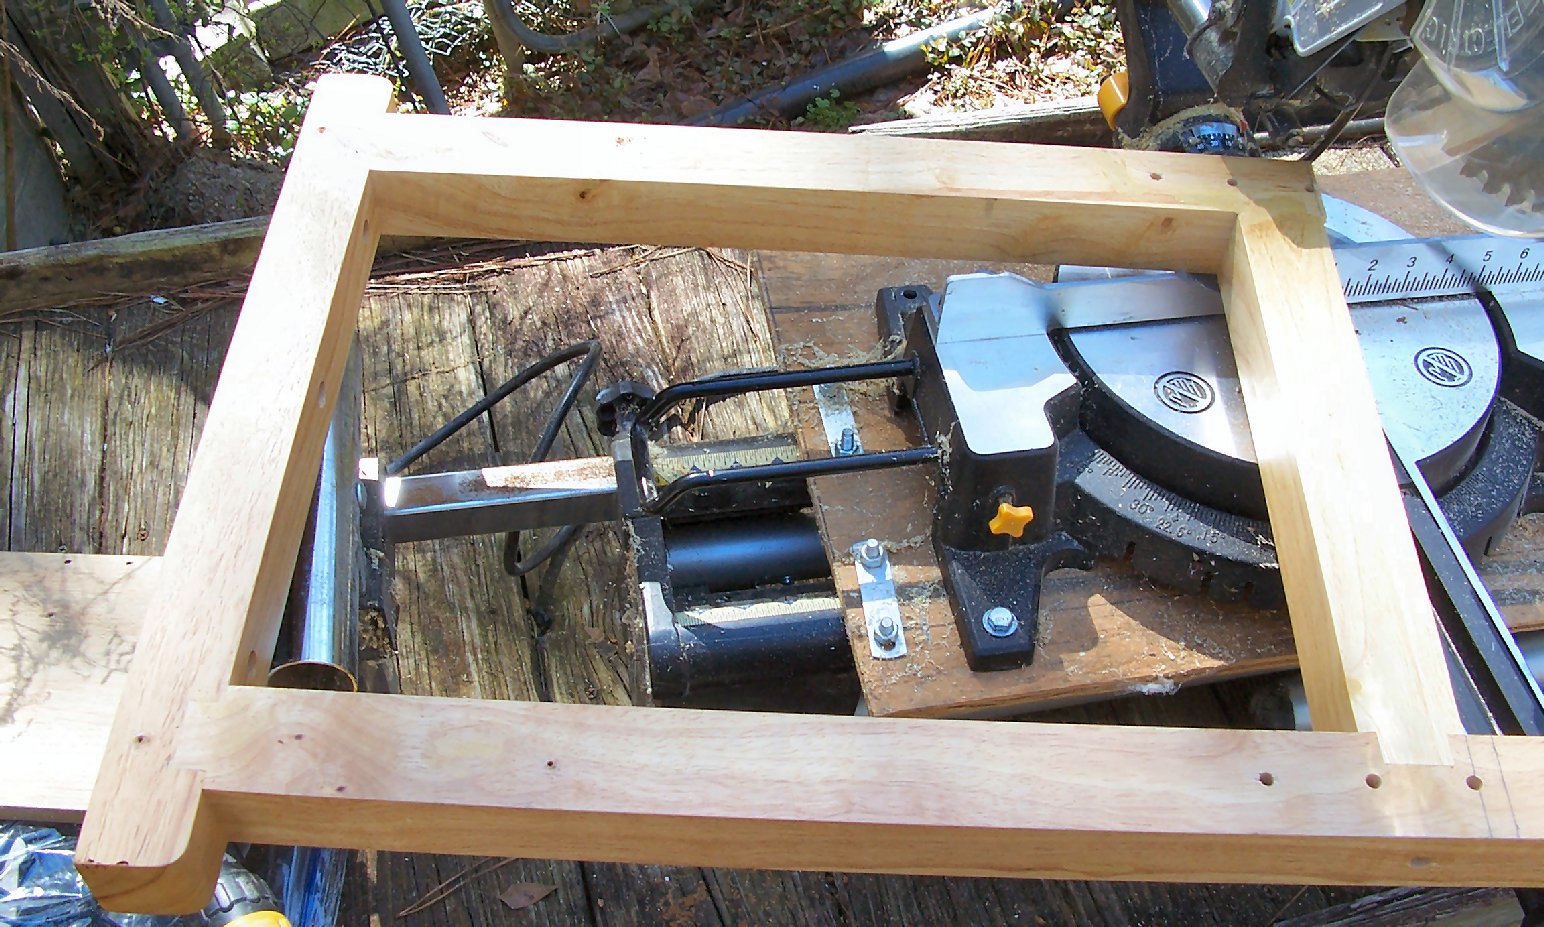
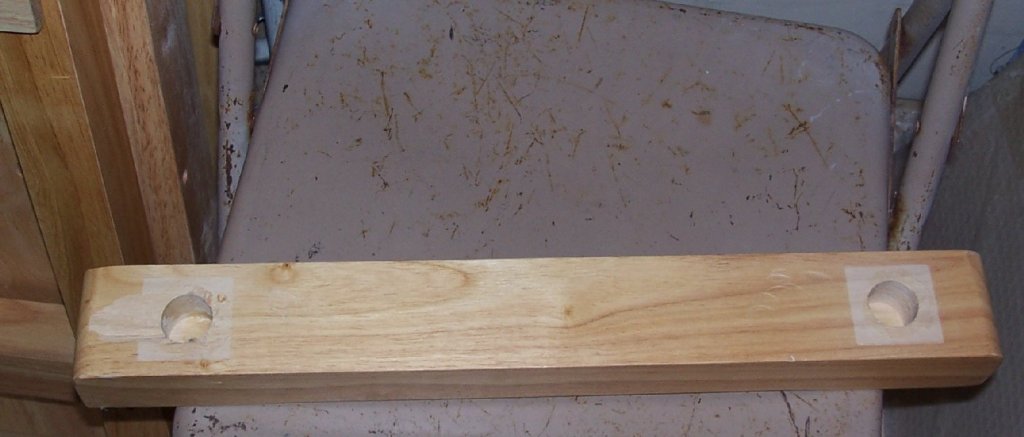
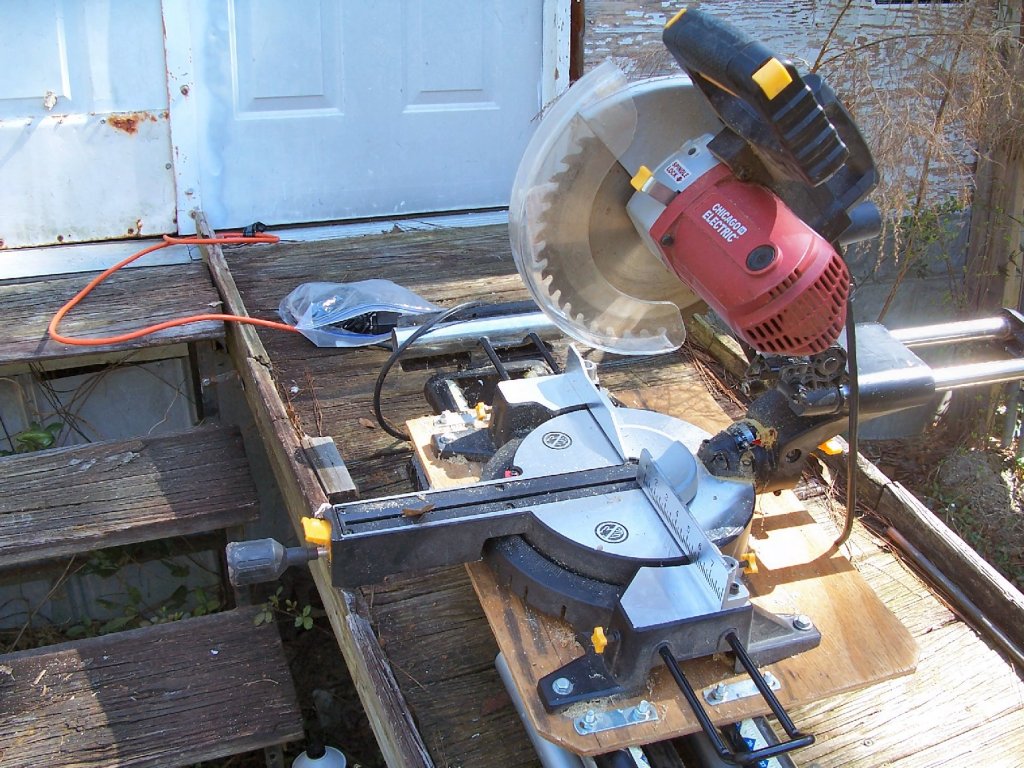
Part 01 After many years of wanting one, I finally bought a Harbor Freight Hardwood Workbench! Actually this is the second one I bought, the first one was in my truck when it was stolen last year! This workbench is designed to be used while standing, not ideal for me, or my knees! So I’m going to kit bash it so I can use it while sitting at it. As it comes the work surface is 34 inches high, I prefer a 27 inch height. Also I need to delete the drawers and the front shelf support bar and shelf board of the lower shelf. I’ll save the drawers and slides for a future project. The legs below the horizontal shelf board on the sides are 7” long, so cutting the legs off at the bottom of this will get me the height I need. The first step was removing the screws that held the feet to the legs, and taping them off the legs. Thankfully the manufacturer did not do a good job of gluing them together! So the first problem is that I will need to drill the shortened legs for a new 1” dowel to mate with the existing hole in the feet, more on this later. I will not be regluing this joint when I reassemble the legs, I will add a couple screws from the foot into the horizontal shelf board to add the needed stiffening. The pins on the end of the legs are turned not a separate dowel, and are slightly larger than 1” anyway, with a matching larger hole in the feet. When I shorten the legs the cut will bisect the lower shelf bracket hole, so I clamped a scrap piece onto a leg, and drilled through the existing holes to make a jig. Next I drilled new upper holes using the jig, then opened up the inside with a larger drill to match the existing holes. I used a piece of duct tape on the larger drill as a depth guide. Sorry that some of the pictures are a little blurry. I had to balance the part on my knees while holding it in one hand and using the other for the camera. I broke out my miter saw to cut the legs. I adjusted the stop on the end of the table so all the legs would be the same length, and cut the first leg. At first I was going to cut just below the hole, but then decided to cut it flush, allowing the foot to rest on the cross piece. This should be more stable. To cut the other leg, I had to remove the square piece, which originally held the slides for the drawers. It stuck up past the top of the leg assembly, and interfered with the stop, when I flipped the assembly over to cut the other side. After the legs were cut I re-installed the piece, as it also stiffens the assembly.Here are both leg assemblies cut. As this picture shows the new end of the leg has this nice divot in it from the original shelf support hole. This is not very conducive to drilling the end for a dowel! So I build another jig to guide the drill for the new dowel hole. It was at this point that I discovered that both my old spade bit and even older Fosner bit were both dull and wandered while drilling!. So I tore the jig apart, and will buy a new drill bit, when I buy a piece of 1” dowel.


- 14 replies
-
- 10
-

-
I was watching a video of a car show from a couple of years ago, where Ford had a machine that was 3D printing a plastic 1:1 T-Bucket body and another robotic one that was sanding the finished bodies.
- 133 replies
-
- 5
-
-
- alert class
- tugboat
- (and 1 more)
-
I tried, and tried, but failed, to hold it in! "I guess, the yokes on us!"
- 449 replies
-
- 3
-
-
- sultana
- model shipways
- (and 2 more)
-
In short, no. Having the sails in place would greatly complicate attaching the shrouds, and ratlines, due to limiting the space near the masts, and risk snapping off or breaking the yards.
-
Almost 30 Years since my last build!
thibaultron replied to Todd Hart's topic in New member Introductions
Light colored floor, to make the task of finding dropped parts. Room for display cases, as it sounds like you don't have room in the rest of the house for displaying your models. Depending on your location, AC. Shop Vac that can be hooked to your saw sander, etc. Or at least clipped near by. Piece of plate glass for your workbench. One from an old china cabinet should be cheap or free, if you can find someone getting rid of one. Small bench top drill press. -
Got the Sinagots book scanned , converted to text, and translated. bad news, really bad translation. The OCR I used is 20 years old, and while it did catch most of the words, it missed a lot of the French accent marks! It is readable, but not for technical details. I have found, though, how to set MS Word to spell check the OCRed French text, before translation, so I'll work on that, then re-translate. The spray booth is presently hidden behind building supplies, so not much progress has been made. This weekend, I'm going to be cleaning, and rearranging the renovated portion of the shop. Hopefully next week, I can continue the build.
-
How about a Catalina, in the markings of the one that spotted the Bismarck, and thus allowed the Swordfish to attack her?
-
Patrick; You are probably the only one who will ever notice any distortion in the shrouds, they look great!
-
Just to put my 2 cents in, a few things I learned about derusting tools while rebuilding a milling machine. Take your average new steel bar. The surface you see is not the steel, it is an oxidized clear surface that is preventing further rust! If you dip the end in a rust remover, pull it out and clean the chemical out, the entire surface will start to aquire a light rust coating. You have to polish it to restore the very fine surface oxide surface. I found this out through reading after trying both electrolysis, and rust removers on the milling machine parts, only to have the parts start to get this light rust as soon as I pulled the parts out of the electrolysis tank, or removed the chemical cleaners. The rust converters, do leave an un-removable coating, as such, I'd worry about using them on critical surfaces, like slides, measuring surfaces, like the tips of micrometers, etc. My final solution was electrolysis followed by a lot to hand polishing with steel wool for the sliding surfaces, and fine sanding on the cosmetic ones. Or wire brushing for lightly rusted areas. I did not end up with a new looking machine, but everything worked as it should, and it cut accurately. For the electrolysis tank I used a large plastic storage tub, the kind you can buy at any major store in the US. The supply was a battery charger I built for the batteries (lead acid seal ones used in emergency lights, motorized child cars, etc.). It had an Amp meter and as the part became less rusty, the current would drop. Any low voltage DC supply would work. Be sure to kill the power before you stick your hand in the water! It has been 20 years, so my memory is a bit vague, but I think I used Washing Soda (not baking soda) in the water. This is available in the laundry detergent aisle, here in the US. In the end, if I had simply gone over the sliding surfaces with some fine steel wool, and wire brushed the rest, I would have been better off. So for just fin rust, a wire brush, or steel wool, with maybe dental picks for the bottom of the knurls.