HOLIDAY DONATION DRIVE - SUPPORT MSW - DO YOUR PART TO KEEP THIS GREAT FORUM GOING! (Only 13 donations so far - C'mon guys!)
×


usedtosail
-
Posts
2,405 -
Joined
-
Last visited
Content Type
Profiles
Forums
Gallery
Events
Everything posted by usedtosail
-
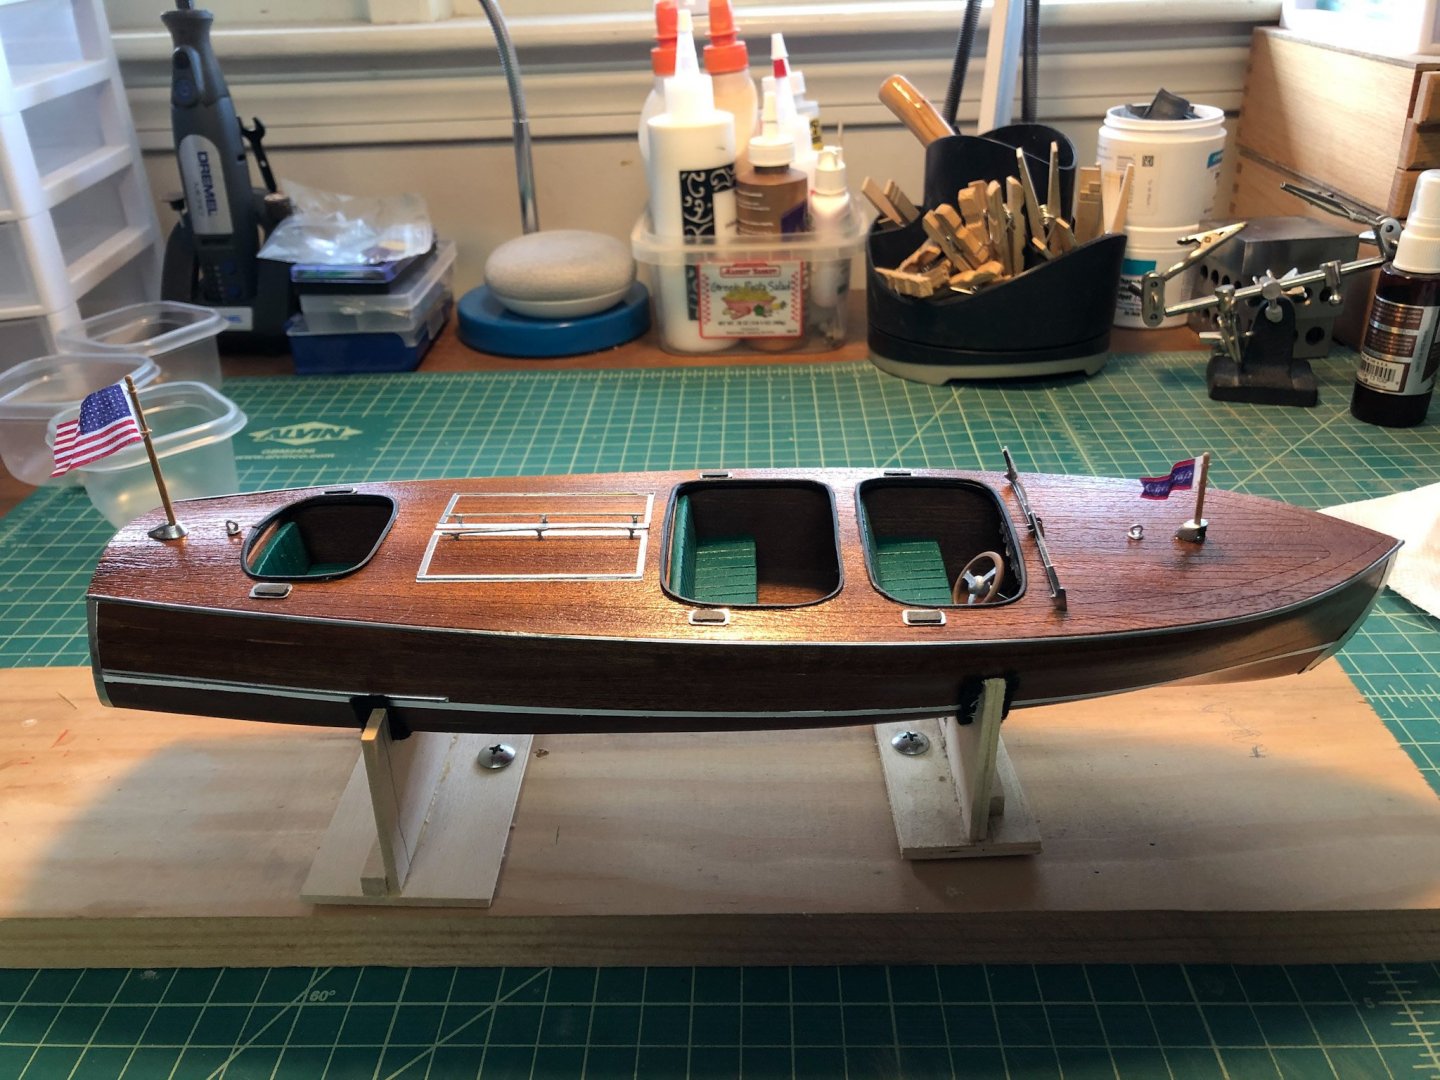
 Just about done now. I glued on the rest of the details to the deck and transom, and also the prop and rudder. Only one more thing to add - a name on the transom and the logo. The kit supplied a couple on the sticker sheet but I am not using them. I made a decal sheet with the name and the logos but I am waiting to receive some Micro Sol to get the decals to lay down better. Should be here tomorrow.
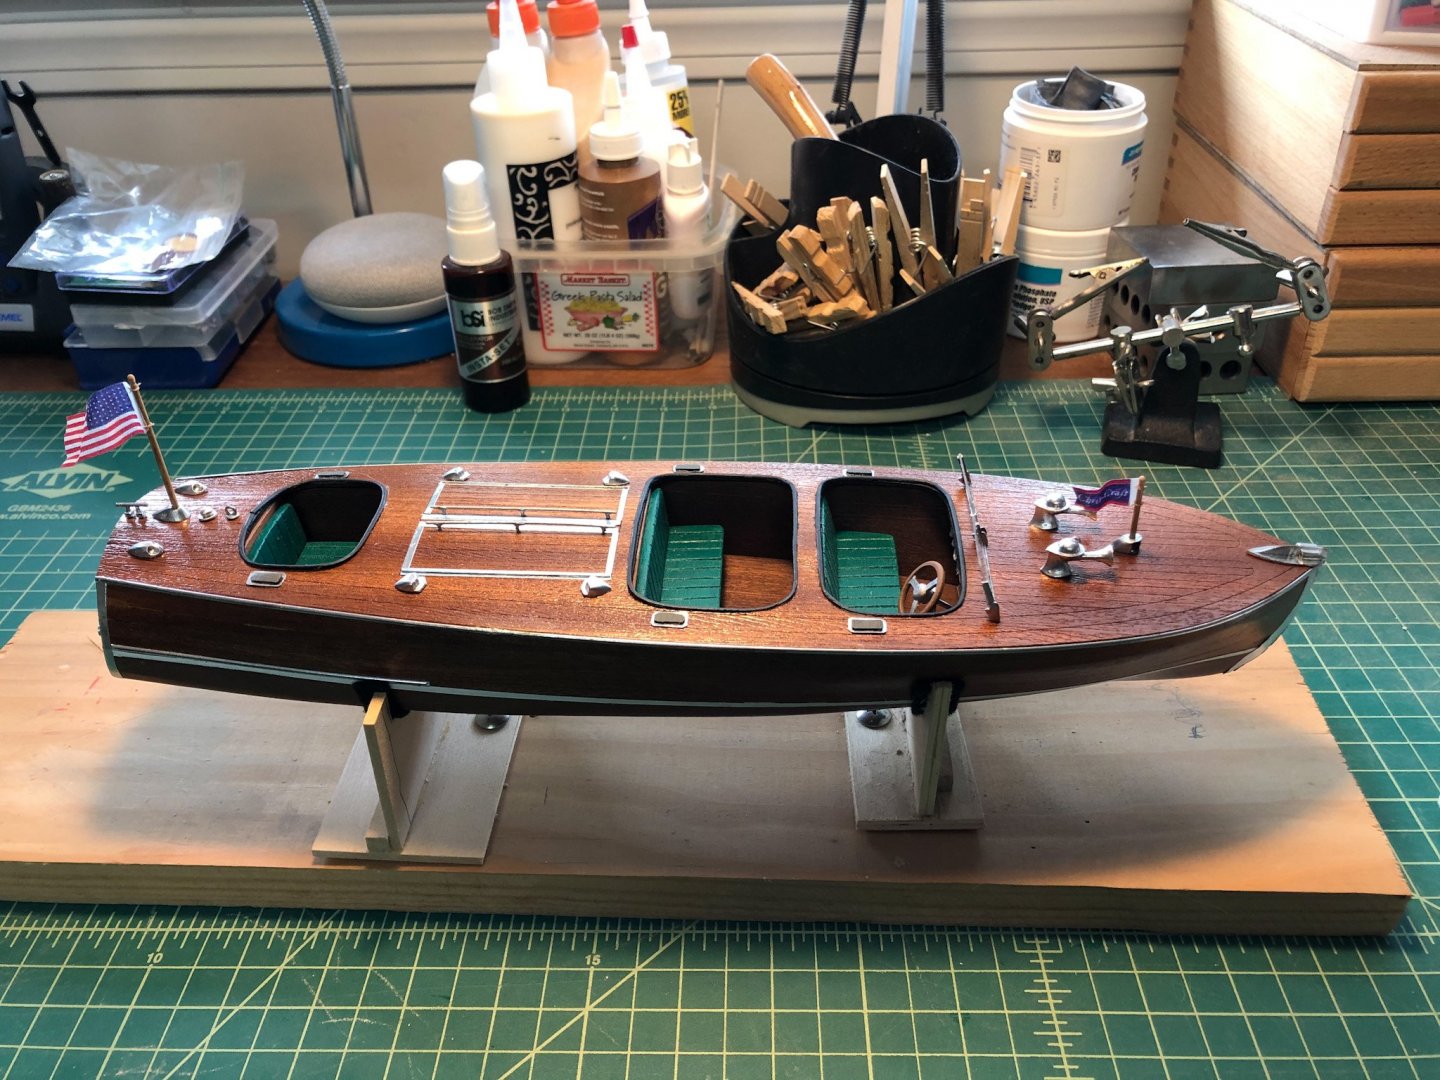
-
You are doing a great job Cleat. That finish is gorgeous. I like the way you made your seats too.
- 36 replies
-
- 1
-

-
- chris-craft 1956 capri
- dumas
- (and 2 more)
-
I have his vertical rope walk which I converted to use horizontally. It works great for me. I did have to replace the power supply but they are cheap and easy to find.
- 11 replies
-
- 2
-
-
- block seizing serving
- serv-o-matic
- (and 1 more)
-
Very very nice build Jesse. The flags are exceptional.
- 1,306 replies
-
- 4
-
-
- syren
- model shipways
- (and 1 more)
-
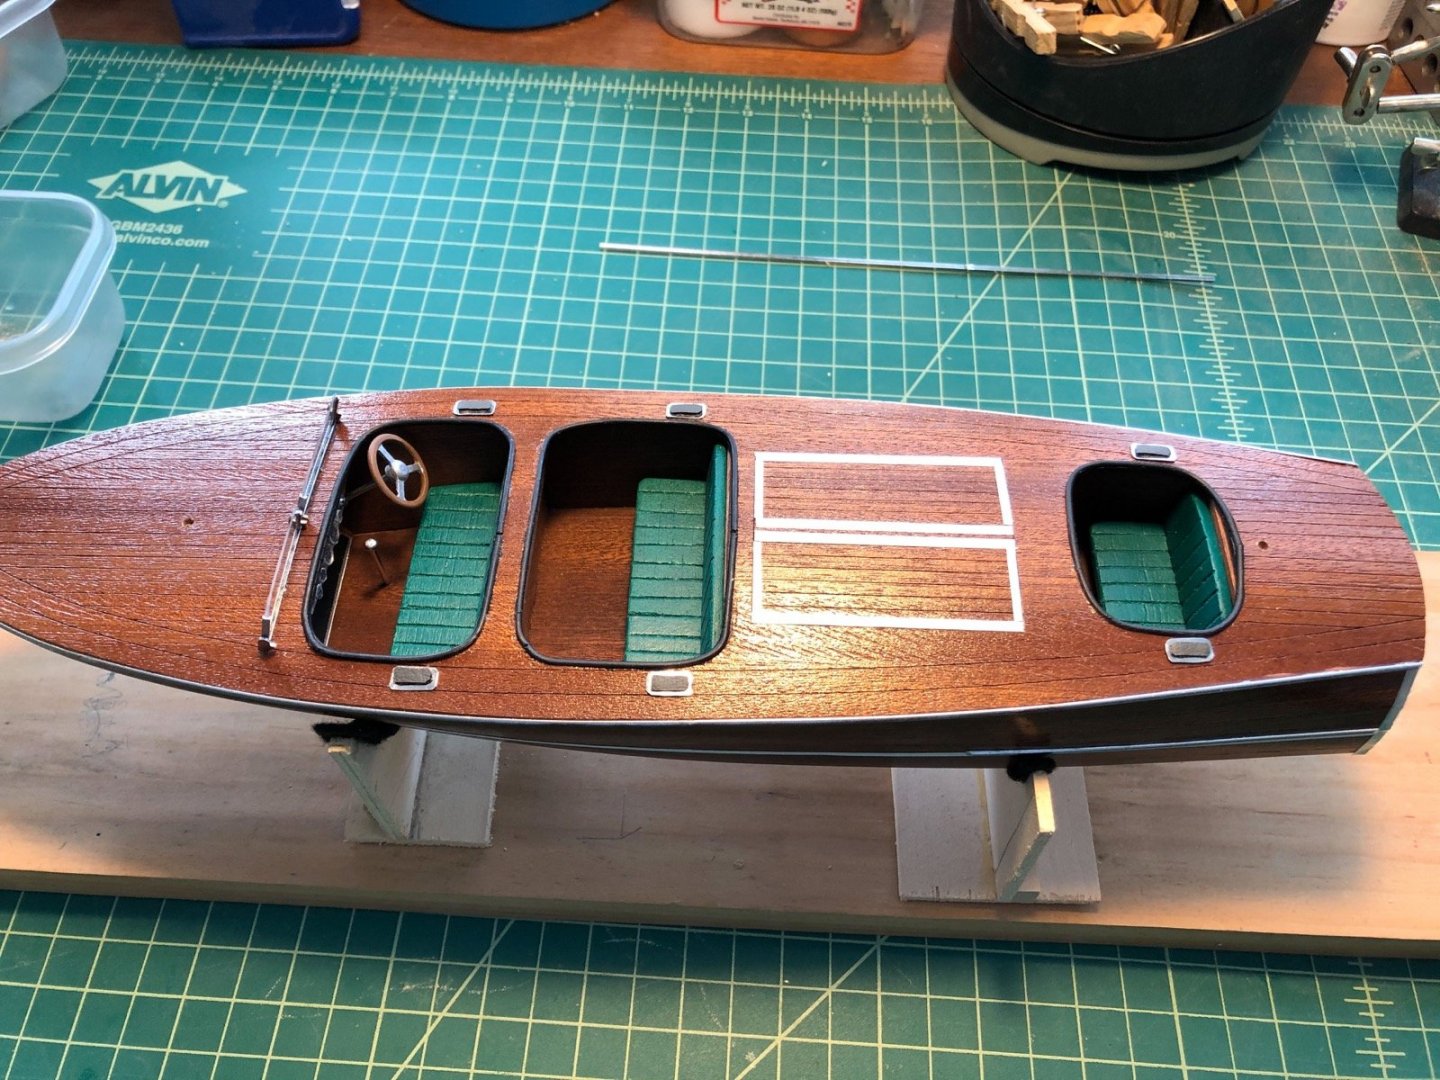
Now it was time to drill the holes for the hatch handles. The thought of this actually kept me awake some last night because I only had one shot at this. Drilling three holes in a straight line by hand for each one was a bit daunting. I thought about using that wood strip with the holes as a jig but it was too clumsy so I instead laid the handle down on the deck and used them directly to get the positions of the holes. Well I had no problem getting the holes right and the handles fit right into the deck. With that of of the way I starting installing the other details I have been working on, including the hinges, flag staff, jack staff, and lifting hooks. I have more details to add and I am working on some decals for the transom. It won't be long now.

-
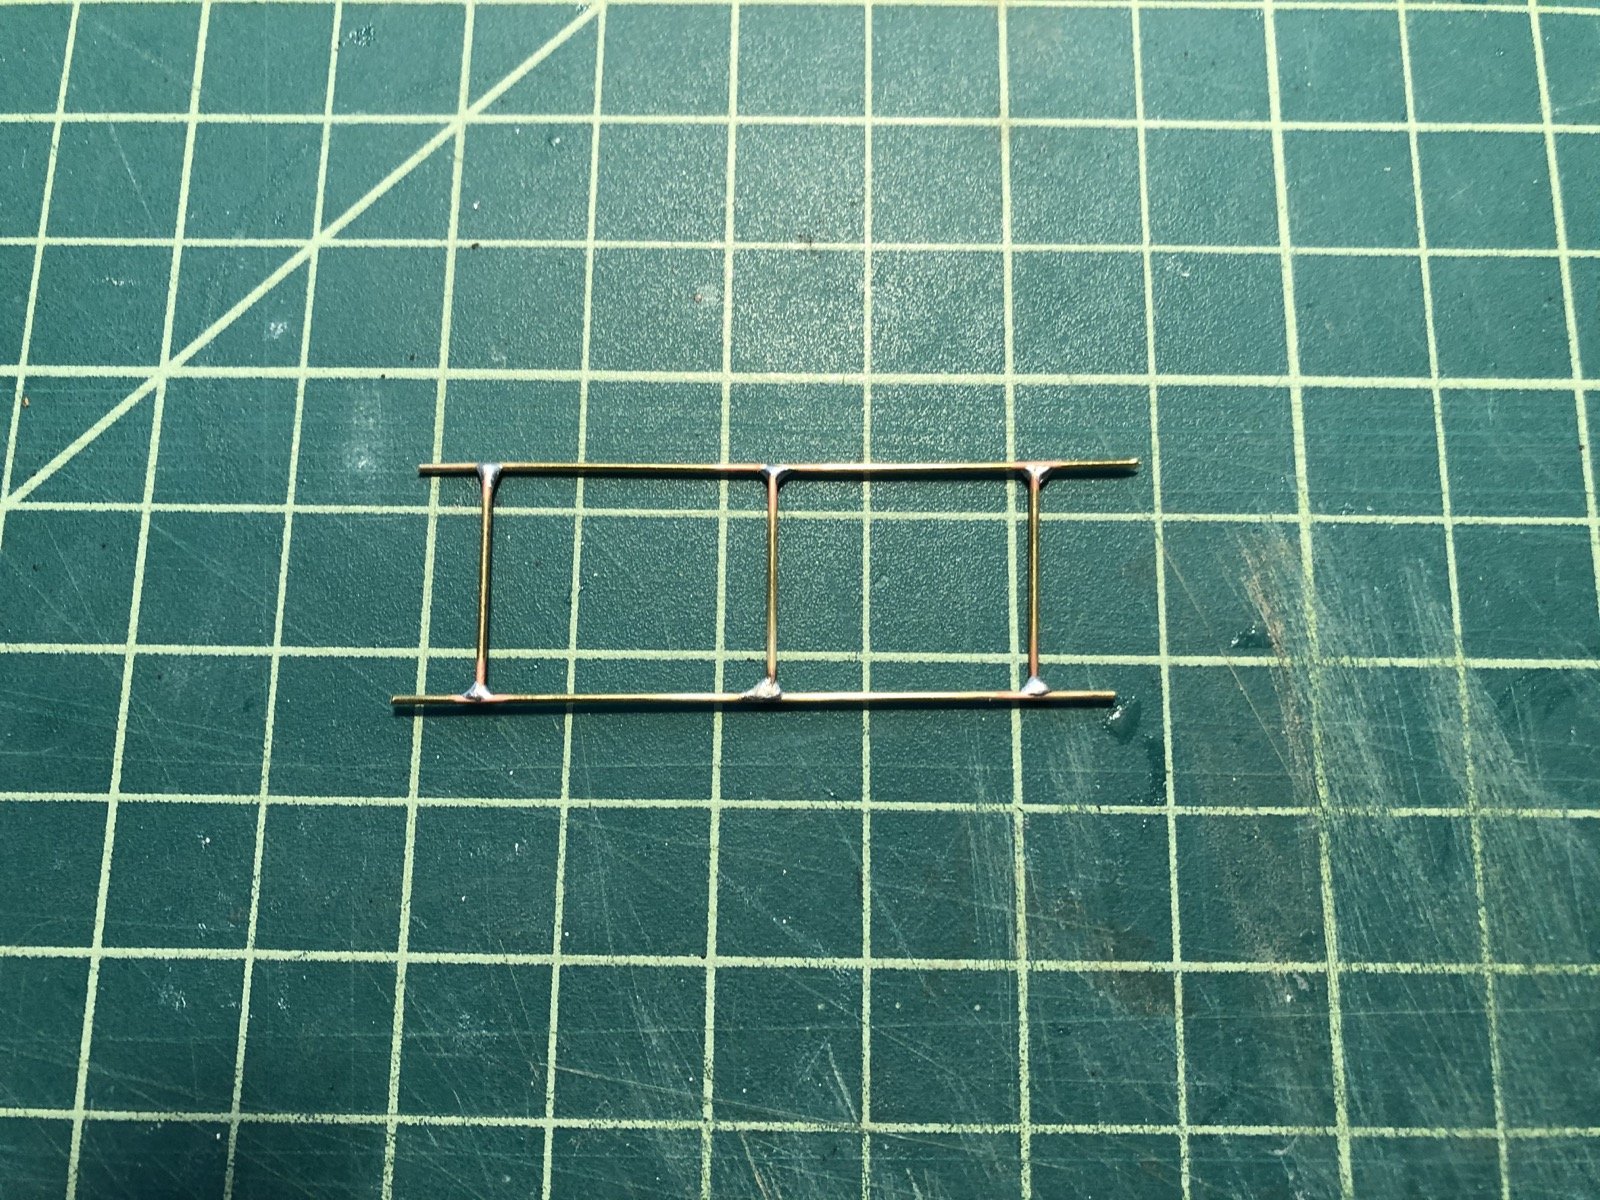
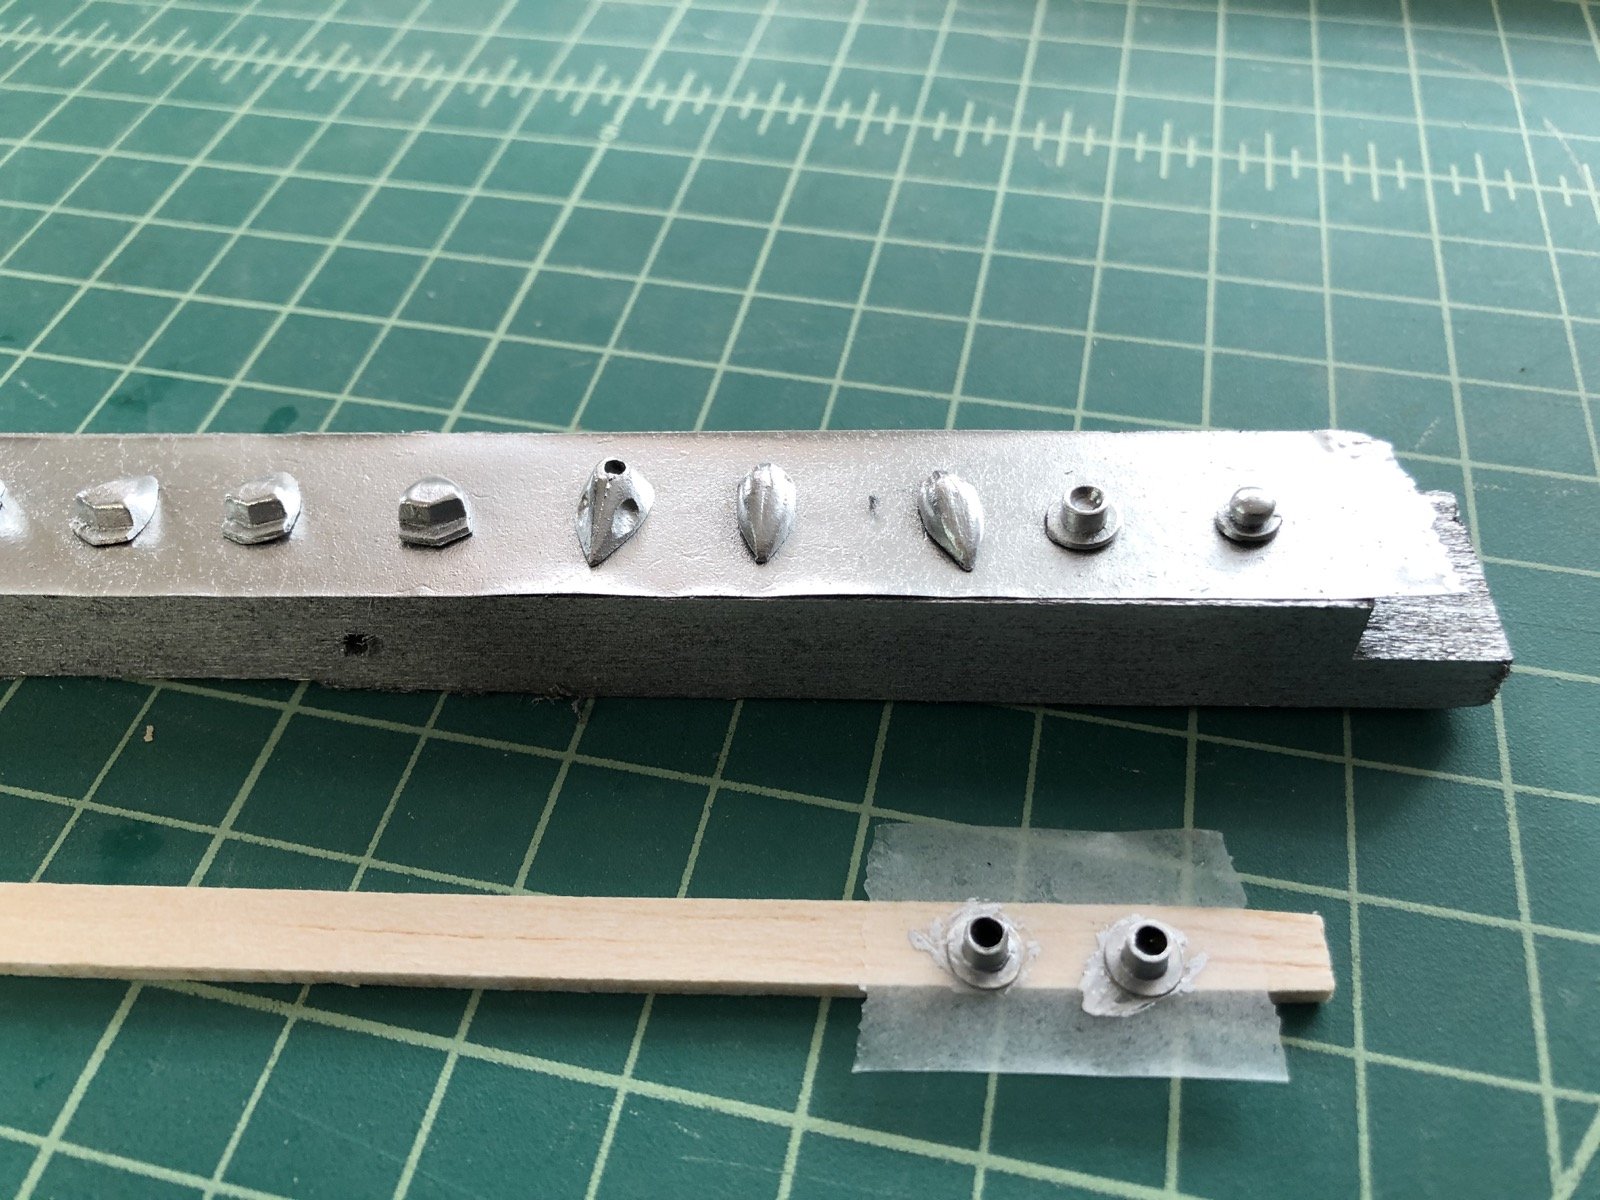
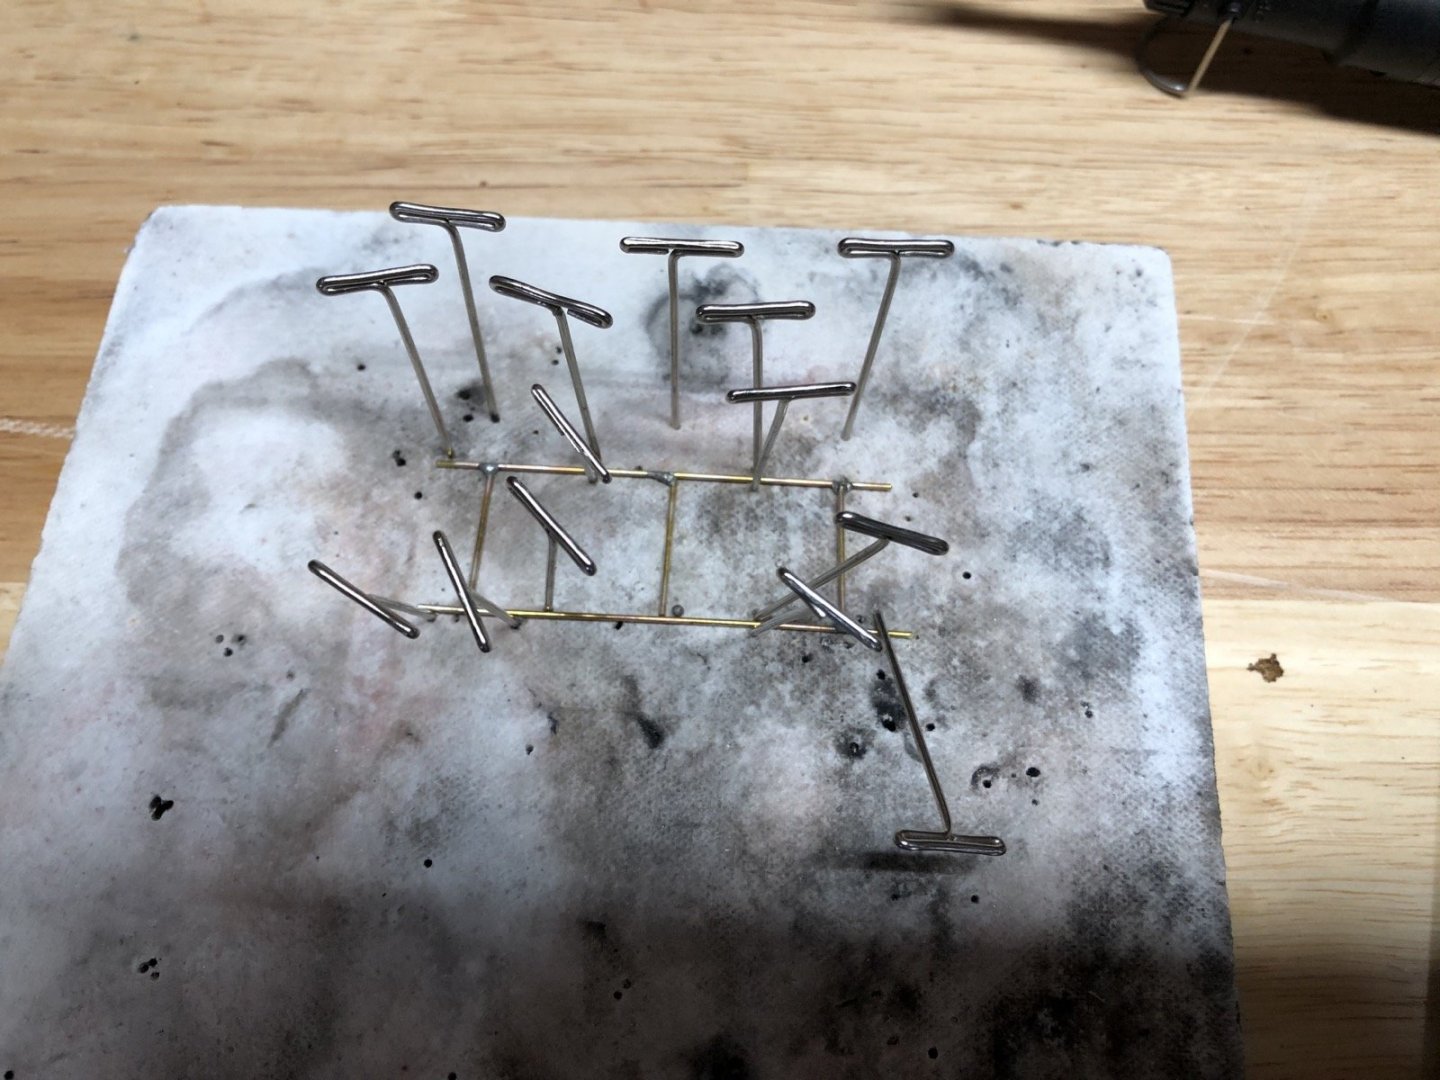
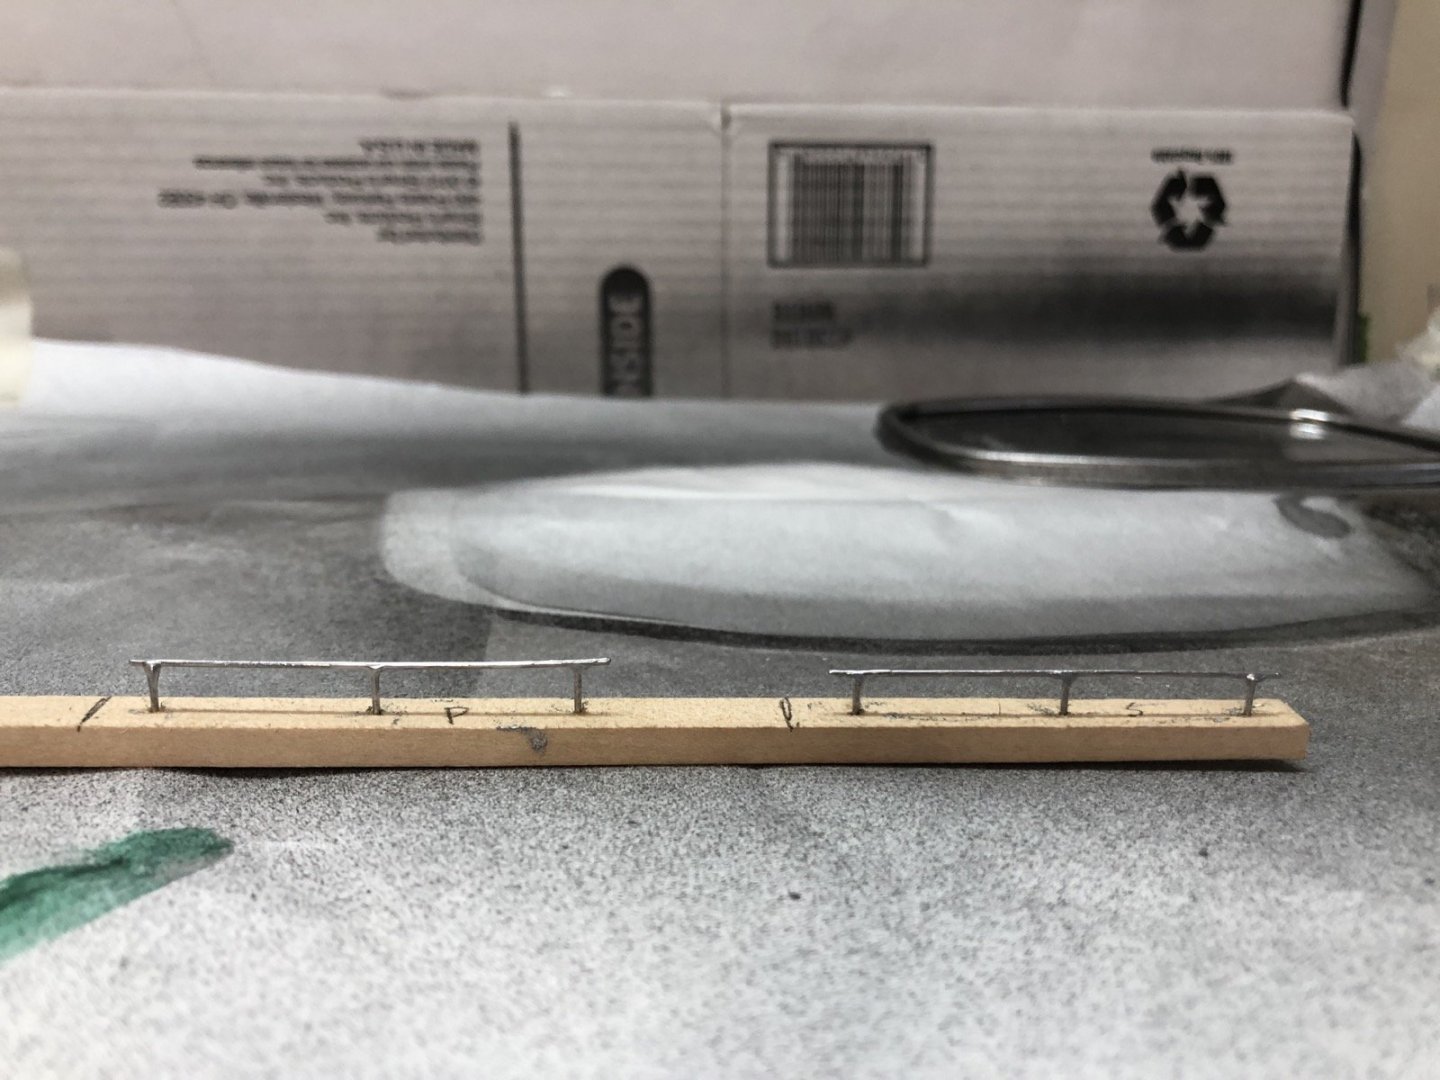
I made the handles for the engine hatches this afternoon. The instructions wanted me to glue the brass rod pieces together using a wooden jig. It might have worked but I would be afraid of knocking them loose as I glue the rest of the details on. So, using what I learned in those excellent soldering videos that someone posted recently, I decided to try soldering them together. In order to make two that were the same, I made them as one piece and then separated them later. I cut the brass rod pieces to length, making sure the three short pieces were exactly the same length. I then laid out the shape using T pins to hold the rod pieces in place. I also used three T pins to mark the locations of the short pieces so I didn't have to keep remeasuring as I got them into position. Once they were in place I carefully added flux and small bits of solder to each joint, then heated each joint with a butane pencil torch. I took this picture after the first round of soldering. The two center joints were reheated with more solder as the first pass didn't come out well. The other four joints were fine. I pulled the pins out and started cleaning up the excess solder with files. This was the crucial test because if the joints weren't good this handling would probably break them. Everything stayed together and I then cut the center supports so I had two equal handles. I cut the ends of the handles and filed them a bit rounded then test fit them in a scrap strip of wood. I left them in the wood and painted them with aluminum paint. I am hoping I can use the wood strip as a jig to drill the holes in the hatches. Overall I was pleased with the result. I have never been able to do this fine kind oif soldering before, even if I know it is not perfect.

-
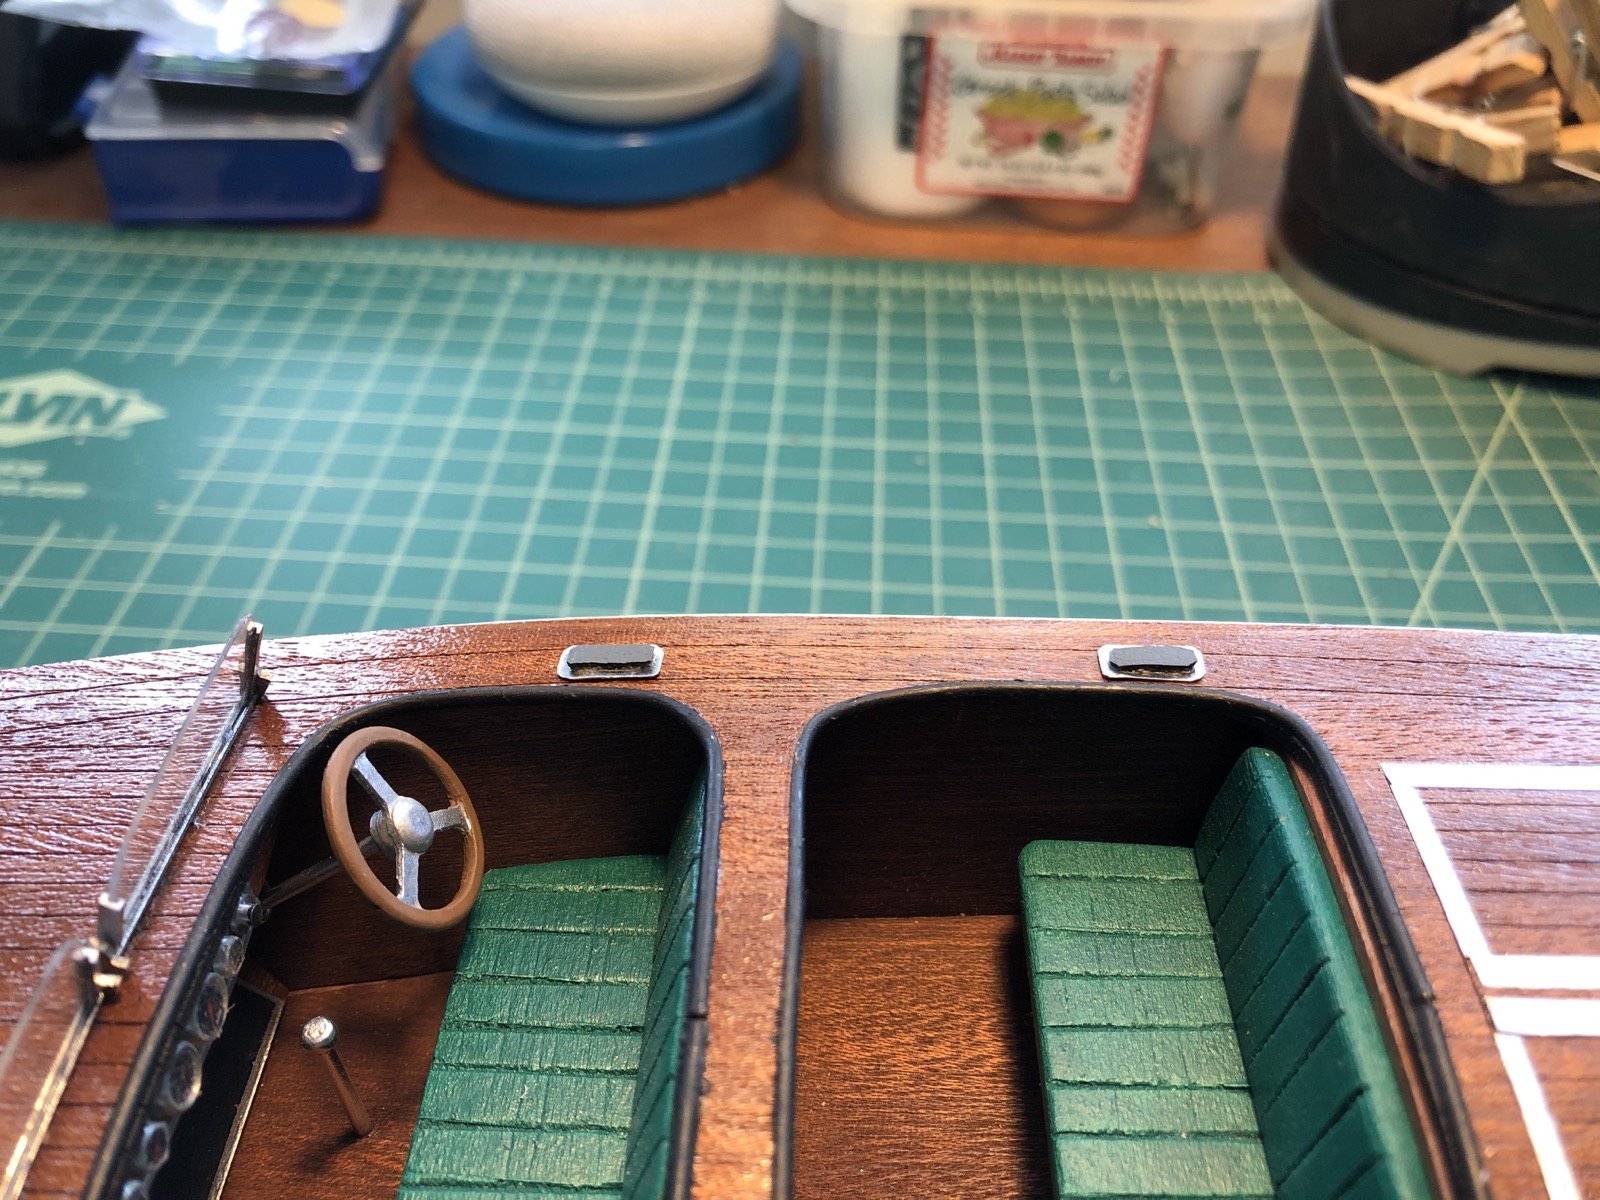
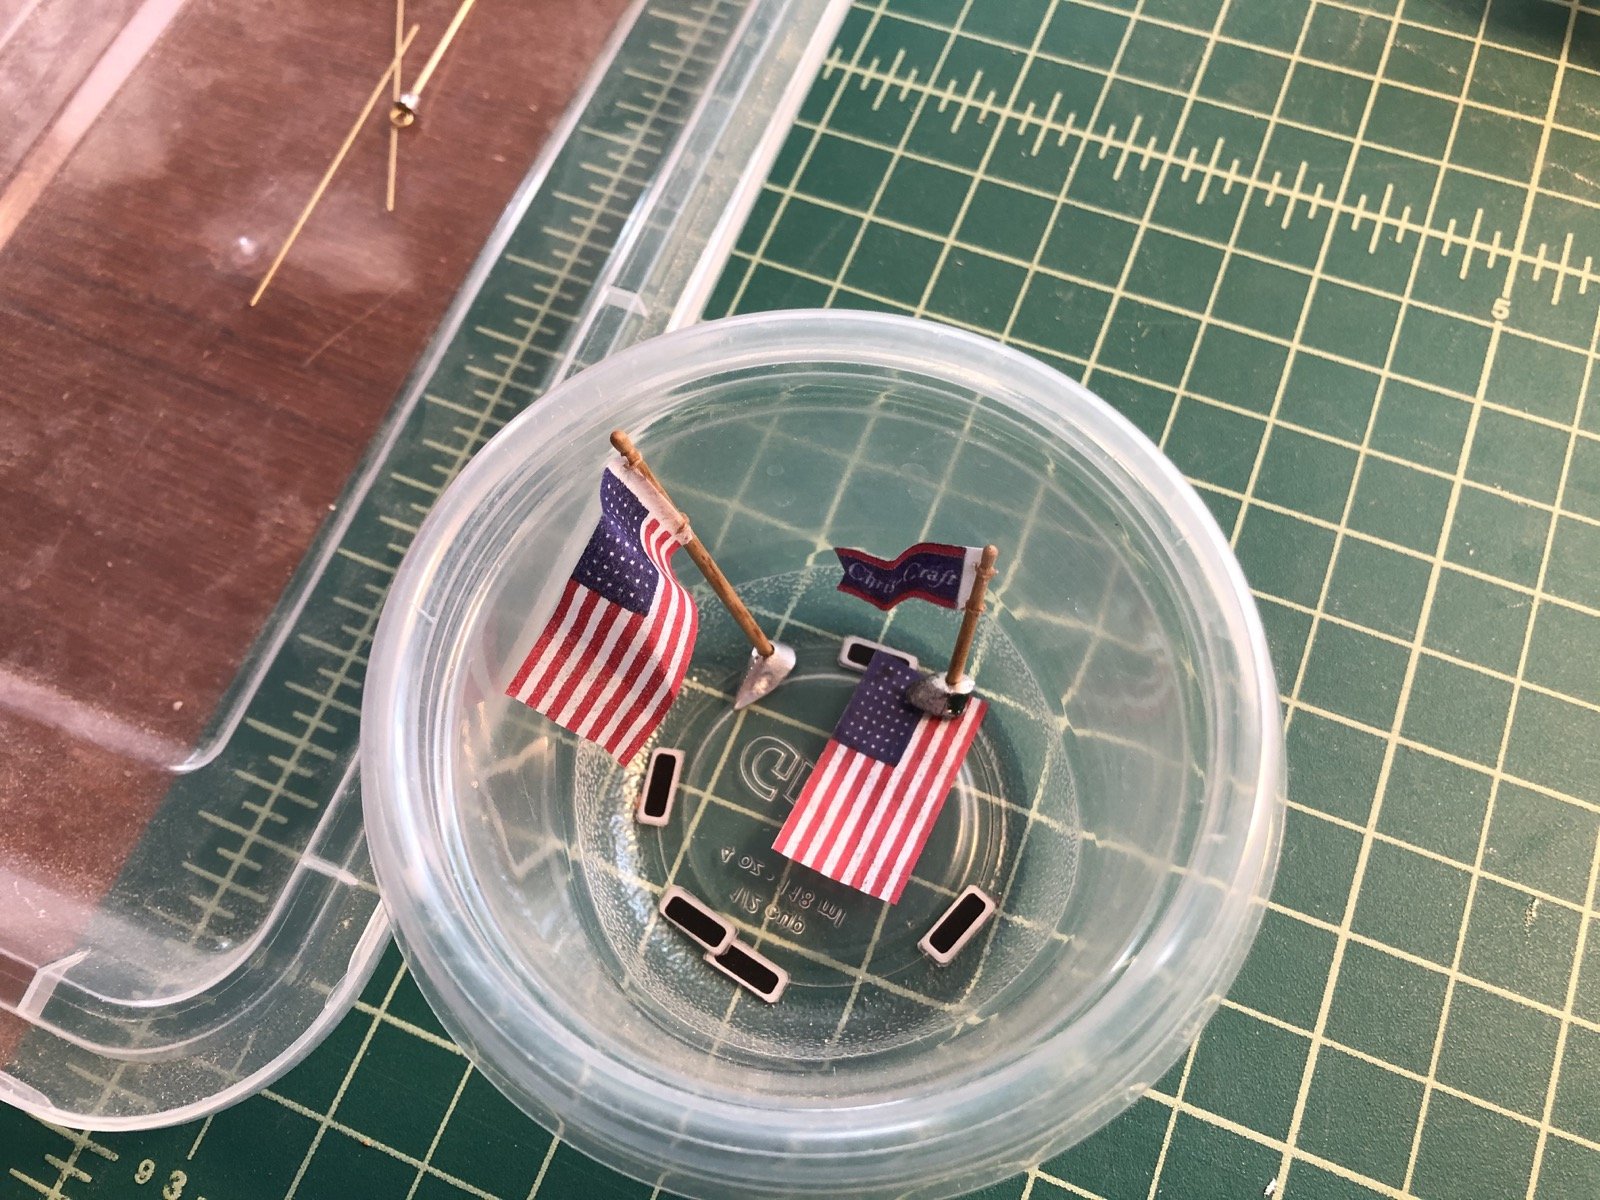
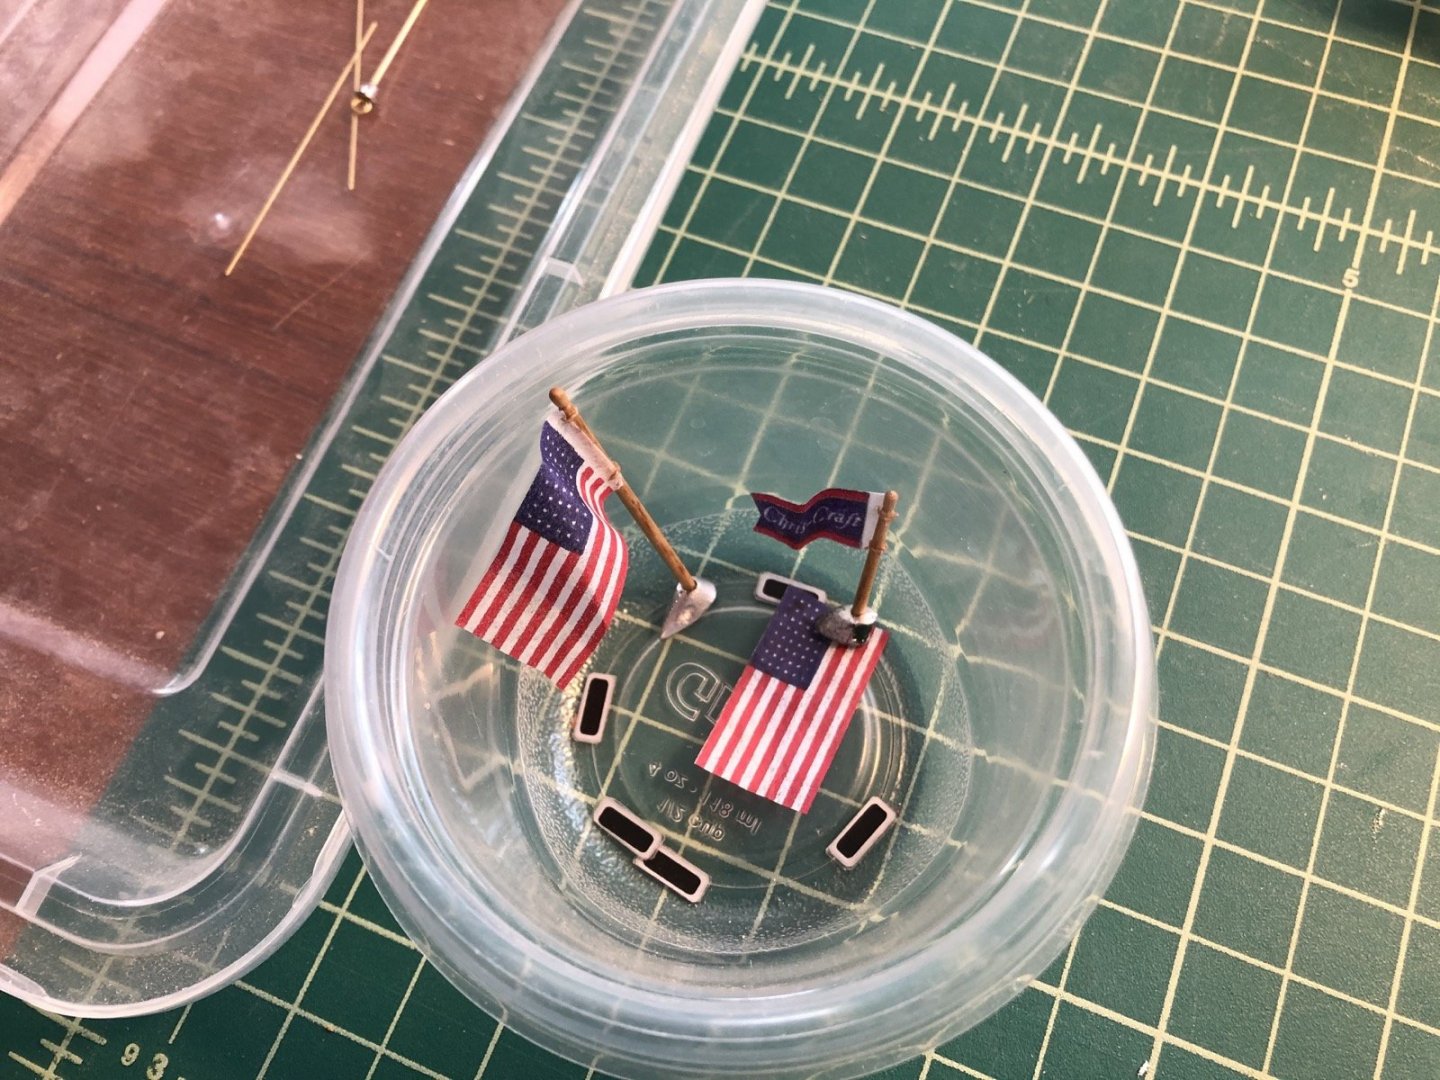
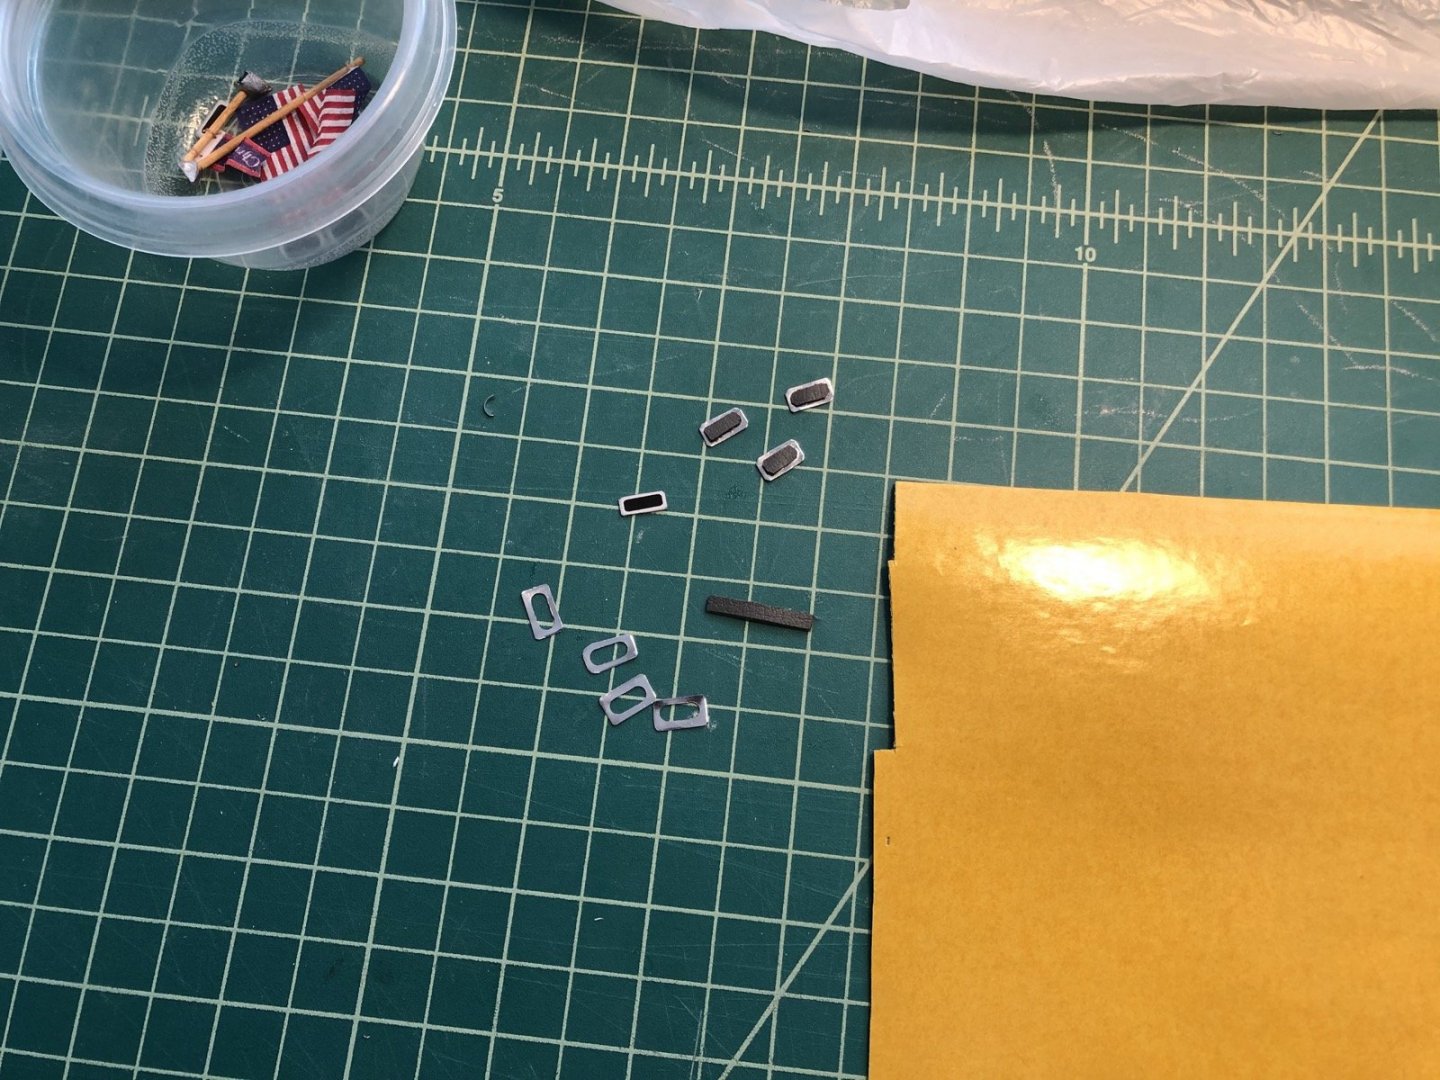
Hello Cleat. Welcome to the build. To answer your questions, the aluminum planking clamp is something that I made from 2 pieces of aluminum angle iron I got from Home Depot. I cut them to about 14 inches in length, then drilled holes through one and tapped the other one so I could screw in those screws that you can hand tighten, also from Home Depot (I forget what they are called). The Spaz Stix has a black spray that you use before the chrome. It is supposed to make it easier to see spots you may have missed with the chrome. You can really use any color under the chrome. Are you going to add a build log? I would love to see your project. I cut the flags and tied them to the flag and jack staffs. I ended up redoing the pennant using the inkjet printer because the ink on the laser jet one was scrapping off as I cut it. Here are the new flags on the staffs. I then made the new foot steps for the deck. In the above picture you can see the kit ones which are just a sticker on a piece of plastic. I wanted something with more depth so I remade them using some thin aluminum sheet and some thin rubber that I had. I first mounted the sheet in the mill and cut a series of holes. I was able to use scissors to cut the steps around the holes, although they were a bit too wide. I cut the rubber into a thin strip and then cut lengths of that to fit the holes, rounding the ends a bit. I was able to push these into the holes from the bottom and get them to stay. I again used scissors to cut the steps narrower and then glue them to the hull with Hypo cement. I like the way they have some depth now. Not perfect but I think better than the plastic. Next I need to make the handles for the engine hatches and add the hinges.

-
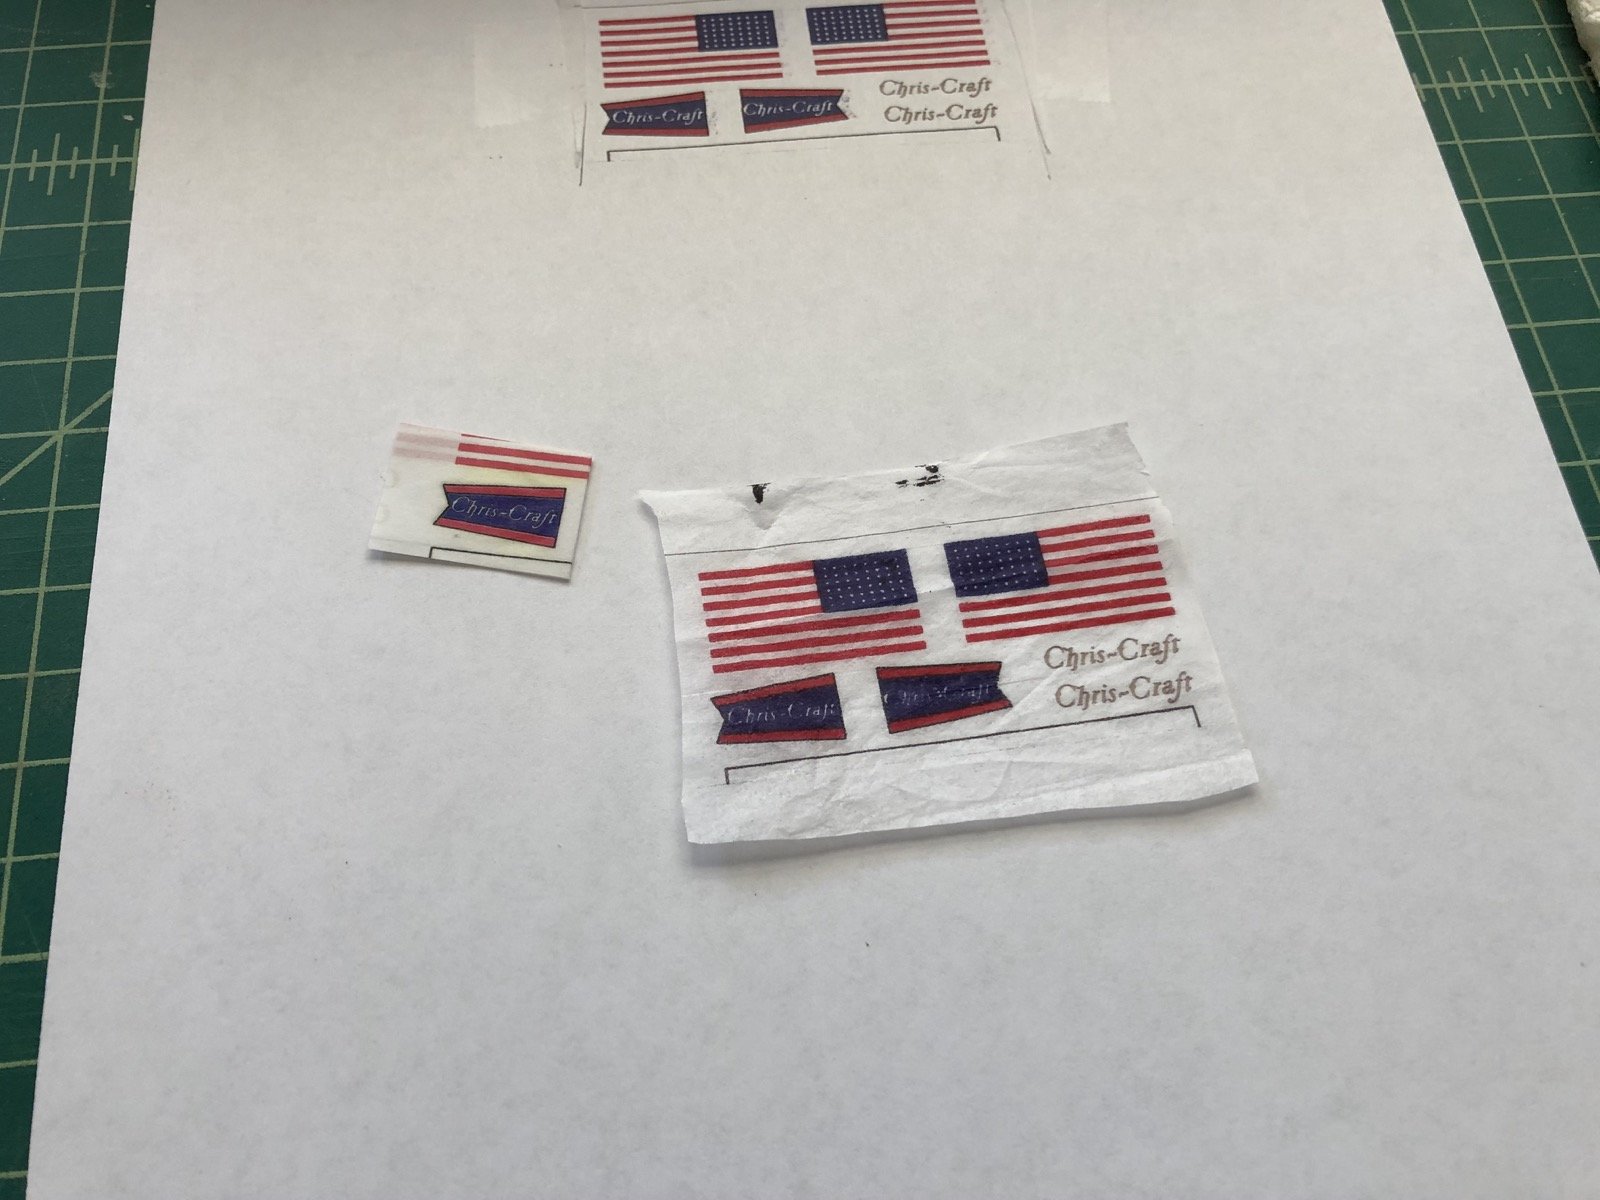
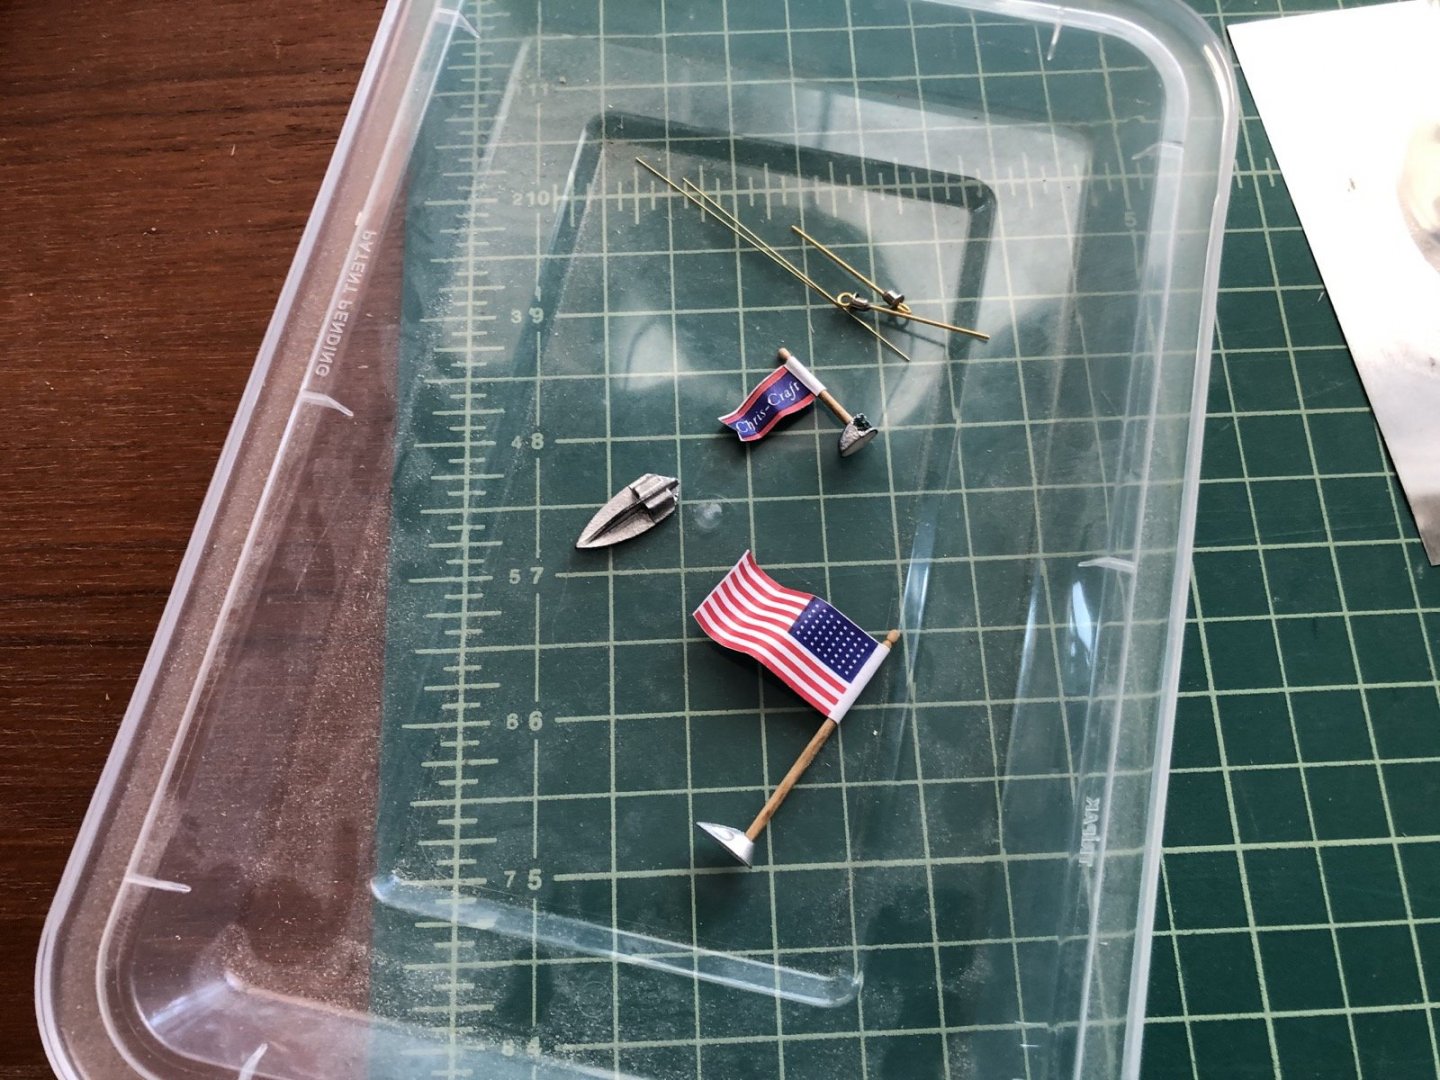
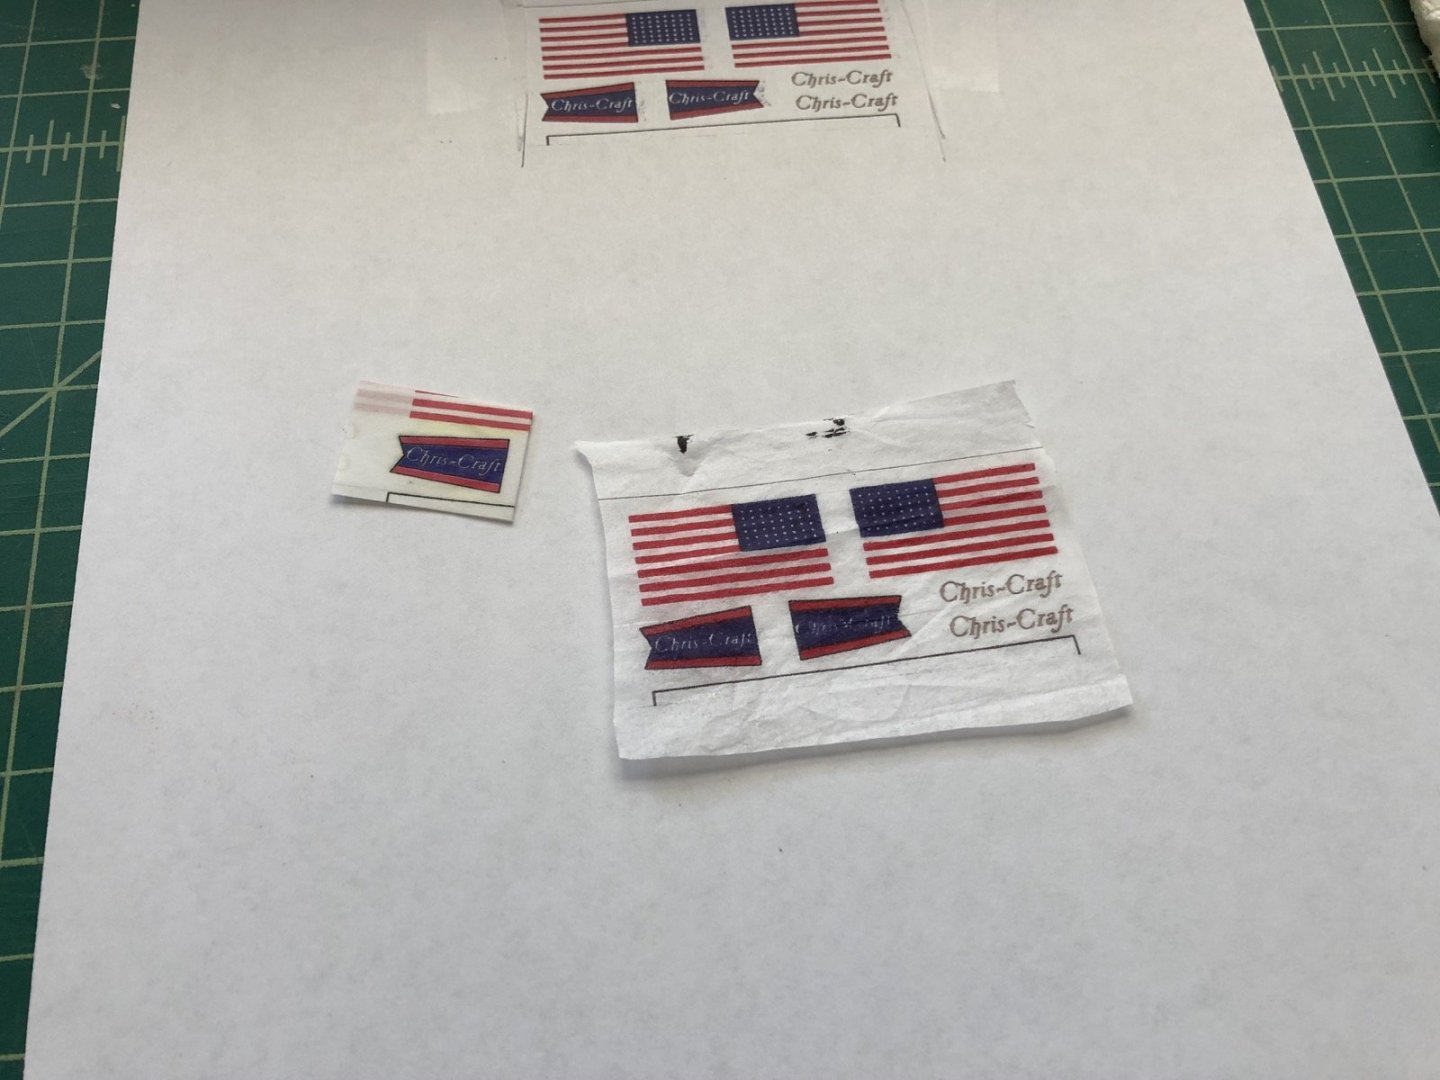
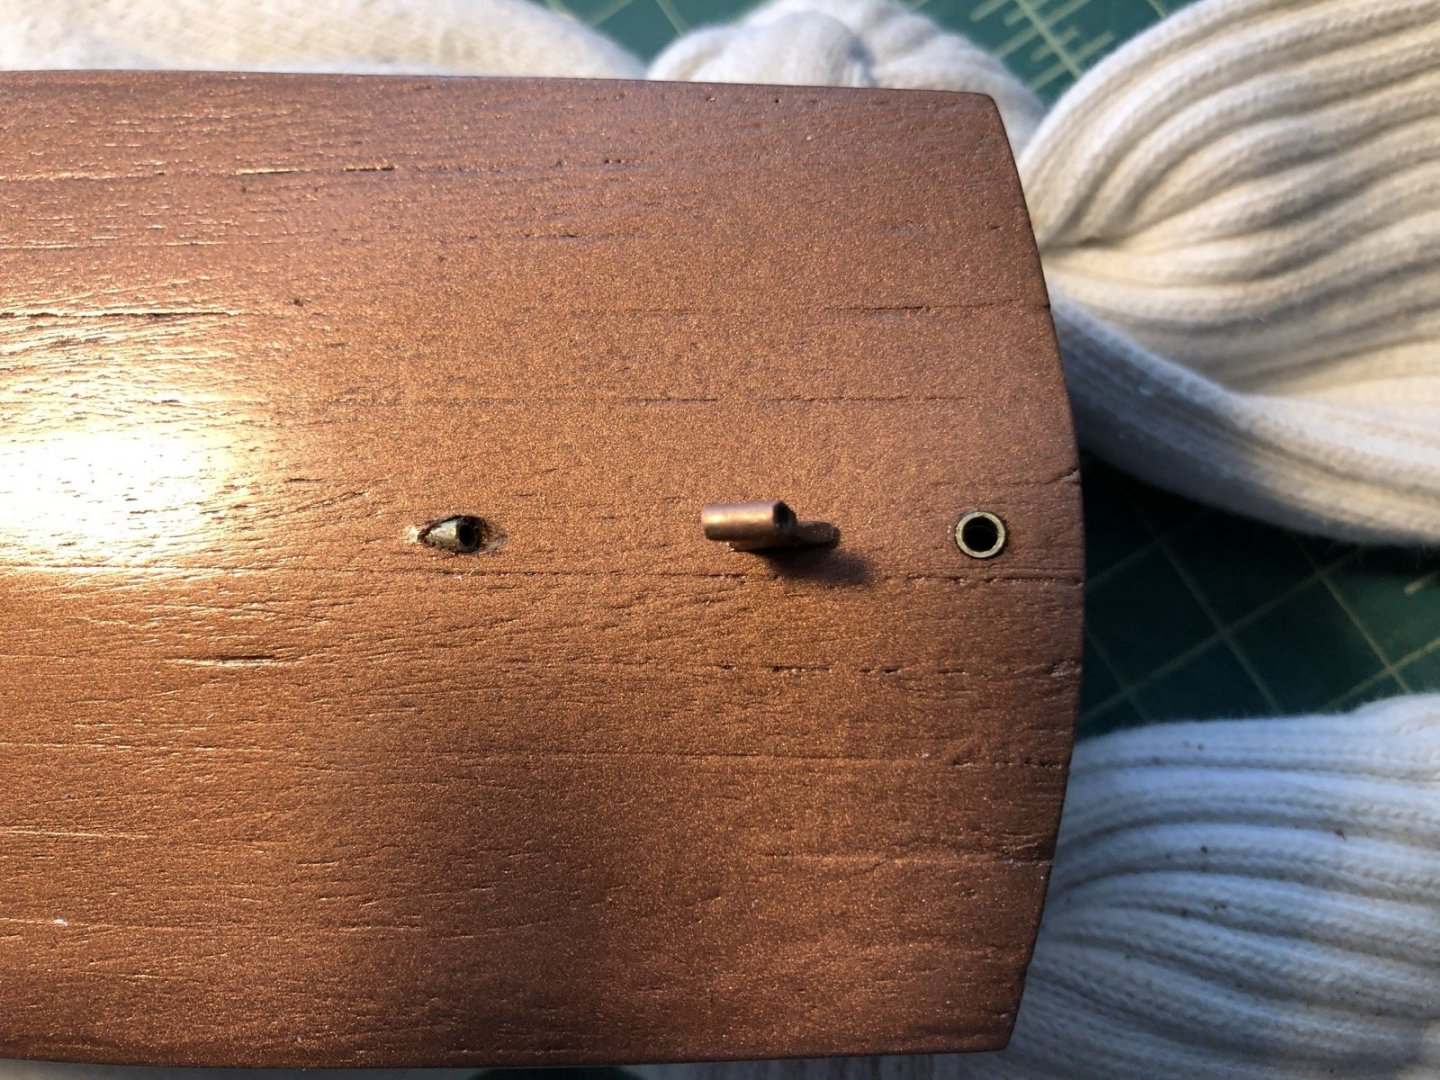
I made the jackstaff and flagstaff from a wooden dowel instead of the plastic rod that came with the kit. The plans show a ball on the top of these but the plastic was too narrow. I used the lathe with files and sandpaper to make them. I tried using the supplied flags which are adhesive plastic and of course they looked terrible. I had made a copy of the sticker sheet and used it to make paper flags, which I wrapped around the staffs after finishing them with oak stain and WOP. They looked OK but I knew I could do better. So I broke out my old inkjet printer and spent a few hours getting it working again as the ink had dried up pretty badly. Once it was working again I printed the sticker sheet on vellum paper. I had to use this for the Chris Craft pennant because of the writing on it I needed two different sides. I carefully folded and glued the two sides together. I printed the flag on tissue paper so I can use only one layer since the inkjet ink shows on both sides. Once I cut these out I am going to tie them to the staffs instead of wrapping them around. For the other stickers, like the Chris-Craft logo and the name on the transom, I am going to try to make a decal sheet. I have the materials but have not tried it before so there will be some learning curve there. You can also see in the first photo the fairlead which goes on the bow. I carefully drilled two holes to open up the tubes and touched up the paint, so it is ready to go. What is not shown is the bow light which I painted red and green in the lens area. The lifting eyes are shown which are supplied as an eyelet and a eyebolt, which you are supposed to glue together and then glue into the deck. The problem is the hole is so large in the eyelet that there would be a hole around the eyebolt. My solution was to fill the hole with Sculpey then put the eyebolt in, then bake them to harden the Sculpey. I now have to paint them and trim the ends of the eyebolts. The two pieces of thin rod I am going to use to simulate the hinges on the engine hatches by painting them and then gluing them on the metal frames. I have also decided to not use the plastic foot steps and I will try to make them from metal sheet and some thin rubber. More on that later.
-
I am so glad you are back to work on her. You are doing a great job and thanks for the shout out.
-
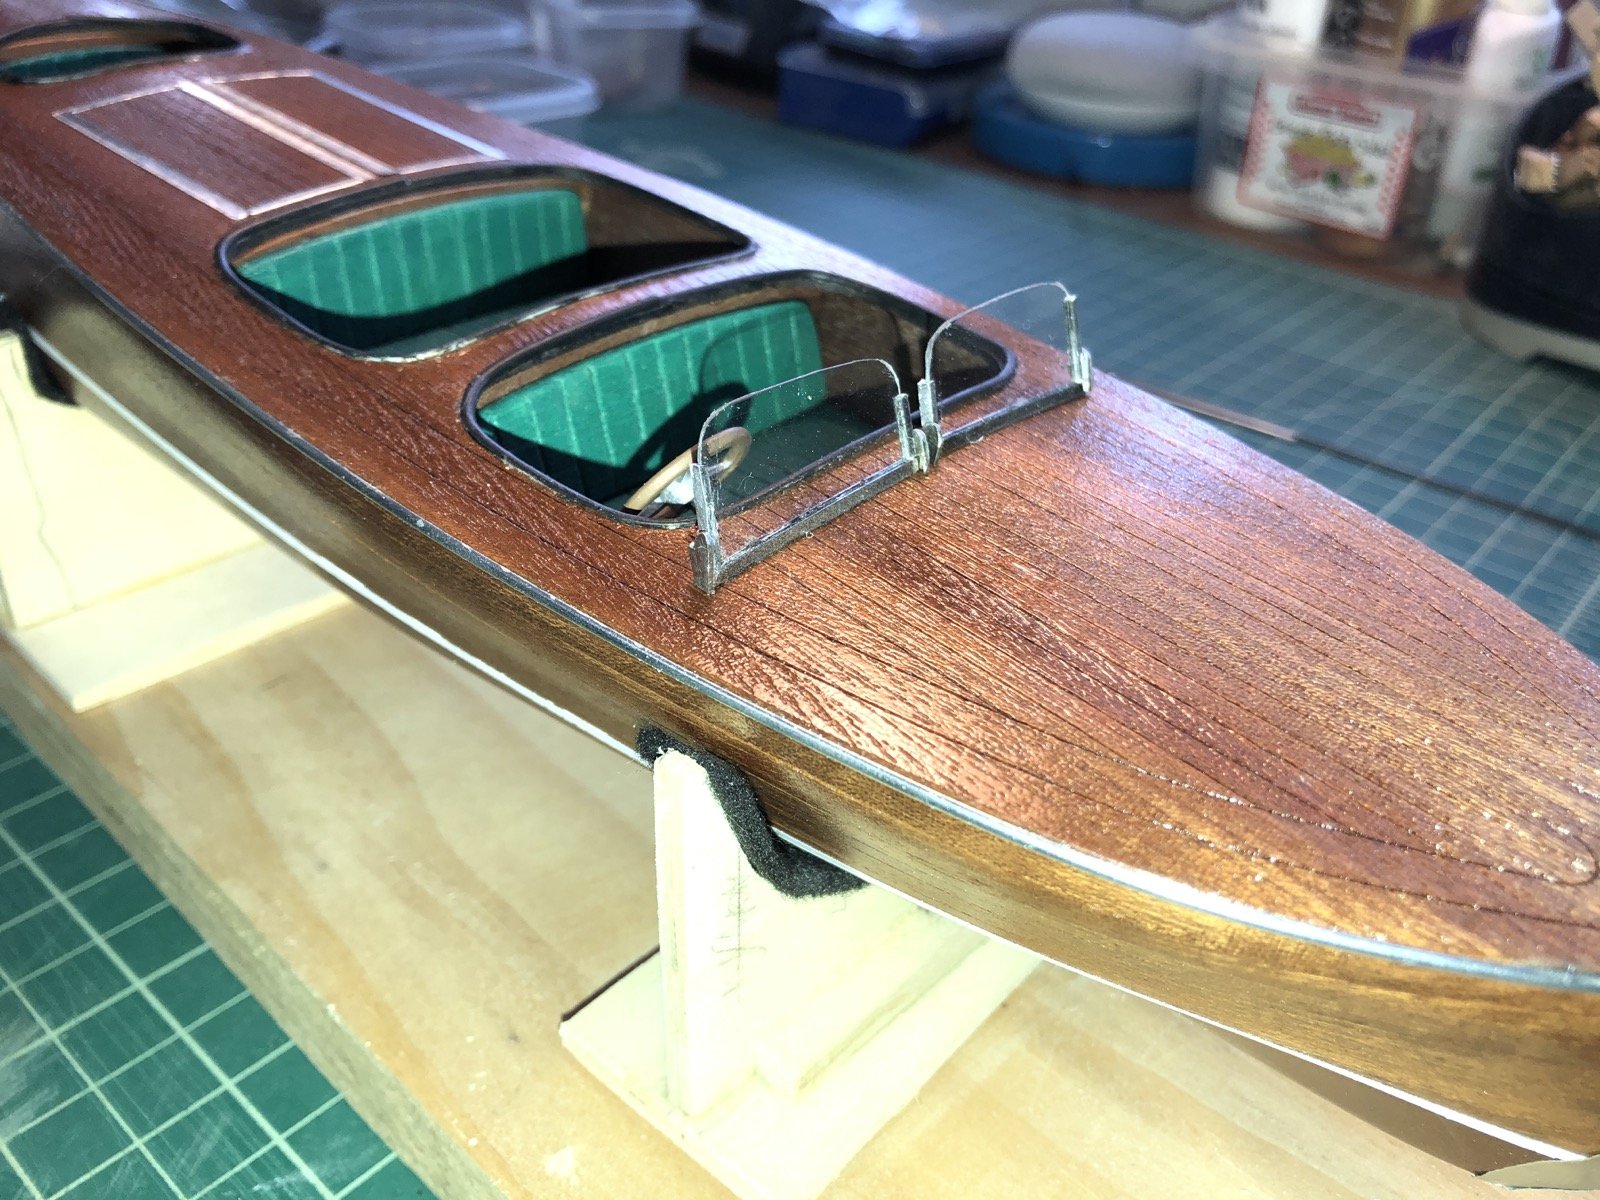
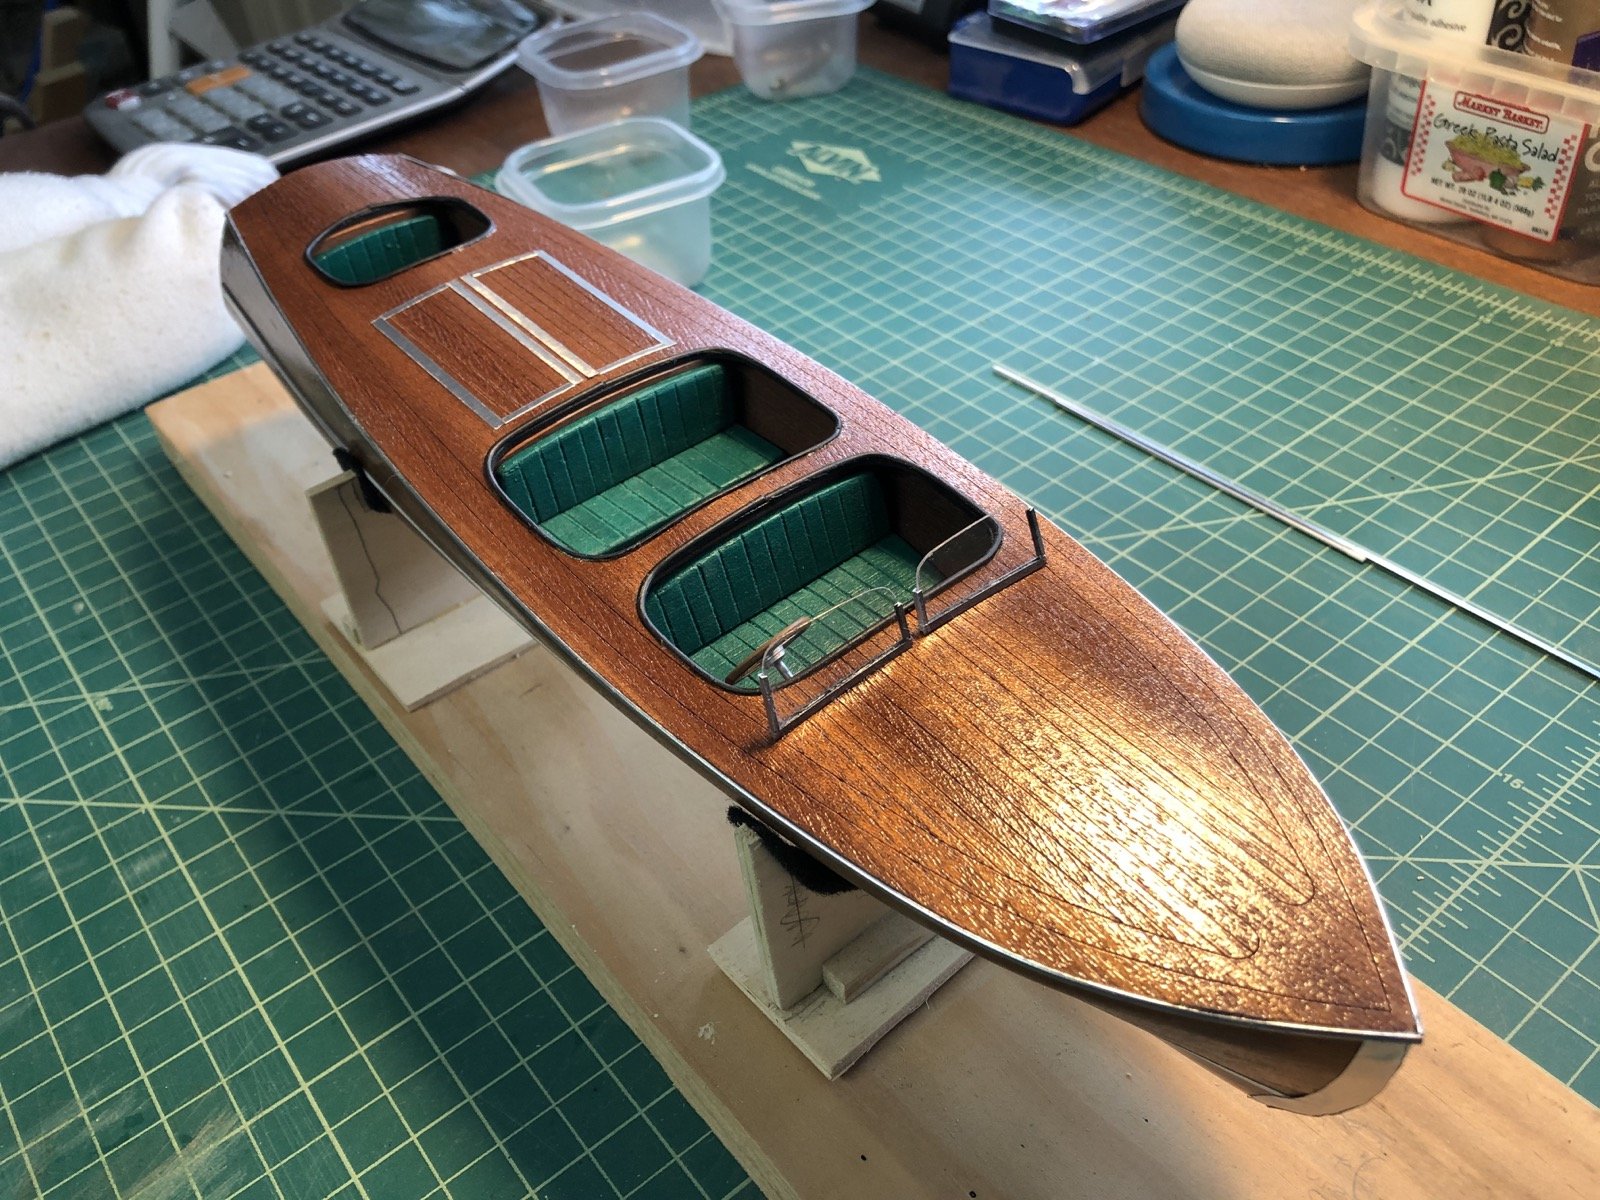
I am happy to report that the windshields were installed successfully. I touched up the aluminum paint on the frames then cleaned the clear plastic with a Q-tip. I glued the windshields to the deck using Hypo cement which is becoming my new glue of choice. I glued one down and only had to hold it in place of a couple of minutes. I then glued the other down making sure it lined up with the first one. After the glue started to set I used a small piece of wood to hold it at the same angle as the first one while the glue fully dried. I was really worried about smearing glue on the deck but luckily that didn't happen. After they were dried I test fit the brackets and shortened the larger ones a bit to look better with the small ones. I then glued them to the windshield frames and the deck again with the Hypo cement. I am currently working on the two flag poles and the plastic parts they fit into.


-
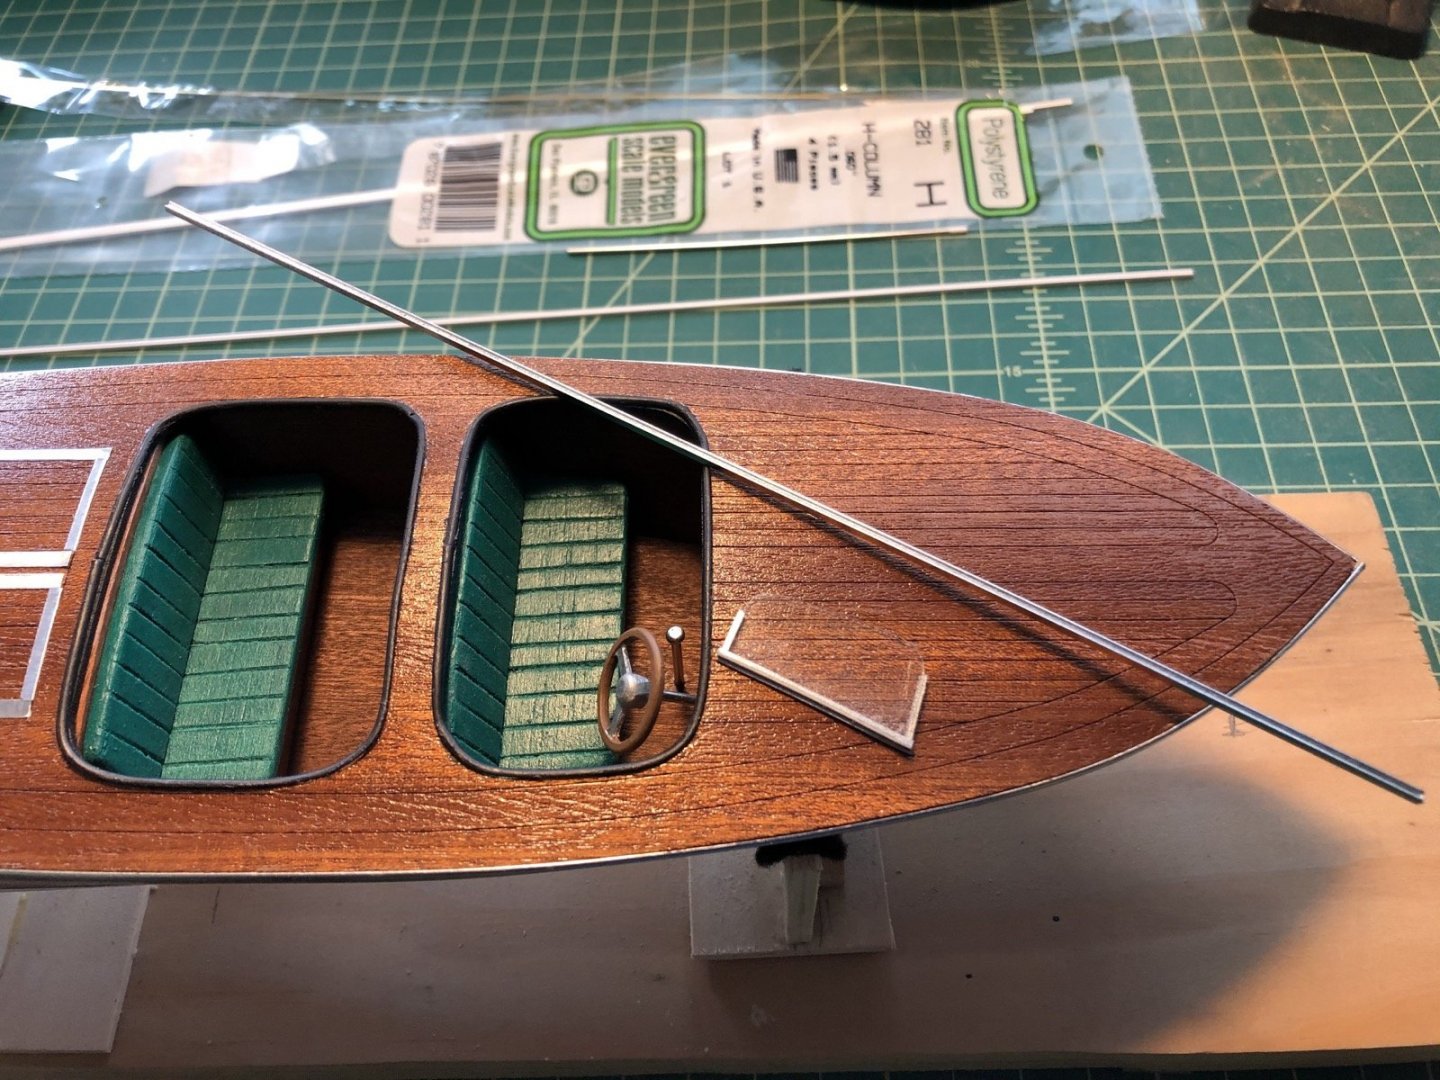
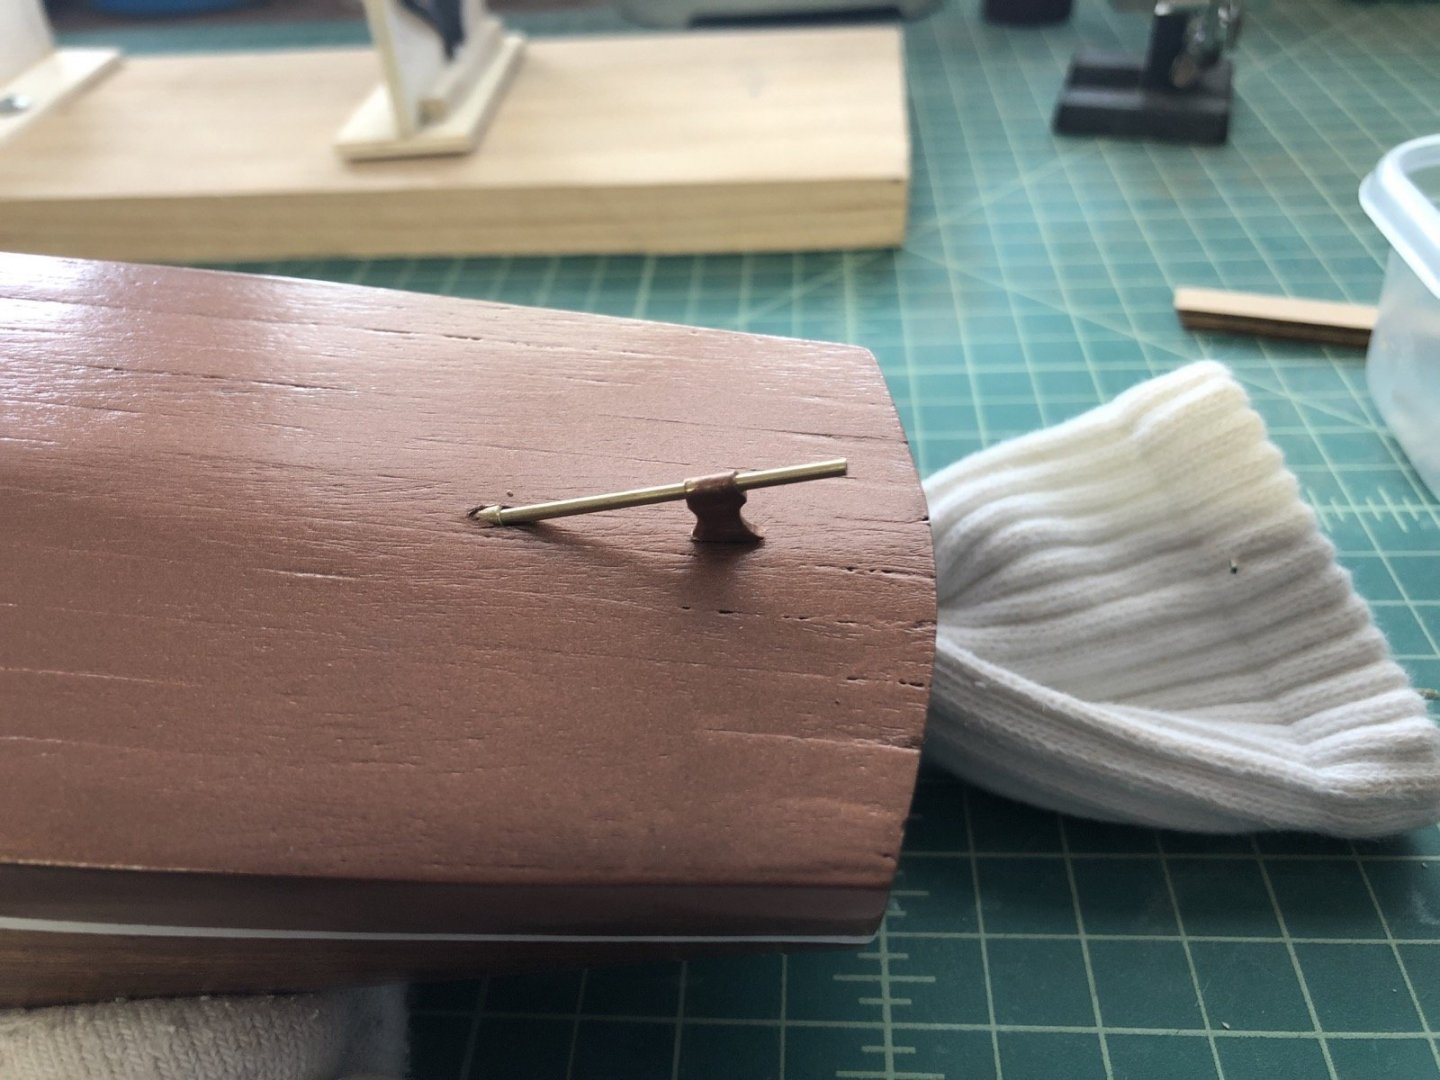
Thank you GL and the likes. The steering wheel was a piece of cake to add. I chromed a piece of dowel for the steering column, glued it to the wheel, then trimmed it to length then glued them to the floor and the bracket in the dash board. The windshield is next and this has bothered me for a while on how to do it. The instructions include paper templates to cut out the windshield pieces from clear plastic. That was no problem as I could easily cut the plastic with scissors. It also has protective coverings on both sides which I then removed. The instructions then said to make the windshield frames to either paint the sides and bottom of the plastic with silver tape or use the adhesive aluminum to wrap strips around the plastic. Then these pieces should be glued directly to the deck. I tried the aluminum strips but it really looked cheesy so I had ordered some tiny H channel styrene strips to try as frame pieces. I painted a strip with the chrome paint then cut pieces and glued them to the plastic pieces. I used the whole H piece on the bottom but cut off one side of the H to make U channel for the sides, which should be narrower than the bottom. I filled in the small spaces on the sides of the H with filler. I filed the H on the bottom to an angle so the windshield pieces will be angled back toward the cockpit. The H channel gives me a lot more surface area for gluing these to the deck, which I think is really needed. Here is one side of the windshield. I just need to touch up the chrome paint on both sides before I can glue them down. The windshield also has brackets on each side of each piece. The instructions provide templates for the brackets but say to cut them out of spare plastic, not supplied in the kit. Instead of plastic I found a sheet of polished aluminum that looked like a good thickness for the brackets. I first tried cutting out a bracket using a jewelers saw with not much success. I then cut a strip of the aluminum and used files and a disk sander to shape the bracket. This worked really well so I made the other three brackets the same way. The two smaller brackets I was able to make on the ends of one one strip as seen here. And here are the four brackets. These will be glued to the edges of the window frames and the deck after the windshields are glued to the deck.How to do the windshield has been bugging me for a while so I think I have a good solution now. Of course until it is installed on the boat I won't know for sure. Wish me luck and thanks for following along.

-
Thanks stuglo. I used the supplied adhesive aluminum sheet to add the cut water to the bow. The instructions contain templates for each side of the bow so I cut one a little bigger so I could wrap it around the bow. I trimmed the pieces at the top and bottom then burnished the aluminum down with a tapered piece of wood. I then started adding the painted rub rails a few inches at a time, using Hypo cement to hold them to the hull. Once I had the upper rub rails on I added the fenders along the transom again using the adhesive aluminum. I burnished these down then cut two pieces of the painted rub rail for the bottom rail, just above the water line. I tapered the ends of these pieces then glued them onto the hull. Here is the current state of the hull. Next steps are the add the steering wheel and windshields.


-
That's the approach I used to rig the dead eyes. It was not a problem.
-
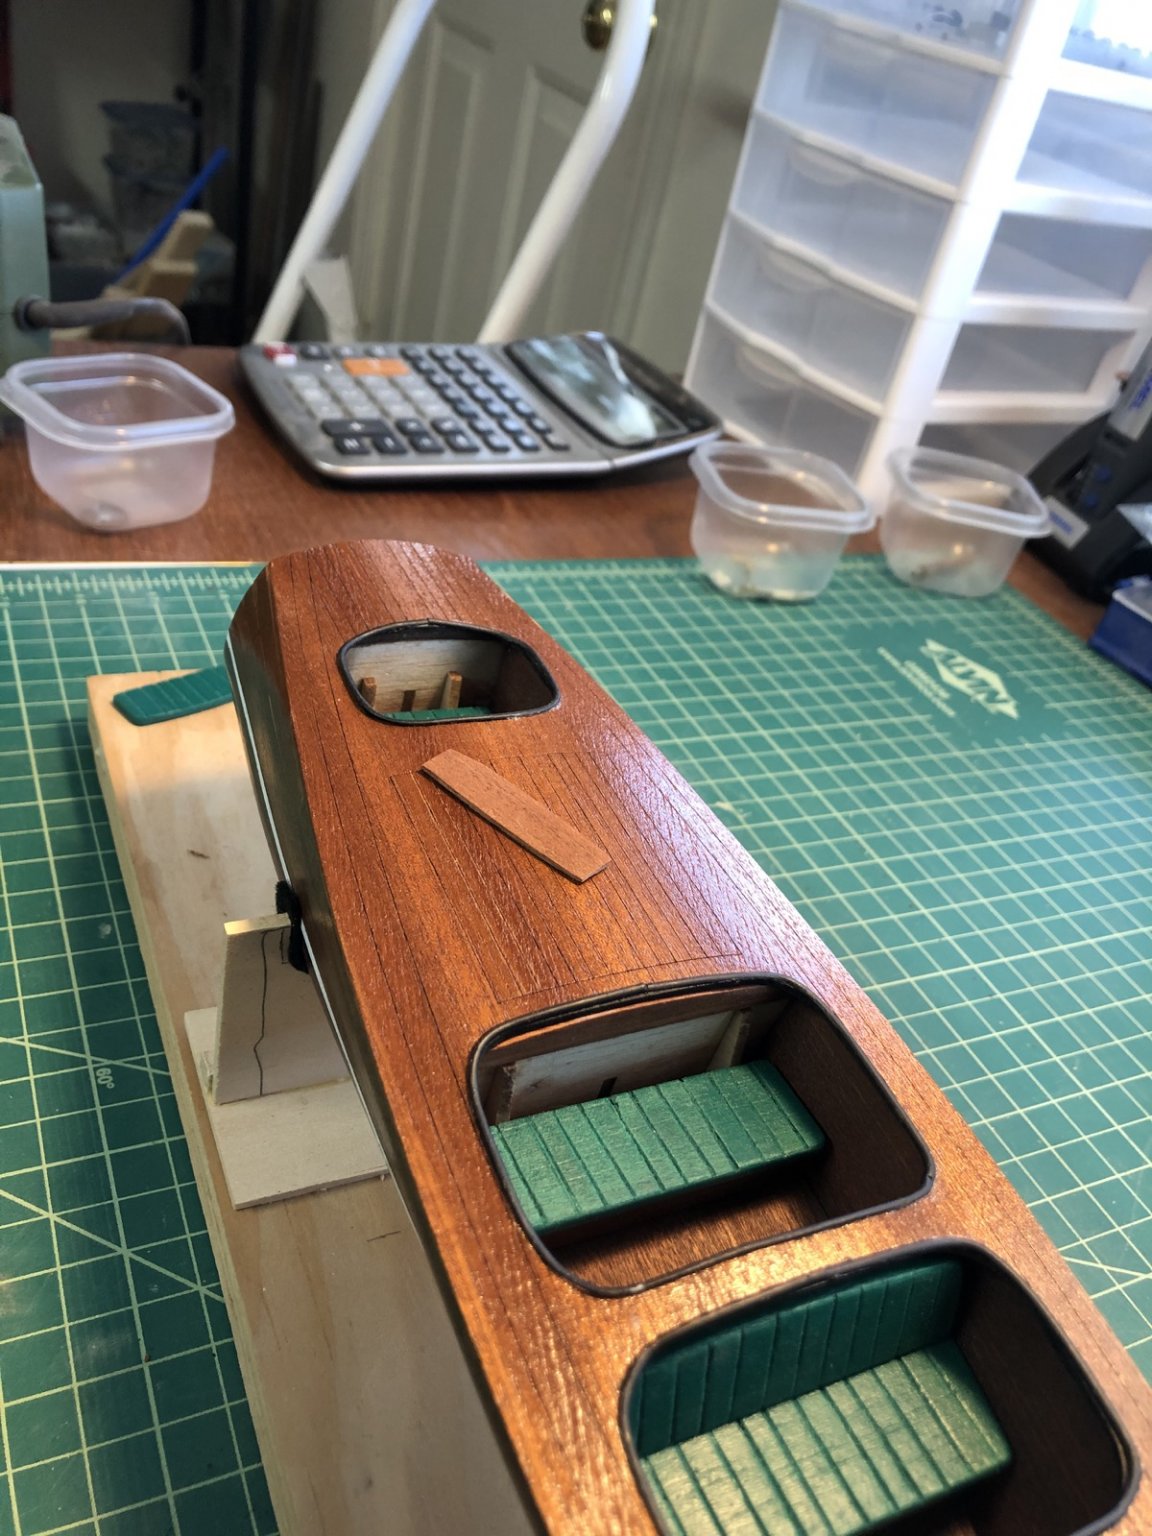
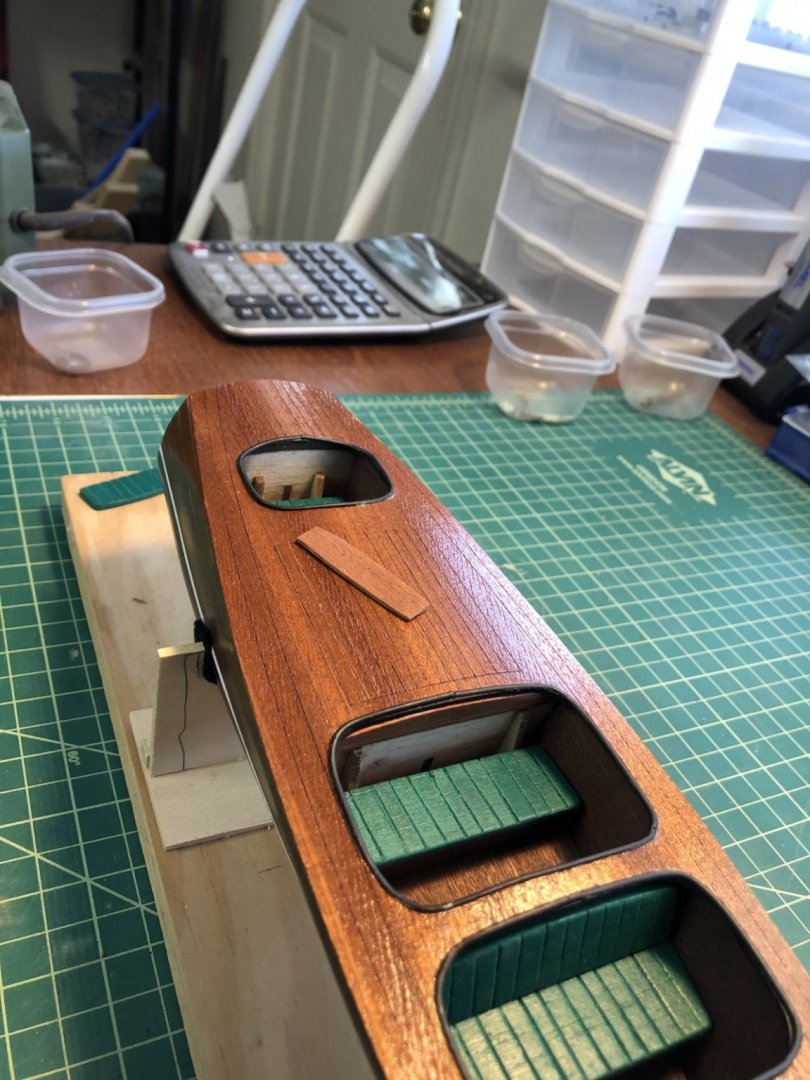
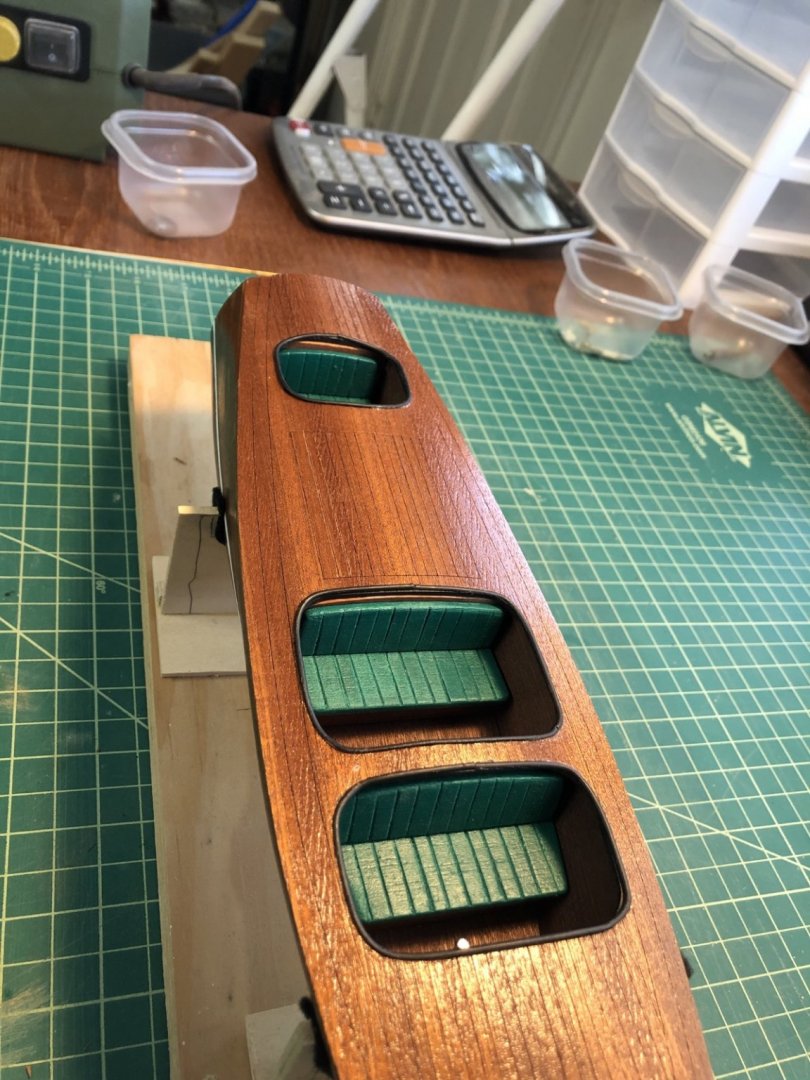
Happy Easter. I glued the seat bottoms into the cockpits and started adding the seat backs. The forward cockpit was fine, but in the middle and rear cockpits the balsa bulkhead was showing above the seat backs. I could have just painted them black to hide them but instead I used some left over mahogany from the deck sheet and the openings from the balsa sheet for those bulkheads to make two mahogany filler pieces to fit behind the seat backs. I cut these out and sanded them until they fit, then finished them the same as the rest of the cockpit mahogany pieces. Here the middle cockpit piece is in place and you can see the rear piece on the deck and the bulkhead piece that it will cover. I then glued in the seat backs and it here is how it looks. The next steps are to add the cut water and the rub rails. I started treating the plastic trim for the rub rails with the black and chrome spray I used on the other plastic pieces.
-
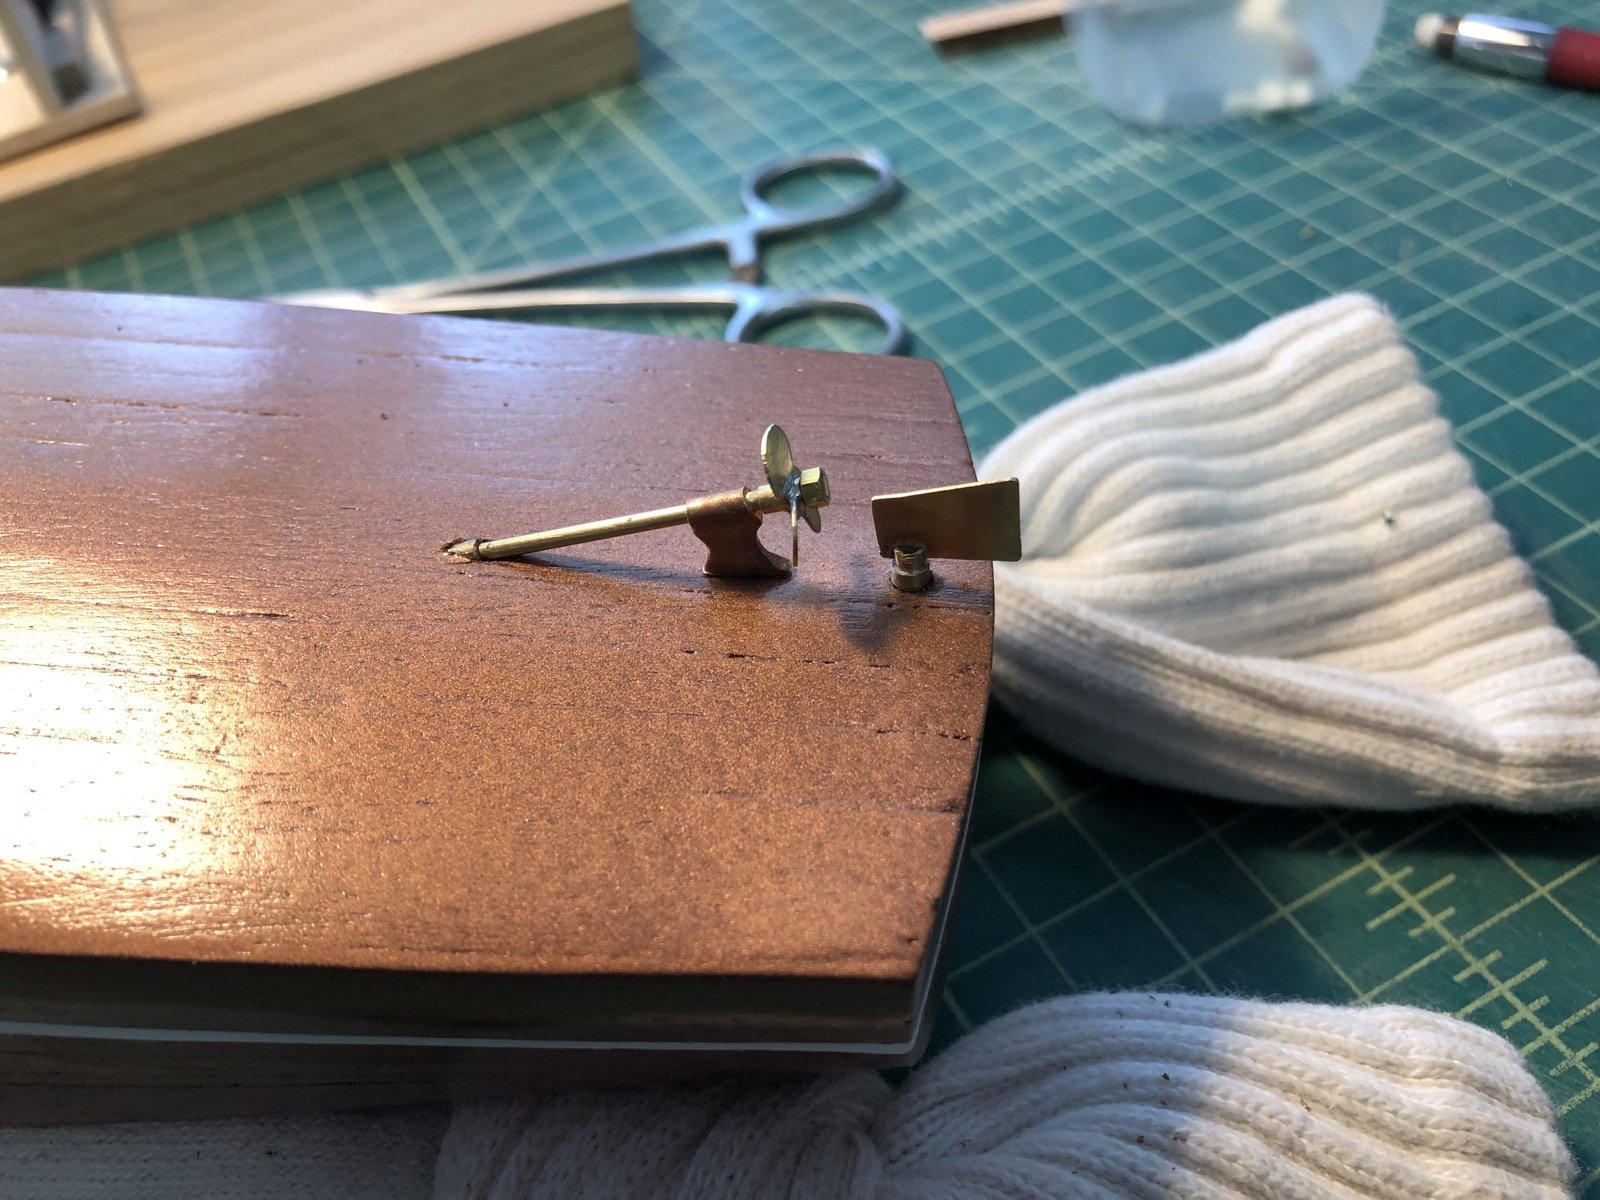
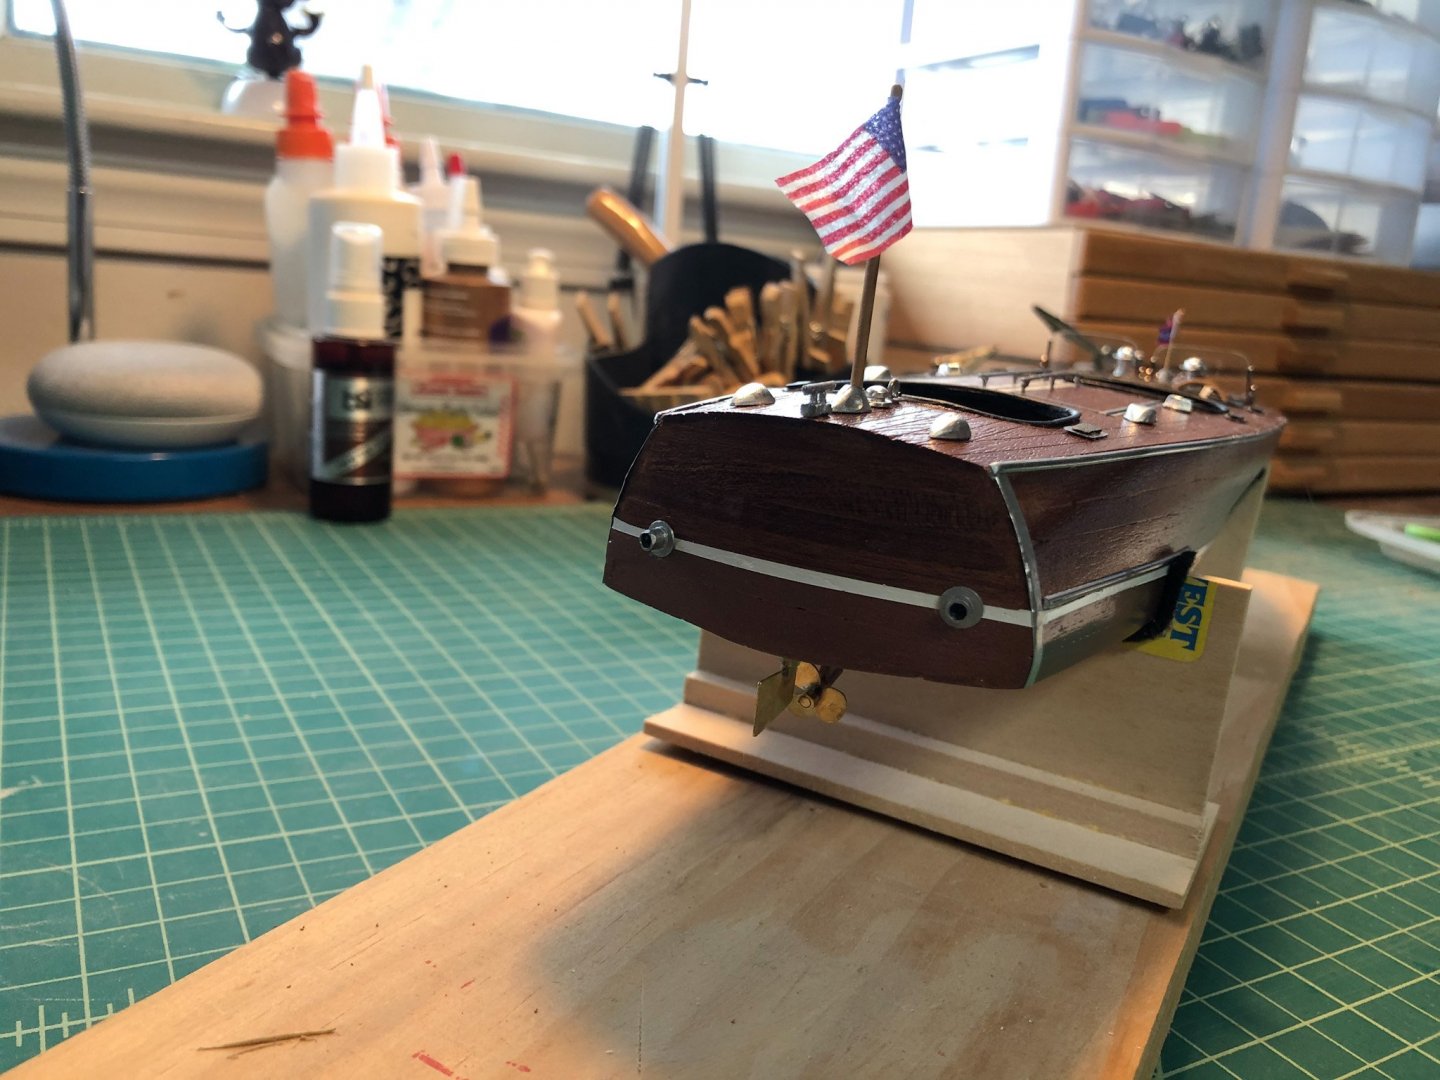
I decided to get the bottom ready for the prop shaft and rudder so that I could keep the model upright going forward. I was concerned about having these delicate pieces hanging down so instead of just gluing them into the hull, I added brass tubing in the hull so that I can remove them until I am about to put the boat on the display board. I first located the location of the strut and drilled a hole for the wire pin. I then used the angle of the prop shaft in the strut to locate the hole into the bottom for the shaft. I hand drilled a series of holes at that angle until I could fit the piece of brass tubing. I glued the strut and the tubing into place using the prop shaft to align them. The brass tube in the hull simulates the shaft bearing that would be in the real hull. I decided to add a prop nut to the end of the prop shaft. I had a very small brass nut, so I turned down a piece of brass rod so that one end fit into the nut and the other end fit into the end if the prop shaft. I glued these together with the prop in place. I then drilled a hole for another piece of brass tubing for the rudder shaft. Here are the prop and rudder assembles dry fit on the bottom. The prop nut looks a bit out of scale but it was the smallest one I could find. I will take these back out and put them aside for now.

-
You did a great job. A very beautiful model.
-
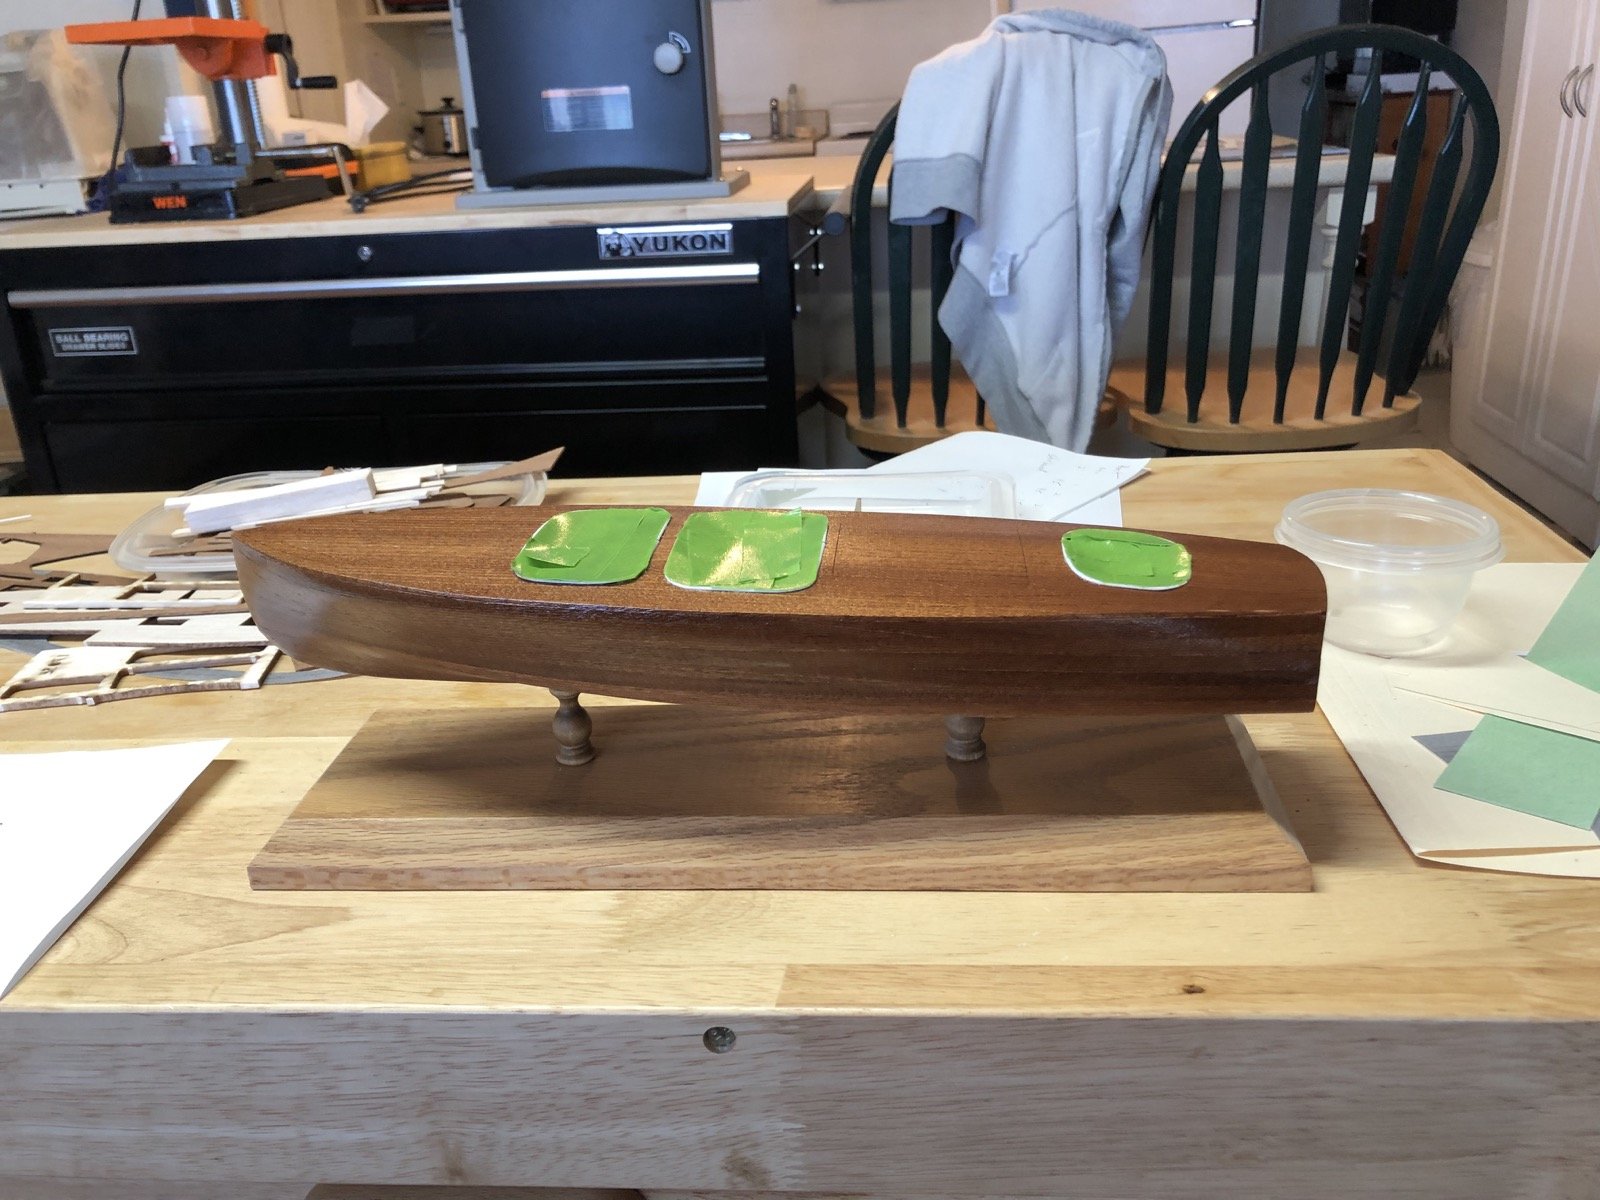
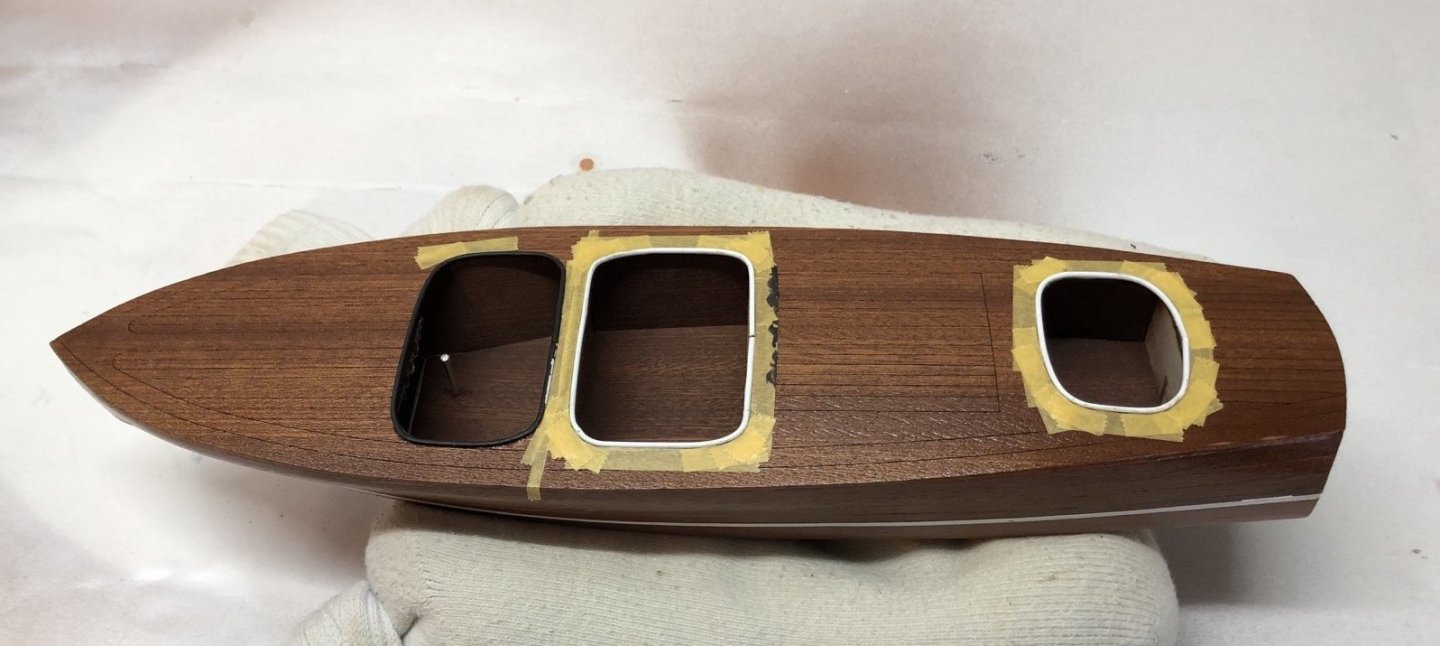
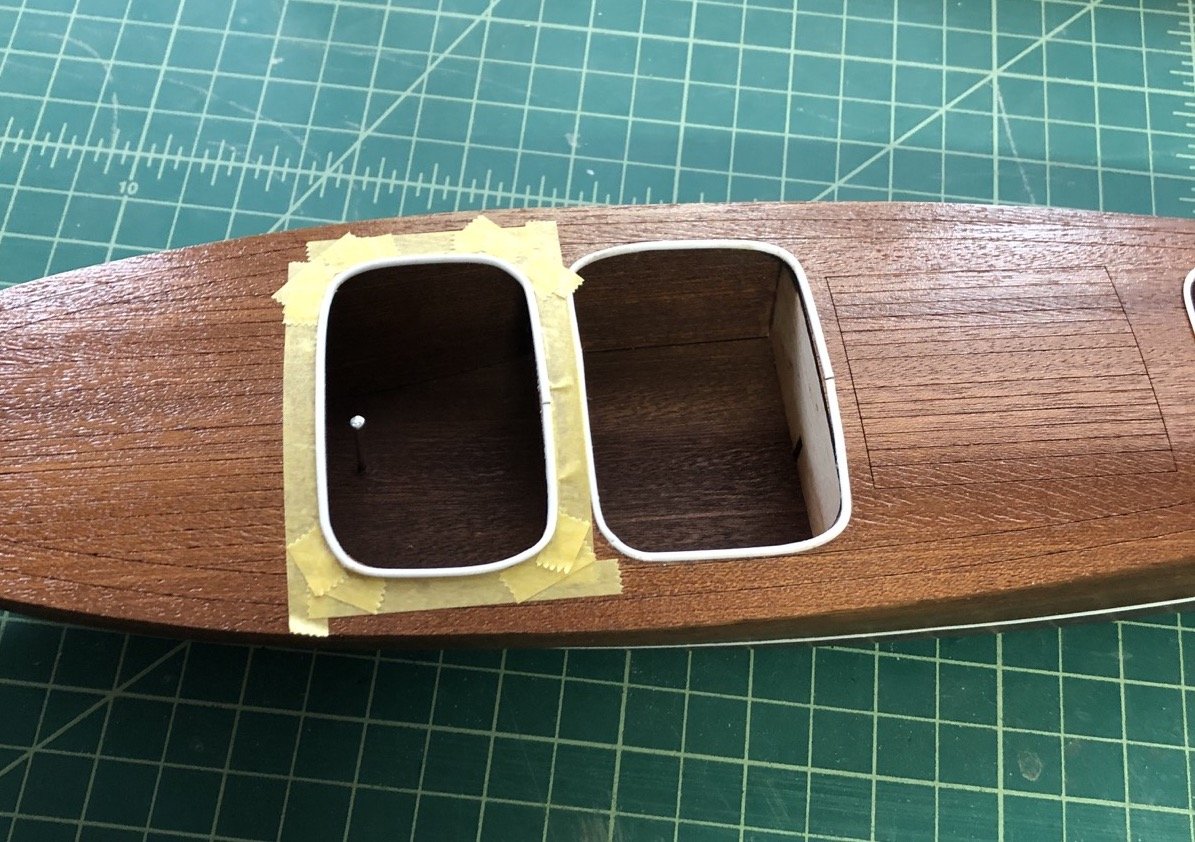
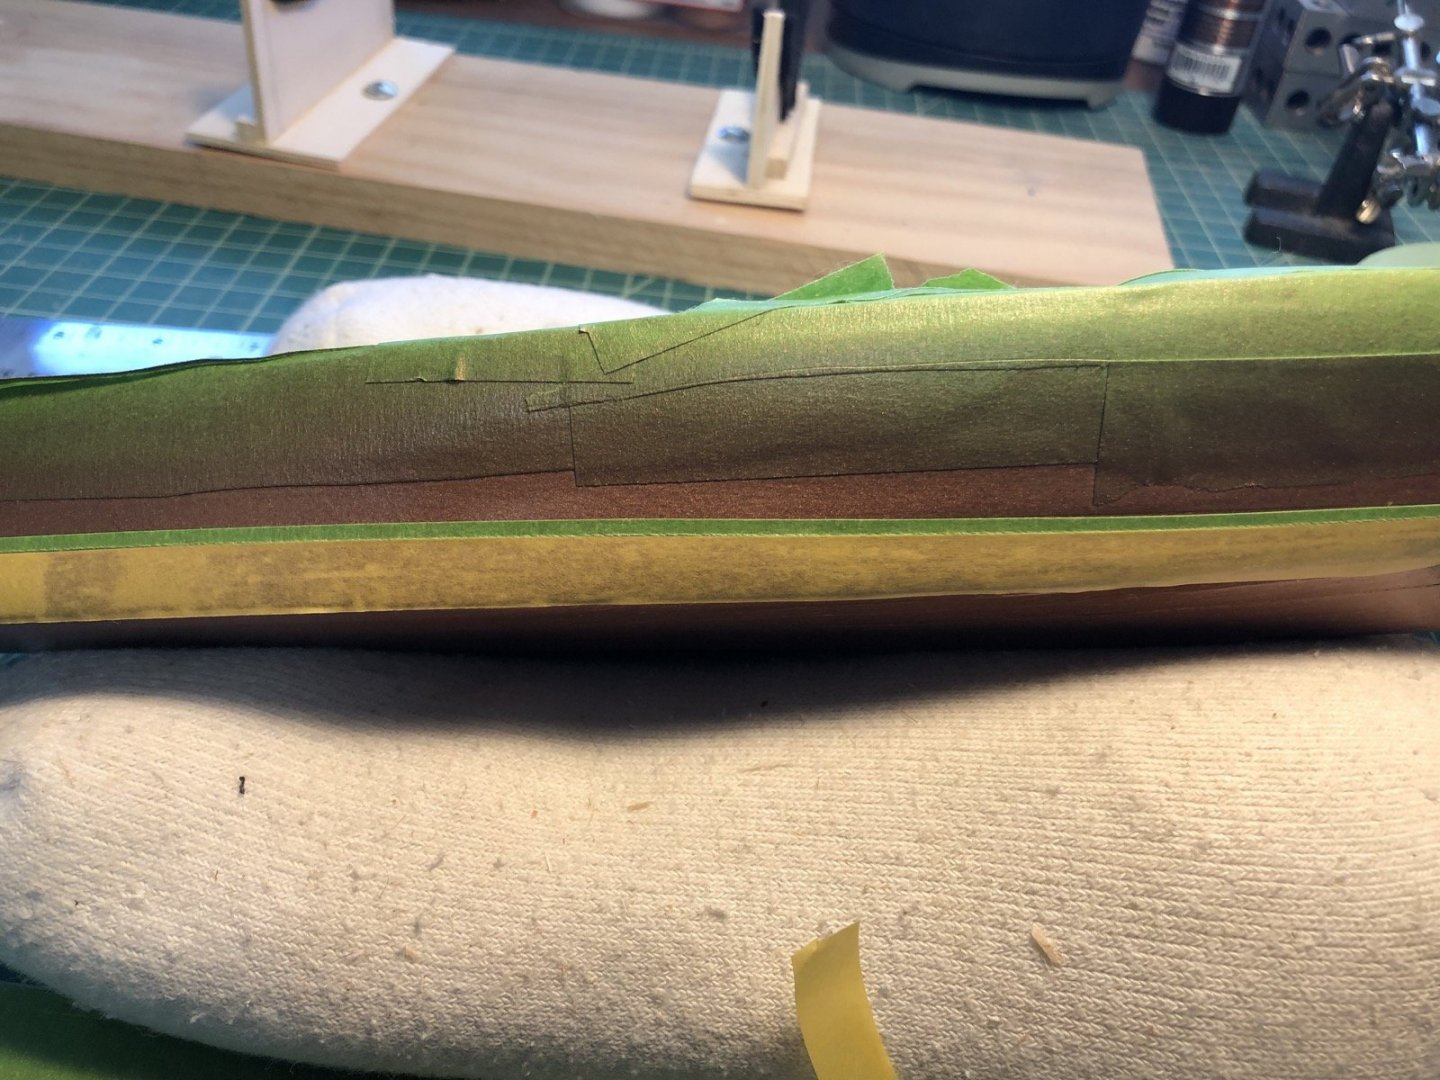
The instructions call for painting the styrene trim pieces around the cockpits black. I decided to start with the first cockpit so I masked off the area around it. I used many small pieces of masking tape around the corners. I brush painted the trim with black enamel paint, then removed the tape after it dried. There was a section where the tape pulled off the paint and another with a white spot, so I remasked those areas and the areas around the other two cockpits. I am in the process of painting them now. I was happy with the look of the painted trim. ' Here is how it came out.

-
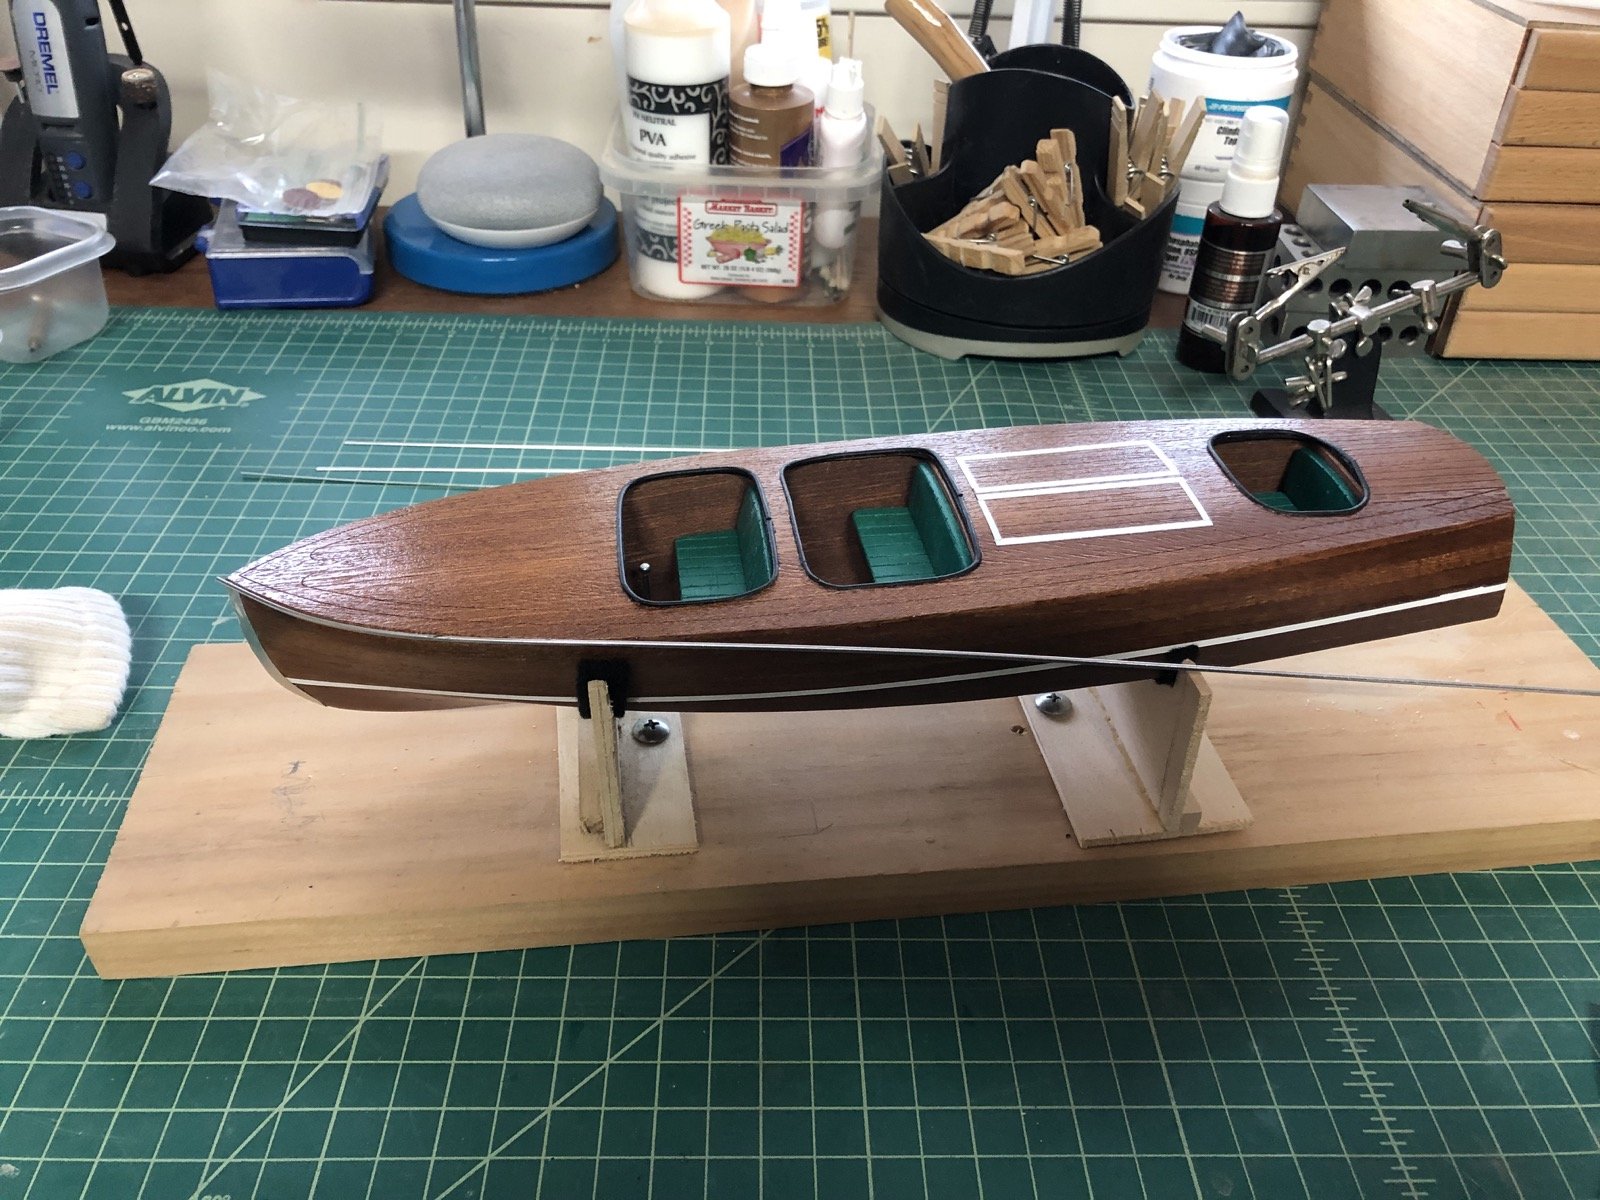
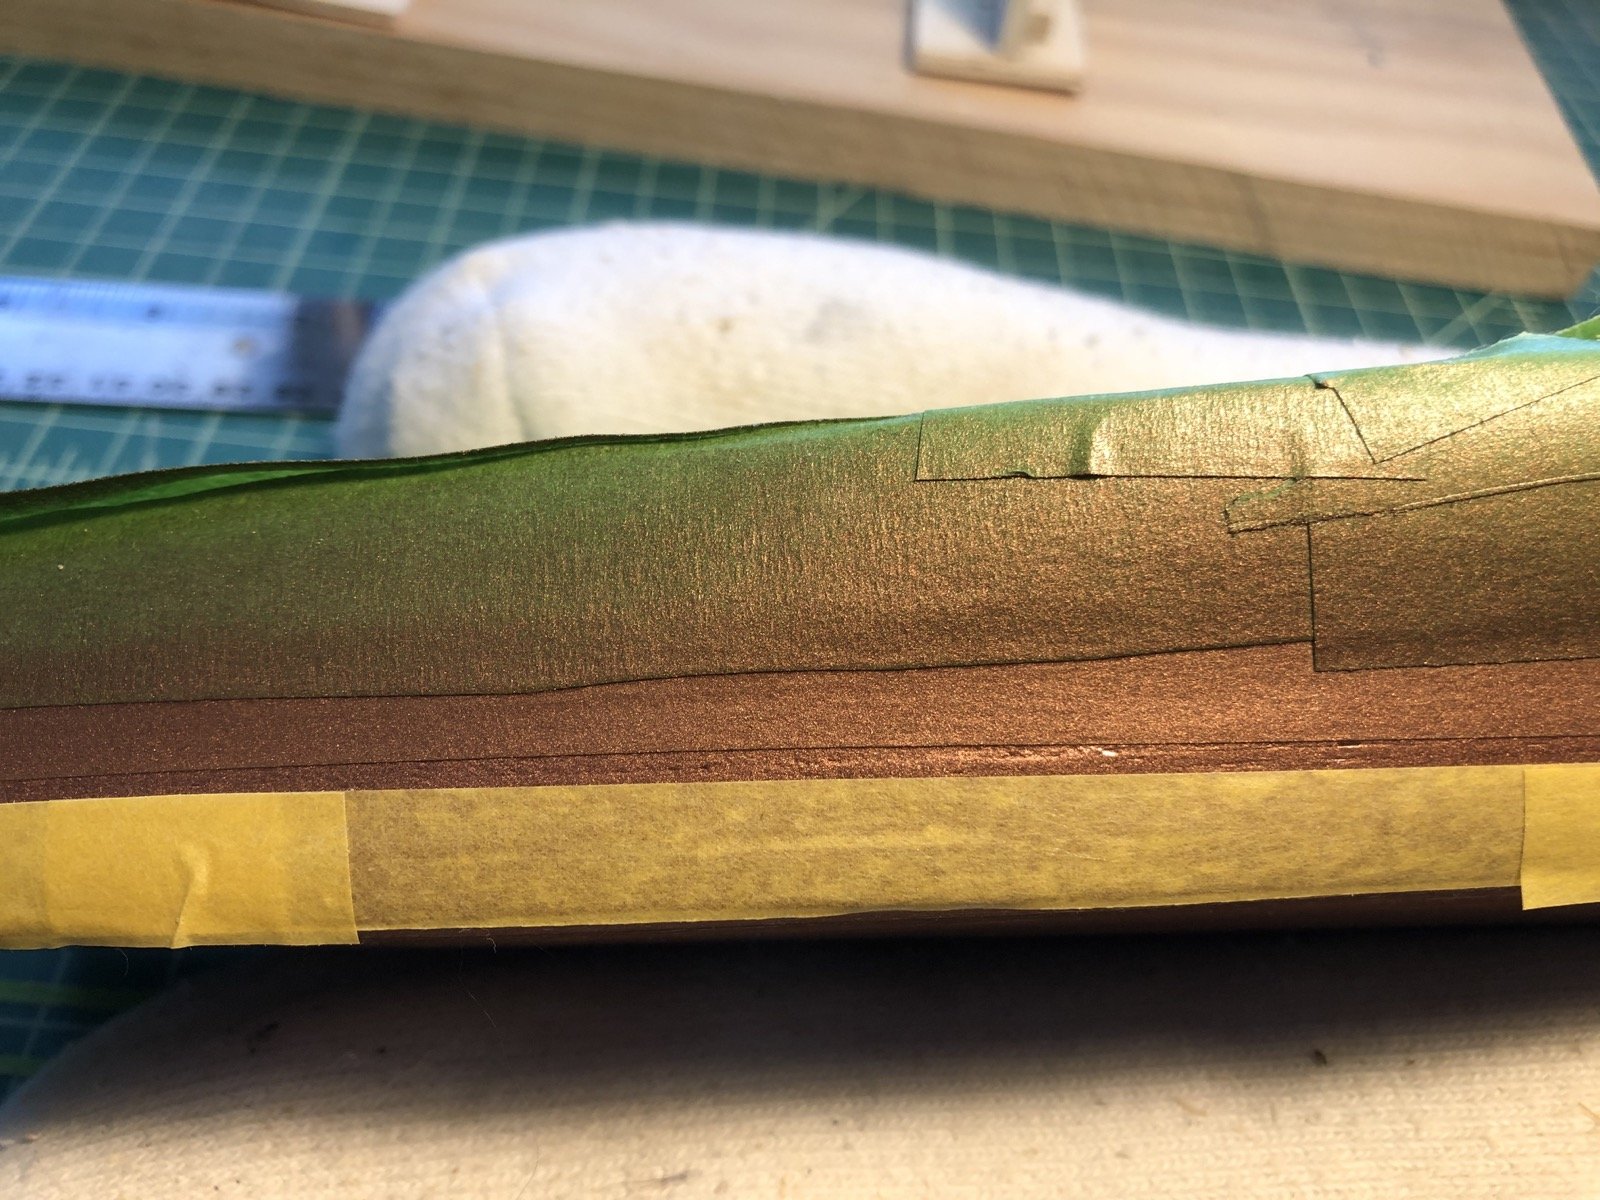
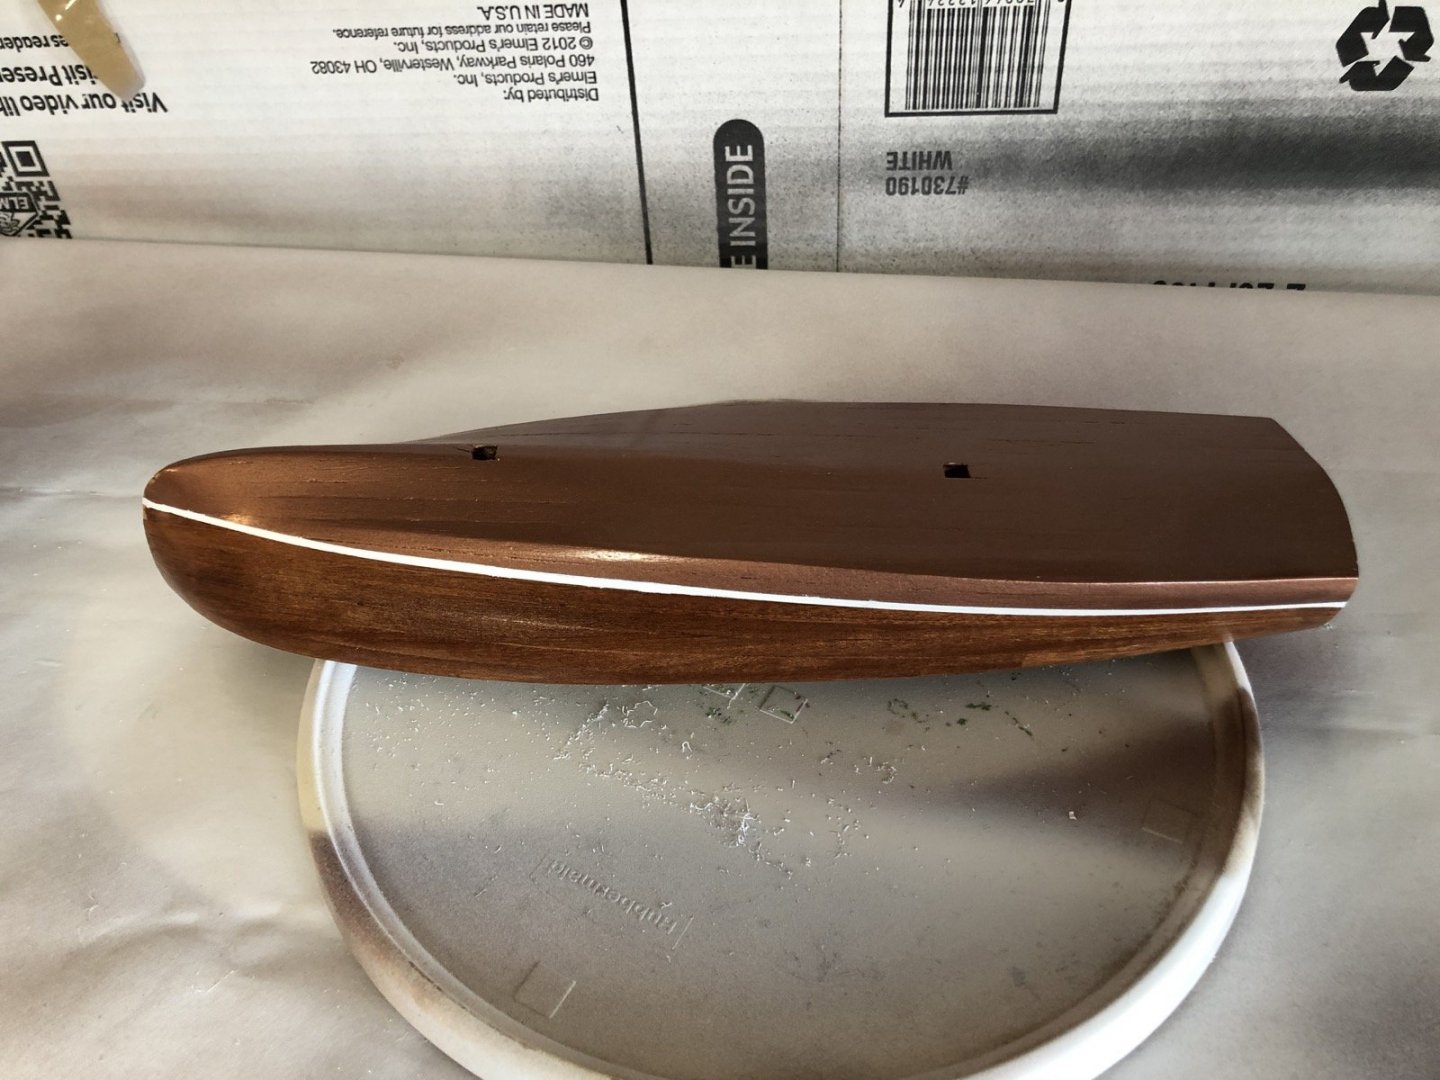
I worked on adding the white water line stripe today. To mask off the hull for the line, I left the masking tape on that marked the top of the line, then cut some strips of masking tape that were the width of the water line strip which is 1/16". I placed this tape along the masking tape, then placed wider masking tape along the other edge. When I removed the 1/16" masking tape, I had the area exposed to paint the stripe. I then sprayed many coats of white paint along that area, then removed all the masking tape after the paint dried. Overall it looked good but I did have a one area along the line where the edge was a bit ragged and another spot that the white paint pulled away from the hull. I put strips of masking tape in these areas and hand painted the areas to touch them up. Here is how it came out after I removed that masking tape. You can see the copper bottom with the lacquered mahogany sides. I like these color combination because the bottom paint is more subtle than using a red or green bottom paint, which are the other traditional colors. I am going to let things dry until tomorrow then I can continue working on the deck and cockpits.
-
The Jacob's ladder looks great. That first shot looking down from the crows nest is an awesome picture.
- 263 replies
-
- 2
-
-
- nave tonda
- round ship
- (and 2 more)
-
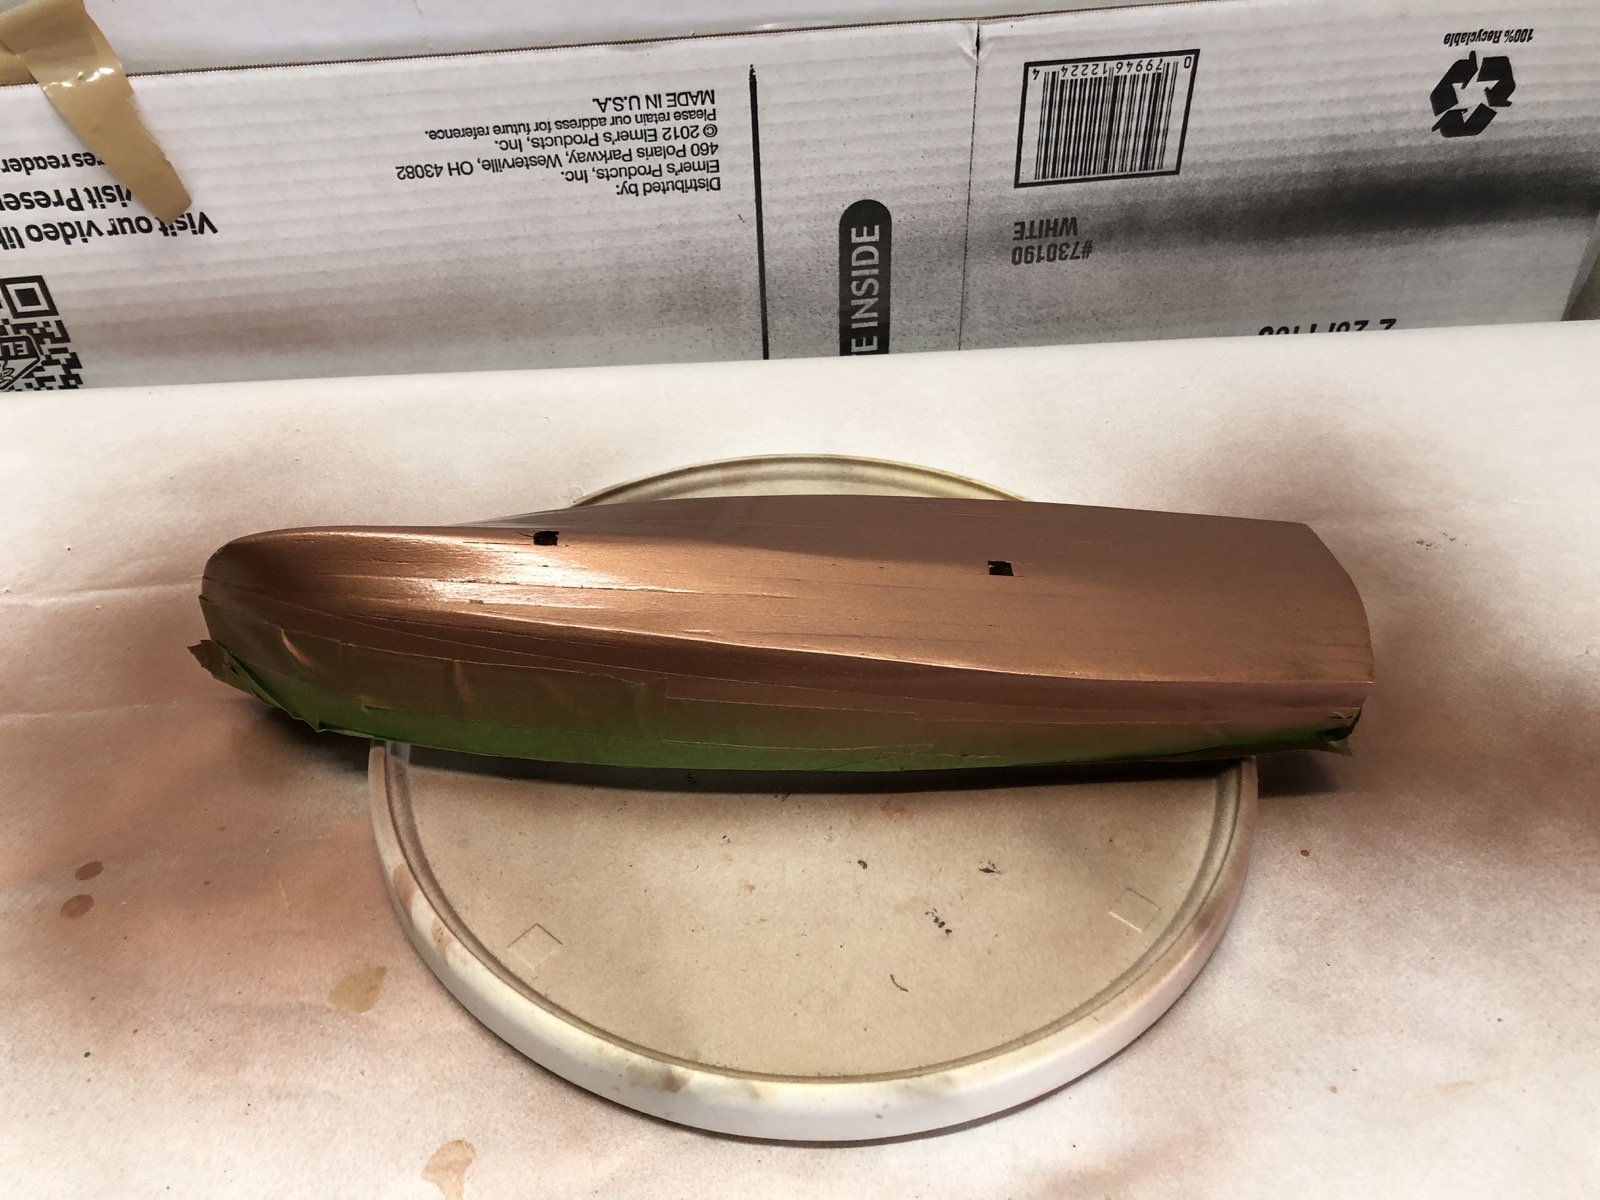
Thanks for the suggestion Tom. I was able to make them from balsa for this model but I will try that on a future one. I marked the water line with 1/4" masking tape, then masked off above that on the sides and the deck. I started on the transom so that I could make sure both sides matched. I then sprayed the bottom and sides with metallic copper paint. I will let this dry for a couple of days then mask off the water line strip which I will paint white.

-
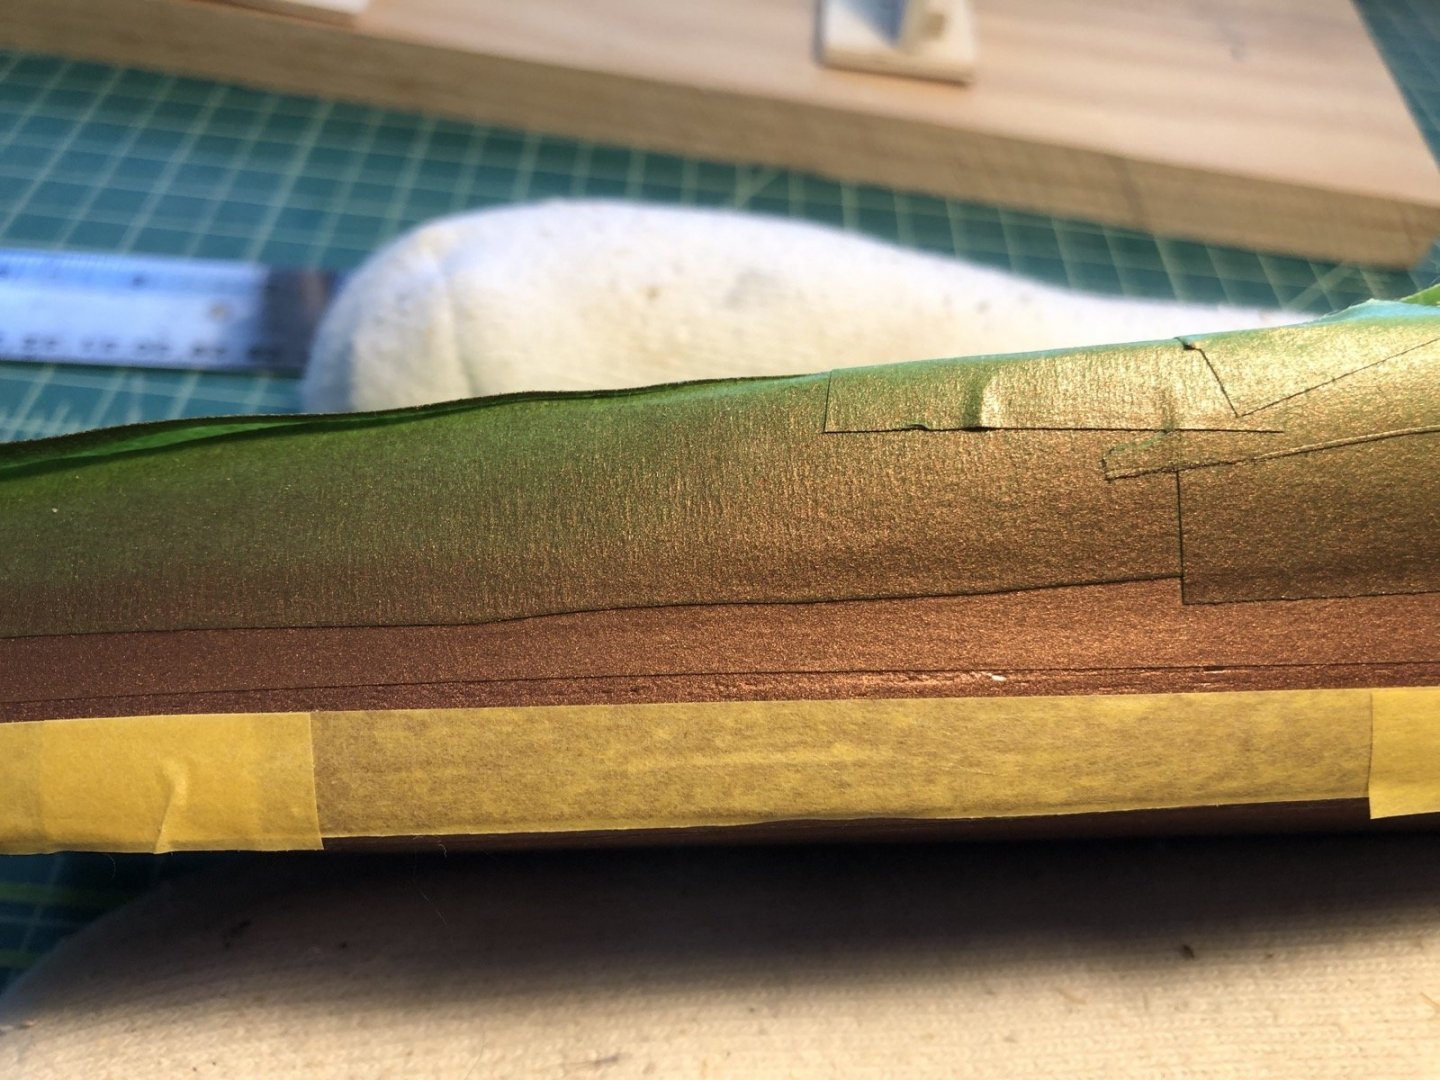
Here are the new exhaust ports. One of the supplied plastic ports can be seen in the strip of chromed parts above these. I tried making a cleat from brass wire but that was a failure so I'll use the supplied cleat after chroming it.
-
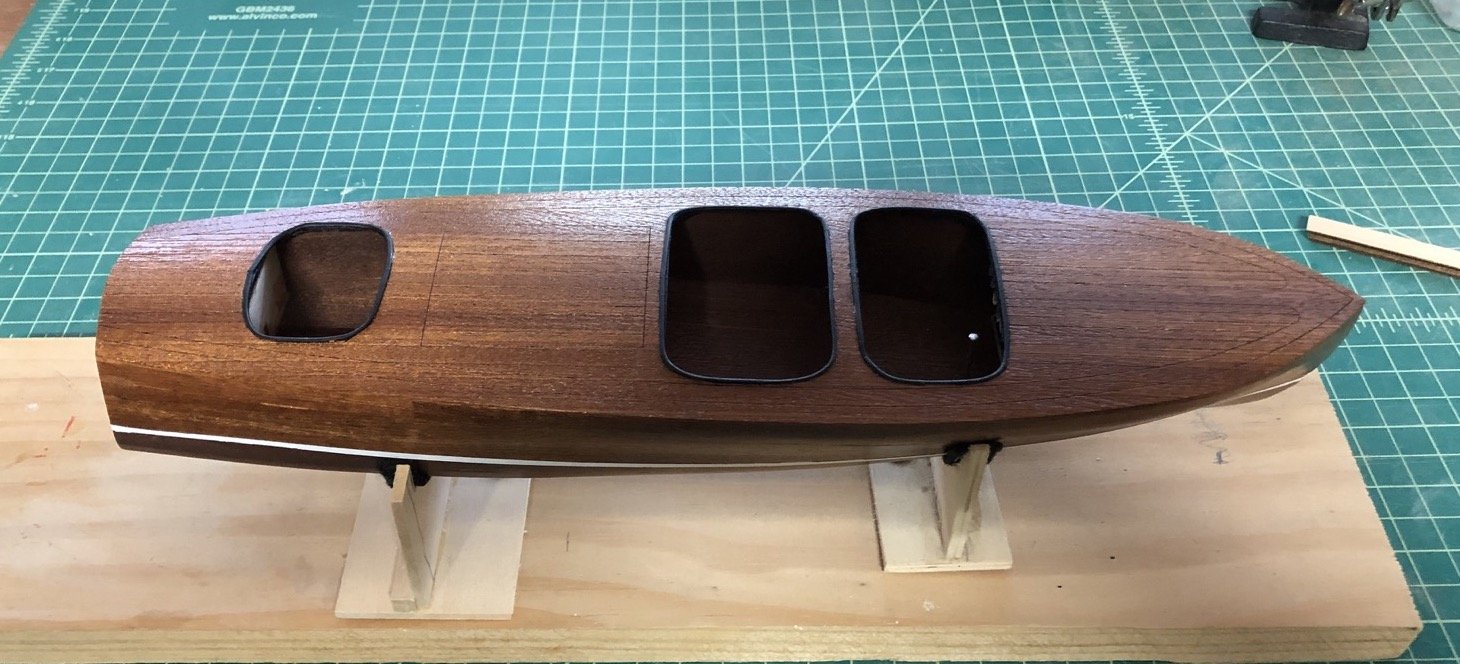
The finish on the deck and hull sides is complete. I test fit the hull onto the display board with the supplied pedestals, which I stained with oak stain to match the display board. I had this board left over from a previous build but the ends were not beveled, so I cut bevels in the ends to match the sides. I have since stained the display board with oak stain to even up the color a bit and I will finish it and the pedestals with wipe on poly. I found two plastic pieces that didn't get chromed - one of the exhaust ports and the cleat for the stern. I decided to try making new ones out of brass instead of using the plastic pieces. I have been watching this excellent class on soldering for jewelry making so I was eager to try out some of the techniques. https://shop.mybluprint.com/jewelry/classes/solder-smarter-strategies-for-better-results/40550 I made two new exhaust ports by soldering some brass tubing to circles of sheet. I am in the process of cleaning them up and will provide some pictures when they are done. I am also going to try making the cleat from some brass wire.

-
This was a great find Bob. I have already started using some of the techniques to create brass parts for my current build.