usedtosail
-
Posts
2,421 -
Joined
-
Last visited
Content Type
Profiles
Forums
Gallery
Events
Everything posted by usedtosail
-
 Just for completeness, after checking last night, the Constitution plans show the wales tapering in width at the stern only, not the bow.
 -
Ah yes, I was thinking thickness too. The Constitution plans also show the wales tapering in width at the bow and stern, but again if this is how they were done at the actual construction, I don't know.
-
The MS Constitution plans have the wales tapering into the bow and stern rabbets. Whether this was done on the original building of the ship, I don't know.
-
You are doing a great job. I am curious to see the differences between the way the practicum has you build and the MS instructions. Either way this will turn out to be a very nice model.
-
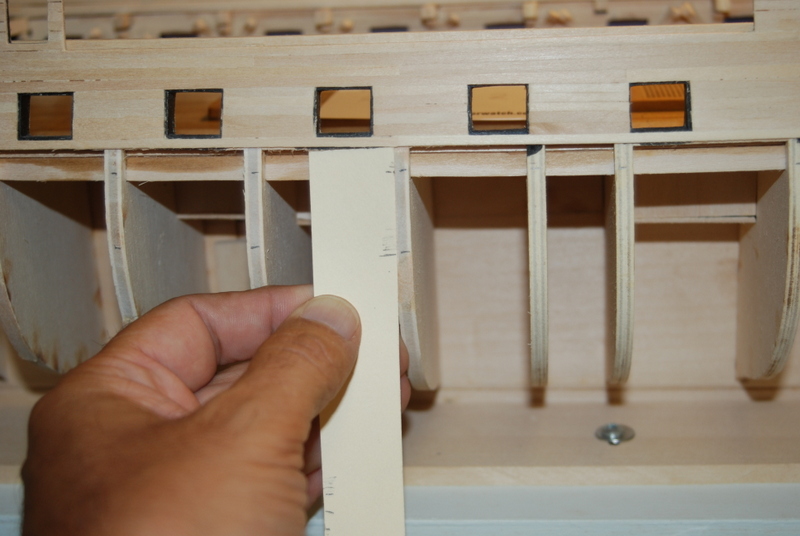
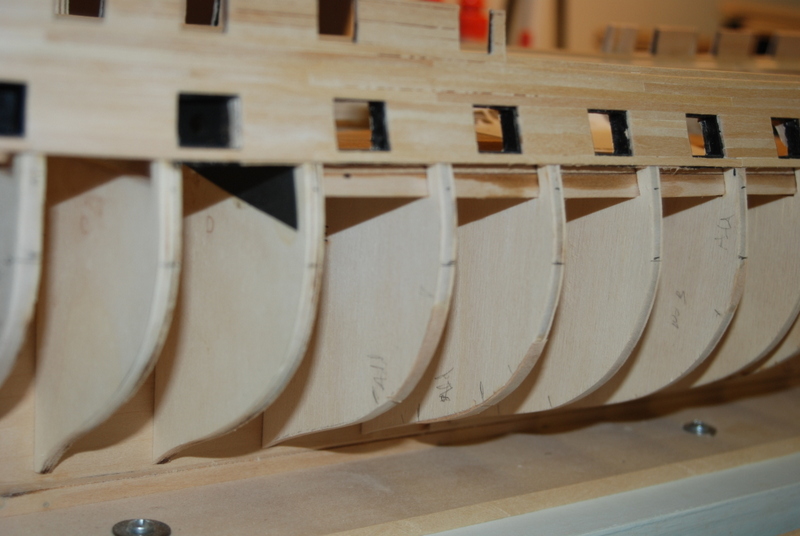
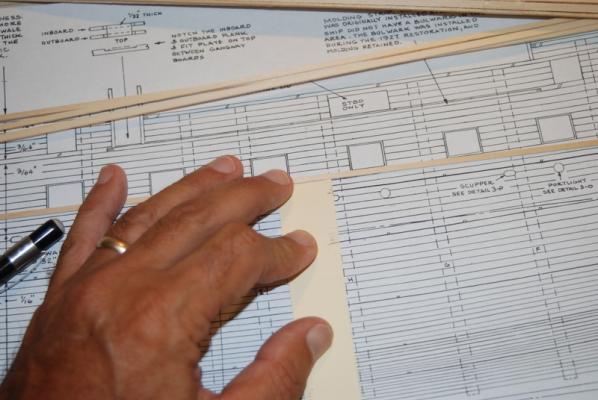
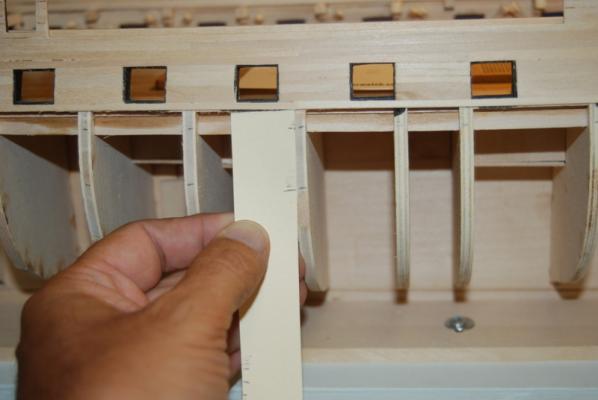
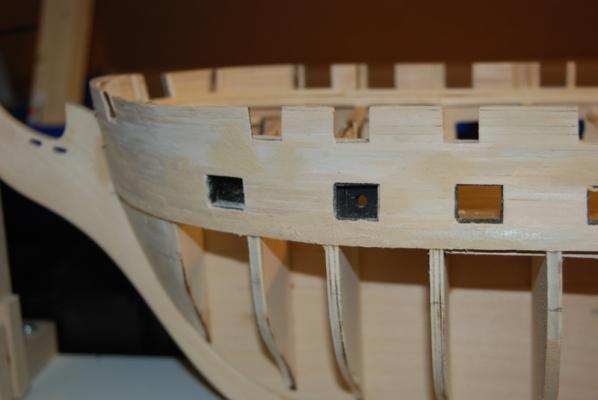
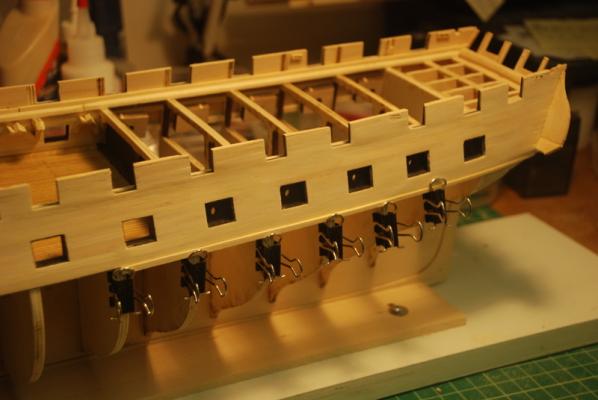
I made some more progress this week on the planking. In preparation for adding the thicker wale planks, I measured the locations of the top and bottom of the wales at each bulkhead off the plans and used a tick strip to transfer that measurement to the bulkheads. I used the plank under the gun ports as the reference, since I could lay the tick strip up against it on the hull. I then placed a batten on these lines and made sure it ran true, and extended the lines to the stem and transom. After I marked the wale locations, I added the remaining two thin planks that go under the gun ports above the wales. Since the wale planks will be thicker than the planks I already have done, I wanted to get the existing planks sanded pretty well so I don't mess up the wale planks later. I gave them an initial sanding then used some wood filler to fill gaps and low areas. I am using a Latex wood filler that is very creamy and sands very well. Here I am about half way through sanding the filler off. I just keep sanding until I can see the plank edges and there are no edges of filler present. I do put the filler on pretty thick at first, but it sands off easily. I used a fairly course sand paper to remove most of the filler, than a finer piece to get pretty close to the finish I want. In this picture, most looks good but I did put more filler on the bottom planks towards the stern. While waiting for the filler to dry in the bow area, I started cutting and shaping the first row of wale planks at the stern. I created a spreadsheet which uses the width of the wales divided by the number of planks to give me the dimensions of each wale plank at each bulkhead. I use these measurements to trim the planks in width. At the bow and stern, the wale planks taper down to the same thickness as the planks already installed (1/16"), so for that I used a sanding block. Here is the first wale plank at the stern, which is tapered in two dimensions - width and thickness And here it is installed with the plank in front of it. This picture also gives a good indication of the sanded upper planks at this point. I will give everything a finer sanding before I paint the hull, too. Of course, this is just on the port side, and all has to be repeated on the starboard side, which I will do after completing the wales on this side.


- 1,354 replies
-
- 8
-

-
- constitution
- model shipways
- (and 1 more)
-
Nice looking bulwarks Mundie. This method has you cutting the gun ports into the bulwarks at some point, probably after the outer planking is done? Would you then add filler pieces in the gaps between the inner and outer planking along the edges of the gun ports? As far as the poly, some folks here wipe everything down with a coat of wipe on poly, even if they are going to paint those areas. My guess is it helps fill in the surface making it smoother, but I just prime and paint and only use poly on the parts I leave natural or stained. Either way you should be fine.
-
That's what I did - cut a new one from basswood sheet. Whatever way works for you. I will enjoy following along with your build.
-
Nice job on the waterways.
-
That is a beautiful area. I hope the new house has a nice workshop, or at least a room that you can use as a workshop. I am anticipating seeing your take on this ship.
-
Thanks guys. Tim - good luck with your move. I love the Finger Lakes area. Which lake are you going to? Geoff - you got that right. I need small victories to keep me motivated. Wayne - welcome back to the hobby. I hope this build helps others as I have been helped by those that have built or are still building the Constitution.
-
Sal, nice touch with the ship's name. You are doing a fantastic job on this build.
-
Nice Pete. Thanks for the tutorial. One thing to mention for those that haven't used it before, when you go to buy the Silica you will think the can is empty. That stuff has no weight! I always used the 105/205 stuff, but now I want to try the G-Flex. It looks much easier to manage small batches.
-
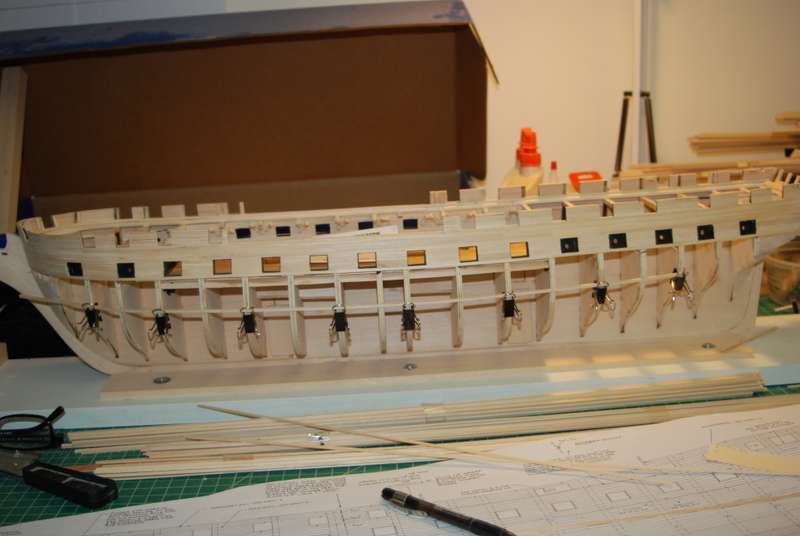
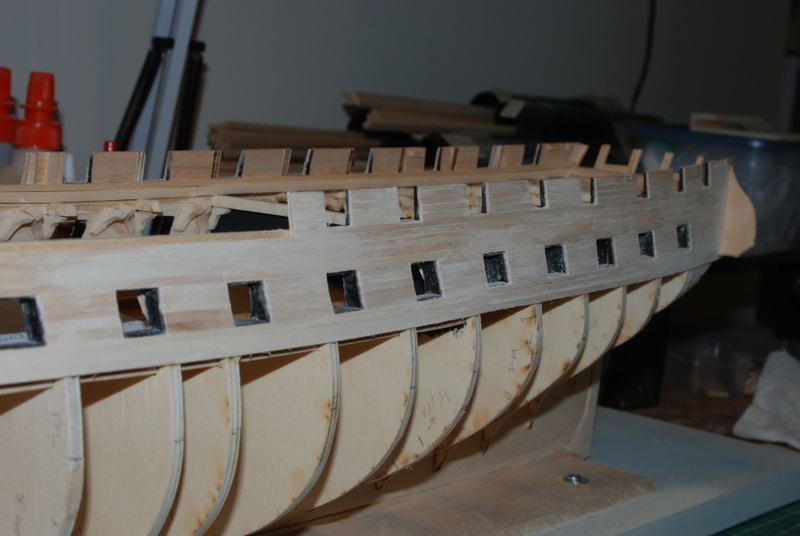
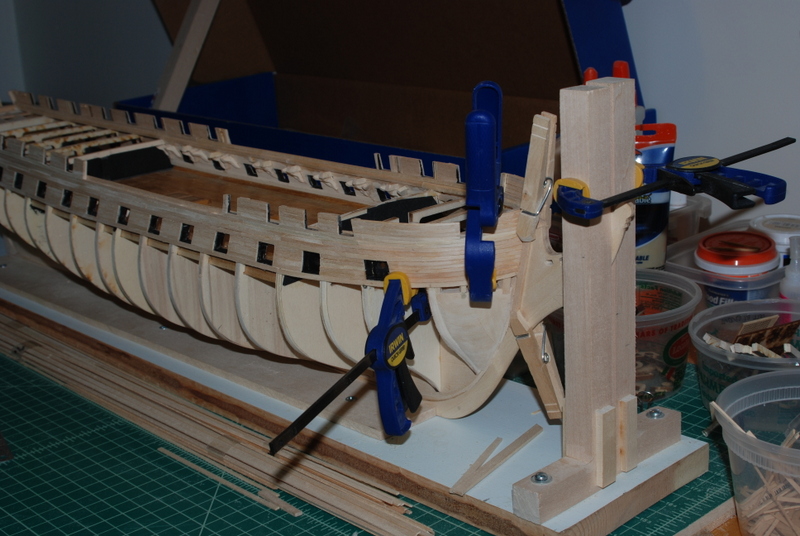
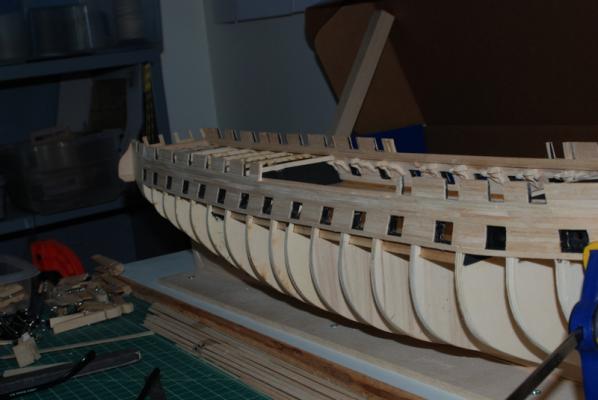
A milestone of sorts... The last two planks framing the gun ports have been installed. I also gave the planks behind these a preliminary sanding. I am going to have to use some filler as the faces of some of the planks are not level with each other and too far off to just sand. I didn't see any springy planks on this side like I did on the port side. I think I paid more attention to this as I was planking the starboard side. There are some gaps between planks that need some filling, though. Overall, I think they came out OK. I was really worried about the planks along the edges of the gun ports, but I was able to clean these up with a riffler file that I could run along the inside edges of the gun ports. The building jig I am using doesn't let me get a good view of the bow straight on, so I made sure to take the hull out of the jig to check the run of planks on both sides at the bow before filling in the area between the stem and the first gun port. Sure enough, I had to adjust the starboard plank under the gun ports at the stem to line up with the same plank on the port side. Next up is the planking below the gun ports and the wales. I will mark off the locations of the top and bottom of the wales and check the fairness with some battens before adding more planks.

- 1,354 replies
-
- 9
-
-
- constitution
- model shipways
- (and 1 more)
-
Two reasons I use wax - knots hold better on waxed line and if I heat the wax into the line, it removes kinks that can form, especially on line that is wound on a card.
-
I agree Pete, it is a shame it had to come down to the courts. I also used to have a Hobie 16 that I raced, so got to know West System pretty well. It is great stuff. I love these Americas Cup models you are doing.
-
B.E. - is there a particular font that you use?
-
That is some very nice detail work at a small size. Very good work.
-
I didn't change the upper deck height from the kit, but you could get the height from the plans in the AOS book.
-
A few years ago, I attempted to bash this kit to match the AOS book. The link to pictures in the gallery is in my signature, if you are interested. The poop deck was the biggest correction that I couldn't make.
-
I have this snippet in my Constitution notes, but don't remember where I found it. It might have come from a post on this site: "Both Michele Felice Cornè and his protégé George Ropes, Jr. depicted boats hanging from Constitution’s stern and quarter davits in their paintings of the August 19, 1812 battle with HMS Guerriere. In both painting series, the quarter and stern boats are painted green with red interiors, but since they have flat hour-glass-shaped sterns, they cannot be whaleboats. They are probably meant to represent the gigs or cutters frequently mentioned in the ship’s logbook. Since the whaleboats for Constitution were not delivered until October 1812, two months after the battle and a month after the ship’s return to Boston, it makes sense that Cornè and Ropes would not include them in their paintings of the battle." So maybe not whaleboats before Oct 1812?
-
Not boring at all Theo. This is lovely work and a real inspiration.
-
Geoff, based on what you have done so far you shouldn't have any trouble. I am enjoying following along with your build.
- 1,354 replies
-
- 1
-
-
- constitution
- model shipways
- (and 1 more)
-
Thanks for the encouragement, Scott. I had the most trouble in that curved area around the bow keeping the planks tight. The use of wedges as the glue dried helped. The areas between gun ports were difficult to clamp, too, but the planks were so short I just held them in place until the glue tacked up. The wood glue I am using dries pretty quickly, so that does not take too long. I have not had to revert to CA yet for the planks, which I have used in the past as a quick clamping method. Once I start using that, it becomes a lot more difficult to remove planks. At least this area is pretty straight forward. Once I start planking under the wales I have to deal with bending and possibly spilling planks. That's when the fun really starts. Your Rattlesnake is very sweet. You are doing a great job.
- 1,354 replies
-
- 1
-
-
- constitution
- model shipways
- (and 1 more)