Supplies of the Ship Modeler's Handbook are running out. Get your copy NOW before they are gone! Click on photo to order.
×
.JPG.ca33079f5815b861e67b9c2cccd37982.JPG)

Blue Ensign
-
Posts
4,553 -
Joined
-
Last visited
Content Type
Profiles
Forums
Gallery
Events
Everything posted by Blue Ensign
-
 Great set of photos Ron, you have truly achieved a sense of life and movement in your dio. I particularly like that close up stern shot, - brilliant. B.E.
- 542 replies
-
- 5
-

-
- Sphinx
- Vanguard Models
- (and 3 more)
-
Hi Dave, I use Steel all the time, especially the tables that give the masting and rigging sizes, item by item, for all classes of ships. Kits tend to oversize the masting and yards, and provide insufficient rigging sizes. There is an online version. The Elements and Practice of Rigging And Seamanship (maritime.org) B.E.
-
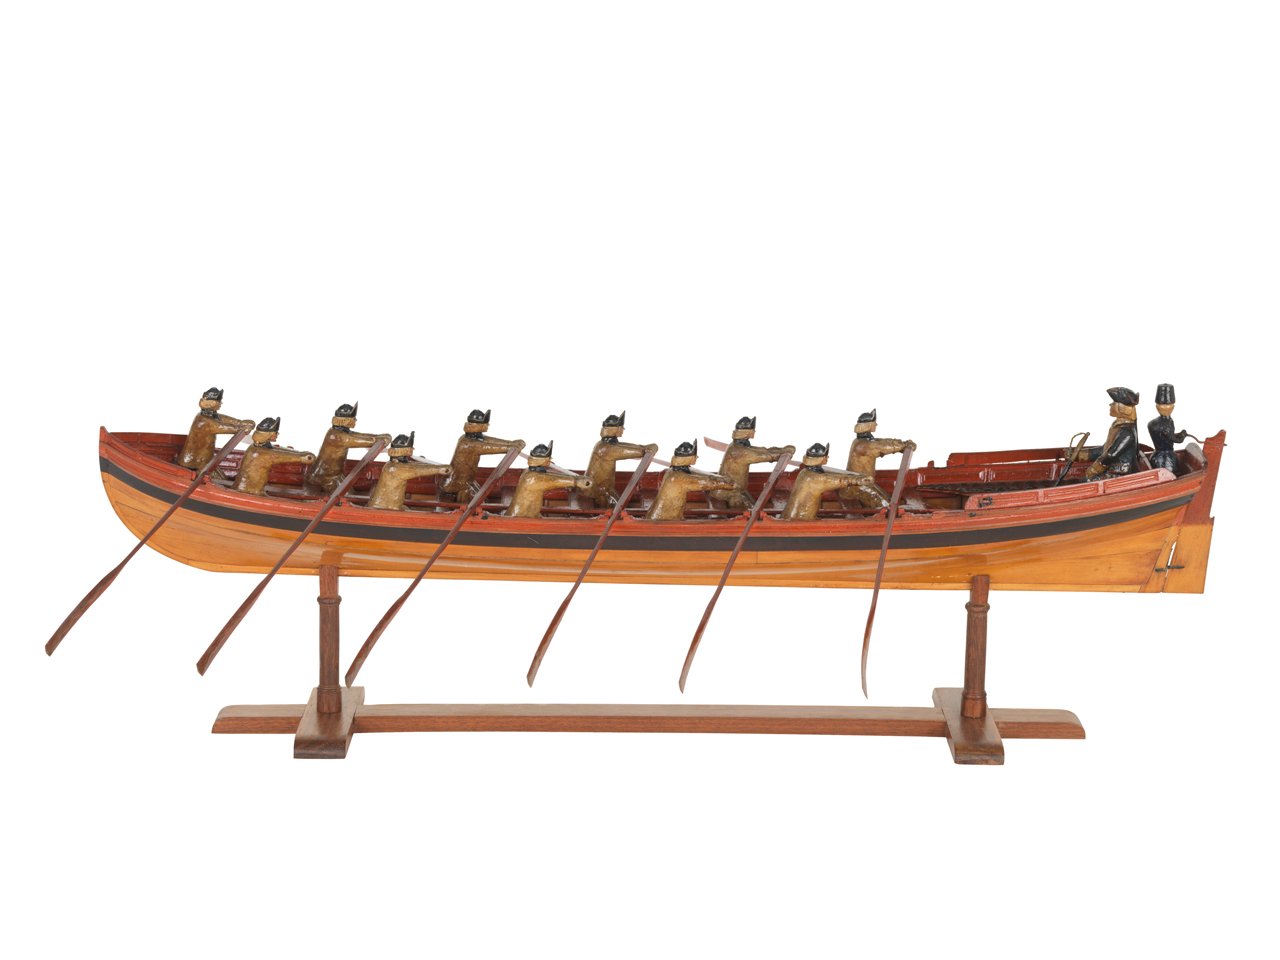
Post Twenty-three The base over which the cover is placed is made of 3-ply plywood, it just happened to be lying about. Although given the w-o-p treatment the finish looked, well, unfinished. 0287 I thought about painting the base but one of the contemporary barge models (above) had a hessian covering which gave me the idea of using baize, a posher alternative, and something I had used to line the case of my Cutter Cheerful build. Speaking of Cheerful I love that model in all its Boxwood beauty and silently thank Chuck for providing the makings every time I walk past. So Blue baize it is. 9819(2) I think the dark blue goes well with the ochre red, the Boxwood stand will remain as is. 9818(2) Stuck down with diluted pva, ironed, and trimmed with a scalpel, job done. 9826(2) 9820(2) The cover will need cleaning up for final fitting, constant handling has taken the clarity from it. B.E. 23/12/2022
.thumb.JPG.ce8675c0be54850d647412df133d47be.JPG)
.thumb.JPG.54fca4b264528c2163e29b93c01a8b4a.JPG)
.thumb.JPG.3ef33e07a34eb63f2aab4b0fa7382007.JPG)
- 106 replies
-
- 16
-
-

-
- Admirals Barge
- Vanguard Models
- (and 1 more)
-
Great set of photos Peter, she does look impressive. B.E.
- 366 replies
-
- 3
-
-
- bellerophon
- victory models
- (and 2 more)
-
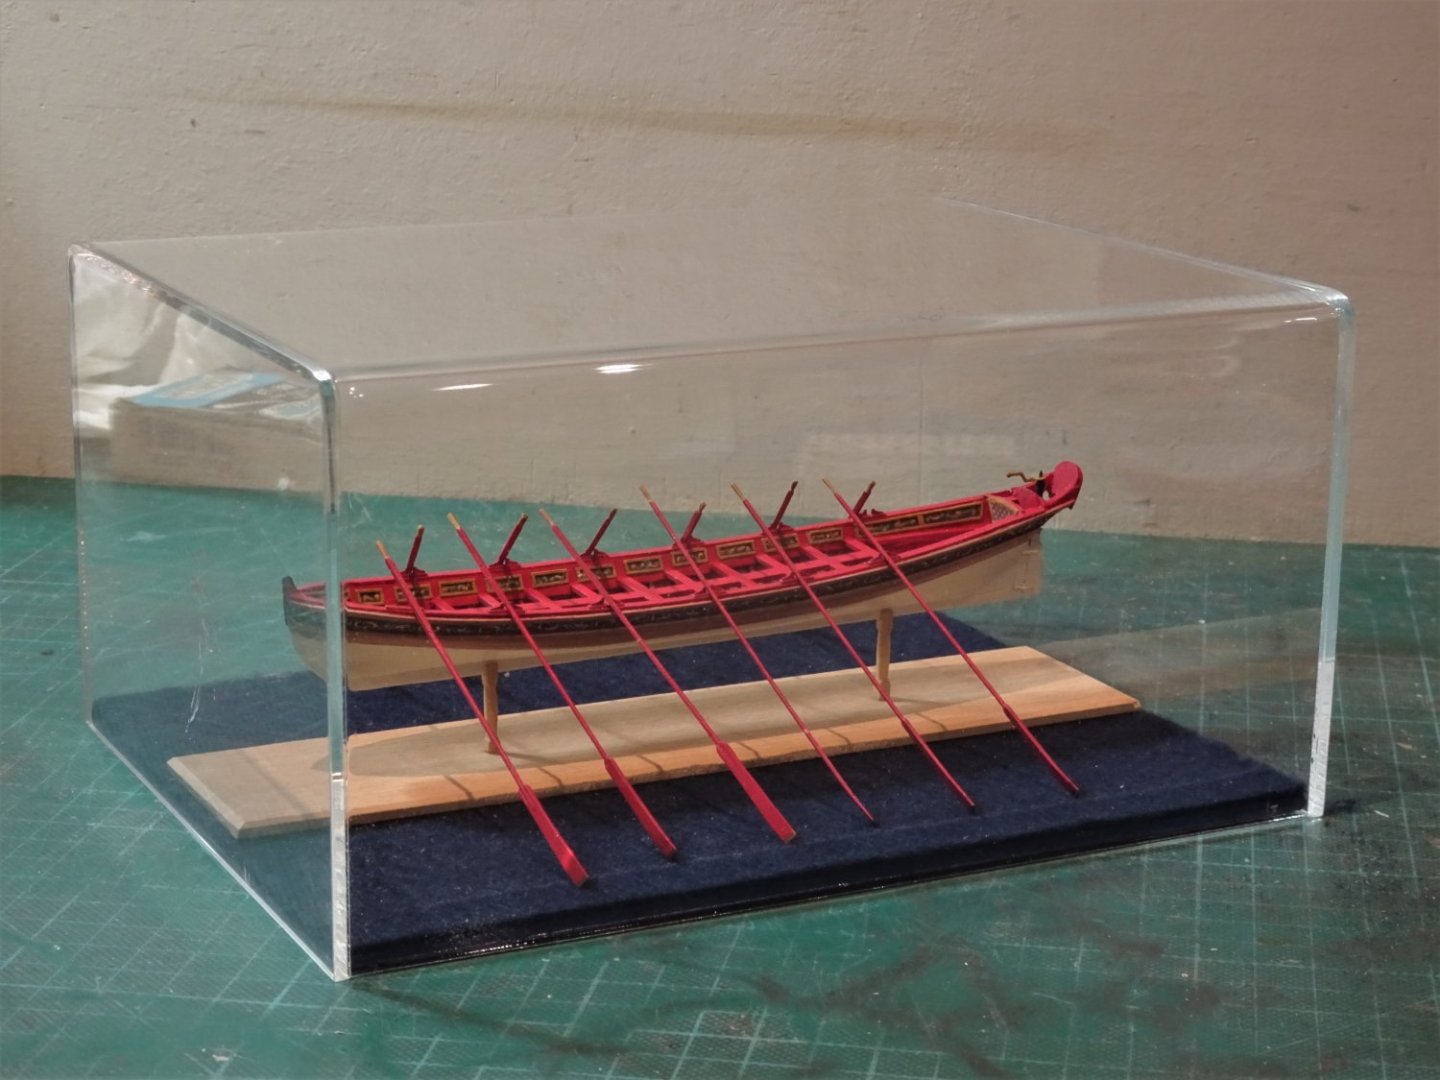
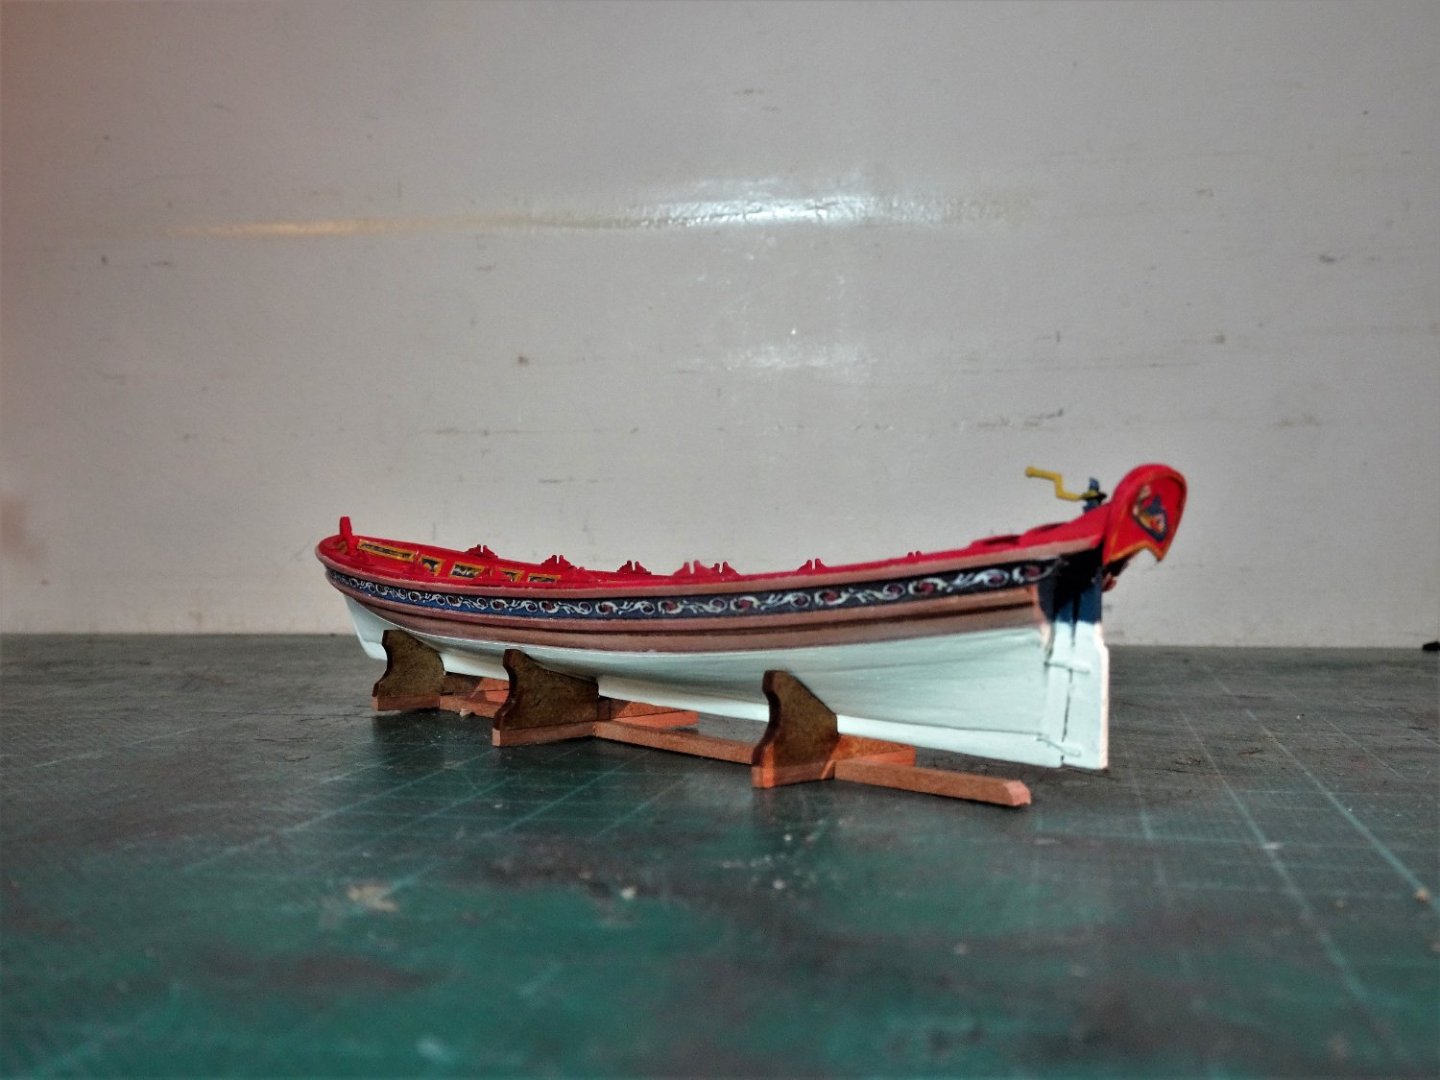
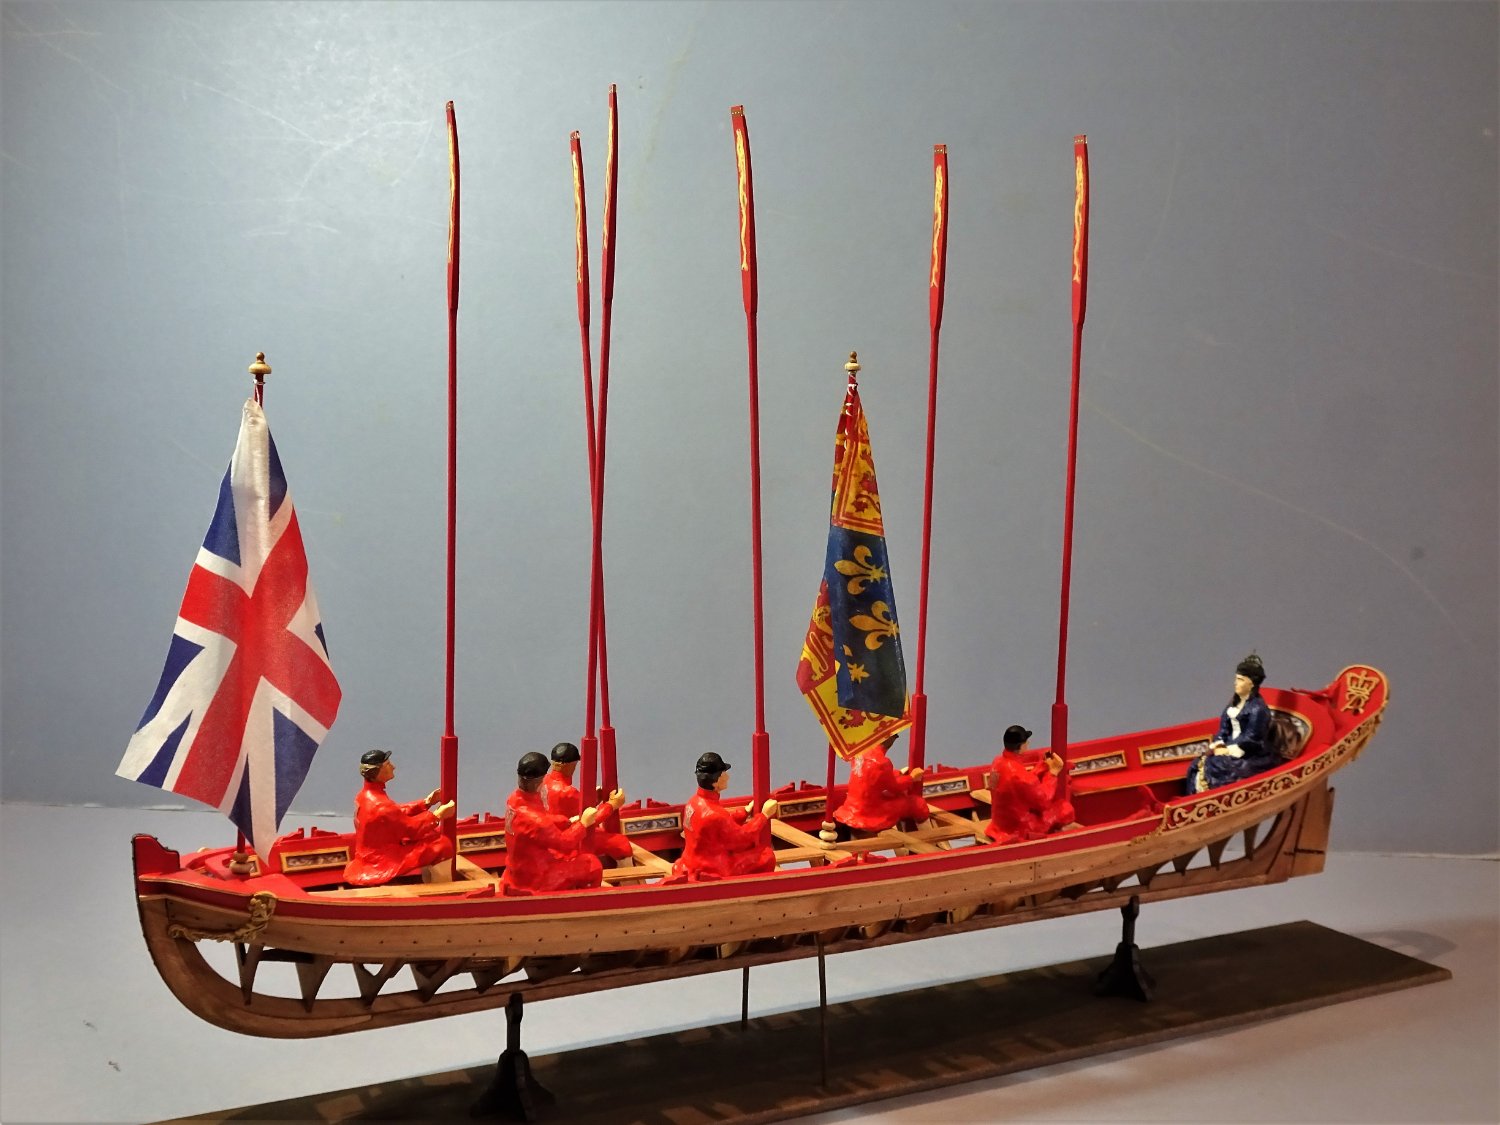
Post Twenty-two 9806(2) A new Boxwood stand has been made that raises the boat a little higher than the kit provided cradles. 9798(2) The oars can’t be properly fixed until I decide about the crew. 9794(4) 9793(2) 9796(3) A baseboard has been prepared to suit the acrylic cover, designed to fit over the whole display to protect the outboard oars. 9800(2) A cover is necessary with this type of display. Until the crew arrive, I can’t progress the build. I last heard that they were somewhere in Cornwall and I’m beginning to suspect they may have been seduced by smuggling gangs, where the rewards are greater and life easier than service in his Britannic Majesty’s Navy. A few more days and I'll have them listed as 'Run' B.E. 21/12/2022
.thumb.JPG.11deb33ba0b4690eea6c4b5bcbdee422.JPG)
.thumb.JPG.63315e818d67ee96babbb5c166ec9088.JPG)
.thumb.JPG.230c959cf938fbebbfb5de536598366b.JPG)
.thumb.JPG.9c4bf4746784ef84cbd34c8e52dc017c.JPG)
.thumb.JPG.eae14acac8b5634bf98a53560c9189e1.JPG)
.thumb.JPG.29028fc3ece8762a71426d582873d400.JPG)
- 106 replies
-
- 16
-
-
- Admirals Barge
- Vanguard Models
- (and 1 more)
-
Your work is outstanding Greg, another beautiful model completed. It is a pleasure to see your builds, an inspiration to us all. Regards, B.E.
-
In the absence of any evidence to the contrary, a good choice I would say, you've done an amazing job on designing and creating this kit. Well done Chris. 👏 B.E.
- 488 replies
-
- 9
-
-
- Indefatigable
- Vanguard Models
- (and 1 more)
-
Your painting skills are second to none Marc, that stern is magnificent. What a statement! B.E.
- 2,623 replies
-
- 4
-

-
-
- heller
- soleil royal
- (and 9 more)
-
Thanks Gary, I think we'll quickly pass over my painting skills, but I've used the silhouette approach on my Fishing boat models, and for scale figure representation on my Cutter Cheerful build. As you say it doesn't detract from the model, and it surely avoids the trouble of painting all those little beggars. I will certainly try the primer only approach first. B.E.
- 106 replies
-
- 4
-
-
- Admirals Barge
- Vanguard Models
- (and 1 more)
-
Great job James, the figure will look impressive at the head of Indy. Just curious, does the figure have a historical association with Indefatigable, I seem to recall a similar figure on Agamemnon, a sister Ardent class vessel, obviously representing the Greek king. I suppose the figure could represent Achilles, he was pretty indefatigable, but perhaps not as pretty as Brad Pitt. B.E.
- 488 replies
-
- 9
-
-

-
- Indefatigable
- Vanguard Models
- (and 1 more)
-
The position is correct Mark, as shown on these contemporary models. Even so , the space on the kit version does seem a little tight to get a scale figure in, something I doubt was intended when Chris designed the model. In the examples shown above the helmsman is very close to the stern bench, I imagine great care would have to be taken not to the knock the large Tri-corn/ Bi-corn hats from the heads of their high ranking passengers. B.E.

- 106 replies
-
- 7
-
-
- Admirals Barge
- Vanguard Models
- (and 1 more)
-
According to Steel: The Mainmast at the partners for a 36 gun ship would be 26” ø (10.3mm) at scale. The Mainmast for a 28 gun ship would be 23⅝” ø (9.4mm) at scale. The Foremast for a 28 gun ship would be 20⅞” (8.3mm) at scale On these figures there would be a difference of 2mm in the diameters of the Fore and Main masts on the proposed Surprise. I would want to be sure that regardless of any historical anecdotes that on the actual model the masts didn’t look out of keeping with each other and spoil the overall effect. What happens on a full-size version doesn’t always transfer well to a model. Just saying. B.E.
-
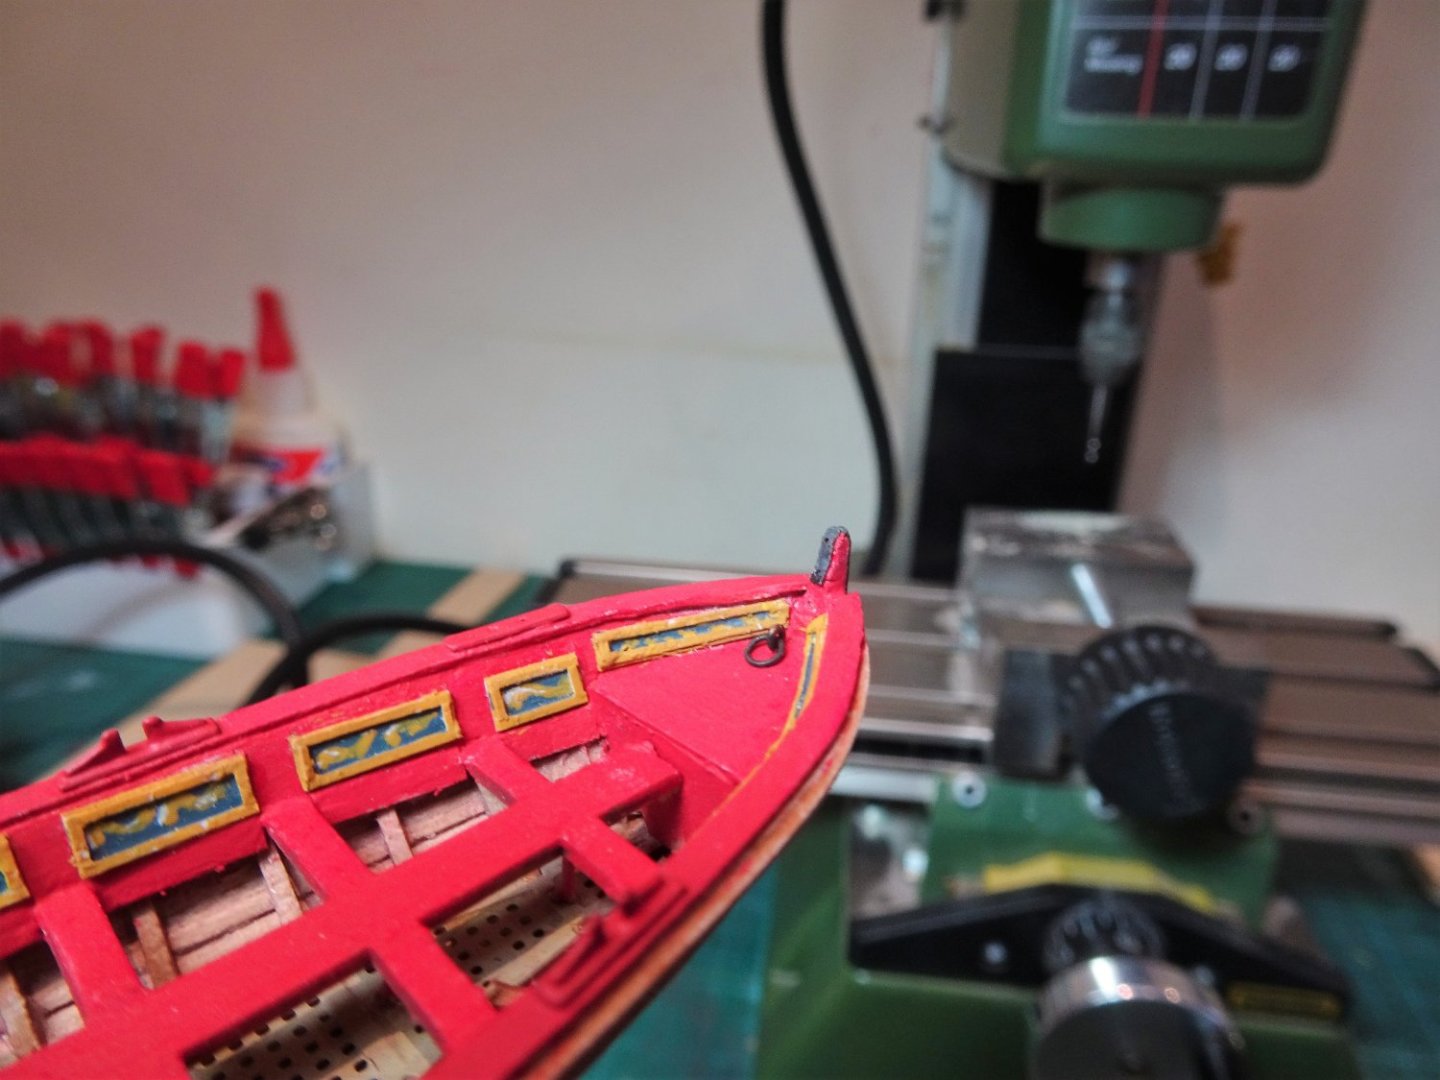
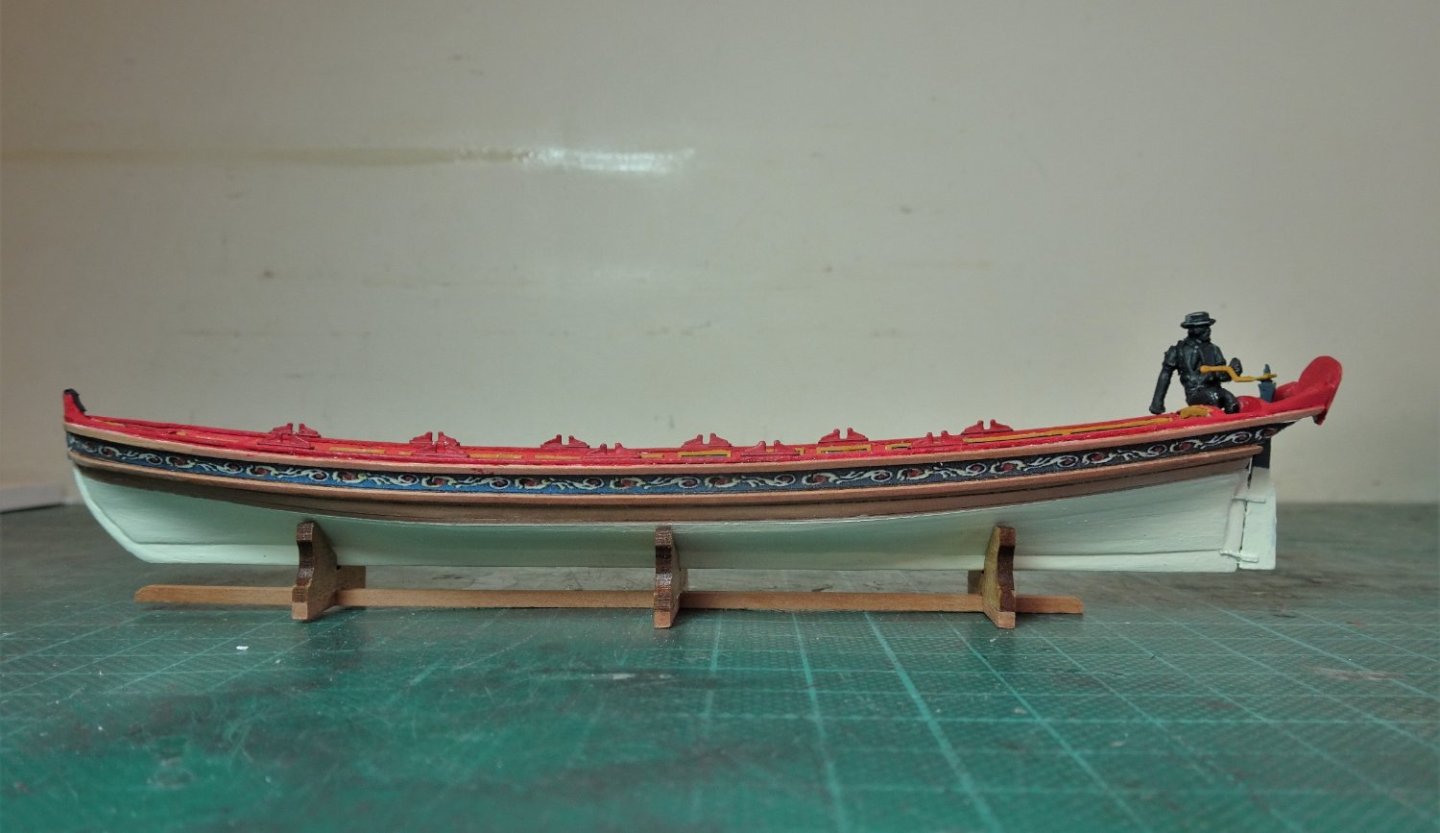
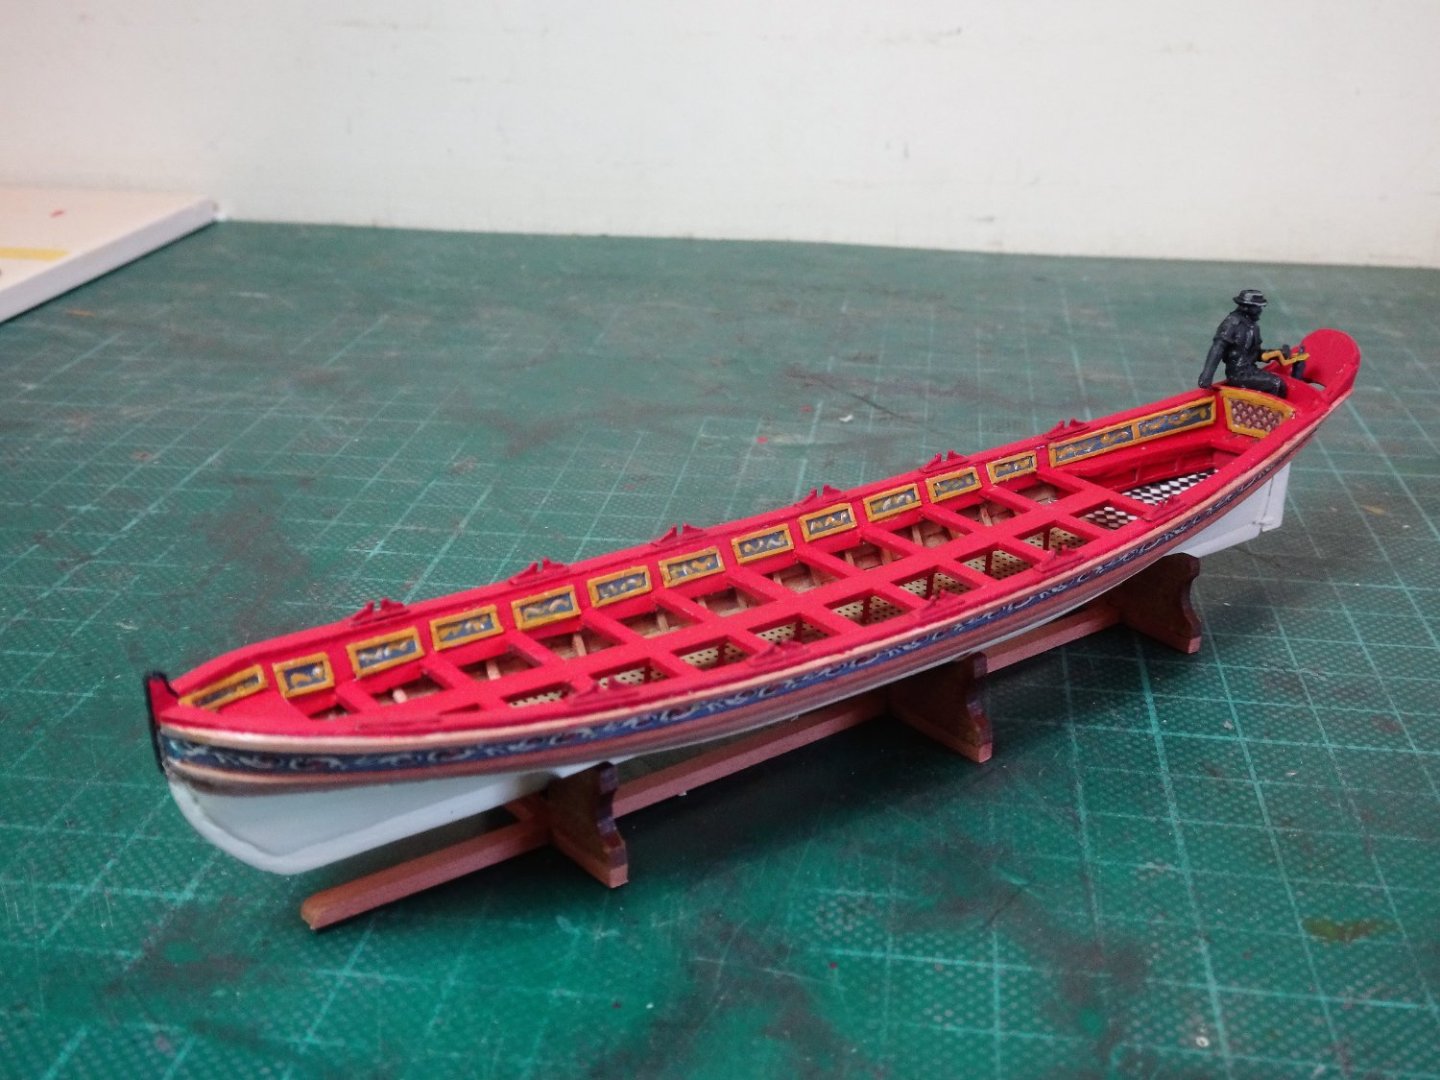
Post Twenty-one In the previous post James (whitejamest) kindly gave me the heads-up on a set of 28mm rowing figures, which I have on order. Meanwhile I continue faffing around with the barge as the macros reveal further need for touch-ins and finishing touches. 9752 A laser board strip provides the iron strap that protects the stem and bow, and a mooring ring is added to the bow. 9749 I am also in the process of making small section Boxwood pillars to replace the kit provided mdf keel supports which look somewhat clumpy against the delicacy of the barge. One of the things that I noticed about the barge kit was the Helmsman’s area behind the Transom. This measures only 5mm between transom and seat back, a scale 12” which presents some difficulties if a scale helmsman figure is to be employed in the display. A 1:64 scale figure will not fit so I scratched around for an alternative that may fit the bill. 9754(2) I came up with a 1:72 HAT figure from a British seamen set; chopped about and bent legs added from a Preiser 1:87 scale Adam and Eve set, a spot of modelling paste, and the Frankenstein version of a helmsman is created. 9768 Only primed at present I will decide on a colour scheme for his clothing once I have the rest of the crew. 9762 Surprisingly he doesn’t look out of scale, but the acid test will be how he compares with the 28mm ‘rowing’ figures I have on order. I also have on order an acrylic cover for the model, and I decided crew or not, the oars will be displayed out as shown in previous photos. Just waiting delivery of the crew now. B.E. 17/12/2022

.thumb.JPG.b92371d8ad04e5b0262b298e52b6e230.JPG)
- 106 replies
-
- 16
-
-
- Admirals Barge
- Vanguard Models
- (and 1 more)
-
Nicely done Hakan, having a well thought out jig that securely holds the hull in the right position, goes a long way to ensuring success. B.E.
-
That is a beautiful clean construction of the Yawl, very well done. I like that you have replicated a matching wood finish to the gratings and footwalings, excellent effect. Regards, B.E.
-
Thanks for the heads up, worth a punt, I’ll order a set and see how they are. I hope your yawl build is going well, it is a nice boat kit. Regards, B.E.
- 106 replies
-
- 1
-
-
- Admirals Barge
- Vanguard Models
- (and 1 more)
-
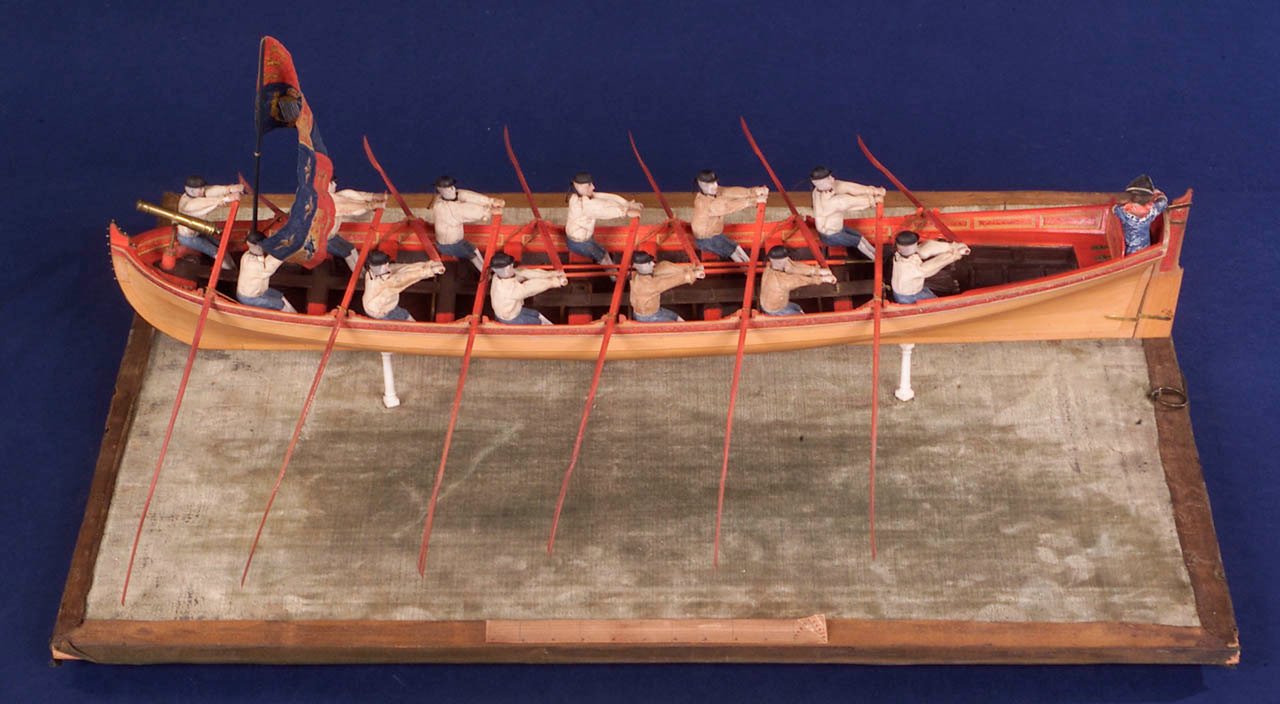
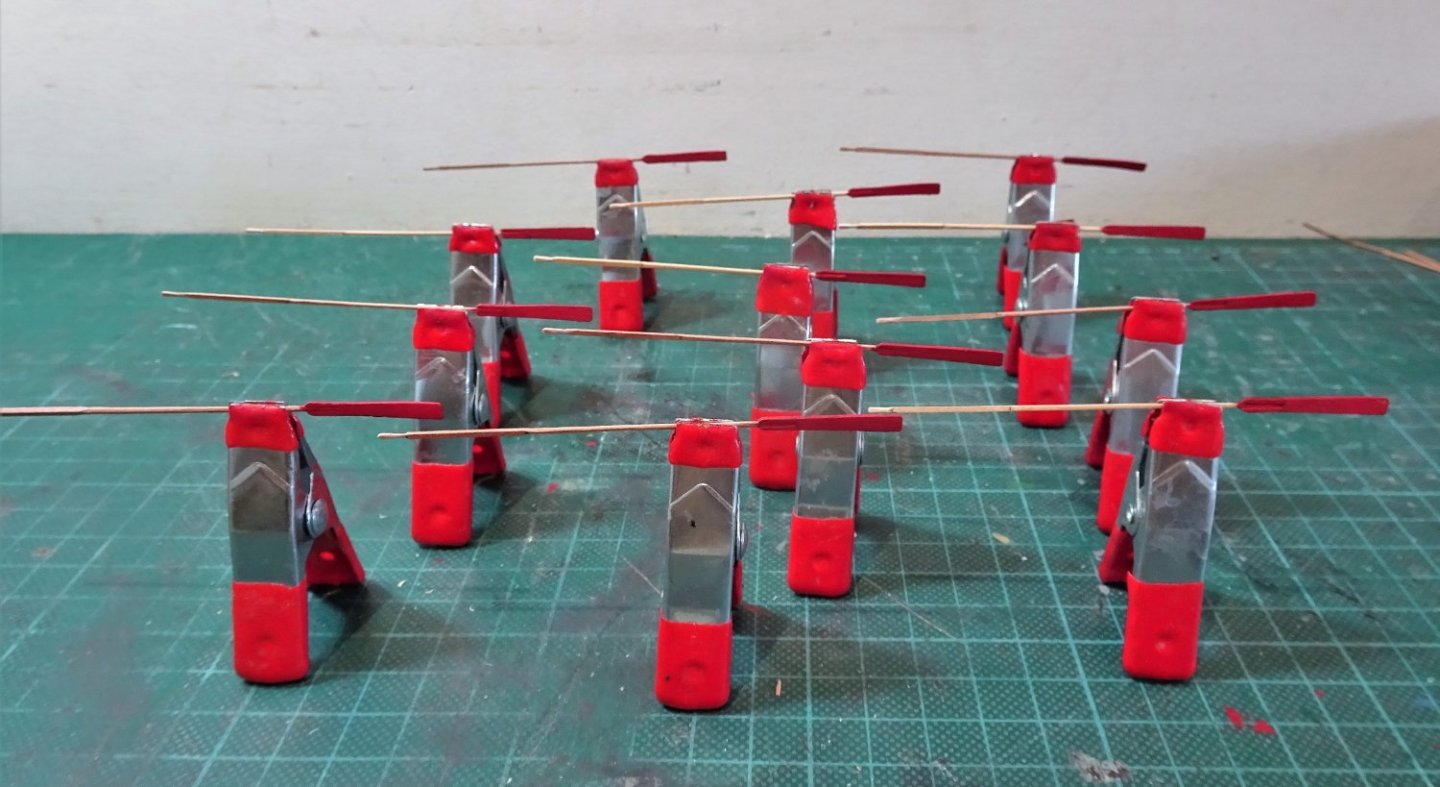
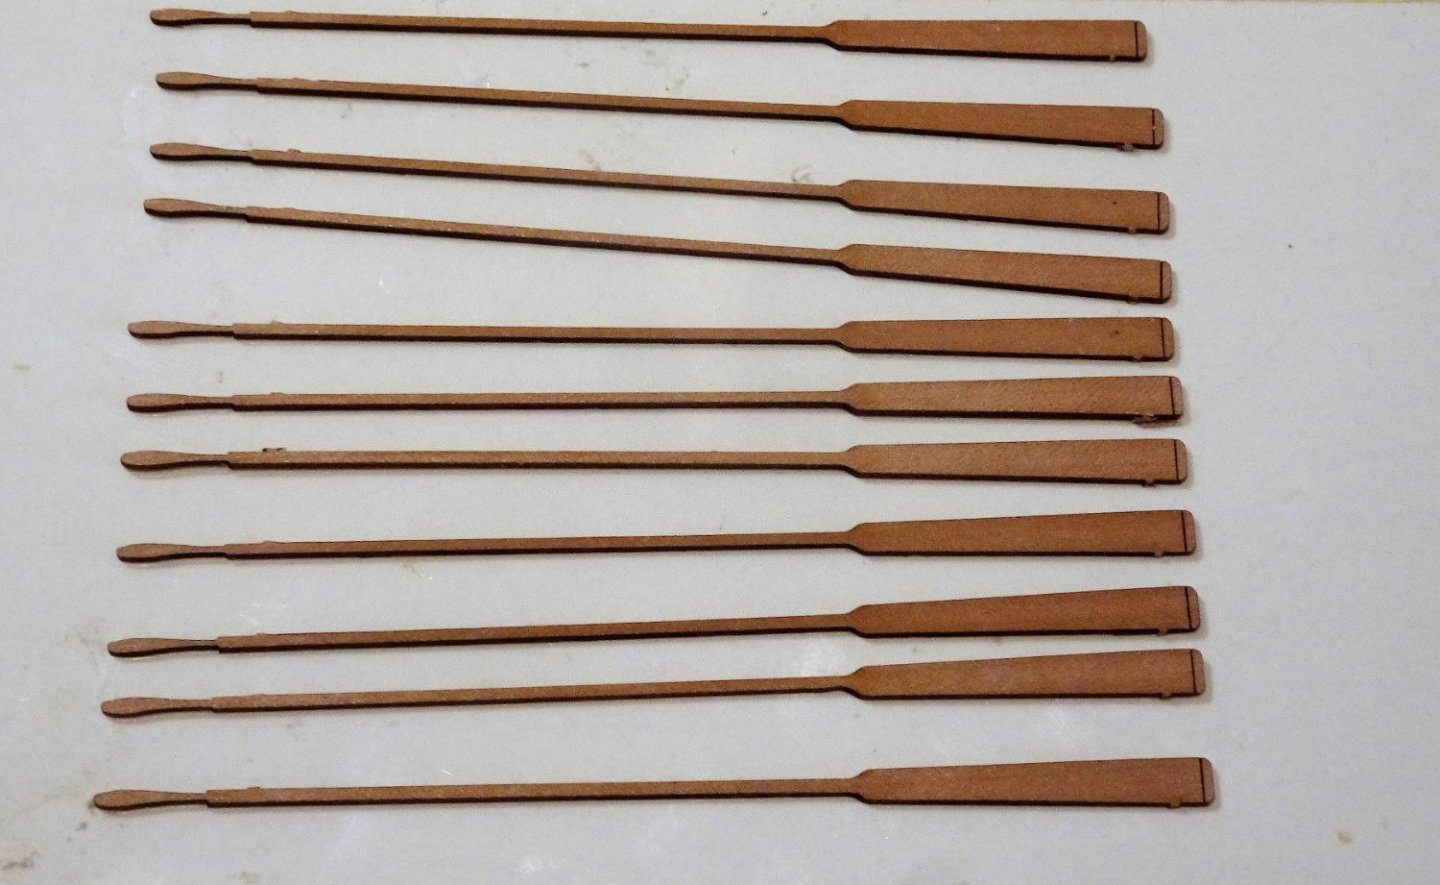
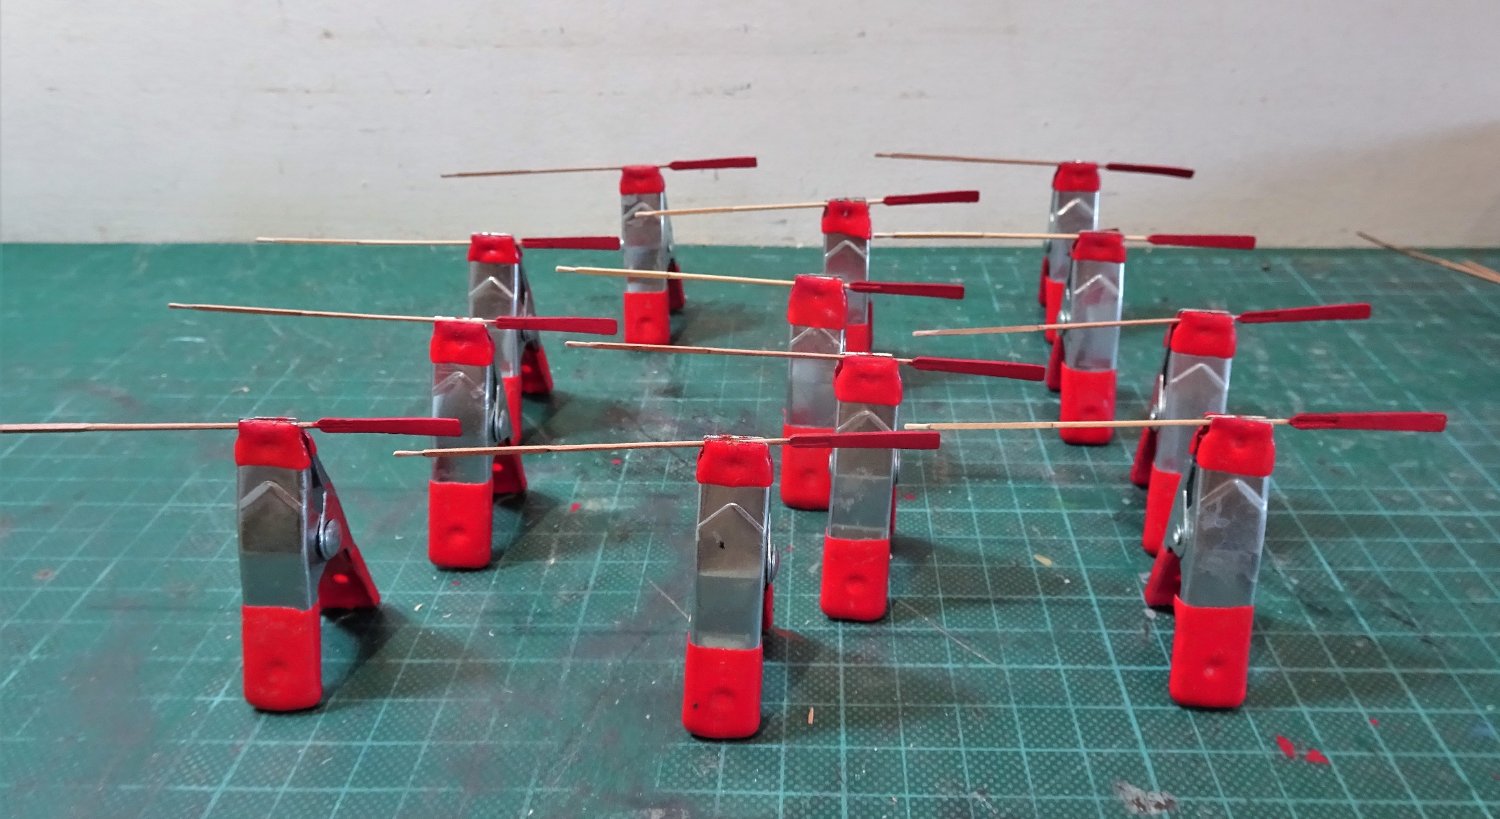
Thank you Jason, Håkan, and Mark, making oars is not too bad provided you have the makings and are prepared to accept the odd breakage close to finish of a piece. Post twenty A day’s work completed the oar set bar the fettlin’ which involved inducing a slight curve to the oar blades and adjusting the handle length to a scale 11” (4.36mm) 9718 A further day involved painting the various elements of each oar. 9743(2) I decided to paint the oars the traditional red, with natural handles, and copper blade tips which represent the metal strips applied to prevent splitting of the wood. Tin was often used but I splashed out on copper, it is an admiral’s barge after all. A decision is to be made of how to display the oars, I don’t really want to follow the normal arrangement of top and tailing them across the thwarts, as they would effectively cover most of the internal area. Ideally, I would like to crew the barge with the oars out but creating acceptable 1:64 scale figures is a very difficult ask and there are no period figures commercially available in this pose that I can find. 03399 03411 I was lucky with the Queen Anne barge kit at 1:24 as I was able to convert a couple of Deans Marine figures to represent members of the Royal company of watermen- they started life as sitting US marine figures of the Vietnam era. I can’t envisage making or modifying 1:64 scale figures, so I will have to pass on that idea. An alternative is to place the oars in position as they would be with the crew in place. 9730(2) 9734(2) 9740(2) This arrangement extends the width of the display area to around six inches, so I’ll ponder on it a while and play around with other options. B.E. 11/12/22

.thumb.JPG.a29a78d0e50c154fd414b2b040c7bf45.JPG)
.thumb.JPG.b5fe36fd37091e3e3737890c62ea0664.JPG)
.thumb.JPG.324e4781ed401fe7613d6e616dbd9dae.JPG)
.thumb.JPG.243bcbd8e86cff36b994904f1174e72e.JPG)
.thumb.JPG.d466bb4df089848cfd0016d40f6def3f.JPG)
- 106 replies
-
- 18
-
-
- Admirals Barge
- Vanguard Models
- (and 1 more)
-
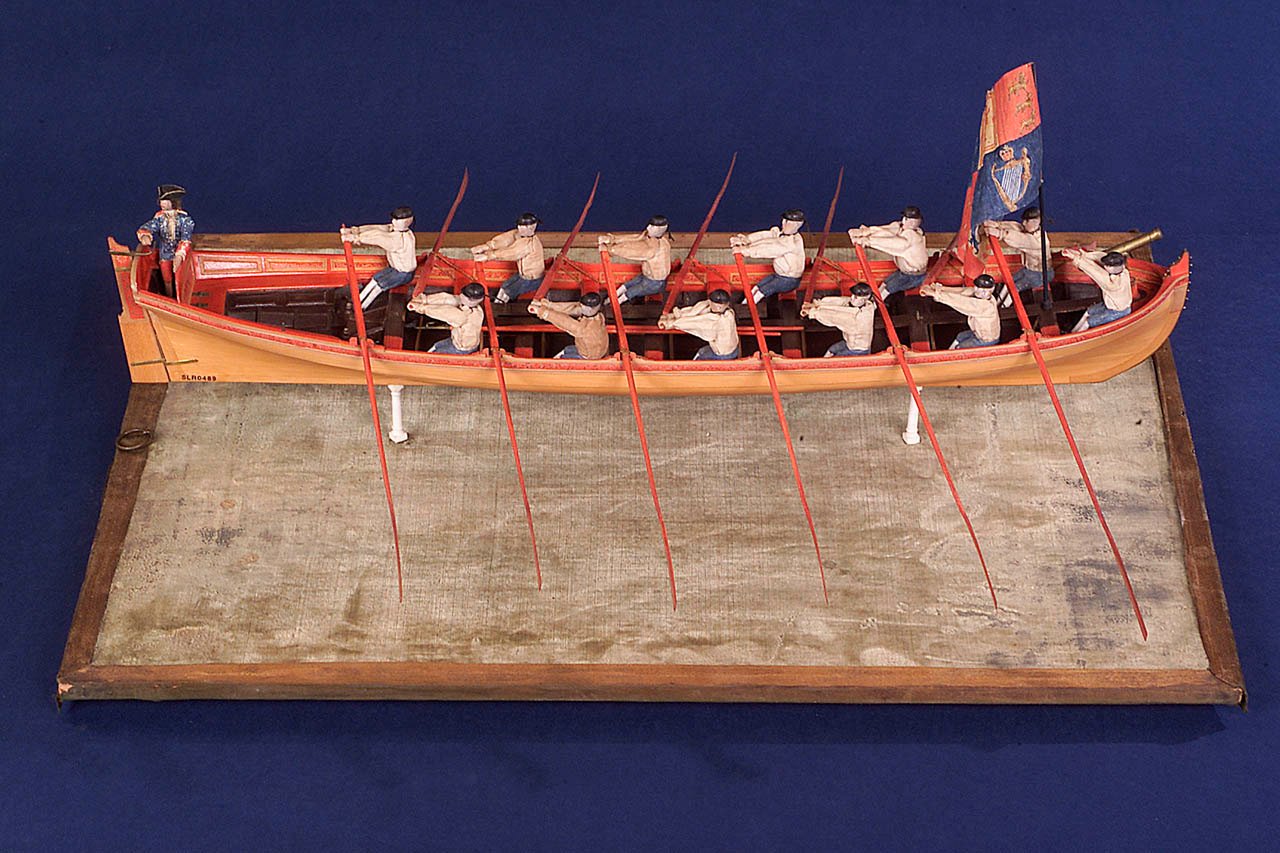
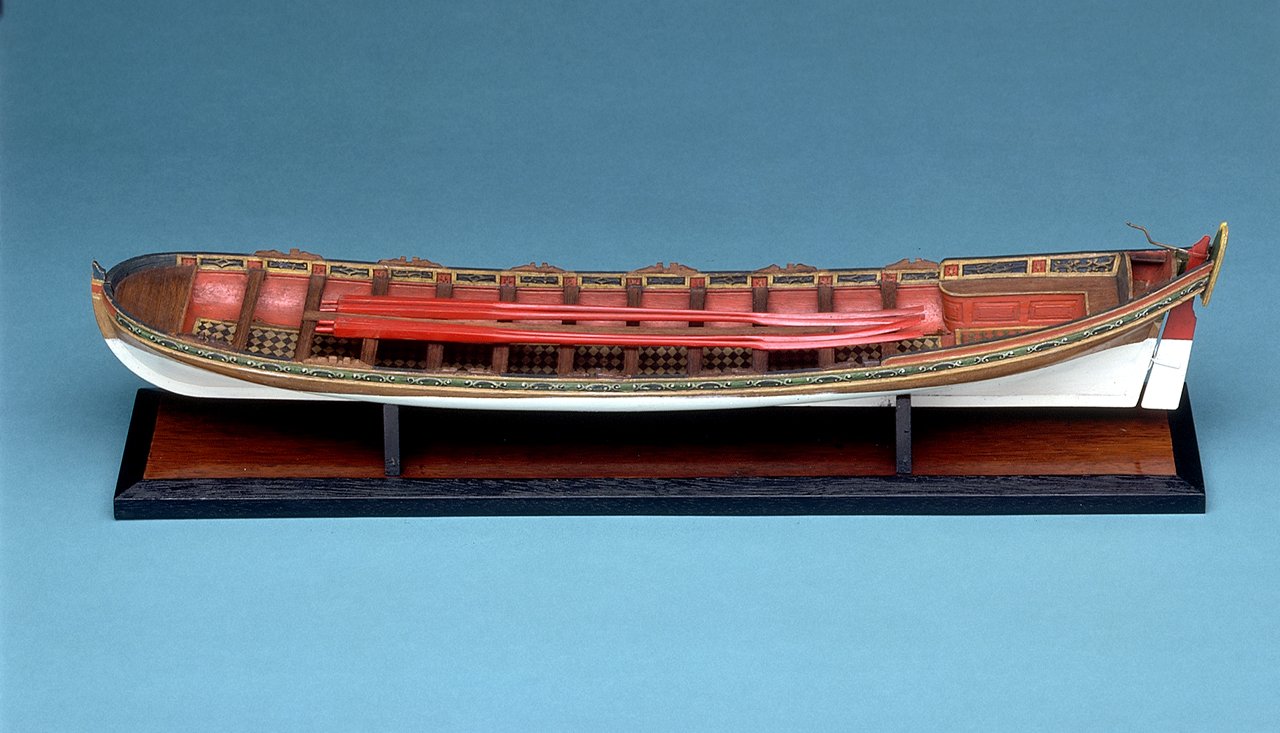
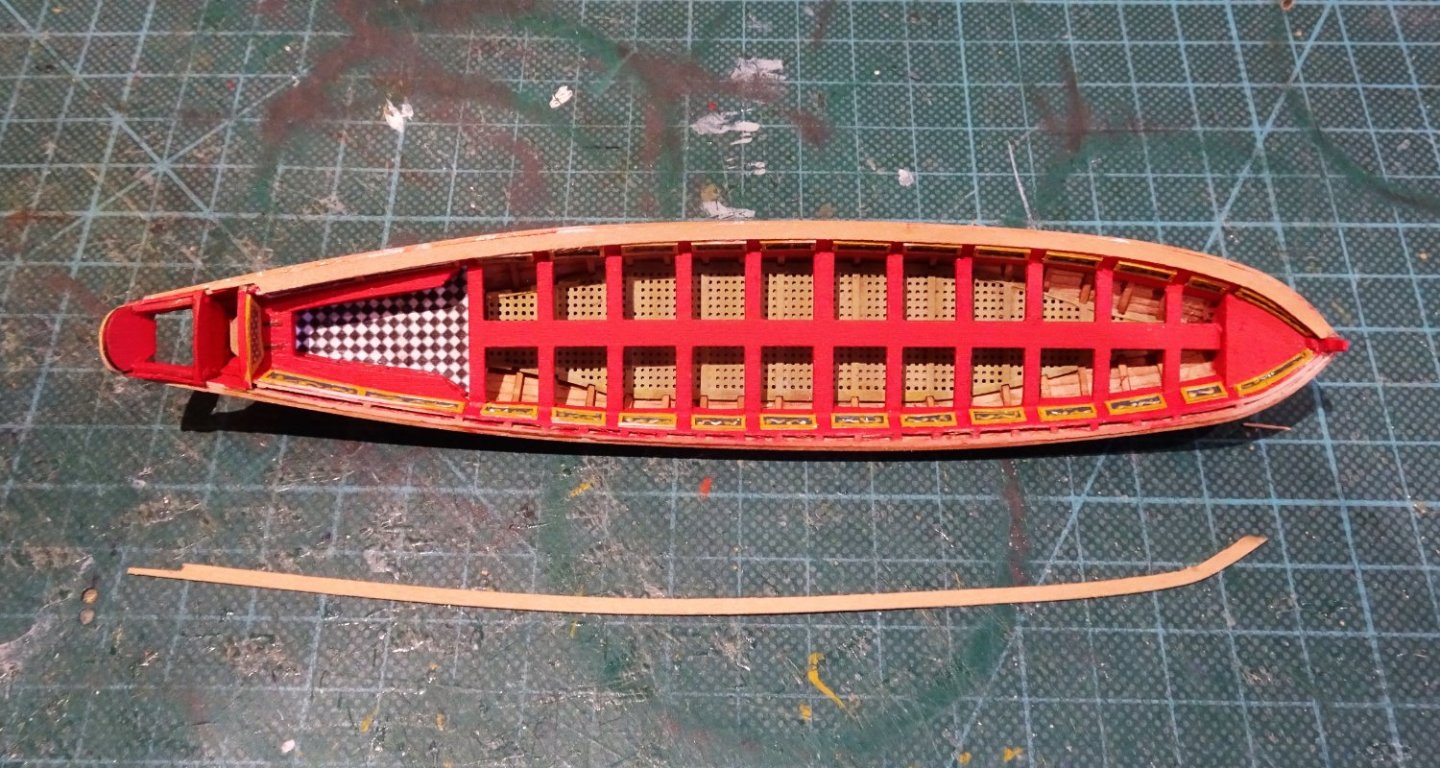
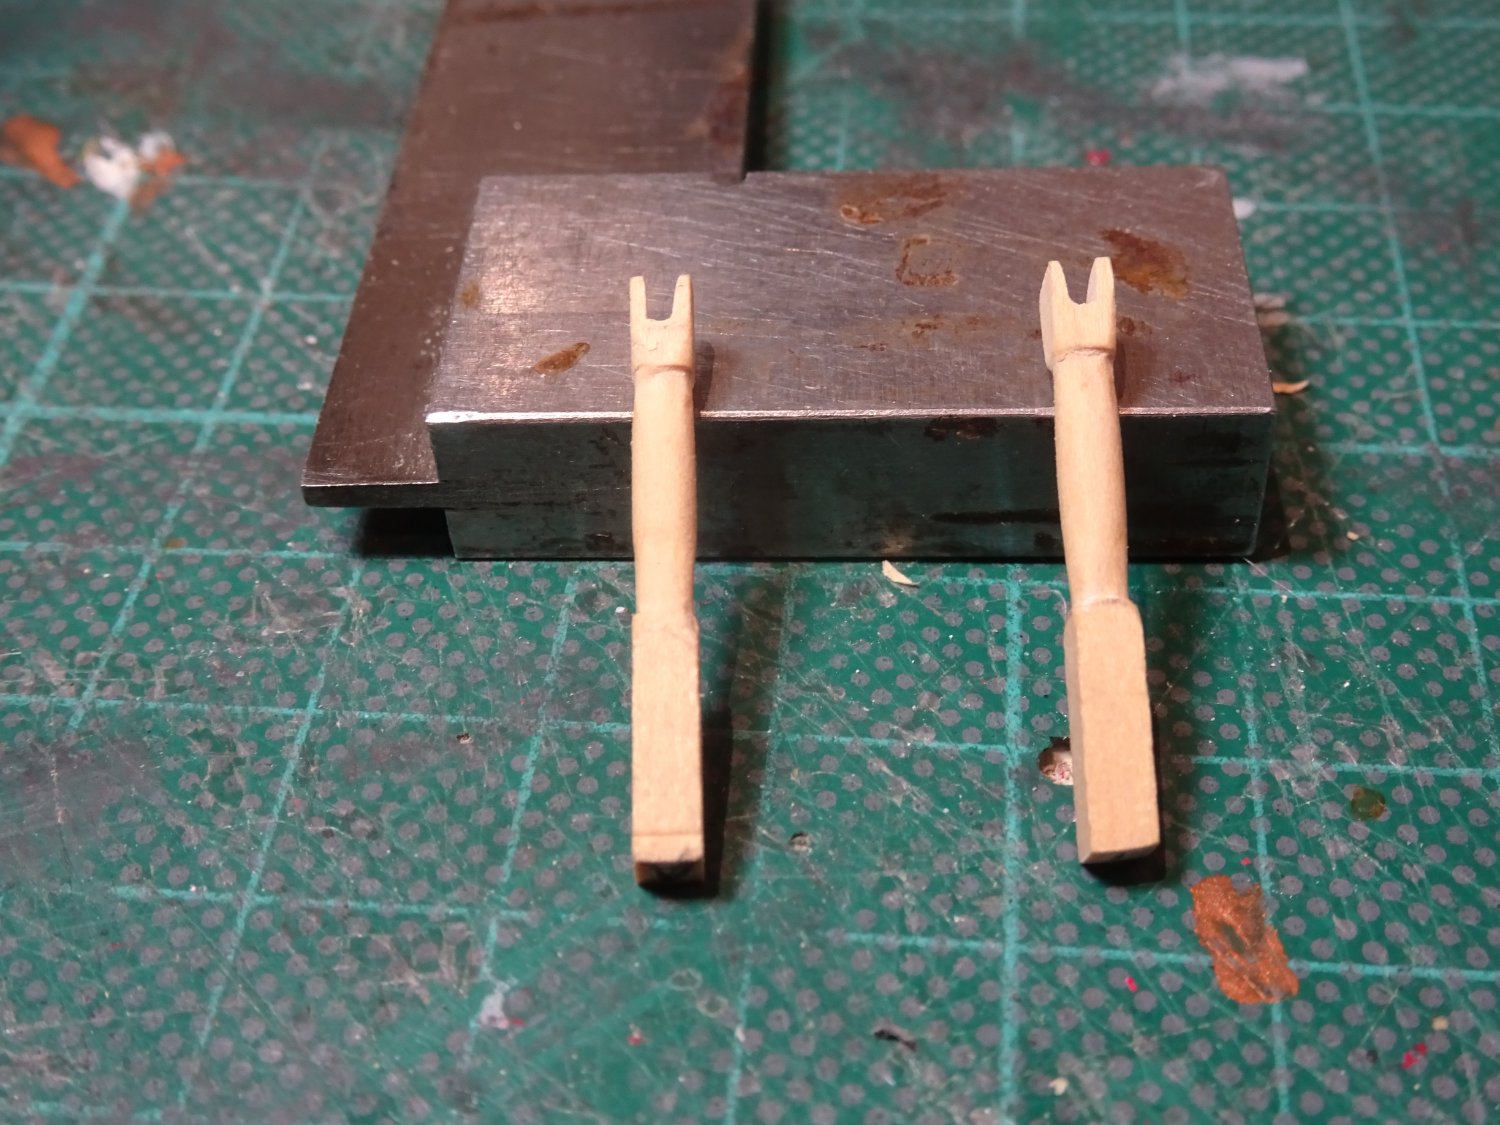
Post Nineteen The oars. A set of twelve Pearwood oars are provided in the kit. These are a scale 74mm long equating to a length of 15’6”. However, the kit arrangement is set up for double banking, so the oars would be shorter than those used for single banking. The contemporary model in the NMM gives a good visual impression of the oar/boat length relationship. On this basis the kit oars should be in the order of 90mm length with a loom of 22mm. 9689 The provided oars are laser cut fare and suffer from the usual process simplification of being flat in profile, lacking the round of the shaft and the swell of the looms. The above photo gives the correct configuration, but a lot easier to do at 1:24 scale. 9701(3) It is difficult to lengthen short oars, more trouble than its worth, so the shafts will need to be scratched, altho’ I can use the blades from the kit offering. 9697(2) Imm square stock is used for the shafts, the sections are marked, the shaft rounded below the looms, and the blade is notched to take the shaft. The blade requires thinning down towards the tip and a slight curve induced. Very soft hands are required, the risk of breakage is high. 9710(2) 7912(2) The relative length difference is apparent in these photos. 9706(2) A further eleven oars are now required to make the set. B.E. 09/12/22
.thumb.JPG.aca5a34e51554dd8aa73f5503ea45578.JPG)
.thumb.JPG.d58d4703ff79a70515c89bf041b27a38.JPG)
.thumb.JPG.1c2ec582778df51a923ebff52ecc2fce.JPG)
.thumb.JPG.752ef81b0c29ac23ad8eab9e56956582.JPG)
.thumb.JPG.3face494e1400c6034b94a47ccc2e5e5.JPG)
.jpg.afd8231fcb1a8717d195956774f75d90.jpg)
- 106 replies
-
- 16
-
-
- Admirals Barge
- Vanguard Models
- (and 1 more)
-
A wonderful effect you have created Ron, I love that port side bow wave, great artistry. B.E.
- 542 replies
-
- 4
-
-
- Sphinx
- Vanguard Models
- (and 3 more)
-
I think you're right Håkan, the mdf supports are a bit ugly, and I have plenty of thin sheet to make more delicate versions. Looks like I will be re-visiting the display, but for the present it is oars that have my attention. Regards, B.E.
- 106 replies
-
- 3
-
-
- Admirals Barge
- Vanguard Models
- (and 1 more)
-
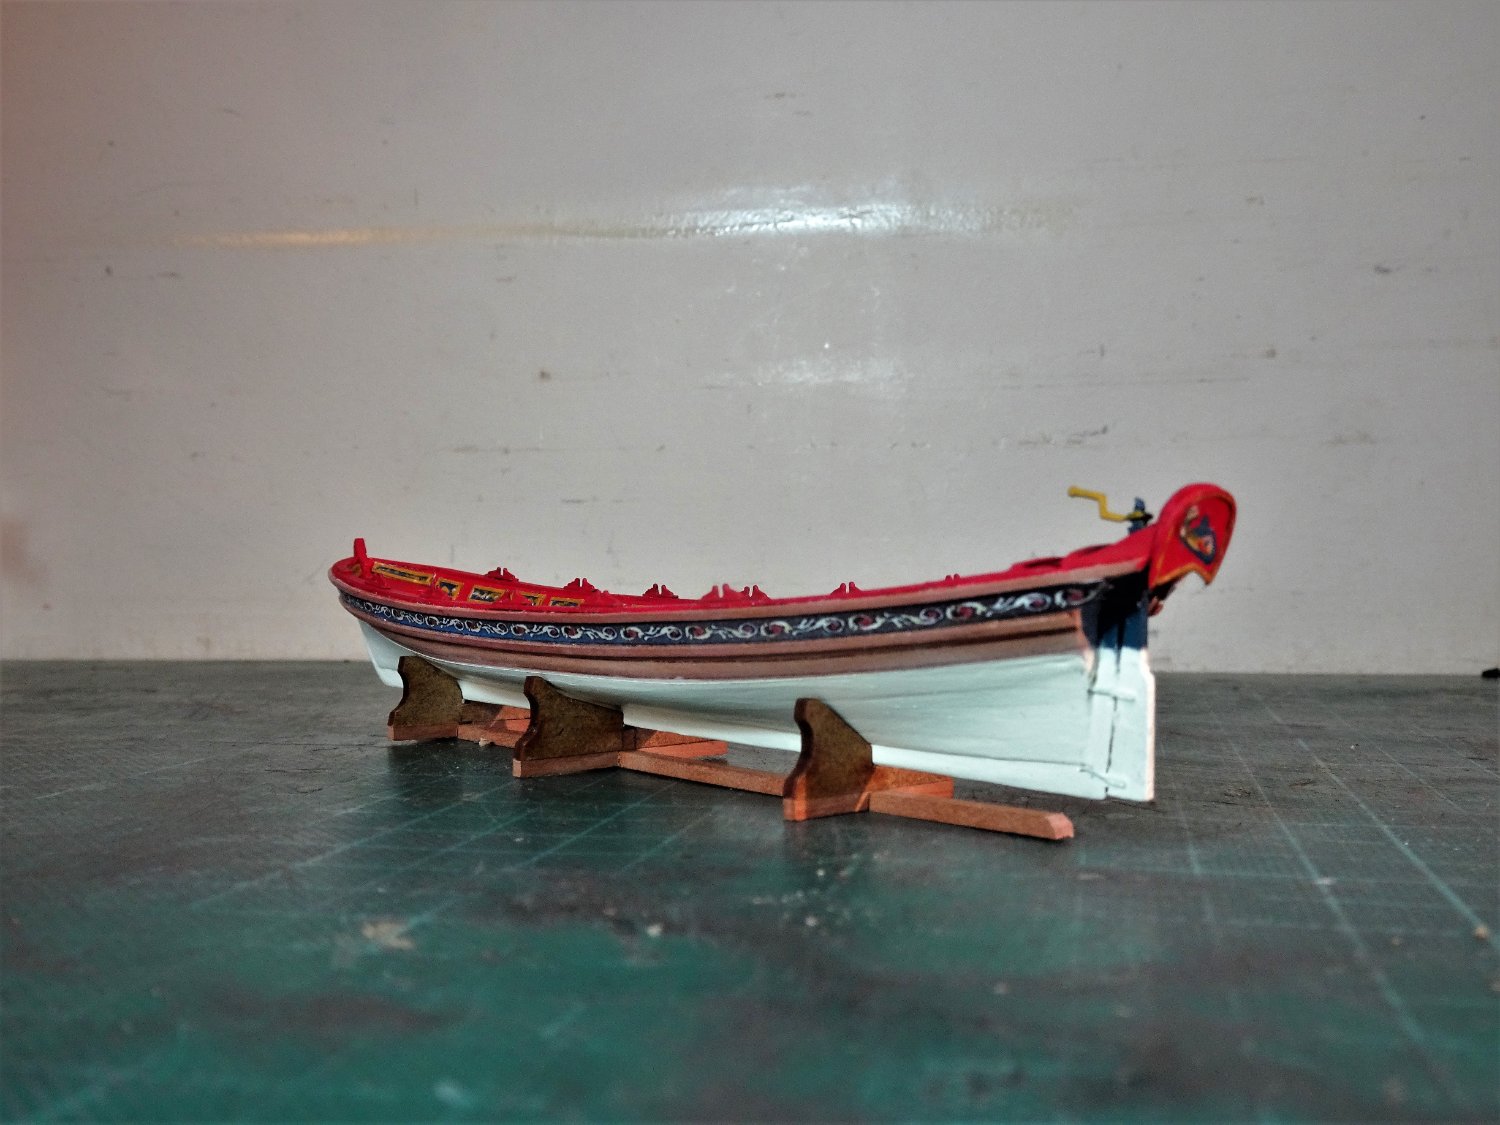
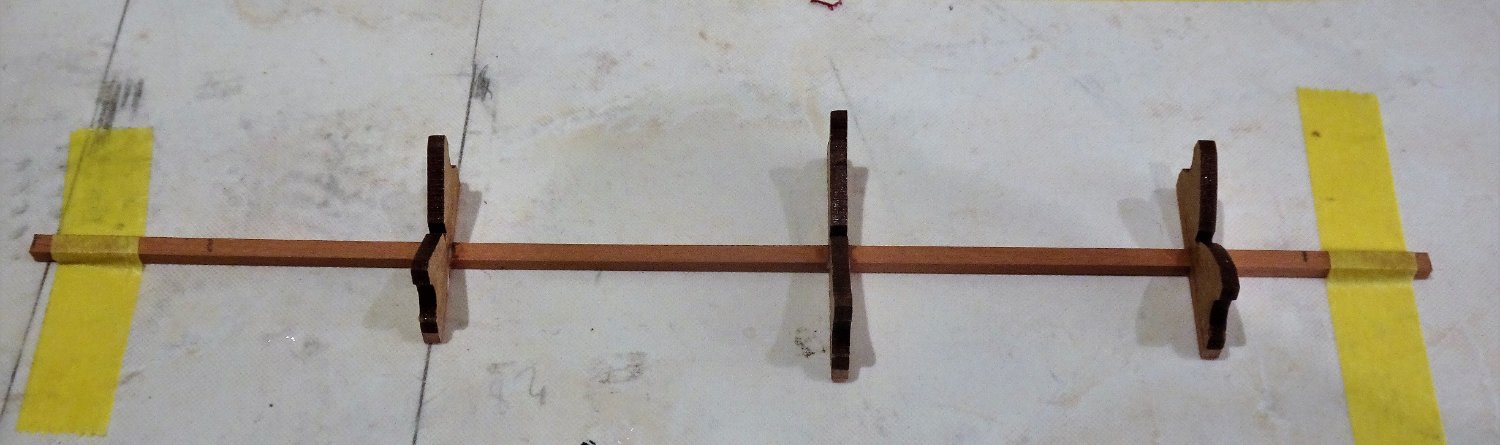
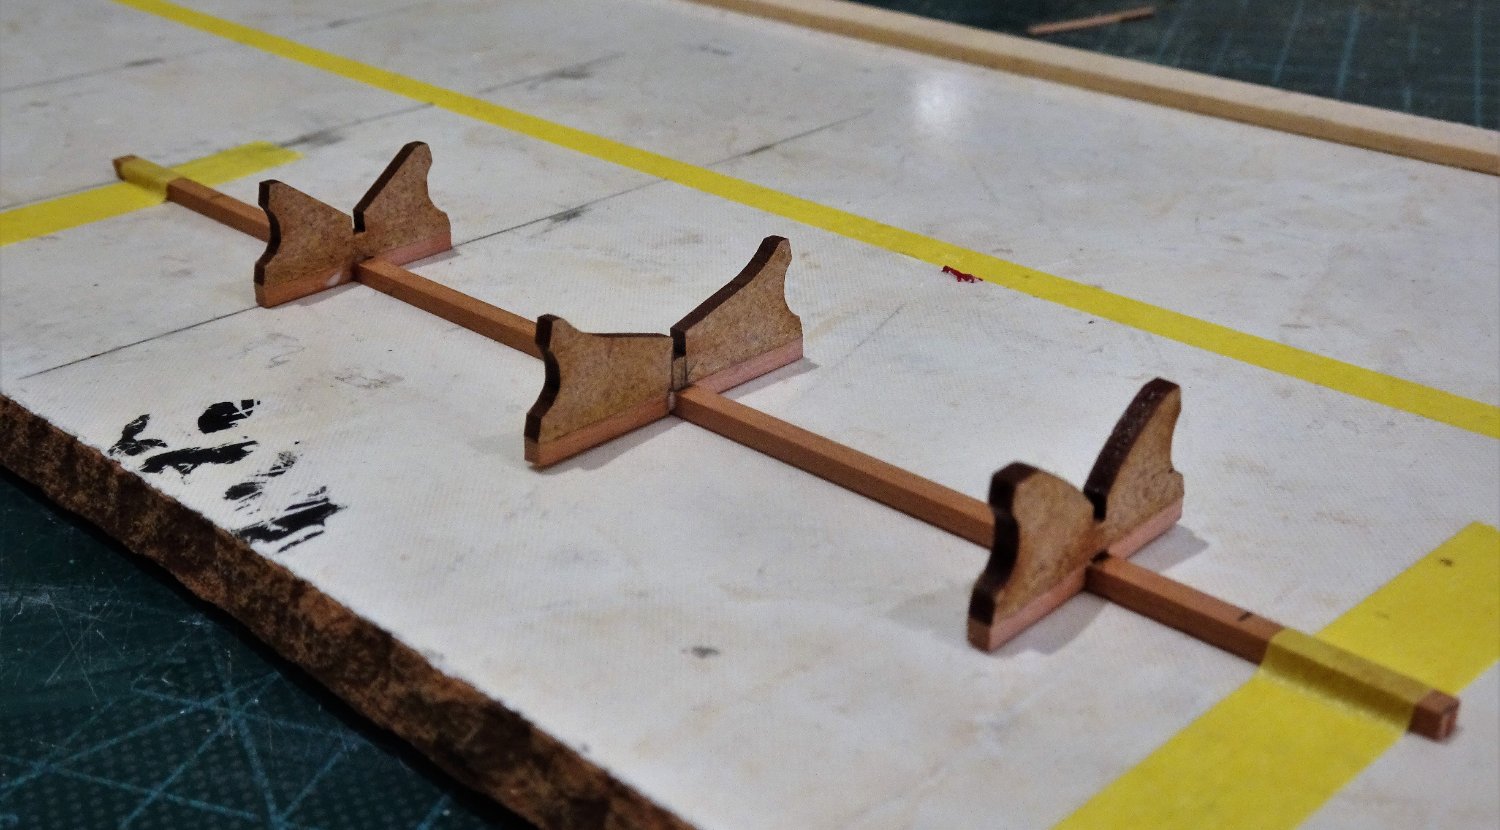
Post Eighteen Looking at the Rudder. 9667(2) The rudder is of brass etch with the straps moulded in. There is a suggestion to pad out the thickness a little using thin spare fret, which I did, the rudder is too thin otherwise. 9676 On my previous boat models, I had not used the etched rudder versions but on the barge I decide to give it a try, mainly because it was to be painted overall. Ca was used to glue the rudder to the stern post, the straps were then pressed into place. 9664 The boat cradles are of mdf. I fixed the positions along a strip of 2x2 pearwood, this will be fixed to whatever base board I decide upon. 9662 Not quite sure how to finish the cradles, but that’s something that can wait. 9683 In the closing stages of the build there is a need to re-do the paintwork, marred by constant handling. The lower hull has been re-painted along with the capping rail and thole pins. B.E 08/12/22


.thumb.JPG.4058ddef24898f0db057101d2f76cbca.JPG)
- 106 replies
-
- 14
-
-
- Admirals Barge
- Vanguard Models
- (and 1 more)
-
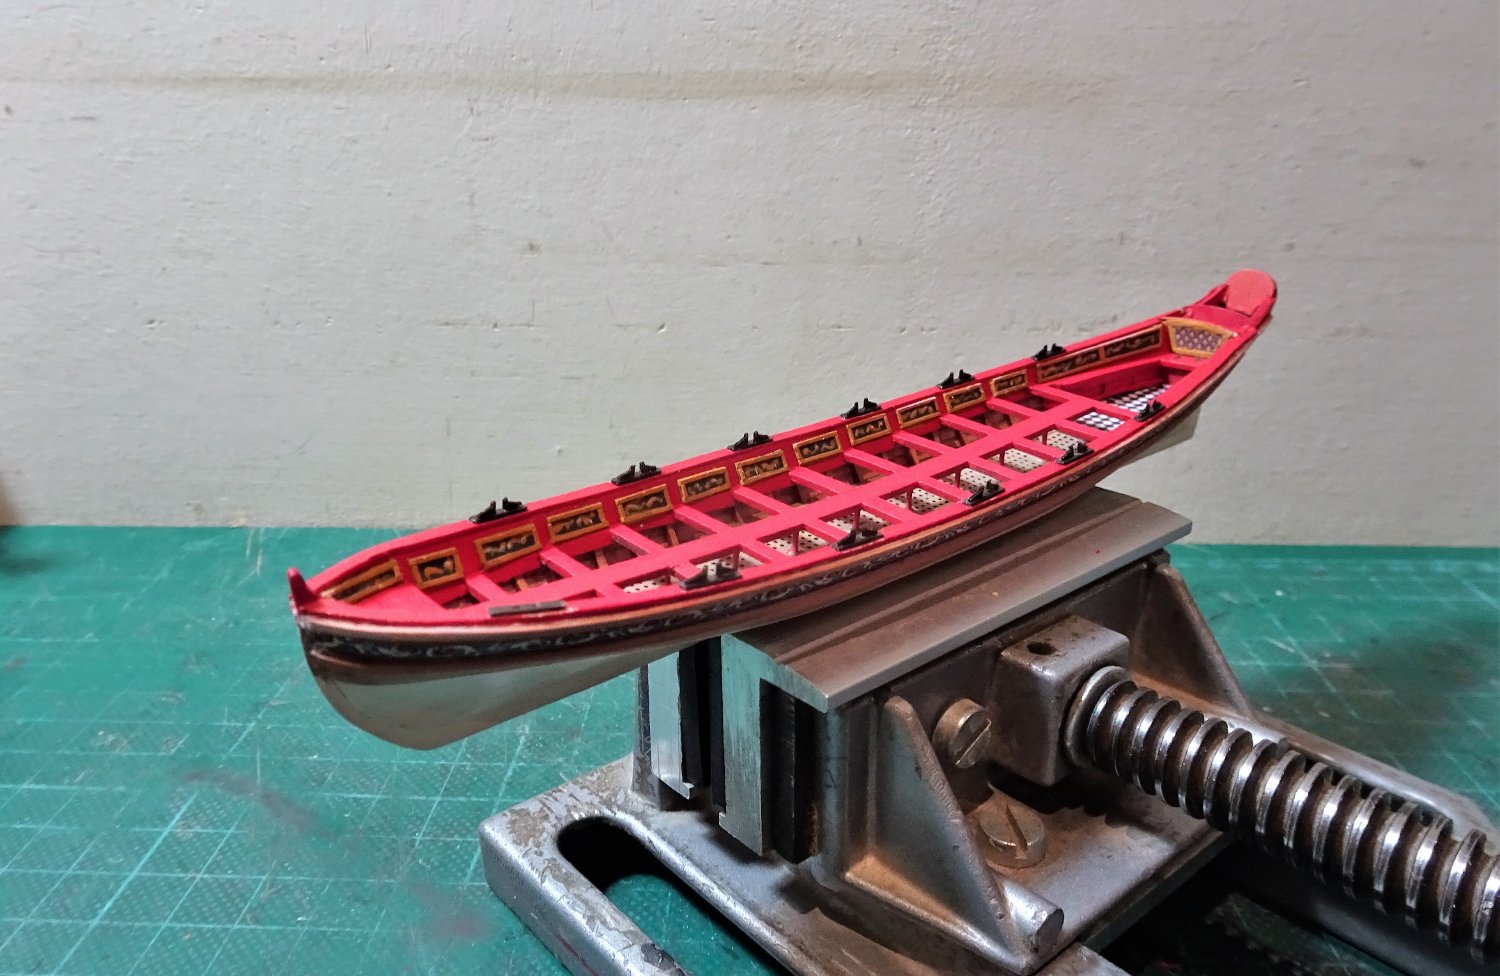
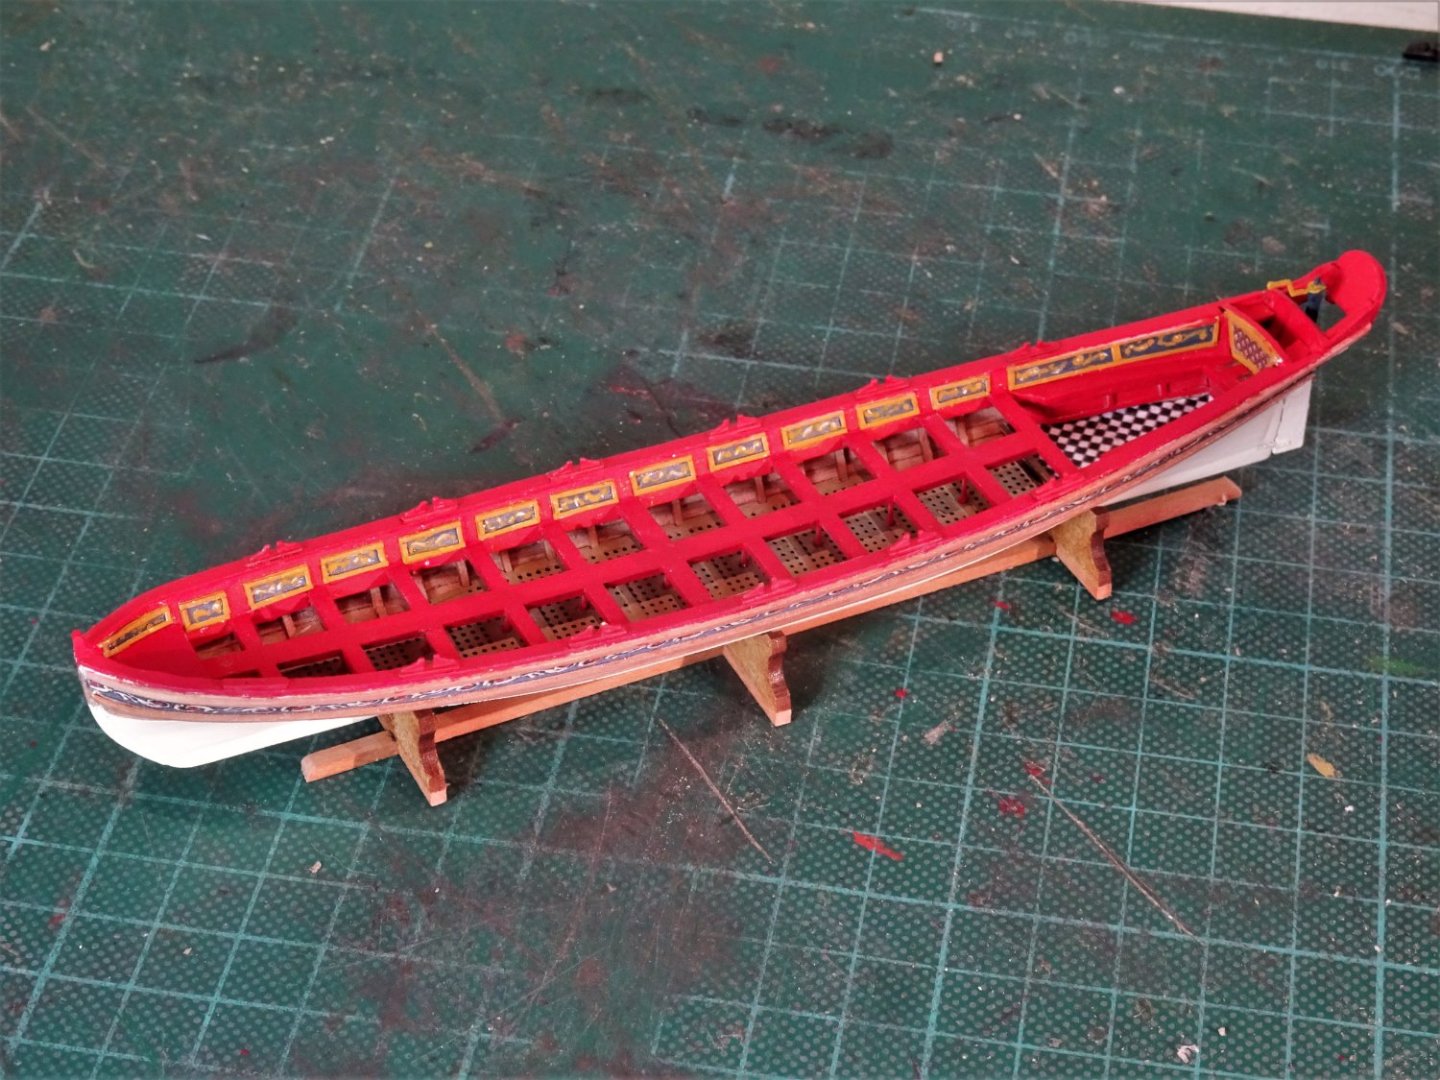
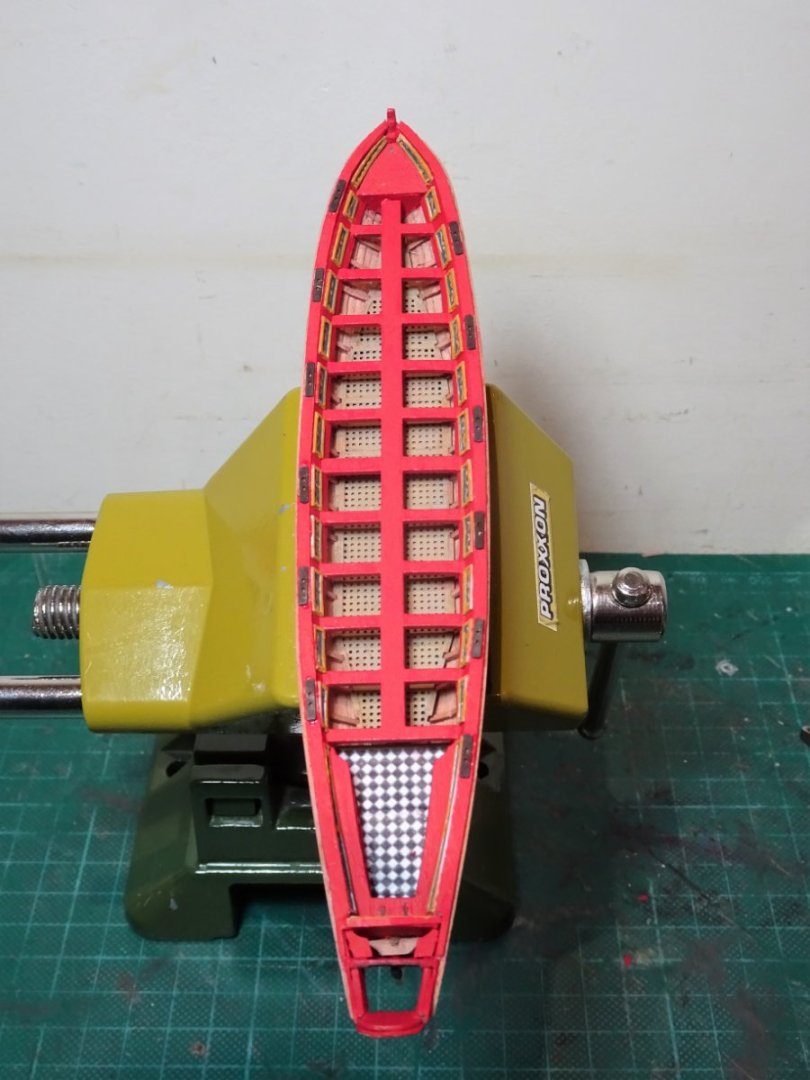
Post seventeen Oarlocks/Thole pins The kit provided oarlocks are of brass etch comprising a base plate into which the tiny pin and bracket combinations fit. At this scale replicating wooden pins is out of the question; the brackets are a possibility but would present a very fiddly exercise. The problem with the base plate is that it would stand proud of the capping rail which I don’t really want, on the other hand, the pre-drilled holes for the pins give a uniform distance between them. I finally decided that the kit parts were the least worst option. 9650 The base plates in position, they have been chemically blackened to provide a key for painting. As previously mentioned in the log, the kit layout is somewhat suspect. Barges were traditionally rowed single banked and so the tholes will be arranged on each thwart alternatively port and starboard. 9648 This arrangement allows for twelve oarsmen to power the barge. One of the benefits using the longer oars is that there is a greater leverage, altho’ the relative narrowness of barges would make double banking more problematic. Aesthetically I think boats look more elegant crewed like this. With the second part of the assembly there is a high risk of the parts pinging off into the ether due to difficulty in holding whilst working. I found it necessary to file the pins a little where they fitted into the base plates. I so very nearly made it, but two pins were lost during fitting leaving me a thwart short of tholes, so bloody annoying.😒 9653 The first plate, port side, can be seen without the pins/brackets, I will try to make replacements perhaps using styrene. 9654 The plates and brackets have been painted to match the capping rails. B.E. 05/12/22

- 106 replies
-
- 19
-
-
- Admirals Barge
- Vanguard Models
- (and 1 more)
-
Hi, The pattern was taken from Chuck Passaro’s Winchelsea build and he gave me permission to use a modified version on my Sphinx build. The artwork was designed by Chuck and out of courtesy I would message him and confirm that he is ok with your use. I see this is your first post on the forum, it would be nice if you introduced yourself in the New members section. B.E
- 855 replies
-
- 3
-
-
- Sphinx
- Vanguard Models
- (and 1 more)
-
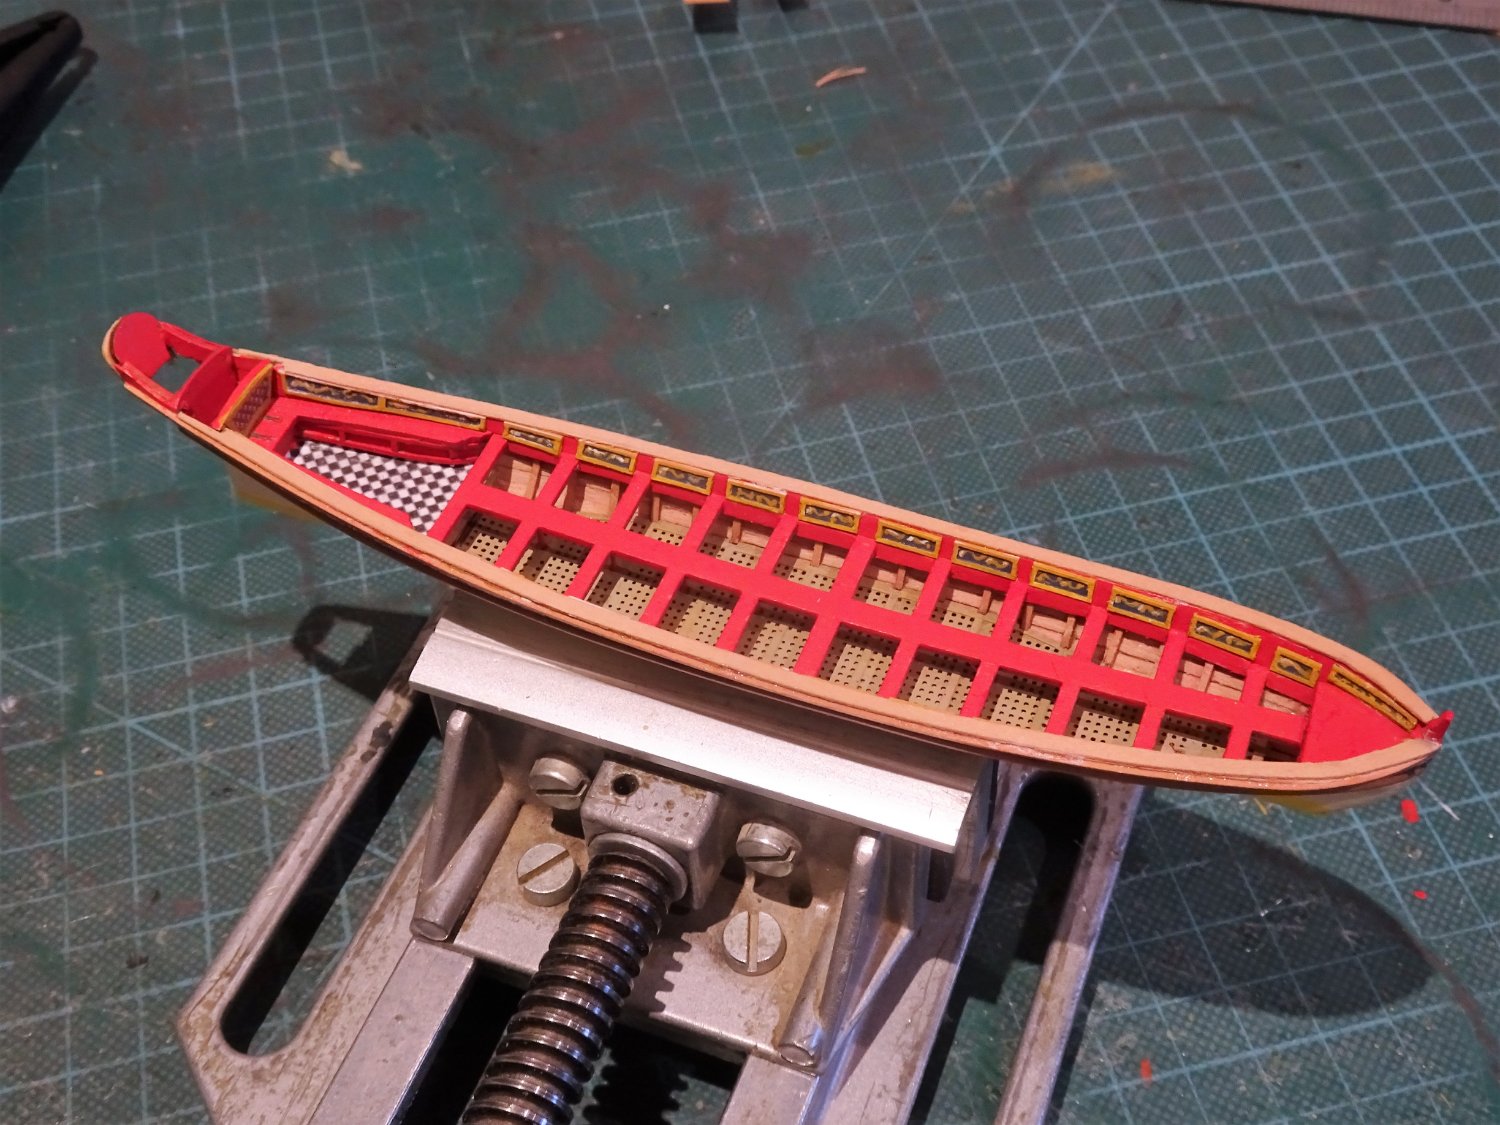
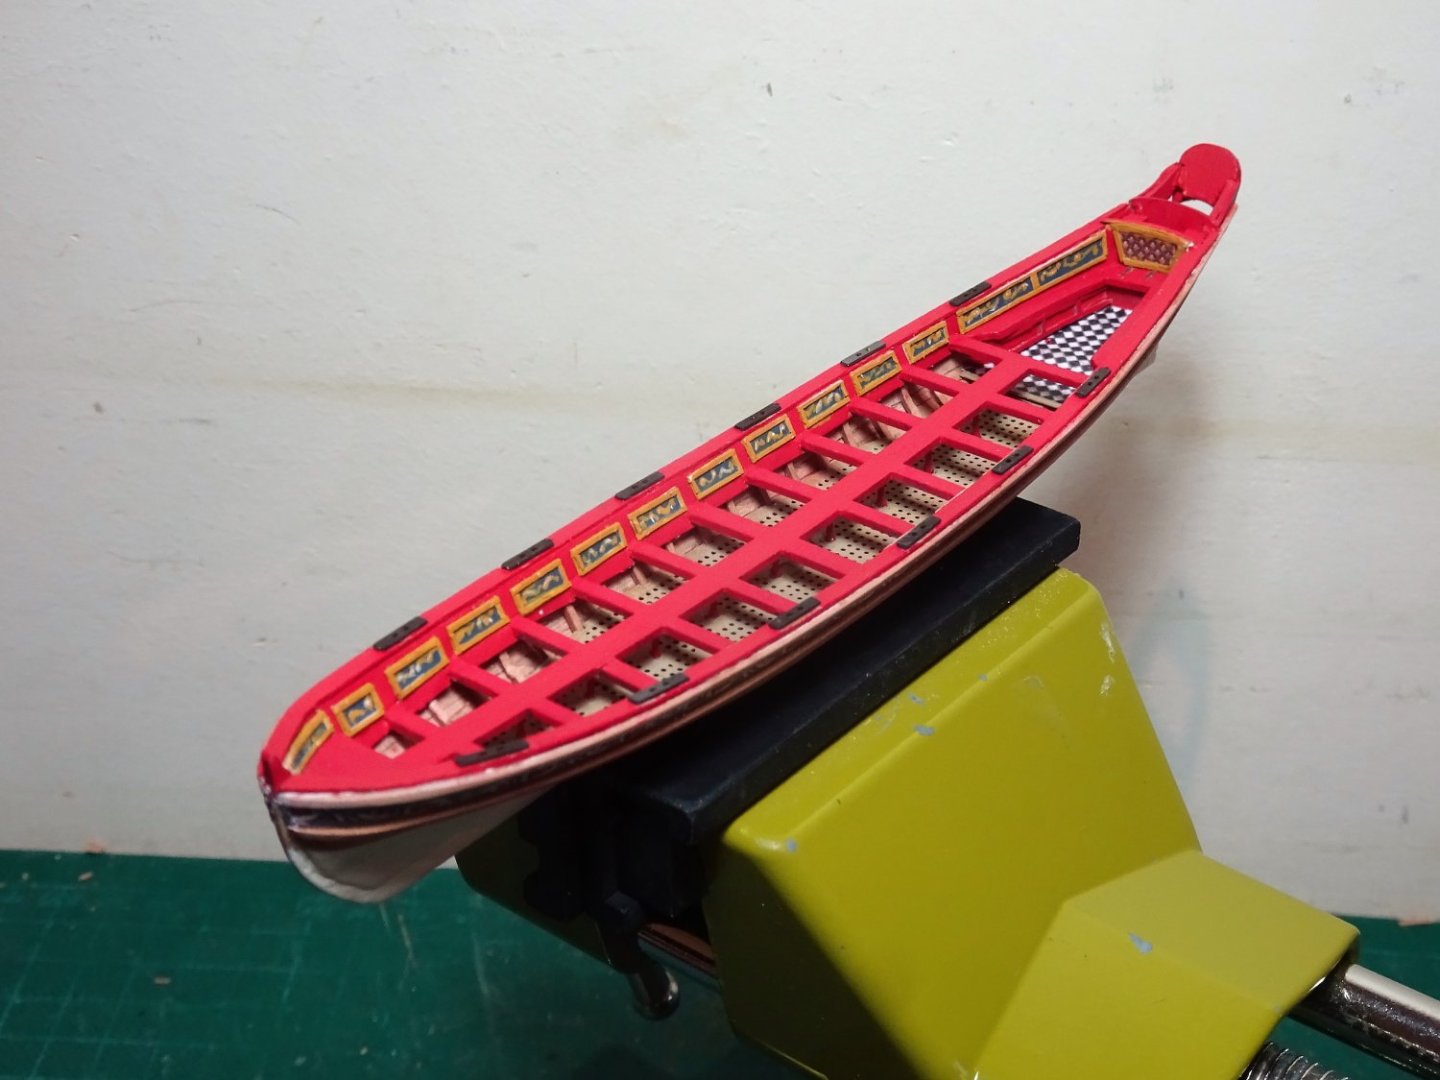
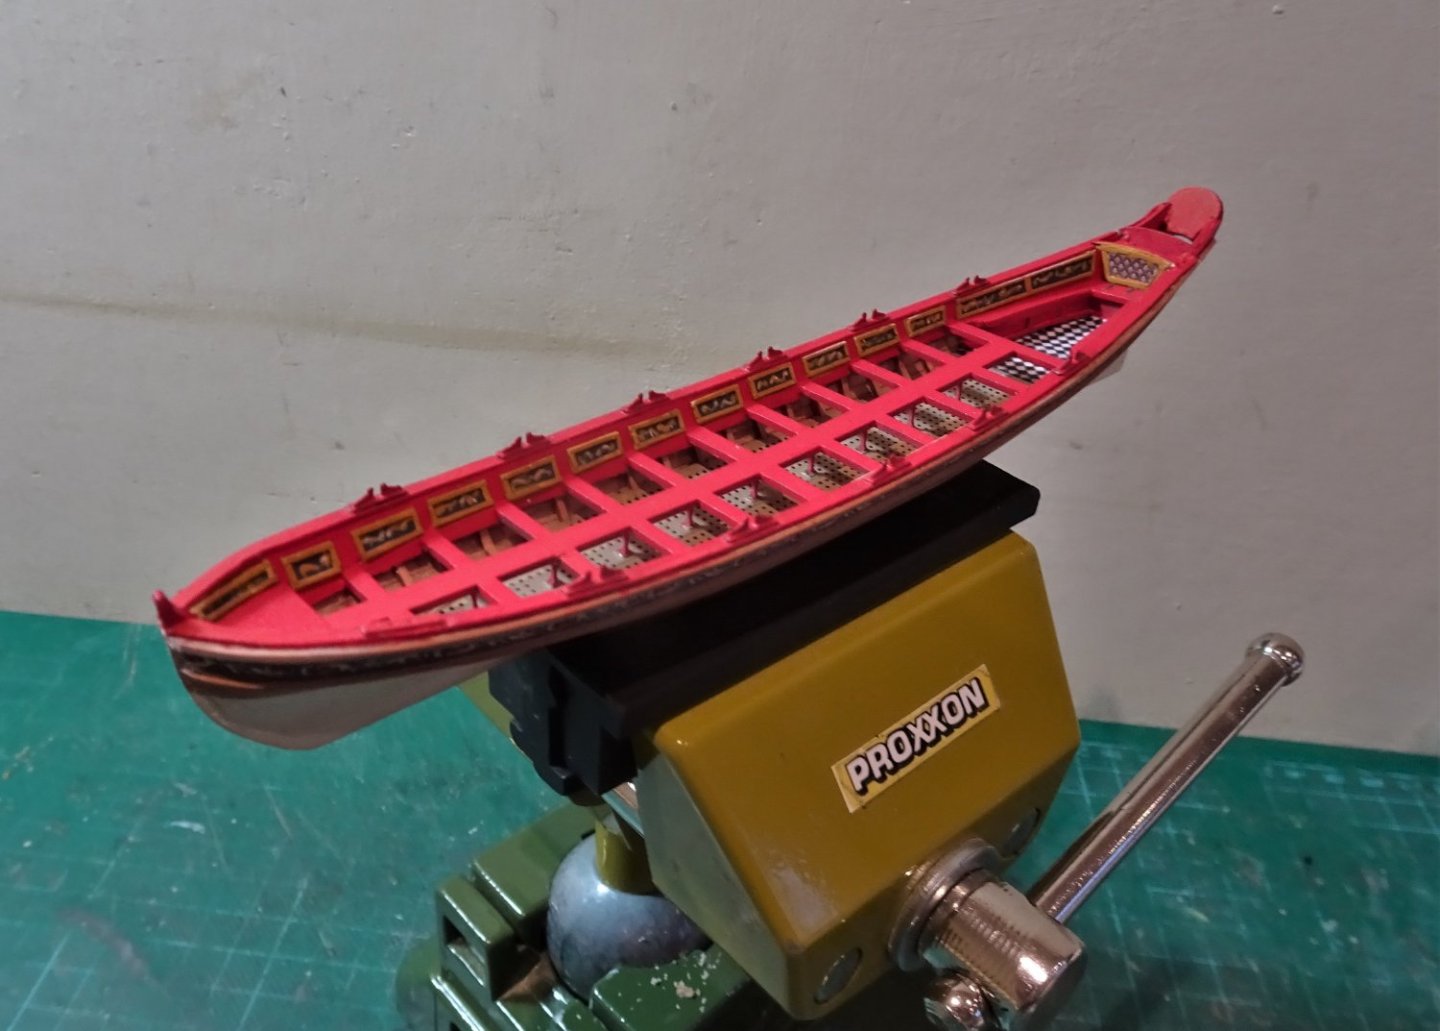
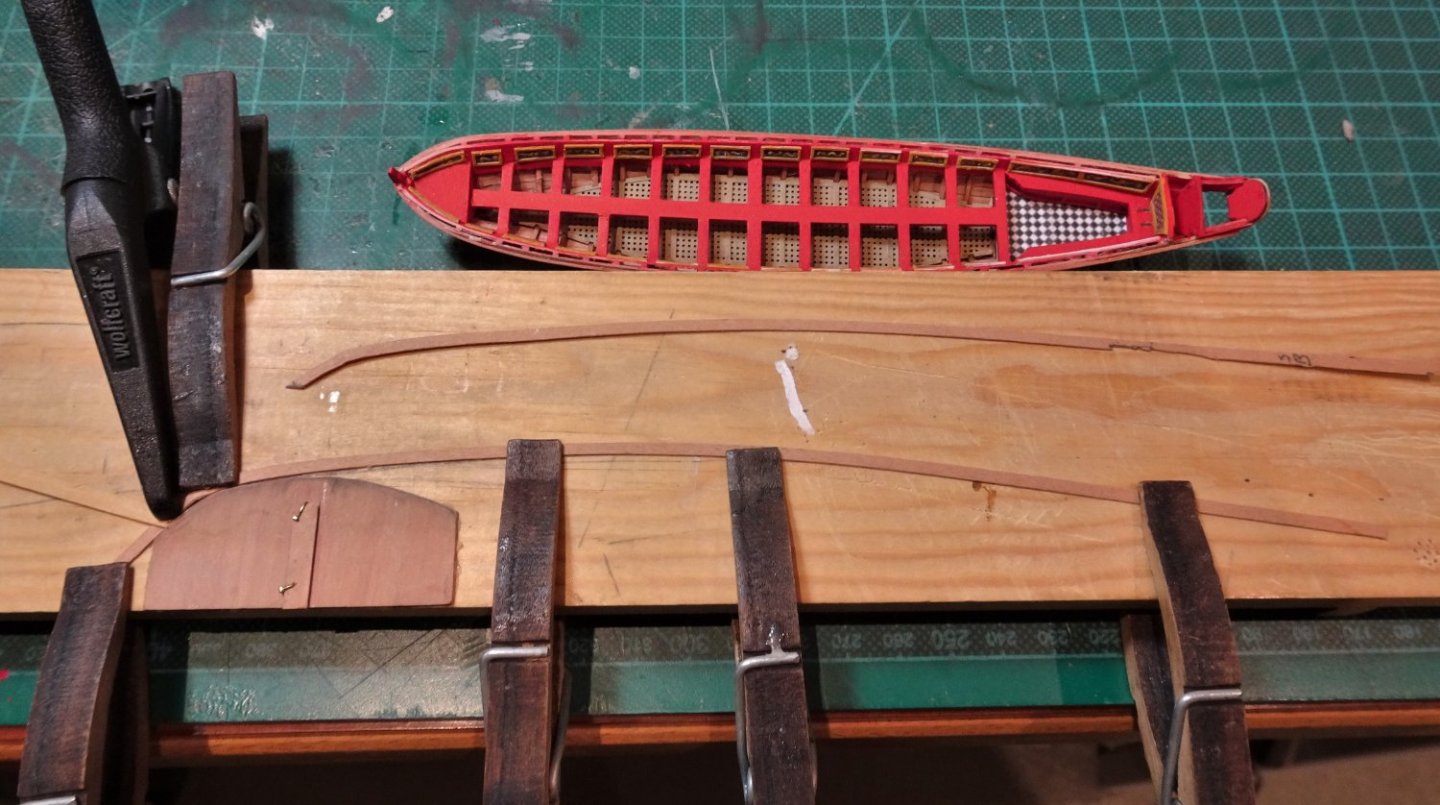
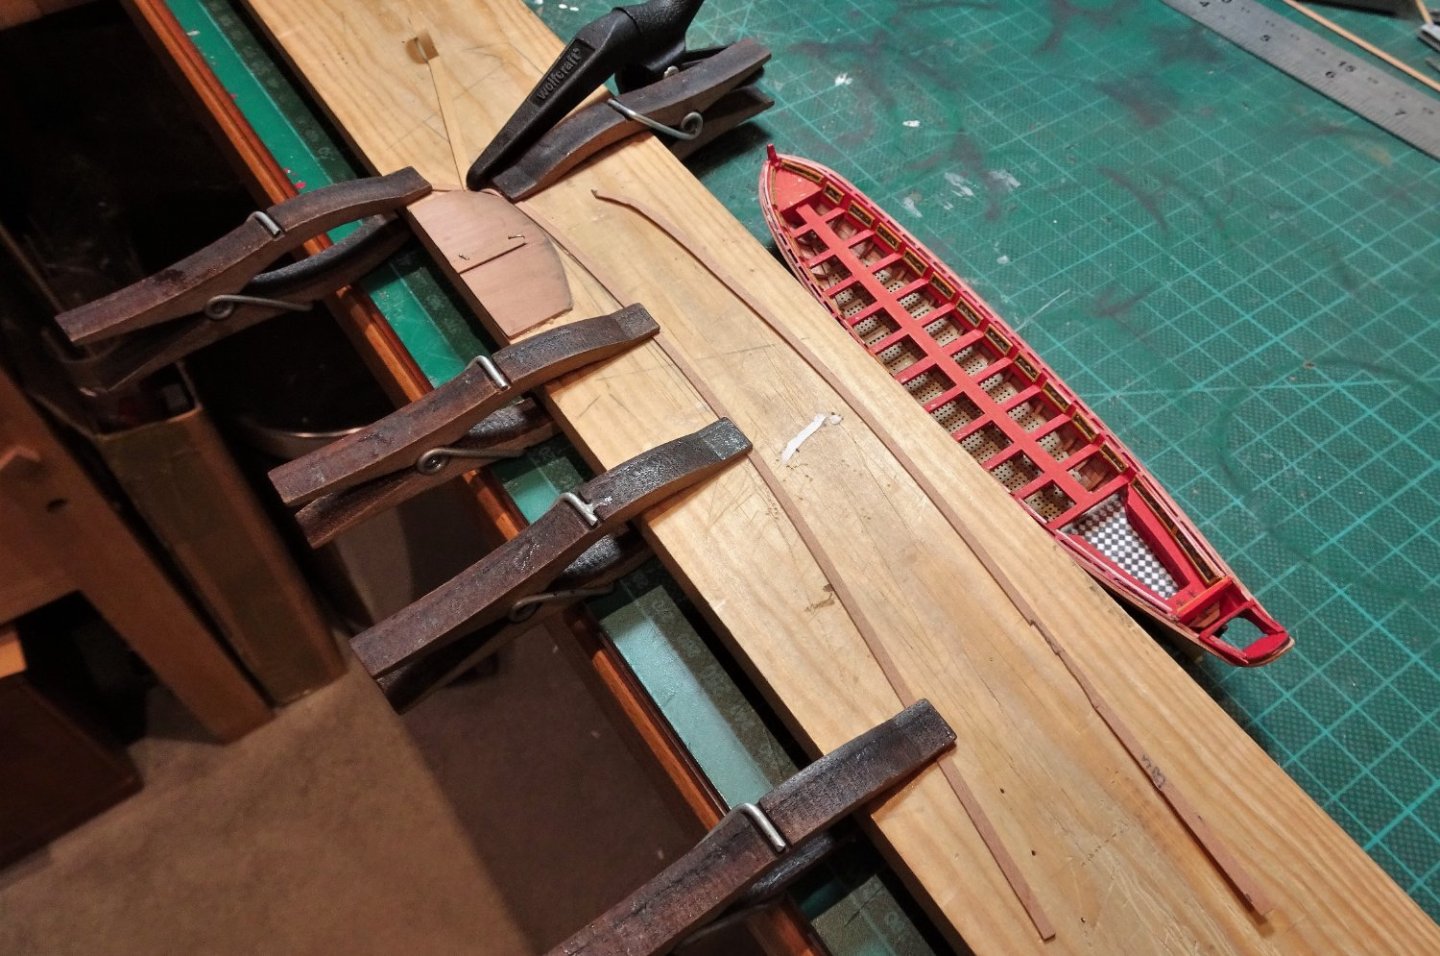
Thank you, Chuck, it's a testy little beggar and I'm struggling to achieve the finish on my models of the Queen Anne Barge, Pinnace, and Longboat. Scale does have advantages. Post Sixteen For the capping rails that don’t feature on the basic kit I use strips of fret which provide a great source of material for modifications on small scale models. 9620 9621 The degree of the bow turn and size of material just about allows for edge bending rather than cutting out. 9623 The rails are glued progressively along the gunwale using ca. I start at the bow, and it helps to dampen the underside of the rail which increases the grab of the ca. The process proved less problematic than I had imagined. 9626 9625 9633 With the rails in place the look of the barge is much improved. Getting there slowly, but each macro reveals further areas needing a tweak or touch-in of the paint work. The thole pins are up next. B.E. 03/12/22


- 106 replies
-
- 19
-
-
- Admirals Barge
- Vanguard Models
- (and 1 more)
-
Hi Håkan, I've been led here by route of your supportive comments on my log. What a beautiful build you are doing, and what a fine example of joinery work; I too like that boat type and will continue to follow your progress. Sorry you're also having to fight the 'C' battle at the same time, best wishes to you. B.E.
.JPG.545bb075f7b3e87e68e3f2b2a975e542.JPG)
.JPG.c147b889d8ad3ff8379f4f99047a74d6.JPG)

.JPG.161aec9b4e3484c502d82dc85cebc509.JPG)
.JPG.86fb97b62d5a46b69156dd78b7cc2b15.JPG)
.JPG.de525a21661696018568e0da22e3fd5c.JPG)
.JPG.a16d05c6d647b61af1b6ba24d0ca0dc9.JPG)
.JPG.b7332795c5e8d2abc3e5e3d95fff3374.JPG)
.JPG.7d6966673bf66987c3da9e484c6aee01.JPG)
.JPG.560b4d144d13bd7da2f2f84a51118575.JPG)

.JPG.ddb0f11a2adcbd096771857a45a8c73c.JPG)


.JPG.8101f478822d19009991298ca4dc9a54.JPG)
.JPG.a0764a7d8b116076d3d7825af97b1634.JPG)
.JPG.0a32d89670e461e29cbae9accf452db1.JPG)
.JPG.25383f390163700f1a96fe091fa8b4ae.JPG)
.JPG.5db9f8735b892affae4f30ff15c70c62.JPG)

.JPG.6a001f632f9562112b6ee32430e1c1d1.JPG)
.JPG.1fc3cf76bdff2ae3f55a981e9cd95cc7.JPG)
.JPG.6288bfa51b71b52f9c44eb269c8c7bc8.JPG)
.JPG.bd596fff97345db8967f742ca57da040.JPG)
.JPG.48c8f8d9244b562919825b3c1a5eb92e.JPG)
.JPG.5056486416dc5bebe571493c3b61790a.JPG)