-
Posts
243 -
Joined
-
Last visited
Content Type
Profiles
Forums
Gallery
Events
Posts posted by Jörgen
-
-
-
Hi all
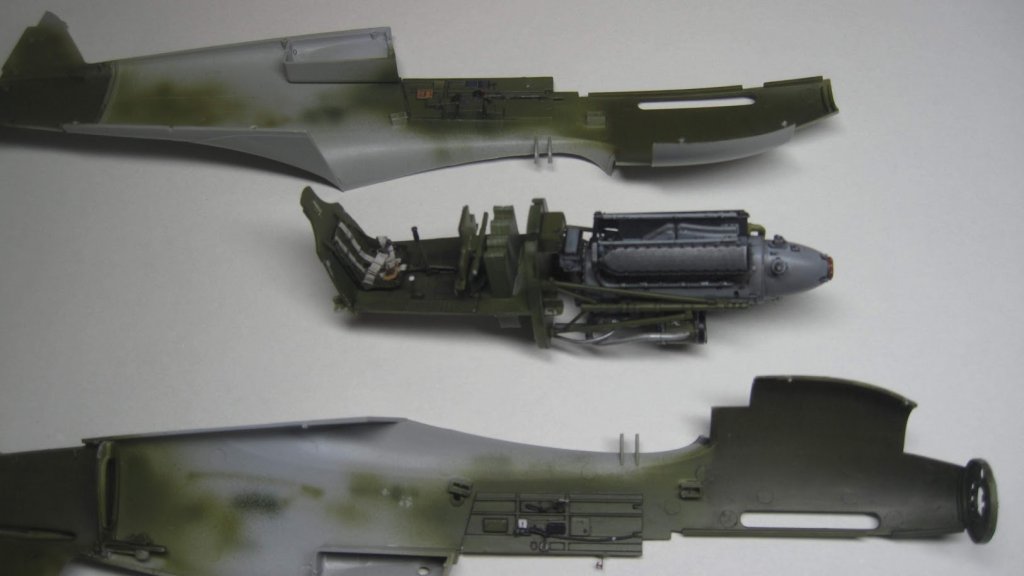
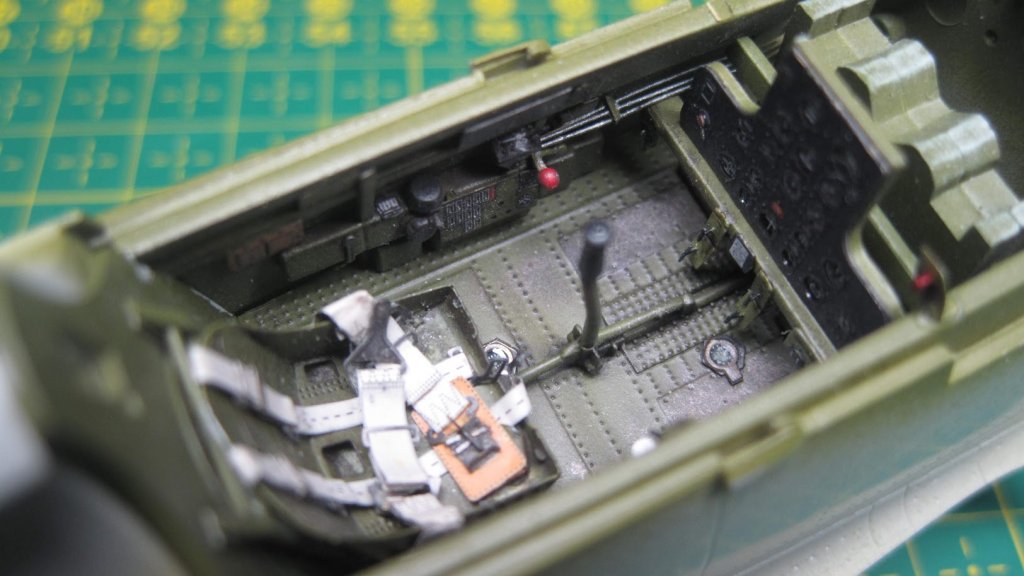
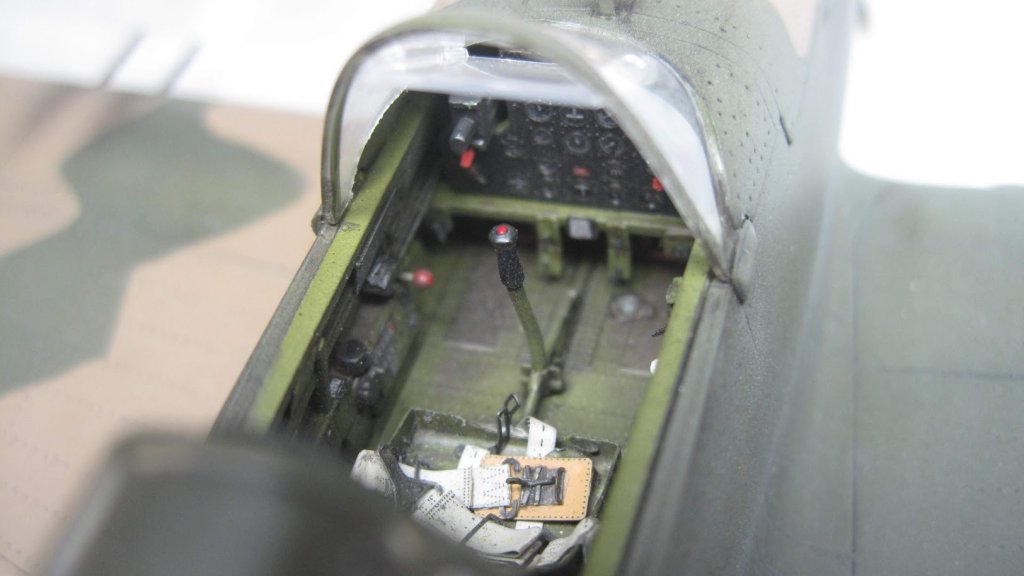
Here is photos of my 1/48 Tamiya Kawasaki Ki 61.
Colors are: AK extreme metals, MRP:s and Flory brown wash
The camouflage is added with freehand from Harder Stenbeck Infinity with 0.2 nozzle. This was done on directly on the AK extreme metal without any protection. Seems to work fine.
If I was to do the kit again so should I paint the blue and yellow strips instead of using the kits decals. They where rather thick.
Jörgen
![[image]](https://modelshipworld.com/uploads/imageproxy/834f4b5caa229fe6b9b47ec829e26fce.jpeg.b1e7f1dc25f6203bd9ff640ae12e241f.jpeg)
![[image]](https://modelshipworld.com/uploads/imageproxy/aa4f1f4d667d6537b4b20aa845958fbd.jpeg.967bcd0b44b430b43ba2658b065ae194.jpeg)
![[image]](https://modelshipworld.com/uploads/imageproxy/fa3879d850a8e7a4dc6375985ab723b8.jpeg.f5bcdd118e037938553f8dc8380322cf.jpeg)
![[image]](https://modelshipworld.com/uploads/imageproxy/9628dffd142b13d1d062937e01b62e54.jpeg.fb267a9294732124e54791c28182a882.jpeg)
![[image]](https://modelshipworld.com/uploads/imageproxy/3cc0b49cf0428dfc3df874e7ea1752b0.jpeg.a40ef1fdeb096b352e5264596c6f01fc.jpeg)
![[image]](https://modelshipworld.com/uploads/imageproxy/c62e9d9e052134caff44e93104e07ea1.jpeg.626d91c3239d81de62e5ad278e39bec8.jpeg)
![[image]](https://modelshipworld.com/uploads/imageproxy/2f05df1d3c6b114f87d8b2d295a5a5b6.jpeg.3fb47432ccc9cb901117dd751d179f4c.jpeg)
![[image]](https://modelshipworld.com/uploads/imageproxy/8e50913032b82de5fa23d813ec685102.jpeg.42f95b82e3c31a49c1fb3f2f7ddca705.jpeg)
![[image]](https://modelshipworld.com/uploads/imageproxy/9405f66c732cb7d4ad630fe46a4f1f91.jpeg.b5147b664e8870297f07b31df39d5a2e.jpeg)
![[image]](https://modelshipworld.com/uploads/imageproxy/f884cc46c1faaf0c7696377ba687546b.jpeg.f0dd2156fb0befb4c67e9b57f8605a93.jpeg)
-
Hi all
I don't do any build logs on my plastic kits but I thought it could be nice to share them with you anyway. I will just post the pictures here if it is ok for you. I jsut add new when I have done them.
This is my first aircraft model in many year. It's far from perfect but I have learnt very much since I started to see Phil´s videos on Flory Models.
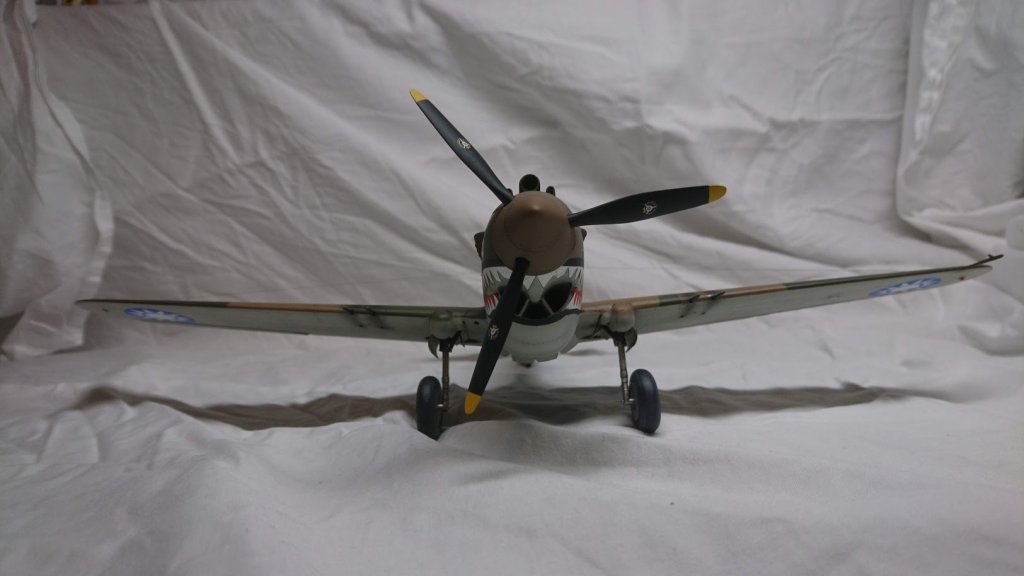
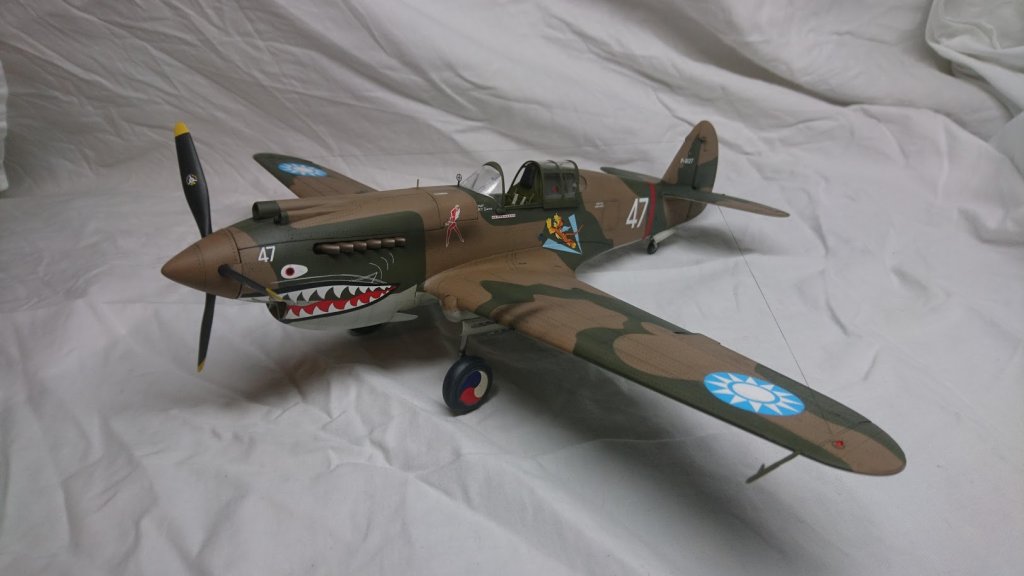
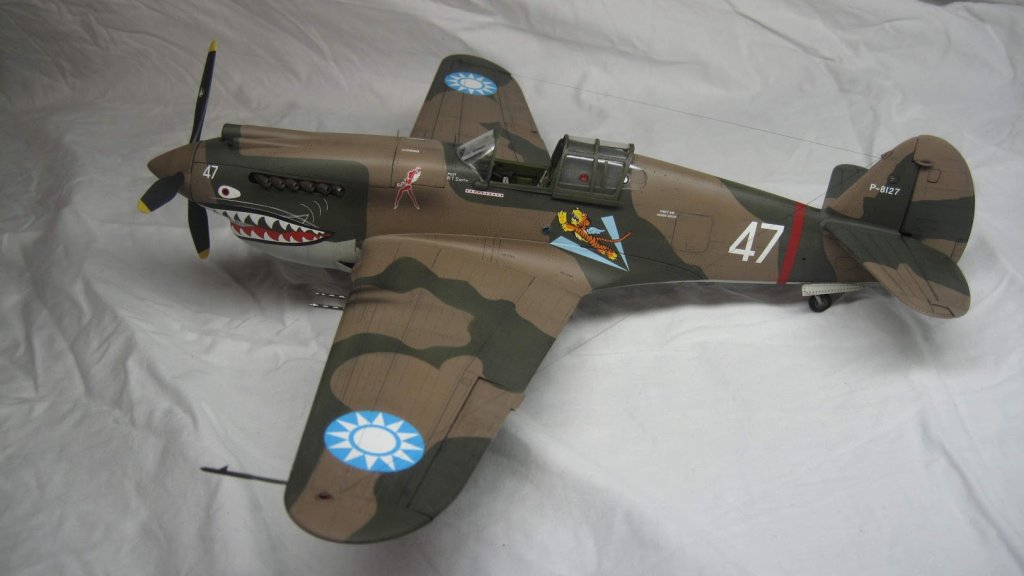
Model: 1/32 Trumpeter P40 B
Extras: Cutting Edge decals and Eduard cockpit set.
Colours: Vallejo Model Air (DuPont brown, DuPont green and DuPont light grey).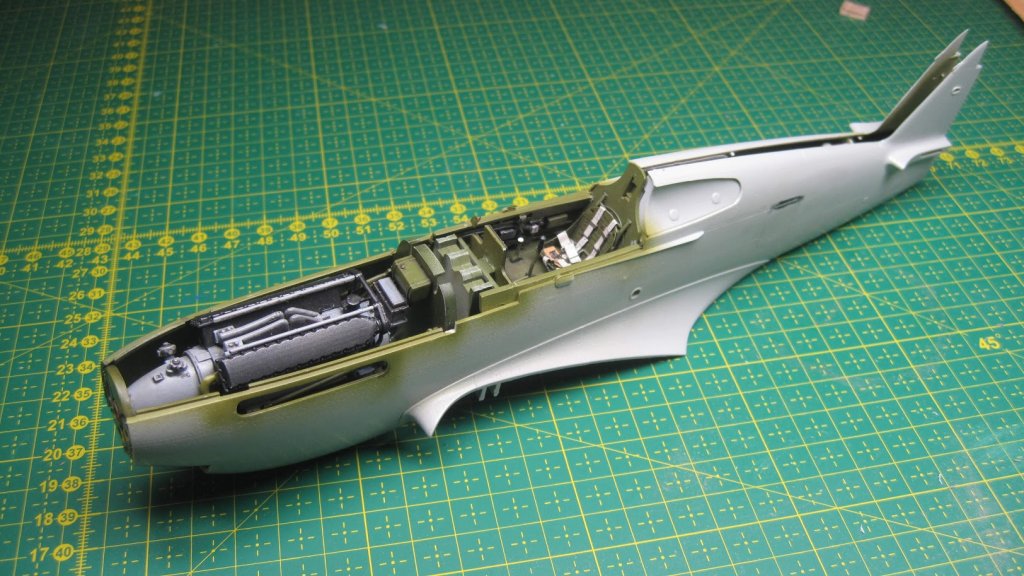
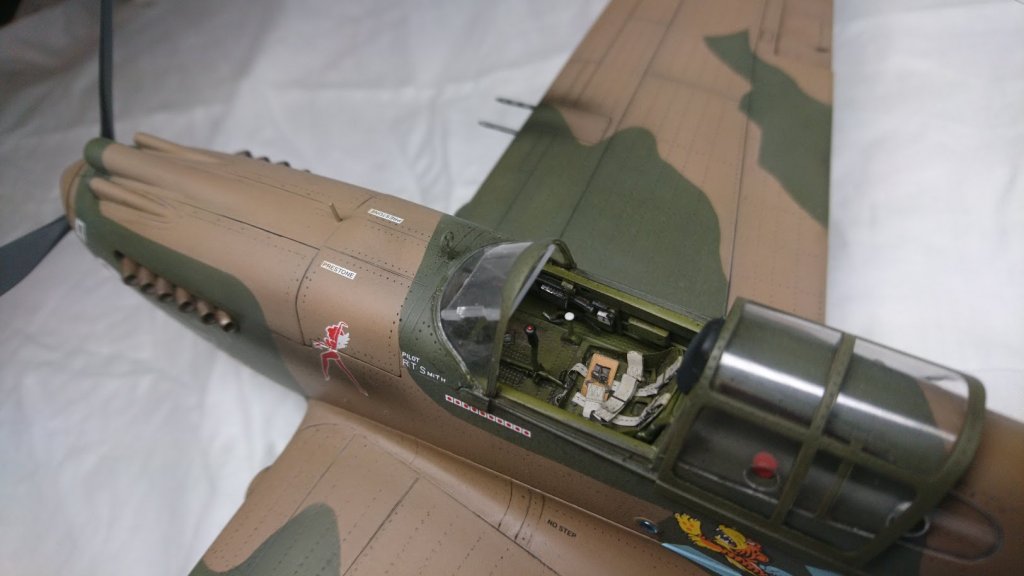
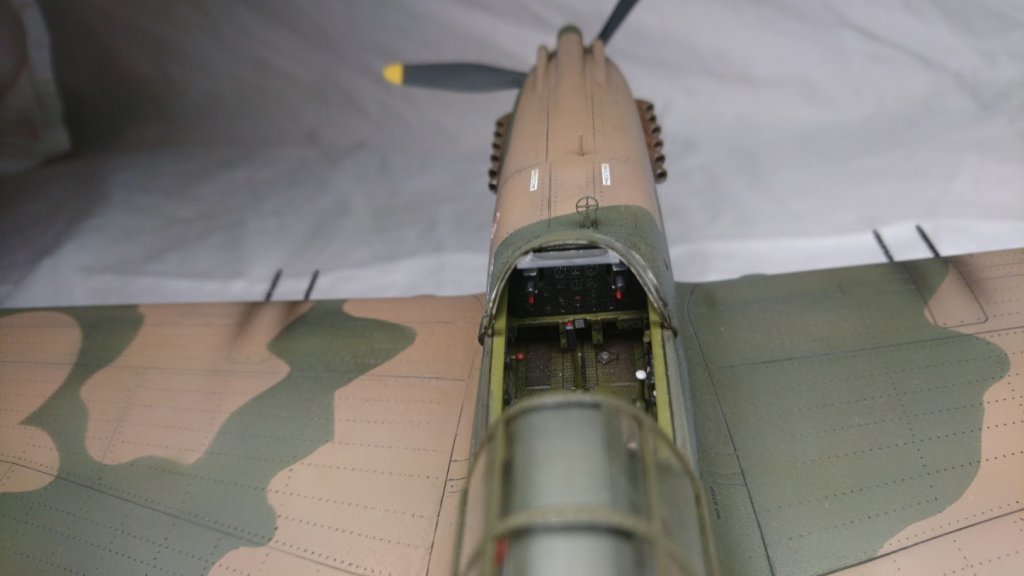
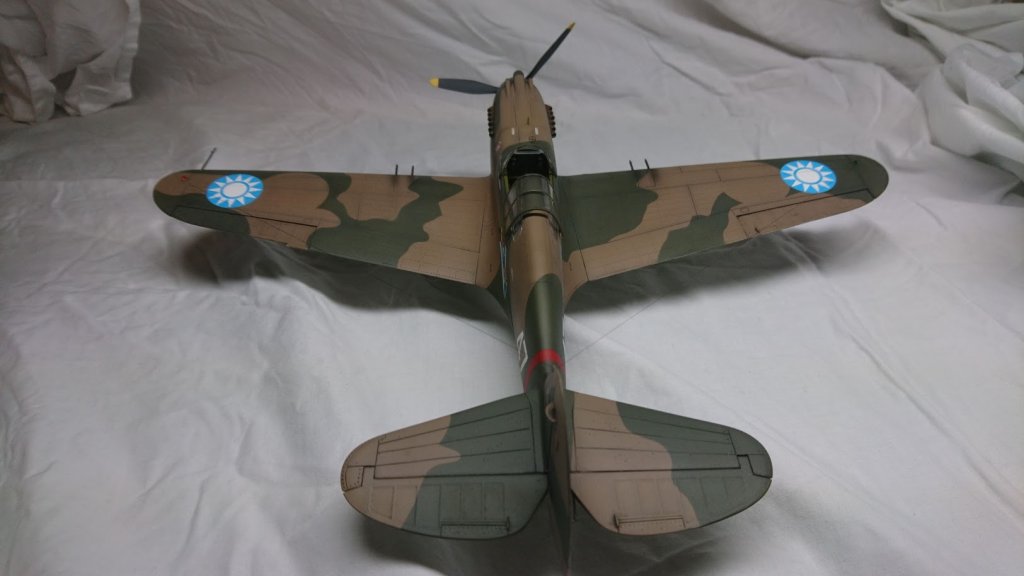
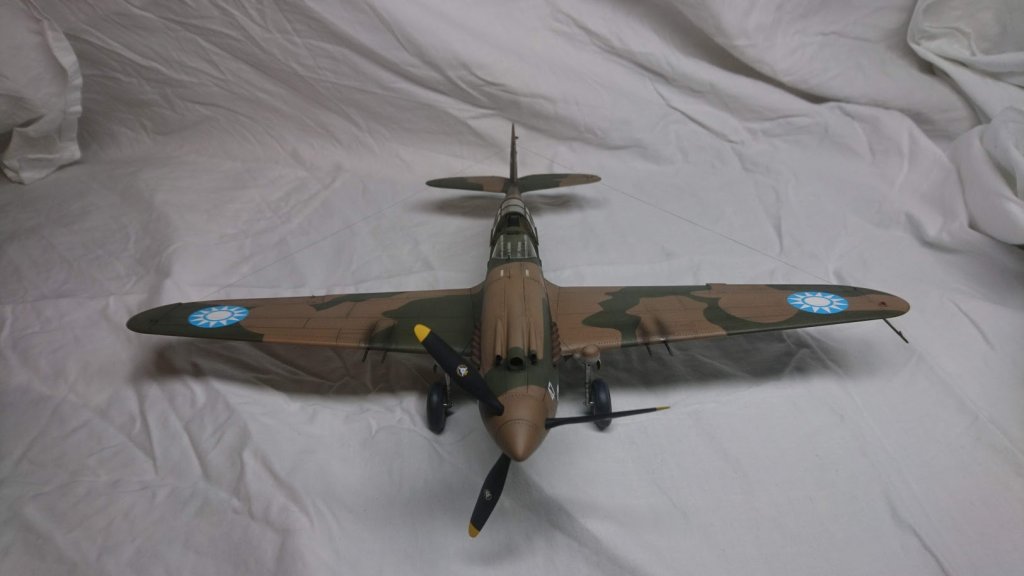
-
-
-
-
-
Here is the result of one of the gun ports. The upper part will be hidden under the lid later.
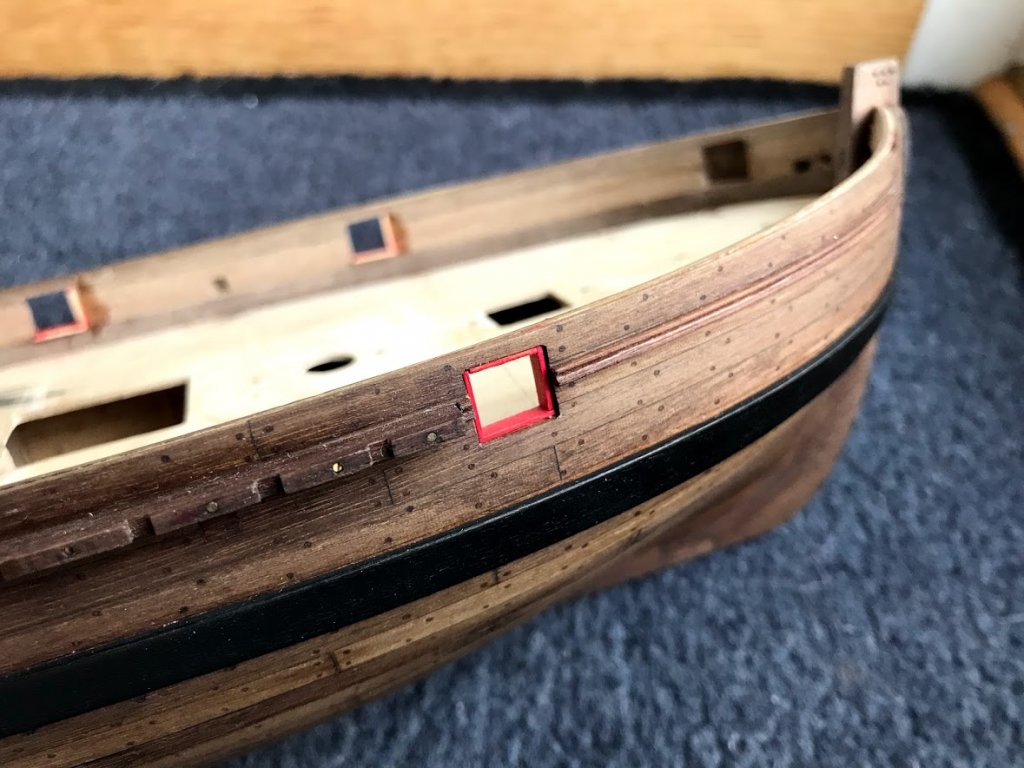
The inside look like this, but when sanded down it looks good.
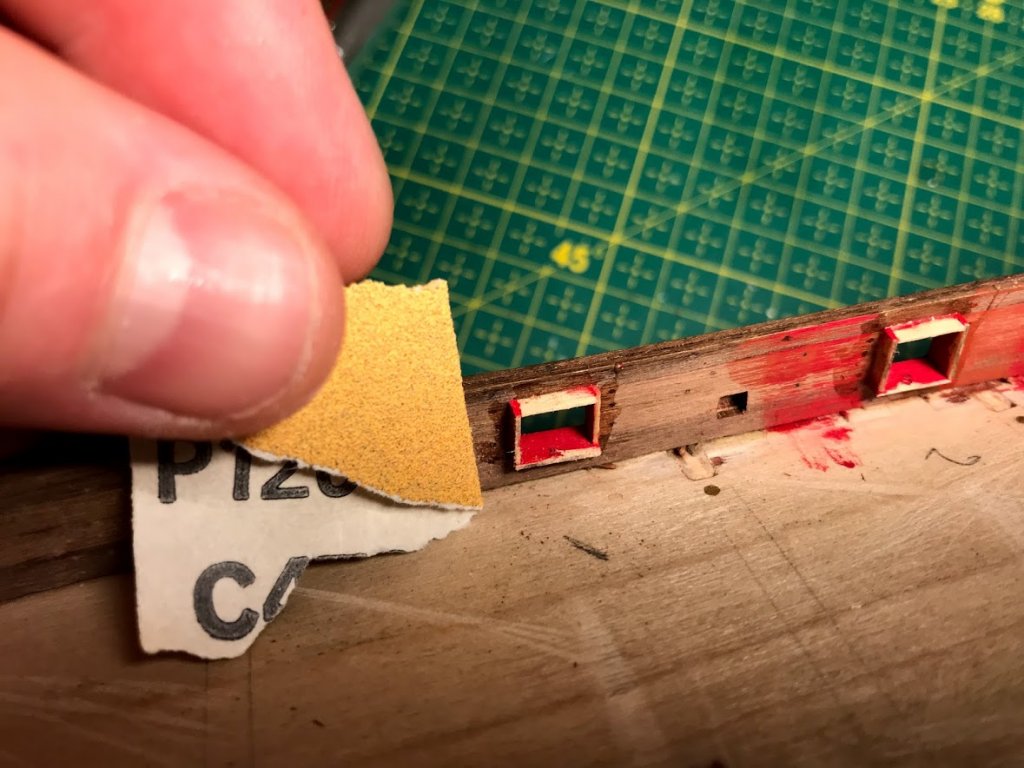
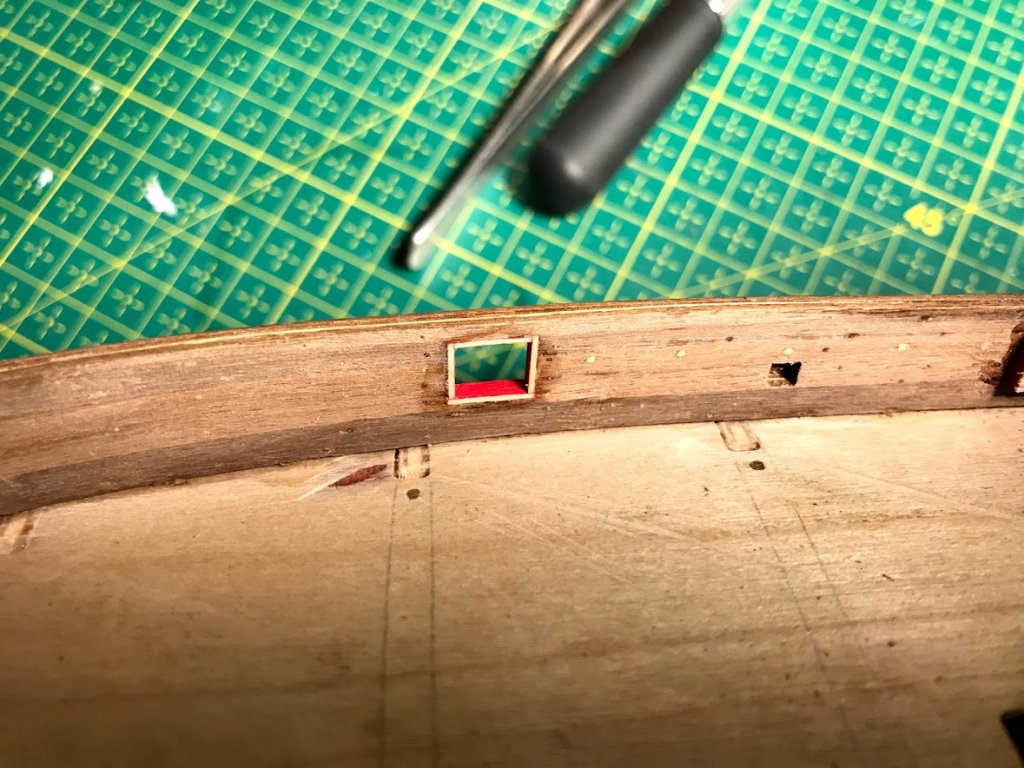
Then I of course (again...) start to ponder over the red color.
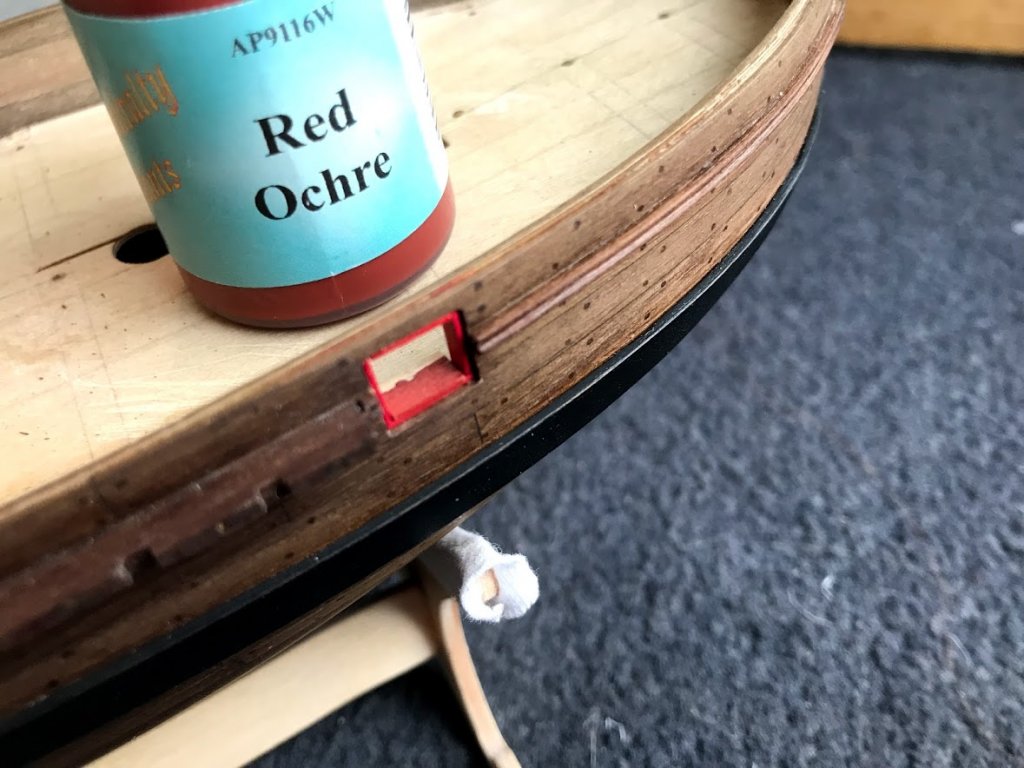
but I think it will be to dark (admiralty to the left and Vallejo to the right) so for now i am sticking with the Vallejo flat red because I think it will be very good against the all of the black that will come later.
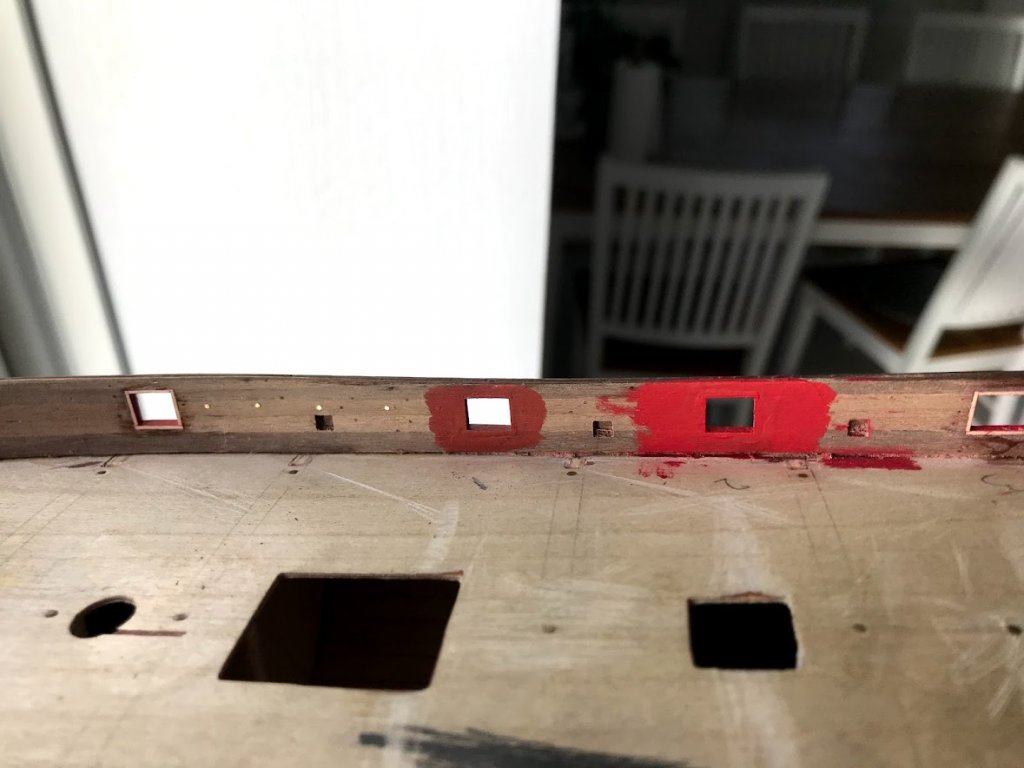
The gun ports required some putty and I have started to use this one from Deluxe. It is very simple to use and when dried you take away the excess with small amount of water.
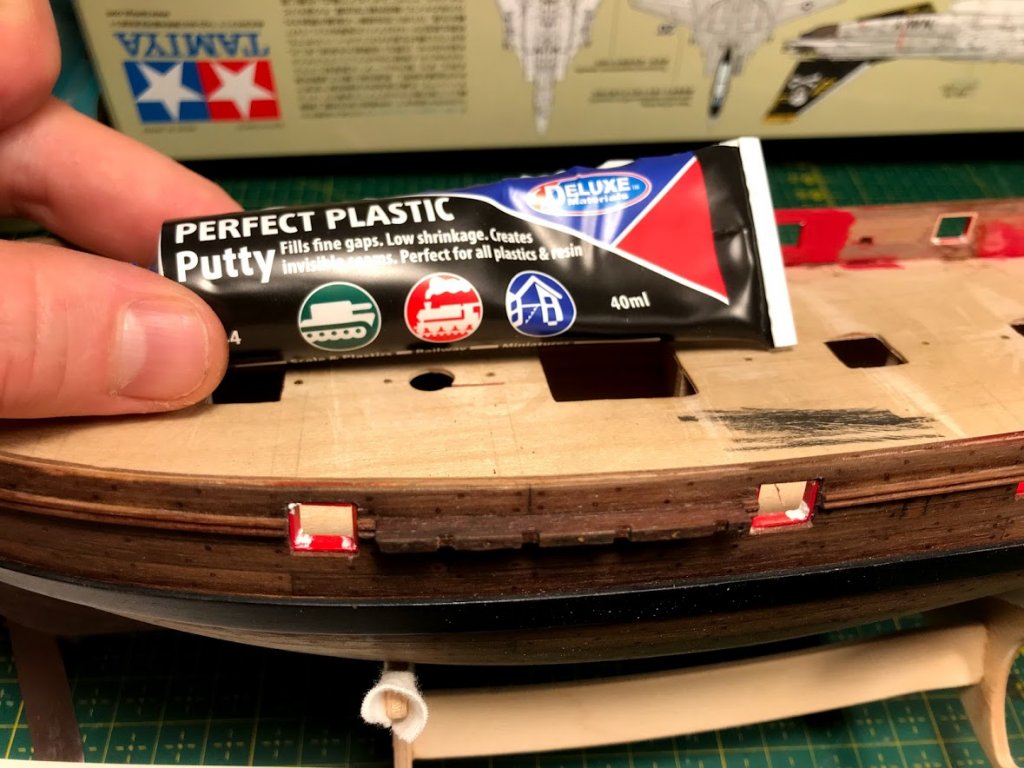
I will use the supplied wood for the deck to rebuild the inside walls.
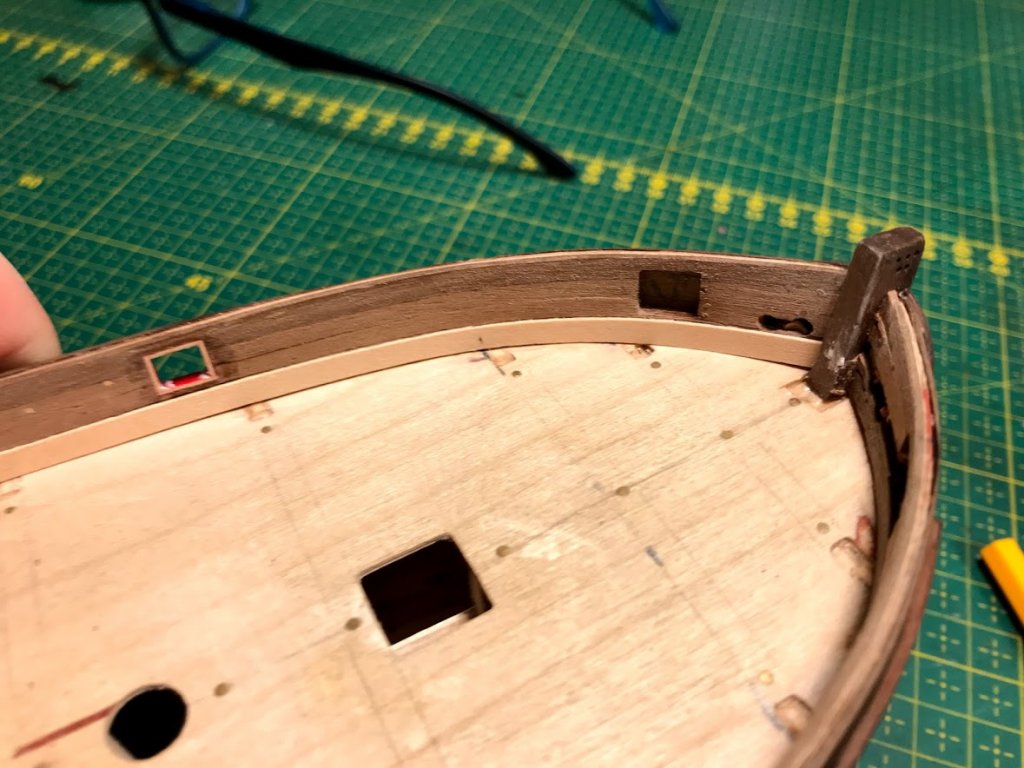
But first so need the front close gun port be fixed so it looks good from the inside.
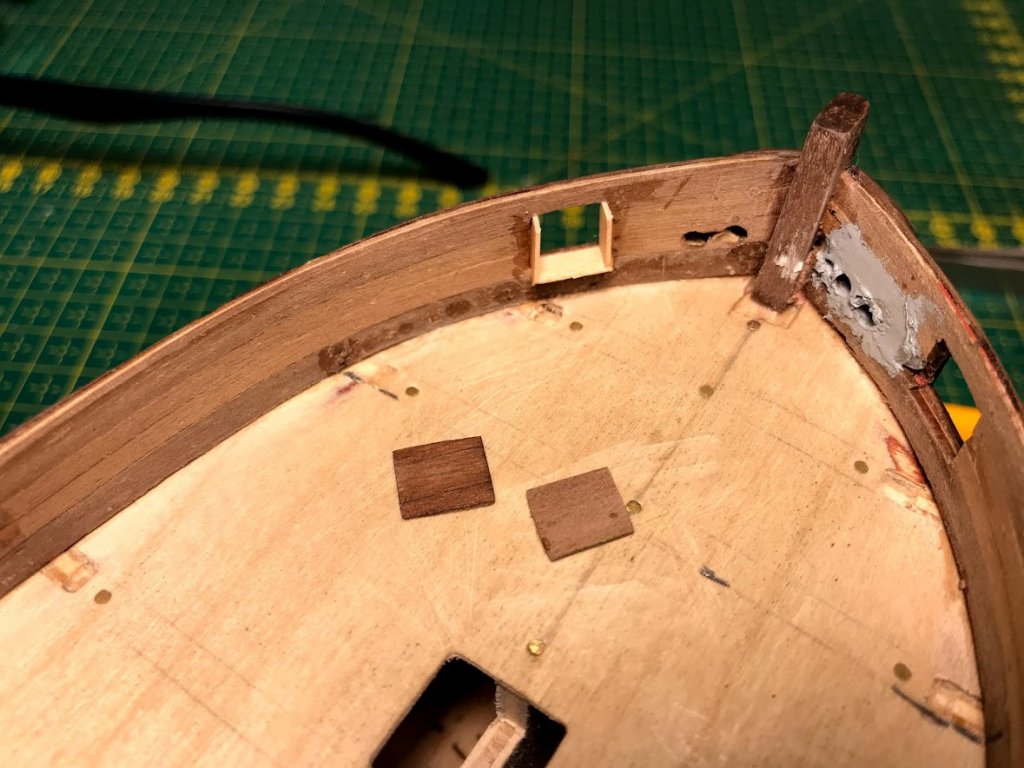
And here is the result. I have used some wood sand fixer (or what it is called...) becouse I want to use primer and then paint on the inside. The gap you see made it possible for me to get a very tight fit of the wood against the stem post and the rear bulks. This gap will later be covered with the supports for the windlast.
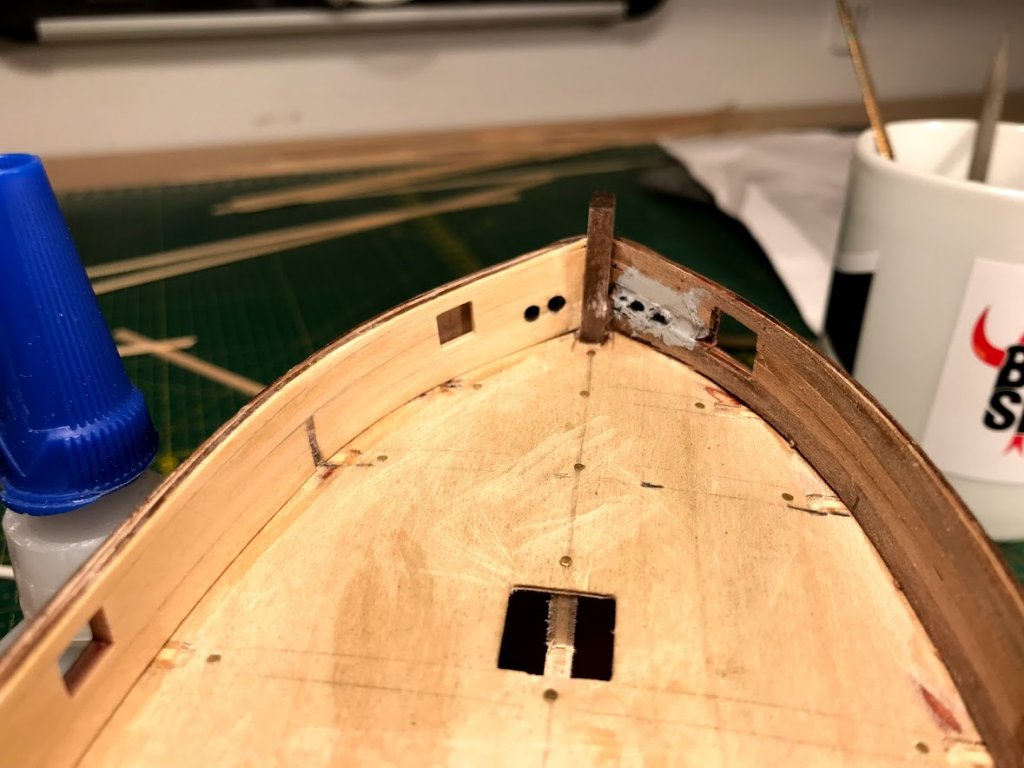
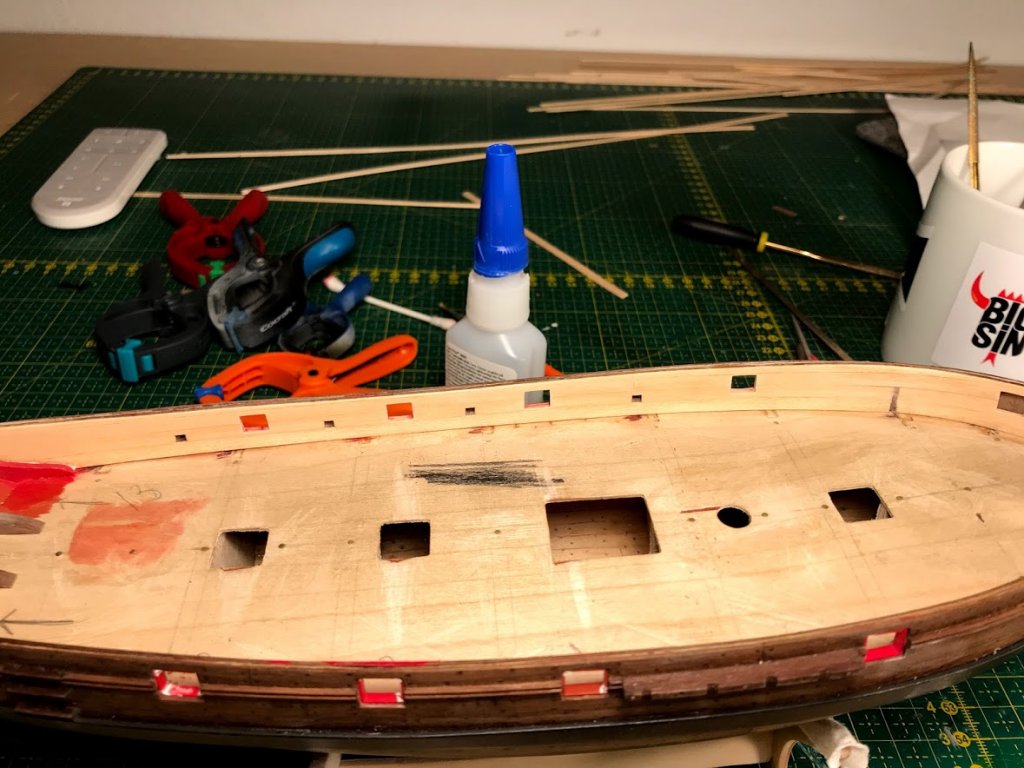
Now i need to do the other side.....
-
Hello all
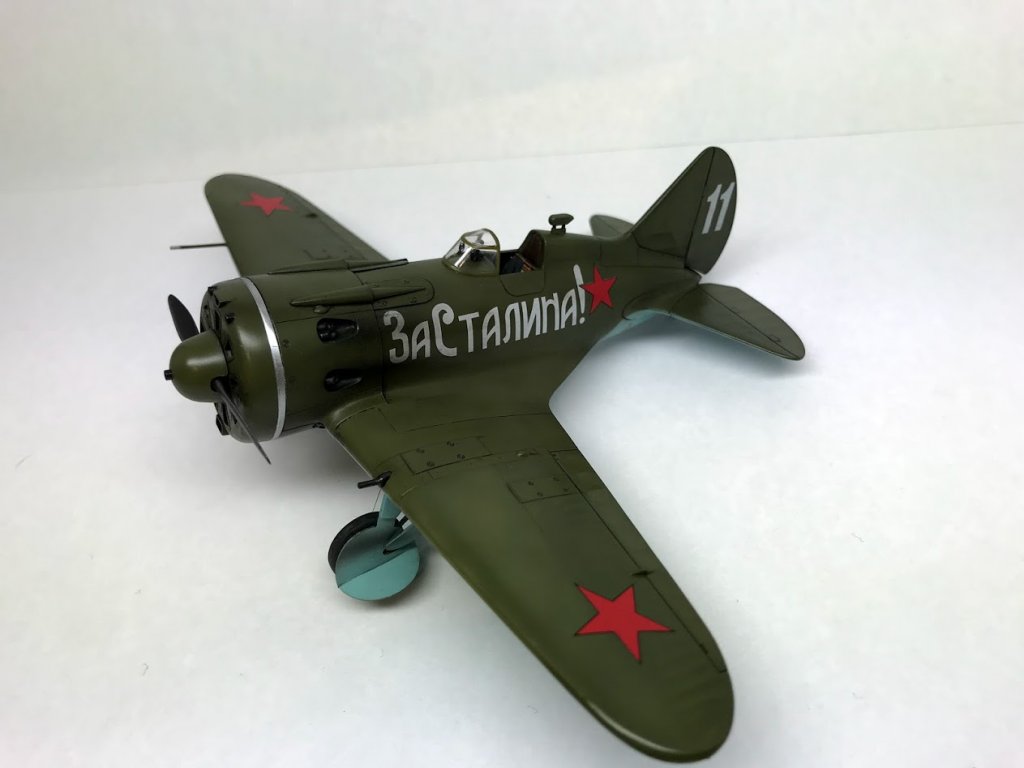
Sorry for not posting for a while but I have to much to do home so the ship yard is in second place at the moment. But I have been able to do some small things. First of all I finished this small thing. It is Eduards Polikarpov I-16 1/48.
On Sherbourne it is now time to take care of the inner hull and prepare it for painting. As you can see in the photo so have the tree nailing damaging it a lot (i was not careful att all).
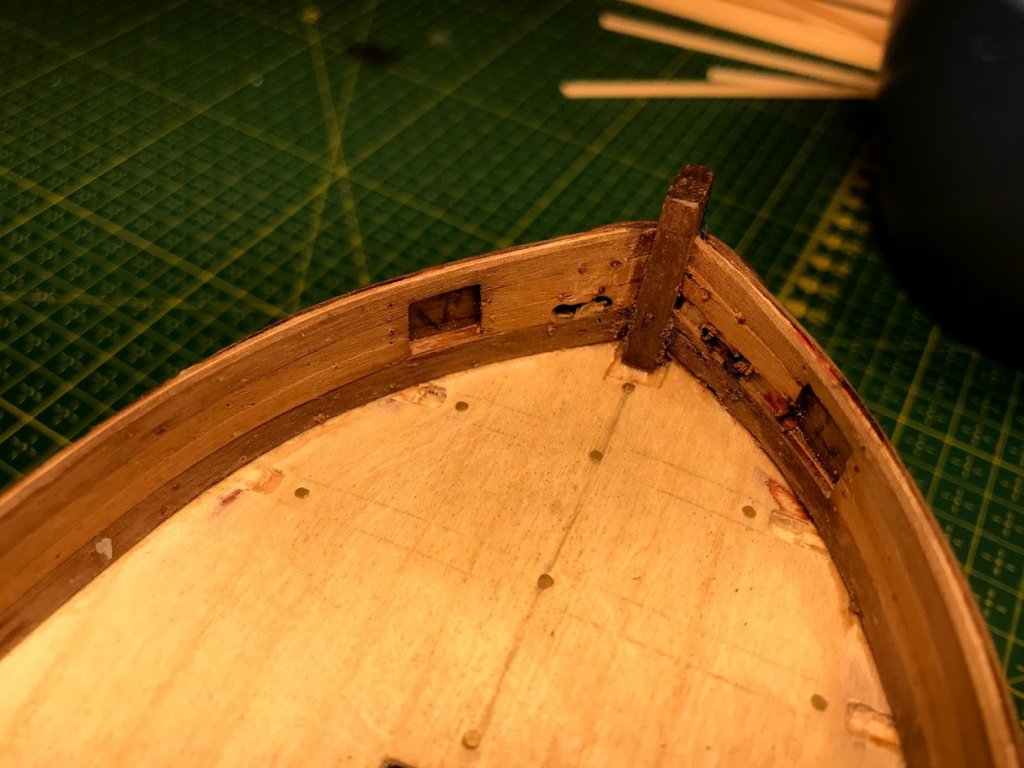
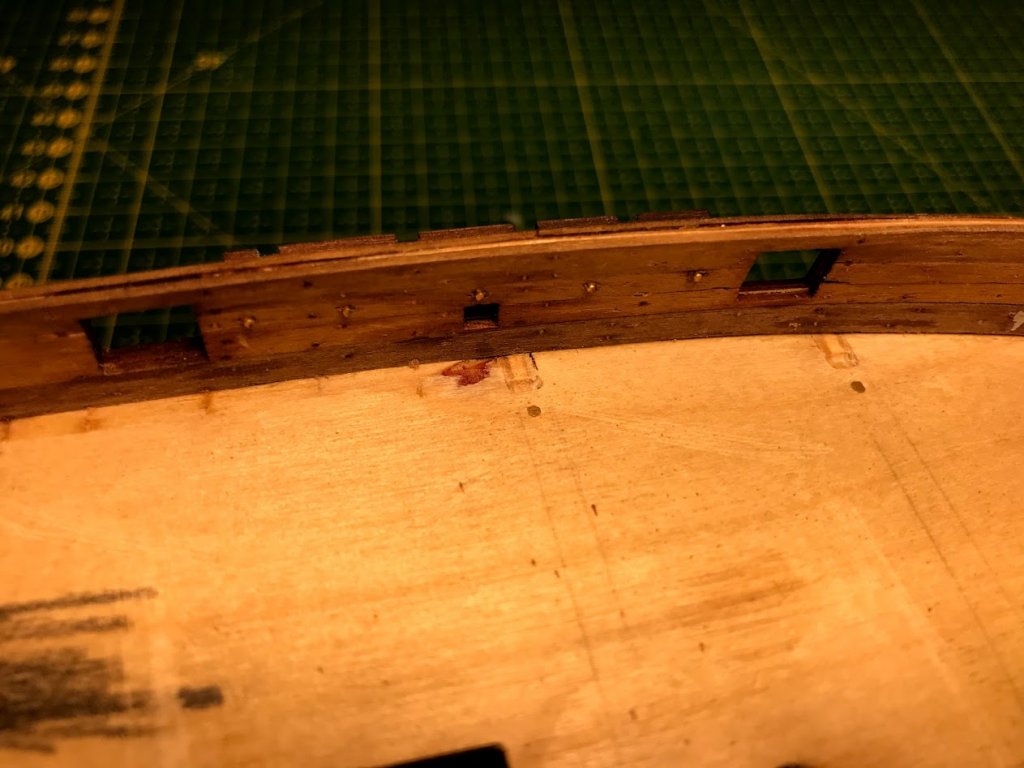
What I have started to do is to build up the canon ports. I do it in this way so I can have a nice painted red edge that is perfect against the dark tree.
I will use Vallejos Mat red Model colour for the inner paint.
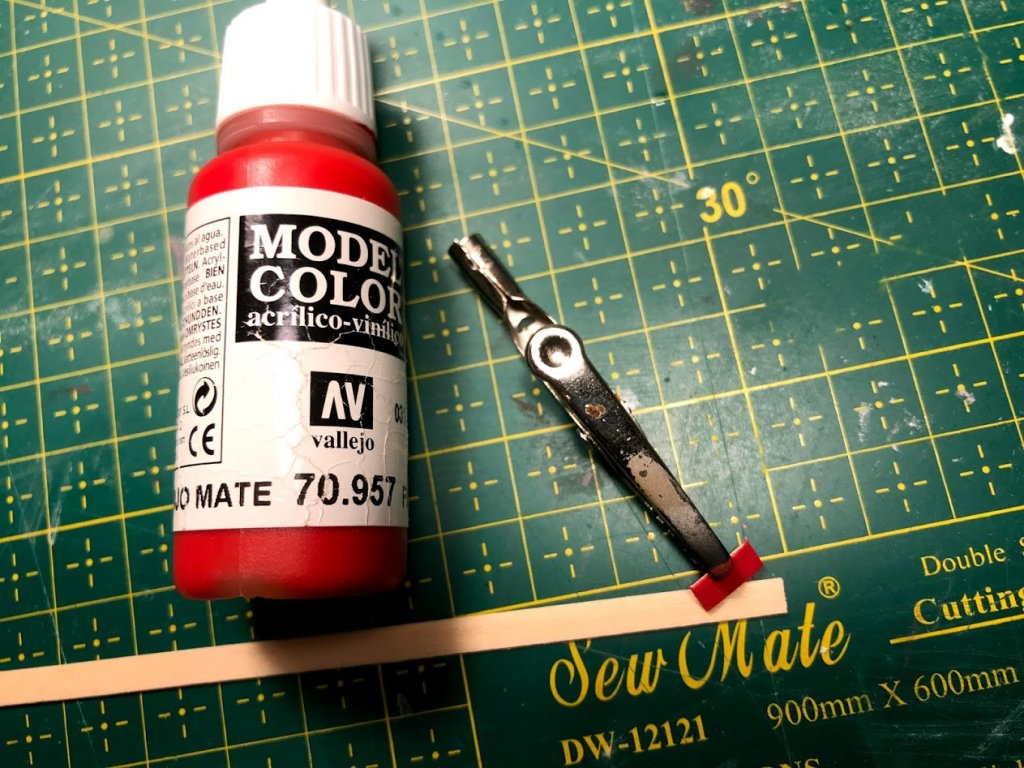
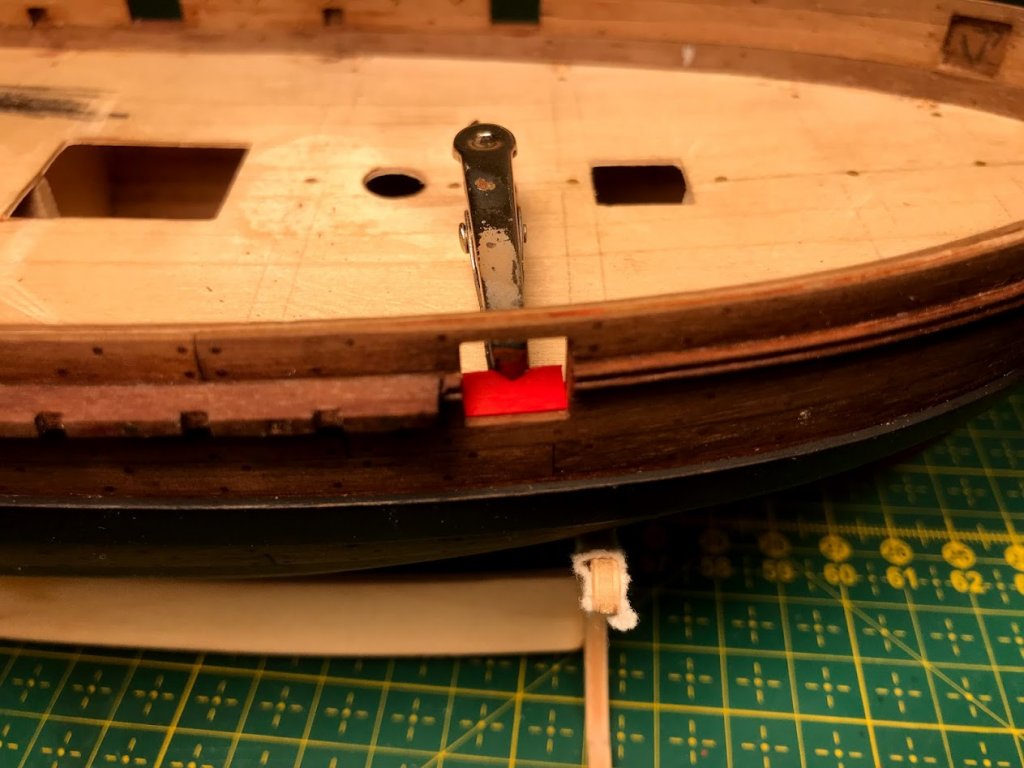
This is how far I have come but I hope I will have more time soon.
I have also started to convince my self to buy Chis Whattons new Alert kit from https://vanguardmodels.com/. I really want to try to work with Pear and boxwood before I buy it to my Vasa kit.
Jörgen
- tkay11, egkb, Edwardkenway and 4 others
-
 7
7
-
I like the tree nailing but I think it must be done with the same color (same wood) as the deck. just to keep the contrast on minimal level. I think that every small detail you can put in will add to the whole picture.
Best regards
Jörgen
-
He has changed website to https://www.florymodels.org/
Some of the stuff is still free but the most is behind the subscription.
Jörgen
-
Thank you Edward. I'm sure your build will be great. Remember to not hesitate on try new things. That is what I am doing, just trying
 . Also check Tonys log (tkay11). He has some very nice guides how to do things on Sherbourne.
-
I will also follow you. I also building Sherbourne at the moment :). And as Tony say, build Sherbourne how you like and don't be afraid to ask questions.
Jörgen
-
-
Välkommen Henrik!
Nice with another Swedish person here:) I will follow your build. Is it your first one?
Jörgen
-
-
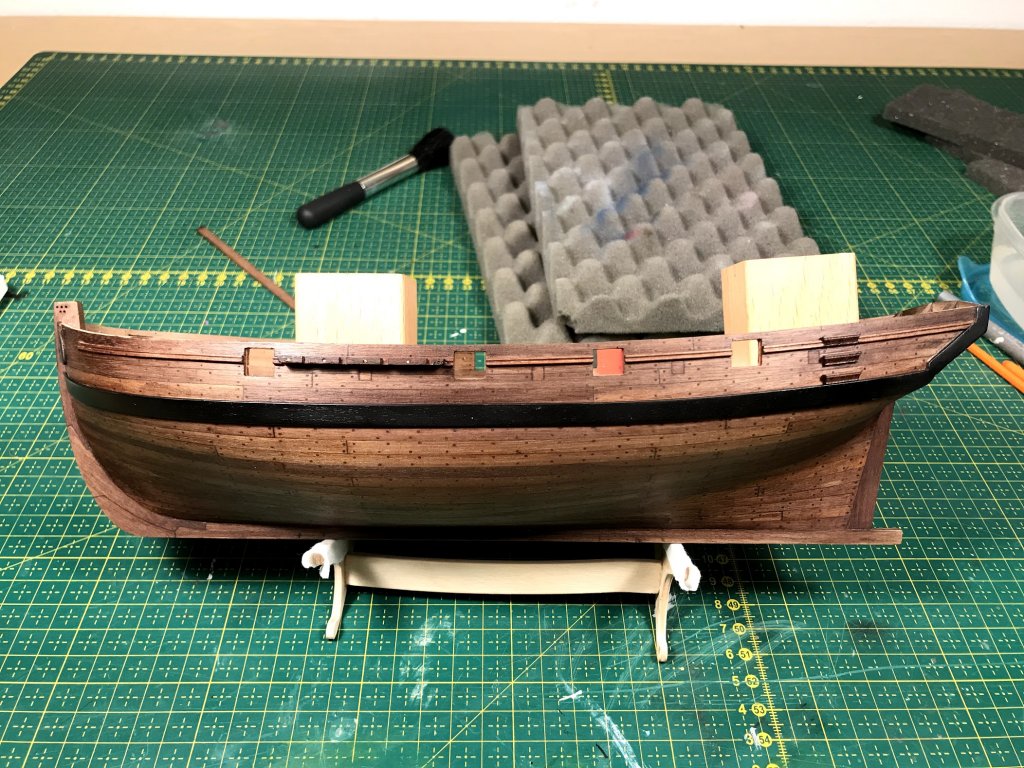
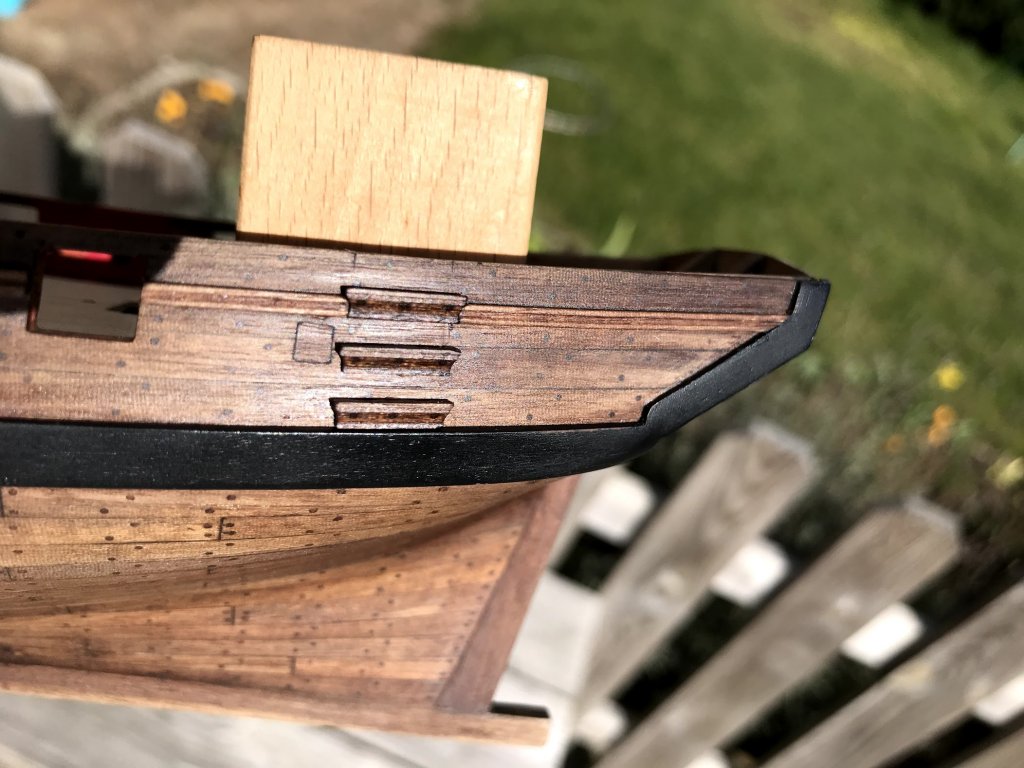
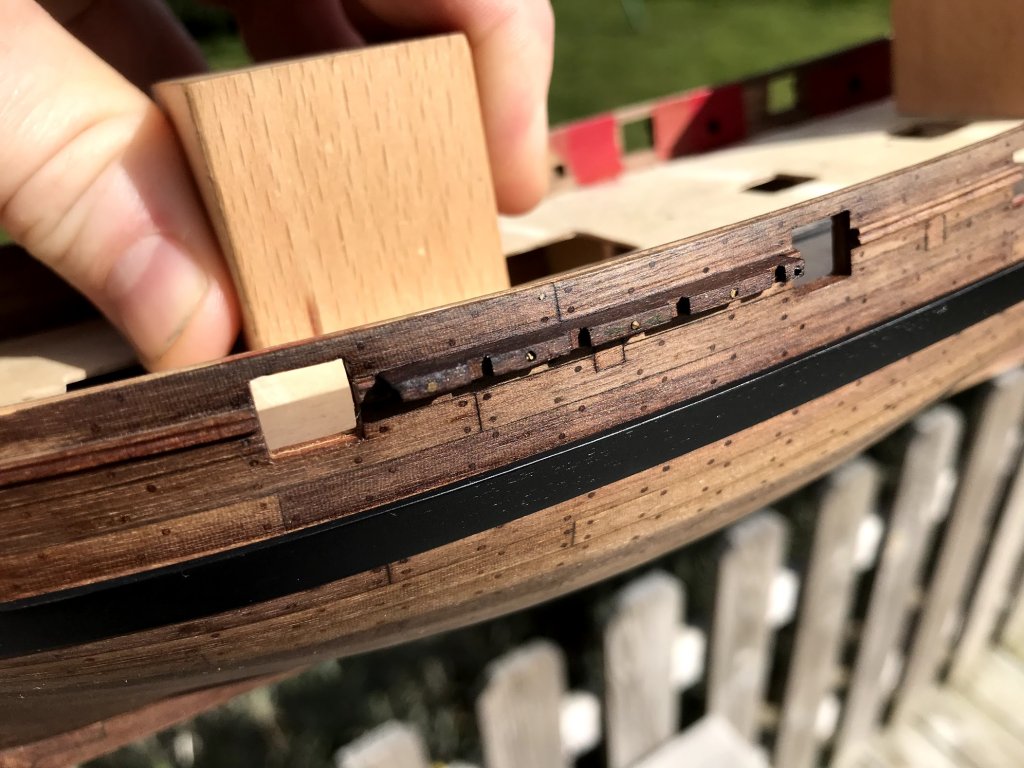
Hi again, a fast update since i manage to do the entry port ladders yesterday.
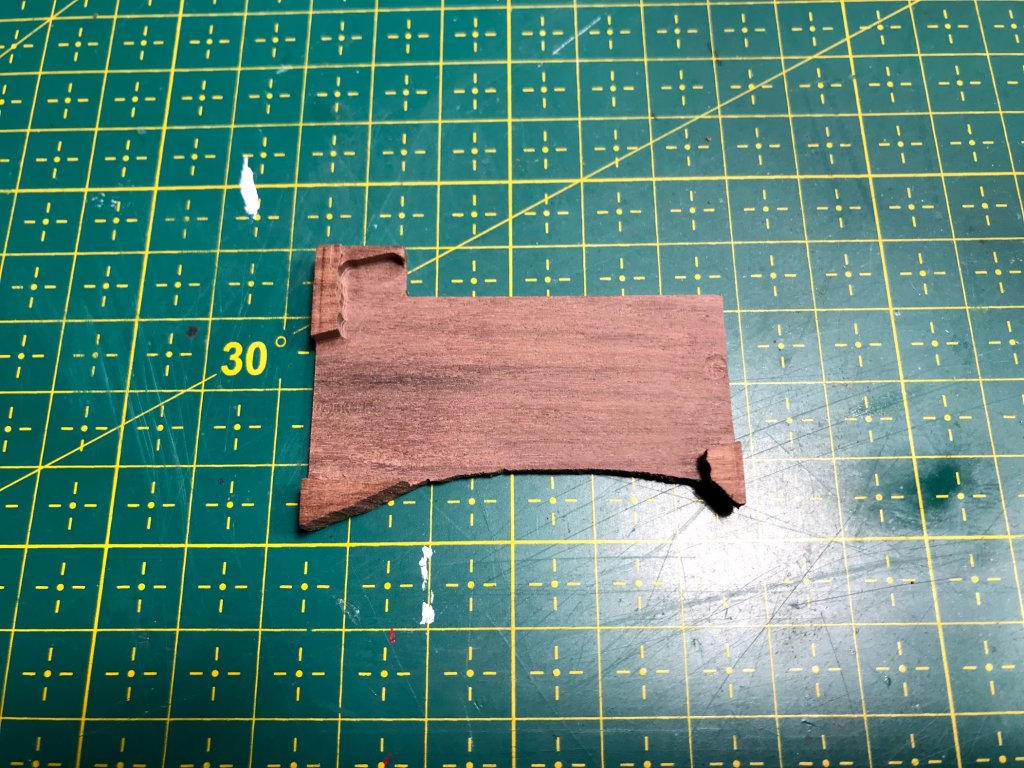
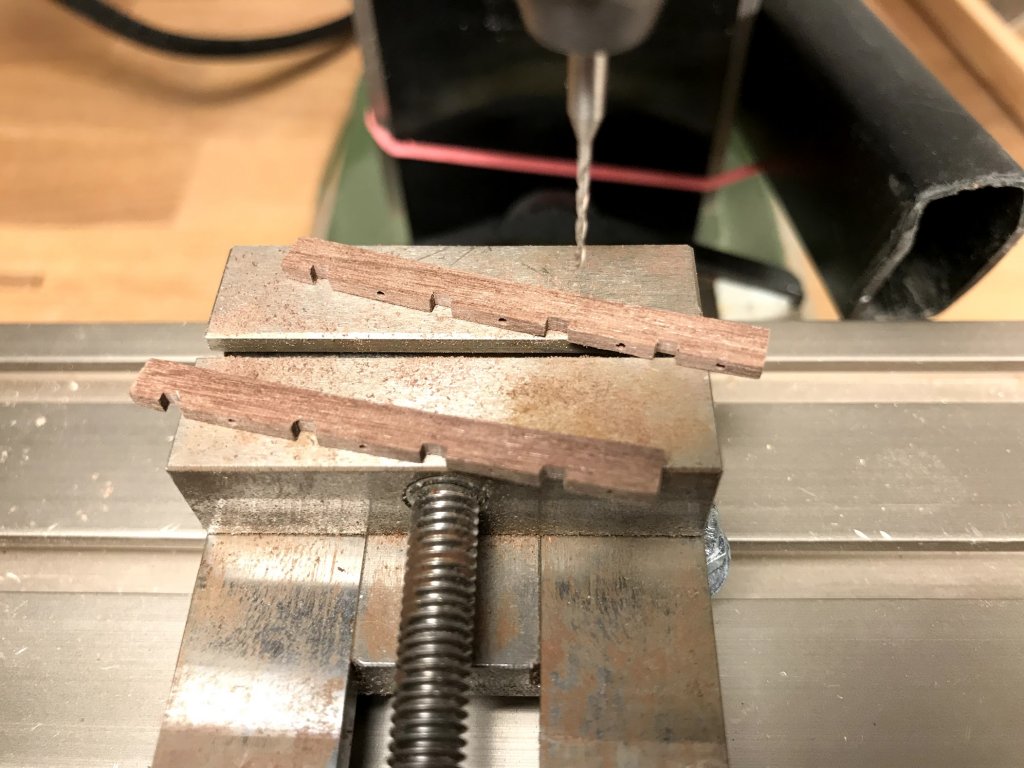
I was thinking how to make six exact the same ladders and this is how I did it. I milled them out on a row from a bigger block. I also drilled out 0.5 mm holes and tree plug them since this is shown in the Alert drawing. The ladders are 2,5 mm high and 11.2 mm wide.
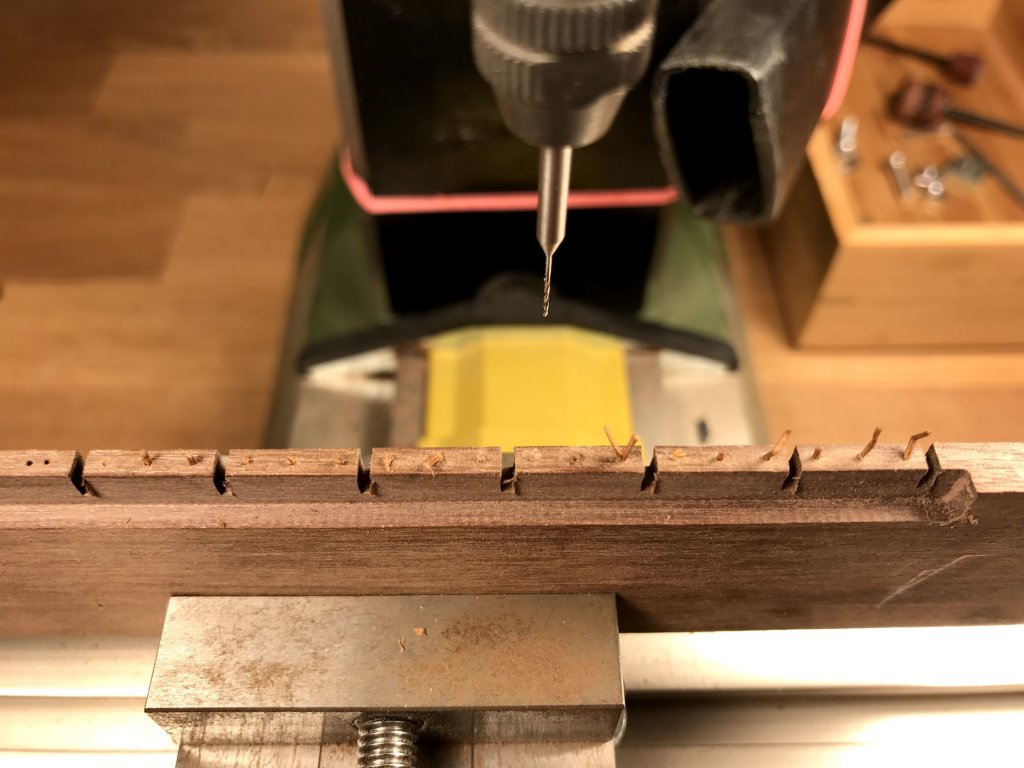
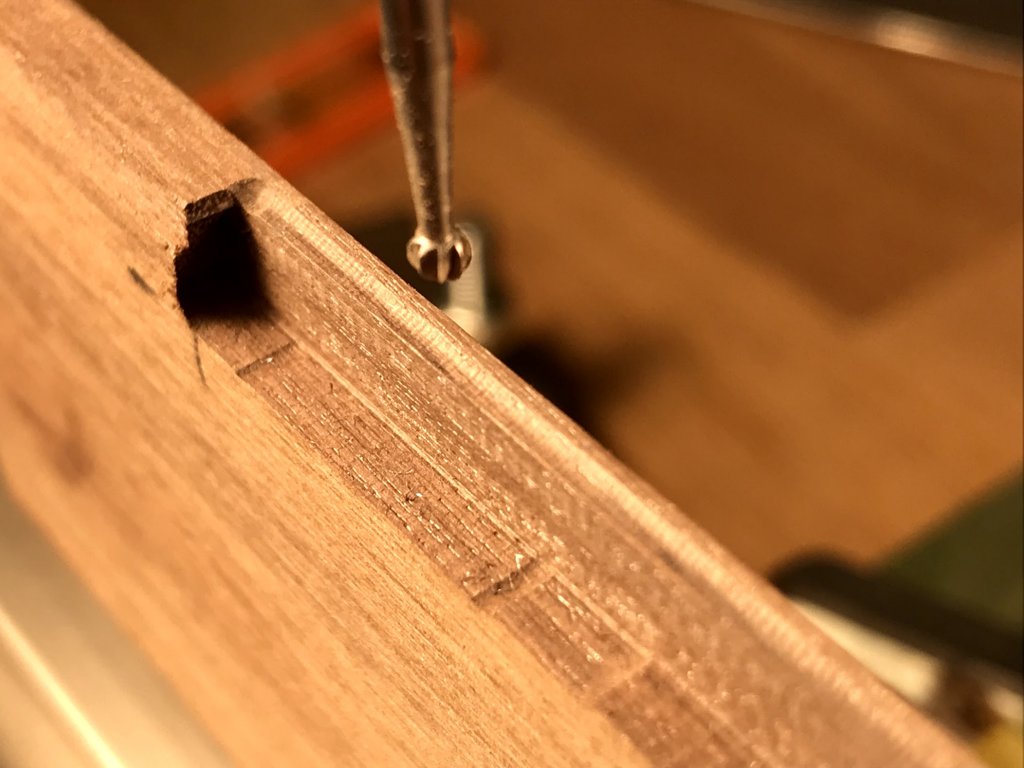
Then i made the curved pattern with a round mill bit.
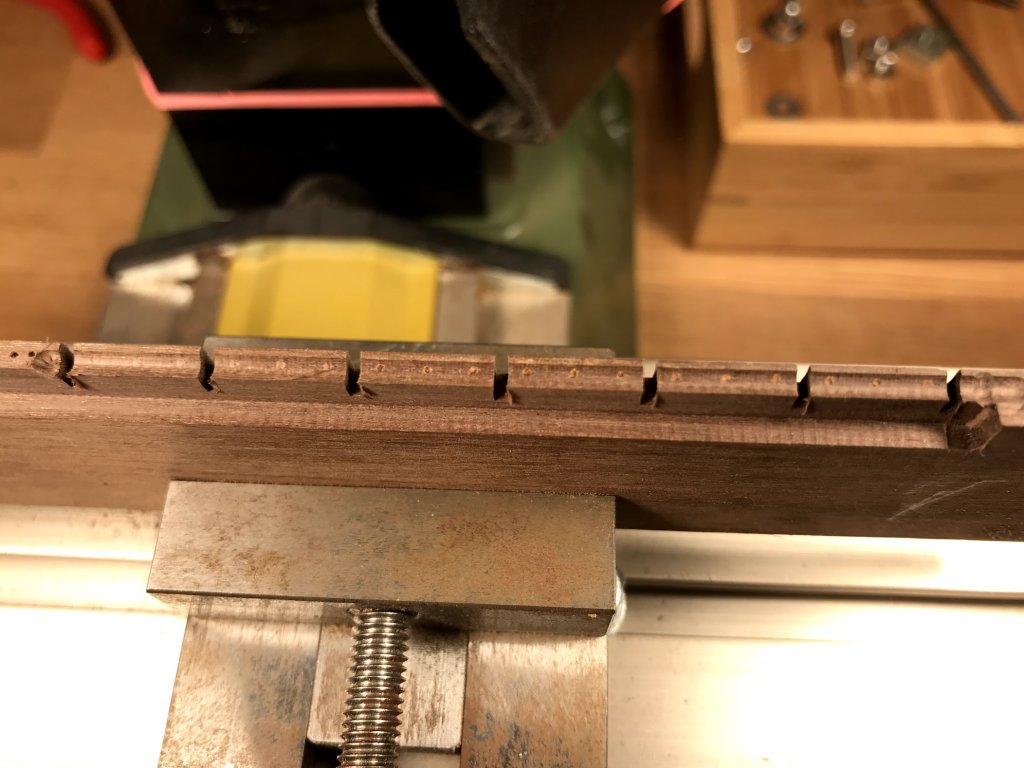
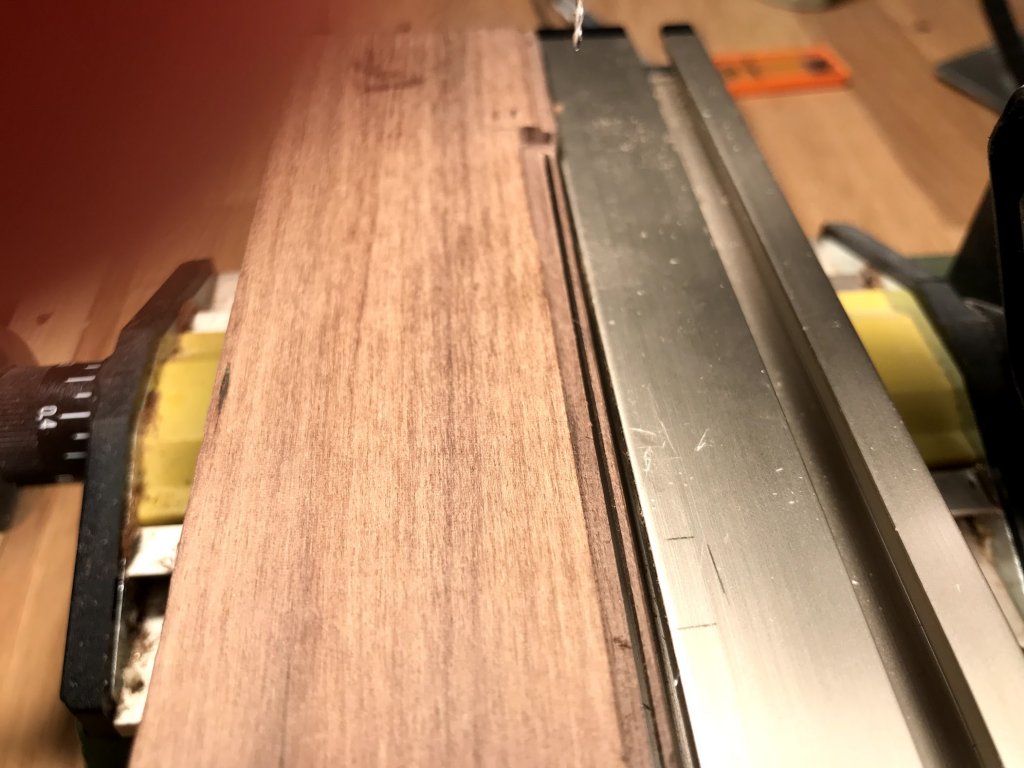
I also milled out a small edge on the upper part of the ladder. Sorry for the bad photo but I hope you can see it.
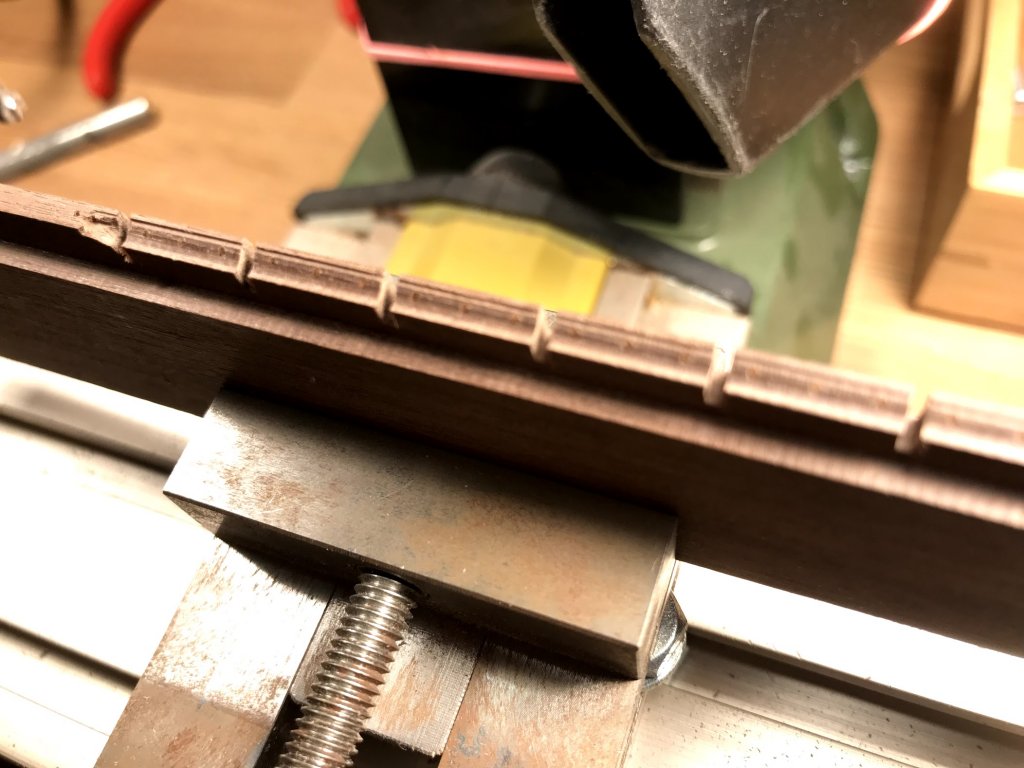
Then the parts were milled out from its block. The corners were rounded with a small file. Also 2mm x 0.5mm hand holes scores were milled in each part. Then they were glued on the hull on each side.
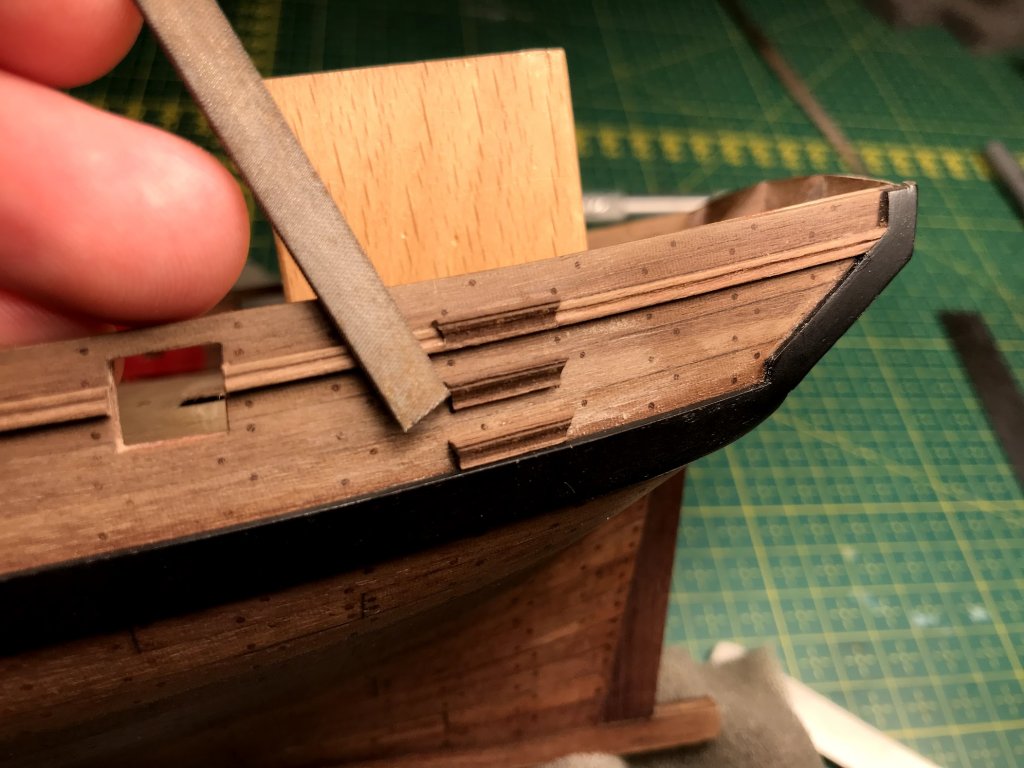
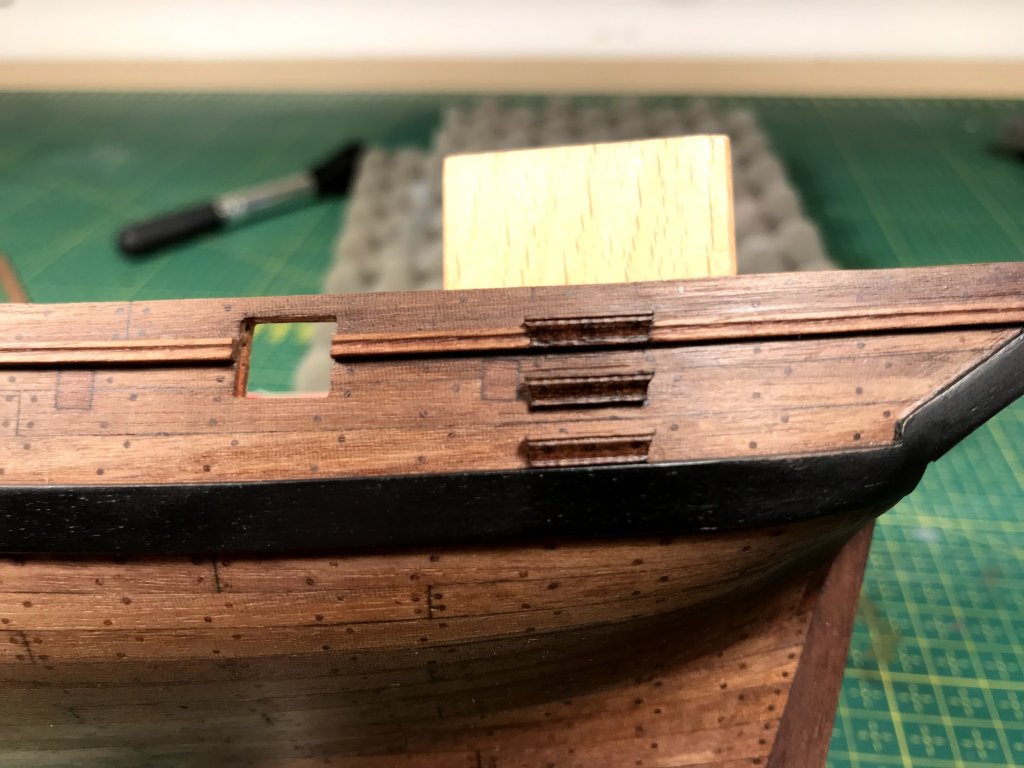
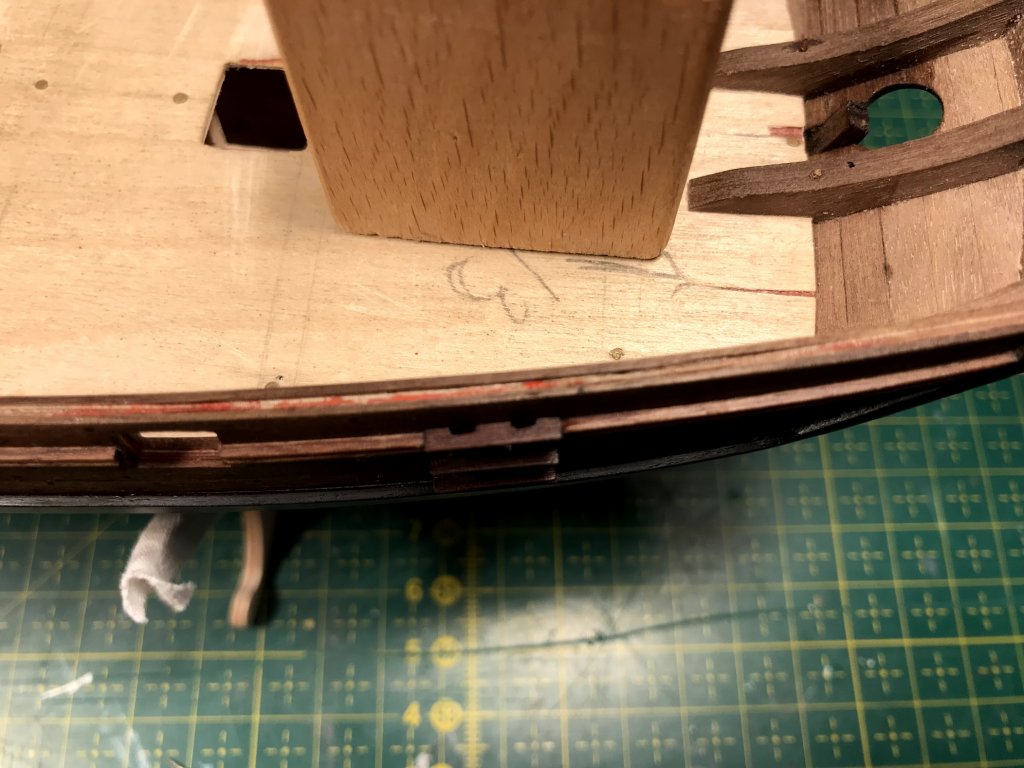
Then a layer of oil was added.
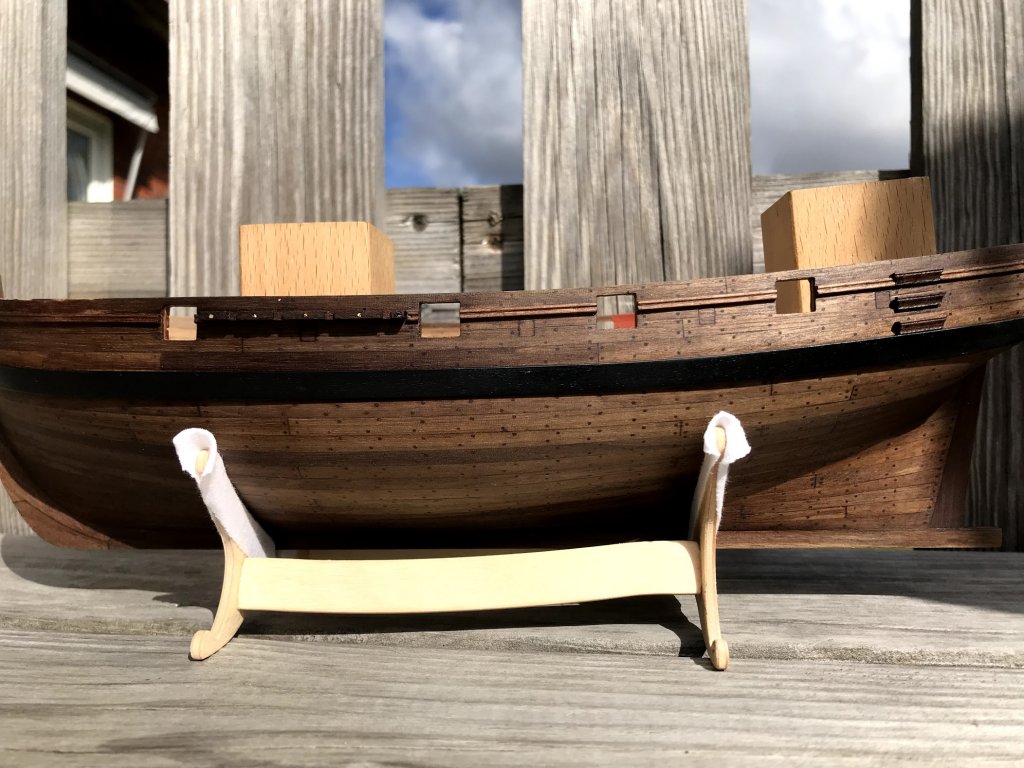
I am really happy with the result and at last I am finish with the wood part of the hull so now can I start to focus on deck area.
Here are some photos and this is all for now.

-
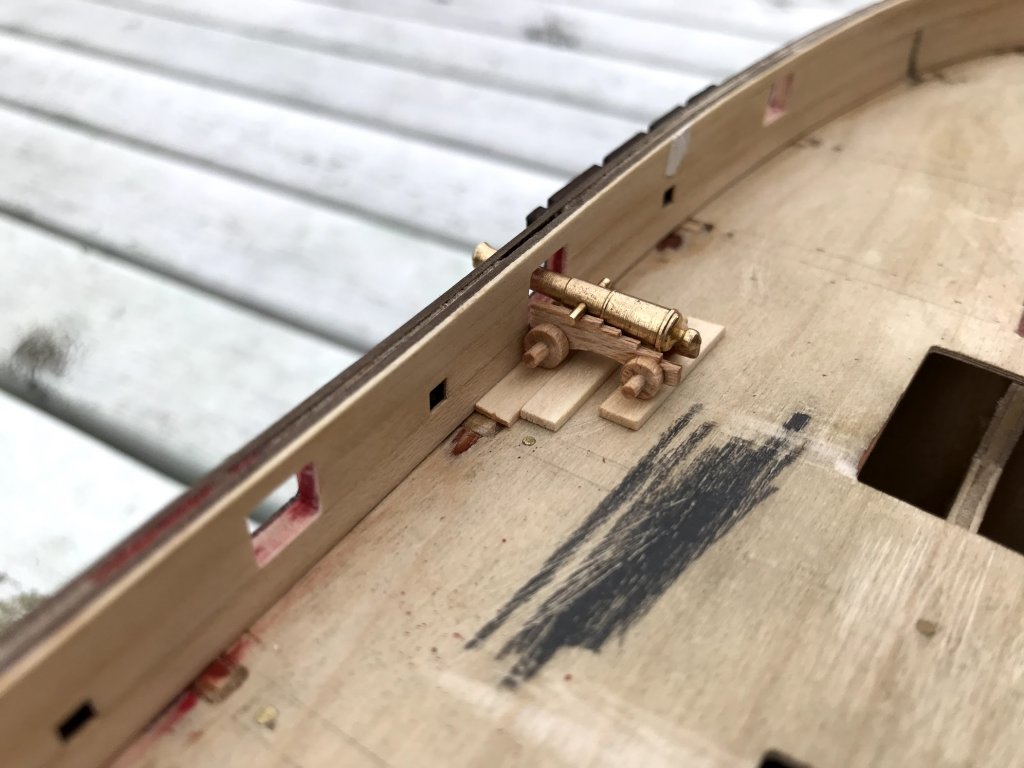
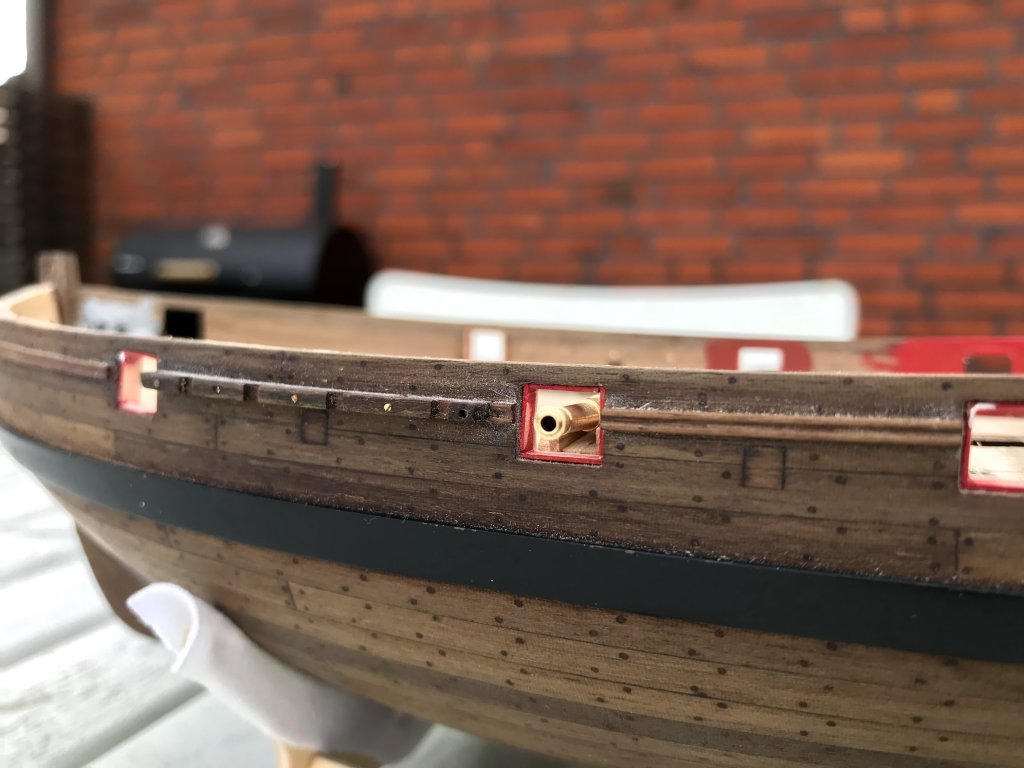
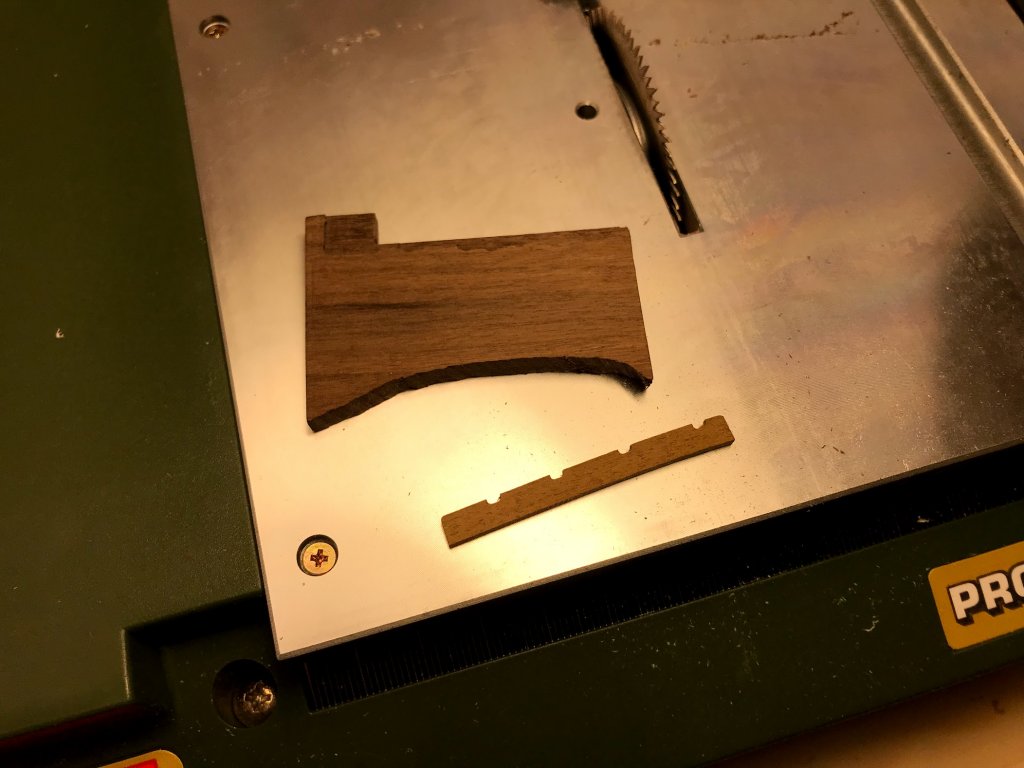
The construction continues with the channels. I used the kit parts for template to construct new parts in dark massive walnut.
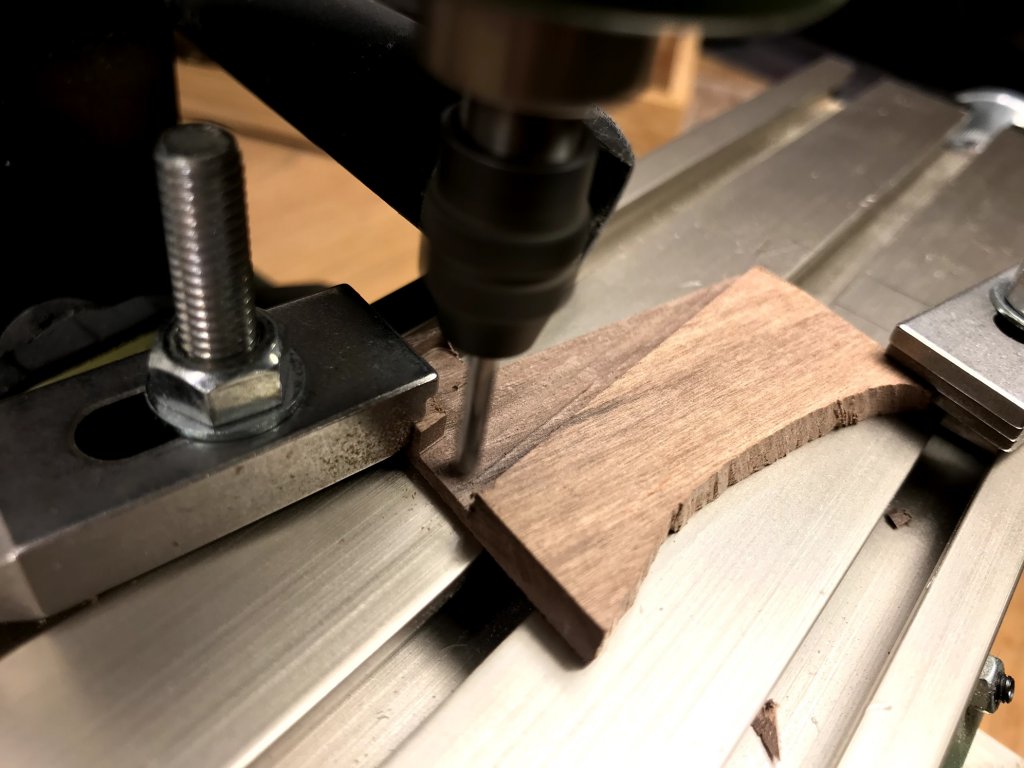
The part with the right color that I wanted to use was 5 mm thick but the channel is 2 mm so I had to milled it to right thickness.
Then I formed the channels and milled out the chain plate slots. I also drilled 0.8 mm holes for reinforcements.
I also created the outer part for the channel but this will be attached later when the chain plates is installed. It was very fun to start to be "creative" with the milling machine

This part is only 1,5 mm thick and i manage to mill the strip out with right thickness.
0.8 mm brass wire is used as the reinforcement. The parts is installed with wood and cuper glue.
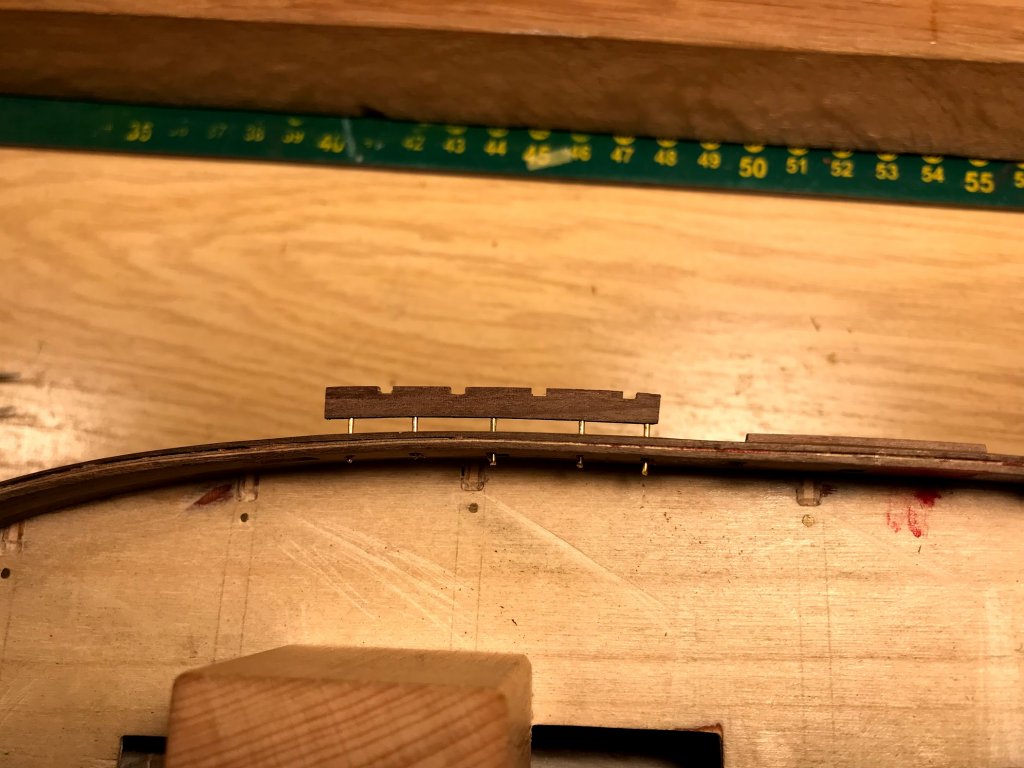
And the installed channel

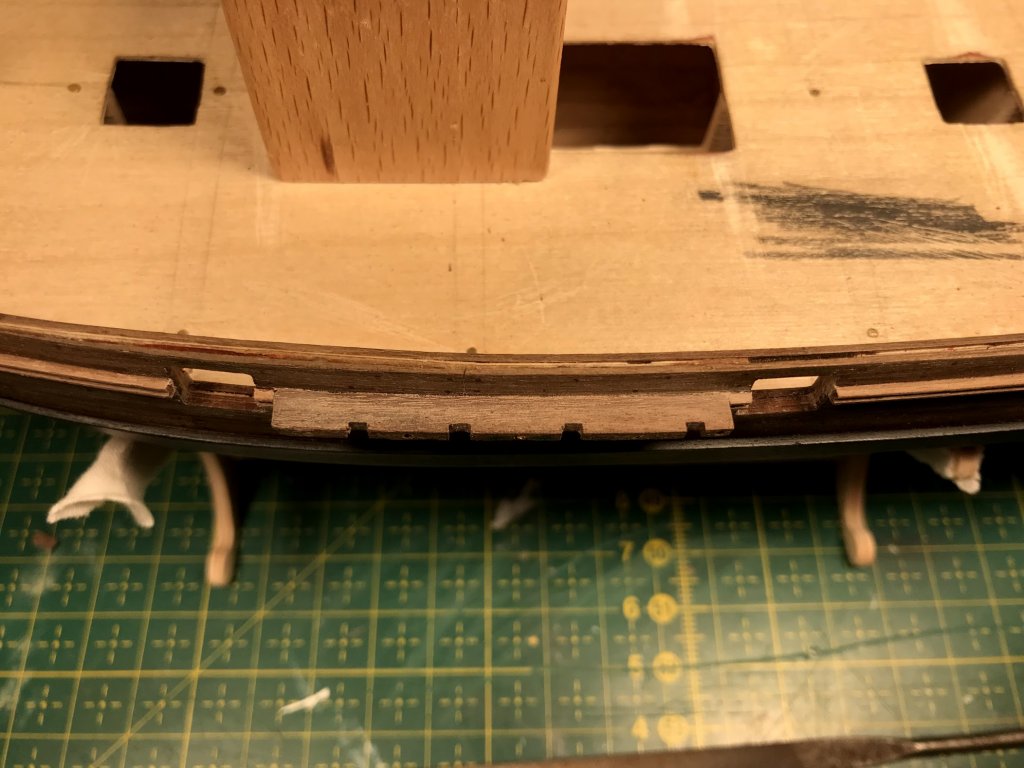
This is all for now. Next part will be the entry port ladders and it should be interesting to see if I manage to mille out the form for them that is presented in the Alert book.
- VonHoldinghausen, JpR62 and tkay11
-
 3
3
-
Hi again
I have been able to do more work on the stern.
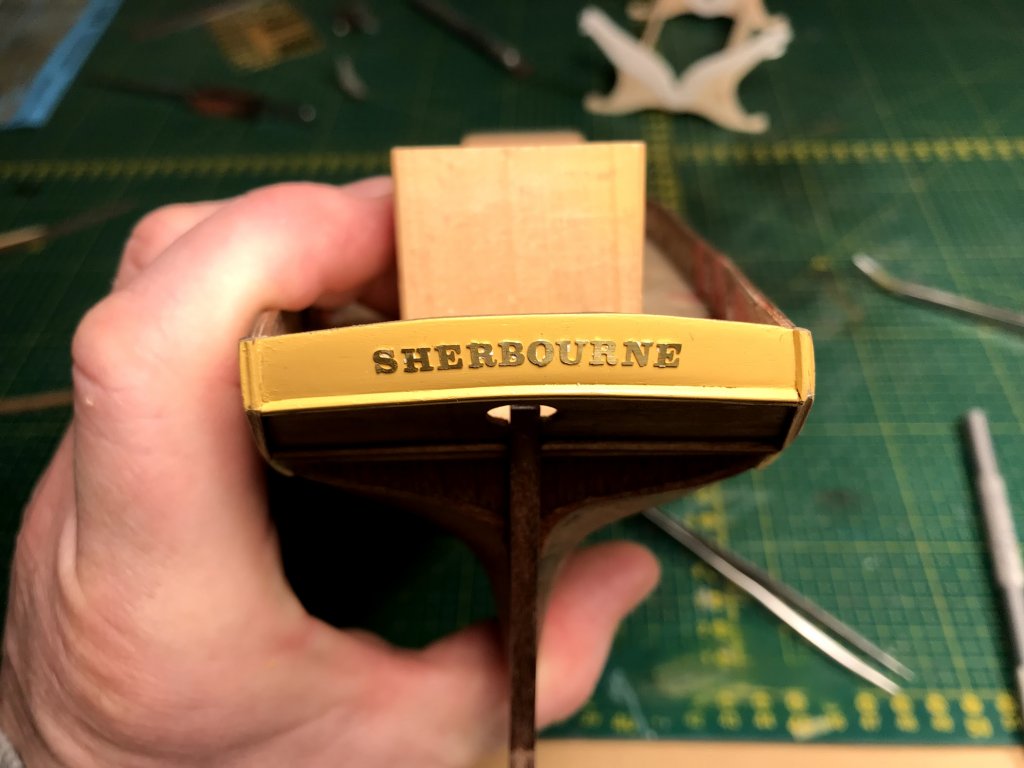
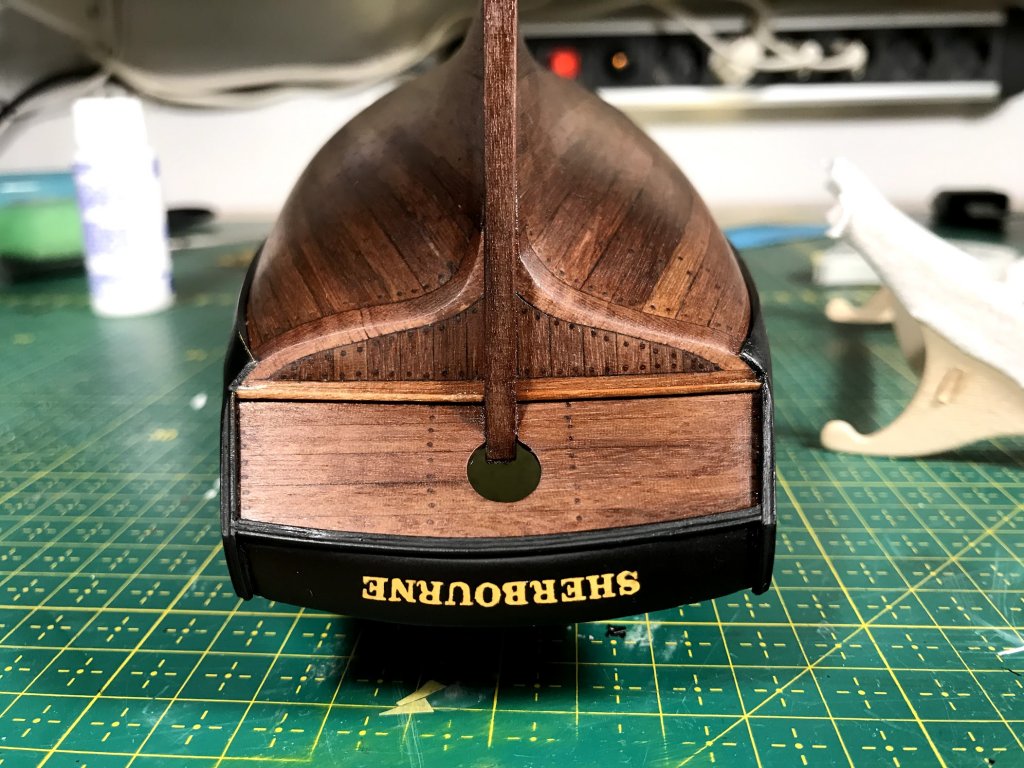
I didn't like the photo etch letters in the kit because In my opinion they are to big. So I order new from http://cornwallmodelboats.co.uk and they are much more in my taste. In the photo below so are the kit letter to the left and the new to the right.
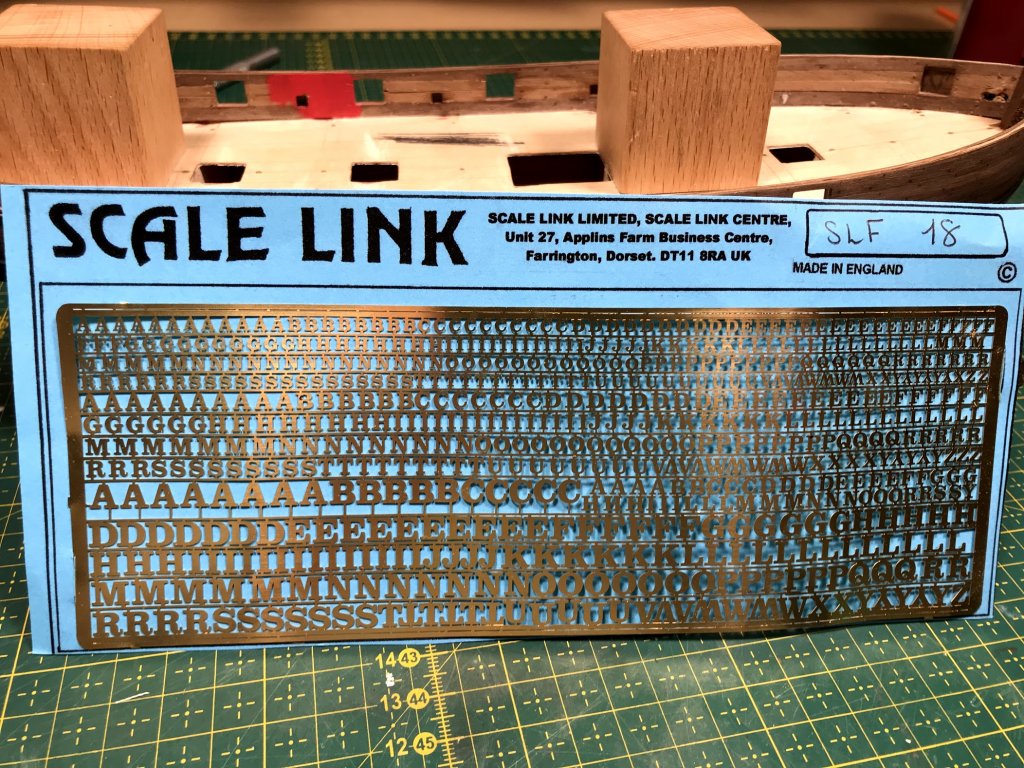
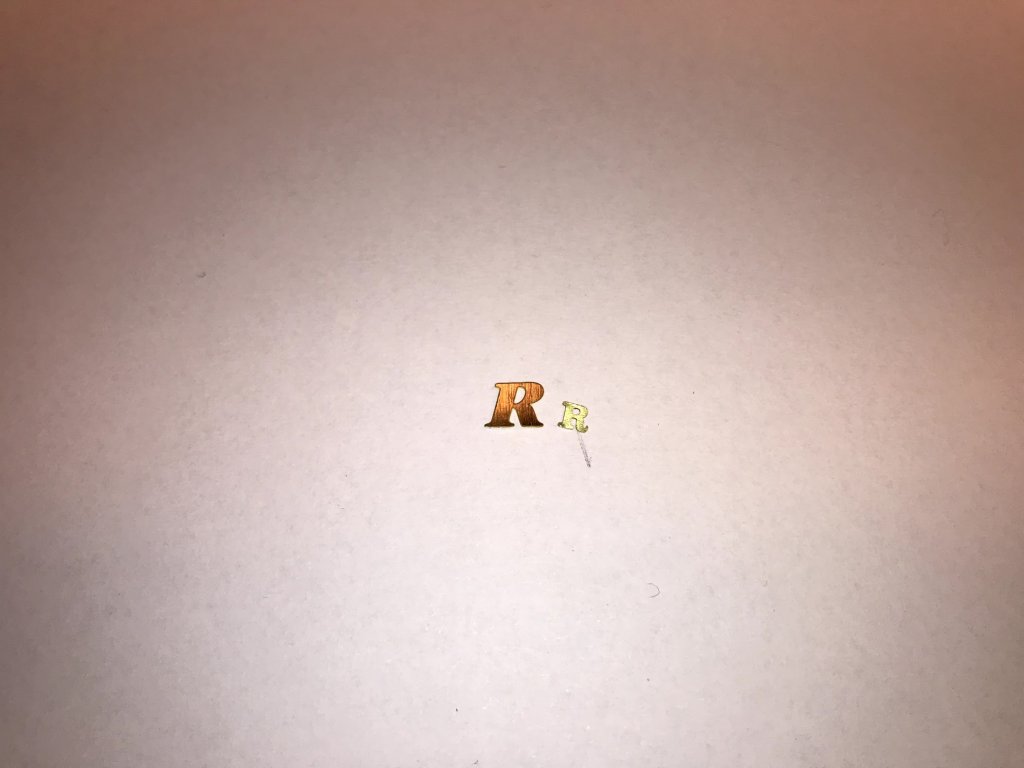
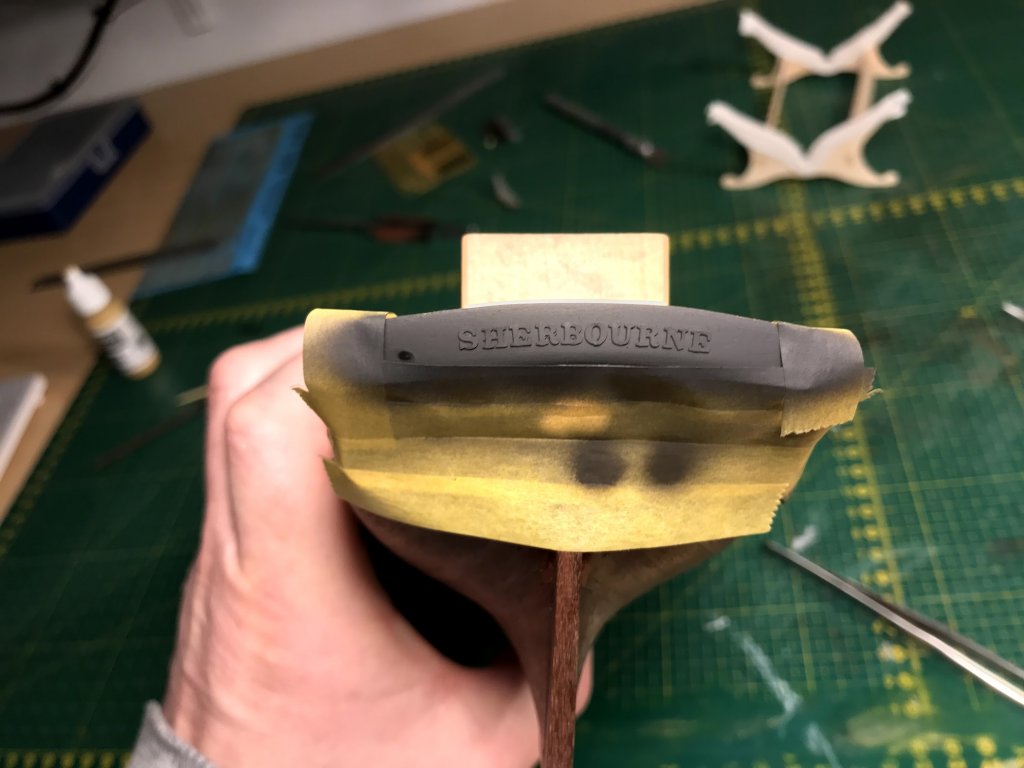
My first attempt to use them failed because I used blu tak to attache the letters but even how small amount I used so were the blu tak spreading out to musch. You can see it on the photo below.
I sprayed it with black but after removing the letters the bad result from the blu tak was shown.
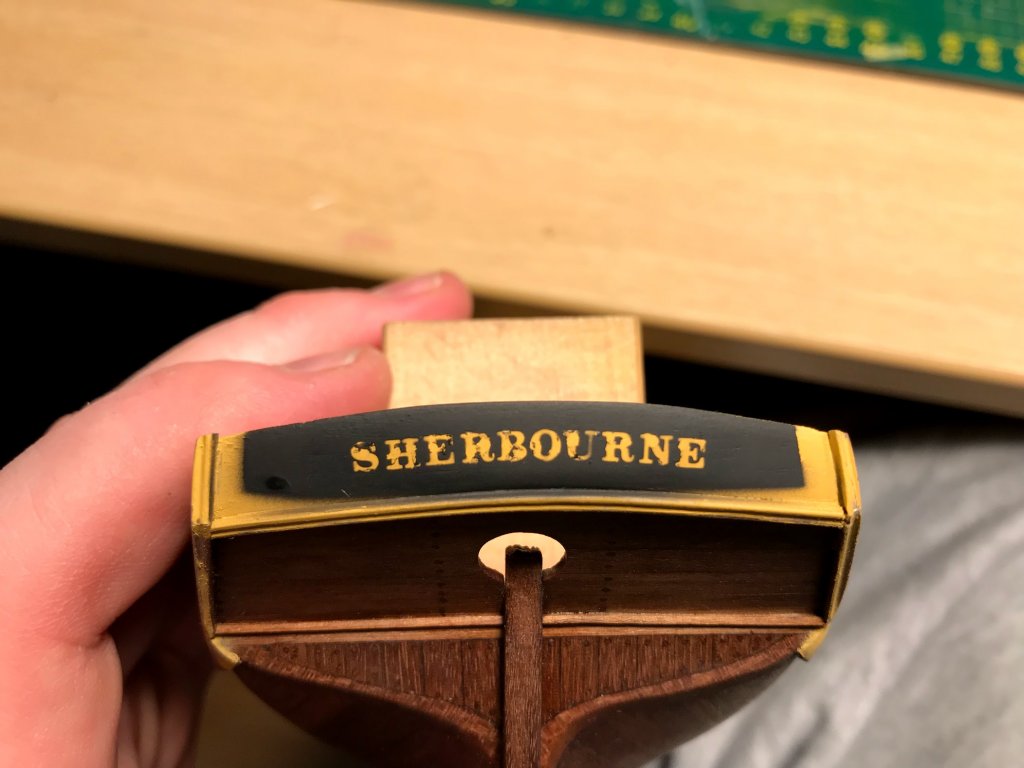
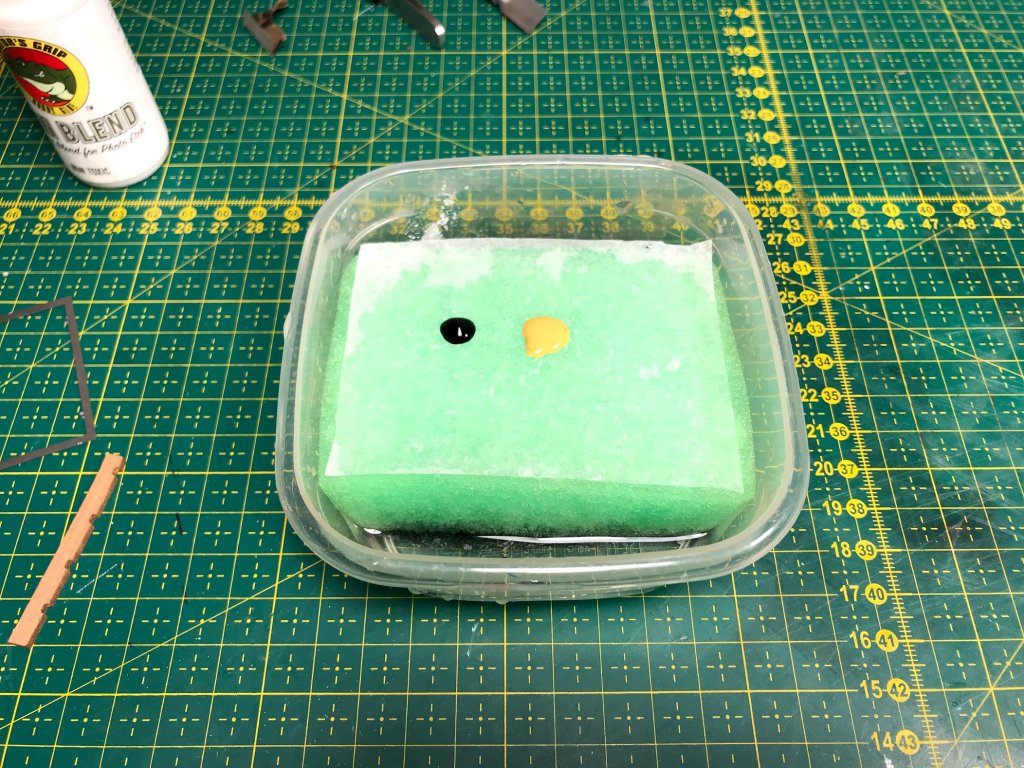
I was not at all happy wit h the result so I sanded it down again and repainted it. Then I used Tamiya X22 clear for protection because I used white glue instead to attach the letters. Then I sprayed it with MRP black lacquer paint because i removed the letters with little water. It was still not perfect but I learnt how to make a wet palette for acrylic colors and I then had the time to fill in the bad areas with a 10/0 brush. Here is a photo on the wet palette and here is a link how to made it, I can highly recommend it if you paint with acrylic colors. https://www.youtube.com/watch?v=QMPn5po5-m0
After this a paint the other areas black with Vallejo models color and the sprayed it with Tamiya XF-86 flat clear to even out the colors. I was then forced to re oil the stern because the masking tape had removed old oil...
I am really happy with the result so I can continue on other parts now and this is all for now


- JpR62, Ryland Craze, egkb and 4 others
-
 7
7
-
I will think on it Tony and it is an interesting idea (Me doing an guide here...
 ). I will soon paint my other FW 190 D9 in 1/48 so maybe do something there. Have some more work to do before painting and Sherbourne take my time for the moment.
This is also the very good benefit to work with "two ends" of the hobby and combine them.
There are some interesting things I have discovered since I started to build wood kits and read books and followed build threads. They are (this does of course not apply to every one)
- Resin is or plastic parts are forbidden.... Some people seems to think that if a part is of white metal or something the quality is so much better than if the part were of plastic or resin. Funny because the details in resin parts is light years ahead of what you can get in white metal.
- Sails seems to be avoided at all times. The idea is that they are impossible to do because of scales etc. Well many more things is done and they are still in wrong to scale. I read in a book by a quite famous builder (i think he was since he did many books) that he didn't want to touch a nail to do stitch or the sewing machine (in my ears it sound like it was a woman's work.....)
- Caldercraft Admiralty color seems to be THE color brand to use

-
Tony, i can't paint without it. I just hate to paint with a brush. Airbrush gives superior finish. I can highly recommend it but it is some investments. But you do not need any expensive compressor or airbrush to start to learn. And it is not hard to do. Much easier than the skills you already has learned during your shipbuilding:)
-
Hi again
Today was a very good day in the cave, I was aloud to work the whole day on Sherbourne since my wife gave me permission....

So here is what I have done (some parts was done during the week)
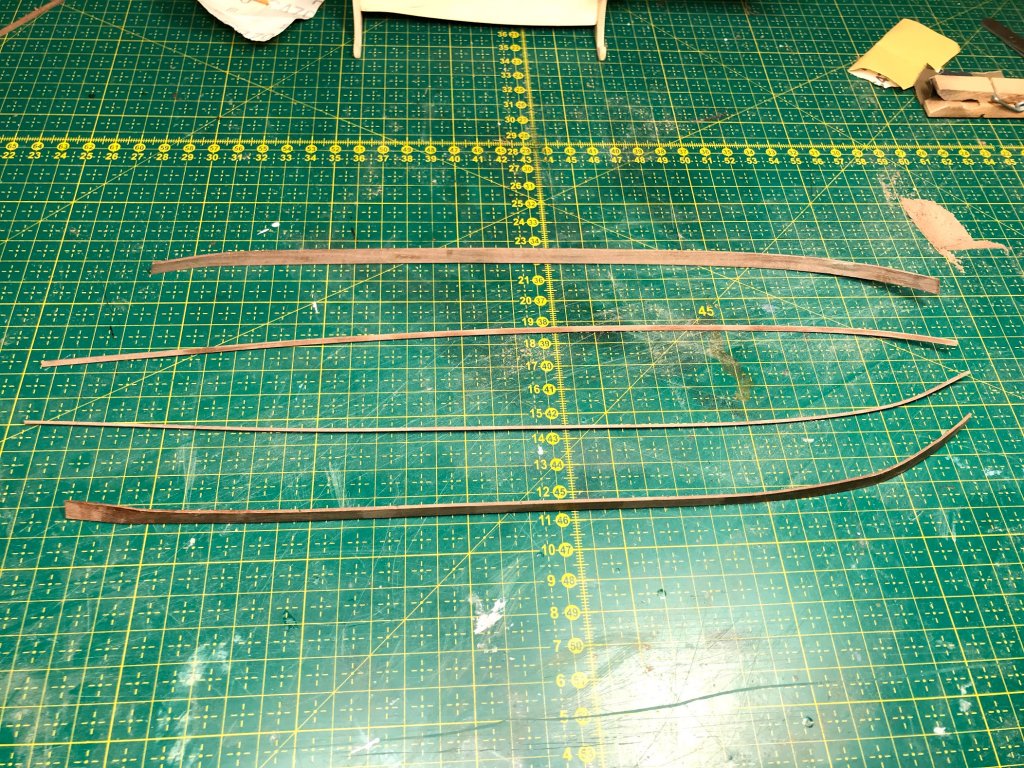
I have formed the whales in water and the have then aloud to dry attached to the hull to be able to get there form.
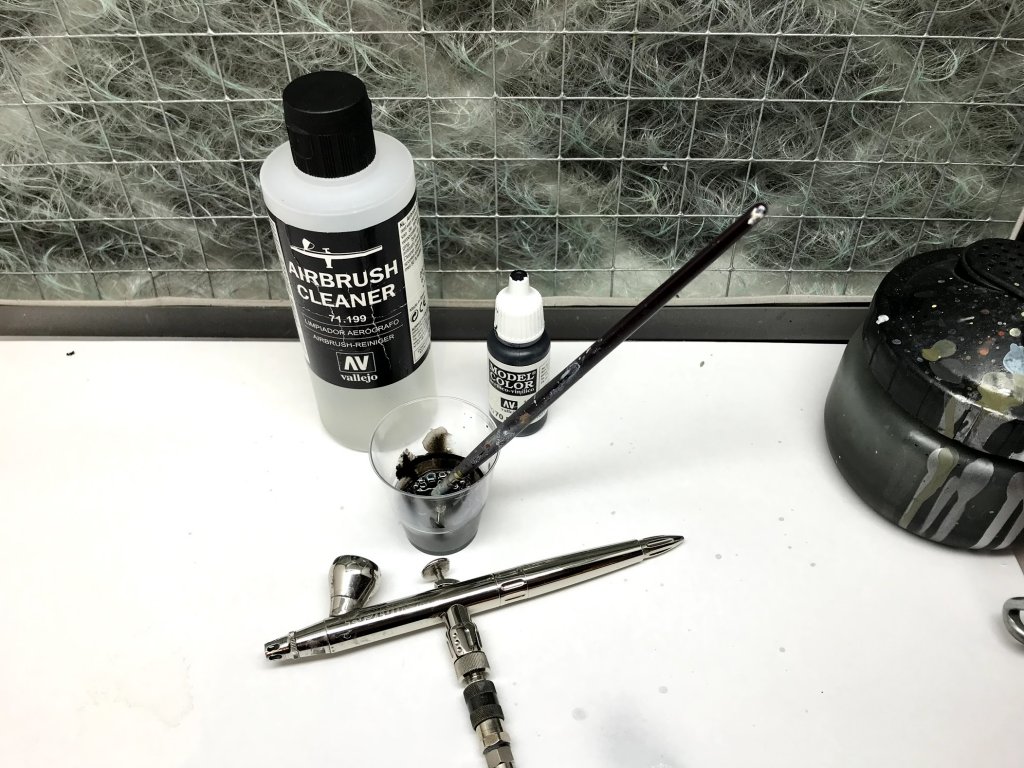
The wales was painted black with airbrush. I used Vallejo Model Color Black diluted in theres airbrush cleaner.
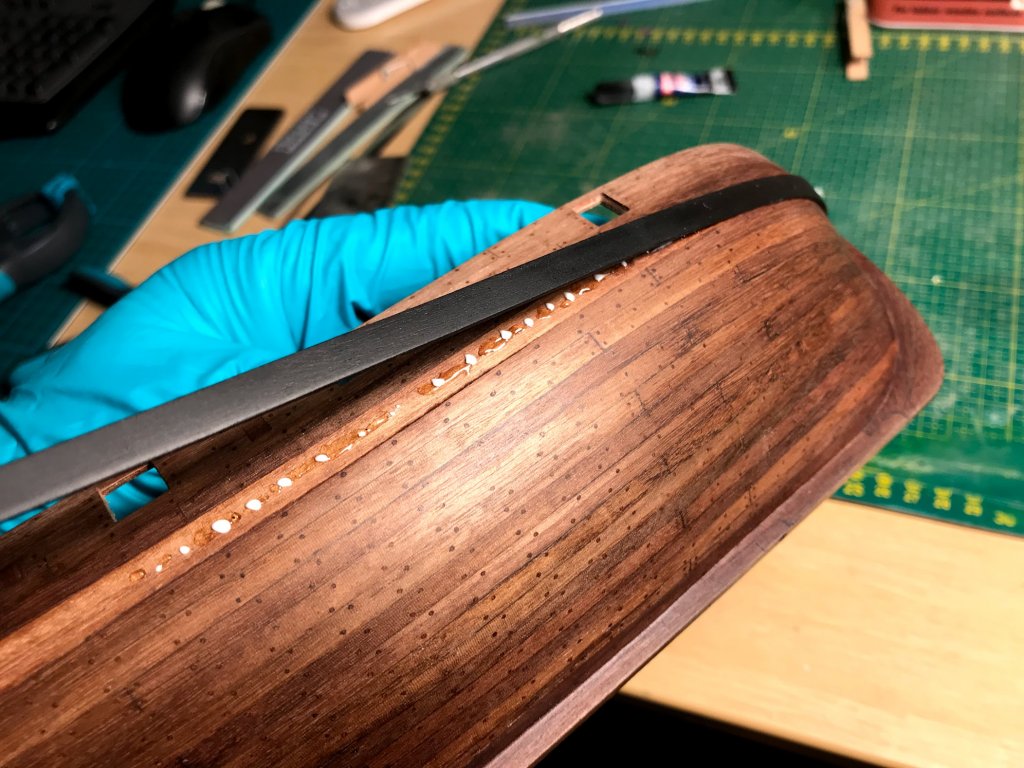
After this I glued them in position with superglue and wood glue.
I constructed some counter timber. They can't be seen on the drawings for Sherbourne but I think they are a nice tough and also they make the stern "come together" and hides the joints.
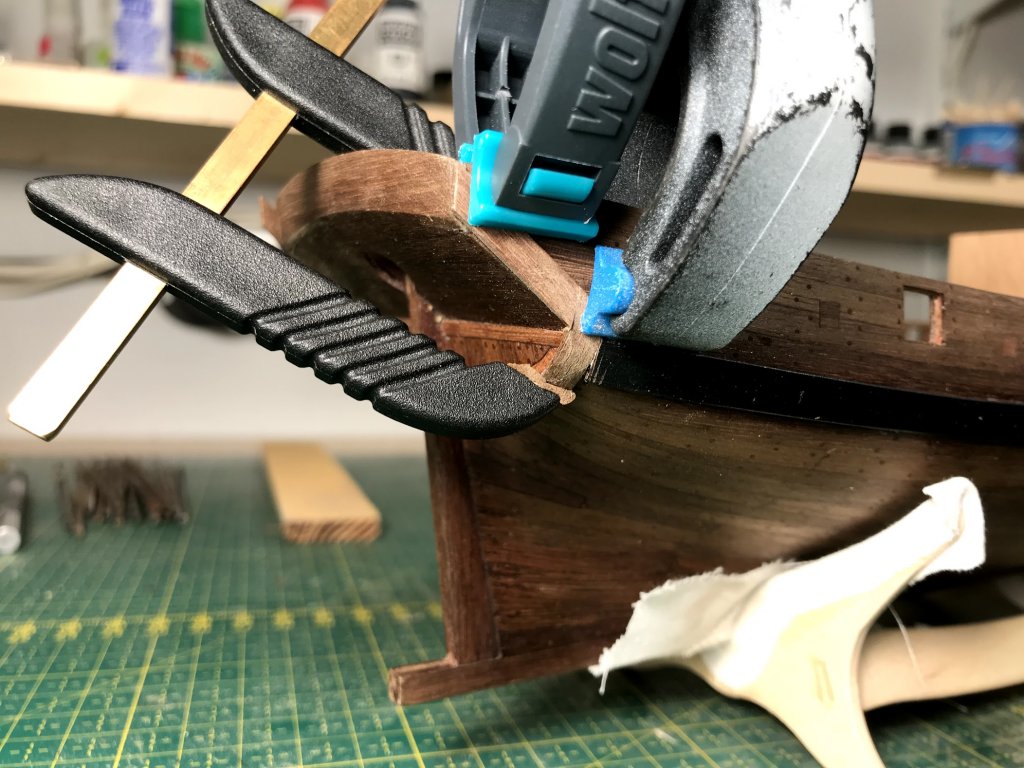
The rails for the stern were constructed and glued on the the hull.
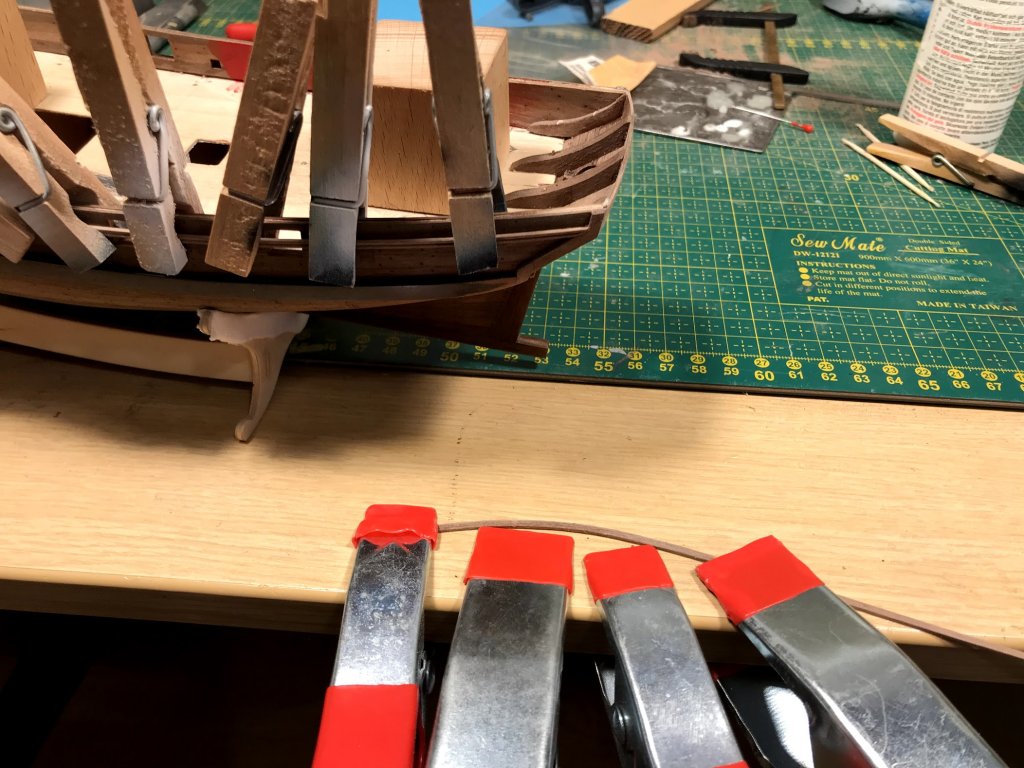
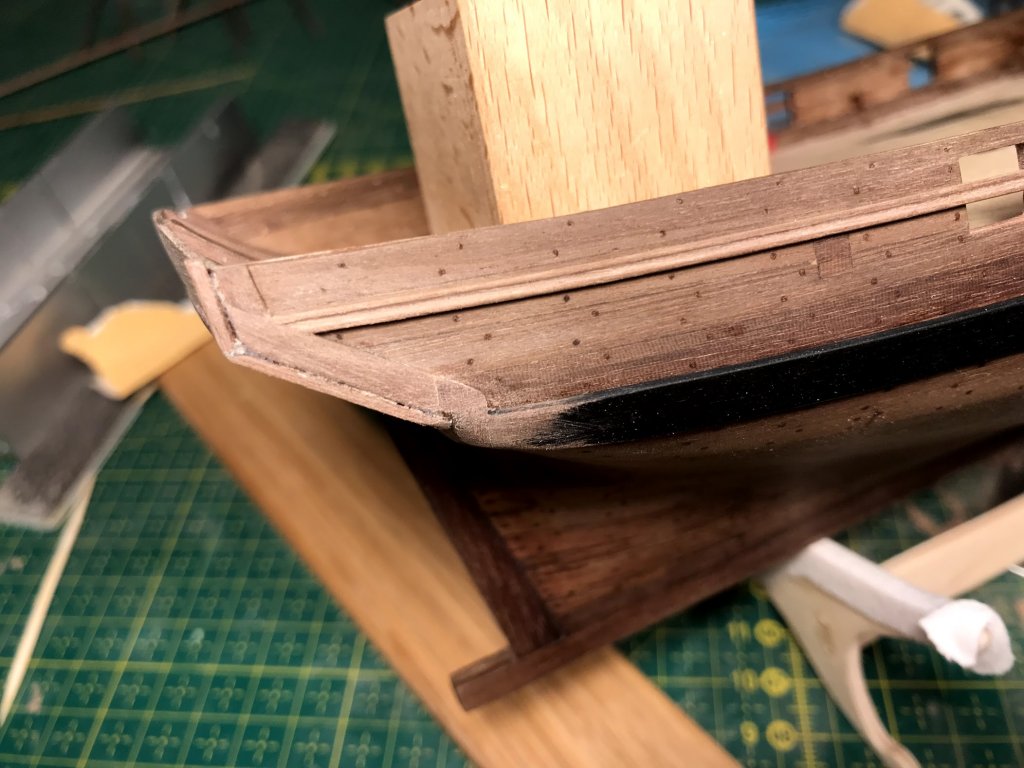
The joint from the stern rails to the counter timber were not so nice....
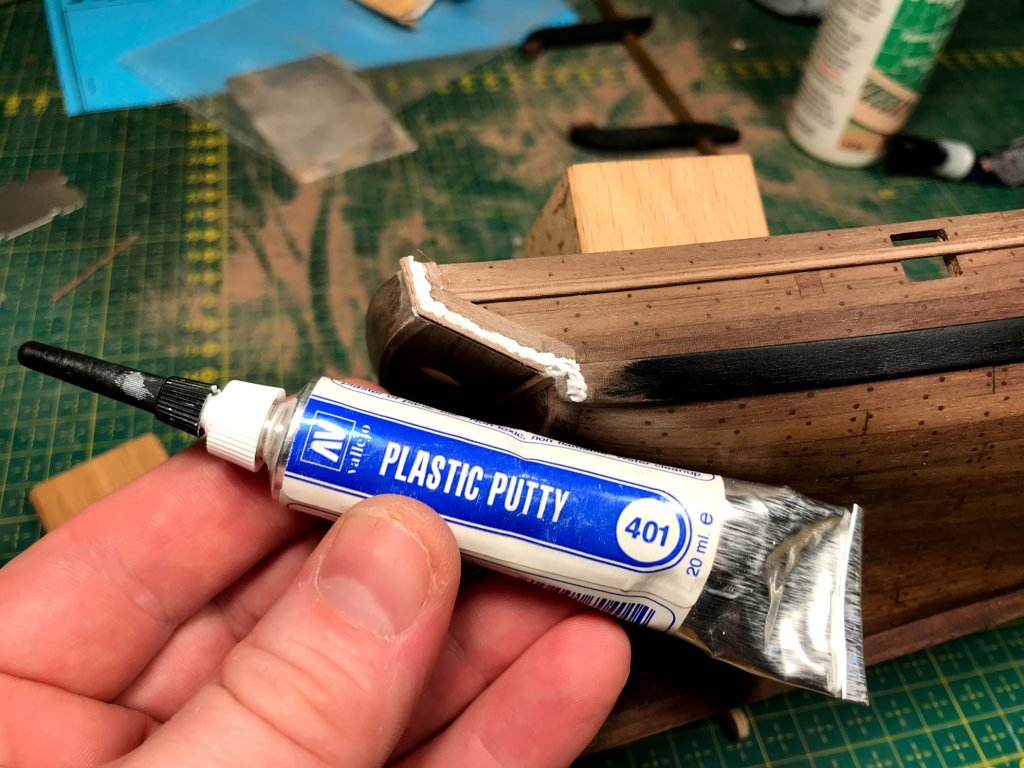
But this is fixed by vallejo putty
And here is how it looks like when finished. I have thinking a lot on how to make the stern on Sherbourne because I didn't like it at all how it was presented in the kit. So this is my way to do it. Others have done it different.
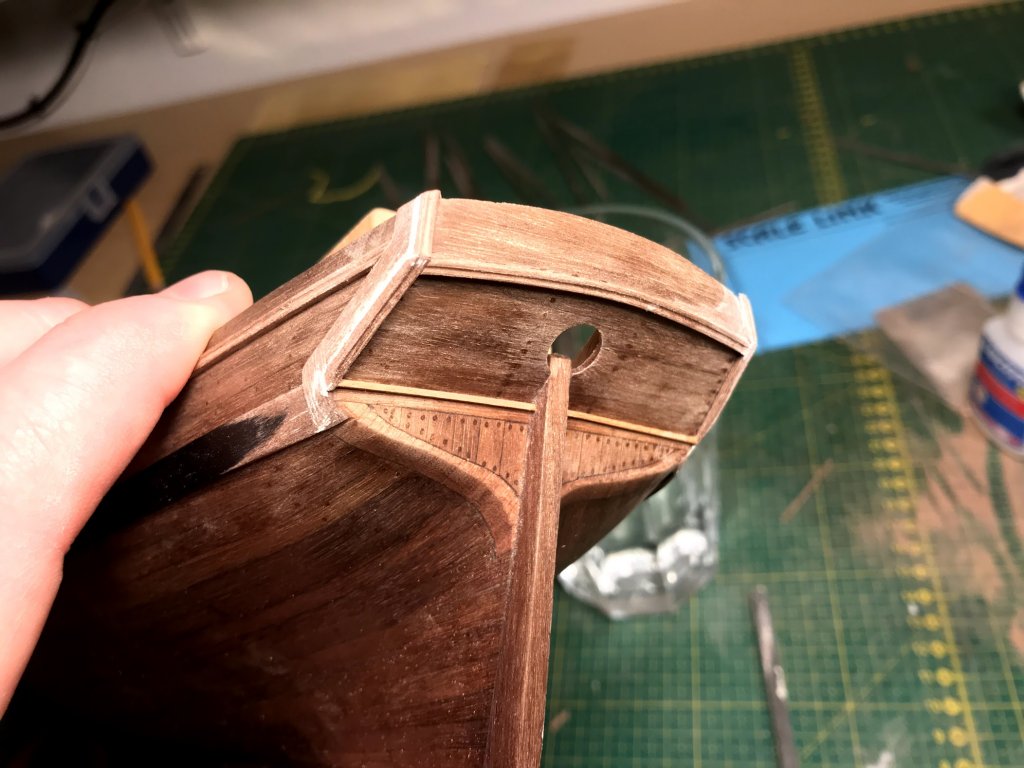
Now next step, some masking tape.
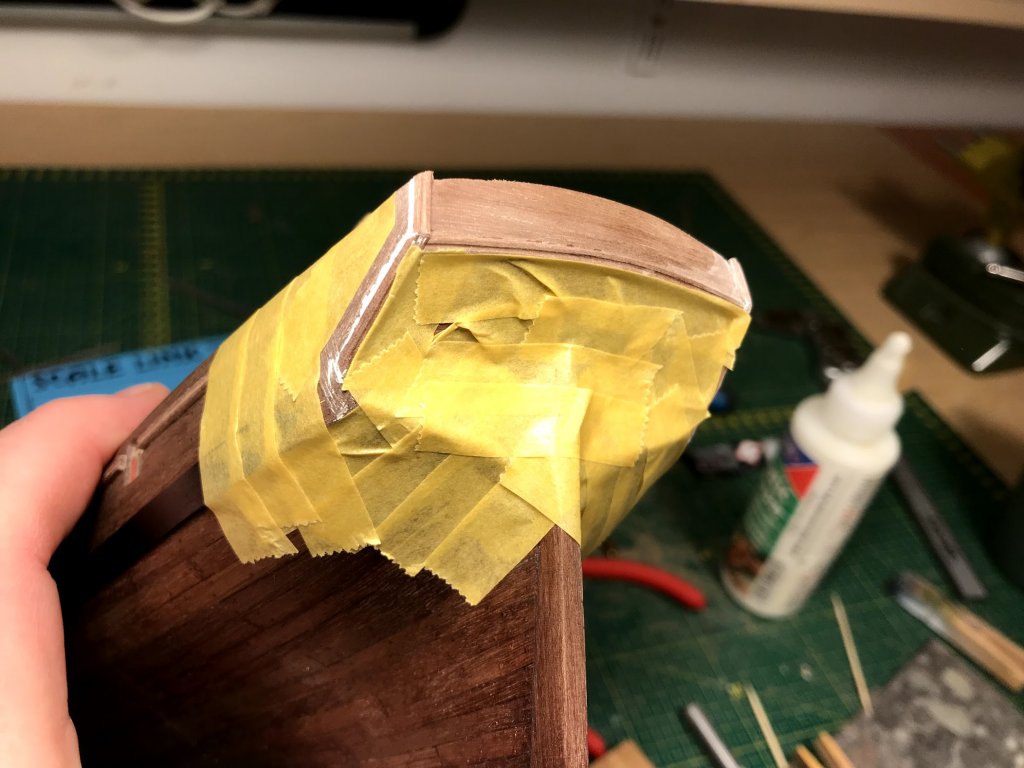
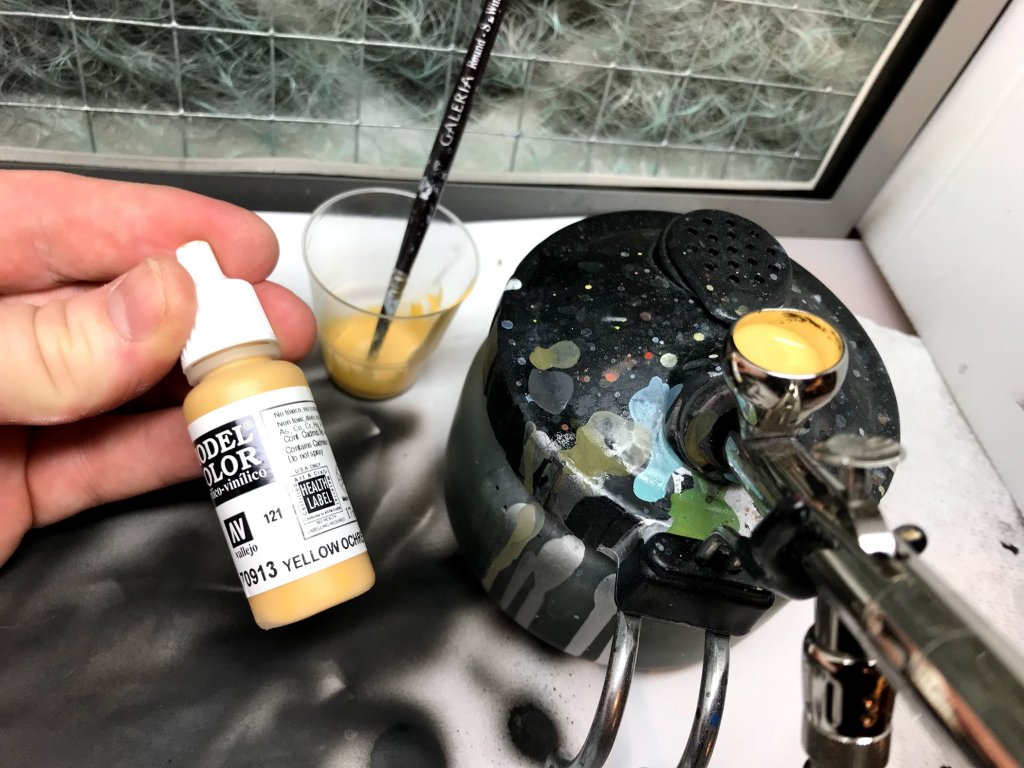
And Vallejo Model Color Yellow Ochre diluted in airbrush thinner was sprayed on
And when masking of the tape it seems that Tamiya masking tape seems to disolve the tung oil. This is very good to remember for the future to avoid problems. It is easy fixed again by just wipe on oil again.
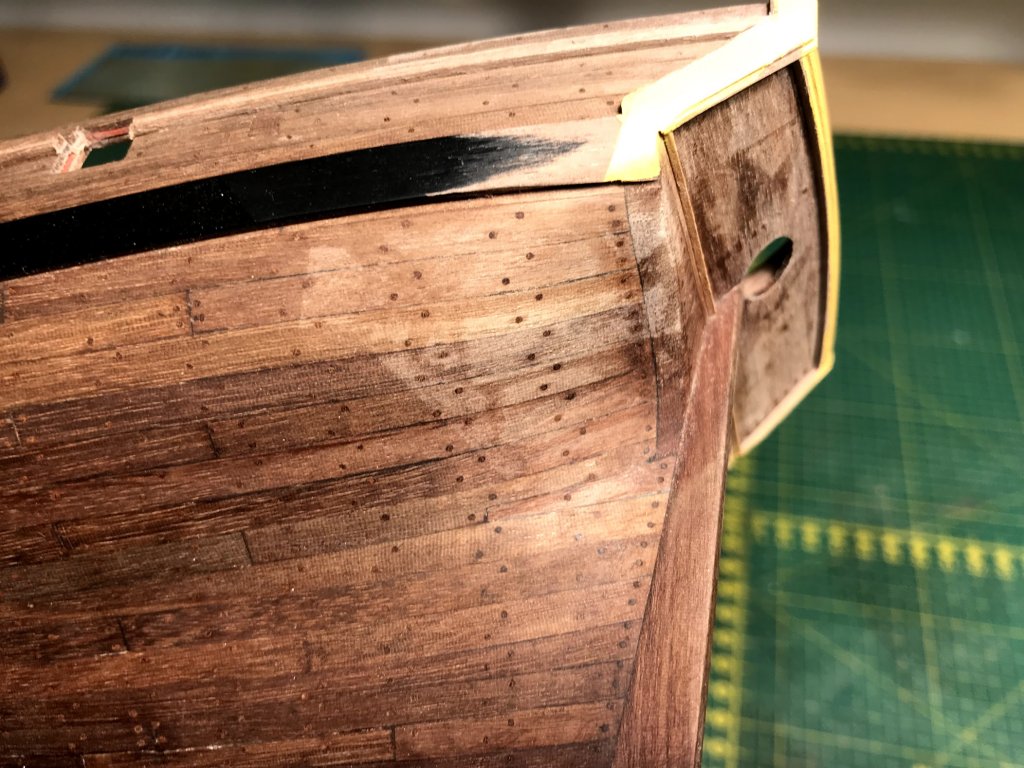
And here is the result
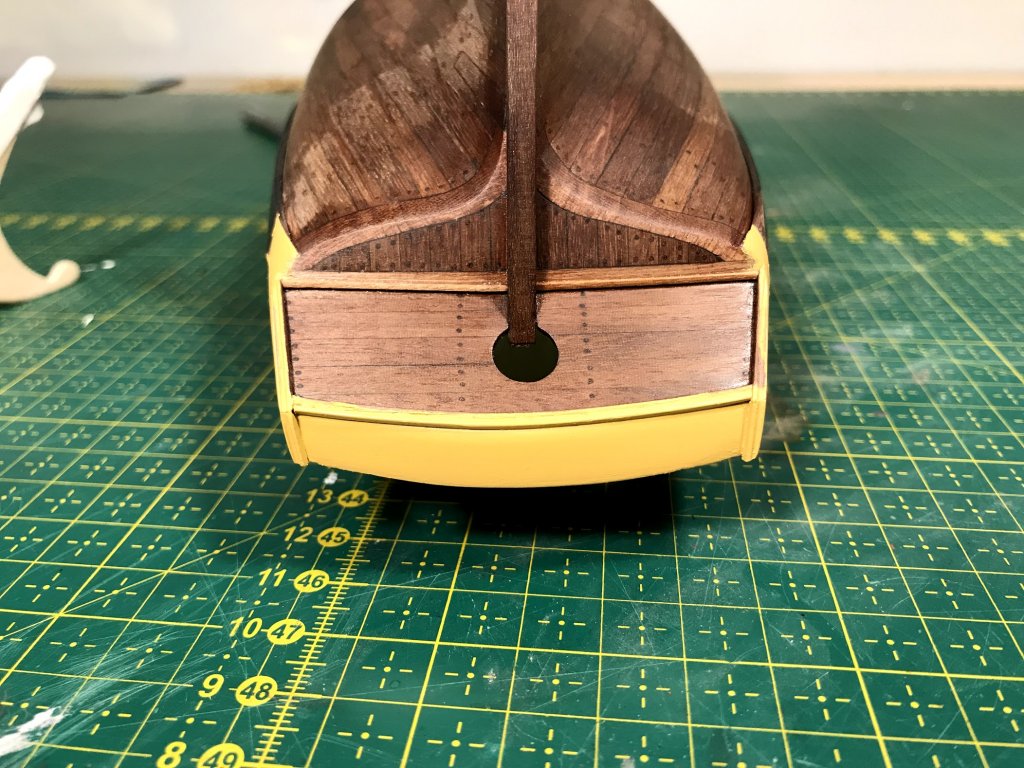
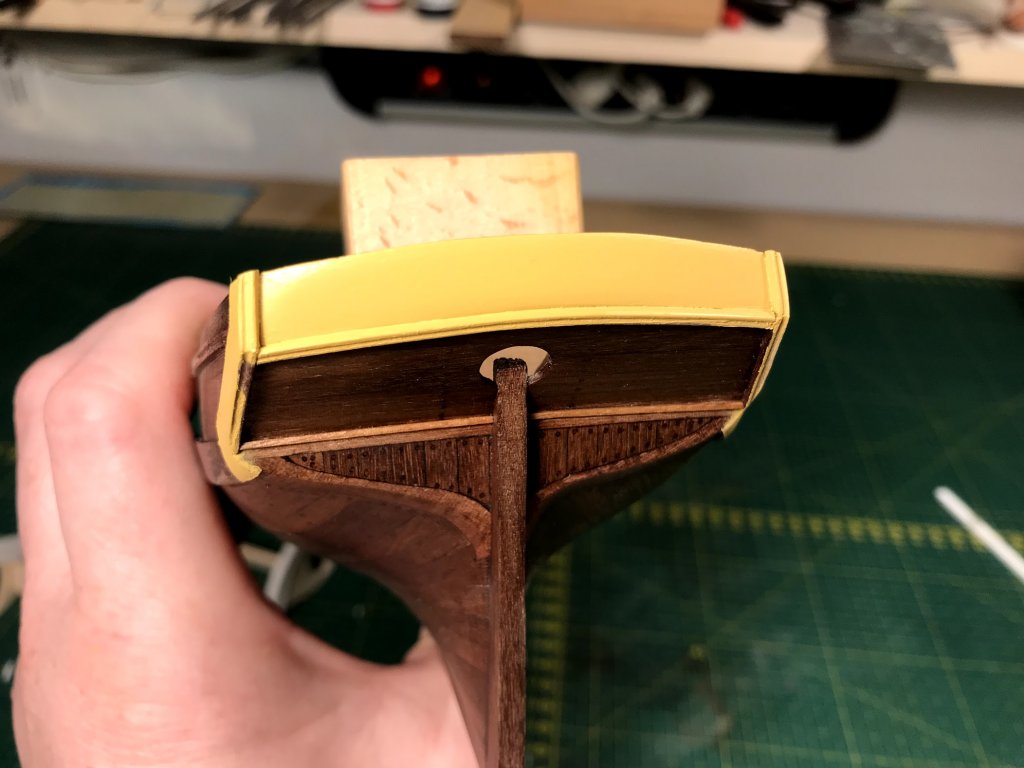
So this is all for now. Now it must dry to morning so I can continue with the stern to clean it upp and try to name the ship :)
Jörgen
- Ryland Craze, egkb, cog and 4 others
-
 7
7
-
Great Job. It looks really good.
-


![[image]](https://modelshipworld.com/uploads/imageproxy/410458e163364fb9f54480853e144c6a.jpeg.2c9db5fa7168971b24b87e519c36dab6.jpeg)
![[image]](https://modelshipworld.com/uploads/imageproxy/2b15568087b01611935ca1afb147a54a.jpeg.eb05ba0bcc8bdcbc4277c713b9309dae.jpeg)
![[image]](https://modelshipworld.com/uploads/imageproxy/0d3afee8f2d90480f4e554c636b3af15.jpeg.f1ea745d99806de167c33bcaf38ef9e8.jpeg)
![[image]](https://modelshipworld.com/uploads/imageproxy/696673f620722446d529eb7afdf60977.jpeg.26ae3ad9ca3dbec64e85d0f7895224dc.jpeg)
![[image]](https://modelshipworld.com/uploads/imageproxy/daff5f4861e05485bd60ce999c9f56d2.jpeg.2087ee7004a62040094bbcd1eee79622.jpeg)
![[image]](https://modelshipworld.com/uploads/imageproxy/24f0e0bc492a02326df0ead2f281ed3c.jpeg.071fd3d623a96edba99e0407056a53f6.jpeg)
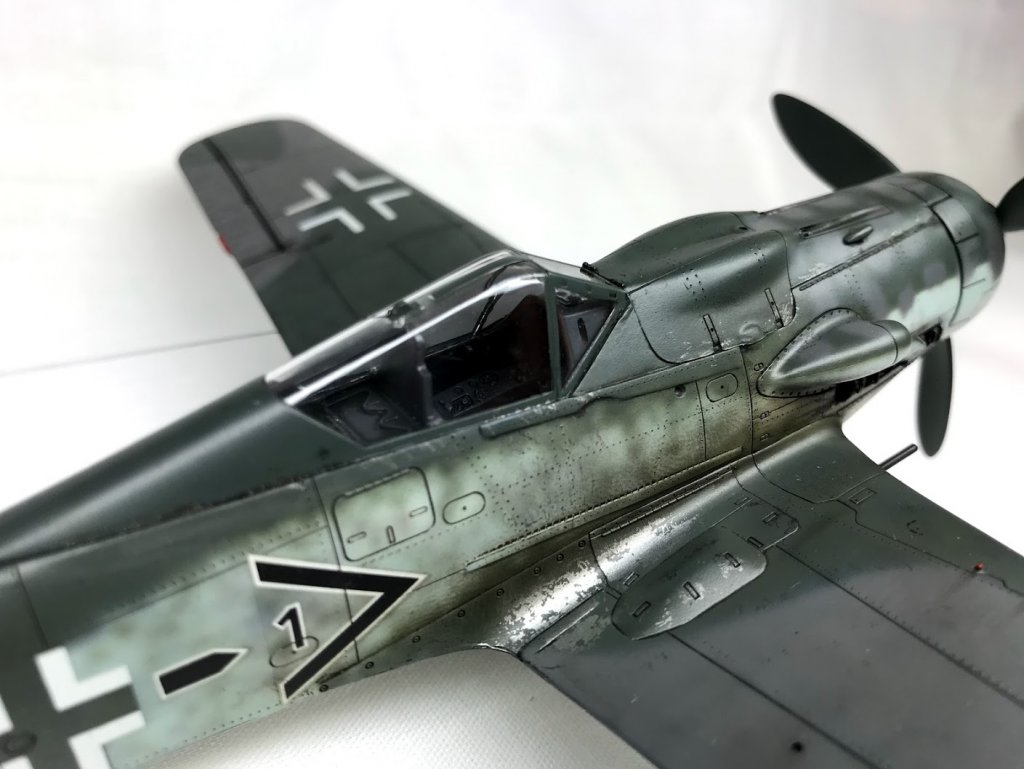
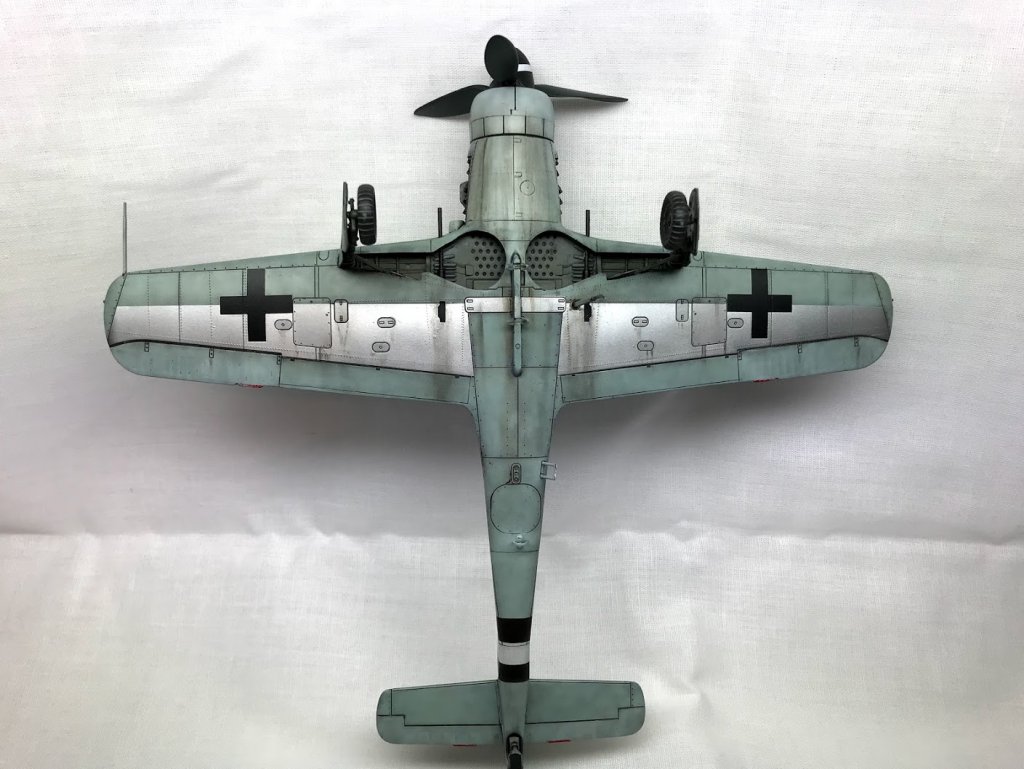

Airplanes and Tanks in plastic by Jörgen
in Non-ship/categorised builds
Posted · Edited by Jörgen
Here is my 1/48 Polikarpov I-16 Type 24 from Eduard. It is built out of the box and painted with MRP paints. I hope you like it even if the photos is little bit dark
![[image]](https://modelshipworld.com/uploads/imageproxy/249053c3859aa2f7dd721dae7c3a454b.jpeg.2af485843ca27baed8ac772933b5f19b.jpeg)
![[image]](https://modelshipworld.com/uploads/imageproxy/cb4a53a2bbce7f6708085f27615fbef5.jpeg.cbae850486983974d5cecb8975a26e45.jpeg)
![[image]](https://modelshipworld.com/uploads/imageproxy/5e048b6b089590033191ed8bd0f24f23.jpeg.5c2aedcaa6386356a61cccc3e4680ac5.jpeg)
![[image]](https://modelshipworld.com/uploads/imageproxy/31a08f96d6af527adc0e266ce17a960e.jpeg.350d31089922cfb46c9011ca2145436b.jpeg)
![[image]](https://modelshipworld.com/uploads/imageproxy/33281e67b953a8fa6d56b98e1933f2c7.jpeg.23ae85bfdf6a282f38fdbbd15f1d5920.jpeg)
![[image]](https://modelshipworld.com/uploads/imageproxy/a36149d3400f7408ea6b7aec496f5b76.jpeg.f57ee584e7db0deb453f4d5fbc79c0f3.jpeg)
![[image]](https://modelshipworld.com/uploads/imageproxy/9fdbc1663f8ec46dce10ffe5d74ef4f7.jpeg.3c300d17e088448b0b1db76fe089a0a0.jpeg)
![[image]](https://modelshipworld.com/uploads/imageproxy/e8c781a2f93319355e4719d7c517aede.jpeg.15f9ca785347402bc207546e3e75a2de.jpeg)
Jörgen