Moonbug
-
Posts
1,028 -
Joined
-
Last visited
Content Type
Profiles
Forums
Gallery
Events
Everything posted by Moonbug
-
 Thanks Nigel and Lawrence I appreciate the comments. Today felt like a day where I did a lot of work but got very little accomplished. I did quite a bit of reading but still haven't discovered a solid infor on belaying to the bulwarks. No worries, I'll press on with my best instincts. I applied a couple cleats and some rails to the poop deck. Which turned out to be a much bigger challenge than I thought - I had to make sure I mounted them while still having enough room left to "open" my poop deck so that the captain's cabin can be seen. Pretty narrow window there. We'll see if it holds up later when the rigging goes up. I'll post some photos when I get a little more done and get a chance. -Bug
 -
Awesome, the copy of "Vanguard of Empires: Ships of Exploration in the Age of Columbus" I requested showed up at the library already! My lovely wife couldn't help but make fun of me of course - noting that this was likely the first time the Librarian every needed to notify anyone of this book. This was compounded by the fact that the last time it was checked out was apparently in November of 1998. Nonetheless... let the research commence! Thanks again for the tip Marktime! - Bug
-
Hey Sjors, nice work. What's your reference for being able to tell what will be visible and what to plank on the lower deck? -Bug
-
Thanks guys. Can't wait to see your aporoach Grant. -Bug
-
Nice work Vivian. How did you add the cross? Was it already on the sail? -Bug
-
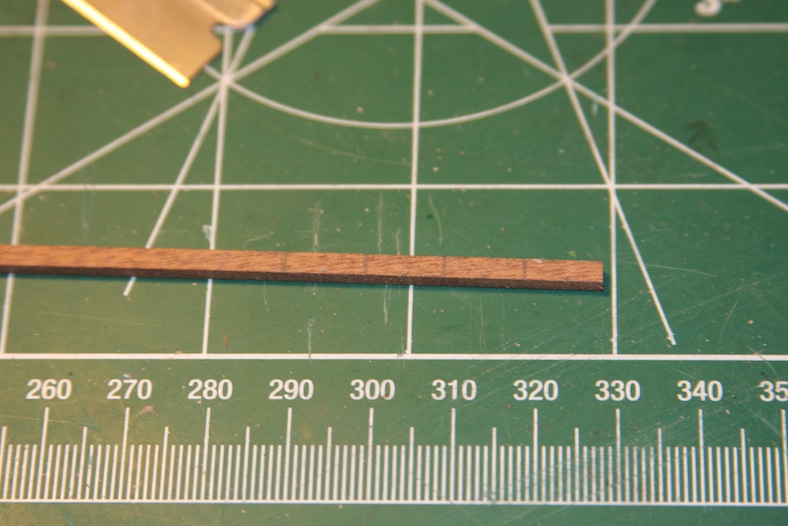
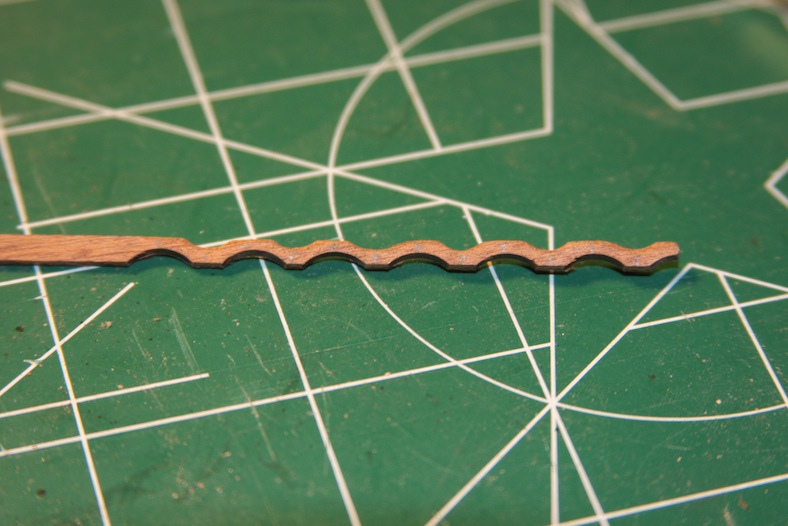
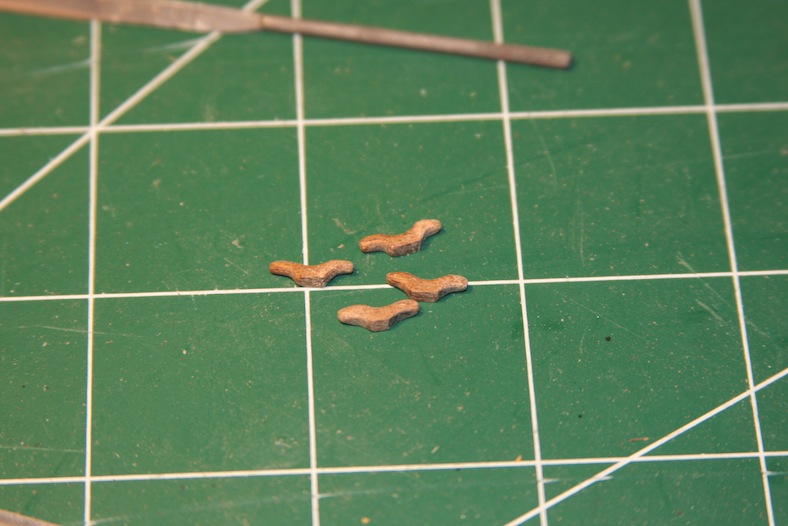
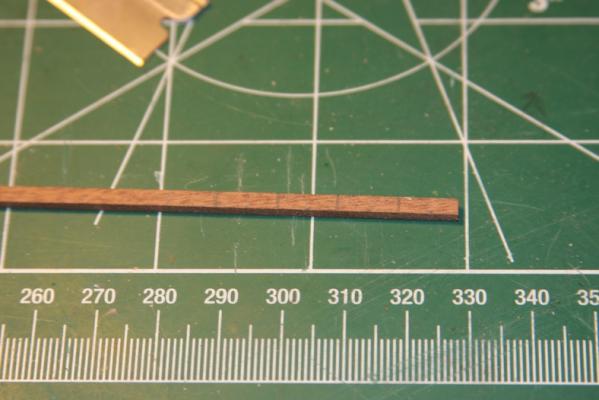
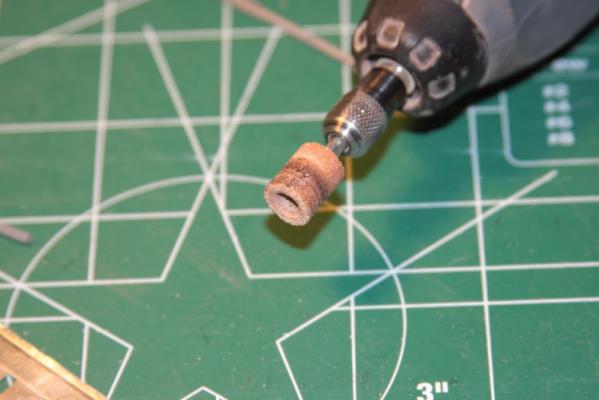
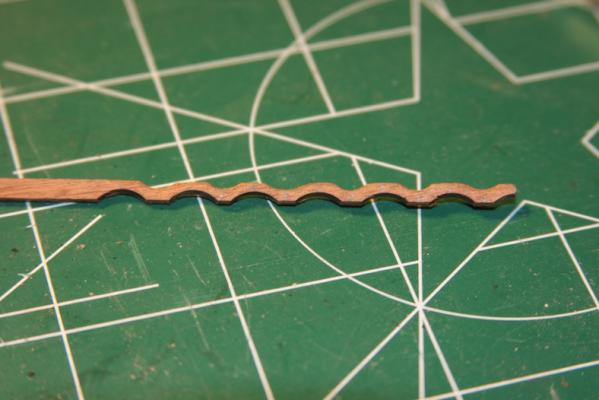
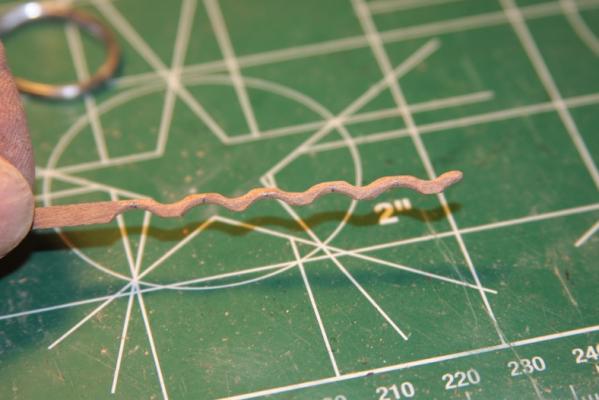
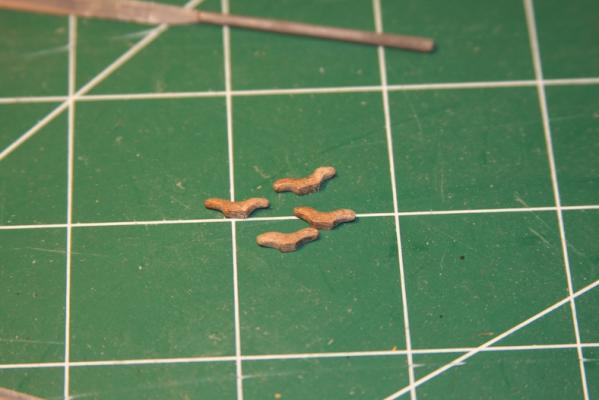
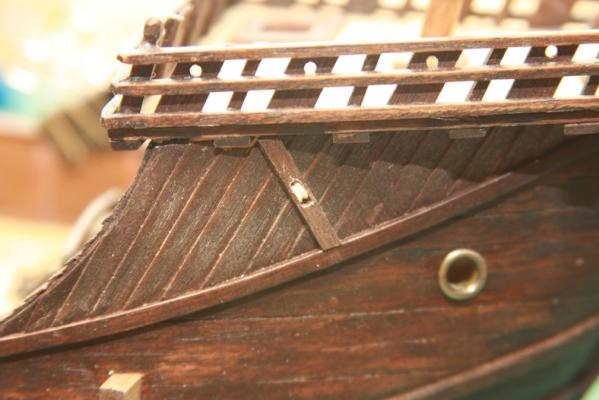
Time for cleats. After a couple failed attempts at making wooden cleats for the bulwarks, I finally came across this entry from Floyd: http://modelshipworld.com/index.php?/topic/1906-wooden-cleats/ which of course made me feel silly for not looking here in MSW first. Doh. At any rate, I used a very similar process starting with a 3mm X 2mm strip, measuring off every 10mm for the width of the cleat I needed. I used a 10mm dremel grinder for the bottom of the cleat and a 3mm to 7mm conical shaped grinder for the top. I then sanded and rounded the edges with 400 grit sand paper. I did this BEFORE I cut them apart since sanding any kind of small piece is much easier for me if it's still on a stem. After cutting the cleats apart I rounded the edges.

- 274 replies
-
- 10
-

-
- Santa Maria
- Artesania Latina
- (and 2 more)
-
Hey Wolf - I'm telling you right now that although I'll need to alter the shape a bit to fit my Santa Maria's time frame - I'm totally stealing your techniques for my second life boat. Nice work! - Bug
-
The church model is the mataro found here: http://www.maritiemmuseum.nl/digitent/mataro/online/eng_mataronline.pdf which proved to be pretty helpful for me when constructing the head beam and prow of the ship. The Artesenia Latina plans and inclusions are pretty weak also. I completely abandoned the plans early and have since relied very heavily on Xavier Pastor's book "The ships of Christopher Columbus" as well as some other research. I just ordered the book "Vanguard of Empire - Ships of Exploration in the Age of Columbus" Roger C. Smith to be delivered to my library, as pointed out to me by marktime. - Bug
-
Very cool. Man, I see so many of those proxxon's... Drat, my next birthday is too far away. hehe - Bug
-
Love the sheaves! I gave it a go with a working sheave, but ended up having to bail on the idea and went with "simulated" because I just couldn't get it to work. Congrats! - Bug
-
Yes of course - and regarding the entire ship. I didn't realize how little actual information there was, and how much conjecture there was before I started this build. I assumed such a famous vessel would be easy to reference. But alas, no. That has turned the project into a fun history lesson, a very interesting challenge in trying to balance historical accuracy with aesthetics, and of course a fun build. There's a lot of "yeah, that could have been right" as opposed to the "that's the way it was" builds like the HMS vessels of later centuries. - Bug
-
Today has become a research day in between "real" work. I've secure delivery of the "Vanguard of a Empire" book to which maritime referred to my local library. Now I'm trying to nail down what the cleats and belaying rails would have looked like. I can't imagine they would have been rails with pins, but it's a tough go finding reference that specific. -Bug
-
Really enjoyed being able to re-locate and catch up on your build, and then to start following it again Danny! - Bug
-
I use the same as Russ. I purchased a standard size container of carpenter's glue, and so far it has lasted for two builds and sets relatively quickly. - Bug
-
Good stuff! Can I see a wider shot of your makeshift guide and drill? - Bug
-
Great color and stain for that piece. Nice. - Bug
-
Cool, thanks. I'm still contemplating exactly how I'll illustrate my mainsail. - Bug
-
Yes Augie, I run into similar problems when I try to shape the basswood in any way. And Bob's Essex is definitely one of the builds I currently follow (and drool over). :-) - Bug
- 2,191 replies
-
- 2
-
-
- confederacy
- Model Shipways
- (and 1 more)
-
I've just stopped by to nudge you a bit like everyone else. :-) - Bug
-
Thanks very much Eamonn! - Bug
-
Rusty - if he hadn't have fessed up I'd have never learned the trick! - BUg
- 1,477 replies
-
- 1
-
-
- essex
- model shipways
- (and 1 more)
-
Hey Shawn, There always seem to be more bumps and valleys that you realize once you get started on the sanding. Be wary of using the CA glue, especially on the second layer of planking. Sometimes it has a tendency to seep through the more porous nature of the thinner wood and cause all sorts of problems and discoloration. This is particularly true if you're using the pure liquid kind (as opposed to the gel). I use CA for the very small parts, but tend to stick with PVA wood glue types for the rest. I've had much fewer problems with the longevity of the hold. - Bug