
HOLIDAY DONATION DRIVE - SUPPORT MSW - DO YOUR PART TO KEEP THIS GREAT FORUM GOING! (Only 13 donations so far - C'mon guys!)
×


Moonbug
-
Posts
1,028 -
Joined
-
Last visited
Content Type
Profiles
Forums
Gallery
Events
Everything posted by Moonbug
-
 Hehe, I should've known it was from a stash somewhere! -Bug
 -
Very nice. Those look great. -Bug
-
Nice work! And good to see you're training the young shipmate! - Bug
- 124 replies
-
- 1
-

-
- santa maria
- mantua
- (and 1 more)
-
Great looking guns, you nailed that paint mixture. - Bug
-
Grant - I have three girls, 15, 14, and 9. I'm all about embarrassing them when I can. I'm the crazy ex combat veteran all the neighborhood boys fear. I like it that way. :-) - Bug
- 274 replies
-
- 6
-
-
- Santa Maria
- Artesania Latina
- (and 2 more)
-
Nice work Bob, and great input from everyone. I'm sure glad you guys are all ironing out the bumps for me before I get to a coppering job! - Bug
-
Dan, What's the best source for English Box, Hobbymill? - Bug
-
That's hysterical Eamonn! A great plan. My middle daughter for one is obsessed with them. Last nights work - display adjustments. When I first moved into my house I built a bookshelf into the wall of the downstairs family room to accommodate the pretty large number of books and movies we have. My San Juan Nepomuceno was on display in the upstairs family room on an end table. Looked good, and people saw it when they came in the house, but it was a little obtrusive and my lovely wife wasn't super fond of it. That led to the discussion of "What are you going to do with the Santa Maria." Then a FURTHER conversation when I started mentioning my future build of an HMS vessel - a more adamant "Well, where's THAT going to go, we don't need giant ships all over our house!" So here's my solution - I converted the bookshelf to hold my builds. The square in the center (that currently houses my Jamaican chess set (I collect chess sets - yes, I'm a nerd) will house the Santa Maria. Then, the shelves on the right will be converted later to house the future build. I still intend to install some plexi-glass over the ship display areas, but I'm pretty happy with the temporary adjustment. Once the future build is done I'll make necessary adjustments and finalize the entire thing and make it permanent.


- 274 replies
-
- 9
-
-
- Santa Maria
- Artesania Latina
- (and 2 more)
-
Great work Grant, and the input for everyone is awesome. Since my next build will be from this time frame, all of this info and trial and error is going to prove enormously valuable! -Bug
-
That's sounds very cool guys. I'm still trying to figure out how I'm going to get the design on the sail. I'm looking into fabric markers Eric from a sewing store. -Bug
-
Thanks for the comment. You got a great build there Geoff, I've been following along. Very clean work. There's a specific reason I'm doing my SM the way it is. As I say in my blog, my teenage daughters actually didn't know what ship Columbus sailed. Whether that's my failing or their school's aside, when I'm done with the build I'm going to use it as a history lesson for their school as a guest speaker in their history class. And yes, as you can imagine they're super thrilled... not. -Bug
- 274 replies
-
- 3
-
-
- Santa Maria
- Artesania Latina
- (and 2 more)
-
Boy Glenn, you're sure not giving me warm and fuzzier about competing. My next build will be an 18th century HMS, but I may leave the hull wood. Coppering scares me. :-/
-
Thanks Popeye, I agree. Since I'm also weathering, the variations give it a little character and a well used look. Client meetings all day today and tomorrow, so not going to get much done... -Bug
-
Thanks for the insight Chris! I knew Chris Watten was behind both, part of the reason for my enthusiasm. I am going to have to evaluate my display wall space for the larger ships, I may have to punt and go with the Fly or Pegasus if I don't have the room... -Bug
-
So, all you master shipbuilder's out there. I think I've narrowed my next build down to either Jotika's Diana, or Amati's Vanguard. So I want to throw it out there and ask for opinions. Up to this point, three out of the four of my builds have been AL - and honestly I'm not thrilled about their kits. But, it didn't matter a ton because I scratch build a lot of stuff. Anyway, I'm ready to move on to a different source. Who makes a better kit, Jotika or Amati? I'm excited about the Vanguard because I know what has gone into it's design, but I also get the feeling Jotika makes a better overall kit. Thoughts?? - Bug
-
Nice work. I'm coming up on these parrels soon... - Bug
-
Thanks everyone, I appreciate the comments and feedback. Marktime, I'm going to try a double in the next day or so to give myself the option for the extra standing rigging. Sjors - you seem to be ordering a lot of parts, pumps, sheave blocks... I'm going to have some work to do to fullfil your order. Thanks Popeye, I appreciate it! Although I have enjoyed doing the research and having to speculate on exactly how she was put together, I'm looking forward to an HMS for my next build so I have some solid references! Lawrence - thanks, more to come soon! - Bug
-
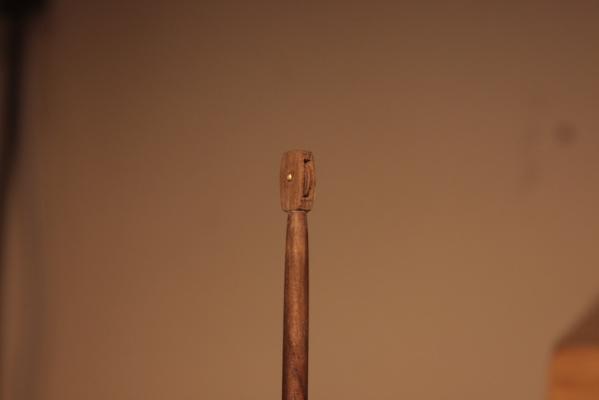
Over the course of the last couple of days, as I continue to make and mount cleats and rails to the deck and bulwarks, I've taken some time to add the nails to the futtock riders (long overdue), and build the sheaves / pulleys that are mounted to the top of the masts. Here are some progress photos.


- 274 replies
-
- 10
-
-
- Santa Maria
- Artesania Latina
- (and 2 more)
-
Daniel, I'm definitely willing to explore all options at this point, so thanks for the info! And thanks for stopping by the build. - Bug
-
Thanks for the info! I've always felt like there was something missing not seeing the mast-to-mast lines, I appreciate having a comparison to help me decide which direction I'm going to go. After all, that's what the forum is for! - Bug


