
DONATION DRIVE - SUPPORT MSW - DO YOUR PART TO KEEP THIS GREAT FORUM GOING!
×


Landlubber Mike
-
Posts
4,541 -
Joined
-
Last visited
Content Type
Profiles
Forums
Gallery
Events
Everything posted by Landlubber Mike
-
 That's looking great! Your technique worked really well. Gives me a little more confidence to try something similar on my builds, though it looks like the plate lines are already built into my Shimakaze hull so it will have to wait for a future build.
 -
No worries at all guys, no apologies necessary! Frankly, I find all this fascinating and it makes me more into my builds when I'm learning history, mechanics, etc. alongside the build. For me, it's less the final destination and more the journey that makes modeling fun for me. I could probably put models together in half the time if I just opened the box and went straight to work. Instead, I like all the learning about the subject that goes along with it. So, again, no need to apologize! Feel free to discuss these types of topics any time they come up! Since I don't have the knowledge that you guys do, I'm more than happy to extend the build log real estate for these kinds of discussions
-
Looking fantastic! I know having all that wood decking will complicate the painting process, but that will look amazing in the end - already does!
-
Haven't seen that page yet Ken, thanks for passing it along! Some cool pictures on that page. The Shimakaze didn't have many opportunities to use its formidable arsenal, and doesn't have much of a military career. With its speed and armament, it could have been really nasty in a fight. Interestingly, when researching this ship, it's one of the most powerful ships in one of those online warship games.
-
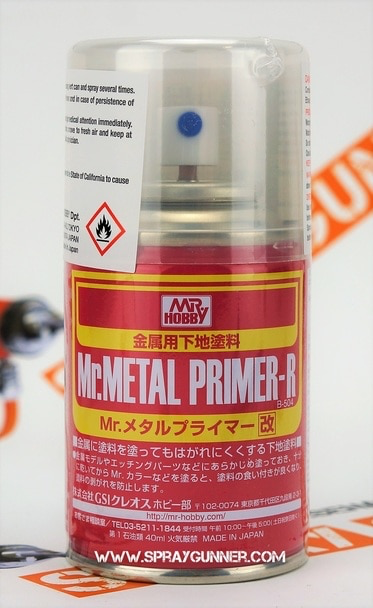
Good to know Greg, thank you. On my 1/700, I used thinned Vallejo black primer on the hull and had no issues. I painted over it with a mixture of Vallejo Model Air grey paints and everything adhered nicely. I've found Vallejo works pretty well, it's just that it can be touchy if you want to tape. Even then, I really only had issues with the black and grey primers lifting on my model planes for some reason. For this 1/350, I was thinking of priming with Mr Surfacer from the rattle can. It goes on a very light gray and coverage is excellent, but I also have their black primer in a rattle can. I think I have some Tamiya white primer in the rattle can too, as well as the Hull Red in a rattle can (forget if it's Tamiya or Mr. Hobby). What I might do is black base it with Mr. Surfacer, and then spray grays on top. Tamiya makes a Maizuru Arsenal paint so I'm going to use that as the gray base. Have you used Mr. Hobby Mr. Metal Primer? For the 1/700 railings and other small PE parts like the guns, I sprayed the fret with this, then sprayed thinned Vallejo black primer followed by thinned Vallejo Model Air grey. Worked perfectly. It also comes in the little glass jar with brush in the cap, but I haven't had an opportunity to try that yet. Looks like Tamiya has similar products out there.

-
McLaren M8B by CDW - Accurate Miniatures - 1:24 Scale
Landlubber Mike replied to CDW's topic in Non-ship/categorised builds
Thanks Lou - really appreciate all that info. Sorry to give your fingers a workout. I'll have to take a look at the kit and the instructions to see to what extent things can be modified. Hopefully AM had sprues that contained parts for both kits, and just swapped out the decals for different versions. *Edit* - forgot to mention that I like the idea of doing an orange car. Have a few Alfa Romeos in the stash so I'd like to do a different color for this one. -
Yeah, I'm not touching it. Little chance of improving on it, big chance on ruining the deck details.
-
Exquisite work Mark, very impressive!
-
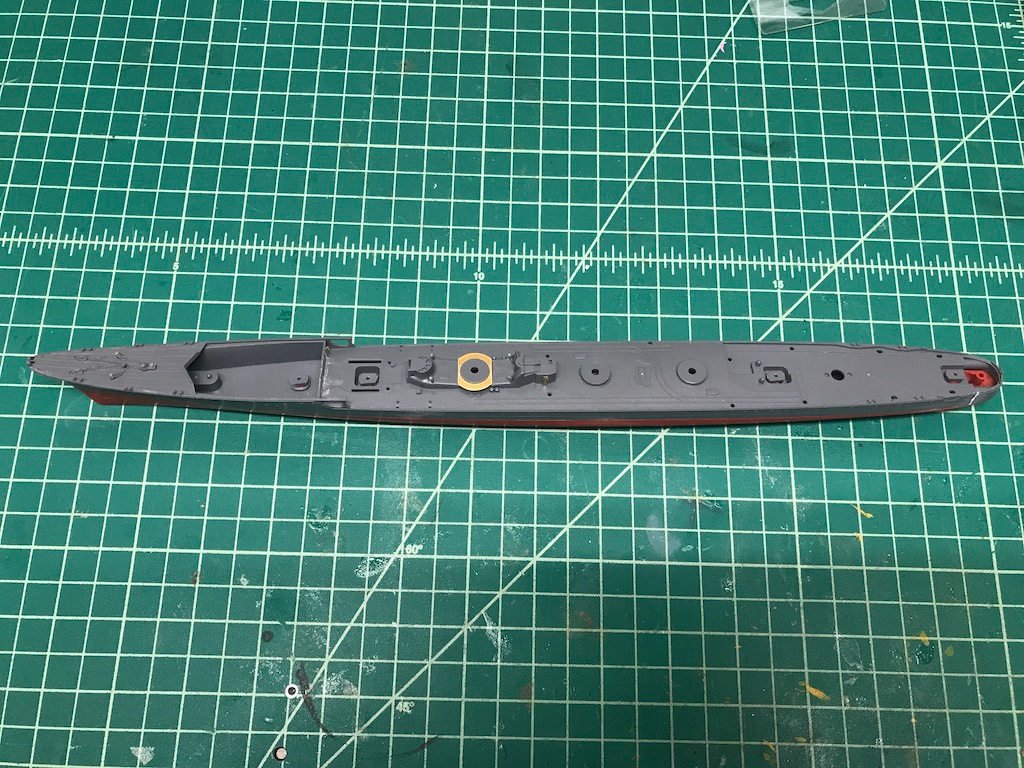
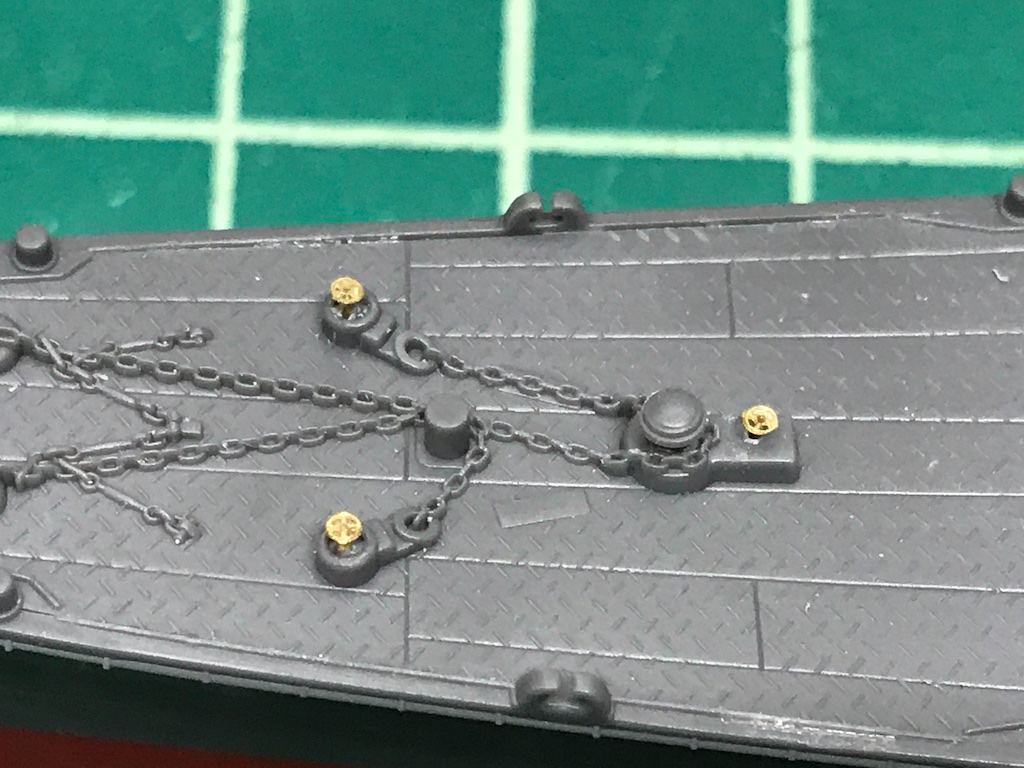
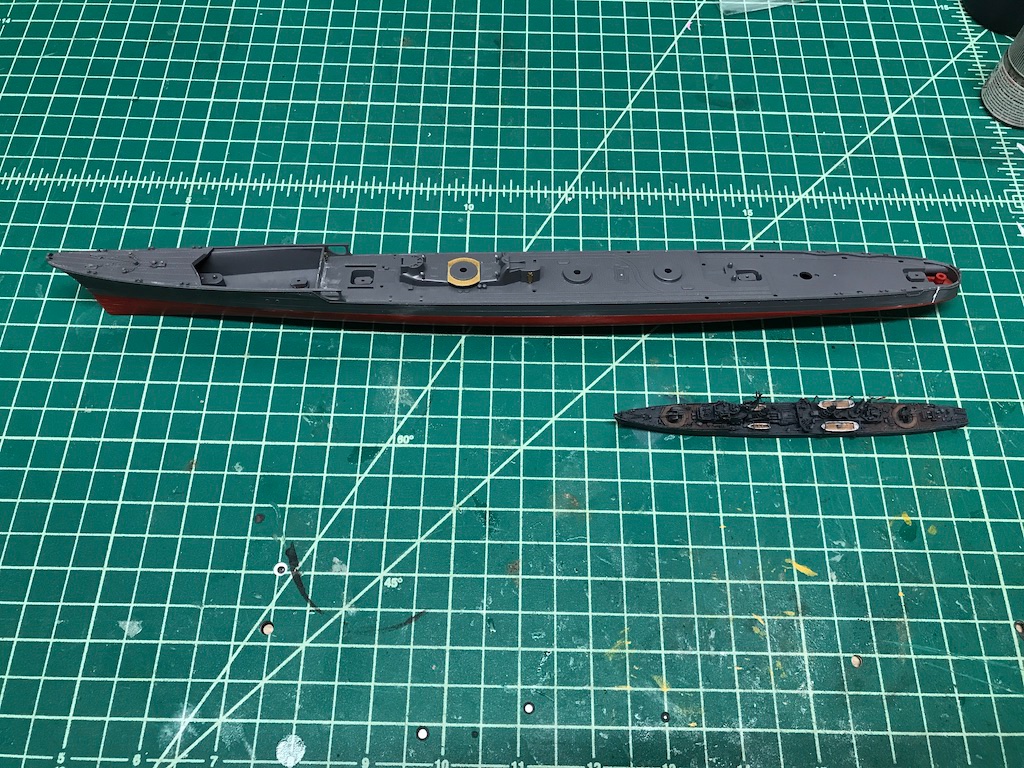
Almost two years later with my 1/700 "test kit" in the books, I've been working on the Shimakaze. I have to say, Hasegawa has done a really nice job with this kit. So far only needed a little filler on one of the back stern pieces, but otherwise, everything is fitting together nice and snug. The fit is really incredible. I decided that I'm going to build this a bit differently than the instructions would have you. I don't know if they envision that one would paint the ship, so they leave a lot of the details off the ship until the very end. Instead, since I'm going to paint it, I'm going to add as much to the hull as possible and then paint all in one go rather than paint the detail pieces and add them separately. We shall see how all that works. Obviously I won't be able to do that with with things like the bridge and some other sections which will have to be built off model and painted separately. I'll have to be very careful not to knock off some of the very small details that I'm starting to add. I'm still working out what to do with the funnels. They had white stripes on them, which Hasegawa provides as decals. Problem is, I'm going to be replacing the rings that circle the funnels with some of the Infini PE - so not sure how the decals fit in with that. I might just try painting the funnels with the stripes first, then adding the PE rings, and coloring the sections of the rings that should be white or black. Will be a little tricky. There are a couple of sections of the deck (near the bow and that big section near the stern) that are molded in brown plastic for the linoleum deck sections. Hasegawa made linoleum deck stickers for this kit that also show the brass cross pieces, so I'm going to try them out. I'll have to figure out whether it makes sense to add the details, paint the deck, and then add the stickers -- or, paint the deck items separately, and add them after I add the stickers to the deck. I'm thinking the latter just in case I glue the deck items slightly out of whack and can't get the stickers to fit. The Infini set is very nice and very comprehensive. I've got a few small bits on the hull, including some of the doors which required scraping off the kit doors and replacing them with doors from the PE set. Who's to say that the PE in 1/350 kits is all that much bigger than the PE in 1/700 kits? These valves were a little bit of a pain to install, and I thought I had lost a set to the dreading tweezer "ping" but somehow managed to find it: Here's an interesting comparison of the Shimakaze against my Hatsuzakura. I was a bit surprised at the length of the Shimakaze, which I would have thought would have been around twice the length of the Hatsuzakura, given that they were both destroyers and the Shimakaze is at twice the scale of the Hatsuzakura. Clearly not the case as you can see in the picture. Come to find out the Hatsuzakura was 328ft/100m long, while the Shimakaze was 425 ft/129.5m in length. Significantly longer! Turns out that the Japanese lengthened the Yugumo-class by an additional 35 feet or so to accommodate an additional quintuple torpedo launcher (the Shimakaze had three quintuple mounts). This kit is a full hull kit, but I think I'm still going to try to put it in a waterline diorama. It's so long and sleek that I think it would really show off those torpedo-like lines nicely in a water setting. Thanks for looking in!
-
So does this 1:1 model come with a 1:1 model of Chris Coyle? I heard he can give Brad Pitt a run for his money. Hope your modeling skills are up to the task!
- 299 replies
-
- 12
-

-

-
McLaren M8B by CDW - Accurate Miniatures - 1:24 Scale
Landlubber Mike replied to CDW's topic in Non-ship/categorised builds
Lou, with those decals, does that mean one can essentially use the red car kit and build it as one of the orange ones? There is an AM kit of the number 4 orange car out there, though I note that the spoiler is raised. I don't know if the red car kit allows you to raise the spoiler on the model, though maybe the spoilers only were raised when the car hit a certain speed? -
Ouch, looking at these closeups I realized that the back railings must have gotten pushed in. Couldn't see it with the naked eye, but the pics certainly showed the issue. A little toothpick action and she's back to normal 👍
- 179 replies
-
- 5
-
-
- hatsuzakura
- pit road
- (and 2 more)
-
Wow those are amazing! That detail is insane! Those will set you back a bit of coin for sure.
-
Wow much more bang for your buck than I got. Thanks for the tip! You’ve got enough there to rig all of MSW for years. Maybe I should just send my 1/700 models for you to rig? 🤔
- 179 replies
-
- 7
-
-
-
- hatsuzakura
- pit road
- (and 2 more)
-
I've picked up some beading wire too. It works ok in certain applications, but in others I've been less impressed. It seems very soft and prone to getting kinks, at least the type I picked up. You can also pick up very thin copper and even lead wire. If I remember correctly, I used something like 0.25mm and 0.45mm copper wire (maybe even thinner) for the pole and supports at the bow (not sure of what exactly that thing is called). The automotive modelers use a lot of this kind of wire for obvious reasons. I probably paid 10x from a model vendor what the cost would be if I knew where to source it from non-modeling applications, but it worked nicely.
- 179 replies
-
- 9
-
-
- hatsuzakura
- pit road
- (and 2 more)
-
I didn't build this one, and I think it has a bluff bow, but I would echo that at the bow, it's better to start tapering from the beginning. The first few planks will look ok, but then as you add more runs, you'll get a clinking effect. Not a big deal if it will be sanded off in preparation for the second planking, but better to have a trial run with how much tapering will be needed. I didn't quite understand the concept of marking the hull with planking bands and dividing up the distance at each bulkhead, but after getting through it with my first build, it now makes complete sense. It's more work on the front end, but less work to have to sand, fill, etc. on the back end. At the stern, the last couple of bulkheads and associated tuck into the counter always seem to require a lot more fairing of the bulkheads than one would think. And frankly, I've found you usually have to start the fairing a few bulkheads ahead of the last few in order to have a nice curve going into the counter. Otherwise, you can get a sharp line in the planking run between the last bulkhead and the stern counter. Again, the first couple of planks may look ok, but after five or six, you realize you might have a problem. It might be too late here, but I'm now a convert to using filler blocks at the bow and stern. Takes quite a bit of work in the front end to get them in, but then the planking goes so much smoother. In particular, you have a nice stable base of support to glue the plank down and run it into the bow and stern instead of relying only on gluing points along the bow and stern and preceding bulkhead.
-
'The Terror' - BBC series Mar 2021
Landlubber Mike replied to Rik Thistle's topic in Nautical/Naval History
That looks like the AMC production from a few years back. It was interesting. I wouldn't say it was a completely historical piece, but more historical fiction. Certainly must have been terrifying being stuck in the middle of vast expanses of ice, supernatural creatures or not.- 8 replies
-
- 3
-
-
- John franklin
- 1845
- (and 2 more)
-
This build is incredible, thanks for sharing! Last summer I purchased this kit with the Pontos sets from a fellow modeler who I think was a bit overwhelmed by everything (the box itself will scare off most). The Pontos sets look absolutely fantastic, but now that I'm seeing your build, I think I might look into getting some of the Veteran aftermarket. Those guns are amazing! Might need to put the family on a ramen noodle diet for the next three months to be able to afford them...small price for them to pay, right?
-
Thank you Dan, really appreciate the kind words. Thanks to everyone for all the support!
-
McLaren M8B by CDW - Accurate Miniatures - 1:24 Scale
Landlubber Mike replied to CDW's topic in Non-ship/categorised builds
Well shoot, I've spent the last few weeks dealing with home stuff and trying to clear the work bench, and see Craig has made a masterful start on this one. As he mentioned, Lou/lmagna was incredibly kind and generous in gifting me one of these beautiful kits as well. I've built a few Accurate Miniatures kits thus far and they have been very nice kits with great deal - but this McLaren kit is something else. The plane kits had maybe 9 or 10 steps, the McLaren has close to 30 if I remember correctly. And the details are amazing, much more than the typical car kit that is out there. I picked up this PE detail set for the kit from Model Car Garage. Apparently on some of the car boards people thought it nicely enhanced what is already a great kit: Maybe I'll start mine sooner rather than later. I have a few Gunze Triumphs that I started work on, but as I mentioned to Craig and Lou, I had some plastic crazing issue when I tried using Zero paints for the first time. I probably applied the paint too heavily, but it could also be a compatibility issue with the primer I used or the plastic that Gunze used. My guess it was my error, and I'm now wondering whether I mixed the paint enough. On my Citroen build, I sprayed a Mr. Hobby gloss clear from the rattle can and it stripped some of the paint. I don't think I shook the can enough so all I ended up shooting was the thinner. The next time I shook the can a full minute plus and had no issues. After that experience, I'm thinking that I had a similar problem with the Zero paints in not mixing them sufficiently (compounded by the fact that I poured the paint from the jar into the airbrush cup, rather than use a pipette which I'm going to start doing so I am not only pulling from the very top of the jar). Sorry for the interruption - just wanted to say good job and thanks for all the extra info to Craig, and thank Lou again for his generosity.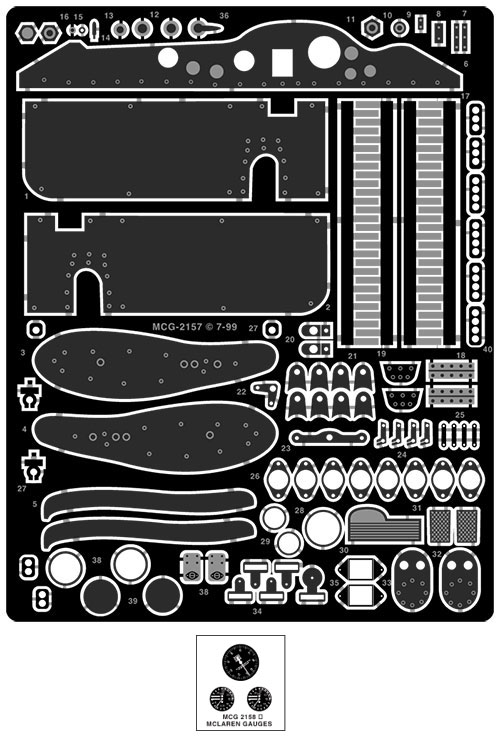
-
This is going to be stunning (already is). Really nice work!
