


Landlubber Mike
-
Posts
4,547 -
Joined
-
Last visited
Content Type
Profiles
Forums
Gallery
Events
Everything posted by Landlubber Mike
-
 Lou, are they resin with PE to attach? I picked up a 1/350 IJN Ise carrier/battleship on eBay that was loaded with Veteran guns. It's been a while since I looked at them, but I recall them looking very detailed. Will wait for you to blaze the trail on putting these things together 🤨
- 179 replies
-
- 8
-

-
- hatsuzakura
- pit road
- (and 2 more)
-
Nice work!
-
Love the looks of this car. What a beautiful convertible!
-
Wow, very nice subject! The Italians sure know how to add elements of design to many things - cars, ships, planes, clothing, jewelry, etc. Not sure about the practicality, but they definitely make beautiful things!
-
Ha! You know what's funny? I actually enjoyed this build a lot. My plane builds have been filled with frustrations from painting, breaking things and having to repair them, etc. Then I recently tried a new paint on a couple of car builds and the paint ran too hot and it crazed the plastic. This 1/700 build was fairly uneventful - just a lot of Optivisor work.
- 179 replies
-
- 10
-
-
- hatsuzakura
- pit road
- (and 2 more)
-
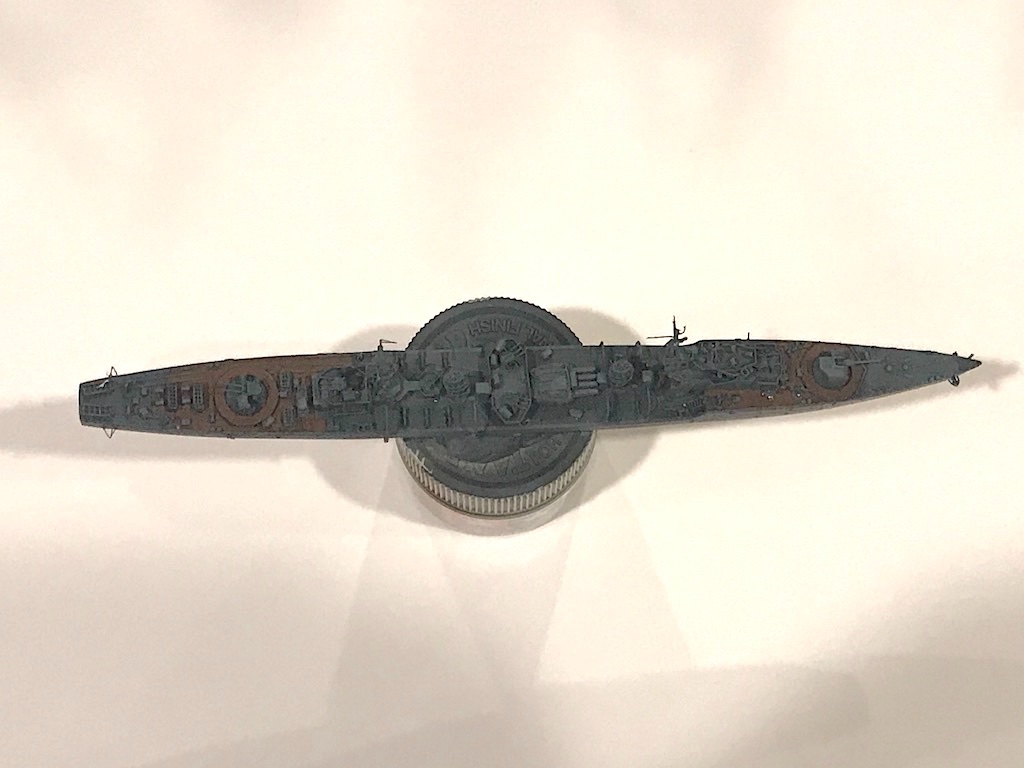
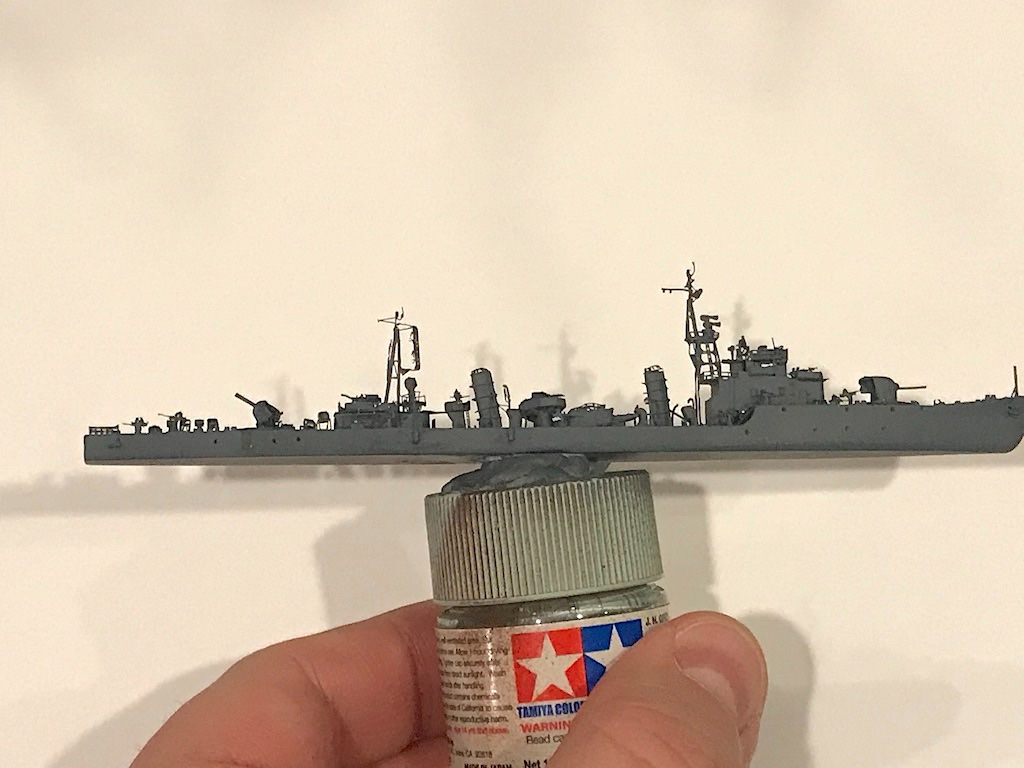
Thanks guys - that’s what I was thinking when it came to the rigging. Seems the safer course. Really appreciate all the kind words and encouragement. I’ve learned a ton on this build. The early portions like the bridge are rough in some places, but overall I like how it came out and will do better on the next one. Got to practice with PE, tried using a filter coat, played with weathering enamels, etc. I thought a destroyer would be a fairly simple subject to cut my teeth on, but man, there were a ton of nice details in the Five Star upgrade package. I should have mentioned a couple of small details I added. The life rings are pre-painted PE from Eduard - how cool is that! Easy to install. Also on the starboard side there is a rack along the rear deck structure. Looks like racks like that held wood for repairs, so I cut little splinters of some leftover tanganyika from my Badger build, wiped them in wipe on poly to bring the wood a little life, then glued them down. Nice little touch I think. If the model came out ok, I was thinking about waiting to put it in a waterline diorama setting until I had a few more of these, but I might put it on a base sooner rather than later. I’m pretty happy with it so I think the waterline is a go and will look into how to do it at this scale. The slightest bumps and touches bend pieces so having it on a base should give it a little more protection. Last week I dusted off the 1/350 Shimakaze and started working on it. After working in 1/700, the tiniest of the 1/350 is no sweat. Looking forward to bringing that one to life, but will probably add another 1/700 build as a side build. I might have added a few 1/700 kits to the stash 🤪
- 179 replies
-
- 10
-
-
- hatsuzakura
- pit road
- (and 2 more)
-
Thanks guys, really appreciate it. I might try the sponge idea since there isn’t too much to do here. I feel like every time I use the airbrush, paint gets where it shouldn’t, even when masking. I have a couple of small sections where it looks like some of the gray got under what was like three layers of tape - not from too heavy a layer that went under the tape, but sorta like the mist floated under the tape - doh!
-
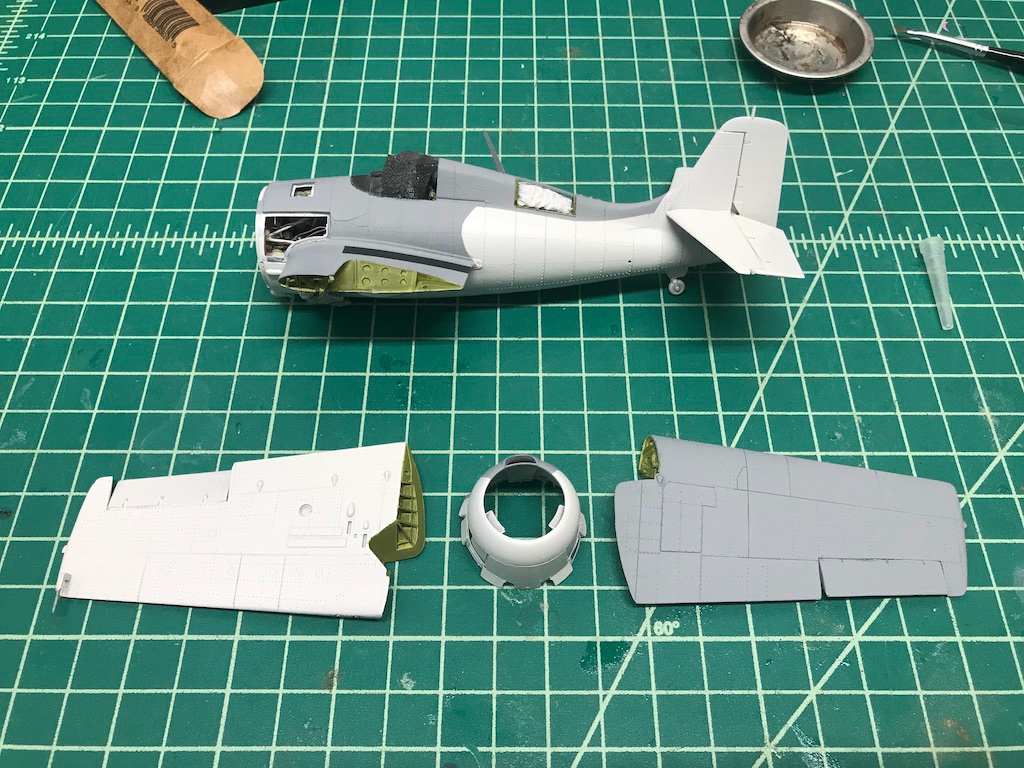
I've been spending most of my time working on my 1/700 destroyer, but have been getting in some progress on the Wildcat. Everything is painted up aside from the life raft, just need to do a few touch ups. I used Tamiya Insignia White for the underside from the rattle can, and Vallejo Dark Gull Gray for the top side. I really like how the two colors are working together. Question for everyone - when I look at pictures of the Wildcat, there usually isn't such a sharp line between the colors, but more of a soft transition as if it was overspray. Any ideas on how to achieve that? I considered taping just outside the line and spaying a very diluted paint mixture. I don't know if I want to re-tape, but was thinking about possibly hand brushing a very thinned gray along the line - sorta just pressing the bristles against the line like I was sponge painting. Any ideas on which would be better? Thanks in advance!
- 241 replies
-
- 10
-
-
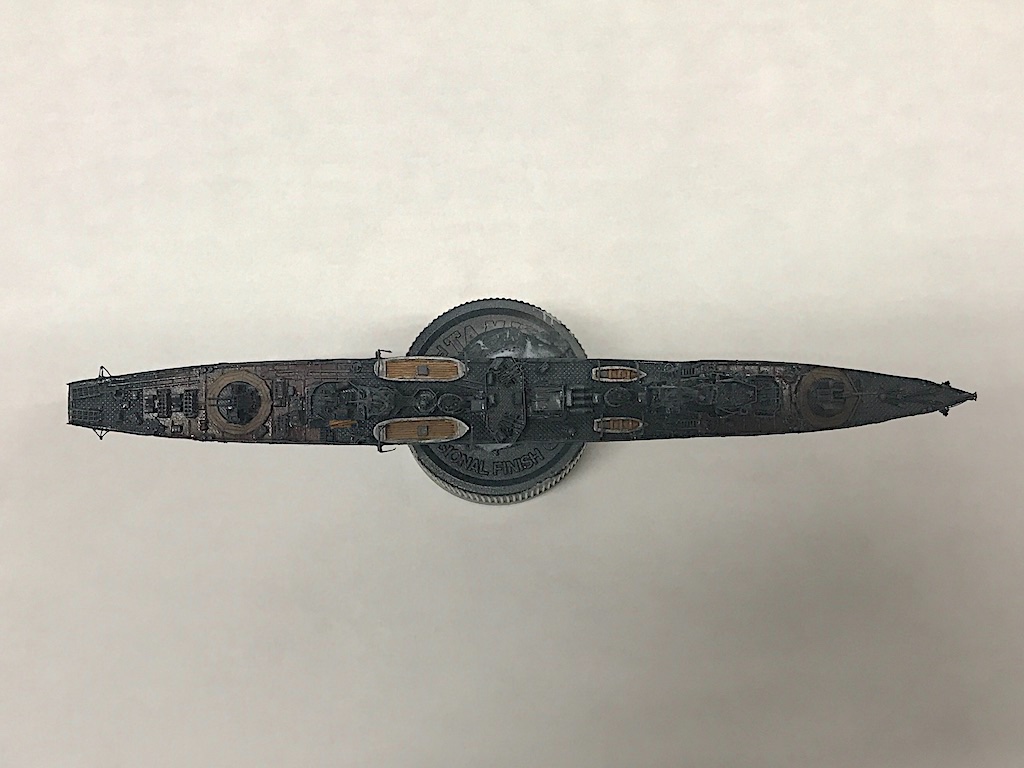
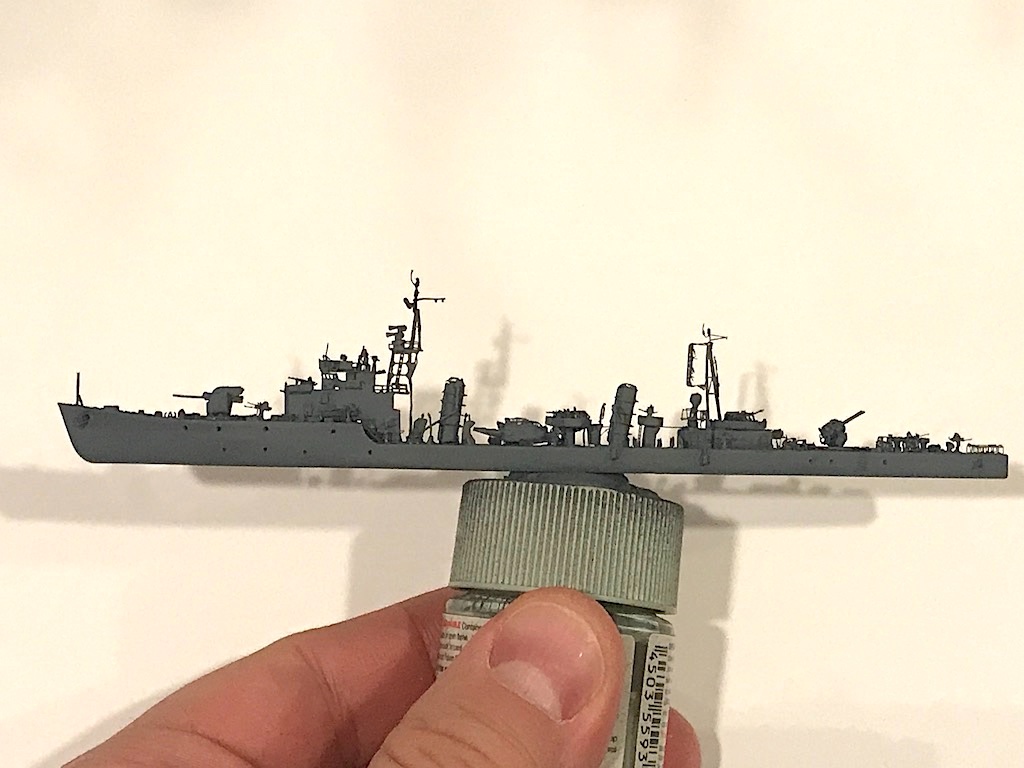
Just about at the finish line. Everything is assembled, just need to add the rigging. I played around with some naval enamels from AK so I'll let those dry over the next few days, and then add a matt clear coat. I'm wondering about adding a clear coat after the rigging. I'm planning to probably use EZ-Line - would it be ok to rig the ship now, and then clear coat at the end? Or should I first clear coat and then rig the ship? I figure the clear coat won't effect the EZ-Line, but just wondering if anyone has any experience on this. Thanks for looking in!
- 179 replies
-
- 17
-
-

-
- hatsuzakura
- pit road
- (and 2 more)
-
I could be. I’ve got three models that are near the finish line. I’m a lot slower than you though so don’t let me hold you up...
-
Beautiful work Craig! Is there a McLaren in the future? 😉
-
Whenever I start to think about how many projects I have "in progress" I always feel better when I remember that there's this Popeye guy out there with a lot more
- 55 replies
-
- 10
-
-

-
Looking good - I like the lines of the He111.
-
Just saw the end result. Great work as always Popeye!
-
Fantastic work Yves!
-
That's coming along really nicely OC - well done!
-
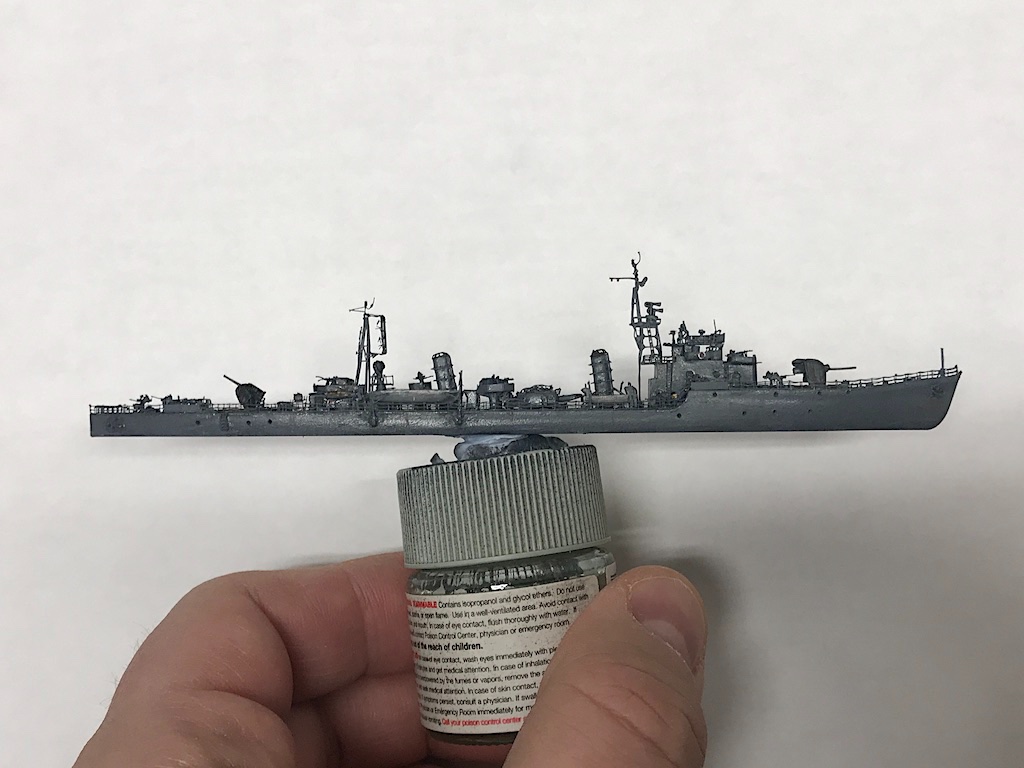
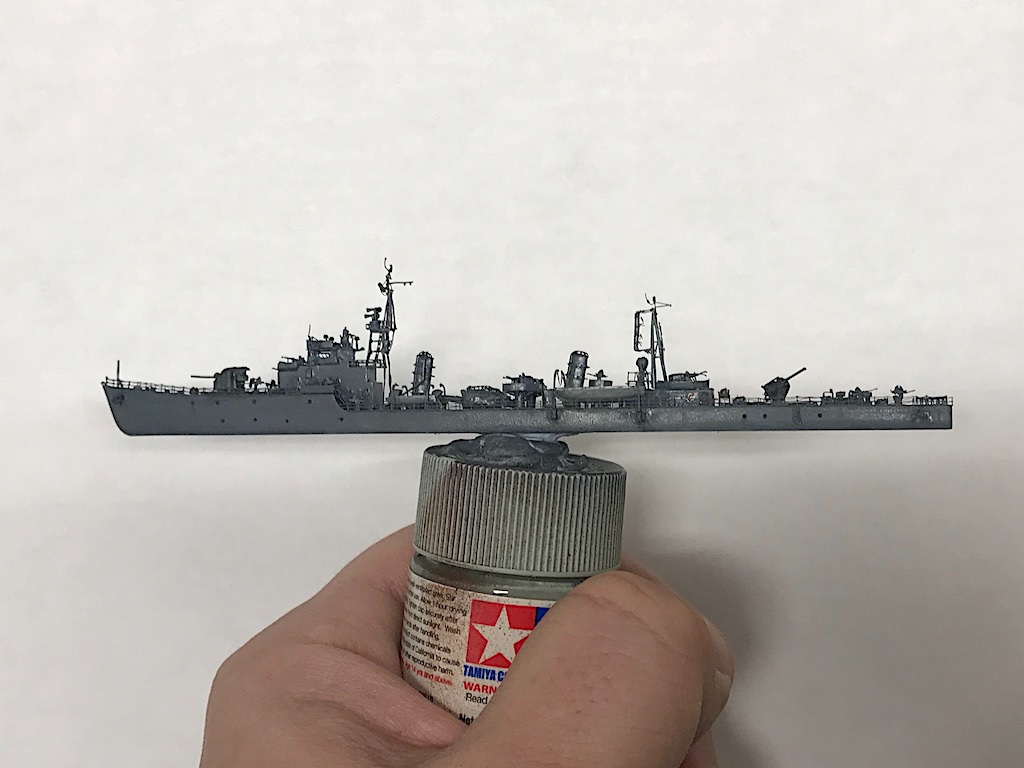
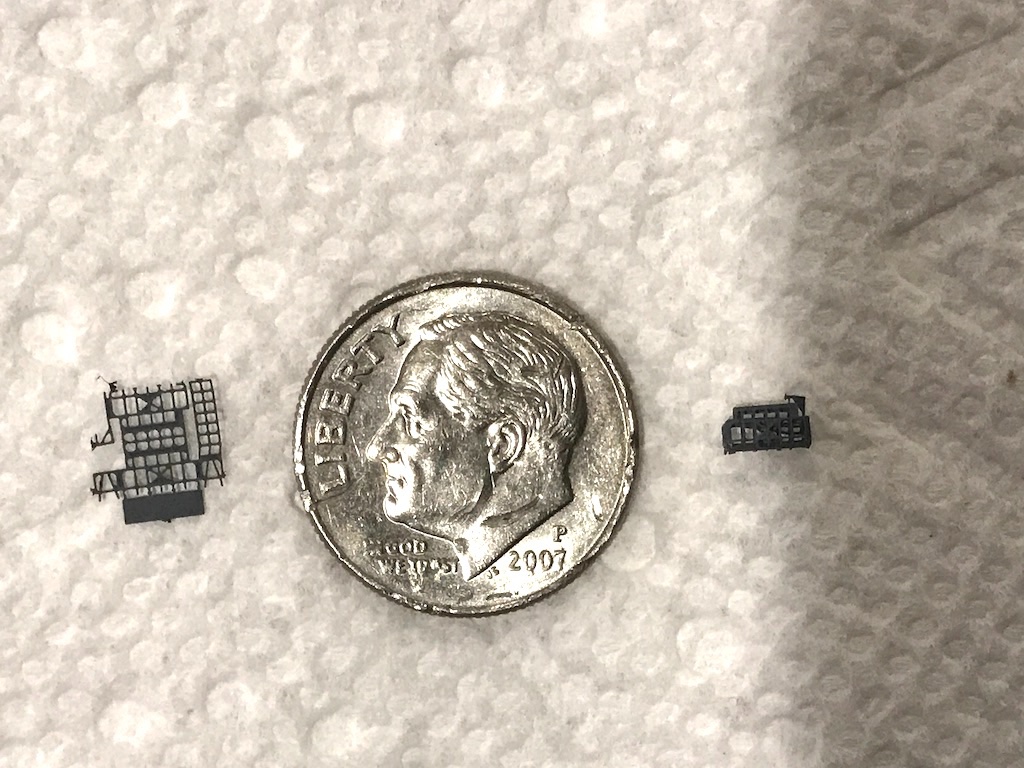
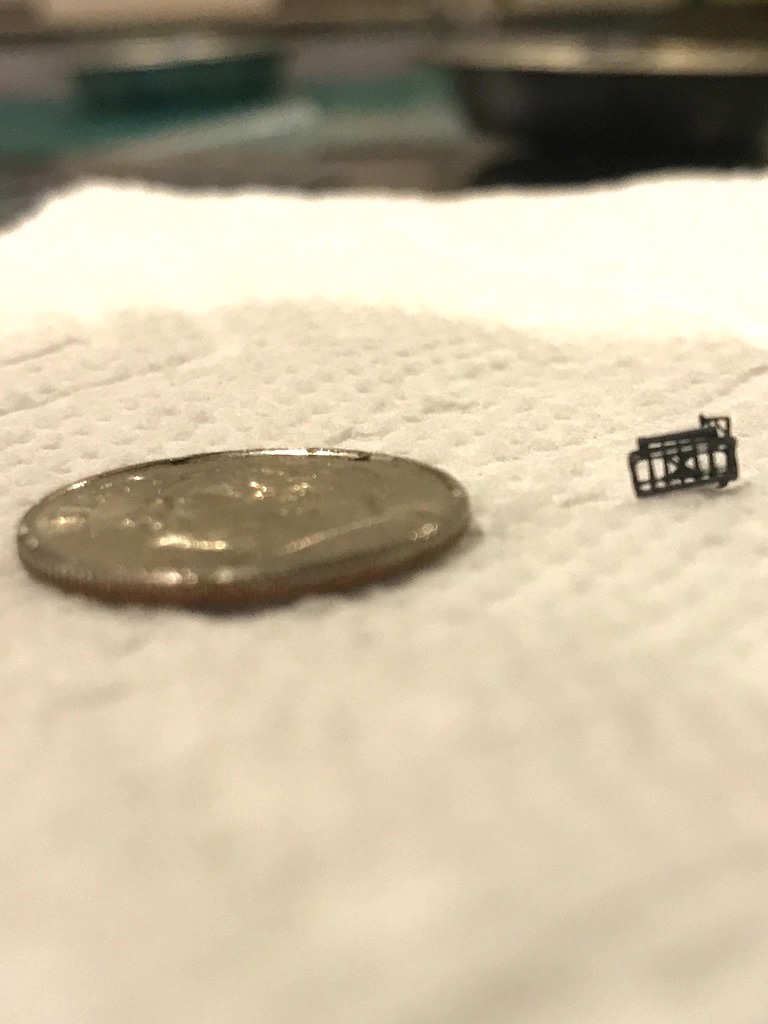
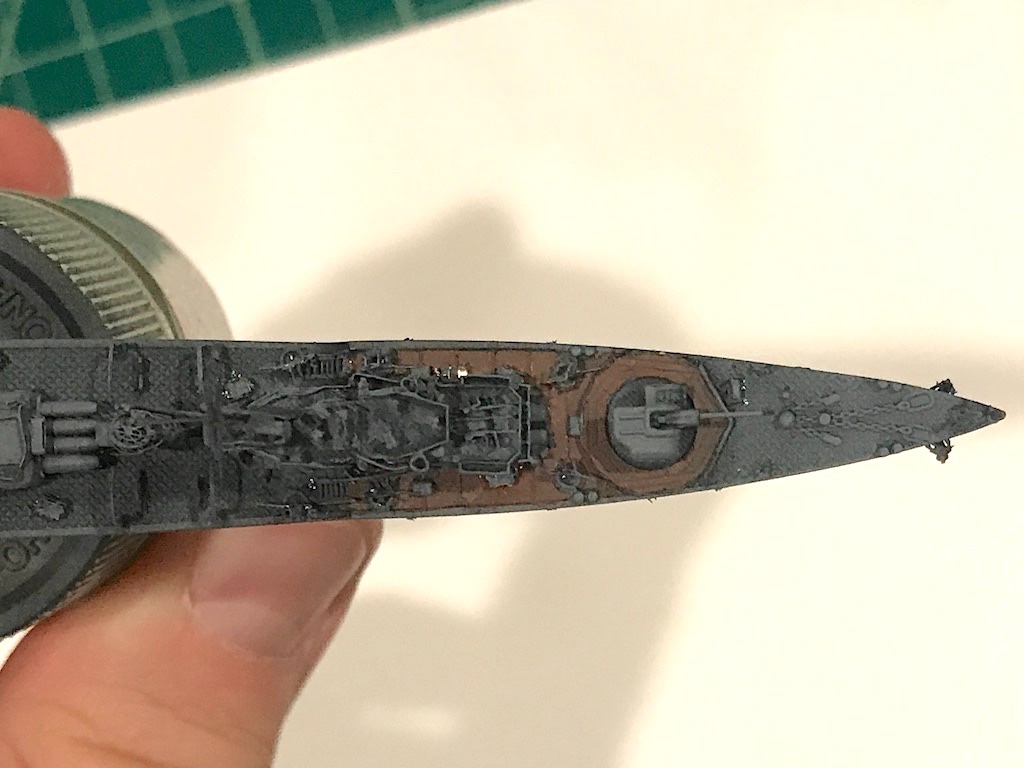
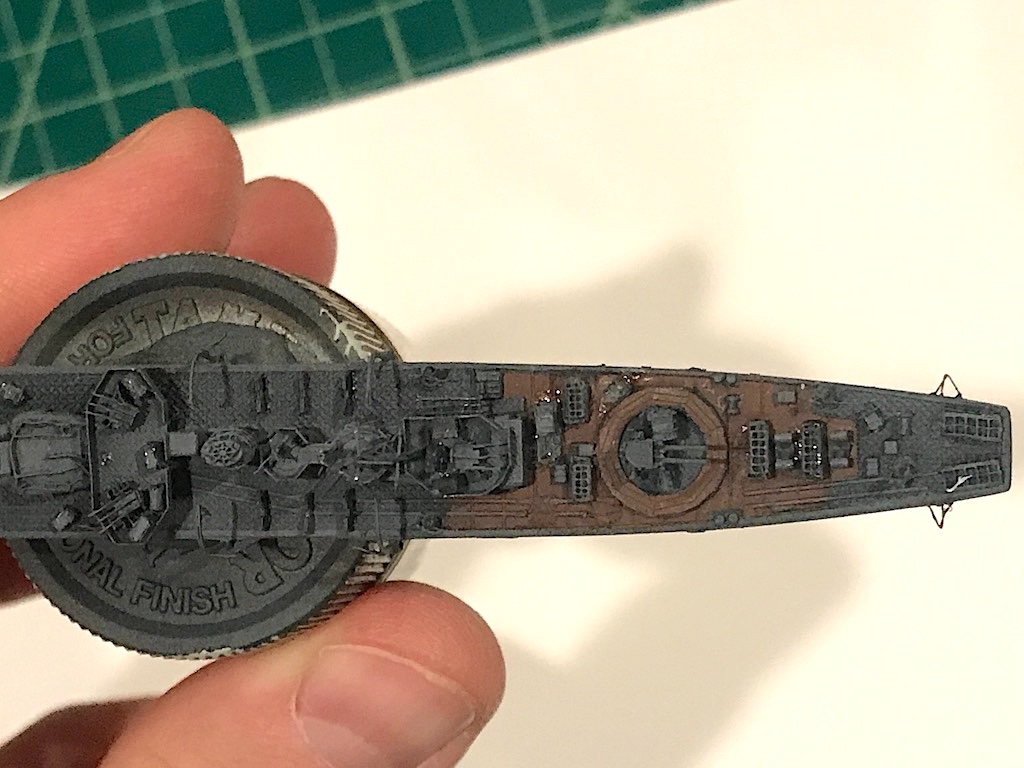
Made some more progress. Got the final 10 AA guns installed, along with some ammo crates and other assorted items. This one in particular was fun: I ended up spraying a coat of Future so I can start the wash and weathering process. Here are some shots of what it looks like. I always cringe when I post these, and have to remind myself that they are taken at high magnification: On the final stretch. Thanks for looking in!
- 179 replies
-
- 17
-
-
- hatsuzakura
- pit road
- (and 2 more)
-
Beautiful work as always Craig. At the rate you're going, you're going to need a few more display racks
-
Wow, very nice! Congratulations!! I was getting nervous as I started reading your post, but glad to see it worked out in the end. 😁