clearway
-
Posts
2,238 -
Joined
-
Last visited
Content Type
Profiles
Forums
Gallery
Events
Everything posted by clearway
-
 Happy New Year and great idea Bob Keith
 -
Looking niceeeeeee Boyd- have you tried Ronseal quick drying matt varnish which is water based and re coatable in one hour! just try some on a few off cuts first to see what you think, i use it on all my models now whether plastic metal or wood Keith
-
weather is the same here in cumbria m8 with some really nasty weather forecast midweek. to be honest i like the variations in wood shade- shows she hasn't been mass produced nd there is so much detail on the finished ship it will detract from the vary shade! Keith
-
looking nice n shipshape there m8y- gonna look awesome when finished Keith
-
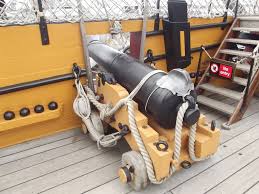
I followd the destructions about fitting the decks Boyd and am now trying to figure the best way to rig the cannons on the main deck. Keith
-
Great Bob- and after rebuilding a mantua victory for a friend i can fully relate with 3mm deadeye pain. Keith
-
Varnish over painted hull
clearway replied to TonyUK's topic in Painting, finishing and weathering products and techniques
no the ronseal quick drying does not yellow the white paint- i varnished the wheelhouse roof of my billings mary ann which i painted white and it did not yellow the paint. Keith -
Nice work with the cannons Boyd- don't forgetb that there is that much detail on Victory that people wont really notice any little compromises Keith
-
Varnish over painted hull
clearway replied to TonyUK's topic in Painting, finishing and weathering products and techniques
I use ronseal quick drying varnish which is water based and available in gloss, matt and satin. -
gotta love kit manufacturers sometimes!
-
In the Haynes victory manual it shows the ropes tied above the breech then run under the trolley to take up slack Boyd. Keith
-
I do this once in a while to dumb down a little and take a break Boyd- mind you have discovered all them lovely turned metal gun barrels and metal working track links + etched upgrades which is a whole load of fun Keith
-
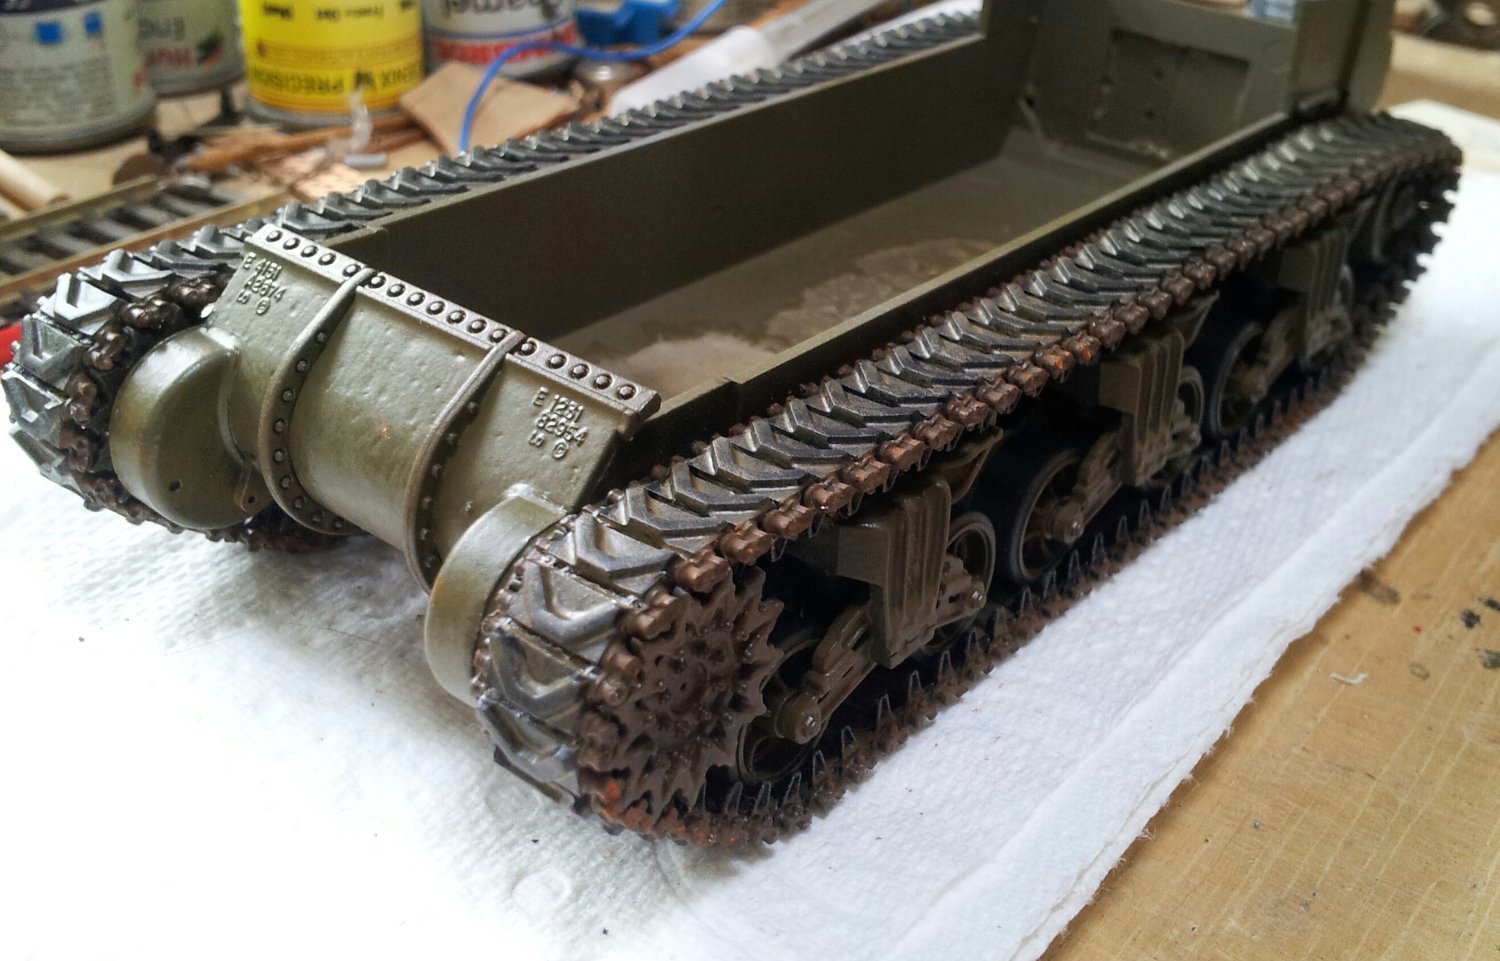
Ty Lawrence- been having a holiday from my Vic and been doing 1/35 armour- especially german kitties see pic below.
-
Coming along great there- i must put my 1/35 german steel cats down and restart my Vic Keith
-
Yet again apologies for not being ships but weathered the edges of the tracks with a mixture of humbrol rust and dark earth and thinned matt 29 paint as a keying coat. Keith

-
Looking good there Boyd- will have to put my 1/35 ww2 german armour to one side and re-start my Vic Keith
-
really coming along nicely there. Keith
-
Nice work- i have the academy warspite with white ensign upgrade and hopefully soon the pontos wood deck. The weathering looks fine to me- at this scale i think less is more if you know what i mean. Keith
-
Nice to see you are better Bob and respect for the pork consumption Keith