


mtdoramike
-
Posts
2,061 -
Joined
-
Last visited
Content Type
Profiles
Forums
Gallery
Events
Posts posted by mtdoramike
-
-
I would like to add here that when you sand the hull after planking, make sure and DO NOT SAND MORE THAN HALF OF THE PLANKS THICKNESS, I can't stress this enough, my brother decided he would use a dremel tool with a sanding drum on it to sand down a basswood hull. You guessed, it made the planking way to thin like an eggshell. He gave up on it, but not me, I pulled most of the planking off, ordered new planking and Finished that ship model and gave it back to him. Any time I go to sand a hull of a model, I get several pieces of scrap wood and glue them together, then I start sanding with 60 grit, then 150 grit and finally 220 grit and see how long it takes me to sand down to half of the thickness of the planking and if it's an hour then I make sure and keep an eye on how much sanding I do on a hull. You will find that even the same species of wood have different hardness.
Also, helpful tip, Once you are getting close to the finished product of the hull planking and find that there is a few minor cracks or dents or dips in the hull planking, get some 5 minute epoxy and collect some of that saw dust, mix it together and pack it into any little dings that you can't sand out. Once dry, sand smooth. If you are painting the hull or coppering it, you can get away with a multitude of sin, but if going natural wood finish, wood putty or wood filler would stick out like a sore thumb.
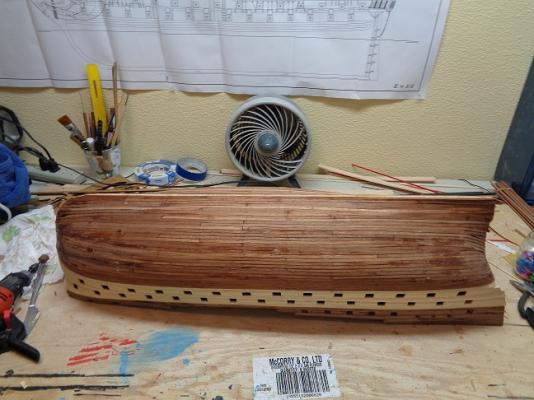
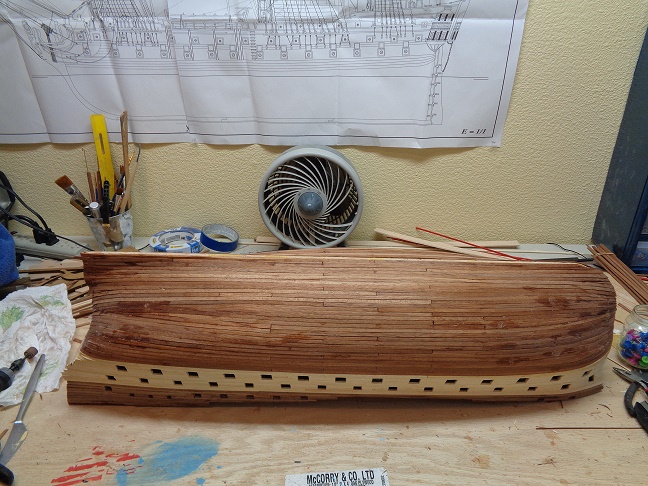
I've gotten one side of the Montanes sanded with 60 grit, notice all the sawdust

mike

-
First off, before you start making saw dust, have you received the kit yet? I have found in every kit that I have built which is getting close to 30 give or take, I have never had an issue with kit supplied wood. My recommendation to you would be to plank the model the way the directions and plans suggest you to do especially on your first model. I have seen far to many models by well intentioned people started but never finished. Planking is or can be one of the hardest parts of ship modeling until you get some of the fundamentals down that and into practice like stealer planks and fillers. You will have time to get fancy with spiling and others things once you get that first hull planking under your belt. NEVER start your planking at the bottom or false keel. Start your planking at the wales and work your way down to the keel. This way if there is an issue, it will be less noticeable on the bottom of the ship as opposed to mid-ship. Once you lay about 3-5 planks that are not tapered at the wales, then you will need to start your taper at the front and back of the hull. I try and never lay full planks because no matter the size, it's just not realistic and also it's a lot easier to get those bends and twists on those smaller pieces of planking. I may lay 3-4 planks from the stem going backward in a stair step pattern and then go back and fill in the planking towards the stern.
Last thing I can suggest is when you lay a plank on one side, lay a plank on the other side as well, this keeps the keel from dis-forming on you at least until you are better than half way through the planking process and the hull and bulkheads become more stable.
mike
-
If you could fade the coloring and leave the white bright white, it would look more realistic. Salt air tends to brighten white cloth. But B would be the closest to what I mean.
mike
- Canute and Daniel Dusek
-
 2
2
-
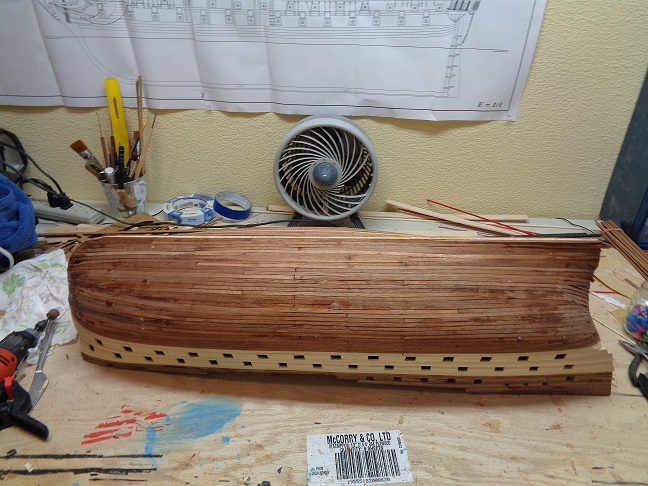
I finished the planking last night and now on to the sanding and there will be a ton of that for sure.
mike

- marktiedens, UpstateNY, toms10 and 5 others
-
8
-
Don't worry, you have a lot more to go
mike
-
She is looking fantastic Paul, what a beautiful representation of the Victory the Constructo kit can make with slight modifications and dedication. WOW!
mike
-
Thanks Daniel. It's just my point of view and I'm sticking with it> hahahahahahaha. The way I look at ship modeling is like this, it's not where you have been or where you are going, it's the journey that you take getting there that is the important part.
mike
- Canute, WackoWolf, Seventynet and 3 others
-
6
-
It's a fantastic kit, it is built using the Artesania Latina kit, which I just finished. I went to Model Space website and used some of their directions when building it. I love the quality of Latina kits from their castings to their quality of wood. Most folks here are biased towards the Caldercraft Victory kit, which cost the most at about $1200.00 and I'm sure the Modelspace kit would cost about the same once all the subscription packets have been received. The thing I didn't care for with the Caldercraft kit the preformed sides, these are a real pain the butt to deal with rather than just planking the sides, which is the way Latina did it.
But with all the above said, I'm a firm believer in no matter what the quality of the kit is, the kit is only the starting point of a build, the rest is research and dedication to building a fine representation of the subject you have chosen. What I mean is, you can or should be able to take a souse ear and make a silk purse out of it before you attempt a build like the Victory so materials quality isn't that important because those are things you can change. All you need is the bones of the kit to get started. Now, if you choose not to buy this kit, may I ask where and who has it in case I feel like building another Victory?
 But it would have to be a real good deal since you can buy the Latina Victory for about $600.00 new.
Mike
-
I have decided (unless a Sovereign of the seas kit drops in my lap) that the Montane's will be my last build. Now the only thing to change this would be if a ship model that I really really wanted to build before I kick the bucket like the SOS or maybe the Soliel Royal drops in my lap. BUt it would take something really tempting to change my mind on this.
mike
-
-
-
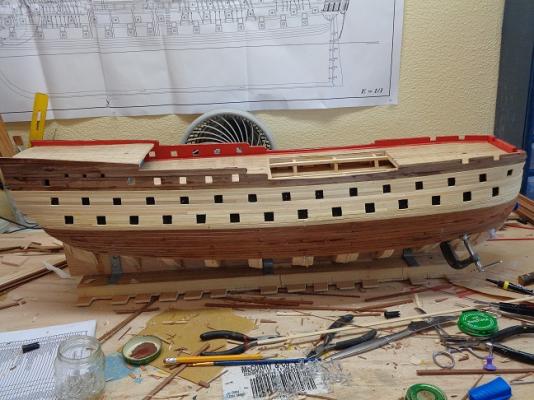
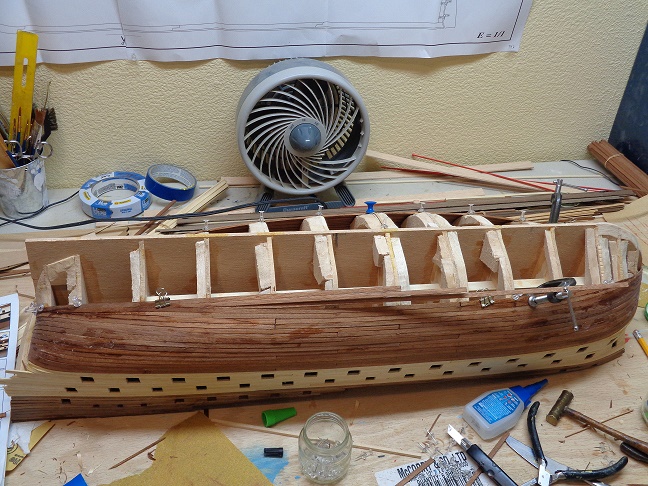
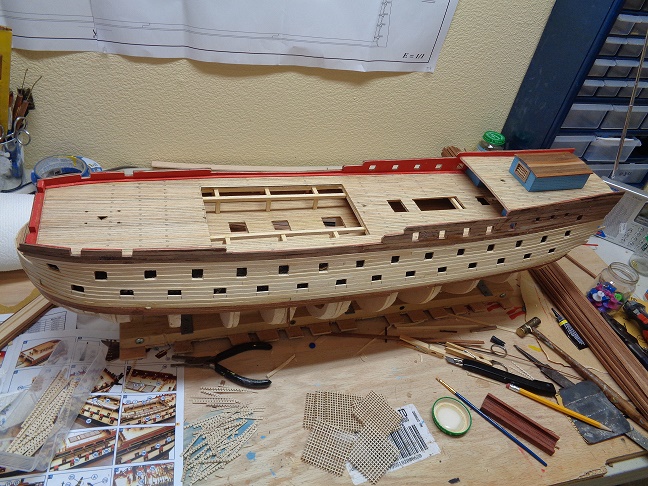
I have begun the lower planking again now that my left hand has healed up. I'm still missing some feeling in the index finger and portions of my thumb, but both are working so I'm back at it. One thing I have noticed is the wood used for the bulkheads isn't laminated plywood or hardwood so it's a bit hard to get anything to really stick into the bulkheads and hold really well. So I have been having to use quite a bit of fast drying glue to stick the planking down. This was one of OcCre's older kits so I'm hoping they updated the wood used for the bulkheads.
mike

- marktiedens, toms10, GLakie and 4 others
-
7
-
-
-
Any solid hull kit is difficult to build because of fairing the hull properly. Most folks take off too much wood and by the time they realize it, it's too late. So it's putty and filler time. You can take wood off, but you can't add it. That is why you have to use the supplied templates to check and triple check the fairing after a little sanding. To me, a solid hull is more difficult to build than a plank on frame. Plank on frame, all you have to do is lay a plank of wood, sight down the plank at each frame to determine where it needs to be shimmed and they all have to be shimmed whether it be a few or a lot.
Also to me, the cheaper the cost of the kit, the harder it is to build due to substandard parts, woods and usually smaller size.
mike
-
-
-
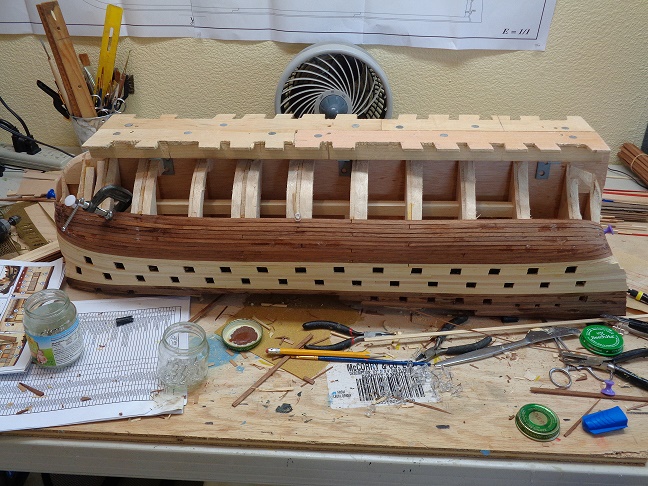
Well my hand is getting a bit better. I lost a bit of feeling in the index finger though and it still hurts if I put a bit of pressure with my left hand especially the index finger. I did a bit of work on the stern house, I cut and inserted a couple of pieces of grating with plastic on the back side to represent windows. But it's a work in progress. I also started putting together the gratings and boy there is quite a few of them. A few more than on the Vic. I will start the planking again shortly.
mike

- UpstateNY, marktiedens, archjofo and 4 others
-
7
-
Thanks for the heads up, I put in my bid for the SOS. I hope to get it as it will be most likely my last model that I will build especially as a donation piece hopefully for a children's hospital or charity.
PS: well the bid topped my limit so I'm still in the hunt for a SOS.
mike
- Altduck, thibaultron, mtaylor and 1 other
-
4
-
-
-
I'm thrilled for you, because this is beautiful work. I want to ask if you are going to seal the gold leafing? I usually seal it when I finish to seal it and keeps it from flaking off.
mike
- mtaylor, popeye the sailor and EJ_L
-
3
-
Yep Chris, with invent of Cad CNC and three D, also comes the counterfeiters and makes it quite a bit easier for them. I've noticed that there are a lot more counterfeit kits being offered by some no name companies than there were back in the 90's. But then again, I've noticed that there are quite a bit fewer named model companies around like there used to be back in the 90's as well.
mike
-
The wood used in this kit is good quality wood that unfortunately resists being bent no matter how much you soak them. I used a pair of crimping pliers to get bends out of some of those stubborn planks. I would first soak them in boiling hot water with a little dish washing soap like Dawn with a little ammonia added to the water. I would let the planks soak over night and then while they were still wet, I would use the plank bending pliers, which helped get the proper bend and even a twisting bend is possible doing it this way. I would then apply the plank while it's still damp on the hull with super glue and nails. Then the plank can finish drying on the model. But make sure you lay a plank on each side of the model or hull as you go along as to not introduce a bow or twist in the hull once the plank dries.
mike


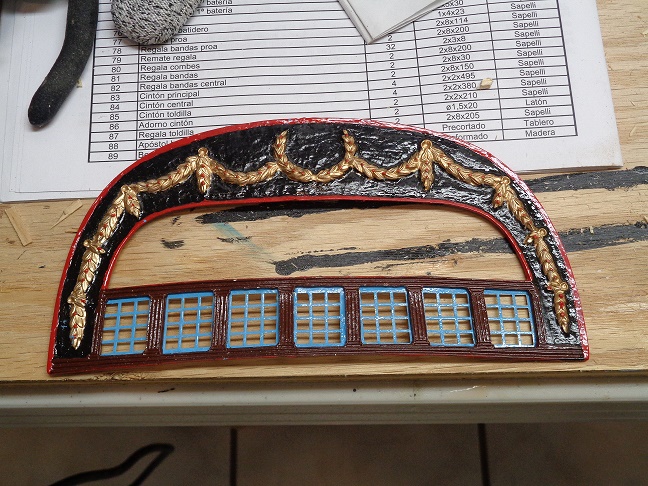
Montanes by mtdoramike - FINISHED - OcCre - 1:70 scale - next donation project
in - Kit build logs for subjects built from 1751 - 1800
Posted · Edited by mtdoramike
Been doin me some sanding this afternoon. I got one side of her sanded with the 60 grit, then on to 150 grit and finally the 220 grit. You can see all the sawdust starting to accumulate. hahahahahaha.
Hey daddy, yep I built an Xebec a few years ago with the Indiscreet, which was a kit I bought off of Ebay that had been carried around from pillar to post and was probably about 40 years old and the box showed it's age, but the contents was still usable. It went to an insurance corp CEO in CT for his kids bedroom hahahahahahaha.
Hey George & Tom, weeeeellllllll, the Victory was technically supposed to be my final build, but then the OcCre Montane's showed up on the classifieds at such a great deal that I just couldn't pass it up and the Montane's was a model that I had wanted to build some day. I had just got to thinking when I was planking the Monte that I have planked more models than I could remember off the top of my head. So I pulled my ad from the classifieds looking for a Sovereign of the Seas kit. Now does this mean never, I will never say never, but I will say this. I'm not opening or actively looking for another project, but and here is the rub, I still have this itch to build the Sovereign so if one dropped into my lap there maybe a possibility, but I'm not expecting it. There are a few others that could come close to scratching that itch and that would be the Latina Santa Ana or the OcCre Santisma Trinidad, both of which I have wanted to build. Now even if I do give up tall ship modeling, I have been looking at building a few R/C radio control boats for my son in law and grandson to play with at the lake. I used to be into RC planes and built probably 20-25 planes, from a PT trainer, Sopwith Camel, Beaver really to many to recall off hand.
mike