Piet
-
Posts
3,568 -
Joined
-
Last visited
Content Type
Profiles
Forums
Gallery
Events
Everything posted by Piet
-
 Thank you all for your most gracious accolades, I am truly deeply touched with your generosity. All of us modelers push ourselves to do better because of the support we get. This has been indeed a very enjoyable challenge for me and am glad all of you like it. The boat or ship in the lamp will have to wait. First I have to draw up the plans but most importantly the strategy in how to shove a boat that's much wider then the opening into the lamp. However, i do have some ideas. But, I'm sure that several experienced ship in bottle builders can help me with ideas. Now I deed your help in how to put the words "completed" or "finished" on the title of this project. Forgive me for my computer ignorance, I'm an old airplane man, not a computer wizard. Also, how do I move this log to the completed section in my signature and "hot link" it??? Gwen and I wish all of you happy and rewarding modeling. I hope to see you all in your shipyards. Cheers,
 -
Yeah man, rather flashy looking! Anchor looks usable buy do the flukes swivel?? Kidding of course but with your abilities I wouldn't put it past you Reference that delirious looking worm - up, I am familiar with them. We had them in Indonesia as well, they could be found in a smallish type of banana. The indigenous Javanese people loved them too as well as some other scary critters. Cheers.
-
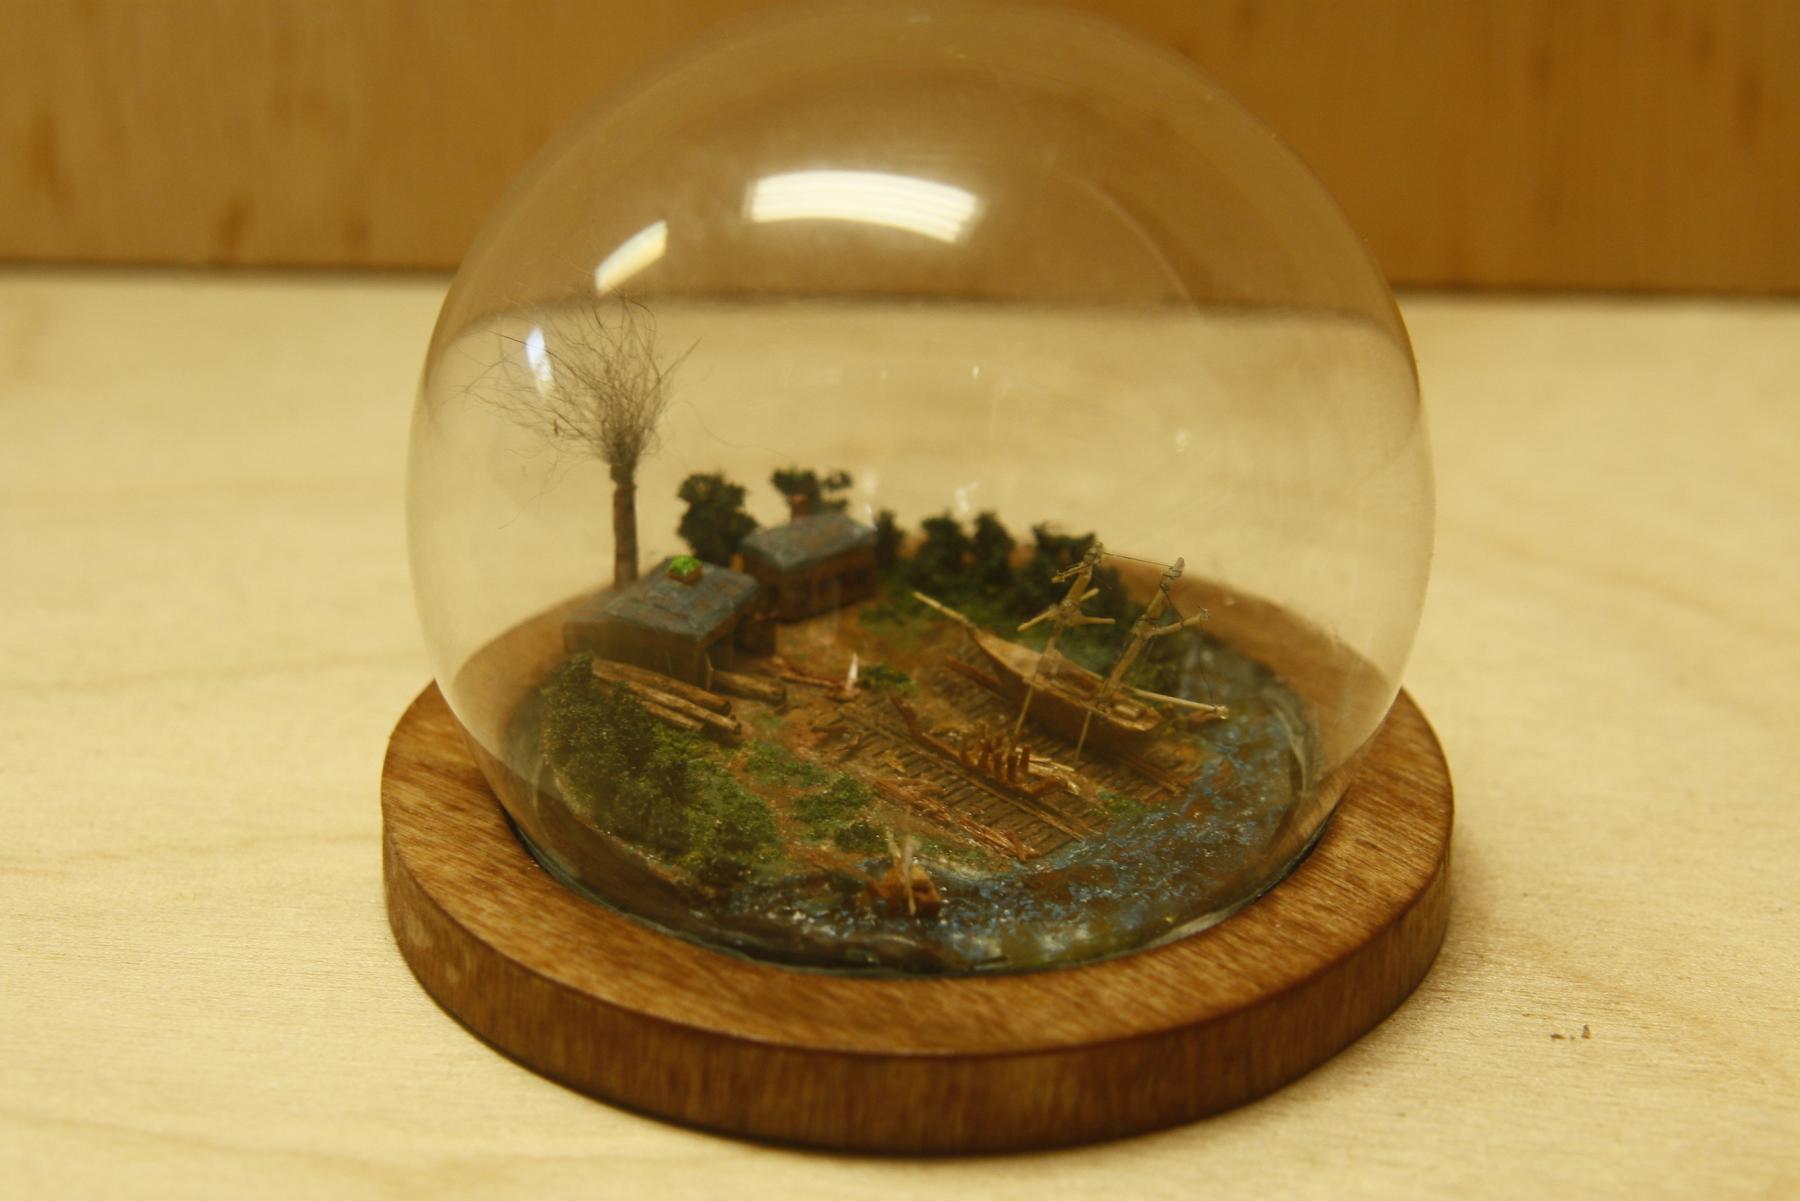
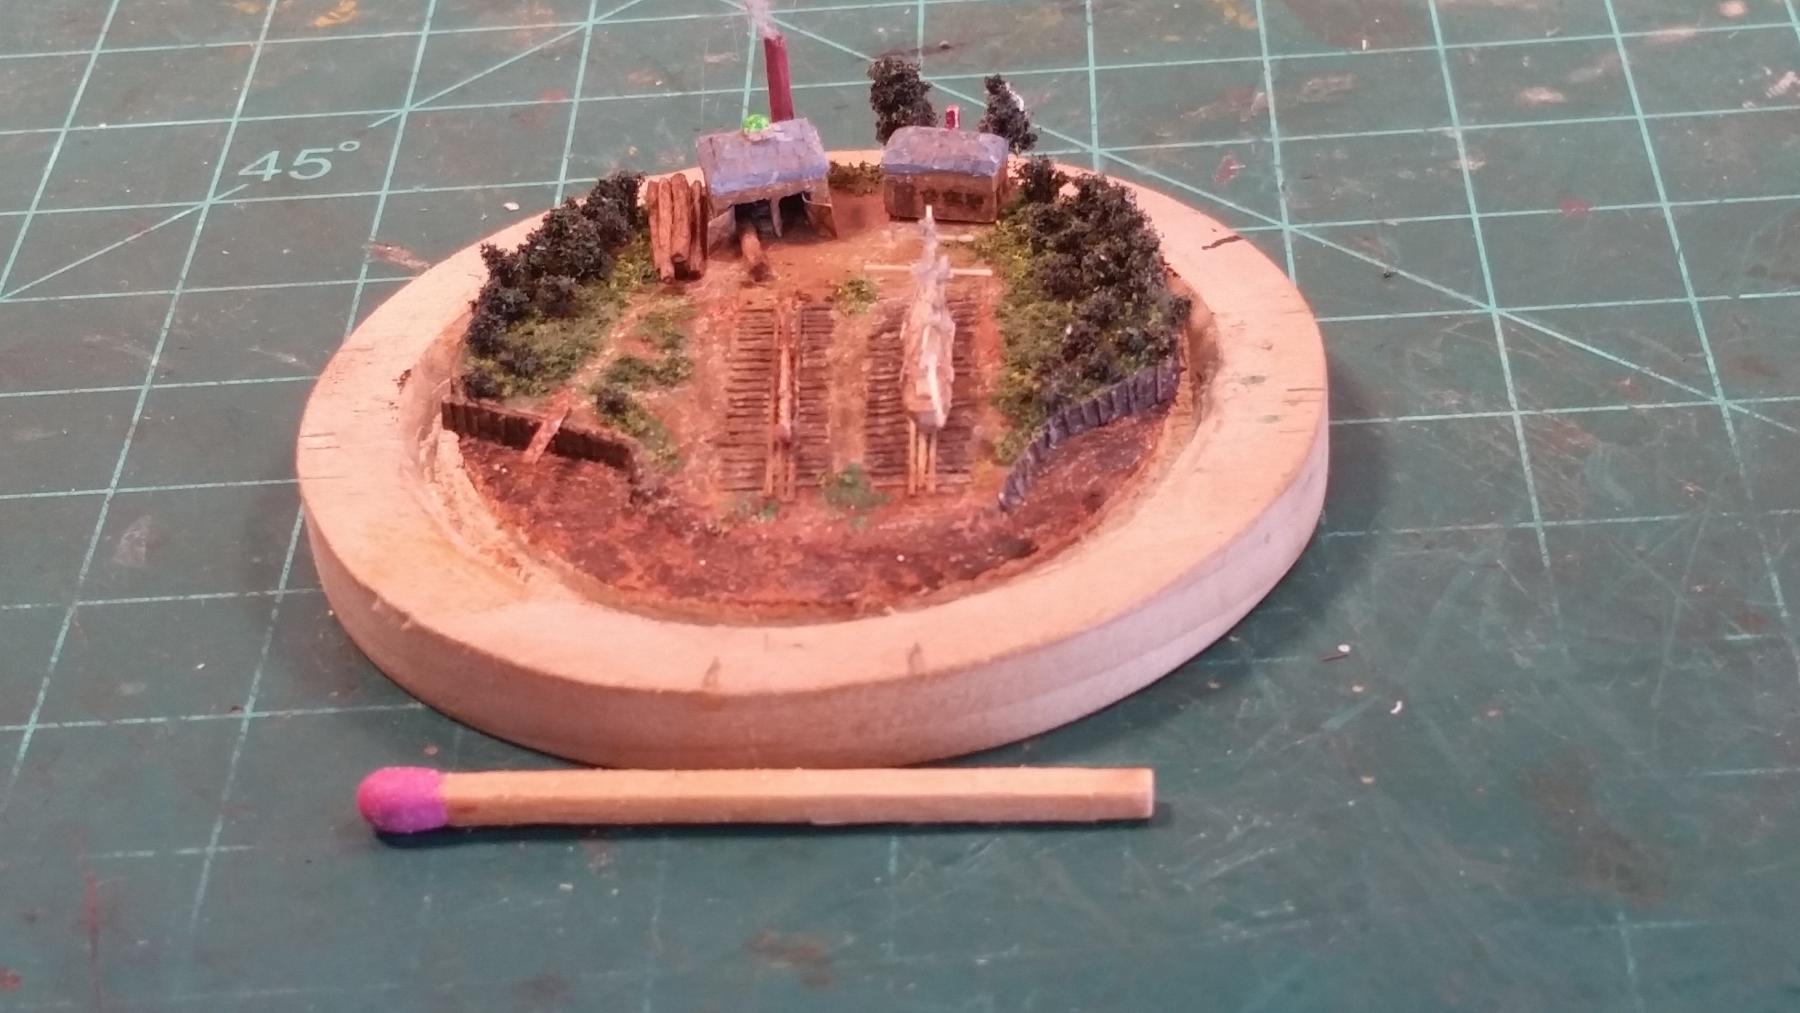
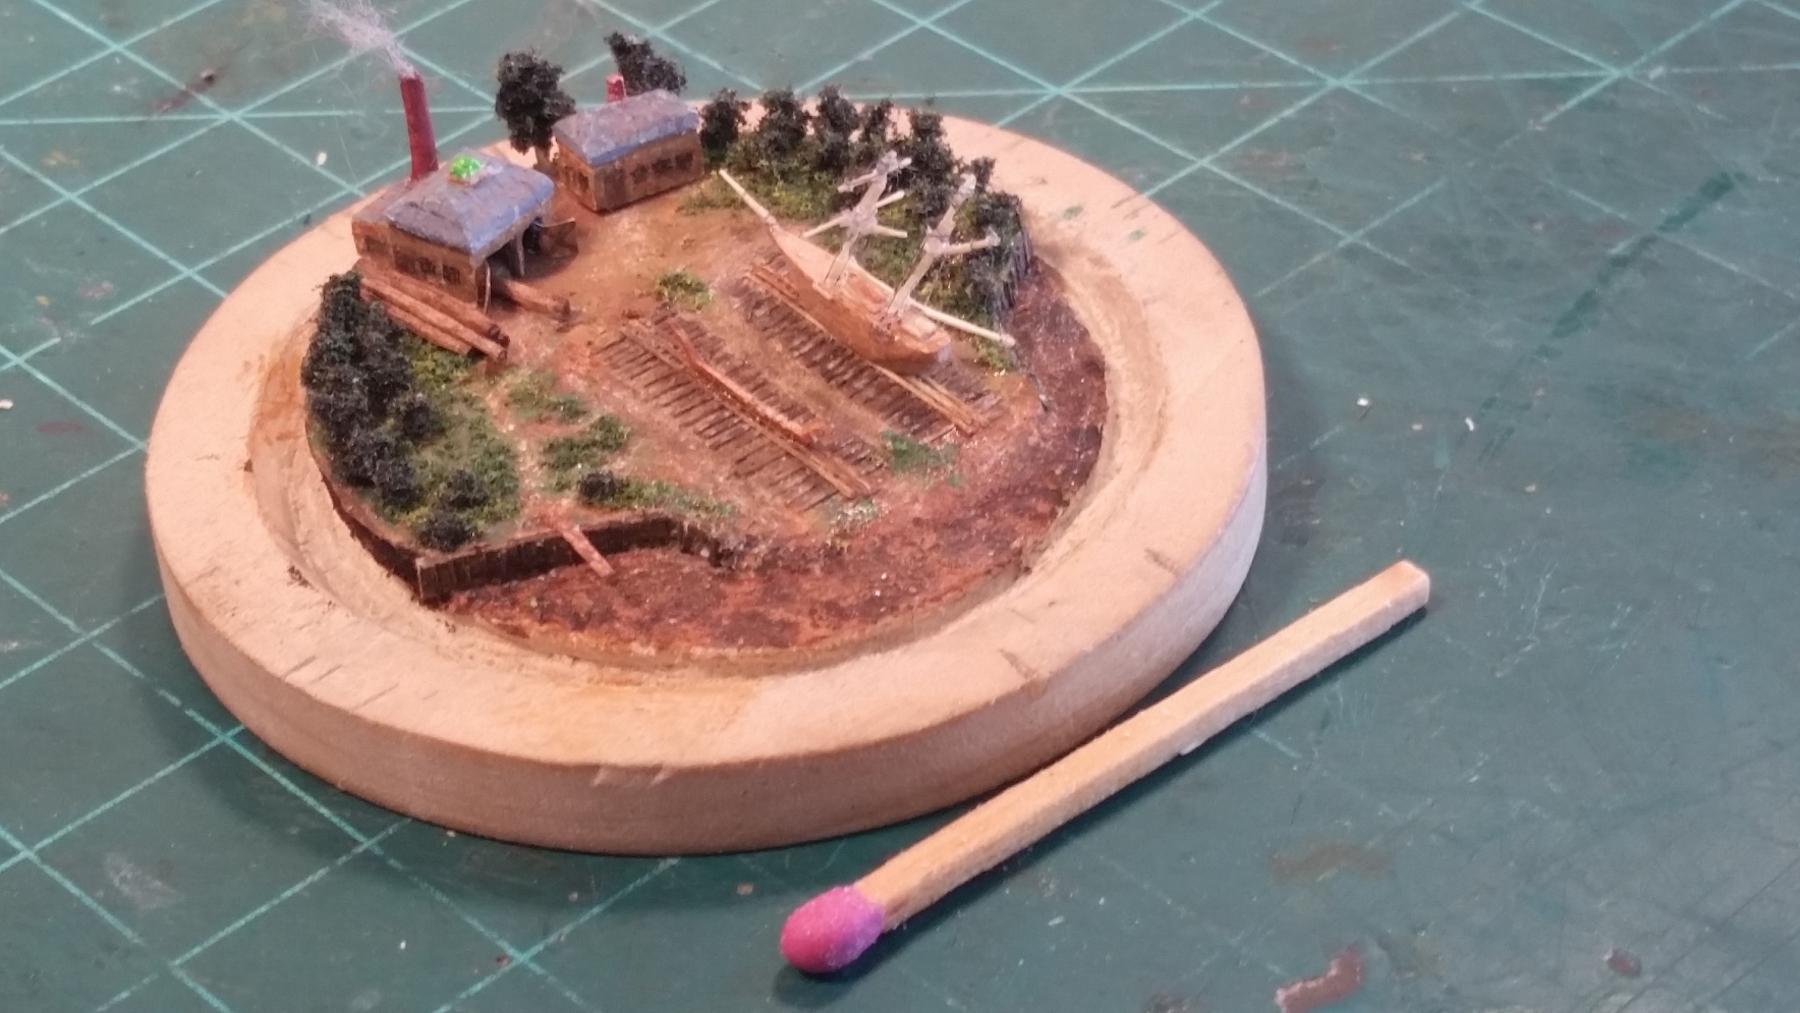
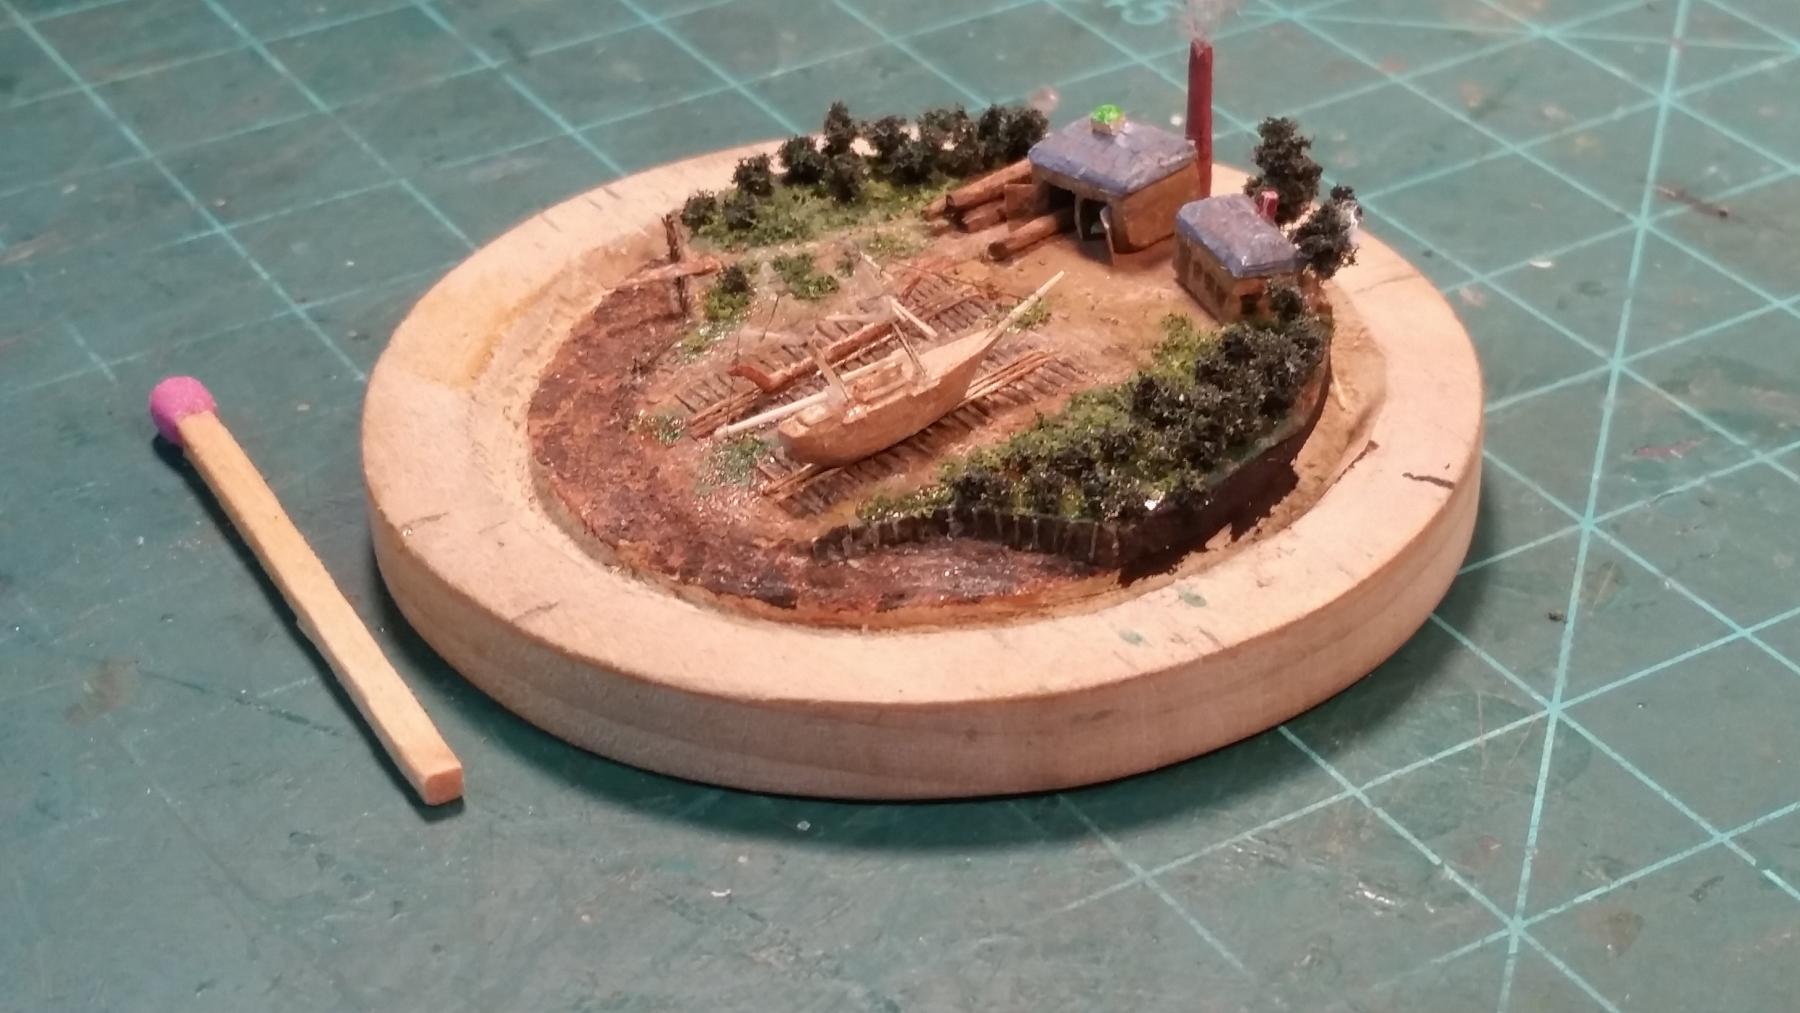
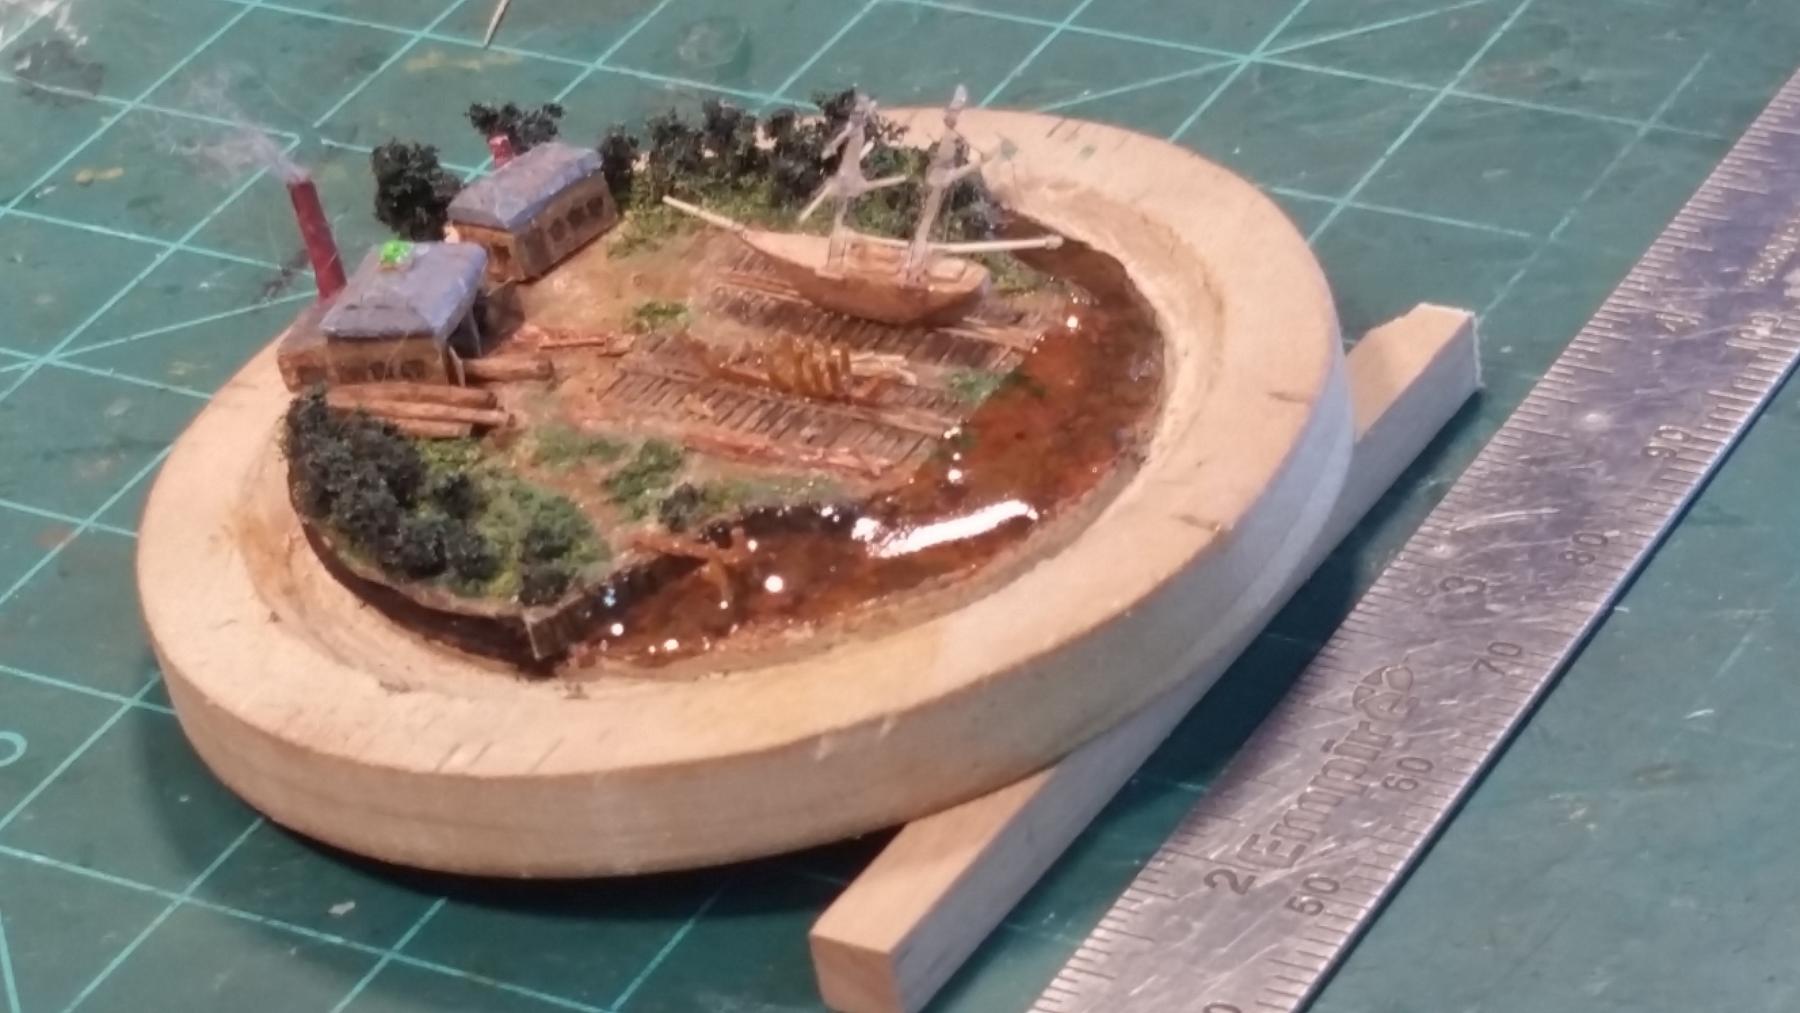
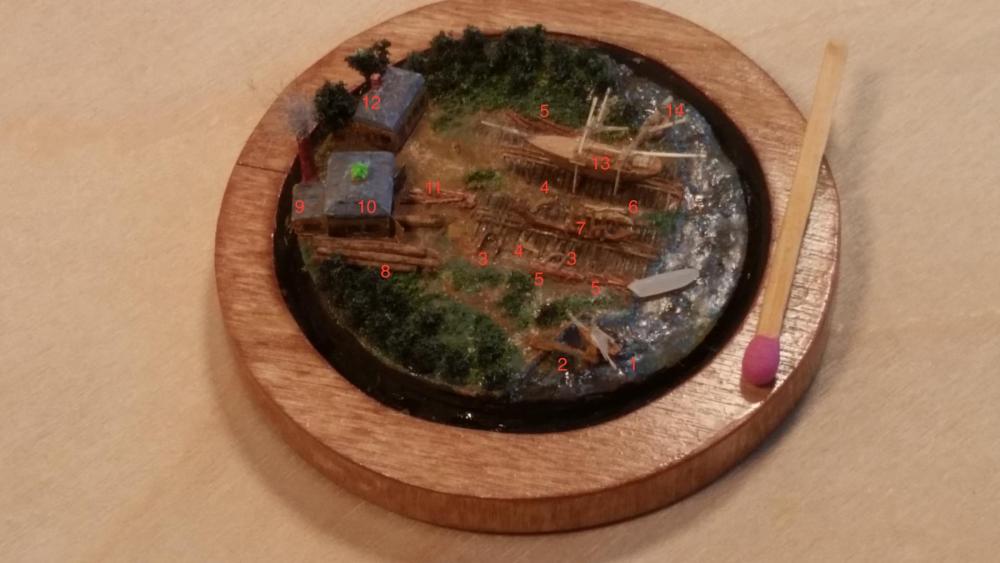
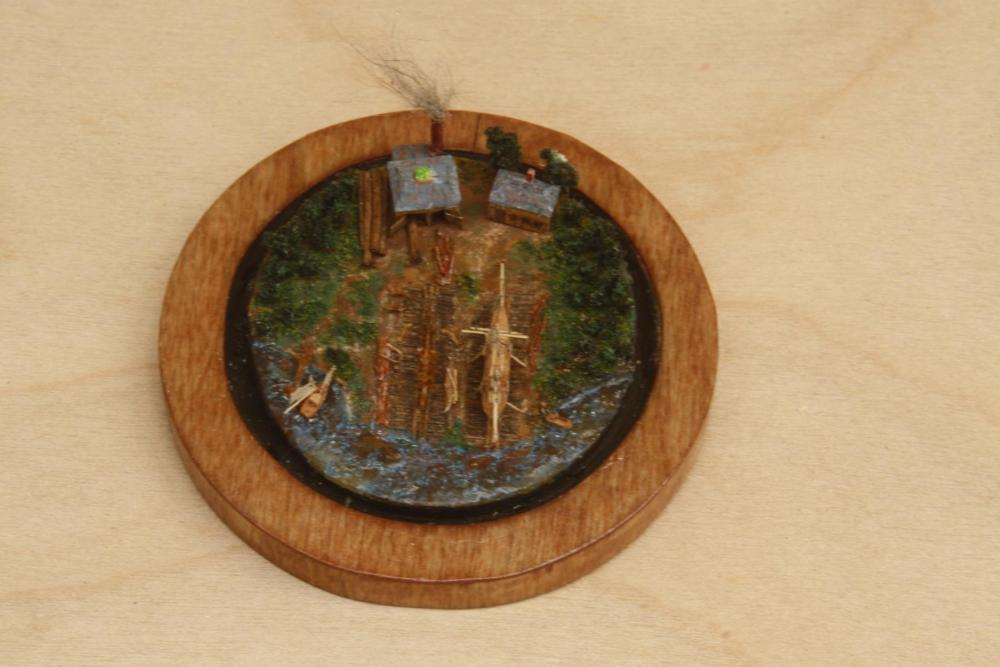
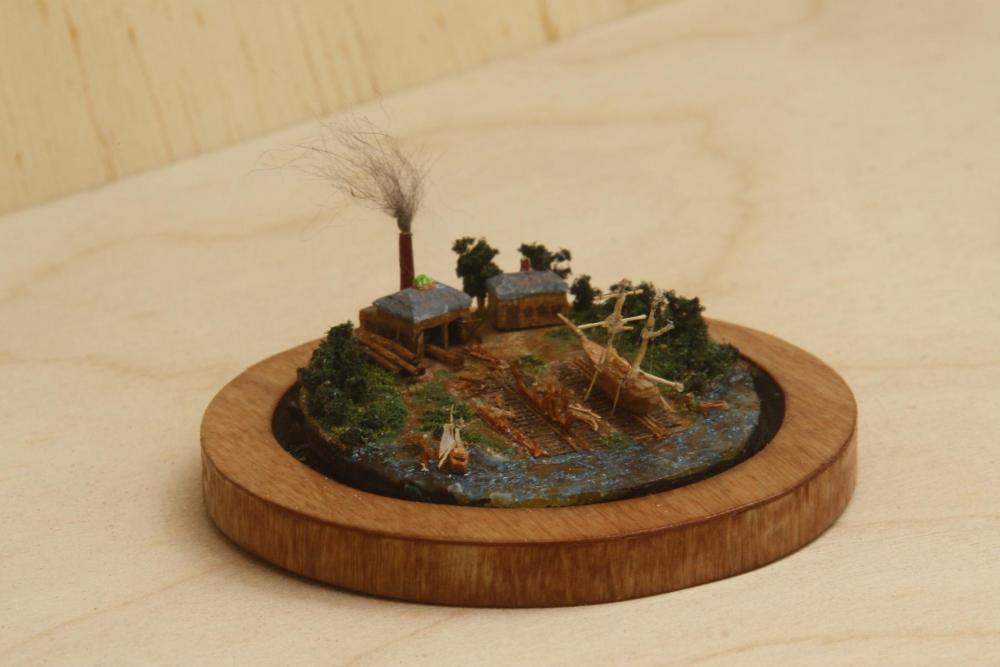
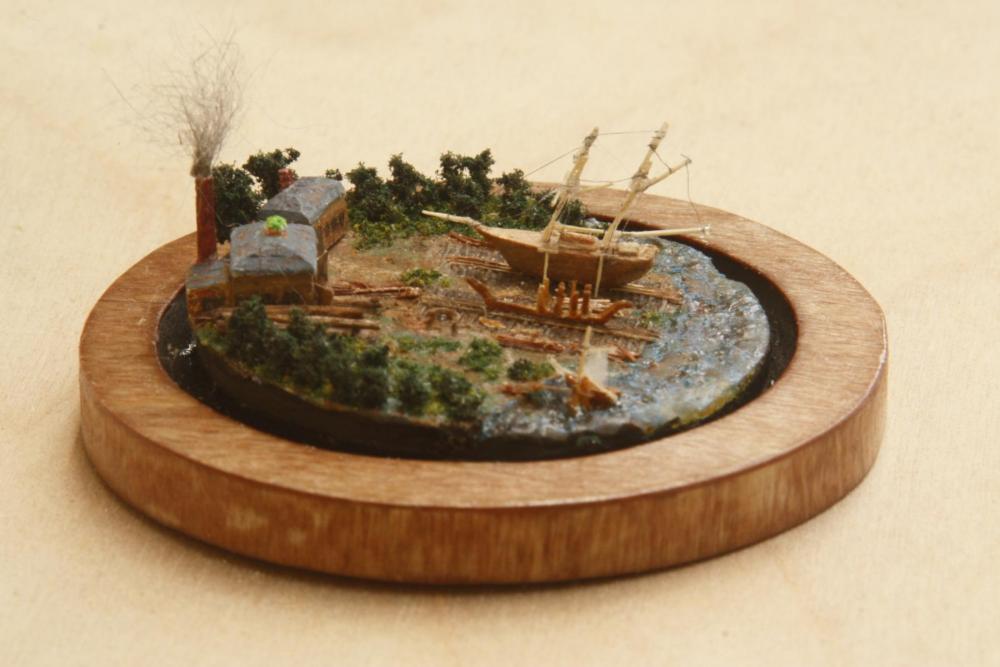
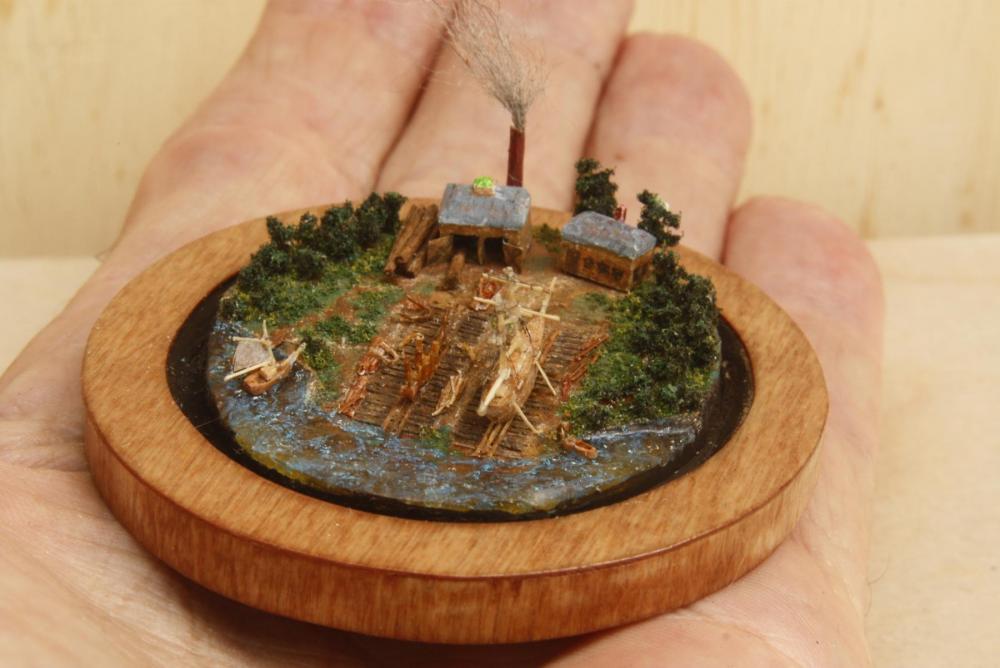
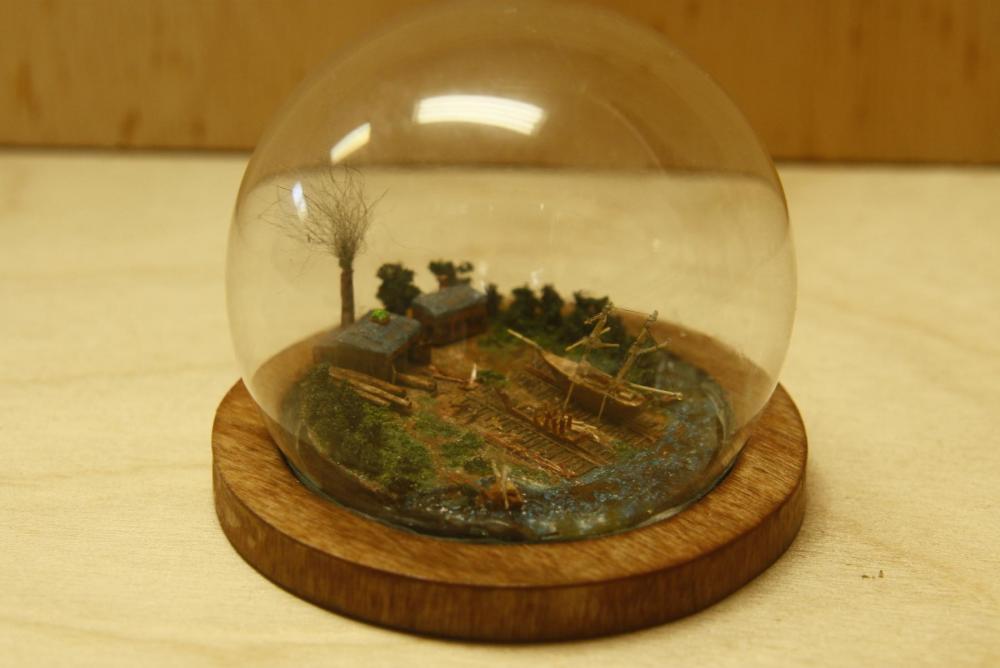
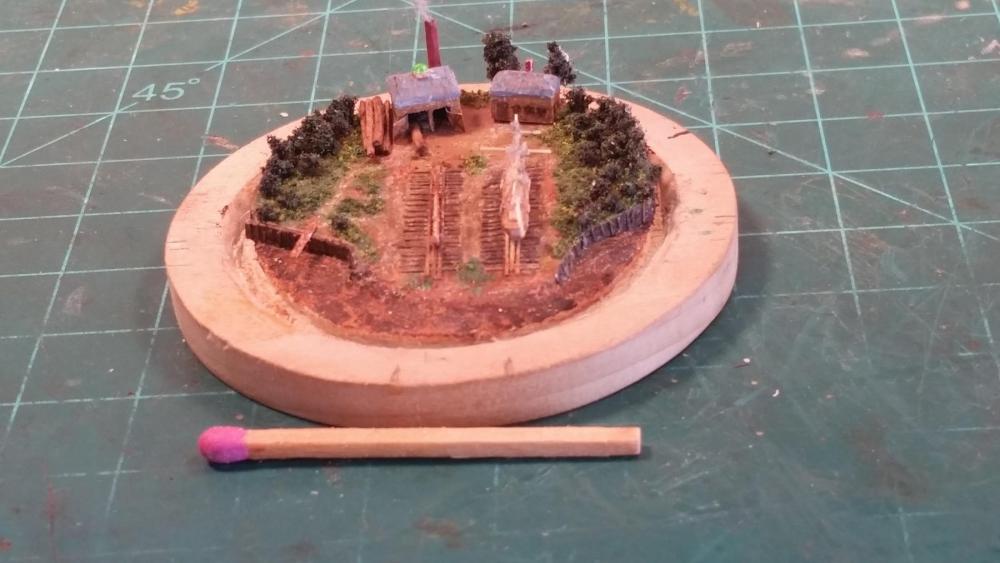
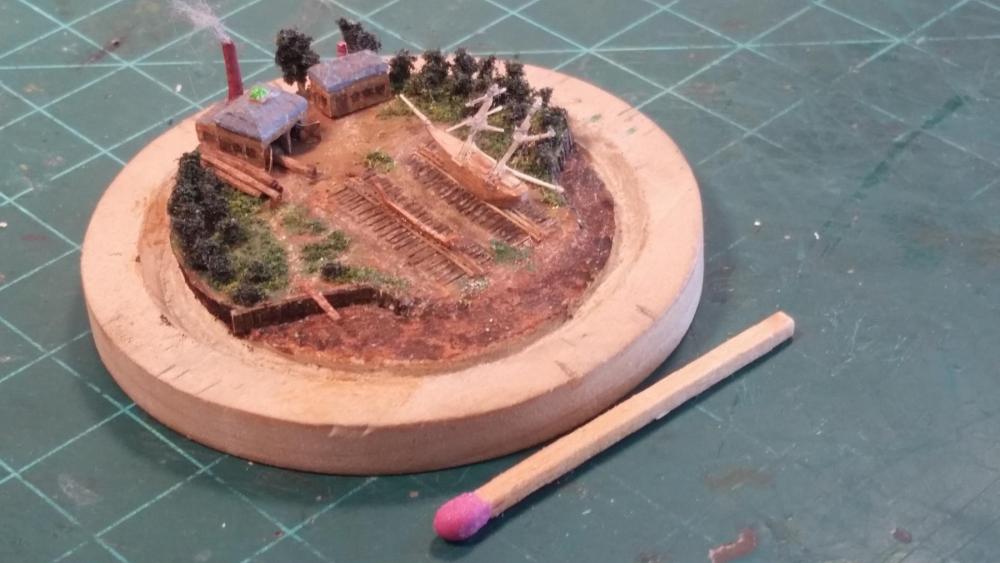
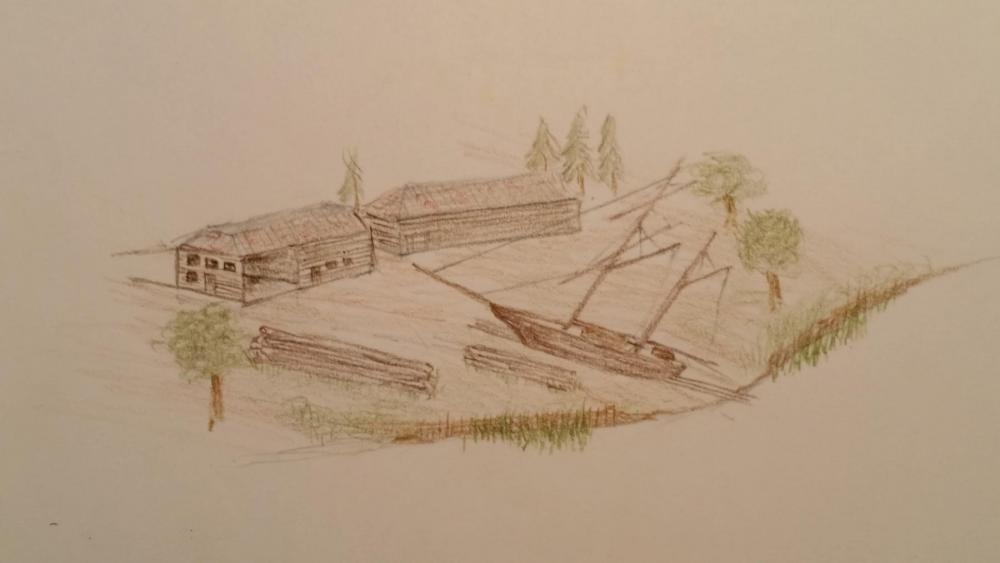
Hello everyone and best wishes. Thank you Mark, Igor, Carl, Julie Mo and Patrick for your very kind words and of course a heartfelt thanks to all who clicked the like button. This will most likely be the last post of my effort to make a micro mini diorama. It's not a Dutch shipyard as Amateur Jan would have liked but I opted for something we could expect somewhere in New England. Is it perfect? No, not by a long shot but the main thing is that I learned a lot and had a lot of fun doing it. There is still that Dutch jacht or fishing boat in a lamp awaiting to do - - - - someday. Thank you all for visiting and your helpful hints and encouragement along the way. My next "little" project will be started in the kit building section but I'll also continue with my VOC ship Surabaya. Gwen would like to see it finished so I can start with her father's ship, the Musi. Here are a few pics I picked out for you to look at. Here I have numbered the various details to annotate what they are. #1 is the 35 foot supply sloop. #2 is the wooden dock the sloop is tied to. #3 are two of the ship's frames. #4 are two of the canted frames. #5 are stacks f hull planks. $6 is a stack of deck planks. #7 is a 95 foot schooner on the ways in the early stage of being build. #8 are logs. #9 is the steam power shed to run the saw with its smokestack. #10 is the sawmill. #11 is a stack of freshly cut planks. #12 is the machine shop. #13 topsail schooner in the stocks close to being launched. She has most of the standing rigging installed. #14 is the 15 foot ship's boat moored to a pole on shore. As a reminder, the sails on the supply sloop is from VERY thin cloth packing material of a package with sail cloth Igor uses for his bottle ships he send me. Thanks again Igor, much appreciated and as you see even the packing cloth came to good use. Te actual sail cloth will be used for the future build for my planned boat in a lamp, see my signature. ] Here I did a "Patrick" by putting the diorama on the palm of my hand. This shows how small it actually is. The width of my palm is 50 mm and the diameter of the diorama is 35 mm. Cheers,

- 159 replies
-
- 22
-

-
And a captain's chair too!!! And it swivels? Incredible! Where is that giant grain of rice Patrick, they don't have it in Oz? Cheers,
-
Yup, nice looking fleet Denis. Waiting patiently for the completion. Cheers,
-
Good news Kees, welkom thuis. Build up strength and we'll patiently wait for your next update. Cheers,
- 434 replies
-
- 5
-
-
- pelikaan
- beamtrawler
- (and 2 more)
-
As I follow along with each update I try to visualize how I would tackle each step. Being of a technical mind (aircraft engineering, repairs, maintenance and flying) makes it double enjoyable for me. I particularly like the use of so much metal in this build. Nice going Nils. Cheers,
- 2,625 replies
-
- 4
-
-
- kaiser wilhelm der grosse
- passenger steamer
- (and 1 more)
-
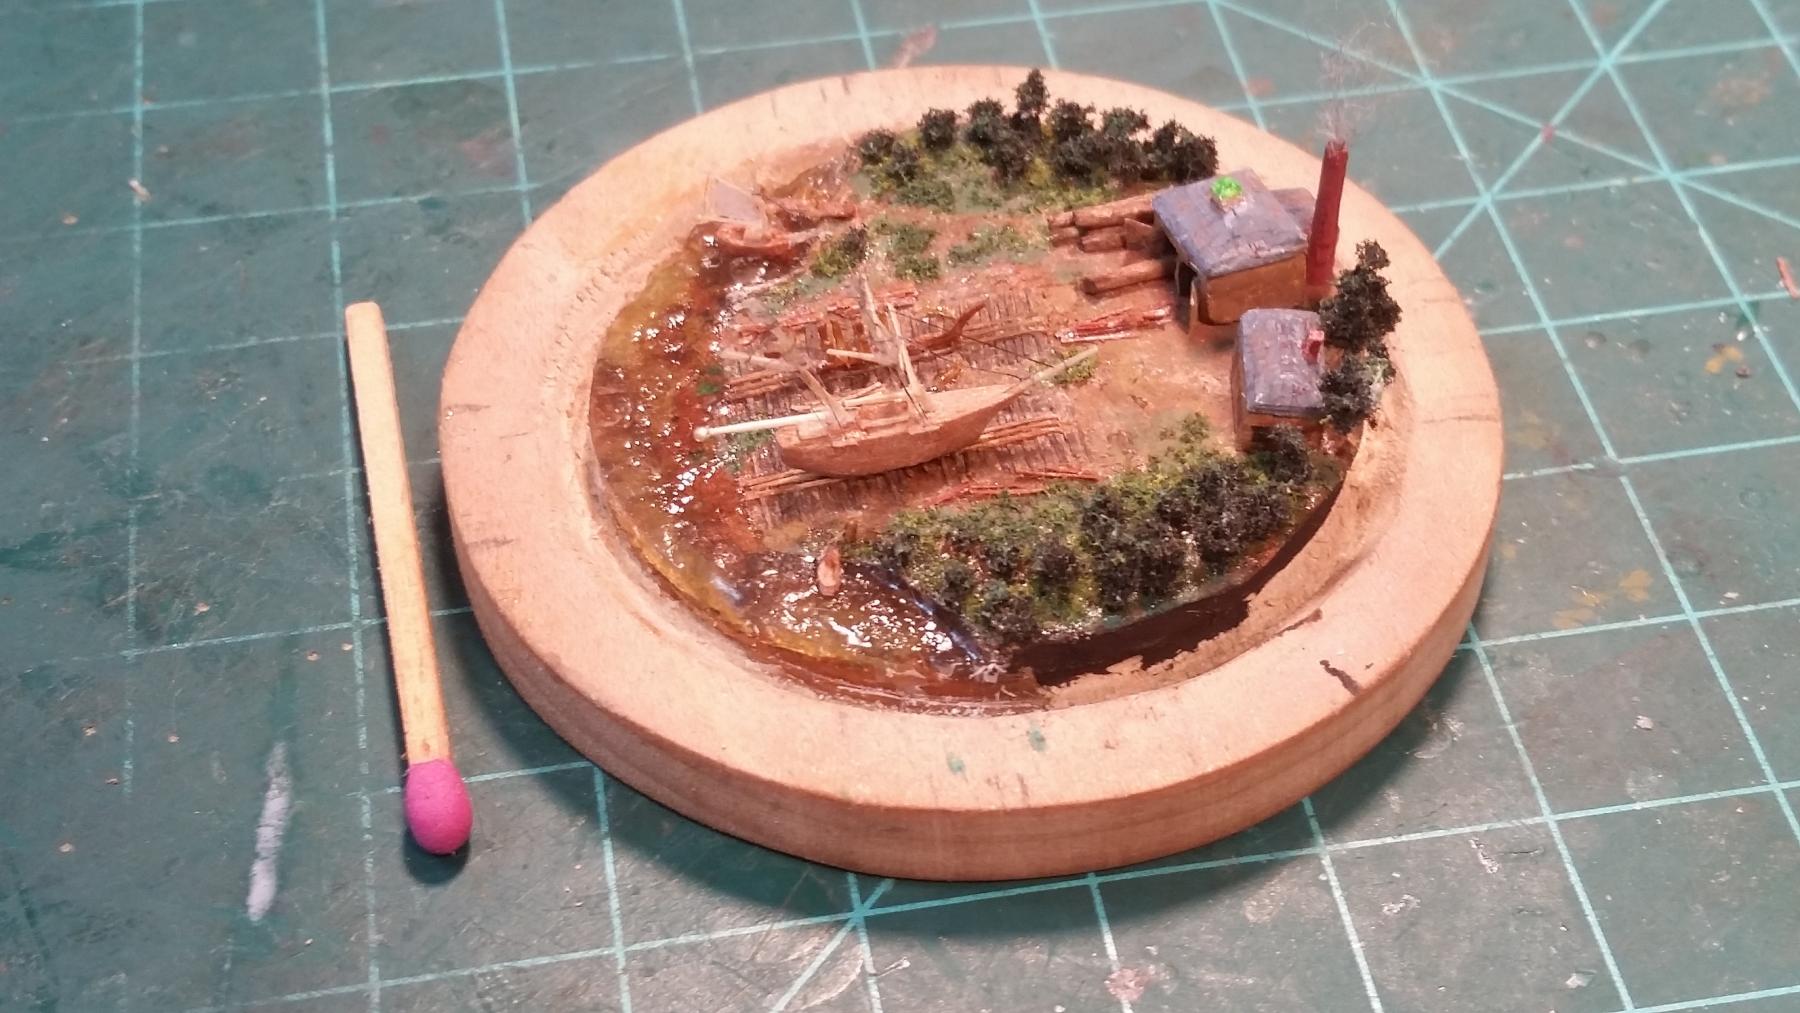
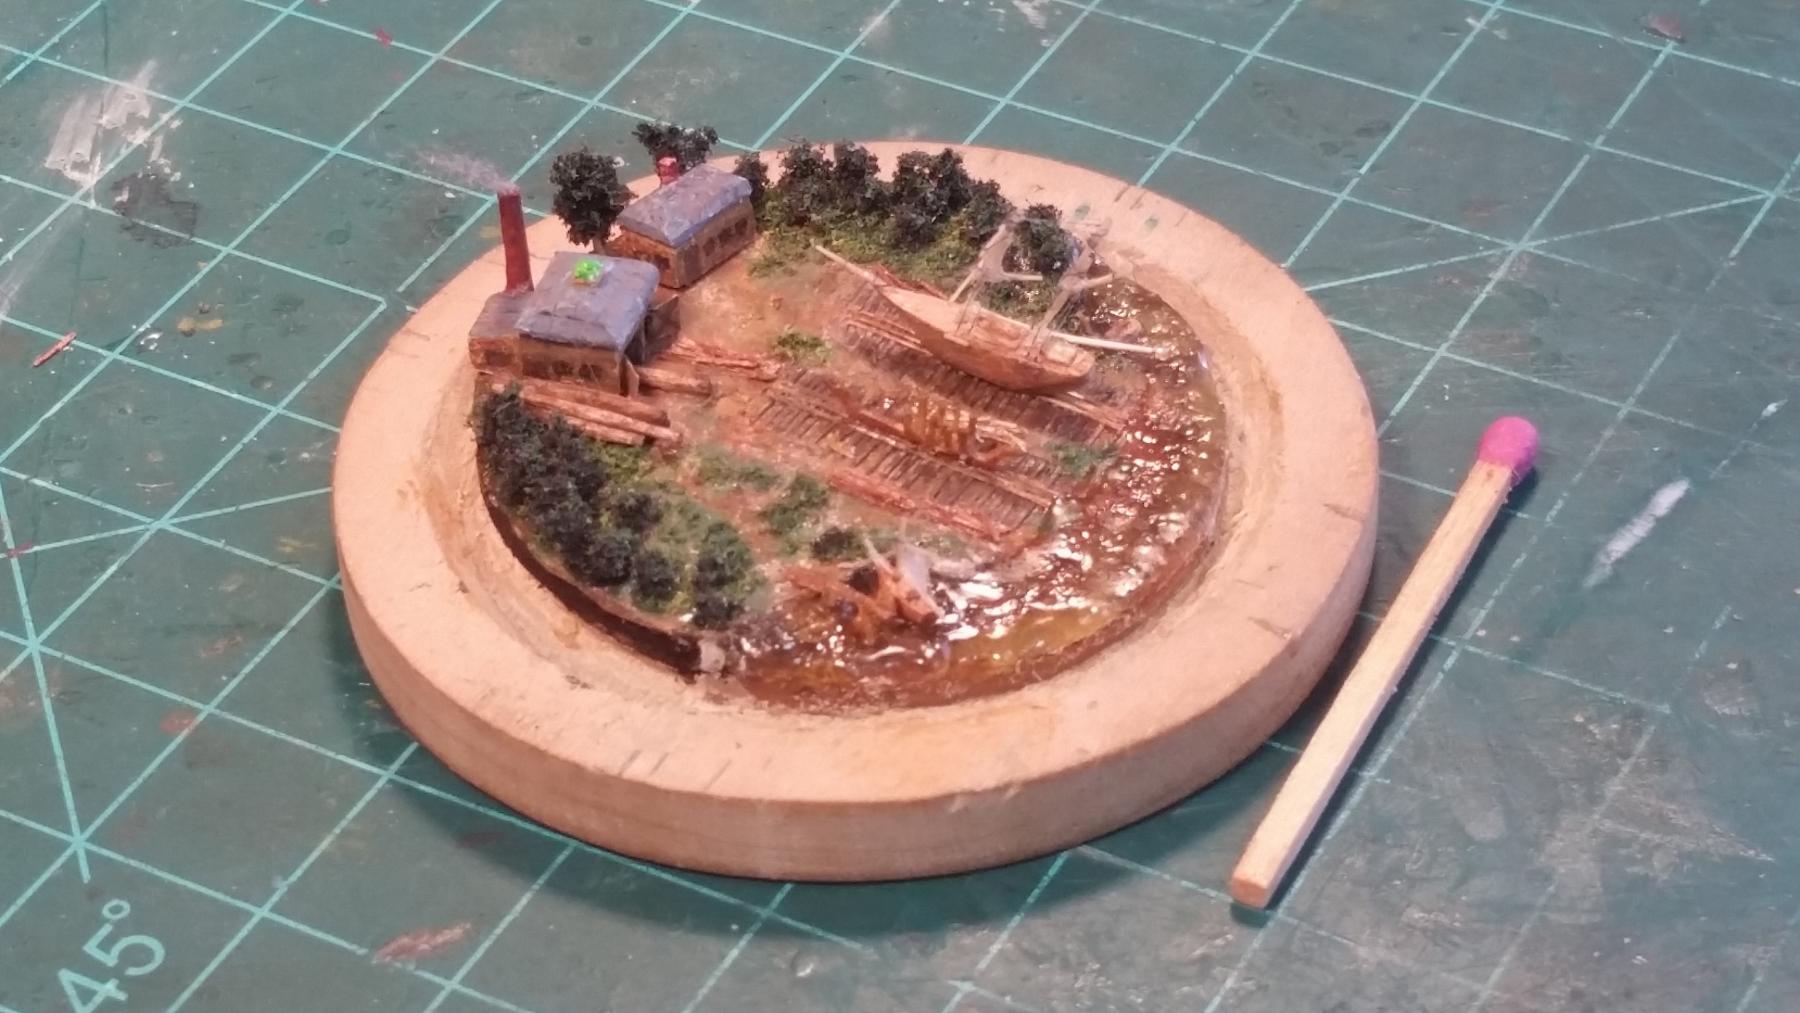
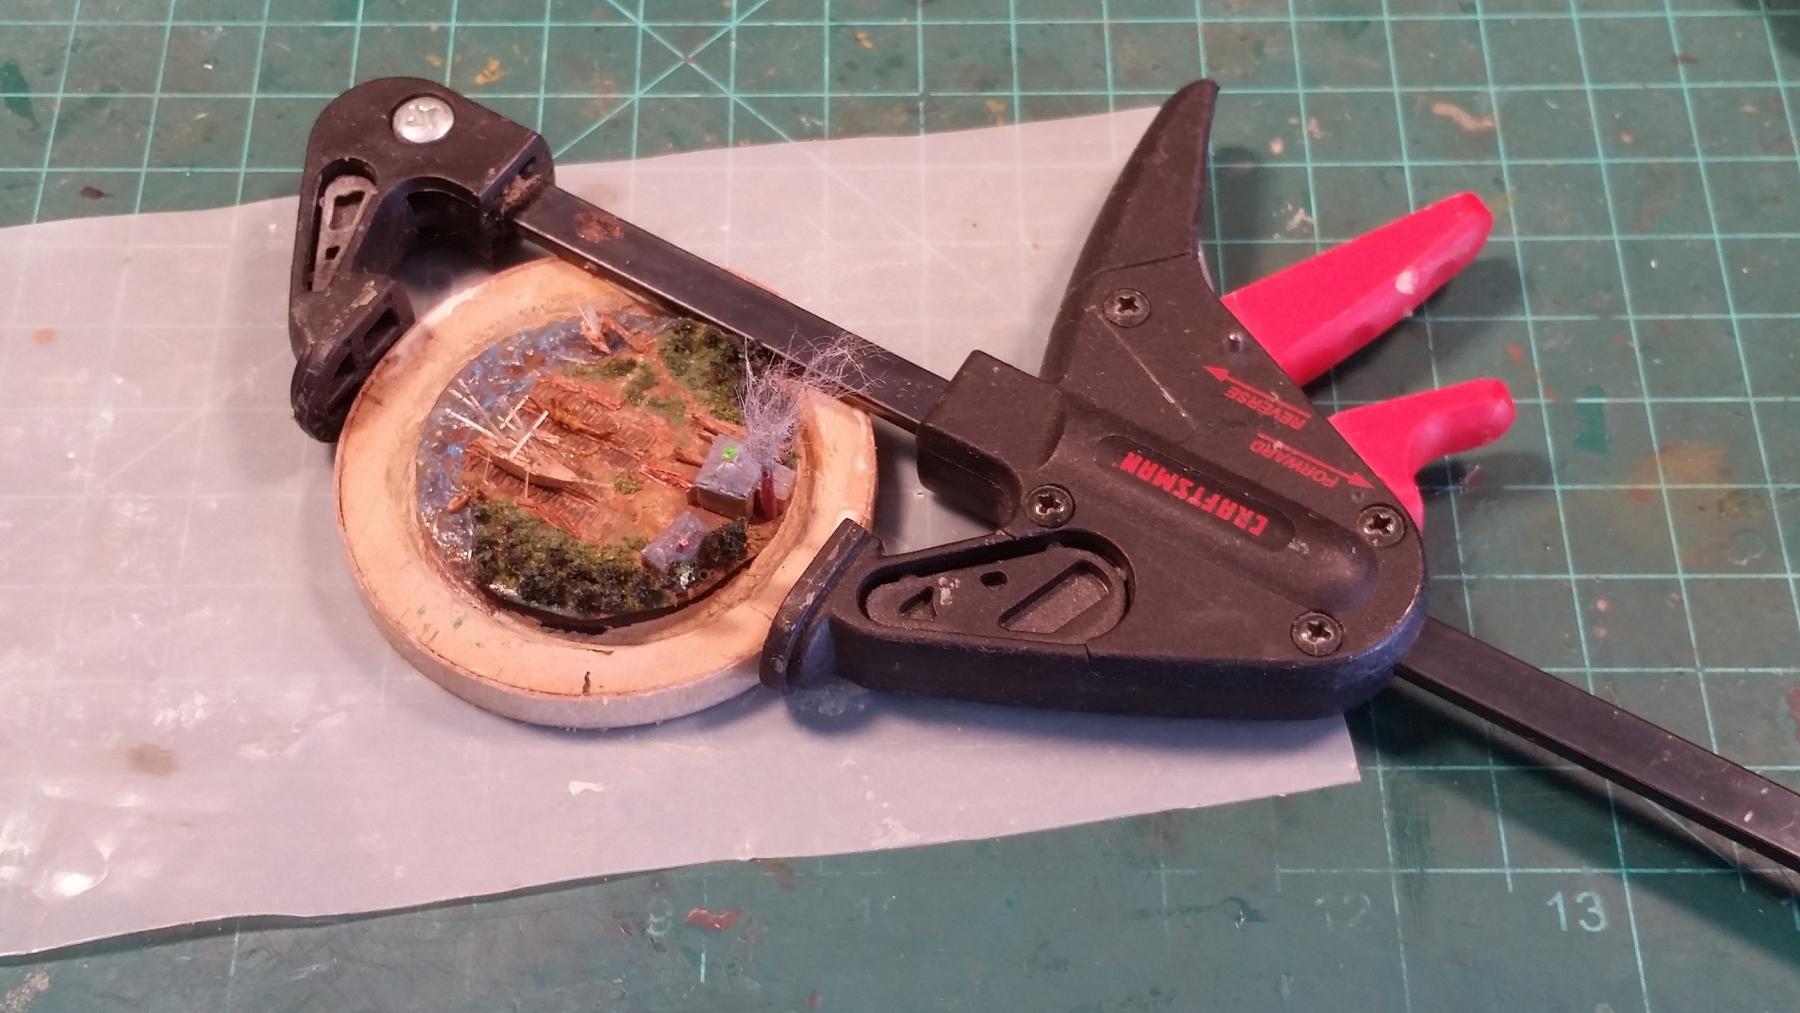
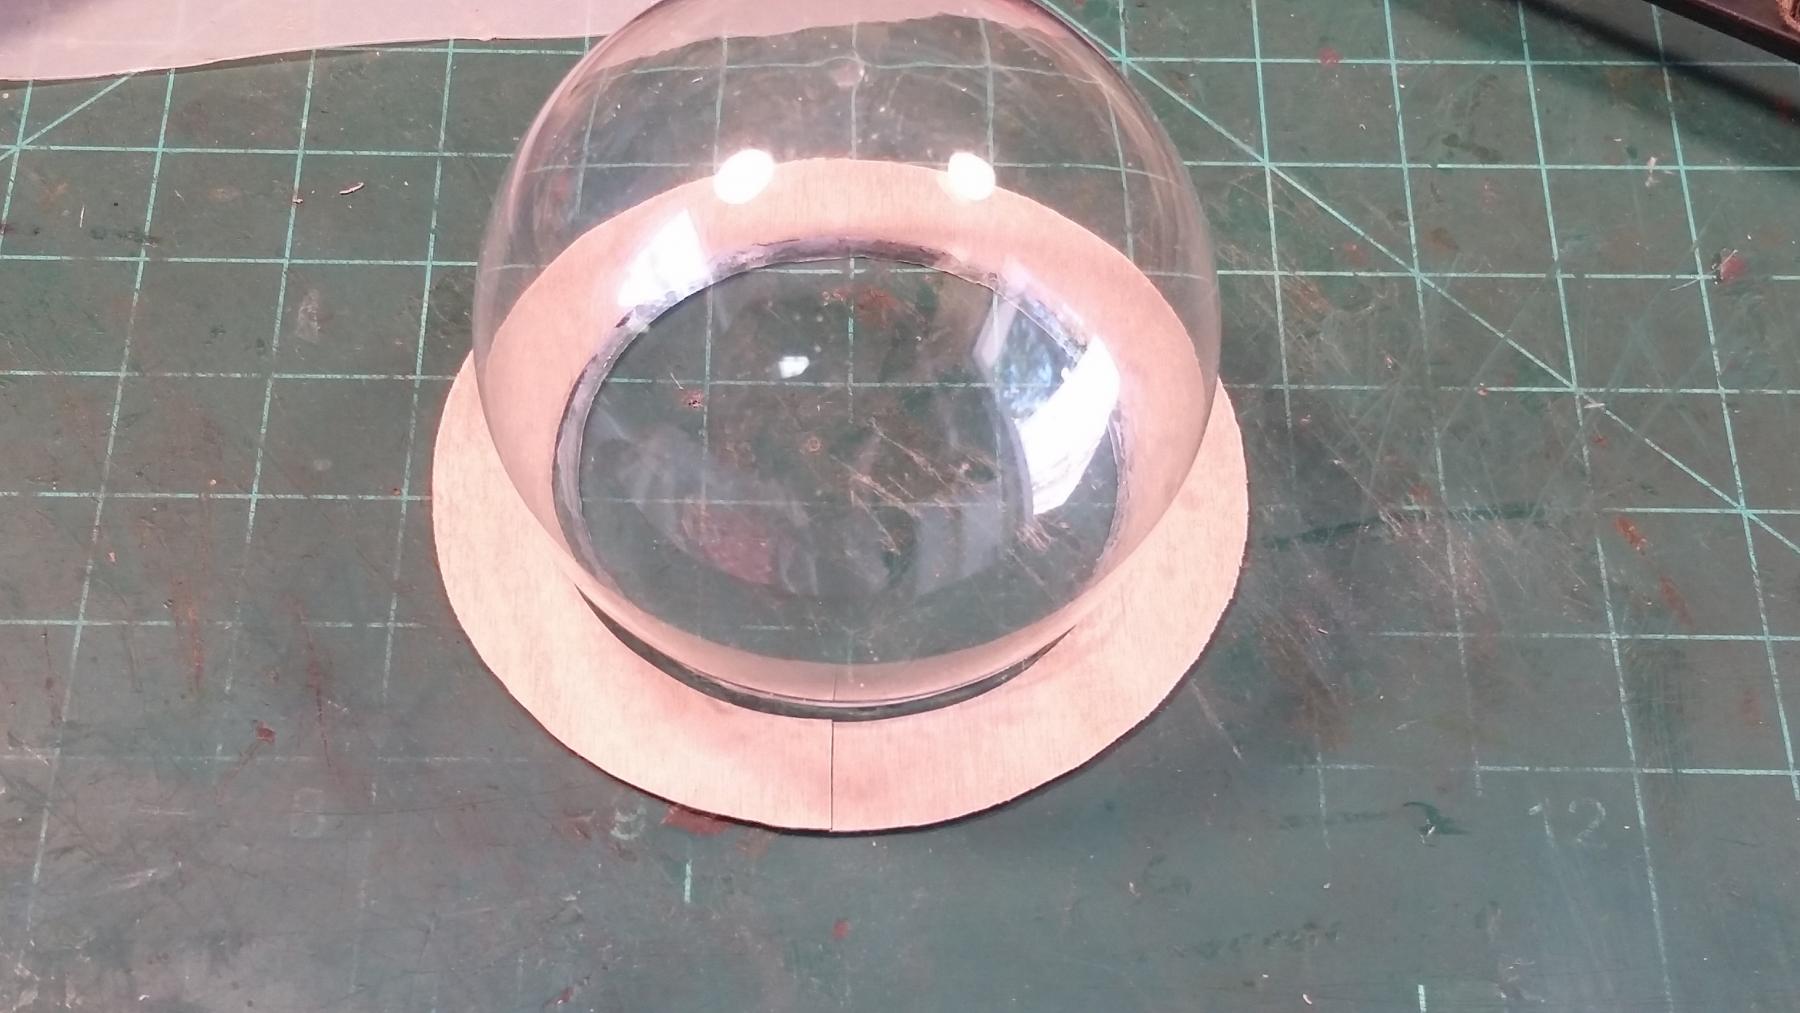
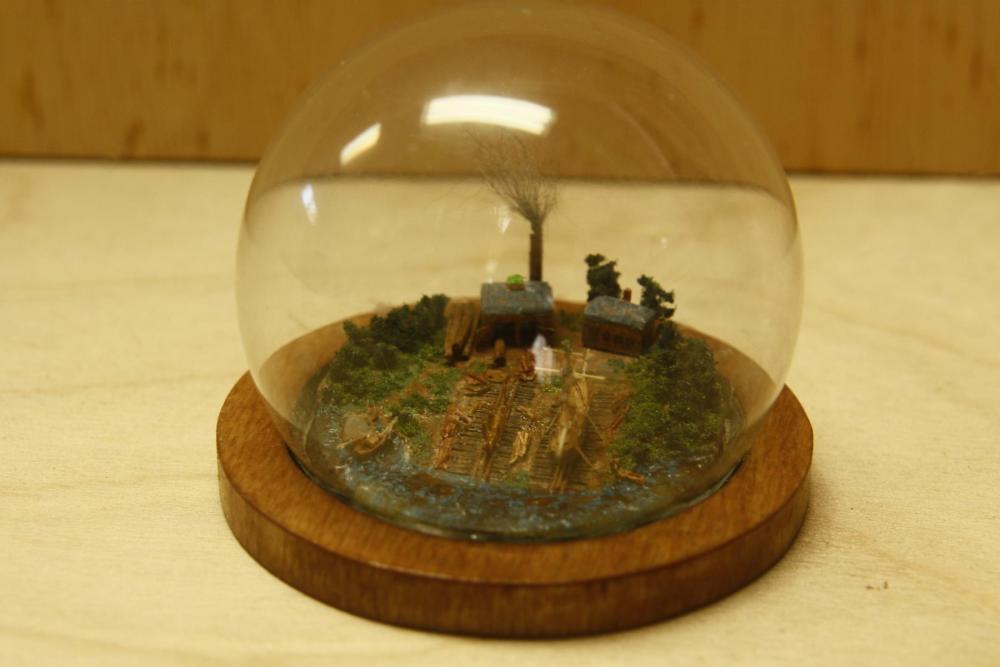
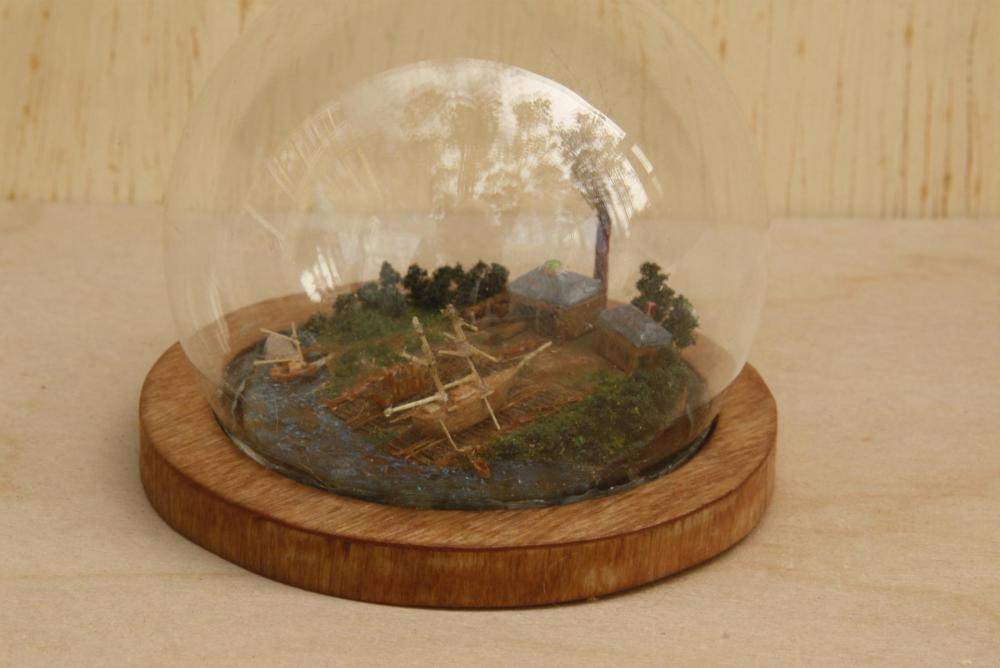
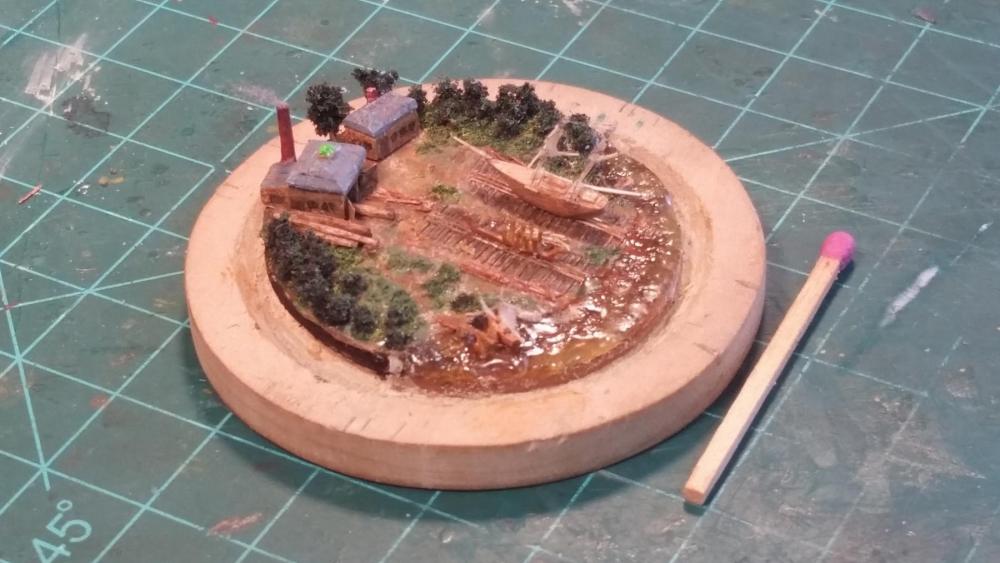
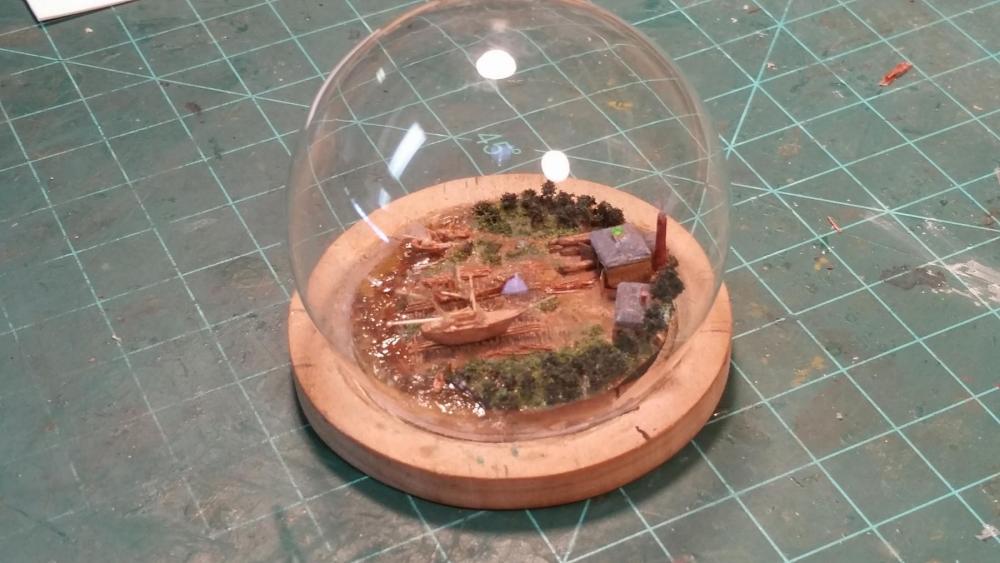
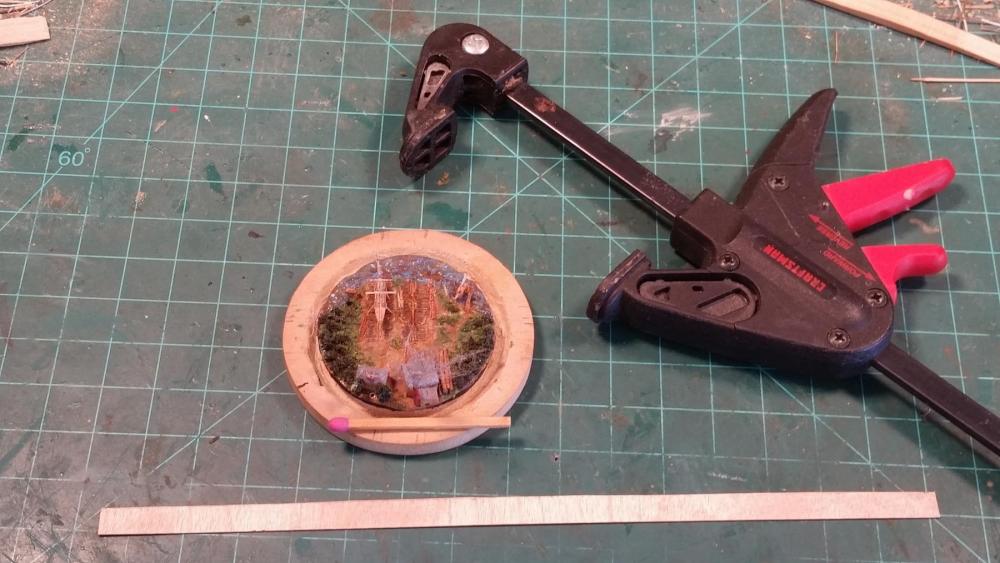
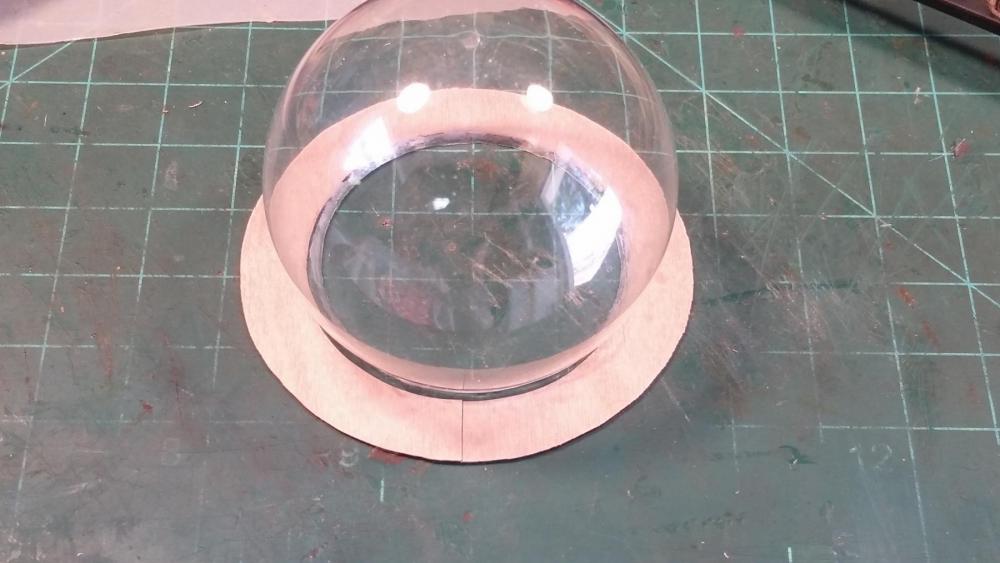
Hello Tim and Capt'n Bob, thanks for dropping in and your kind words and to all who visited and clicked the like button. Yeah Bob, I have no idea how they got that grain of rice to the wharf. It's bigger then the supply sloop Today's installment include a few more pics from where we left off in the last post with the addition of cutting out and gluing on the finishing veneer to the base. After this was done I decided to add a few more items to the diorama, like it really needed it I'll be showing these additions in next installment, which actually signals the completion of the project. I'm still sorting out the few pics I want to show, including a few incriminating close-ups. This and the next pic shows the 35 foot supply sloop and 15 foot ship's boat added. The ship's boat is actually tied to a post on shore. Here I tried the fit for the lamp globe. Not bad, plenty of space. Here I cut some veneer to glue onto the side of the diorama base. Gluing-up in progress. Here I have cut-out the top veneer for the base and - - - - - Here the top veneer is being glued up. Never have enough clamps. Cheers,


- 159 replies
-
- 20
-
-
That looks mighty fine rigging Kevin. Very impressive! Cheers,
- 1,319 replies
-
- 6
-
-
- caldercraft
- Victory
- (and 1 more)
-
Ah, the Red Lion being build, marvelous, don't mind if I pull up a stump and watch? So far great progress. Cheers,
-
Beautiful work on the boats Hennie. Remember now, I need two for a 1665 era VOC ship, I'll put my order in now Cheers,
- 214 replies
-
- 4
-
-
- agamemnon
- caldercraft
- (and 1 more)
-
Hi Dave, she looks more like ship now, beautiful work. And yes, it would have been a blast joining you on this trip but alas we'll have to forfeit it this time. I have a few doctor appointments too, nothing serious, just routine checks. Wish you the best of luck and take plenty of pics to share with us. Cheers,
- 962 replies
-
- 7
-
-
- sovereign of the seas
- ship of the line
- (and 1 more)
-
Utterly amazing Patrick, utterly amazing. I called Gwen in to take a look see and all she did was shake her head. Well, I had to help her lift her jaw from the floor though. Do I see a glass door in one of the bathroom shower stalls? I agree with the general consensus about the one pick with the boat all in its individual parts. I doubt very much that there is another model of the Majellan like this one in the entire world. Cheers,
-
Wow, beautiful looking set of deck beams Mark and it looks like you also installed part of the waterways. Deck furniture finished? And you haven't shown any of it? Or is that also salvaged from V1.0? Cheers,
-
Thank you Mark, Daniel, David, Glenn, Patrick, Carl, Keith and Pat for your most kind words and all the likes, that's what motivates me, thank you all. David, to answer your question about using a surgeon's microscope, ummm, no. Just a cheapy 3 X optivisor. My dentist has one that's $350 and really powerful with a great depth of field. Poor little old me can't afford to lay that kind of sough out. In my next life Great seeing you here Glenn. In model making one can use whatever suits the need. Actually, I should have paid more attention and used the hair from her tummy. Oh yes, she LOVES a rough back rub, one time she made some funny cackling noises with her eyes closed. When Gwen does it she bites her hand, go figure. Well Patrick, a few more installments and we can reveal the finished product. It's now sitting between the two sloop models on top of the dresser cupboards. As small as they are, this thing disappears between them. The rice grain is actually from the land of giants as is the matchstick Well, like I mentioned already, we are now close to revealing the finished model. I have been busy sorting out the pics. I made a bunch with my Canon EOS 450D and the Samsung cellphone. Needles to say, I have to pic the best out of the bunch. Till then, my best wishes to all. Cheers,
-
Happy birthday Kees and beterschap toegewenst. Cheers,
- 434 replies
-
- 3
-
-
- pelikaan
- beamtrawler
- (and 2 more)
-
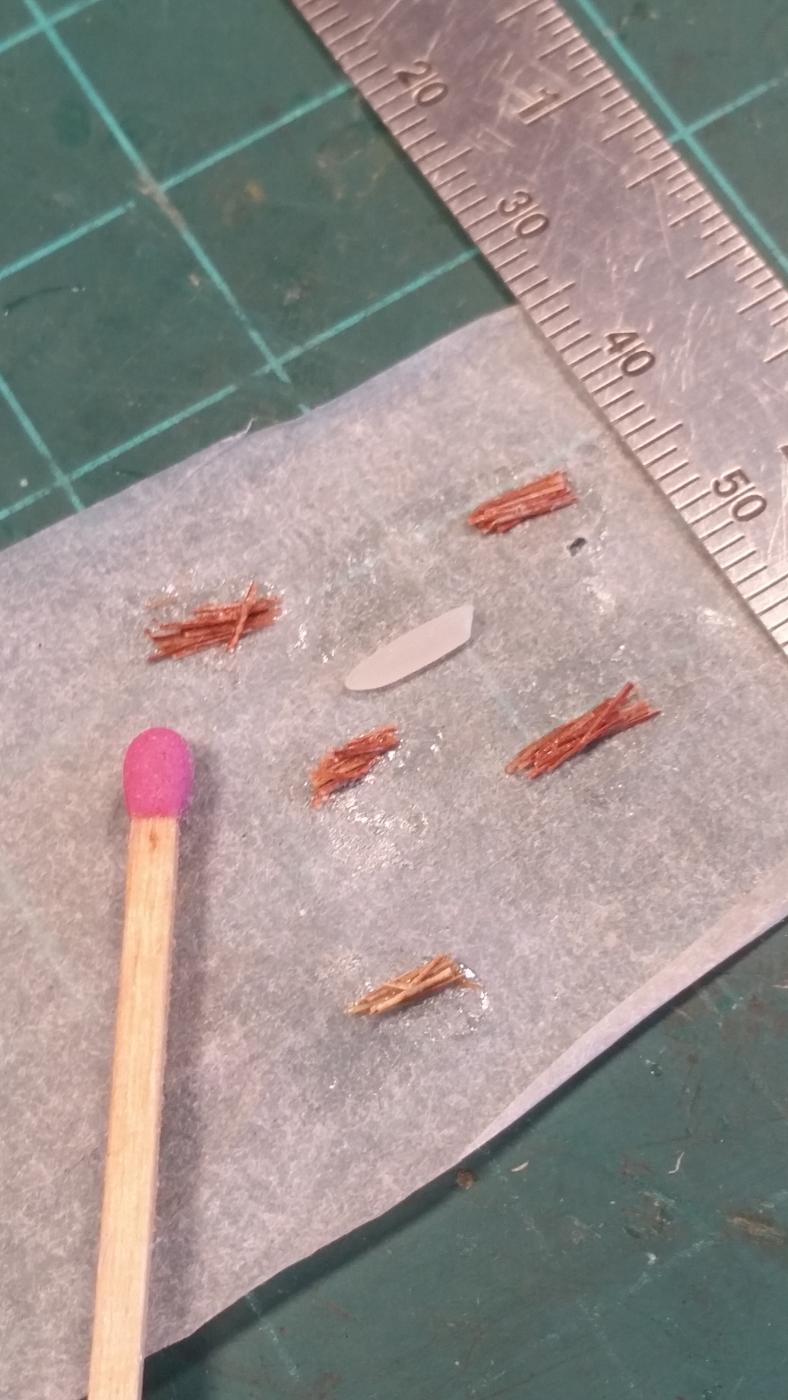
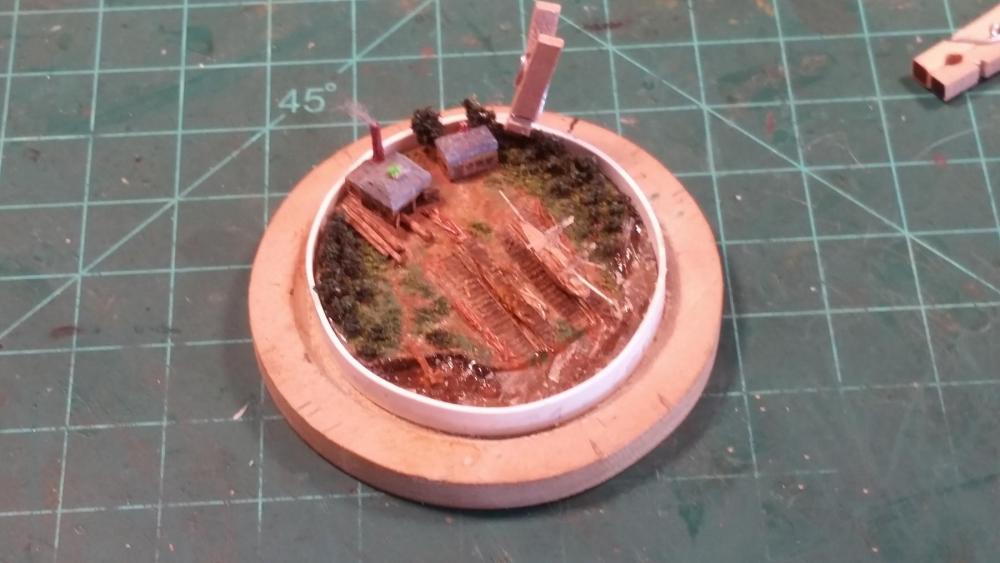
Thank you Pat, Dirk and Lawrence for your very kind words and of course also to all who clicked the like button. Well Lawrence I prefer working in larger scales too, much more forgiving. At a scale of 1:2000 even the tiniest drop or hair will show up big time out of scale as my pics show. Thanks Dirk for dropping in and your kind comment. How is your project coming along? Good to see you here too Pat and yes, Ivanna Poes is a character, nosy and likes to see what we are doing. The two buildings have been cemented on and we are ready to add other stuff to the landscape. I have cut the deck and hull planking to scale size and prepped for pouring the water. I didn't count on the capillary action of the resin I used for the water. It climbed right up the wall retainer and the dock pillars. i had a heck of a time to remove most of it. As the resin was setting I tried to stir it up some to create movement. I think it worked out okay. I have now cemented both ships to the slipways and prepping for the next step. That's about all for now, next post will show a little more. Here I have cemented the near completion schooner and the one at the beginning stage to their slipways. The keel has just been laid and waiting for the frames to be erected on it. I have also put the logs near the sawmill and one inside to be cutup for planks and larger timbers. This is another view where you can see the keel on slipway 2 more clearly. Yet another view from the other side. This shows a packet of deck planks on the right and a packet of hull planks on the left with a grain of rice for size comparison. I made a form from stirene prior to pouring the water. I didn't want to let that stuff run into the groove, too much work to grind it out later. Here the water is poured, setup enough for me to remove the jig. I had to do a lot of work after this phase to simulate movement and push the resin away from the retaining walls and the dock posts. It helped some but needed to remove more after the resin had hardened. Viewing it with the naked eye it's not noticeable but it irritate me. Cheers.


- 159 replies
-
- 14
-
-
Good to see you back Dave. Some nice rope work you are doing, it's all downhill from here - - - ummmm, except for the clove hitches that is Great to hear that you joined that model group and kindle a fire for wooden tall ship building or any kind of wooden ship. Good luck with the show. Cheers,
- 962 replies
-
- 5
-
-
- sovereign of the seas
- ship of the line
- (and 1 more)
-
Great progress Nils. Always like to see your full ship photos. Cheers,
- 2,625 replies
-
- 4
-
-
- kaiser wilhelm der grosse
- passenger steamer
- (and 1 more)
-
Totally outrageous!!!! and then questioning your skill level??? Horse pucky my friend, the scale you are working with and then making all the details look as if they are life size is insane. You'll do okay with the bathrooms too, just make them large enough to comfortably work on them and then treat them with Preparation H, they'll shrink to fit Cheers,
-
Very nice beam work Mark and I agree with replacing the one that's too short. It's just a minor redo and will not haunt you later on. Yes, the gap can be covered by the waterway and or planking but you will always know and gnaw at you. Cheers,
-
Thank you Patrick, Carl, Tim and Capt'n Bob for your very kind words and also to everyone who clicked the like button. Well Capt'n Bob the one schooner is not quite ready yet to slip down the ways, she's still in the stocks. The new one has only four frames erected but there are a few laying ready though, along with the deck and hull planking. Oh, sorry, that'll be shown soon though. Making people at this scale is taking it to the extreme. For a 5 foot 8 inch person (my size) he'll be only 0.85 mm and to now carve a head, arms and legs on them was just too much for me. I tried though, and perhaps i should have used "Sculpy." In any case, there'll be no people running around. Welcome to my shipyard Tim, glad to see you and thank you for your encouraging words. Yes, fortunately I still have steady hands and okay eye sight, although the latter needs some attention. Working with this scale does help improve the eyes though. Yes, Carl, a lighter color would have shown up better but weathered wood clapboard does age darker. The whole thing can be lit up with a flashlight or placed under a lamp and then you can see the details okay. Oh my Patrick, master builder????? No, no, far from it. Looking back at it now and the close-ups - - - I should / could have done better. But on the other hand, nobody is going to put a microscope to it and besides I have had a lot of fum and satisfaction with it. The overall appearance is a pleasing one and a sure conversation piece. Yuns will see the buildings put in place and perhaps the water added in the next post, I think. We are coming close to the finish of this project and the start of a small kit build that's rather special to me. Cheers,
-
Papegojan 1627 by mati - FINISHED - 1/48
Piet replied to mati's topic in - Build logs for subjects built 1501 - 1750
Impressive work Matt. Cheers, -
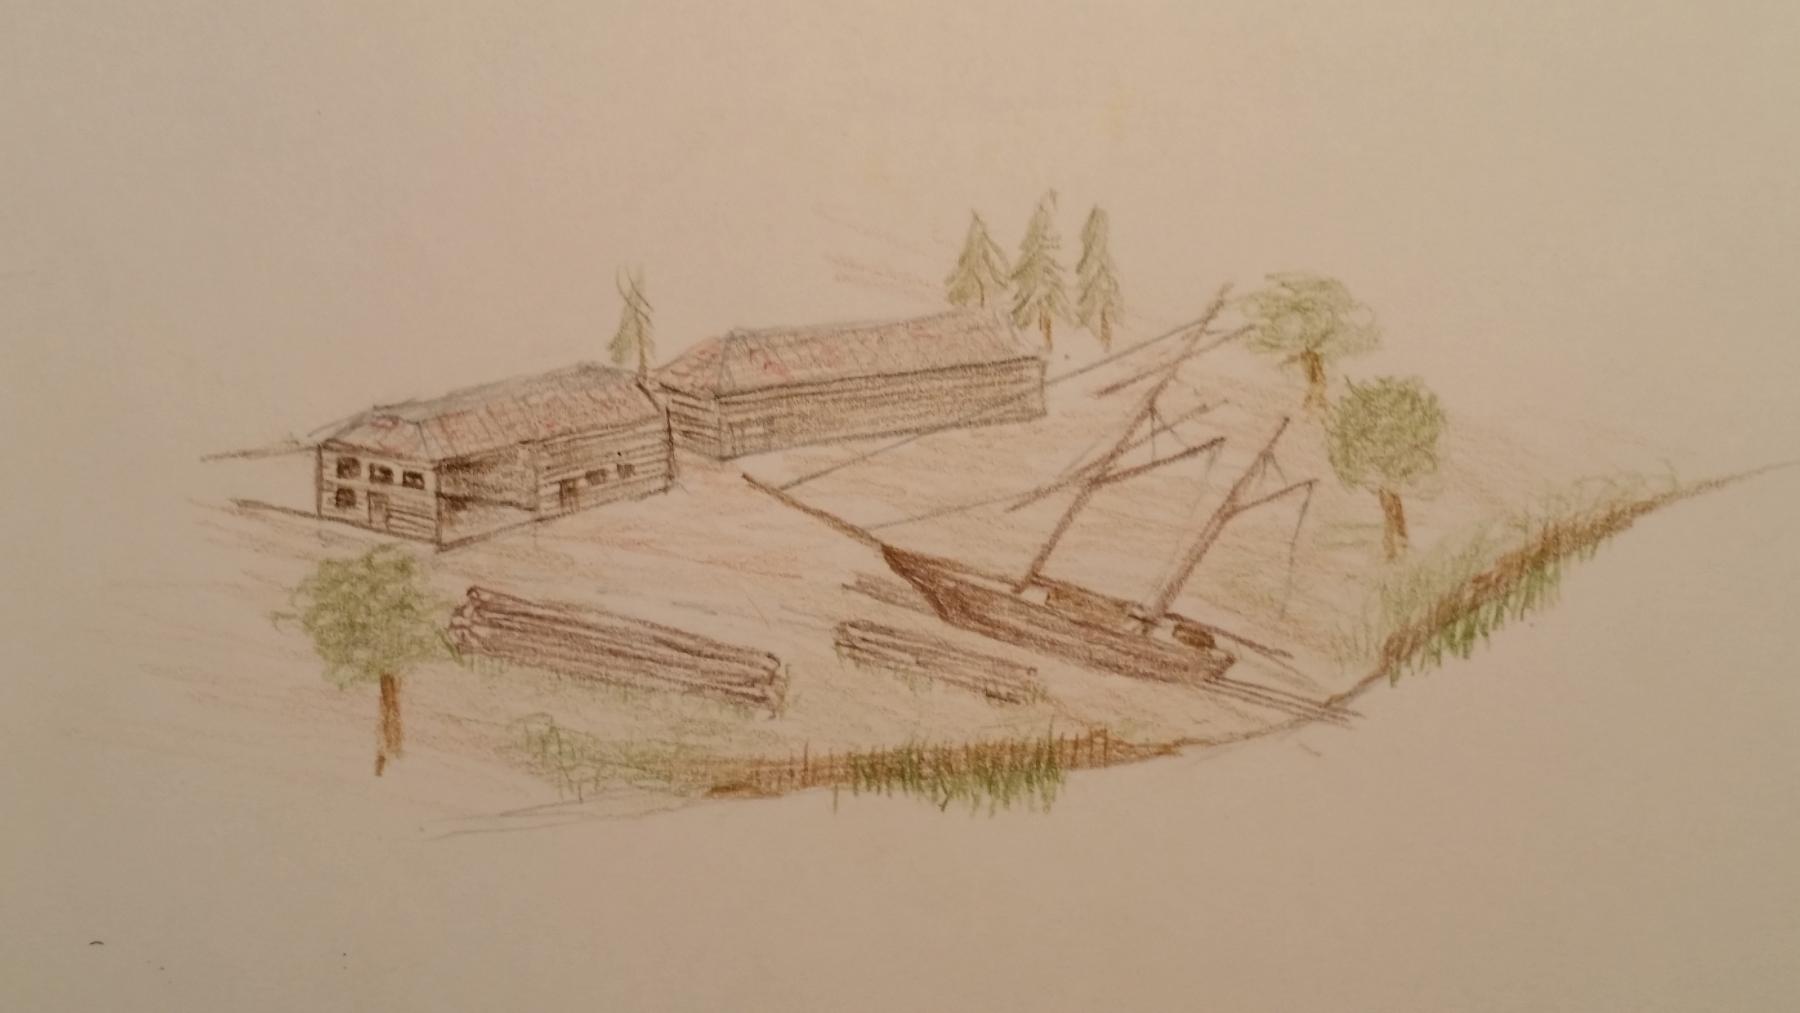
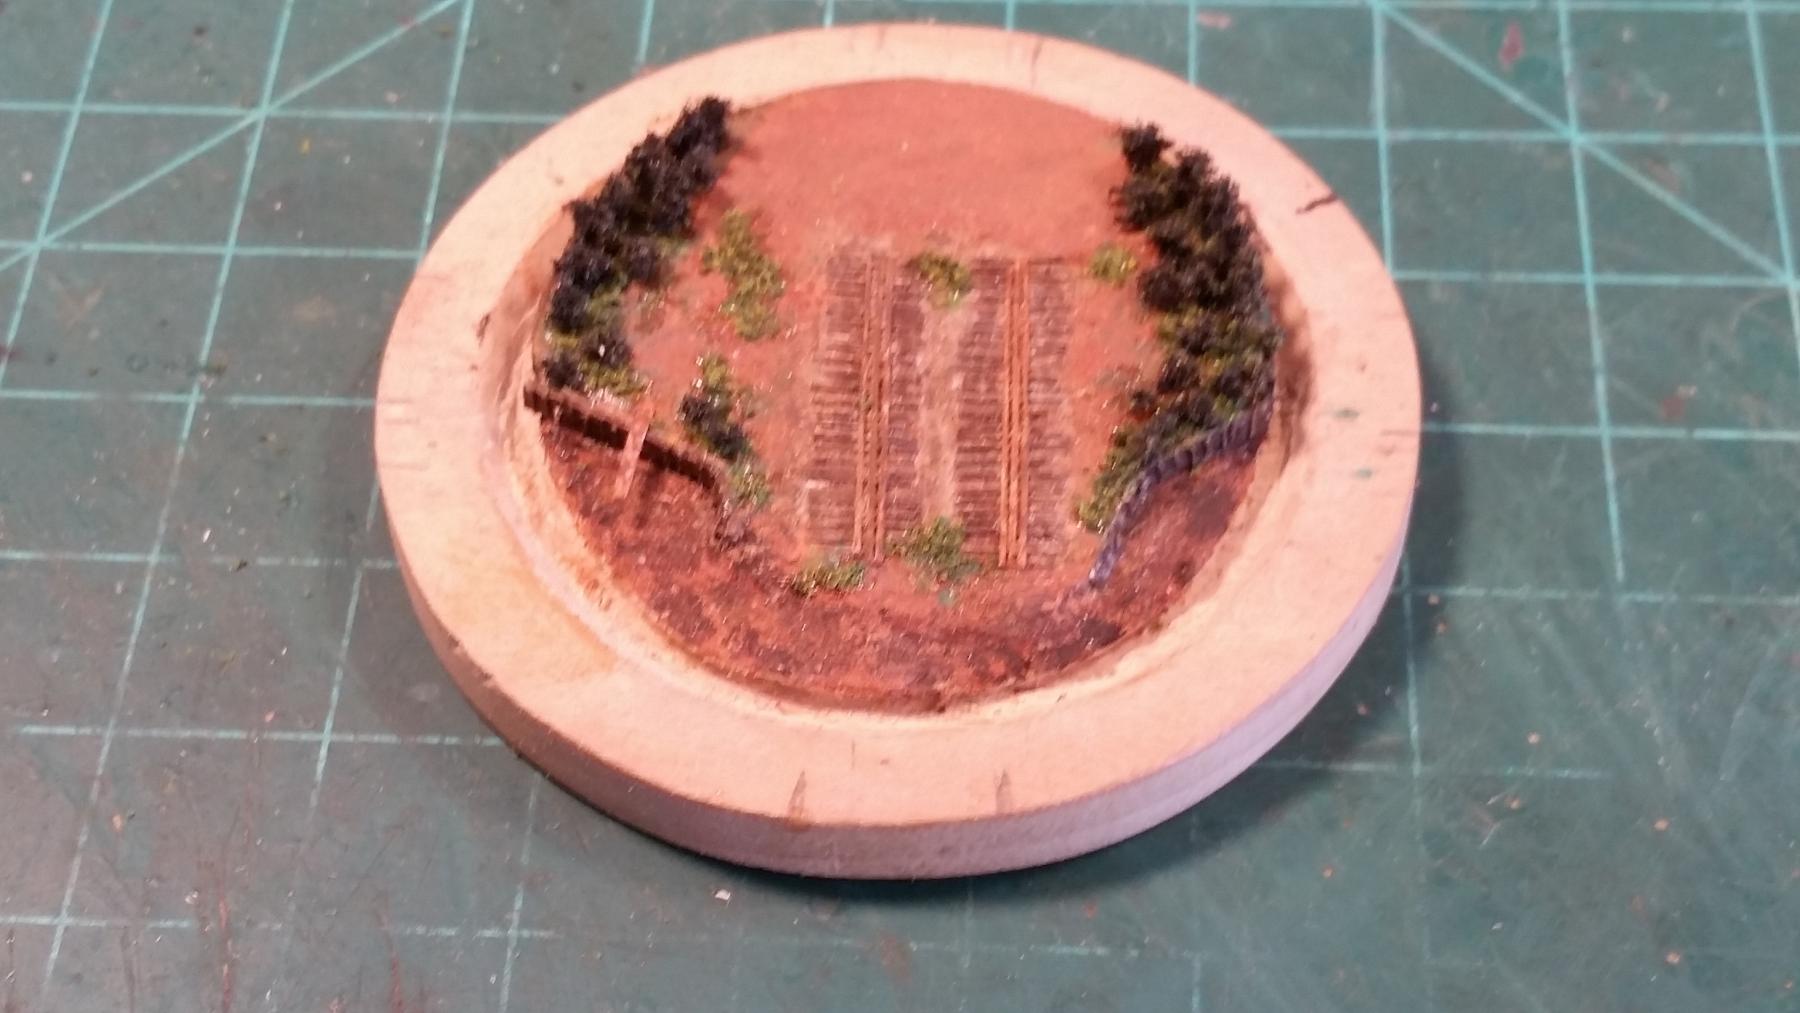
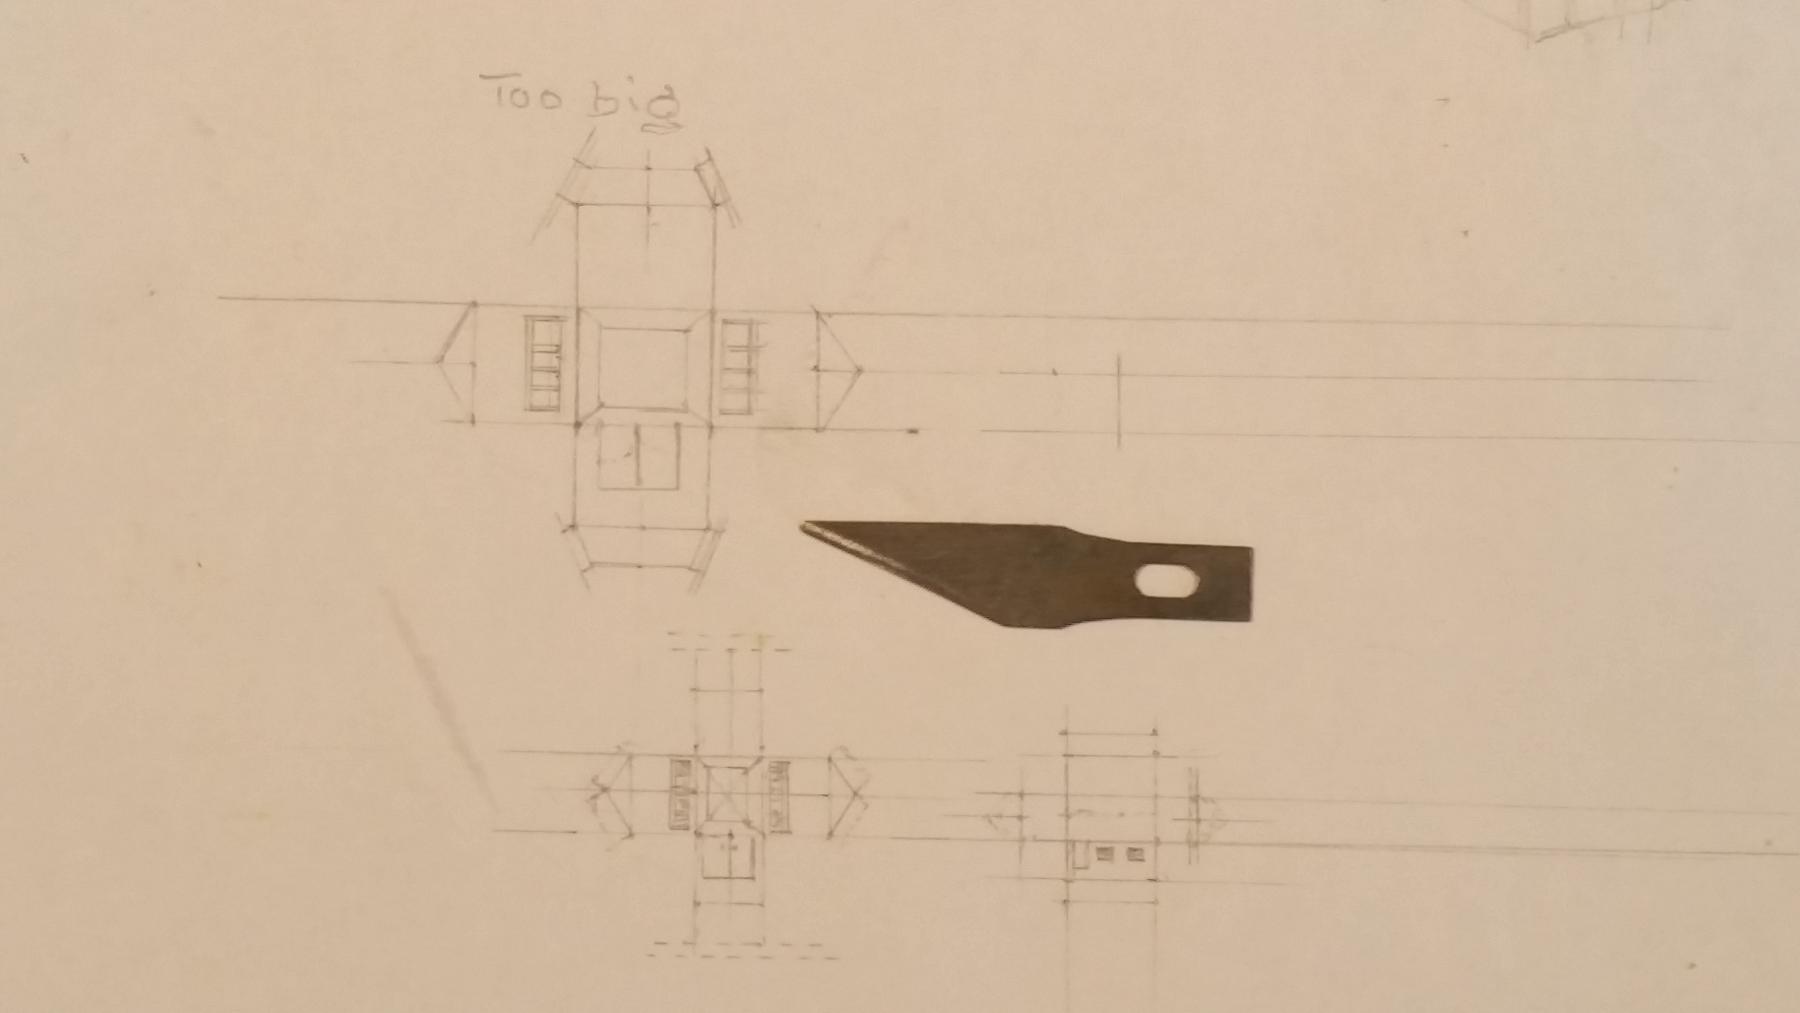
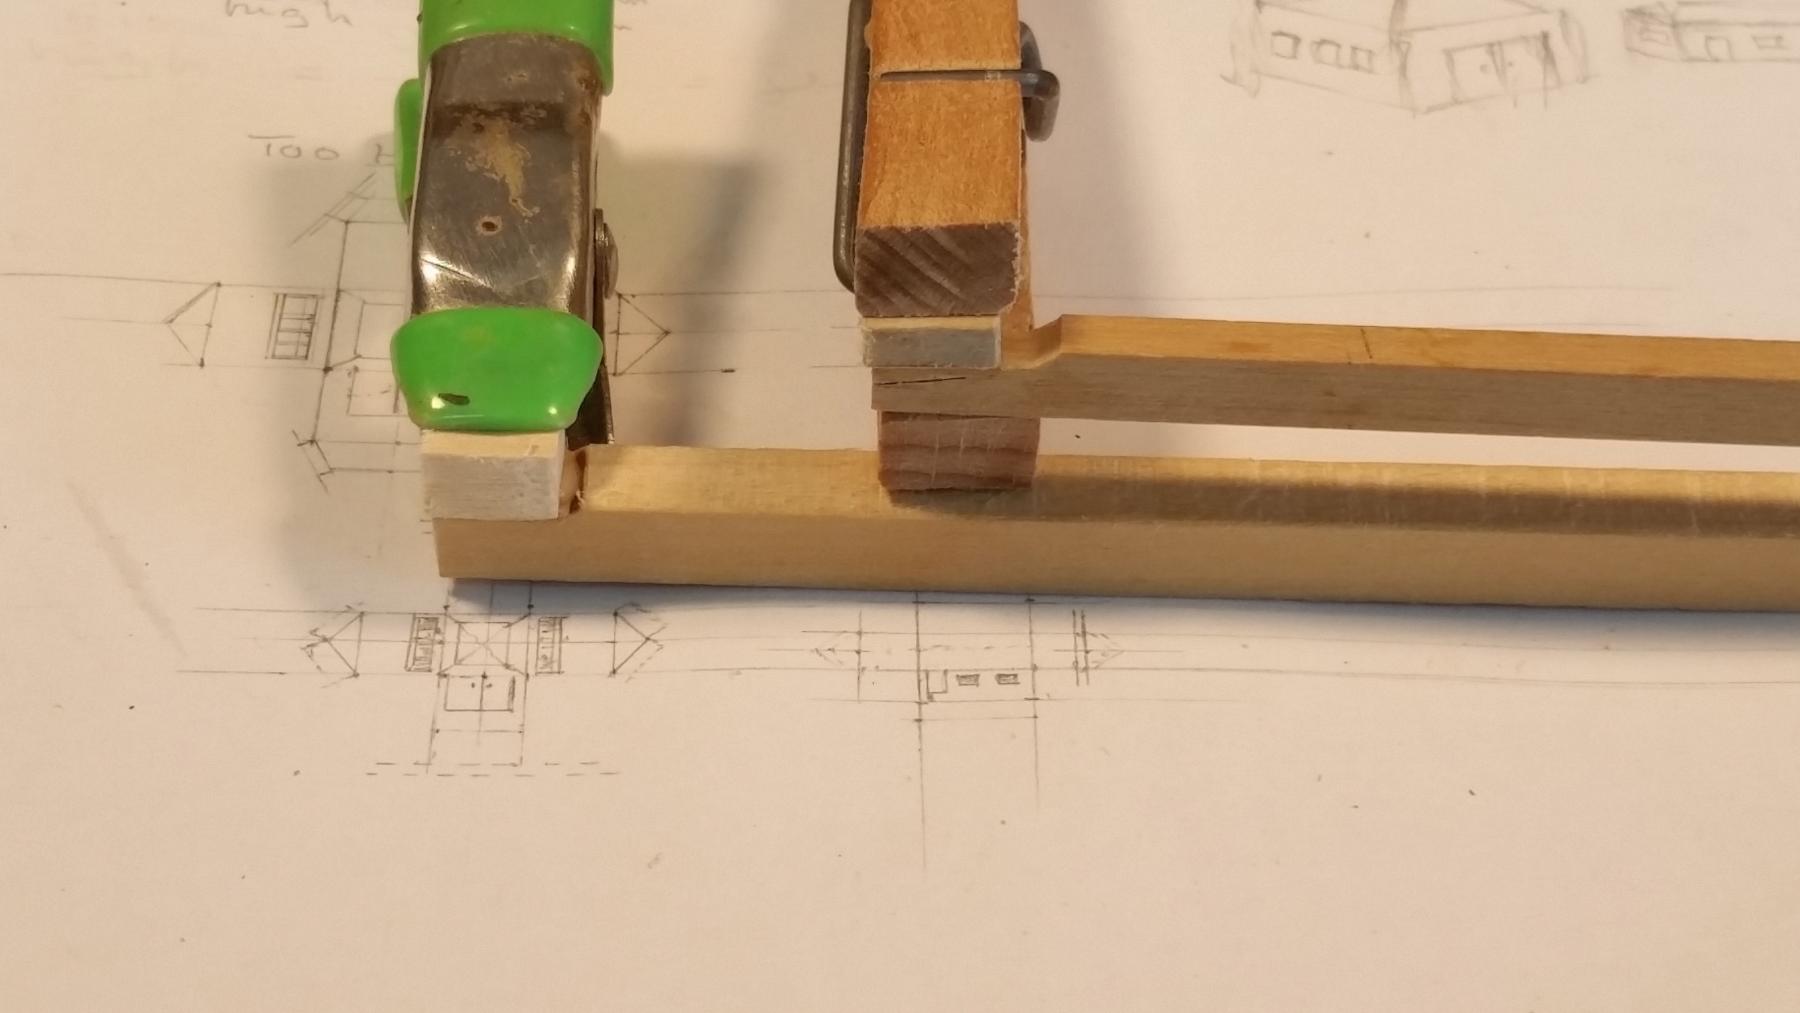
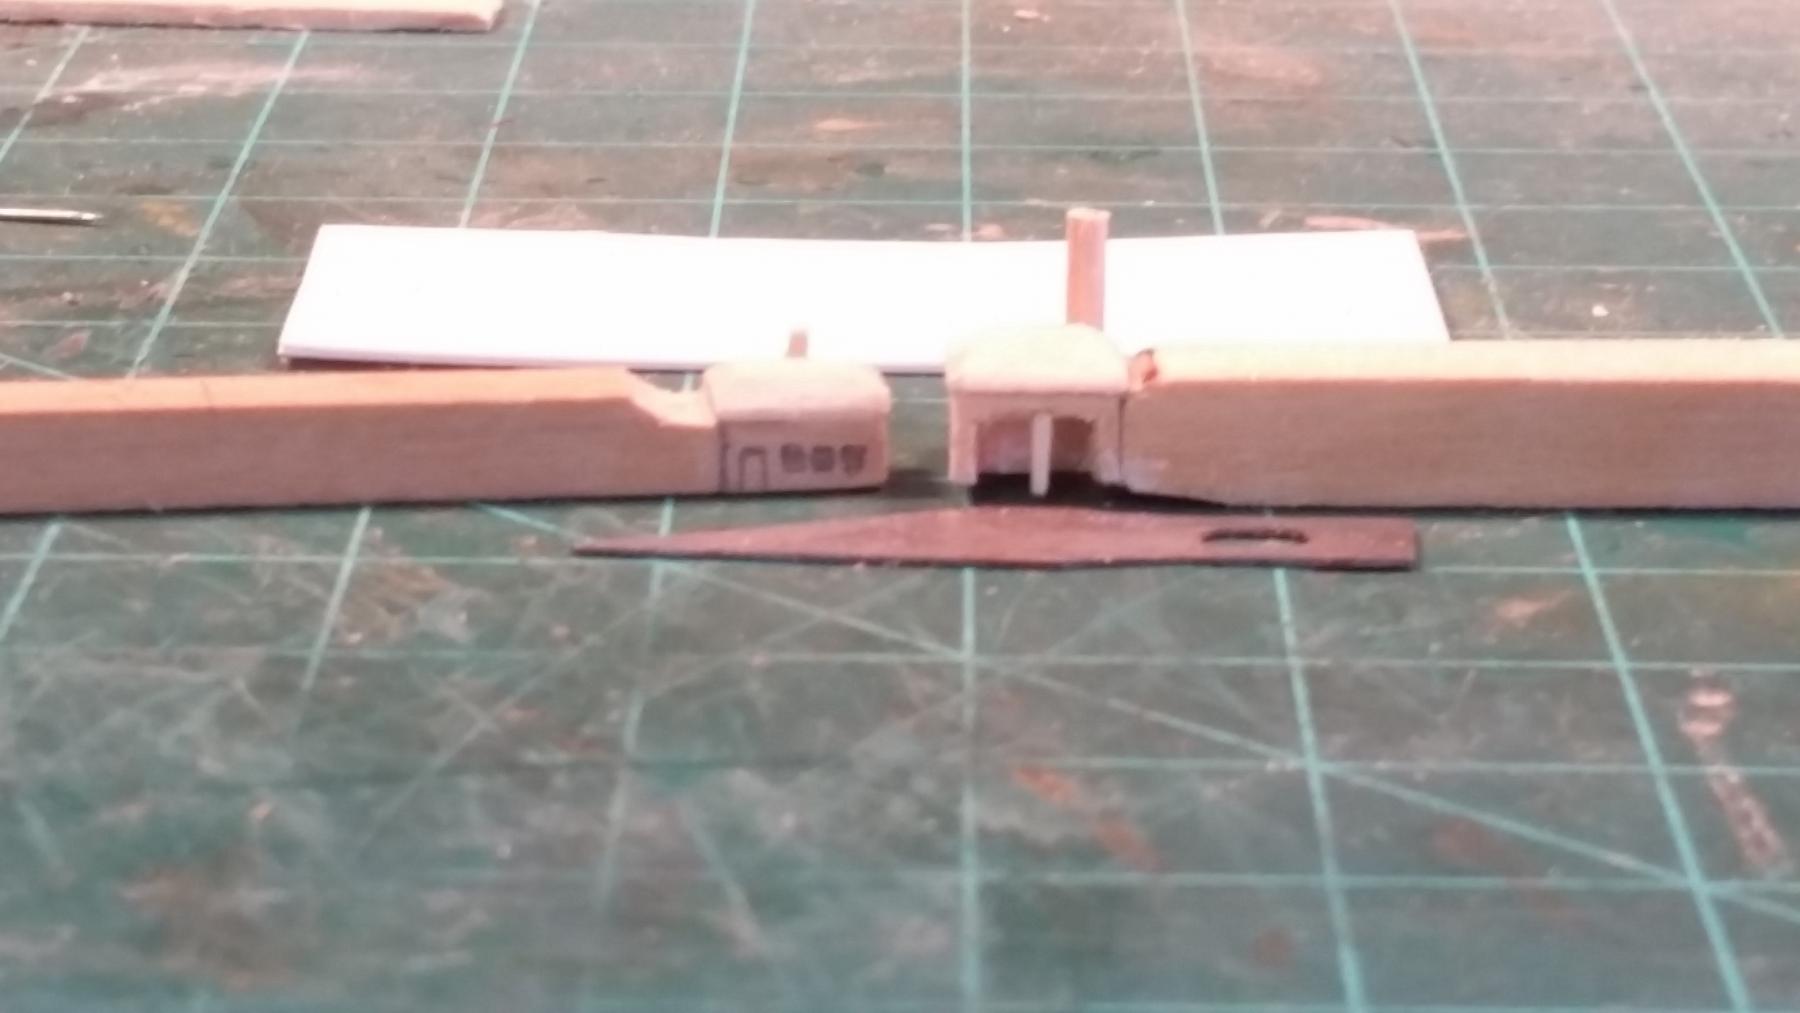
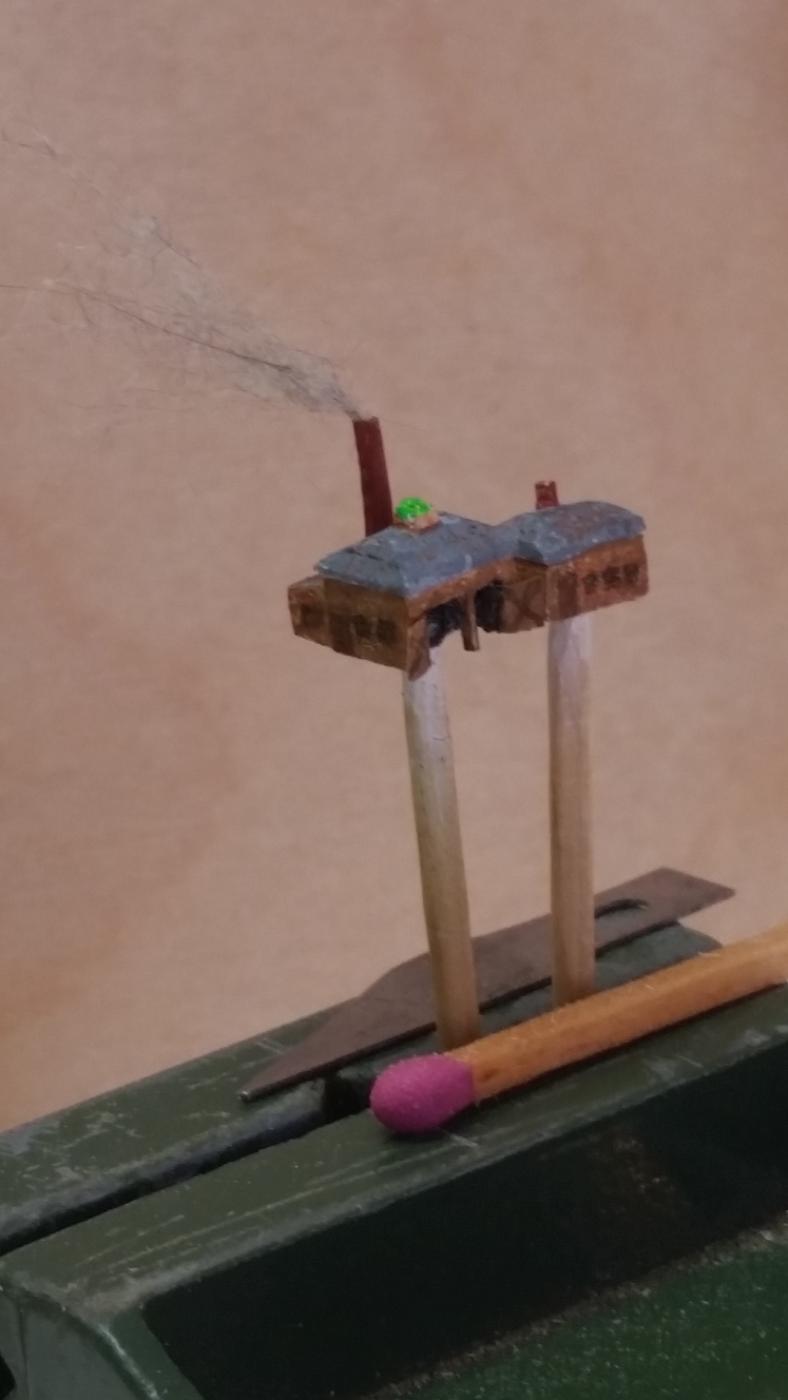
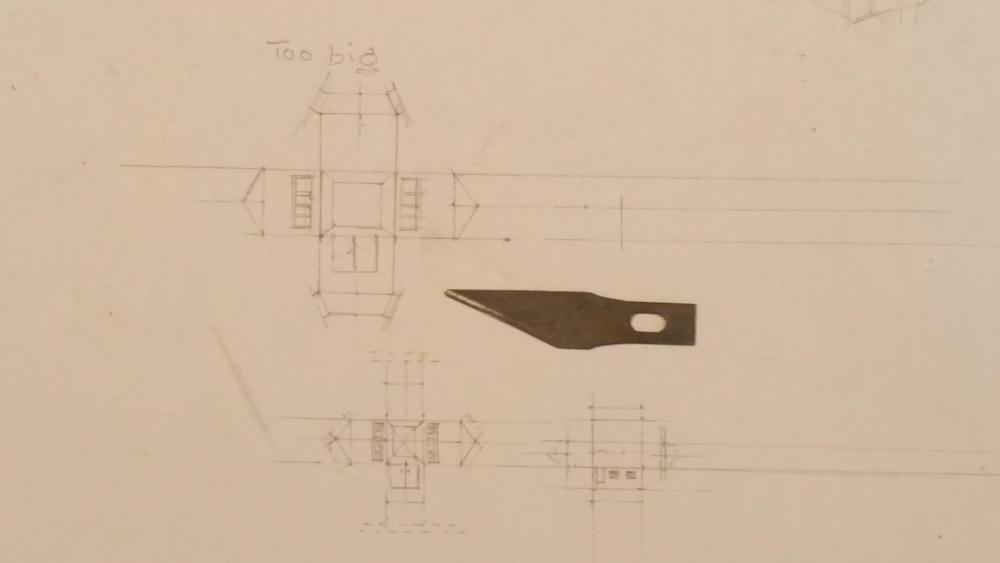
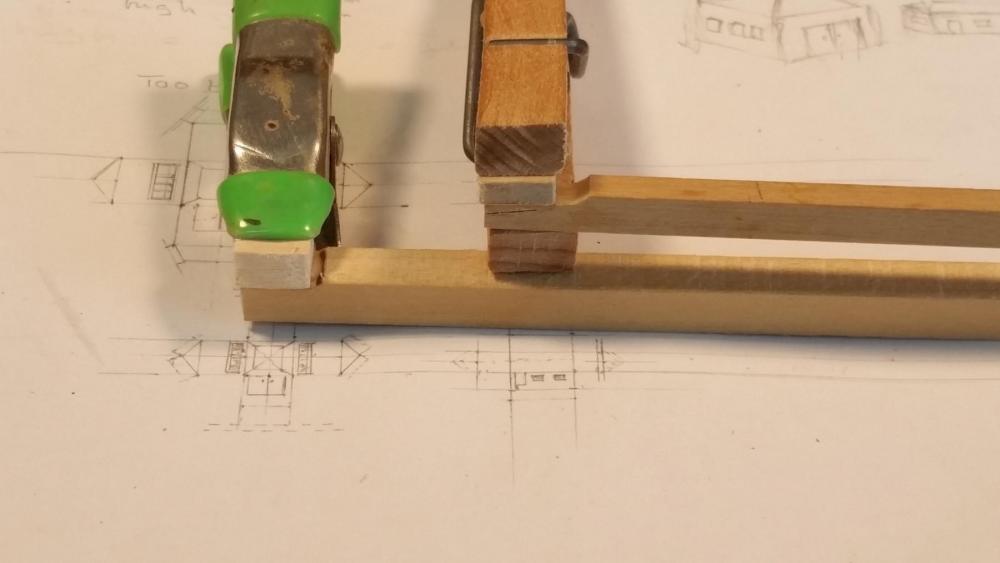
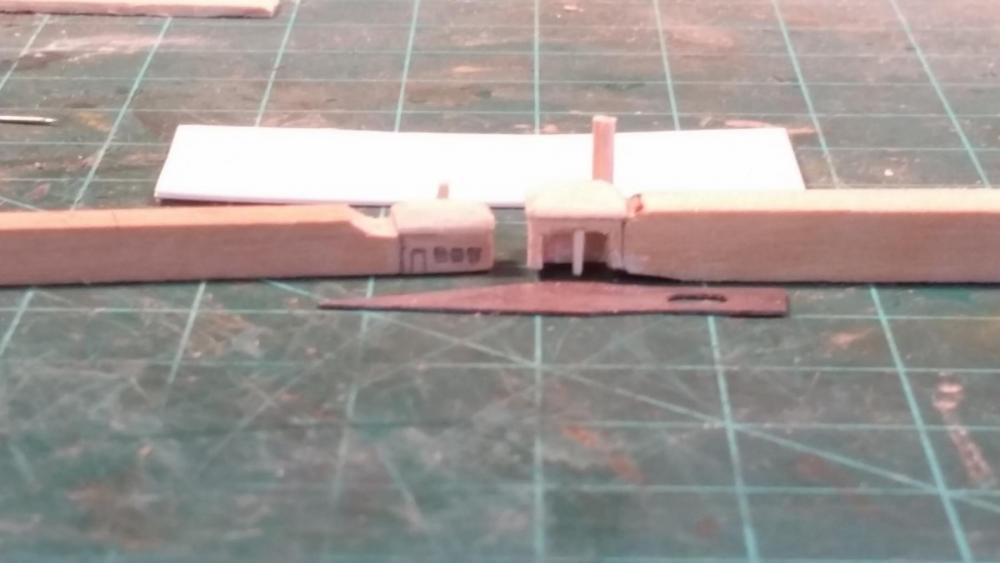
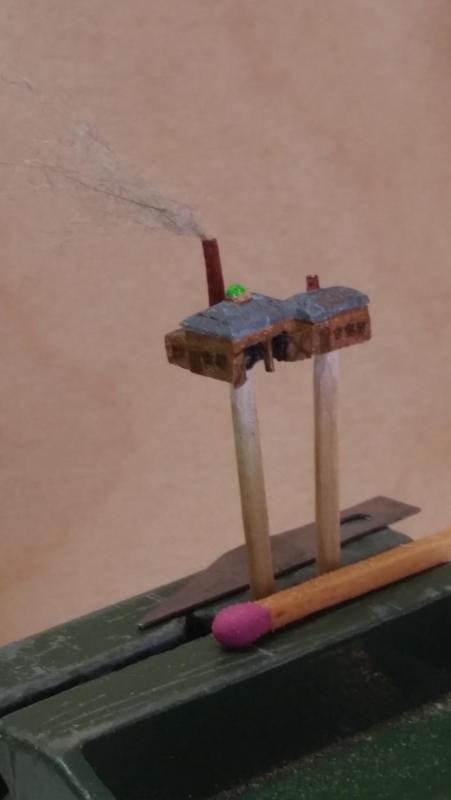
Thanks Carl for the faith you have in my abilities, sometimes it requires us to take a step back and let things settle. A little head scratching, pondering and thinking in how to tackle a problem. Something as insanely simple as ship's frames can become a giant obstacle. Yes, I'm happy with the end result. In the last post I talked about getting to the "landscaping" part and now is the time to show the start of that process. As I have shown all yuns an idea at one of my very first posts, this diorama has progressed to include two slipways instead of one. I also changed the waterfront a little. The sawmill and shop's building was a definite. I first thought to make them from copy paper and all in one piece, lik,e a cut, fold and glue model. I don't know what I was thinking, it sounded like a great idea at first but after i drew up the plans I realized that it was not going to work. Gwen also thought that I was nuts just thinking about it. So, I made them from solid wood I took some scrap pieces, one for the base buildings and another for the roof. I also attached the steam boiler room behind the sawmill with a smoke stack from a toothpick. To at least show some interior of the sawmill I carved about half it away from the inside and left the sidewalls whole. The details will be painted. The walls are simulated clapboards with slate roof tiles. The chimney is simulated red brick. I was not very successful painting all the bricks, kinda difficult in a scale of 1:2000 Actually what I did was, after the red paint had dried, I penciled some horizontal and vertical lines in them to at least give the idea. For the clapboard and roof tiles I just scratched a few lines in the wood trusting that the brain will complete the picture. I also put smoke coming out of the chimney by using some of the fur from our cat Ivanna. For the grass I found some model railroad grass but I had to modify that too by mincing it with a sharp kitchen knife. For the trees I was going to use kitchen scrub-buds, cut into shape and paint them. However, when finding the fake grass I also found fake tree stuff already in green. To put the grass on the base I first painted these areas with the same green I mixed for the VOC ship Surabaya and while whet sprinkled the grass on it and kinda tamped it into the wet paint. Not to bad an effect. After I "modeled" the trees they were glued on with nail polish. After the buildings were completed and cemented to the base I could also add a few trees behind them but that'll be shown in a future post. Here are the pics with the usual explanations, hope yuns like them. This was the original plan and as yuns can see I have made several changes. Here you see the beginning stages of adding grass and trees. This shows my overambitious plan for a cut, fold and glue set of buildings. Here you see the beginning phase of the sawmill and the shops building. The lower part will be the lower partvof the buildings with the roof part cemented to the lower parts. This shows the roughed out buildings. I should have added the matchstick for scale reference. Both buildings completed. As mentioned above I hollowed the sawmill out and cemented paper doors to the side frames. it's a shame you can't see the details I penciled into the doors, just accept my word for it. Honest. I also put a cupola with a copper roof on top of the sawmill. This is Ivanna the cat, I call her the Dutch way as poes, who so graciously donated some of her fur for the smoke She .likes to keep me company when I chat with all yuns on MSW. Cheers,


- 159 replies
-
- 16
-