Piet
-
Posts
3,568 -
Joined
-
Last visited
Content Type
Profiles
Forums
Gallery
Events
Everything posted by Piet
-
 Great progress Tim and thanks for the tip on the Bondo Glazing and Spot putty. Have done my share of body filling, cars as well as on aircraft but this stuff was not available then. Hey, I'm talking 40 years plus ago. Cheers,
- 227 replies
-
- 6
-

-
- BlueJacket Shipcrafters
- Stephen Hopkins
- (and 2 more)
-
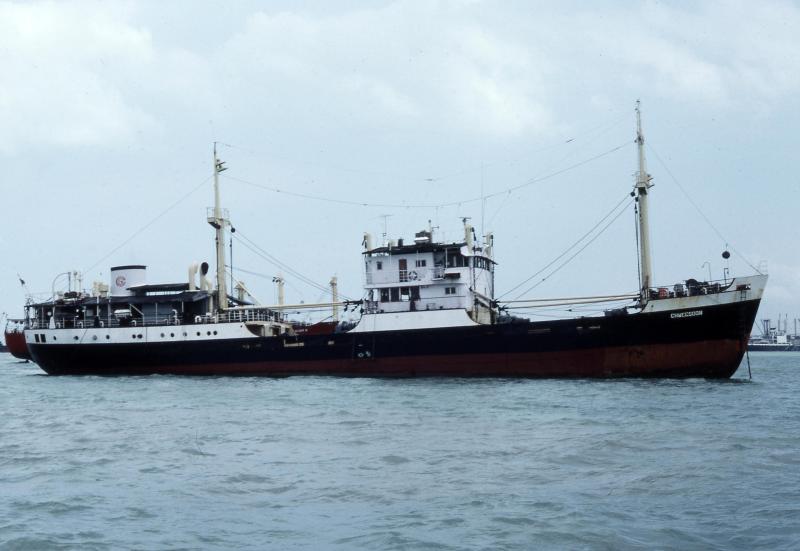
Thank you Jan, Hans, Patrick, Carl, JesseLee and Popeye Denis for dropping in and of course all those who clicked the like button. It's always a pleasure hearing form all y'all. Well Jan and Jesse, no ship in a lamp but there will be a lamp involved. Jan, your link didn't open to the spot showing the Musi. Here is a pic of that ship. This ship was sold twice and in the below pic she's named "Chweeson." @ Hans, thanks for the b-day wish and good to hear that your stuff arrived. Now I am waiting to hear from Carl for his stuff to arrive. @ Carl and Patrick, B) ackle, ackle, ackle he grimaces with an evil cackle - - intriguing, nerve wracking, thickening plots I may just let yuns wait a little longer. We are almost there my friends, I just need to find the time to open a new build log. Cheers,
-
Outstanding work on the basket Igor and thanks for showing us a new, to us, material for the sea. Anxious to see how it comes out. Cheers,
- 131 replies
-
- 5
-
-
- bottle
- the old man and the sea
- (and 1 more)
-
Congtrats on the ear Dave and that's a mighty fine ornamental looking ship. Great job you did on making it look so very impressive, as the King intended it. Cheers,
- 962 replies
-
- 6
-
-
- sovereign of the seas
- ship of the line
- (and 1 more)
-
Hello Patrick and Carl, thanks for dropping in. Next build is coming soon, just one more item and then I can start a second log. Of course you can always join in the fun here, plenty of space. I think this project will speak more to Patrick and Igor for obvious reasons. However, I hope that everyone will also like my efforts. I'm still very occupied with my outside activities but there is light at the end of the tunnel - - - and it's not a train or bus My thanks also for all who clicked the like button. Cheers,
-
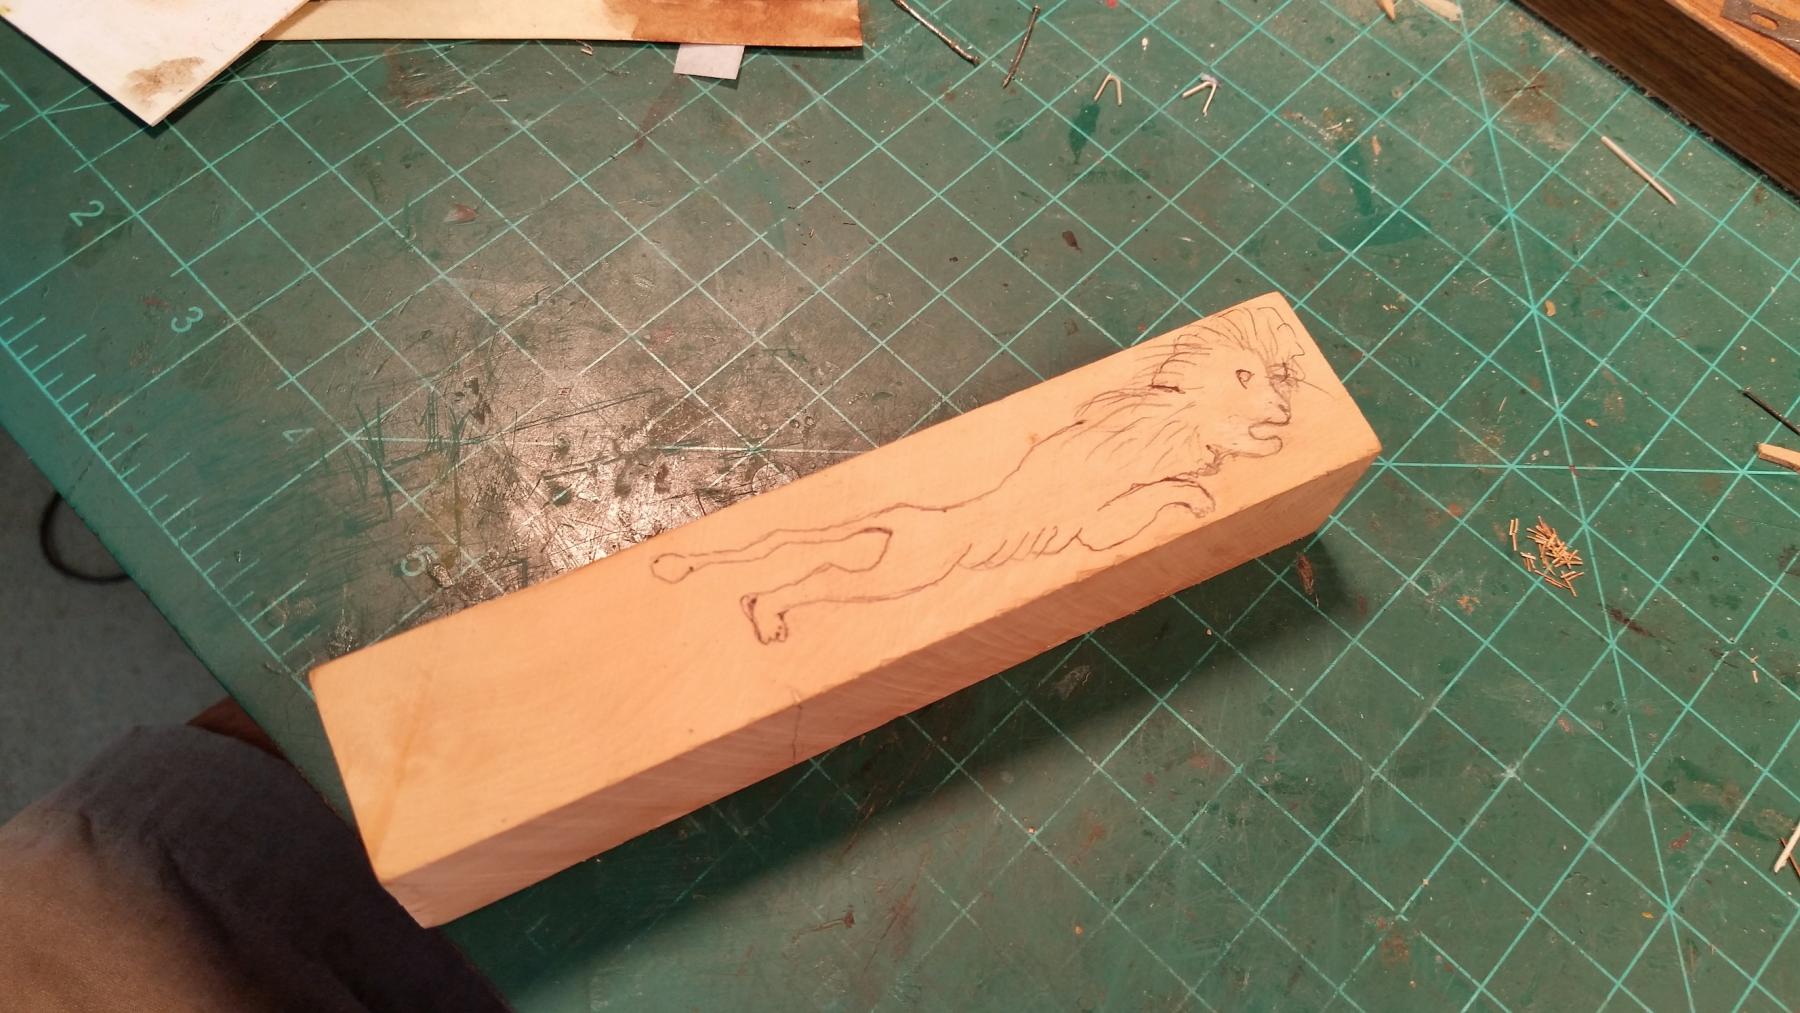
Thanks Lawrence for dropping in and checking up on me. Yeah, no bodily harm to my 82 year old tanned Adonis like bod Just been very busy with our much neglected yard as well as helping my neighbor. I had to cut back the VERY overgrown hedge on the north side of the back yard from 25 feet to hip height. Had to remove a very pesky ground cover in the front yard and still need to do some major work at the draining ditch. All heavy manual labor, but I'm taking it slow and easy. I did manage to do a very quick sketch of the bow lion on a piece of boxwood though. I do plan to first carve the lion from a piece of basswood or plain old pine. Once I'm sure that I can produce a decent carving then I'll use this special chunk of boxwood. My other special project is close for the disclosure and another build log. One more item I need to do though before that event. I think I'll take tomorrow off and do that. Then figuring out how to start a new build log Cheers,

-
Just caught up with your new bottle build Igor. I have been much too busy with house and yard work leaving me very little time for MSW. What a great idea and what great work you have done so far. Cheers,
- 131 replies
-
- 4
-
-
- bottle
- the old man and the sea
- (and 1 more)
-
Hi JesseLee, I'm so very sorry about Keith's condition and pray that the Almighty will spare you that fate. Stay strong and good courage. Cheers,
- 1,306 replies
-
- 8
-
-
- syren
- model shipways
- (and 1 more)
-
Hello Tim, count me in as well. My first technical schooling was to become a ship's machinist and was certificated in the various trades needed on board merchant ships. Switched over to my real love, aircraft maintenance and engineering and piloting. My father served in the Royal Navy (Netherlands) but was killed in action during the battle of the Java Sea against the Japanese Imperial navy. One of my planned builds is a model of a Dutch merchant ship of the KPM (Koninklijke Paketvaart Maatschappij or Royal Packet Company). My wife's father retired as the captain of that ship in 1952, the MS Musi. He was also Lieutenant Commander in the Dutch Royal Navy and captured by the JIN at sea and made a POW. Needles to say my interest in your project is of the highest rank. Cheers,
- 227 replies
-
- 6
-
-
- BlueJacket Shipcrafters
- Stephen Hopkins
- (and 2 more)
-
Fantastic work Nils!! Cheers,
- 2,625 replies
-
- 1
-
-
- kaiser wilhelm der grosse
- passenger steamer
- (and 1 more)
-
Papegojan 1627 by mati - FINISHED - 1/48
Piet replied to mati's topic in - Build logs for subjects built 1501 - 1750
Fantastic work Mati! Cheers, -
Love the video Kees! That plastic stuff intrigues me, seems easier and faster to work with, provided one know how to work with it. You seem to have mastered it Kees, fantastic results. Cheers,
- 434 replies
-
- 3
-
-
- pelikaan
- beamtrawler
- (and 2 more)
-
Nicely done Popeye Denis, stairs look very functional. Cheers,
-
Beautiful looking side galleries Mark. Actually, the word elegant would better describe it. The French and Italians always had and still have a flair for elegance. Quite a challenge to capture that in 3D - - but you are up to it. Cheers,
-
Nice work and great pics Kevin. She's looking impressive. Cheers,
- 1,319 replies
-
- 4
-
-
- caldercraft
- Victory
- (and 1 more)
-
Sorry for my absence JesseLee, have been too busy with very needed work around the house. Your new toy looks really nice and well help in making all kinds of things. Like dead eyes and spindles, wheel axles for the cannon carriages and their wheels. Keep battling that lyme thing my friend. Cheers,
- 1,306 replies
-
- 4
-
-
- syren
- model shipways
- (and 1 more)
-
Looking good Hennie, and yes, redoes are very common in our endeavors. Cheers,
- 214 replies
-
- 3
-
-
- agamemnon
- caldercraft
- (and 1 more)
-
Missed your friendly and interesting stories but good seeing you back in the shipyard. This first planking looks excellent, good enough to pass for the final planking. Good luck with the job situation. Cheers,
-
Papegojan 1627 by mati - FINISHED - 1/48
Piet replied to mati's topic in - Build logs for subjects built 1501 - 1750
Intriguing method for making the dead eyes Mati. Something for me to remember and yes, i have made a note of it. Thanks for showing. Cheers, -
Here I am, sitting next to Michael shaking my head in unison. Awesome work Patrick. Cheers,
-
Thanks for the very interesting travel log Nenad, beautiful country. Great attempt at the ship's bell and at that scale it would be very difficult making it look more like a bell. Once it's mounted we'll get the idea. Keep going my friend, I admire your tenacity. Cheers,
- 4,152 replies
-
- 4
-
-
- cutty sark
- tehnodidakta
- (and 1 more)
-
Patience, patience my friends. Gwen is muttering about so many things that need to be done around the house. All yuns know what that means - right? Better go and make busy with the things she's mentioning - - - otherwise be afraid, be very afraid It'll come in due time, a new build log! Cheers,
-
AWESOME! People in those circles normally don't put chairs back, the steward takes care of that job What a nice thought Patrick, making those chairs. The details just keep coming. Cheers,
-
Wow babe, that's sure a scary thing that's happened to you. Glad you are okay. Deck work looks great. Cheers,