Piet
-
Posts
3,568 -
Joined
-
Last visited
Content Type
Profiles
Forums
Gallery
Events
Everything posted by Piet
-
 Nice set of stairs there Dennis and yes, the canvas sides would have been lovely too. Cheers,
 -
Awesome looking dunny there John. Love the gull's eye view. Cheers,
- 745 replies
-
- 3
-

-
- francis pritt
- mission ship
- (and 1 more)
-
Just catching up. Gorgeous looking jewel Pete. Cheers,
- 258 replies
-
- 4
-
-
- buzzards bay
- herreshoff
- (and 1 more)
-
Very nice work Mark! I love that silver maple you used, really sets it apart. btw - 1 mm off? The Dutch would say pffffff. Cheers,
-
Totally awesome Patrick! I surmise we'll see some nice cushions near the hot tub too?? My bony rear end needs soft cushions to sit on Cheers,
-
That rope work looks great Kevin and perseverance always wins - - - in the long run Cheers,
- 1,319 replies
-
- 4
-
-
- caldercraft
- Victory
- (and 1 more)
-
Wonderful Pete, she's like a sparkling jewel! Cheers,
- 258 replies
-
- 4
-
-
- buzzards bay
- herreshoff
- (and 1 more)
-
Nice job done on the metal work Ian, looks really good. Cheers,
-
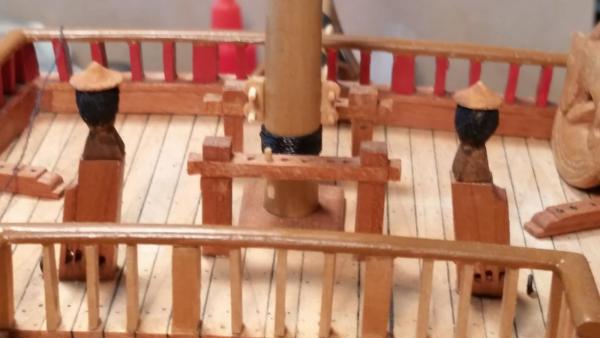
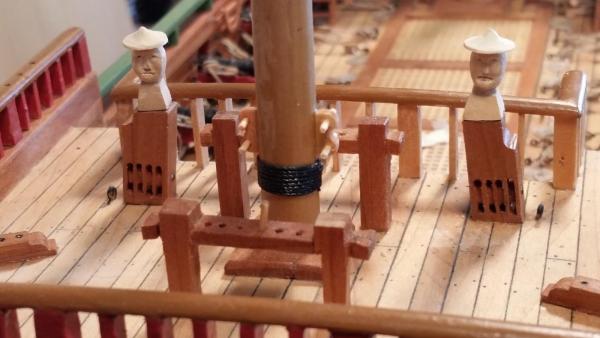
Hello everyone. I've been busy with that other project I can't talk about right now. Right now it looks promising because I finally found a solution for a big dilemma I was facing. It started to look like I had to abandon this project but I found what I needed. In the meantime I painted the faces of the two knechten and will leave them detached for the time being. As I mentioned to Jan I may have to make a new set but a little smaller yet. The ropes for the tackle will be touching the heads. I'll wait till after i have done the two carvings for the head-railings. By that time I'll have gained a little more prowess in this carving business. Actually I should be starting with working on the masts, making the cheeks, trestletrees and tops, so I can start with the shrouds. Yeah, that means deadeyes and chainplates too. Actually looking forward to it. Well, here are two final pictures of version 3.0 of the knight heads. Version 4.0 will be coming later. I hate to admit it but Jan had a gut feeling that these may be a tad too large. Cheers,
-
Wow, I'm overwhelmed with all your likes and responses, I'm blushing - - but loving it @ George: Thanks for the kudos on my carving attempts but I'll keep my model kinda subdued, cheep Dutchman that I am, can't afford too many carvings @ Remco: Thank you, thank you, thank you, much appreciated. How's the KF coming along? Any progress with the stain situation? @ Captain Steve: Thank you Captain Steve. @ Jan: I consider the like button hit twice, thank you I may have a problem with the knechten after all though, it'll be very close to a no go. I'll wait till the tauwen are installed. @ Patrick: Thanks my friend but leave the master part out, as mentioned some time ago I'm only a master mechanic. How would I have known that after a few rejects that the carving seems to be progressing in the right direction - - - unless one tries @ Pete: Thank you my friend. @ JesseLee: Thank you too JesseLee, appreciate it very much. Hope you are feeling better, hang in there. @ Frank: Thank you very much. @ Ian: Thank you Ian, and yes, there are plenty of things I can't do - - - just ask Gwen - - hmmm - - well perhaps not In a discussion with my dentist last week, he said that the great white usually wins the fight with a crock. He's from South Africa and swears by it. He's a big dude and I wont argue with him @ Popeye Dennis: Thank you my friend. @ Mark: What can I say but thank you for your kind words. Truthfully, yes, I have never carved anything in my life before, other then a turkey for Thanksgiving. I guess that one sets ones mind to it it's just possible that something presentable can be achieved. Thanks again all y'all and happy modeling. Cheers,
-
Nice work Nenad, well done. Cheers,
- 4,152 replies
-
- 5
-
-
- cutty sark
- tehnodidakta
- (and 1 more)
-
Stunning, amazing - - - fantastic job Patrick. Okay, a new 000 sable brush and you're in business. I'm enjoying your successful work. Cheers,
-
Spectacular Popeye Dennis, simply spectacular. Cheers,
-
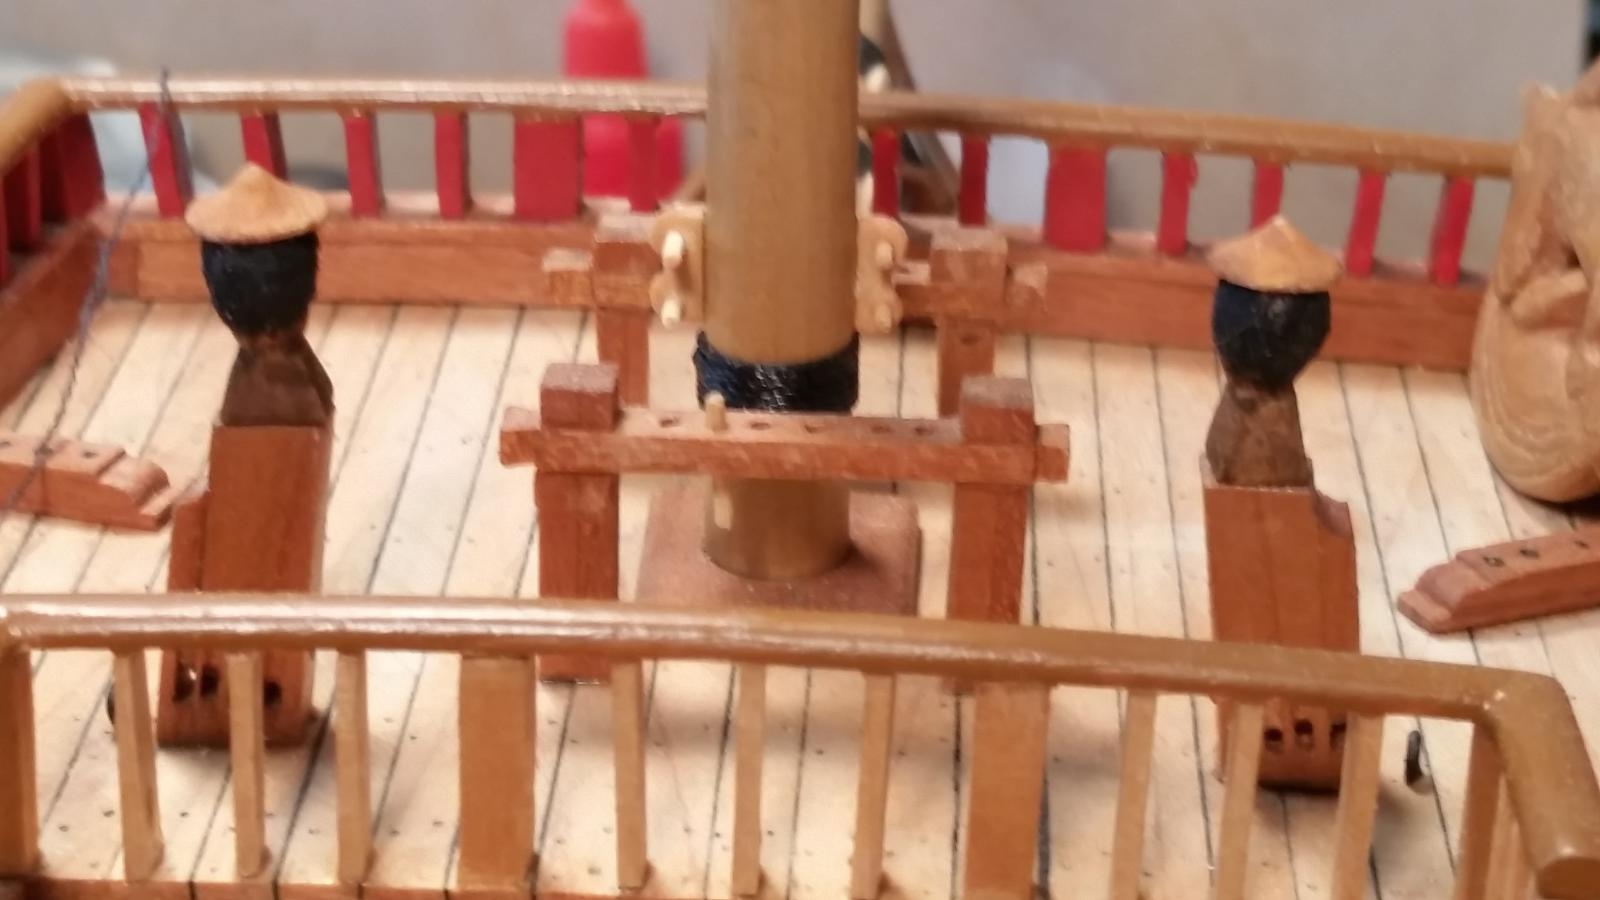
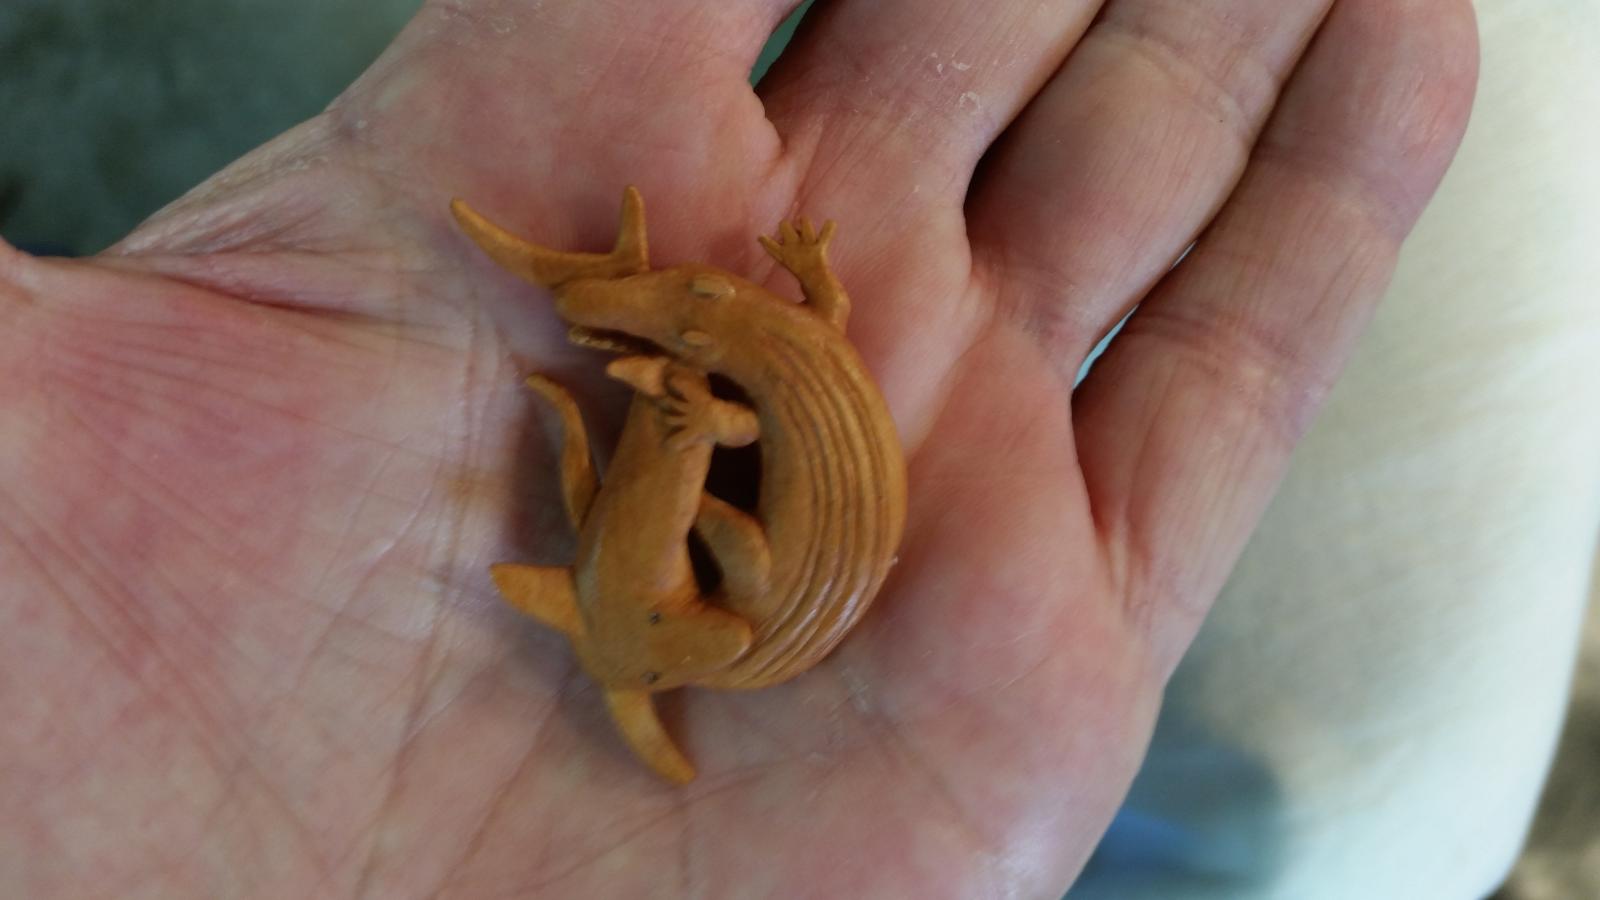
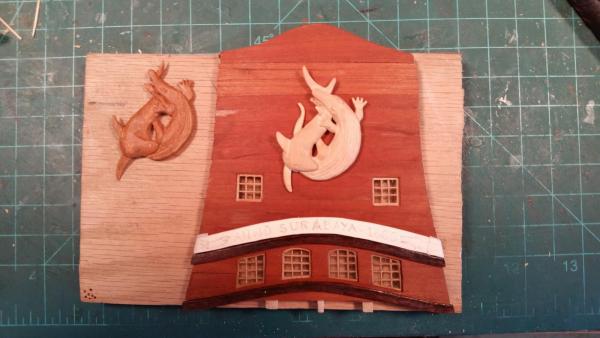
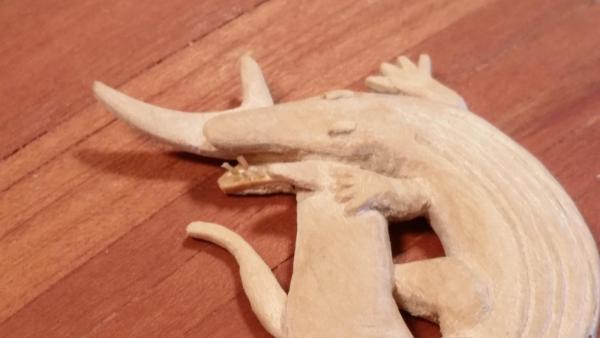
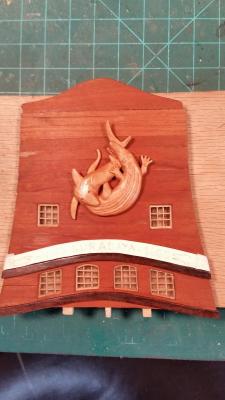
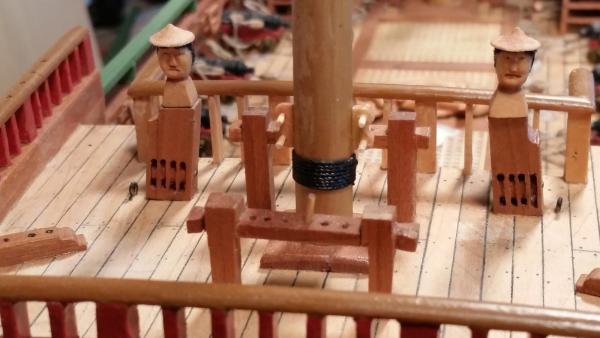
Thank you Mark, Carl, Sjors Hans and Jan for the kudos and thanks to all who clicked the like button. @ Carl: Yes indeed the paddie workers wore them kind of hats but also other folks and kids. Rather then using a fez or their traditional black fez like hats I chose something unusual. It's different alright, I wanted something other then the usual knechten you'd see on VOC ships, like Moors as Hans shows. @ Sjors: No my friend, I usually smile and these have a mean looking face I would be angry too of I had to be perched on top of a post Actually, one looks like the gardener that came around once a week, with one of those pointy hats too @ Hans: Ah yes, that looks terrific! I love that carving on the Batavia, well done. Hmmm, you need 100 of them and in 5 mm? Better get stated man - - - - - you can make one and make molds so you cast the rest, do like Sawdust Dave does it @ Jan: Yes, that was a concern to make sure that the ropes don't rub against the hats. I think I measured it out but one never knows - - - my measurements may be off. In that case we'll have to go to version 3.0. Just remove the hats and give them a full head of hair. Talking about hair, I did not carve hair on their heads and had to add some, which I did today. I was thinking of cutting a few pieces from Gwen's head So when i asked for some she told me that if tried "to be afraid, to be VERY afraid." So whit that ominous warning I resorted to using cotton from a swab. Worked okay. A little glue and dabbing some cotton on, a little trimming and it actually looks kinda like the real thing It even feels soft like hair, no kidding Next will have to be painting the faces a light brown with - hopefully - red lips. Can't give hem rosy cheeks though. Hey, I'm having fun. I finished version 2.0 of the surabuaya carving this afternoon. I think it really came out pretty good, even Gwen said it looks great. I even put teeth in the crock's mouth. A few bamboo slivers, poked a few tapered holes on the jaw, some CA and shoved the bamboo slivers into the holes. Then trimmed them to size and carefully shaped them into pointy teeth with my trusted #11 blade. I stained it rather lightly with cherry, just enough to offset it from the darker counter. I can now cement the carving to the counter and will use two pins as extra security and strength. Don't know yet what kind of glue or cement, I'll think about it some. Hey, I kinda like this carving thing, challenging but rewarding when things work out good. This small stuff is a strain on the eyes though but it's a good thing to exerciser the eye muscles. Next are the carvings for the head-railings up front and the lion! I'm rather apprehensive about tackling that one but sooner or later I have to do it. Okay, here are a few pics of the work we have done, hope yuns approve. Here I have placed the unstained version 2.0 carving on the counter with version 1.0 next to it for comparison. When you click on the picture to enlarge it you may see the teeth. h yeah, I even added the crock's tail. A close-up showing the crock's teeth. This was before I played dentist and cut the teeth a little shorter and shaped them into more crock style teeth. Sharpened my #11 blade and lucked out again not damaging any teeth. Here I am holding the carving on the palm of my hand to reduce the glare and also as a indicator to it's size. The completed carving on the counter about where i think it should go. There'll be carvings all around including the name plate. Both knechten have hair now. Ready for some suntan Cheers,

-
Nicely done Nils, bravo! The breakwaters worked out splendidly too. Cheers,
- 2,625 replies
-
- 3
-
-
- kaiser wilhelm der grosse
- passenger steamer
- (and 1 more)
-
Black-smithing too eh JesseLee. Iron works look great. Hang in there my friend, stay strong. Cheers,
- 1,306 replies
-
- 6
-
-
- syren
- model shipways
- (and 1 more)
-
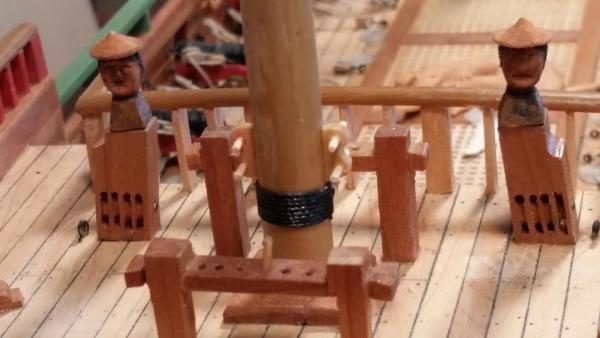
First of all my thanks to all for visiting and your likes. @ George: Thank you for the kind word. Yes, they are fiddly parts but it's rather relaxing and making sure I don't slip with the #11 blade So far I have lucked out. @ Carl: Thanks for the good words, appreciate it. Hey, this IS the original so I'll have to wing it, no examples then on paintings and models This ship is of my own design (before I knew better ) I may just stain then, the Javanese people are a light brown anyway and the hats are from woven palm fond leave centers. @ Dave: Thank you Dave for dropping by and checking up on me. Good to see you in the shipyard. Gun port hinges are indeed crazy, 1/2 mm brass tubing. Yup, carving is fun and relaxing but slow going. @ Frank: Thank you also for the good words. Yes, a good med report is always welcome and a stress relief. Thanks for the good word on my humble carving efforts. @ Dirk: Thank you for dropping in and your kind words. Now you tell me that I don't have to carve every detail in those tiny knechten hoofdjes I thought they had to look something like people No problem though, I do like to work small. @ Lawrence: Yes indeed it was good news and a load off my poor mind. The carvings are evolving and hopefully someday they'll look like halfway decent. Thanks for the undeserved compliment, I'm still learning and trying. You can do it too my friend, just follow the advice my friend Michael Angelo, carve everything away that doesn't look like Humphrey and you are there, simple Yesterday I made the hats for the two heads. Carved them from a solid square piece of wood, now that was really fiddly work. Had to be very diligent and careful because of the grain. It's so easy to use too much force but here too I lucked out. I hollowed the hats out a little to make them appear lower on the heads like they should. I then cemented them on with a dab of CA. They still need some extra trimming and now I need to add some hair to the heads. Or maybe just some flat black paint. These seemingly small jobs just take so much time but what else is there to do - - - oh yeah, spring yard work and there's a lot. Have neglected it some so I have to get going before Gwen hires a yardman for mucho dinarie Okay, here is a picture of the two knechten still loosely placed on the pulley beam gizmos. Cheers,
-
Windows look very promising Popeye Dennis, like to see them in with a light inside and lit. We'll all sing Psalms then Cheers,
-
Beautiful work Michael. Cheers,
-
Looks convincing Nenad, nice work indeed. Yes, staples are hard steel and unless you anneal them they can be difficult to work with at this scale. Anneal over flame to cherry red and let cool to room temp. Cheers,
- 4,152 replies
-
- 7
-
-
- cutty sark
- tehnodidakta
- (and 1 more)
-
Dave, the best way to state this would be "The Sovereign Of The Seas as interpreted by Dave." Your interpretation will look just as stunning as any other SOS and you can proudly put your name to her. I'll do the same for my VOC ship model. Cheers,
- 962 replies
-
- 9
-
-
- sovereign of the seas
- ship of the line
- (and 1 more)
-
I have to correct myself Sjors, before Jan does . Yes my VOC model does have crowfeet on all masts. I just looked at the Batavia replica so my model must have them also. It makes sense though. So, it looks like I'll have zoo as well Cheers,
- 1,616 replies
-
- 4
-
-
- caldercraft
- agamemnon
- (and 1 more)