Louie da fly
-
Posts
7,991 -
Joined
-
Last visited
Content Type
Profiles
Forums
Gallery
Events
Everything posted by Louie da fly
-
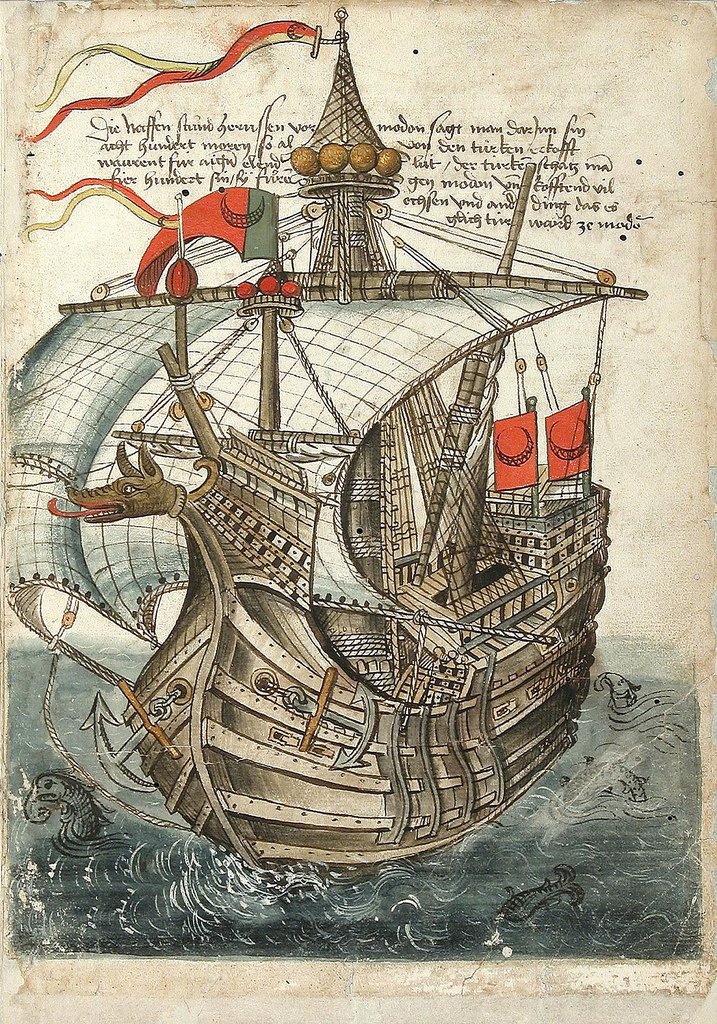
Can anyone help with translating the accompanying text for this picture, of a carrack used in a pilgrimage to Jerusalem in 1487? I'd always thought the crescent flag meant that it was a Muslim ship, but it seems the crescent was in fairly common use in Western heraldry, and the text might give a clue to the nationality of the ship. I learnt German for a short time when I was in school, but the elapsed time, the script and the Renaissance German make it impossible for me tomake any headway. I've managed to work out a few words, but the overall meaning is far beyond me.
-

7th Century Shipwreck found in Israel
Louie da fly replied to grsjax's topic in Nautical/Naval History
The difference in religion was never a barrier to trade or even to diplomatic relations. The Byzantines, for example, made treaties with their neighbours regardless of religion - Muslim, Zoroastrian etc. It's howyou got along. And of course trade was the same. Whatever turns a profit. That the ship was built shell-first is not a surprise for the 7th century, but the size certainly is - 25 metres! That was a very big ship for the time. The "preserved length" of the 7th century Yenikapi wreck of the merchant ship YK11 (a model of which is currently being built by Woodrat) was only 9 metres. -
Looking very good! Have you sorted out the deck colour yet, or are you leaving it to "percolate" in your head for a while?
- 211 replies
-
- 4
-

-
- prince of wales
- tamiya
- (and 2 more)
-
Welcom to MSW, Paulo. Make sure you start a build log - it's a great way to get encouragement, help and advice. The instructions on how to start a log are here:
-
Welcome to MSW, Resoian. With that list of projects ahead of you, you're not going to get bored for a long long time. (Oh, and apparently taking on new things is a great way to avoid Alzheimer's ) Starting of with a half-model submarine sounds very good. I always think a timber backboard with an attractive grain is a good way to go.
-
Very good idea. I don't know if there's a real risk of warping, but doing it this way will head it off if there's a chance of it happening. Also a good idea. The only suggestion I'd make is to offset the joins so they don't all land on the same set of frames.This is how it was done in the day and I think if you search "Planking shifts" (I think that's the term)you'll probably find more info. Normally there was a repeating pattern of three strakes, so every fourth strake was the same (if that makes sense). And it might be possible to make scarph joints between the planks instead of butt joints. However, I'd be wary of doing that - Because of the overlap in scarph joints, they might shorten your strakes so they don't fit the ship. You're going well, despite the confusing instructions. Keep up the good work.
-
Very nice work.
-
Just returning to this build after a while. You're doing beautiful work -getting very close to complete.
-
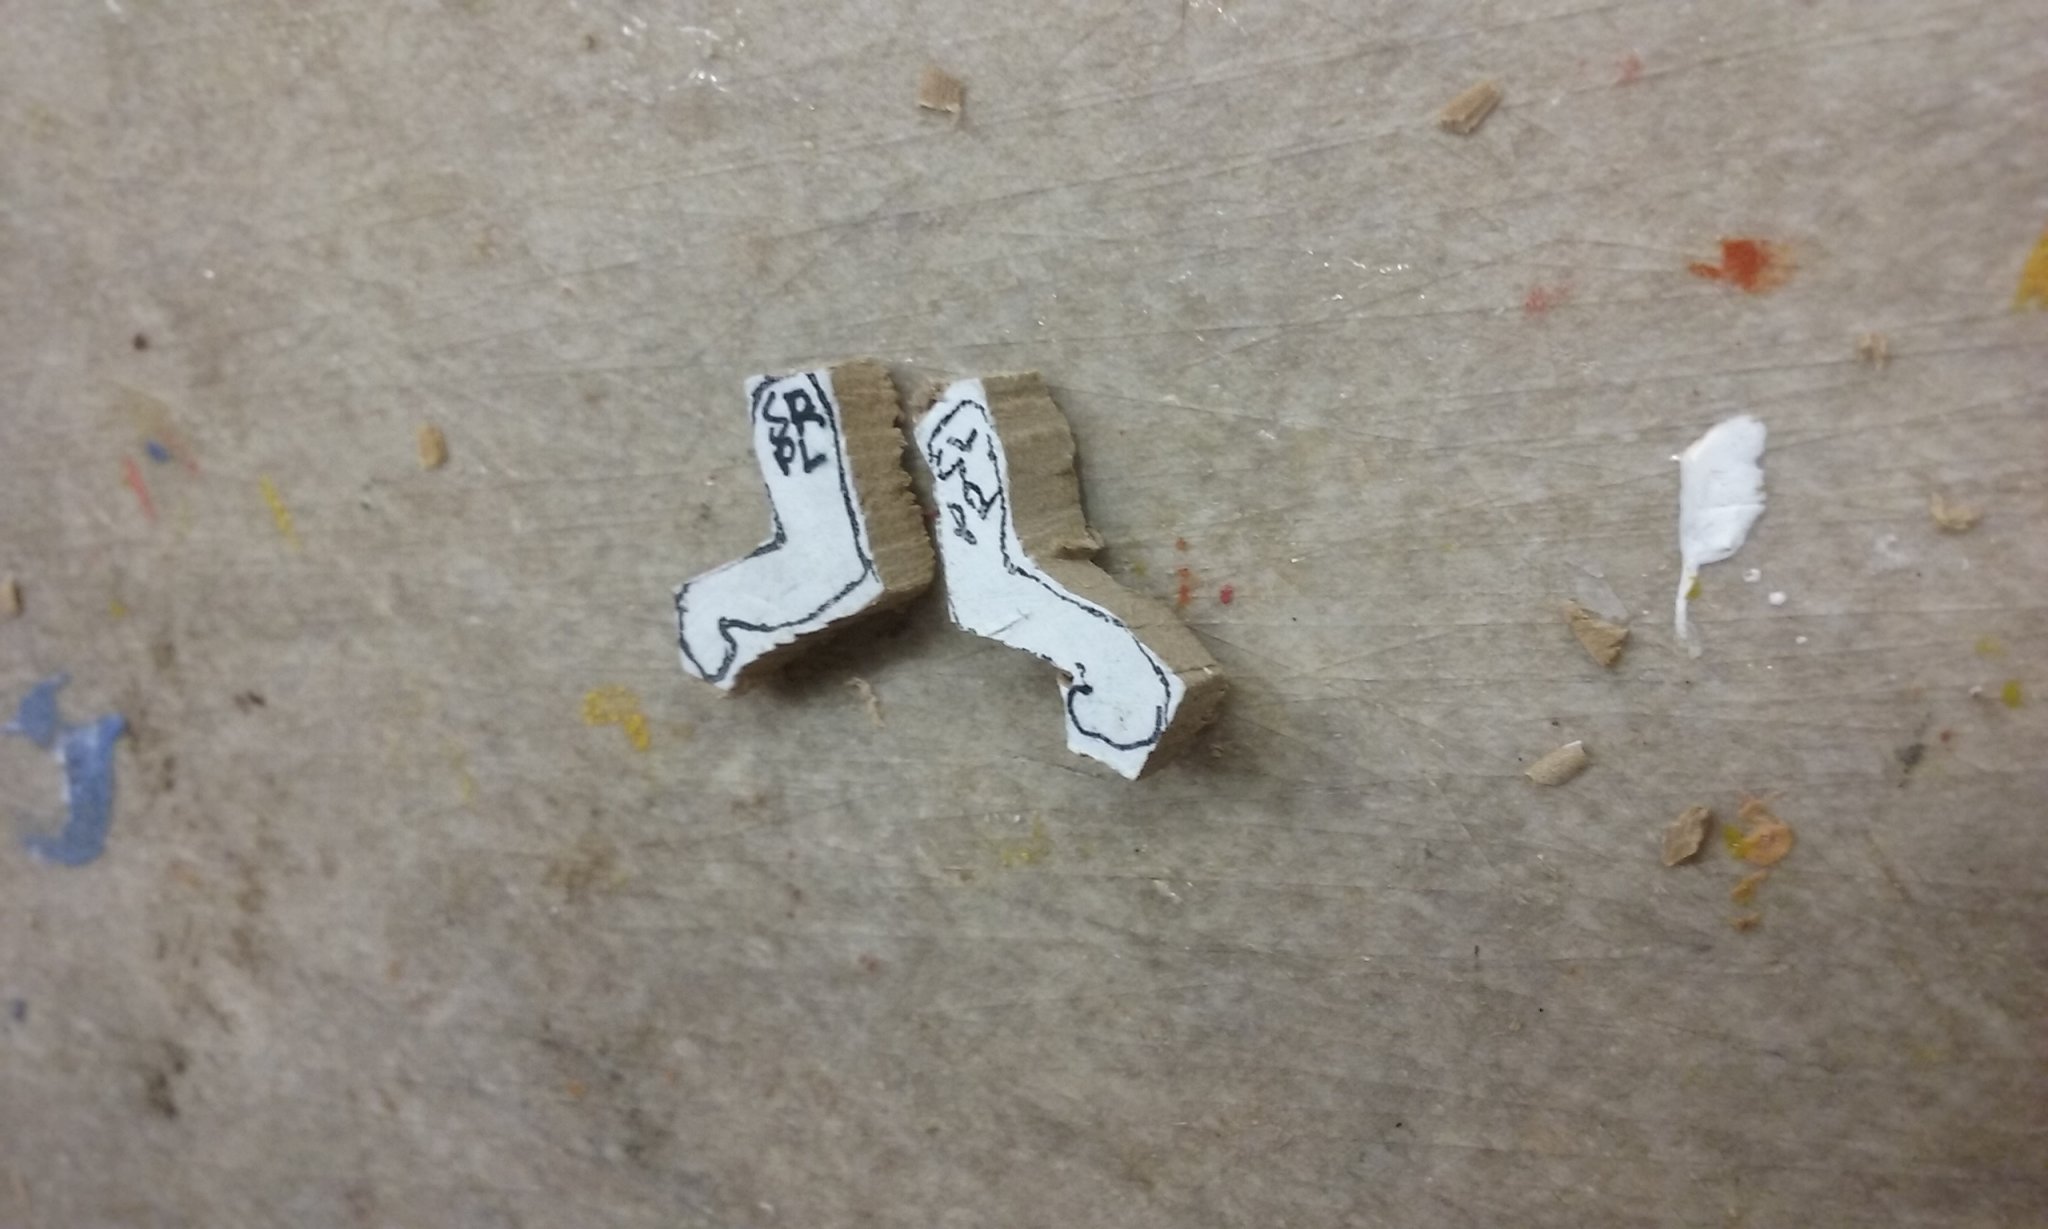
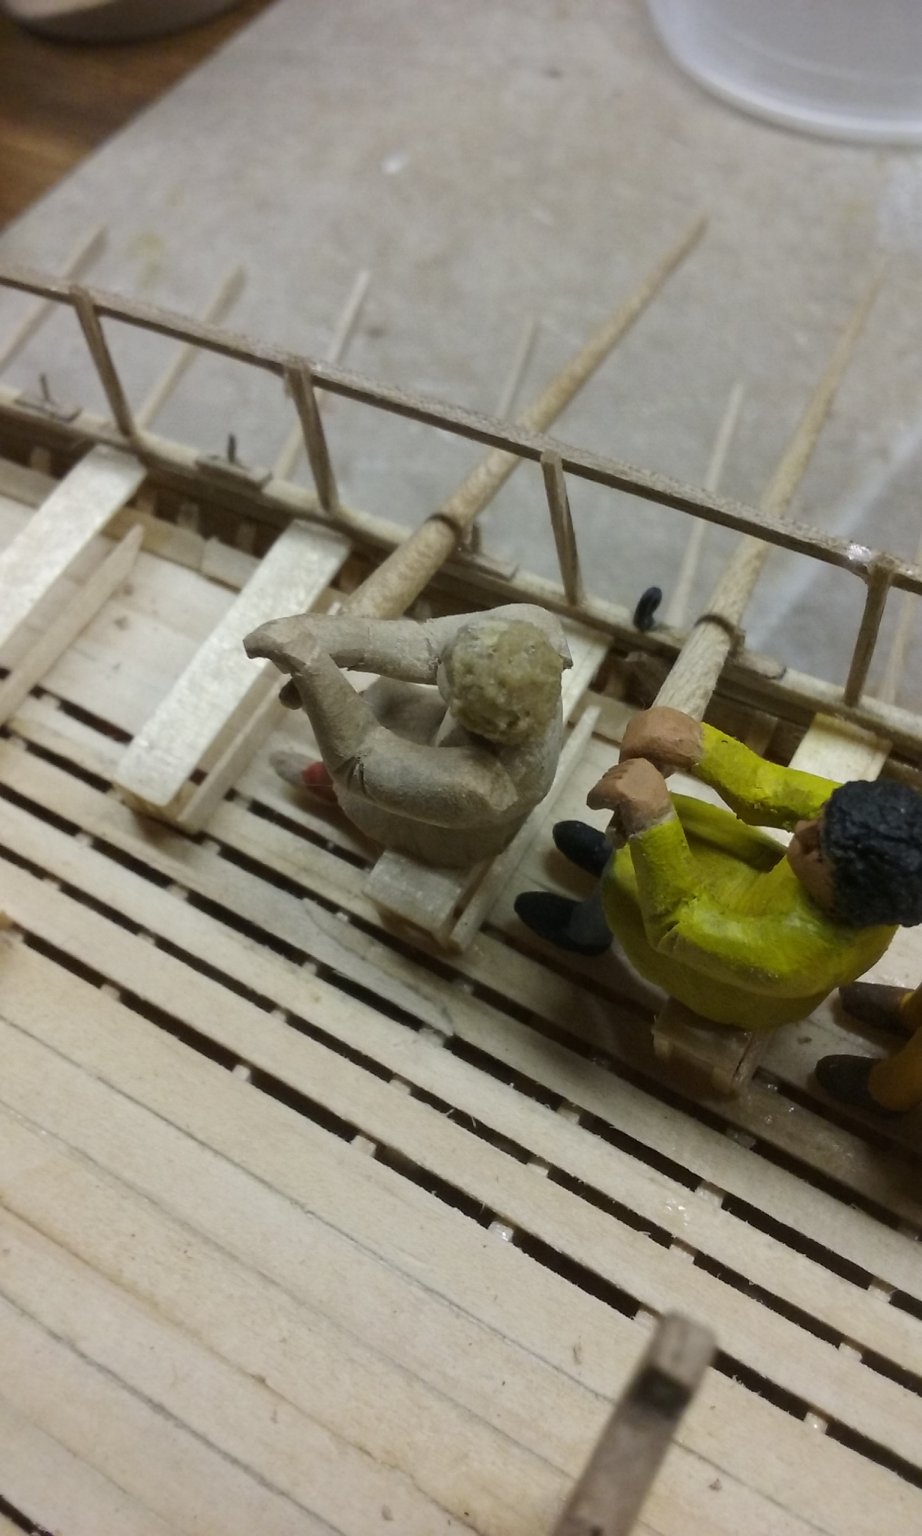
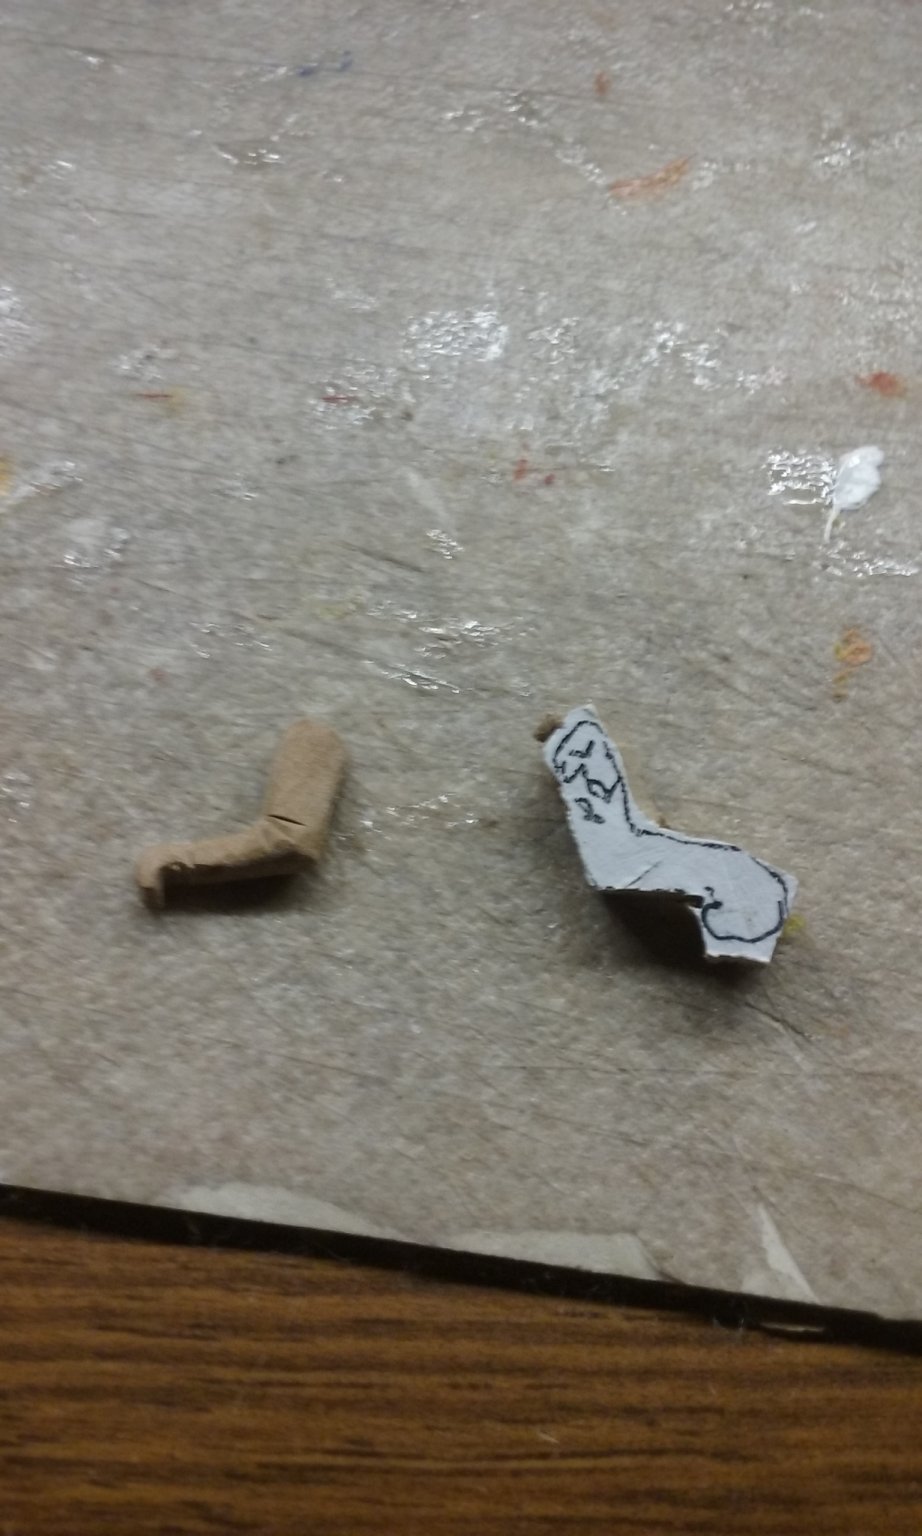
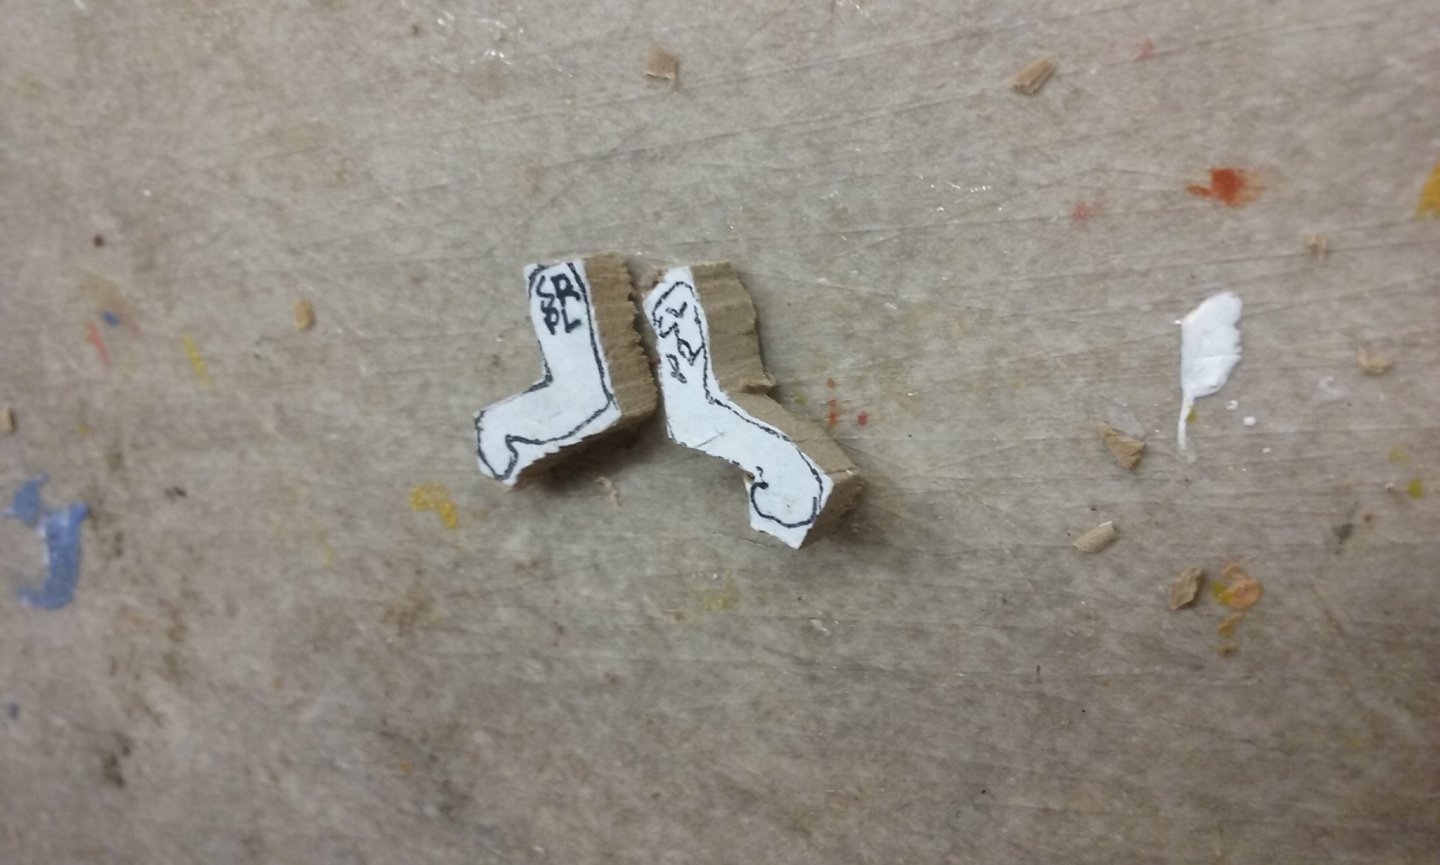
A slight change in technique for the arms has made my job a fair bit easier. I had been mass-producing the arms, sawn to a rough outline (NOTE: The letters on the arms stand for "Starboard Left/Port Right" and "Starboard right/Port Left". As the figures are effectively mirror images of each other, the same arm can be put either on the left side of a figure on the port side of the ship, or the right side of a figure on the starboard.) Once I had cut enough for 4 oarsmen I glued them onto all the figures at once. After that I'd dissolve the glue that held the oarsmen to the benches and take them off. Then I'd (as outlined in an earlier post) drill a hole linking each arm with the oarsman's body and insert a bamboo pin. Next I'd get the arms to swivel around the pins and glue the figures back on their benches. Finally, I'd take the arms off the figures and one by one I'd trim the arms to shape and glue them into their final positions on the figures. A few things wrong with this. First, doing four figures at once starts getting frustrating - like working on an assembly line it gets boring pretty quickly. It takes forever for anything to actually be complete. Second, I found the pins were often in the wrong places, because the arms were so roughly shaped when I attached them, Third, it was inefficient use of labour - too many steps involved. So, what I'm now doing is - still gluing the figures to the benches four at a time; that hasn't changed. But then I cut out only one pair of arms - for a single figure at a time. And I just hold an arm up against the body and see what trimming is needed for it. I gradually carve it to shape until it's exactly right, down to the fingers, the cuff of the sleeve and the folds in the sleeve at the elbow. Once that's done, I glue the arm into its final position at the shoulder. And repeat the process with the second arm for that figure. Once all that's done, only then do I unglue the figure, drill and insert the bamboo pins. The arms don't need to be pivoted or shaped - they're already in their final configuration and position. And then I move on to the next figure. This saves several steps which I have discovered are completely unnecessary, and maintains my interest better, because each figure is complete ready for filling, final trimming, and painting before I move onto the next. And in fact I can add the filler and wait for it to dry while I work on the next figure, so I have four figures at different stages of development (keeping me interested), rather than having to wait till all are done before I can move on to the next step. I've discovered I really have a "thing" about repetitive work. Who knew? A small thing, perhaps, but this hobby is supposed to be fun, not a drag.


-
Wonderful photos! As far as I'm aware, both Gokstad and Oseberg ships are accepted as "pleasure craft", or perhaps "yachts", rather than warships. The Gokstad ship's shields were the real thing - holes around the rim indicate that at one time they'd had a rim reinforcement, probably of leather, probably sewn on. The shields were thinner at the rim than at the centre (making them easier to manoeuvre but strong where it mattered), and the bowl-shaped protective metal "boss" over the handgrip was for use, not for show - see http://members.ozemail.com.au/~chrisandpeter/shield/shield.html . So they were not just knocked up for decorative purposes, as they probably would have been if the ship was purpose-built for the burial. It appears that the Gokstad ship at least was a working ship, though perhaps their trips were not long distance or of long duration. That doesn't solve the issue of what happened to the seats, though. I've always thought that trying to row while sitting on a chest on the deck would be very difficult. Surely the chest would rock back and forth as you pulled on the oar, making it hard to get a proper purchase. Back in my re-enactment days I made a replica of a Viking chest (the Mastermyr chest http://www.angelfire.com/wy/svenskildbiter/Viking/vikchest.html for those who are interested - those drawings are by me). I wouldn't like to sit on it and have to row.
-
Nice jig. I should think you'll be able to get quite a bit of planking done before the supports at bow and stern get in the way. That should certainly stabilize the shape of the hull.
-
Andrew, the kermes beetle is a different breed from the cochineal beetle, but it's likely the dye is the same substance. I was under the impression that cochineal was from the New World and didn't come into use until after the conquest of the Americas. Apparently during the American Civil War Garibaldi was offered the status of Major General by the Union but he wanted to be in overall command of the army. Nothing came of it. The murex also lives on the Eastern coast of the Mediterranean so it's possible that Tyre had a flourishing industry as well as Crete. The amount of work (and shellfish!) to make the dye is why it was restricted to the Imperial family. Yes, the urine had to be stale, and the best was apparently fom young male beer-drinkers. I have no idea how they worked that out. But apparently traditional tweed is still dyed that way, and does smell (slightly) of stale urine.
-
That was at the re-enactment of the Battle of Hastings in 2006, on the actual battlefield. As I'd been to the previous Big One (and because I'm a shameless self-promoter) I got to play King Harold's brother Leofwine.These guys are members of my hearth troop, which I recruited in Australia (and elsewhere) before I went. Not so much a skaldborg - the battle captain of the English right wing described them as "having your own personal SAS". He used them as shock troops. And though the Franco-Bretons were scripted to break and run, I think the Aussies gave them a good reason to do so. The Australian method of re-enactment fighting is somewhat more vigorous than the English, and I don't think the enemy knew what hit them. See http://www.oocities.org/egfroth/Hastings2006.html Yes, the Bayeux Tapestry shows the great majority of the English with kite-shaped shields - only a few with round ones, which seem to have been going out of use at that time. The mail is made of iron rings - the most recent re-enactor stuff is closer to the original in that the rings are closed with tiny rivets. Mine is old-(re-enactor) style with the rings butted closed, but made of spring steel which is a lot stronger than mild steel and resists the attack of the dreaded "mail moth". The stuff is prone to rust. It would probably be kept in an oiled leather bag. Not many Vikings had mail - it was pretty expensive - and swords were just about as rare. A spear, dagger and perhaps an axe would be what most Vikings had unless they were rich. The swords would have been taken care of even better than the mail, as they were invested with all kinds of manly mystique. I doubt very much that a sword would have been stored under the floorboards.
-
That seems to be a good solution to the problem, Balclutha. I think it will be visible only to you when all's said and done.
-
Aaaargh! BTW, even the cleanest and shiniest of mail doesn't shine from a distance - it just looks grey. I puzzled over this for a while, then realised it's the combination of the shine and the shadow -sort of pixillated in very small bits of black and white/silver - looks grey from anything more distant than very close up. So much for Tolkien's "shining mail". A bit of a disappointment, really. That's me standing third from the right, with my hand resting on the head of the Big Axe (TM).
-
I think it was my misunderstanding of how things worked, not a fault with the site. Sorry for the fuss, but thanks for the help.
-
Hello from Kansas City
Louie da fly replied to Richard in Missouri's topic in New member Introductions
Welcome to MSW, Richard! I'd agree with Mr Bluejacket about starting a build log. A great way to get help, encouragement and advice. Though I can't offer a 10% discount on anything, unfortunately -
New Member - Ranger, Spruce Goose, Tippecanoe, The Dinghy
Louie da fly replied to Chuck L's topic in New member Introductions
Agreed. But back to models, I tried to find model skiffs - no kits, but I came up with this - http://www.ahssa.org.au/model-skiff-resurgance/ Unfortunately the most recent mention is 2013, so it looks like they might be languishing again. But there are some other good links on this site giving some history of the "two-footers". Perhaps you could get in touch with them - they might have plans etc (if you're prepared to undertake a scratch rather than kit-build). And just like the full-sized boats, sometimes it apparently got a bit over-exciting - see https://en.wikipedia.org/wiki/Two_foot_skiff -
Yep - the link worked for me! Looking forward to seeing the next instalment!
-
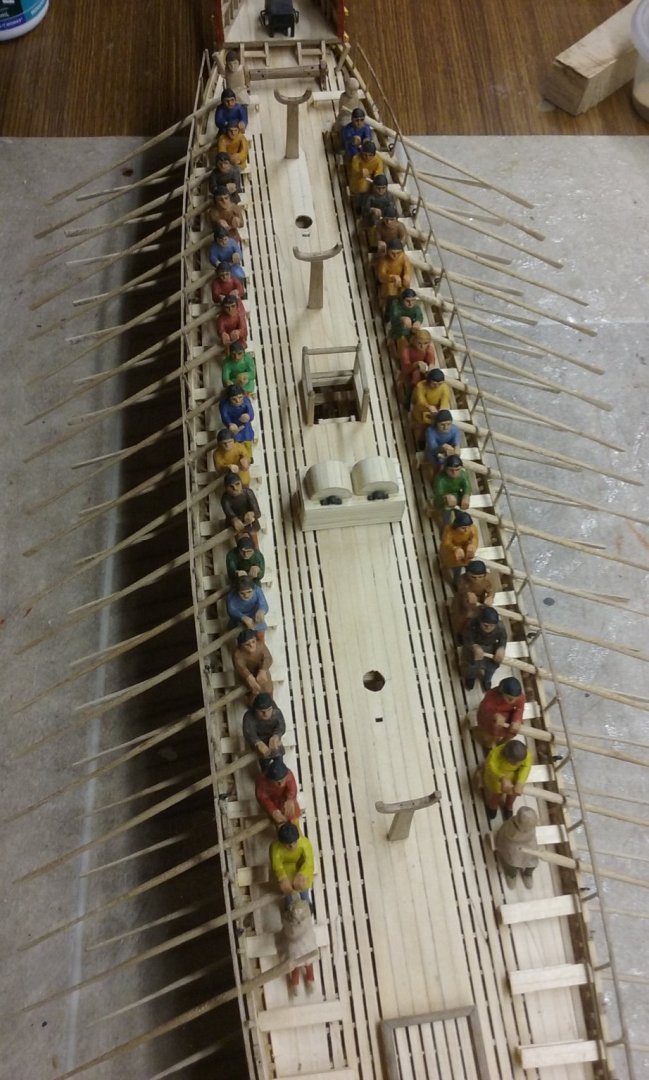
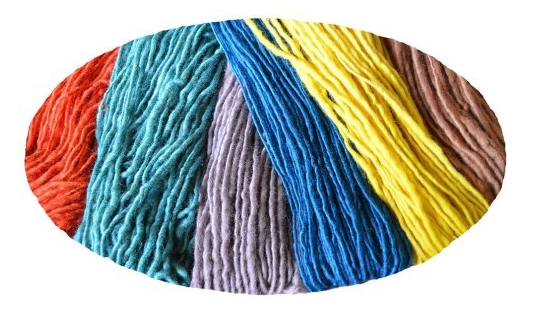
Four more oarsmen finished and four more started: Getting very close to the end. A note regarding the clothing colours. Dyes at the time were (of course) all natural. I haven't done any natural dyeing myself, but from what I've seen the colours are much richer and more beautiful than those produced by modern dyes - an example: The madder plant (rubia tinctorum) has roots that are quite dramatically red, and can be made into a dye which (depending on the treatment) can be anything from orange to maroon. The most common is a "brick" red - it's not capable of providing a "fire-engine" red. A much brighter red was available from a small beetle, which was found on the kermes oak, native to the Eastern Mediterranean. It was difficult to make in great quantity (lots of beetles!) so was reserved for the rich. It's also known as Cardinal Red, for obvious reasons. Much too expensive for an oarsman to wear. Blue is from woad (like braveheart). It contains indigotin, the same chemical as the indigo plant, but not in the same concentrations. A very beautiful blue. Repeated dyeing would produce deeper and deeper shades of blue (the same applies to the other colours). The extraction process produced a truly disgusting smell, (a combination of bad cabbage and raw sewage) making woad dyeing a "noxious trade". About half the easily available plants in nature produce a yellow dye. The most commonly used (at least in western Europe) was dyer's greenweed. Dyeing alternately blue and yellow produced green. Browns could be produced with walnut shells, and tannin from oak galls and iron (which was used to make black ink) could produce a good approximation of black though I don't know if that was used as a fabric dye. As far as I'm aware there's no mention of naturally "black" wool from black sheep being used, but that doesn't mean it wasn't. Shoes in contemporary illustrations are almost always black, and a friend of mine once sent me a sample of leather that had been tanned in an iron pot -combination of iron and tannin producing a very dark brown - almost black. I left it outf or over a year in the tropical sun at Port Hedland where I lived at the time and it didn't fade at all. Whether this is how they produced those black shoes I have no idea, but it certainly did produce the result this time. Naturally enough, undyed fabric could also be used, but I have no idea whether this was actually done at the time or if fabric was always dyed. Presumably your wealth and status would have had something to do with that. "Pure" white was apparently a prestige colour, probably because it was so hard to keep clean. Purple came from the shellfish murex, but was reserved to the Imperial family - "Imperial Purple". Another dye which produced a disgustingly foul smell. Purple could also be produced (and was) by dyeing with woad and madder - but the colour was still restricted to Imperial use. So I've given my oarsmen clothing in colours that could be produced with the dyes of the time and within their budgets.
-
Hi Andrew. You've done a good job handling the "Friday Kit" issue - yes perhaps you could have done it more easily with a saw, but at the very least it'll be a lesson learned and another thing to know if it ever happens again (fingers crossed it won't!). Regarding the stempost/prow, sometimes no matter what you do, the wood will always return to the shape it wants to be in. In which case the only sensible and realistic thing to do is make a new one out of a piece that isn't bent. Obviously, it would be preferable if you can get the existing one straight, but just be aware that making a new one might be better in the long run. Unfortunately this would also involve making new doubling pieces for the prow - I doubt you could re-use existing ones, unless you can dissolve your glue - rubbing (isopropyl) alcohol will dissolve PVA (white) glue and I'm told nail polish remover dissolves super (CA) glue, but I haven't personal experience of the second one. You can get isopropyl alcohol (brand name Isocol - in a 75ml dark green plastic spray container with a white label with a crocodile on it) from Coles or Woolies in the personal grooming aisle (so you can get it while doing your necessary food shopping). What you should do about the different thicknesses of the stem and stern posts vs the keel is a bit hard to know without looking at it, but your assessment is probably right. I'm not sure what you mean about the possibility of damaging the carving strips, but I'm really not familiar with how it all fits together, so it's a bit hard to visualise. Perhaps those who have made the same kit will be able to help on this one. Good luck with it. You're doing a good job and your persistence and attention to detail will pay off in the long run.
-
I haven't checked this build for a while.You've made tremendous progress in the meantime. I particularly love the paintwork on the figurehead!
- 2,699 replies
-
- 3
-
-
- heller
- soleil royal
- (and 9 more)
-
New Member - Ranger, Spruce Goose, Tippecanoe, The Dinghy
Louie da fly replied to Chuck L's topic in New member Introductions
Yes, but once upon a time it used to be even more extreme . . .