Louie da fly
-
Posts
7,990 -
Joined
-
Last visited
Content Type
Profiles
Forums
Gallery
Events
Everything posted by Louie da fly
-
 Wonderful work, Steven. She's a beauty. Would I be offending you if I said she looks very steampunk? BTW, given the apparent size of the model, you could possibly have got away with thinner metal than 16ga, which is fairly difficult to form. But I have to say you've done a beautiful job of it. Steven
 -
You've done a magnificent job with her, Clare. Truly a model to be proud of. (And yes, I'd have sworn she was wood.) Steven
- 175 replies
-
- 1
-

-
- hanse kogge
- shipyard
- (and 1 more)
-
If you were "created" as a peer (i.e. your father wasn't a lord - you were elevated to the peerage for services to the Nation), you generally got to choose what title you were known by - if you lived at Smallbridge, for example, you could choose to be known as Lord Smallbridge. Or you could be known by your existing surname, which happened a lot - Lord North, Lord Melbourne etc. Or in the case of Smallbridge, Lord Hornblower. When Arthur Wellesley was granted a peerage, he couldn't call himself Lord Wellesley, because his brother had already taken the name. So he became "Arthur, Viscount Wellington of Talavera", or just Lord Wellington - later (as he went up the ranks of the peerage) he became successively the Earl, Marquess and then Duke of Wellington. Whatever rank in the peerage you were, you could either be called by that rank (Viscount So-and-so) or just "Lord So-and-So". Nelson's full title (leaving out his navy rank) was "Horatio, baron Nelson of the Nile". Or he could be called just "Lord Nelson", or even "Nelson". Later the King of the Two Sicilies granted him lands in Bronte (Italy) and a further title and he signed himself "Nelson and Bronte". Steven
-
Happy to be of help, Bolin. Some of the anchors are from the Mediterranean and should be regarded with caution, but others are much more appropriate. It seems to me that anchors with the ring next to the flukes co-existed with anchors without them. I've made anchors from brass and also from wood. I think it comes down to what you're most comfortable with. Steven
- 179 replies
-
- 1
-
-
- longship
- Helga Holm
- (and 1 more)
-
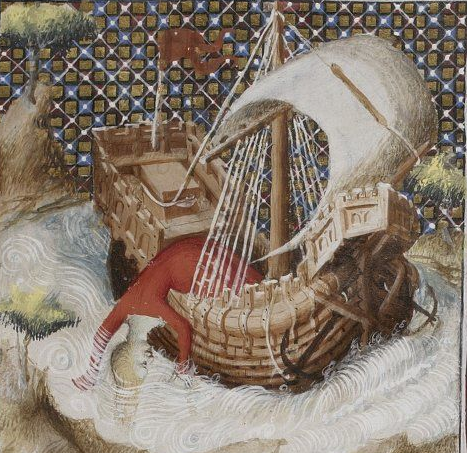
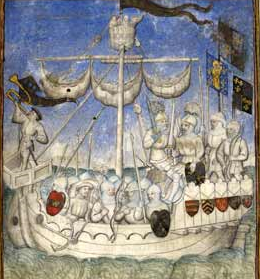
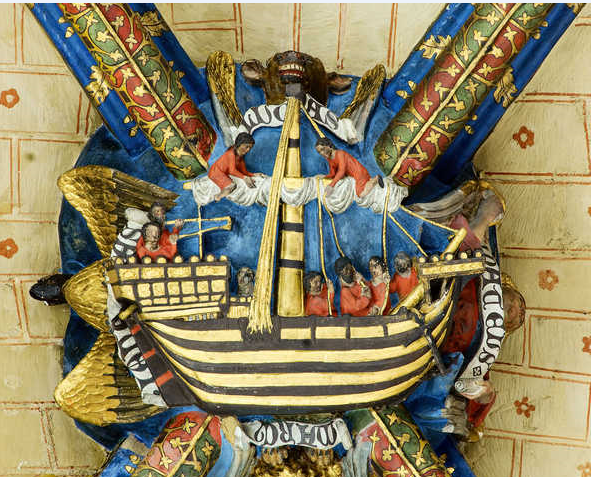
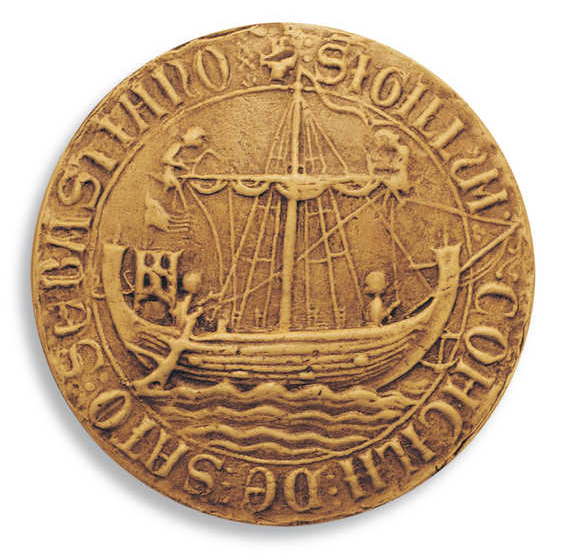
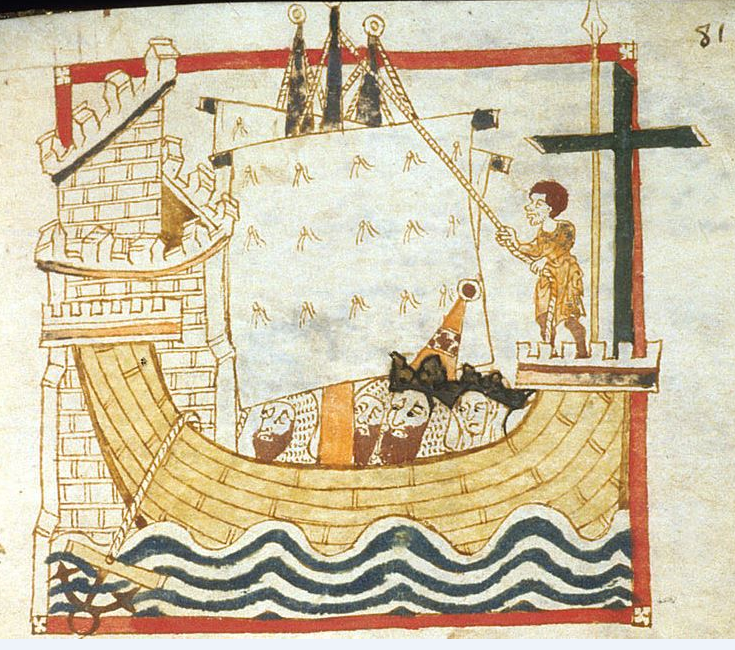
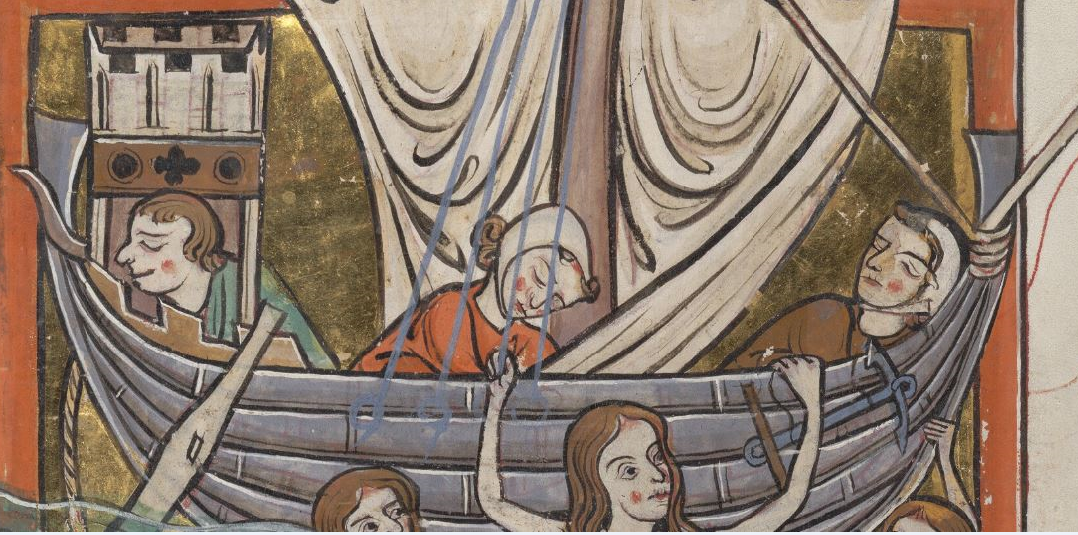
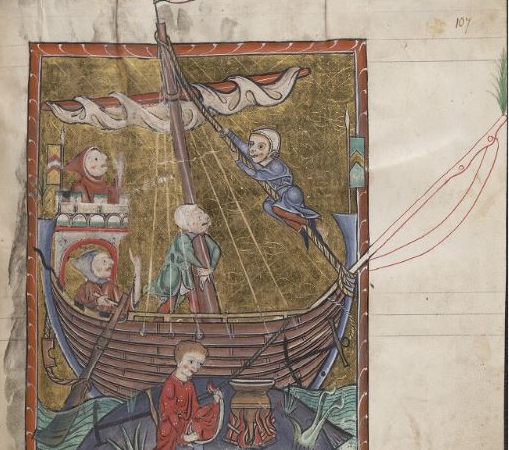
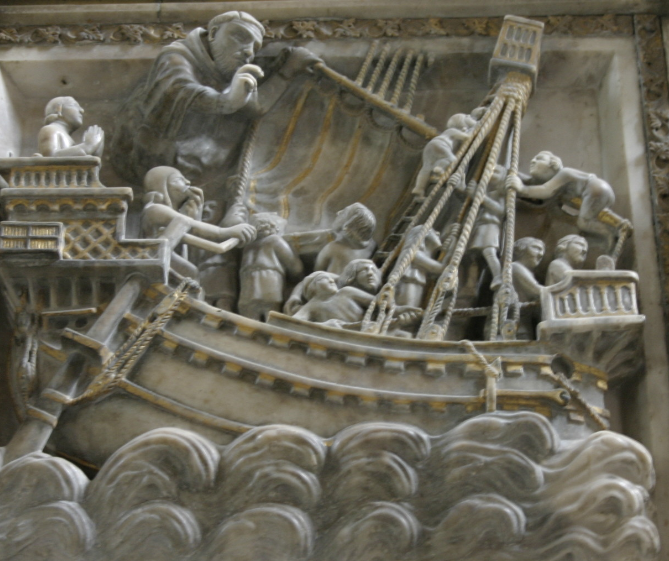
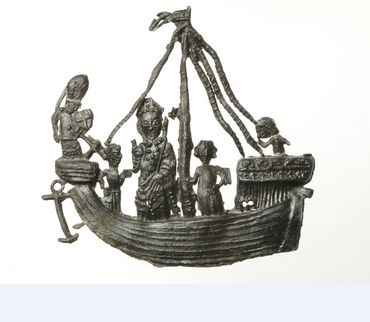
Here are some examples which might help. The dates are either side of the date you're after, so you should be able to get some idea of what was likely in the period you're interested in. 1403 Boccaccio-Maitre des Cleres Femmes du Duc de Berry Expedition to Canary Islands 1420-30 Seal of San Sebastian 1297 Bayonne cathedral 14th century Bodleian Library MS. Bodl. 764 f.74v 1226-1250 Bodleian Library MS. Bodl. 764 f.107r 1226-1250 BL Egerton MS 3028 f. 81. 1338-1340 San Eustorgio, Milan. 1336 to 1339 Fresco, Skamstrup church, late 14th century. St Thomas Becket Pilgrim badge 1360-1400 San Pietro in Ciel d'Oro, Pavia. 12th century I hope that helps, Steven

- 179 replies
-
- 5
-
-
- longship
- Helga Holm
- (and 1 more)
-
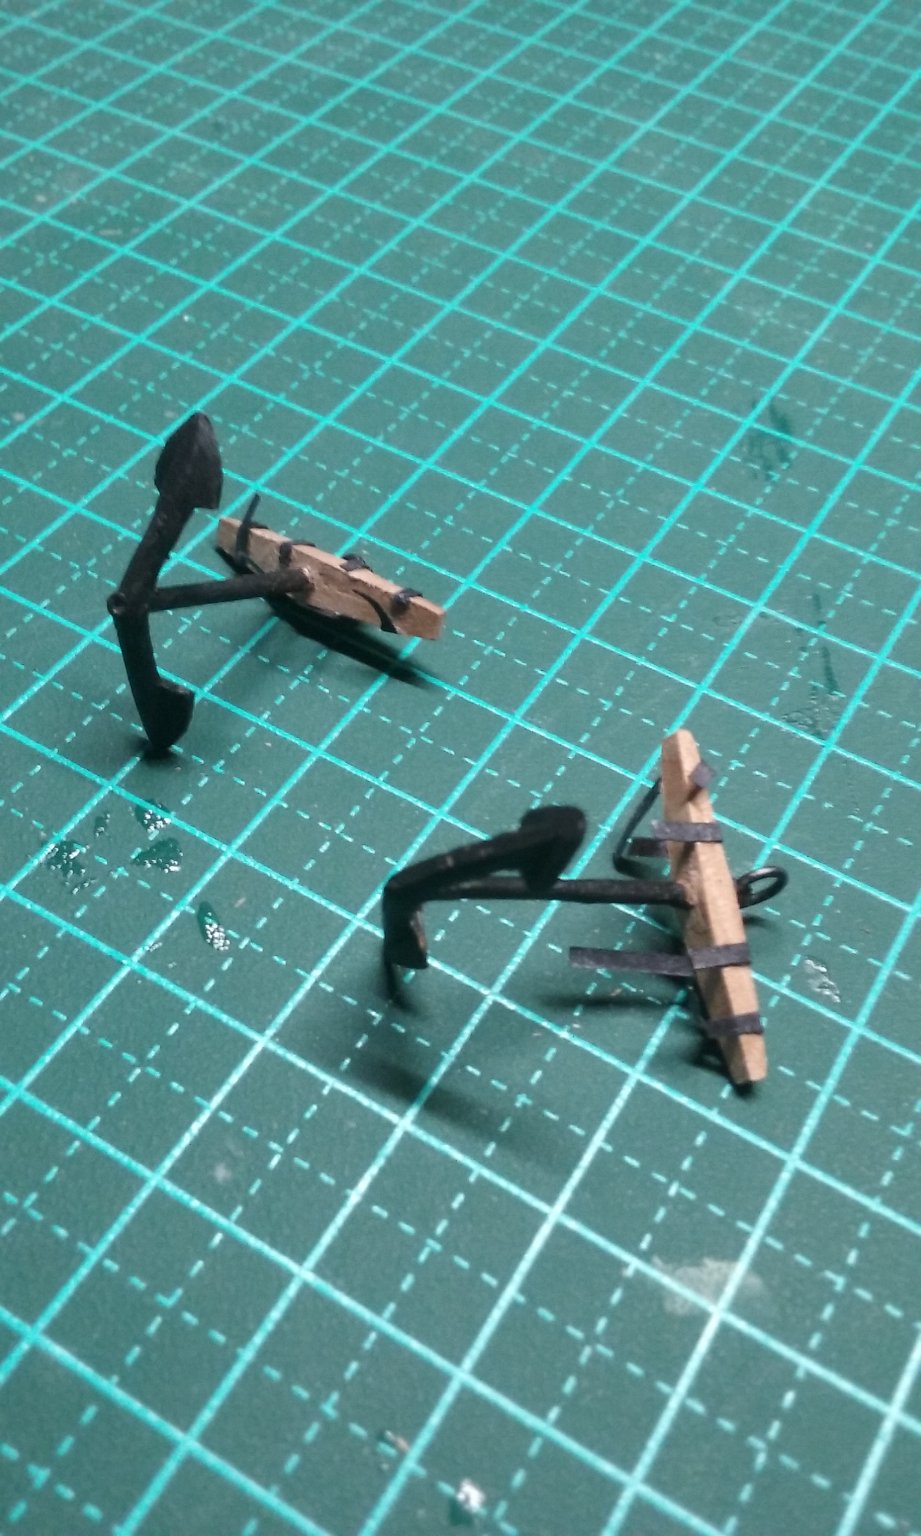
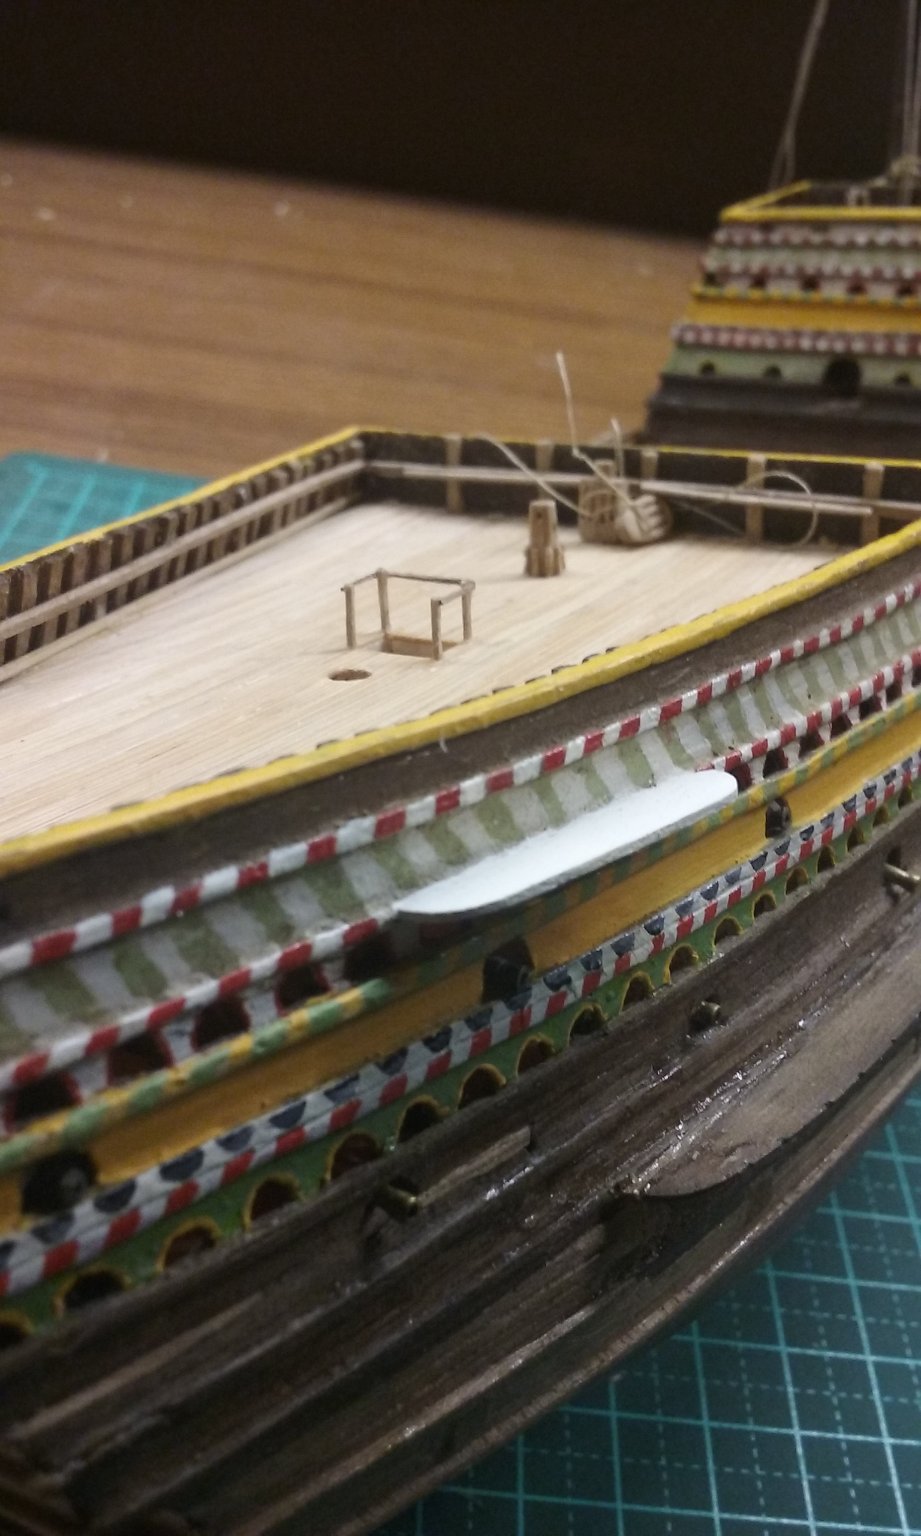
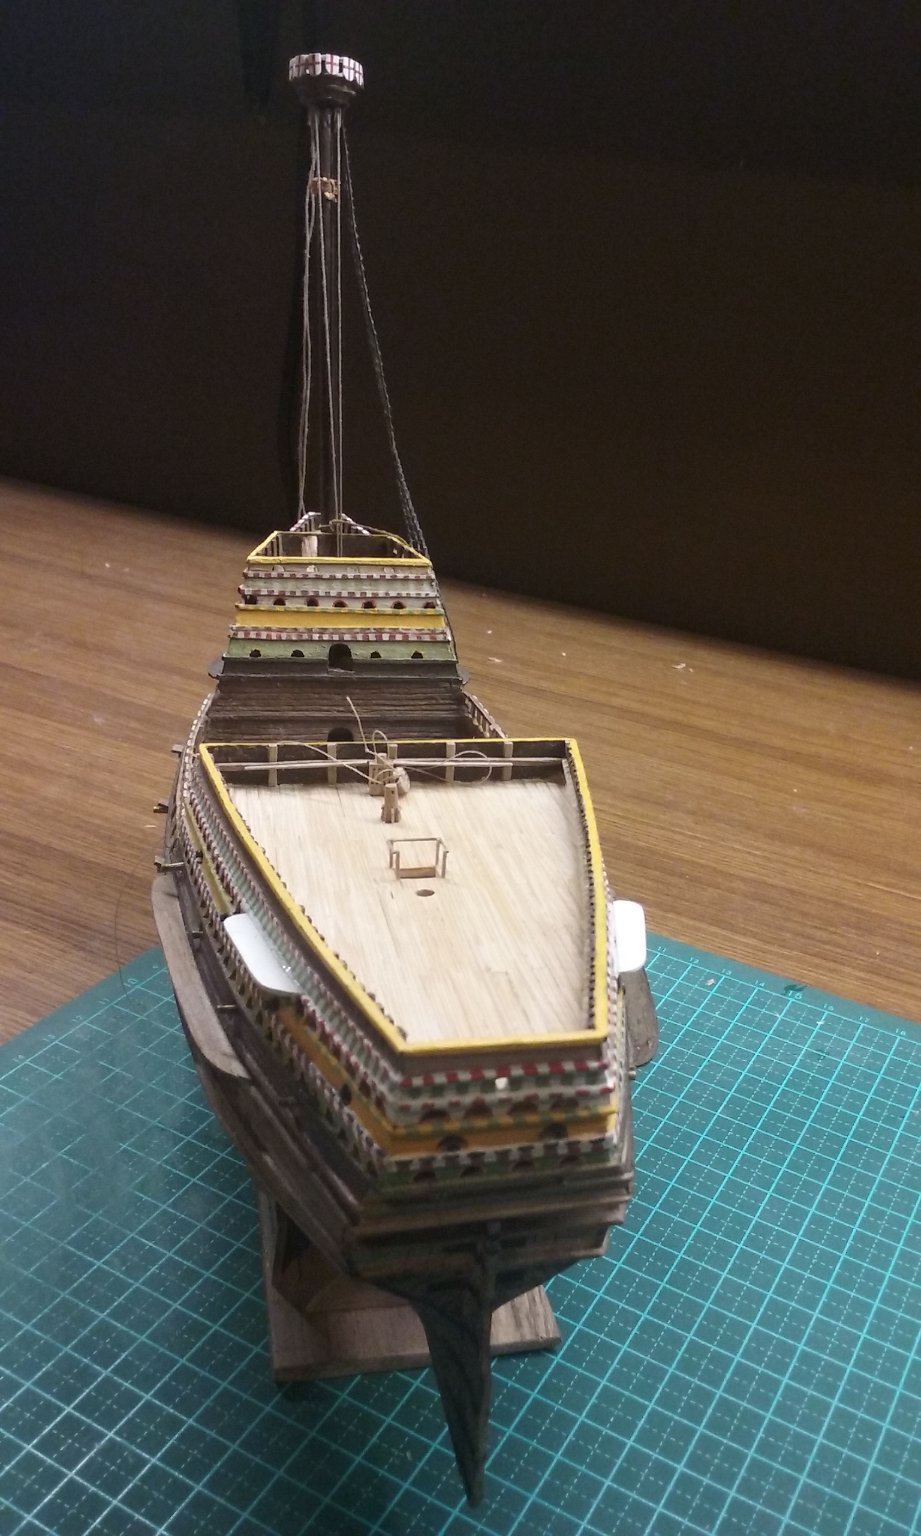
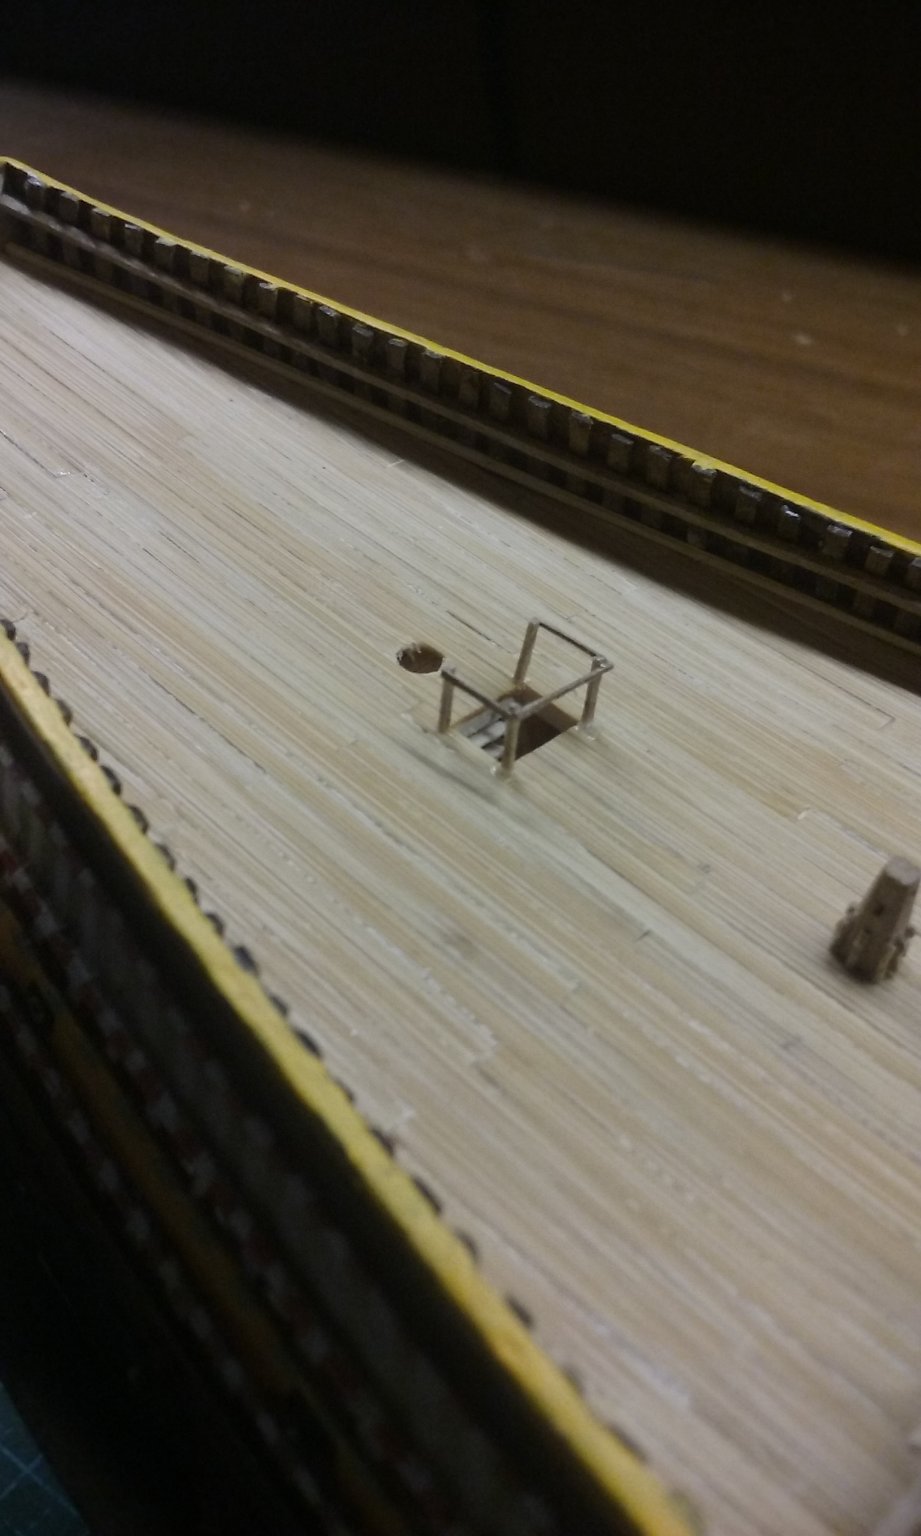
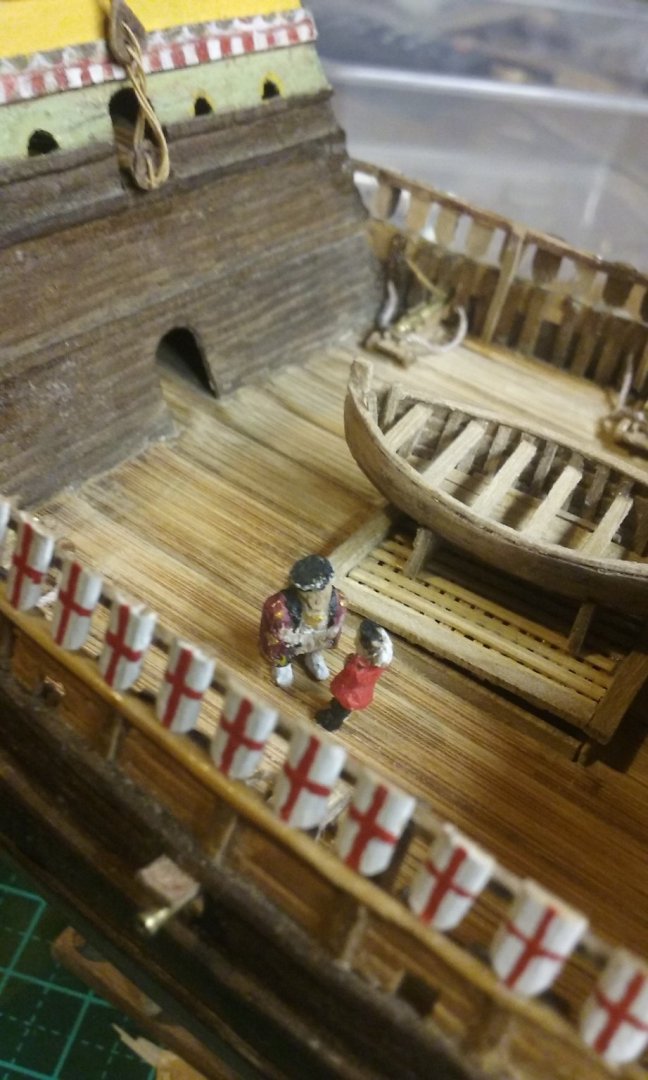
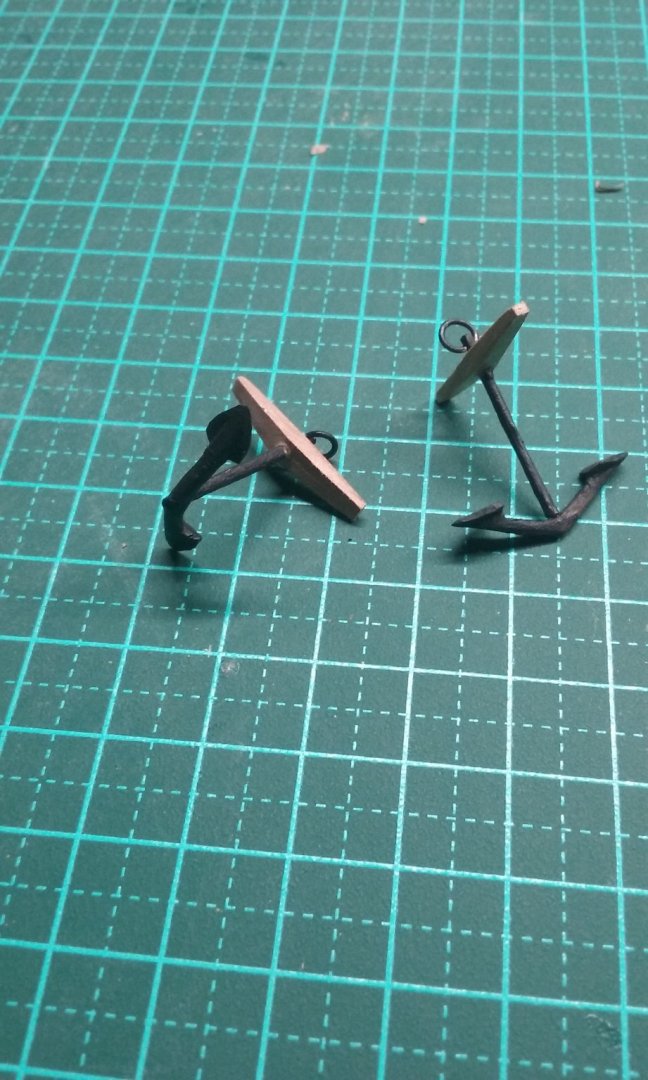
More fiddly stuff. King Henry with one of his courtiers glued to the deck. I think I'm going to need a few more figures - they look a bit lonely standing there by themselves. And the anchors with their reinforcing bands - in progress and finished. I made them out of strips of paper I'd blackened with a spirit pen. Starting to attach the starboard fore "chains". That's all for now. Steven


- 740 replies
-
- 13
-
-
- Tudor
- restoration
- (and 4 more)
-
HMCSS Victoria 1855 by BANYAN - 1:72
Louie da fly replied to BANYAN's topic in - Build logs for subjects built 1851 - 1900
That's beautiful work, Pat. Well worth the wait. Steven- 1,013 replies
-
- 3
-
-
- gun dispatch vessel
- victoria
- (and 2 more)
-
Hi Spooky and welcome. You're making good progress with your model. Keep it up! Regarding Golden Hinde accuracy, firstly nobody knows exactly what she looked like. Any model is speculative, based on knowledge of her size and number of guns, plus contemporary information on ships of the time, including pictures. Any model claiming to be of the Golden Hinde is actually just a generic "typical Elizabethan galleon". But don't let that stop you - it's no more or less a accurate depiction of the ship than any other model. One thing, though. She wouldn't have had a hind as a figurehead or on the stern transom - she started her voyage with Raleigh as the Pelican and wasn't renamed until she was partway through her journey. If you want to get a good idea of the kind of vessel she would have been, see Backer's superbly researched Pelican/Hinde at Steven
-
Hi Michael, and welcome. There's no reason you can't put up a build log for the model you're working on at the moment. I'm sure a lot of people would like to see it. By the way, I love your architectural models. Steven
-
Hi Kirk, and welcome to MSW. Do you have a model under way at the moment? Steven
-
Thanks everybody for the likes, and Liteflite for the comment and suggestions. I'm not in any hurry with the anchors - there's plenty of other stuff still to do before I even think of putting them in position. That hinge idea sounds good.Maybe I'll try it, but currently I just drill the holes and then cut around them in a triangle with a (sharp) craft knife. Pristine! Pristine? You've got to be kidding. It's got great blobs of CA and remnants of white glue, the surface is impregnated with sawdust from sanding, you name it! And there are places where the lines have been worn away - it was just a cheapie I got from a junk shop. Nice that it looks pristine in photos, though . Steven
- 740 replies
-
- 2
-
-
- Tudor
- restoration
- (and 4 more)
-
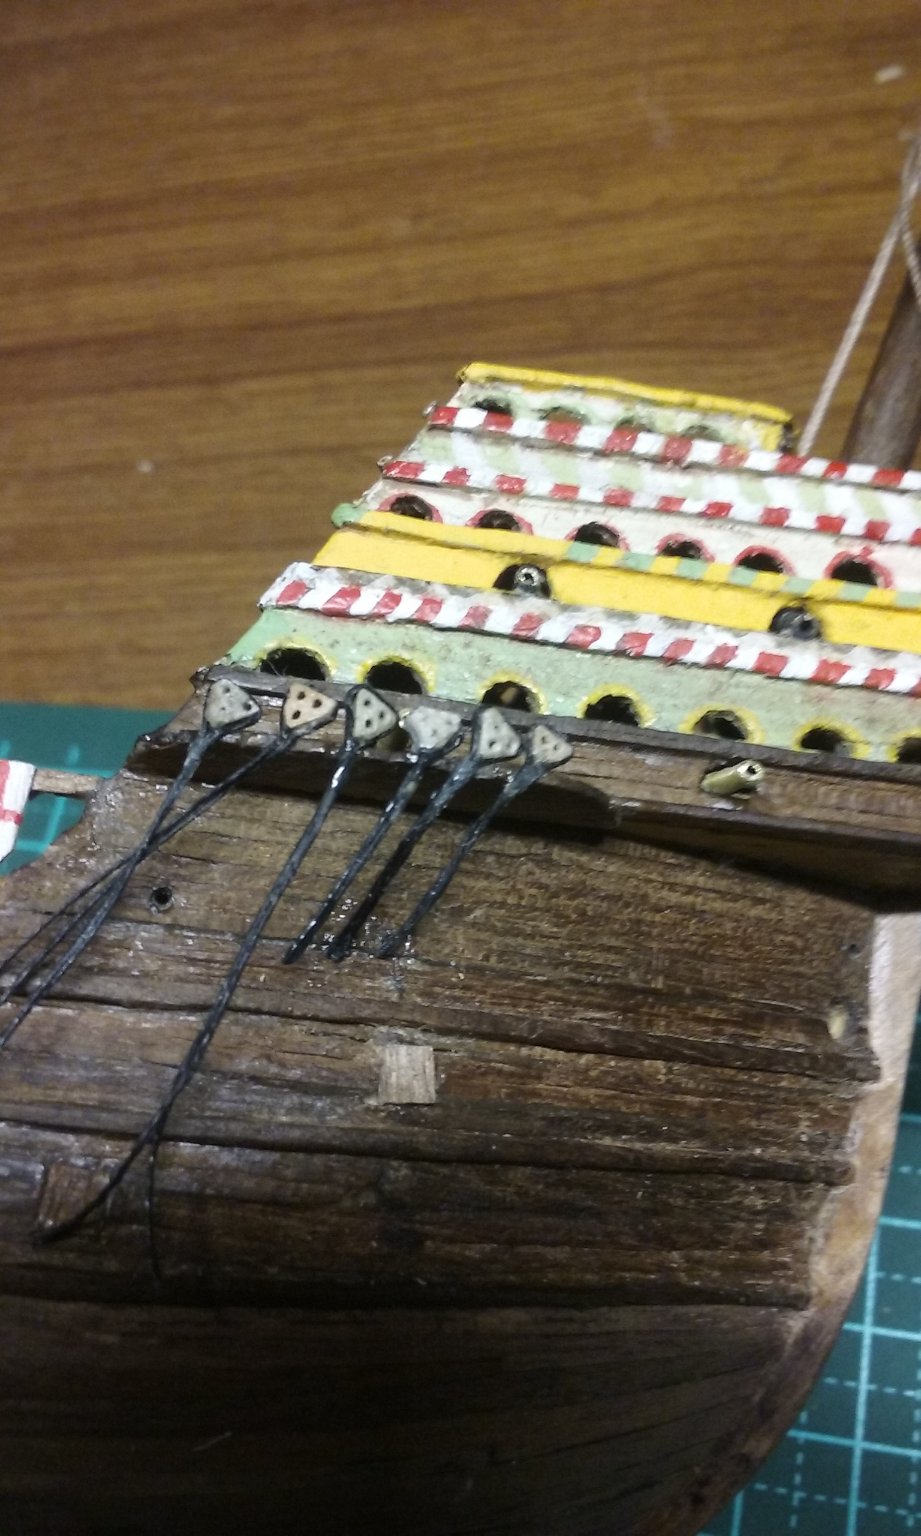
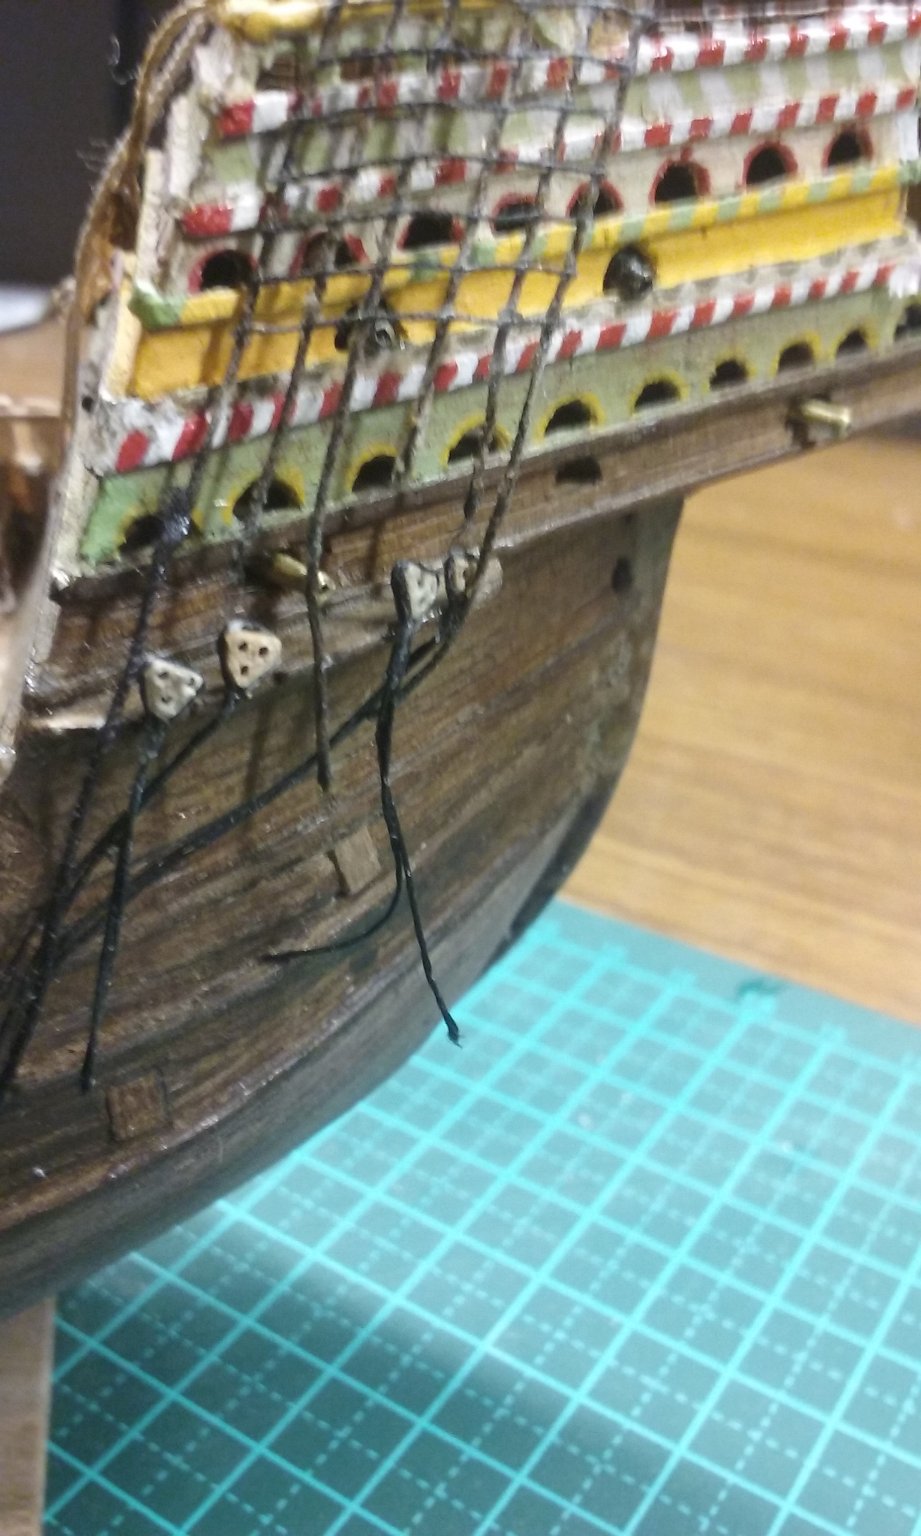
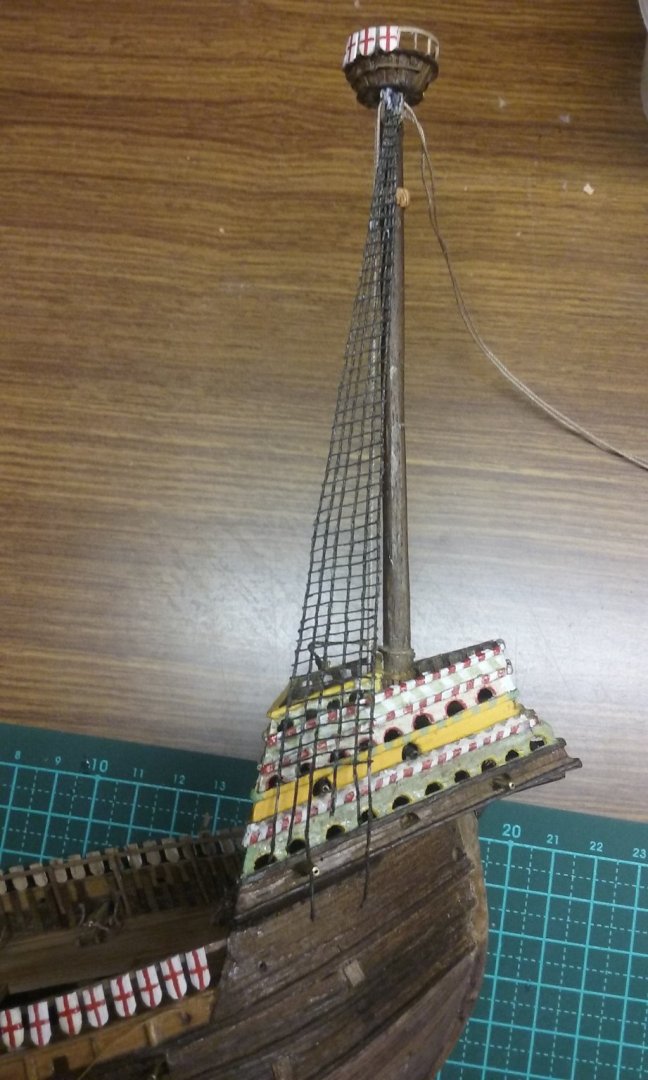
I've made a railing for the steps leading down from the upper deck. And after a lot of faffing around trying to drill perfect tiny triangles of holes for my deadeyes, I decided I should really make a jig. I used galvanised iron strap, as used for cross-bracing in house construction. Took me about 10 minutes to make one, with two (not perfect, but acceptable) triangles of two different sizes and spacings, for different sized deadeyes. Should have done it ages ago. And I've finally added the starboard foremast shrouds and started work on adding the deadeyes for them. Four lower deadeyes in place and two to go. Then the upper ones and the lanyards. And it looks like I'll need to add a couple of ratlines at the bottom end of the shrouds. Slow but steady progress. Steven


- 740 replies
-
- 9
-
-
- Tudor
- restoration
- (and 4 more)
-
Coming together very nicely, Clare. But what's that thing hanging in front of the mast? Steven
- 175 replies
-
- 1
-
-
- hanse kogge
- shipyard
- (and 1 more)
-
Nice work, mate. The only other way to do this without splitting would be to source your wood from forks in tree-branches. You've done a good job. Steven
-
Beautiful work, Kondzik! I'm continually amazed at the quality that can be achieved from card. Steven
-
Very nice. Is it adjustable for different widths? Steven
-
That twill weave looks really good - it has the "diagonal" pattern that twill fabric exhibits. 2mm strips - that's quite a fine weave for just strips of paper. You've done an admirably neat job of it. Steven
-
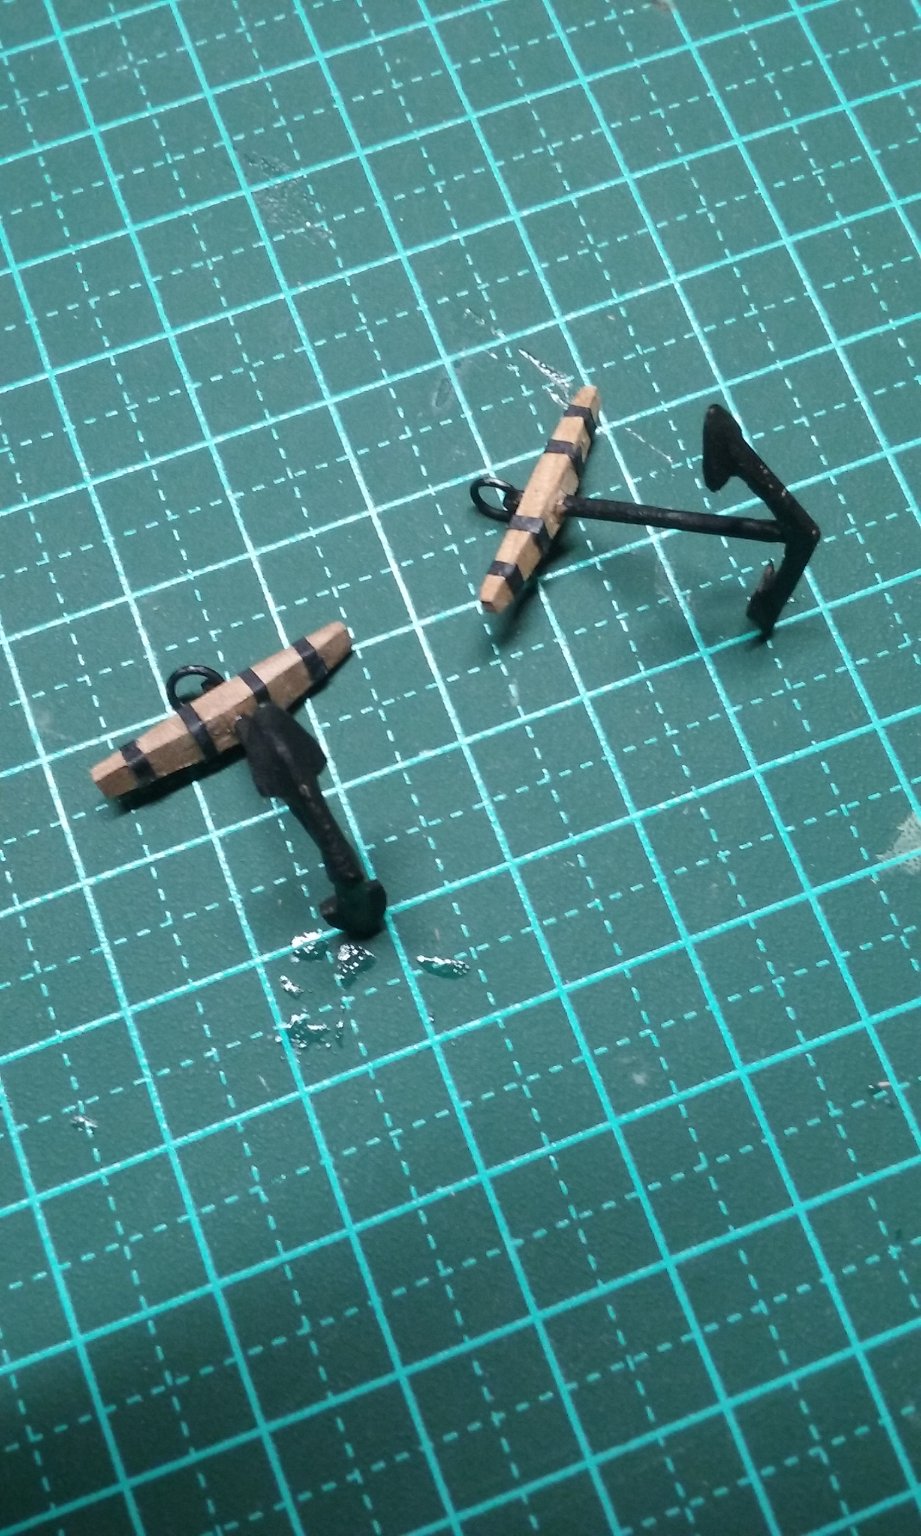
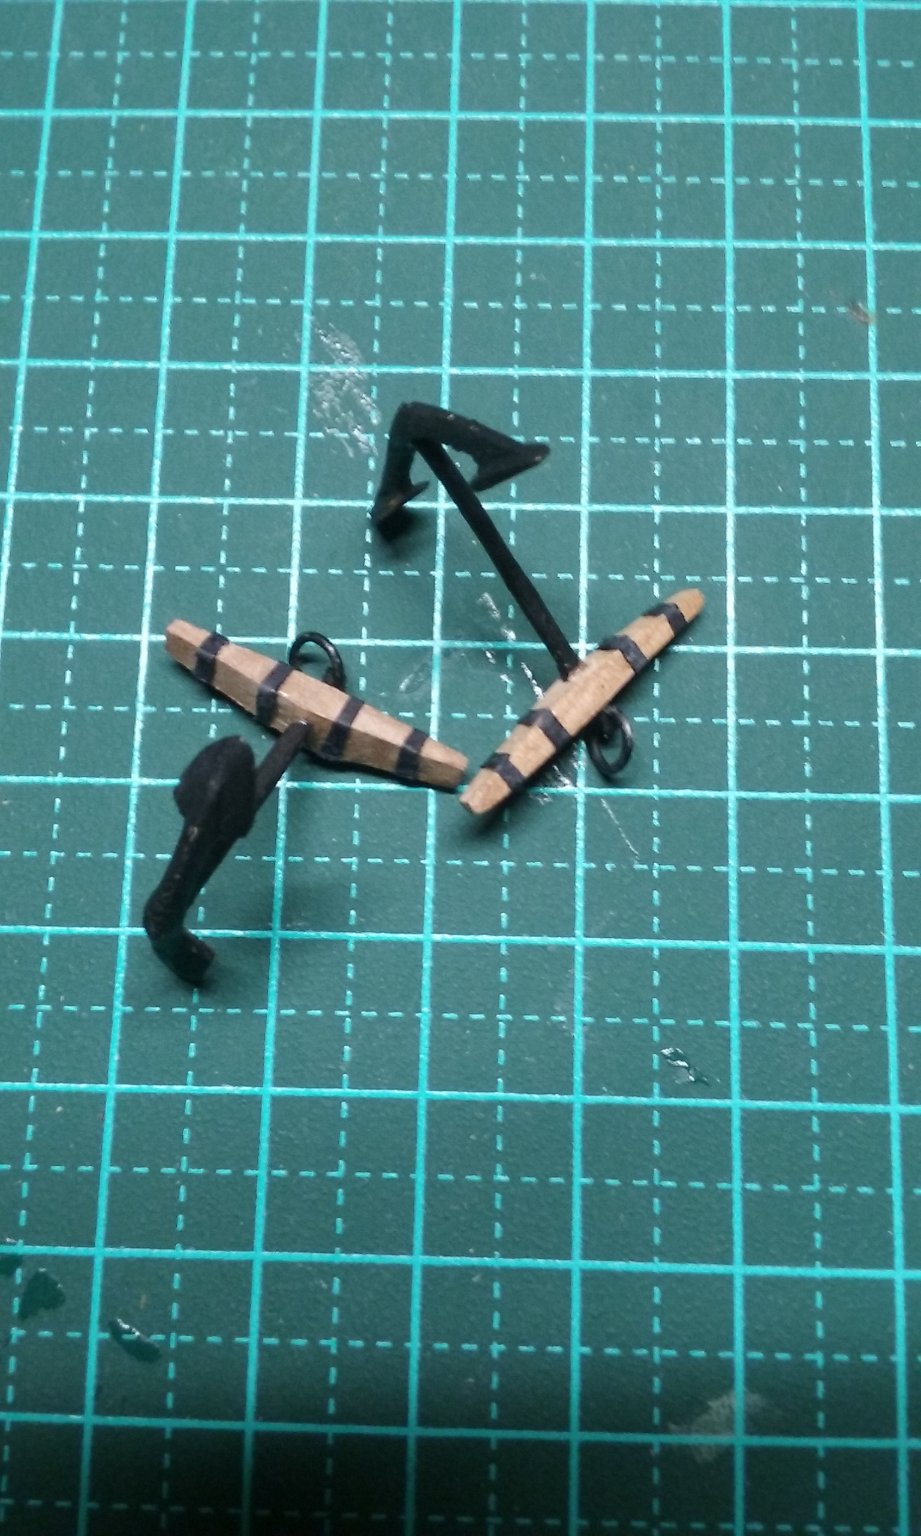
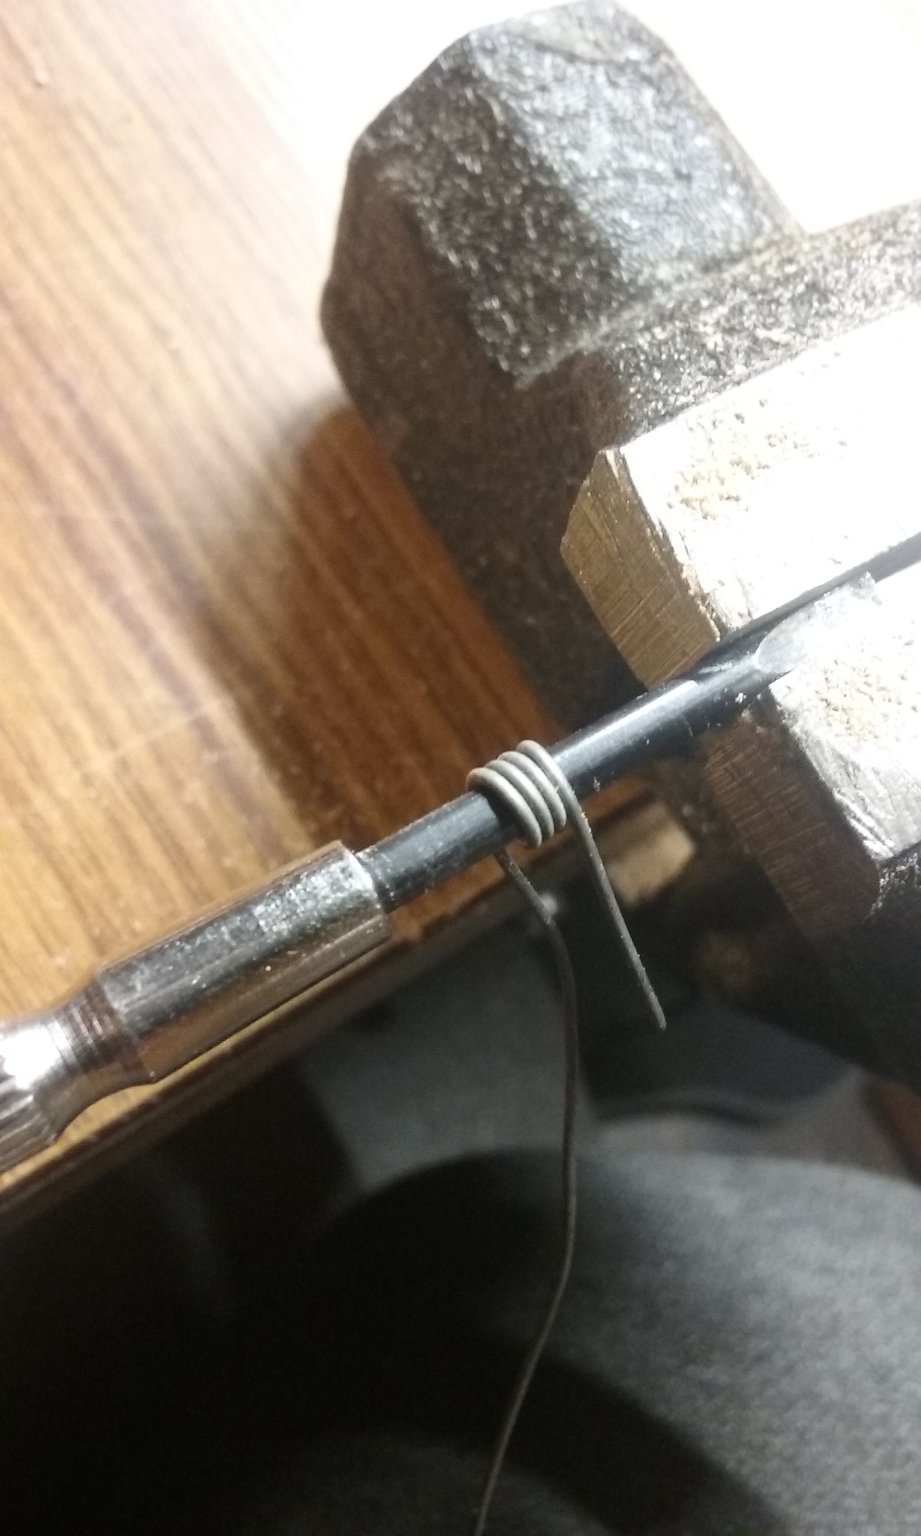
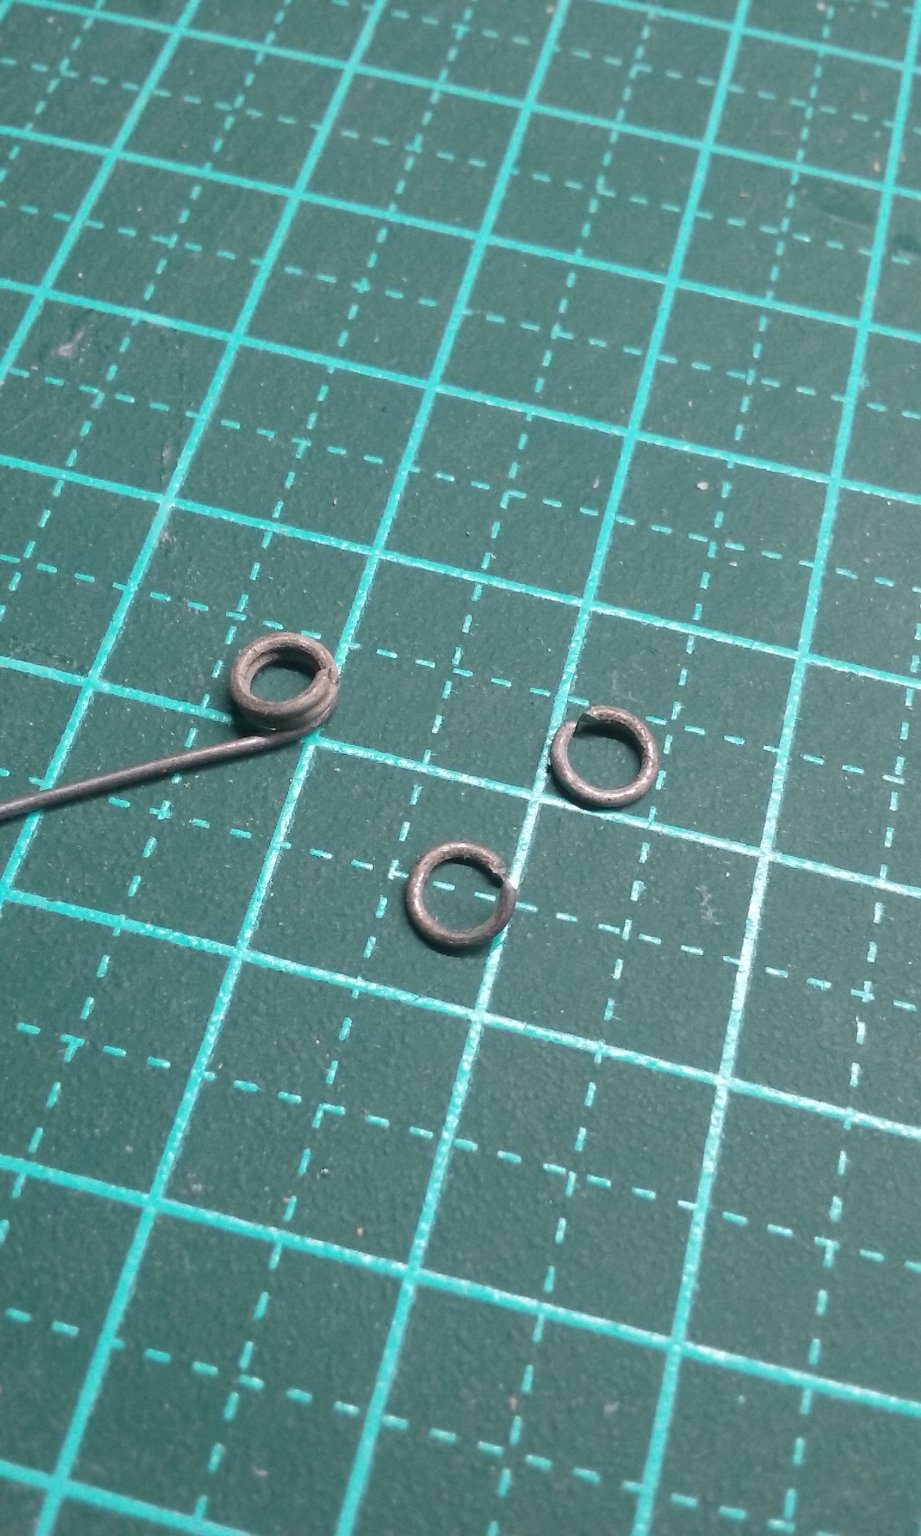
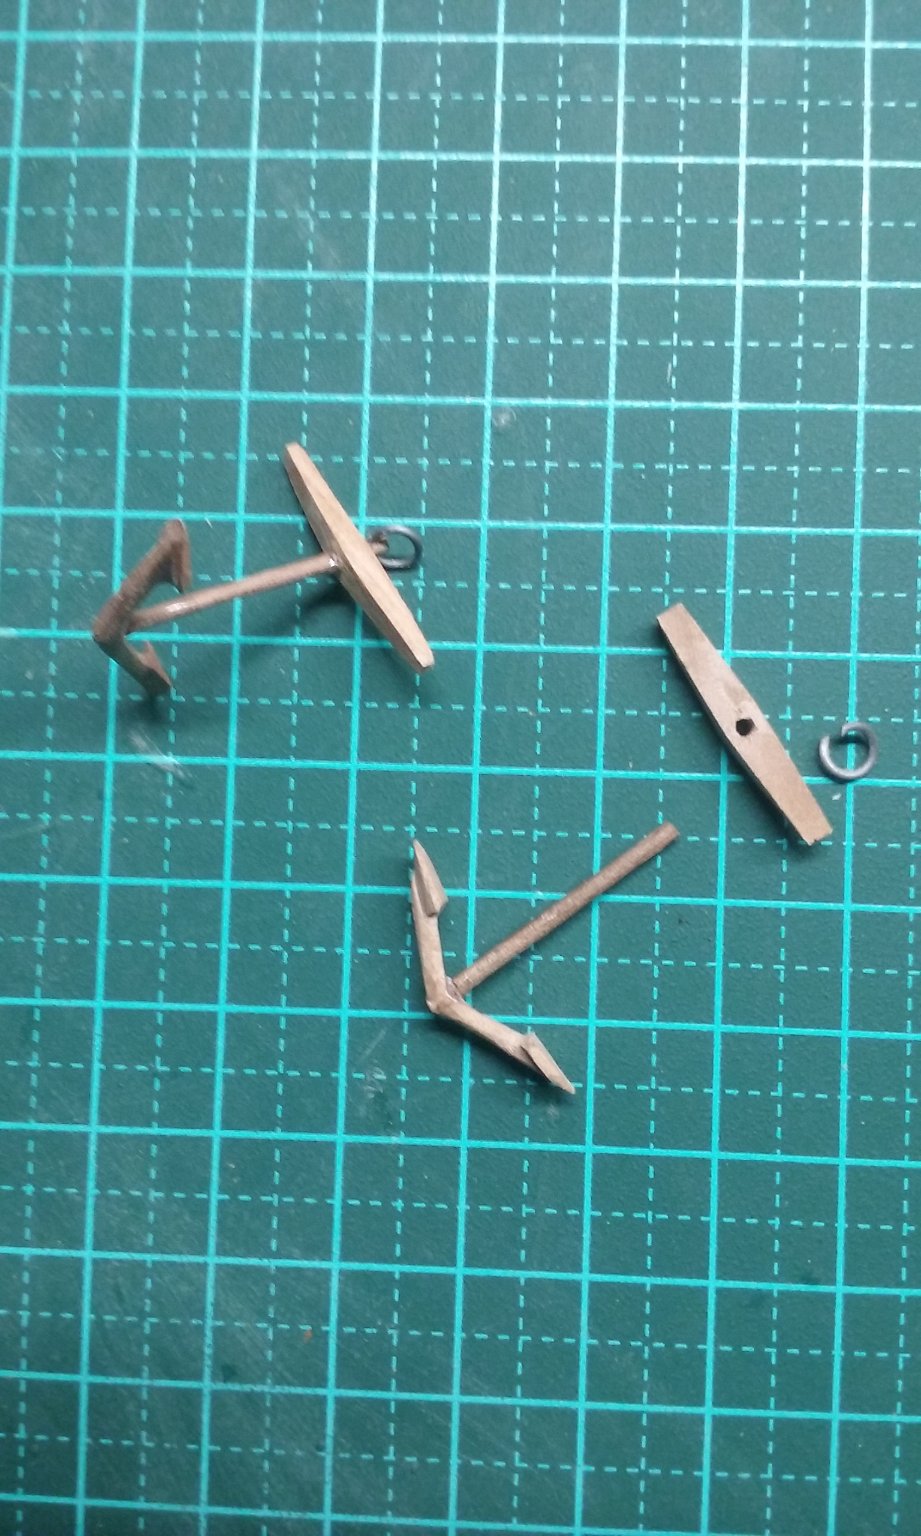
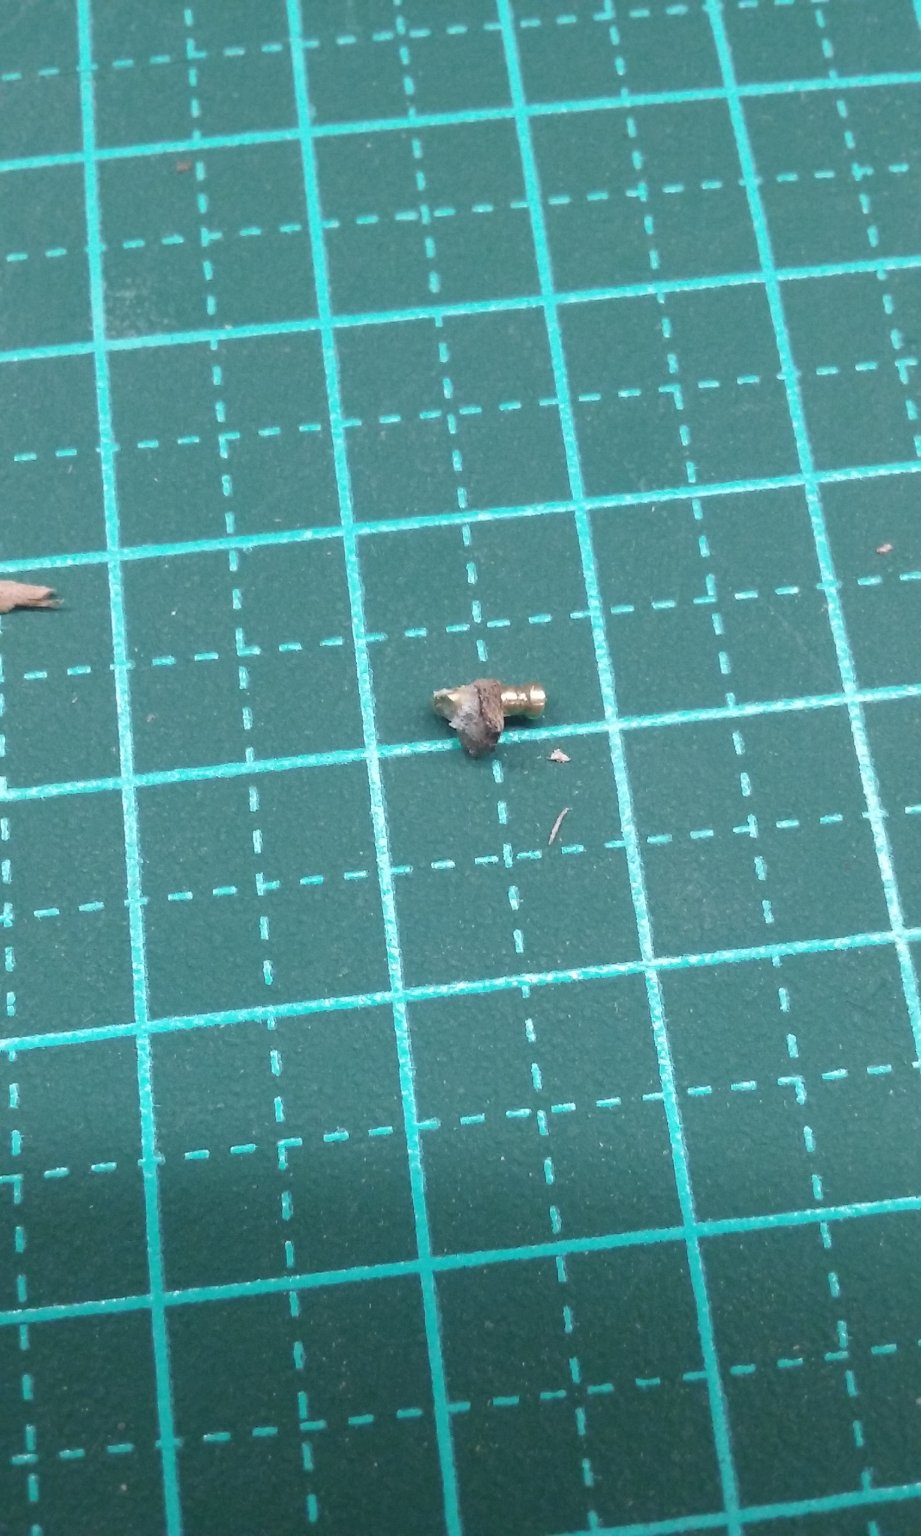
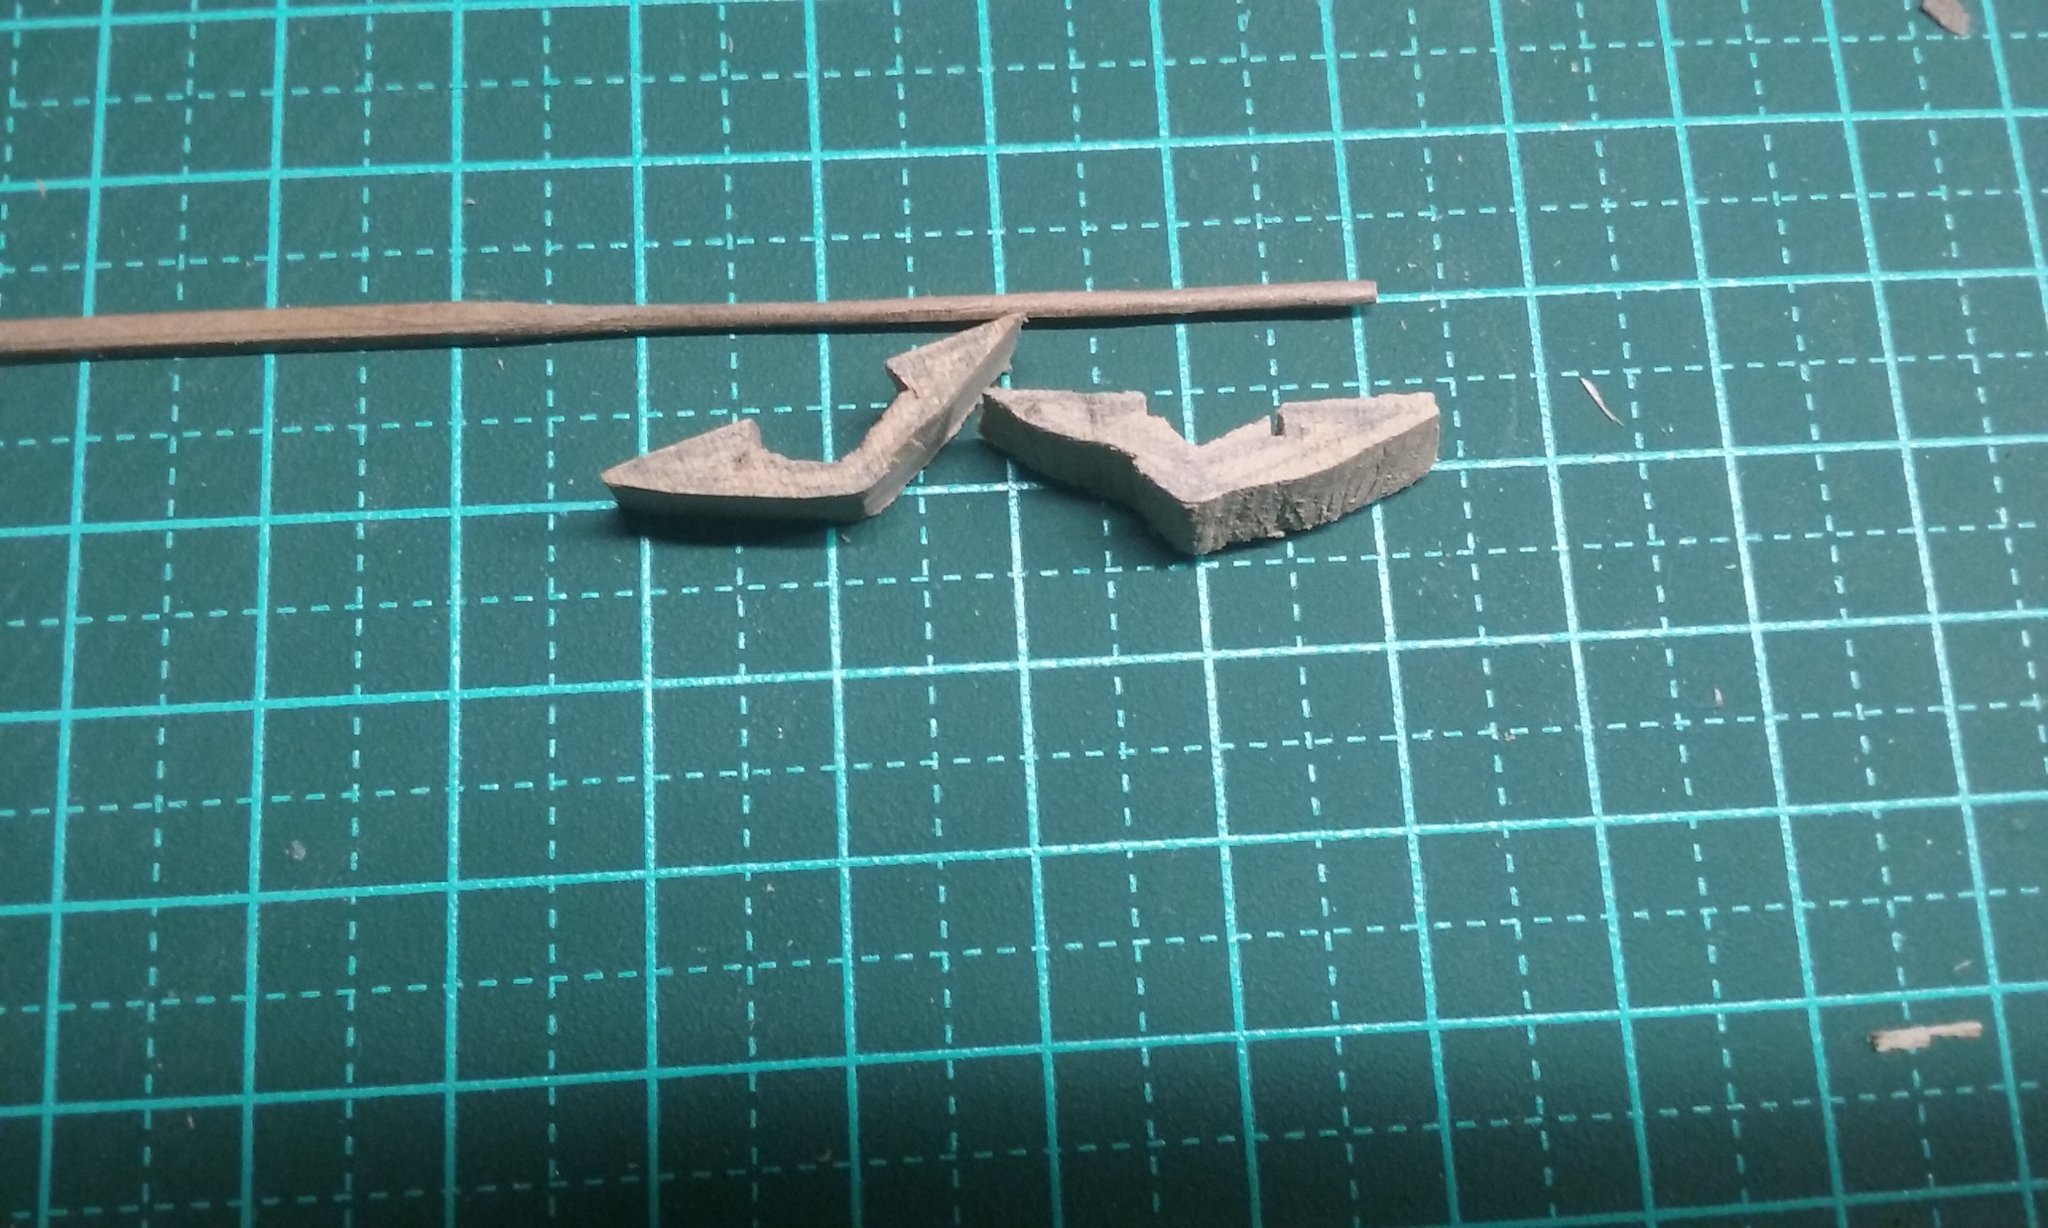
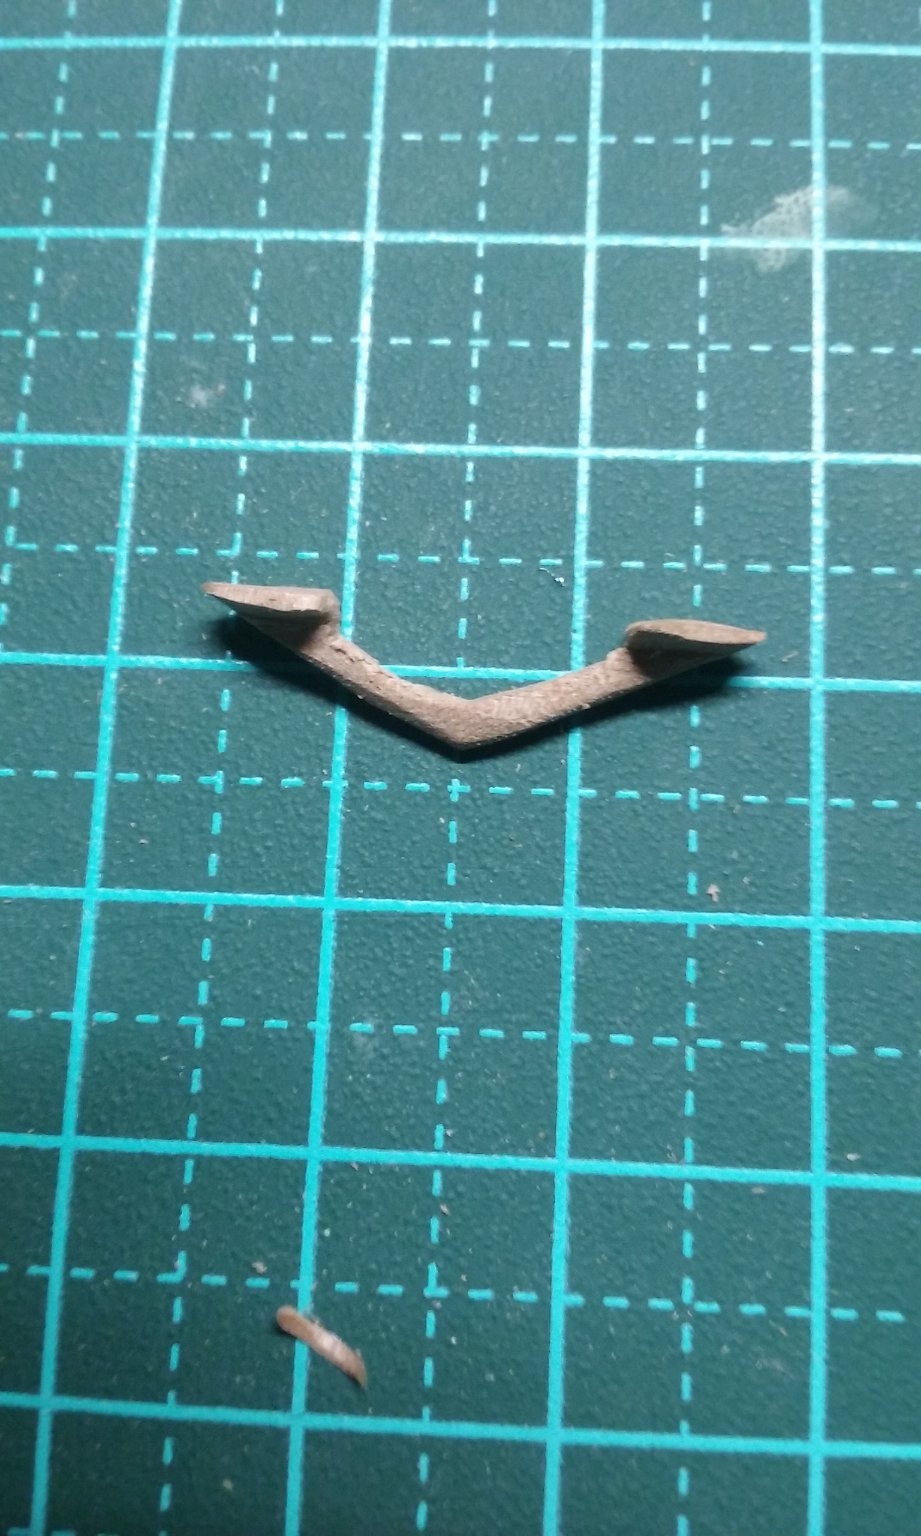
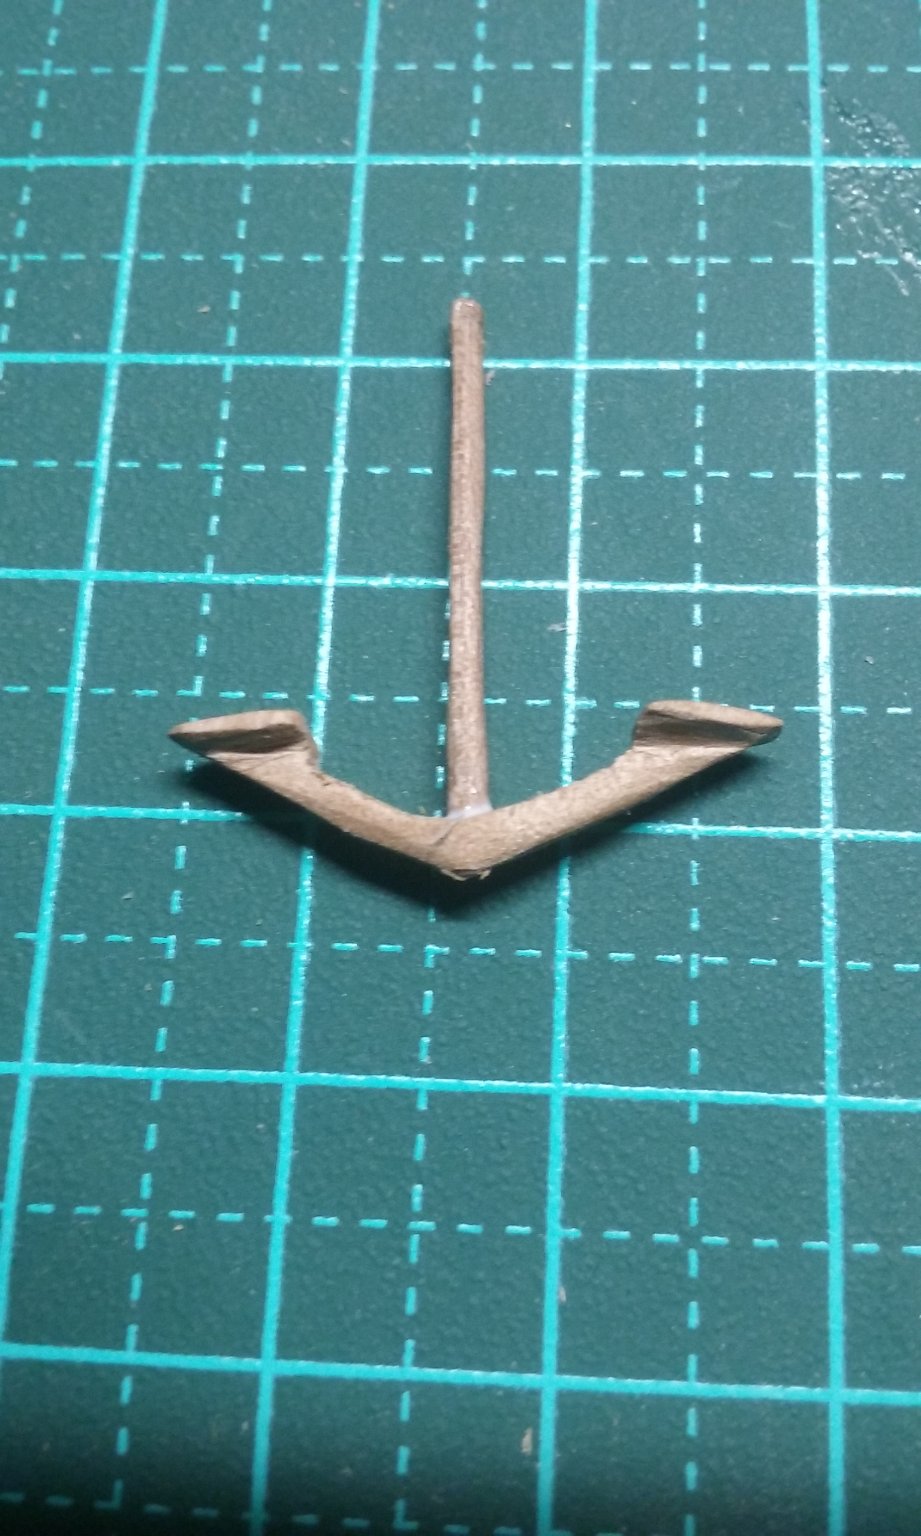
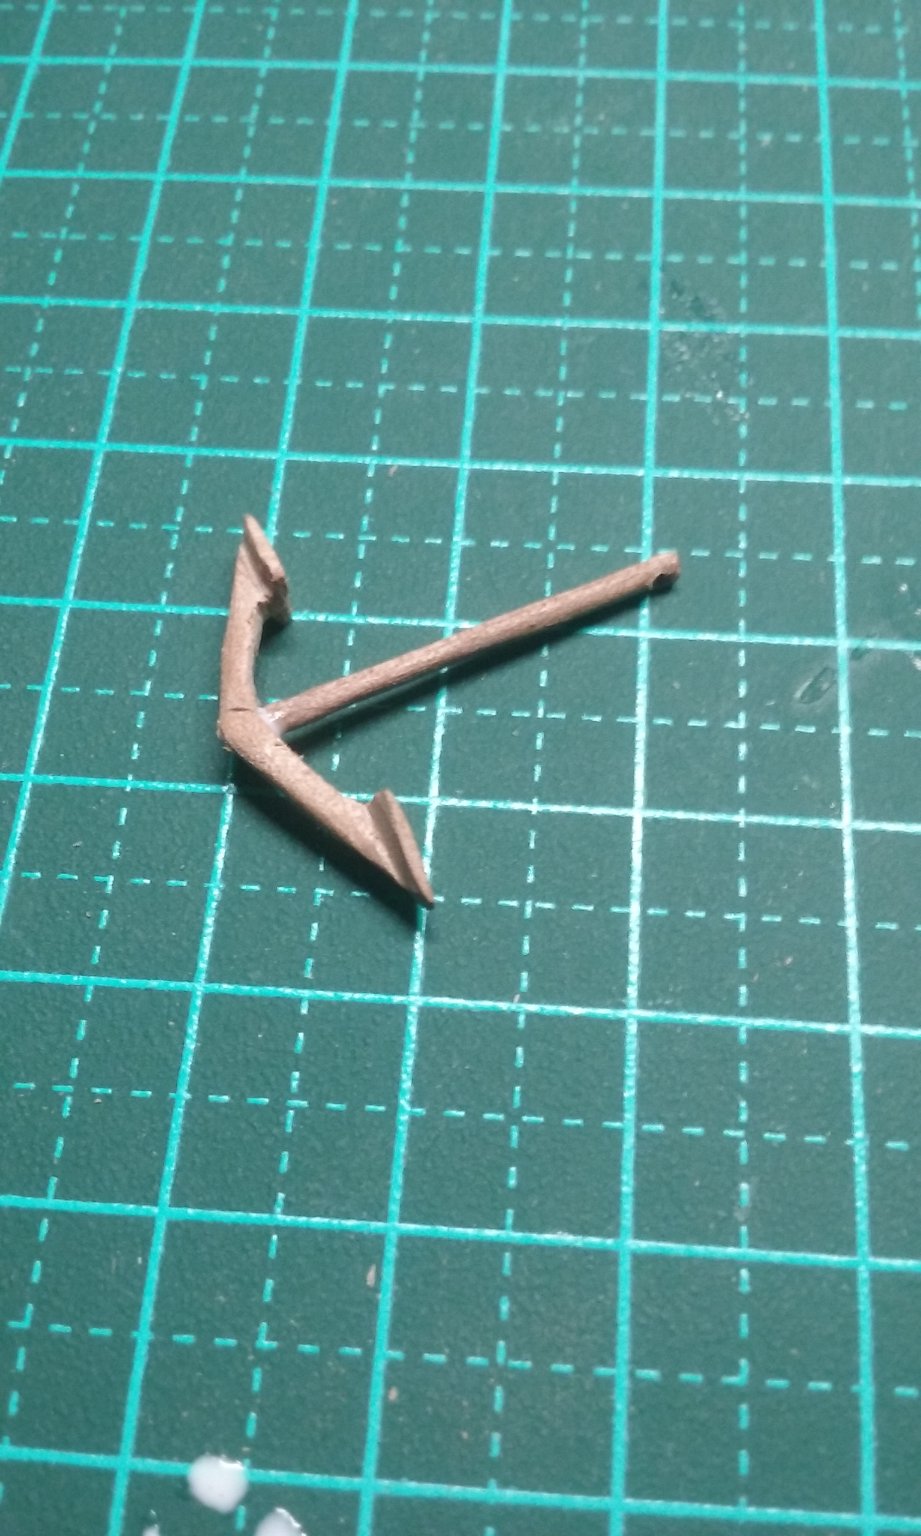
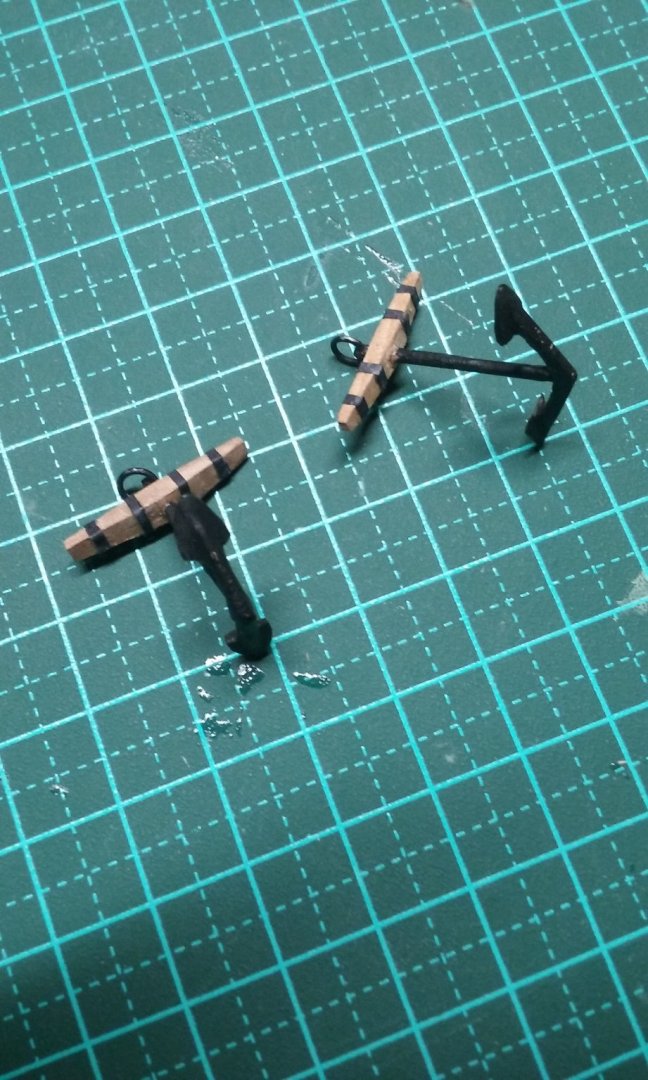
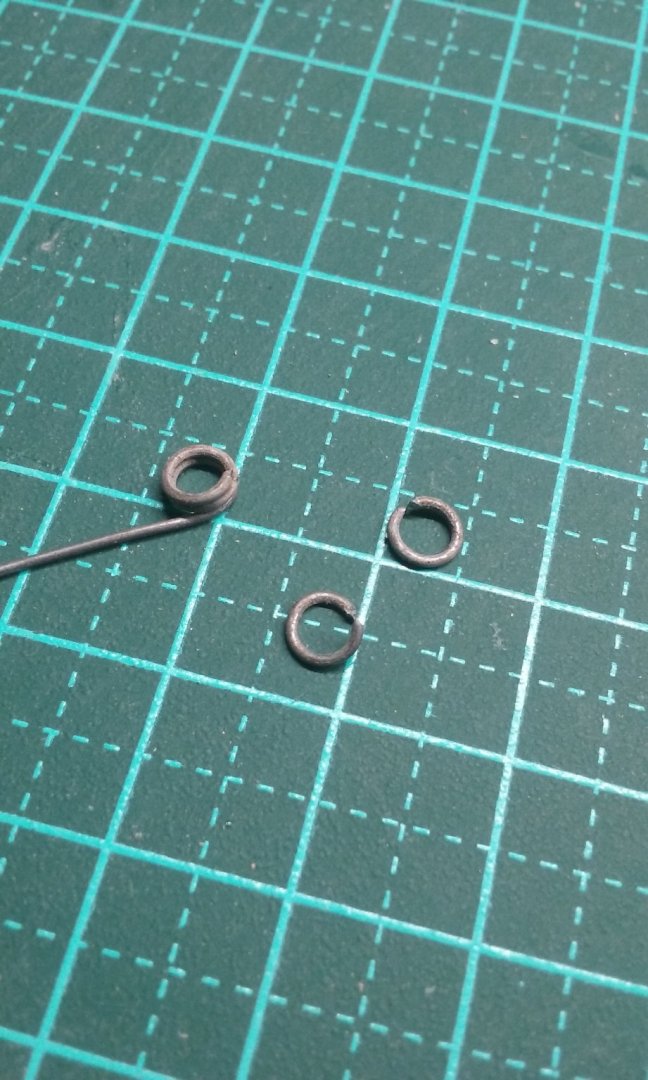
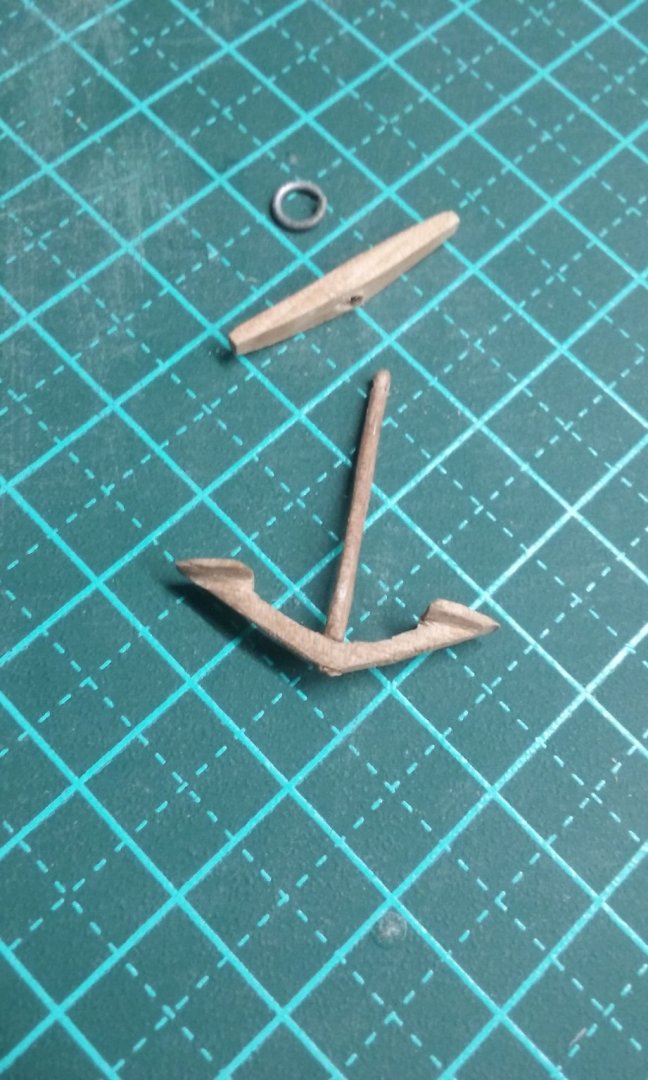
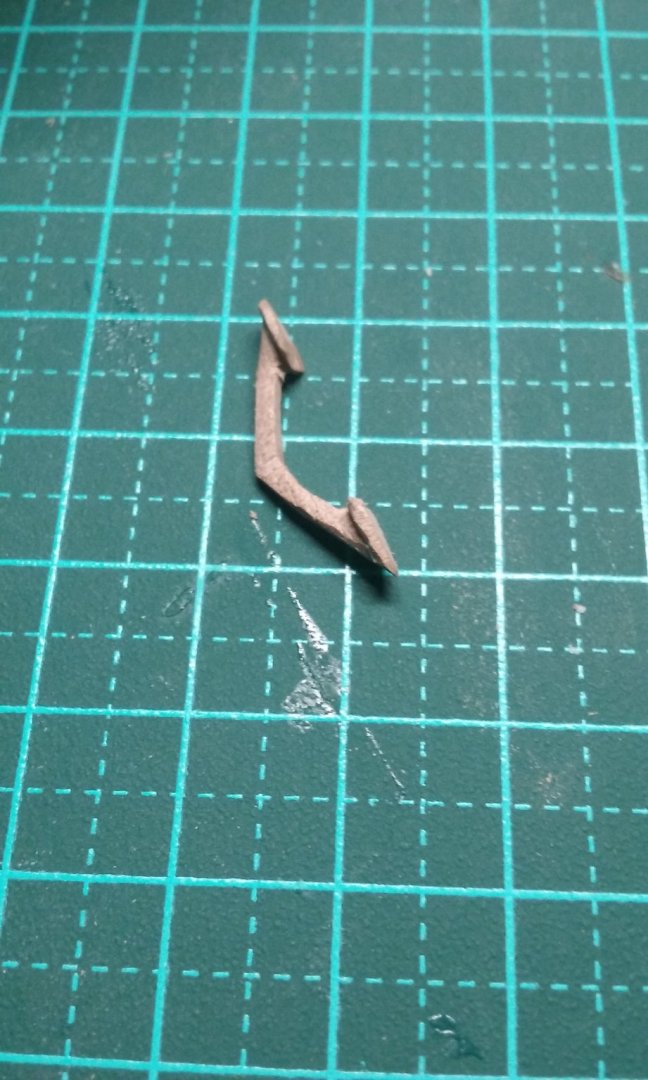
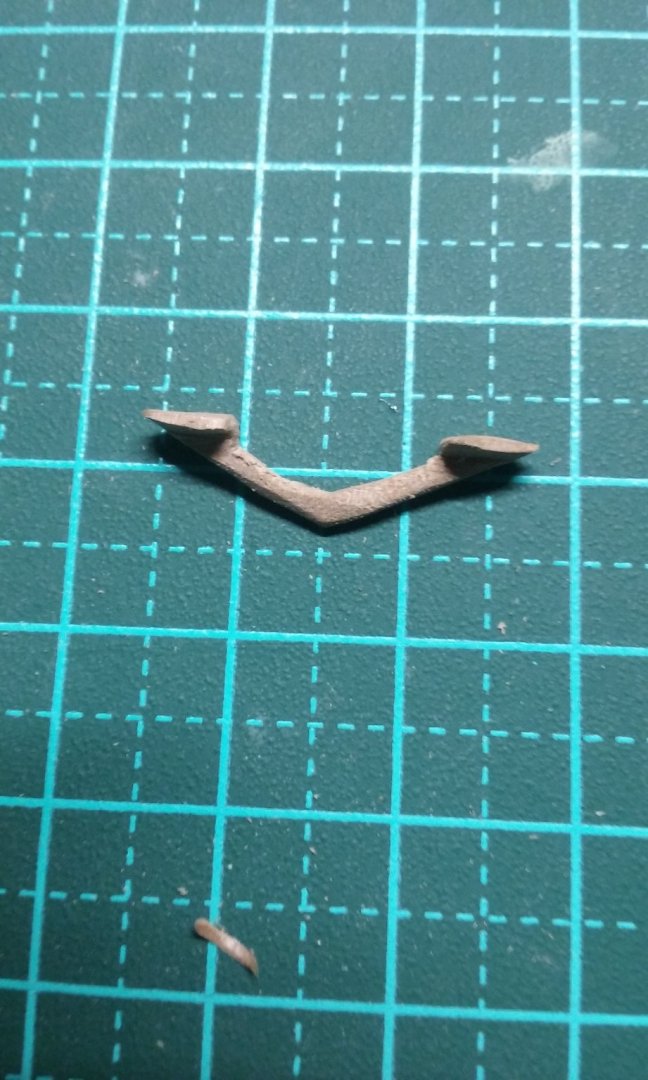
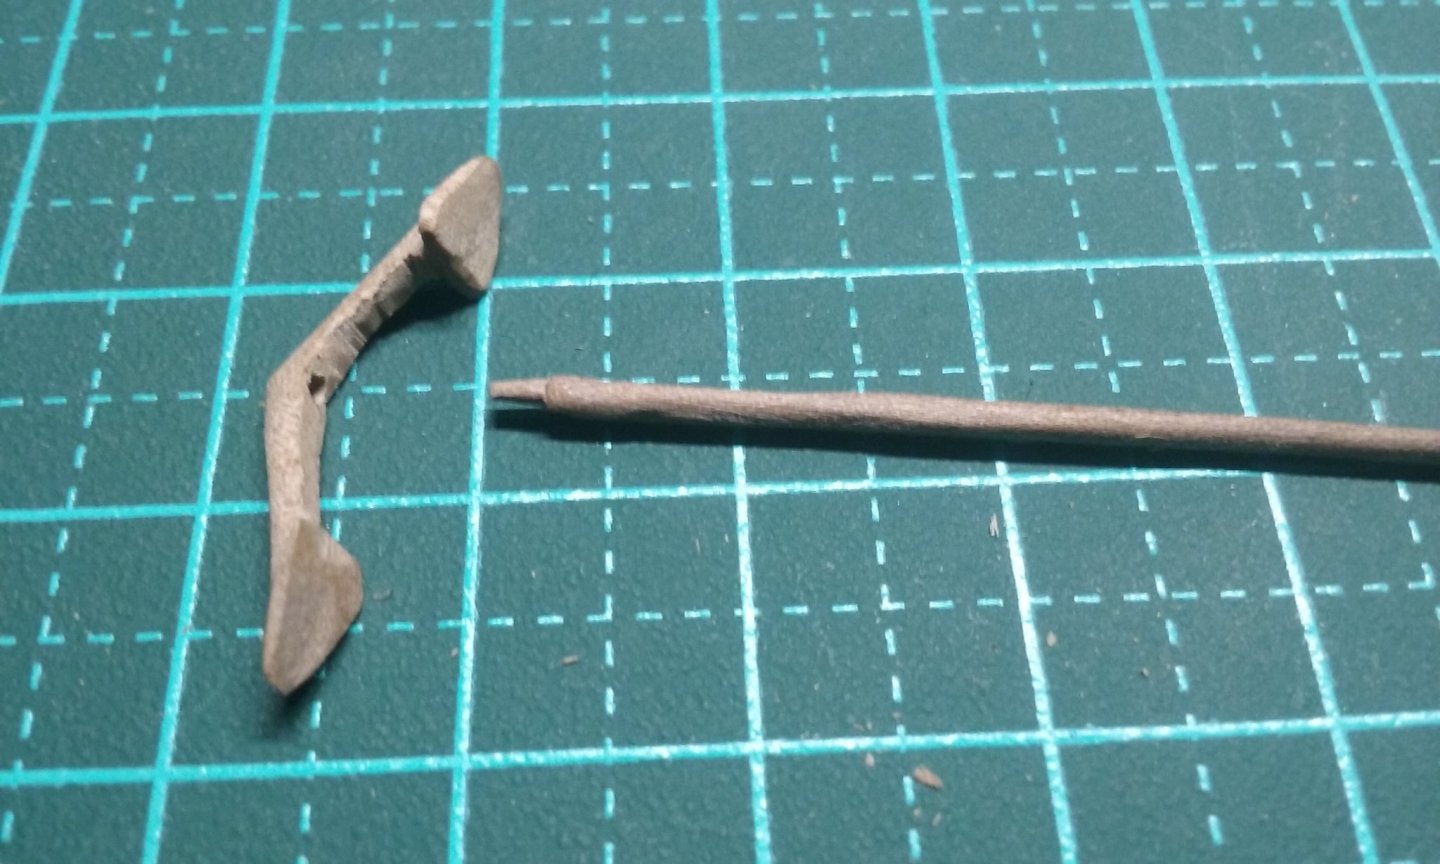
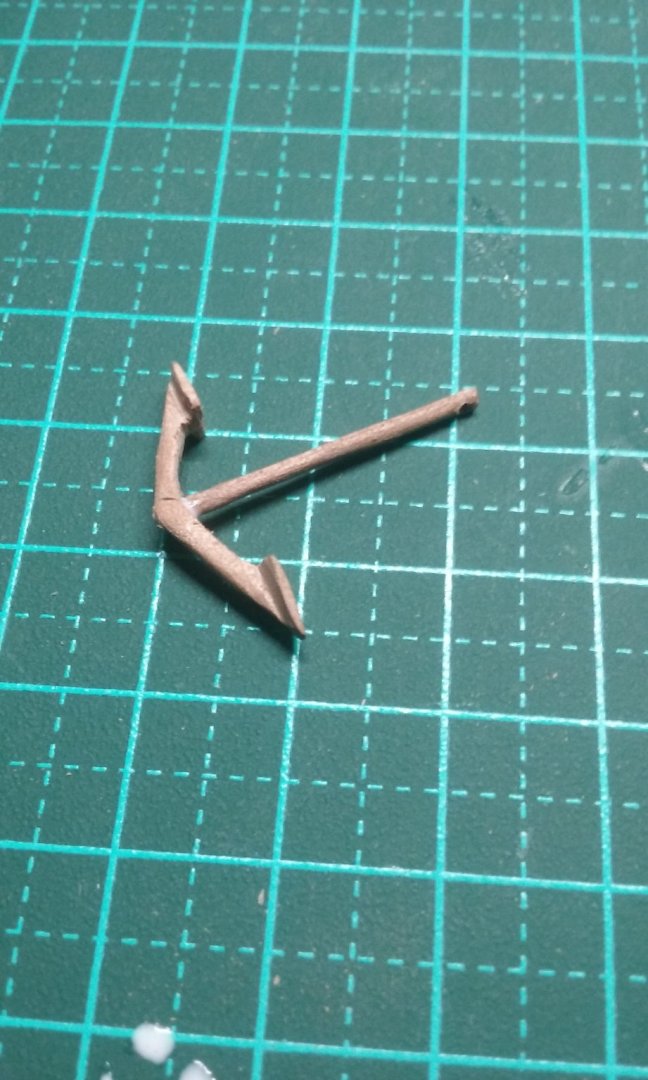
Anchors. Making the rings for the anbchor cables. The stock and ring made, and the anchor ready to assemble . First anchor assembled, second ready to go Anchors painted and complete On the first anchor, before I cut and carved the shank I should have drilled the hole in the top of it (for the ring) , as the shank split when I drilled the hole. Fortunately I was able to glue it back together. Apart from that, the first was relatively plain sailing. But the second was a real trial - this time I drilled the hole for the shank before I'd completed carving the flukes - big mistake - while finishing the carving I pressed too hard and broke the arms. Then once I'd fixed that (using CA as it's not as flexible as PVA) the tenon at the end of the shank broke off as I was putting it in the hole in the arms. Had to re-carve the tenon - fortunately I'd made the shank slightly longer than it was supposed to be, so I had a bit of wriggle room to do so. But they're done! I might put black paper "reinforcements" around the stock as shown in the reconstruction picture in Landström's book - I haven't decided yet. Steven


- 740 replies
-
- 12
-
-
- Tudor
- restoration
- (and 4 more)
-
Thanks everybody for the likes. Thanks in particular to End Of The Line. I've noticed you've been proceeding through the build log bit by bit, and your attention and 'likes' are appreciated. Steven
- 740 replies
-
- 3
-
-
- Tudor
- restoration
- (and 4 more)
-
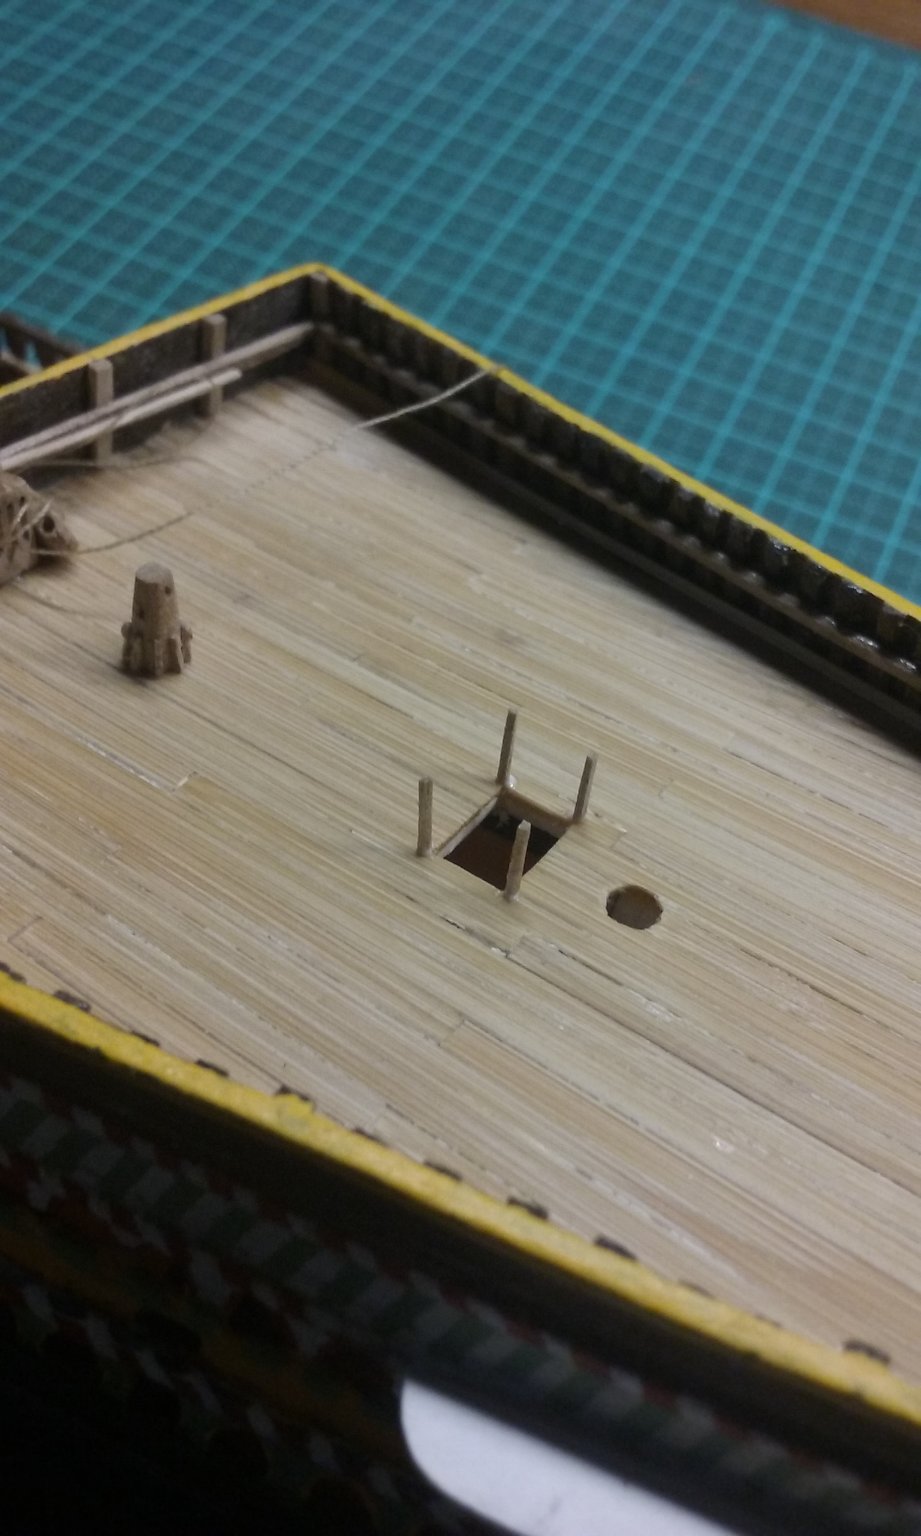
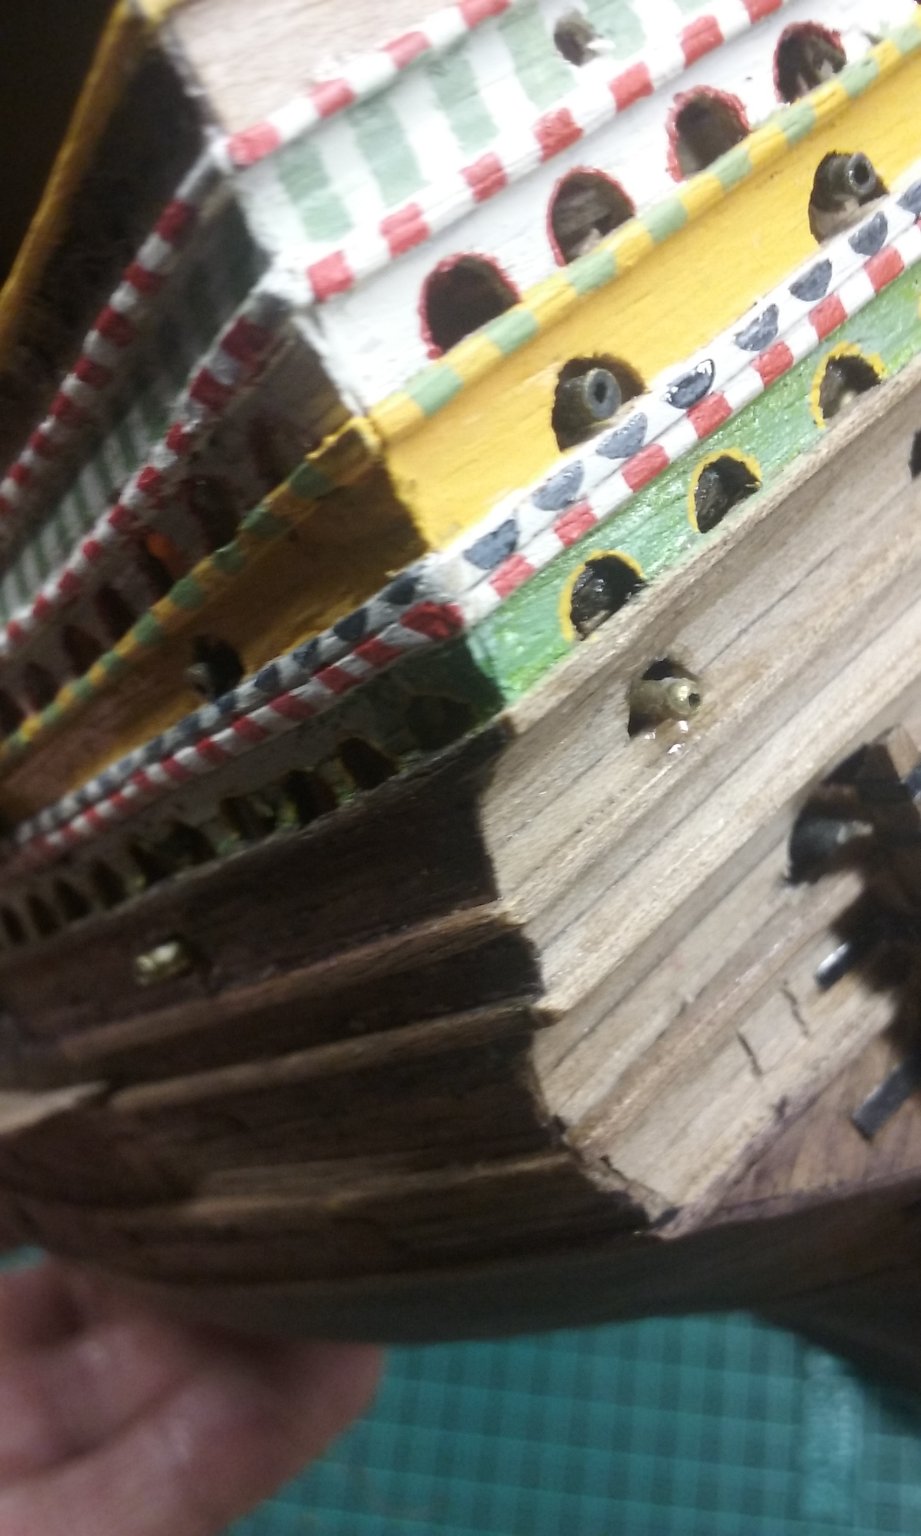
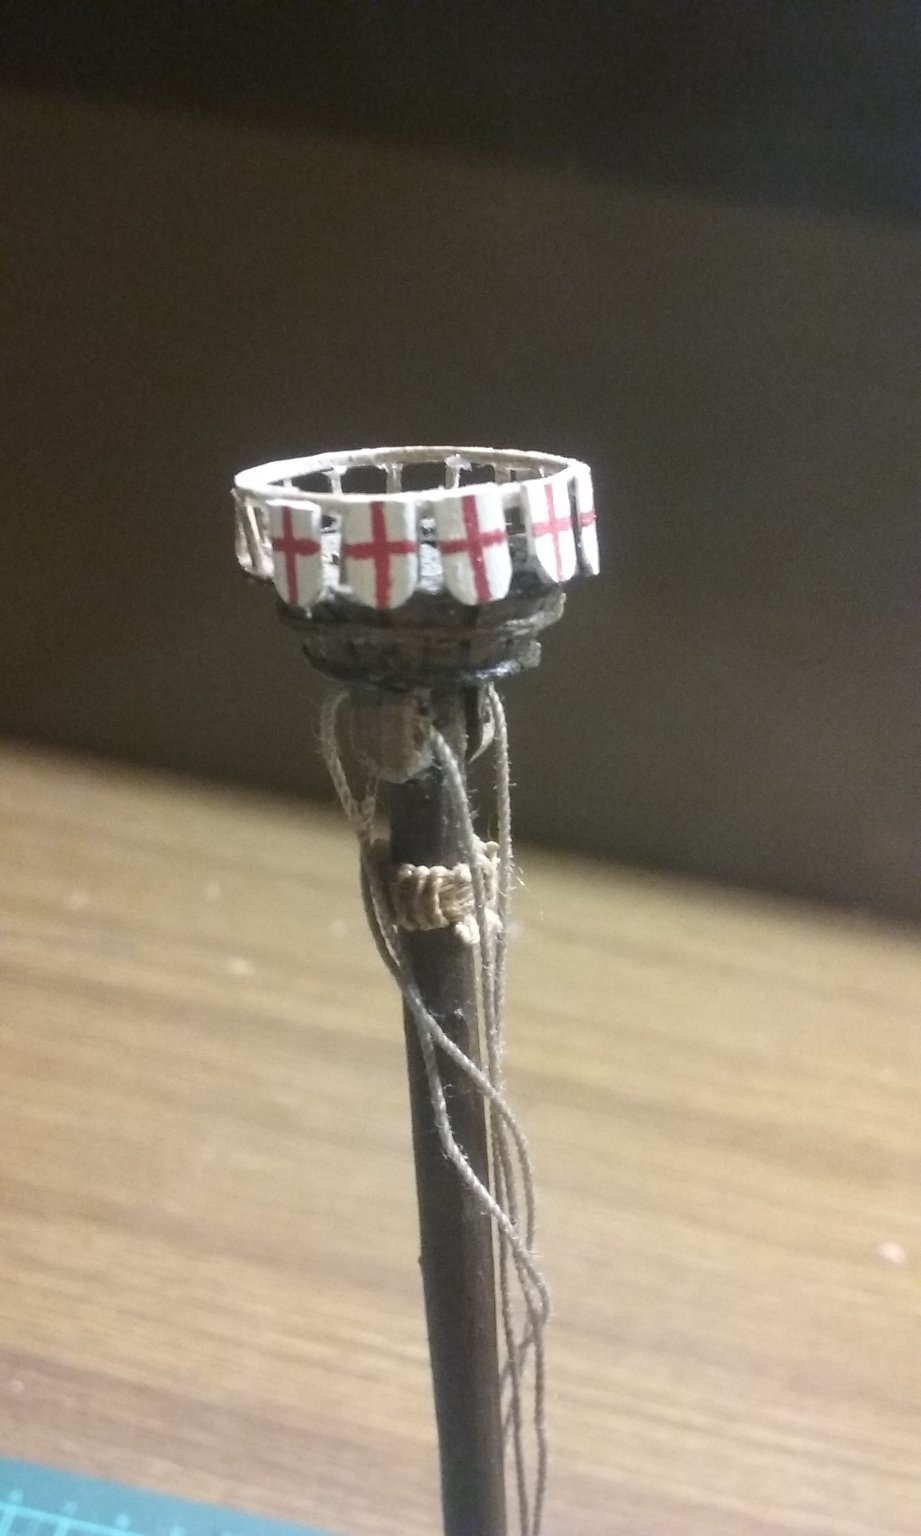
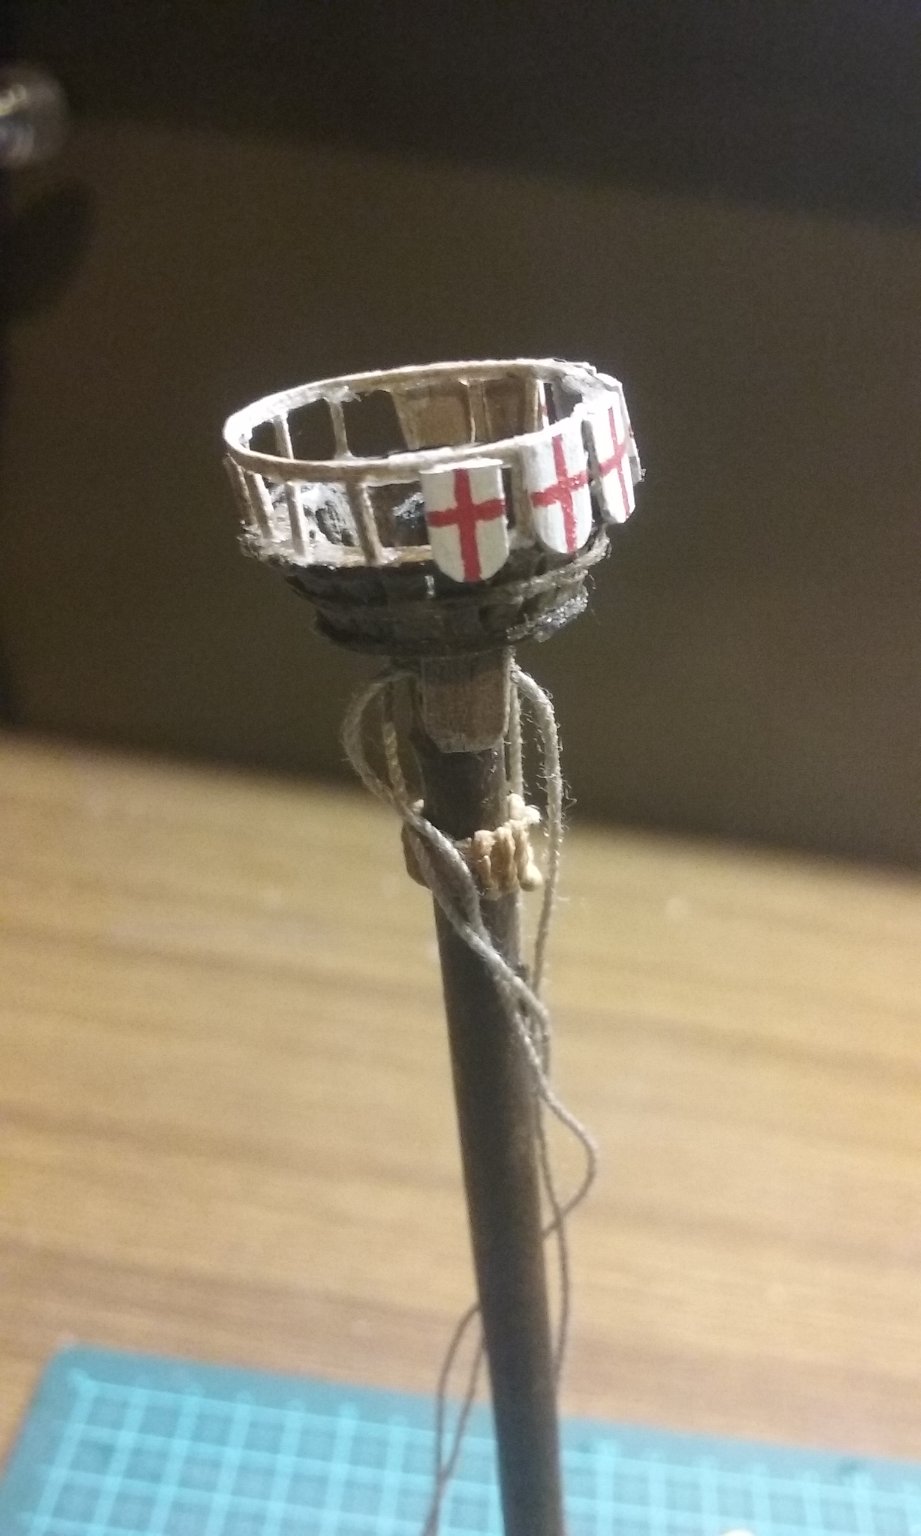
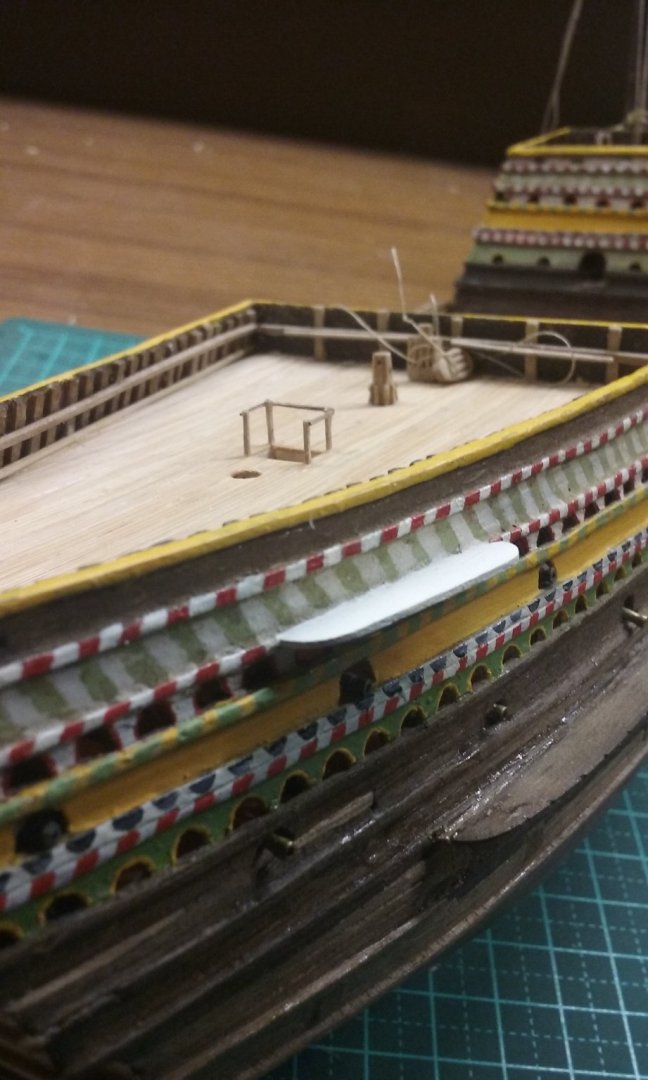
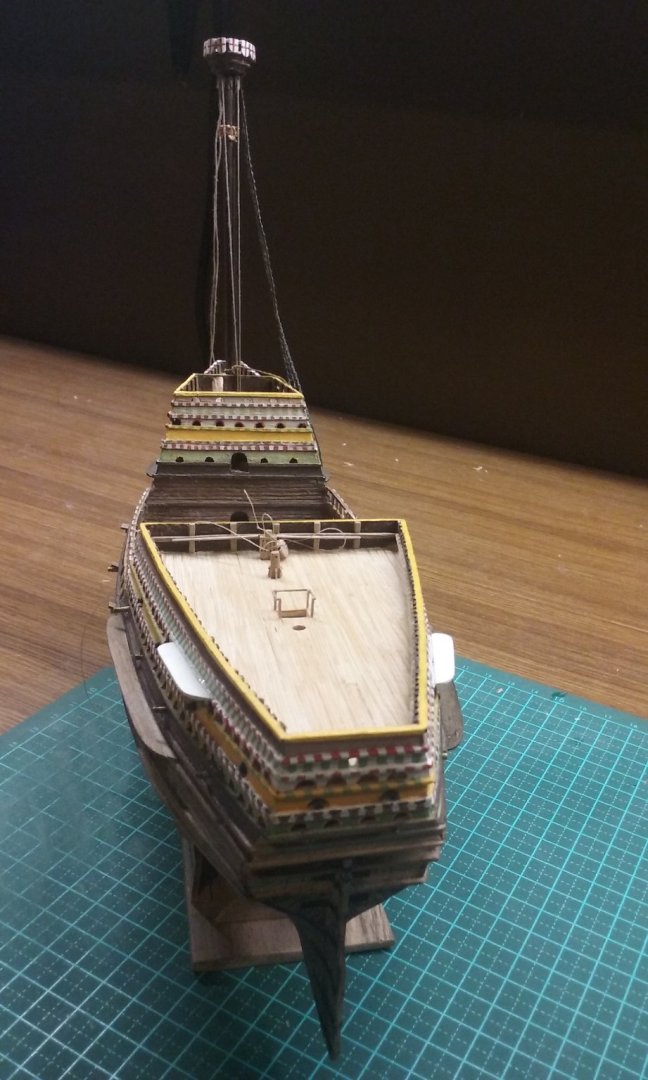
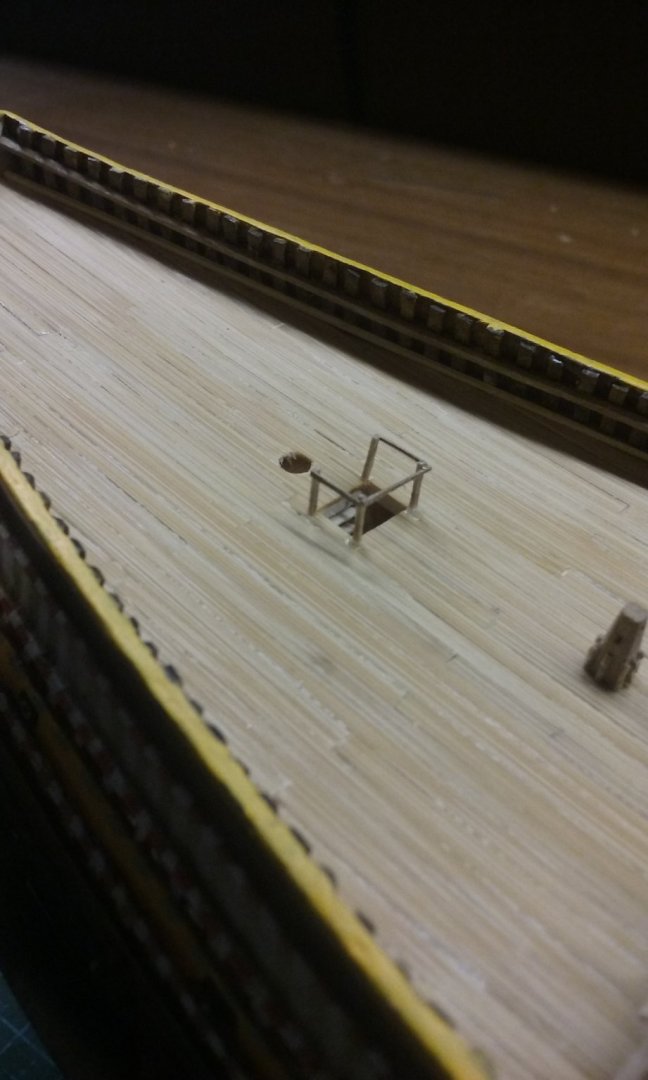
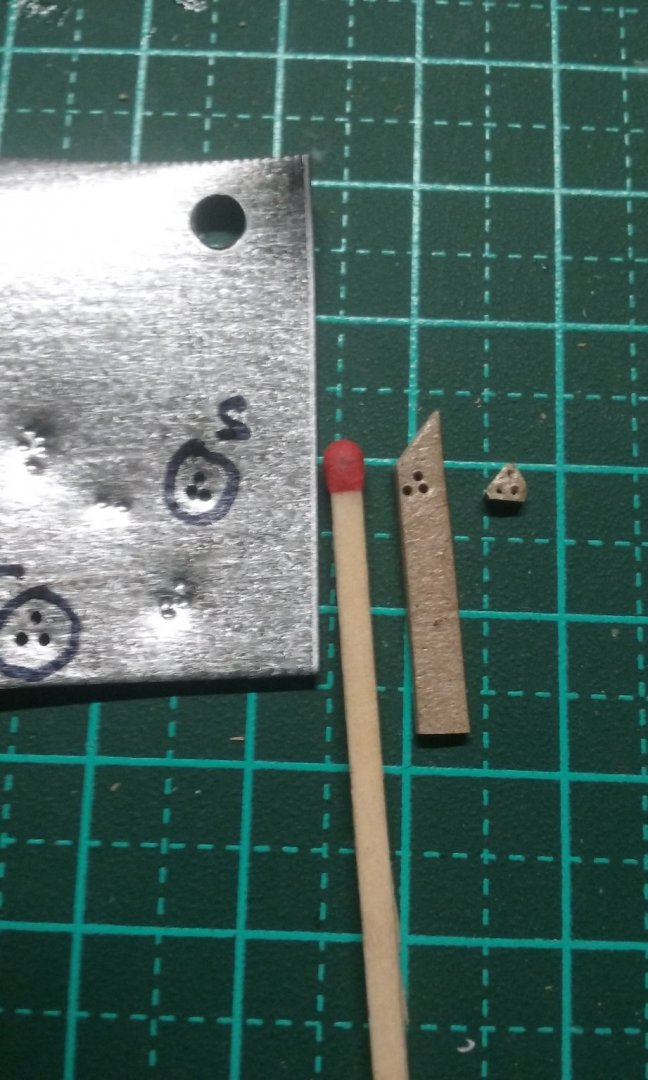
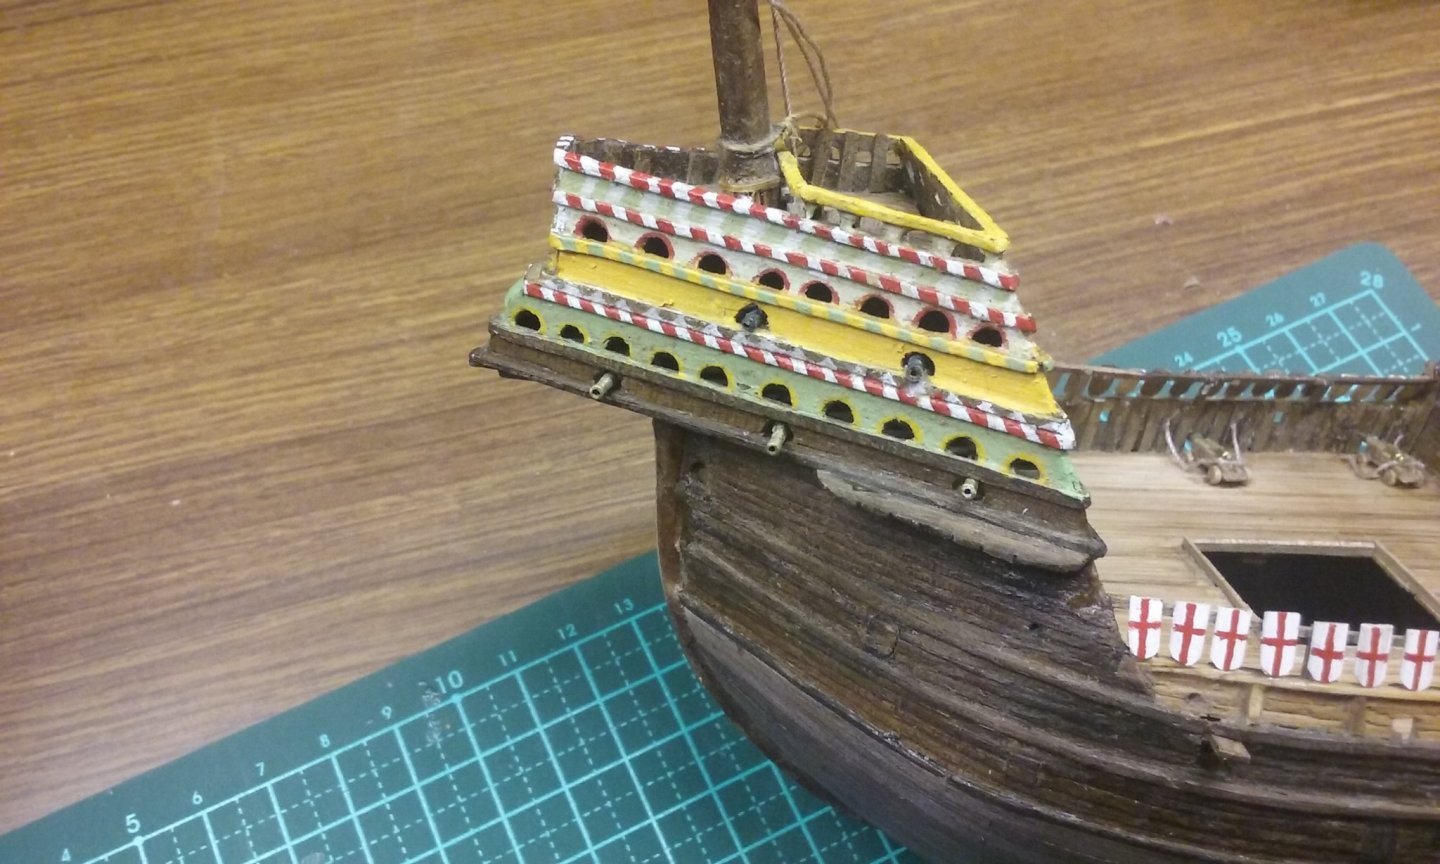
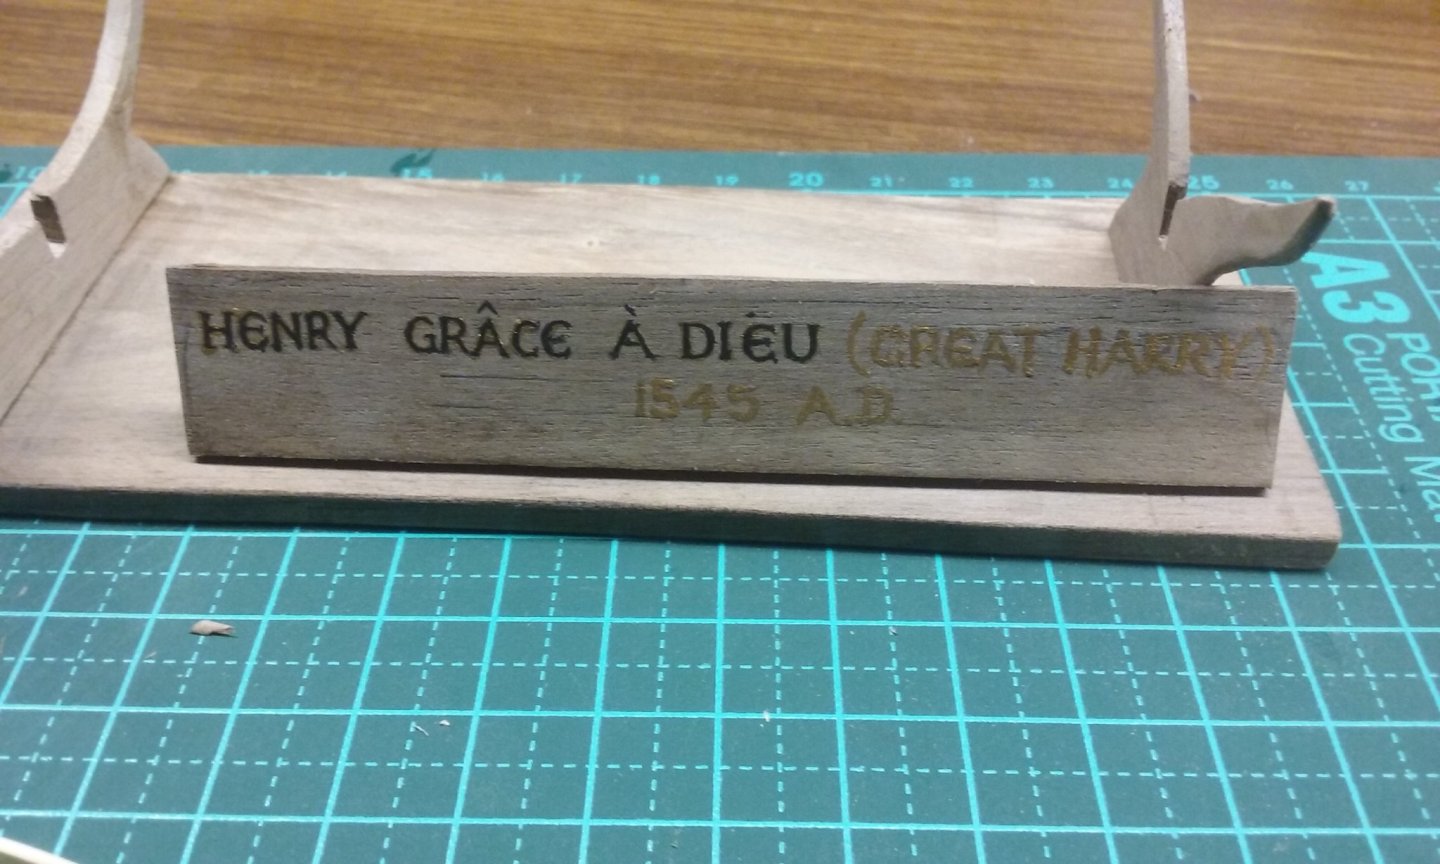
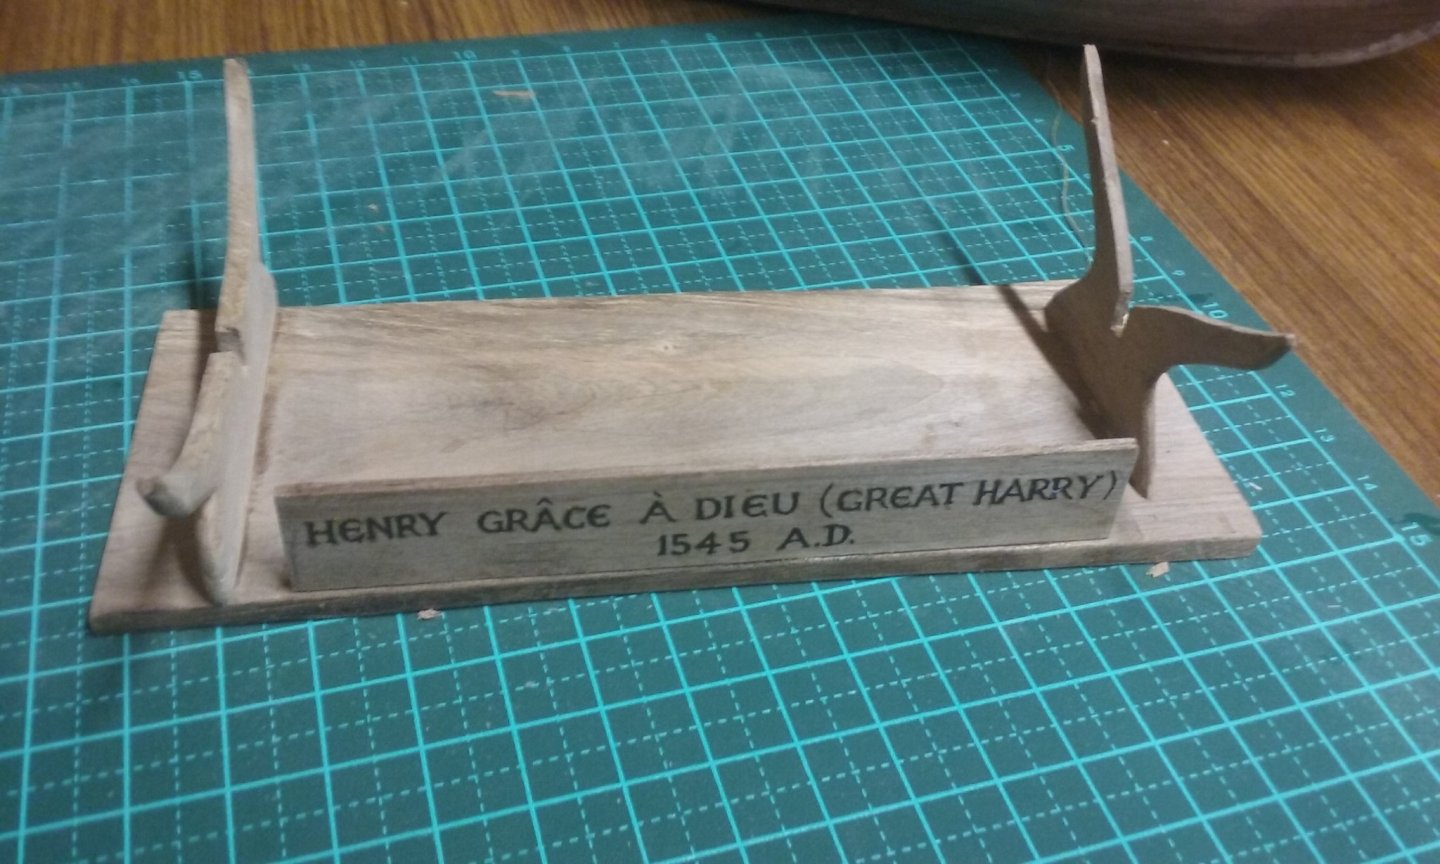
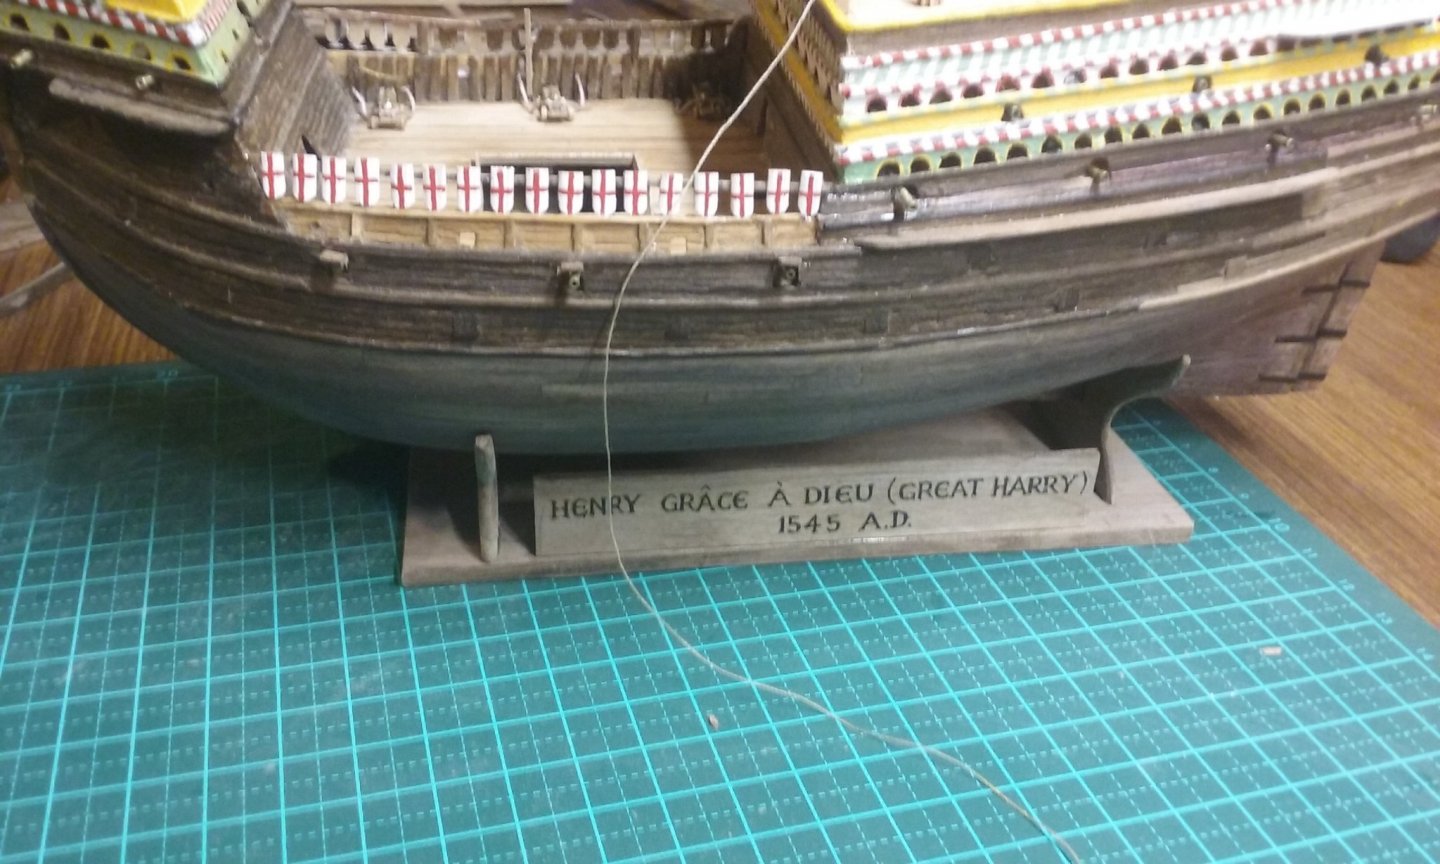
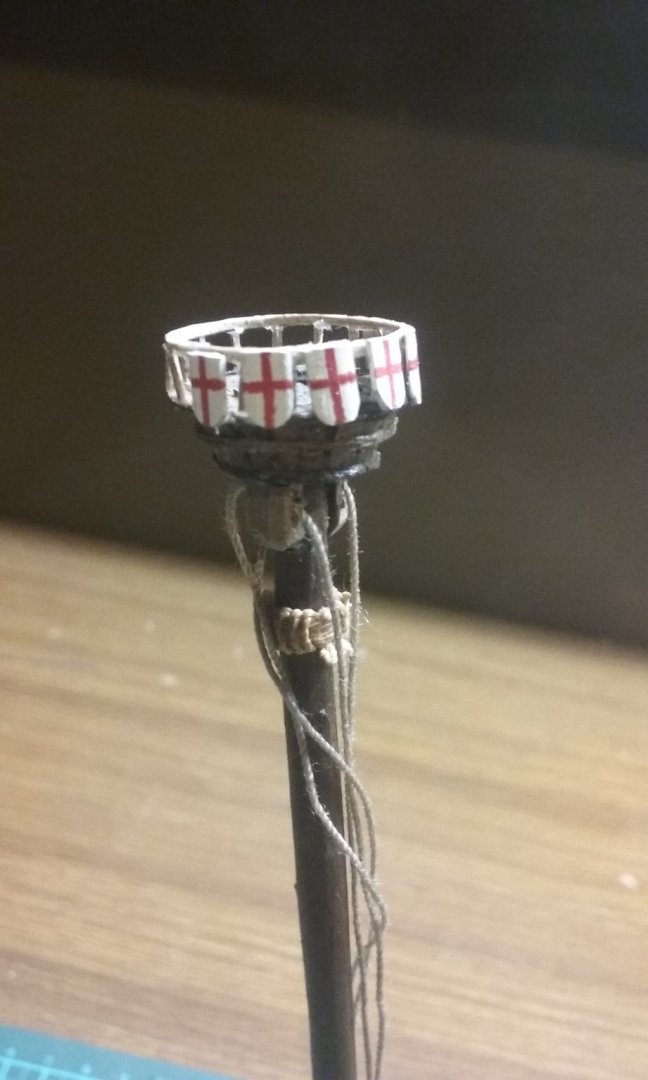
New stuff. There were another 6 "bronze" and 4 "iron" guns to be put in place, but really not much to secure them to, as I hadn't put decks in for them to sit on. The best I could do was to shorten them and glue them to the hull planking, and hope the glue would hold. First I tried gluing a wooden backpiece to the barrel, to go hard up against the inside of the gunport. Didn't really work, so I took it off and just relied on the strength of the CA to hold the barrel in place. Forecastle guns in place And here's the stand with the nameplate half painted. I found that gold didn't show up properly agains the wood of the background, so I filled in with black letters, using the gold as a border around them. I had to re-do the stand three times - the two supports weren't really in the right position and I had to move them and also raise the forward one so the keel was approximately horizontal when the ship was in place. I've put the railing on the foretop and fitted the pavises (big square-ish shields). Making the anchors. I'm useless at soldering, so I'm making them out of pear wood, which I feel much more comfortable with. This is the first of the two anchors. I'm pretty happy with how it's turned out so far. Next to make is the stock and somehow figure out how to make and fit the ring. Steven


- 740 replies
-
- 15
-
-
- Tudor
- restoration
- (and 4 more)
-
I'm particularly enjoying the research component of this build. To my mind that's half the fun of modelling and you're really putting in the "hard yards" on this one. Steven