


Ryland Craze
-
Posts
1,442 -
Joined
-
Last visited
Content Type
Profiles
Forums
Gallery
Events
Posts posted by Ryland Craze
-
-
Welcome to Model Ship World Jake. You did the right thing by starting a build log for your kit. The bulkheads may be loose, but be sure that they are properly seated in the false keel and that they are at right angles to the keel. This is a very important part of the build, so take it slow. I would use a PVA glue (yellow glue) to set the bulkheads and make sure the glue has set on the bulkhead you are inserting before moving to the next bulkhead. Good luck on your build and be sure to ask if you have any questions. We are here to help you be successful with your first build.
- Old Collingwood and Baker
-
 2
2
-
You are making good progress on your build. Thanks for posting a detailed build log. It will help future builders of this kit.
- BobG and Josh Williamson
-
2
-
Nice job on your sloup. Many of use the "poor man's lathe" to round off square stock. I always take a sanding stick and knock off the corners making it an octagon before I chuck it into my drill. That was an interesting technique you used on dyeing the sails.
-
-
-
Very nicely done. Your Cheerful is looking great.
-
Your keel looks nice. Now the fun part starts.
-
Welcome to Model Ship World Jerry. The Glad Tidings build into a very fine model. Here is a link to Olha Batchvarov's build log of this model. It has a lot of information that will help anyone building this model.
- mtaylor, Baker and Keith Black
-
3
-
Welcome to Model Ship World tomsimon. You have picked a good kit to get you started in this hobby. The book, Ship Modeling Simplified, by Frank Mastini was the first book I purchased on ship modeling and it got me interested in this hobby. I was fortunate to have known Frank Mastini as he was a member of the Hampton Roads Ship Model Society. He was mentoring me on the Bluenose shortly before he passed away. I treasure the time I spent with him.
-
-
Welcome to Model Ship World Daniel. You have a good collection of kits that should keep you busy for quite a while. Please post pictures of your current model as we would like to see your progress.
- mtaylor, JeffT and Edwardkenway
-
3
-
-
You are making good progress James. Another approach you can take in gluing large surfaces is to use a combination of CA and yellow glue (Titebond). Just put a small amount of CA to tack the surface of the piece being glued and use the yellow glue for the remainder of the bond. This way, if the part is misaligned, it would be easier to break the bond before the yellow glue sets. You can also use a small paint brush and water to clean up any of the excess yellow glue in the joints.
- CTYankee, pwog and FriedClams
-
3
-
2 hours ago, shipman said:
As usual, my views are a little off-beat. The pre-painted model on page 4(?) to me looks superb. All these red's and blue's are far too bright at this scale. If you must use colour, it would make a welcome change to try a different selection.
Can't fault your craftsmanship; an exceptional build.
Thanks shipman for your comments. I am glad you like the colors I chose. I actually painted the cap rails with another red (you can see remnants of the paint in the second picture of your quote) but it was too bright for my liking, so I sanded it off. The Grumbacher Cadmium Red color was a better choice to me as I felt it closely matched the colors on the contemporary models in the NMM that the kit was modeled after. The freizes provided in the kit were drawn by Chuck Passaro and were based on the NMM models. I have attached the pictures of the two models that Chuck Passaro modeled this kit after:
And here is a picture of my model from page 4 of my build log :

-
-
Thanks Chuck and Glen for your comments. I also appreciate the "Likes". This is a really nice kit and I am enjoying the build.
1 hour ago, fnkershner said:Ryland - I want to thank you for your log. Your log has the detail that I need for my model. I have been using it extensively for my build. Can you tell me where you found the thumb plane? I have not yet purchased the rigging kit. but I plan to once Chuck has them in stock.
My miniature block plane is a Kunz 101 that I purchased from a Woodcraft store about 15 years ago. Stanley, Lie Nielsen and even Ebay have these miniature planes for sale. I am finding that I am using this plane more than I ever thought I would.
I have been reading the build logs of other Medway Longboat builders and I find that each one has tips and techniques in it that I will use on my build. There is a wealth of information out there and I appreciate the efforts of Chuck, Rusty, Bob G, Bob W and others who have posted very detailed build logs. Their build logs are an inspiration for those of us that are building this kit.
-
Welcome to Model Ship World. I look forward to seeing your build of the Tamiya Yukikaze. The photo etch really brings a model ship to life.
- JeffT, mtaylor and Cap'n Snack
-
3
-
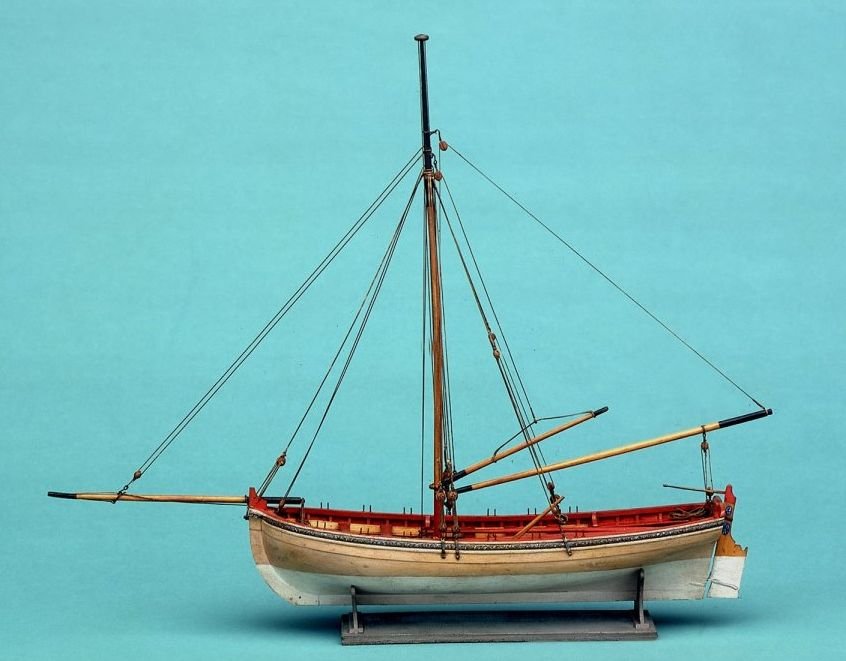
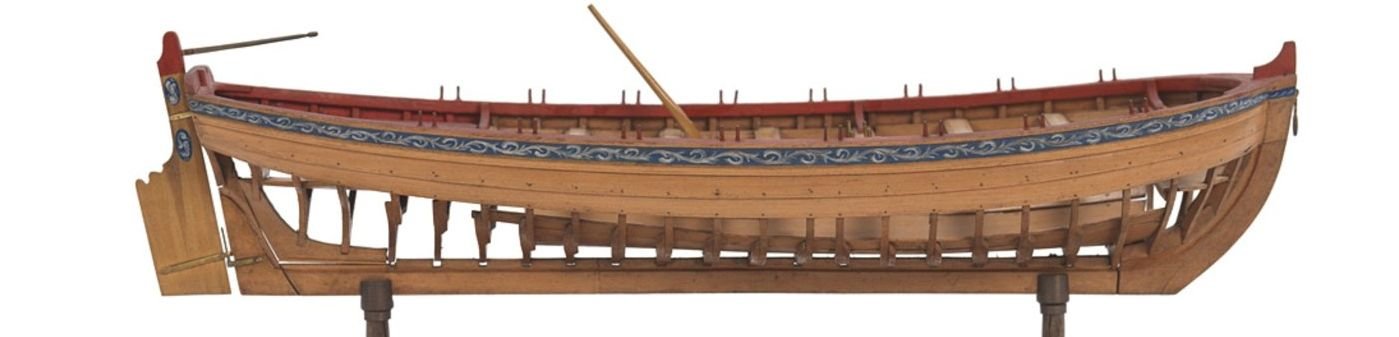
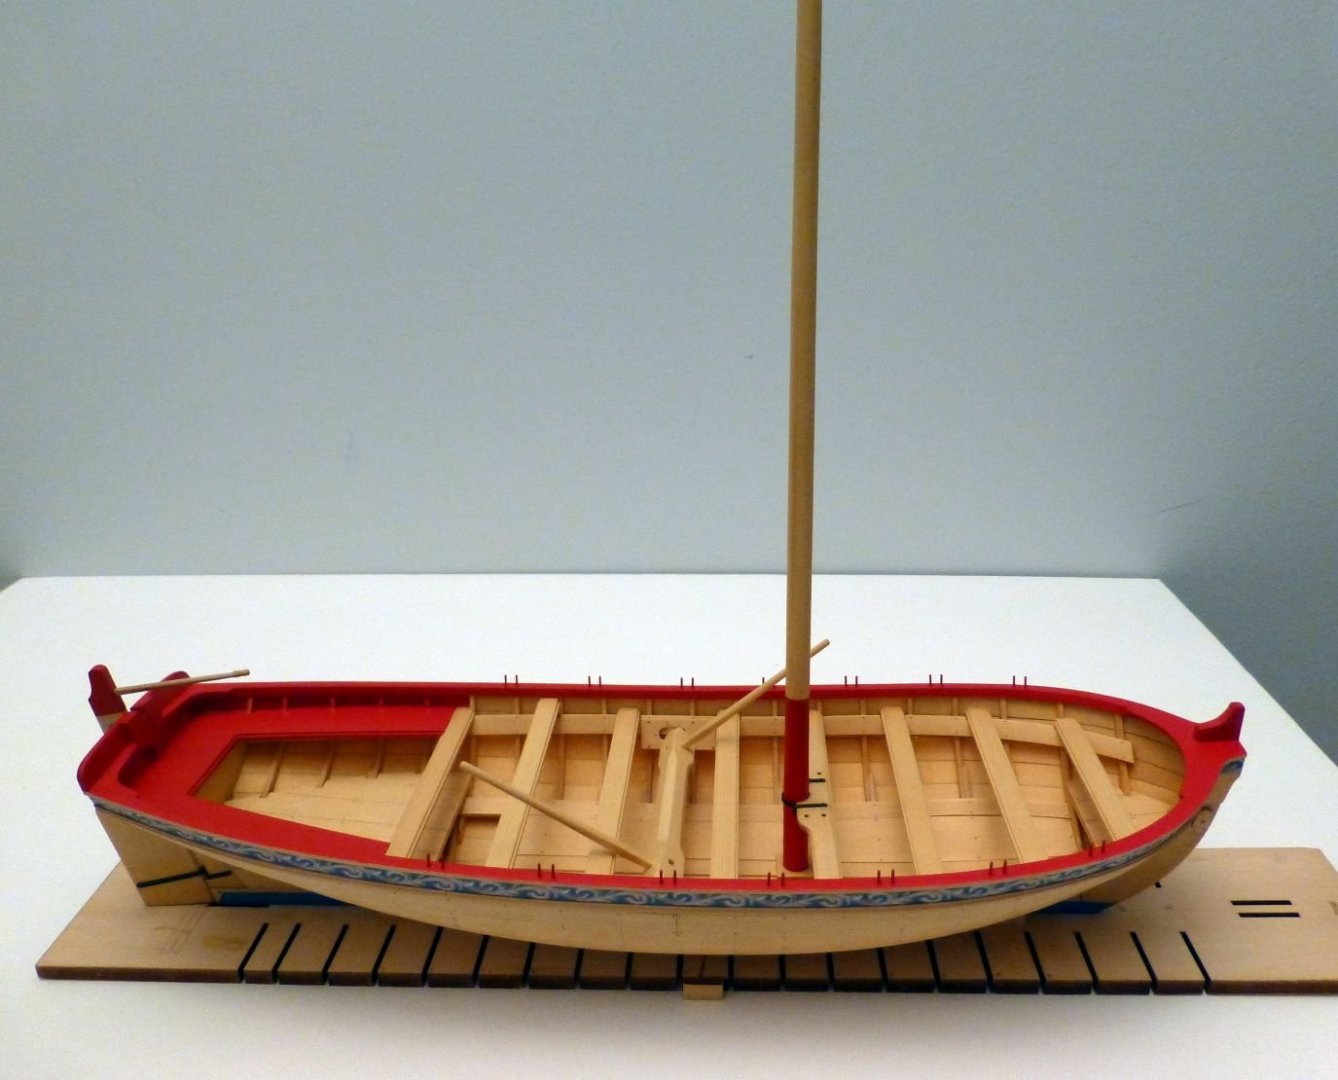
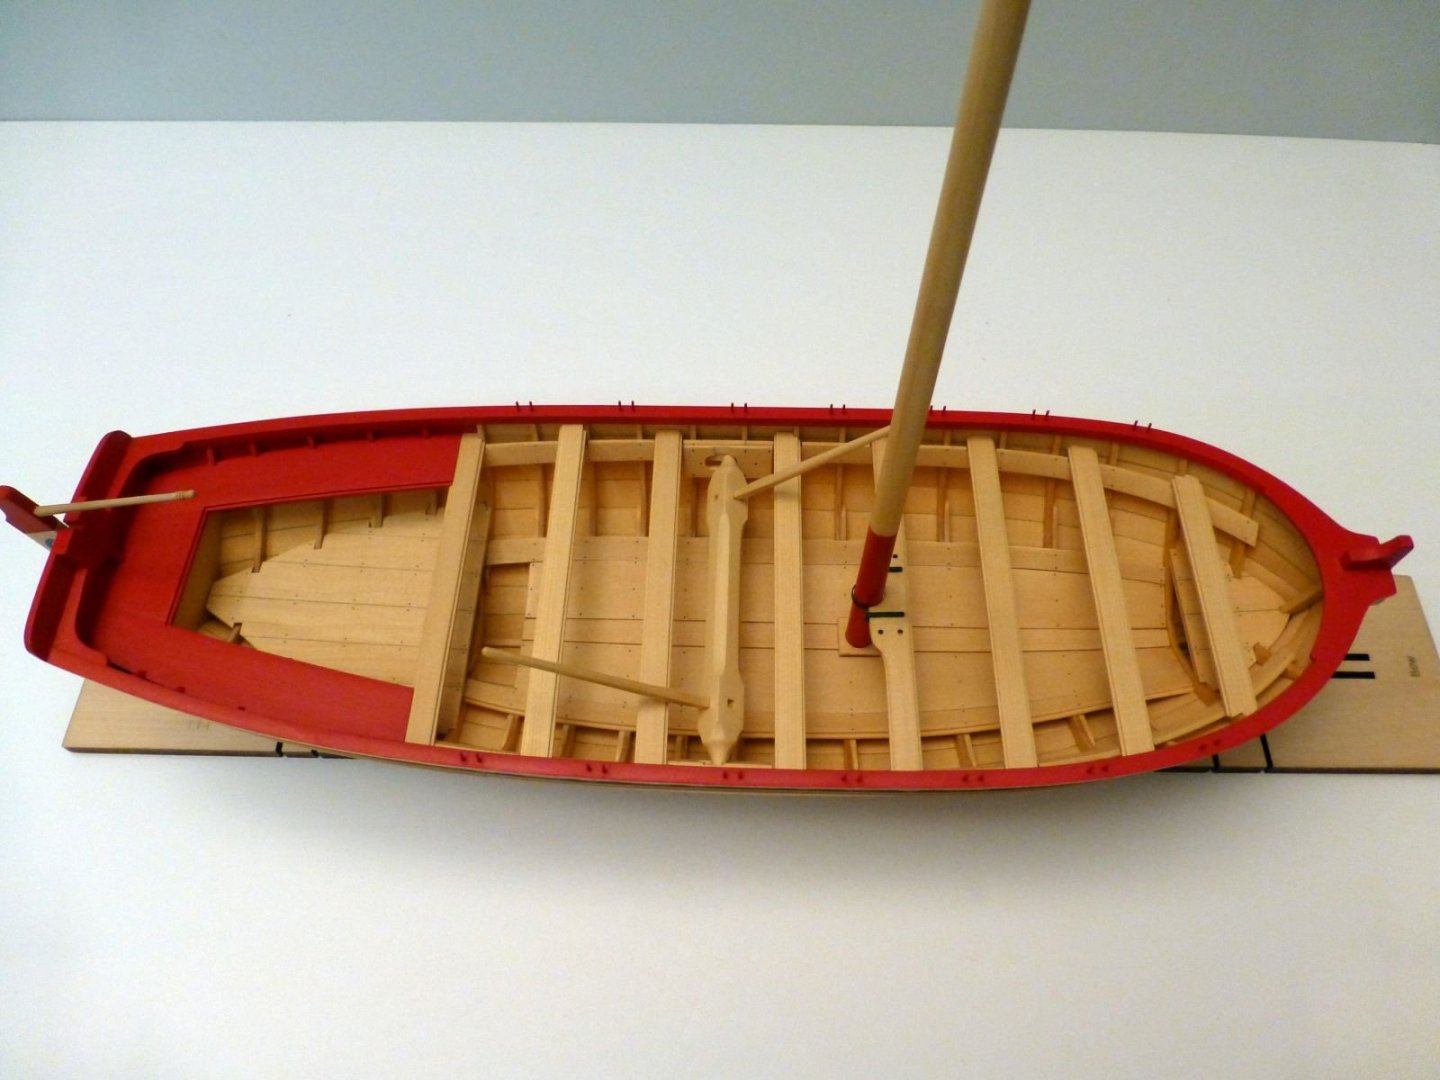
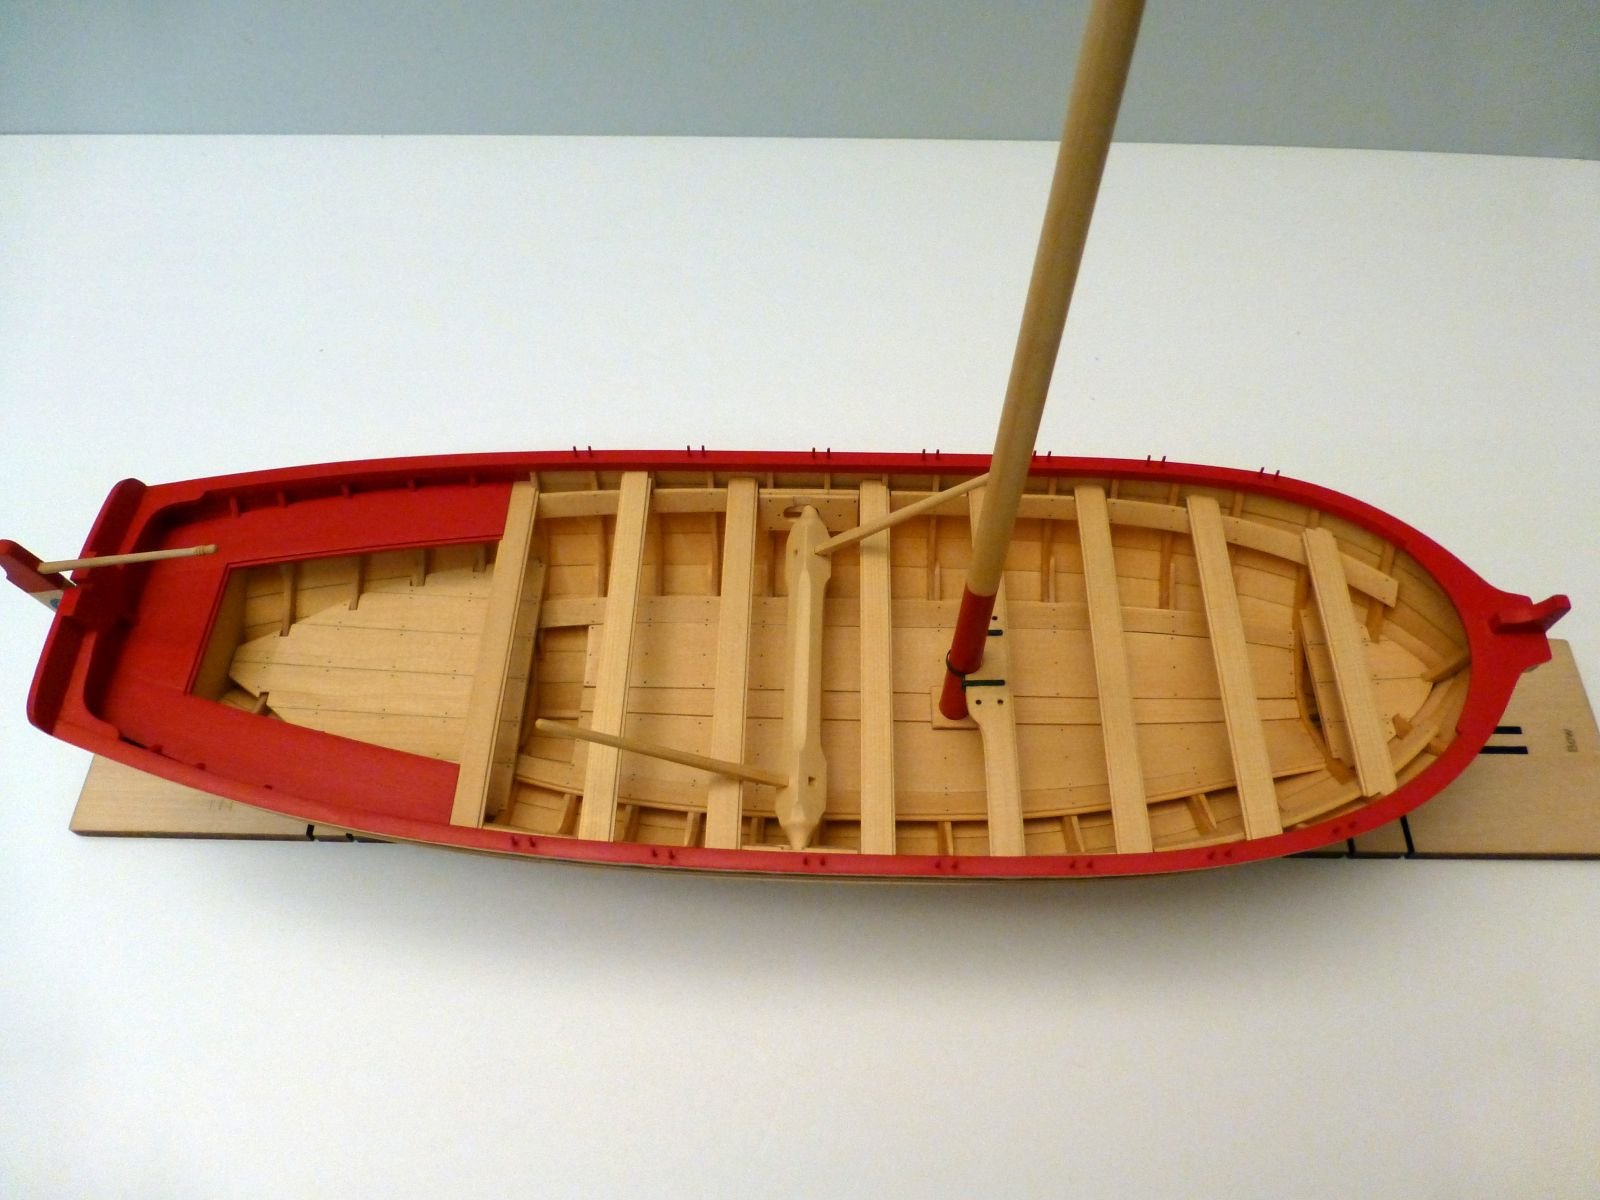
Thanks everyone for your replies and for the "Likes". Progress continues at a snails pace on my Longboat. I have completed all of the shaping of the mast, boom, gaff and bowsprit and finished painting them and applying WOP on the wood surfaces. I stepped the mast (temporarily) and I am ready to start the rigging. Here are some pictures of the status of the model that I shared with my Club members on Zoom this past Saturday:
-
-
Welcome to Model Ship World David. I am sorry to hear of the news of the tornado as I am sure you lost more than the Syren. You sound like an experienced modeler and I look forward to seeing your work.
-
-
Welcome to Model Ship World Daniel. The Polaris from OcCre seems to be a good model for a beginner. I believe OcCre has some videos on YouTube with tips on how to build the Polaris. Good luck on your build.
- mtaylor and Daniel Filipe
-
2
-
Congratulations on finishing your Cutty Sark. You built a highly crafted model and the details you added during this build make this model stand out. If you get a chance, please post your pictures in the Gallery.
-
9 hours ago, Gabek said:
Can't wait to create some crew, fabricate parts and make ornamentation for my models.
- Gabe
Please post some pictures of your work when you create them. 3-D is here to stay and we are in the infancy of this new technology.
- mtaylor, Keith Black, Chuck Seiler and 1 other
-
4

Hi there from NE Ohio
in New member Introductions
Posted
Hi Tom and welcome to Model Ship World. The Niagara builds into a nice model and it is great that it is located a short distance from you. Ship modeling is very enjoyable in retirement.