


Ryland Craze
-
Posts
1,442 -
Joined
-
Last visited
Content Type
Profiles
Forums
Gallery
Events
Posts posted by Ryland Craze
-
-
Nice to see another Medway Longboat build log. You have made a good start. For the false keel at the transom, I removed some of the laser char. I aligned it to the keel by using the squares on my cutting mat. I placed the transom on a vertical line with the keel following a horizontal line. You have to make sure that the keel is square to the cutting mat. I used a small machinist square for this. The laser etched slot on the transom helps with the alignment. I also measured the bottom of the ears on the transom with the keel setting upright to make sure they were both equal in height.
It looks like the floor on the two piece frame #3 might be too low at the edge. It could possibly be the effects of the photo, but felt it worth mentioning.
- Justin P., Old Collingwood, BobG and 1 other
-
 4
4
-
Hi Dougal and welcome to Model Ship World. Your trucks are very realistic as well as excellent photographic skills. I do hope you start a build log on your Endeavour Longboat as we would like to follow your progress.
-
-
Your Bounty is coming along nicely. The extra details you are putting on this model are paying off.
8 hours ago, Backer said:This build is relaxation for me, if a certain color is not right or a rope is knotted incorrectly
so be it.I like your attitude. Your build of the Bounty will be a model you will be proud of.
- Jeff T, Veszett Roka and Baker
-
3
-
Congratulations on finishing your first build. You did a really nice job on your Lobster boat. I am sure that you learned a lot that will help you on future builds.
- pwog, popeye the sailor and FriedClams
-
3
-
Congratulations on completing your Lady Eleanor. You have a highly crafted model of a work boat. I look forward to your HMS Flirt build.
-
Jerry, You are off to a good start. By following Olha's videos, you will do just fine.
You can add photo's within your text. After downloading your pictures, just place your cursor in the text and click it where you want to add the photo. Then click on the plus sign on the photo and it will be added within the post. After you post your picture, you can add more text and repeat the process to add more pictures.
-
Check out the rigging instructions for the Medway Longboat, which is a larger scale version of your longboat. It is chapter five download on the Syren website. Here is a link: https://syrenshipmodelcompany.com/medway-longboat-1742.php
-
-
The amount of detail at that scale is just amazing. Thanks for the photos.
- Canute, mtaylor, popeye the sailor and 3 others
-
6
-
Absolutely Beautiful! I feel like I am looking at pictures of a full scale Alfa Romeo. Your work is going to be a inspiration for future Pocher modelers.
- lmagna, Canute, Old Collingwood and 7 others
-
10
-
Welcome to Model Ship World Mark. Chris and Mark have given you good advice. I think it is important to start with a not too complex kit to build your skills. If you see a kit you like in the kit reviews section of this forum, check out the build logs by using the search function. MSW contains many detailed build logs that will help you in your build.
- mtaylor, Old Collingwood and MarkSH01
-
2
-
 1
1
-
Congratulations on completing your HMS Terror. It really turned out nice.
- HardeeHarHar and Seems ok to me
-
1
-
1
-
-
David, The 18th Century Longboat is not the easiest model to build. Based on the pictures you posted, I do not think you would have a problem building any of the kits you mentioned. It sounds like you have learned a lot and improved your skills from your previous builds. I would build whatever kit that appeals to you the most.
-
Nice work on the weathering. Everything looks so realistic.
- Jeff T, P.Raveneau and Old Collingwood
-
3
-
-
Welcome to Model Ship World and thanks for sharing pictures of your build. Your model definitely looks like a pirate ship. I am looking forward to seeing more.
-
I am having the same problem.
-
Welcome to Model Ship World Jon. Retirement does present its advantages when building ship models. You will find many kits available that may suit your interest.
- JRGlasoe, Old Collingwood and mtaylor
-
2
-
1
-
-
-
-
I have made some progress on my Longboat and I shared this with the members of the Ship Model Society of New Jersey during last nights Zoom meeting. The mast has been finished by adding the simulated iron bands and eyebolts. I made the two upper iron bands using 1/16" wide chart tape and then formed the eyebolts using 22 gauge wire. I then weathered the iron bands and eyebolts with Tamyia rust weathering powder to give it some contrast.
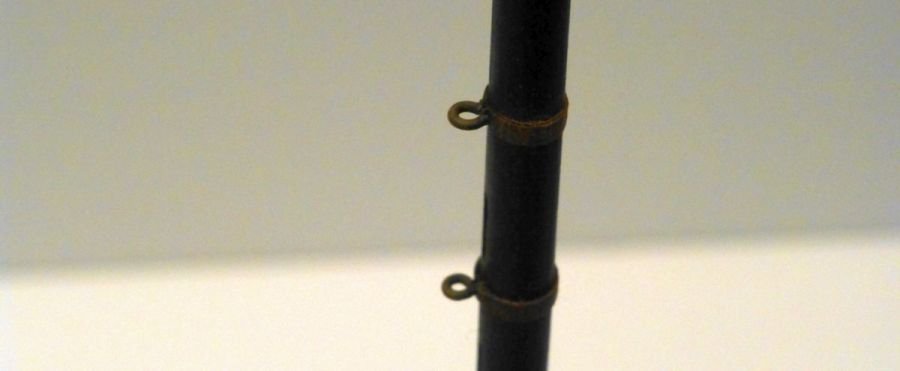
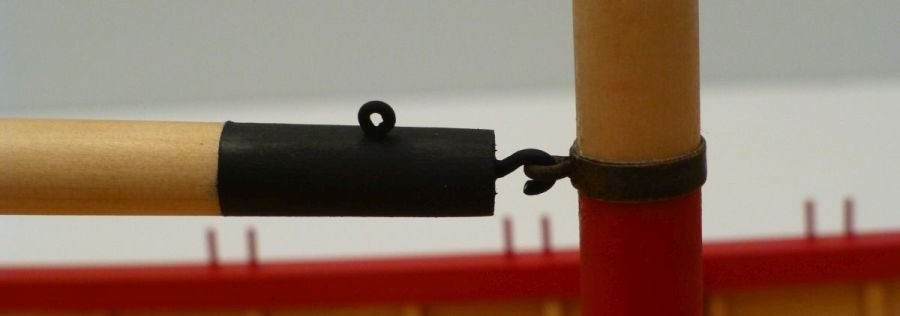
For the lower iron band, I used some black masking tape cut into a 3/32" wide strip and then made an eyebolt using 18 gauge wire. The hook in the boom was also made using 18 gauge wire.
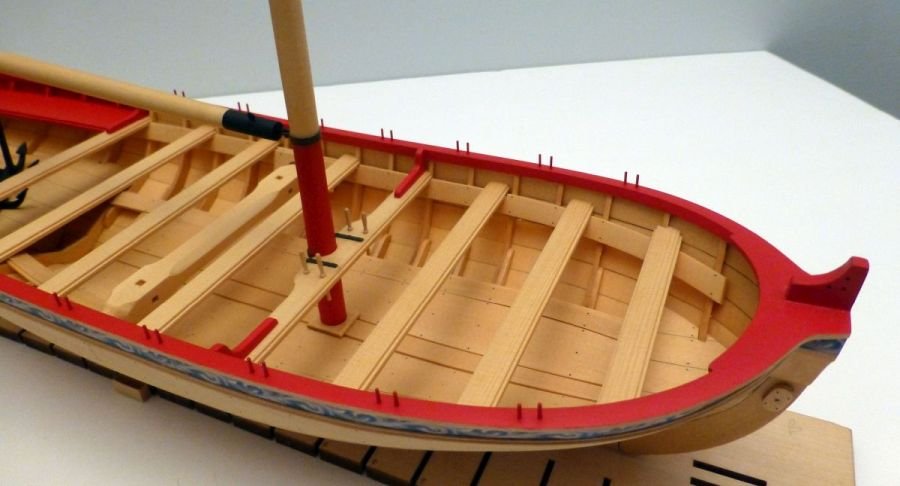
I also added the knees and belaying pins. The knees were painted off the model and then glued to the thwarts. I used some 1/16" wide chart tape to help align them onto the thwart before gluing. The belaying pins were turned using my dremel and some small files.
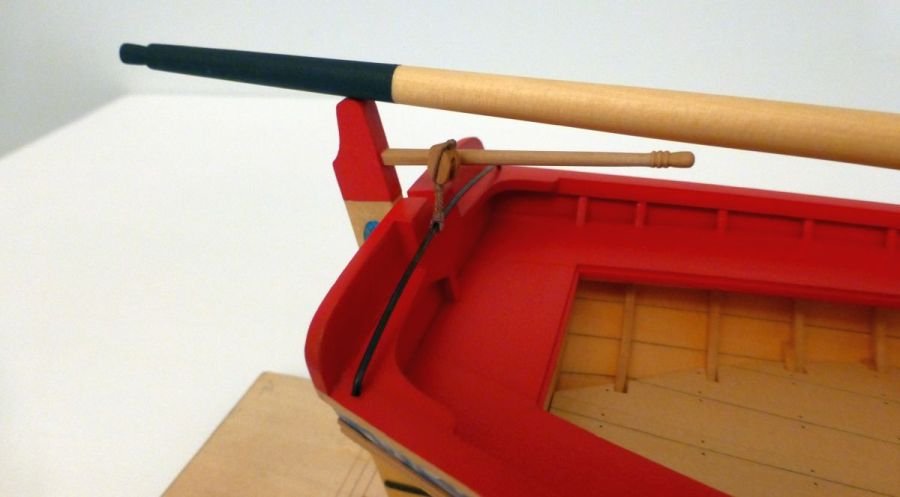
The horse was made using the supplied 20 gauge wire. It was blackened and then a 1/4" block was seized to the horse before attaching the horse to the stern.
My next step is to fit the pedestals that came with the engraved base from Syren Ship Model Company to the hull. I feel it would be difficult to handle the hull while trying to install the pedestals with the mast and rigging installed.
GLAD TIDINGS 1937 by shipphotographer.com - FINISHED - Model Shipways - Scale 1:24 - Pinky Schooner - just a christmas present
in - Kit build logs for subjects built from 1901 - Present Day
Posted
Beautiful and highly crafted model. I have enjoyed this build log and the videos and have learned so much from your techniques.