


Ryland Craze
-
Posts
1,540 -
Joined
-
Last visited
Content Type
Profiles
Forums
Gallery
Events
Posts posted by Ryland Craze
-
-
-
-
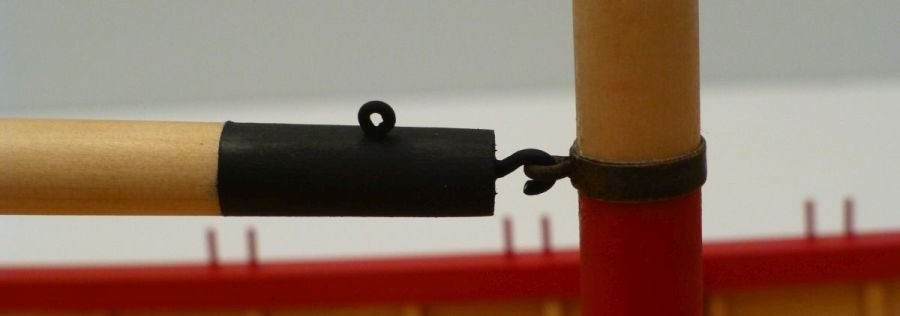
I have made some progress on my Longboat and I shared this with the members of the Ship Model Society of New Jersey during last nights Zoom meeting. The mast has been finished by adding the simulated iron bands and eyebolts. I made the two upper iron bands using 1/16" wide chart tape and then formed the eyebolts using 22 gauge wire. I then weathered the iron bands and eyebolts with Tamyia rust weathering powder to give it some contrast.

For the lower iron band, I used some black masking tape cut into a 3/32" wide strip and then made an eyebolt using 18 gauge wire. The hook in the boom was also made using 18 gauge wire.
I also added the knees and belaying pins. The knees were painted off the model and then glued to the thwarts. I used some 1/16" wide chart tape to help align them onto the thwart before gluing. The belaying pins were turned using my dremel and some small files.
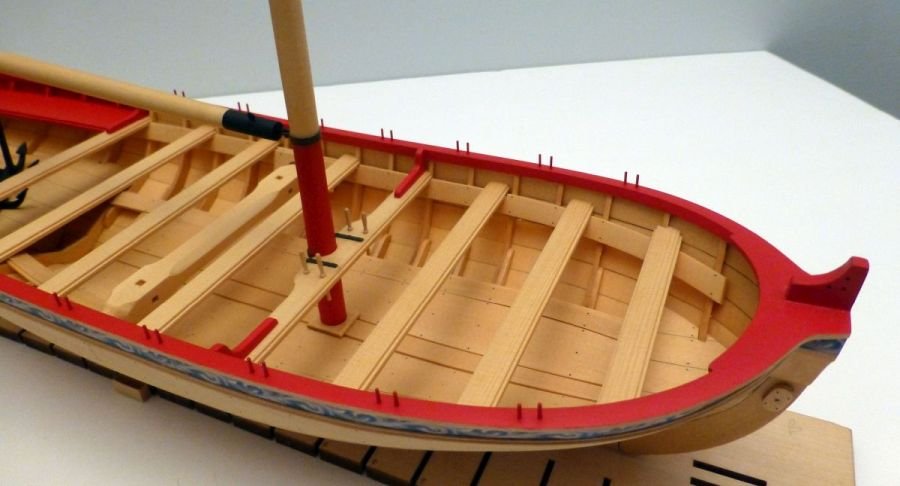
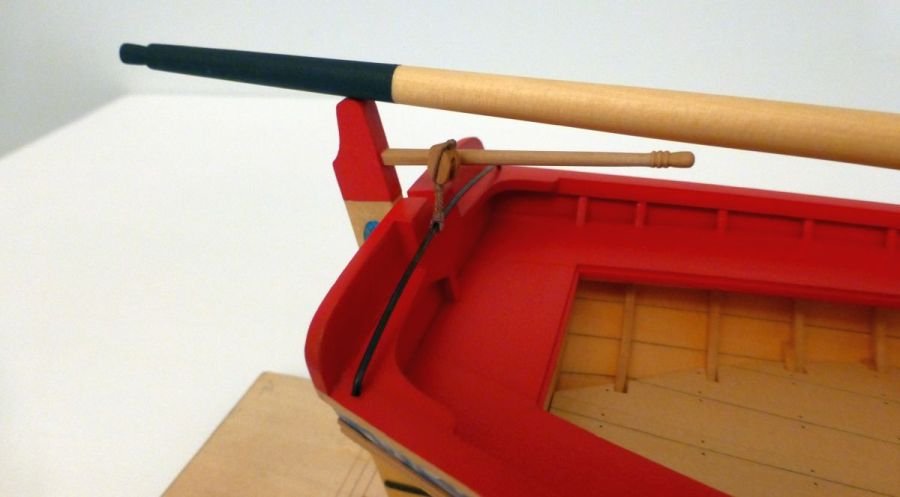
The horse was made using the supplied 20 gauge wire. It was blackened and then a 1/4" block was seized to the horse before attaching the horse to the stern.
My next step is to fit the pedestals that came with the engraved base from Syren Ship Model Company to the hull. I feel it would be difficult to handle the hull while trying to install the pedestals with the mast and rigging installed.
-
-
-
Hi Bud and welcome to Model Ship World. We were all absolute beginners at one time. When I started in this hobby, there was no MSW. It is a good idea to start a build log on your Endeavor. If you have any questions about your build, just ask and you will receive answers from the membership.
-
Bradley, You look like you are having a lot of fun building these two models. I am glad you started a build log on these kits as they can be a great introduction into building wooden ship models. You could not have a better teacher than David Antscherl.
-
Nice job on your deck. The Winchelsea is bringing out the best of the builders.
-
4 hours ago, Rik Thistle said:
It's been fun so far and I'm happy with the way little Fifie is turning out.
You should be happy. You have done a good job on building your Fife.
-
Hi Mark and welcome to Model Ship World. You have received some good advice on selecting your first ship model. If you are a complete beginner, you may want to check out this ship model kit:
This model is designed for the first time modeler and you can get a version that includes all of the tools and supplies needed to complete the model.
- grsjax, mtaylor, Rik Thistle and 1 other
-
 4
4
-
-
-
-
I purchased my Kunz miniature plane from Woodcraft many years ago. I did a Google search and came up with this: https://www.highlandwoodworking.com/kunzpalmplanewithouthandle.aspx
There are other miniature planes that are much nicer, such as the Lie-Nielsen, but my Kunz does the job. It is based on the old Stanley 101 block plane.
I am glad to see your progress on your Longboat. I hope to start rigging mine today.
-
-
That is a nice looking model. I am glad that Model Shipways is producing a kit for first time builders. You could not have a better teacher than David Antscherl, the designer of this kit. The description of this kit states it is the first in a series of progressive model tutorials. This is definitely what a new builder needs to improve their skills. So many new builders come into this hobby, get frustrated with their build and leave, never to come back. This series of kits should give them the confidence to complete their models and move on to more complicated ship models.
-
-
You are off to a good start on your Beagle. It is never too late to start a build log. I see that there are 131 videos on YouTube of building this model. Here is the link to these videos: https://www.youtube.com/playlist?reload=9&list=PLrPwa5r7zKUzDlhkDF4ztrTc2ag_wVD_a
-
-
Floyd, I am sure that you are not the first modeler to break a frame when fairing a Medway Longboat. The frame broke at a place where it will be visible on the inside of the hull. The break is about one plank width above the top of the floorboard. If you decide that you will repair this frame, this is how I would do it. I would first take some wax paper and place it on the laser cut seam of the frame center where the breaks occurred. It looks like you may be able to slide some wax paper in the seam under the section of the center frame where the floor and top timber are joined together right at the break. This should keep the removable part of the frame from being glued to the actual frame. Next, I would glue the broken frame where the breaks occurred, both top and bottom. Then I would glue some scrap pieces of wood on both sides of the top of the frame (side closest to the build board) to reinforce the frame where the break occurred, similar to the reinforcement you did for the single frames. This should be covered up by the cap rail later in the build and not visible.
This repaired frame will be very fragile but should hold the planking very well and should be almost invisible at the break. Just remember that you will need to fair the inside of the hull once the frame centers are removed, so go lightly on fairing this frame. This is a minor setback as we all have had something like this happen to us. You will get it fixed and continue on with this build.
-
-
-
Nice start to your build. I have always been amazed at how plastic modelers can paint plastic to make it look like wood. Good job.
- Old Collingwood, bosco72 and Baker
-
3
-
Great job Michael. It is a beautiful model.
- Old Collingwood and MEDDO
-
2

New member
in New member Introductions
Posted
Welcome to Model Ship World Sparky. Thanks for sharing pictures of your past builds. Your models look very nice and skillfully constructed. What do you plan to build after completing your Longboat?