-
Posts
685 -
Joined
-
Last visited
About captain_hook
- Birthday 12/29/1975
Profile Information
-
Gender
Male
-
Location
Kriftel, Germany
-
Interests
Sailing Ships and Great War Biplanes
Recent Profile Visitors
-
 rvchima reacted to a post in a topic:
Liebherr LTM 11200 9.1 Crane by captain_hook - Lego - Approx. 1/18 Scale - Mammoet Colour Scheme
-
 FrankWouts reacted to a post in a topic:
Sloop Speedwell 1752 by Chuck - Ketch Rigged Sloop - POF - prototype build
-
 AJohnson reacted to a post in a topic:
Sherbourne by DB789 - Vanguard Models - 1:64
-
 FrankWouts reacted to a post in a topic:
HMS Sphinx 1775 by Ronald-V - Vanguard Models - 1:64
-
 Javlin reacted to a post in a topic:
Liebherr LTM 11200 9.1 Crane by captain_hook - Lego - Approx. 1/18 Scale - Mammoet Colour Scheme
-
 Mr Whippy reacted to a post in a topic:
HMS EURYALUS by Matiz - FINISHED - scale 1:56
-
 scrubbyj427 reacted to a post in a topic:
HMS Portland 1770 by scrubbyj427 - 1:48 - 4th rate 50-gun ship
-
 Mr Whippy reacted to a post in a topic:
Sherbourne by DB789 - Vanguard Models - 1:64
-
 captain_hook reacted to a post in a topic:
HMS PEGASUS by giampieroricci - Scale 1:36 - Swan-Class Sloop from plans by David Antscherl & Greg Herbert
-
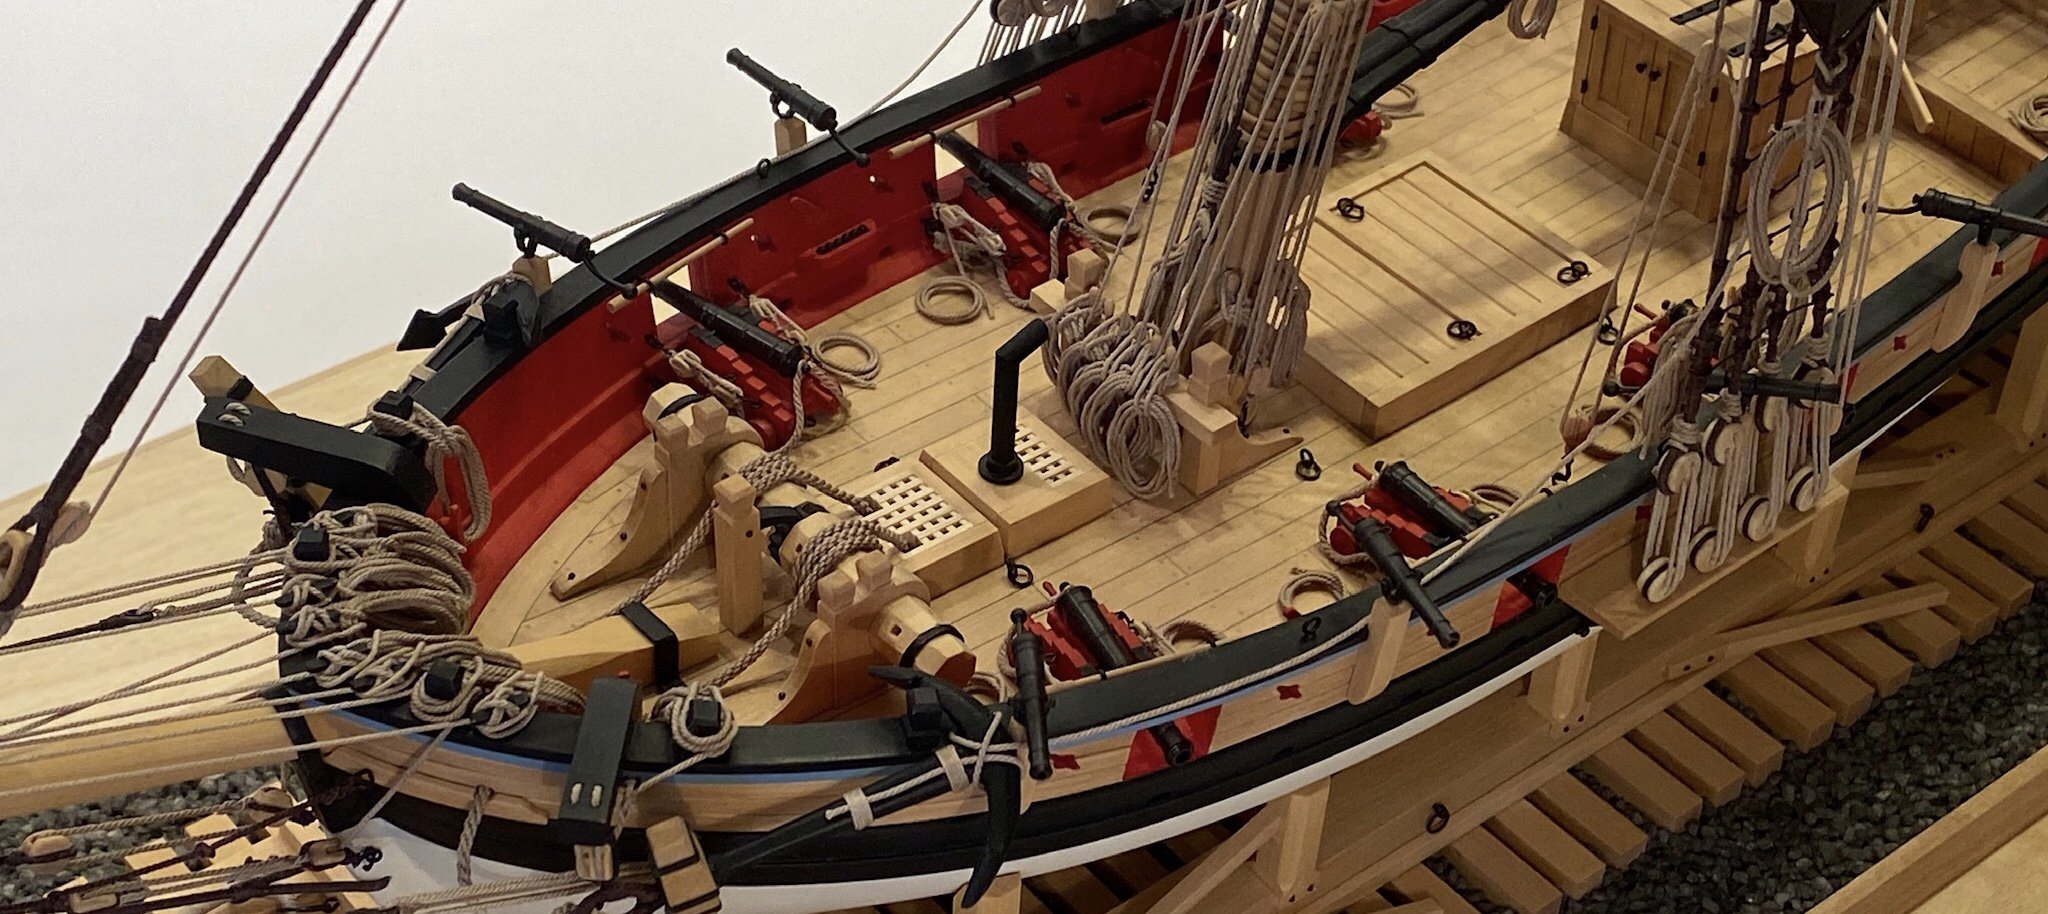
Hello and good luck with the build. If I remember correctly, the Caldercraft Sherbourne kit included 4x0.5mm Tanganyika planks for deck planking. I used 4x1.0mm holly for my Sherbourne, which simulates faded wood very well, basswood and maple would also be good options. Boxwood is certainly a more elegant option, but that would be expensive. There are many ways to simulate caulking. It also depends on how clearly you want it to be visible. A soft pencil would be a more subtile accent, but a more intense finish would be to paint the sides of the deck planks with diluted black acrylic paint (pre-treat with clear varnish and let it dry so the paint doesn't soak deeply into the wood later). I've also seen model ships where the deck planks were separated with black cellulose or paper. This also looks very good, at least at a larger scale.
- 21 replies
-
- Vanguard
- Sherbourne;
-
(and 1 more)
Tagged with:
-
 Oboship reacted to a post in a topic:
HMS Sphinx 1775 by Ronald-V - Vanguard Models - 1:64
-
 captain_hook reacted to a post in a topic:
HMS Portland 1770 by scrubbyj427 - 1:48 - 4th rate 50-gun ship
-
 Ronald-V reacted to a post in a topic:
HMS Sphinx 1775 by Ronald-V - Vanguard Models - 1:64
-
 captain_hook reacted to a post in a topic:
HMS Sphinx 1775 by Ronald-V - Vanguard Models - 1:64
-
 captain_hook reacted to a post in a topic:
HMS Sphinx 1775 by Ronald-V - Vanguard Models - 1:64
-
 captain_hook reacted to a post in a topic:
Cannon Jolle 1801 by ccoyle - FINISHED - Master Korabel - 1/72 scale - Swedish gunboat
-
 captain_hook reacted to a post in a topic:
Cannon Jolle 1801 by ccoyle - FINISHED - Master Korabel - 1/72 scale - Swedish gunboat
-
It may be a bit smaller, but it looks great - it can even be placed on a desk. Great work.
- 117 replies
-
 captain_hook reacted to a post in a topic:
Le Chebec by Yvesvidal - CAF Model - 1/48
-
It really turned out to be a wonderful model. Thank you so much for the many photos; your work is truly inspiring.
-
 captain_hook reacted to a post in a topic:
HMS EURYALUS by Matiz - FINISHED - scale 1:56
-
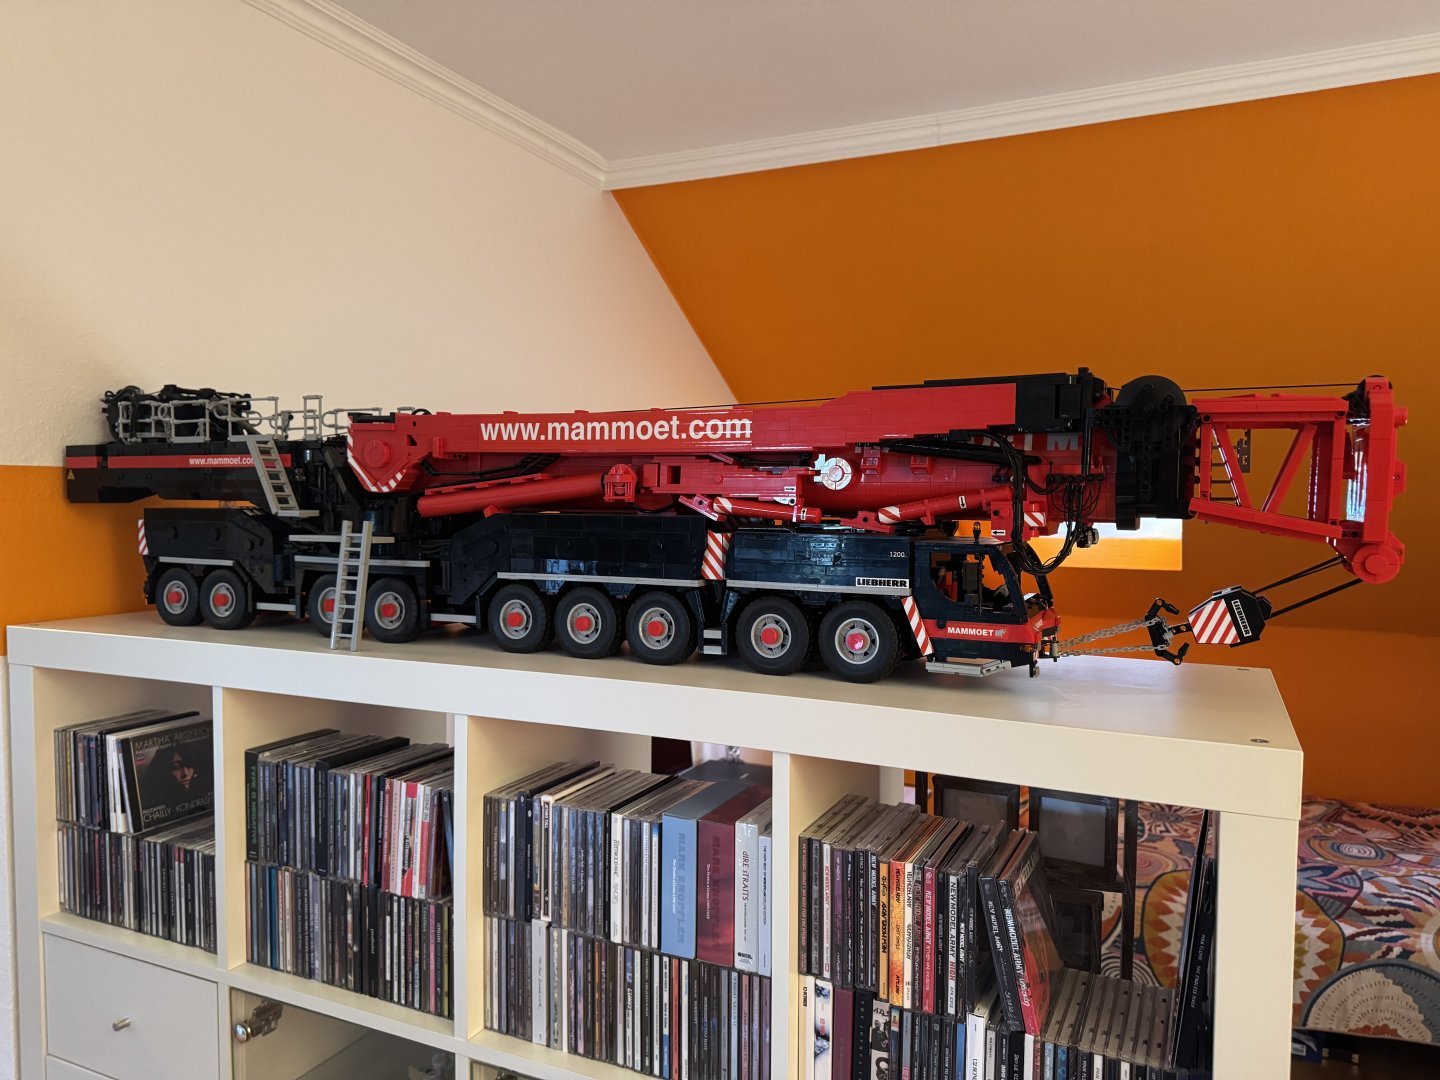
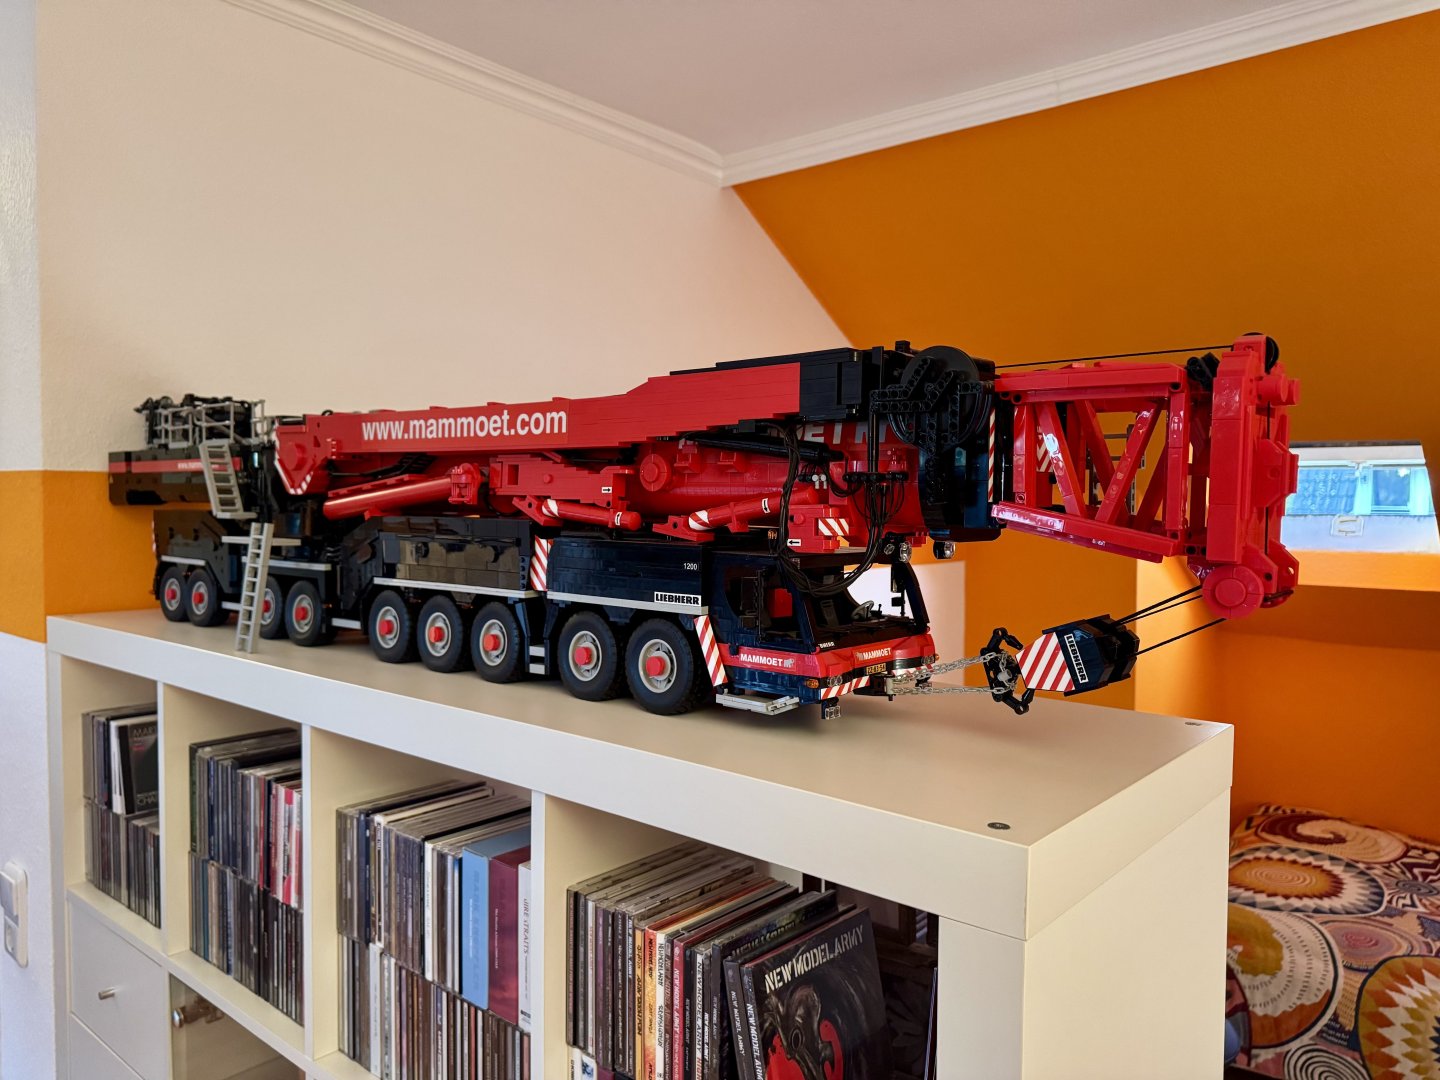
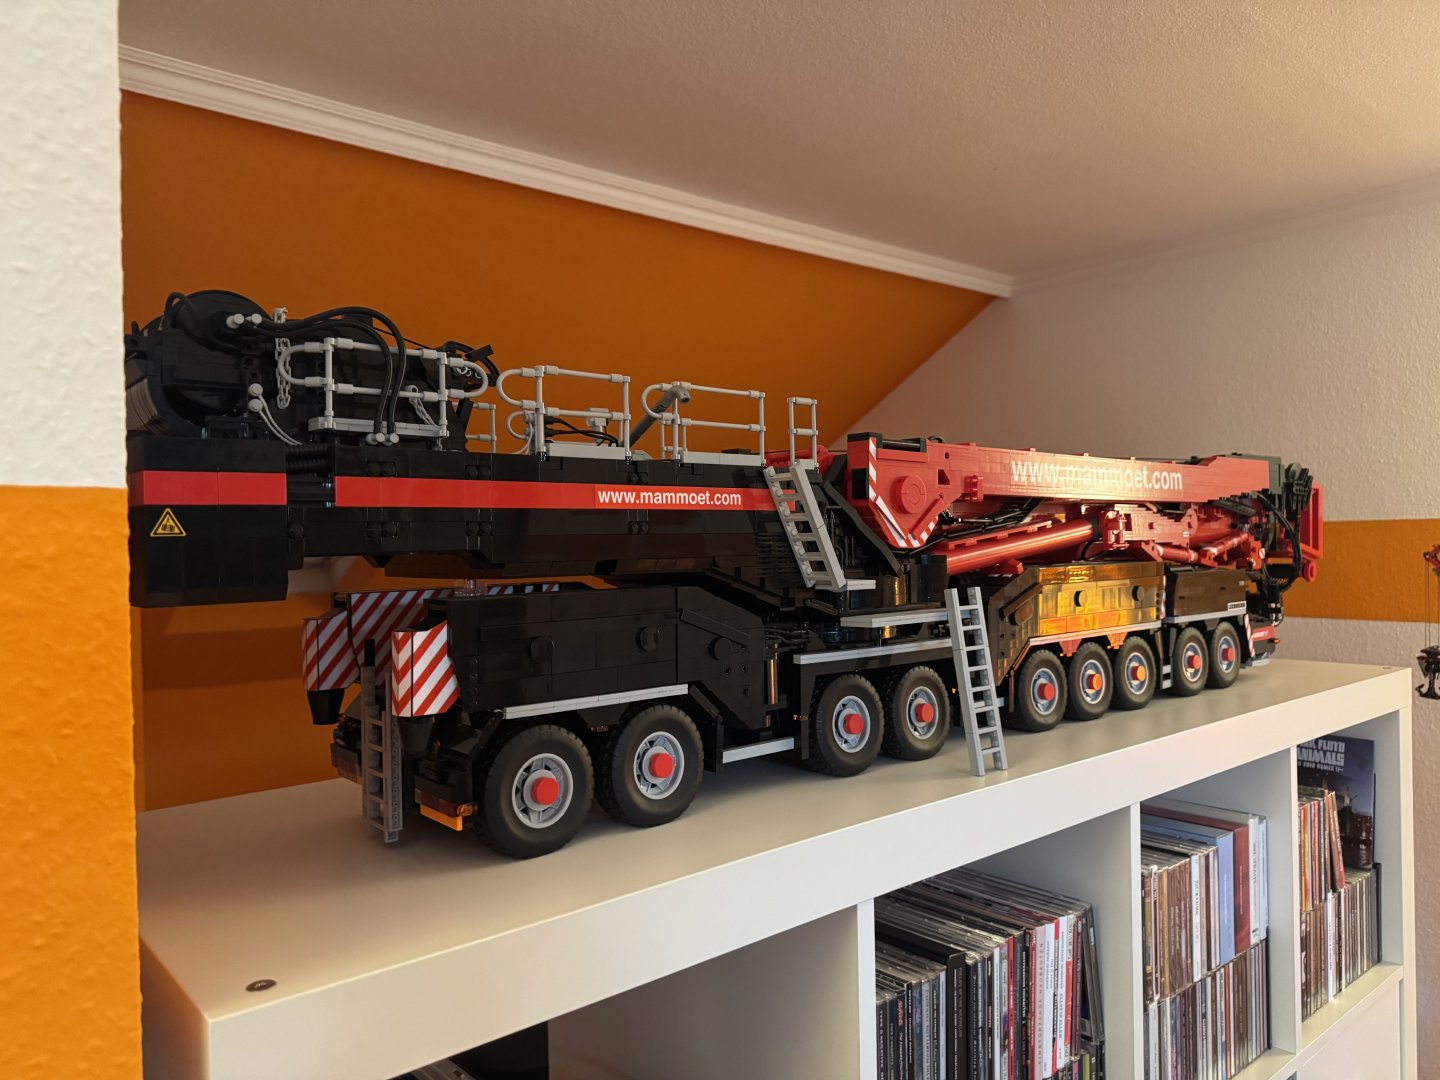
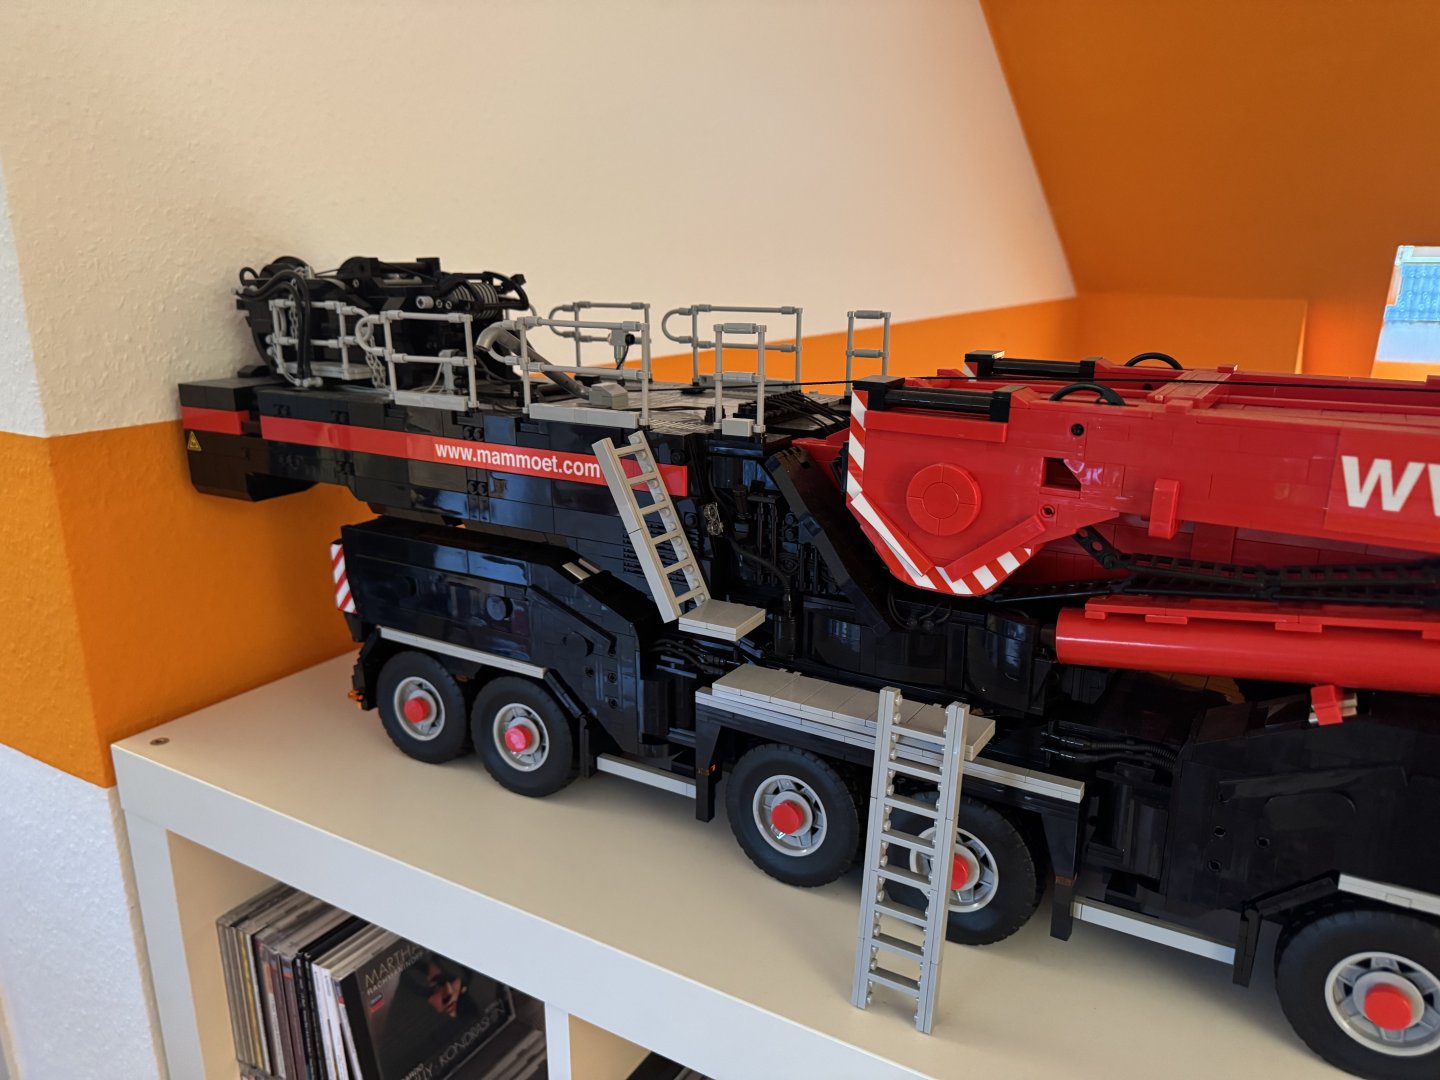
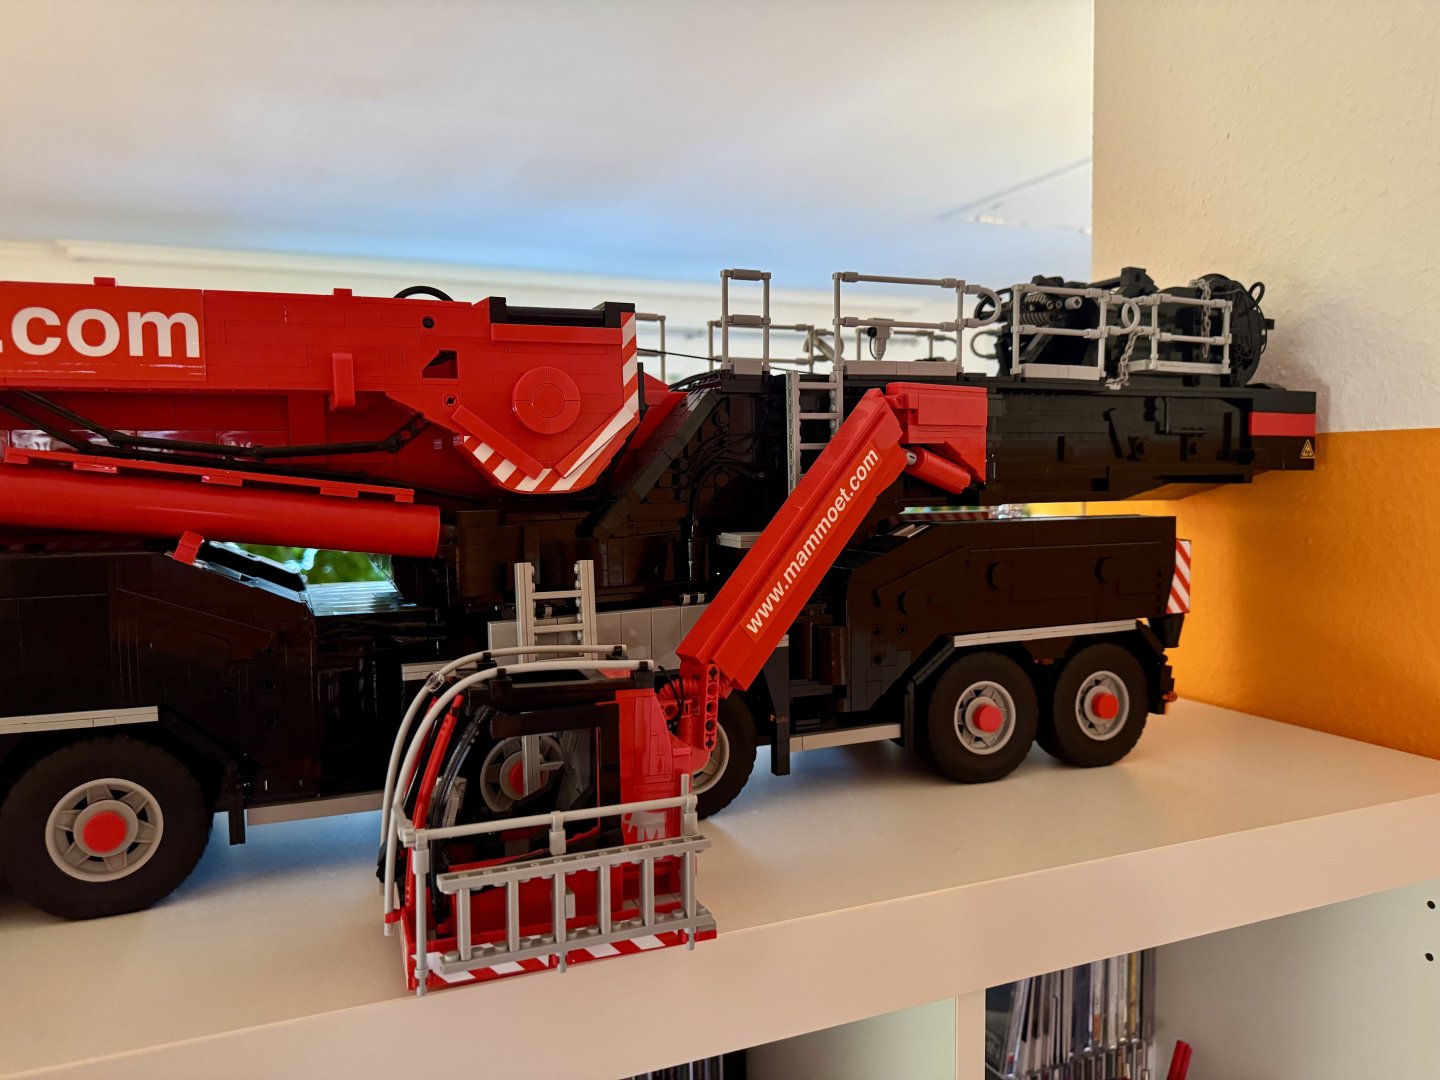
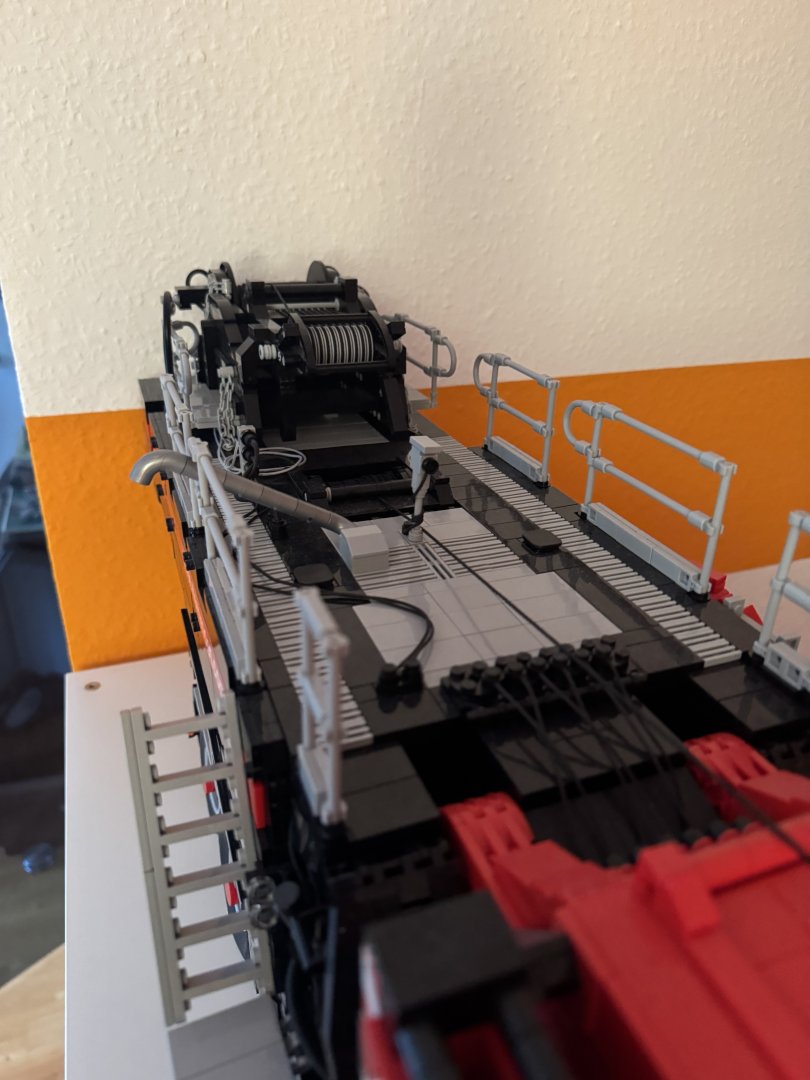
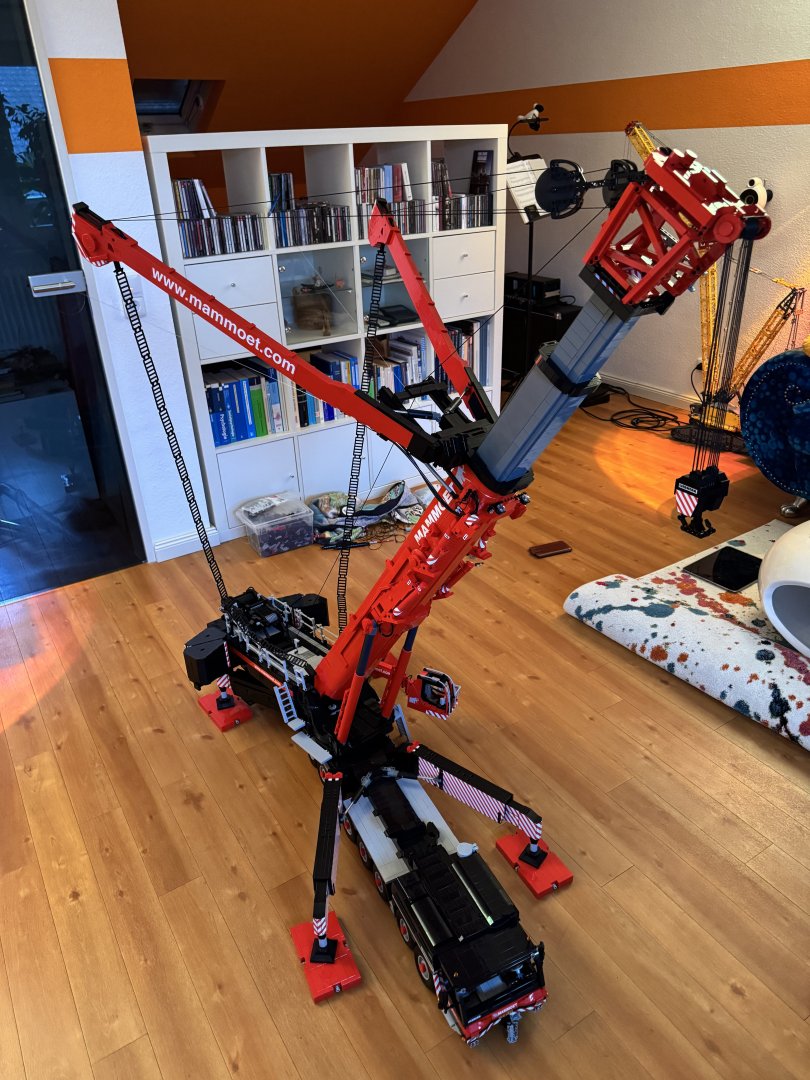
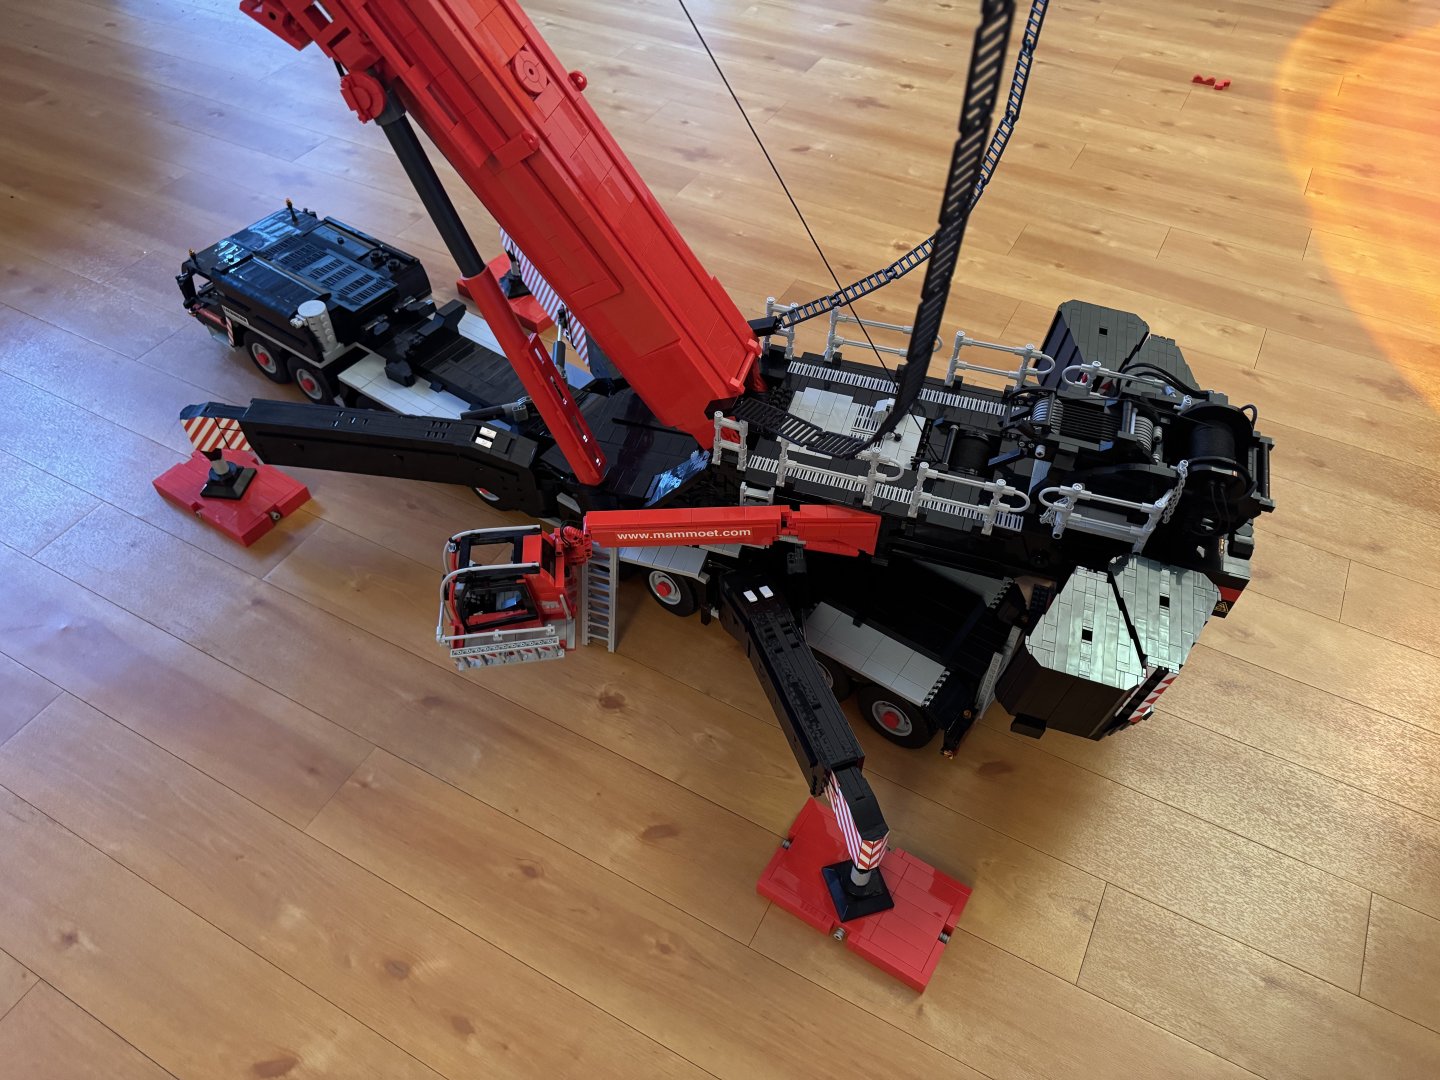
The model is largely a home-made construction, with the mechanics being a scaled-up version of a common MOC (a Technic Version of the Liebherr 11200). The model combines regular bricks and Technic bricks. However, the electric screw cylinders that lift the boom are not original Lego, but compatible accessories from another company. The stickers were designed with Corel Draw and then printed by a printer-company on commission. Here is picture of the real crane ..
-
Hello everybody. Since I couldn't get to my workshop in 2023 due to the installation of a solar system, I realized a childhood dream of mine – a scale model made of Lego. I chose the Liebherr heavy-duty crane, model 11200, as my motif. This crane can lift a maximum of 1200 tons, has nine axles, and a three-stage boom with a heavy-duty jib. The 1:18 scale model is built from around 14,000 bricks, 16 motors, and two battery boxes. It's basically remote-controlled, but due to its weight of almost 10 kg, it's not particularly stable when assembled – the limits of Lego's load-bearing capacity. The model was inspired by an earlier model by a Dutch hobbyist, although it was considerably larger. It took about nine months to build, with a few hours of work every now and then. I completely assembled the crane once and extended it for a photo shoot. Now it sits retired on my shelf. A model of this size was always my dream – but due to cost reasons, it wasn't realized until later. Now back to ship modeling; the next kit is already on its way … stay tuned.
-
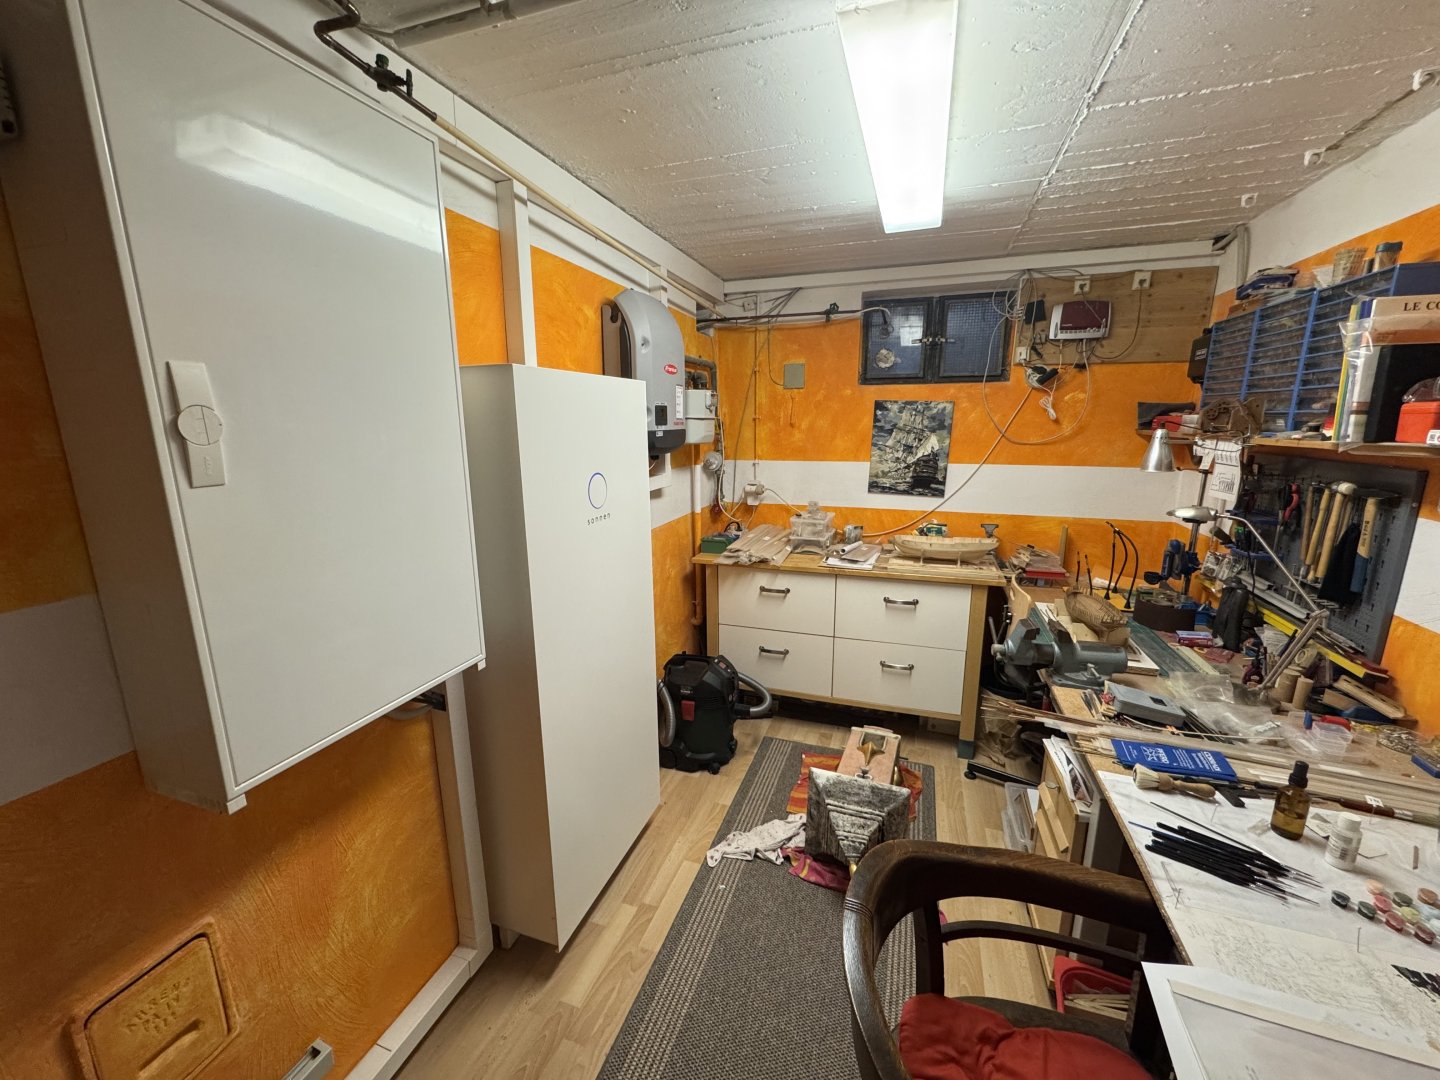
Hello and thank you for your interest in my building log. Two years ago we installed a photovoltaic system in our house and I had to completely clear out my building room because the battery was being installed there. It was such a mess that it took me quite a long time to rearrange the room. There were also changes to my self-employment and I'll be moving into a different building soon. These things have distracted me from model building, and once I'm too far out, I can't get back in. Because of the long break, I've forgotten many details about ship modeling I’ve learned before and now I feel like I'm back to the start. To get back into it, I'm going to pause building the Coureur for now and look for an easier project, perhaps the Alert from Vanguard Models or something similar to start with in the next months …
-
 captain_hook reacted to a post in a topic:
HMS EURYALUS by Matiz - FINISHED - scale 1:56
-
 captain_hook reacted to a post in a topic:
HMS EURYALUS by Matiz - FINISHED - scale 1:56
-
That is a nice little boat, well done! And great photos too.
- 62 replies
-
- Saucy Jack
- vanguard models
-
(and 3 more)
Tagged with:
-
Thank you guys for the support. I don't want to give up but this task will definitely slow me down quite a bit and I have to move on carefully as I don't have much scrap wood for spare parts left. Precut-planking sucks! @Beckmann Yes, I use a heat-gun for pre-bending the planks. But clamping them helps a lot to fix them in the right position until the glue has dried. @Chuck Thank you. I will keep that solution in mind if I fail to use the precut-planking properly. @mtaylor Yes, you're right - per aspera ad astra.
-
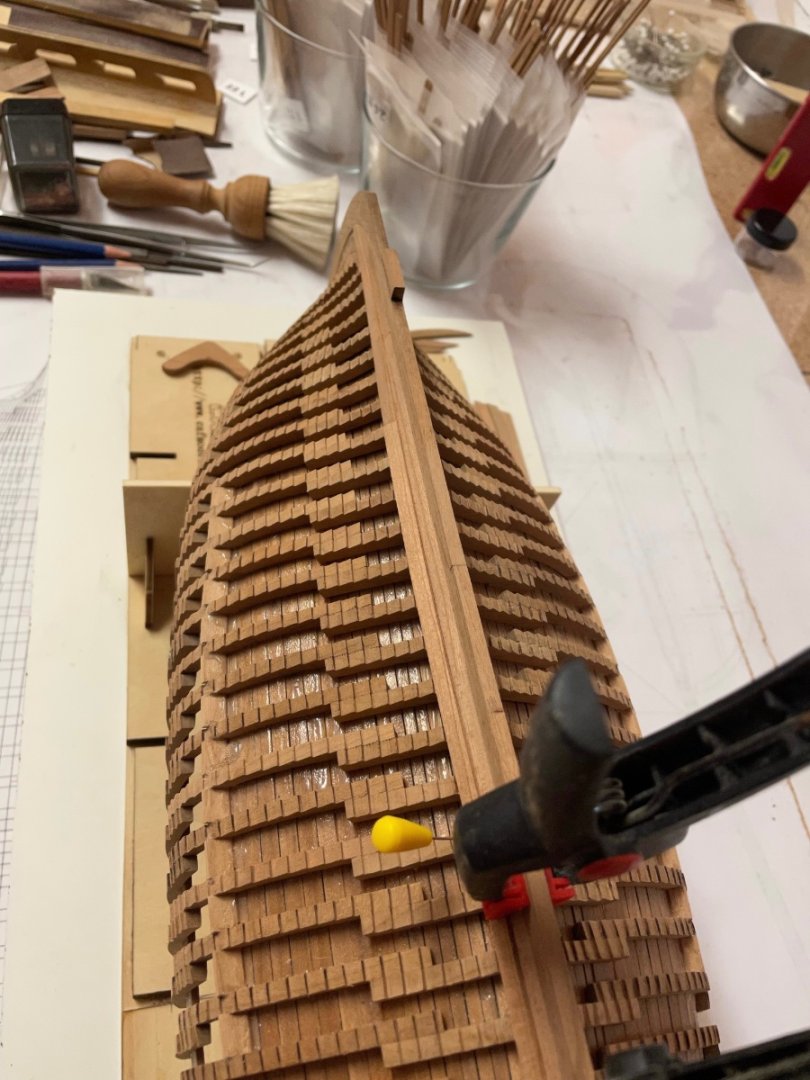
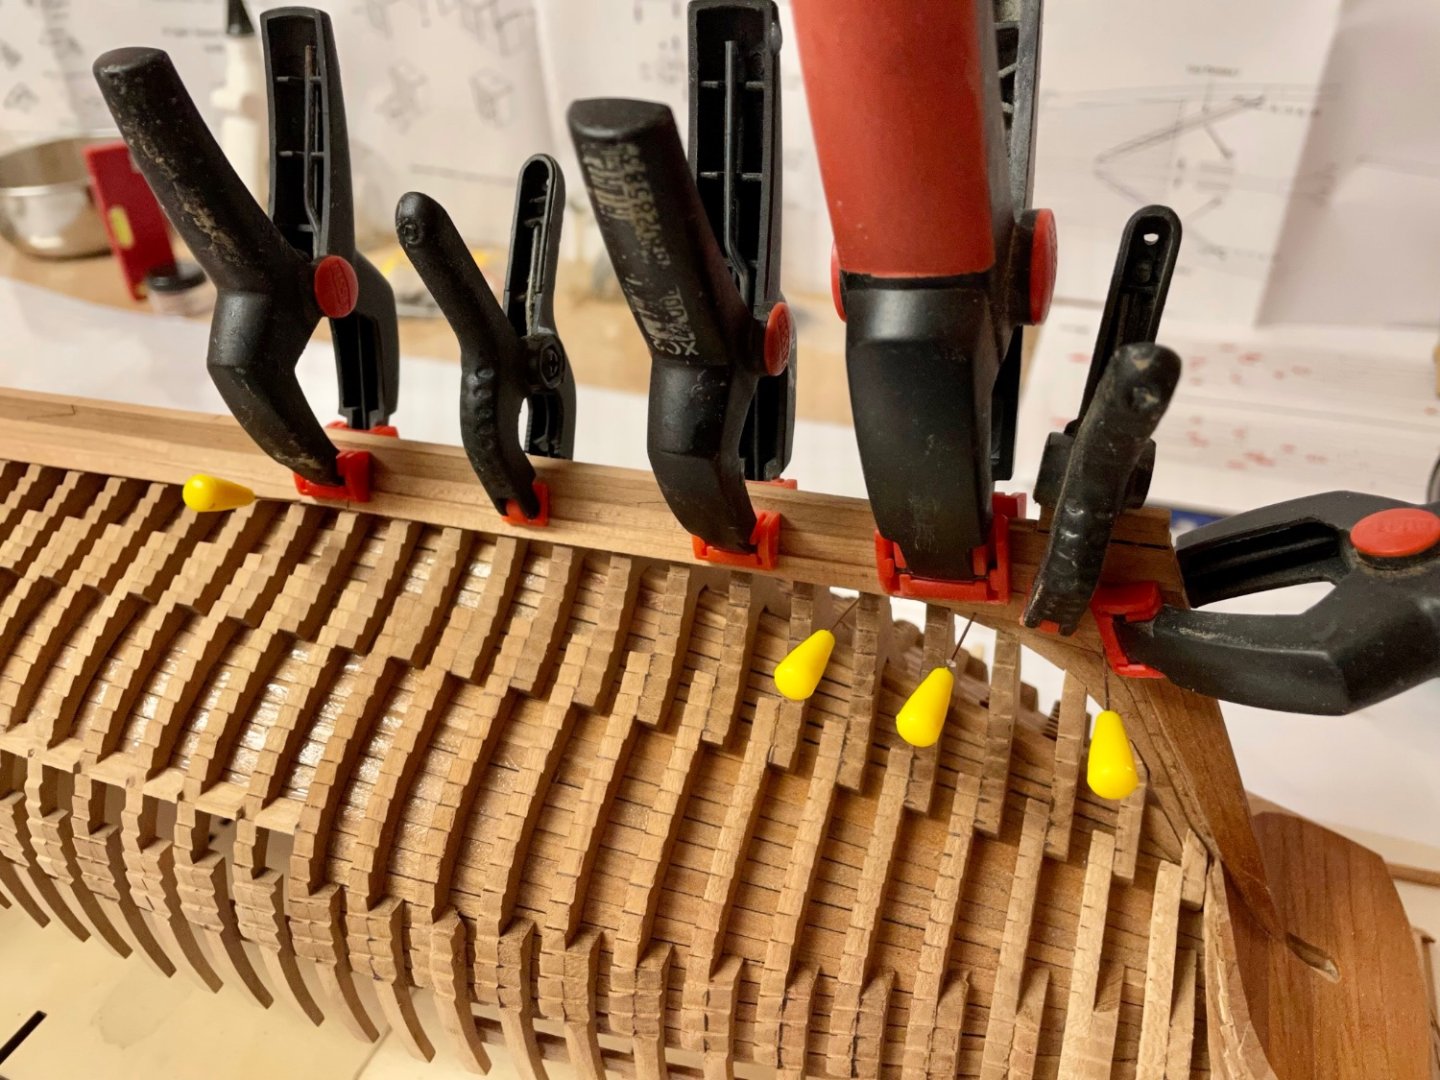
Today I have started planking the outside with the first two planking rows on the starboard side. This is pretty much testing my patience and perseverance. No. 25 consists of four parts and no. 24 of three parts. No parts is fitting exactly from the start as they are longer and wider as needed. So you’re able to make custom adjustments but this takes a very large amount of time. As the cnc-milled rabbit is only about .5 mm deep you have to taper / flatten all parts of no. 25 to fit into that rabbit too. Took about 3 hours to finish one row and there are 23 more rows to go … I caught myself thinking about starting another project several times and this might be the final task to decide if I will continue building this model next year or just switch to a more suitable project like the Cheerful which has been waiting for me in the shelf for about 3 years now. As the cherry stripes are slightly rotated around their own axis from center to bow and center to stern to fit the hull several clamps are needed to fix them in position until the glue has cured. Another problem is that the plans do not show exactly where the overlap of the clinker-planking begins for each row - so it’s about 3 cm at the bow and 5 cm at the stern for no. 24. So that’s it all for this year, have to help my wife preparing the New-Year-Party. Stay tuned .. and happy new year! Andreas
About us
Modelshipworld - Advancing Ship Modeling through Research
SSL Secured
Your security is important for us so this Website is SSL-Secured
NRG Mailing Address
Nautical Research Guild
237 South Lincoln Street
Westmont IL, 60559-1917
Model Ship World ® and the MSW logo are Registered Trademarks, and belong to the Nautical Research Guild (United States Patent and Trademark Office: No. 6,929,264 & No. 6,929,274, registered Dec. 20, 2022)
Helpful Links
About the NRG
If you enjoy building ship models that are historically accurate as well as beautiful, then The Nautical Research Guild (NRG) is just right for you.
The Guild is a non-profit educational organization whose mission is to “Advance Ship Modeling Through Research”. We provide support to our members in their efforts to raise the quality of their model ships.
The Nautical Research Guild has published our world-renowned quarterly magazine, The Nautical Research Journal, since 1955. The pages of the Journal are full of articles by accomplished ship modelers who show you how they create those exquisite details on their models, and by maritime historians who show you the correct details to build. The Journal is available in both print and digital editions. Go to the NRG web site (www.thenrg.org) to download a complimentary digital copy of the Journal. The NRG also publishes plan sets, books and compilations of back issues of the Journal and the former Ships in Scale and Model Ship Builder magazines.



.thumb.jpg.62d1d69fed1f32364417cb1f9cdeb009.jpg)

