


BobG
-
Posts
3,091 -
Joined
-
Last visited
Content Type
Profiles
Forums
Gallery
Events
Posts posted by BobG
-
-
20 hours ago, Danstream said:
I thought that joining this forum would be an excellent way to facilitate learning and getting first hand advices from experienced modelers.
Welcome to the forum, D. Be sure to select a model that you are interested in but suitable for a beginner. There is a lot to learn and become familiar with. Start a build log when you start making your model and don't hesitate to ask any and all questions. You'll get a lot of good advice and support from some of the very experienced modelers here. Good luck!
- Danstream, bruce d, Ryland Craze and 1 other
-
 4
4
-
12 minutes ago, Geam said:
Maybe I'll try airbrushing in gloss acrylic.
Acrylics do not completely durable without a clear coat to protect them from damage unless the model is for static display. You could spray an acrylic color and then clear coat it with a gloss varnish and you would have a glossy finish that is hard and would protect the acrylic paint. I had good luck spraying Vallejo Acrylic Air on the hull of my Pen Duick model and then clear coated it with Vallejo Varnish. Their varnishes come in flat, satin and gloss. I used a mixture of satin and gloss to get a semi-gloss finish. Vallejo acrylics and varnishes are water based too which I prefer.
-
Is the grim reaper a big decal?
-
20 hours ago, fnkershner said:
Someone mentioned that the only camera they have is an Iphone. It is the same for me. So I have a dump question. How do you get your pictures form the phone to the computer so they can be uploaded to this blog.
Tap on the photo that you want to select and it will be enlarged. Various choices of how you want to share the photo will now show up. For example, my MacBook Pro will show up as one of the choices so your computer should show up there. Tap on your computer icon and the photo should be AirDropped to your computer and will now show up in your downloads folder. Go to your finder and open your downloads folder and your photo should be at the top of the list of downloads. Now simply highlight that downloaded photo and drag and drop it into your post. I hope this helps!
Remember, Google is your friend. You can literally find an answer to just about anything you ask it to look for. For example, "How to transfer photos from my iPhone to my computer." You will get a lot of responses. You can search for the same question on YouTube and a bunch of videos will come up too. I find answers on Google and YouTube for many things especially when it comes to computer and tech questions.
- Ryland Craze, fnkershner and Nirvana
-
3
-
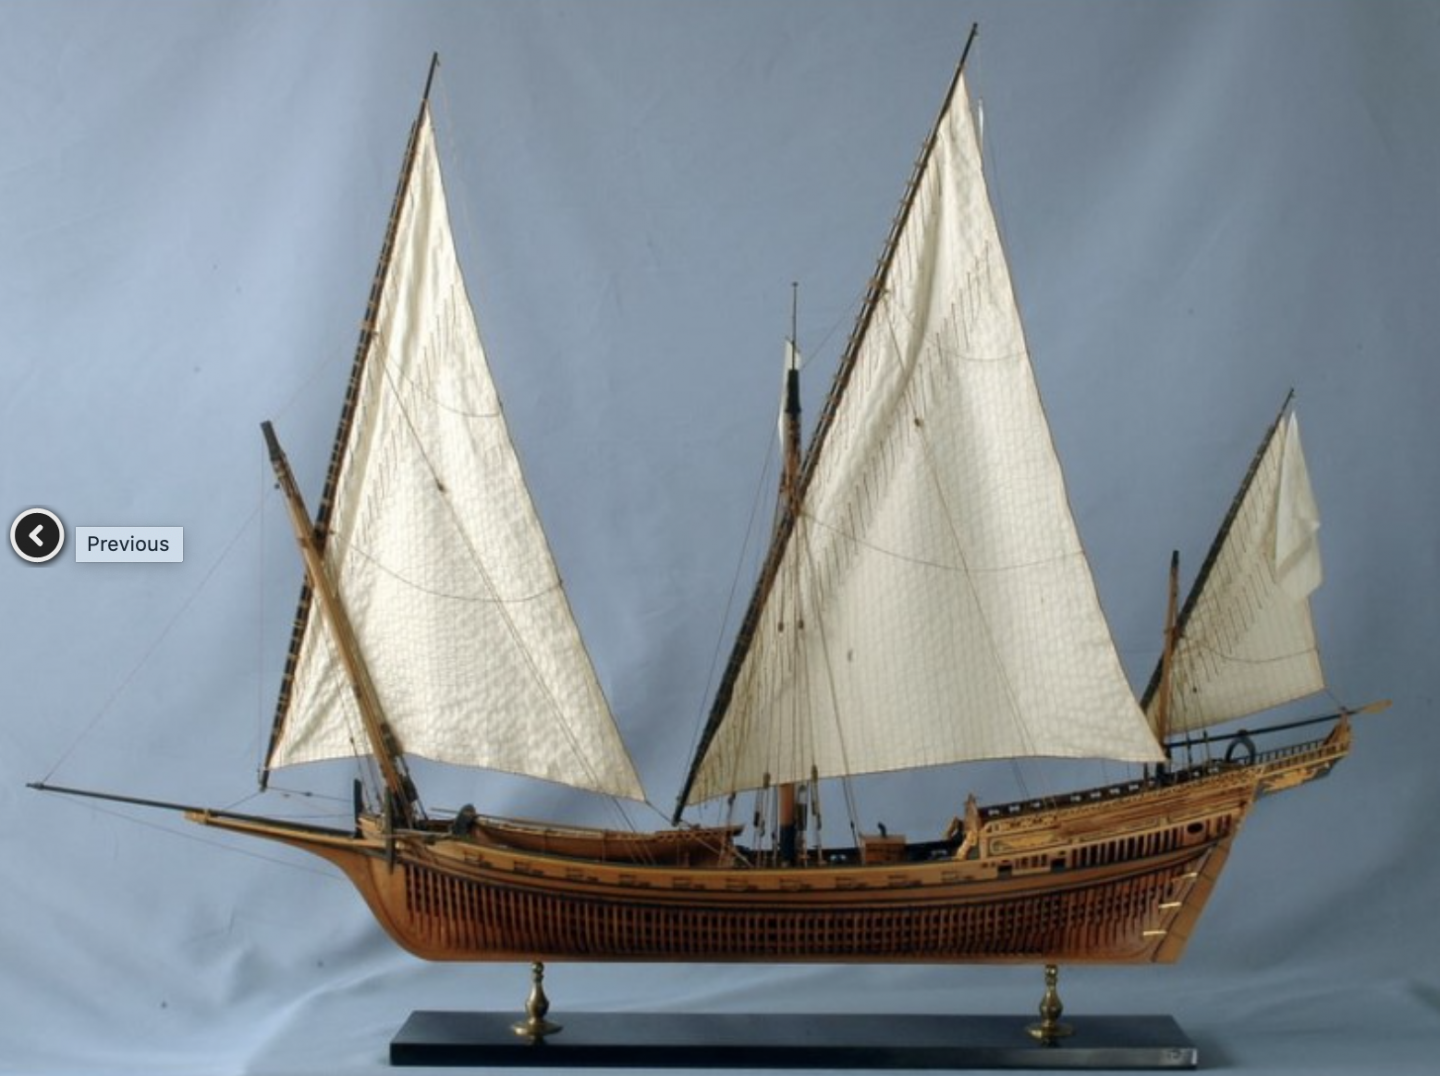
3 hours ago, ASAT said:
Bob, he has already done the Le Requin, just waiting for Ancre copyright issues to settle.
Thanks, Lou, that would be a fantastic model. I think the xebecs are extremely beautiful ships. I hope he gets approval to go ahead and sell the kit soon. Here's a photo of the Le Requin model:
-
On 9/3/2020 at 9:23 AM, David Lester said:
There's a large manual - it has very little in the way of written instructions, but is mostly computer generated images that take you through the process. They will require a fair bit of scrutiny to follow, but appear to be quite comprehensive.
First of all, I'm really glad to see you are making a build log of this impressive ship model, David.
My second build ever was the small Croatian fishing boat, Batelina, by MarisStella. It turned out very well for me and I learned quite a bit. The instructions had a couple of steps out of logical sequence that made things a bit more difficult but I was able to overcome those difficulties and the model turned out nicely.
I like the MarisStella line of models so, after the Batelina, I started building the Stilac which I think is a beautiful ship. The instructions, as you noted, were primarily a whole lot of computer generated 3D images. Many of the images were repetitious and did little to help me understand the brief and often confusing written instructions. I reread the instructions many times and studied the plans as best I could but I just could not make sense of it all and was not happy with some of my work as a result. I finally gave up and put the model on the shelf in hopes that someday I may be experienced enough to complete it. However, it was a disappointment for me since I really wanted to be successful with this model.
It sounds like the instructions on the Ontario are similar and that's disappointing to hear. MarisStella offers a wonderful line of models in my opinion and it's really too bad that the instructions are not better. I look forward to your build and hope that, with the extensive modeling experience you have, the instructions will not present you with much difficulty.
Good luck!
-
Wonderful explanations of your planking process, BE. I hope you have a nice holiday.
-
3 hours ago, closehaul said:
I've been rough sanding the hull
I've never done a solid hull model. Is there a lot of material to remove to get the hull profile correct?
-
What a great job you've done on this colorful, little boat, Turk Sailor!
I'm glad to see a build log for this model. It's a perfect entry level model and you were wise to start off with a model you could be successful with. Too many first time ship modelers get in way over their heads with an advanced model and then get discouraged and never complete it. I started off with a little dory boat by Artesania Latina and found out that I really wanted to learn more and improve.
So congratulations from a fellow Californian. San Francisco is one of my favorite cities. My son works in the city too.
Have you decided what your next build will be?
-
On 6/16/2020 at 12:47 PM, thegrindre said:
As mentioned above there is a lot of dry brushing, applying and than wiping off to get that type of appearance. It's very time consuming but as you can see it turns out 'perfectly'.
It would be great if you would make a build log of the Billing Boats African Queen, Rick. Will you be weathering it too?
-
On 9/3/2020 at 9:25 PM, fnkershner said:
Bob - I have read your Build log. I think you did an outstanding job. I hope mine turns out as well as your. So tell me how did you do the Scarf joints for your Keel? And later in your log you talk about a better tool than the helping Hands (which I have) can you give more details?
I don't have a table saw so Ryland's advice might be best for you. I used my Dremel tool to roughly take off some material at first. Then I finished up the scarf joints using a sharp #11 Exacto blade, small files, a micro chisel and sanding sticks. I kept placing the pieces together to see how the fit was coming along and then would file a little bit more until I got a nice, tight fit.
Full disclosure: I blew might first keel with a boneheaded mistake. I completed the scarf joint and had a beautiful fit. Then I marked the holes and drilled them and then glued the larger filament into the holes, sanded the keel lightly and applied a coat of Satin WOP. It looked great! However, I was admiring my work the next day and embarrassingly realized that I had put the holes on the port side of the keel in the wrong place. My wife said, "Nobody will notice that but you," but it bugged the heck out of me so I ordered another keel from Chuck and made a new one. It was one of those mental errors where I scratch my head and say, "How the hell did I do that?"
The tool I have that is 1000% better than one of those flimsy Helping Hands is called a Quad Hands. I used it a lot when I was stropping blocks and for holding lines when I was securing them to the mast etc. It's heavy so it very stable and the magnets on the arms are powerful so they stay put where you want them. I recommend it highly. I got mine on Amazon.
Here is the one that I got with a link below the photo:
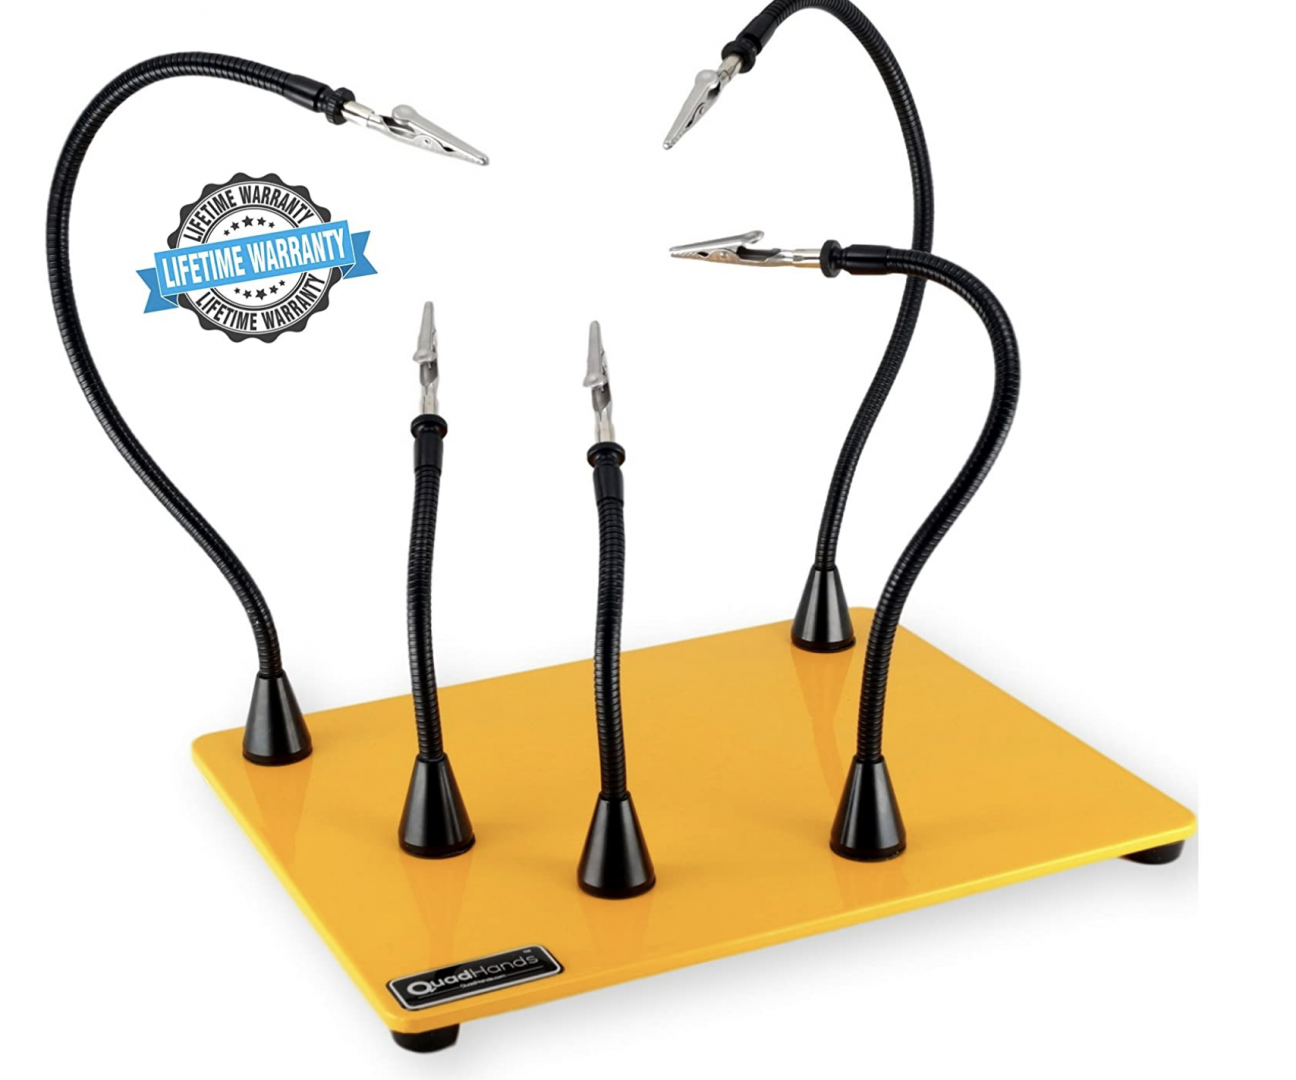
https://www.amazon.com/gp/product/B01MZG2D99/ref=ppx_yo_dt_b_search_asin_title?ie=UTF8&psc=1
- bruce d, MEDDO, Nunnehi (Don) and 1 other
-
4
-
-
2 hours ago, Chuck said:
Its really not enough to just make tick marks. If you take the next step and use thin tape or thread along your tick marks, you can see if what you measured out is correct.
Thanks for reminding how important that step is and that I really do need to do it, Chuck. Fantastic photos as well!
-
On 8/23/2020 at 1:24 AM, vaddoc said:
Leather's books would be very helpful
Hello vaddoc,
I downloaded the Gaff Rig Handbook by John Leather and it's excellent. I think I'll be able to make sense of the gaff rig on the Pen Duick now. I also found a used copy of his book, A Panorama of Gaff Rig, and it should arrive next week. I'm very visual so a picture is worth a thousand words when I trying to understand something. Thanks for suggesting these books to me.
- glbarlow, vaddoc and FriedClams
-
3
-
6 hours ago, FriedClams said:
I've been checking out your build on the Pen Duick Bob and I'm impressed with the execution and fine fit you're achieved. The hull came out spectacular and what a beautiful paint job! I'll be keeping tabs on your progress. Very nice work.
Thanks very much, Gary.
As I noted in my previous post, the third time sanding and painting the hull was the charm. I'm still a rather aspiring novice but I'm finding this hobby rather addicting. Your current New England Stonington Dragger build is a work of art.
Thanks for taking a look at my build.
- FriedClams and glbarlow
-
2
-
8 hours ago, MadDogMcQ said:
Bob, that paint-job looks just fantastic. I especially love that beautiful shade of green. WOW!
Thanks so much, Tom.
Getting the hull painted to my satisfaction was a bit of a journey for me. I used an airbrush for the first time and there was a learning curve for me. I've learned that I need to redo mistakes and things I'm not happy with or it bugs me every time I look at it even if nobody else would notice. So I ended up sanding and painting the hull 3 times before I was happy with it.
Thanks for stopping by and good luck on your most interesting build.
- MadDogMcQ and FriedClams
-
2
-
-
This is a fantastic model and I learned a ton building. Good luck. She's a joy to build.
-
-
-
11 hours ago, HakeZou said:
All three decks had some significant issues with inaccurate cuts.
You've done a nice job of correcting these deck problems.
Unfortunately, errors in the kit supplied materials are all too common especially with the kits from some of the long established model ship companies. Errors instructions and plans are also commonplace. It's too bad that these companies do not correct or upgrade their kits after these errors have become widely known for a very long time. It's great to see, however, that some of the newer model kit companies like Syren and Vanguard are setting new standards for excellence in kits currently.
-
-
On 8/17/2019 at 6:36 PM, jerrynast said:
I have photos of any of this if anyone is interested.
I'd love to see photos of your build of this beautiful boat.
-


Armed Virginia Sloop by Ciciak35 - FINISHED - Model Shipways - 1:48
in - Kit build logs for subjects built from 1751 - 1800
Posted
Wonderful work, Matus. You have a fine looking dog there too!