HOLIDAY DONATION DRIVE - SUPPORT MSW - DO YOUR PART TO KEEP THIS GREAT FORUM GOING! (Only 75 donations so far out of 49,000 members - C'mon guys!)
×


ccoyle
-
Posts
10,459 -
Joined
-
Last visited
Content Type
Profiles
Forums
Gallery
Events
Everything posted by ccoyle
-
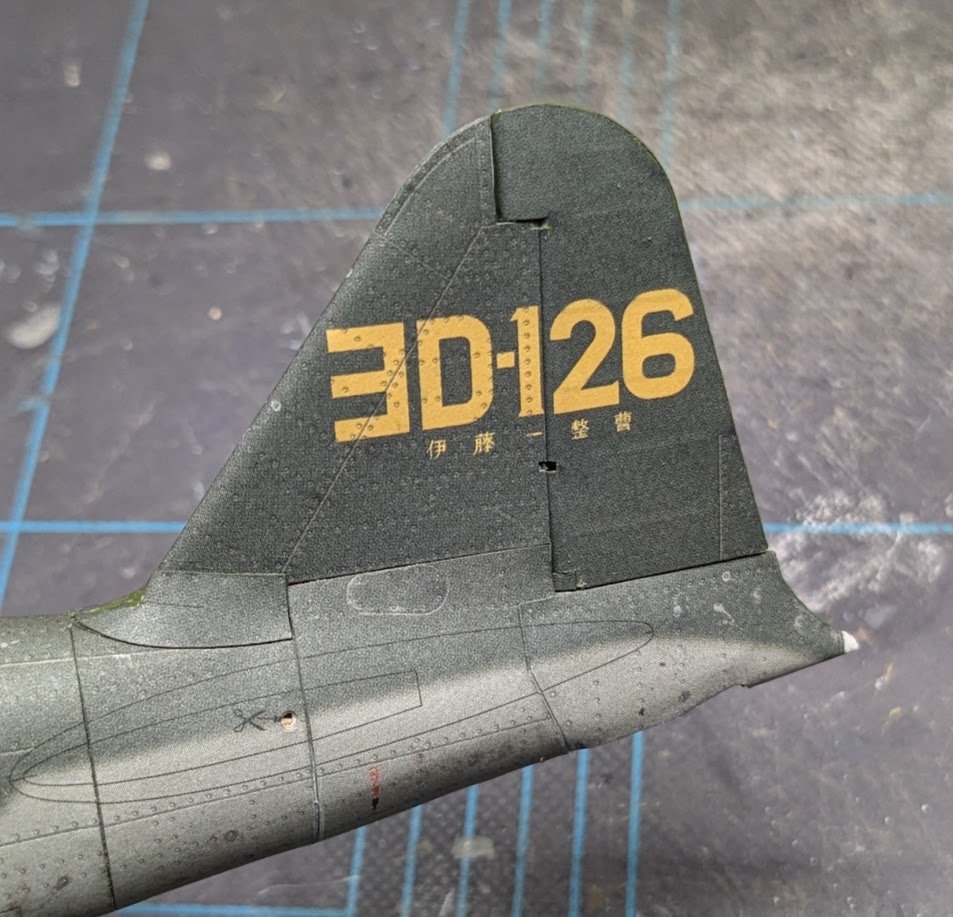
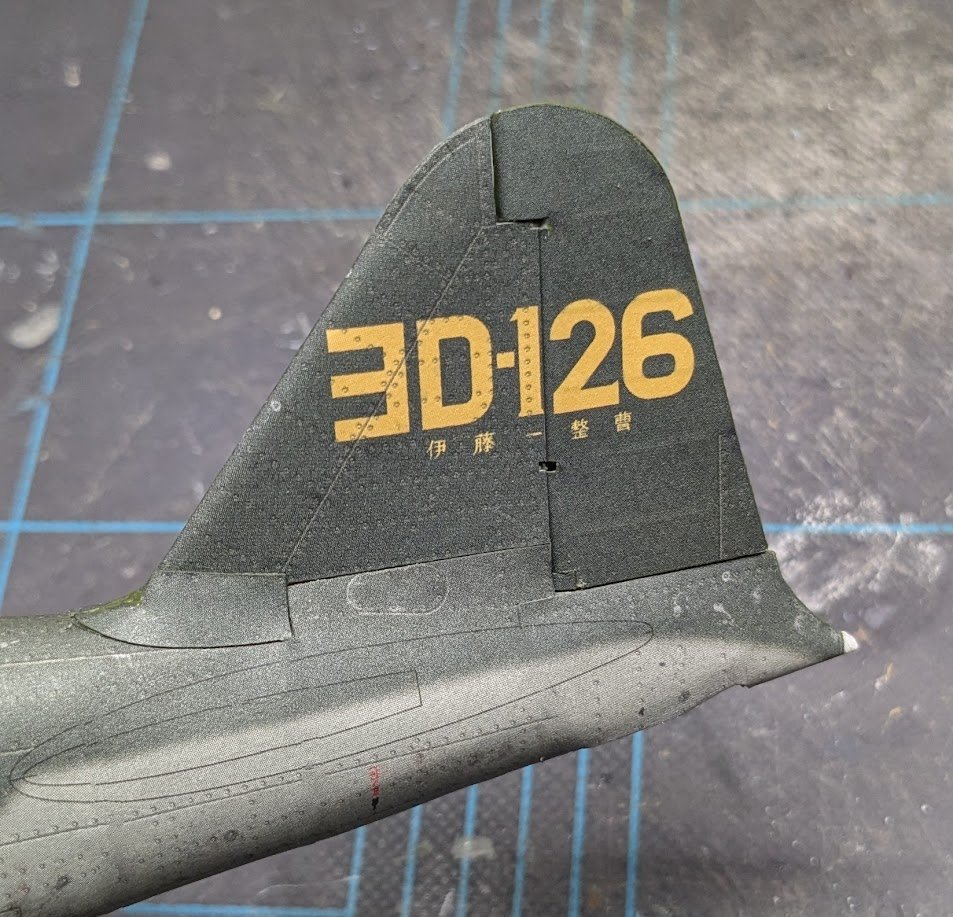
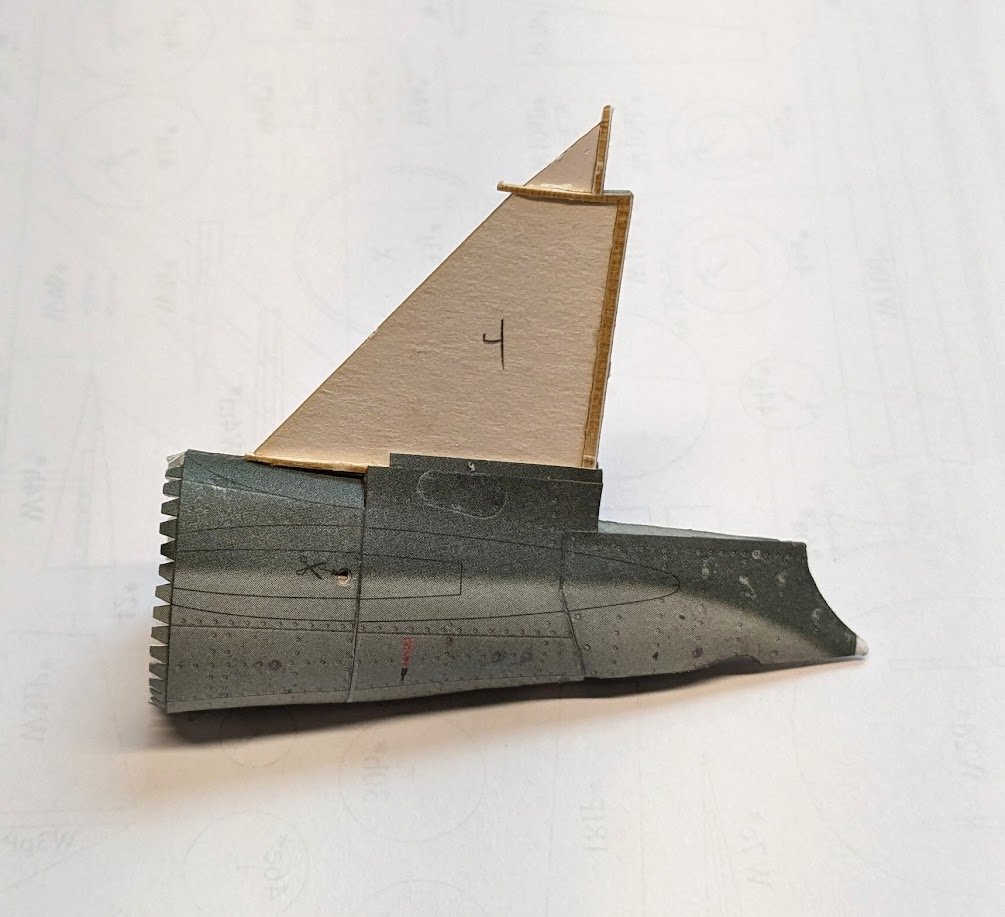
 Completed the vertical stabilizer and rudder. Here we have the rudder framing and cladding. I added a joiner strip from scrap card. And here's the finished assembly. And, just for fun, here's the same shot of the rudder after being massaged with "magic erase". 🤫
- 112 replies
-
- 15
-

-
Welcome aboard, Gershon! I'm sure some members will chime in shortly with suggestions for rigging references. I have tagged your project as a first build, which should draw some extra attention to it. Good luck with your project!
- 4 replies
-
- 1
-
-
- Enterprise
- Constructo
- (and 1 more)
-
A noble and kind gesture! The model turned out well -- I'm sure she'll like it.
- 56 replies
-
- 2
-
-

-
- Lindberg
- sternwheeler
- (and 1 more)
-
The AI problem isn't limited to just Google. The internet is simply awash in AI-generated crappola grande. And I'm sure we all have friends who seem to be completely incapable of detecting it and insist on flooding their social media pages with it. As always seems to happen, dimwits and ne'er-do-wells have taken a potentially useful tool and largely ruined it. 😢
- 732 replies
-
- 7
-
-
-
- Lula
- sternwheeler
- (and 1 more)
-
"Magic eraser" -- I'm tellin' ya, that's the secret!
-
I love all that nice, cool overcast in your photos! Makes me miss the Pacific Northwest, especially between now and October here in the Deep South! 🥵
- 71 replies
-
- 2
-
-
- Miss Adventure
- Model Shipways
- (and 2 more)
-
Okay, I got the fuselage completed and all the seams patched up, and I think they look pretty darn good! Of course, I also used my camera's onboard "magic eraser" tool on the photo. I should've thought of that trick earlier! 😂

- 112 replies
-
- 13
-

-
-
Welcome aboard! Finding just the instructions for that kit might be a challenge. In the meantime, you can check out this finished build log: .
-
I have managed to do some very unsatisfactory seam work on the rear fuselage and will now have to go about seeing what I can do to doctor things up. Not the result I had hoped for. 🫤
-
Your observations about Vanguard kits are interesting. The thing is, the Vanguard and Caldercraft kits, besides sharing the same designer, Chris Watton, make similar use of etched brass and small parts. Etched brass is commonplace these days -- you'll be hard-pressed to find any wooden kits that don't make use of it. And the only way to get away from smaller parts is to go for larger scales (which might actually be counterproductive, since larger scales can include more fine detail). That said, of the three kits you listed, the only one that wouldn't interest me, personally, is the Corsair, since that is a generic brig and not a historical vessel. But with your experience, you could build any of them, so choose whichever you like best -- just be forewarned that all of them will have that dreaded PE brass and small parts. Cheers!
-
I did not properly appreciate until now how small this model is!
-
Same here (sadly)! I wish I could travel back in time to meet the person who decided it would be a good idea to make yards consist of a fast-growing ground cover that needs to be mowed at least weekly during the hottest part of the year -- brilliant!! I'd shake the man's hand and then slap him around a bit on behalf of all of us tortured homeowners!
- 436 replies
-
- 5
-
-

-
- Syren
- Model Shipways
- (and 1 more)
-
So, after completing the SBLim and taking a week off to travel and visit family, the Zero is back on the bench! The aft fuselage is now skinned. A little tricky, as you can see that the forward-most skin tucks underneath the vertical stabilizer, the middle skin rides up the sides of the stabilizer, and the aft skin tapers to a sharp ridge leading down to the tail light. On the underside, the skins must align with the tail wheel well and the tailhook recess. That's all for now!
- 112 replies
-
- 15
-
-
-
Welcome aboard, Andrew, and good luck on your project!
-
A point of clarification about the pricing: Some of the prices on the kits page are shown in Euros, which would seem to make those kits prohibitively expensive. Clicking on an individual kit page reveals that the prices are actually in Turkish lira, which is considerably less expensive!
-
An unusual and beautiful subject! Well done!
- 288 replies
-
- 4
-
-
-
- Santos Dumont No. 18
- hydroplane
- (and 1 more)
-
My $0.02 worth: Badger and Supply will both make beautiful models, but they are dated designs. Chris Watton designed them, but his newer designs from Vanguard Models are much improved. I think you will find either of the Caldercraft kits like taking a step backward in terms of kit quality. Fair American also makes a nice model, but Model Shipways kits generally provide you with far fewer pre-cut parts than a Vanguard design. The builder is expected to make many parts using measurements taken directly from the plans. Model Shipways also uses more off-the-shelf fittings than Vanguard. You can't go wrong with Flirt or Speedy. Syren was designed by our very own Chuck Passaro, but the kit is manufactured by Model Shipways, so I think some of the caveats about Model Shipways kits may apply, although Chuck can give you a much better answer on that. Chuck has also written a very detailed practicum for that kit, and we have seen multiple fine finished examples of it here at MSW. Other than that, if you can build a cutter successfully, than you should be ready for a brig. Cheers!
-
I once had a student named Amanda Lewis. She was born considerably later than 1884, obviously. 🙃
-
Welcome aboard!
-
Congratulations on a fine result!
-
Welcome aboard! I hope you enjoy your stay!