ccoyle
-
Posts
10,594 -
Joined
-
Last visited
Content Type
Profiles
Forums
Gallery
Events
Everything posted by ccoyle
-
 Using an extender tip like these: Easy to find online or in Hobby Shops -- probably got mine at Hobby Lobby.
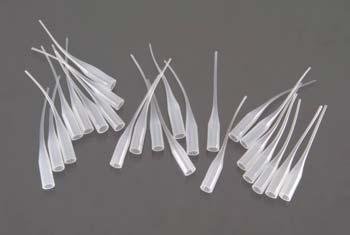
- 146 replies
-
- 6
-

-
- Speeljacht
- Seahorse
- (and 2 more)
-
Whatever the stuff is that I have on hand. I'm chained to my desk at work at the moment, but I think it's DAP DryDex color-changing wall compound.
- 146 replies
-
- 6
-
-
- Speeljacht
- Seahorse
- (and 2 more)
-
I can't read the hail clearly -- "Port of..."?
-
Welcome aboard from your neighbor to the south!
-
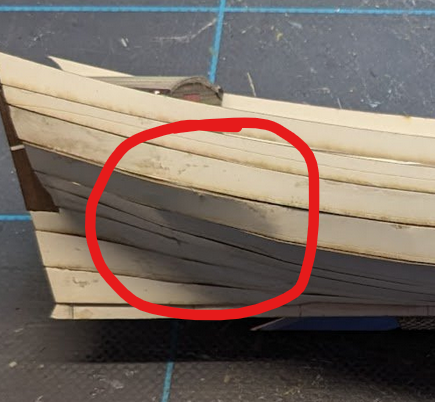
I don't have a picture for this, but I did try out some filler on the spot circled in the image above. The wet filler did not grab the coated card stock very well, but I'm pleased to report that it stuck fast once dried. I sanded the spot down, and the treatment seems to have worked well. I think I will repeat this for some of the other more obvious imperfections, but not for the entire hull.
- 146 replies
-
- 13
-
-
- Speeljacht
- Seahorse
- (and 2 more)
-
The finished model looks exceptionally realistic -- well done!
- 97 replies
-
- 3
-
-
- Curtis Wilbur
- I Love Kit
- (and 2 more)
-
Intro and interests, from a beginner
ccoyle replied to Desert_Deckhand's topic in New member Introductions
Welcome aboard! -
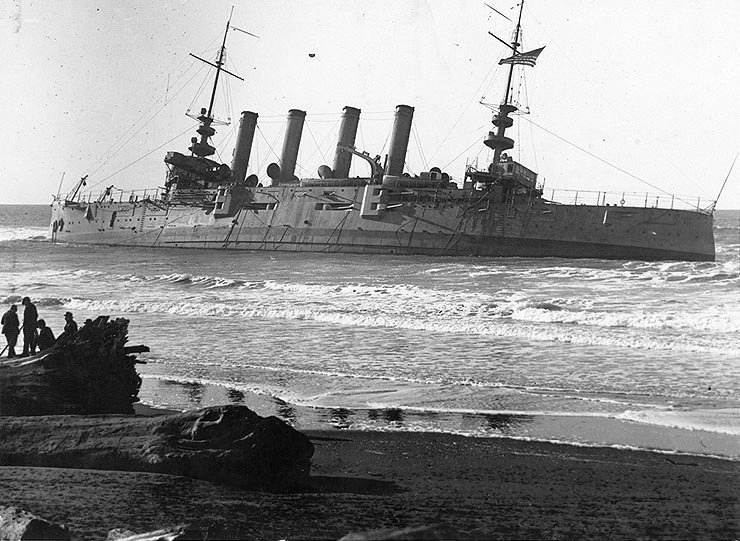
St. Louis' sister ship, USS Milwaukee (CL-21), stranded on the beach at Samoa, California, in 1917 while trying to tow off a stranded submarine. The submarine, H-3, was subsequently hauled over the North Jetty of Humboldt Bay, refloated, and eventually placed back in service. Photo in public domain, courtesy of Wikipedia
- 32 replies
-
- 4
-
-
- St Louis
- 3D Printing
- (and 2 more)
-
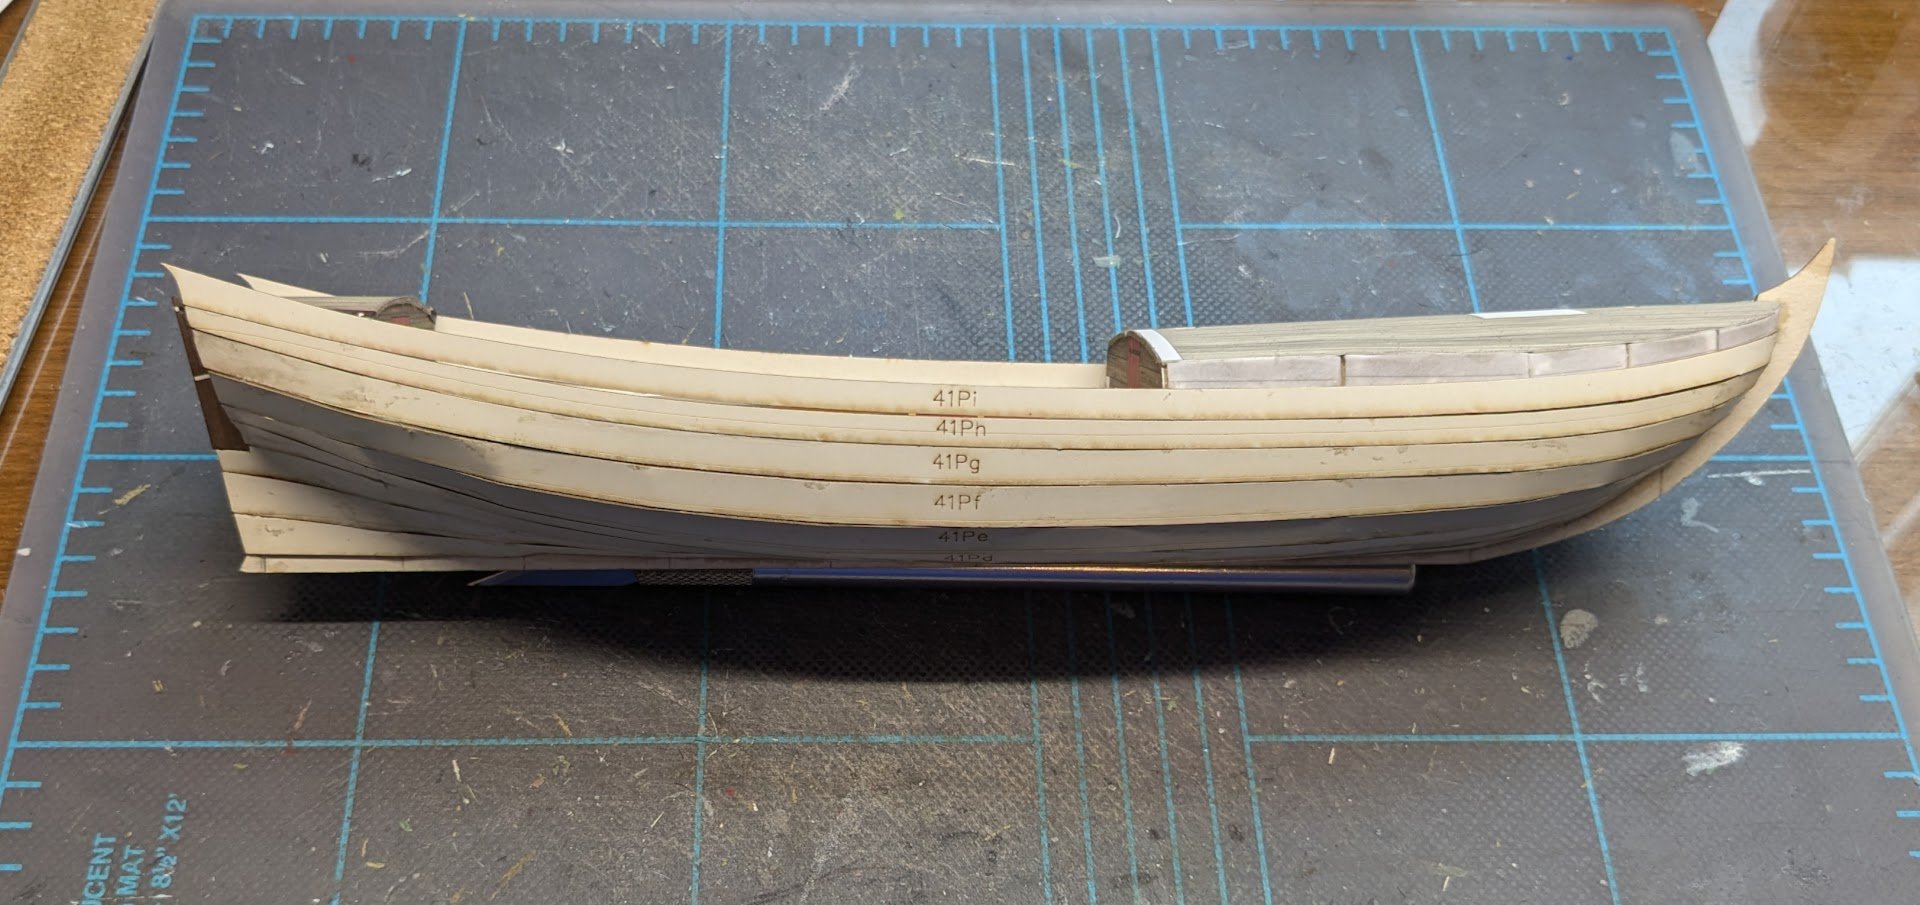
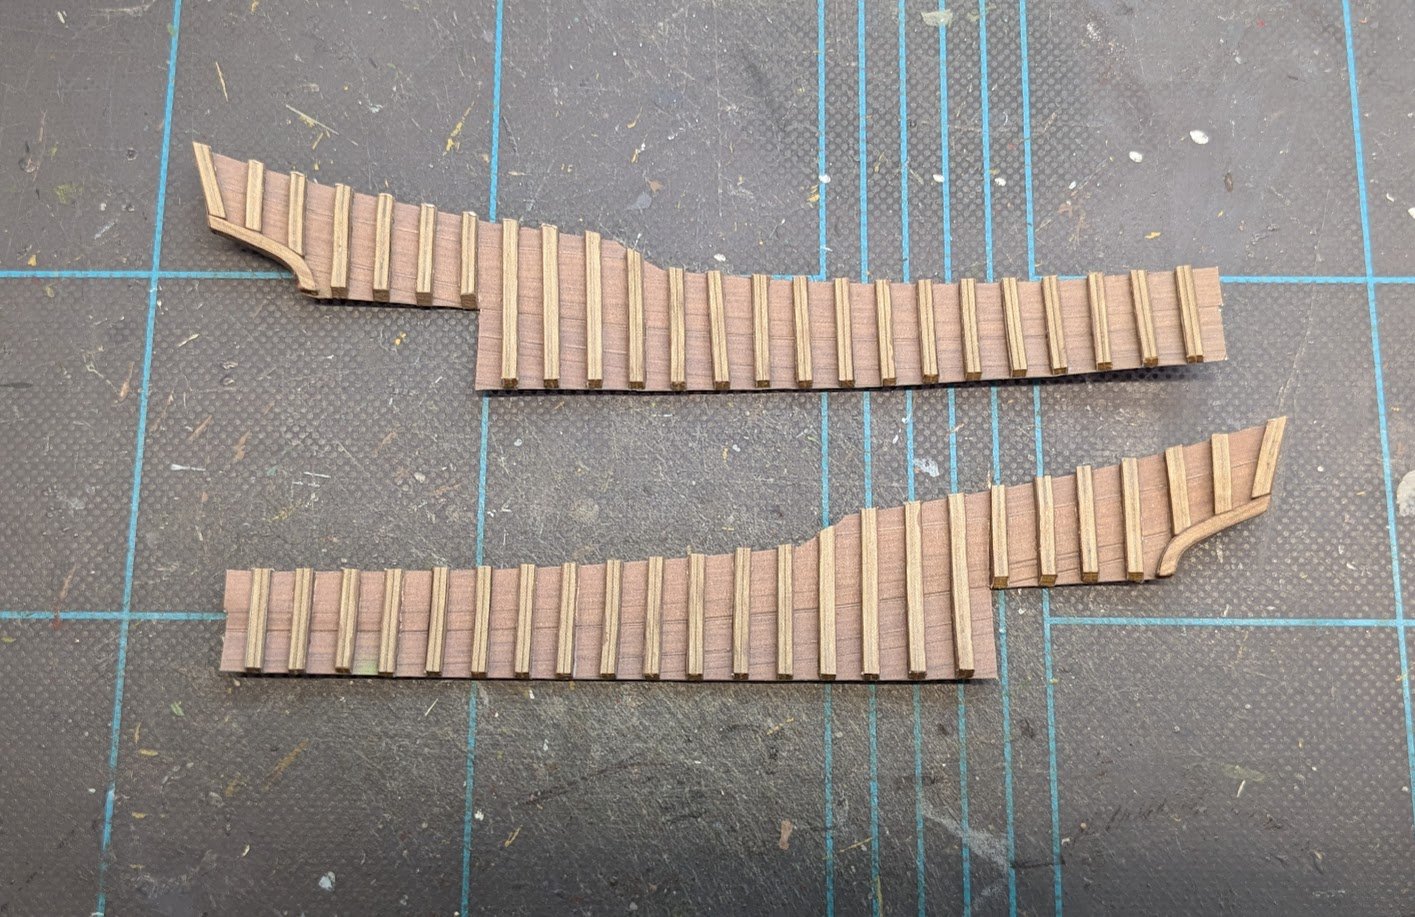
I have the first layer of planking on up to the aft cockpit deck. I followed the directions that said to only glue the planks at each bulkhead station, to help prevent some of the dreaded "starving cow" effect, but I nevertheless achieved some in spite of my efforts. I'm thinking about whether I should attempt some filling and sanding, or just accept that the finished hull will have some noticeable kinks.

- 146 replies
-
- 17
-
-

-
- Speeljacht
- Seahorse
- (and 2 more)
-
Welcome aboard!
-
Which Soleil Royal, Sergal or Artesania Latina?
ccoyle replied to Ryk's topic in Wood ship model kits
Done! -
https://modelshipworld.com/?/guidelines/ "You must use clear and legible English at all times. Some leeway is given if English is not your first language but please remember that this is an English speaking website and English is the 1st choice of language for postings. Moderators may alter or delete posts that don't make sense because of poor spelling and/or grammar."
-
Hi, Nick. It is in 1/250. There's an embedded link in my post (click the underlined name).
- 68 replies
-
- 4
-
-
- Coates
- Rudderow-class
- (and 1 more)
-
First timer introduction and needing some advice
ccoyle replied to Stuka's topic in New member Introductions
Go easy on tools at first. I've never used a keel clamping tool for a build, nor a pin pusher. In fact, I rarely use the brass nails in kits at all except for purposes other than serving as nails. Most modelers end up with drawers full of tools they never actually use. It's not a bad idea to start off with some basic cutting, shaping, and clamping tools and then buy what you need only if and when you discover a need for it. -
First timer introduction and needing some advice
ccoyle replied to Stuka's topic in New member Introductions
Welcome aboard! We tell this to all the beginners, but whatever you choose, make sure it is a subject that has a lot of appeal to you, personally. When you arrive at tricky or tiresome construction bits, and you will, you will be much more motivated to do them if you really like the subject. Cheers! -
I'm quite impressed by your skills, Nick. I have been following your build with interest, having recently completed a card model of USS England (DE-635). I also had a 3rd cousin aboard Samuel B Roberts at Samar.
- 68 replies
-
- 3
-
-
- Coates
- Rudderow-class
- (and 1 more)
-
Thanks, Tomek. I think I will proceed with Marcel's suggestion and add the second layer of planking up to the level of the cockpit benches, which should provide more gluing area for the inner bulwarks. Cheers!
- 146 replies
-
- 8
-
-
- Speeljacht
- Seahorse
- (and 2 more)
-
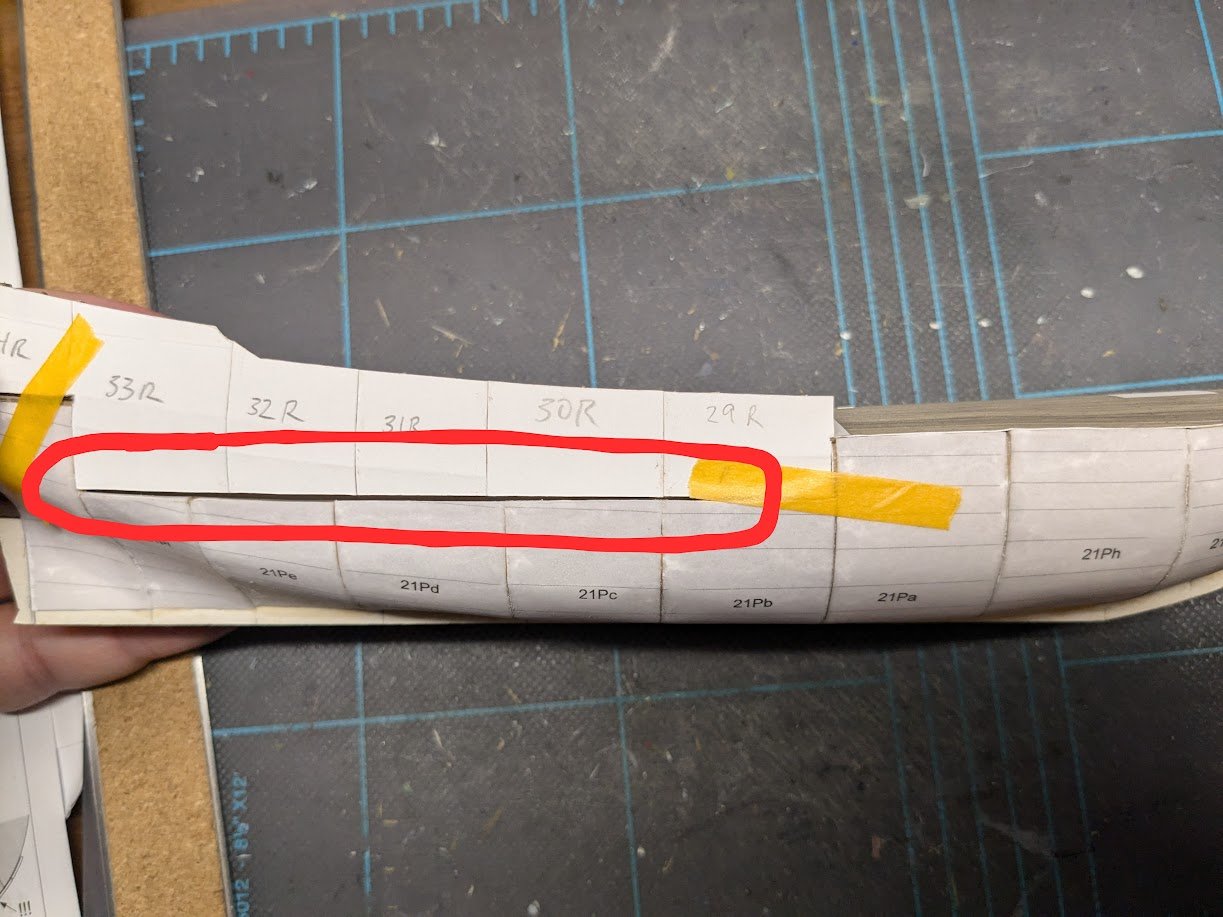
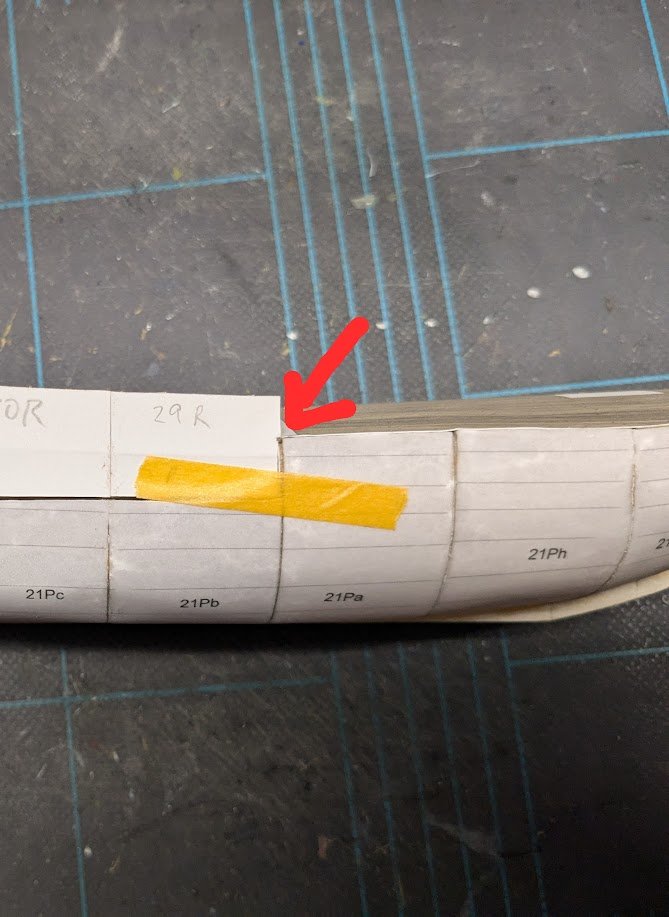
Well, I finally got the inner bulwarks completed. But now I'm afraid I may have created a bit of a pickle for myself, and I'm hoping that @0Seahorse and @Marcel1981 can advise me on how best to proceed. The problem hinges on the fact that I did not get the outboard edges of the cockpit benches flush and level with the tops of the bulkheads in that area, nor did I get the hull skins flush with the bulkhead tops, either. Thus, that outboard edge is neither straight nor at the correct height all along its edge, creating a gap, as you can see in this test fit of the inner bulkhead: This is something for future builders to be aware of. In hindsight, I should have added some stringers made from scrap pulp board at bench height between the cockpit bulkheads; this would have ensured a proper seam between the outboard bench edge and the bulkheads themselves. In fact, I have even mulled over buying a second kit and starting over just to add this step. 😬 There are small notches in the bulwark piece that fit the covering boards on the decks at either end, so I can tell that the bulwark is at the correct height. So one option for fitting the piece is to force the bulwark down until it contacts the cockpit bench edge (not the best option, IMO). The other option is to glue the bulwark in at the height shown in the photo and then add a little filler material to the gap along the bottom edge. You can see in Marcel's photo that this entire joint will be covered over by a piece of planking on the inboard side, so I'm not really worried about cosmetic damage at this juncture. Thoughts, gentlemen?
- 146 replies
-
- 14
-
-
- Speeljacht
- Seahorse
- (and 2 more)