


Cathead
-
Posts
3,552 -
Joined
-
Last visited
Content Type
Profiles
Forums
Gallery
Events
Everything posted by Cathead
-
 Looks great, happy to follow along. Being also of Norwegian descent, I quite enjoyed building (and improving) my Dusek longship.
- 75 replies
-
- 1
-

-
- Oseberg
- Billing Boats
- (and 1 more)
-
@gak1965, it most certainly is a hammered dulcimer (or more precisely, a stand and case; the dulcimer is set up behind the camera view)! That's hilarious, how similar our two settings are. If you're interested, I've started posting music videos on my YouTube channel, which mostly focuses on interpreting Missouri's geologic and natural history. But we should probably keep any further dulcimer discussion to private messages so as not to steer this thread into the shoals! I'd love to hear more about your playing. Brian, thanks, I knew you'd be in the gallery. I'm going to have to force myself to make compromises from your level of attention to detail or I'll never complete this thing! And I do want to get back to scratchbuilding. But it's going to be really interesting to see what I can adapt from your work into this tiny scale. Welcome to all others, too.
- 113 replies
-
- 5
-
-
- Cairo
- BlueJacket Shipcrafters
- (and 1 more)
-
Like you said, this is a tough build to learn on but you're spot on by sticking with it and doing your best. My bet is you'll be surprised by how well it comes together. Not only are we often our own worst critics, but a completed model has a way of hiding faults that seem apparent during the build process. And most people who see the completed model are more likely to say "wow, you actually built that?" rather than "hey, your planking's suboptimal".
-
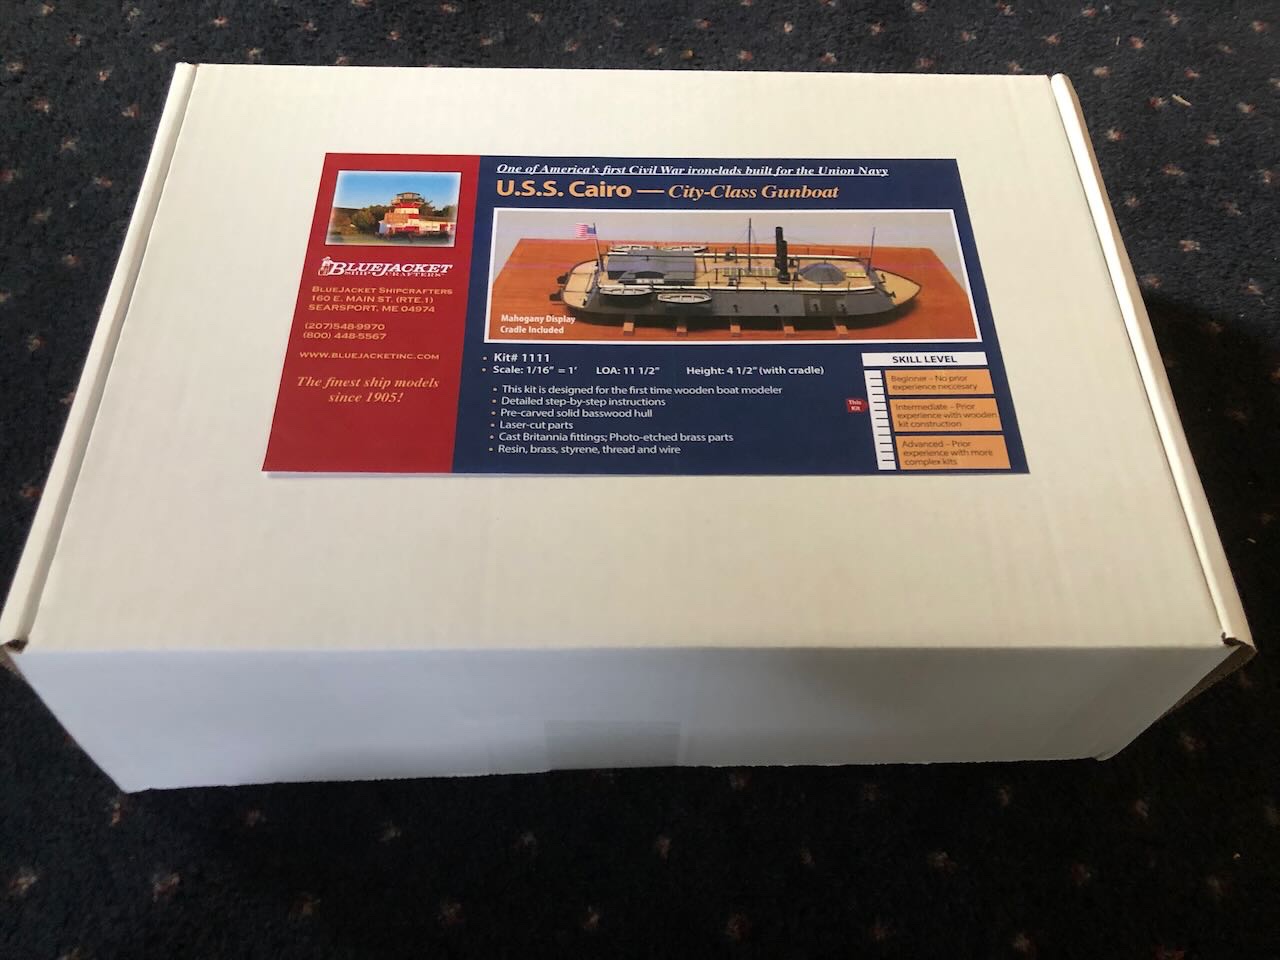
Build goals Although I have a couple scratchbuilds planned in my head, I chose this kit as my next project for a couple reasons. The outstanding large-scale detailed scratchbuilds of USS Cairo by @mbp521 and her sister ironclad USS St. Louis by @thorn21g and the Gateway Model Shipcrafter's Guild have been really fascinating and inspiring. MSW doesn't have any completed build logs for this kit; the only log of any kind didn't get beyond an opening post before being abandoned. BlueJacket is a good company but seems under-represented on MSW build logs, so I wanted to raise awareness of their kits (and this one in particular). There are so few realistic riverboat kits that this one should get more attention. I hope @MrBlueJacket will be able to pop in from time to time. I don't have a full workshop right now and am not ready to dive into a full scratchbuild. Just before my injury last winter, I packed up my entire workshop in preparation for remodeling a spare room into a permanent improved workshop, but that's been on hold ever since. I'll be building some kind of small portable workstation to bridge the gap until I can complete the home renovations necessary to start on a real scratchbuild again. It'll let me learn/practice some new skills. I've never built anything at this small a scale. I've never built a solid-hull model. I've never worked with this much metal, and especially not fine-scale brass details. I'm still really backed up on other real-world projects and don't have the mental bandwidth to dive into a complex scratchbuild right now, so hopefully a simpler kit lets me ease back into model-building. So overall my goal is for this project to be a fun and relatively straightforward return to building, though I'm quite certain I'll find various ways to enhance the kit with alterations or details based on the above-mentioned builds. I also hope it'll serve as a review of this kit for other MSW members who might consider it. Thanks in advance for looking in and following along.
- 113 replies
-
- 8
-
-
- Cairo
- BlueJacket Shipcrafters
- (and 1 more)
-
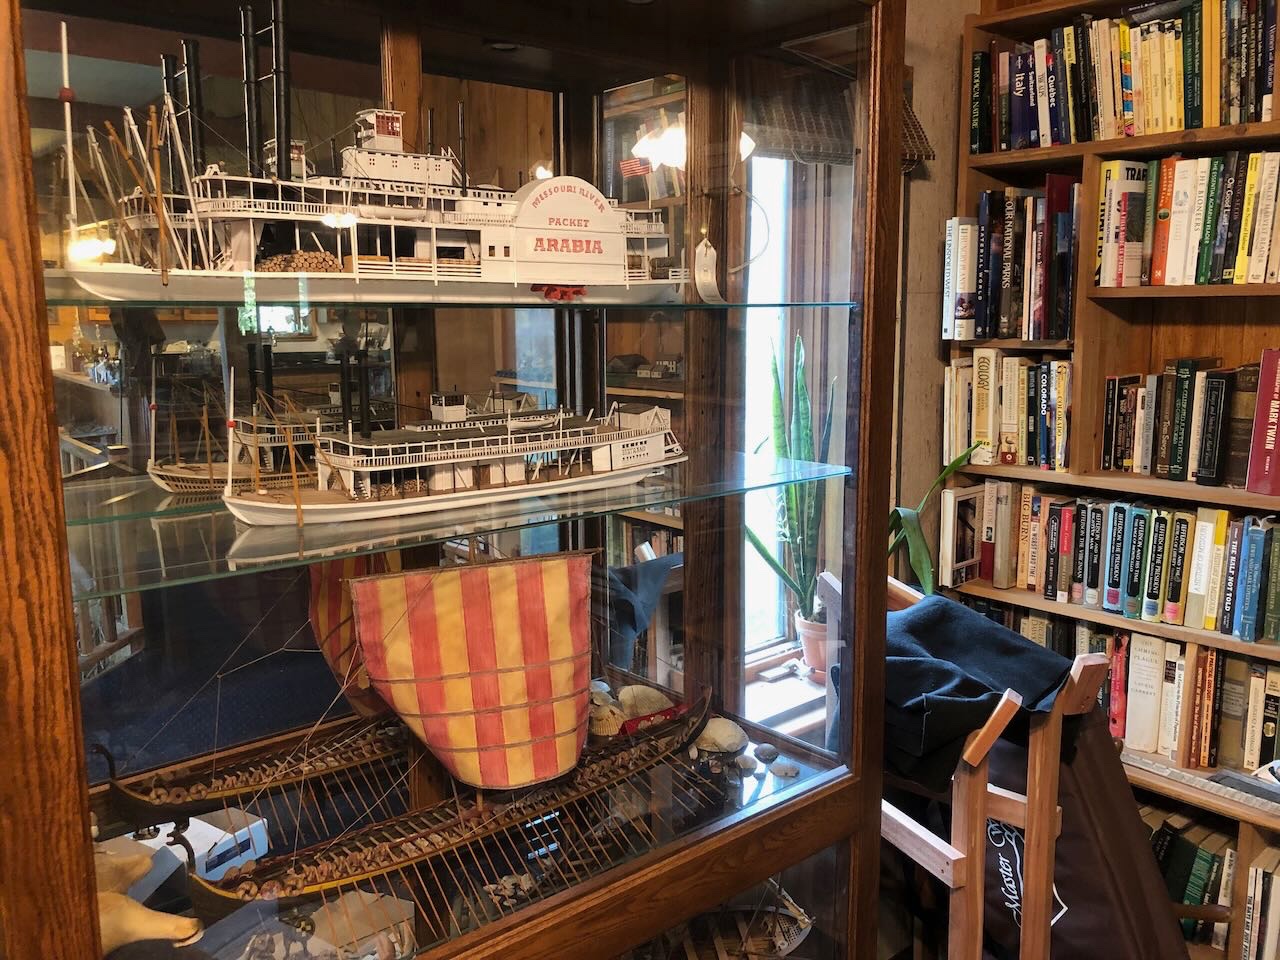
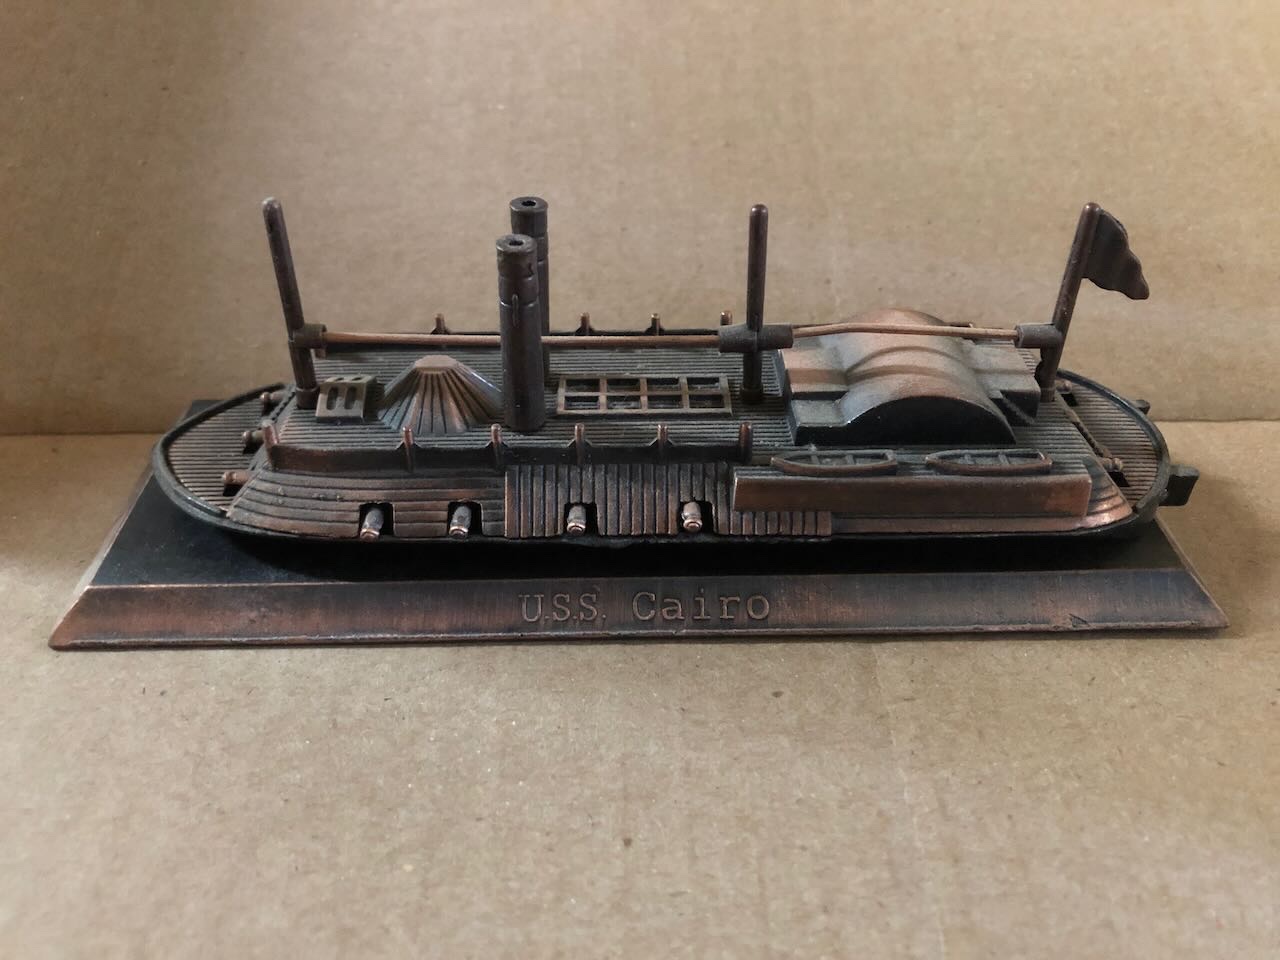
My next project will be the USS Cairo kit from BlueJacket. This vessel was an ironclad gunboat designed and built during the American Civil War for service on the Mississippi River and its tributaries, as part of the Union's push to control the West's inland waterways and cut off Confederate supply lines, communications, and commerce. Her actual service was unremarkable, and she sank less than a year after her commissioning upon hitting several mines near Vicksburg, Mississippi. However, she became immortal when her wreck was discovered mostly intact in the mid-1960s and eventually salvaged, restored, and placed on display at Vicksburg National Military Park. I've visited the display and associated museum, where it's absolutely fascinating to be able to actually walk around the vessel and peer into her depths. When completed, this will join my scratchbuilt Western River steamboats Arabia and Bertrand, two other examples of mid-19th century Western River steamboats salvaged from old river channels in the American interior. This kit is a much smaller scale than those two models (1:64 and 1:87, respectively), so will nestle comfortably alongside the Bertrand. For inspiration, I'll have on hand this simple paperweight acquired at the Cairo museum! Announcing the start of this build feels unusually good, as I've had a forced ~7 month hiatus from modeling building due to a complicated situation involving a serious hatched-derived wrist injury (with subsequent surgery and long recovery) that, for a while, had me unsure if I'd regain the dexterity and strength necessary to keep building scale models (much less the larger-scale timber management and building work I do in real life). The Cairo kit is a 43rd birthday present but also a celebration of a return to reasonable normality. Thanks for looking in! Next post, I'll cover why I chose this model and what I hope to achieve with it.
- 113 replies
-
- 12
-
-
- Cairo
- BlueJacket Shipcrafters
- (and 1 more)
-
Polaris by JDillon - OcCre
Cathead replied to JDillon's topic in - Kit build logs for subjects built from 1801 - 1850
Yeah, that looks fine for a first build. Keep at it! -
If you do try to sell cases, my advice would be not to under-price them. Not only does this not reward you for your skill and time, but it undercuts professionals who need to get a certain price for their work. Cheap work undercutting skilled work is already the bane of the model-selling world, no need to add to it with respect to cases.
-
Cool! Can't wait to see how the new planking flows back there. The bow looks so much better with a nice smooth run. Well done.
-
Have fun with what looks like a pretty cool kit with some room for interesting upgrades, based on existing build logs.
-
fairing of the hull
Cathead replied to Mike P.'s topic in Building, Framing, Planking and plating a ships hull and deck
Hey Mike, welcome to MSW! You've asked a good question, but posted it in the Build Log section, where members document the progress of their builds. It's an awkward place to ask a more general method question like this. I'd suggest going to the Framing and Planking section of MSW, where you can (a) have a better chance at an answer, and (b) do some quick searches for content related to your question, since fairing and sealing hulls has been discussed in the past. -
Wefalck, only pulling forces might be the normal case, but Mark makes a really good point about a combat vessel having a steering rope shot away and needed to exert both force directions from the other end, all but necessitating a solid connector (as you suggest). Now I don't know what to think again. Brian, this area was exposed at the stern, right? Easy to fire on and damage but also easy to repair? Also exposed to elements? (as opposed to being enclosed in a way that protects against damage but prevents easy access) If so, does that argue against any rope being used until the lines were inside the hull? So maybe that apparent wire rope does run through the pulleys into the hull, and there was a solid bar attaching the tillers?
-
That's got to hurt, I'm sorry! I've been there. But since your goal is to learn, I think you'll be happy in the long run. But I do feel a little bad! Keep going, you'll be thrilled when it comes together.
-
I have no educated opinion, but I certainly see your point that the thing dangling from that rudder looks like stiff wire cable rather than dangling rope or chain. Is it possible that, instead of connecting to the rest of the control system, it's a short length of wire that connects the two tillers internally (since you imply that something did so, and this would have to be strong)? Also, in that photo, it looks to me like there's a semi-circular feature connected to the upper-left part of what you've marked as the tiller. This would appear to correlate to the semi-circular part of the tiller opposite the rudder (at the internal end of the tiller), as shown in your first drawing. If so, that wire/cable is coming off the opposite end of the tiller and thus wouldn't be anything from the control system since that also attached to the inner end of the tiller. I can't tell from the photo whether the tiller is at all attached to the rudder or is just dangling loose. For my theory here to be true, it has to be dangling loose and rotated nearly 180º. But if it's still attached, what's that semi-circle doing at the rudder end of the tiller?
-
Great job! Such fun to follow along, thanks for taking the time to share it all with us.
- 146 replies
-
- 1
-
-
- Harriet Lane
- Model Shipways
- (and 1 more)
-
Don't feel bad, you're doing fine and as you noted, the whole purpose here is to learn and practice. Mine had all sorts of issues that I would (hopefully) do better next time!
-
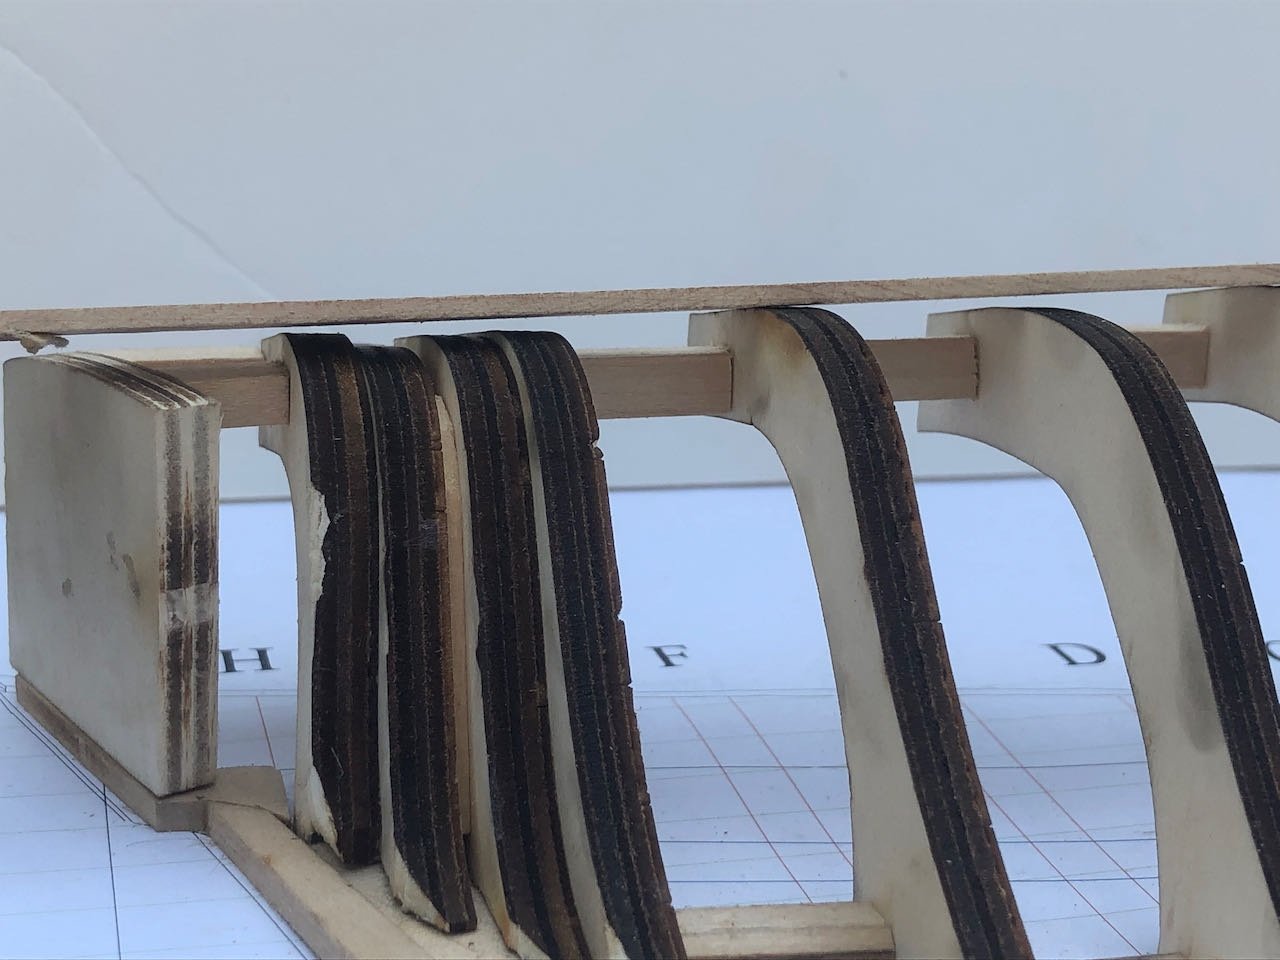
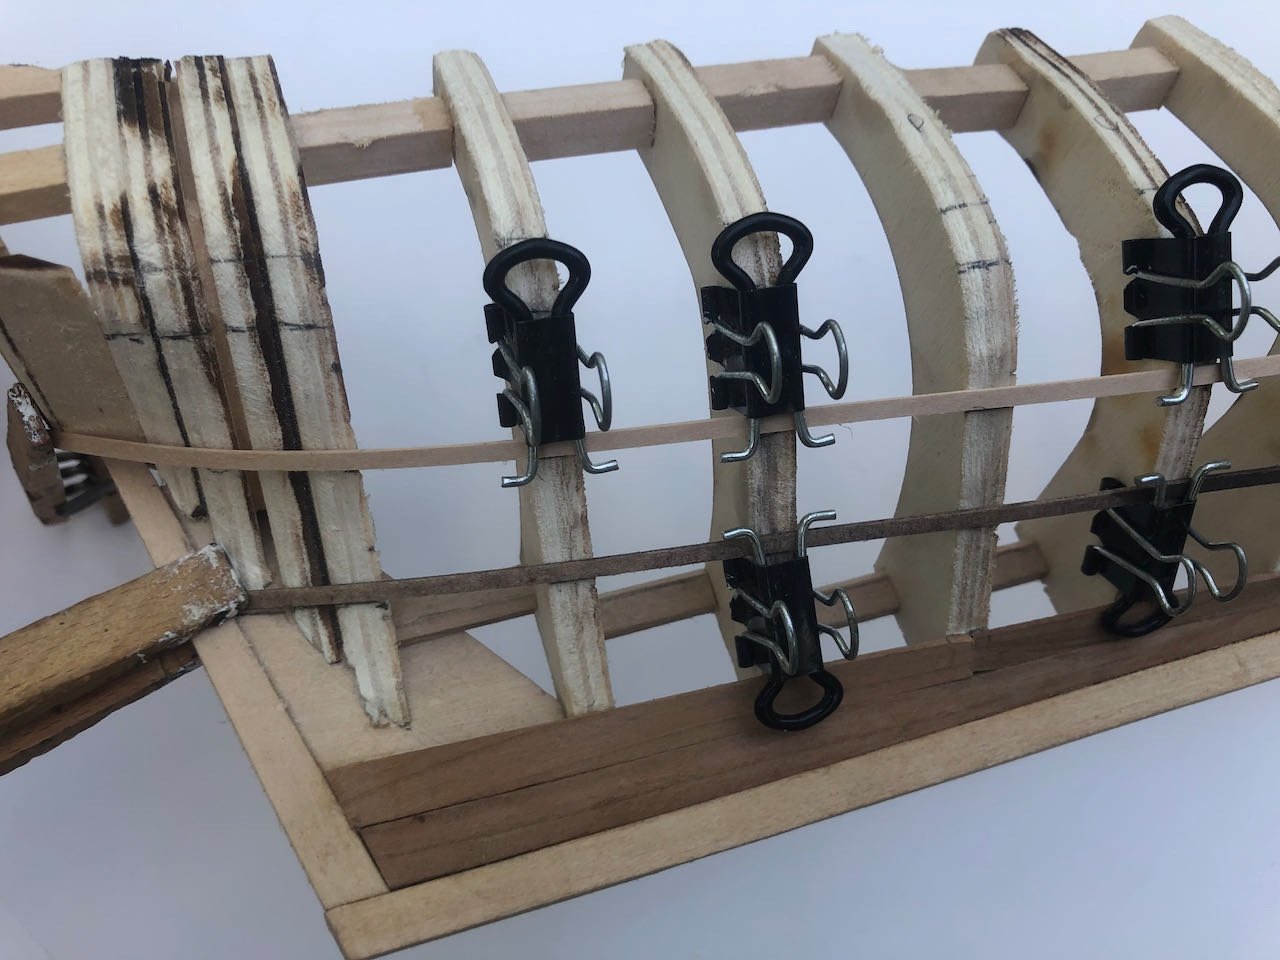
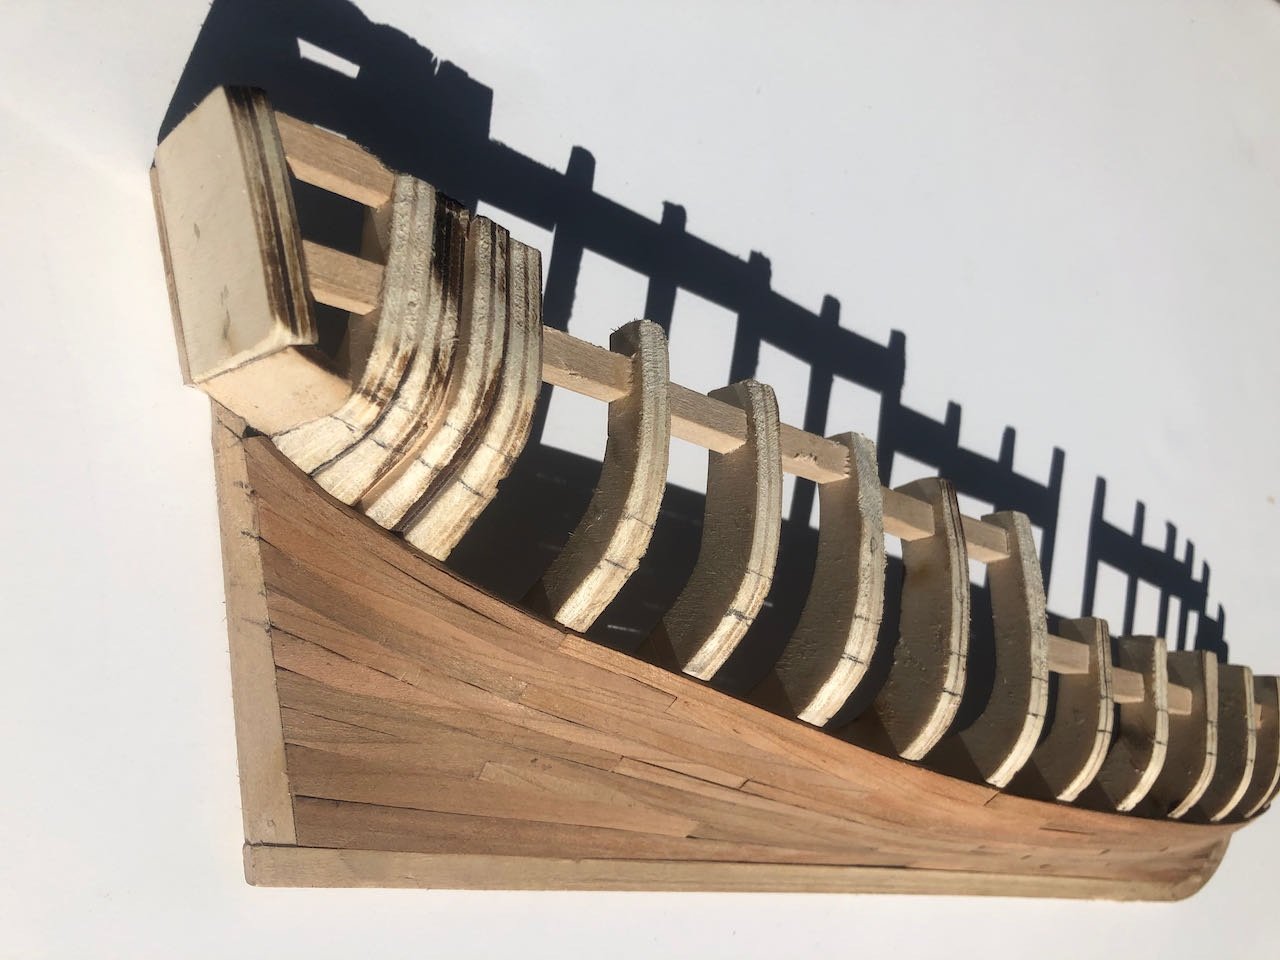
So here's what my framing looked like pre- and post-fairing (you can also see how uneven the original frames were in my kit). I basically just kept removing material, checking with thin battens, until I got a run that was smooth. I didn't write anything about this part of the stern in my log, unfortunately, and my memory isn't clear. I rechecked @tlevine's instructions, and it seems like my fairing was pretty similar (see, for example, her photo 97 and mine here) but it's so hard to interpret this stuff from flat photos. In my opinion, more important than trying to emulate any exact shape is to make sure the shape you end up with has a smooth run with no knuckles or awkward angles. Use thin battens obsessively until you're sure every plank will flow across that space and end where you want it, including the butt ends. It can even help to use several side-by-side to help see places where sudden changes occur along a frame (one can lay flat and the next start to knuckle).
-
Google "knitted military tank" and you'll find quite a few creative results, like this: Very cool model so far. I haven't really dabbled in the non-ship parts of MSW before but this is too interesting to let go.
-
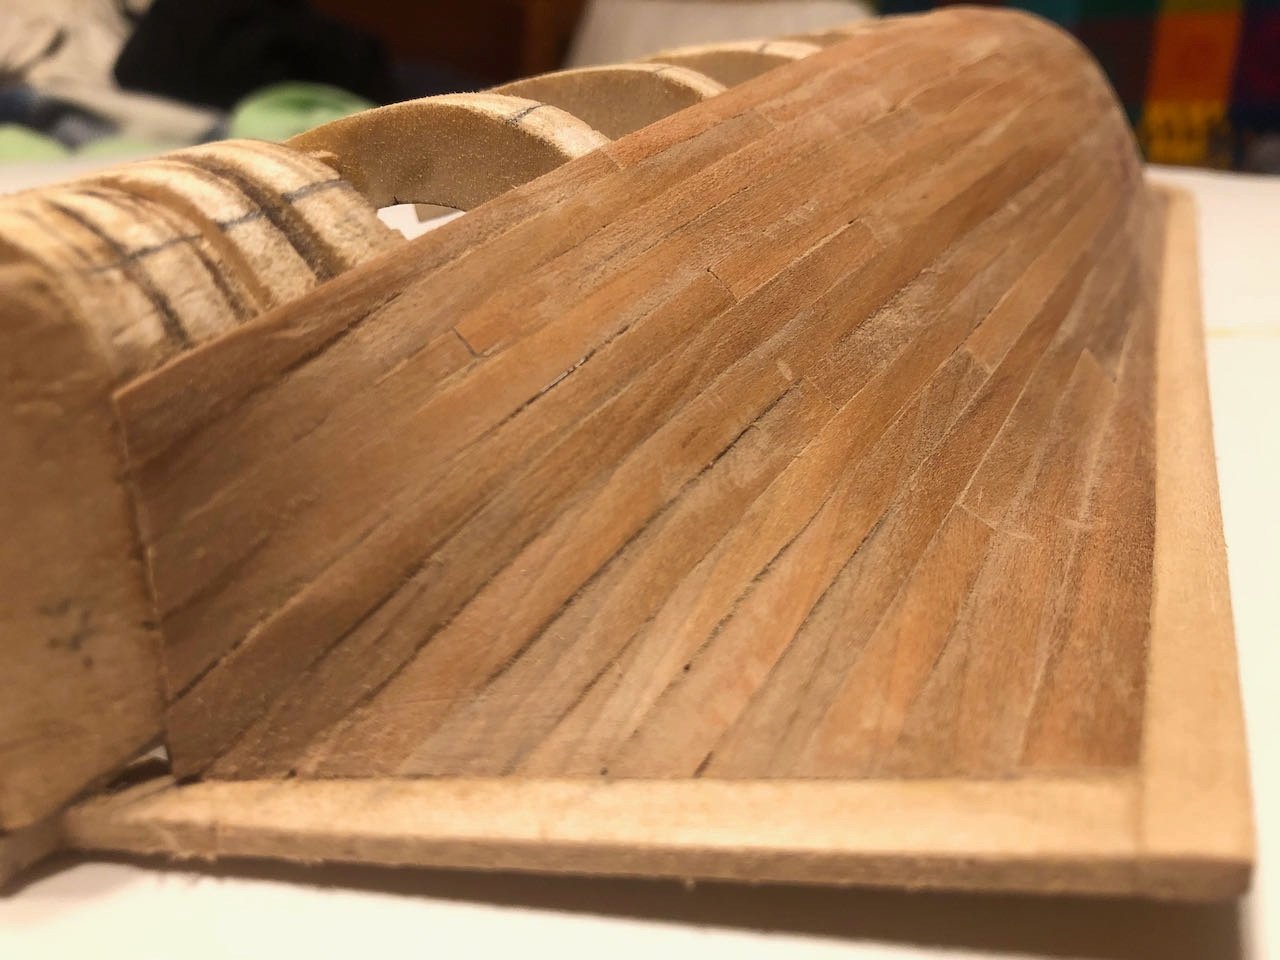
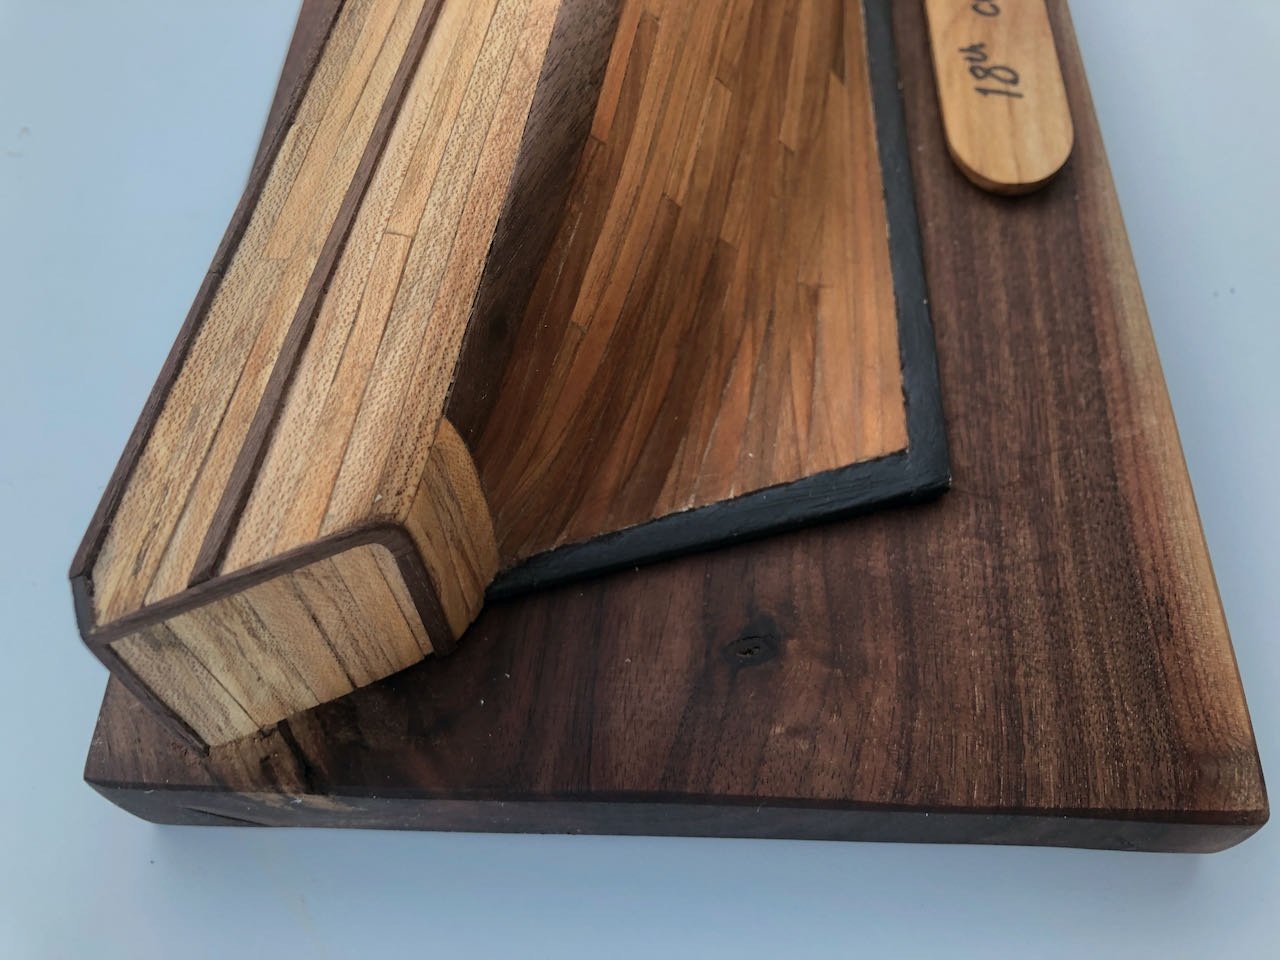
That run of planking looks so much better! Well done. Here's how it looked on mine prior to planking: During planking: And after: Hope that's helpful in visualizing one way (not necessarily the only/right way) to do it.
-
I answered this in your original thread, but I'll repeat here. AL, like many manufacturers, provides digital version of instructions on their website. I found it through an easy Google search: https://artesanialatina.net/en/ships-advanced/459-tuna-fishing-boat-marina-ii-wooden-model-kit-8421426205060.html

