


amateur
-
Posts
3,460 -
Joined
-
Last visited
Content Type
Profiles
Forums
Gallery
Events
Posts posted by amateur
-
-
Looking good.
Is there a way to get the flag hanging somewhat more realistically? "Hanging" like this it does no justice to the realism of your model.
Jan
-
On 10/4/2020 at 8:52 PM, silverman834 said:
Thank you Roger and Bolin, it sounds as if I don't have to worry about a parrel and maybe just add a trozza if I see the need. Thank you!
I havn't seen any signs of oars in these wrecks and imagine the ships running with a minimal crew and probably waiting for favorable winds, or maybe finding a farmer with oxen to drag them?
Which is not compatible with the location of the wreck. The zuiderzee was a rather shallow, relatively large open water, with in some locations a bogland between water and coast. No way vessels could be drawn.
same holds for 'favorable wind': winds can be from the same direction for weeks. Waiting for favorable winds can take some time.
Interesting to see a mast like this. Never saw one in the context of Dutch shipbuilding. But then, medieval ships never my main interest
")
Jan
-
-
Quote
but I am now confident that I will be able to make this work.
Don't tell me that you had any doubts on that.
We hadn't
Jan
- EJ_L, mtaylor and Hubac's Historian
-
 3
3
-
Ah well, didn't see that on the pic.
All the same, I am a bit puzzled by the fact that it seems tha although the important information is on the 'land-part', more ink has been spent on the ships.
But on most maritime charts, the compass rose is drawn with at least 8 points, there are some bearings on landmarks etc. This is more like a landowners map, trying to find the best place for his new development....
You say there is a copy of the map dated 1750. Does that one have the ships also?
Jan
-
I don't know how it was in the UK, but in the Netherlandse (and other "EU-countries") larges sheets of paper were often/always made with a watermark.
This mark can be quite helpfull in dating the map (at least biy providing a time-fence).
By the looks of the map itself, I would vote for late, rather than early. Also: the detail of the roads (canals?) are far better drawn than the details of the coastline. My guess would be that the printer of this map did a nice job on the street-layout, and just put a nice lithograph of the ships in the part where there were no streets to display. (in which case he would have copied the nice painting in his (grand)fathers house, and thus display ships of an aera already gone by th date of the map)
Jan
-
I checked the Vasa-forum, and there Fred Hocker describes that on Vasa the inhaul and outhaul tackles were actually the same tackles. Inhaul actually not very often needed, so if needed, the outhaul was released from theringbolt in the side, and attached to the ri gbolt inthe deck.
the inhaul was probably rigged to the ringbolt on the other side of the deck.
Jan
-
-
8 hours ago, Keith Black said:
Ilhan. what a wonderful album of photos and your drawings.
In foto 39, they look like traditional deadeyes. in your drawings, S01 and S07, you have them drawn as traditional deadeyes. What has made you doubt your original thoughts?
I ask not as criticism but out of simple curiosity.
Thank you for posting the Loreley link, I wish you the very best in your continued efforts to realize your dream.
probably while this doesn’t look like normal rigged deadeyes, there seems to be some strap over them.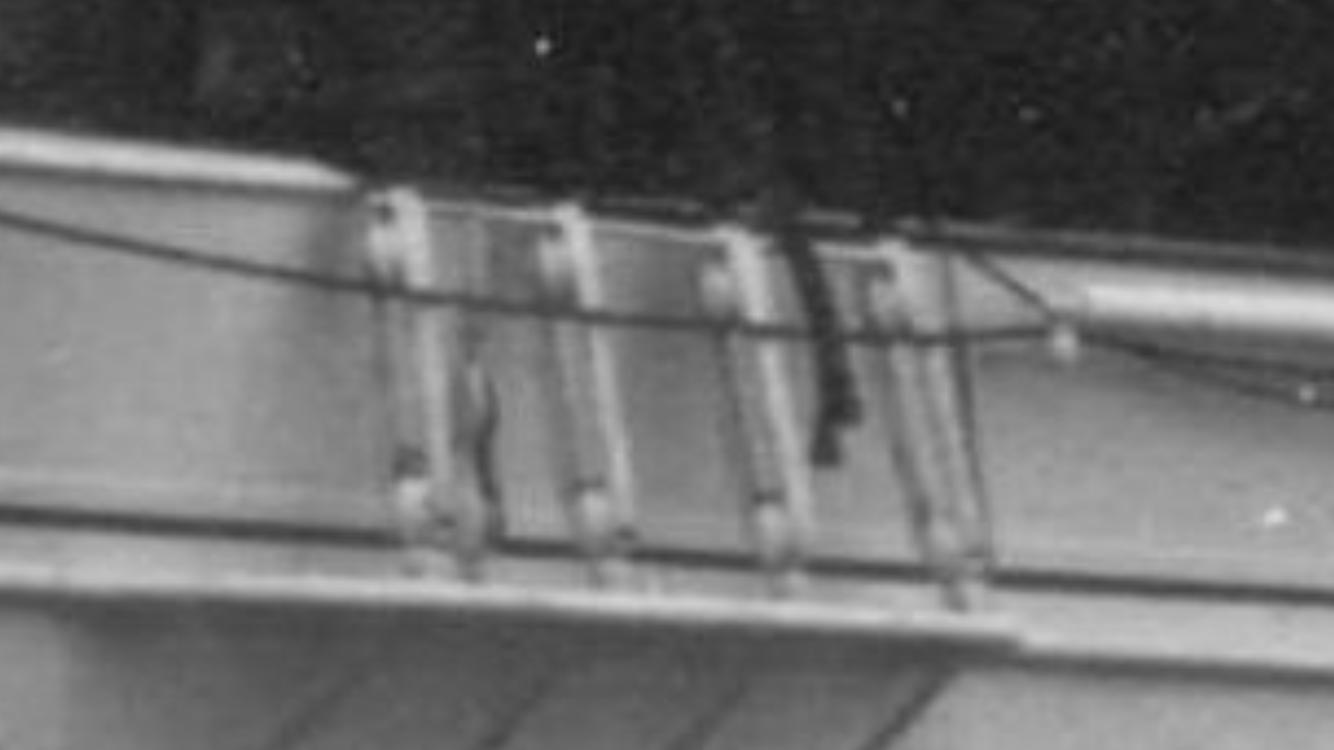
Besides: all other stays visible in the pics are rigged with some sort of turnbuckle-like construction.
Jan
- Keith Black and mtaylor
-
2
-
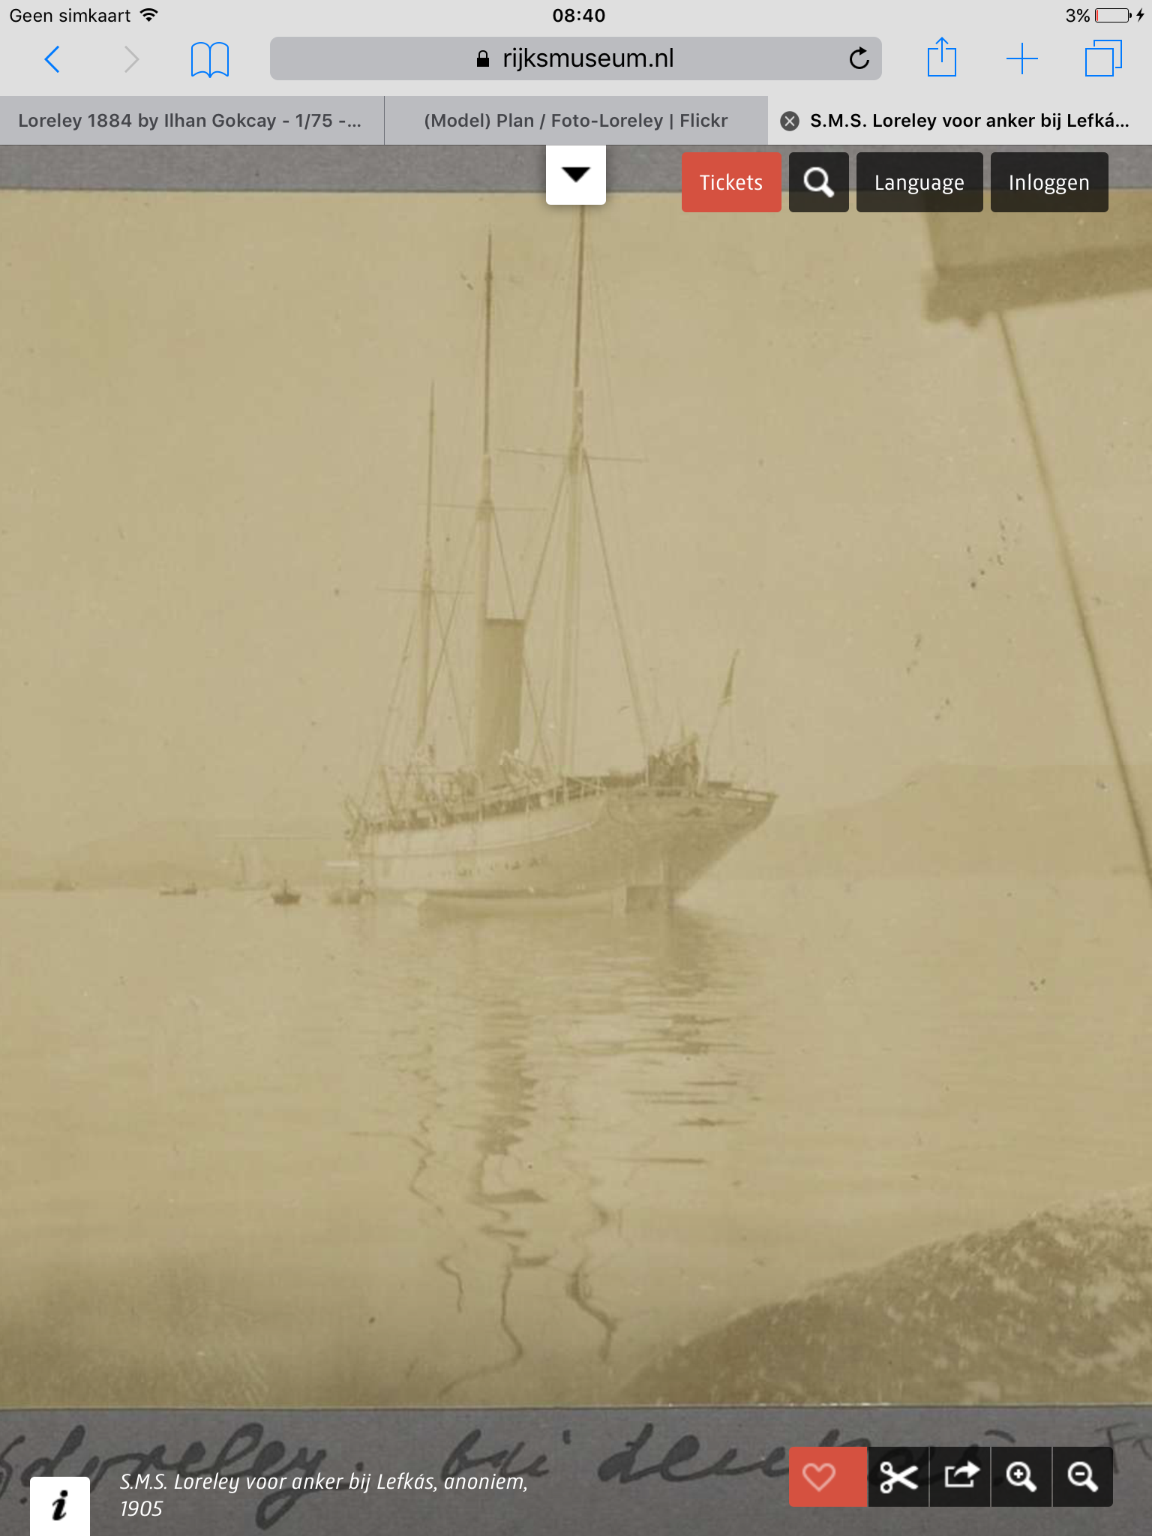
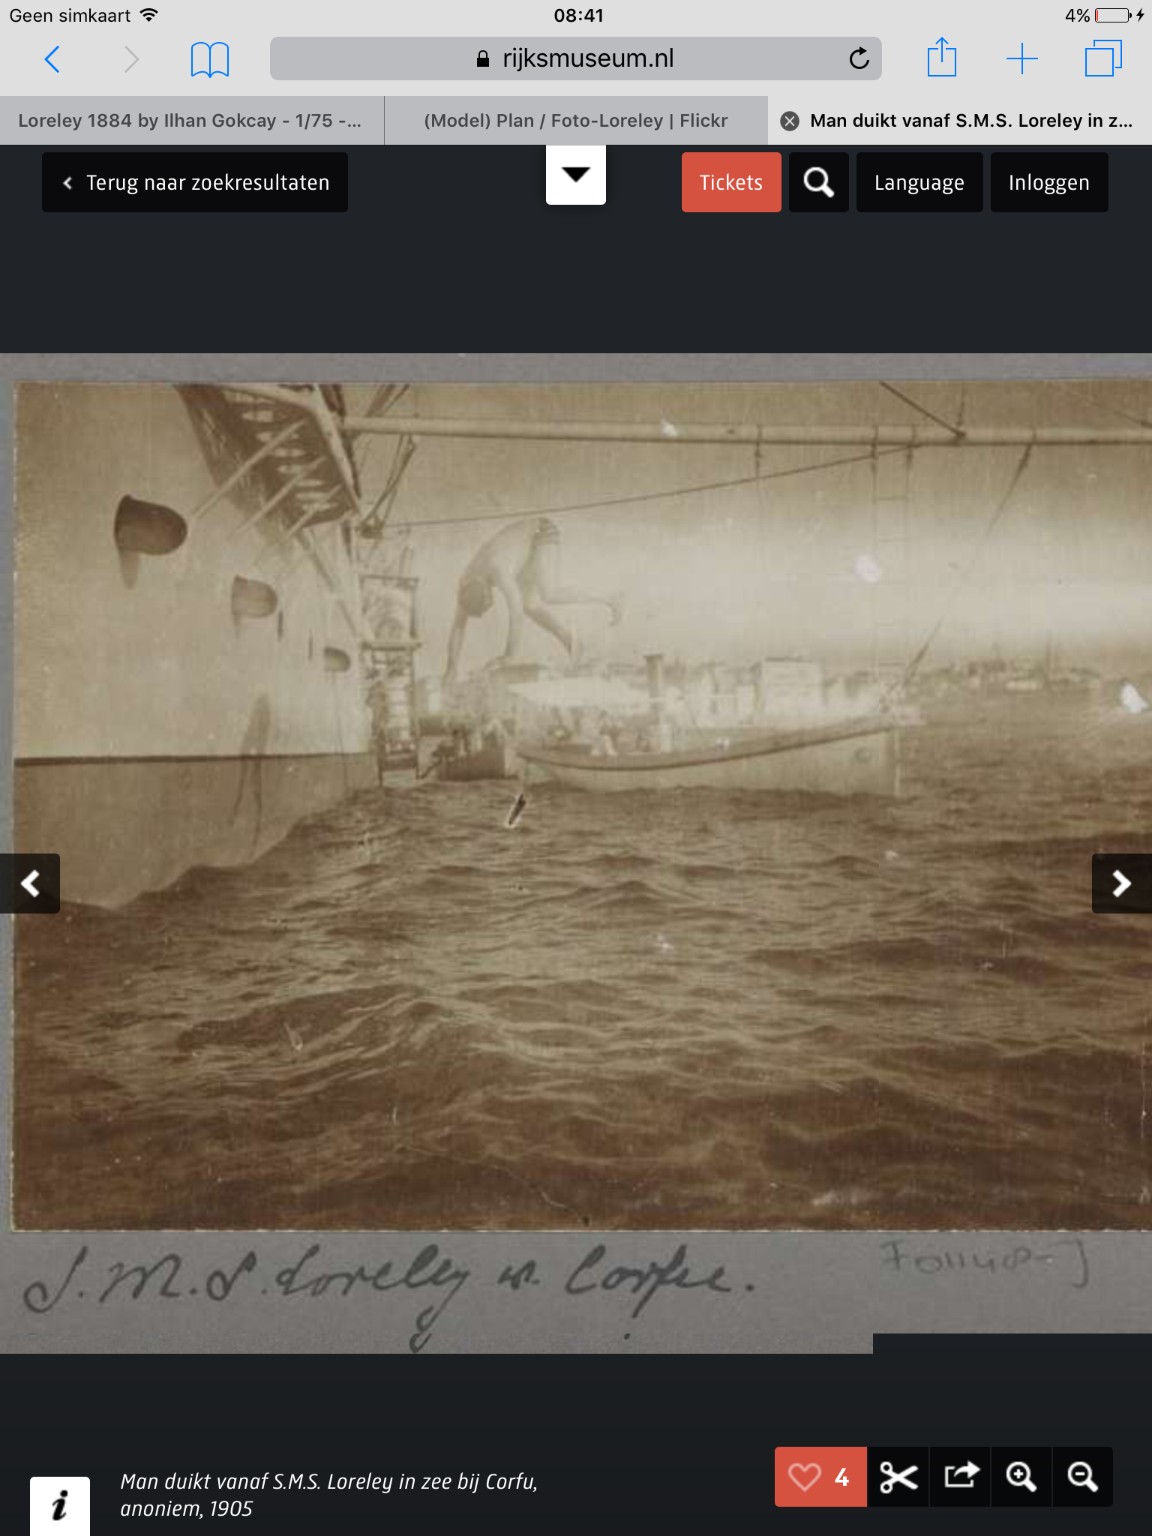
They do not show a considerable amount of detail, but in the Dutch Rijksmuseum collection, there are a couple of pics of Loreley. I took screenshots, and copied the link
https://www.rijksmuseum.nl/NL/collectie/RP-F-F01148-M
https://www.rijksmuseum.nl/nl/collectie/RP-F-F01148-I
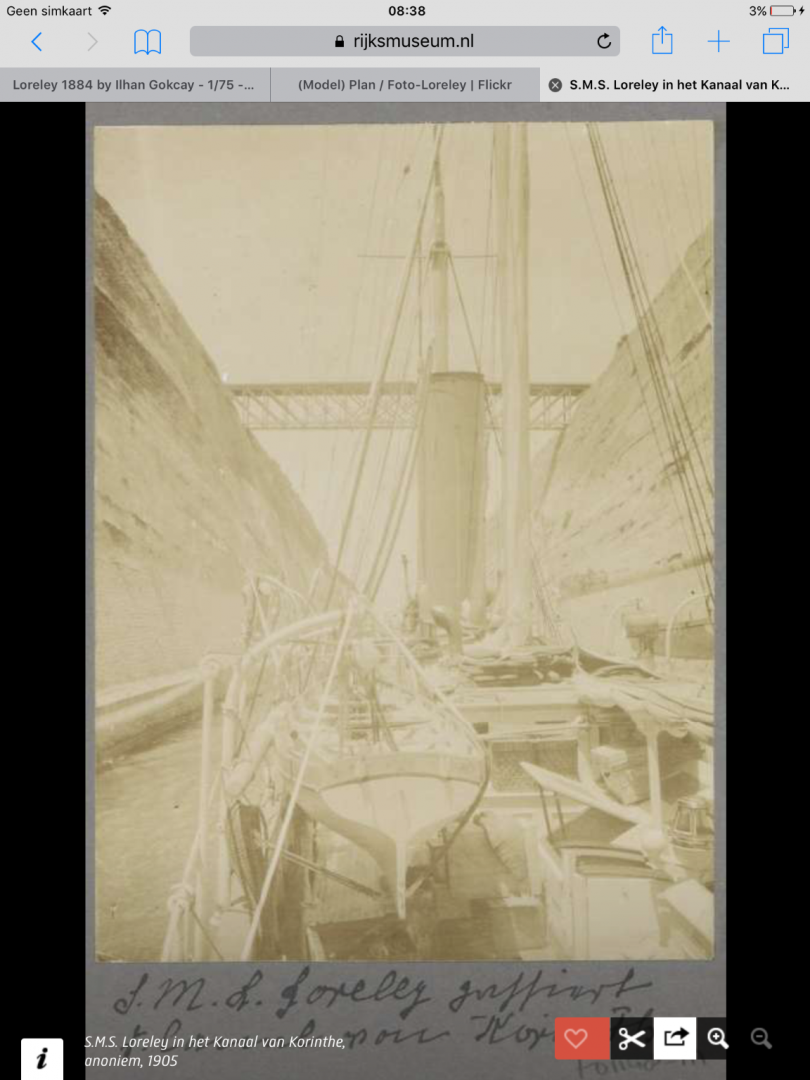
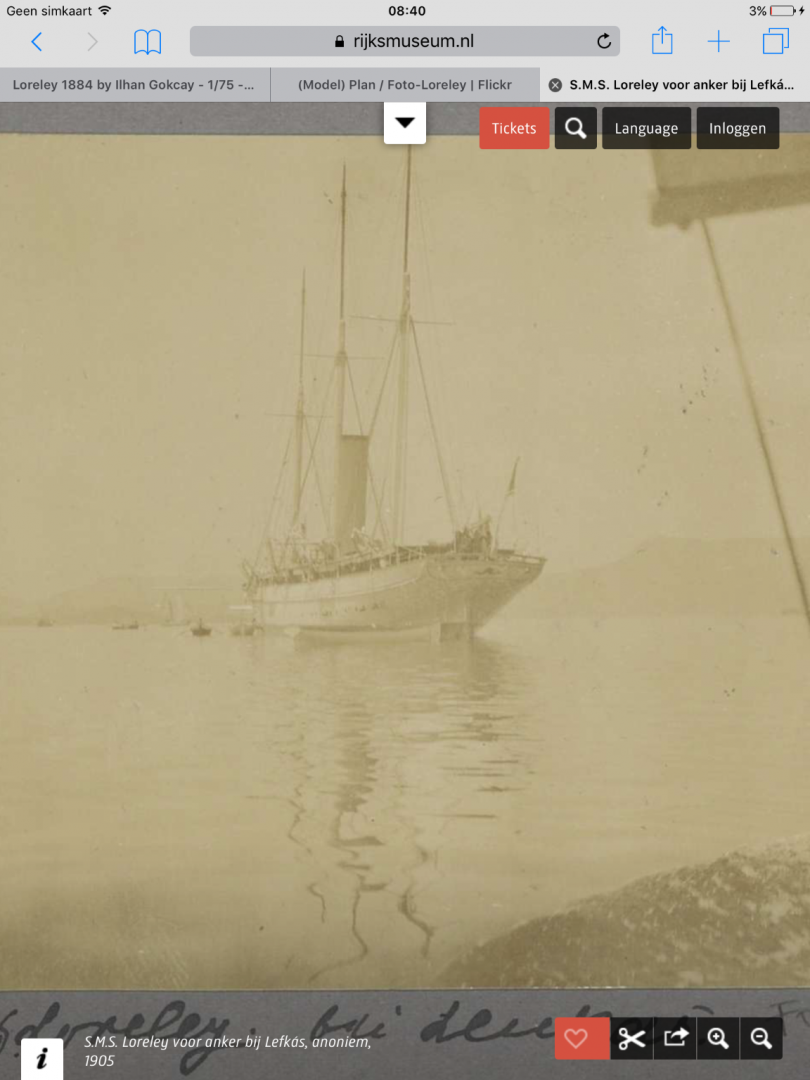
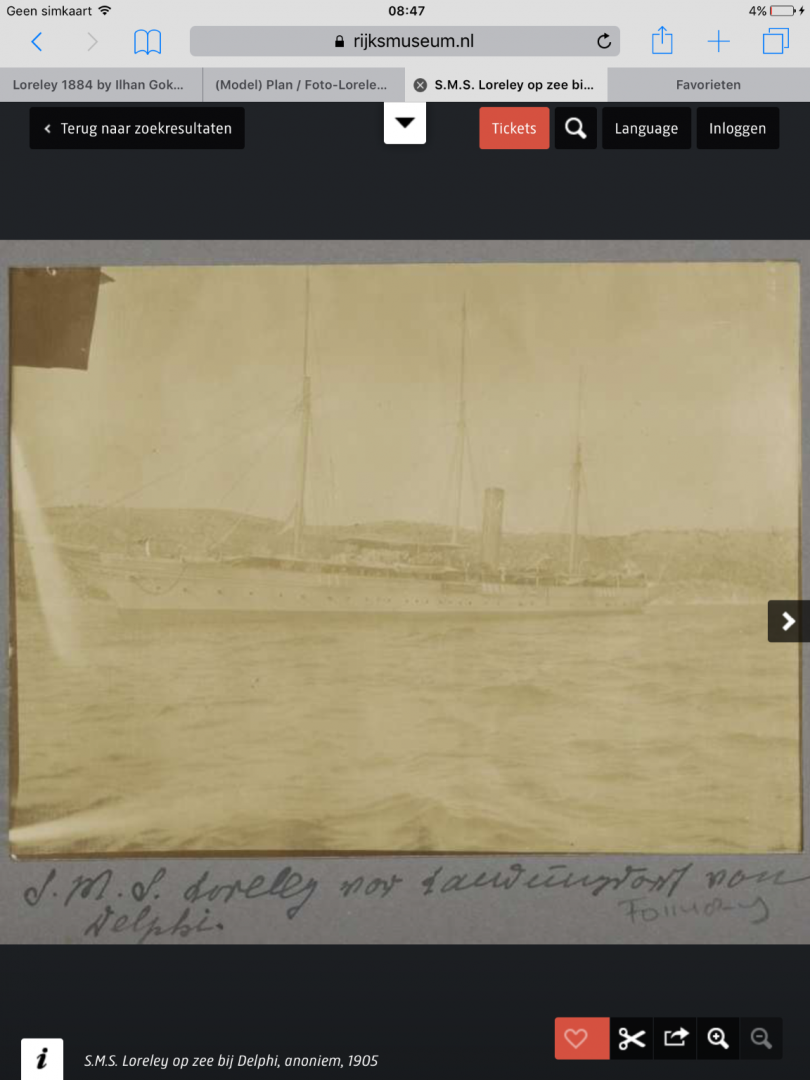
This one is frustrating: it shows the channels, but not the deadeyes.
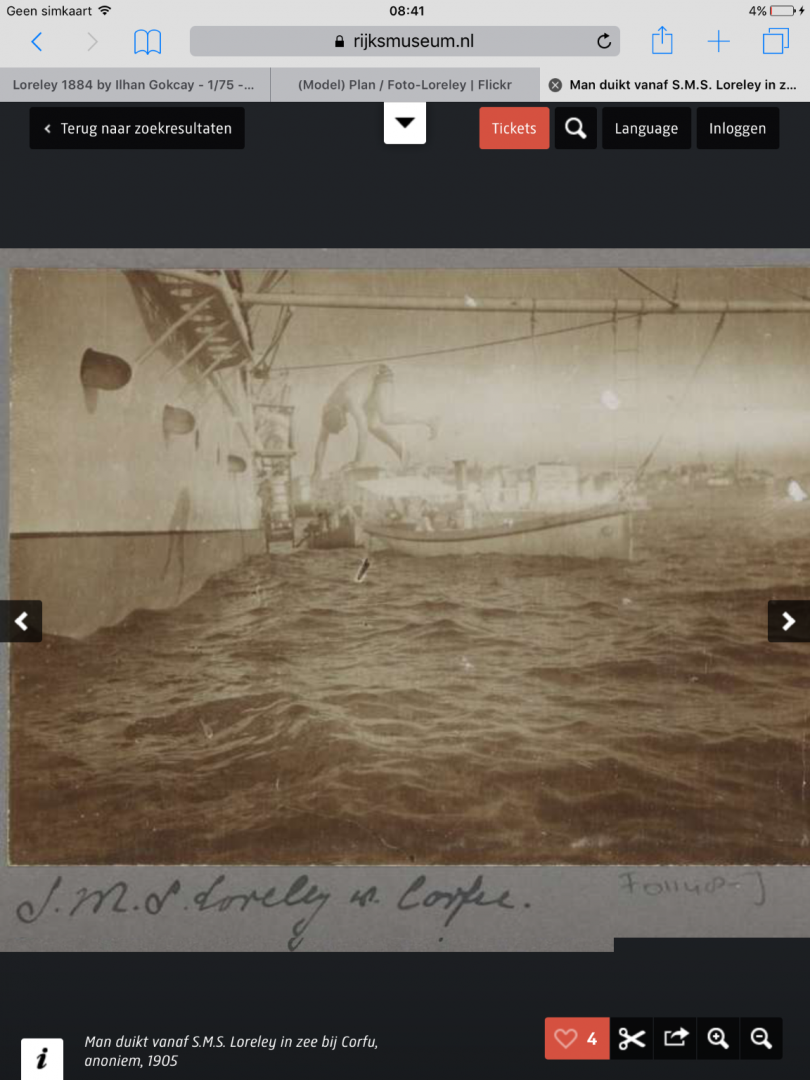
Holidaypics from a distant period....
-
And in your second picture they look more like "normal deadeyes".
I have once seen (and I blame myself for not remembering where) a nice illustration of the systems that have been invented in the rather short period between the mid-1850's when wooden deadeyes were standard, and the early 1900's, when steel turnbuckles were the standard. I thought it was on segelschiffsmodellbau, but the man I thought that posted denied doing so....
Still thinking and searching …..
Jan
- mtaylor, Keith Black and Ilhan Gokcay
-
3
-
-
-
-
That is really a close call. Both look great.
As you say: choice depends on the actual part you are looking at. I prefer the Eduards-version because of the breachlock does look a bot more detailed. But taking the handwheels as your main part, the other one is (marginally) better, at least in the pics. I guess that placed on the model both will be looking fantastic.....
Jan
-
Sounds like you have a nice organ. I try to find my way on a small, not so nice, early 20th century one. Bach doens't quite fit to something like that, and Mendelsohn is above my league

I like the 'Psalmbewerkingen in Noord-Duitse stijl' van Sietze de Vries (also not fit for my instrument, but at least I can play them
)
I'll folow your upcoming build. Not quite a plastic/small scale myself (actually, almost no modelbuilding left in my sparese time) but I am surprised at the precision of those smale-scale models.
Jan
- Keith Black, mtaylor and IJNfan
-
3
-
And another welcome.
There are some 1/350 builders active here in the forum. Enough to share experiences
(btw Bach or something more modern?)
Jan
- Ryland Craze, IJNfan, mtaylor and 1 other
-
4
-
-
Hi Doris,
Your rigging looks absolutely wonderful. (do you make the rope yourself, or do you have a source for that?)
The only thing I do not quite understand is the rigging of your top-rope: you used a sheeve rather high in foot of the topmast, I would have expected a sheeve somewhere further down the heel of the topmast (like in Andersons book pages 176/177). Rigging it through a lower sheeve would enable lifting the mast above the level of the cross trees.
[edit, 10 sept].
And looking again, I realized that the set-up is exactly as in Anderson, but not with a single, but a double top-rope. I should have seen the other rope going down.
Did take me some time to understand that what I expected to see, is on the other side of the masttop. (And thus not visible in your pics as all pics show the same side of the model)
I should have seen it at once yesterday. As one of my teachers said: please think before you are going to ask silly questions....
")
Jan
-
-
Interesting to see that they rigged the lanyards 'upside down' in Kampen: the stopperknot is in the lower deadeye, not the upper one.
Jan
- FriedClams, Canute and ccoyle
-
3
-
-
You could (when you have loads of time) go through the danish navy archive, whether or not there are any usefull drawings. (Nosearch available, no sorting in the archive, so random clicking needed....)
I found some that may be helpfull:
https://www.sa.dk/ao-soegesider/billedviser?epid=17149179#208161,39521644
same here: https://www.sa.dk/ao-soegesider/billedviser?epid=17149179#208163,39521646
the decks have been marked in red, in this ship, the poop-rail is even lower (ie non-existent), and no deck-openings.
the other one on the rig:
https://www.sa.dk/ao-soegesider/billedviser?epid=17149179#208164,39521647
gaf-rigged, but having a full length lateen yard.
Jan
I
-
AllBentleys in the internet have gloss bonnets, and not so glossy bodywork.
looks as if you hit the nail on the head.
Jan


U-552 by yvesvidal - FINISHED - Trumpeter - 1/48 - PLASTIC - Type VIIC U-boat
in - Kit build logs for subjects built from 1901 - Present Day
Posted
Chuck explains it here. (In his log of Cheerful) Printing on very thin paper. Sounds easy. But I guess some trial and error is needed before it works.