


Roger Pellett
-
Posts
4,519 -
Joined
-
Last visited
Content Type
Profiles
Forums
Gallery
Events
Posts posted by Roger Pellett
-
-
I have most of the “Two Foot Library” books in my collection, bought when I was much younger. While they are old standbys, their scope is limited pretty much to Eighteenth and Nineteenth British and American Sailing Vessels. As such they would be useful to most kit builders trying to improve the accuracy of their work.
The list mostly omits small craft, regional craft, and completely omits engine powered ships.
I am a scratch builder that tries to build models of vessels never modeled or at least rarely modeled before. This means that these ships either did not participate in noteworthy historic events, or for which little information is commonly available. This means tracking down information on a project by project basis. Others venturing into scratch building will need to either buy the plan packages available from sellers like Ancre and Seawatch or develop a library for each project as I have done.
Roger
- druxey, Smile-n-Nod, thibaultron and 3 others
-
 5
5
-
 1
1
-
-
-
That looks like the stuff that many outlets today pass off as “Mahogany.” Coarse, stringy- nasty stuff. No comparison to the real thing. If you have a wood burning fireplace it might make good kindling. If you can mill your own wood, living in Chicago you should be able to find a real lumberyard that can offer something much better.
Roger
-
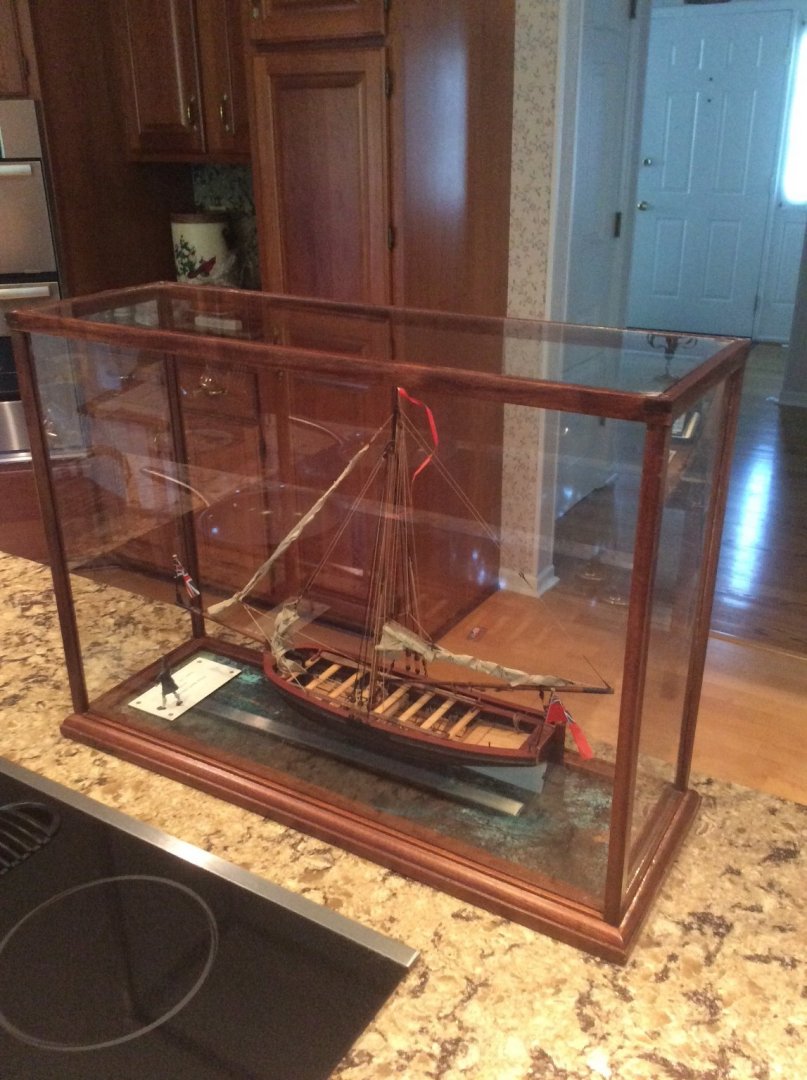
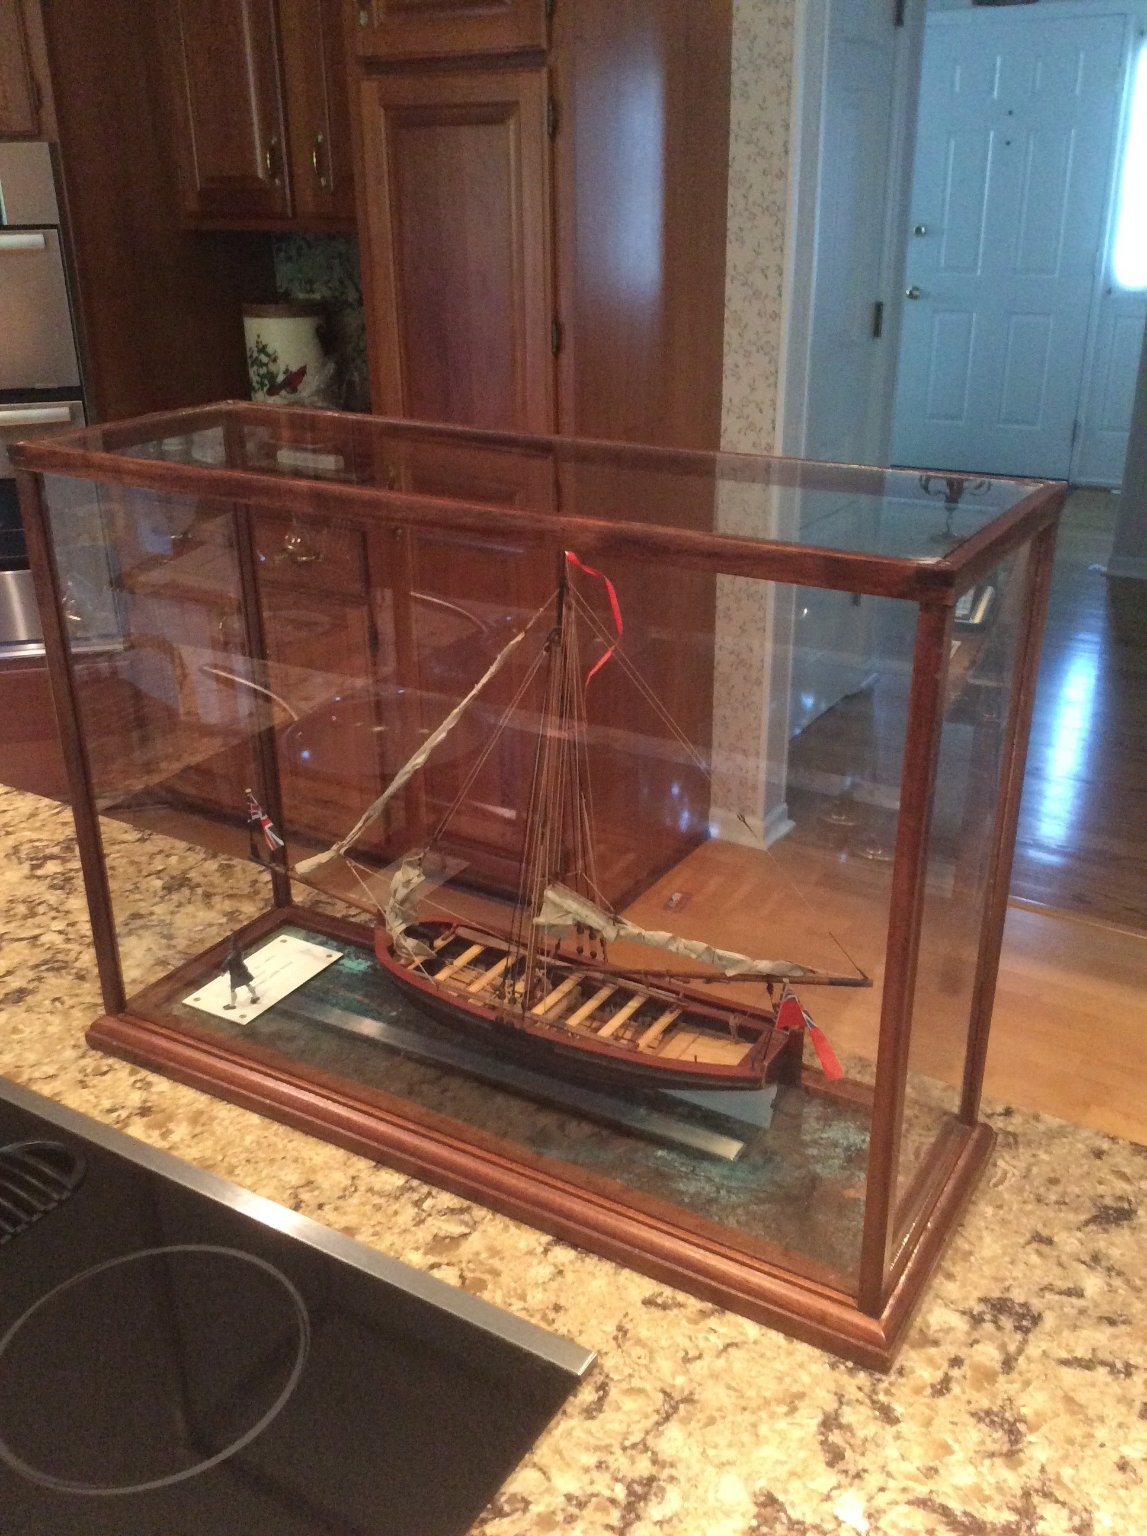
The reason for the notches used with my system is to secure the uprights. The uprights pass clear thru the mitered base joints to the case bottom. They are easily cut with my bandsaw. For an earlier case, I used short pieces of dowels glued into holes drilled into the base and longitudinally into the uprights. This didn’t provide the same rigidity.
Roger
-
I’d like to add my two cents worth to Bob’s excellent post above. Although you have decided to buy a kit, this might be interesting to others wanting to build one from scratch.
Tools: At least one right angle picture frame clamp is a must. Also a table saw for ripping stock and cutting grooves. I have a 35+ year old set of Sears molding cutters that are excellent for cutting the decorative edge on the prepared stock. If you are interested in using a set of these i’d be happy to post a photo of my setup.
Materials: I personally like American Black Walnut as it is easy to finish and I have a good supply. Although Mahogany is a traditional boatbuilding material, the stuff sold today called Mahogany is nasty stuff. If you can find and are willing to pay for true Honduras Mahogany it is a joy to work with. Teak can make a nice case and is also easy to work with. I find cherry to be hard to finish.
Like Bob, I like the thickened epoxy glues. A little poster paint powder can be added to the mix to color it like the wood that you are using.
For the last case that I built, I bought glass from our local Ace Hardware. They cut it accurately. Since I don’t live in sunny California,😜 I have not used UV resistant glass.
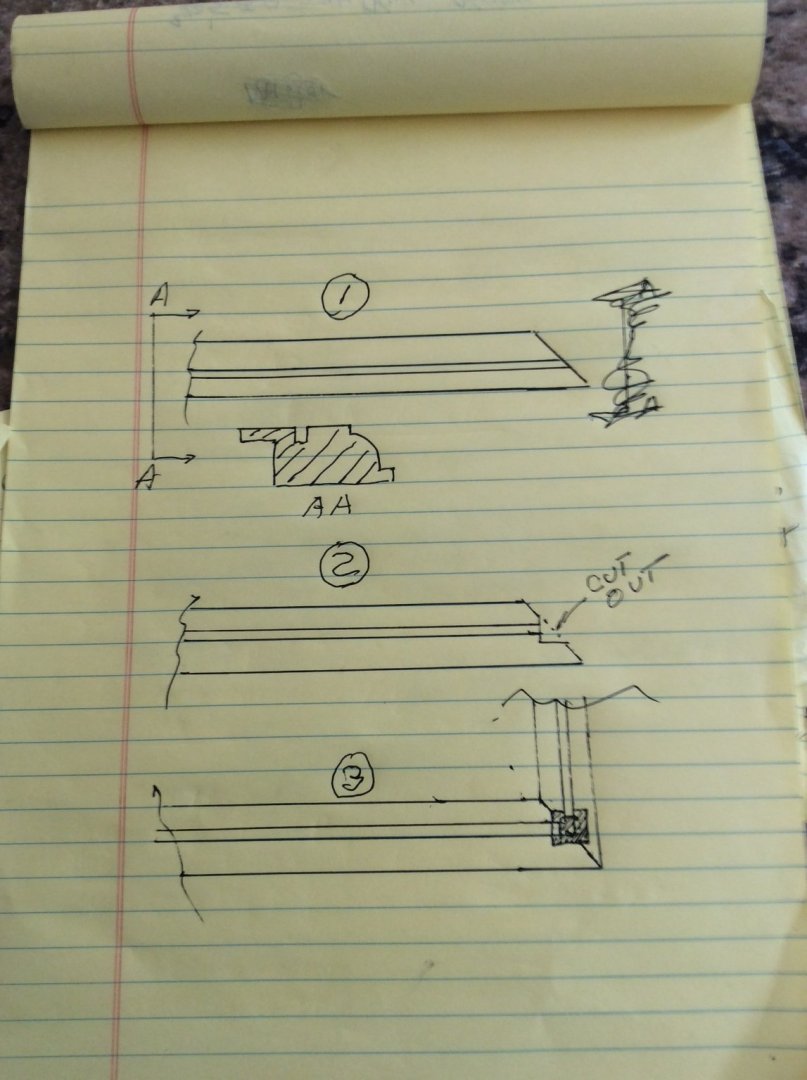
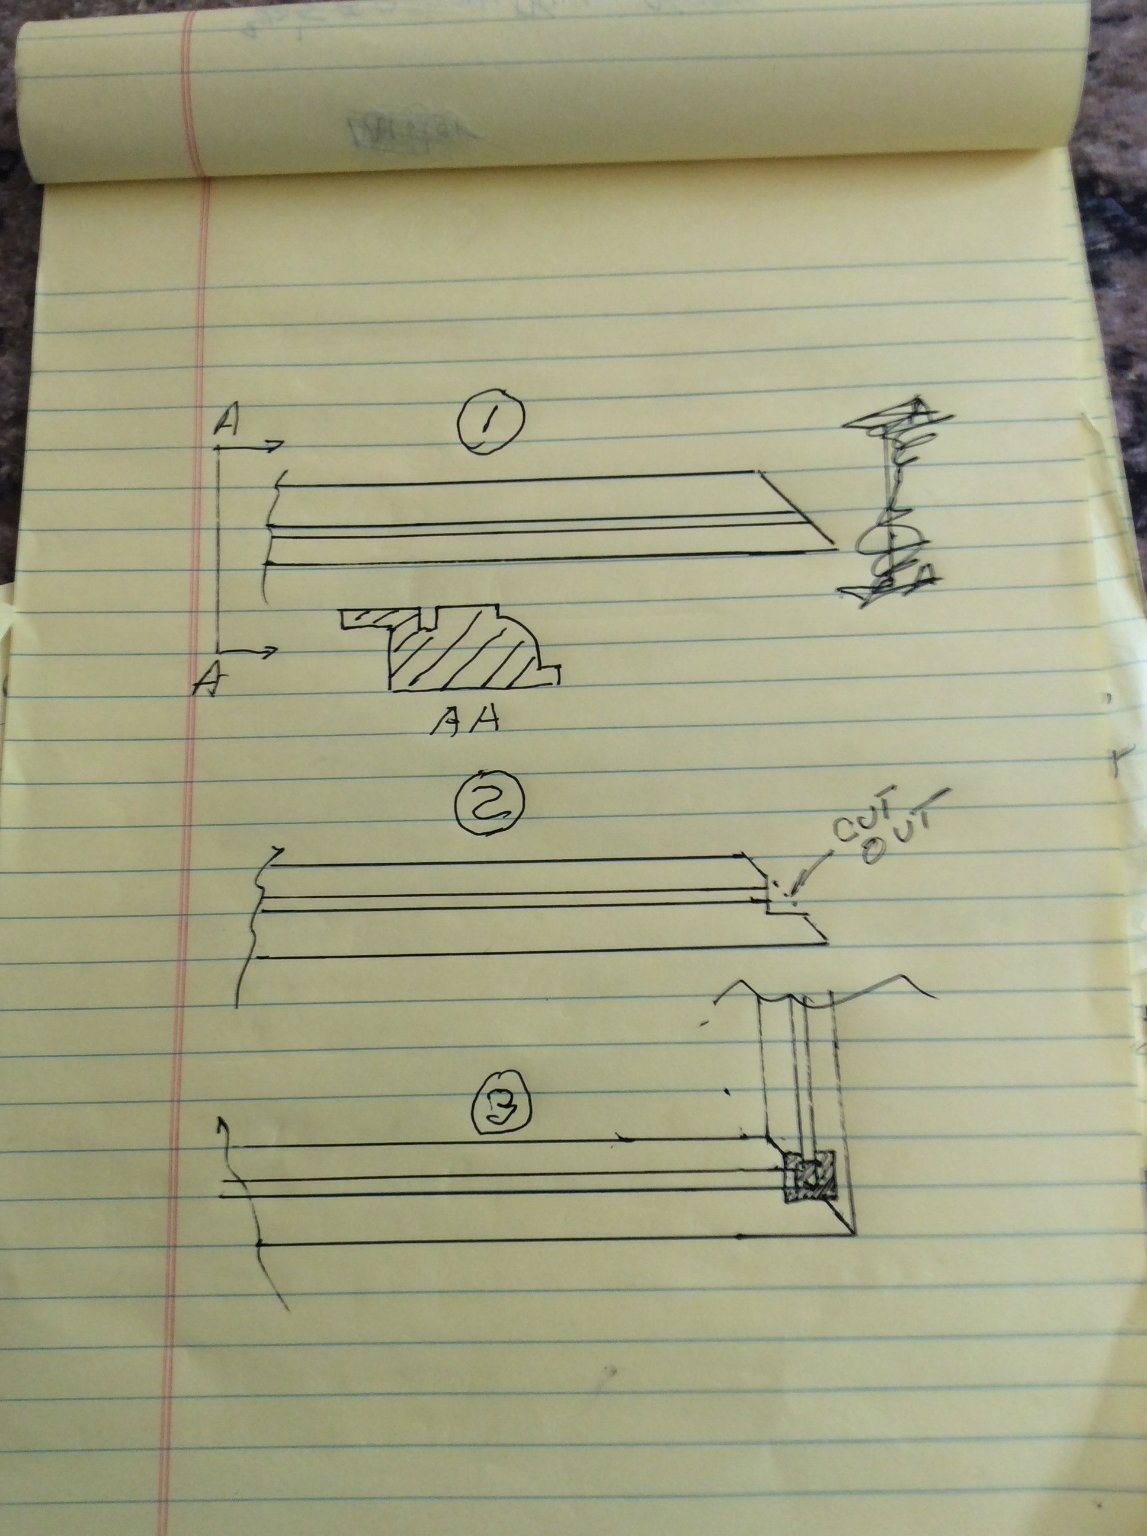
The rough sketch below shows my system. The key is embedding the upright posts into notches cut into the mitred corner joints of the base. When glued with epoxy this results in a solid three dimensional joint. When making these corner joints, I use right angle triangles made from 1/8th thick plywood set into the grooves to ensure that everything is square. Wax the edges of the ply!
-
If you live in a part of the world that has “Big Box Home Improvement Stores” such as Home Depot, Menards, Lowe’s, Etc, each one will stock a line of store brand air compressors. These come with an air tank, pressure regulator, and moisture trap. The compressor-tank combination is sized to drive the air nailing and air stapling tools that these stores also sell. These small compressors will provide enough clean, dry, air at the desired pressure to operate any airbrush. They often go on sale, particularly at Holiday Time. They can be bought for around $100. I fitted the Connections for my air brush, my air tools and the compressor with quick disconnect fittings. Air brush companies also sell adaptors to connect with the outlets of these compressors.
They’re also great for inflating bike tires and the flat on your wife’s car that she ignored.
Roger
-
Wefalk,
I assume that you are referring to the job of scrapping obsolescent Russian Submarines.
Here in Duluth, we have several companies that manufacture heavy shears for cutting scrap metal. These shears are boom mounted on the same tracked units used as excavators. The businesses grew out of boom mounted equipment built for the logging industry.
In 1990, my wife and I were involved in helping to settle a family that had immigrated from Russia. The husband had had an excellent position in a Russian tractor plant, but jobs in Duluth were scarce. One day he was offered a job by one of the companies that manufactured these shears. They had just received a large contract to supply these for use cutting up Russian Submarines. The job involved supervising final assembly of the machines in Russia.
Having just “escaped” with his family he had no interest in returning to Russia. Fortunately, he made a good decision. He went on to have a successful career with another company.
Roger
-
It looks like your planking job gave you a nice fair hull- Well Done!
I would fill any large nicks and gaps with a sandable filler, one that will completely harden. I would not try to fill the pores in the wood. Then sand thoroughly. Many modelers consider the first coat of primer to be sacrificial. Then prime again. It may take more than one additional sand and prime cycle to get the results that you are looking for.
Roger
- thibaultron, mtaylor, drjeckl and 3 others
-
6
-
-
-
I am not advocating it’s use as suitable for building fine models, but there are occasionally posts on the forum from modelers looking for balsa carving blocks.
Today I got an ad from Woodcraft Supply, (woodcraft.com) for balsa carving blocks. I don’t know sizes or prices. I have no connection to the company.
Roger
-
-
Chief,
Welcome, I look forward to following your progress. It is great to see more Minnesotans interested in ship modeling.
Roger
-
Ras,
Preparing the shellacked paper is easy. Shellac is available in spray cans. The brand is Kiltz, the same people who make the primer that hides water stains on walls. Simply spray it on the paper. The spray can allows you to saturate the paper without building up a heavy coating. It is easier to spray whole sheets and then cut out the plates. A paper cutter makes this easier.
All shipyards that built ships to be sold to others were concerned with cost. They therefore tried to minimize waste by using standard plate sizes where possible. Plates could be easily formed into segments of cylinders with plate rolls available at any well equipped yard. Forming the plate in three dimensions was much more costly requiring pattern making and blacksmith work. My plate layout for Benjamin Noble required few cut plates and only two 3D forged plates per side; evidence that my plate layout was correct.
Roger
-
Ras,
Since you are building a steel hulled ship, when planking the hull, there is no need for you to follow otherwise conventional methods. The time tested method for planking full sized boats subject to wet-dry cycles is a double layer of diagonal planking. On this forum, there are at least two examples of this planking technique, one using a stapler to temporarily affix the strakes! The second diagonal planking layer is laid 90 degrees to the first and is glued to it. This will give you a solid substrate on which you can add whatever plating system you choose.
Any metal plating system like Aluminum or Copper foil requires CA, Epoxy, or Pressure Sensitive adhesives. In my case, I was concerned with the longevity of any pressure sensitive adhesive, am allergic to CA fumes and Epoxy is messy. Shellac stiffened archival quality paper was easily applied with regular wood glue, and hopefully will respond to humidity changes relative to the wood core better than metal.
You will also to research the plating system used for the real ship as there were several.
Roger
-
Steven,
I was not suggesting that you should have used the “Viking ship” stem as your build is of a different vessel. Like many threads, this was wandering, however slightly, as different posters discussed different ways of attaching clinker planking to stem and sternposts. I was adding my two cents worth!
In building these ancient ships, your research is always thorough. You are giving us a window into an unknown world.
Roger
- Louie da fly, Cathead, Tony Hunt and 3 others
-
6
-
Some “Viking ships,” a loose term, had an extra deep stem posts with the ends of the clinker posts carved into them. The planking butted against their respective plank shapes carved into the posts.
I realize that this explanation is confusing. I’ll post a picture later.
Roger
-
Ras,
See my Benjamin Noble Lake Freighter build: Scratch Builds 1901- Present
I just plated the hull with shellacked paper.
Roger
- mtaylor, lmagna and GrandpaPhil
-
3
-
That’s a good book too and agrees with Guilmartin’s contention that the heavy guns carried in the galleys’ bow were capable of only one shot before battle was joined at close range.
- mtaylor, thibaultron and Canute
-
3
-
I highly recommend the book, Gunpowder & Galleys by John F. Guilmartin. This book covers galley warfare in the age of Lepanto.
In this book, Guilmartin uses a value of 1/8th horsepower per rower. This is based on hydrodynamic data developed by Admiral W.L. Rodgers USN in the 1930’s. This would allow a Renascence Galley to be propelled at a speed of 7kts for a distance of about 3 miles. After that, speed would decline rapidly. The kinetic energy transferred to the target ramming, (I realize that by this time galleys did not ram) would be velocity squared x displacement x a constant to convert weight to mass and to account for the fact that the target would slide sideways when hit.
Although it might seem that damage from ramming could be increased by adding more rowers to increase velocity, this required a larger galley with more hydrodynamic drag to the point where a practical limit was reached.
Guilmartin, therefore makes the point that by the Sixteenth Century, a galley was primarily an infantry assault craft.
Jumping ahead to the Mid Nineteenth Century, steam propulsion completely changed the game. USS Merrimack’s machinery was noticeably poor, propelling her at a speed of between 5 and 7 knots on a good day. Author Paul Silverstone claims a speed for CSS Virginia of 9kts which I find hard to believe. Even at a slower speed her mass must have been an order of magnitude or more than that of a galley from any age. Since basic wooden frame built ship structures had changed very little from the 1500’s she was during her short life a formidable weapon.
Roger
- thibaultron, mtaylor and Canute
-
3
-
-
Good news, Michael. It will be good to get this done. Wishing you a speedy recovery.
Roger
- Keith Black, michael mott and mtaylor
-
3
-

AMAPÁ 1907 by Ras Ambrioso - FINISHED - scale 1:64 - Brazilian Customs Cruiser
in - Build logs for subjects built 1901 - Present Day
Posted
Ras,
I also like the PVA glues, of which Titebond is one. I recommend that you use one of the PVA glues for plating your hull. I don’t like the applicator tip on the bottle as when it sits for a while it gums up with dried glue. To solve this problem I bought a cheap squeeze bottle like diners used to use for ketchup and mustard. The top on the bottle screwed onto the Titebond bottle.
Roger