Chuck
-
Posts
9,711 -
Joined
-
Last visited
Content Type
Profiles
Forums
Gallery
Events
Everything posted by Chuck
-
 That looks great. A really nice longboat model. I am so glad you enjoyed it. Well done.
- 109 replies
-
- 3
-

-
- medway longboat
- Syren Ship Model Company
- (and 1 more)
-
Great to see you building again Jeff. Looks great so far!!! Chuck
-
Looks good Bob....remember that you will probably have to adjust the position of some of those beams either forward or back to comply with the fittings below them. This is so they line up properly with columns and bulkheads etc. Chuck
-
Remember….entries to the photo competition must be submitted by August 2nd!!! Time is running out so get your model entered soon.
-
Beautiful. You have done a really nice job with the model. I do hope you enjoyed putting it together.
- 109 replies
-
- 2
-
-
- medway longboat
- Syren Ship Model Company
- (and 1 more)
-
I use Dull coat....or Krylon Matte fixative. I spray from far away....about 2ft. Chuck
- 1,784 replies
-
- 3
-
-
- winchelsea
- Syren Ship Model Company
- (and 1 more)
-
Just a wipe on poly finish. I applied and wiped it off immediately buffing it to a dull finish.
- 1,784 replies
-
- 5
-
-

-
- winchelsea
- Syren Ship Model Company
- (and 1 more)
-
Very nice….yes they do take a few tries. You did them quite well.
-
Yes it is correct…just tie it around the mast above the shroud gang. the model looks excellent. Really nice rigging work. Very neat and clean. chuck
- 109 replies
-
- 3
-
-
- medway longboat
- Syren Ship Model Company
- (and 1 more)
-
David We have all been there...I am so glad you are sticking with it. My advice to you is to just slow down. Slow down your building a great deal giving each task much more care and attention. The results will be much better and a pleasant secondary outcome is that you will end up with fewer models in the end which we all know is a big problem. In addition, not trying to move ahead quickly to the next task can be much more enjoyable. Take the time to line off your hull and then only add a couple of strakes each day but done neatly and with care. Take twice as long to build your model and you will end up with half as many models to give away and less you have to convince your kids to take an interest in. Looking forward to following your Speedy project. 😃
- 3 replies
-
- 14
-
-
Ben that looks fantastic. Your lining off looks great....a really good example for others to look at when they start lining off their hull. You can see every strake just as it will appear when finished. That strategy will payoff in the long run.
- 399 replies
-
- 3
-
-
- winchelsea
- Syren Ship Model Company
- (and 1 more)
-
You have to bevel the edges of those planks so no gaps can be seen inboard. But since it will be painted also…just apply some filler. On the outboard side it looks like you just need to sand that area on the right side down to even it out. That need fixing because after you put the molding on it wont look good. You need to have a nice curve that isnt wobbly/ wavvy port to starboard.
- 274 replies
-
- 2
-
-
- Cheerful
- Syren Ship Model Company
- (and 1 more)
-
Chapter 7 laser cut parts are now available. Please remember that if you are far from needing these parts, please refrain from buying them. I will always have more made when these are gone. Your fellow Winnie group builders that are up to this chapter in the process will thank you. They have been eagerly awaiting its release. As soon as I return which is on Wednesday, I will start making the cherry version of chapter 7. Currently having fun somewhere in Virginia......either on a mountain or under it.....next stop Alexandria. Chuck


- 1,784 replies
-
- 32
-
-
- winchelsea
- Syren Ship Model Company
- (and 1 more)
-
Chapter Seven... Chapterseven.pdf
-
Beautiful figures.....They will translate into some fantastic CNC carvings.
-
Really nice work. The rigging is coming together really well. Chuck
- 778 replies
-
- 1
-
-
- cheerful
- Syren Ship Model Company
- (and 1 more)
-
I use artist acrylics from a tube. I am using Grumbacher at the moment. But I have also used Windsor and Newton.
- 1,784 replies
-
- 2
-
-
- winchelsea
- Syren Ship Model Company
- (and 1 more)
-
I got it from micromark years ago. I cant remember what the name was but they have a few brands and color sets. I have gotten several sets and they are all mixed up now but check them out.
- 1,784 replies
-
- 1
-
-
- winchelsea
- Syren Ship Model Company
- (and 1 more)
-
Dying/coloring rope; sources for purchase of quality rope
Chuck replied to Tomculb's topic in Masting, rigging and sails
Cotton and natural rope actually sags more than poly. It is so finicky when it comes to moisture. What you describe as sagging one hour and super tight the next absolutely happens with natural and especially cotton ropes. In fact....if you rig with cotton rope on an especially humid day and make your lines tight......when it dries out the next day the lines will shrink. I have seen belaying pins pull away from the bulwarks when this happens because cotton shrinks when wet and then it dries. Poly on the other hand is more slippery but has much more stretch. So if the lines are taught the stretchiness tends to prevent any sagging at all. Its a trade off. I like the natural stuff but it tends to be fuzzy. I also like the poly ropes because it is so crisp and clean. Now that the unravelling issue is solved, it is just a matter of personal preference. I never belay my lines permanently when first rigged. I let them sit and adjust for a while. Then I tension them later and permanently belay them. That helps with either material. With poly line there is no dye needed. Only certain brands are really shiny. So many colors to choose from. Cotton is more problematic that way although good color choices are out there. It just tends to be kind of fuzzy. Chuck- 28 replies
-
- 11
-
-
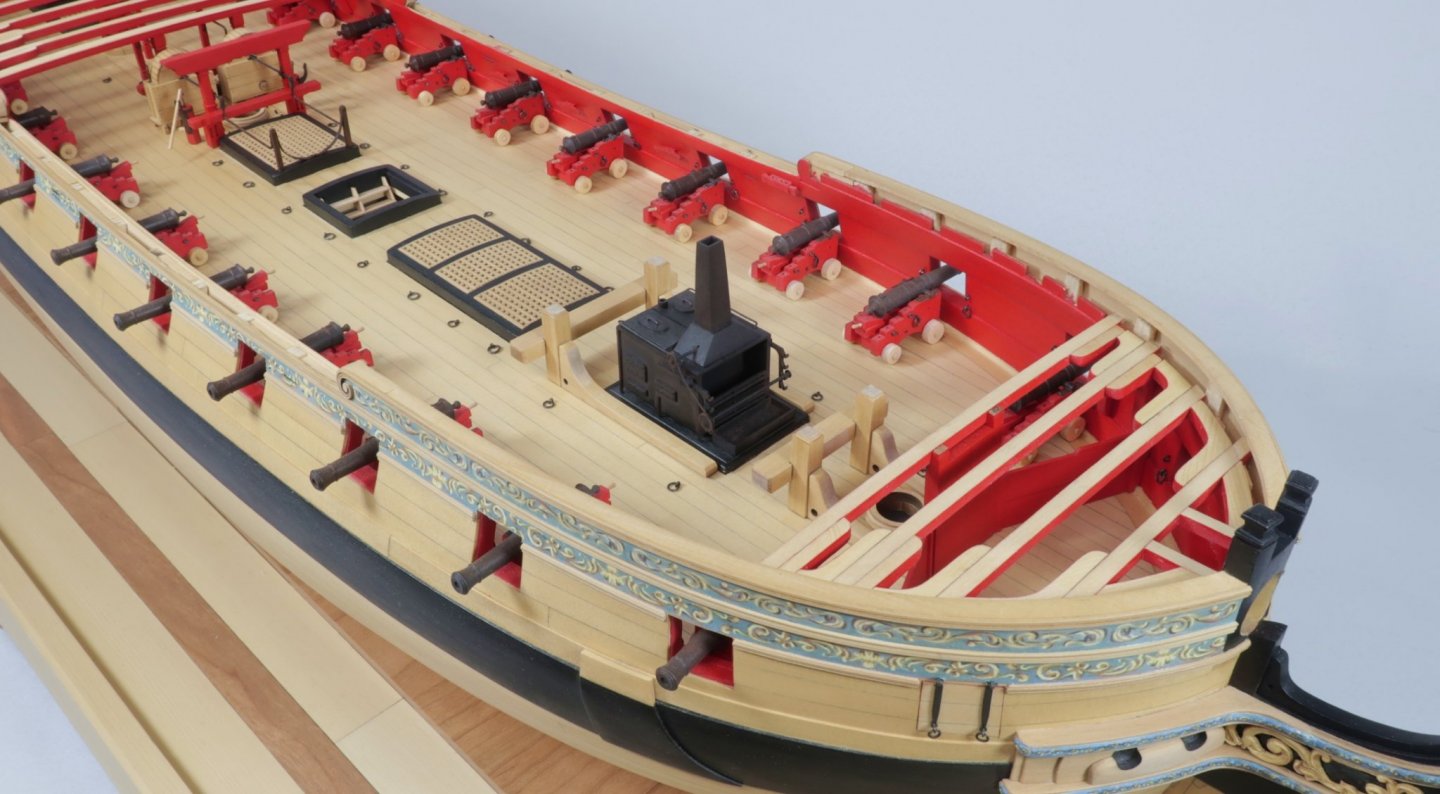
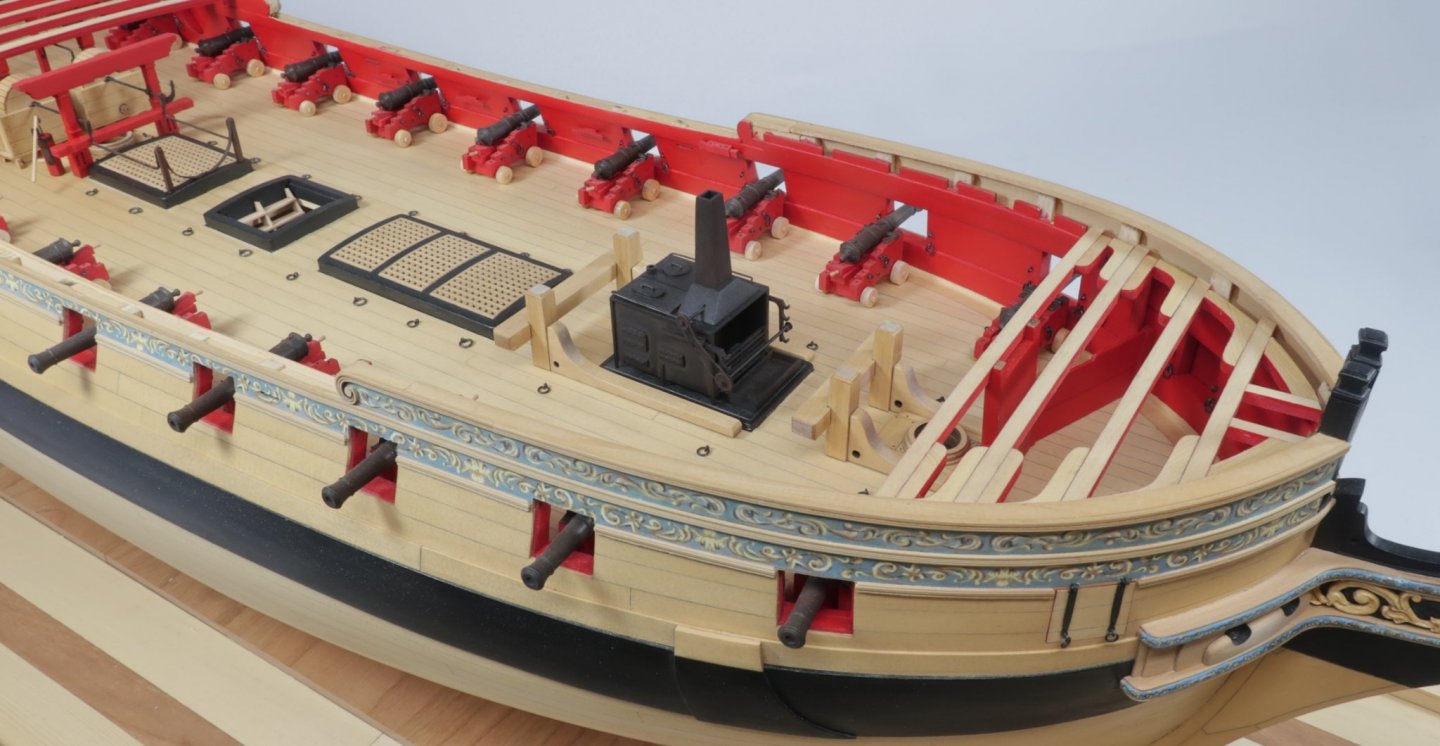
They moved it up to the gun deck. It was a real mistake to have it on the lower deck. They did the same with the pumps. This was indicated on the original draft and other primary notations. Its another difference between the contemporary model. Changes shown in red....I have a few of these showing the update. Chuck

- 1,784 replies
-
- 13
-
-
- winchelsea
- Syren Ship Model Company
- (and 1 more)
-
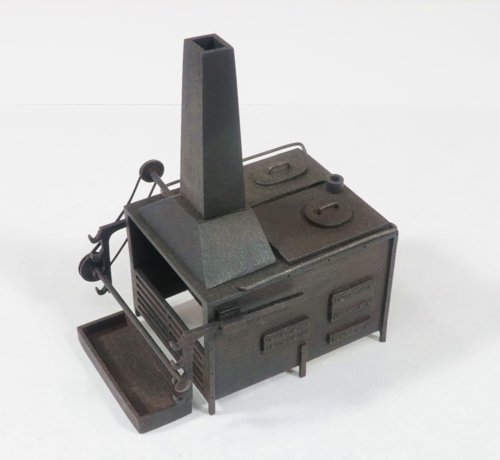
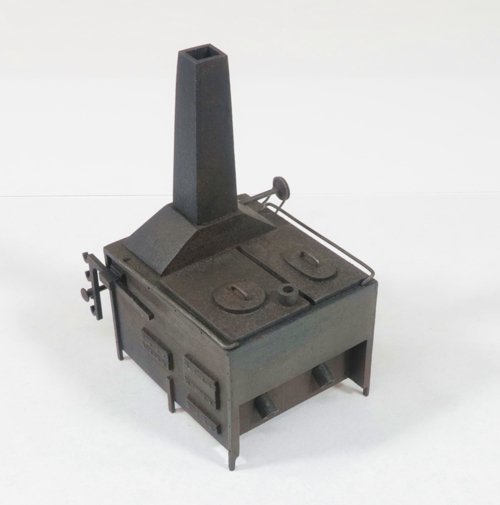
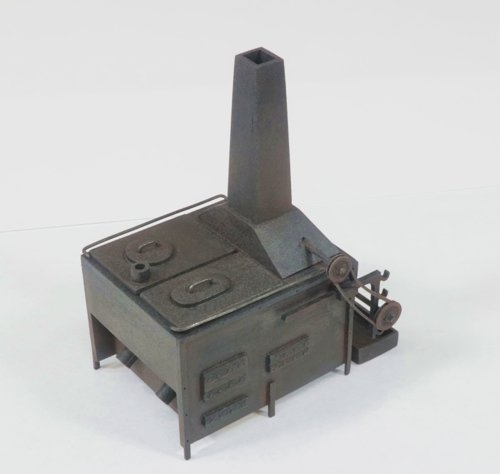
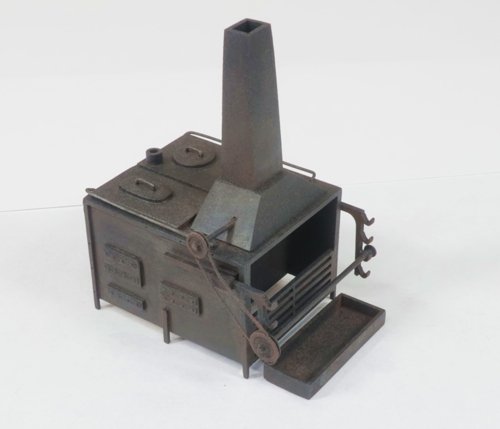
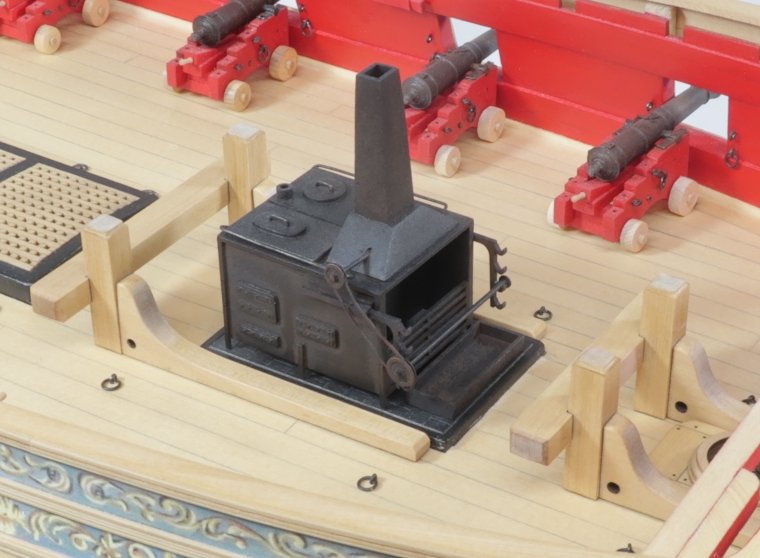
I decided to design and make the stove before I put any more beams in position. I just wanted to have it ready when its time to glue it in permanently. Usually when I design new mini-kits like this I have to make five or six of them. I got lucky and this time everything went together perfectly on the first go around. Unfortunately I didnt take any construction photos so I am going to have to make another one anyway. Maybe it will come out even better the second time around. Here are some photos. Except for a 1mm brass rod and a bit of 24 gauge black wire, this stove kit is made entirely of boxwood, yellow cedar and laser board. The pulley is laser board for example. The close ups are pretty brutal but on the ship it looks really nice. It was hard to photograph a black stove so you guys can see all the details.
- 1,784 replies
-
- 43
-
-
- winchelsea
- Syren Ship Model Company
- (and 1 more)
-
Ahh!!! Good times…i remember it fondly. Topes all over the place, LOL. But its looking good.
- 778 replies
-
- 1
-
-
- cheerful
- Syren Ship Model Company
- (and 1 more)