MORE HANDBOOKS ARE ON THEIR WAY! We will let you know when they get here.
×


michael mott
-
Posts
5,195 -
Joined
-
Last visited
Content Type
Profiles
Forums
Gallery
Events
Everything posted by michael mott
-
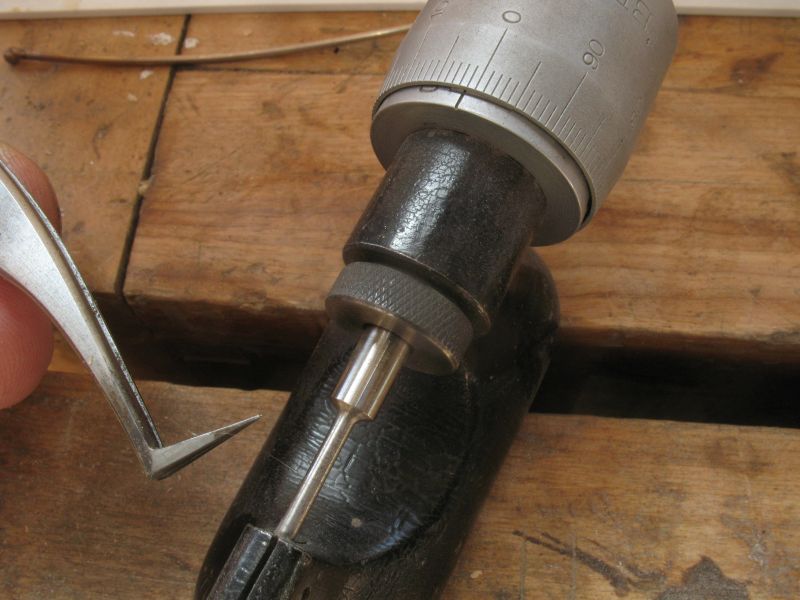
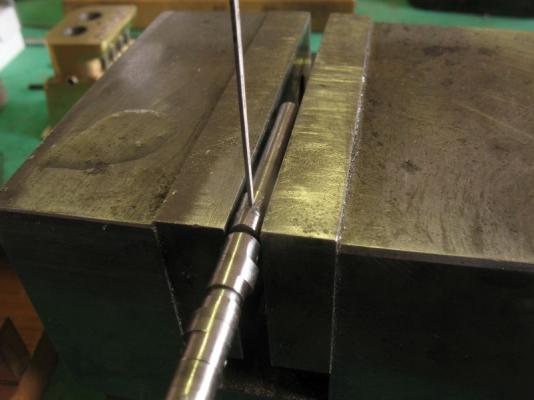
 Hi Patrick, the wrapping I was referring to was a cotton like wrapping, it had no integrity after taking it off the wire . I then looked at some polyester thread and pulled a strand out of it and it is .01 mm, I have some black polyester so tomorrow I will measure a strand from it . this picture shows the strand that just slipped through the bench micrometer that is set up with 100ths of a millimeter The colour is too light so some black thread would work well I think, and yes it would be for the rigging on the 1/500 cutter. Michael
-
3D Printing - Not Just Yet!
michael mott replied to dvm27's topic in CAD and 3D Modelling/Drafting Plans with Software
Thanks for the information Pat Michael -
3D Printing - Not Just Yet!
michael mott replied to dvm27's topic in CAD and 3D Modelling/Drafting Plans with Software
I posted this in Shore leave, but this seems to be a good place also especially regarding the price point for those who know how to do this. 3D printer called Tiko Michael -
:D Great ideas for the thin sails and thanks for the info on the coloured pencils Piet Patrick I am looking forward to seeing how the sails turn out, something I have been holding off myself for quite some time on my little cutter. Incidentally i was thinking about the very fine wrapping on some #36 gauge wire that I have last night, when I get out to the shop today i will measure it I think it is extremely fine. Michael
-
Gerry, great that you are able to get back to the garage to continue your work on the model. I had to do the same thing and move anything that would freeze when we went away for a week in February. michael
- 553 replies
-
- 2
-

-
- sloop of war
- constellation
- (and 3 more)
-
Denis your model is looking super, and because it is mostly white on the deck at least the birds droppings will blend in nicely. Michael
- 956 replies
-
- 7
-
-
- andrea gail
- trawler
- (and 1 more)
-
Mike, exquisite work on the rudder pintles. Patrick, so sorry to hear about your loss, so unexpected I would be traumatized too. Michael
-
Hi Mobbsie, I too am looking forward to seeing how you restore this lovely looking craft, I have had my eye on Doris for some time which is also a Bawley I have even started on the hull, but that is another story. Michael
- 62 replies
-
- 2
-
-
- harwich bawley
- fishing boat
- (and 2 more)
-
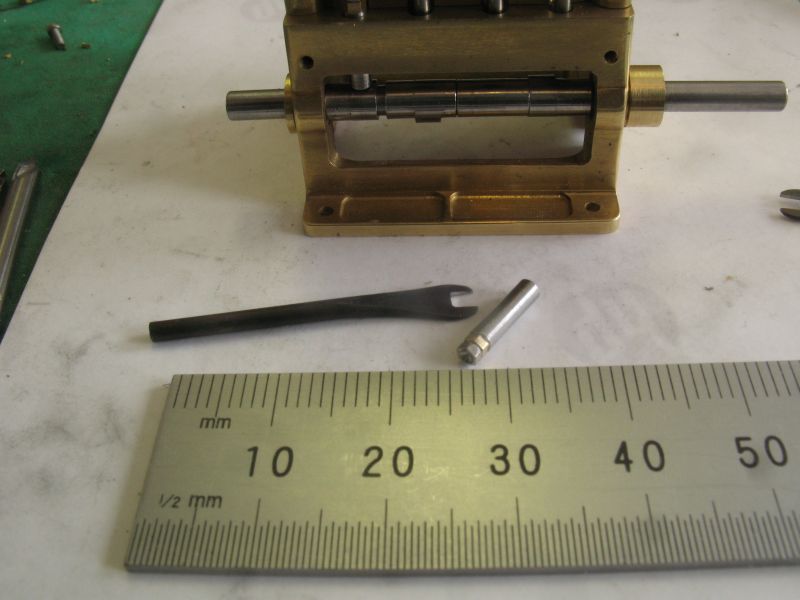
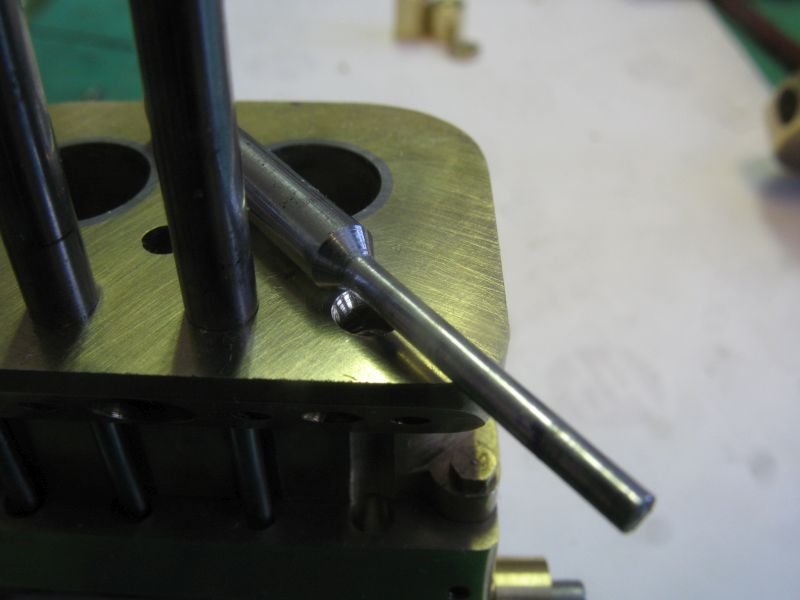
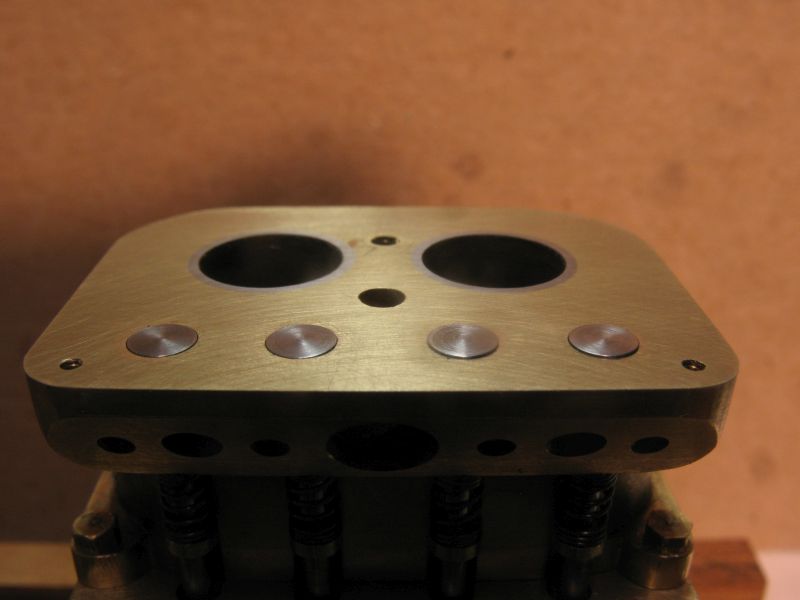
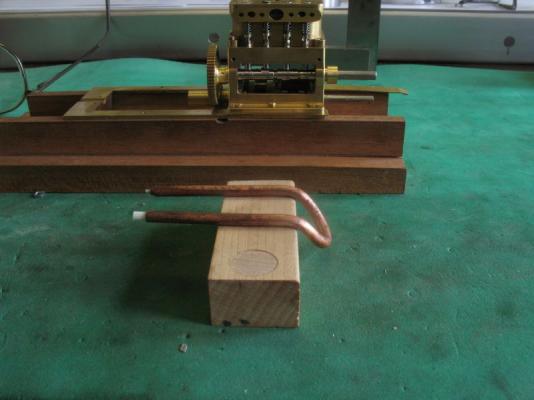
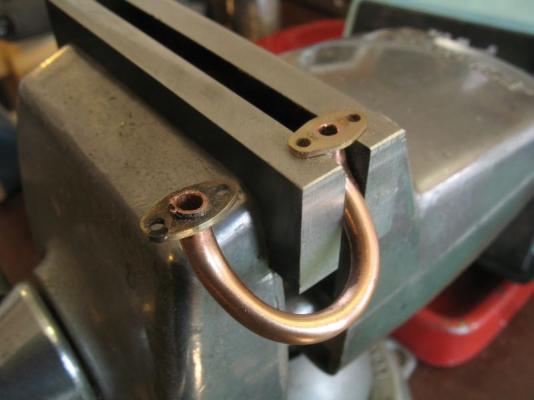
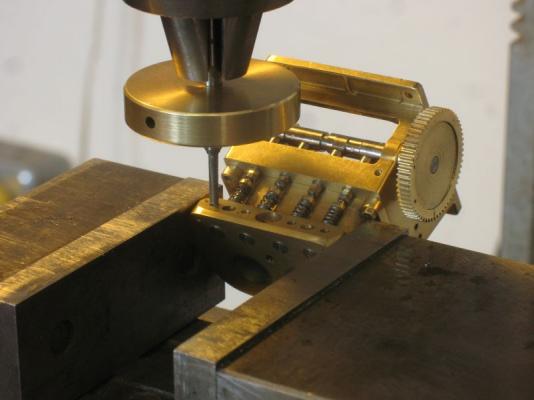
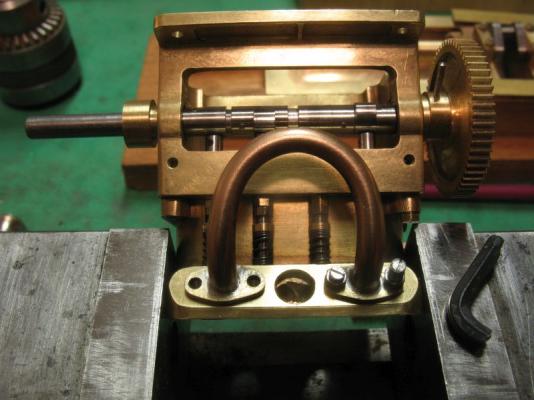
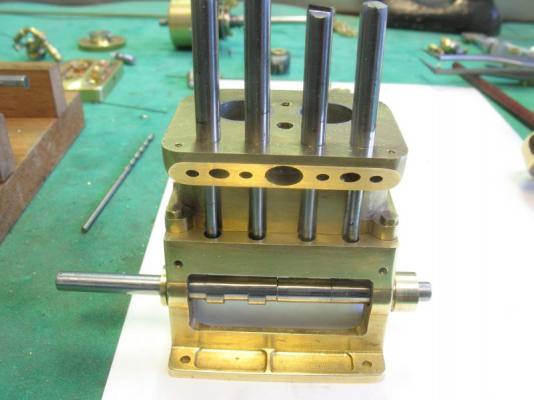
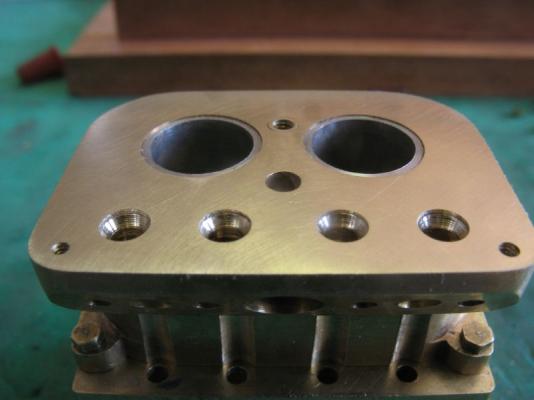
First of all thank you all for the kind messages and birthday greetings. Judy and me went for a nice walk and them met her Mum and Brother for supper at a great Greek restaurant that has tasteful furnishings and no TV's. Row the taper pins are quite tough, I got the idea about using them from some old mechanical navigating equipment that all sorts of splines and gears that were fixed with small taper pins. I started work on the inlet manifold today, it is 1/8 inch diameter copper tube I am going to use a petrol vapor carburetor. By all accounts this type of carb works well in small engines. I can make the carb look scale and have the vapor pass right through the model carb with the fuel tank hidden under the seat or floor boards. the tube was annealed and filled with some .093 styrene them bent around some 1/2 inch dowel, the the loop was folded down a few degrees to match the face on the cylinder. The extra length was cut off with a jewelers saw and the styrene burnt out. the flanges were turned on the lathe filed to shape then soldered to the tube. The faces that mate to the cylinder were cleaned up with a file and a sanding stick. The four short holes in the cylinder needed to be tapped for the manifold studs these holes are only .060" deep I reground the tip of a 1x72 tap to make it absolutely flat and square, then just knocked off a few thou with an Arkansas Stone. The head was rest in the small machine vice so that the manifold face was horizontal, used the back end of the #52 drill(.063") to locate the first hole then was able to index to all the rest following the numbers on my plans. the drill was replaced with the tap with one of the brass thumb discs for the tapping. I turned up some stud from some .073 music wire, this allowed me to cut a slot for a small screwdriver to set the stud temporarily, I will use high temp loctite with the final set up. The stud on the right is too long so I will shorten it up to match the left one. Because the space is pretty tight I made some special small diameter nuts out of some 3/32 allen key, (a great source for small hex-stock old allen keys) I softened it by heating up to a bright cherry red and letting it cool slowly. Tomorrow I will finish off the inlet by adding the T and the bottom of the loop which is where the carb with attach about 1/4 inch below the T Thank you to all who visited the log over the last day or so. Michael

-
Nice work on the brass railing, I too thought the ship was much bigger looking at that one photo with you "holding" the ladder. Michael
- 205 replies
-
- 2
-
-
- kw49 antje
- trawler
- (and 1 more)
-
Just catching up Patrick, the amount of detail in the model is amazing, the mast and rigging are coming together well I see. Michael
-
Ed the bow decorations are simply superb. Michael
- 3,618 replies
-
- 1
-
-
- young america
- clipper
- (and 1 more)
-
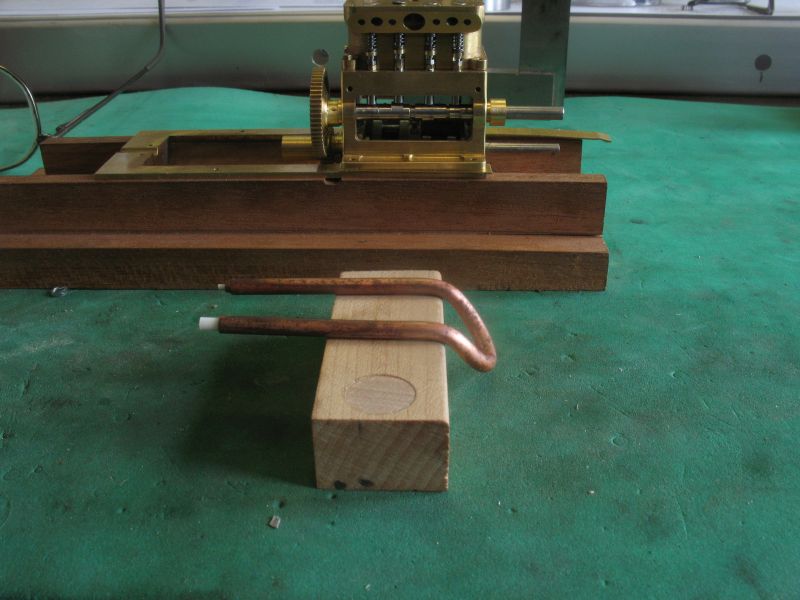
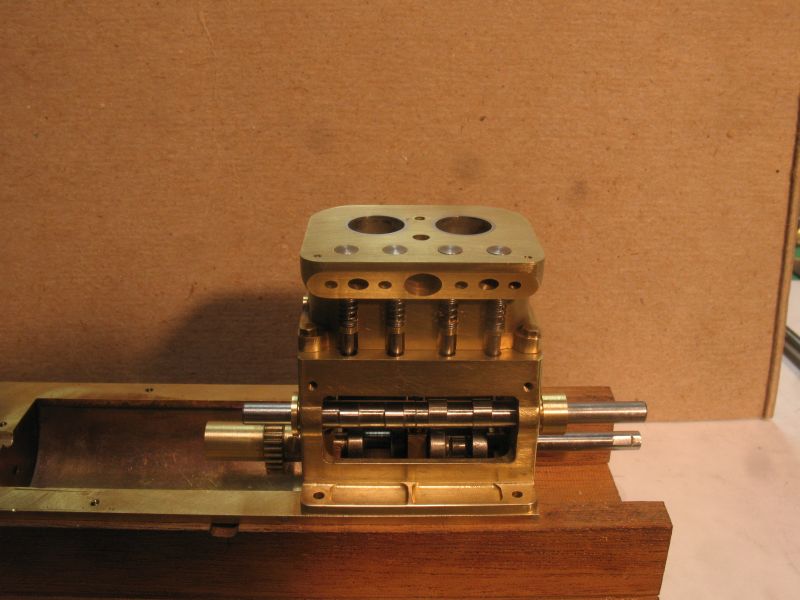
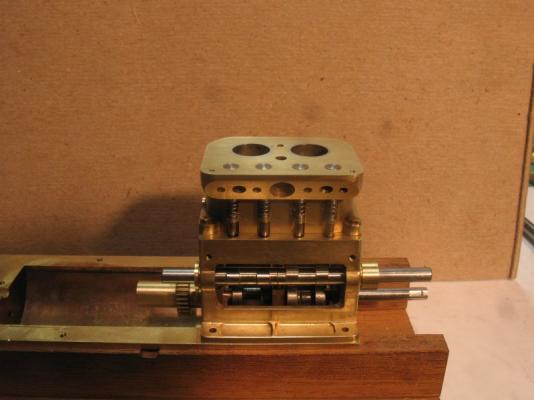
Nigel, Patrick, thanks for the kind remarks, and thanks to all who visited and made it known. Patrick the wood base is just a placeholder so that I can work on the engine. The engine will be mounted on some Costello bolsters set for it when it is mounted in the hull. Michael
-
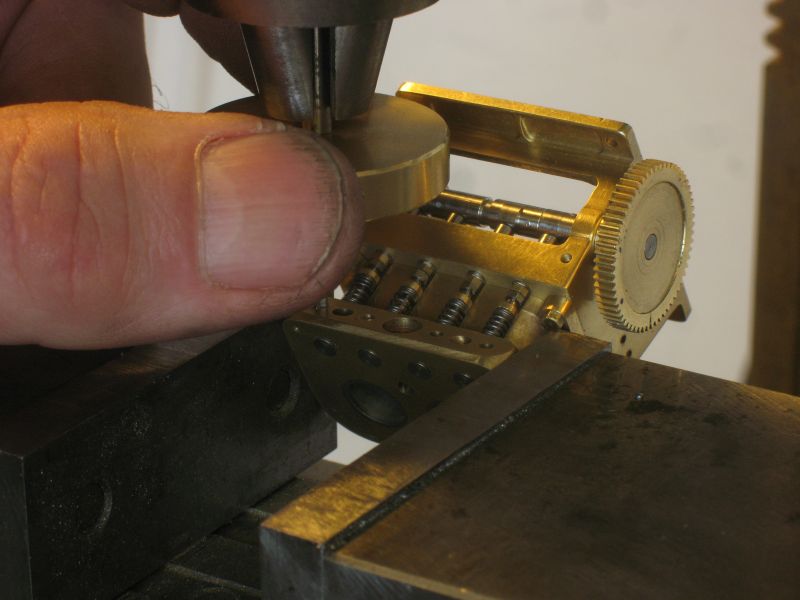
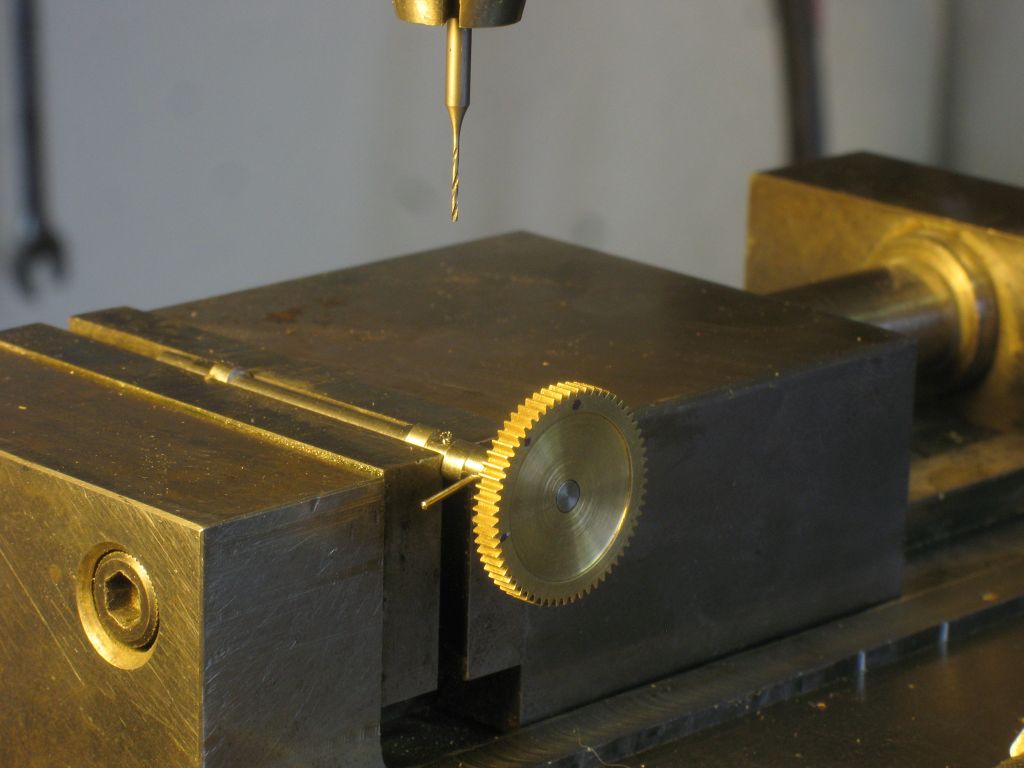
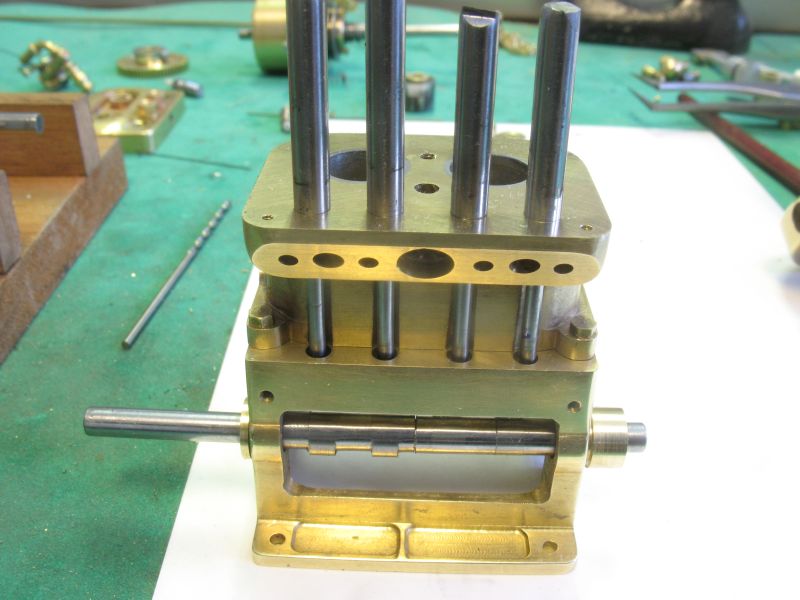
John, Steve, Denis, Druxey, Mark, Lawrence, thanks for your kind remarks. A big thanks also to all who have visited. The valves and lifters have been a tricky bit of work so far. Had to make a wrench for the reduced sized nuts. drilling the holes for the taper pins to fix the cams All the cams are now pinned in place. here is a video of the valves in motion Michael


-
What!!... you mean you are not going to be able to adjust the sails..... Great work Danny Michael
-
Very Nice John, my that is a lot of work fitting all those slots to match. Michael
- 745 replies
-
- 1
-
-
- francis pritt
- mission ship
- (and 1 more)
-
Nice, will you be putting some roof on the cabin? Michael
-
An interesting concept Dan having a gun up there in the first place. Also there does not seem to be a lot of "leg room" for actually aiming or firing the thing if what you say about golf ball size shot. Beautiful work on the sails and rigging, the furled ones look great too. michael
-
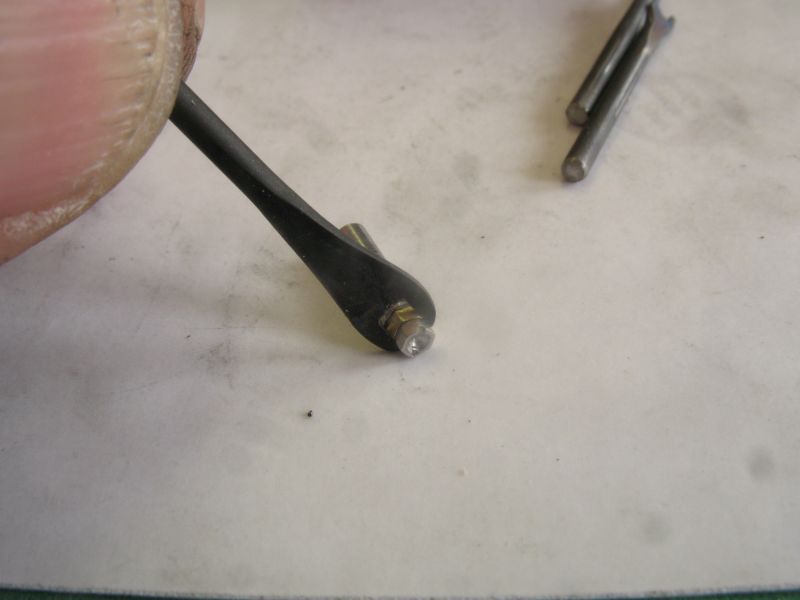
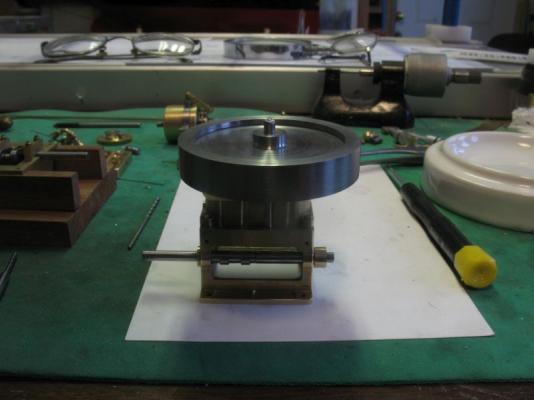
Spent the evening turning up the new valves. decided that the flywheel might be a good way to spin the valves after the valves were lapped I parted them off then completed the rest of the turning. popped in the new springs and the old keepers. tomorrow I will cut the new lifters. Michael


-
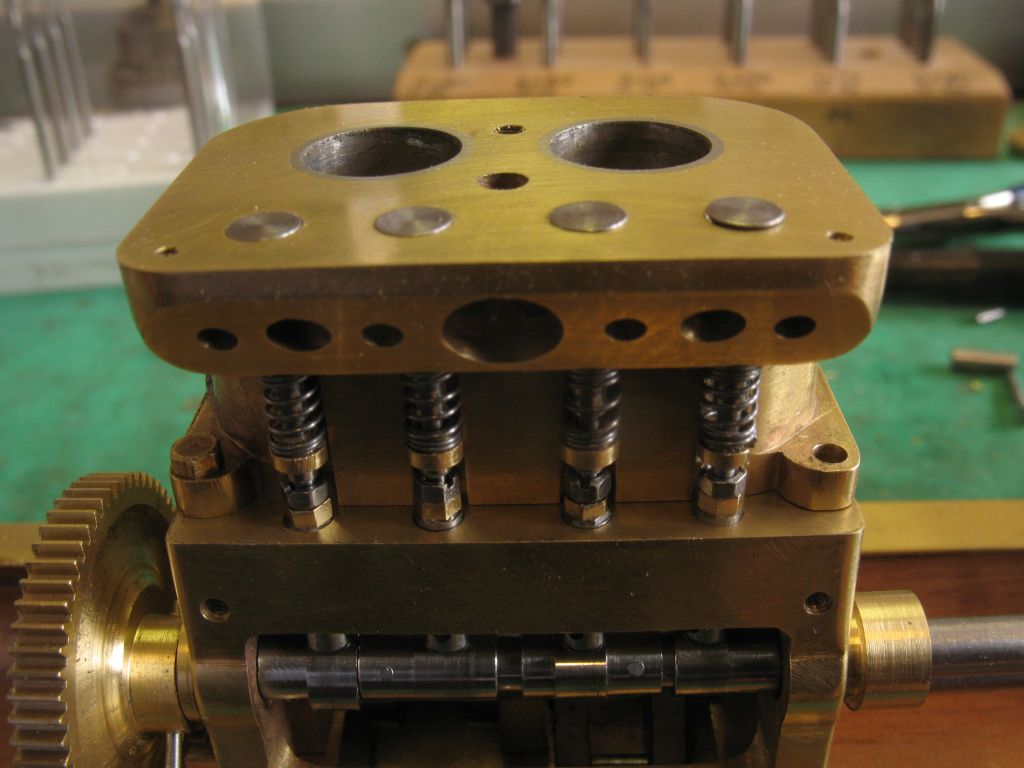
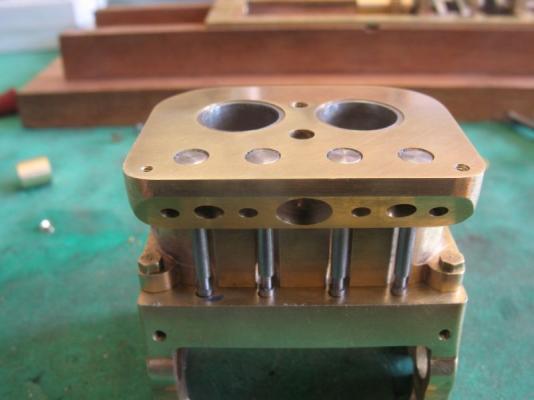
Thanks to all for the feedback on the valves. today I revisited the drawings and made some measurements of the cams and I am going to do a couple of different things before making new cams. First I skimmed .010" off the top of the head this cleaned up the difference between the cylinder liners and the head as well. I did some checking on the engine sites and the practice seems to be to leave the stock that the valve is turned from long enough to use the top as a handle to do the lapping after the valve is lapped then it is parted off from the stock. I am also going to burnish the valve while it is still on the stock, this will ensure that most of the polishing will happen on the brass. I am also going to raise the position of the keeper about .050" this will give a little more pressure on the valve when closing and keep the keeper above the crankcase more. Thanks for all the likes as well. Michael
-
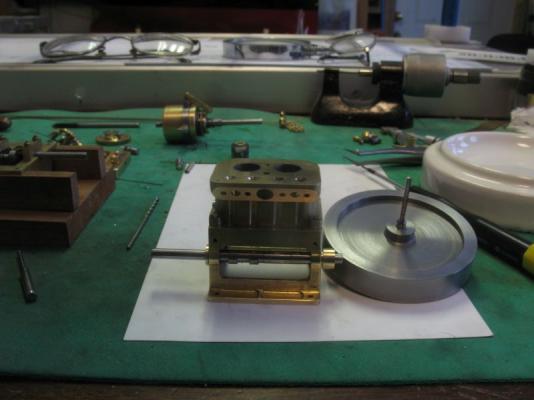
Scott thanks for this insight, perhaps a valve set up as a burnisher that could be used as a polishing burr instead of cutting the angle polishing it. The other option would be to add some drill rod valve seats........no I'm not going there. Mark thanks for the tip about keeping the valves in their respective seats, and I will raise the cams so I will have to make some new ones. Denis the suction cup will need to be replaced with some form of adhesive at this diameter 'Tis snowing again today so a good day to be in the shop. Michael
-
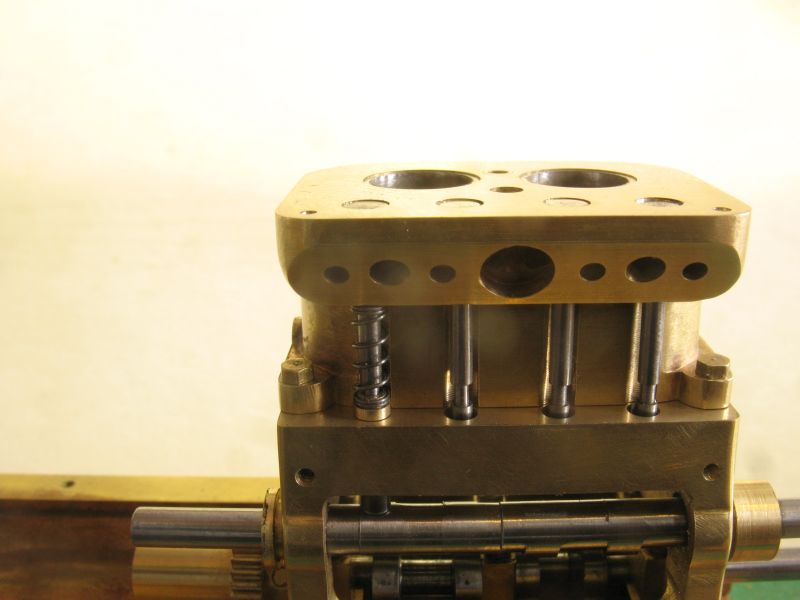
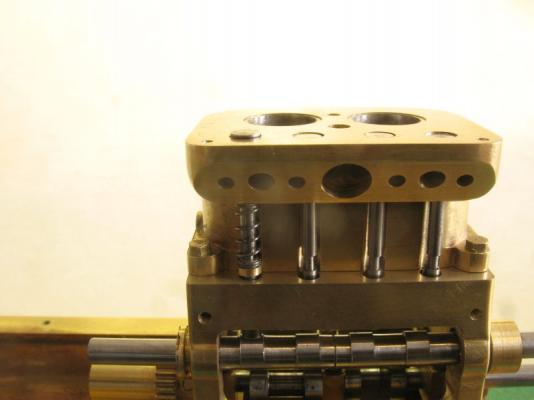
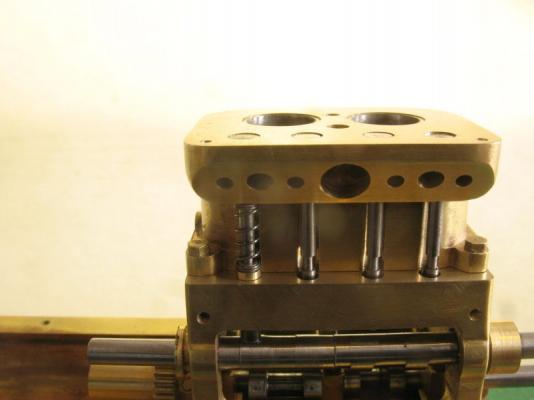
Thanks for the visits and likes. Denis, the valves are just shy of the surface now and I am thinking that I need to change the amount of rise on the camshaft lobes. The valve seats look so rough at this magnification I am working on sorting out how to lap the valves and the seats The tiny clearances at this scale are beginning to concern me. Valve open valve closed I think it needs to open about 15 thou more. Oh well what's one more change, and it probably wont be the last Michael
-
Yes double congratulation in order! Michael