HOLIDAY DONATION DRIVE - SUPPORT MSW - DO YOUR PART TO KEEP THIS GREAT FORUM GOING! (89 donations so far out of 49,000 members - C'mon guys!)
×


michael mott
-
Posts
5,200 -
Joined
-
Last visited
Content Type
Profiles
Forums
Gallery
Events
Everything posted by michael mott
-

Cutty Sark by NenadM
michael mott replied to NenadM's topic in - Build logs for subjects built 1851 - 1900
Oh no Nenad, if you reach too low you miss the top, your model shows that the top is where you are reaching. Michael- 4,152 replies
-
- 7
-

-
- cutty sark
- tehnodidakta
- (and 1 more)
-
Mike, the planking really shows the shape of the hull well you make it look easy, nicely done. Michael
-
Alexandru, I have admired the work on Longridge's Victory for a long time, your model has taken this ship model and raised it to a whole new level of craftsmanship and detail. Michael
-
Ed your comment made me laugh out loud. I liked the way you fabricated the gudgeons the shot of cutting them made me wince a bit though. Michael
- 3,618 replies
-
- 4
-
-
- young america
- clipper
- (and 1 more)
-
Lovely work on the rudder Toni.The photograph of the display cabinets is a bit of a tease, any chance of a few more pictures of the display cupboards and the ships in them? Michael
-
Great work Sherry, isn't it fun thinking outside of the box. that is also quite a few old needles. And I thought I was a pack rat Michael
-
Wonderful workmanship John, it is a very graceful looking hull. Michael
-
Pen Duick 1898 by Mfelinger - 1:20
michael mott replied to Mfelinger's topic in - Build logs for subjects built 1851 - 1900
Superb! simply Superb, the rework of the deck was certainly worth all the effort. Michael -
Mind if I pull up a chair. Michael
-
Johann the rigging looks beautiful the close ups look like 1:1 hemp and not modelwork. The machine is nice too. Michael
- 662 replies
-
- 1
-
-
- bonhomme richard
- frigate
- (and 1 more)
-
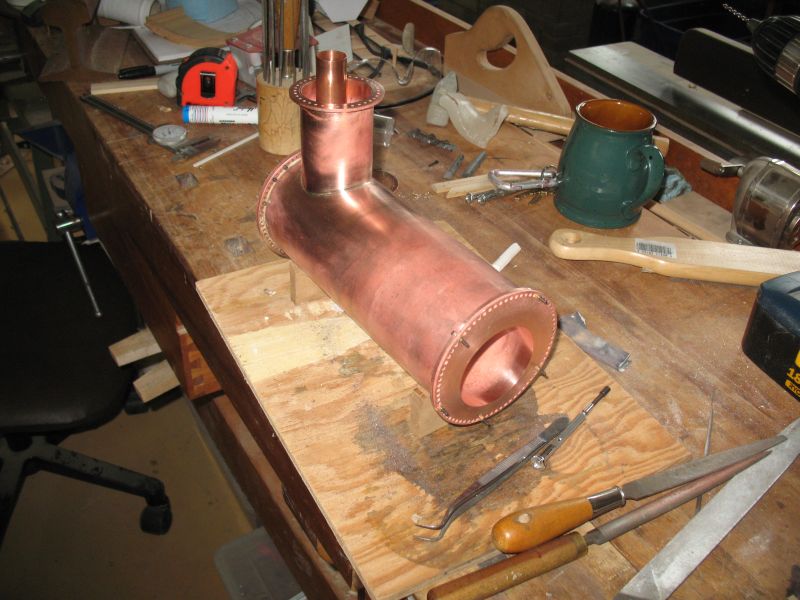
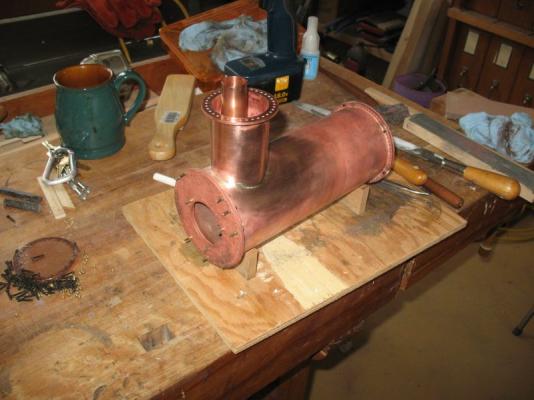
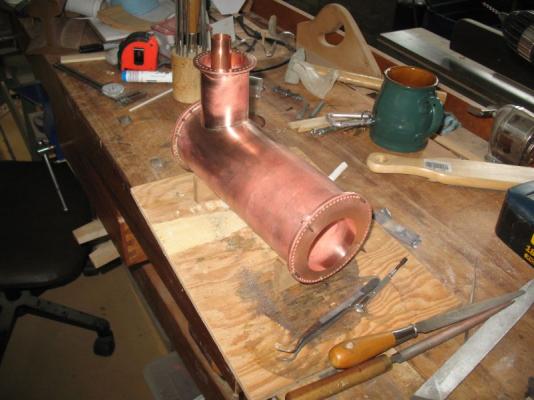
Wow Nils that is a complex boiler, I am curious about how the tubing is wrapping around inside the main outer tube. I have K.N Harris book Model Boilers ans Boilermaking published in 1972 A Model and Allied Publication your boiler reminds me of a "Cornish" or "Scot" marine boiler. John that is a beautiful model and the boat looks fantastic Michael
-
Steve this is drill rod. here it is sold in 36 inch lengths and comes in all the fractional sizes from 1/16 to 1 inch, anything that is ground and rigid between 1" and say 3/4 would work, I noticed that the headstock bore is 20mm that is just over 3/4 so some 3/4 rod would work even if it longer just let 6 inch hang out of the chuck. Carl I'm not so sure about that, there is a lot of talented builders here who I have learned from. Michael
-
I completely agree with Patrick Nils. It would be great to see what you did in detail as you strip down the engine for the overhaul, Steam engines are a lot of fun. A steam launch is on my list of things to get done in the next few years. I already have a couple of different boilers half built. this one would work well. Michael
-
Steve i had a look at your type of lathe. To check if the head is out of alignment I suggest you put an 8 inch length of 1 inch ground bar stock in the chuck. Put a dial indicator in the tool post and set it up as close to the chuck as possible zero it and wind the carriage away from the chuck and watch the dial if the head is parallel to the bed then the dial should stay at 0. If the dial changes then there will need to be some adjustment. A common problem with turning a slight taper is that the material springs away from the cutter very slightly if it is longer than 3 diameters in length unsupported. Use a live centre to support the end if it is longer than 3 diameters or use a collet and feed it out. Self Centering chucks are not good at re-centering a piece once it is removed from the chuck. Collets on the other hand are very good at keeping the material concentric. I notice that the ways on your lathe have a v on the front part of the bed this is a good thing, I wish Myford had done that the V is good for keeping the carriage in line. I looked at the manual and the headstock is set with the V groove as well, so it does not look like you can change anything on it (you really don't want to anyway. I think that with a bit of research and some tweaking your lathe will be more than adequate for your hobby work. Michael
-
Matt just finished going through the entire log , what a wonderful job you are doing, the tiny tools are great. Michael
- 425 replies
-
- 2
-
-
- bounty launch
- model shipways
- (and 1 more)
-
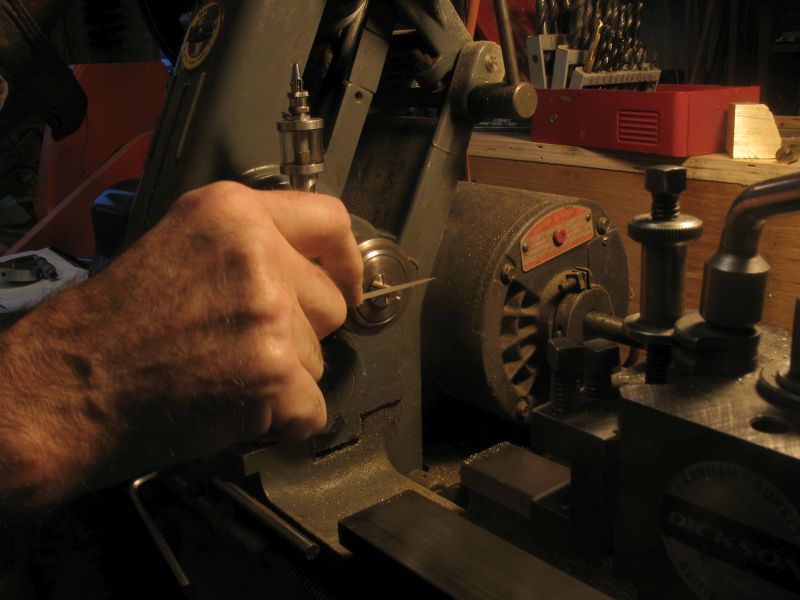
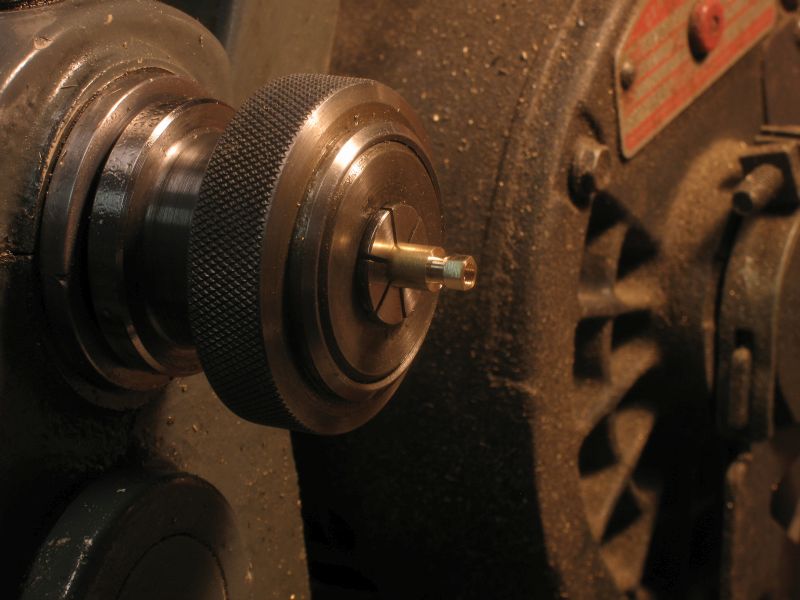
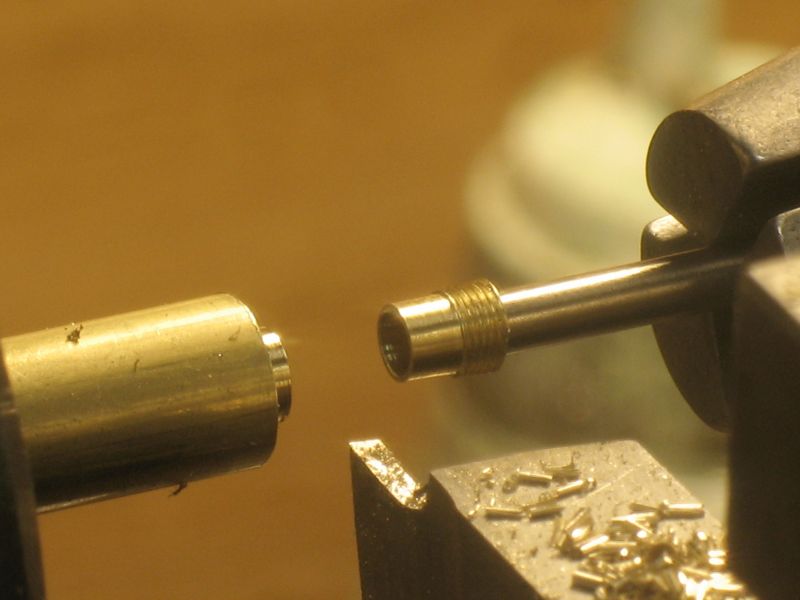
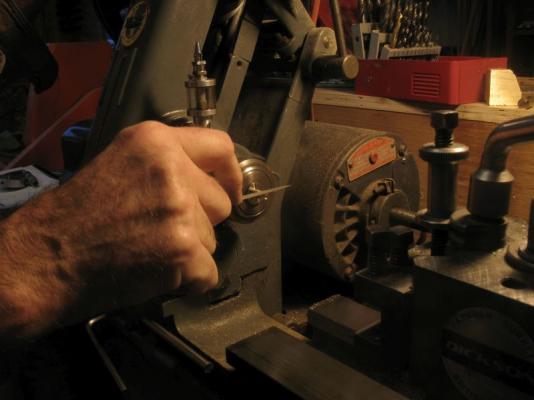
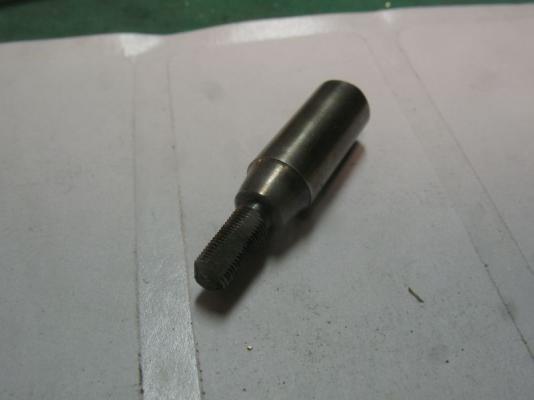
John I know I'm completely bonkers. Steve what kind of lathe do you have? Screw cutting is easy if you unplug the machine and are using brass or free machining steel. here is a bit of SBS of union building. I used the dremel with a small stone to add some relief to the tap. By locking the rotation of the quill and clamping the dremel in the vice I was able to take very small cuts by indexing in the grinding stone and raising and lowering the tap in the quill because the depth of the amount of threads in the union I did not need to make the relief very long. this really helped to make the threading more smooth. threading the blank nut threaded 3/32 deep" filing the flats polished ready to part off male part threaded and bored 3/32" parted off onto the shank end of the #42 drill(.093) I used the drill as a support because the wall thickness is around .010" the two halves are sweated to their respective pipes. and threaded together uncoupled thank you for all the likes, I lost count so thank you for that. Michael


-
Carl no I already have one now Sorry Carl I couldn't resist I prefer a solid connection because of vibrations and the possibility of water spraying all over the inside of the boat, should the connection come undone. Having spent many years fixing exhibits built by people who didn't think that their exhibits would ever need fixing, I am rather shy of things that cannot be dis-assembled. Bob, glad the link was useful. Thank you to all who have posted likes over the last entry. Michael
-
Denis if you have a scroll saw you could always strap them to the top and run the saw for a few minutes. my humbrol tins are the tiny ones from the 70's Michael
- 956 replies
-
- 4
-
-
- andrea gail
- trawler
- (and 1 more)
-
I like the colour Denis as well, your comment about the long time paints have been sitting on your shelves, reminds me I have a drawer full of old Humbrol the good old enamel type, and also some old floquil . The Humbrol is amazing even after 30 years this stuff is still good in the unopened cans. Michael
- 956 replies
-
- 2
-
-
- andrea gail
- trawler
- (and 1 more)
-
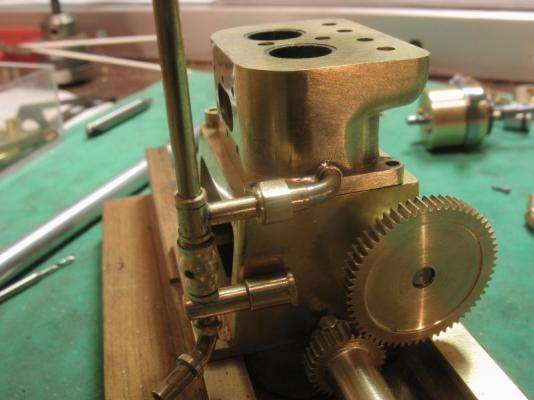
Ed this link on the old marine site shows the cover on the gears and the plates covering the openings on the crankcase. They are different engines but the same model, there seem to have been quite a few innovations and modifications to these engines, sort of reminds me of some of the dressing up that the hod rod cars seem to have. Druxey, thanks I followed the same design as the miniature 00x90 taps that I purchased from Walthers the model railroad suppliers. the same tap that was in the pin chuck. I used the hockey puck tap holder when I cut the thread. by making the tap first it was not difficult to then by trial and error get the mating part to fit nicely. Steve the taps are the easy part the dies are a different story. having a screw cutting lathe is the key, I just wish i had the quick change gearbox for the Myford instead of having to change the set up by hand following one of the three different plans that are in the set up diagrams. thanks for all the likes Michael
-
Your attention to the details of the rigging lead me to suspect that you have spent time sailing on a ship with rigging like this. It is one thing to follow a plan quite another to fully understand how the rigging actually works. Fantastic work Nils. Michael
-
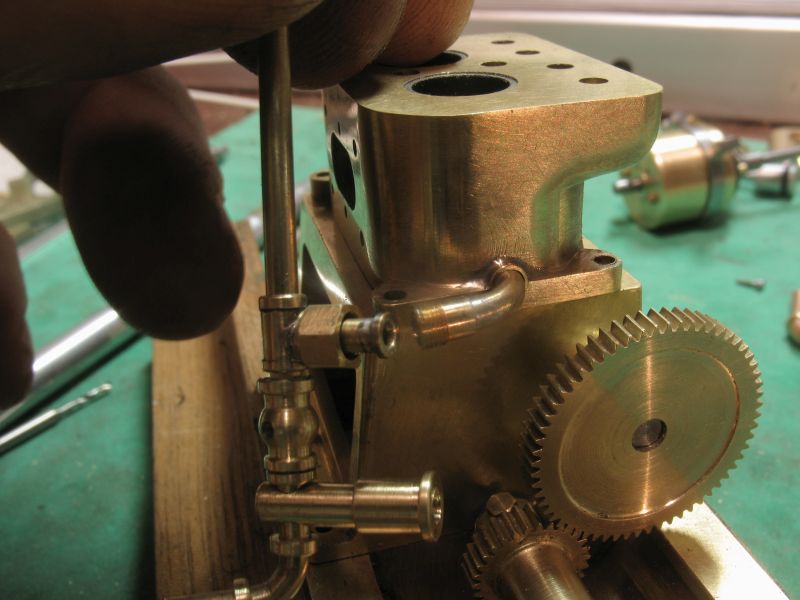
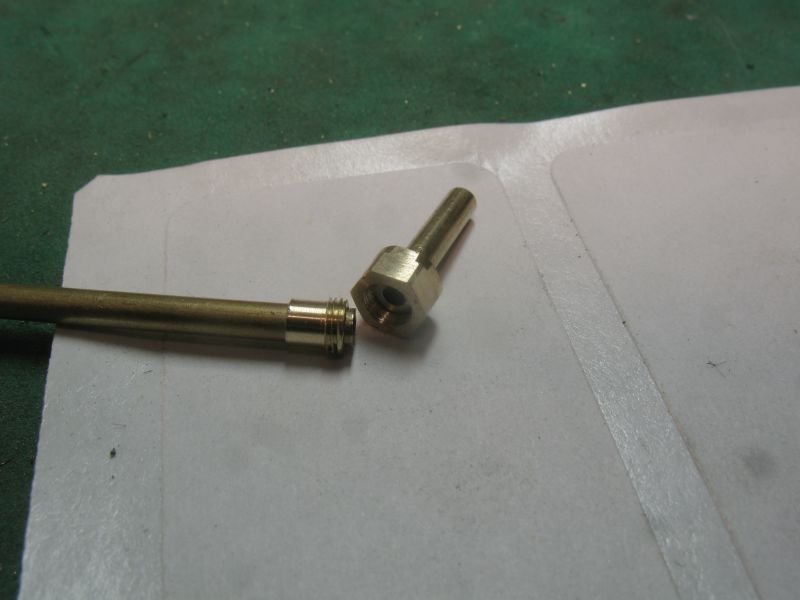
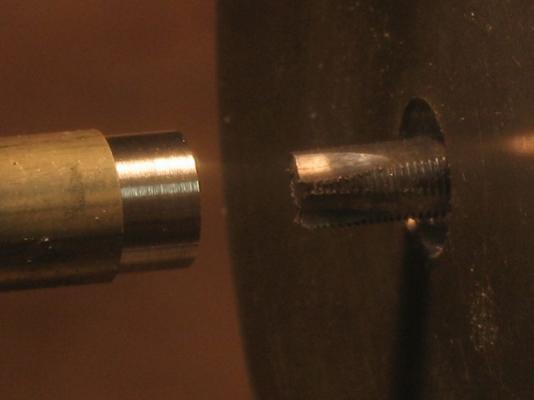
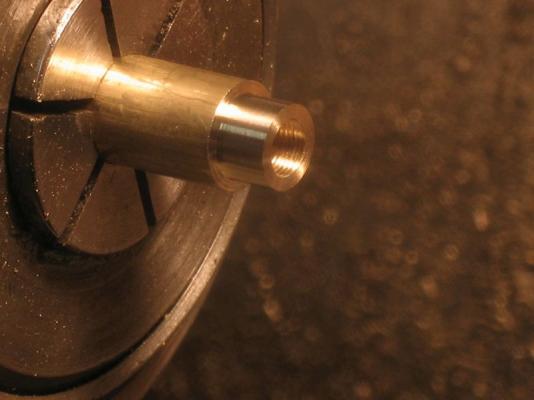
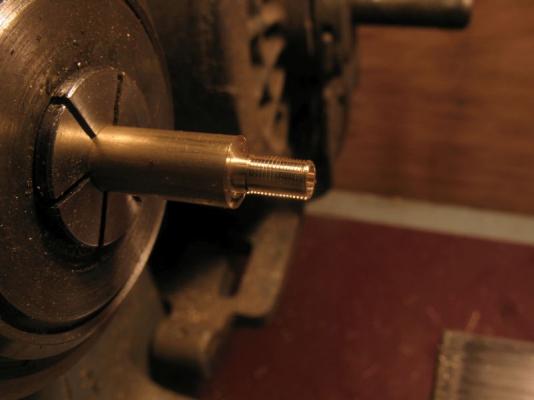
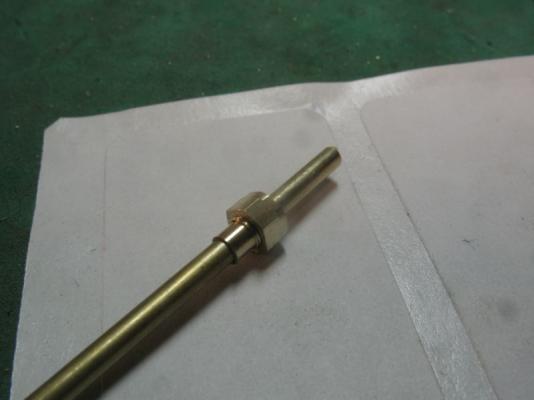
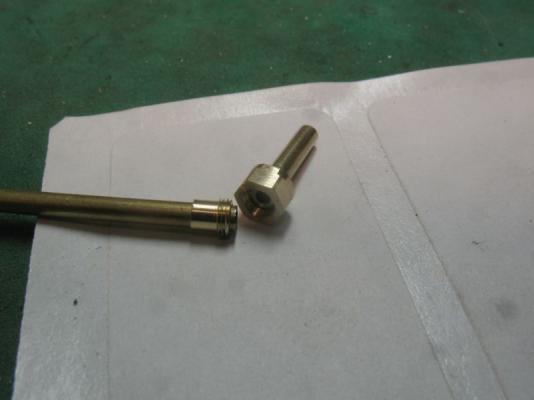
This evening I had to give the union a run. First order was to set up the change gears on the Myford lathe to cut 80 threads per inch, then did some test cuts with a freshly ground cutter on some brass. then turned down some 1/4 inch drill rod to .138" which is the size of the major diameter of a #6 machine screw then turning everything by hand(I unplugged the lathe) and taking .001" cuts threaded the shaft, polished it up with a leather strop. Hardened and tempered it then ground three flats with the diamond stone. next I turned up the brass nut, and threaded it after the threading was done the clearance hole wad drilled through and then it was parted off. Next the male part was threaded and tested with the tapped nut and .0005" reduction threading cuts until the nut wound on to the thread easily. The male part was then parted off and slipped onto the end of some 3/32 tube. A couple of tiny refinements and it will work just fine. michael

-
Looks like you are making some good progress Mark, we all do the dance one way or another. Michael
-
Pen Duick 1898 by Mfelinger - 1:20
michael mott replied to Mfelinger's topic in - Build logs for subjects built 1851 - 1900
excellent step by step, reminded me of long hours this summer doing a similar thing on the cover-board on Maria. Your deck looks beautiful. Michael