HOLIDAY DONATION DRIVE - SUPPORT MSW - DO YOUR PART TO KEEP THIS GREAT FORUM GOING! (89 donations so far out of 49,000 members - C'mon guys!)
×


michael mott
-
Posts
5,200 -
Joined
-
Last visited
Content Type
Profiles
Forums
Gallery
Events
Everything posted by michael mott
-
 Hi Mark there are some brad points that do go as small as 2mm this tool company has a great variety of miniature end mills and drills that could also work. Pricey but very good quality. there is also Lee Valley with a good selection michael
 -
Thanks for all the likes, Thanks Jack, Judy sounded great on the phone this evening, I am looking forward to seeing her tomorrow. Here is the short clip of the spark test I suppose I could have waited till dark then the spark would have been more visible, when it is set up with the electronic timing the spark will be triggered by the magnet in the flywheel. Michael
-
Alexandru your use of the different colours of wood looks fantastic. Michael
-
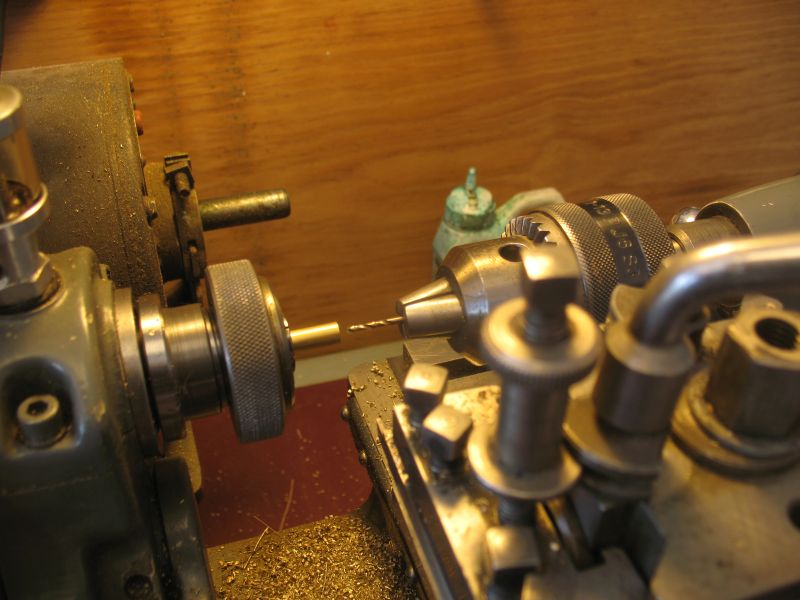
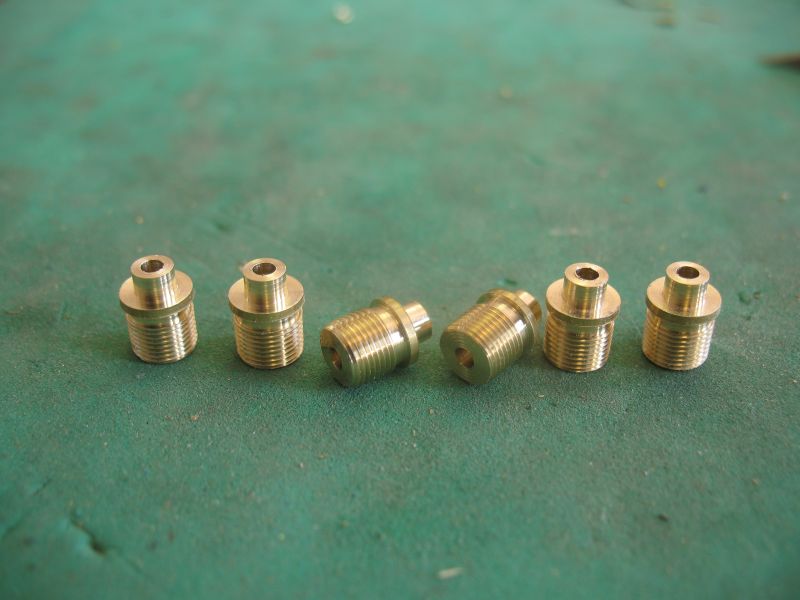
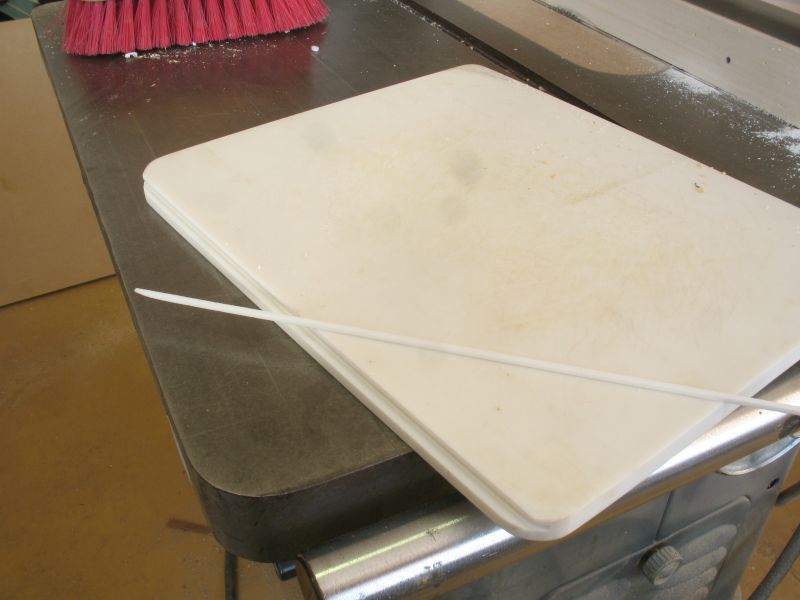
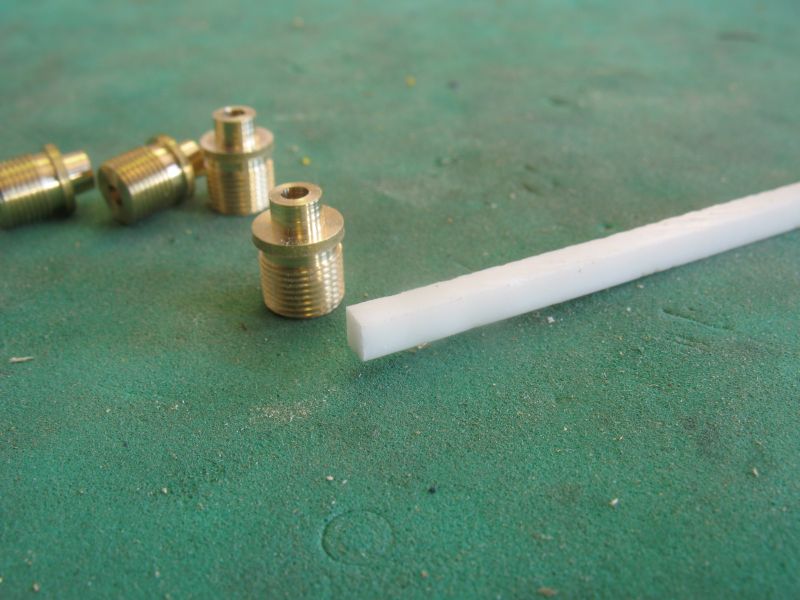
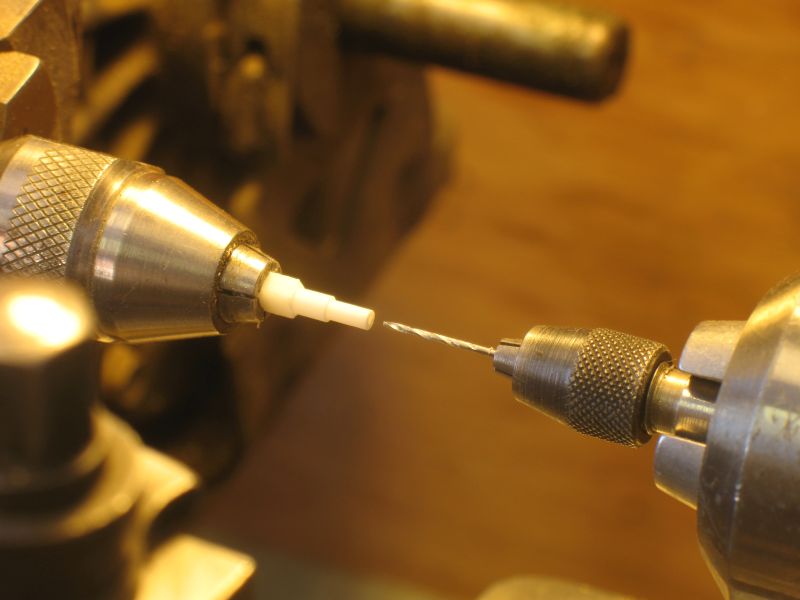
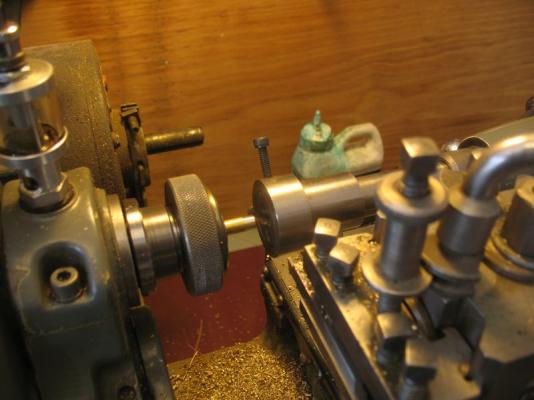
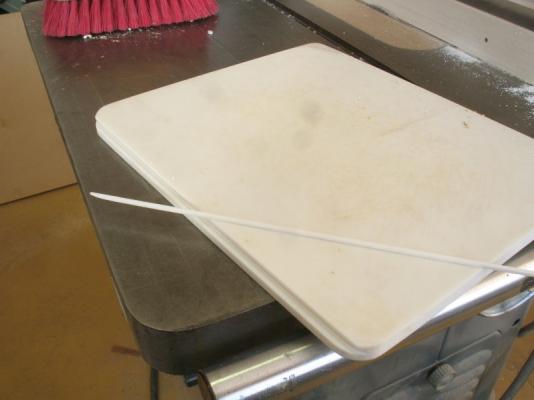
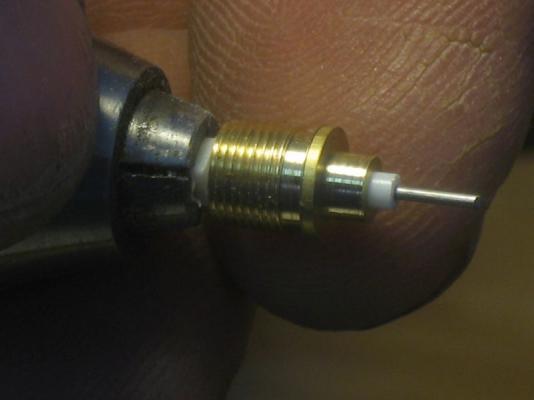
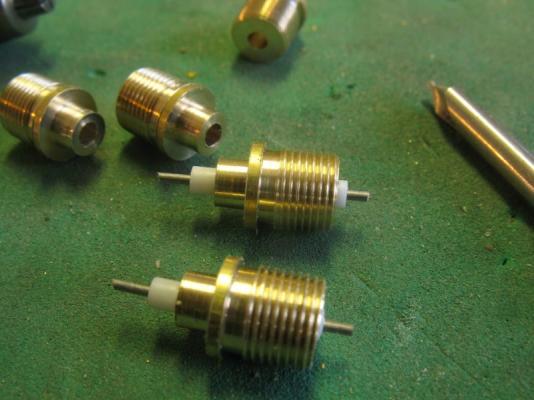
I was able to get a little break from driving today and was able to stay home. I had a couple of hours in the shop and worked on the spark plugs a little more. A few more bodies were turned up out of brass. the small diameter stub represents the plug body and will be filed to a hex section the larger diameter of the rest will represent the circular plate that is on top of the head covering the oval plate as in this picture Next I cut a strip 1/8th by 1/8th off the side of a scrap of Corian that I used as a cutting board in the kitchen using the tablesaw. Some time ago I made a special 4 jaw collet from a bolt in order to make square headed bolts out of 1/8th square stock This came in handy for turning down the Corian to .078" diameter after drilling a .028" hole about 3/8" deep I turned short sections 1/16 long down to the finish diameter and progressed toward the chuck, this helped to support the work. once the full length was turned I slipped the steel core rod into the Corian and then pressed the brass over the Corian, using the tailstock chuck to ensure a good alignment. and a shot with the finger for scale The electrode was tested with a piezoelectric crystal to see how the spark would work and it worked fine I will need to add a steel in for the ground so that the spark jumps from steel to steel and not steel to brass. I will do some more experiments on the fabrication next week if I get time. It was a good stress reliever today to focus on the model and take my mind of other things. Michael


-
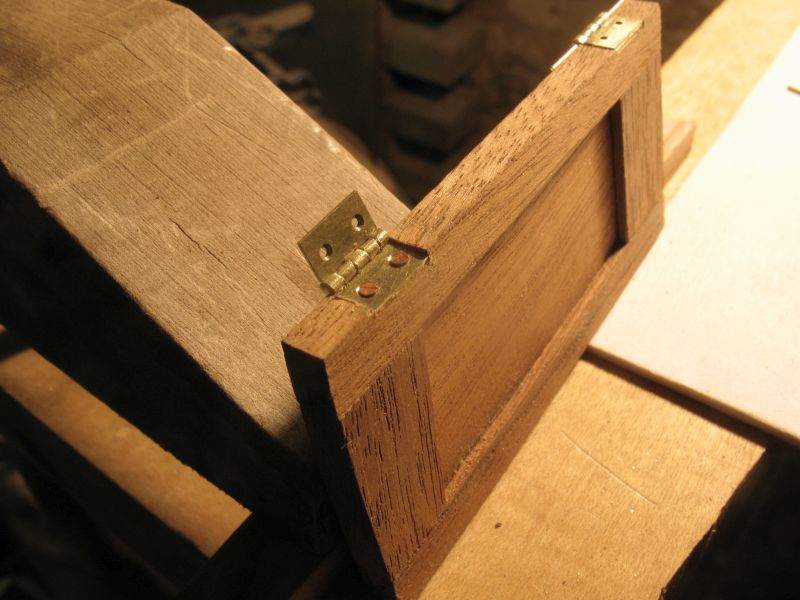
Mark I am still giving the chuck operation some thought. That said, looking at what you are working to accomplish I would approach the fabrication of the axles differently. from the photograph of your set of axles the round portion appears to be the same diameter as the square section is wide. I am not sure of the way the full size axles were made, on the model however the junction between the square or rectangular section and the round section is hidden by the wheel, unless of course the wheel is left off. this then leads me to suspect that there would be very little ability to determine if the stock(axle) were made from one solid piece or assembled from two or three pieces. from a manufacturing process there is a much greater difficulty of getting a clean smooth finish at the junction of the rectangular section and the round section using a lathe, purely from the physics of the cutting action on the fibers of the wood no matter how fine the grain. The way I would approach this is to use an assembly method by combining a dowel and a rectangle or square section, for the following reasons. 1, The ability to cut and sand to accurate length all the rectangular or square sections first (square can be reduced to rectangular after gluing in the dowel). This method has already been accomplished with the wheels so square section is a breeze. 2, The dowel can also be cut to accurate lengths. this eliminates the need to reverse the work in the holding device whether a 3 or 4 jaw chuck with any number of sleeves to accommodate the section. (and some of the ideas suggester are great.) 3, The square or rectangular piece can be set up in a jig in the vice to drill a through hole or from each end to accommodate the dowel, the important thing here is to use a brad point bit especially ground for drilling into wood. in the case of the round part being the same diameter as the width of the rectangular make the part wider to begin with to allow a full hole to be drilled. After the dowel is glued then you can either sand or cut the extra side material away to reduce the width down to the diameter of the dowel. 4, A simple stop type jig can be used to position the dowel in the center of the square or rectangular section, in preparation for either a tiny pin (brass) to ensure that it stays where you put it or a touch of glue. 5, If the wood used to make the rectangular section and the dowel are from the same stock it would be impossible in my view to know that it was not made from a single piece of wood. All of the above is of course only my opinion and the way I would approach this element of the whole. There are so many ways to approach the building of our models, and the sharing of all these ideas is what makes this such a wonderful site. Michael
-
I'm thinking about it. The wheel cutting trick is a nice one. Michael
-
Thanks for this Chuck, even though the cameraman was not able to show the close up that you audience saw it was never the less very informative and added to my understanding of the planking. the bending segment was particularly useful as well. Michael
- 1,051 replies
-
- 2
-

-
- cheerful
- Syren Ship Model Company
- (and 1 more)
-
Good morning Lawrence. Thanks for you kind words. The tiny machine screws can be had at this site or you can make them if you have a small die. and some hex brass or even round brass to make cheese heat or round head. it is also possible to fake the look of very small wood screws even smaller than what you can buy, by using a jewelers saw and with the finest blade make a slot in the top of a fine brass pin, or like this one in a tiny flat head rivet from the scale hardware suppliers like this one. Lee valley carry the very small wood screws. Michael

-
I would like to be able to watch over your shoulder for a few weeks just to enjoy watching a master at work. Michael
-
It is great to see the hull shape beginning to take form, nicely done. Michael
-
ancre Le Fleuron 1729 by rekon54 - 1:24
michael mott replied to rekon54's topic in - Build logs for subjects built 1501 - 1750
Stunning work! Michael -
Igor, what an amazing model you are making, I have been sitting with a wide smile all through the build this morning. the way you have accomplished the tiny details is superb. I will be following along. Michael
-
This thread is for sharing how and what you use the #11 or exacto knives for. Get someone else to take the picture or use a tripod, because using these knives usually takes two hands. I will include some pictures of how I sharpen the blades as well. Michael
-
Is there a better #11 blade handle
michael mott replied to roach101761's topic in Modeling tools and Workshop Equipment
I have read through this entire thread, in order to get an understanding of the percieved pros and cons of using x, y, or z knives and blades, I am still not any wiser. This thread brings up for me a number of questions. 1 how do you hold the knife? 2 what do you use it for? I do not ask these questions lightly or flippantly. I am a firm believer in using the right tool for the job. In classes that teach how to use various tools, and the safety concerns that are usually addressed and demonstrated, I have never seen any tutorial or visual demonstrations on how to use the ubiquitous hobby knife, perhaps I have not looked hard enough. My understanding of a scalpel is that it is designed and used for surgery, please correct me if I am wrong in my understanding. The fact that it is a very sharp small knife gives it a broad range of other uses, and for me this is the rub. When choosing a tool to do a particular task I think that we, I mean we, because we all do it, often reach for a familiar tool out of habit or because someone showed or told us that this worked -- but is it the right tool for the task? I am going to start a new thread asking you to show what you use the knife for and how you hold it, Get someone else to take the picture. I think that this will be very instructive. When I was in the business of making commercial models we used a lot of exacto #11 blades for cutting plexiglass by using the back edge as a scraping blade to scratch a fine line then the plexiglass or styrene was snapped to length in preparation for the next task. I supplied the blades for the staff and used to buy them by the thousands. I have boxes of old brand new blades with just the very tip snapped off. I resharpen them when I need one which is not very often. Michael -
Matija, I just went through all the build again, beautiful work. It is easy to get lost in all the small details you have made so well. Michael
-
Thank you Altalena, for you compliments , I am taking a short break from the pilot cutter. Michael
-
Hi Altalena it is great to see more progress on your model. the sides of the centerboard trunk are an interesting design, is this decoration or is there some other reason? Michael
-
I have to agree with all the comments above regarding the quality of your tutorials about the sailmaking. Superb work Dan Michael
-
A neat solution indeed. Michael
-
I am working on the spark plugs today, and it is not snowing. michael
-
The details look great Denis, your work puts a smile on my face. Michael
- 956 replies
-
- 2
-
-
- andrea gail
- trawler
- (and 1 more)