michael mott
-
Posts
5,200 -
Joined
-
Last visited
Content Type
Profiles
Forums
Gallery
Events
Everything posted by michael mott
-
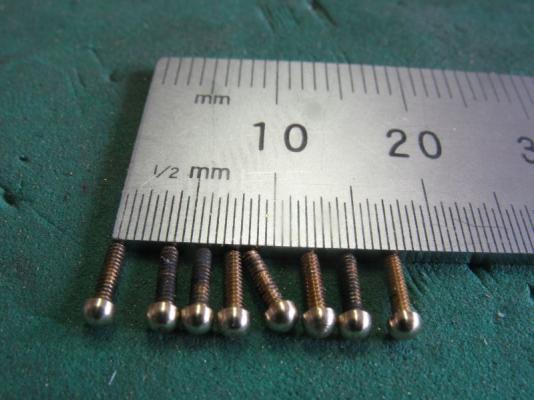
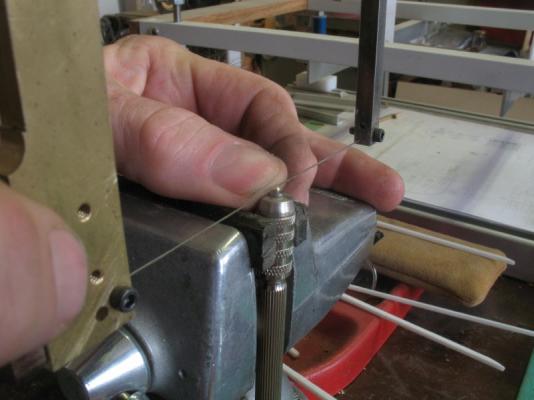
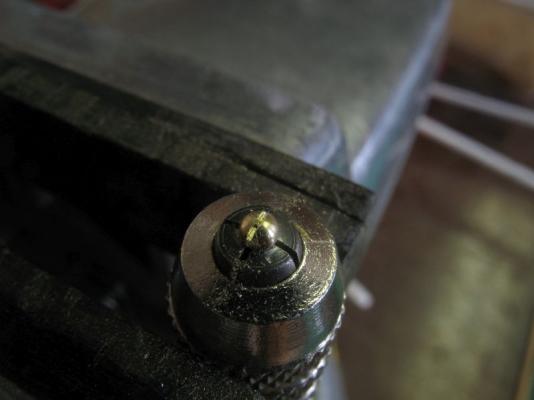
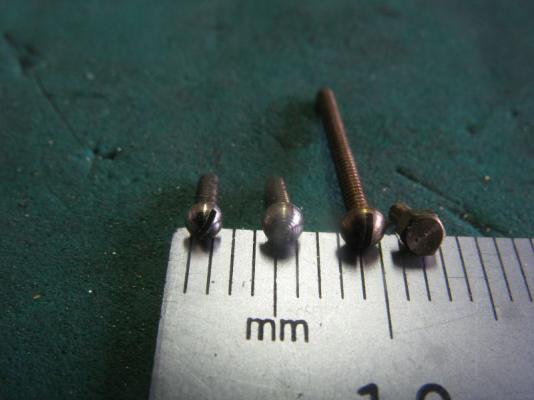
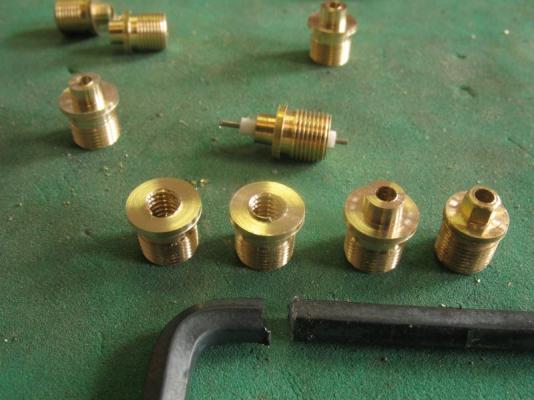
 Thanks Kees, and for all those who added a like to my previous set of pictures. today I modified some 00 x90 hex head brass machine screws, cheating I know. I chucked up a small drill chuck in the Myford lathe to hold the small screws. The round head 00x90 from the suppliers are .087" max head diameter which was a bit large so I turned down some hex ones I had to .078" diameter then filed the round with some fine files and then gave them a burnish with a clockmaker's burnish, Next the screw slot was cut with the jewelers saw. After drilling and tapping the circular plate I discovered that the round head screw were still a bit too big, also the holes in the circular plate still needed to be opened up for a clearance for the 00 x90 screws. I reduced the diameter of the screws to .071", which is about as small as I want to go with the 00 x 90 which has a max thread diameter of .060" Left one is .071 next is .078, next is the commercial round head at .087" and the hex type that I used as the base for the modifications. Tomorrow I will finish the other plate and the rest of the screws down to the smaller diameter. Michael
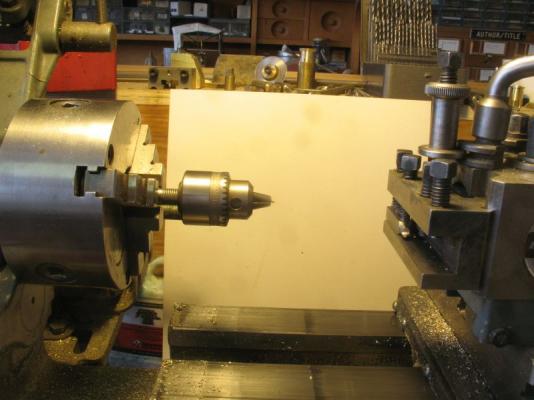
-
Chuck your planking work is outstanding! I hope I am able to get closer to this standard on my next hull. Michael
- 1,051 replies
-
- 2
-

-
- cheerful
- Syren Ship Model Company
- (and 1 more)
-
ancre Le Fleuron 1729 by rekon54 - 1:24
michael mott replied to rekon54's topic in - Build logs for subjects built 1501 - 1750
Those eye-bolts are a lot of work even with the tools that you are using, the end results are great. Michael -
John what a beautiful looking hull, super job on the planking. Michael
- 745 replies
-
- 1
-
-
- francis pritt
- mission ship
- (and 1 more)
-
Thanks for all the likes and for the kind wishes for Judy. i read right your an Englishman abroad with skill,s like yours i,d say Sheffield lol Gary, well it was St Marys Hospital Paddington right next door to the Great Western Railway Station. (or as some say God's Wonderful Railway) Then I grew up in Acton W3 in West London..... trial and error is a wonderful teacher, I have lots of scrap boxes that have accumulated over the years, and also encouraged by the right folk when I was young. Michael
-
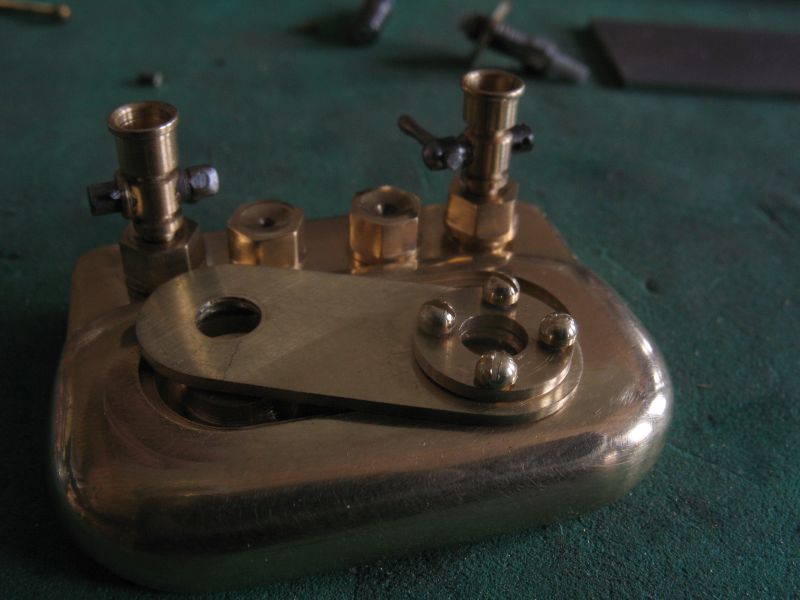
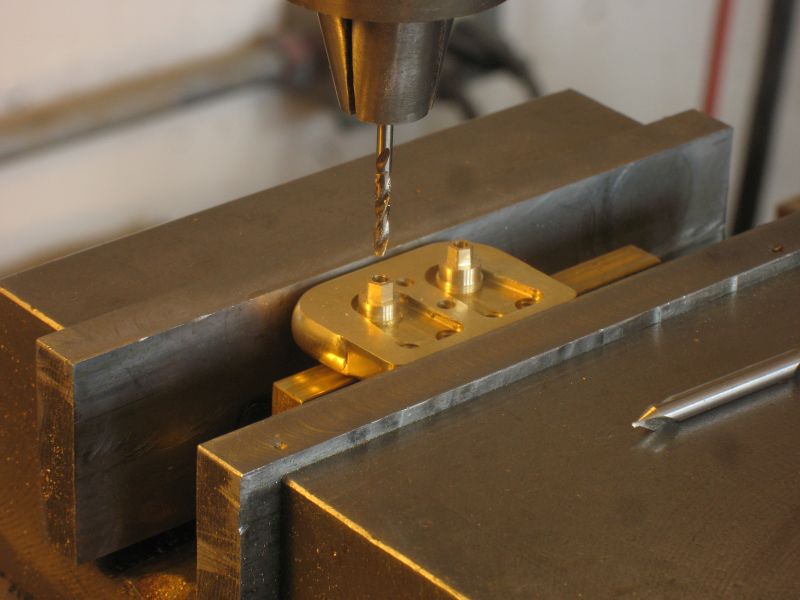
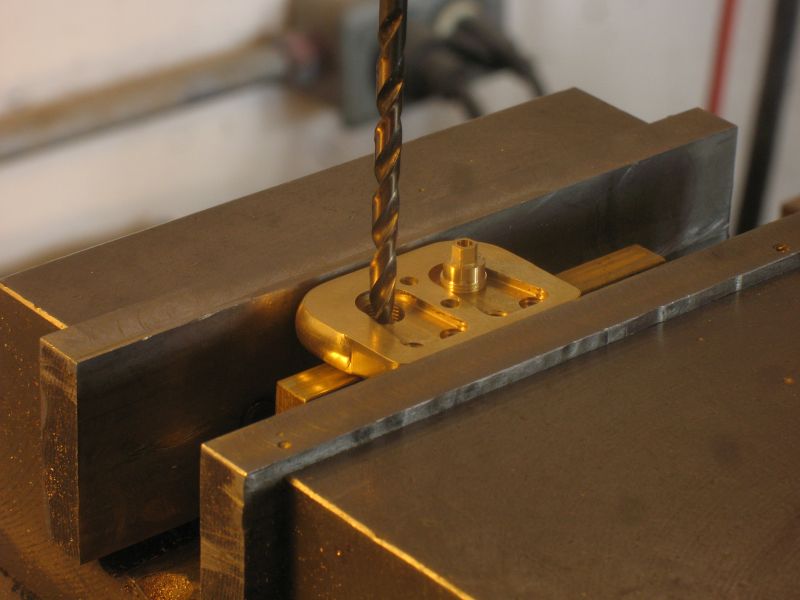
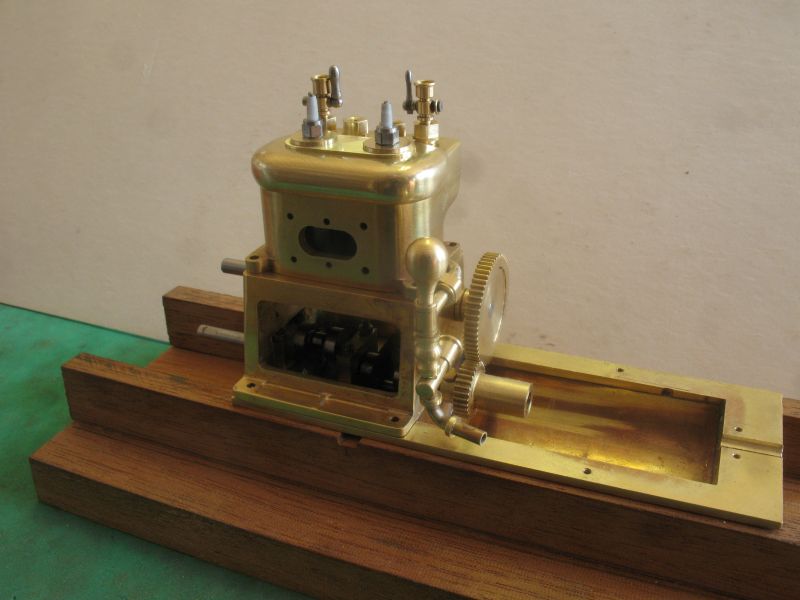
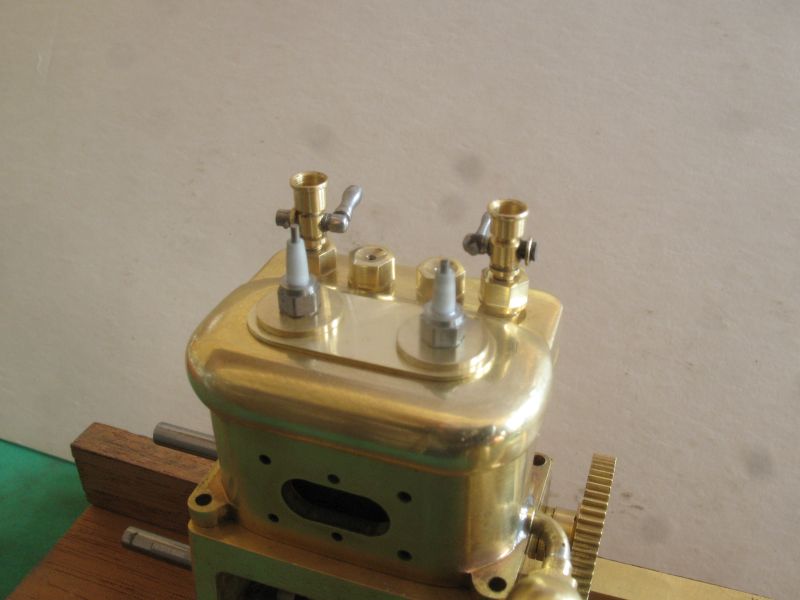
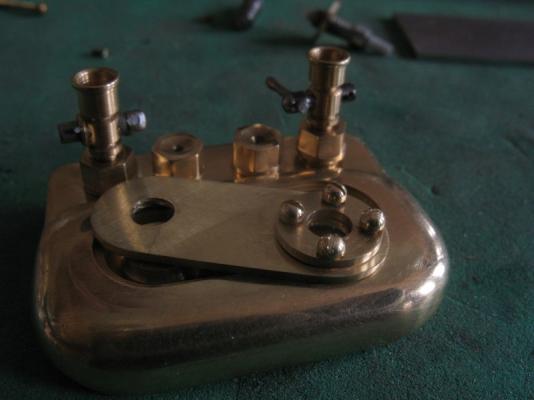
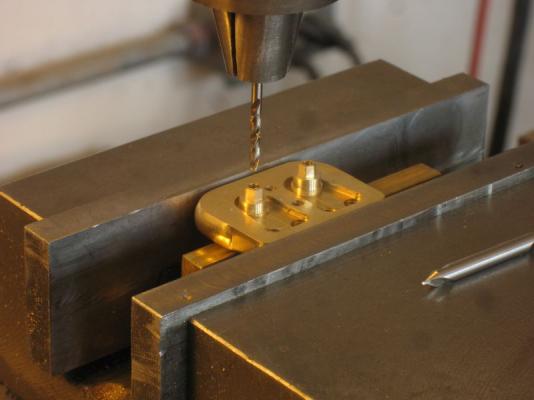
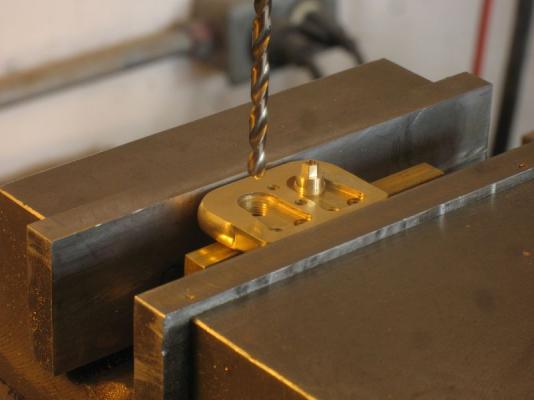
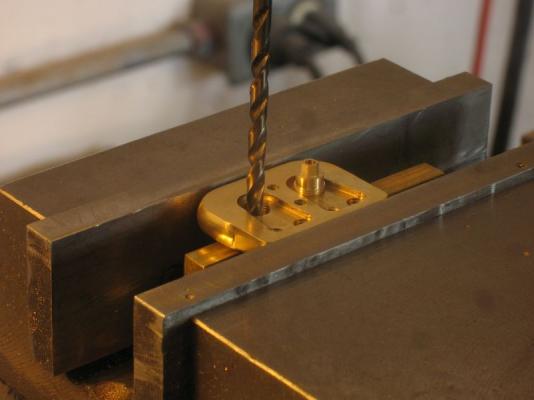
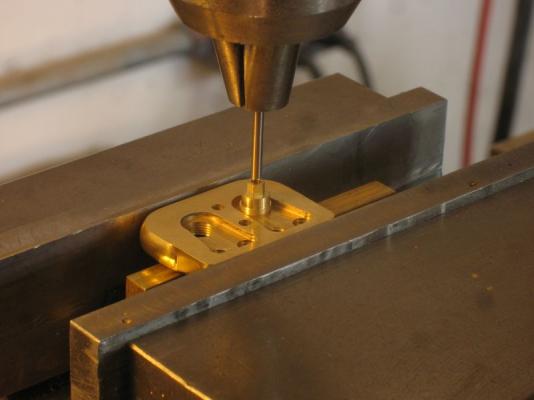
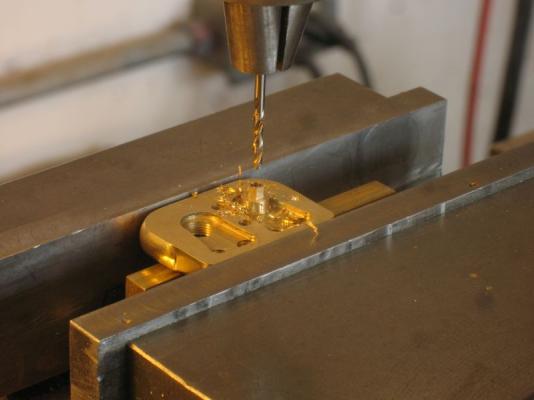
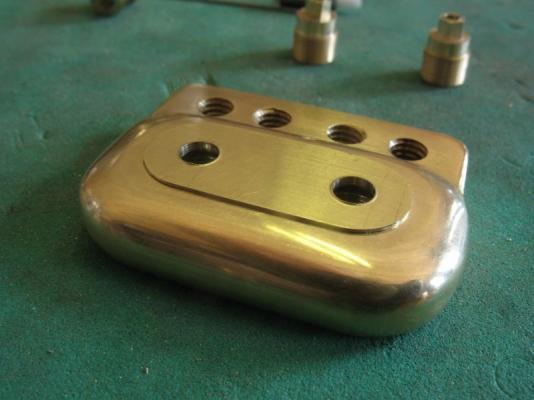
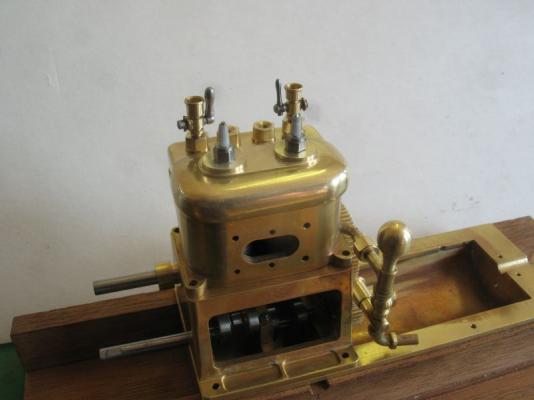
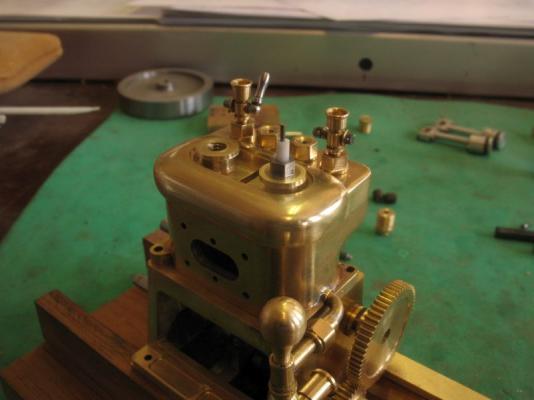
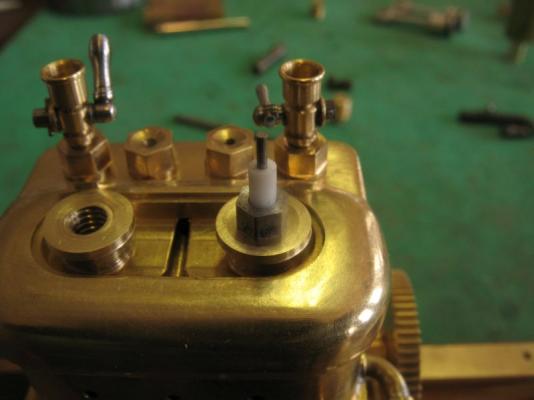
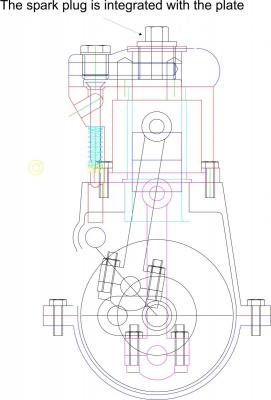
Patrick, Druxey, Mark T, Germanus, Row, Jack, Igor, Carl, Bob, John, Gary, Mike, Dan, Denis, Ed, Mark. Thank all so very much for the well wishes, it is indeed great that Judy is well enough to be home and she has even gone back to work at the Library, (it is a small rural one and Judy is the Librarian Manager she was looking forward to getting back so much. P.S. : the Most Honourable and Noble Swiss Watchmakers´ Society at Geneva would be pleased to send you their application form. Germanus this made me smile, They are way way above my league, but as a kid I wanted to be a watchmaker..... it is a funny world we live in. When I was 15 I had 24 chiming clocks in my bedroom all sort of them, picked them up in junk shops in England, they would be hard to find these days, but in the late 50's early 60's they were a dime a dozen. I am almost sure that if to fill in couple of drops of gasoline in this engine it will start working. Igor, as soon as she is ready that is what will happen. The cover plate for the cavity on the top of the head, took for ever to fit, but it had to be precise and snug before I could drill the holes. After the blank was fitted I flipped the head upside down and clamped it in the milling machine on top of a sacrifice block of brass, I used brass so that the plate had something the same density so that the hole would not form a bur on the drill exit. The set up included using a couple of the original integrated spark plugs as drill bushings to act as guides for pilot drilling the holes in the plate After the .078 hole was drilled the bushing was removed in order to then drill out a clearance hole for the spark plug which is .136" The head was then indexed over to line up the second hole this was done by trial and error, by raising and lowering the .078 drill until it slipped into the hole easily. I did ensure that the upside down bit ran true before doing the set up. Then drilled out the second hole. Then repeated the clearance hole for the plug. I made a couple of large .031 brass washers to act as the small circular covers these will get mounted to the oval plate with four small 00x 90 round head screws. It is great to get a bit more time in the shop, and I am spending more with Judy now that she is back on her feet. Thanks for all the likes as well. Michael


-
Mark there seem to be no end to the challenges. the Idea of gluing the spacers to the wheel first seems like a good idea I would be tempted to make a small piece of deck under each cannon with a wavy edge on either side like one does on a drawing to show the cutaway, this would then give a much larger gluing surface and would also give you the opportunity to make some small adjustments in the positioning without it looking untidy which it might with all sorts of spacers. Michael
-
Beautiful workmanship again Ed, is about all I can add. Michael
- 3,618 replies
-
- 2
-
-
- young america
- clipper
- (and 1 more)
-
Nils. I am continually amazed at how much fine detail and work you accomplish. Michael
-
I have always found that when using masking tape I give the the surface a shot of the same colour that I am masking first to make sure that if any bleeds happen then at least they are the same colour as that which I am masking. Next I coat the colour that is the new one. When the paint has flashed off, while it is still soft I peel the tape back as close to the surface as possible without touching it to avoid lifting any of the soft paint. Michael
-
Nice jig Mark. would it be possible to hold the assembled carriage on 4 sharp pins into the bottom of the axles by just pushing it onto the sharp pins or needles? that way the axles are not touching any other wood. Michael
-
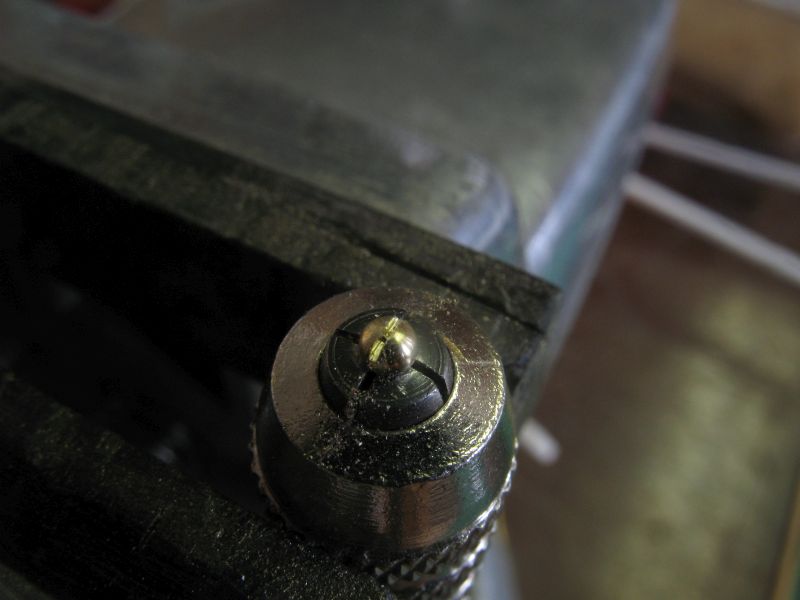
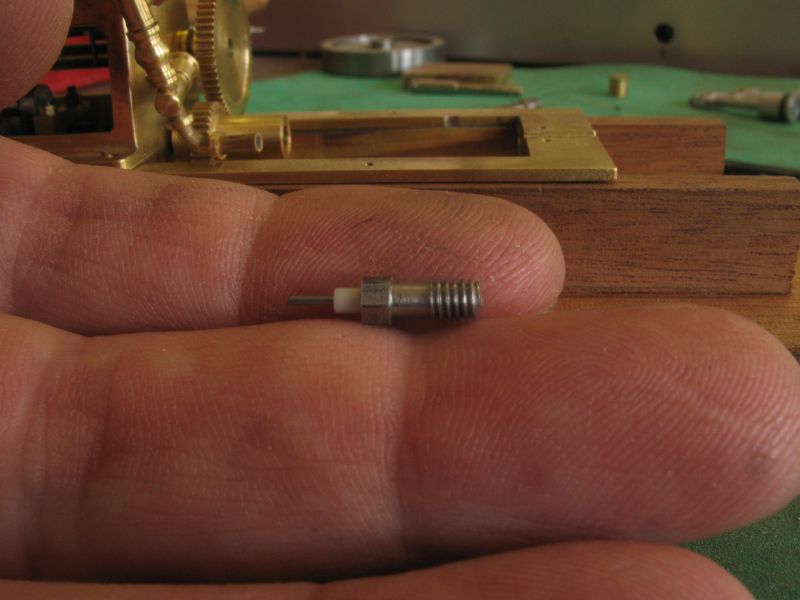
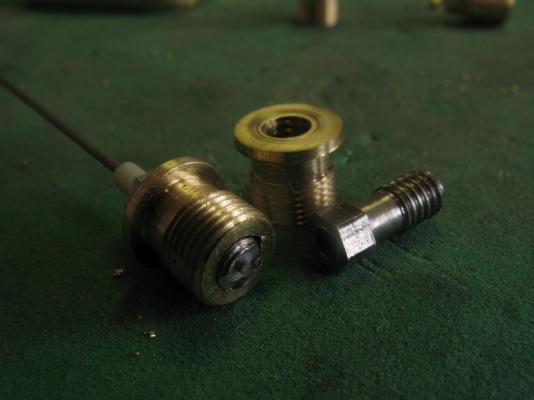
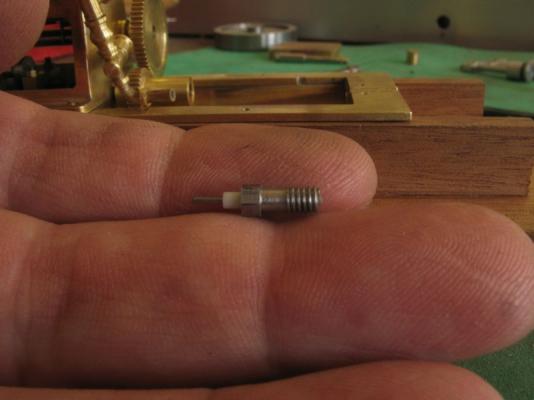
Thanks to all for the likes and comments I have not been able to spend much time in the shipyard this last few weeks, but things have improved a great deal this week, Judy is home now. I did manage to get some time today to make some changes to the spark plugs. I was not happy about the way the plug were integrated into the head structure so after a couple of experiments I now have proper spark plugs they are made from some Allen key, that I annealed. The thread is a 6x40 I had to make them long reach which meant it was a bit tricky drilling a .028" hole almost 1/2 inch long through the Corian core which is only .078" diameter. The hand shot for scale The brass now functions as it was intended to hold down the oval cap to enclose the water cavity, and the spark plug threads into it. All I have to do now is add a brass 0 x 80 or a 00x90 threaded section to the top of the electrode in order the be able to make a good positive connection with the ignition cables. i will need to see how easy it is with the 00x90 which is a better scale size. Michael

-
I am enjoying this build a great deal Patrick, the volume of detail is amazing. Michael
-
Fantastic work Ed, your description of joggling the planks brought back memories of doing on Maria last summer because I basically used the same method. The overall shots are great. Michael
- 3,618 replies
-
- 2
-
-
- young america
- clipper
- (and 1 more)
-
A beautiful rework of the deck Bob. Michael
-
At the speed you are working Ed, I am wondering whether the ship aught to be named the lightning instead of the Young America.... just kidding with a big smile. Beautiful workmanship all round. Michael
- 3,618 replies
-
- 4
-
-
- young america
- clipper
- (and 1 more)
-
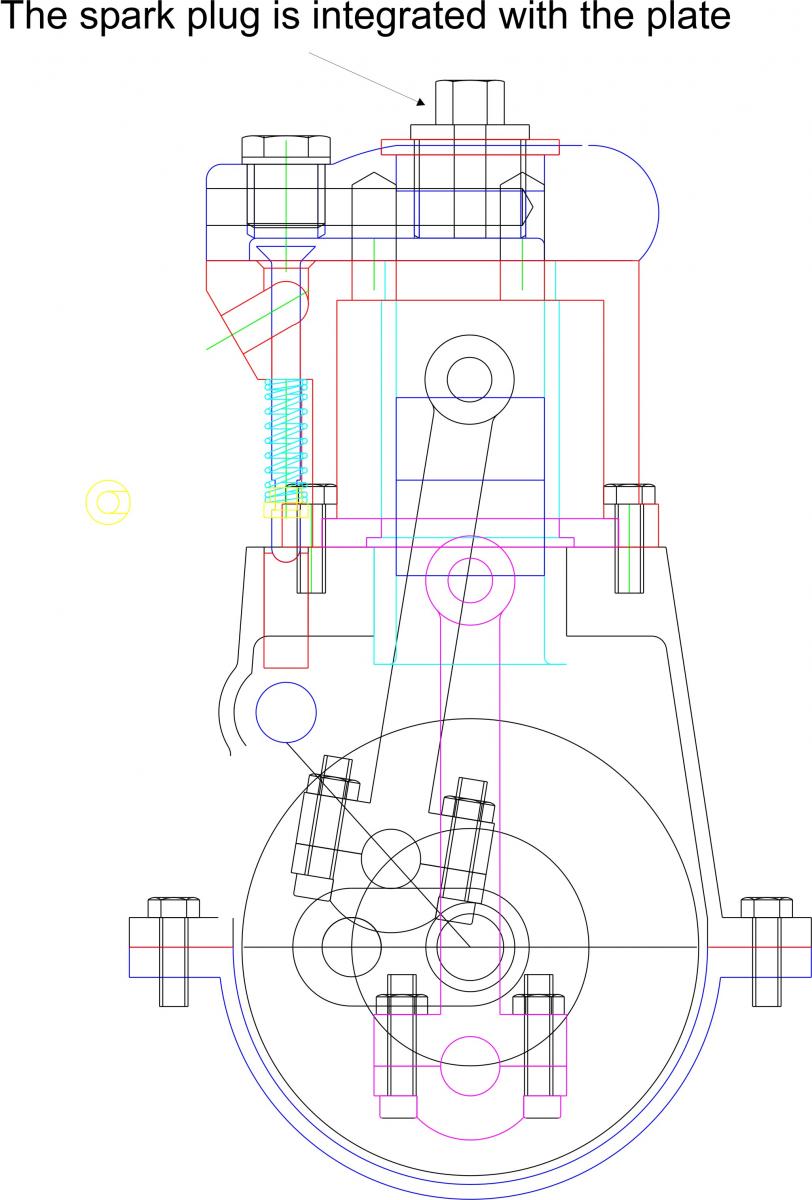
Bob, Row, Denis thanks for your great comments, and for all the likes recently. I had to go back an measure it, it is set to be .047" I might need to change that, I don't know at this point. but the design will enable me to make a change if I need to. spark plug.pdf I will be making a small short sleeve at the bottom end of the plug that will thread in this will be then notched to creat a short stub to act as the ground for the plug so that the spark jumps from steel to steel. Michael
-
The whole ship is looking great Denis I too am enjoying seeing the little details come together. Michael
- 956 replies
-
- 2
-
-
- andrea gail
- trawler
- (and 1 more)
-
HMS Alert 1777 by Jaekon Lee - 1/64
michael mott replied to Jaekon Lee's topic in - Build logs for subjects built 1751 - 1800
Lee checking in your build, beautiful work on the planking of the hull Michael -
Congratulations on the completion Dave they look really fine next to each other, your next build will be fun to follow as well. Michael
-
"I would never have believed someone could hand build a spark plug that small," Mark I have seen a smaller one on one of the model engine sites. Druxey, thanks for the well wishes. "From the camming, (I went back and re-looked again) it looks like a 4-cycle then?" Mark yes it will be 4 cycle I still need to separate the cams from each other in order to set them properly on the cam shaft. "Don't know whether Judy will be glad when she sees that cut Corian board ..." When I have finished re trimming the edge no-one will be able to tell it being an odd sized piece of scrap to begin with Jack, thanks for the support. And thank you to all who posted the like option, it means a great deal to me to be able to connect and share our hobby. Michael