HOLIDAY DONATION DRIVE - SUPPORT MSW - DO YOUR PART TO KEEP THIS GREAT FORUM GOING! (89 donations so far out of 49,000 members - C'mon guys!)
×


michael mott
-
Posts
5,200 -
Joined
-
Last visited
Content Type
Profiles
Forums
Gallery
Events
Everything posted by michael mott
-
 Very nice looking model I like the way you tackled the sails and the ships boat. Michael
 -
Toni your ship is really beautifully crafted, congratulations on your milestone. Michael
-
The ships in bottles are very intriguing, I am always amazed by how things are staged to get them inside. Michael
-
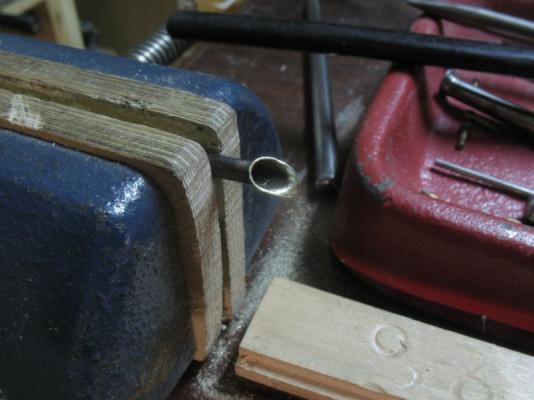
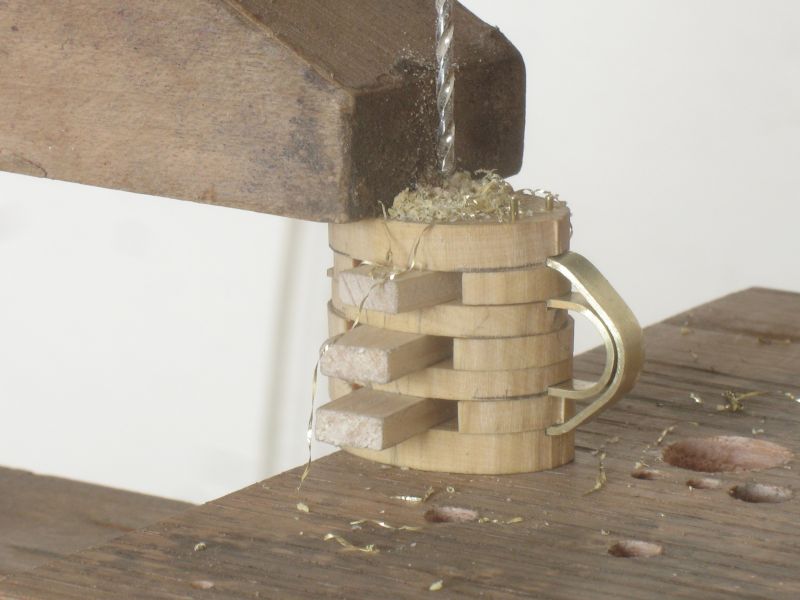
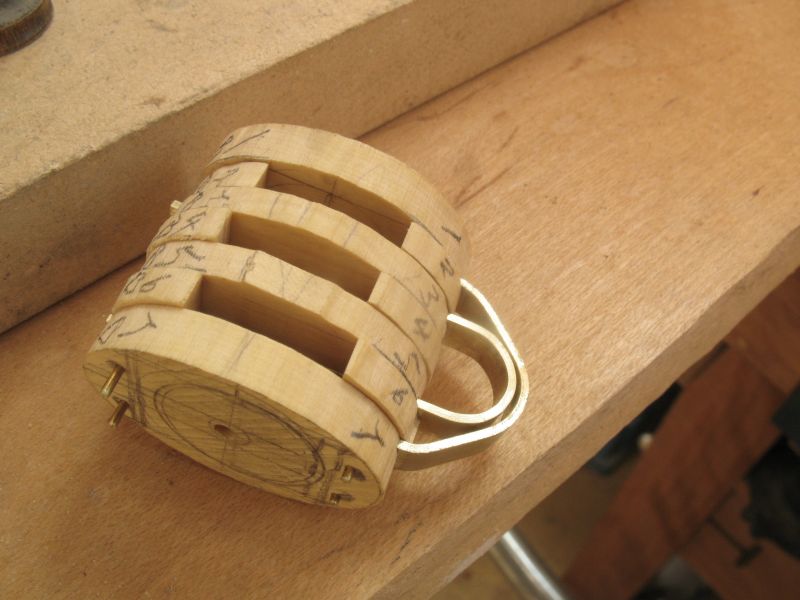
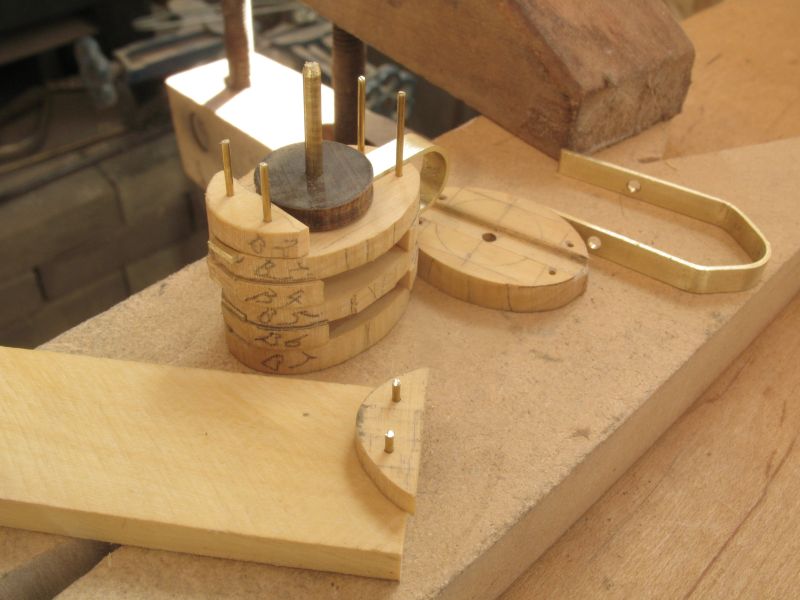
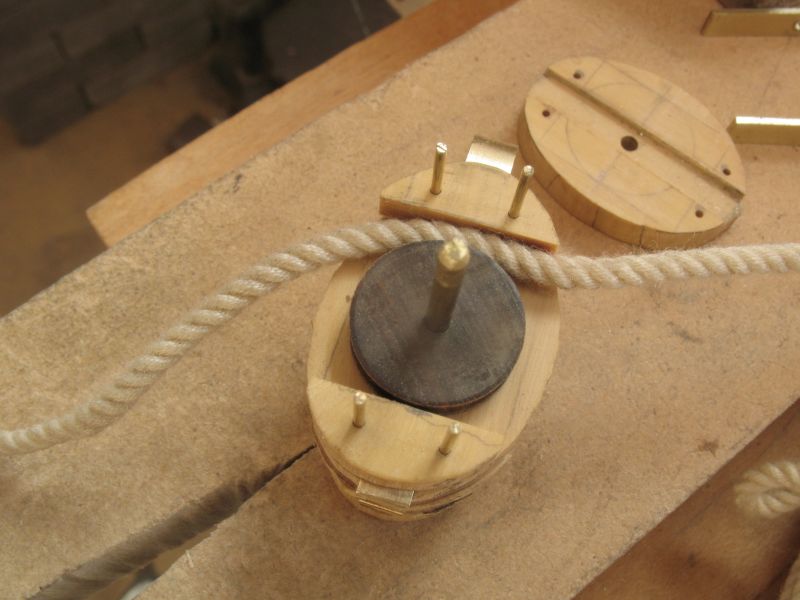
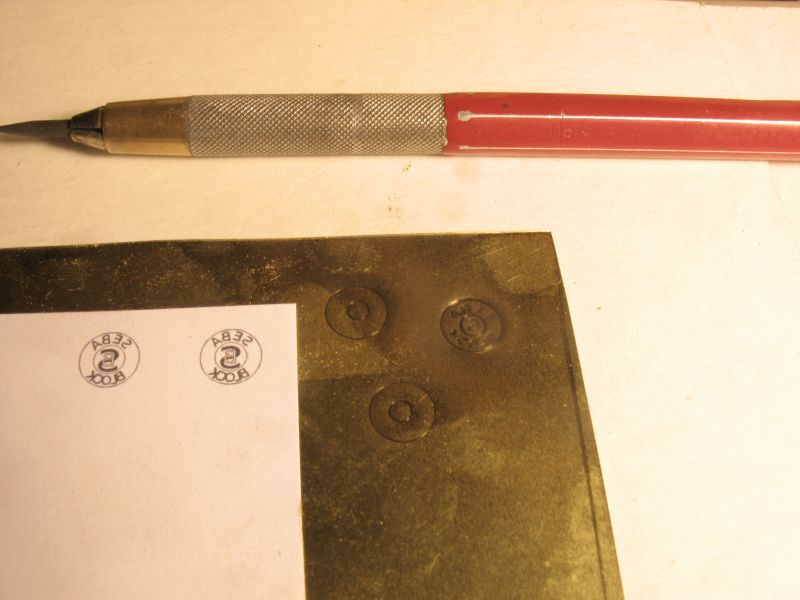
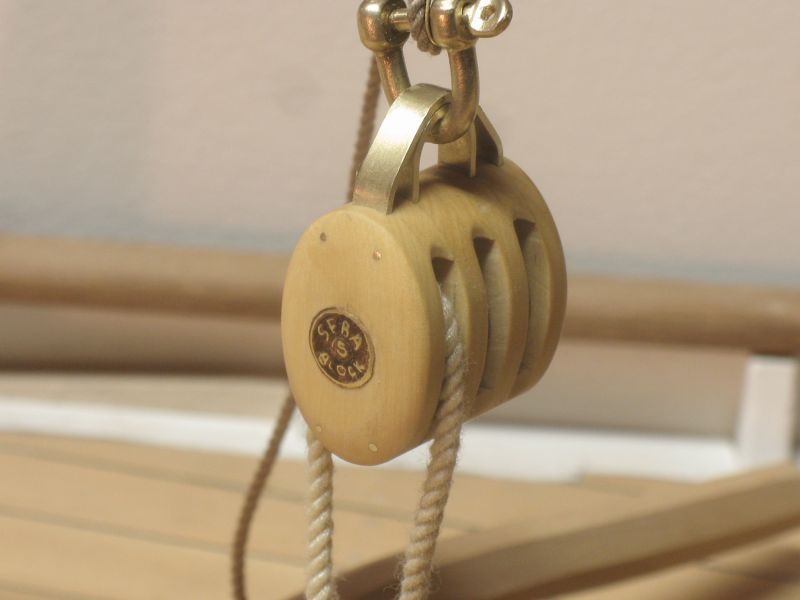
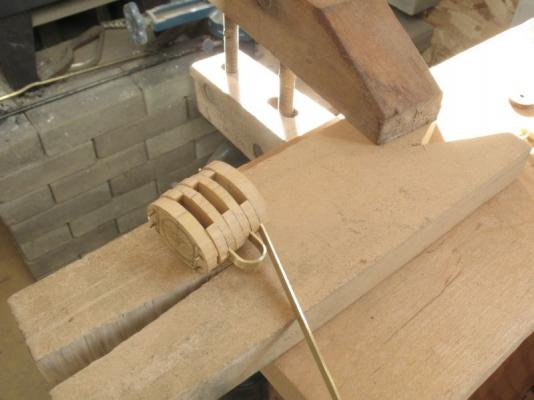
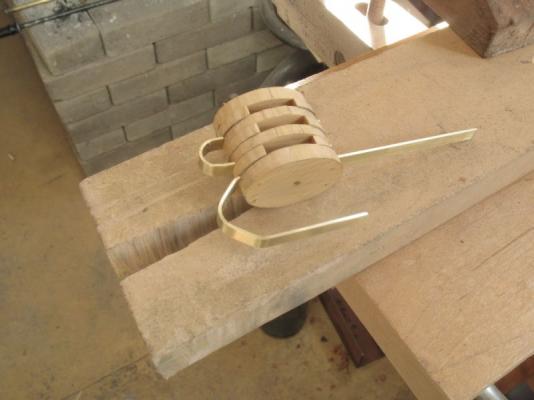
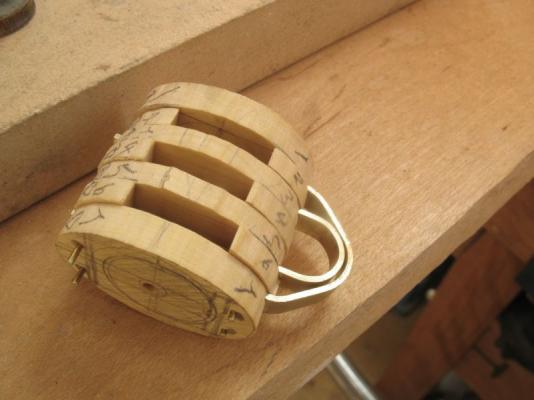
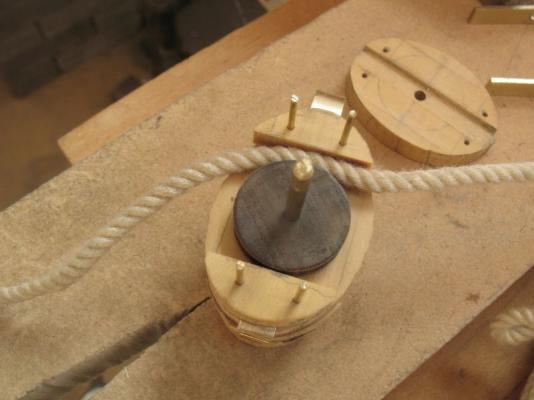
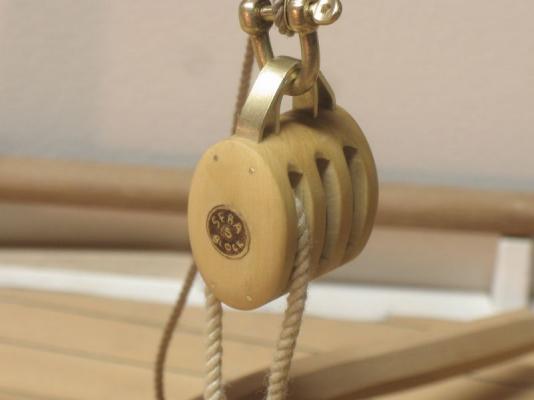
Thanks Bob. I finished up the triple block today. The first picture shows the beginning of the second set of strapping for the outside of the three sheaves the inside one is already installed, these were bent up using some drill bits clamped in the vice to get the correct curves. the next one shows the way I formed the second bend by reversing the direction this allowed me to bend the strip until the outside leg was parallel to the side of the block. a little tweaking was needed to get the exact width for it to slide easily into the slots. The next one shows the set up for drilling through the rest of the wood and the brass bars after clamping the block to the wood table snug packing pieces of soft spruce were wedged into the sheave slots to prevent the drill from buckling the brass bars. The next shows the code numbering on the spacers so that I could get them sanded and returned to the same locations within the stack. Next the spacers were sanded to a consistent dimension using a simple jig, one for the top spacers and at the opposite end for the bottom spacers. I checked that there was enough room for the 7/8ths rope. The assembly was then glued together and given some final sanding and shaping. The next picture shows how I made the cover plate for the shaft for the sheaves. The brass shim-stock is .0015" the pencil is a 9H I drew the image in Corel draw full size at 1/4 inch diameter then mirror imaged it so that I could follow the lettering on the brass. the 9H is hard enough and because it is graphite there is a built in lubricant. it took a few tries scribbling the letters in reverse to get an acceptable rendition, (where's Leonardo when you need him?). Now to make the bottom block which is a double, and then two singles to complete the main sheet primary tackle. Michael


-
Bob what an excellent job on the flare, that looks fantastic. Michael
-
Nils thank you for all you answers to our questions and what a great way to finish. The model does look wonderful in the case. So what's next? Michael
- 222 replies
-
- 1
-

-
- gorch fock
- barque
- (and 2 more)
-
I do like these yacht hulls they are so sculptural. looks like you will have the planking done in no time at all Floyd. Michael
- 80 replies
-
- 1
-
-
- Americas Cup
- Endeavour
- (and 1 more)
-
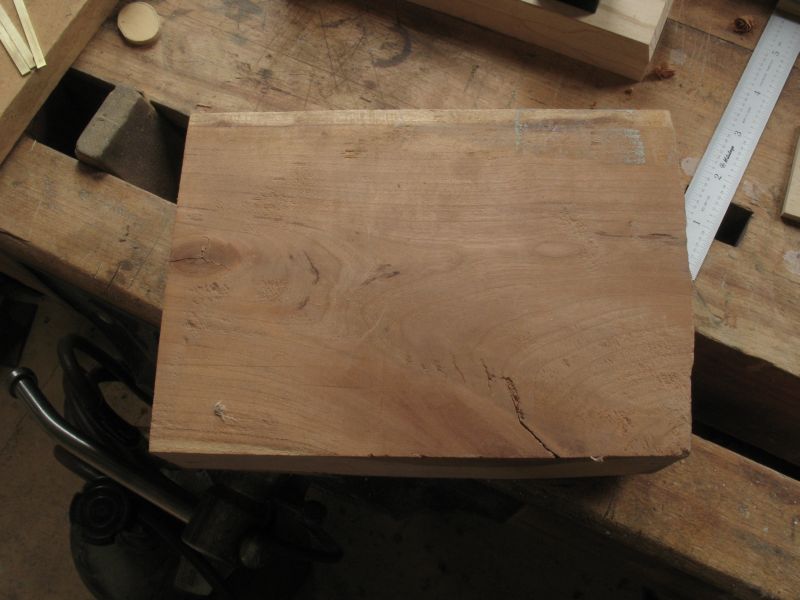
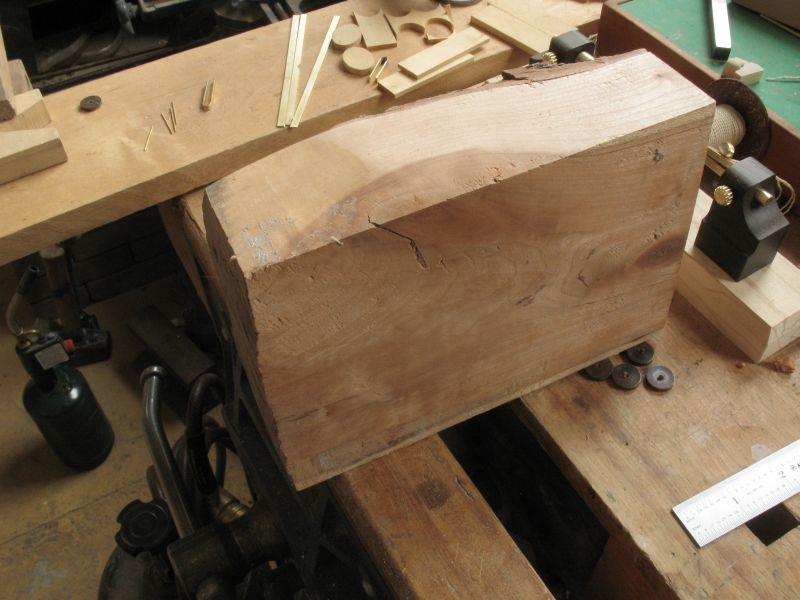
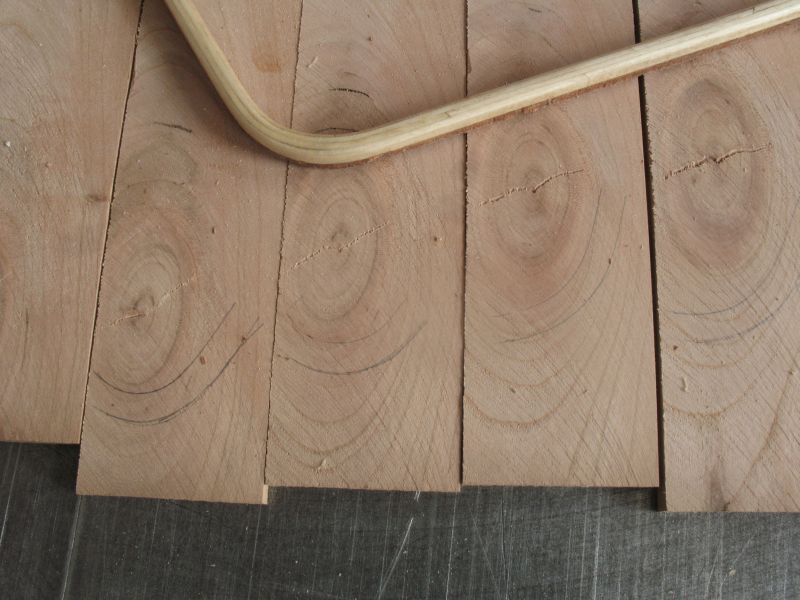
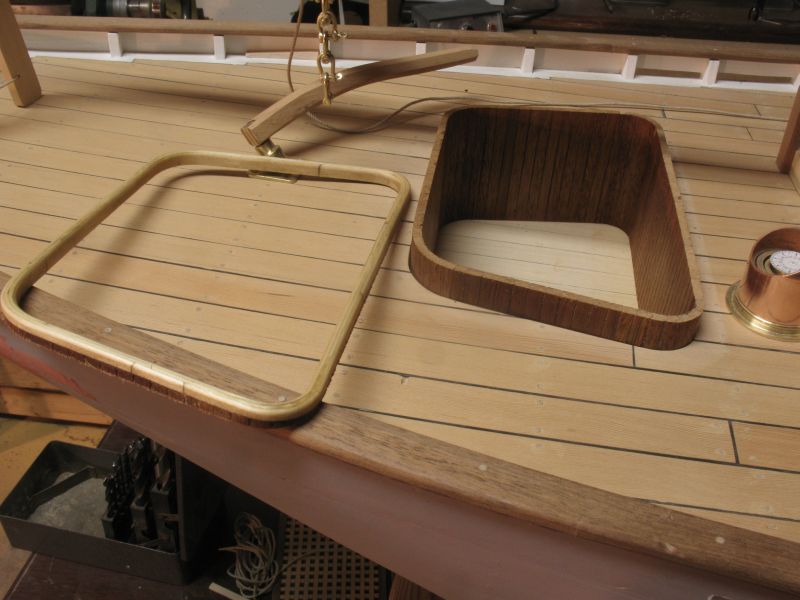
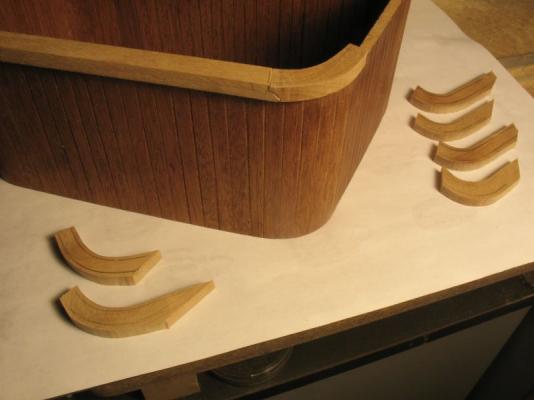
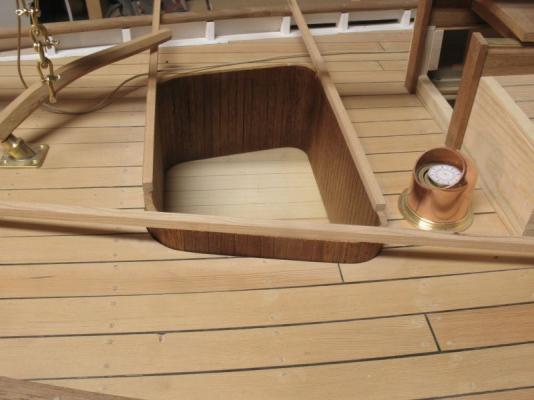
found a chunk of cherry that looked promising. After slabbing it up, and tracing out the top curves This took a while but I am happy with the way the joint looks I like the proportions better and think this will work out. I did do another test though using Ed's suggestion of adding the glue during the initial forming. I think though for this cockpit I will be using the curved grain pieces that came from around the knot in the wood. Michael


-
Very nice I do like the way the water looks as well. Michael
-
Nils I keep looking at the volume of rigging and the work on the sails, and I am sitting here shaking my head in amazement, and to think that you did all this in 1600 hours...... wow! I really like the sails, what is the line that you used for the bolt rope with the stainless core? Michael
- 222 replies
-
- 1
-
-
- gorch fock
- barque
- (and 2 more)
-
Yambo no apologies needed, regarding the cutting from the solid wood it is something that I am contemplating finding a piece of cherry with a bit of curved grain would make that decision much easier. You are correct though about the difference in appearance and it is something I need to decide on from the aesthetic point of view. Ed thanks for endorsement on the tube, and you thoughts on the gluing I will try that, it makes a lot of sense. I did just clamp up the cherry that soaked overnight, bending it cold and with a metal wrap perhaps I will go unclamp it and redo it with the glue. I am also looking at some thinner sections. Michael


-
Beautiful work Karl, and very informative photographs of the details. Michael
- 662 replies
-
- 1
-
-
- bonhomme richard
- frigate
- (and 1 more)
-
Ed your clean and clear pictures are very inspiring as well as educational keeping everything in line and placed around those areas to be removed must keep your mind on its toes. Beautiful workmanship as always. Michael
-
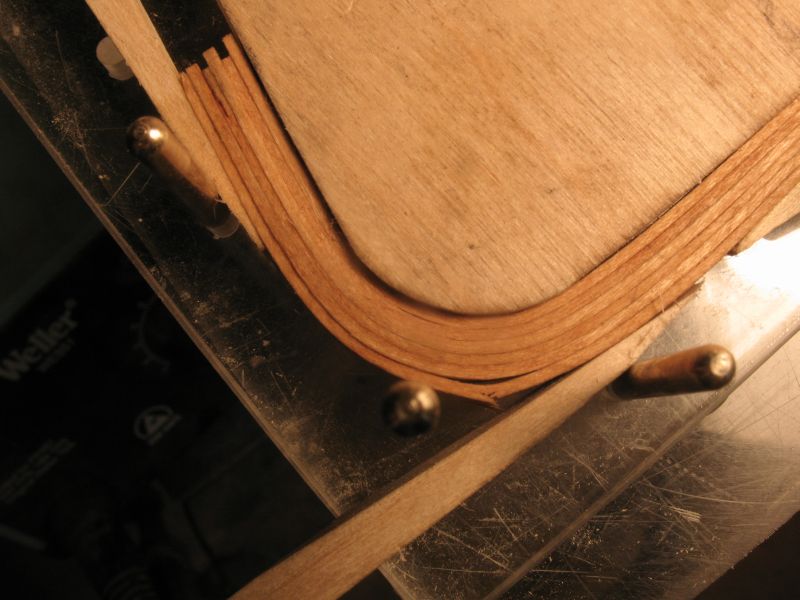
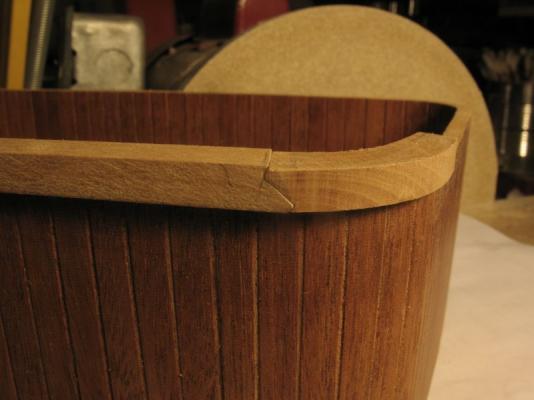
Steve, John, Dan, Yambo, S. Coleman, thanks for the kind remarks. And again to those who pushed the like button. Yambo there will not be any butt joints only scarph joints, the cherry laying on the top of the cockpit is just that. I was looking at the proportion of the section. And on the original laminations I did vertical scarph joints, layer by layer. The cherry that soaked overnight went around the sharp corner very nicely and the first dried well. Dan thanks for the tip about the thin metal wrap, makes a great deal of sense. Michael
-
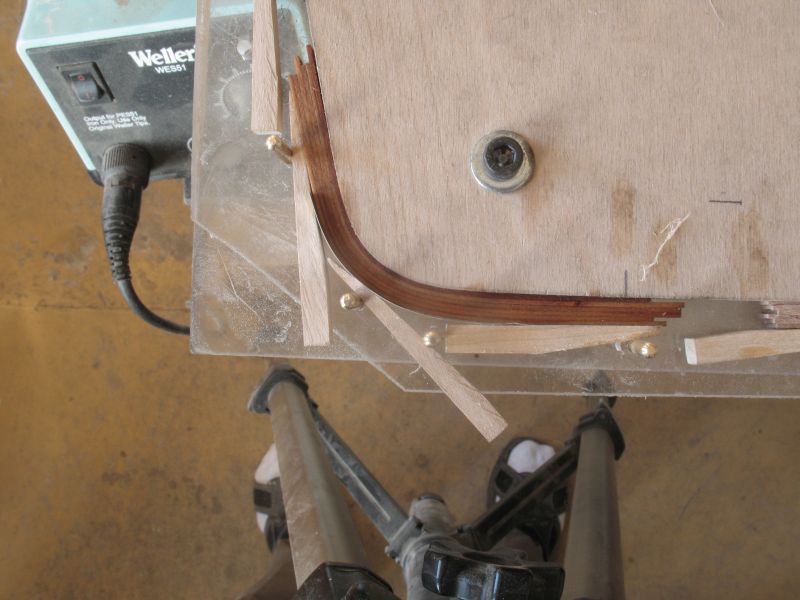
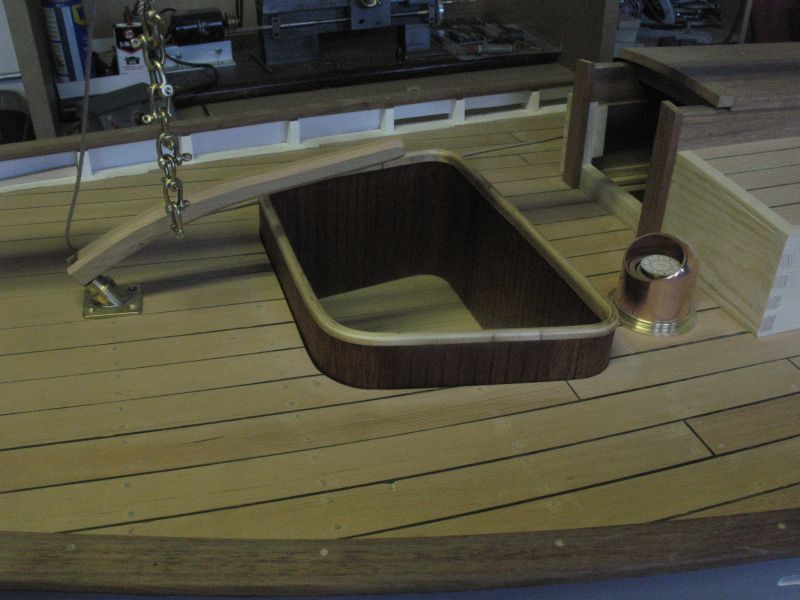
The deed is done. The square cherry for the straight sections. The colour is closer to the mahogany but will still provide some contrast. A series of short pieces soaked for a short time and wrapped around the form. The rest of the cherry will soak overnight. Michael


-
Ahh but better that doing it three times at my rate. Great work Mark. Michael
-
Tony just went through your build, some great ideas and your innovative ideas for making parts are great.`I particularly liked the yoke for the cannon soldering the tube to the bent rod then fretting out the middle. Michael
-
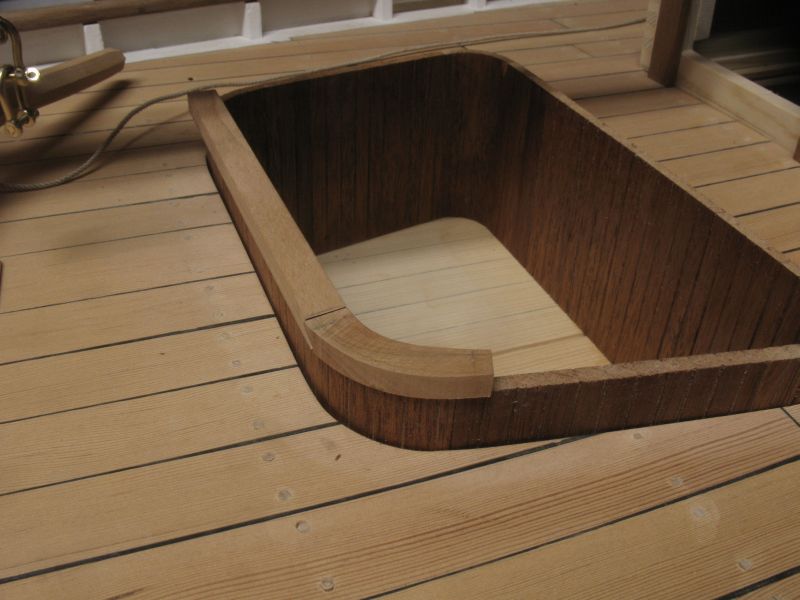
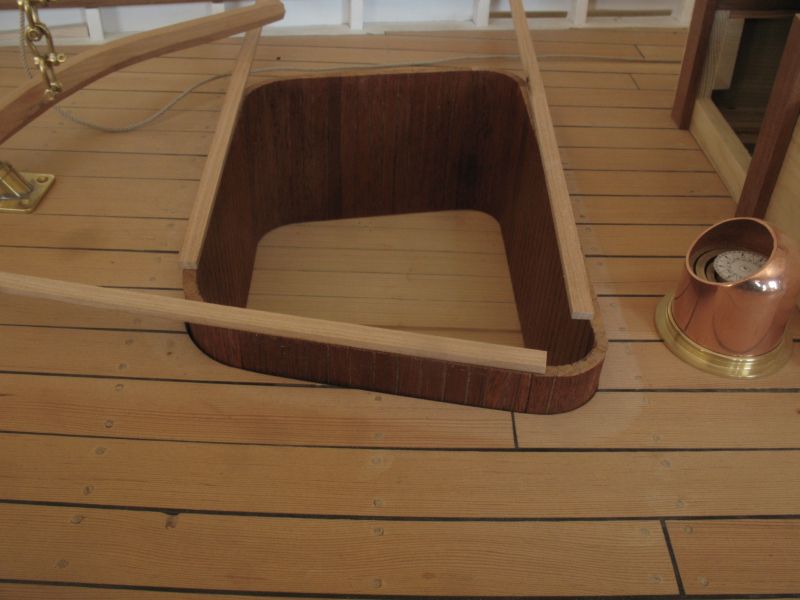
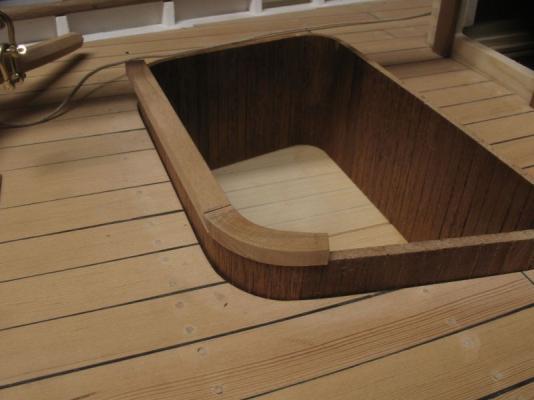
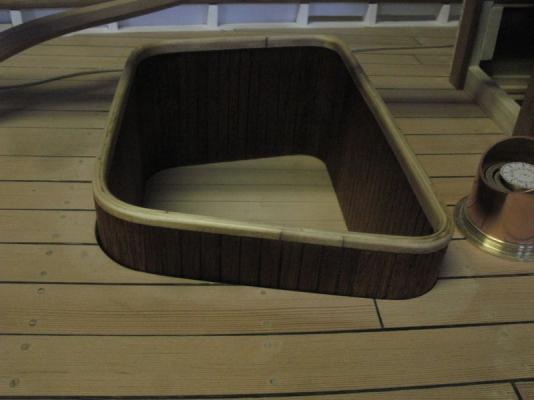
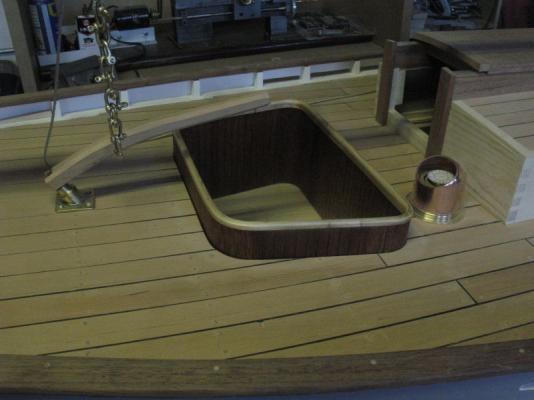
Thank you all for the really positive comments it really means great deal. and for all the likes. The things that we are pleased with seem to be countered sometimes by those that we are not. The fittings for the ropes through the bulwarks will be fine using copper. The cap rail of the cockpit however is a different story, I am not happy with the way this has turned out. after sanding it to profile it was treated with Tung oil. the joints are way too obvious and the contrast is much greater than I anticipated. I will see what it looks like when the oil has dried but my guess is that I will still be disappointed. In that event I will sand it off and do it over using some slightly different steps. The first thing will be to use solid material for the straight parts and re laminate some new corners. I think I will use either Maple Birch or Cherry, I will look at how each laminate up on the tight radius first. Michael
-
Cutty Sark by NenadM
michael mott replied to NenadM's topic in - Build logs for subjects built 1851 - 1900
With a hammer 3 x larger and heavier than anvil $%#$%&%$$ I must try to drive his bike trough deep water .... Forgiveness is the greater path "as your own behavior must have established its worth". Michael -
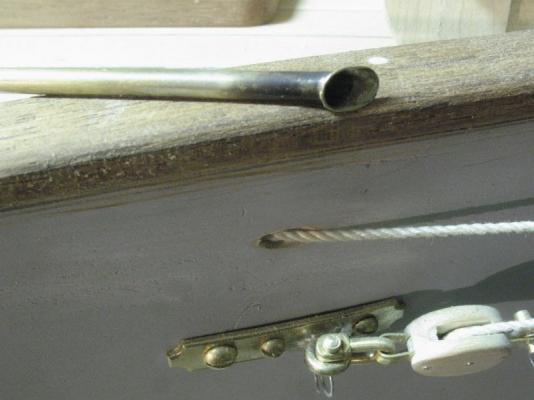
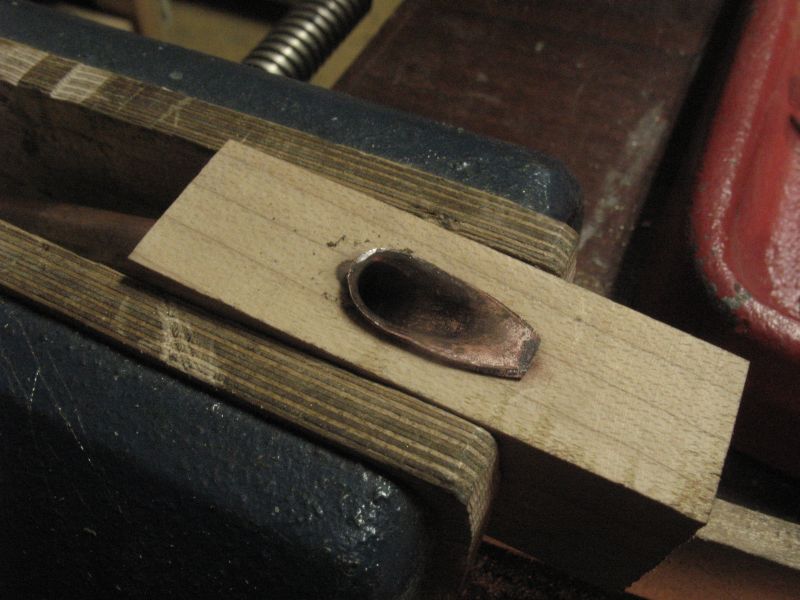
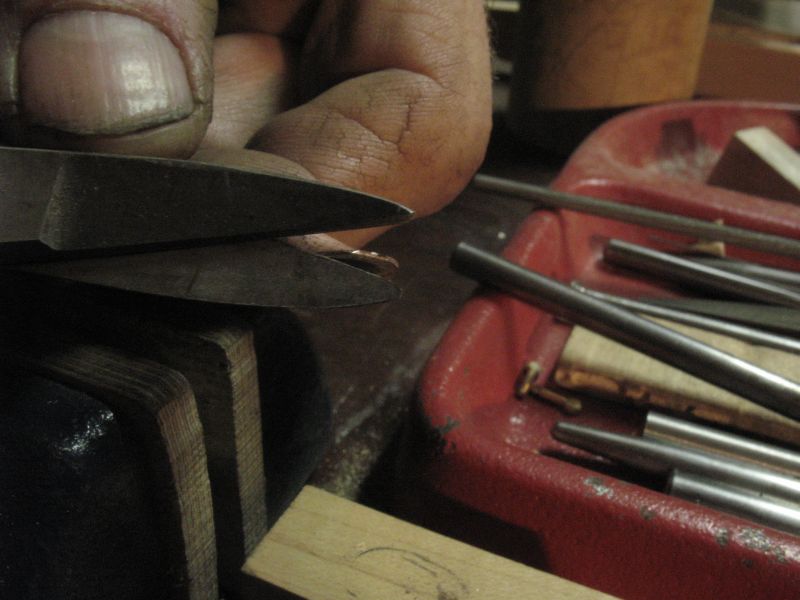
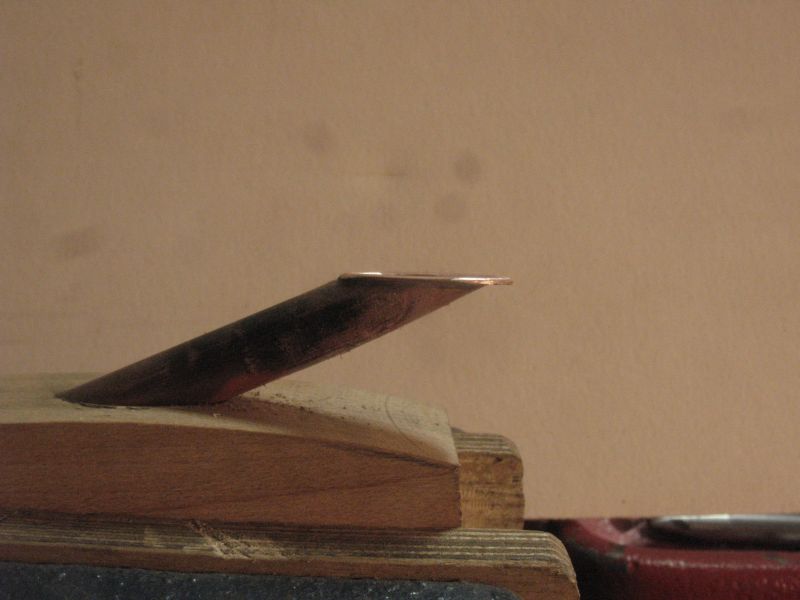
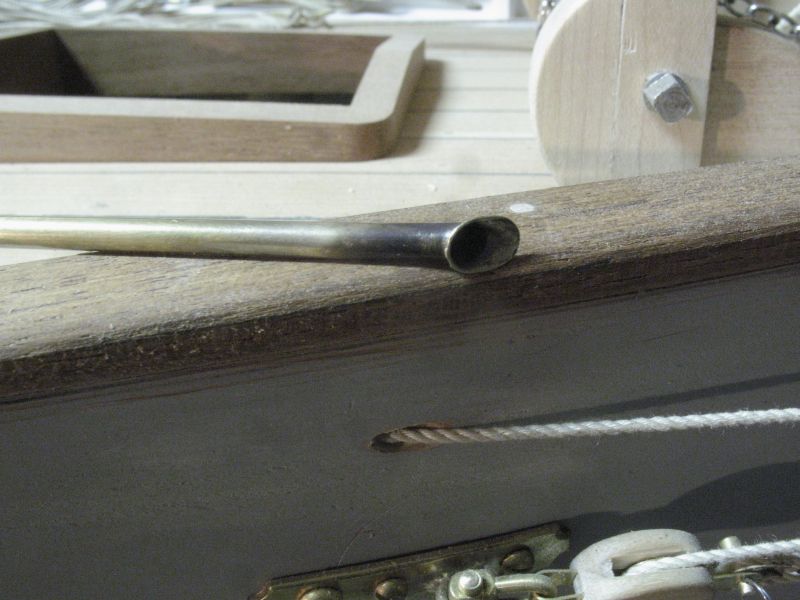
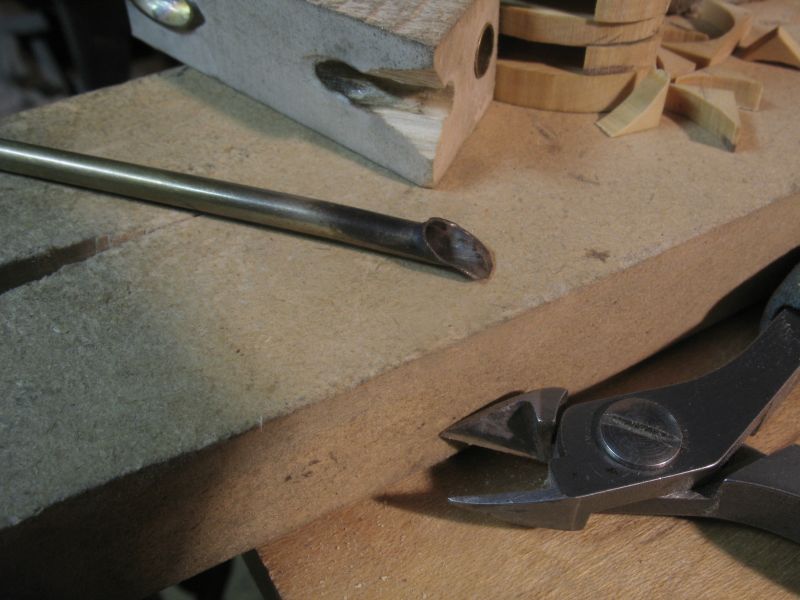
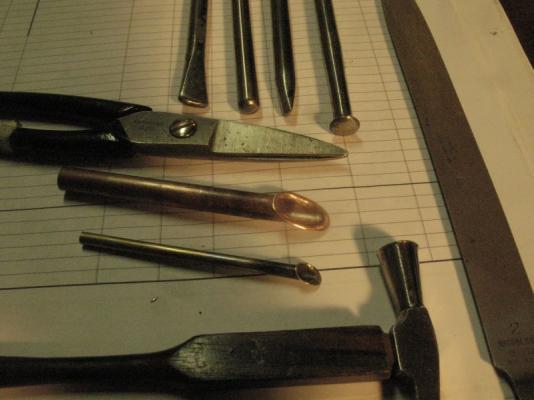
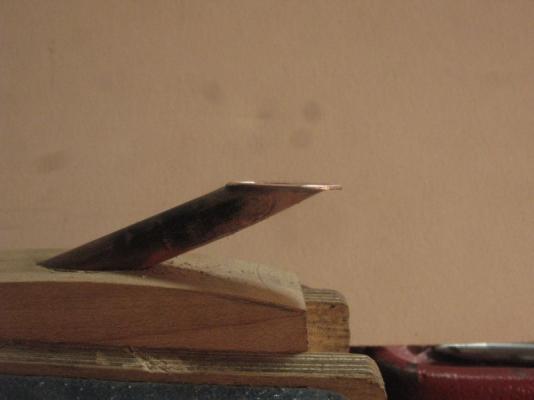
John, thanks for checking out the progress. I had a chance to make a second hawser fairing, this time I used copper, definitely a better choice of material, it is much more malleable I only needed 2 annealings. I am tired so just a sequence of pictures using exactly the same process as the 1/8th diameter one, I will make the smaller ones out of 1/8th copper tube. The most work forming was done with this tool The last picture is showing the difference between the 1/8th brass one and the 1/4 copper one. Also the four different tools for forming and some metal snips and file, the final polish was done with wire wool Michael


-
Geoff, thanks, I have to say that I have had the same experience following along with others who show how they solve a particular task. Bob, the metal is indeed brass, I think that the colour was off because of lighting. I also think that the Flaring would be easier with copper, which I will try. The other tube that I did not flair yet is 7/32 diameter brass. The tools I used were given to me a long time ago by a jeweler, they are just shaped silver steel and hardened. Tom, thanks for your kind remark, I have been following the examples set by builders like Ed Tosti and Karl among others. S.os, thanks for the compliment, sharing what I know is the least I can do in return for the amount of knowledge that I gain from the members of this site. Druxey, thanks for your continued support and for your articulate and timely use of our language:>) Michael
-
Piet, Great work on the boring little hinges now that is dedication. the details are a definite plus. Michael
-
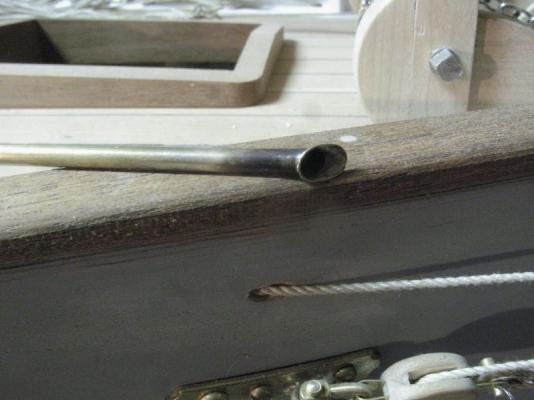
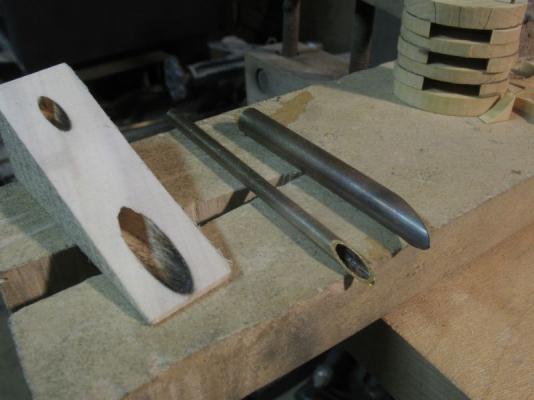
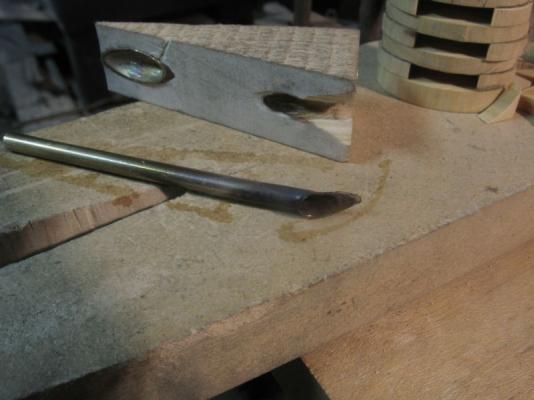
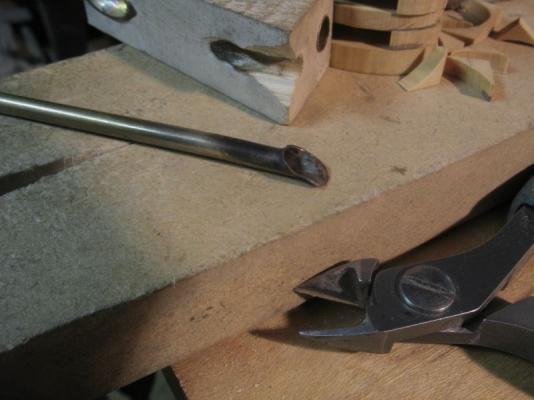
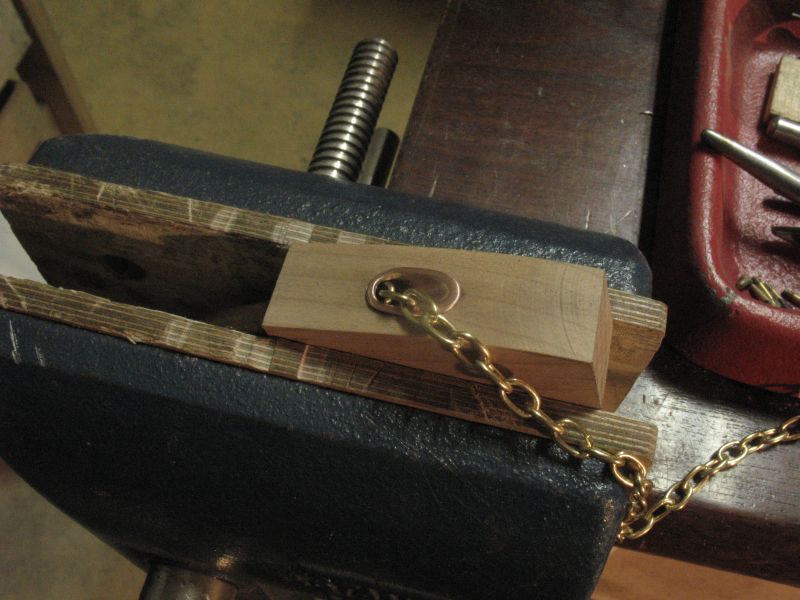
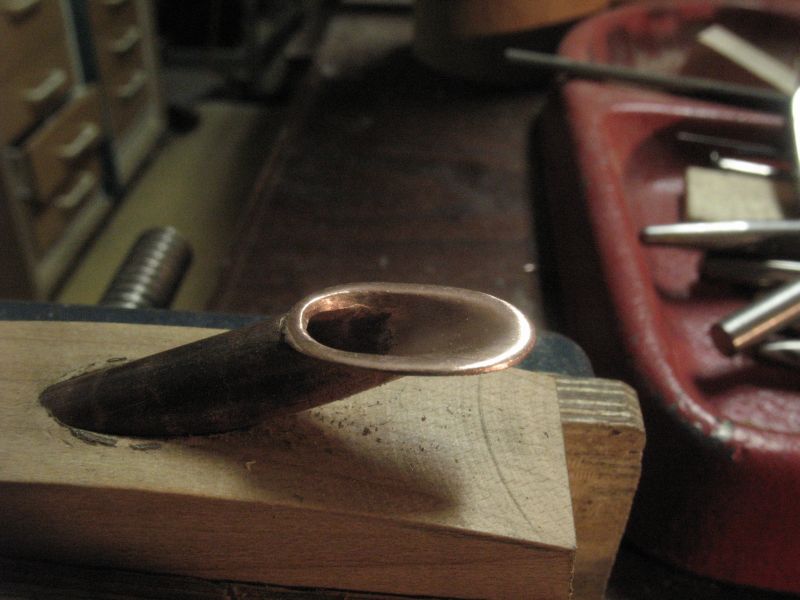
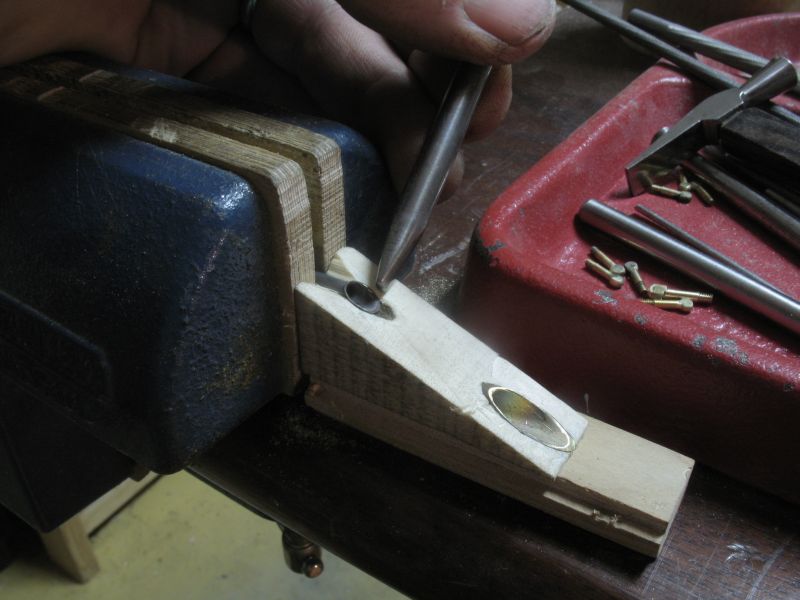
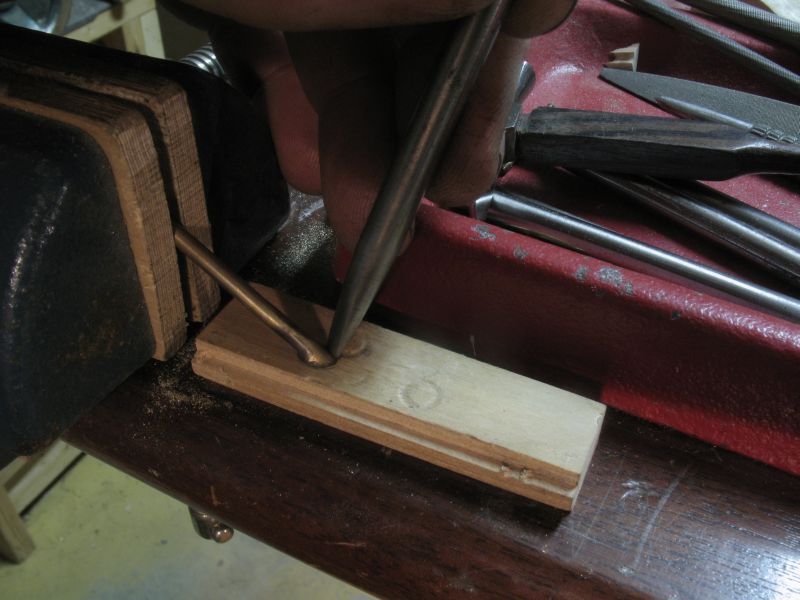
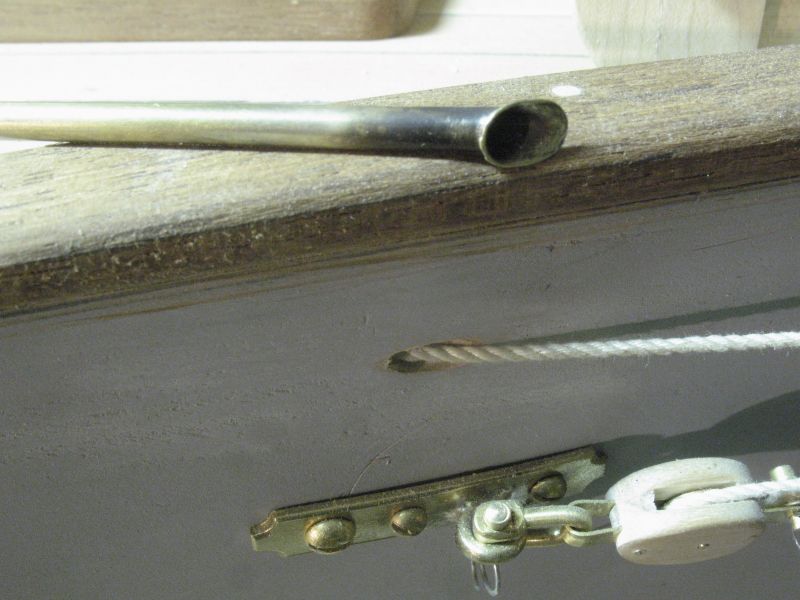
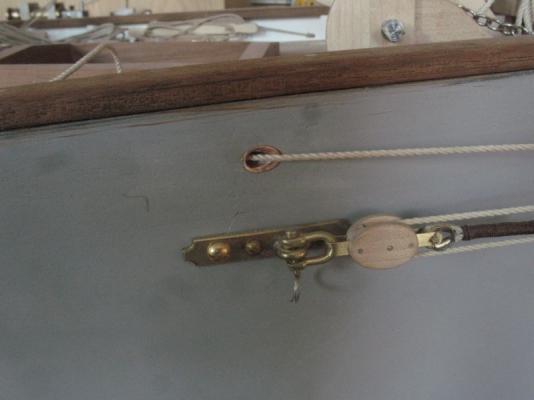
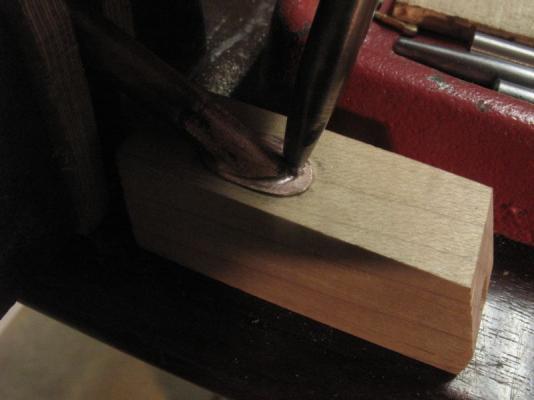
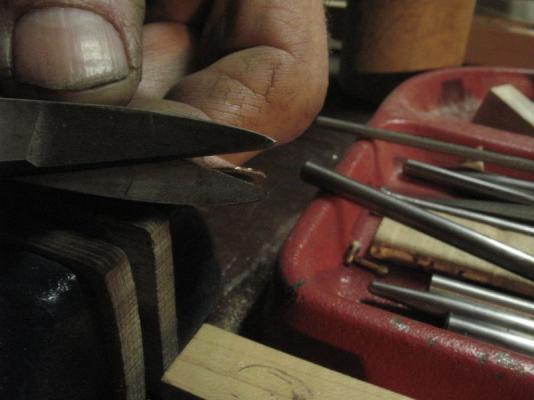
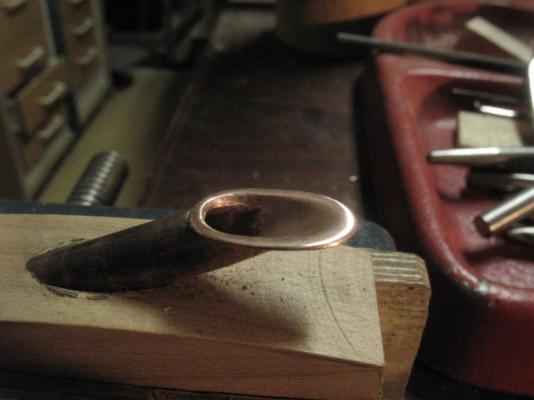
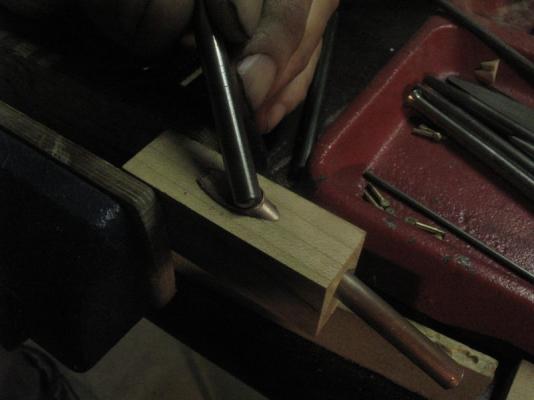
Thanks for all the likes Yes I'm definitely hooked. Not wanting to clutter up Bob's Lettie build log, and needing to deal with the same basic issues of holes through the bulwark and because Bob was waiting for me to try this, I did here are my results for the holes in the cutter at least one side of the hole. 1 cut the holes then sand the angle and tubes the tubes have had the first annealing 2 the first forming using a spoon shaped modeling tool for working with sculpy (not the best) 3 after the second annealing and using some shaped steel rods, the point was trimmed with some flush cut side cutters. 4 The wood soft poplar snapped out but the wood block was still usable for forming here the end of the seel rod is almost hemispherical 5 next a slightly narrower tip followed by a third annealing 6 an even sharper tip used on the back side to flare out the tube a little more the block under it is hard Maple 7 a little polish with some steel wool 8a check with the eye laying on the cap rail above the hole that it will serve So I will use this method for the rest of the holes both inside and out Michael