michael mott
-
Posts
5,200 -
Joined
-
Last visited
Content Type
Profiles
Forums
Gallery
Events
Everything posted by michael mott
-
 Oh... as soon as the cap is glued I will take a stab at it pictures too. Michael
 -
Steve very cool, the smoke must have given you a skip of the heart beats especially after the weird noise. I will have mine on a trailer to the lake. Michael
-
Nils Thank you for the explanation that is a very neat solution for them. Michael
- 222 replies
-
- 1
-

-
- gorch fock
- barque
- (and 2 more)
-
Bob, if you drilled a hole the same diameter as some brass tube through a small piece of hardwood, then cut it trough to the shape of the hull at the bow, you could then file the brass tube to the same shape then anneal it and seat it back in the hole only sticking out a little bit. Next you could use the end of a piece of solid rod to shape the open end into an oval type eyelet. Just a though because I have to do the same thing and I though I could watch how you get on before doing mine;~) Michael
-
SS Vinal Haven by TBlack - FINISHED
michael mott replied to TBlack's topic in - Build logs for subjects built 1851 - 1900
Tom very nice drape to the boat coverings, it looks natural. the big one looks pretty spiffy too. Michael -
Interesting to see this up again though not really. I did not like the way Draftsight worked for me, I am of the older school of drafting with a pencil and it took me too long to switch from Generic cad which was a great drawing /cad program but was eating into Autocad sales too much. After Autocad bought out Generic they did one upgrade then dropped it for the first version of Autocad LT which by any stretch of the imagination was a difficult change, for the generic mindset that I was used to. when the newer version of Autocad Lt came out it was far superior to the original and so I did buy it and have become reasonably comfortable with it. At my age I did not want to go through the hassle of learning yet another drawing program(I'm still learning new things with Autocad). All that said We all work with what we know and like and I will be looking to transfer my autocad Lt to a newer computer that I can put my XP operating system on. I am hoping that I can get something that will accept XP asap so that I can keep the drawing in the XP operating system that I find to be a good one for me. because my old tower is beginning to get a bit grumpy mechanically, The newer hard drives and usb sticks have more than enough capacity for what I do.Yes and I still like a stick shift in a car. The new computer that I can use for internet connecting will also be acquired but nothing fancy as long as I can transfer stuff to email or post here it no doubt will come with 7 or 8 operating system . It is a good thing we don't have to rely on horses and carts for our major transportation needs though. Michael
-
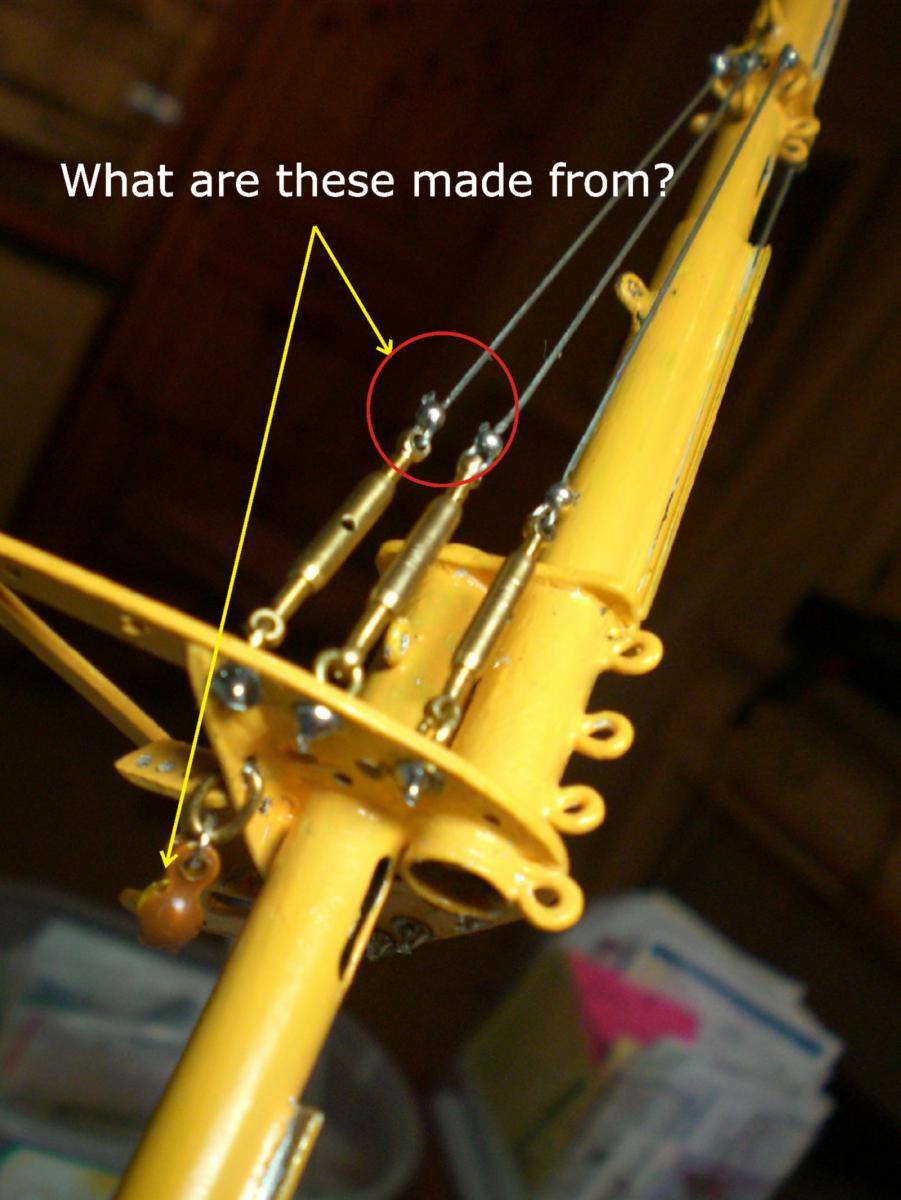
Nils 1600 hours that is amazing I am curious about all the blocks and the way you have fixed the shrouds. How did you make the blocks and the other question is what metal did you make the small shackles from? Michael

- 222 replies
-
- 1
-
-
- gorch fock
- barque
- (and 2 more)
-
Cutty Sark by NenadM
michael mott replied to NenadM's topic in - Build logs for subjects built 1851 - 1900
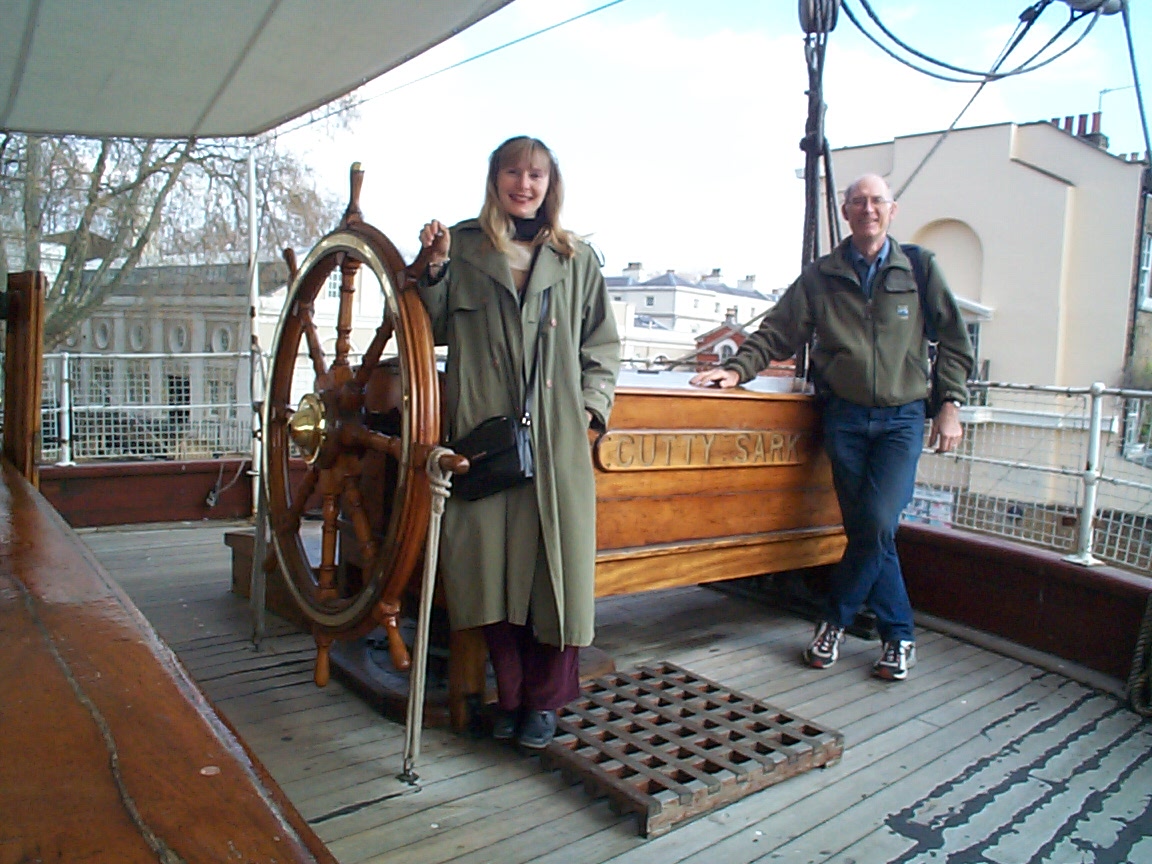
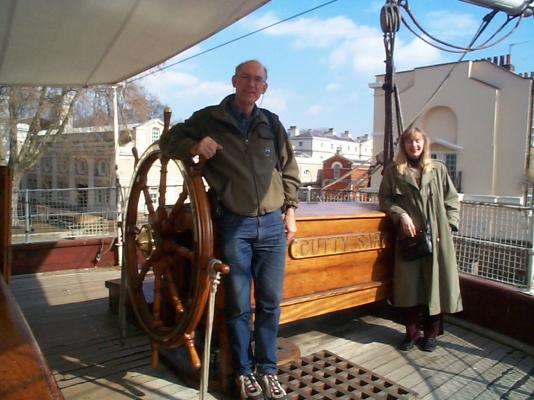
Nenad following along with Sailors comment about the difference between the deck and the rest of the ship, I hope you don't mind a couple of pictures that were taken in 2003 when i visited the ship before the fire. The first two show the exterior deck, when Judy and I were on board The last one shows the deck and interior furniture note the difference on the floor between the inside and the outside. Oh and tea was great....just kidding. Michael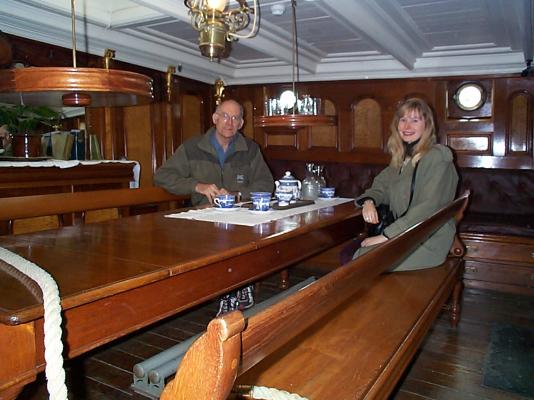

- 4,152 replies
-
- 6
-
-
- cutty sark
- tehnodidakta
- (and 1 more)
-
So if my calculations are correct 1.5 x 365 x 24 = 13140..... oh subtract a couple hours for sleep and eating (1.5 x 4 x 365 =2190) which leaves 10950 hours And if it did not take that many hours then you must work incredibly fast. An absolutely wonderful build it is fun following along. Michael
- 222 replies
-
- 2
-
-
- gorch fock
- barque
- (and 2 more)
-
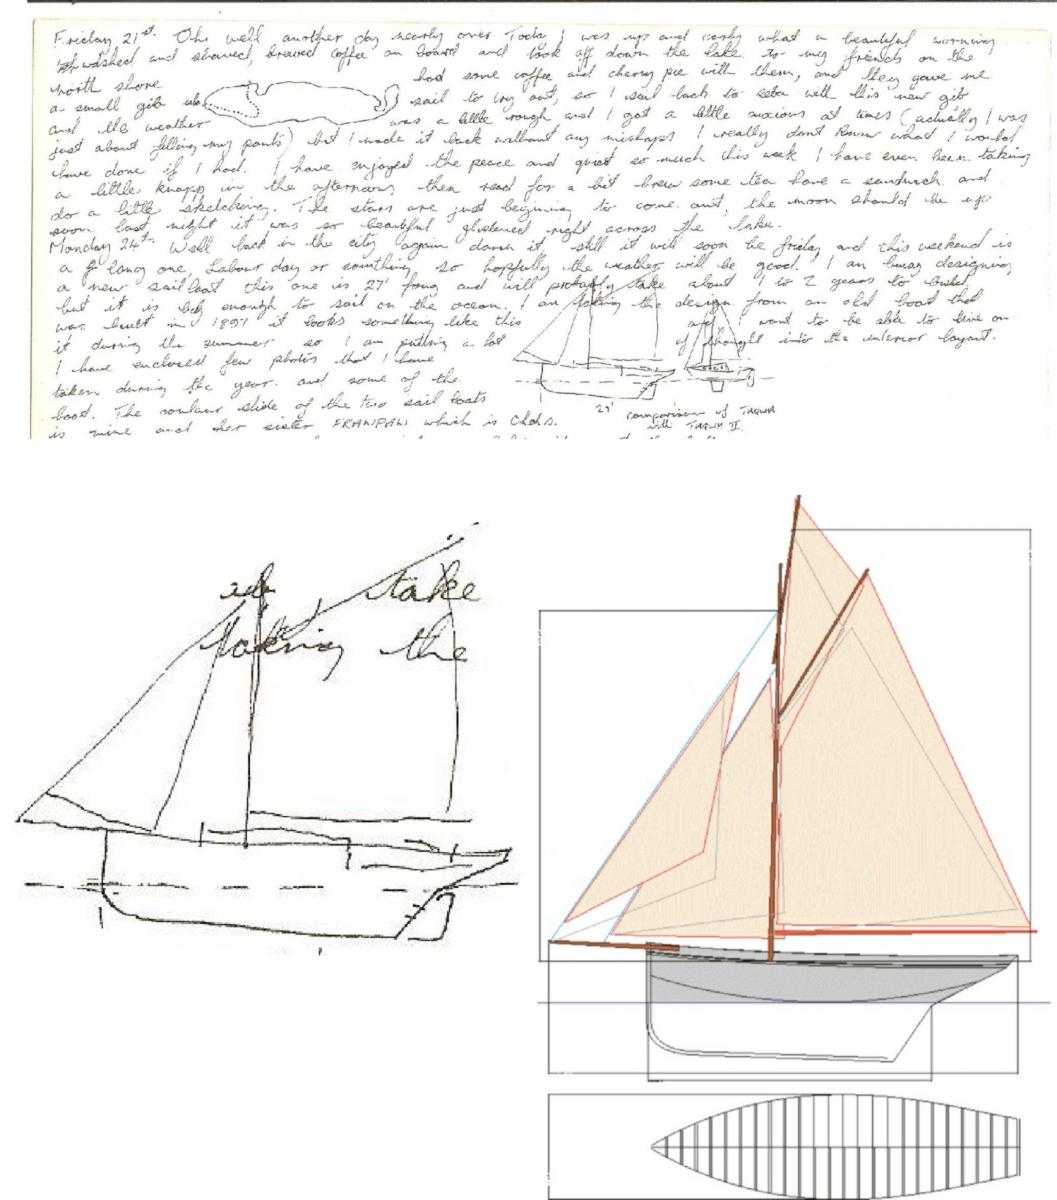
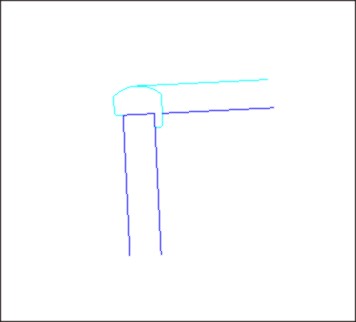
I had a wonderful surprise this evening, I was looking through some family material looking for some information for my Brother who lives in BC when I found a letter that I had written to my mother and father in 1969 in it I was describing a boat that I was going to build, it was an interesting enough coincidence that I thought it worth sharing in this particular build log. I was 21 years old at the time. I definitely see a resemblance it has taken a while so far and it is a lot smaller than my original idea that i had completely forgotten, but it was obviously lurking there in the back of my mind somewhere. Michael

-
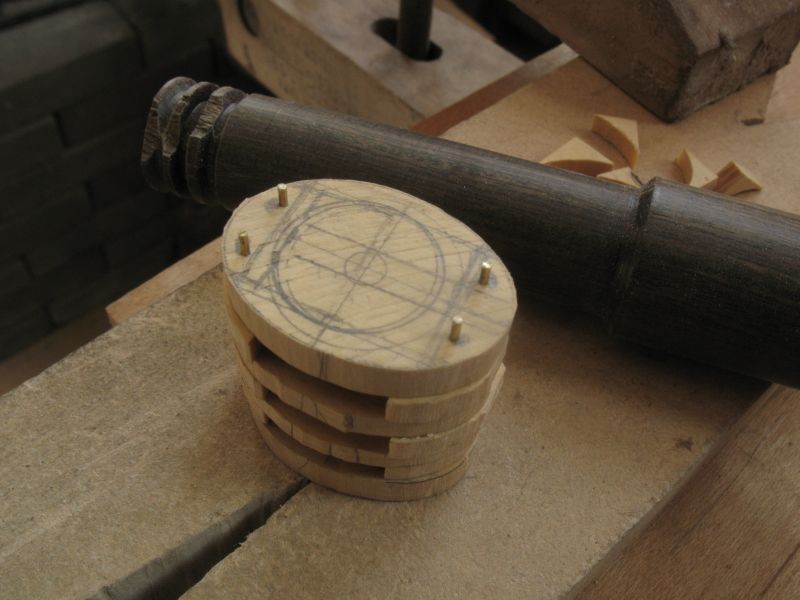
Denis, thanks. Greg I am glad that the updates are well received, the sheave blank is Lignum Vitae, and the end that the chip outs occurred is for the same reason that Ebony tends to chip out as well, it is such tough stuff to season properly.This blank was machined originally from a small billet that was given to me as a gift when I left the University of Alberta as a technician in the Industrial Design and Sculpture Department in 1977, so 30 odd years later the stuff still checked a little after being re-sawn The Same goes for the Ebony that I have, it is even older around 40 years and there are a lot of microscopic checks in it too, so I have to be very selective in how I re-saw it. Michael
-
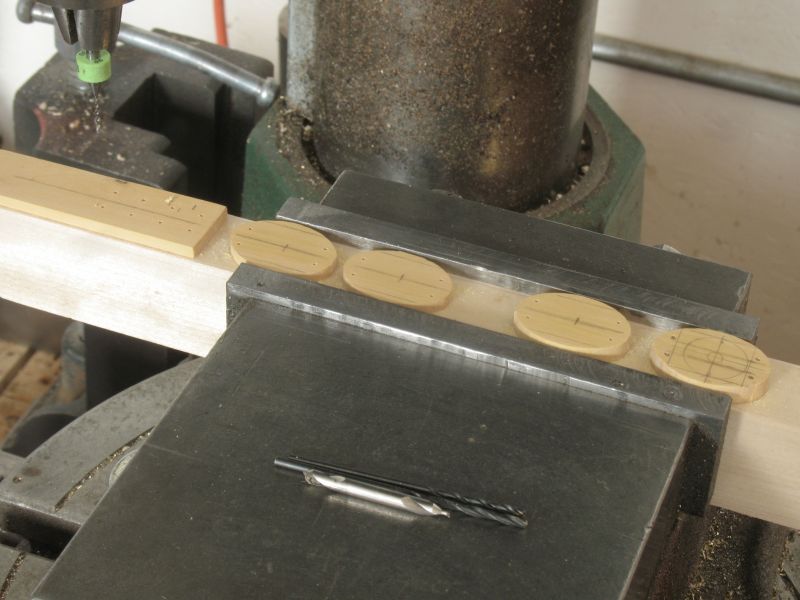
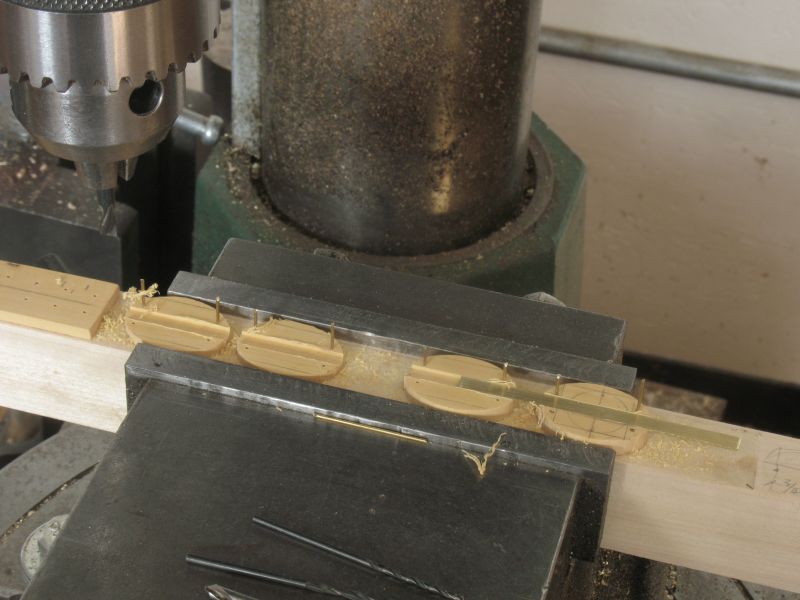
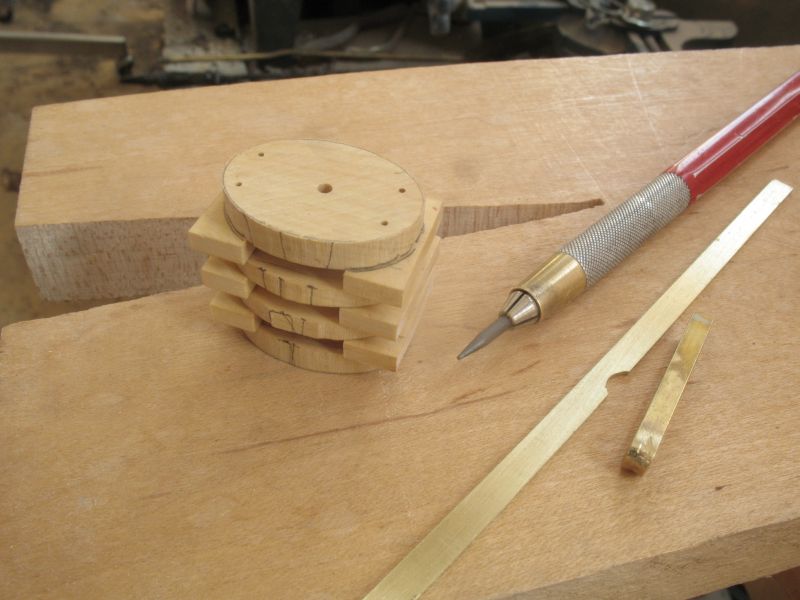
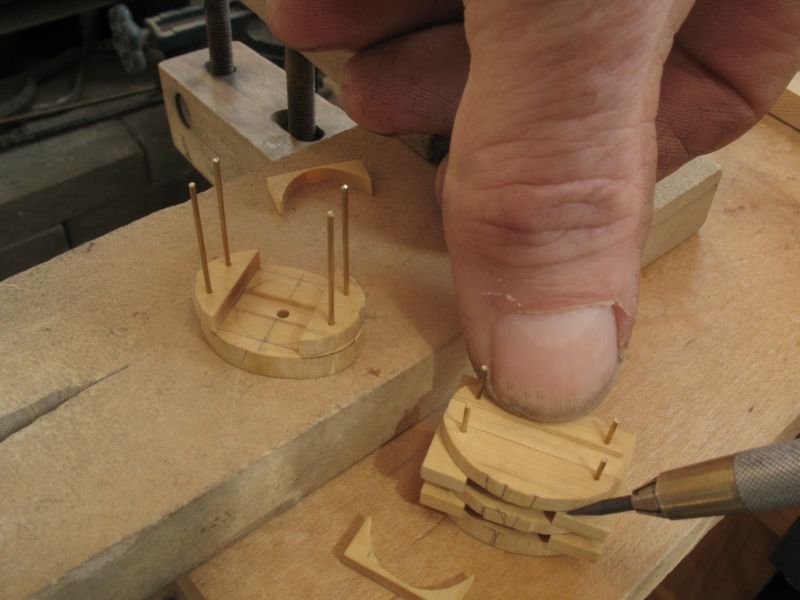
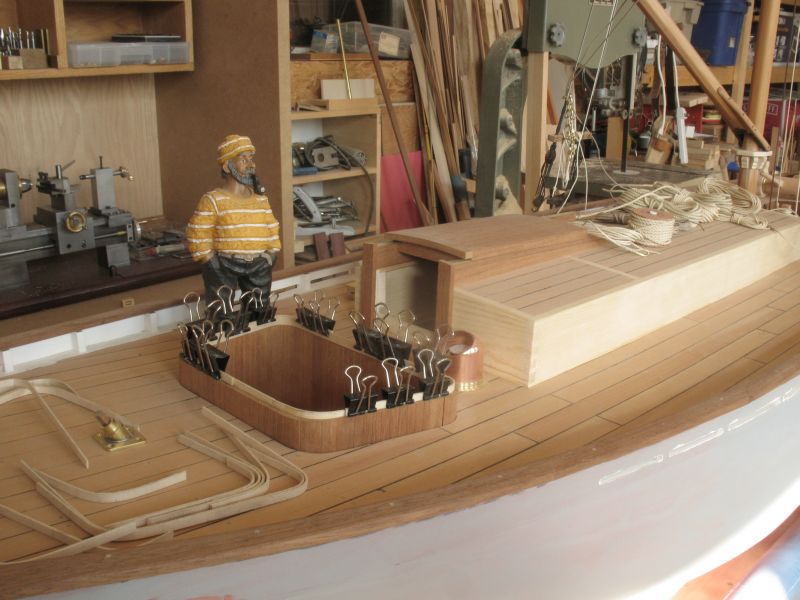
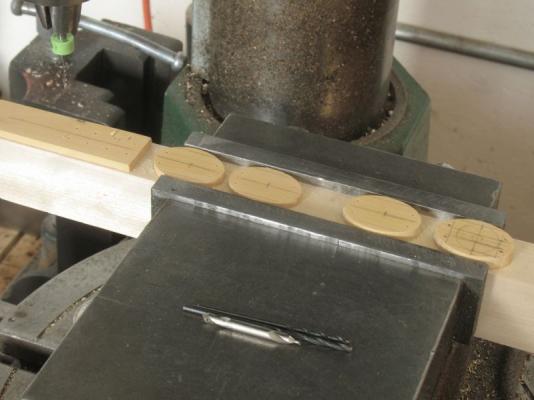
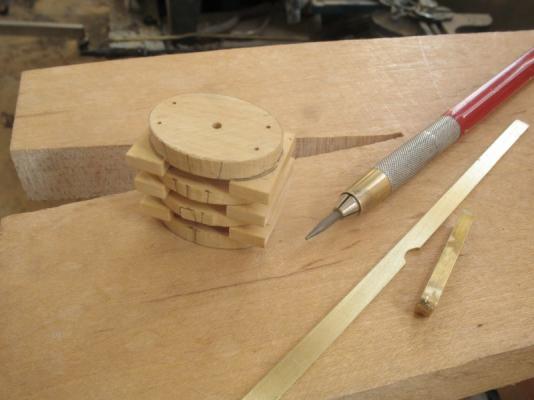
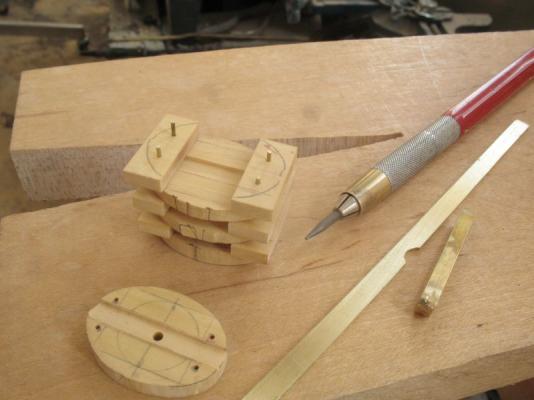
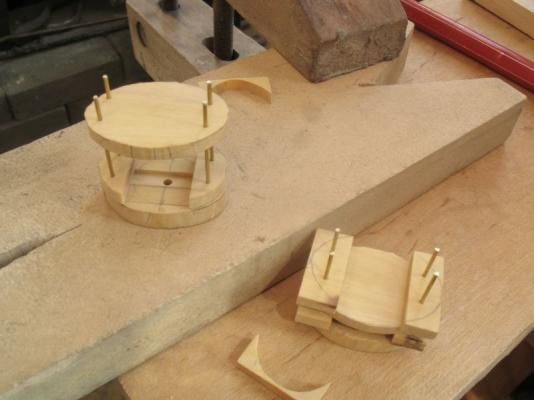
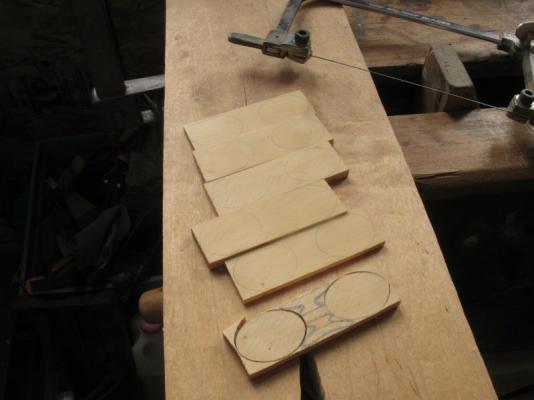
Sherry, thanks for those kind words. While waiting for glue to dry on the cockpit. I worked on the Boxwood blocks for the main sheet. the block parts were stuck to the block of poplar with some double sided carpet tape. After drilling the 1/32 holes I dropped in some brass 1/32 rod to give the blocks a bit of assurance against the shear forces of the 5/32 end mill made from a snapped off (on purpose) drill bit. The next task was one that I did have a little concern over because I did not use a centre drill to ensure that the start did not wander. The Boxwood has such a fine grain that I felt confident that the drilling would be Ok. I used 4 rods of 1/32 brass to assemble the stack of partsI was happy that they slid down nicely. Because the wood is quite hard and fine I did not want to sand the excess off the assembly and opted to use the trusty jewelers saw , plus the off cuts can be used later on something else. the first task was to trace the shape from the elliptical pieces to the spacers with a sharp pencil. Next I will drill the centre hole through the rest of the parts at the same time as the brass parts. To be continued. Michael


-
Doris, Nigel took the words right out of my mouth. Michael
- 883 replies
-
- 3
-
-
- royal caroline
- ship of the line
- (and 1 more)
-
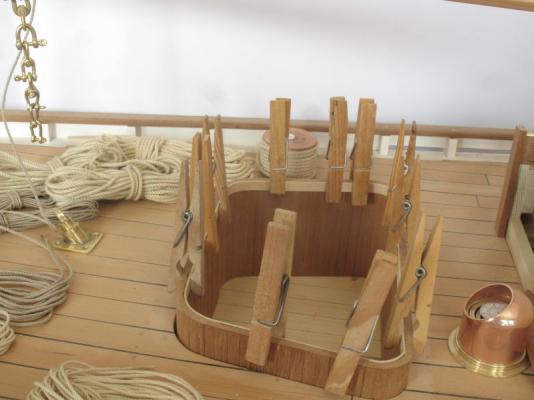
Bob you are absolutely right, I have already spent way too much time this morning reading and watching videos of how to make a Turks Head knot and its many variations. I'm not going to pick up this gauntlet just yet, Mr Old Salt. And you are not helping by encouraging him Mr. Druxey. I still have not yet finished deciding on the final shape and design of the tiller, it will be interesting though when I get there. the current apple wood one is just a placeholder. I have not resolved the connection point to the rudder shaft yet. Today I hope to get the rest of the cockpit cap rail glued up. Every day there seems to be more and more work to do on this project, it will definitely help on the next cutter though, I can see that this type of modelwork is going to be fulfilling the rest of the foreseeable future. I just wish there were more hours in the day;~) Michael
-
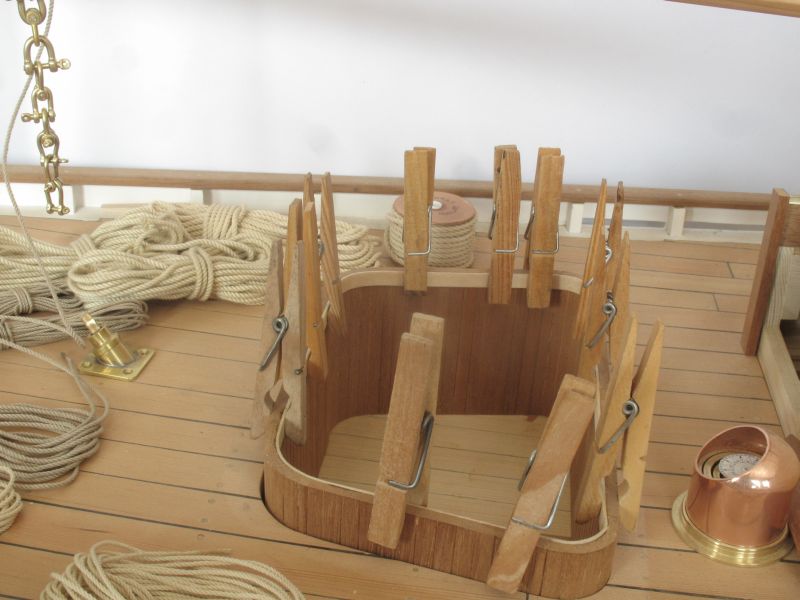
Thanks for all the likes. "It really is amazing what we can find lurking in the wood isn't it?" Steve yes it happens when one is open to options. Bob Had I been more conservative I would have cut a shorter piece of the end of the small log and would have also missed it. Daniel, thanks. Today was a good day for clamping. The inside cover was glued first and now the task of adding the layers one piece at a time. After the rest are glued up then I will shape the profile Michael

-
Bob, the paint job looks very good it will be great to see the contrast with the deck planking. as you install it. Michael
-
Very nice work I will be following along Christian. Michael
-
Yes but it will be a very simple R/C mostly just to know that it will sail, before getting on with the next cutter along with other projects that seem to be hovering in the wind. Michael
-
I really like what you are doing with the little gem, I think your choice to leave the sails alone and not repaint them is the right and wise one. Michael
-
Cutty Sark by NenadM
michael mott replied to NenadM's topic in - Build logs for subjects built 1851 - 1900
Nenad the stanchions look great, I would also opt for the number 3 sample for the deck. Michael -
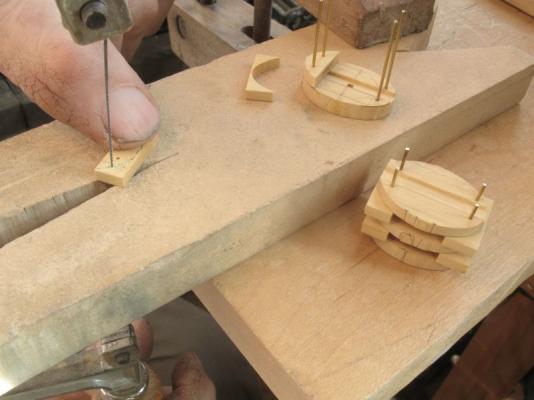
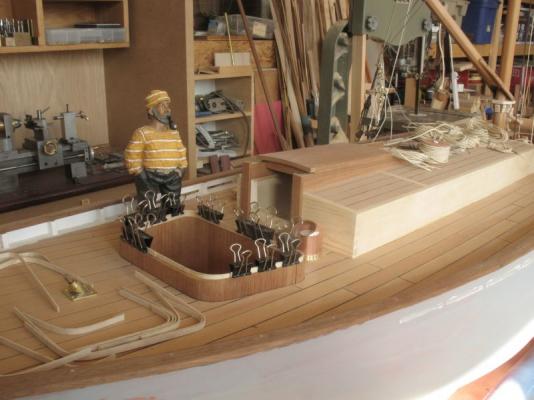
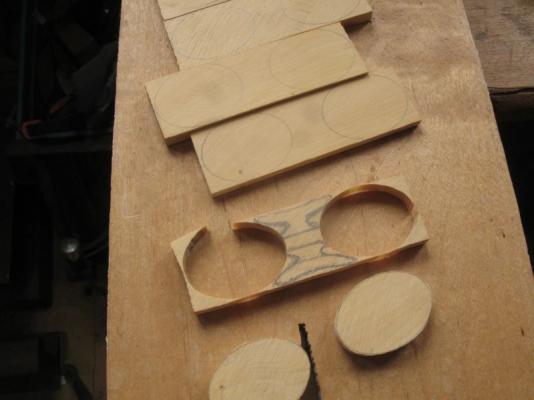
Thank you all for the "likes" Sailor, thanks for the compliment. Denis, Thanks, I really do enjoy working with Metal, although it does have its quirks. today I unclamped the strips for the cockpit cap and began to think about the next steps which led me to cut a wider strip of a slightly thinner piece measuring .259 high x .040 inches thick which will be glued to the inside first to act as a lip for the top strips which are .190 x .050 inches. I did try using a curling iron but it was a bit too big in diameter, the Admiral was at work (shhh) I ended up plugging in the soldering station dialing back the temperature to about the half way point on the dial. slowly moved it back and forth whilst applying pressure to the strip to freehand the curves. It was then clamped into the cockpit to dry. While it was drying I cut a short 2 1/2 inch section off the 3 inch diameter log of English Boxwood Buxus sempervirens to make some larger blocks for the boom and the main sheet the top one will be a triple and the lower a double both 8 inches in scale. after squaring it up I cut some pieces which are 3/4 x 1/8 inches by 2 1/2 inches long laying out the ovals for the blocks, it occurred to me that I would end up with a larger more useful offcut if I drew the ovals at each end of the wood. As I was fretting the ovals out it dawned on me that there were two cleats just hidden there waiting to be found, I think seeing Doris' wood cleats must have been lurking there in my subconscious. I was happy to make this discovery and now I will have a few cleats to shape up as well. Michael
-
This is getting very interesting, I am learning a great deal watching your design of the controls for your sails. Michael
-
Very nice work on the masts and small boats Nils. What type of resin are you using? Michael