HOLIDAY DONATION DRIVE - SUPPORT MSW - DO YOUR PART TO KEEP THIS GREAT FORUM GOING! (89 donations so far out of 49,000 members - C'mon guys!)
×


michael mott
-
Posts
5,200 -
Joined
-
Last visited
Content Type
Profiles
Forums
Gallery
Events
Everything posted by michael mott
-
 Sherry the shot from below the stern shows what a beautiful job you are doing, I say this because it is a view that we do not see a great deal and it is a difficult area to build it looks really superb. Michael
 -
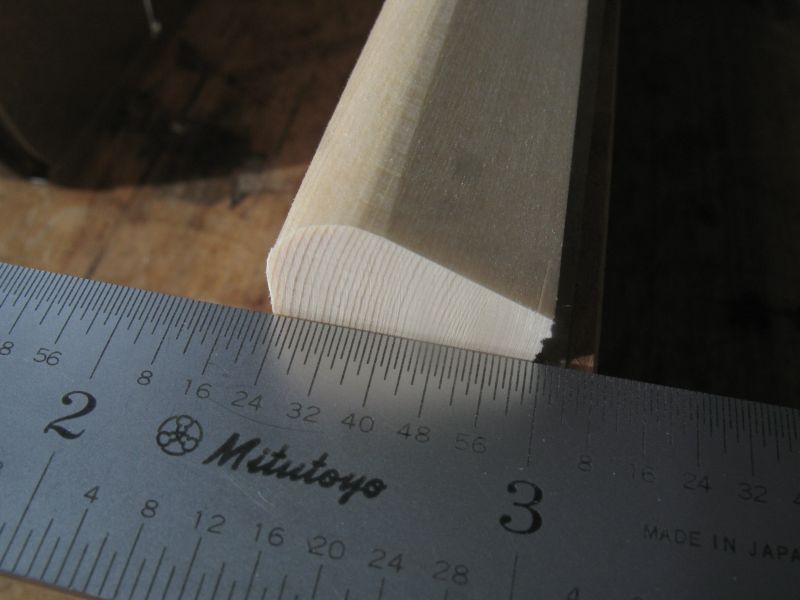
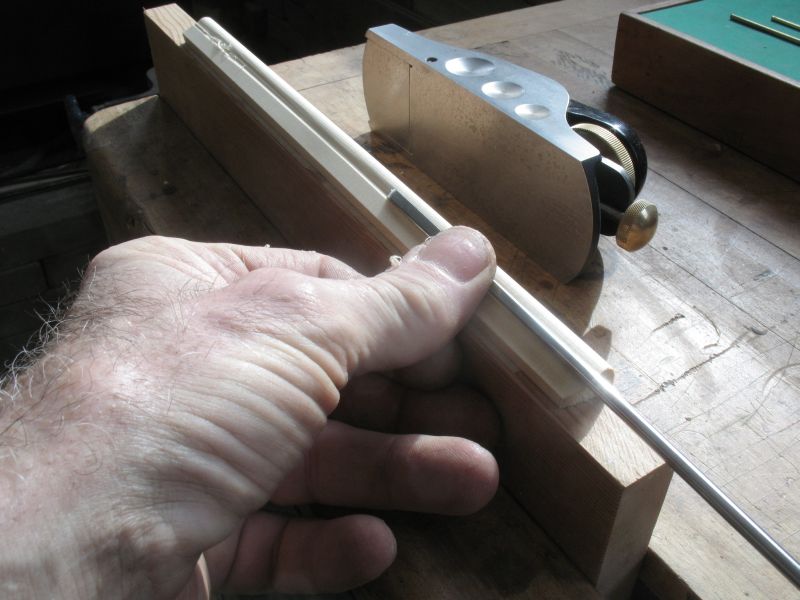
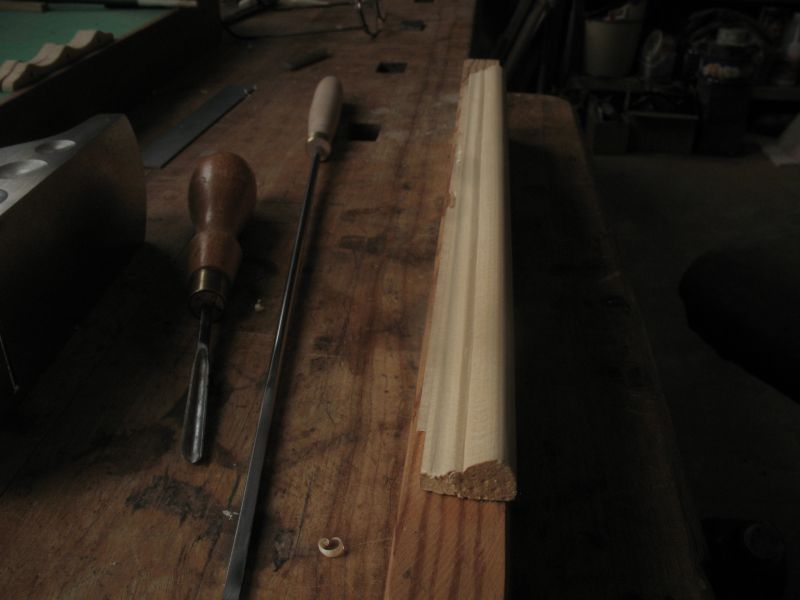
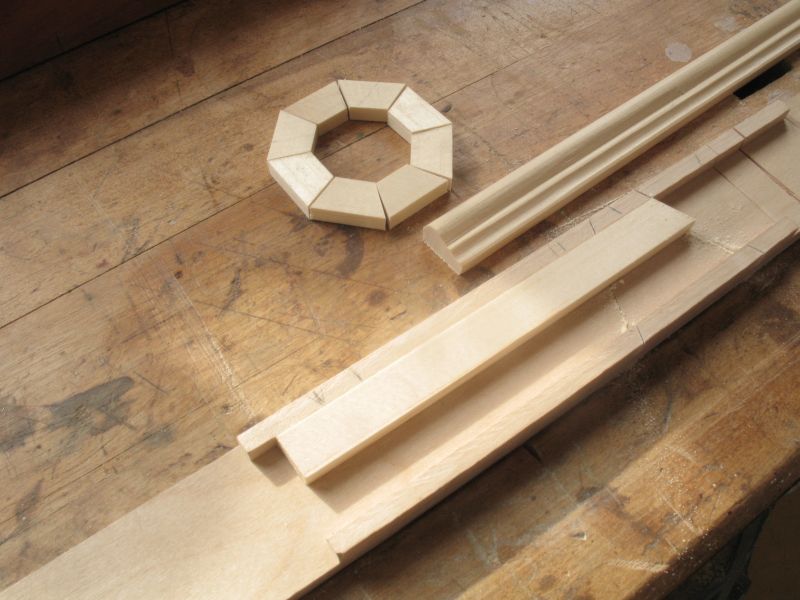
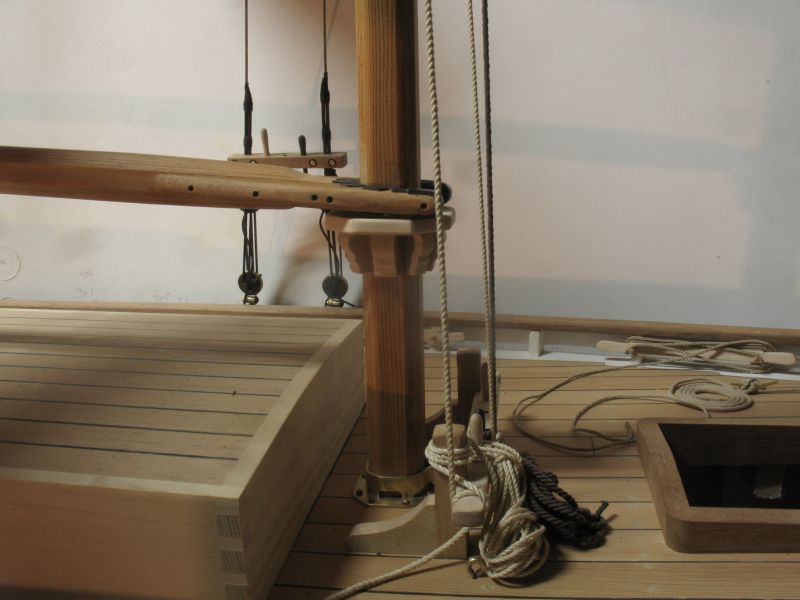
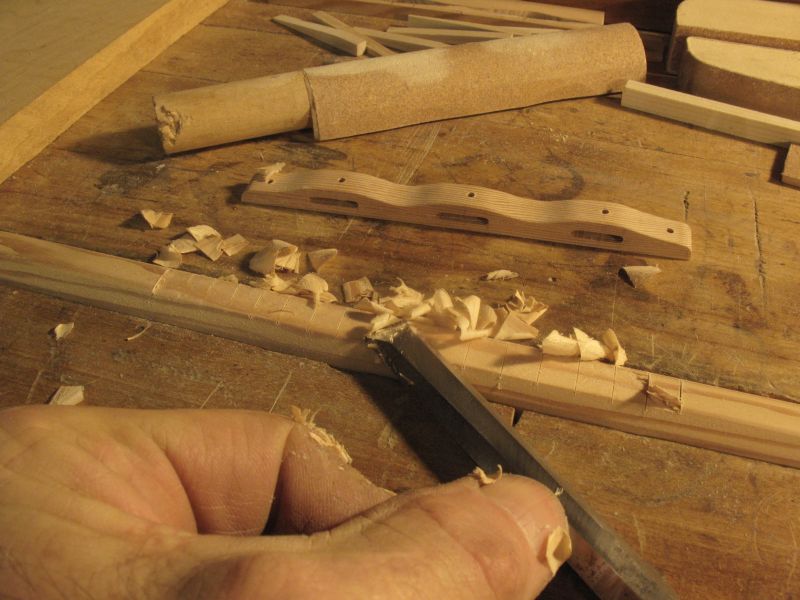
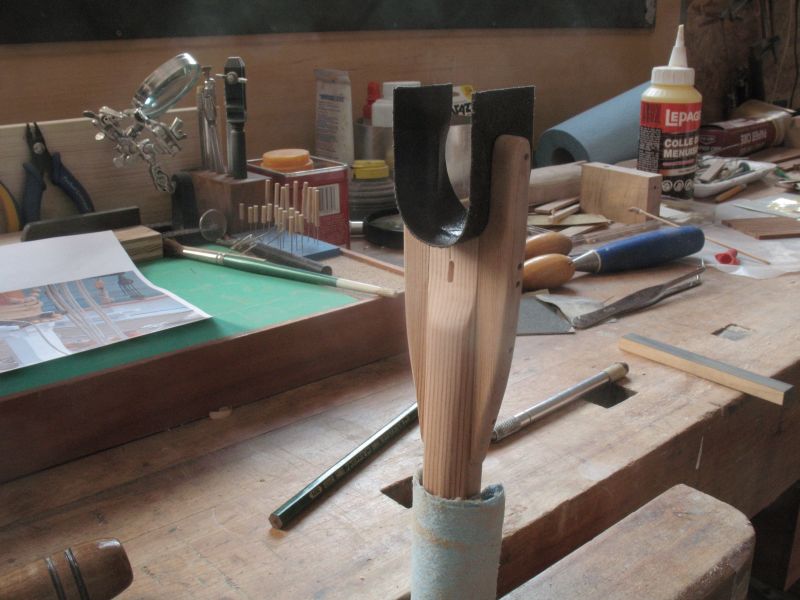
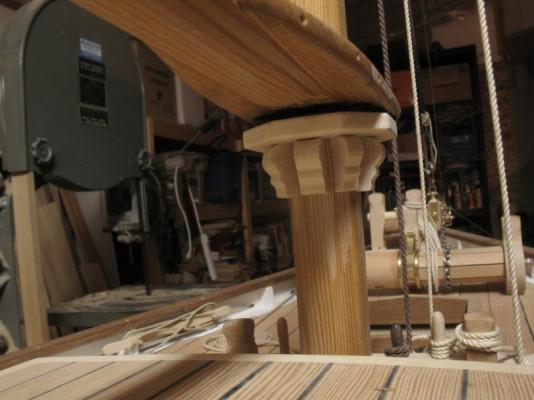
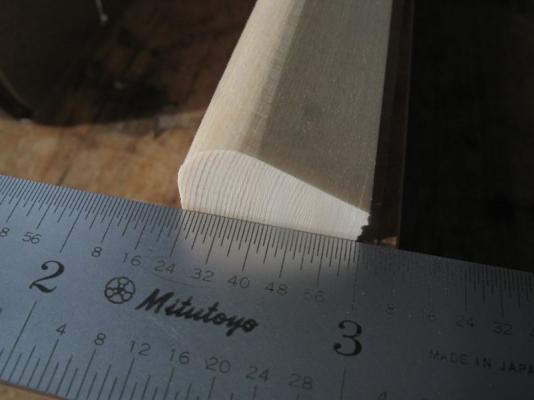
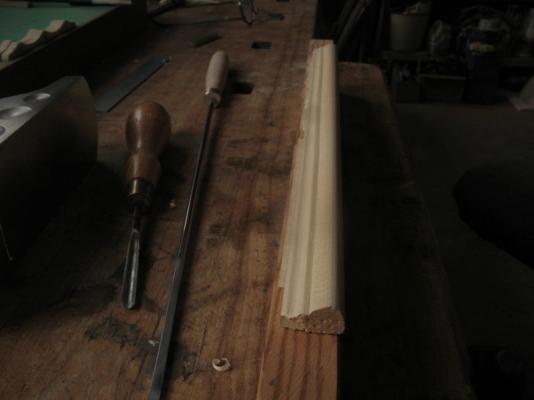
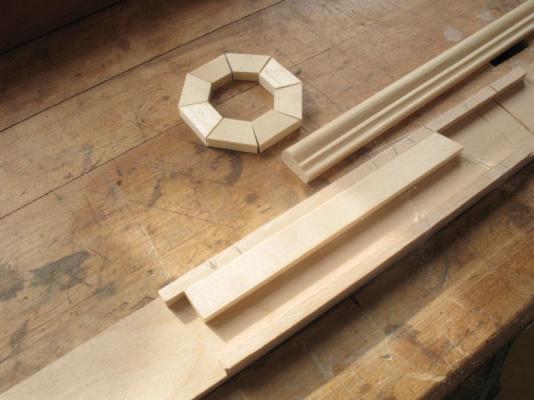
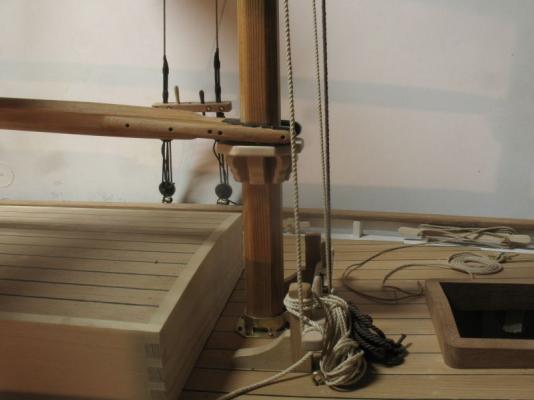
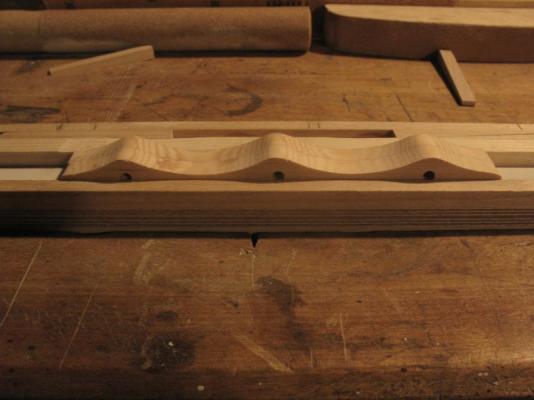
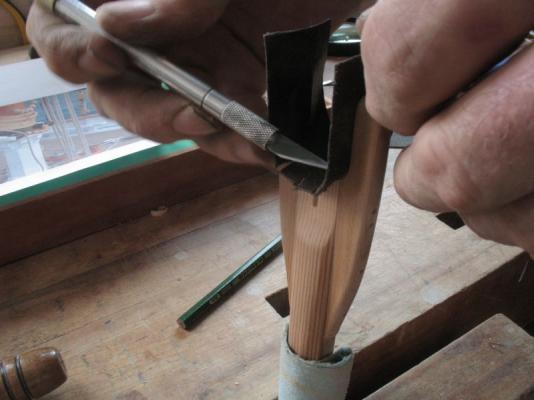
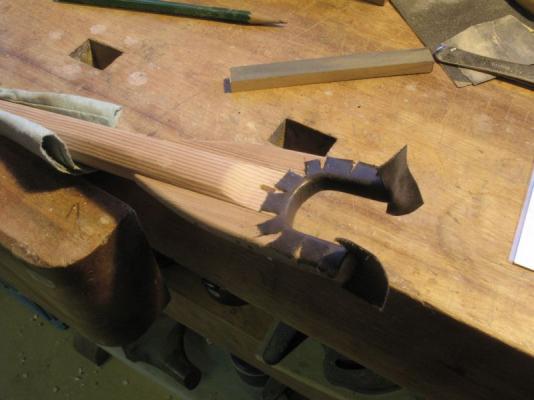
Garry, Nils, and John, thank you for following along with the encouraging remarks. I worked at building the boom rest at the base of the mast today. I began by reshaping a stick of very fine grained spruce firewood. I stuck it to a piece of fir with some carpet tape so that I could clamp it in the vice to plane it to shape. Using just the block plane to start I rough shaped the stick to a sort of pear-drop type shape Then switching to my long small chisel I cut the recess below the curve. This was followed by a small gouge to completed the shaping, I decided not to sand the surface but to just leave the cut surface. Another piece of the same firewood was used to make the top ring to fit around the mast, I glued the sections together 2 at a time without clamps but by rubbing the two surfaced together , I find this works just as well as clamping if not better in some cases. The form piece was cut to short lengths to act as support blocks under the ring, their sides were hand sanded using the shooting board with a block of wood with sandpaper glued to it which acted like an sanding plane The blocks and the two halves of the ring were then glued to the mast. . Walter's viewpoint Tomorrow some parrel beads and then some more tackle. perhaps I will have a go at making the topping lift eye splice. Michael


-
Remco it is difficult to tell that there is any damage. The new tally tags are amazingly small, I printed something in 1pt script with my ink jet, just so that i could understand the scale a little better that you are working with. It was difficult to tell they were letters, did you use a laser type printer to get the definition? Michael
-
Bedford, Sherry, Ed, thank you for your very kind comments, and for the likes. It is so important to hear positive thoughts in our daily lives, I do appreciate them. Ed the wood is some clear Fir. I like to use the sort of wood that was used for many of the parts of the craft, as you know this is not always possible because of the limitations of scale and densities. The beauty of working at this larger scale is that it is possible to find some pieces of wood that are quite close grained either because they are old or grown in less than Ideal conditions. The Fir and Spruce grown in the higher altitudes is often much more dense because of the short growing season and harsh conditions. Often whist chopping a log of firewood I will notice some particular fine grain and save a few pieces that can be used for modelwork later. Michael
-
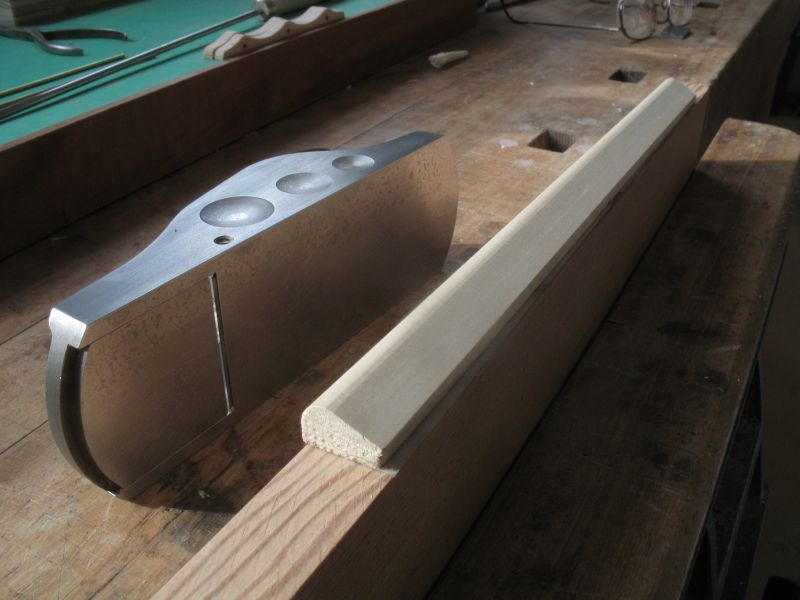
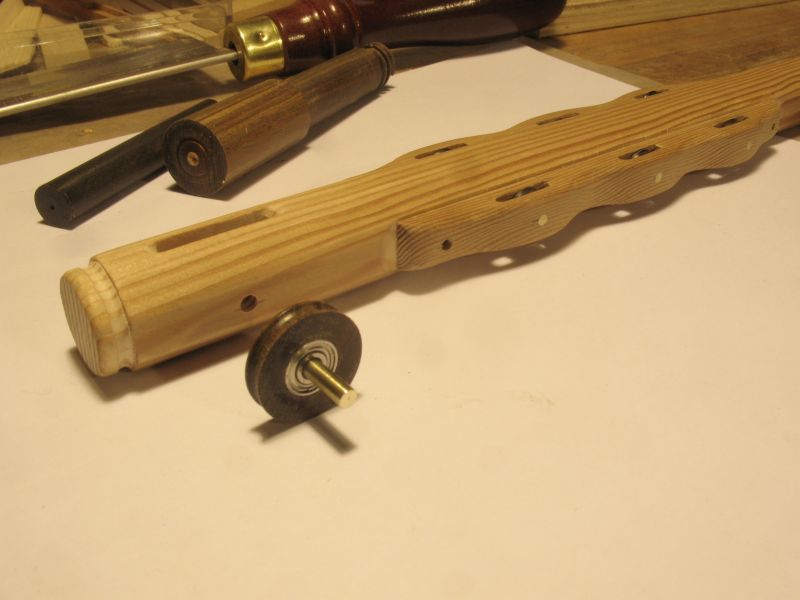
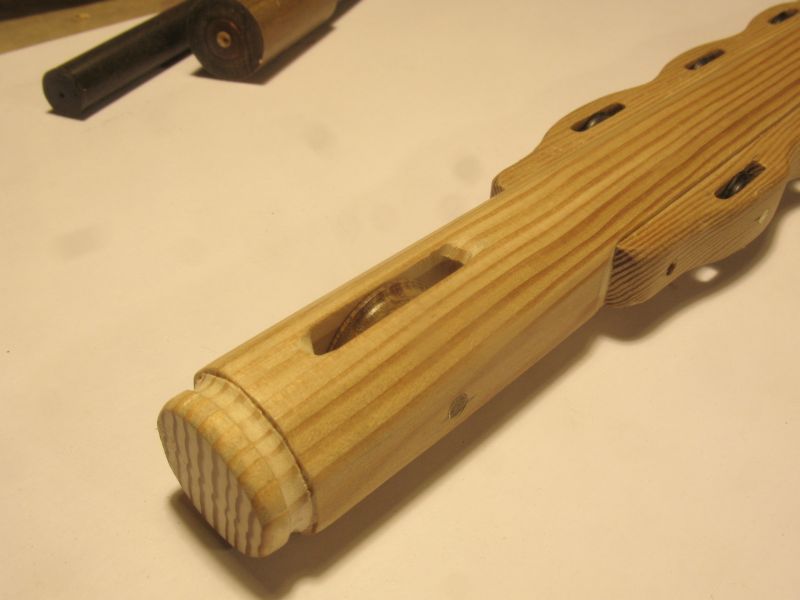
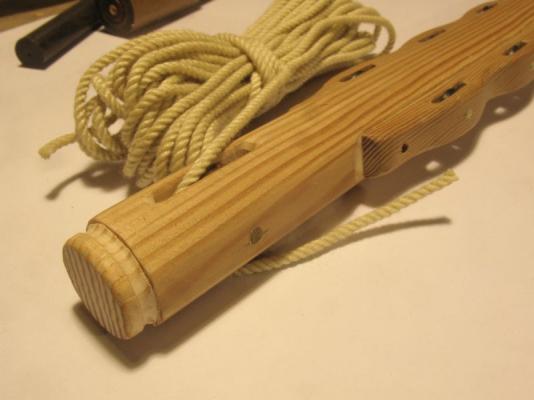
Sherry, thank you for your comment. Bob don't sell yourself short your work is anything but. John, not only long sleeves, but I had to put on some long pants my knees were gettin cold. Denis, yes I do like making sawdust, it is good to be back at it. S.os, Thanks for the compliment. Greg, thanks there are so many here that keep raising the bar it is hard to keep up. I have nothing against the Joneses mind you. Mark, thanks for your kind thoughts, and yes the wind is the kicker with these low temps, they were warning about serious wind chills about the Province some as low as -49 wind chill. I finished the other reef comb and dropped in the sheaves they are 3/8th diameter and ebony. The next picture shows the Lignum vitae sheave for the clew out-haul at the end of the boom. It has a 3/8 x 1/8 ball race. The last one shows the rope that will be used for the adjustment I also notched the end of the boom for the Topping lift which will have a spliced eye to snug over the end of the boom. Michael


-
I see that you have a loose thread on one of those sails better get out the sail palm.....;~) Absolutely brilliant attention to detail sir. The texture of the folded paper look very convincing. Michael
-
Daniel the model looks really sweet in that bottle. Congratulations on a super job. Michael
-
Excellent work Gary it really shows your skill. Michael
-
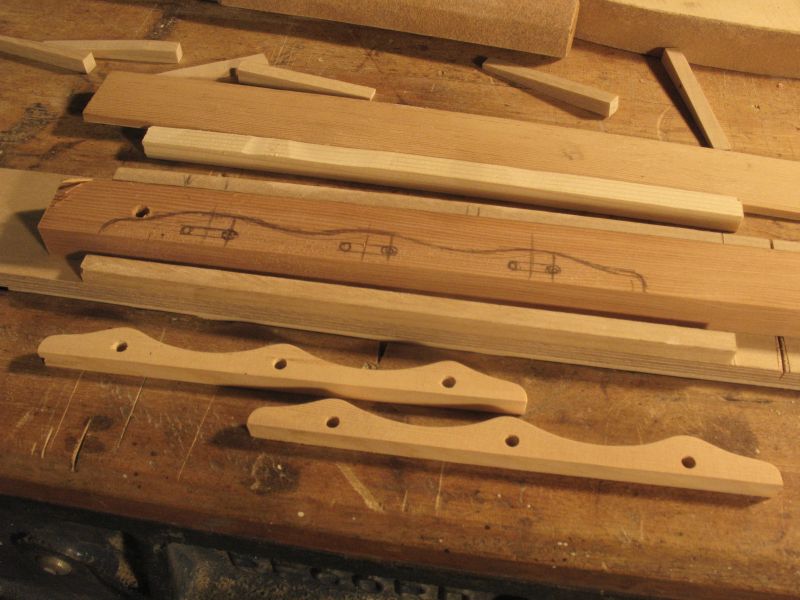
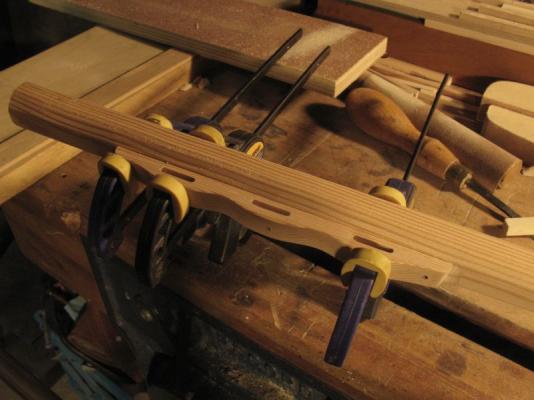
Thank you everyone for the supportive and encouraging comments, and the "likes" It is very much appreciated. Working further on the boom I made a start on the reef comb and bee blocks. the first set of reef combs did not allow for the bee blocks so started a second set the sheave will be 2 1/2 inch scale diameter The first pair clamped into the small saw guide with some wedges so that i could file and sand them at the same time. The second set started after cutting the slots first, then using the jewelers saw to fret them out. The boom being prepared to glue on the reef comb on the port side The come clamped and glued I will drill through the boom and the starboard side after the starboard side is glued on this will ensure that all the holes match well for the pins Brrrr its down to -32 tonight.... in like a lion out like a lamb as the old saying goes. Michael

-
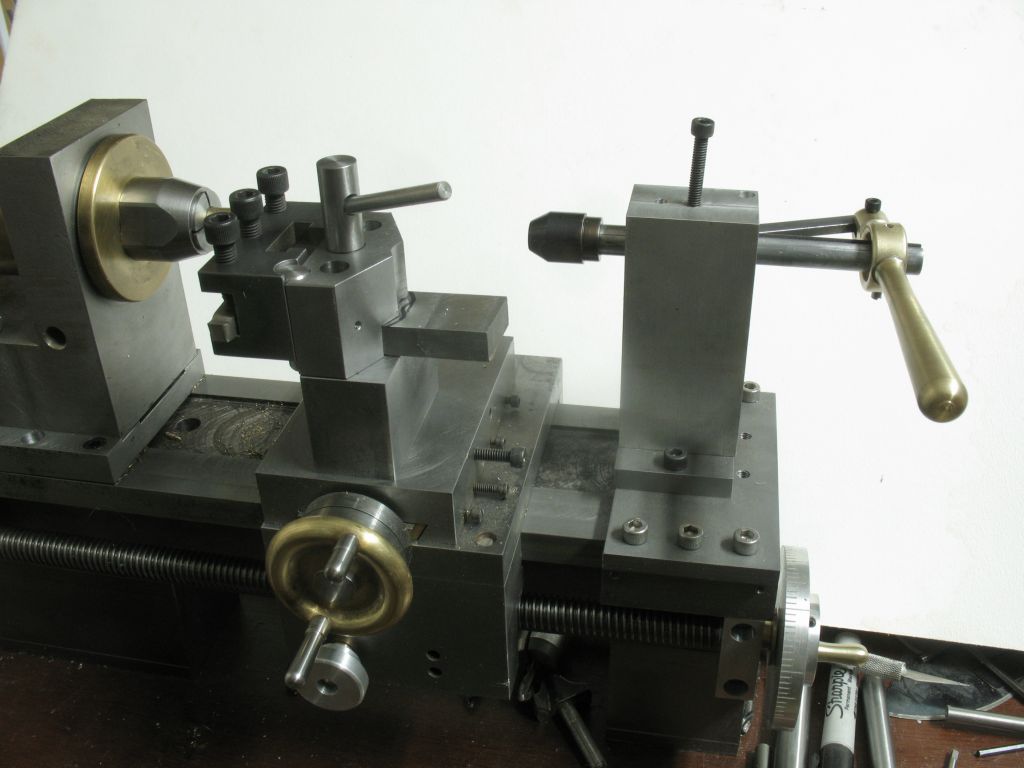
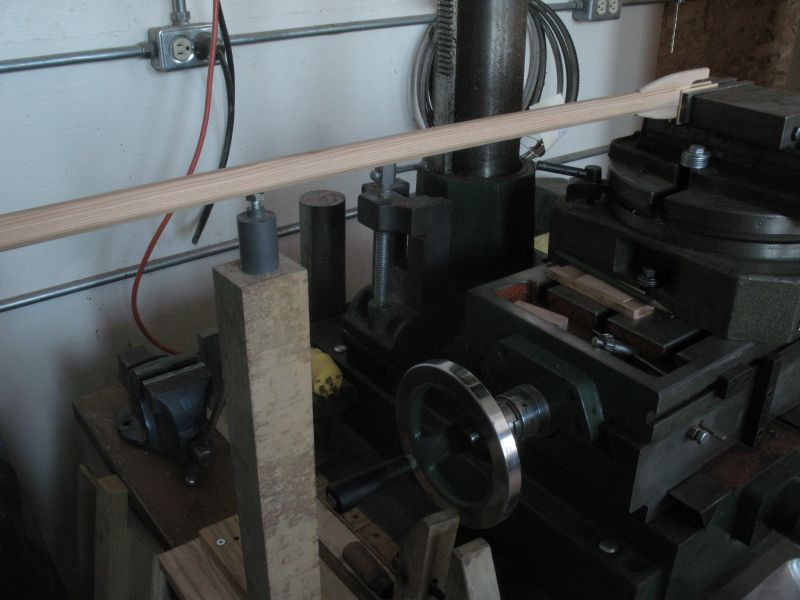
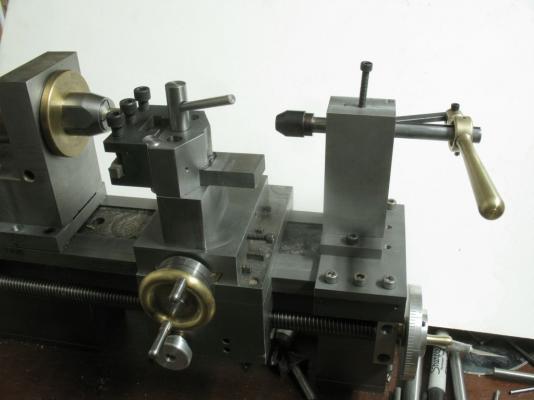
Daniel, Mark, B.E., Nils thanks for stopping by and the kind rematks and thank you for all the "likes' Nils that is a very beautiful looking hull, I shall have to have a look. Dan I made my own here near the bottom of the page you can see how I made it. A lot of work for sure but I am reasonably pleased with the results. The simplest way produced the best rope. I did build a rope making machine here but in the end I did not like the results for the fine rope I will revisit the machine but for the time being the larger diameter that I am using I prefer the way I am making it now. I now have to make some more blocks for the boom and associated lines, I can see that the blocks and shackles are going to keep me busy, but at least my newly finished little lathe that I started to build 43 years ago will be handy now for the small diameter stuff because the Myford only goes so fast. It was a lot of work but it needed to be finished, I am glad I took the time to get it done. it will make turning the small pins and shackle parts that much easier. Michael

-
Superb workmanship Drazen! the gratings are also beautifully fitted. Michael
-
Yes a great job on the soldering, nicely cleaned up too. Michael
- 346 replies
-
- 1
-

-
- terror
- polar exploration
- (and 2 more)
-
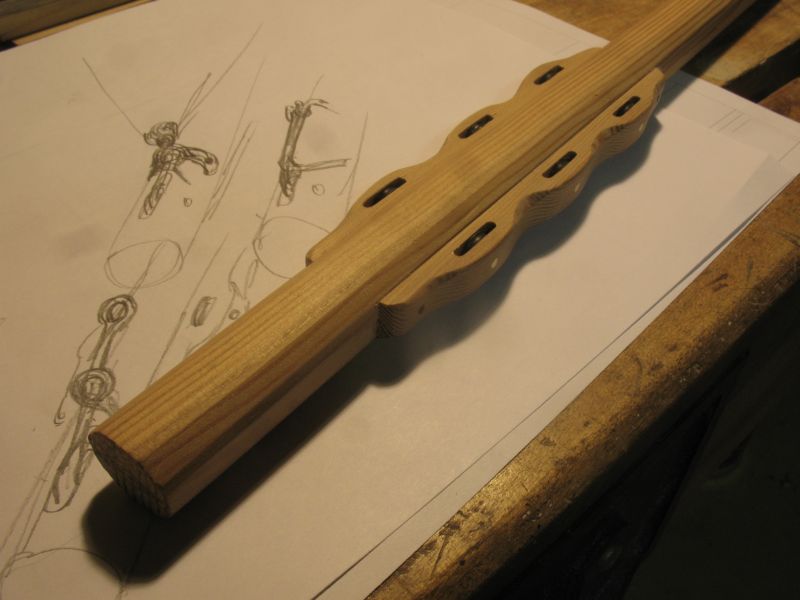
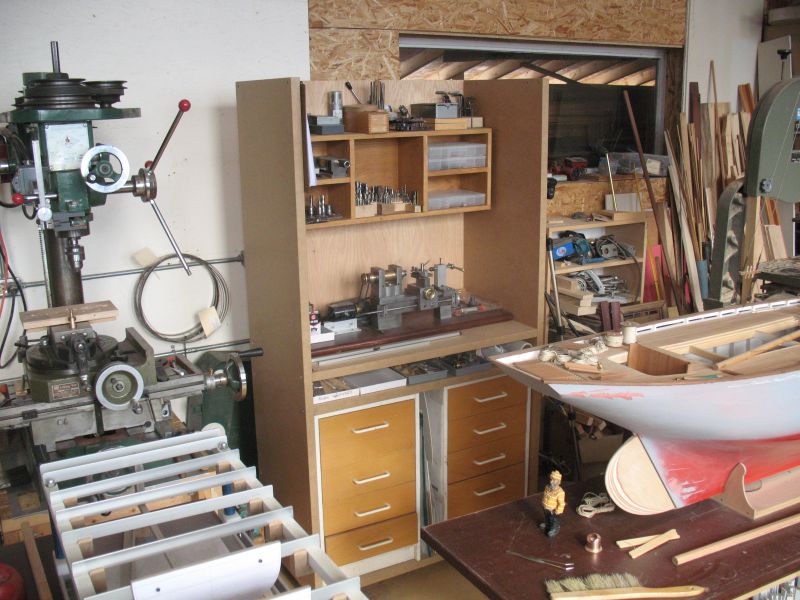
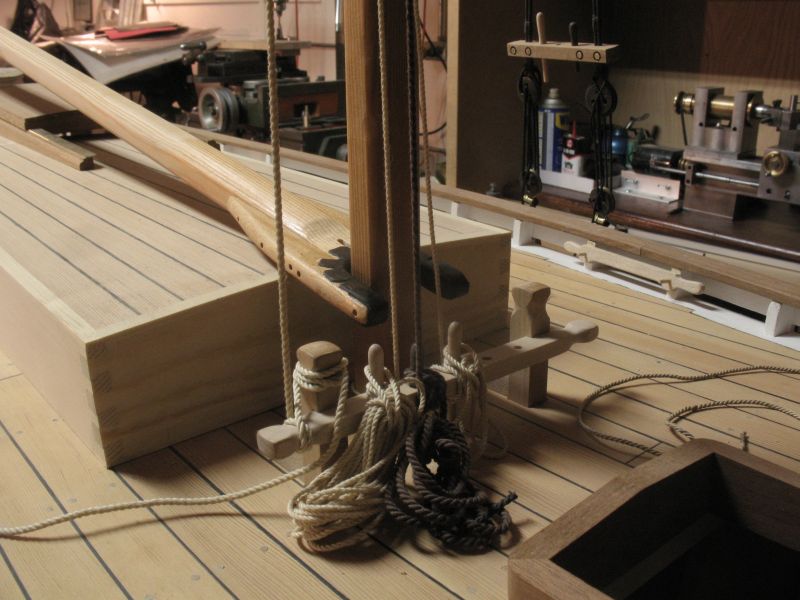
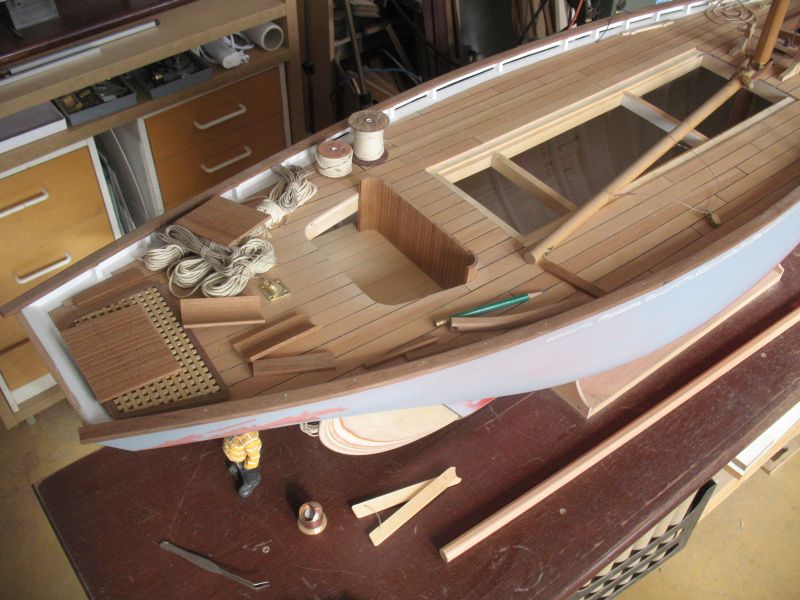
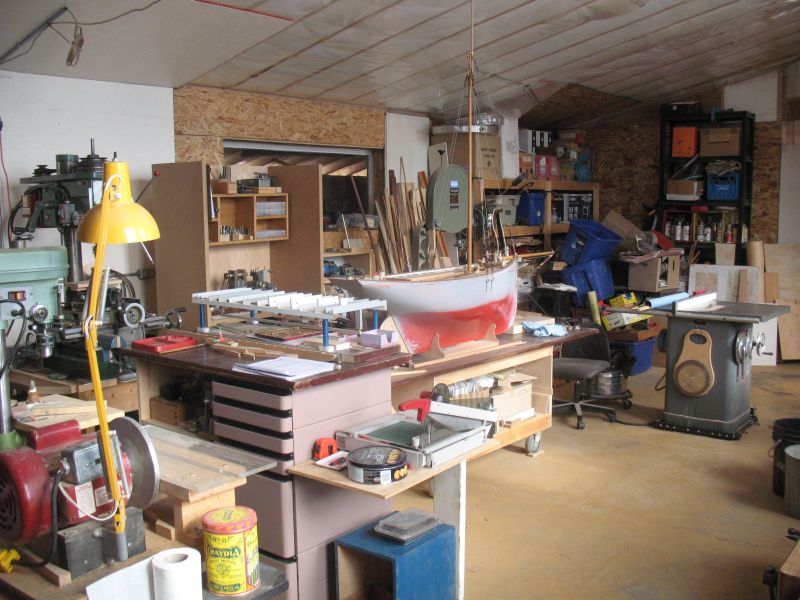
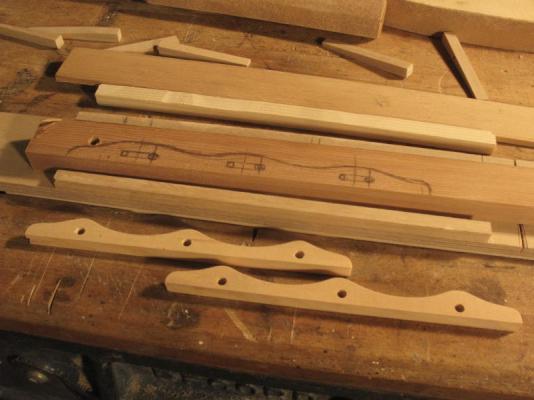
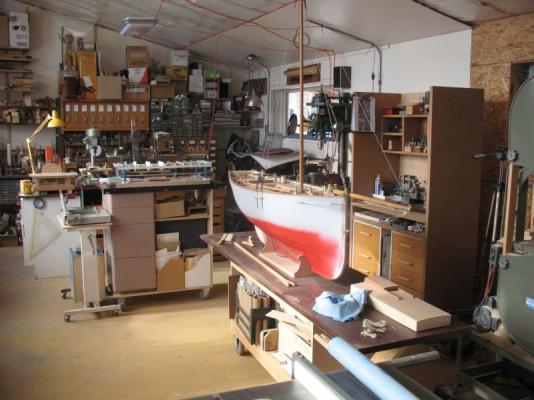
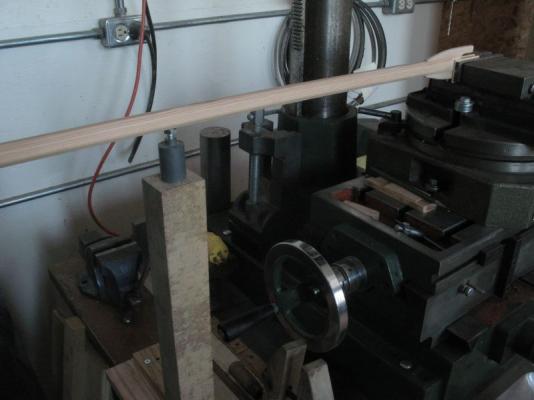
Today I finished tidying up the work area so that I now can work on either Skipjack or the pilot cutter now that both have their own tables. Rearranging things really does take a while it seems getting some of the model wood out of boxes and onto some additional shelving makes it so much easier to work. That done I was able to get the final gluing sorted for the new walls of the cockpit when it is good and set I will work on the top rail. Walter thought it was about time. The gaff was re-threaded with some of the new rope, a fiddly job, and as I was working I kept thinking about the incredible amount of rigging on Nils' Clipper. Then time to get the boom finished after some final shaping of the jaws, the holes were drilled for the strength bolts and for the slot to accommodate the plate for attaching the tack of the mainsail and the down-haul. because of the length I needed to add a support. Once the holes were drilled I began gluing on the leather. Then the leather was cut to allow for the wrapping. after folding down the tabs and the final shaping the jaws end was given a liberal coating of Teak oil. Left to right the new lines are the Gaff throat up-haul, peak halliard, jib shroud, gaff throat down-haul. Next I need to make the support for the boom on the mast. Michael


-
S.os Thanks for the kind words. Regarding the annealing I used some heat sinks and a small hot flame. Michael
-
Thimble help needed
michael mott replied to Senior ole salt's topic in Metal Work, Soldering and Metal Fittings
take a look at this thread and here scroll down to the bottom of the page where I show a step by step method for making thimbles I made a thimble for the 1/16th cable first I filed a couple of grooves at each end I annealed the centre part only and shaped the thimble using the same tools and methods as before At the moment it is attached to the bowsprit end cap but it will be attached to a traveler on the bowsprit, so that it can be hauled it to change sheets. Michael -
Piet, the model look very good, it is also great to see you holding her in your hands it is always a treat to see the face behind the build. Michael
-
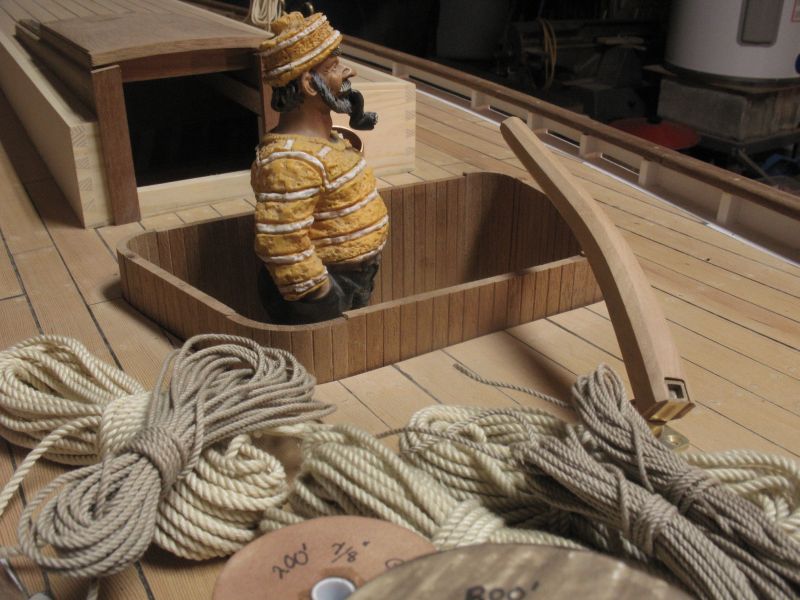
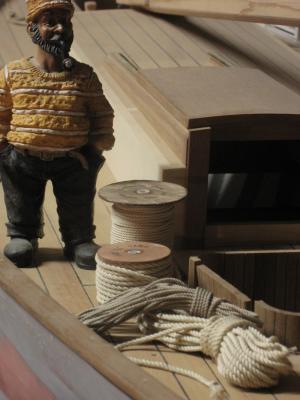
Thanks for the feedback and all the likes. Dennis the little chap arrived with a model slate wagon that I had received from a chap in Wales as part of a swap project for some model wagons in the large scales of model railways a few years back, he just seemed more nautical than railway worker. Brrrrr -30c this morning Michael
-
I just finished reading this very interesting and informative book about the shipping industry. Rose journeys from Rotterdam to Singapore aboard the Maersk Kendal. She covers the current state of Piracy and a myriad of topics that include the state of the global fleet and the life-cycles of the big ships their demise. everything that you ever wanted to know about the global movement of stuff, and what it takes in both human and mechanical resources. Overall an informative and entertaining read, Michael
-
- 3
-
-
Bob that is a sweet looking hull, An interesting trade off regarding the painting, be interesting to see how it goes. Michael
-
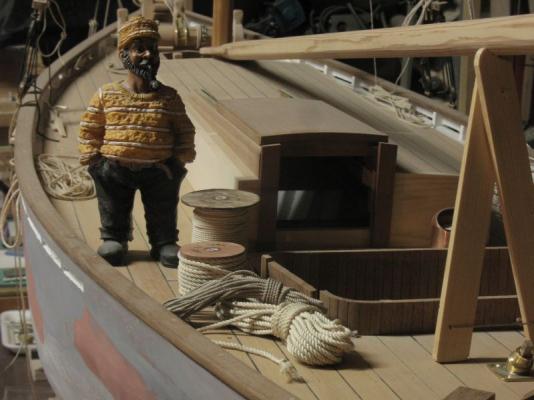
Well Walter just took delivery of 800feet of 1/2 inch line and some 1 inch cable plus some other line for the rigging and docking he seems rather pleased now that the delivery has finally arrived, he can get on with the boom now. The 5/8 line will be delivered tomorrow he was assured. Michael
-
Lovely work Alexandru. Michael
-
cable laid vs rope (left vs right twist)
michael mott replied to davec's topic in Masting, rigging and sails
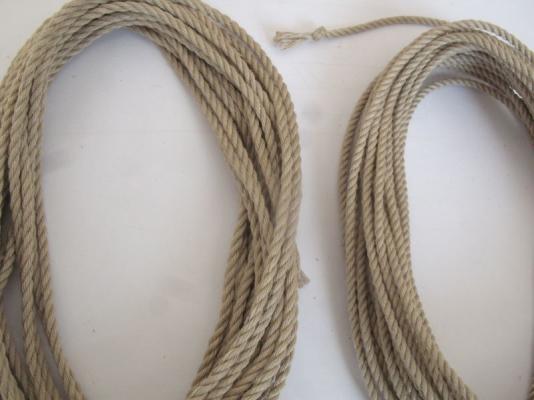
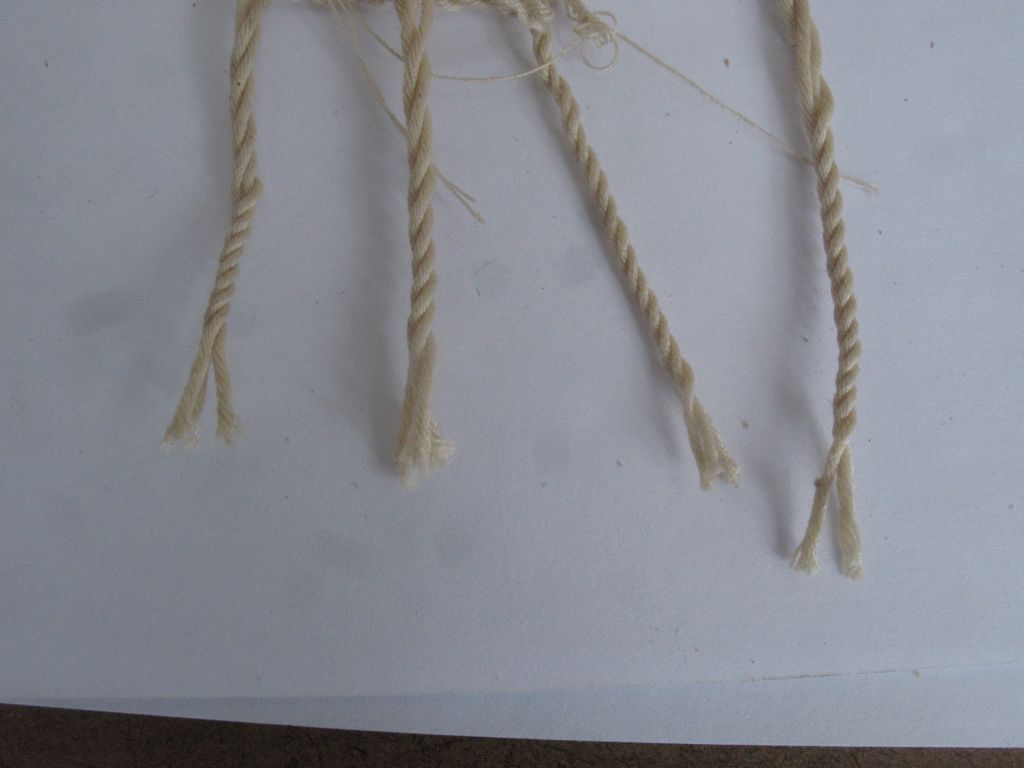
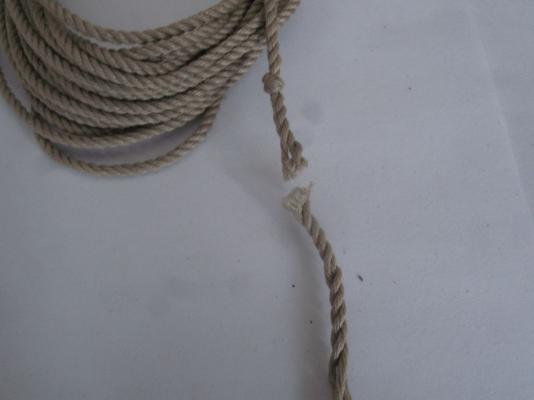
Dan if my understanding is correct then the 9 strands would be formed from three strands and then the three are wound again to form the cable, which is similar to what Chuck describes for the heavier rope/cable Gaetan just to clarify one point the friend in the picture is me and I can feel the tension on the lines which were twisted with a fair bit of initial twist in each strand I felt the tension in the same way one checks the tension in ta bandsaw blade when one does not have a tension tool gauge. it doesn't show but I am putting a fair bit of pull on the drill to maintain the tension admittedly this is not the same as a set mechanical weight. I have used similar set up to the one you have shown, I prefer this method because of its simplicity and my body is a good way to feel the tension. For rope that is only 50% correct I am pretty satisfied with how it looks for my model regardless of the technicalities of construction. As you can see the loose cut end looks reasonably stable. I agree that to achieve absolutely consistent results a consistent set up is required. These smaller 1/2 inch scale ropes were made by having the drill with the spinner get pulled across a table for 36 inches a crude measure for sure but a consistent set up each time. It would also be good to have a revolution counter to ensure equal and opposite numbers of twists but as a friend once quoted to me "I am not building a Piano" so using my own senses and the value of practical experience I think that I will be able to get reasonably consistent results of making Cable and Rope in right or left hand twist as the following picture again shows improvement on the 1/2 inch scale rope with the correct twist. Not much unraveling on the loose cut ends. Michael
-
cable laid vs rope (left vs right twist)
michael mott replied to davec's topic in Masting, rigging and sails
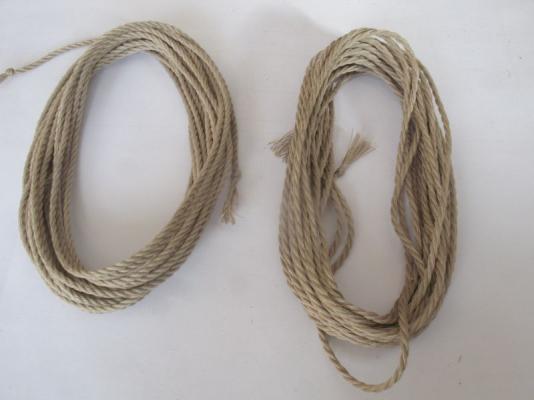
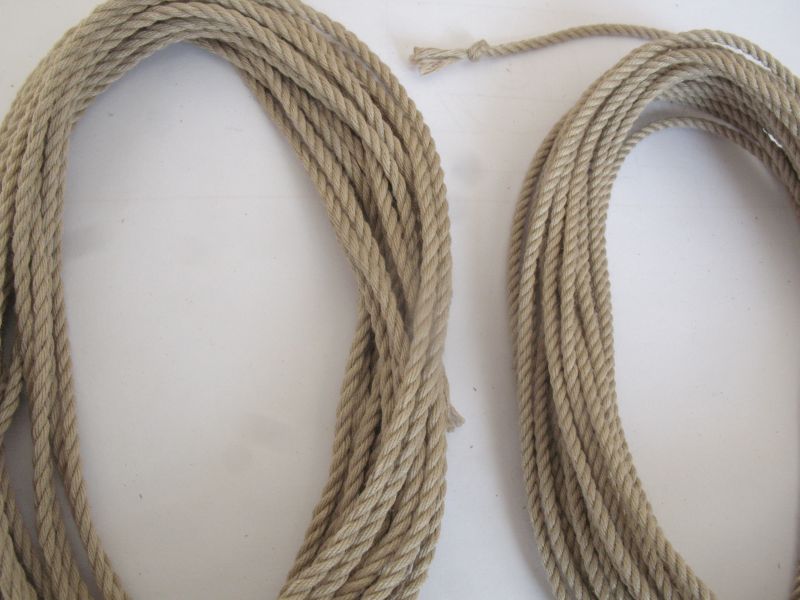
following your advice Chuck I have unwound and rewound the loose rope on the right both of these ropes have the same number of strands the rewound one is now also smaller in diameter and there was very little unravelling and it looks much better. michael