HOLIDAY DONATION DRIVE - SUPPORT MSW - DO YOUR PART TO KEEP THIS GREAT FORUM GOING! (Only 24 donations so far out of 49,000 members - C'mon guys!)
×


michael mott
-
Posts
5,198 -
Joined
-
Last visited
Content Type
Profiles
Forums
Gallery
Events
Everything posted by michael mott
-
 Steve the white stripe really helps to define the shape of the hull, nice job. Michael
 -
Ed it really is like watching a full size ship going together, Your attention to these small details in both the historical commentary and the model are exemplary. Michael
- 3,618 replies
-
- 3
-

-
- young america
- clipper
- (and 1 more)
-
Karl, the barrel looks very convincing indeed. what temperature metal did you use? Michael
- 662 replies
-
- 1
-
-
- bonhomme richard
- frigate
- (and 1 more)
-
Hmmmmm tough situation there! can tou use a different bottle so that you do not have to rebuild the whole thing? Michael
-
Thanks for all the likes. Denis Thanks. Dan, I just cannot wait for you to be around;>)) Row, thanks, and yes the stainless has already crossed my mind I will be looking for some, that or some bronze. Michael
-
Druxey I have to draw the line __________________________________________ Not that I didn't try though;>)) Andy I thought you would approve. Mark, I shall think on it for sure. Greg Thanks,have you seen the film Grumpy Old Men, the sardine would make my wife a grumpy person:>D Geoff, Thanks, I have not seen the book you mention I shall have a look for it, I am familiar with the Pilot Cutter Marguerite though. Michael
-
Very very nice Danny the flagstaff clamp is really sharp, the rest is super as well. You mention it was a spare trunnion clamp is there a picture in your build as to how you made them? with out me having to go looking to far. Michael
-
That is some very nice joinery Mark, and tricky fits as well. michael
-
SS Vinal Haven by TBlack - FINISHED
michael mott replied to TBlack's topic in - Build logs for subjects built 1851 - 1900
Looking great Tom, the tie downs worked out well. Michael -
Remco that bit of beam work is a great piece of workmanship! Michael
- 1,215 replies
-
- 1
-
-
- sloop
- kingfisher
- (and 1 more)
-
Beautiful work Garward the lamp illumination works very well. michael
-
The decorative frames really do set off the ports nicely. Michael
-
I have to echo what Sherry has said, superb attention to details. Michael
-
Thank you everyone for the positive comments and for the likes. Well as it turned out Andy, Walter was short on a couple of screws so rummaging around the odd screw bin he found a couple of 0ld Robertsons for all the Canadians in the crowd These were really hard to make, I used some Sig copper rivets and swedged the square hole with a ground punch made from a broken 1/8th shank number 73 drill. The scrap metal bin just gained a few oz. Michael

-
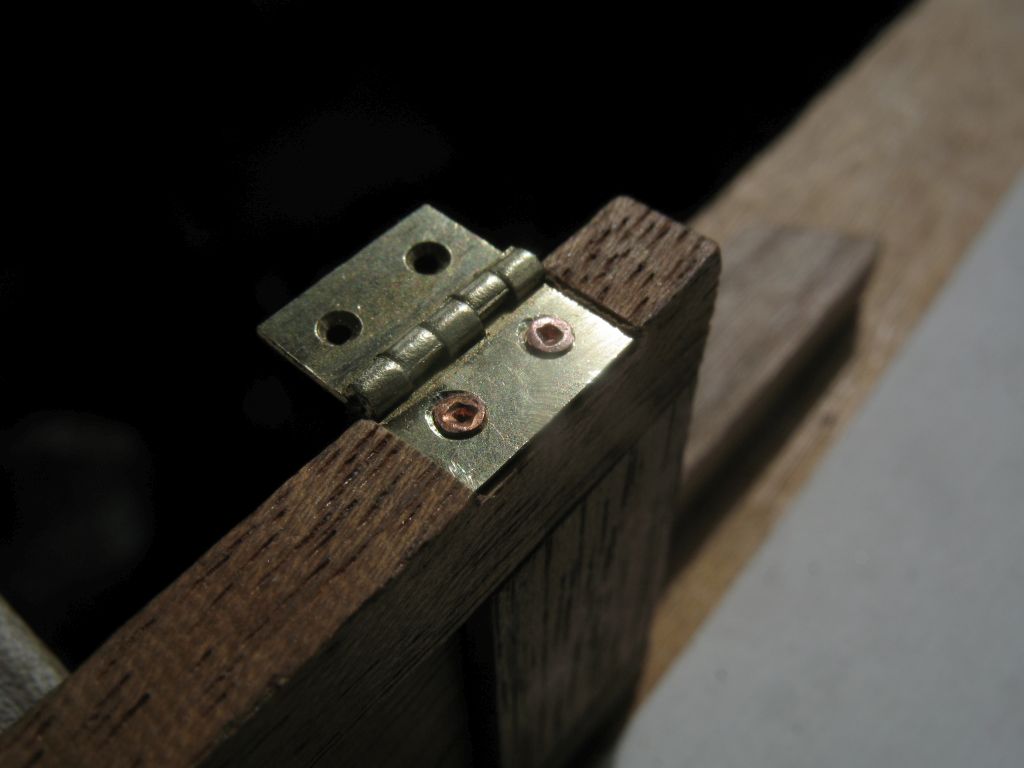
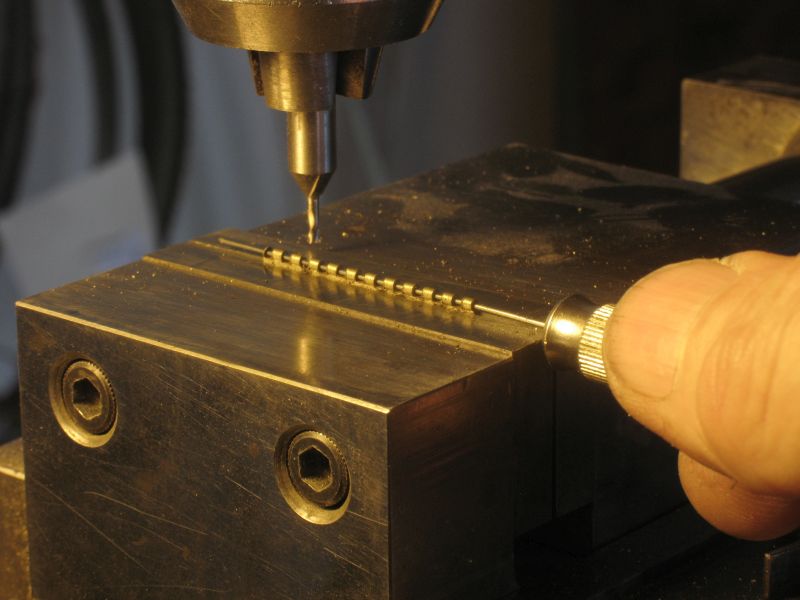
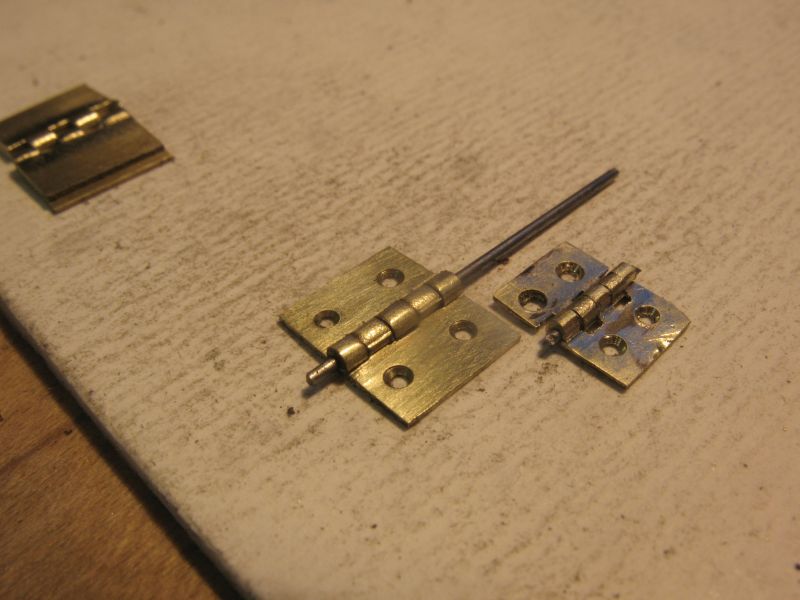
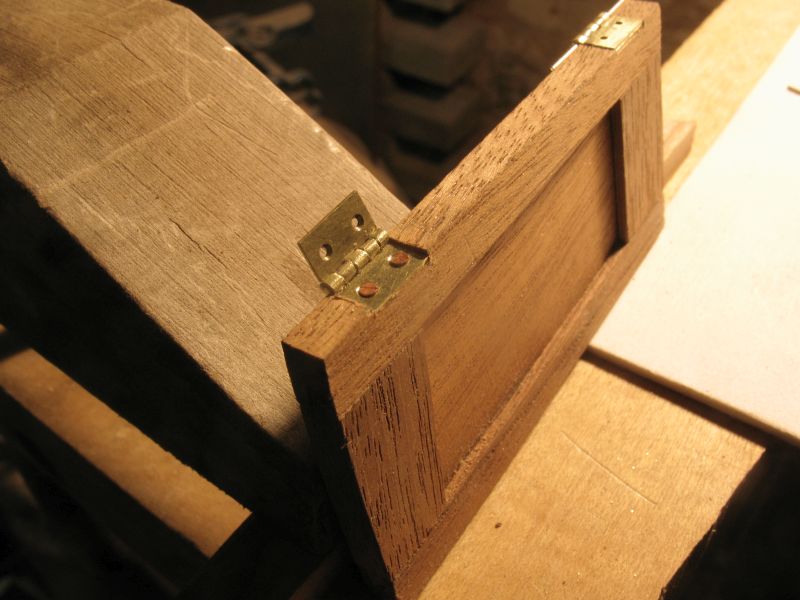
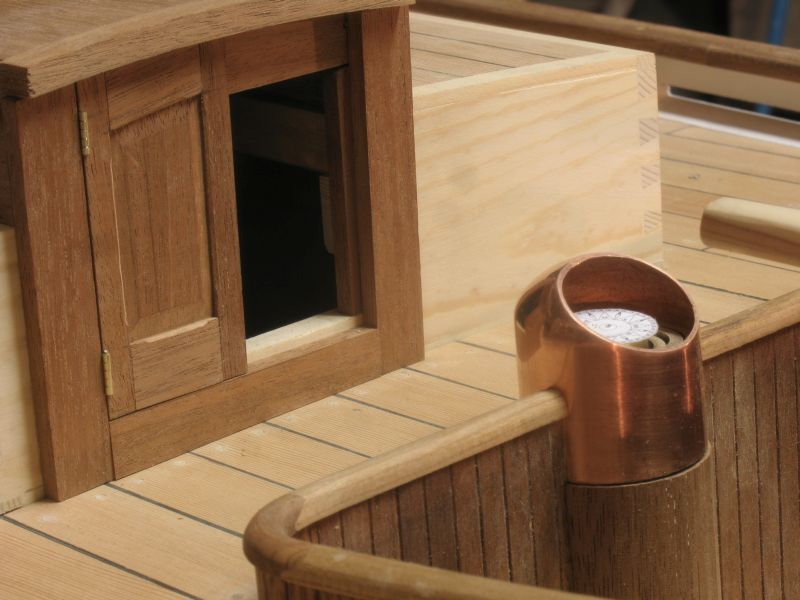
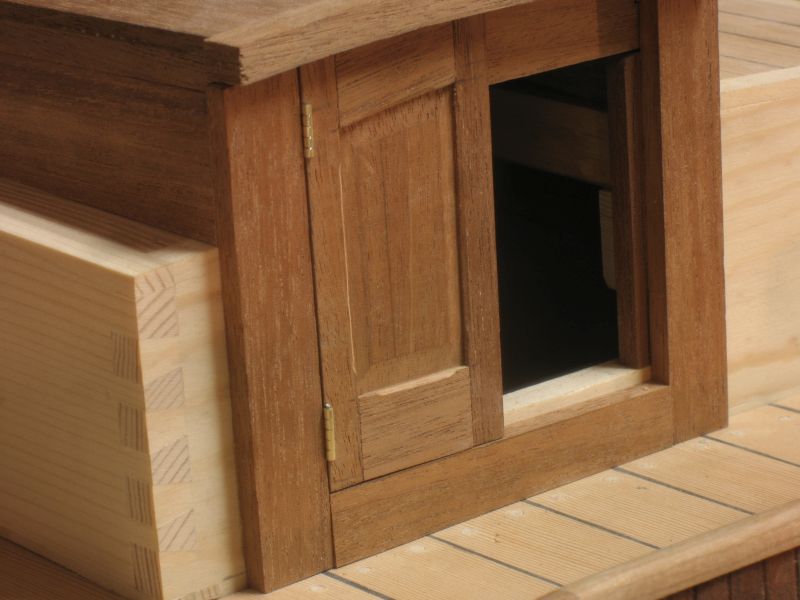
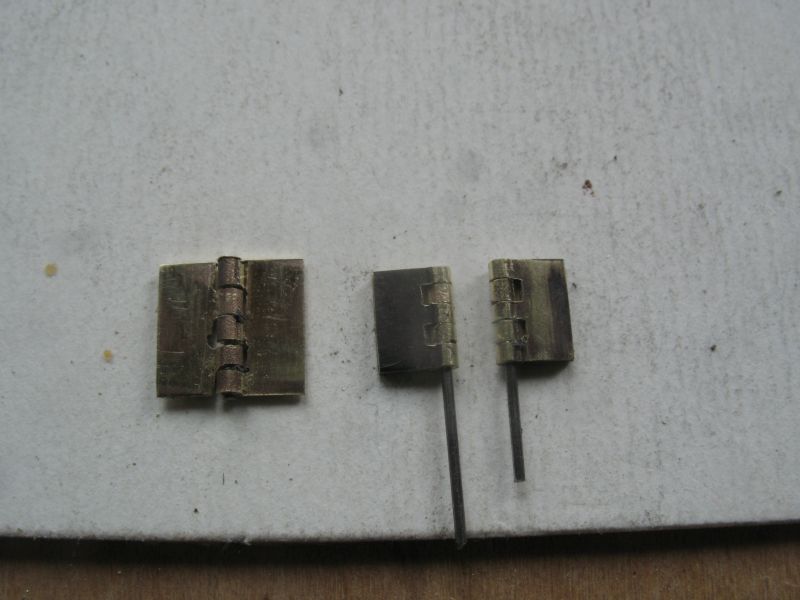
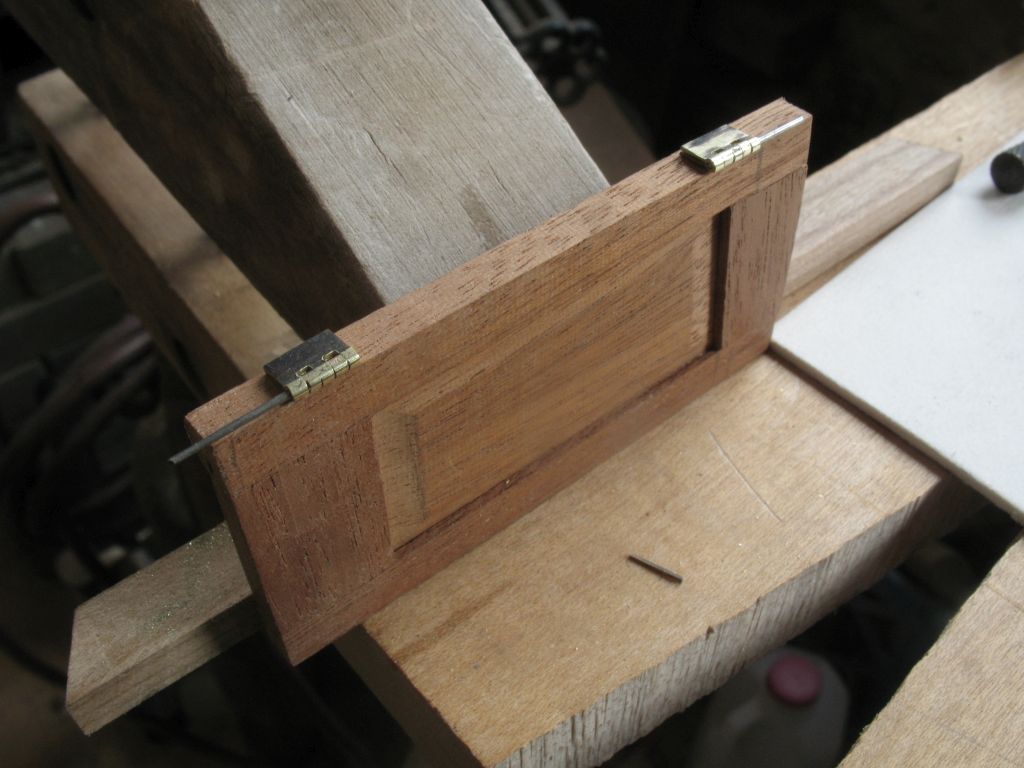
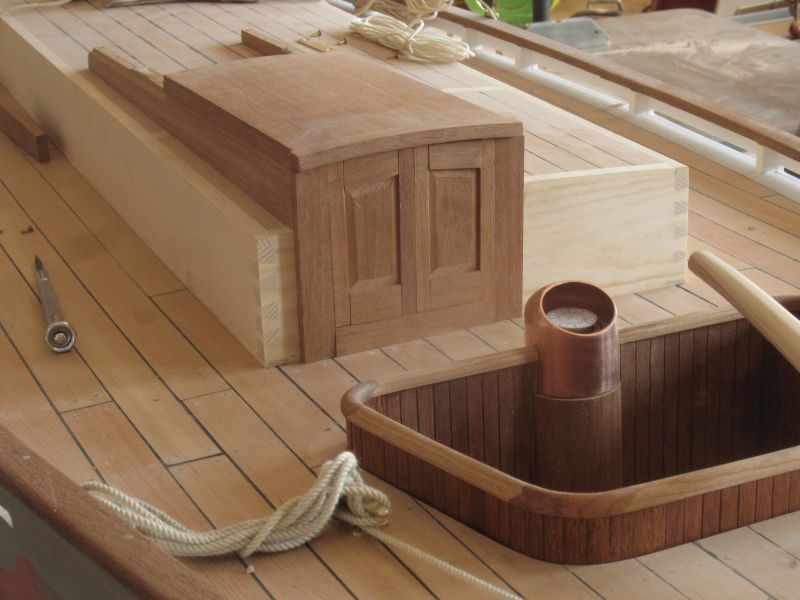
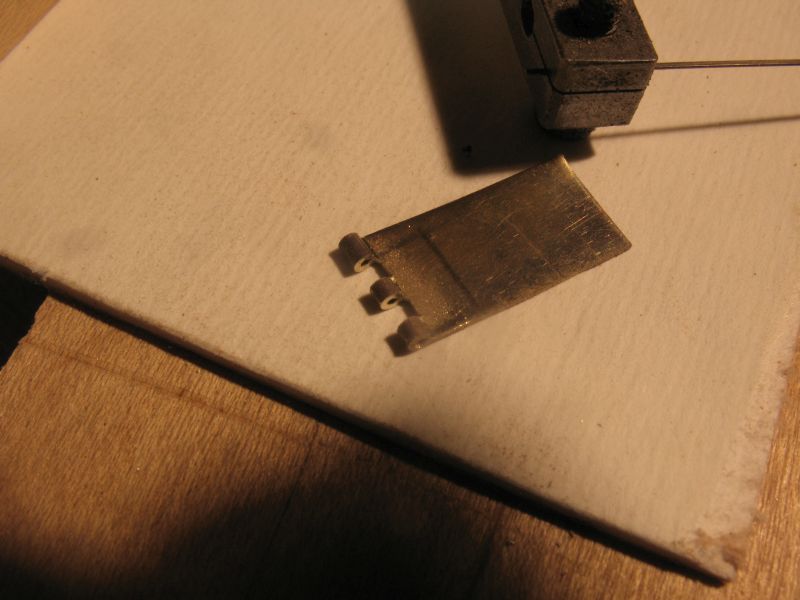
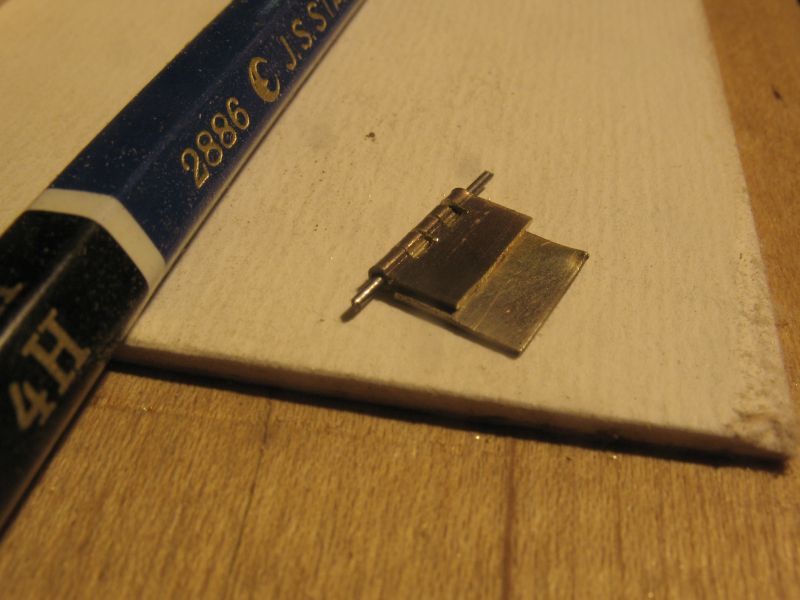
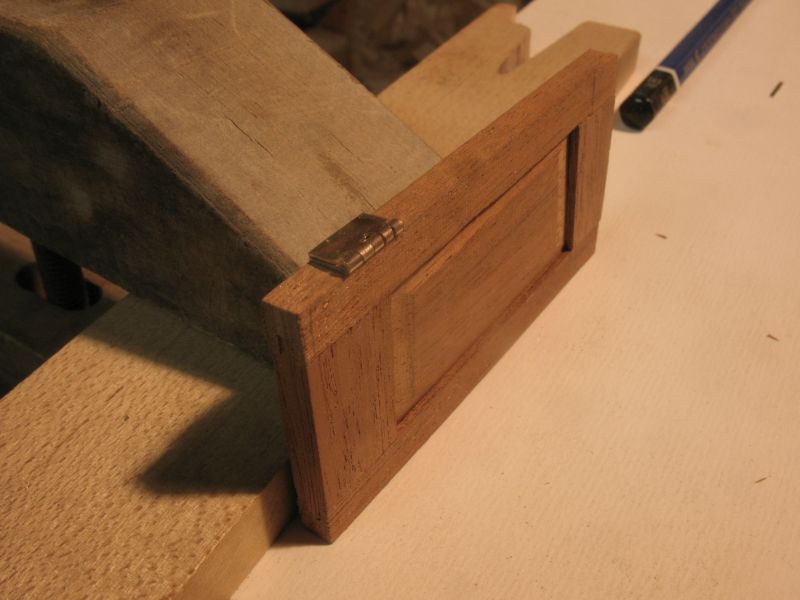
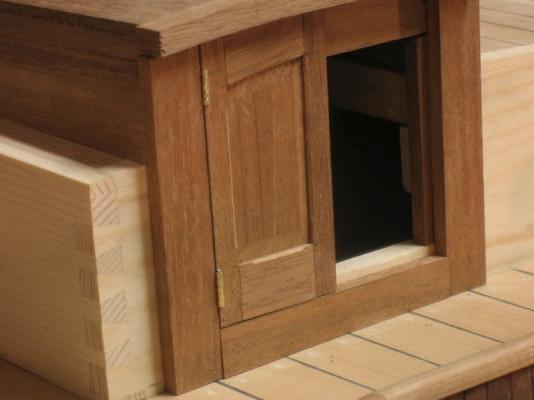
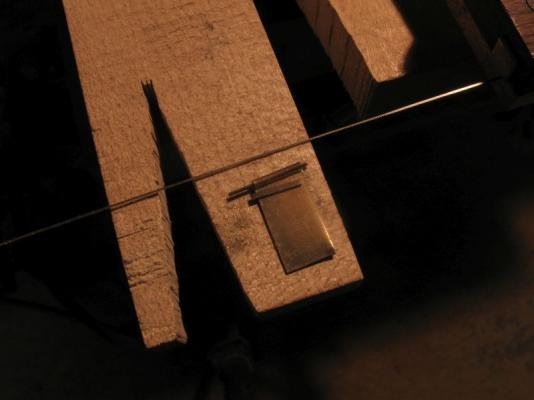
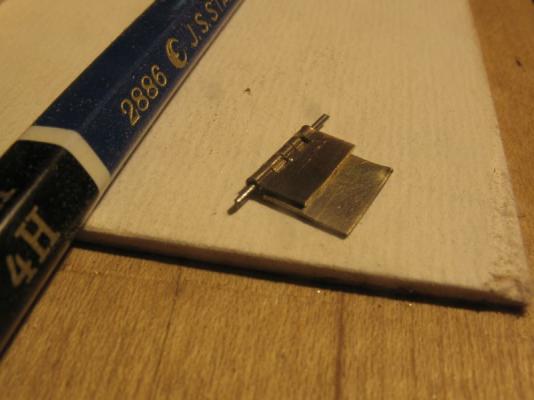
Druxey There ya go Kieth I am glad that you can use the saw blade trick. Mark Thanks And than you all for the likes. I was not very happy actually with the set of four new hinges so today I began a third set, this time I did not anneal the brass but bent it cold, and scaled up just a little by using a 1/16th end mill. The picture shows a steel rod acting as a bit of a drill to clean up the holes after the milling The next picture shows the new hinge made today next to the slightly smaller earlier one. the new one looks a lot tidier to me Set up in the companionway. I added some small bevels to the door frame. tomorrow I will finish the second set for the other door. Michael


-
Paul what a great workstation from the wood you have recycled. Yes the XP issue has caused me to upgrade to W7 It came loaded on a used PC, looking forward to seeing more updates now. You are a master at the Styrene. Michael
-
Very nice work on the dead eyes Bob. Keith thanks for posting those links about the pilots. michael
-
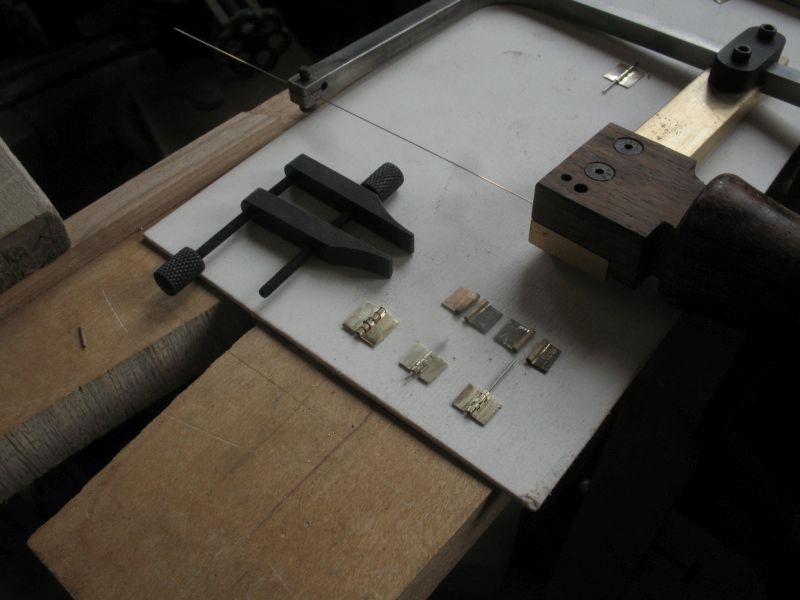
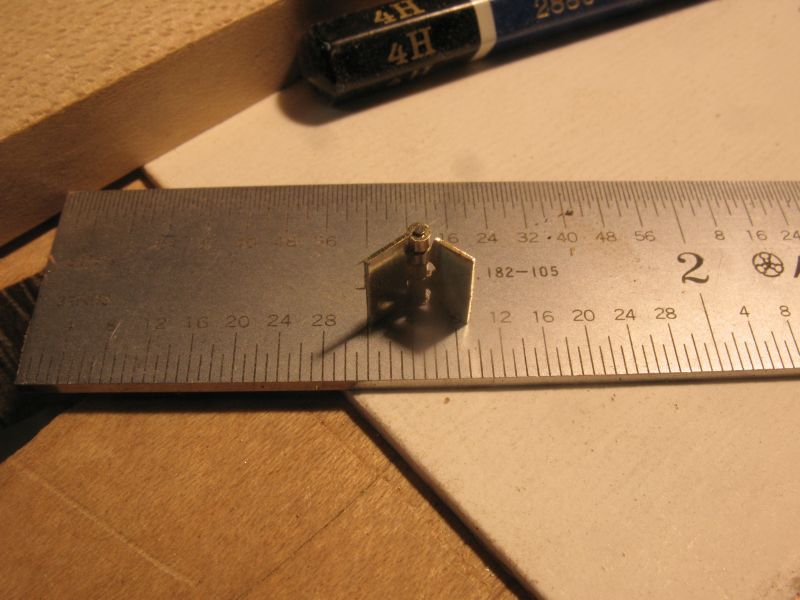
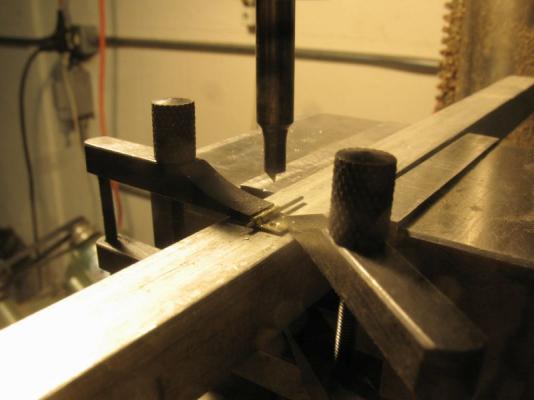
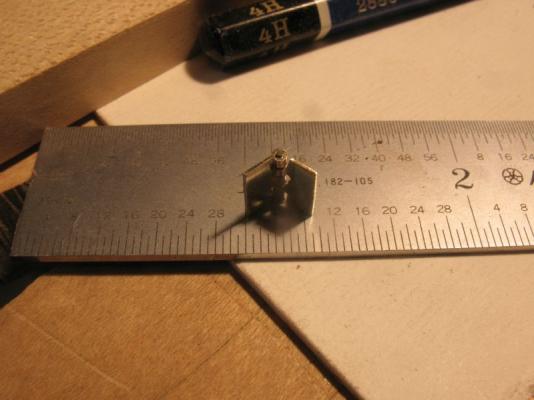
Denis thanks. S.os the diameter is 2 scale inches at the moment but is still need a little refining I will bring it down to about 1 5/8th or 13/64 actual. Worked on the set of 4 hinges today, The blade in the jewelers saw was purposely set at about half length to keep it flatter. The hinge on the left is the original test hinge Drilling and countersinking the fixing holes, the holes are .033 or a number 66 drill and i had to make the countersink from a bit of drill rod At first I used some hard maple as a backing support but I needed a harder surface so used a piece of 1/2 inch square Duraluminium bar The hinge pin is 1/32 or 1/4 inch scale Michael


-
Another gauntlet.... Hmmmmmm.. Thanks for the complimentary comments and likes everyone.
-
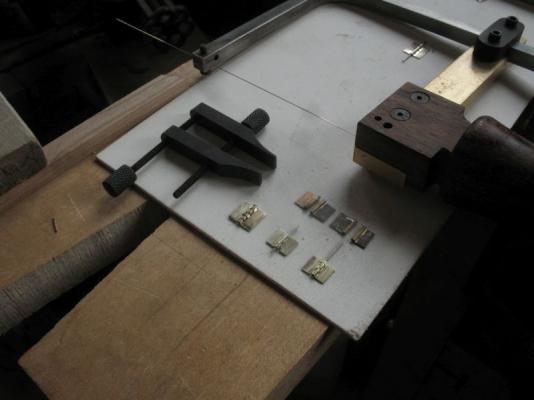
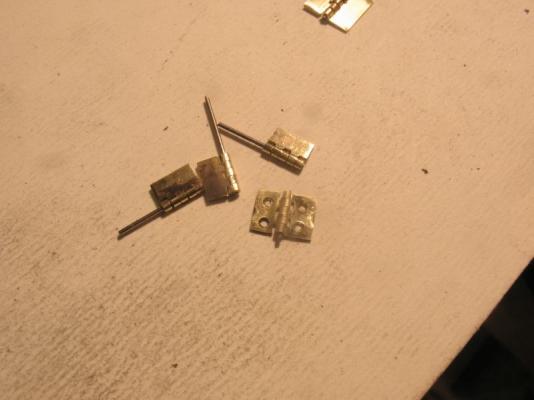
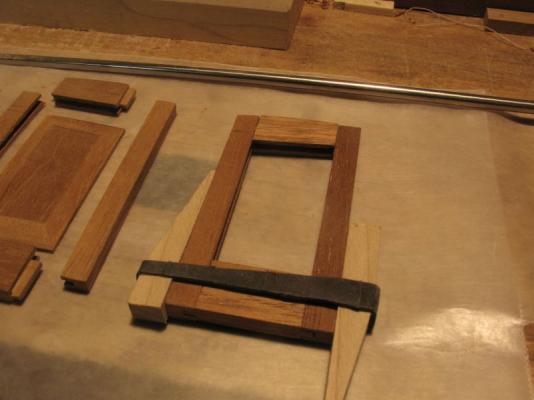
Had a great day today, family time I got some nice gifts some small metal toolmakers clamps from lee valley plus a mitre box for the razor saw, the first commercially made one I have ever owned, and some boat building time. Gluing up the doors using some wedges and bicycle inner tube bands Making a test hinge first some 1/64 thick brass strip was annealed and folded over some .015 steel rod the the excess was cut off with the jewelers saw next the half was slotted, again with the saw the second half was made in the same manner next the sides were filed up square and even checking the size on the side of the door next the relief needs to be filed into the doors and the sides of the companionway before the doors are mounted. Oh yes and now I need to make a set of four hinges that are the same size. Michael


-
Yes it looks like Pine to me, however there are quite a few different types of pine, and without a clear image of the grain and pore structure it is difficult to tell which one, there is a website, the name eludes me right at the moment where there are images of the structure of different woods that you could match to find out exactly which species of Pine if in fact it is pine. Michael
-
Beautiful job on the deck planking and tree nailing Dan. Michael
-
The thing about using a T square and Triangles is that it is a universal language that many of us me included used to learn how to draw. I now do use Cad a lot but it is amazing how many times I use my drawing knowledge to do things in Cad that are ingrained in the pen/pencil and paper mindset. The practical geometry that my drafting teacher imparted gets used on a daily basis, I thank him all the time. I like your sketch. Michael
-
Dave I have a whole load of true Black American Walnut that a friend gave me from his kitchen renovation all is 3/8 x 2 1/2 inches and a few varying lengths from 12 inches to 24, all neatly stacked and waiting for the right job. I have always liked the look and workability of the real stuff. True Mahogany, Swietenia macrophylla is also very nice to work with. The local Lee valley has some wood they are calling Yellowheart ,Are you familiar with this wood I just noticed it the other day and looked at it but I was in a bit of a hurry (never a good thing) and did not inquire? Michael