HOLIDAY DONATION DRIVE - SUPPORT MSW - DO YOUR PART TO KEEP THIS GREAT FORUM GOING! (Only 51 donations so far out of 49,000 members - C'mon guys!)
×


michael mott
-
Posts
5,198 -
Joined
-
Last visited
Content Type
Profiles
Forums
Gallery
Events
Everything posted by michael mott
-
 Nils, the amount of rigging and the details that you are incorporating are amazing, I could not imaging taking on such a complex project in this lifetime. I have enough trouble with one mast. Beautiful work, I look forward to seeing the sails. Michael
 -
Good! It must be quite rewarding having the visitors check in on the process and to be able to explain the ins and outs of the shipbuilding methodology. Michael
-
Mauro, that looks like a great start. I look forward to seeing the continuation. Michael
-
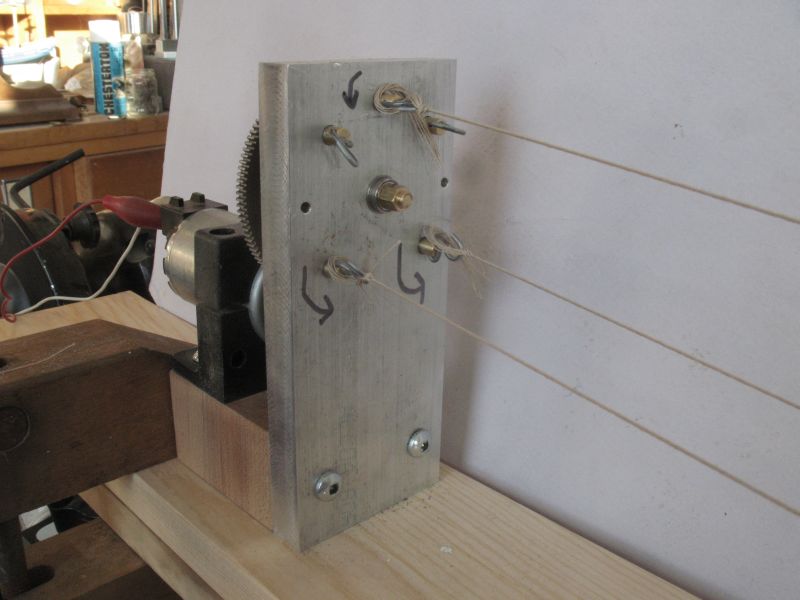
cable laid vs rope (left vs right twist)
michael mott replied to davec's topic in Masting, rigging and sails
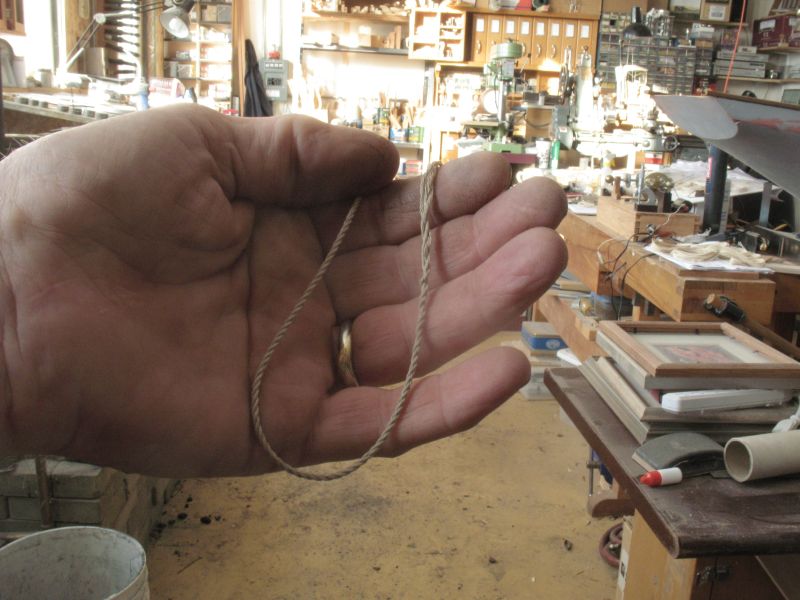
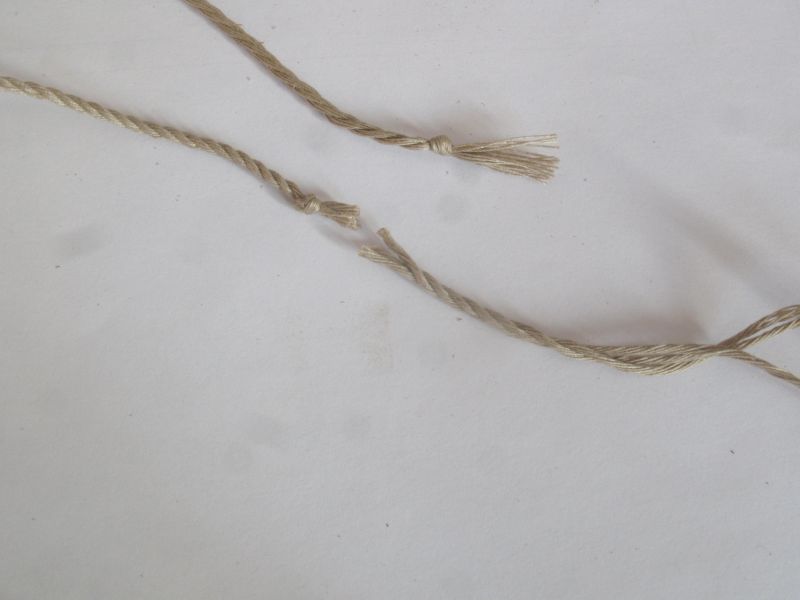
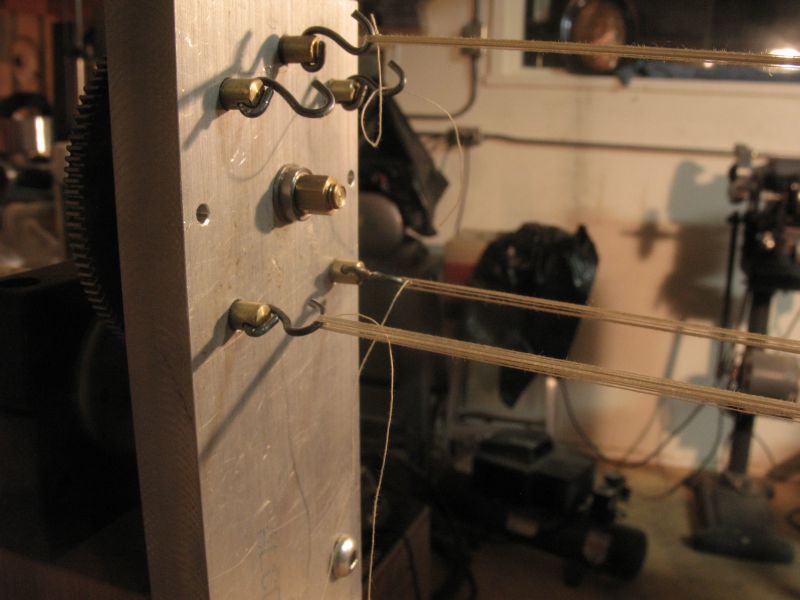
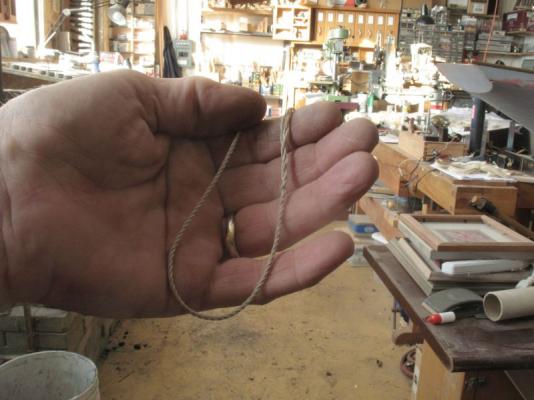
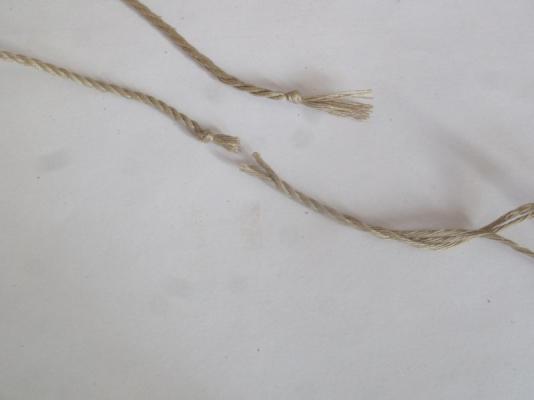
The following sequence shows the way I have made the rope Gaetan. whirl end with threads twisted I added the arrows to remind myself of the correct turn spinner end ready to rotate The beginning of the rotation of the spinner end Notice the three twisted lines at the centre of the span The rope unhooked at the spinner end the finished spin at the whirl end The cut rope on the bottom is the same rope that was used for the original test that was laid up left handed and too loose the bottom rope was unwound and rewound using the drill and resetting for the right hand lay, the bottom rope is still not perfect as it is unraveling a little so the equal tension is not quite right yet the two coils of rope to show the progression of the method that I am getting a little better at. Michael


-
cable laid vs rope (left vs right twist)
michael mott replied to davec's topic in Masting, rigging and sails
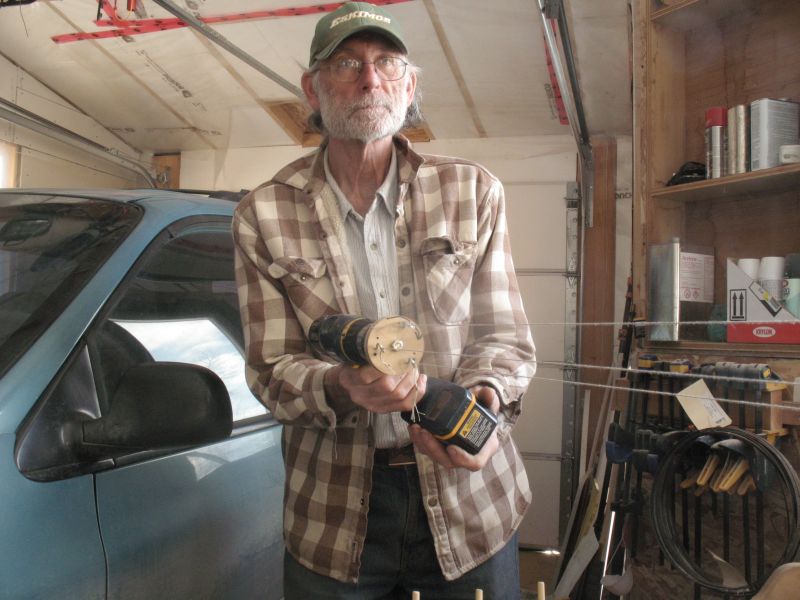
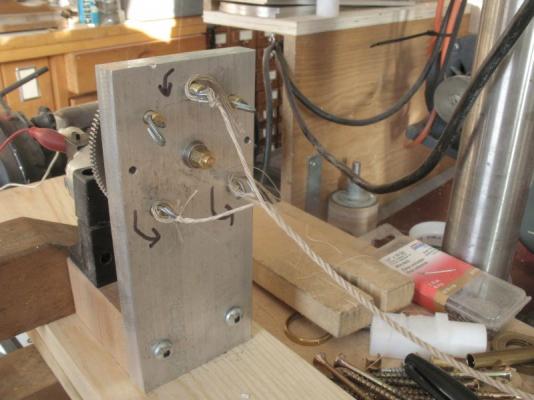
Bob yes you are correct I got the names backwards. Gaetan the way it works is that the threads are stretched between the aluminum whirls and the disc in the drill which is set up facing the whirls 25 feet away The whirl end is rotated while the end in the drill is fixed until the threads are twisted up when I have twisted them enough (this is the part where I am still learning the feel of the tension) I stop twisting and go the the drill and start it revolving in the opposite direction of the twisted threads and the rope immediately begins forming at the midpoint between the whirls and the disk with the three hooks after running the drill for long enough for the rope forming to reach the drill then I stop and unhook everything that is all there is to it. I will take some pictures tomorrow of the way it works for me. Michael -
cable laid vs rope (left vs right twist)
michael mott replied to davec's topic in Masting, rigging and sails
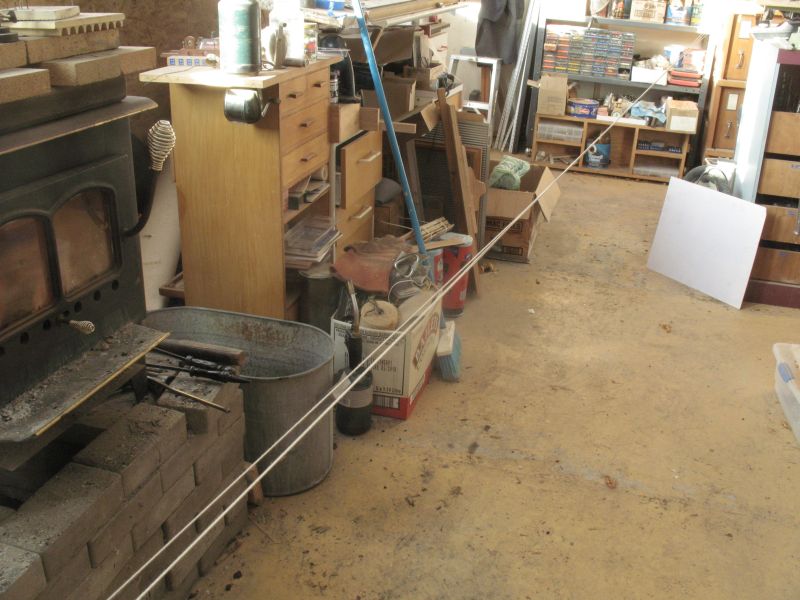
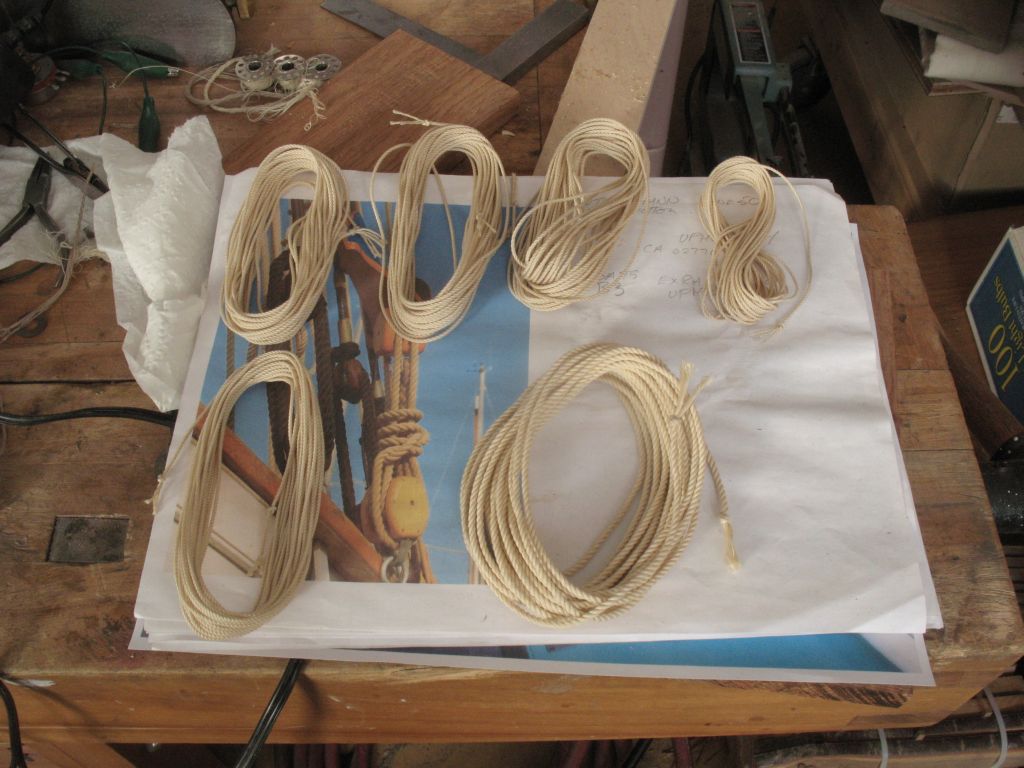
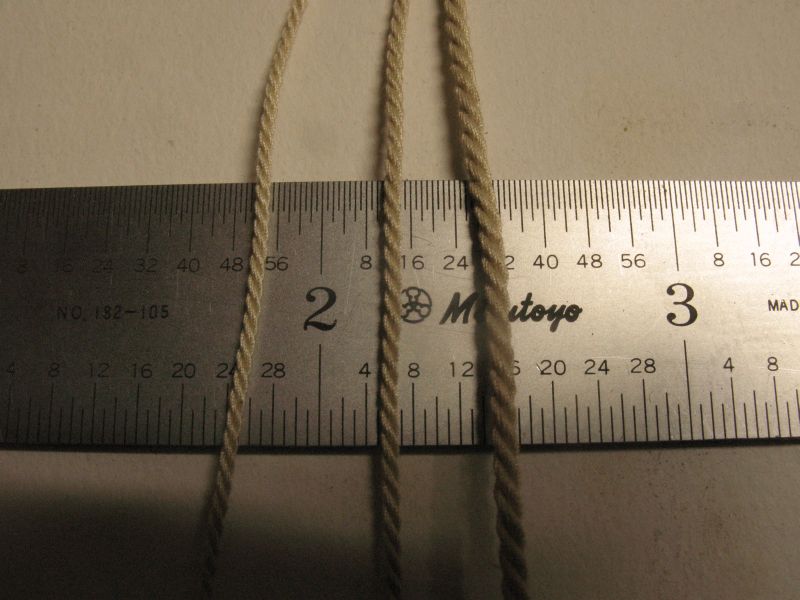
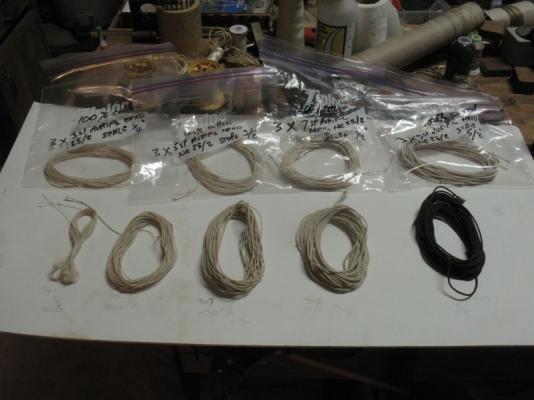
So after some more twisting I made a few feet of some .045 rope which is using 9 strands of Guttmann 50ne 100% cotton and 25 feet of .093 which is 3/4 inch diameter in 1:8 scale it took 3x21 strands. and I walked 1575 feet to string up the tools, for just this one rope, and calculating the 1/2 inch ropes it all ads up to 4950 feet that is almost a mile. Who would have thought this modelmaking hobby would provide exercise as well? I think it looks pretty close, it will do for this model. And the equipment. Michael


-
cable laid vs rope (left vs right twist)
michael mott replied to davec's topic in Masting, rigging and sails
I went back into the vaults here on the forum because I just realized that I had been making z lay or left hand rope and revisiting some close ups of some of the cutters rigging discovered most of the lines are right hand or s laid. After rereading the comments again in this thread about ropes unraveling I still had to sit and do some little drawings showing the mechanics of which way things were twisting and whirling to fully understand Chucks comments about equal and opposing forces in the ropes, I think that the light bulb just went on in my head, and the comments about the feel of the tension is something that I am also beginning to understand. Every day I learn something new about this wonderful hobby and it really is remarkable how much sharing goes on here and what a wealth of knowledge there is by the membership. This is all very important to me because my ropes and rigging are working and not static. For me I need to understand the whys and wherefores of what I am making, even when my experimenting leads me to the wrong conclusions. I then understand why its the wrong one. So back to some more twisting, I discovered it takes 3 x 21 strands of ne50 Guttmann cotton to make 3/4 inch rope in 1:8 scale. Michael -
Stunning artistry Doris, you make it look so easy, I would never have guessed the cannons were not metal. Michael
- 883 replies
-
- 1
-

-
- royal caroline
- ship of the line
- (and 1 more)
-
Curious about Amati ropewalk
michael mott replied to Shamrock's topic in Modeling tools and Workshop Equipment
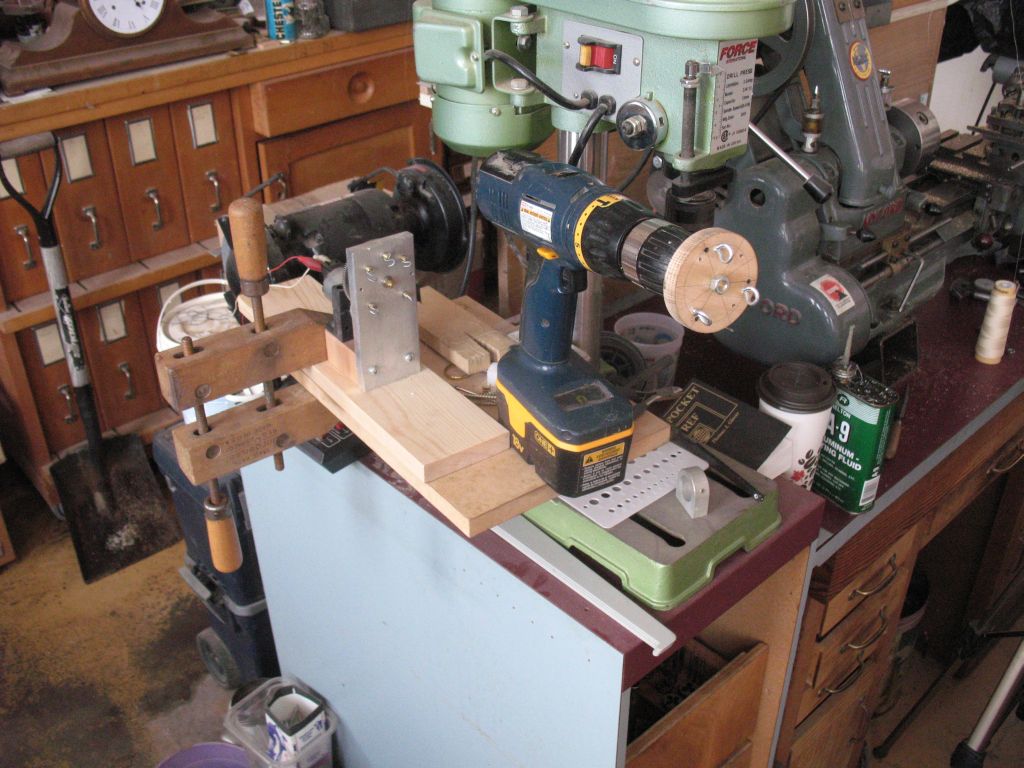
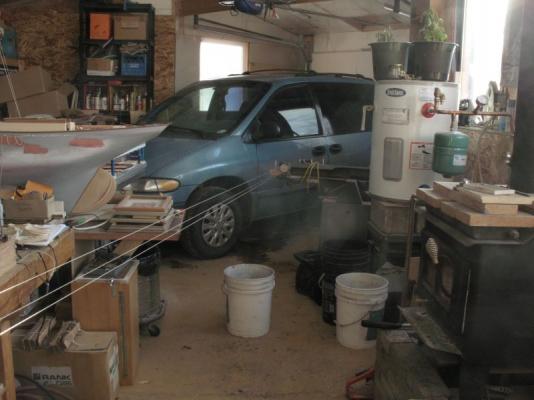
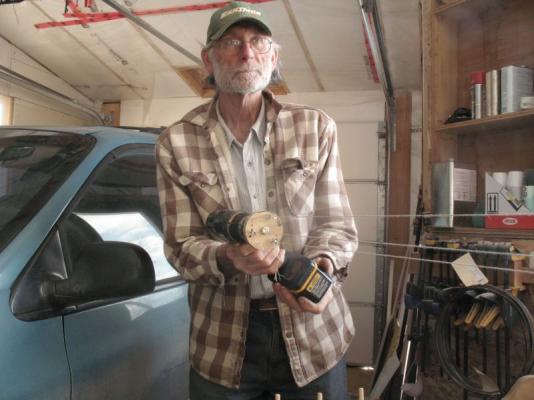
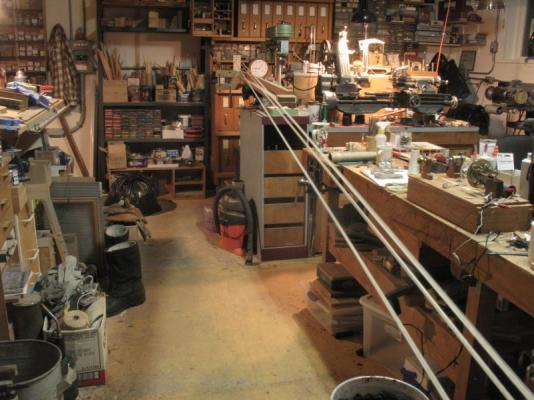
Q yes the size is similar I made the gear end a year or so ago it is about 2 1/2 inches wide, I took apart this walk and discarded all the rest and just kept the whirl end that replaced this one and this original wooden disk. I drilled it out and threaded it put in three fixed hooks and chucked it into a battery drill The original wood disk shown is the one now in the drill with the three hooks, the span goes all the way to the door and the drill is just laying on the trestles on its side, as the three sets of threads twist up first the drill gets dragged across the board on the trestles when it has pulled about 36 inches toward the geared end I stop the twisting and go to the drill and hold it so that it is in a line with the geared end and while maintaining the tension turn it on. it is amazing how fast this set up works. when the winding with the drill is done the rope is finished it doesn't want to unwind or unravel and is soft. The distance can be as long as is practical as far as I can tell, I am getting some exercise walking back and forth with the cotton spool slipped over the end of a screwdriver so that I can lay up the threads. 39 x 25 feet like laps only in my shop instead of the gym. Michael -
Curious about Amati ropewalk
michael mott replied to Shamrock's topic in Modeling tools and Workshop Equipment
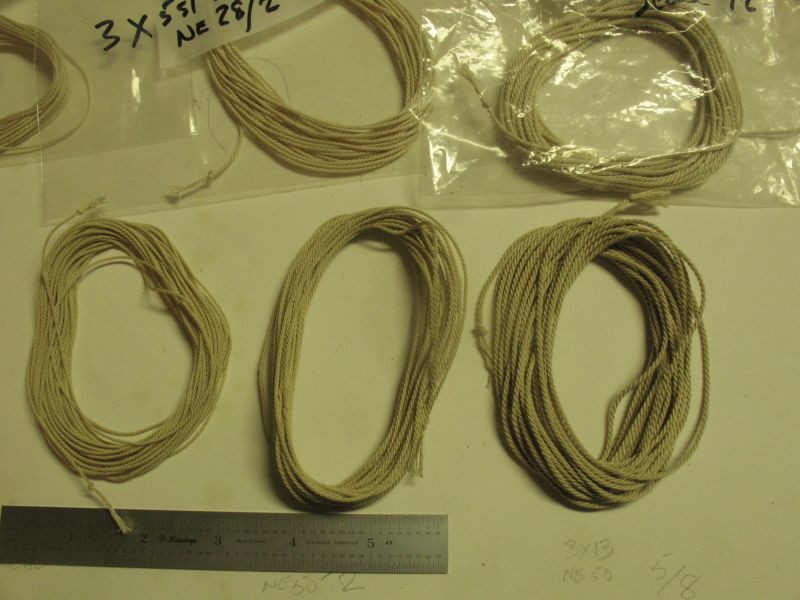
Gotta hand it to Chuck, for his knowledge and helpful advice. The first few ropes were a bit loose but I followed Chucks advice and the ropes improved immediately Using exactly the same principles made lengths of rope 25 feet long. using Guttermann 100% cotton threads Ne50 Although I couldn't imagine making the volume that he does, just the stuff for my boat is enough for me. The ropes are 1:8 scale 3x5 for 3/8 scale rope 3x7 for 1/2 inch scale rope 3x 13 for 5/8 scale rope Tried some ne28 Aurifil which is in the plastic bags it is very nice stuff to work with and is also 100% cotton I have to say that this method is so much easier to set up and string than any other method or tool that I have tried. My Bobbin box basically now has a fancy device on the lid, because I am sold on this method for making rope. No offense to any other tooling or methodology. Sometimes it just takes a while for the simple way to sink in. So to bring this back to the original question, I would echo the Comment that the type of machine that Amati makes is a good one. Michael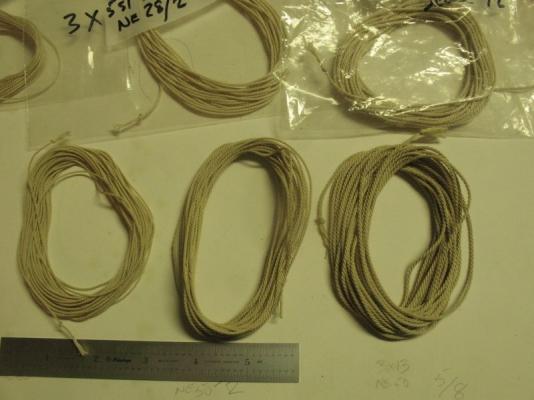


-
Jay, I have used carbide router bits on brass and aluminum on my regular mill. Michael
-
A sharp solution to the gun ports Dan. Michael
- 241 replies
-
- 1
-
-
- queen annes revenge
- pirate
- (and 2 more)
-
Rusty Beginners luck or not, a very nice job of turning a complex shape. I am curious about the colour, is the nylon painted and if so what with? Michael
- 421 replies
-
- 1
-
-
- granado
- bomb ketch
- (and 2 more)
-
Good morning Q Thanks for your kind remark, regarding a ball turning attachment I have often thought it would be a handy tool however so far in my life i have managed to scrape by (pun intended). Michael
-
Micro drill holders
michael mott replied to Trussben's topic in Modeling tools and Workshop Equipment
Gary, your question about using a brake, reminded me about the brake I have it is small and will bend sheet up to about 30 inches long, uses a bar of 1/2 inch steel as a clamp bar and will bend thin sheet easily enough. I purchased it to bend aluminum flashing when I was building the house. Can't say that I have used it for any model work though. A good small vice with clean square jaws is more useful in my opinion, for the small stuff we bend. Michael -
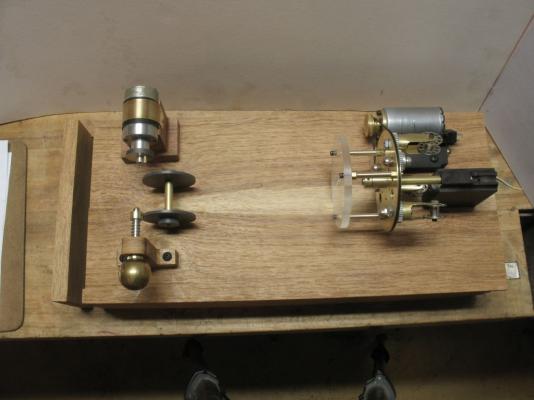
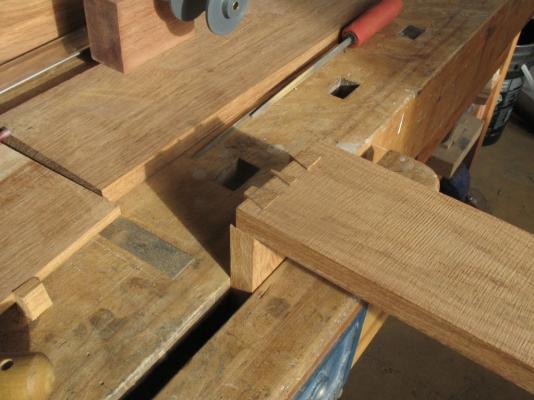
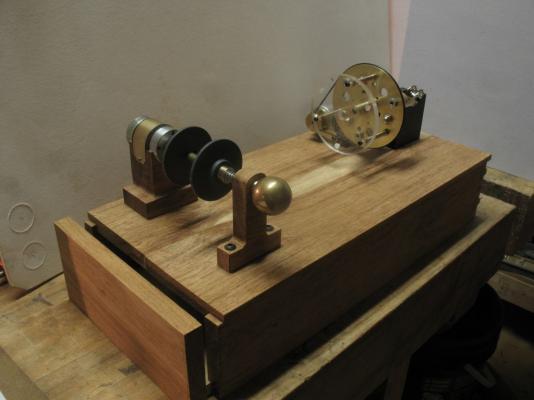
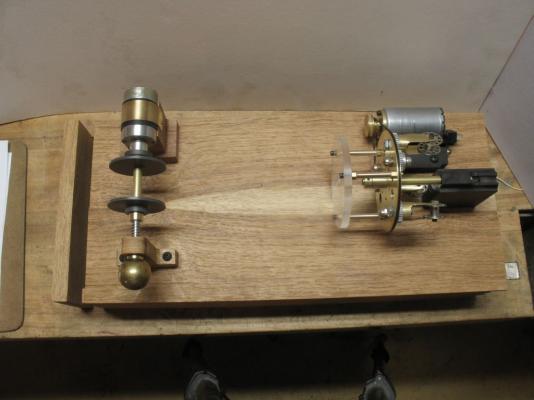
I have started the base which is actually going to be a small box with a drawer at the spool end. the box is 7 3/8 inches wide by 3 1/4 inches high and 16 inches long. the wood is Brazilian Rosewood I had been saving for a special project and this seemed like a good one to use it on. I glued up the top so that the figure converged at the spool in allusion to the threads coming together to form rope. The closed end is dovetailed I have now sorted the spool holder and some spools the spool is locked onto the drive with a simple pin which locates into a hole on the spool. the brass ball is salvaged from an old pinball machine I worked on years ago, mounted it onto a new shaft. The drawer will hold threads and bobbins and tools for threading and adjustments. There will be two speed control pots located at the front of the machine end. Michael


-
I am simply amazed at how much detail you have achieved with such a small model. It is beautifully executed. Michael
-
Hmmmm I see a long life that is connected to wood working ..... perhaps something to do with shipbuilding.... and ..... The balustrade is Iooking great Sherry. Michael
-
Congratulations on finishing the deck planking Russ it looks very good. Michael
-
Good to know that I am not the only one to do things like that. The tools and work on the ship do look rather crisp. Michael
-
You are coming along nicely Lextin. Michael
-
Just caught this log Nils, wonderful just wonderful to see how you built her. how did you make the vents? Michael
-
Paul I have to echo the comments by Druxey. Thank you Michael
-
Druxey is right regarding the pliers, you really do get what you pay for. The Swiss watchmaking and jewelry tools are superb. Michael