HOLIDAY DONATION DRIVE - SUPPORT MSW - DO YOUR PART TO KEEP THIS GREAT FORUM GOING! (Only 72 donations so far out of 49,000 members - Can we at least get 100? C'mon guys!)
×


michael mott
-
Posts
5,200 -
Joined
-
Last visited
Content Type
Profiles
Forums
Gallery
Events
Everything posted by michael mott
-
 Paul I have to echo the comments by Druxey. Thank you Michael
 -
Druxey is right regarding the pliers, you really do get what you pay for. The Swiss watchmaking and jewelry tools are superb. Michael
-
Ed I think that your comment could lead to some rather lovely 1:32 0rv 1/24 cross section models like the other that are being built. Superb job on the bracing and the framing, I am really enjoying your work on this build. michael
-
Harriet McGregor by Boccherini
michael mott replied to Boccherini's topic in - Build logs for subjects built 1851 - 1900
Grant I don't know about the details but it looks like a pretty fine model to me, definitely continue to post pictures of your build. Michael -
Hi Dan, I would think that if you were to drill a hole through a scrap of metal or even a nut drilled out to the correct diameter then cut in half, and you annealed the brass you would be happy with the resulting form, that you could obtain. Michael
-
A gem all by itself. excellent work Karl. Michael
- 662 replies
-
- 1
-

-
- bonhomme richard
- frigate
- (and 1 more)
-
Just catching up Bob, The hull is looking very sharp, I am looking forward to the rest of her. Michael
-
A good looking cutter for sure, I am sure you will do her justice. Michael
-
Nice! very Nice! actually brilliant!! Michael
-
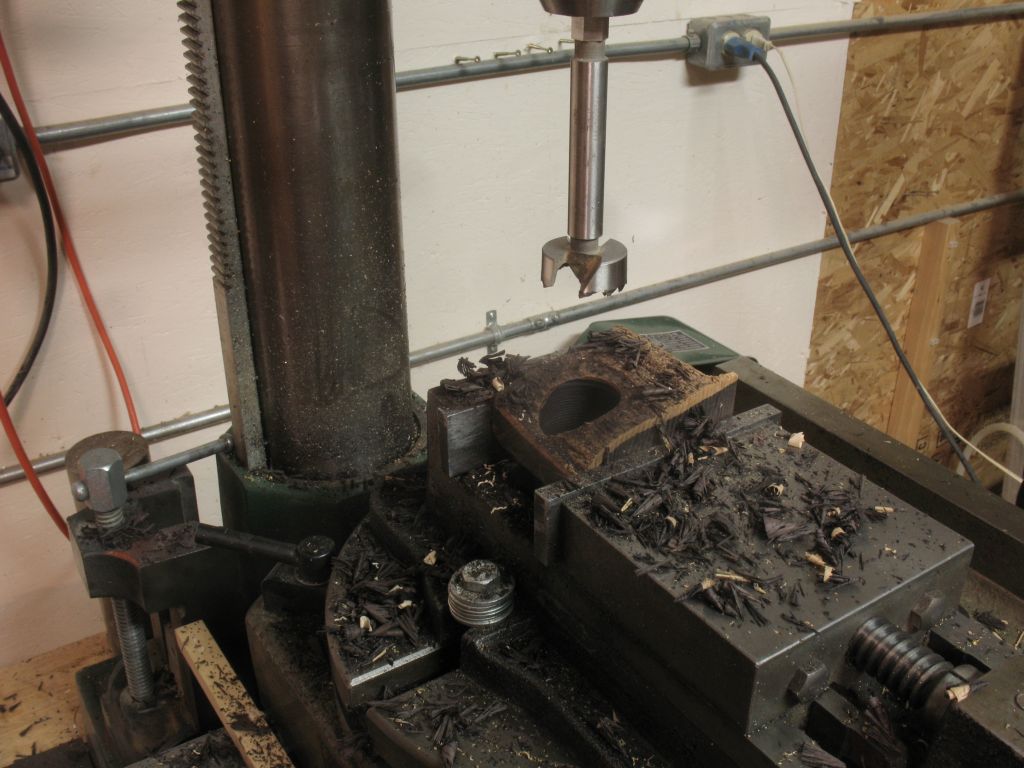
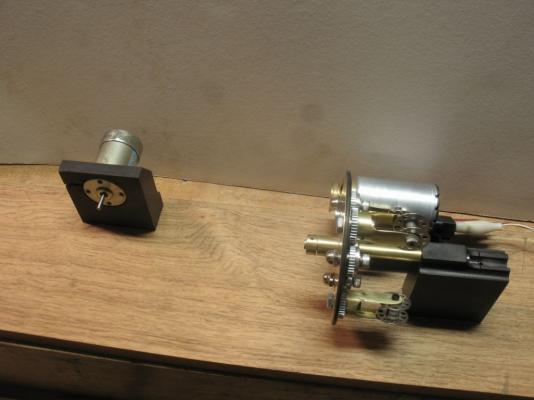
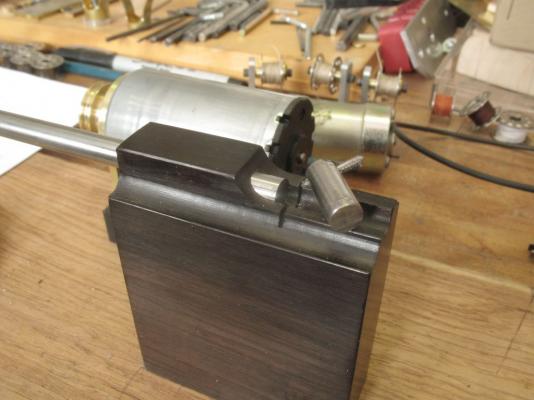
Q I like the simplicity of the gearing in the ropewalk that you illustrated, it is the way that my long horizontal walk operates. I will use it to lay up larger cables. The machine has been undergoing a major rework based on my discussion with Alexey. I also watched the video that he posted on U-tube. first I removed the broken tap. Next I pushed out the soldered bushings. Next I bored out the 3/8 holes to 1/2 inch on the new pitch circle, and inserted new bushings re-drilled for 10x32 holes and tapped them for the idler gears, and reassembled the lot. Because of the way that the thread spools are mounted the gears had to be mounted on the back side which looks better as well. Then made the take up spool motor mount from the rest of the small block of ebony that the other mounts were made from. Next the take up spools, and the guide plate which will be from some clear plex and will be circular. Michael


-
Curious about Amati ropewalk
michael mott replied to Shamrock's topic in Modeling tools and Workshop Equipment
Chuck, thanks for posting your comments on this, it is always great to get the perspective of those who do production work. The need for simplicity is obvious, when one is making the volume that you are. The old adage "practice makes perfect" is evident in your work. Michael -
Great to seeyou putting up the frames John. Michael
- 745 replies
-
- 1
-
-
- francis pritt
- mission ship
- (and 1 more)
-
Alexey, The spool spin freely in the spool holders as well. The central core would come out of the fixed shaft with the sun gear. similar to what Bob did. Michael
-
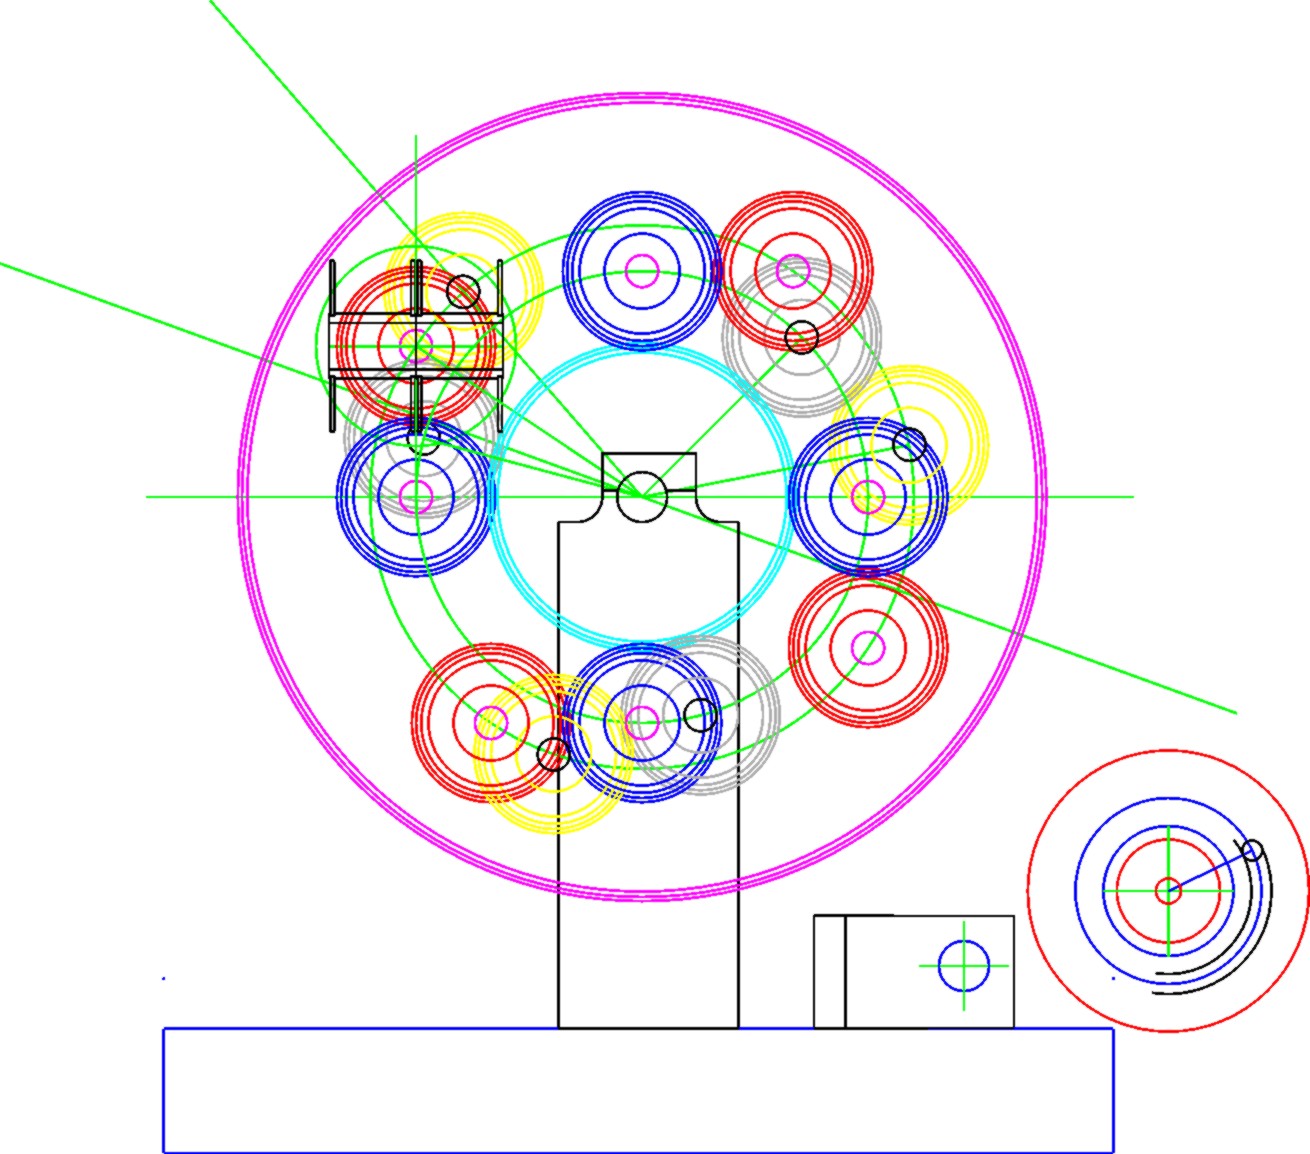
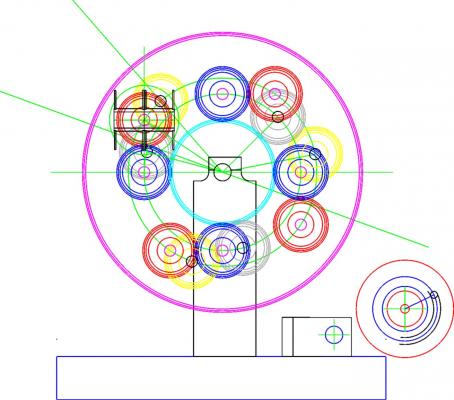
Alexey I am proposing to mount either a set of 4 or a set of three moon gears, because the only holes in the solar disc are the 10x32 tapped ones for the mounting of the moon and Idlers in either configuration. Everything spins freely. Michael
-
Alexey, again thank you for your advice and knowledge. It is great that you are selling your machines,. I have no interest is selling anything I am just enjoying building a machine for myself, and sharing what I do. When you say to take care in the lay of the thread on the spool what do you mean? michael
-
Alexey, Thank you for your compliment and clarification, this is not a problem at this point I will put the "planet" gears back. I had misunderstood the rational for the idle gears. I have lots of Pinion stock. Michael
-
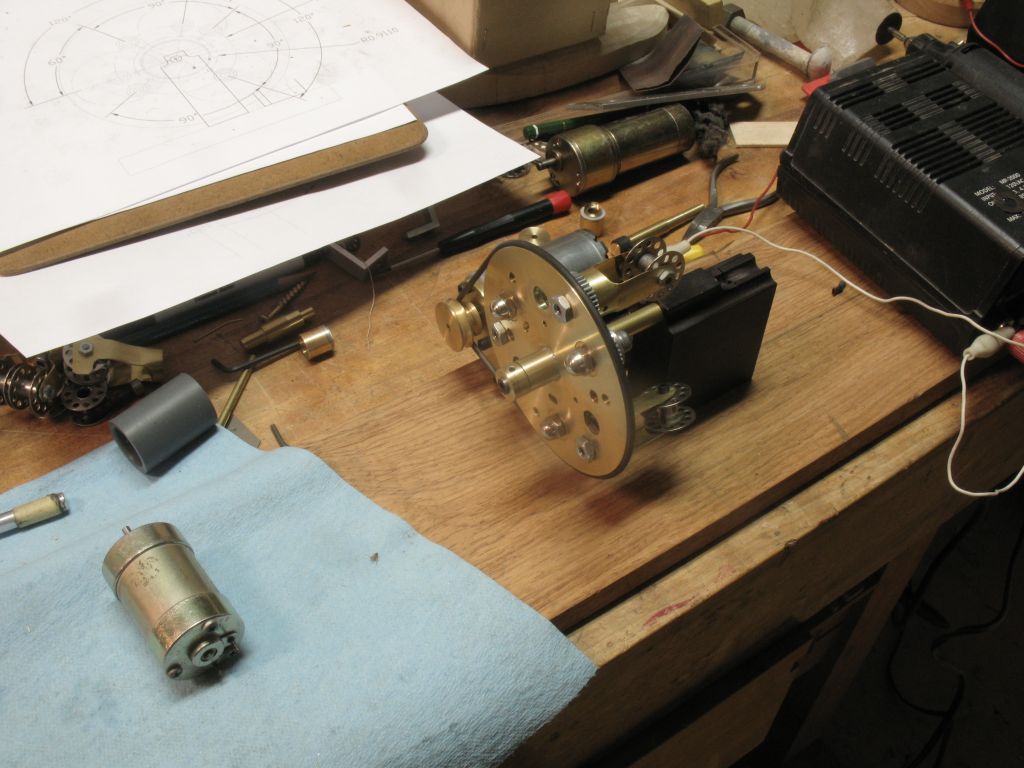
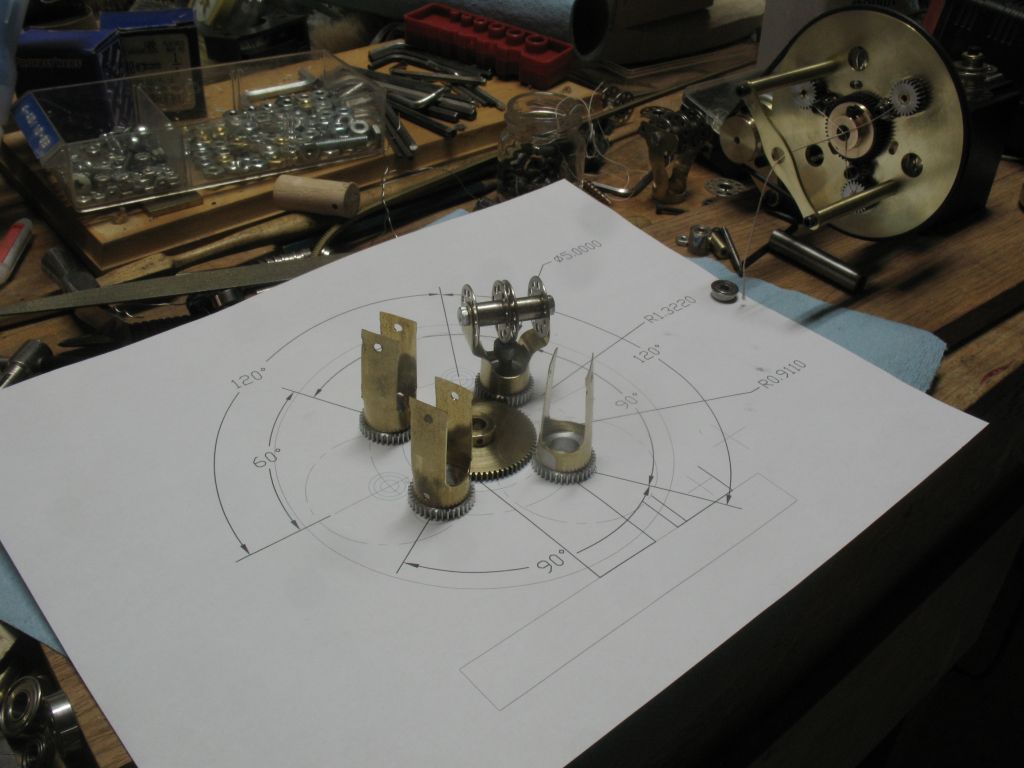
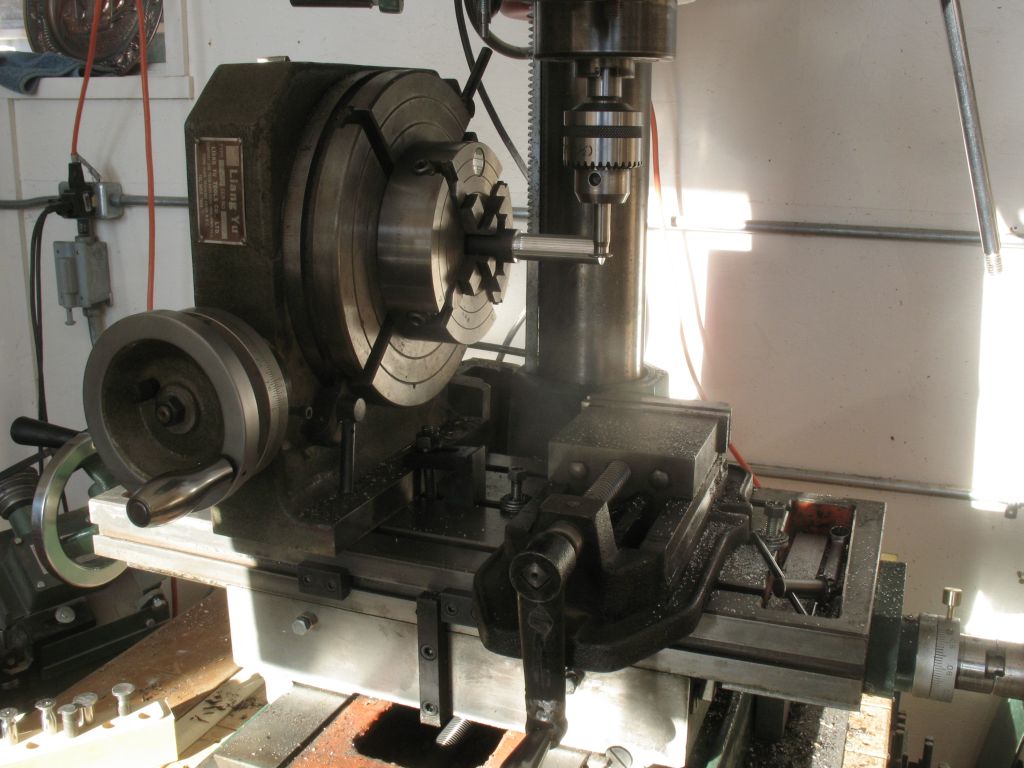
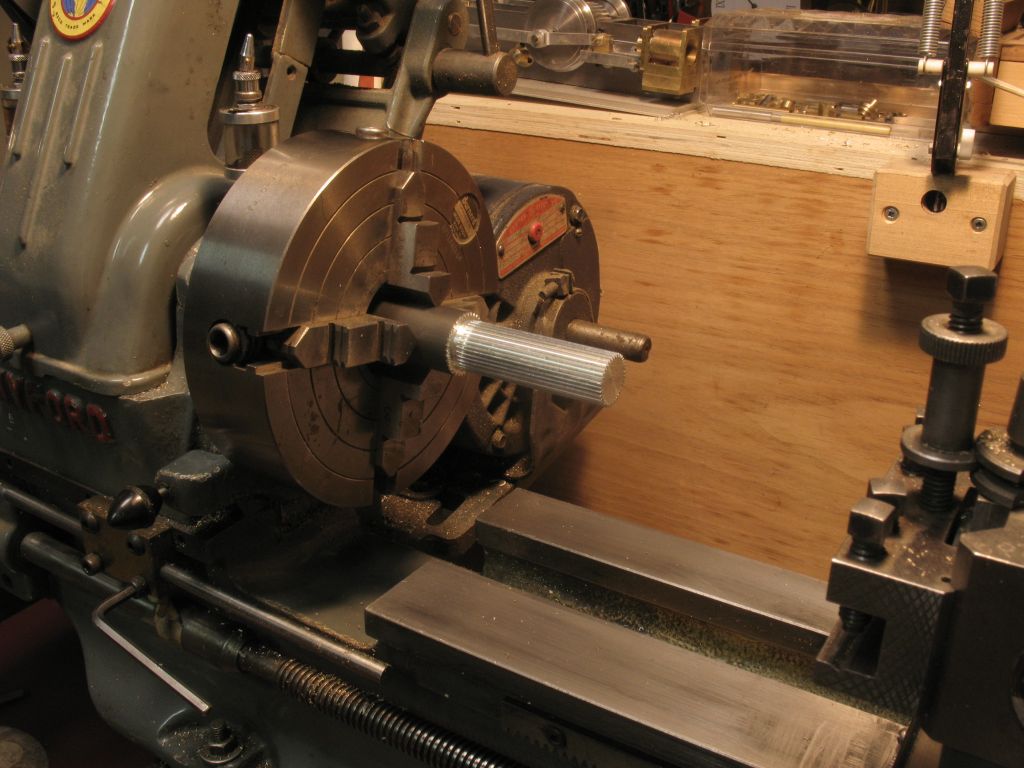
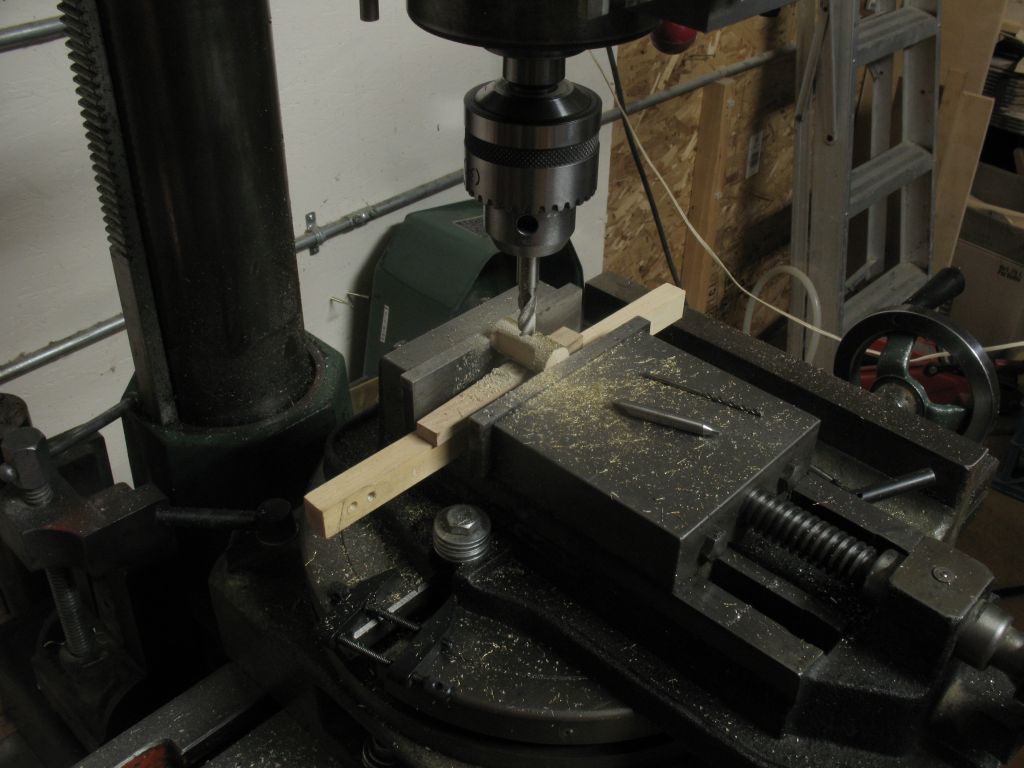
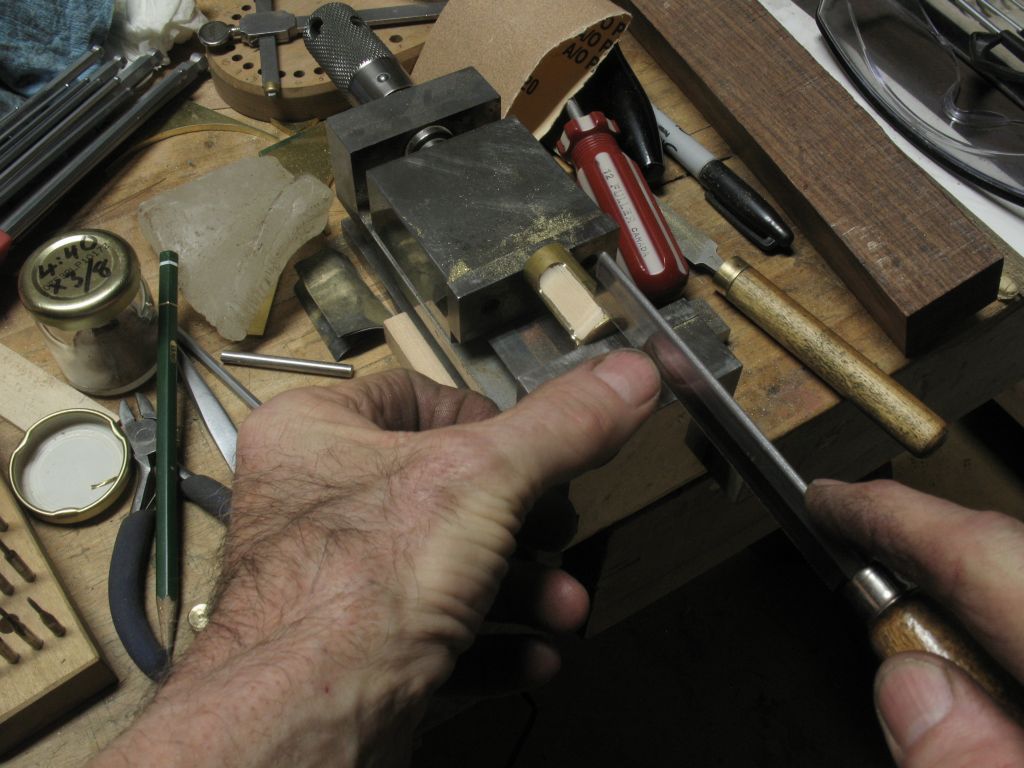
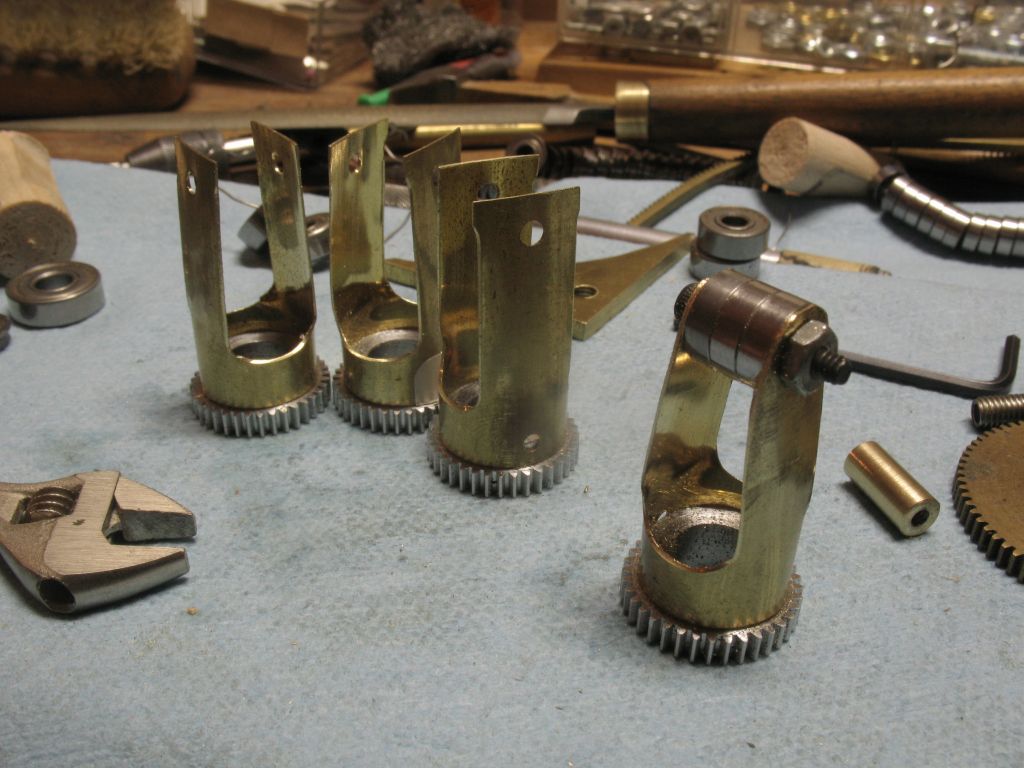
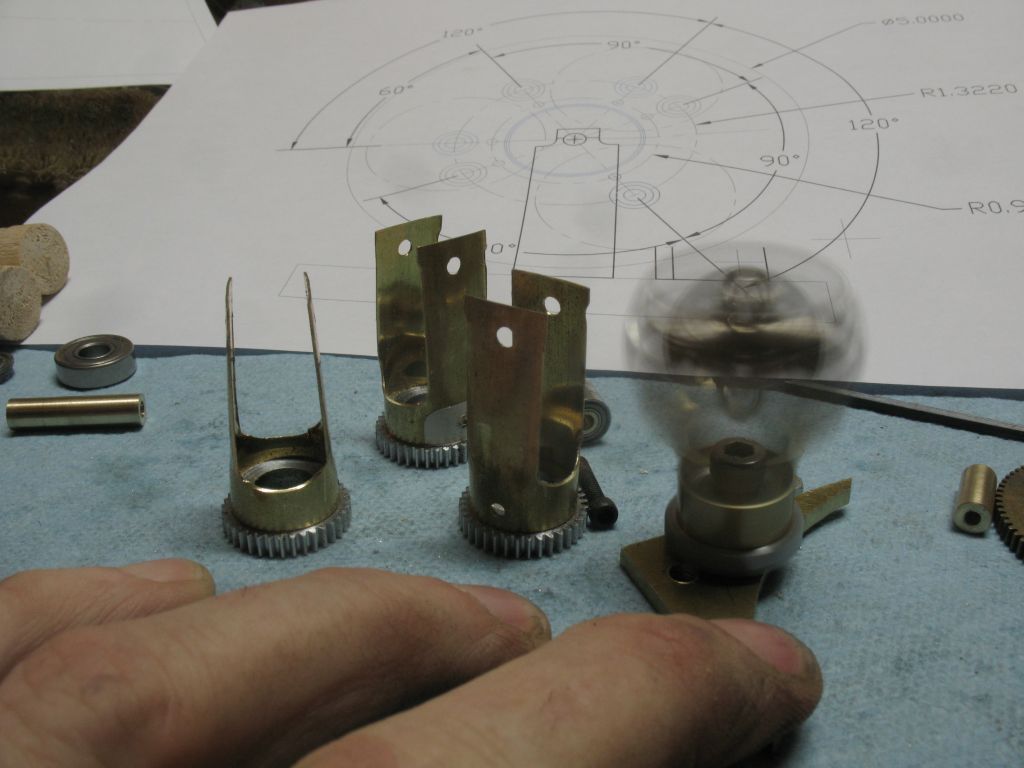
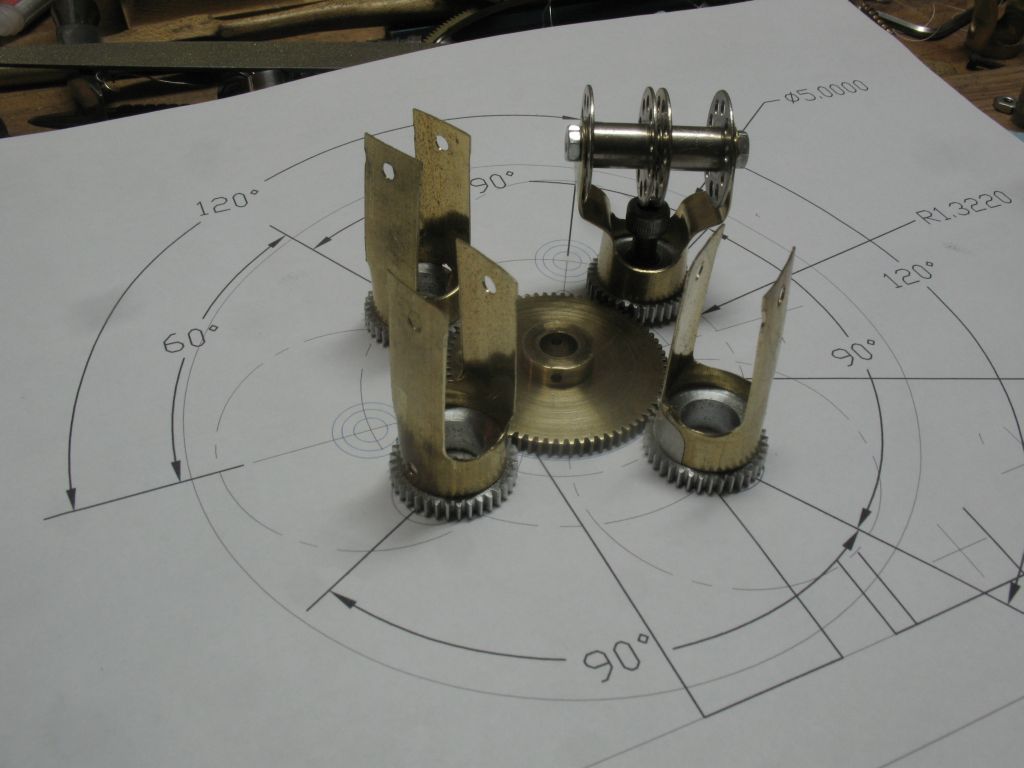
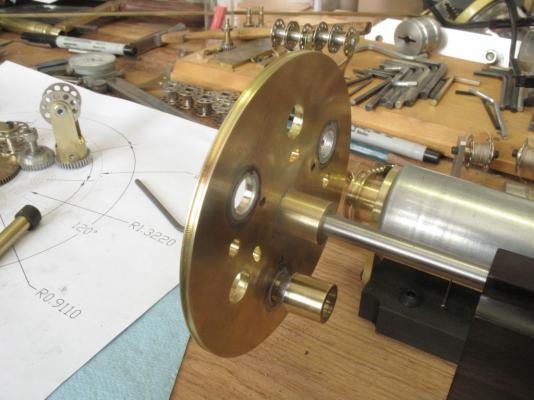
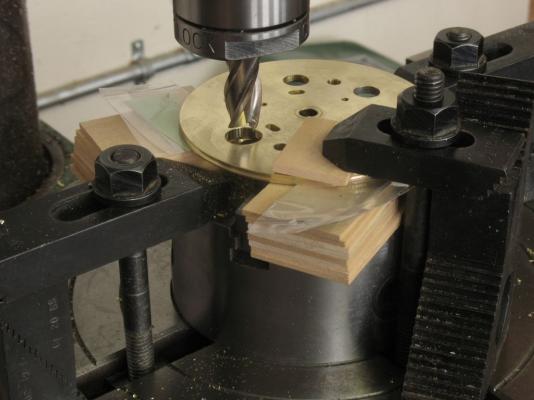
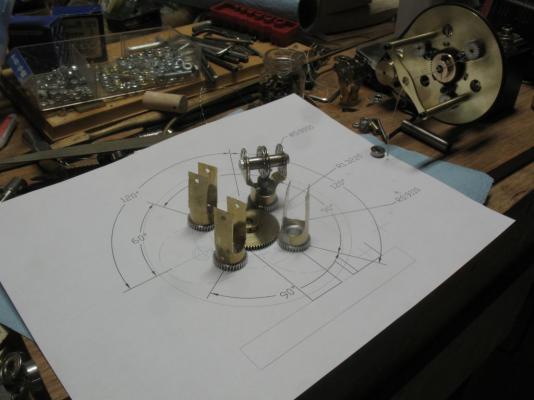
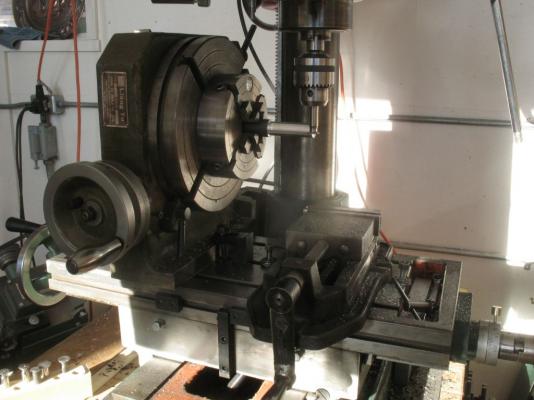
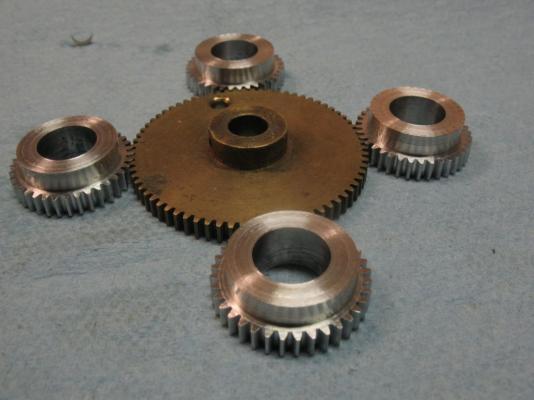
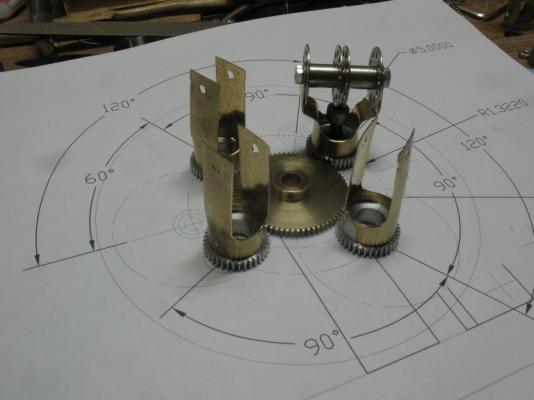
Continuing on with a major design change, step one was to eliminate the idler gears as not needed. This entailed using a larger central fixed gear, I found a brass 48DP x72 tooth one in the scrap gear drawer.. This meant that I would need some 36 tooth gears to maintain the 2:1 ratio, so I set up the mill to do that. I used a short length of Dur-aluminum turned to the correct diameter and cut the 36 teeth with the 48DP cutter for 35-54 teeth The 4 jaw chuck was then transferred to the Myford for the final machining I left a 5/8 shoulder and reamed the gears to receive 3/8 x 3/16 bore shouldered bearings. Next the bobbin holders were made from some 21/32 brass tube 1 1/2 inches long. these were filled with some birch dowel so that they could be milled without collapsing. The top ends were then opened up with a small hobby saw. then pushed onto the gears. The hole for the bobbin spindle was drilled at the same time as the side milling, this was now set up with some ball races as a filing jig to round of the ends of the arms After they had been flattened in the vice, by squeezing them over a chunk of 1/2 inch thick aluminum. A 10x32x1/2 inch long stainless cap screw is used as the holding shaft to the solar Disc to use Domanoff's nomenclature, this screw is bored out with a number 33 drill to let the thread pass through. The arms were bent to accommodate a shaft a 1/16 of an inch wider than 2 bobbins for them to spin freely on. this unit was then spun on the vertical shaft to make sure that it will revolve freely. The new solar disk will be 5 inches in diameter, with the 10x32 tapped holes for a 3 or 4 configuration. I am contemplating wrapping some rack around the edge of the disk and using a small pinion to drive it instead of the belt. Michael


-
Nils , the set of winches looks great. what a superb model you have created. Michael
- 113 replies
-
- 1
-
-
- heinrich kayser
- steamship
- (and 1 more)
-
Ed What a beautiful looking skeleton. Michael
-
MicroMark MicroMill - Review
michael mott replied to mtaylor's topic in Modeling tools and Workshop Equipment
Mark, I think that you would do well to get the largest mill you can afford, Wefalk's comments about the differences in mills and drills is good.The thing that I find the most limiting usually is the size of the table and its travel distances. Q That is a nice little chart Michael -
SS Vinal Haven by TBlack - FINISHED
michael mott replied to TBlack's topic in - Build logs for subjects built 1851 - 1900
Looks good Tom, its a model not a piano. Michael- 326 replies
-
- 1
-
-
- vinal haven
- steam ship
- (and 1 more)
-
Bedford Now that was a neat way to set the tabs I shall remember that one. and use the same principle in the future, so thanks tor this. Michael
-
A neat solution indeed . Michael
-
Christi, and Bob and Q Thank you for your kind remarks. Good morning Q yes the mounts are ebony, some of the stuff I have had saved for years. even after 30 years the stuff is still prone to checking a little because it was such a large log when I purchased it. 36 inches long by almost 7 inches by 4 inches as a rough hewn billet. My log of English boxwood 18 inches long by 3 inches in diameter will be used for some new tooling in the not too distant future as well. I have some ideas about multiple bobbins, so I will see where that leads. Michael