michael mott
-
Posts
5,200 -
Joined
-
Last visited
Content Type
Profiles
Forums
Gallery
Events
Everything posted by michael mott
-
 Mike a beautiful job on the throat halliard. Michael
- 452 replies
-
- 3
-

-
- cheerful
- Syren Ship Model Company
- (and 1 more)
-
Always a joy to look in to the next installment Ed I am always learning new tips about the various fittings and the sequencing of construction of these elements. Michael
- 3,618 replies
-
- 2
-
-
- young america
- clipper
- (and 1 more)
-
Looks very sharp John, rigging seems to give everyone a hiccup or two, you survived them it appears. Michael
- 745 replies
-
- 1
-
-
- francis pritt
- mission ship
- (and 1 more)
-
How much of this stuff do you need? at your scale I would have thought that a tube would last a lifetime Michael
-
Cutty Sark by NenadM
michael mott replied to NenadM's topic in - Build logs for subjects built 1851 - 1900
Nice work on the drawing Nenad. Michael- 4,152 replies
-
- 5
-
-
- cutty sark
- tehnodidakta
- (and 1 more)
-
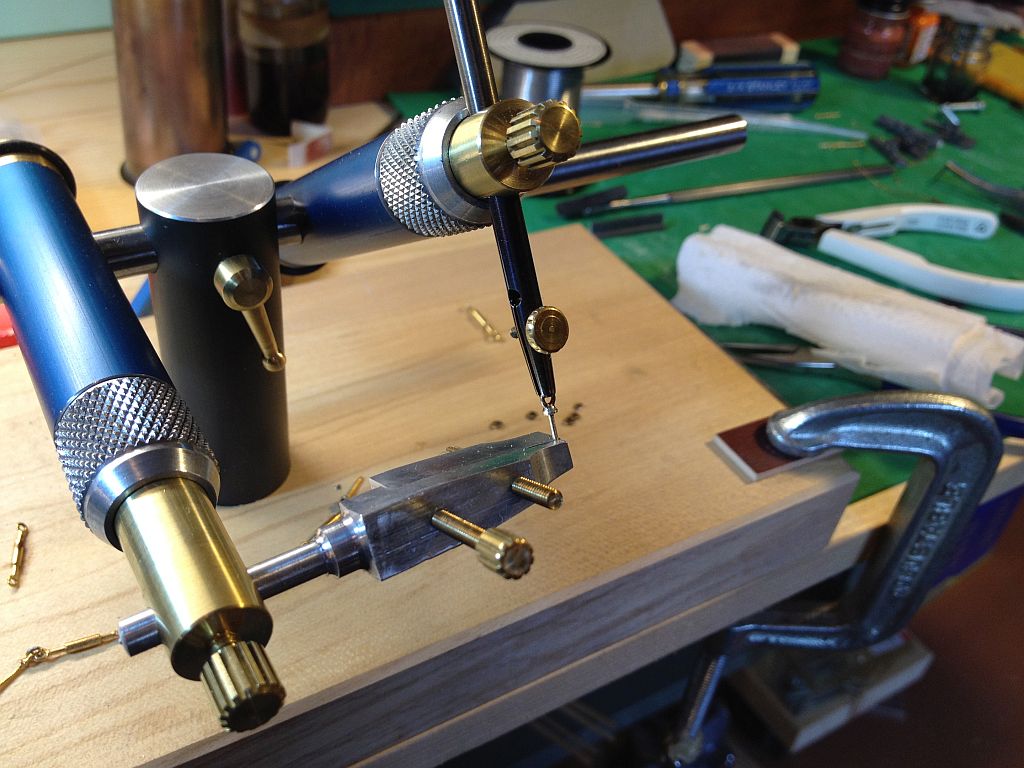
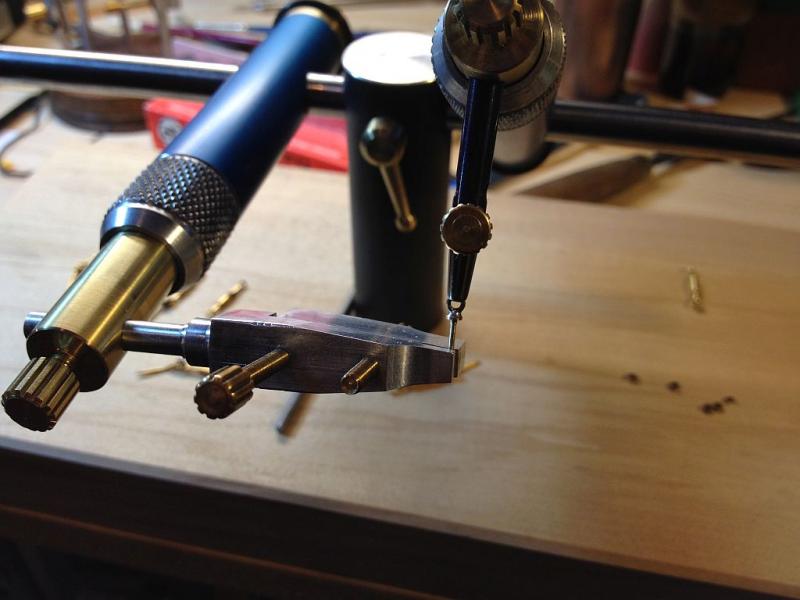
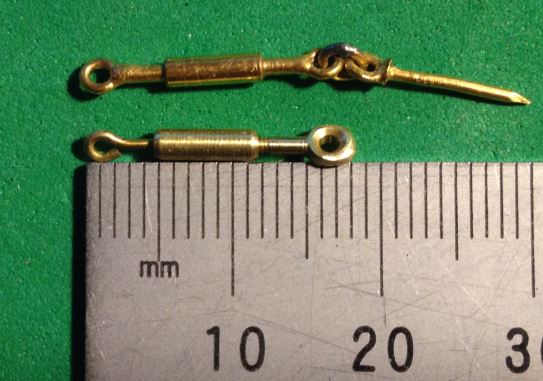
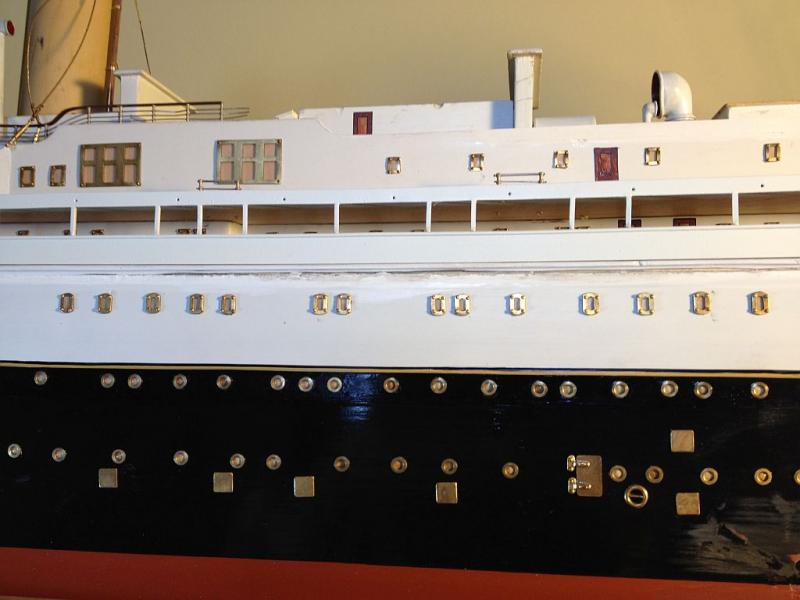
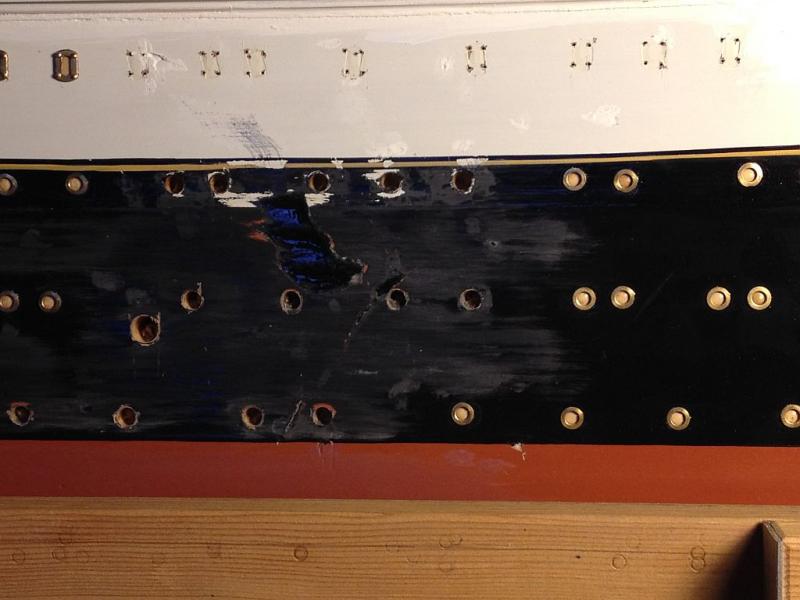
Thank you to all who have been watching and following quietly. And for the nice comments about the progress. A little more work to report. One of the eyebolts that holds the lower end of one of the funnel stays was missing. On close examination of those that are remaining they look to be formed from a Jump ring soldered to the head of a small brass escutcheon pin. After looking through the pin drawer and not finding the right size I had to make a pin. I used the blue third hand to set up to solder and used the weight of the clamp to create a steady pressure so that as the solder melted on the head the ring pressed down using gravity. Yesterday after looking for the micro turnbuckles that Nils had Mentioned and not finding any really small ones I had a go at making one the same size as those of the ship and used one of the solid pretend ones as a guide. I used a 00x90 thread into some .082 brass rod (actually I turned it all down from free machining brass rod) then machined a swivel hook for one end that fitted through a .040" hole in the bottom of the threaded center part. I annealed the swivel and made the eye with some round nose pliers. The threaded eye was also turned on the lathe. The eye was filed and drilled from a ball formed while turning. In retrospect it would have been better to form the eye the same way as the swivel end. It is only a single acting because I don't have a 00x 90 left hand tap and die. I found out that the car needs a new computer......Oh well, at least it warmed up a bit it's only -14C today. Michael

- 749 replies
-
- 22
-
-
- albertic
- ocean liner
- (and 2 more)
-
Hi mick the thread is 1x64 which is .073" major diameter minor diameter is .0561" tap drill is a #53 decimal equivalent is .0595 which is 1.4986mm Cheers michael
-
I have a drawing that was one by Leonardo of a ball bearing set up. Michael
- 525 replies
-
- 5
-
-
- anchor hoy
- hoy
- (and 1 more)
-
Poor results with carpenters glue
michael mott replied to a topic in Modeling tools and Workshop Equipment
Looks like B cryptic still but B is better than nothing. I would agree that your batch of glue sounds like it has a problem, it might have been frozen at some time in the past, either by the retailer of somewhere else along the line, My glue does exactly the same thing as Derek's sample. Michael -
This has been my way for a long time, but it is a double edged sword. Nice capstan. Michael
- 962 replies
-
- 5
-
-
- sovereign of the seas
- ship of the line
- (and 1 more)
-
Congratulation on the completion Russ. ......Now what's next? Michael
-
Maury you show in this picture the "cabinet" for the bearing I wonder if a wooden channel that sloped up to the side for pouring in some lubricant would work. Looking at the cross section again one could use a hollow shaft for the capstan to pour in the oil. The other thought that crosses my mind is that oil floats on water Or are these questions just my modern thoughts and were not considered for this vessel? Michael
- 525 replies
-
- 2
-
-
- anchor hoy
- hoy
- (and 1 more)
-
Lovely rework of the gear to make it look like a wooden one Maury. one thing that you might want to think about is the lubrication of the bearings especially the bottom one under the big gear. Wood being what it is will have a tendency to swell, and the gear in this boat will no doubt be wet a good deal of the time. Perhaps a channel or some way to get tallow or fat down to the bottom to lubricate the gear in its bearing plate or block. Michael
- 525 replies
-
- 4
-
-
- anchor hoy
- hoy
- (and 1 more)
-
What a fantastic job on the capstan Frank, I am glad that I am not the only one who adds all sorts of stuff to the scrap box while making the final piece. Michael
- 649 replies
-
- 5
-
-
- dunbrody
- famine ship
- (and 2 more)
-
Gary not only is the lighting great but I really like your work station I also like to work standing usually. I spotted all the clamps along the one end, very tidy. The ship looks very clean. Michael
-
Looks good Russ your story is OK for me. Michael
-
A Lorch Micro-Mill that never was ...
michael mott replied to wefalck's topic in Modeling tools and Workshop Equipment
Wefalck I just love that round knurling tool, My one concern would be the amount of pressure needed to push into the brass with a single roll, you have obviously overcome that issue. I am so tempted to make one though. anything in particular to watch out for? Michael -
Guidance, Encouragement, or just a Sanity Check
michael mott replied to RFP's topic in Wood ship model kits
Rob, I will add my rather young (68 years) recommendation as well. By the looks of your work on the Constitution and given the health report that you submitted, I would say that there really is nothing stopping you. I shall follow along. Michael -
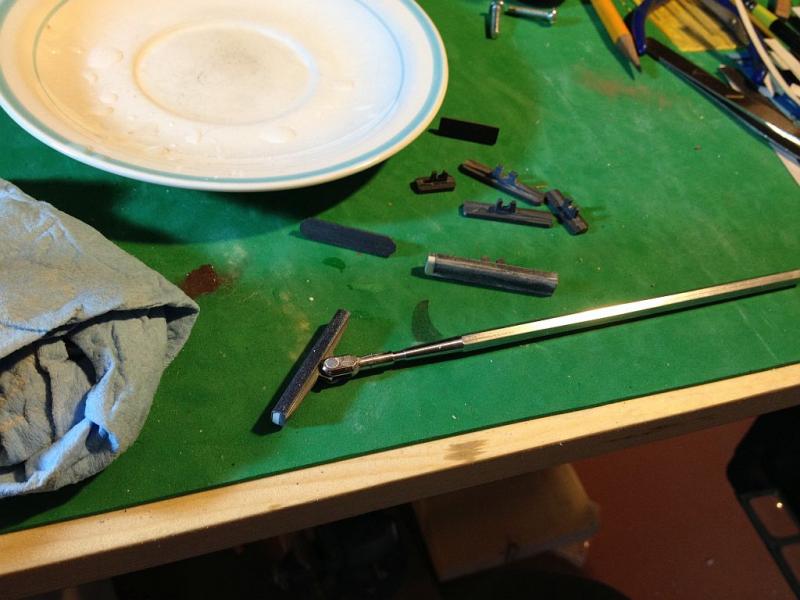
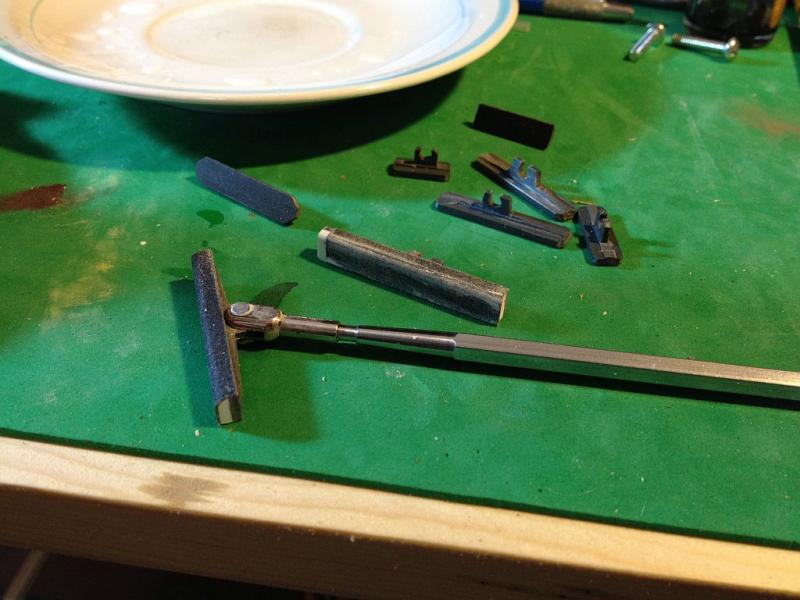
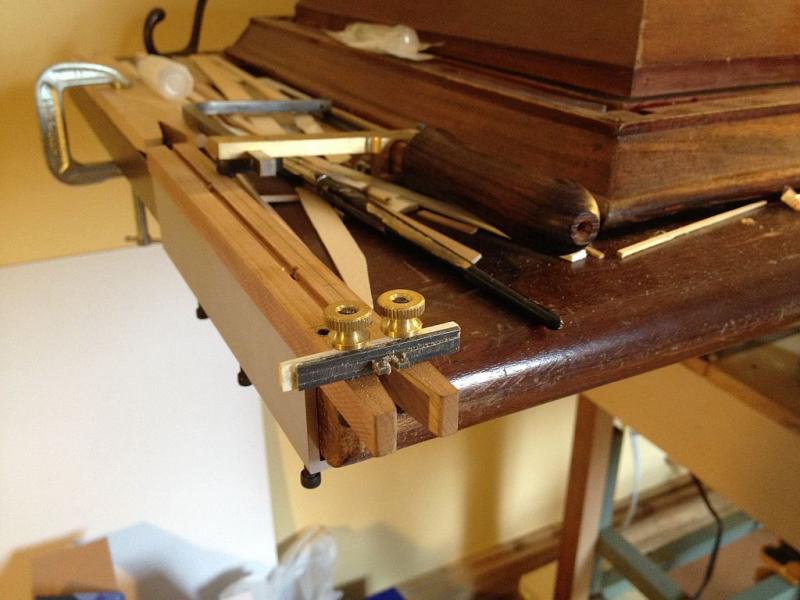
A little more progress today I did modify the procedure a little now I am using a drop of water in a saucer to wash off the sanding pad. A couple of new pads with some added thickness glued to the T section using styrene strip which was then rounded on one edge. I have started to sand down the area under the lip of the main deck using this new pad. I am also using a new small jewelers saw cutting V block with a couple of 8x32 thumb screw to hold the parts it is set up to also cut into the end of dowels up to 3/8 diameter. The picture shows one of the new pads being shaped with the jewelers saw. The thumb screws are really helpful for this sort of task. The screws are threaded up through the wood and locked up to the wood, this allows for the thumb screws to be loosened and tightened without the screws falling out the bottom or having to hold them while making adjustments. Again thanks for all those who have been following and pressing the like button Michael
- 749 replies
-
- 22
-
-
- albertic
- ocean liner
- (and 2 more)
-
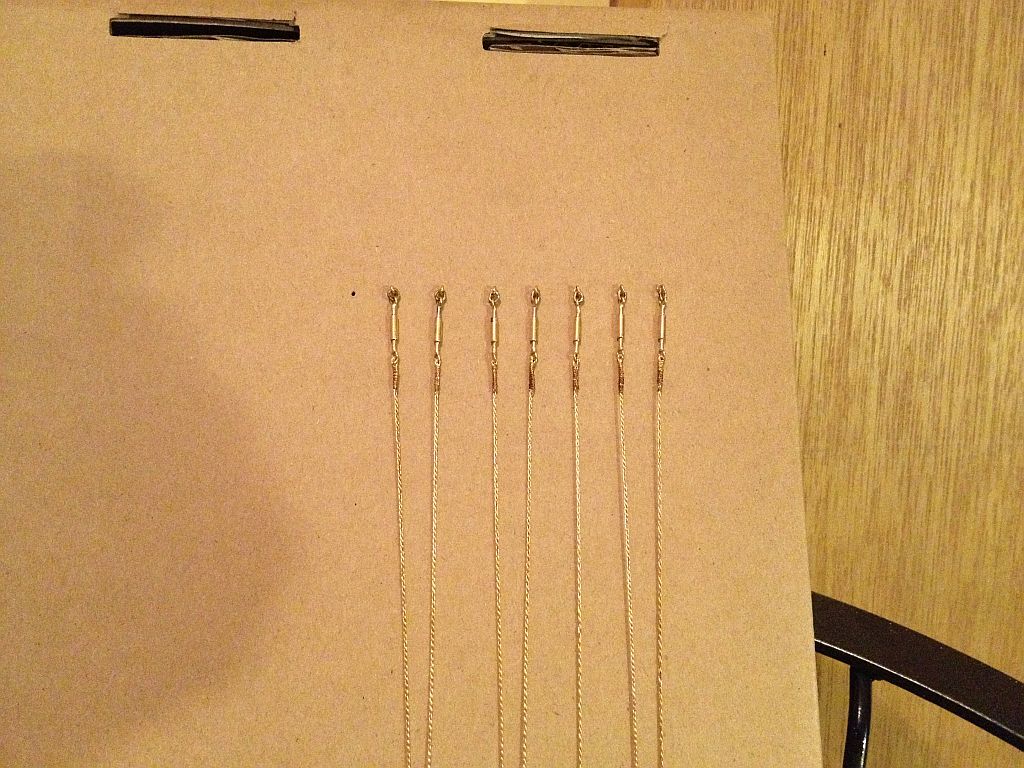
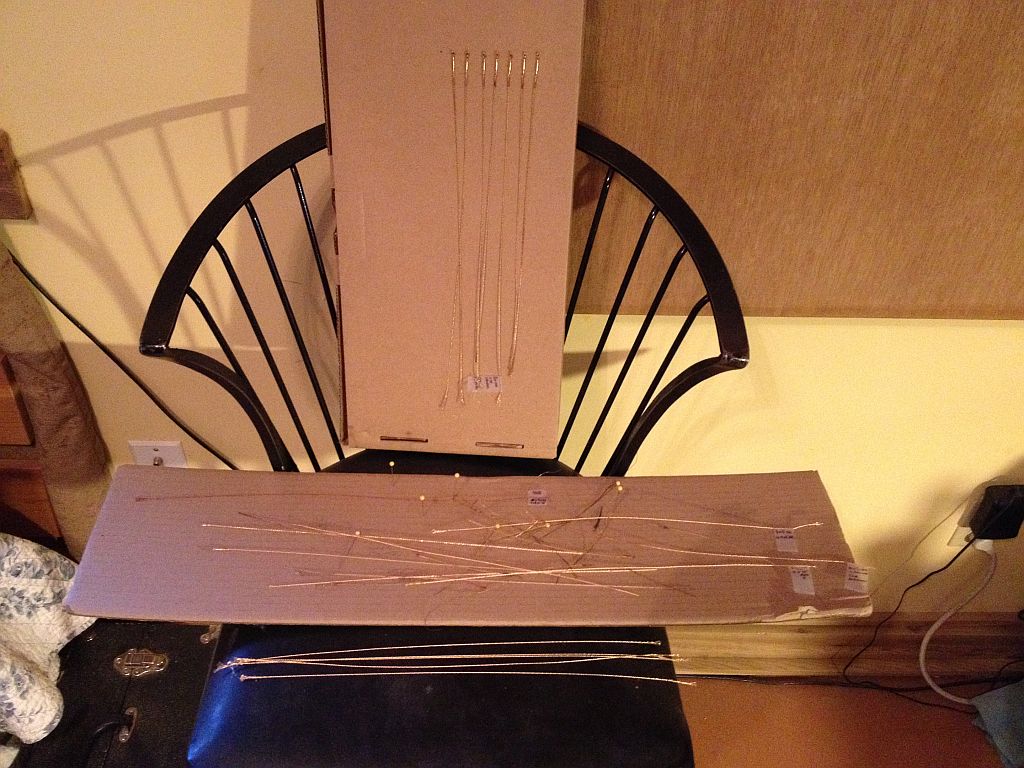
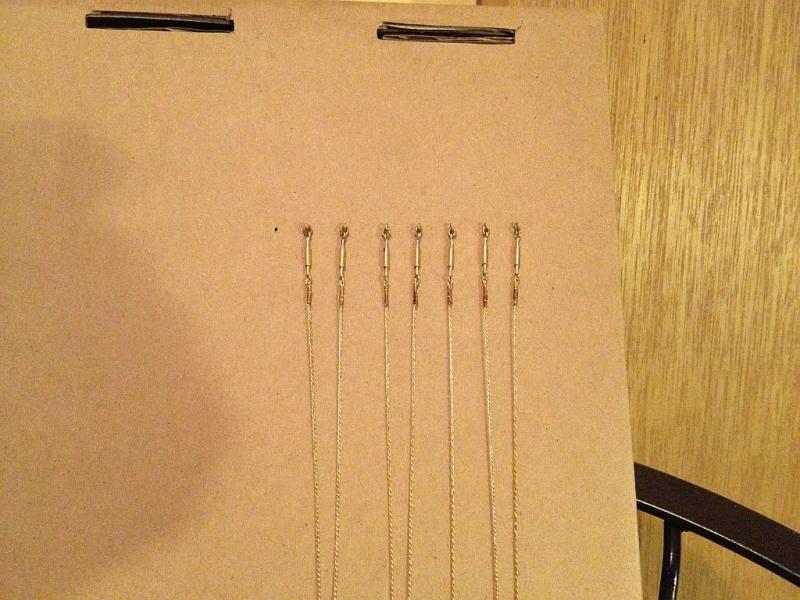
Thanks for all the comments and support by hitting the like button. Jan, I have sort of made up my mind but first i want to get the divets filled then take it from there. The new sanding pad is proving to be one of those tools that I wonder how I ever got along without it, and why some manufacturer hasn't already got them on the market.......remember that you saw them here first. I have been spotting the small divets with paint then a day later doing a semi wet sanding by just licking my finger and wiping my wet finger over the sanding pad. It wets the wet and dry paper just enough to stop it clogging, but not enough to cause any problems with the model. I have also been continuing to wind up stay cables and a shot of more progress. The stay station central Oh yes and in my spare time I have been reworking the bathroom in cottage style with Cedar wainscotting, to keep on the good books of my lovely wife Judy. Michael

- 749 replies
-
- 21
-
-
- albertic
- ocean liner
- (and 2 more)