EJ_L
-
Posts
2,246 -
Joined
-
Last visited
Content Type
Profiles
Forums
Gallery
Events
Everything posted by EJ_L
-

New to Modeling, still prepping for my second build
EJ_L replied to CosmicRust77's topic in New member Introductions
Welcome to MSW Kevin! Best of luck to you on your Virginia Sloop. I'm sure you have done so already but, if not, I know there are some nice completed and active build logs on here that you should check out. Have fun! -
Awesome! She sure is a busy model with all those details. Lots of interesting pieces to look at.
- 122 replies
-
- 4
-

-
- tamiya
- King George V
- (and 2 more)
-
Very nice! I am looking forward to seeing what you do with the paint colors.
- 2,699 replies
-
- 2
-
-
- heller
- soleil royal
- (and 9 more)
-
Hi Sargon! This ship is next up in my own shipyard as the kit is in the mail to me as I type this. I think I will pull up a chair and follow along. It will be nice to have some company on the build. Looking forward to seeing what you do with yours!
-
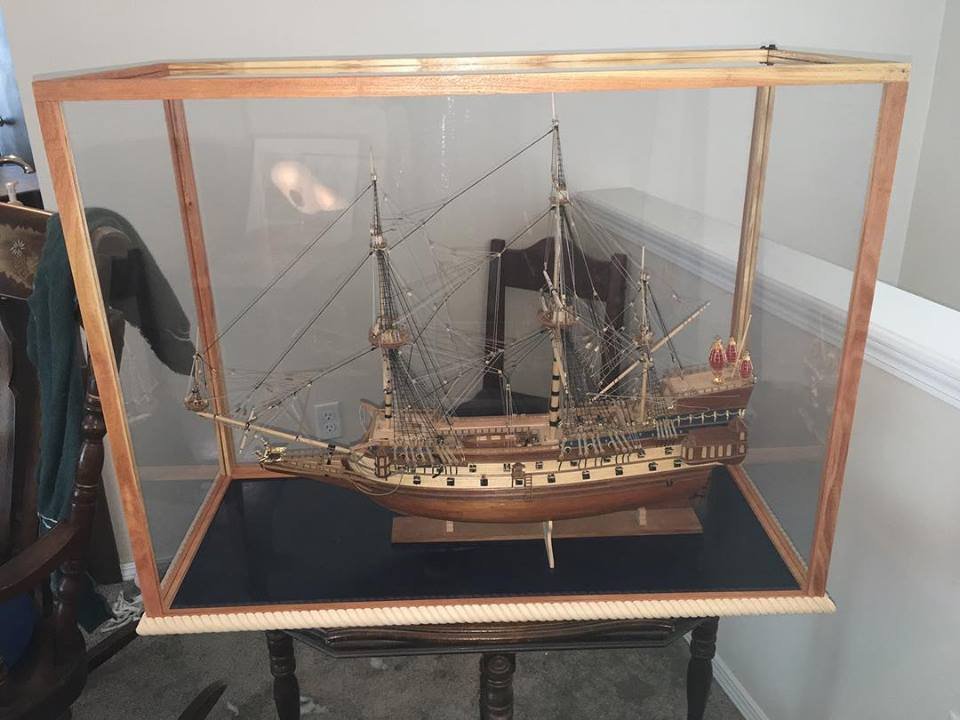
I took another small break from S.R. this weekend to build a display case for La Couronne. For those who have not followed that build, here it is! I now have a nice, big open space in the shipyard that is begging for a new project. Better start saving up that money! 😃 I promise to now concentrate on getting decorations carved on S.R. so there can be more updates!

-
The back panel hinges open to the side. Latches on the opposite side and top keep it aligned and sealed closed. I though about the door either opening up or laying down but, being so large, 26 inches by 35 inches, both of those options kept getting in my way when the door was open so I decided a side swing would be best.
- 608 replies
-
- 2
-
-
- la couronne
- corel
- (and 1 more)
-
I finally built La Couronne a home. Display case is made out of Honey Locust wood and Lexan in stead of glass. She will now make her way down to the basement where she can sit proudly next to Rattlesnake and await on Soleil Royal to join them. With this update, the log is 100% finished!
- 608 replies
-
- 7
-
-
- la couronne
- corel
- (and 1 more)
-
Welcome to MSW! As I'm sure you will see, that model is a favorite of many and there are several great logs both past and active on here for her. A lot of great ideas and ways to make your model a little more special. Good luck and happy modeling!
-
Welcome to MSW! Best of luck on your Swift!
-
Welcome to MSW!! Great to have you with us and best wishes on your future builds! Happy modeling!
-
Wow!! That scroll work is really going to be fantastic!! Still not sure how I will approach mine but, I'm sure I will get an inspiration eventually. Without a doubt Marc, your build continues to be a very educational build. Be it historical accuracy or artistic interpretations, you have well thought through plans and better still, excellent reasoning that you are always willing to share with us. Thanks!
- 2,699 replies
-
- 4
-
-
- heller
- soleil royal
- (and 9 more)
-
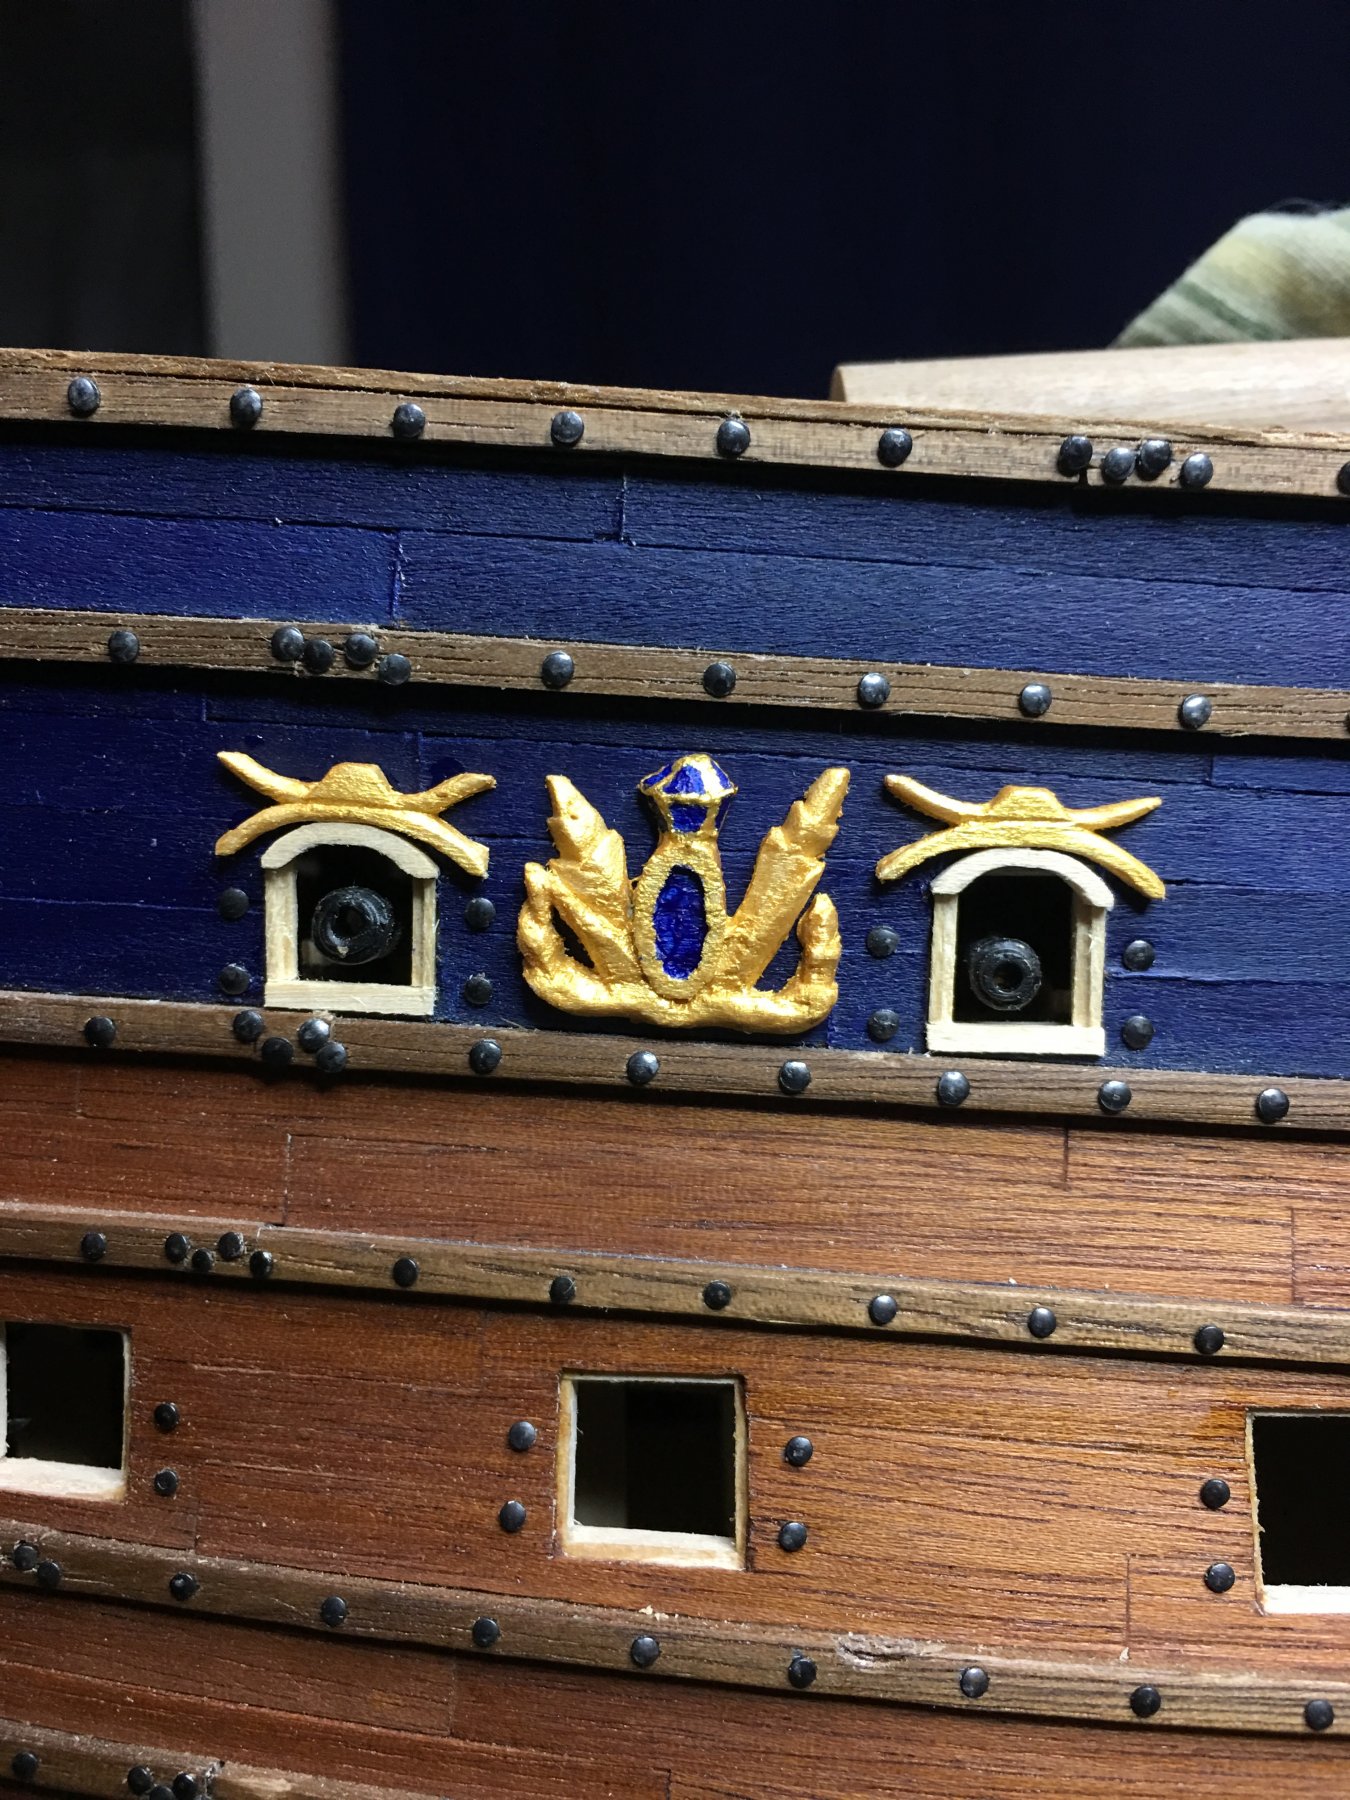
Been a while since I’ve had much to update. Took a much needed vacation to visit a friend from the Navy before work gets into my very busy part of the year. Nice and refreshed now and ready to get back to building! Been working on the decorations on the sides and am now on the third incarnation of them as I kept not being satisfied with them. Fairly happy with the look now and progress should continue moving forward. This is a very slow portion of the work so updates will probably be sparse till they are done but, I will try to post something every so many. As always thank Hanks you all for stopping by, the likes and comments. Much more to come!

- 961 replies
-
- 12
-
-
I'm trying to work out similar designs or at least come up with a plan on what I am going to attempt on my own build. None of that frieze is of course shown on my plans and the cast metal pieces are far different in design that anything Berain. I'm glad you have come to the same stage of work as your designs are giving me a clearer direction on where I want to take my own. I think you will have far greater success in achieving the smaller details in plastic than I will in wood and am looking forward to seeing them!
- 2,699 replies
-
- 2
-
-
- heller
- soleil royal
- (and 9 more)
-
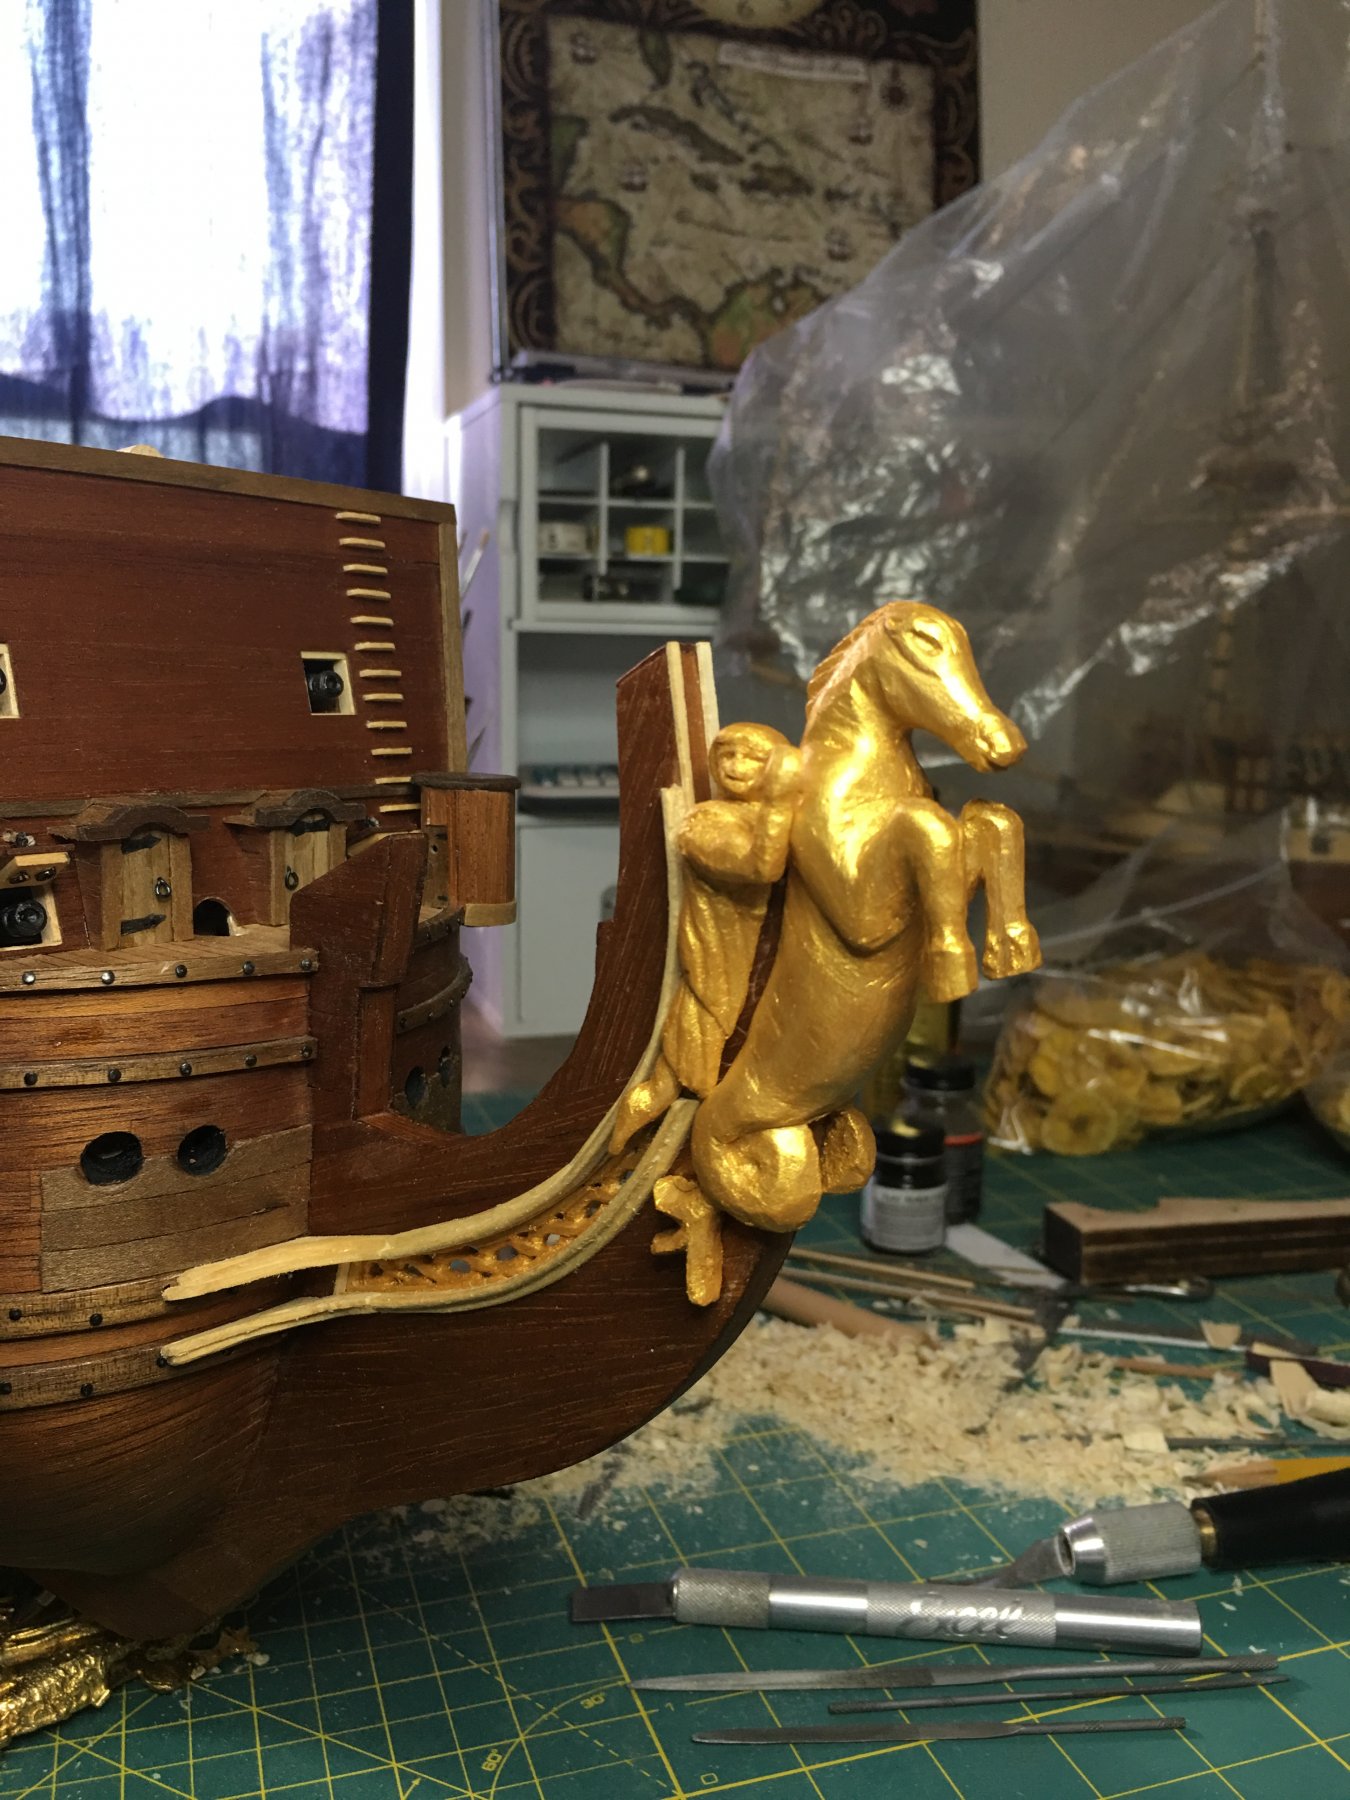
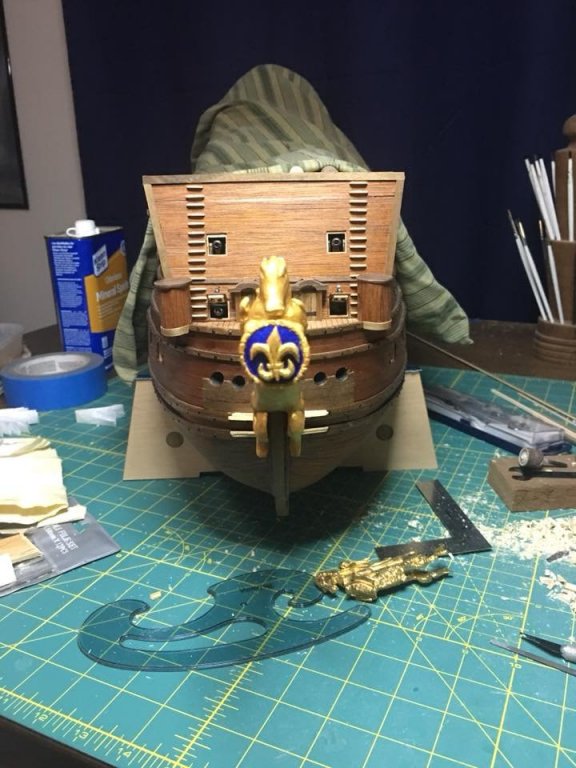
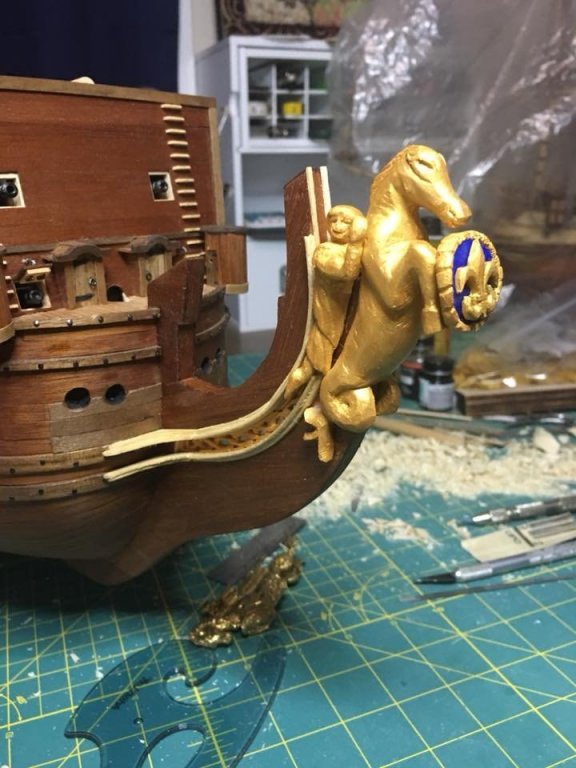
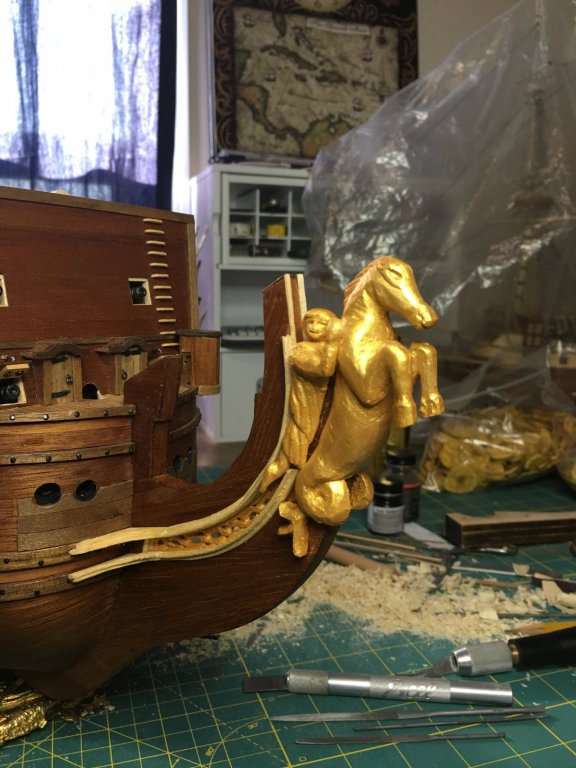
Thank you all as always for the nice words, likes and following along. I actually finished the figurehead a couple of days ago but, didn't get around to posting the pictures. So here it is. I need to get out my good camera and take some new pictures of everything. Been hoping the weather will cooperate this weekend so I can take them outside in the natural light. Always a better choice. Now I get to flush out the bow with the gratings and their framework as well as start designing the iconic side decorations that I do not know the name for. Still have a lot of work to do so I better get back to it!
- 961 replies
-
- 13
-
-
I’m sad I found this build so late but wow! Cool project Chuck. I’m looking forward to when the kit will be available as it looks like I may have found a nice smaller project to give me a break from my larges ones.
- 421 replies
-
- 4
-
-
- medway longboat
- Syren Ship Model Company
- (and 1 more)
-
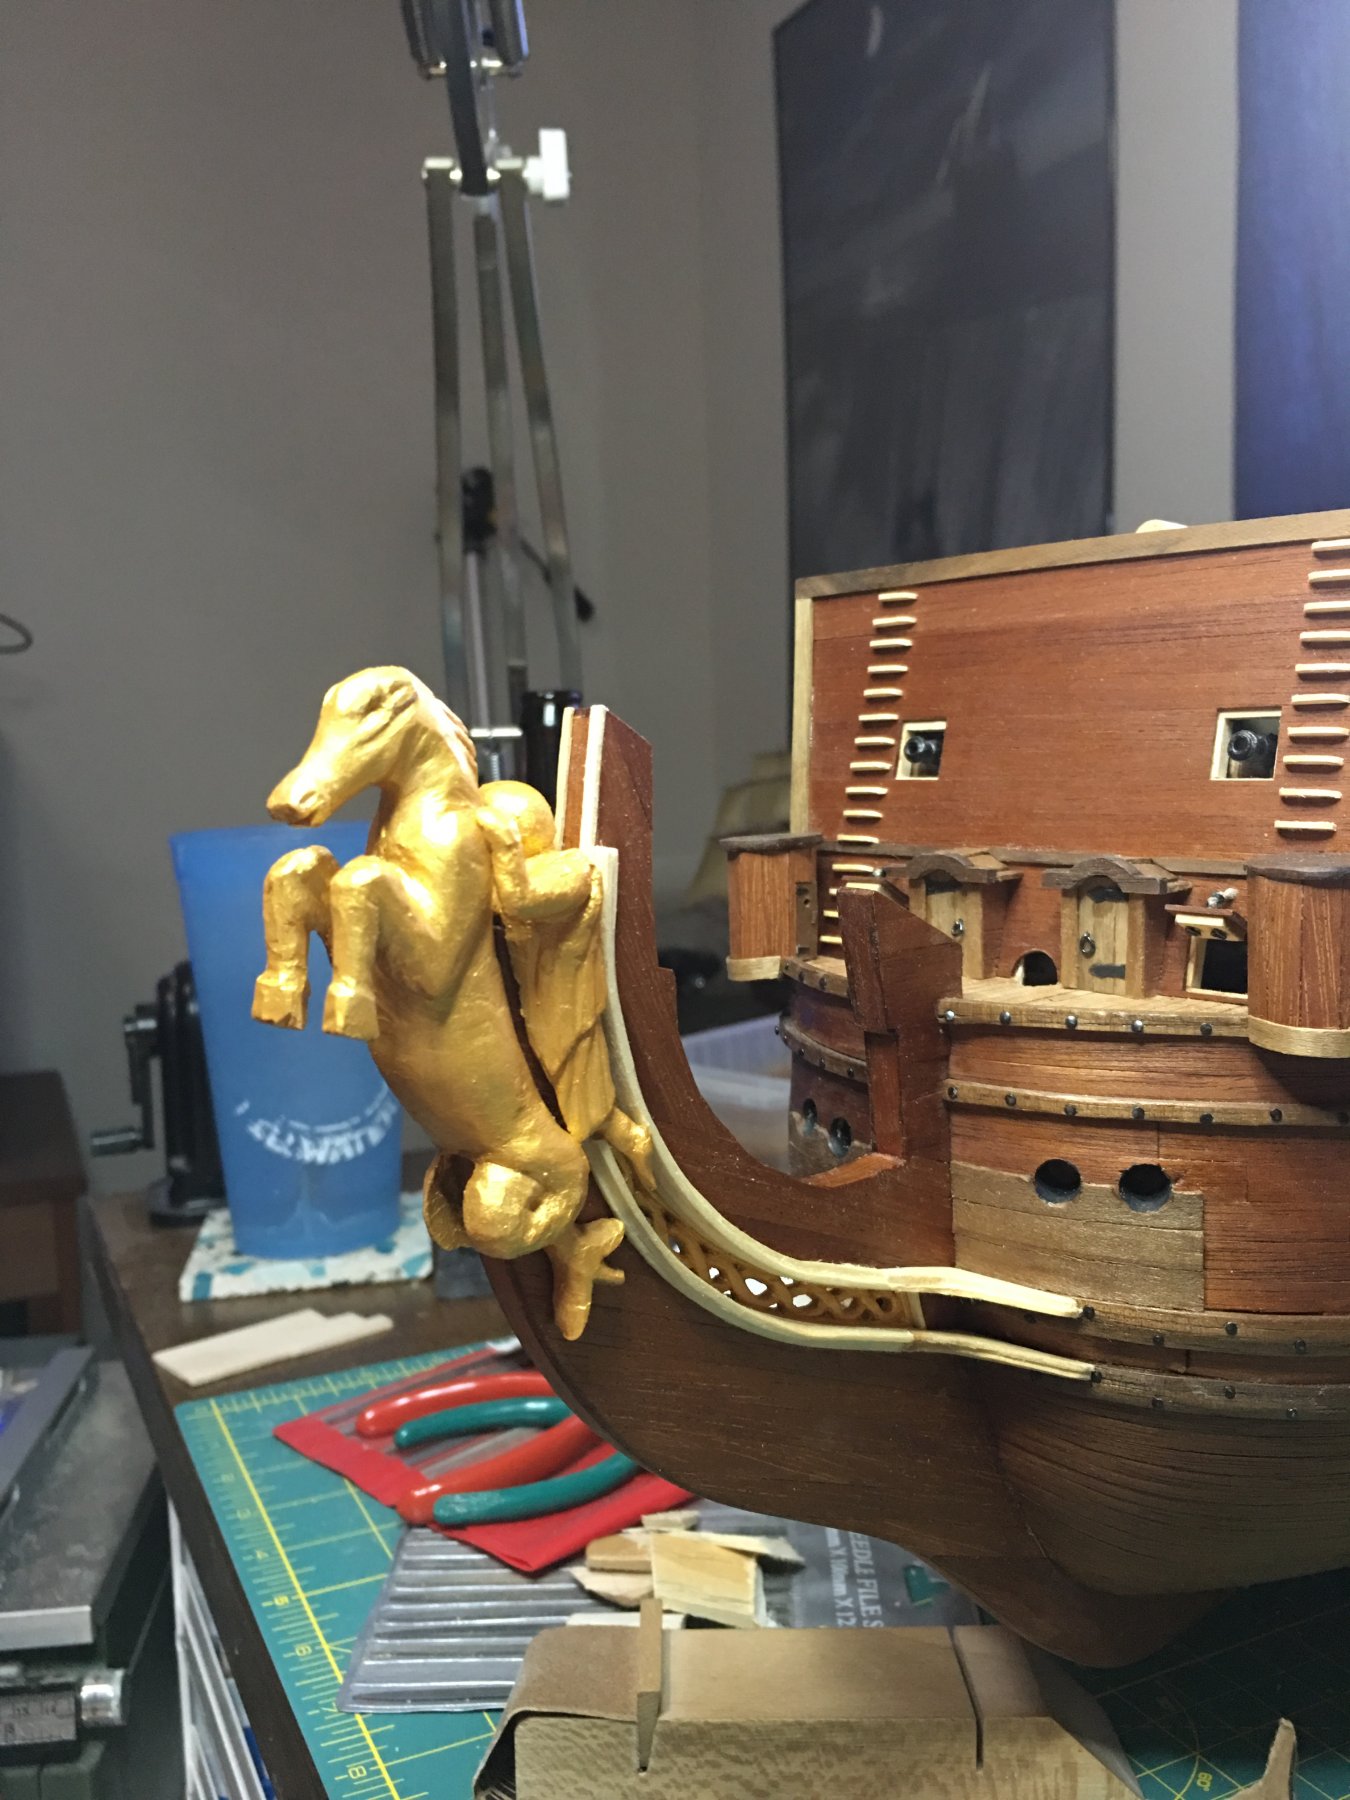
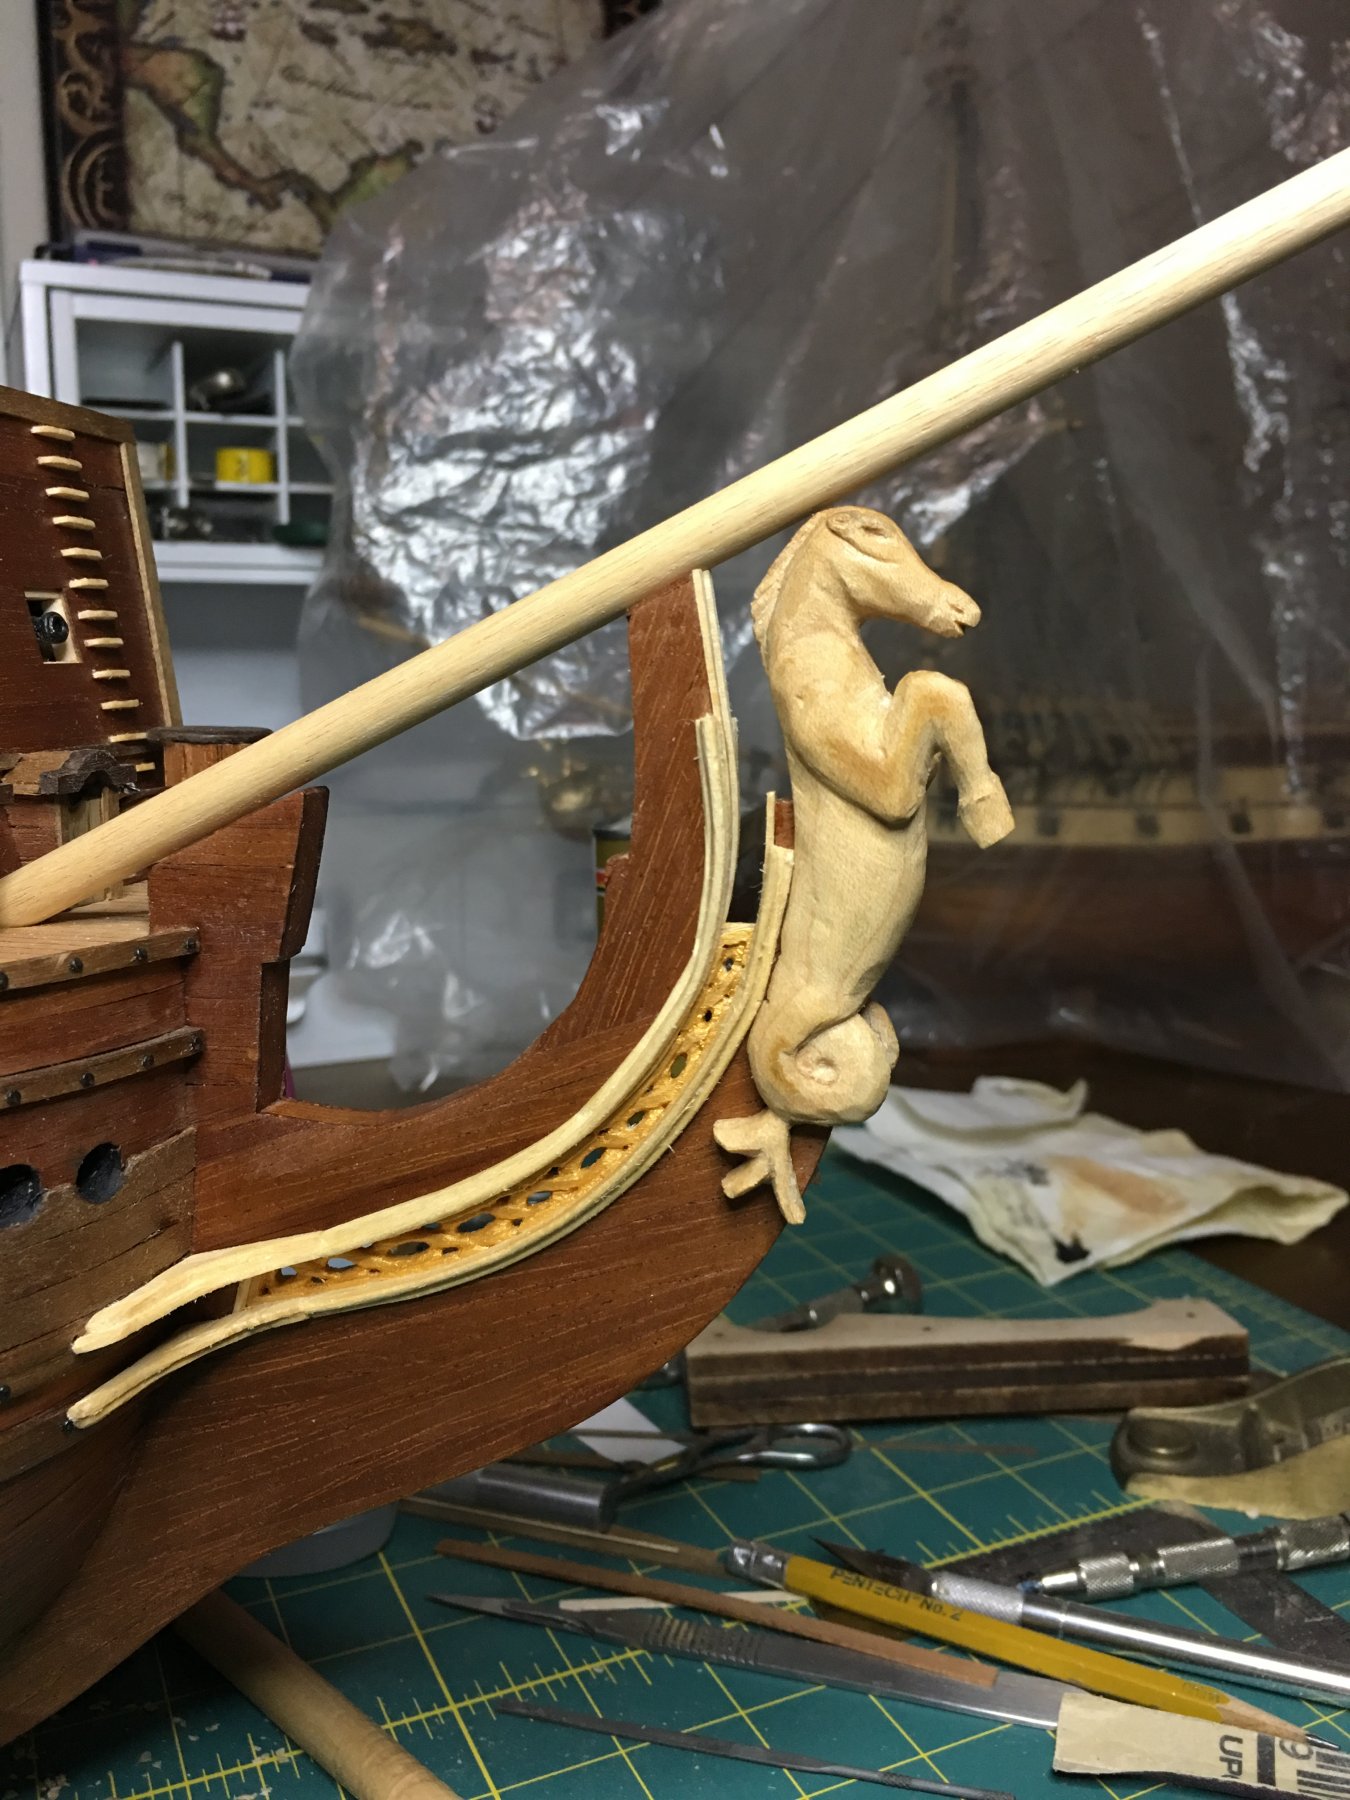
Thank you all for the nice words, likes and following along. The carvings have been a huge challenge but, one that I am glad to have attempted. Still have the shield to make to complete the figurehead. More to follow!

-
Nice start indeed and while no, she is not the easiest build to start with, you appear to be doing quite well! I look forward to watching this one come together.
-
Welcome to MSW Chris! I'll head over and take a look at your build. Best wishes and happy modeling!
-
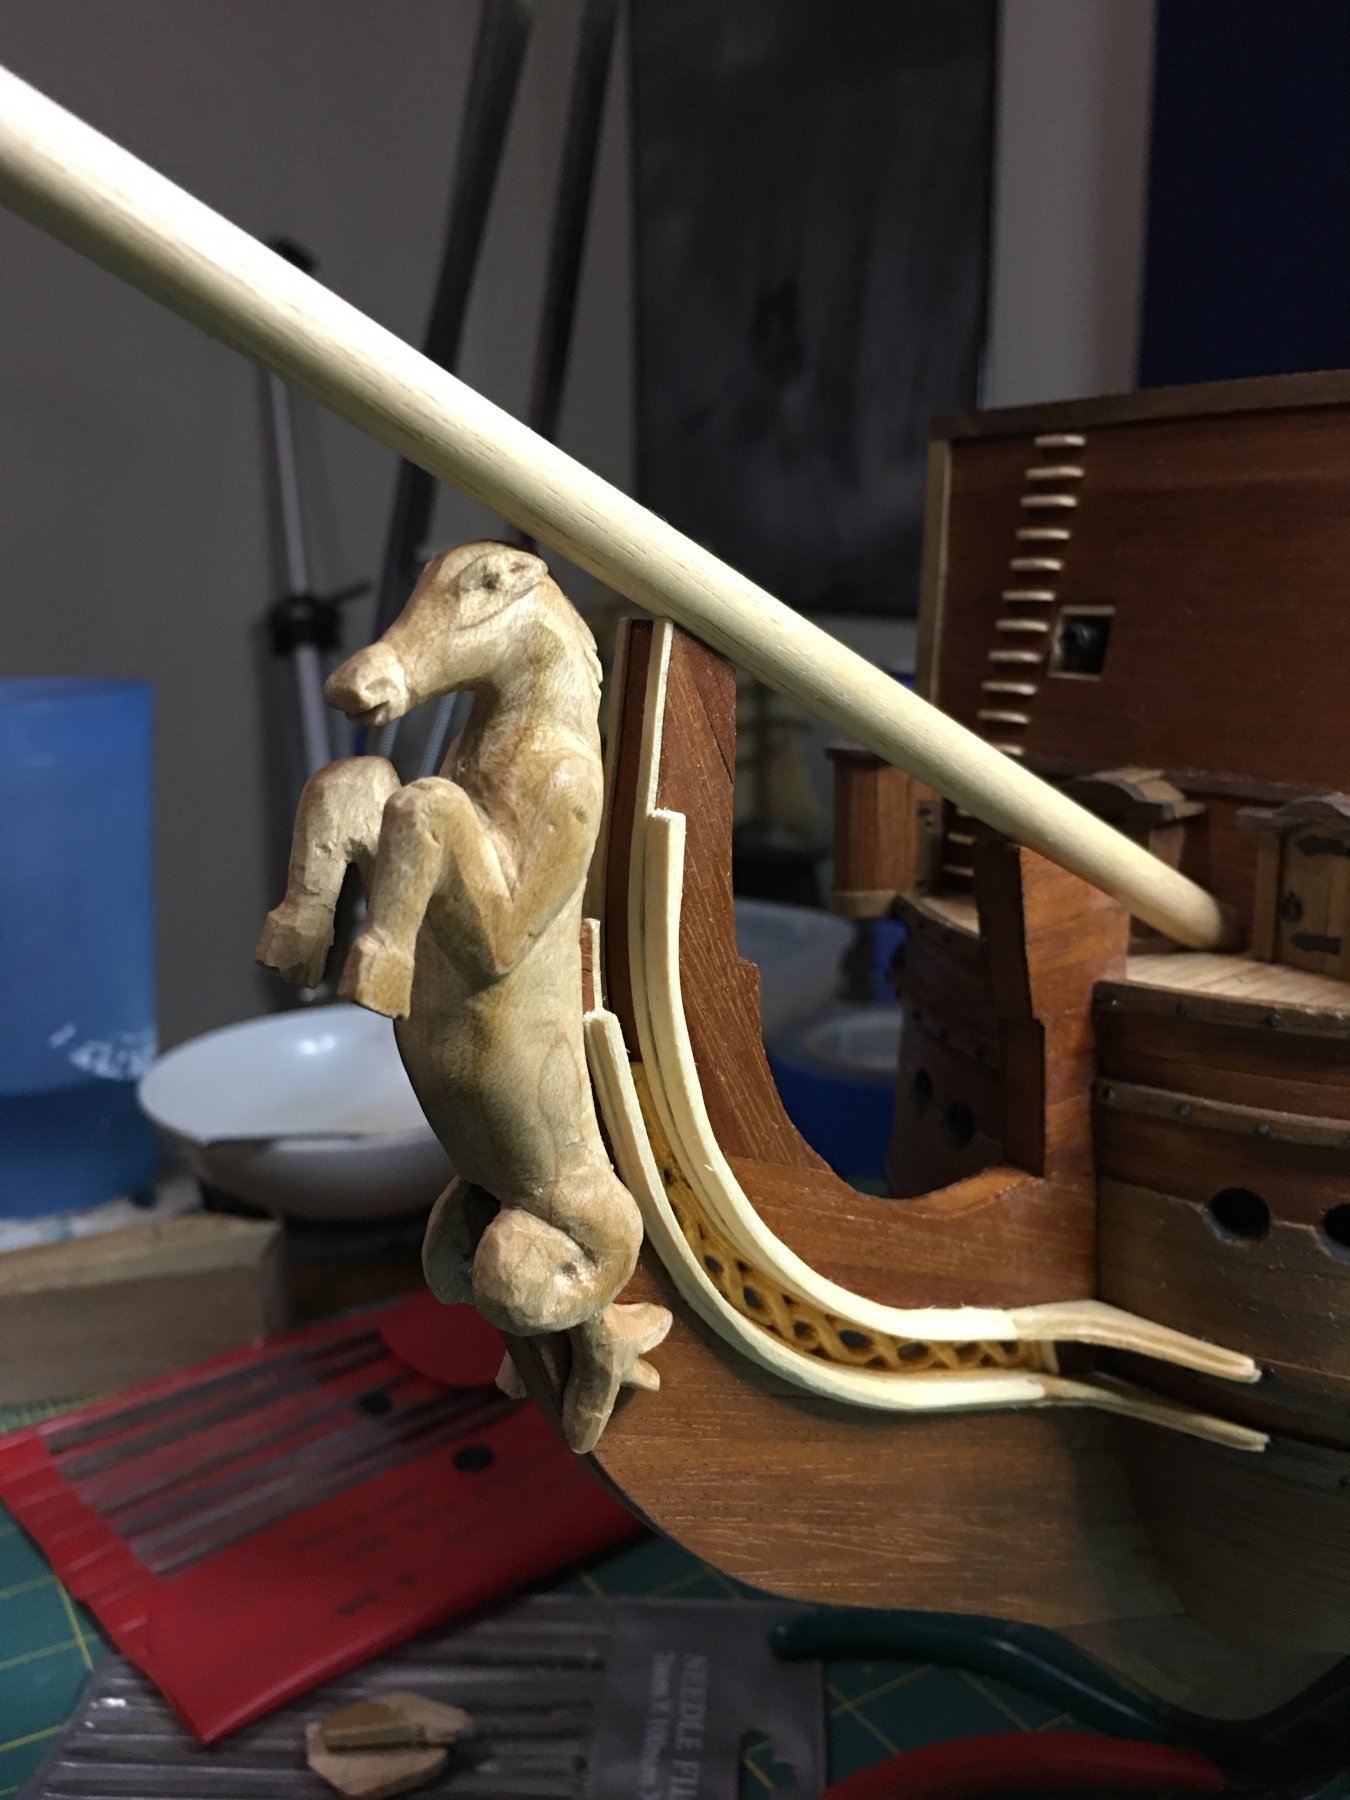
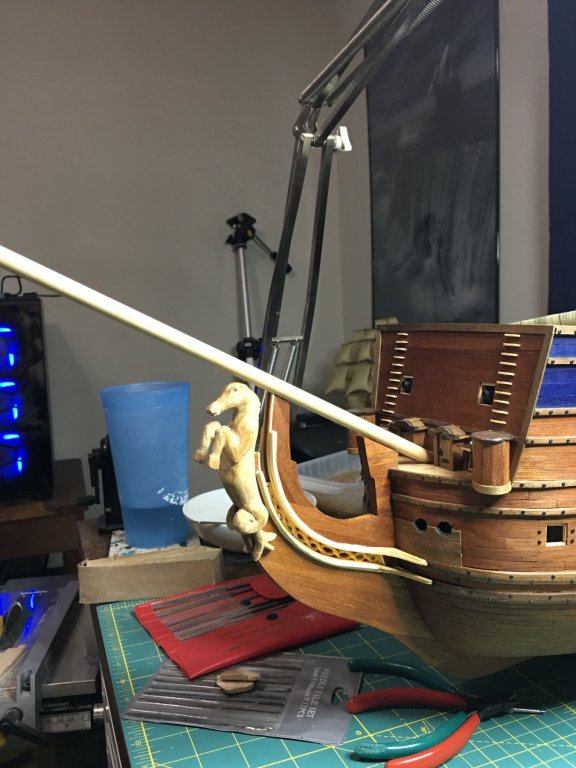
First part of the figurehead is dryfitted in place. I will start working on the rider next as well as the shield piece that will sit between the front legs.


- 961 replies
-
- 11
-
-
This sounds like an interesting project. I will have to join the group in following along. Happy building!
-
Hello from therealangrysailor
EJ_L replied to Therealangrysailor's topic in New member Introductions
Welcome to MSW from a former Navy Seabee! It may be best to stick with something smaller and simple both for the ease of learning and the time constraints. That being said, absence makes the heart grow fonder and if you don’t manage to finish a build before deploying, you will be more than ready to pick it back up when you return! In any case, find something you will like and have fun. Best of luck to you! -
Welcome to MSW! Looking forward to seeing your build. I will keep an eye out for your log. Have fun and best of luck!
-
Welcome to MSW! You have a nice build started there. I will have to go take a look at your build log and see more. Have fun!