HOLIDAY DONATION DRIVE - SUPPORT MSW - DO YOUR PART TO KEEP THIS GREAT FORUM GOING! (89 donations so far out of 49,000 members - C'mon guys!)
×


EJ_L
-
Posts
2,246 -
Joined
-
Last visited
Content Type
Profiles
Forums
Gallery
Events
Everything posted by EJ_L
-
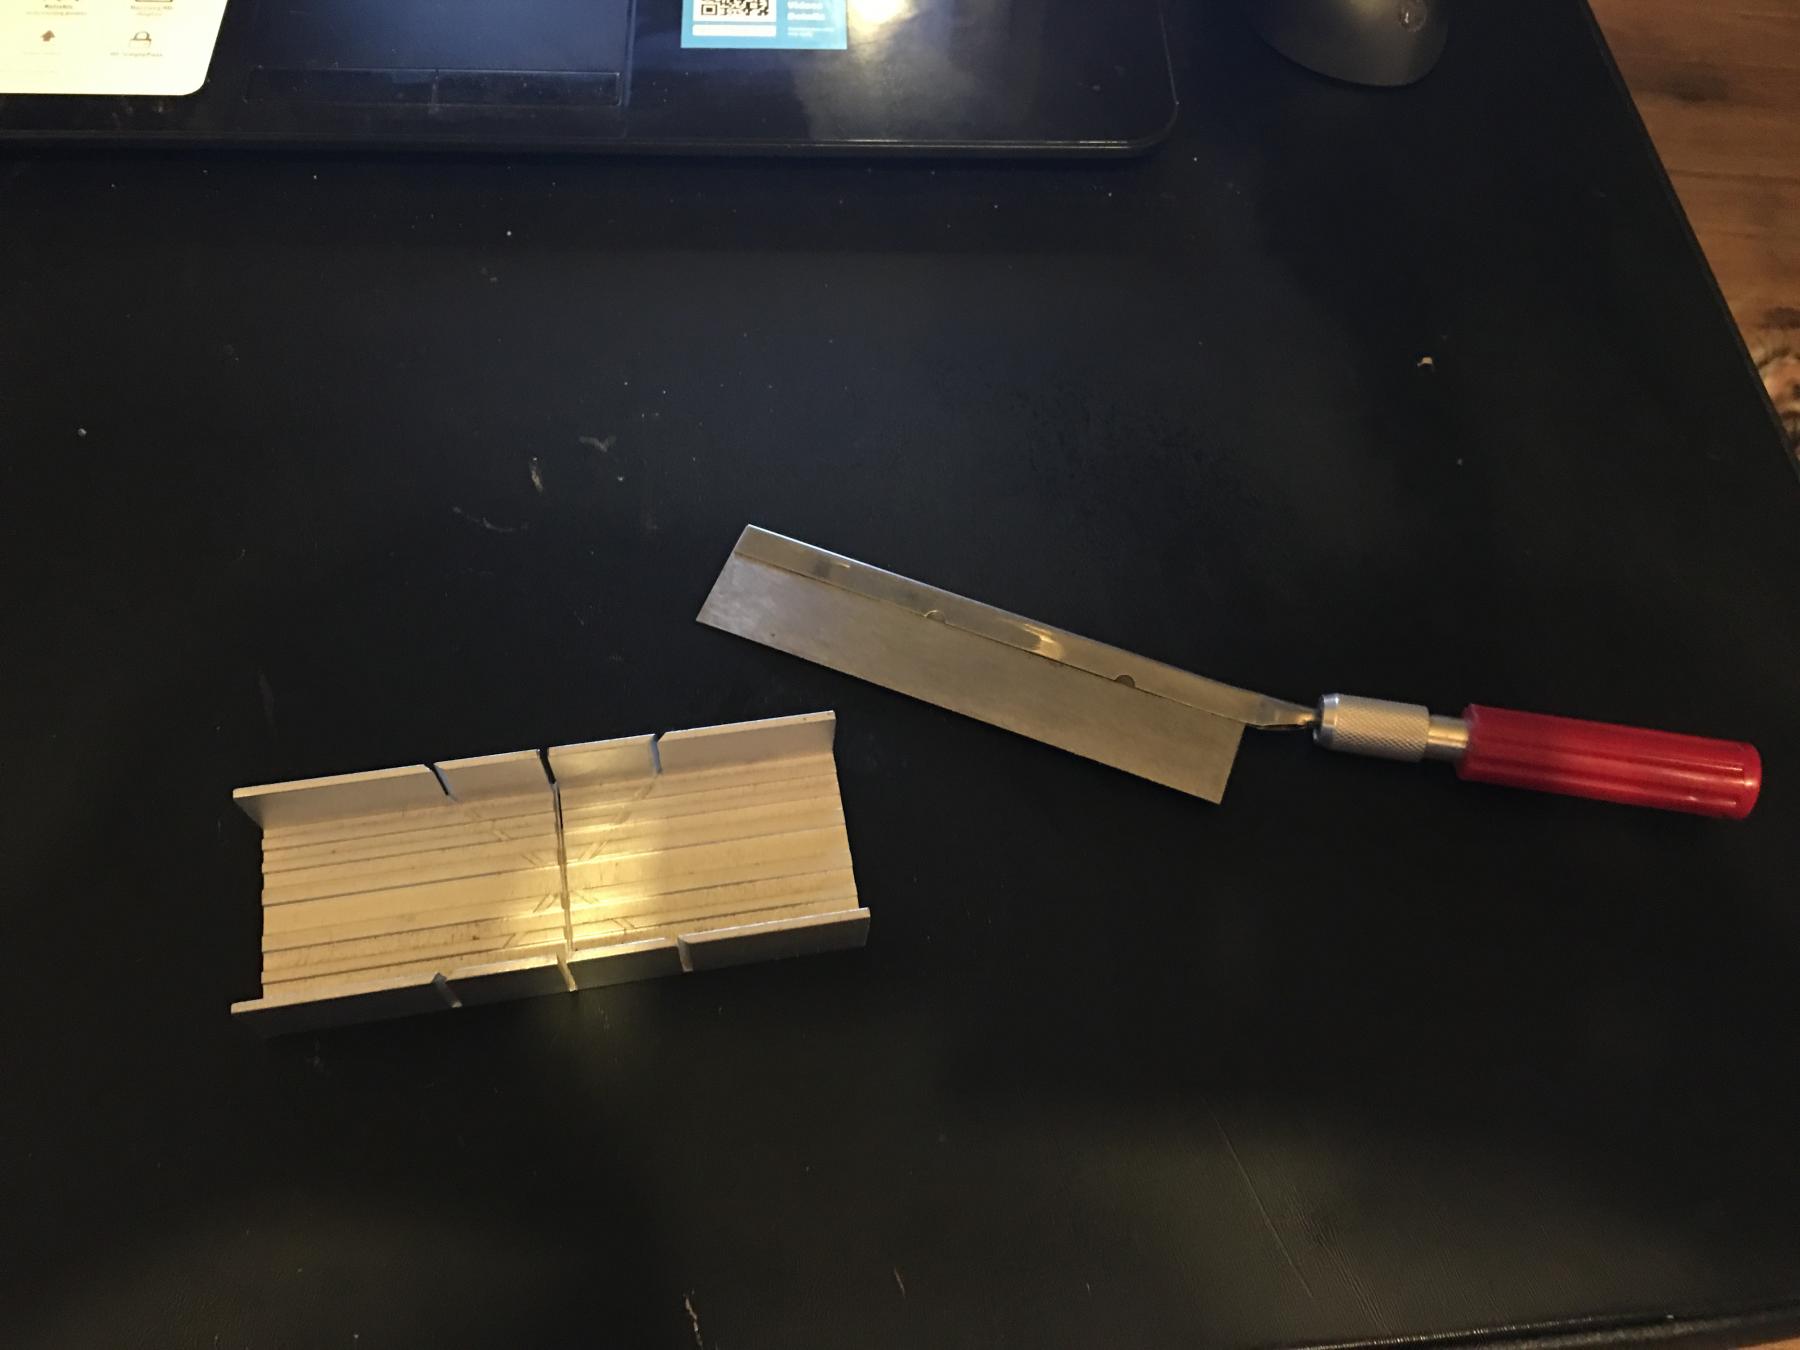
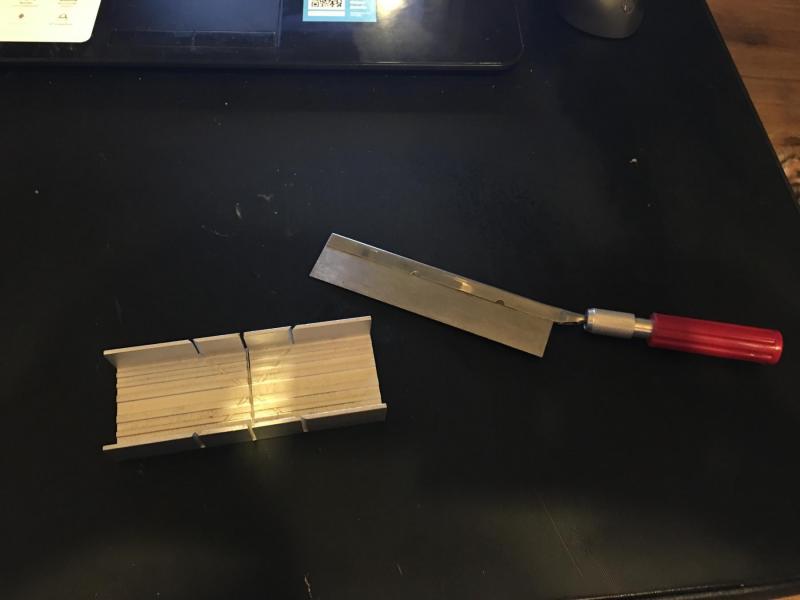
 If you have a Hobby Lobby near you they sell them. If not, here is the link for them on their website. They are Excel brand. You will want to get the 1-1/4" saw blade to fit the box.
 -
I always order extra wood when I buy any. Never know what may come up that you will need it be it a mistake or deliberate decision. I will get a variety of sizes and usually even some sheets if they are available. As for the tool I have not used that one myself. I do have a cheap-o one that came in a kit from several years back. It works ok on very soft woods but not the most acurate as Robin said, the blade can move. I would buy a hand miter saw. It is what I use to cut the majority of my wood when making straight cuts. I do have other saws but that little miter box gets a lot of use. They are cheap and easy to find at any hobby store.
-
I think all the best craftsmen do that. If you ever stop critisizing your own work then you stop growing and learning. The work you are doing is fantastic and something to be very proud of!
- 213 replies
-
- 4
-

-
- la couronne
- 74 gun
- (and 2 more)
-
You should be able to double plank it. You can order some wood 1mm or even 1/2mm thick that would not add too much to the hull. You will still have to do all the sanding but it would make the hull look much nicer that way. Double planked hulls are great for learning as they give you twice the practice while allowing for more mistakes on the first as they can be covered. Plus the second layer now has a much better surface to lay the planks on which allows for a much nicer finish. I would highly recommend going that route if you don't mind spending the extra money. It will be worth the effort.
-
Wow! Rigging is already hard enough and now you have to belay lines down below decks. I'm looking forward to seeing this reverse rigging method you have planned. I understand the concept but I have never seen it and am very curious. Someone out there will make a killing in the ship building hobby if they can ever create scale robotic people that could get under there to tie off those lines!
-
Nicely done. Those roof domes came out great and all those details are making her look sharp. I think that blue paint was a good choice. It is allowing the gold on the detail pieces to really pop. Smart thinking making the quarter galleys removable. On a ship that big, anything that can be easily removed and replaced will make transporting it much easier. Your doing great work!
- 213 replies
-
- 2
-
-
- la couronne
- 74 gun
- (and 2 more)
-
I would try to make all my cuts now before the final planking. Mostly cause like you said, if you mess up on something it will be easier to cover up and fix with that final planking layer. They probably just recommend waiting so you only have to cut one time through two layers instead on multiple cuts. That deck does look great!
- 653 replies
-
- 8
-
-
- trabakul
- marisstella
- (and 1 more)
-
I would go ahead and finish the hull before inboard. My first question is have you ever used wood filler or spackle before? If so then disregard the next little bit. If not then it is easy to apply. First though go ahead and and down your hull. Get it as smooth as you can so that there are no rough edges and the shape of the hull can be seen. Blow off the saw dust or better yet use a vacuum to remove the dust especially between the planks. Now you should be able to see the gaps in the planking as well as any low spots in the hull or and funny shapes to the curvature of the hull. To fill in the gaps simply apply the filler with anything from a small putty knife to a stick of scrap wood, tongue depressor style craft sticks or even you finger will work. Use thin layers and do not glob it on thick. It is always easier to add another thin layer than it is to sand off a lot of excess filler. For the low spots in the hull you want to use something that will be wide enough to stretch from high spot to high spot across the depression so that the filler lays down under the stick in the space created by the span. Let it dry, (read instructions on container as brands vary) and look to see if more is needed. If obvious gaps appear then go ahead and apply more filler otherwise begin sanding. Be careful when sanding that you don't dig into the wood and create dips. If you can use a sanding block to keep the hull lines straight that is best. Around curves though you just need to exercise caution and sand lightly. This is also where I stress again, when applying the filler, go easy and use thin layers. You do not want to have to sand large amounts back off. Waste of time and materials plus it is tiring. You should be able to feel the curvature of the hull under your hand as you sand. Pay attention to the overall shape and curves and feel for spots that do not follow the natural and expected shape. Also pay attention to where you are sanding. The wood and filler will change color somewhat and will obviously become smoother as you sand. Again this is why you go slow and look at where you are sanding. Low spots on your hull will remain rough and the same color as before you started to sand. If you see this happening that is an indication of where more filler may be needed. Apply another thin layer in that area and when dry repeat the sanding. Do this as many times as needed to achieve a nice evenly smooth hull. This next step is up to you. As this is a first build this detail may not be that important to you. On a wooden ship, the planking is a major feature. Seeing each strake clearly is one of the things that people enjoy seeing. Depending upon the amount of filler that had to be used many of the individual strakes may be covered up. Hope is not lost as they can be faked into the hull. The way to do this is to scribe them in using a hobby knife or anything similar with a sharp tip. Hopefully the majority of the strakes can be seen so that all you have to do is scribe the line through the filler from where it disappears to where it reappears. Again, go slow as this can be tricky to keep straight on a curved surface. You do not want to cut all the way through the filler just deep enough to leave a groove that will represent the edge of the plank. Now you are ready for paint. Color is up to you though typically the lower hull would be white. How you paint it is again up to you but I would recommend an airbrush if you have one and if not then a rattle ball can (spray paint) will work. Krylon, Rustoleum or whatever your local hobby/craft/walmart sells will work fine. Look for flat or satin finishes. What you want is a smooth, even finish without brush strokes and not to heavy. Too heavy and the paint will fill in the spaces between planks. Like with the filler, paint in light layers. Lay down a light cover and let dry. Then apply a second, third or fourth as needed till you can no longer see the wood through the paint. Simplified that is it. The stuff I have been using is Elmer's Carpenter's Wood Filler. I got the color change stuff that goes on purple and dries white so you can easily tell when it's ready for sanding. I bought a small 8 oz container and have been using it for years. Probably picked it up at either Home Depot or another hardware store for just a few dollars. It is stainable, paintable, sandable and cleans up with water. Hope this helps and good luck!
-
San Martin by augustus
EJ_L replied to augustus's topic in - Build logs for subjects built 1501 - 1750
Excellent pictures of outstanding details. I'm always impressed at how nice and clean all of the lines are in your woodwork. Looks like it won't be long and we will be seeing the rigging going up. -
Breaks are a must. Whether it is to work on a different build or to do something else entirely it is good to take a break. When I force myself to do something I tend to make mistakes or not put the effort I could into it. Unless I'm getting paid to do something, I work on my own schedule and when I want. I actually try to take breaks even when I don;t want to sometimes. It is refreshing and clears my head as well as builds up the desire to work. Shelve the project for a little while. Work on something else and see if she starts begging you to come back.
-
And here I thought I was daring just putting my bowsprit and spritsail topmast on early! I guess no one can question if your build are structurally sound. Well done!
- 473 replies
-
- 8
-
-
- greek bireme
- dusek
- (and 1 more)
-
Thanks Mike and yes it is scary having it jutting out there just waiting for something to hit it. I suppose I could have held off till after the foremast was built and I was ready to connect the rigging to the bowsprit but it is just the order I have always built the masts. I am looking forward to having my big model table back since it allows me to keep the ship and those more delicate pieces further away from accidents than this card table does. Hopefully only a few more weeks!
- 608 replies
-
- 5
-
-
- la couronne
- corel
- (and 1 more)
-
All of those accessories have really made an impact on her appearance. She is looking fantastic and I'm getting excited to see her in the water!
- 414 replies
-
- 3
-
-
- riva aquarama
- amati
- (and 2 more)
-
On the first build the most important thing is that you are learning. Even if what you are learning is how not to do things. When you go to trim up the bow and stern do it very slowly. Trace out the edges of the stern and stem posts but do not cut on those lines. Instead, cut inside them so that the opening is smaller than what you will need. From there you can test fit the pieces and just gradually widen the slot until they fit nice and snug. That is really the method to fitting any pieces on these models especially with the often complex shapes that we make. Sand paper and files will become your best friends in making sure all your parts fit correctly. On wood filler, I just use Elmer's wood filler on anything that will be painted or second planked. As it sounds like you will be painting and not staining then it is not as important on what you use as it will be covered up. Just make sure that when you are done sanding and smoothing that you can still see individual planks. If you end up having to put a thicker layer in placed and the edges of the planks become covered up then you may want to take a knife or awl or something with a point and scratch out the plank lines.
-
For the tree nails I'm cheating by just drilling a hole and then darkening it in with pencil lead. I've seen this method used on a few builds now and it seems to work fairly well especially at these smaller scales.
- 608 replies
-
- 5
-
-
- la couronne
- corel
- (and 1 more)
-
Your planking is moving along nicely. It is one of the slower stages of ship building so I understand the desire to have something to break it up and that moves a little quicker. That card build looks interesting. Let us know when you start that as I would enjoy seeing her come together also!
-
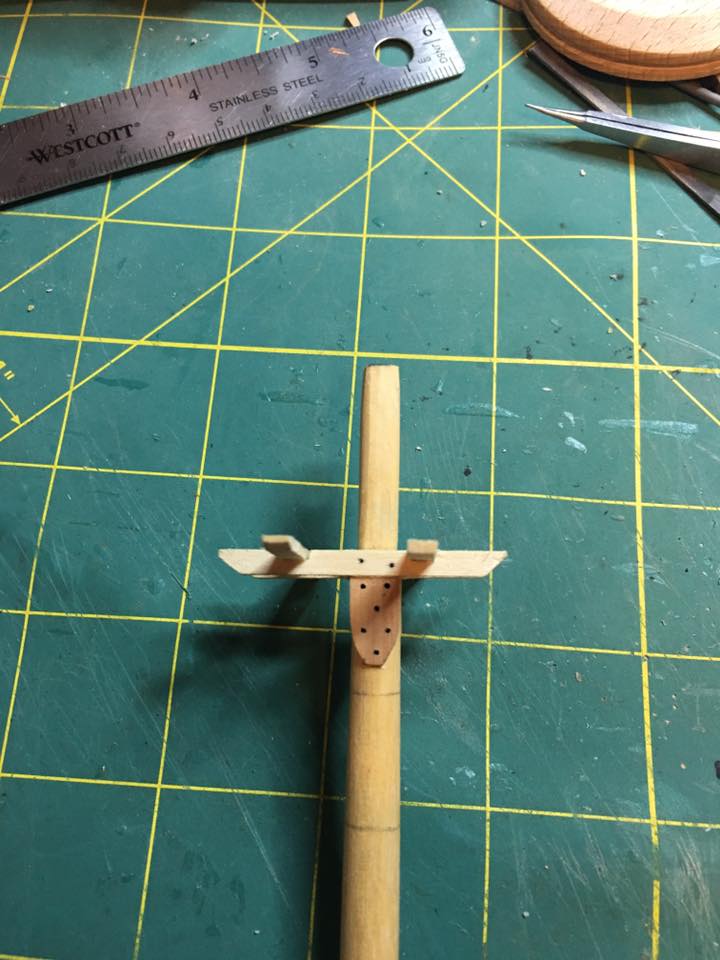
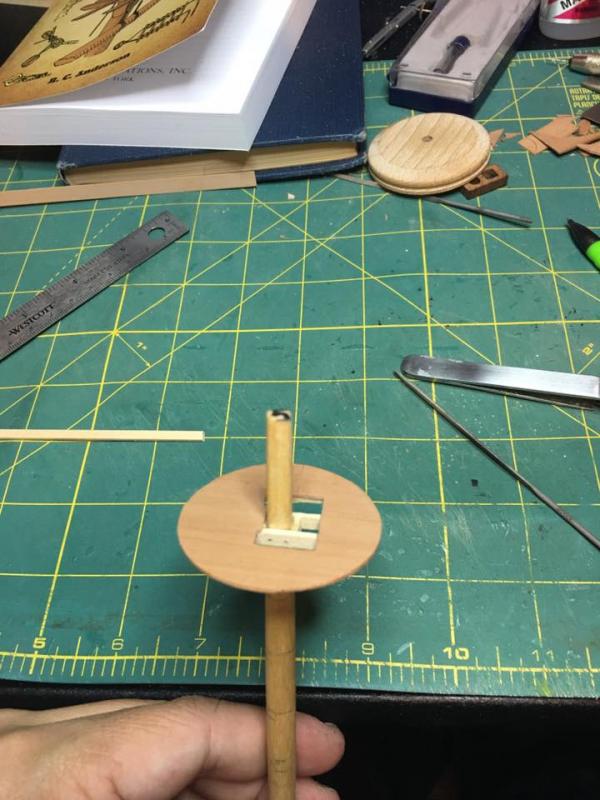
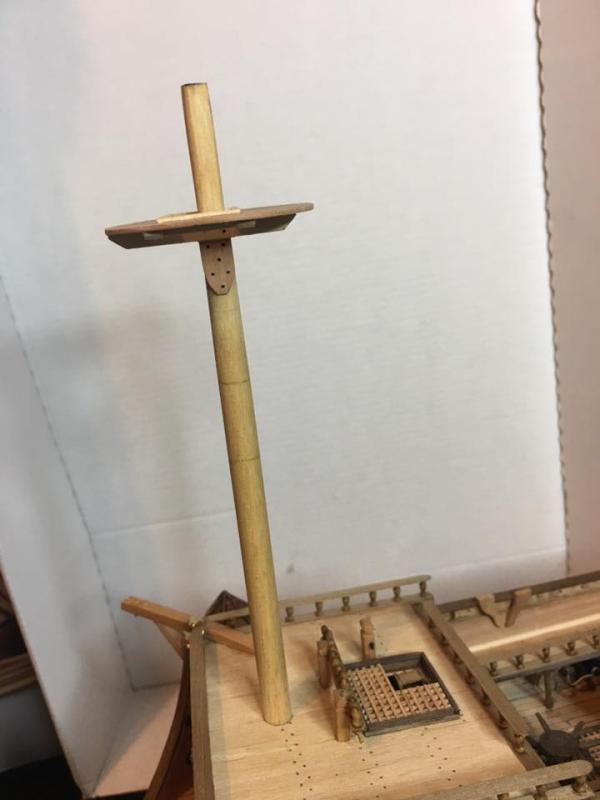
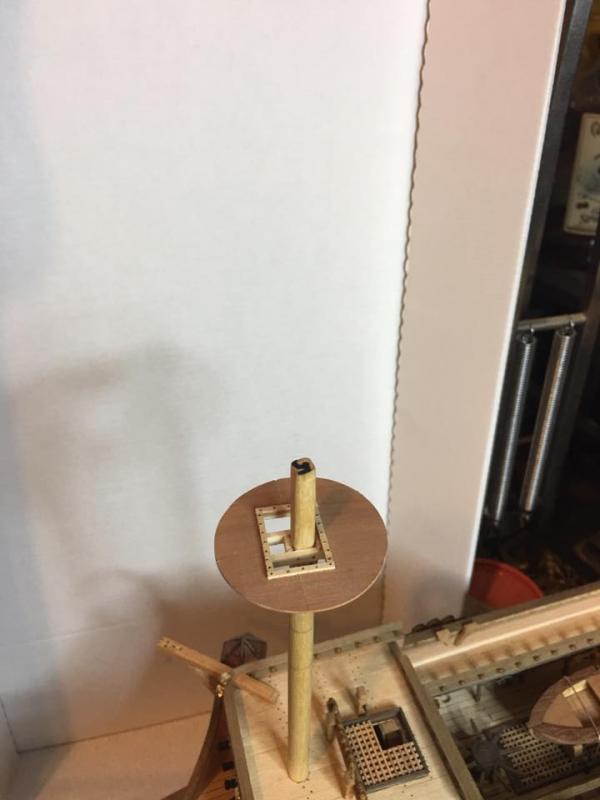
Hard at work building the foremast and I thought I would post a quick update. Trestle trees, and platform have been successfully mounted. Working on the parts for the railings now. I'm trying to remind myself to take a lot of progress pictures and post them with the hope that I will start to make it more of a habit.

- 608 replies
-
- 10
-
-
- la couronne
- corel
- (and 1 more)
-
Excellent job on those shrouds and stays. Very neat and clean rigging. It is good to see her climbing skyward and as usual the results are worth the wait in updates.
- 481 replies
-
- 1
-
-
- rattlesnake
- model shipways
- (and 1 more)
-
Adding those people really puts that into perspective and I must say, WOW! Excellent work!
-
I highly encourage people to start small and work up and fully support messages like this cautionary tale however I say that as a "do what I say not as I do" message. The only beginner ship I built was Constructo's 1:150 scale Bounty and it was my seventh build. It was more of a filler ship build that I had picked up while waiting on La Couronne to arrive. I've always been one to dive into the the deep end from the start and while I will never say that all those experiences turned out good, it is just the way I am. I have a few bad models as a result of doing things this way that while I am proud of myself for pushing through them, they could have turned out many times better had I started slow. Burnout, frustration and a lack of knowledge and skills limited what I was able to do and as a result I would unknowingly skip critical steps or just settle for what it is as I had no way of knowing any different. Those models are now on the rebuild wish list. Still, I do not discourage a person from tackling that larger, more difficult build from the start if they have their mind set on it. Being passionate about a project is just as important as that drive can help carry you through those tough times when it is easy to quit. Also, with great communities like this one where helpful knowledge and a friendly conversation with people who know your struggle it is much easier to attempt those harder builds early on. We are no longer isolated to build by ourselves and having to figure things out on our own. More than likely that question you have has been asked and is answered on here and probably in multiple threads. I can testify to how well this community works. My current build is my first one on here and just what I have learned from MSW has made this build a hundred times better than the last and myself a much better modeler than what I was a year ago. Know yourself when choosing your model. Know your strengths and weaknesses and be honest about them. Build where you feel comfortable, don't be afraid to ask for help and above all be sure to enjoy it. If you can manage that then you can build any ship you want.
-
I do the same. I've been using a lot of the same nails for years though a lot of them got turned into hinge pins on my current build.
-
I've seen a lot of things on ships that make me question how and why they are the way they are. I guess function was always the greater concern over comfort ease for the sailors. Your ship sure is looking good!
-
The bowsprit rigging is an interesting rigging system. I'm still learning my way through it all in trying to decipher how the lines are attached to each other and where they g plus how they get there. I think I have most of them figured out now but there are still a few unknowns. I was wanting to put more of the blocks on the bowsprit but soon realized that a lot of them need to wait on the forestays to be rigged. Looking at the print there are maybe three more that I could go ahead and place and I will probably do that in the next build session or two. One of the most confusing parts is trying to figure out if some of the rigging is on both sides or just one. There are a few lines that appear to only be on one side of the bowsprit but I cannot find where it's counterpart is on the other side. Fortunately for me the rigging on the Vasa is very similar to Couronne's and as there are many fine builds of that vessel and some excellent pictures taken of their rigging I can combine that with what I'm reading in different books to get my answers. Just a slow process but it is worth it.
- 608 replies
-
- 5
-
-
- la couronne
- corel
- (and 1 more)
-
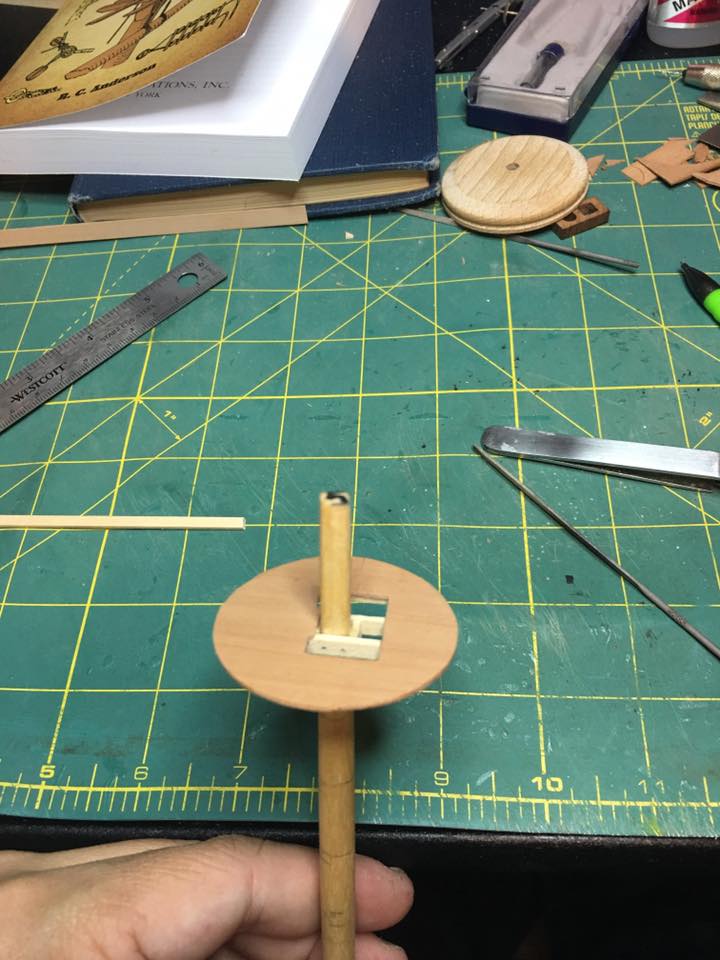
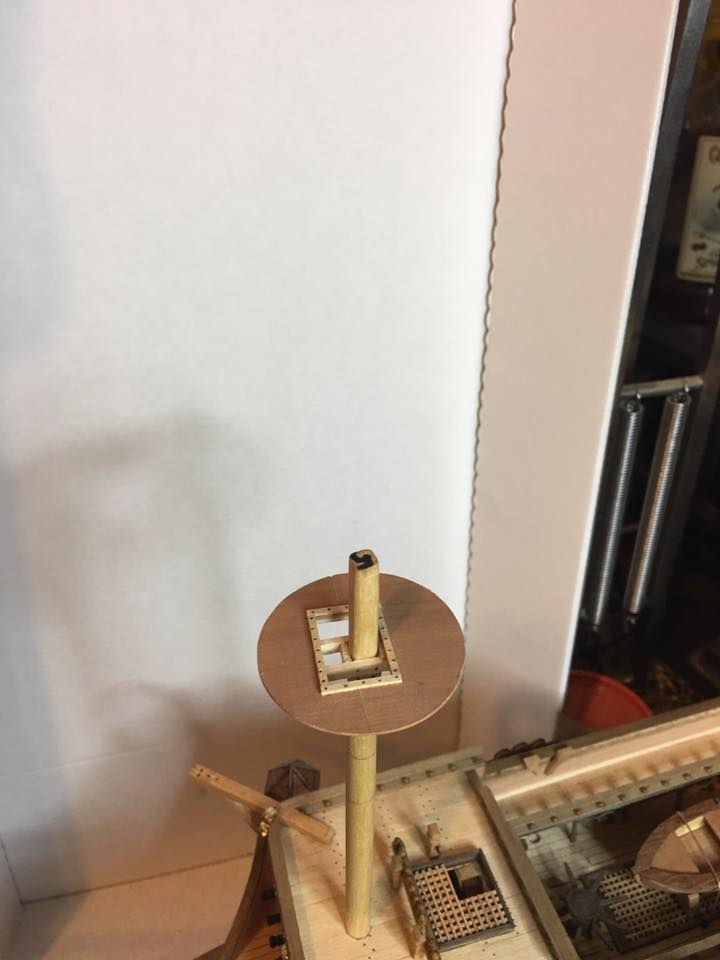
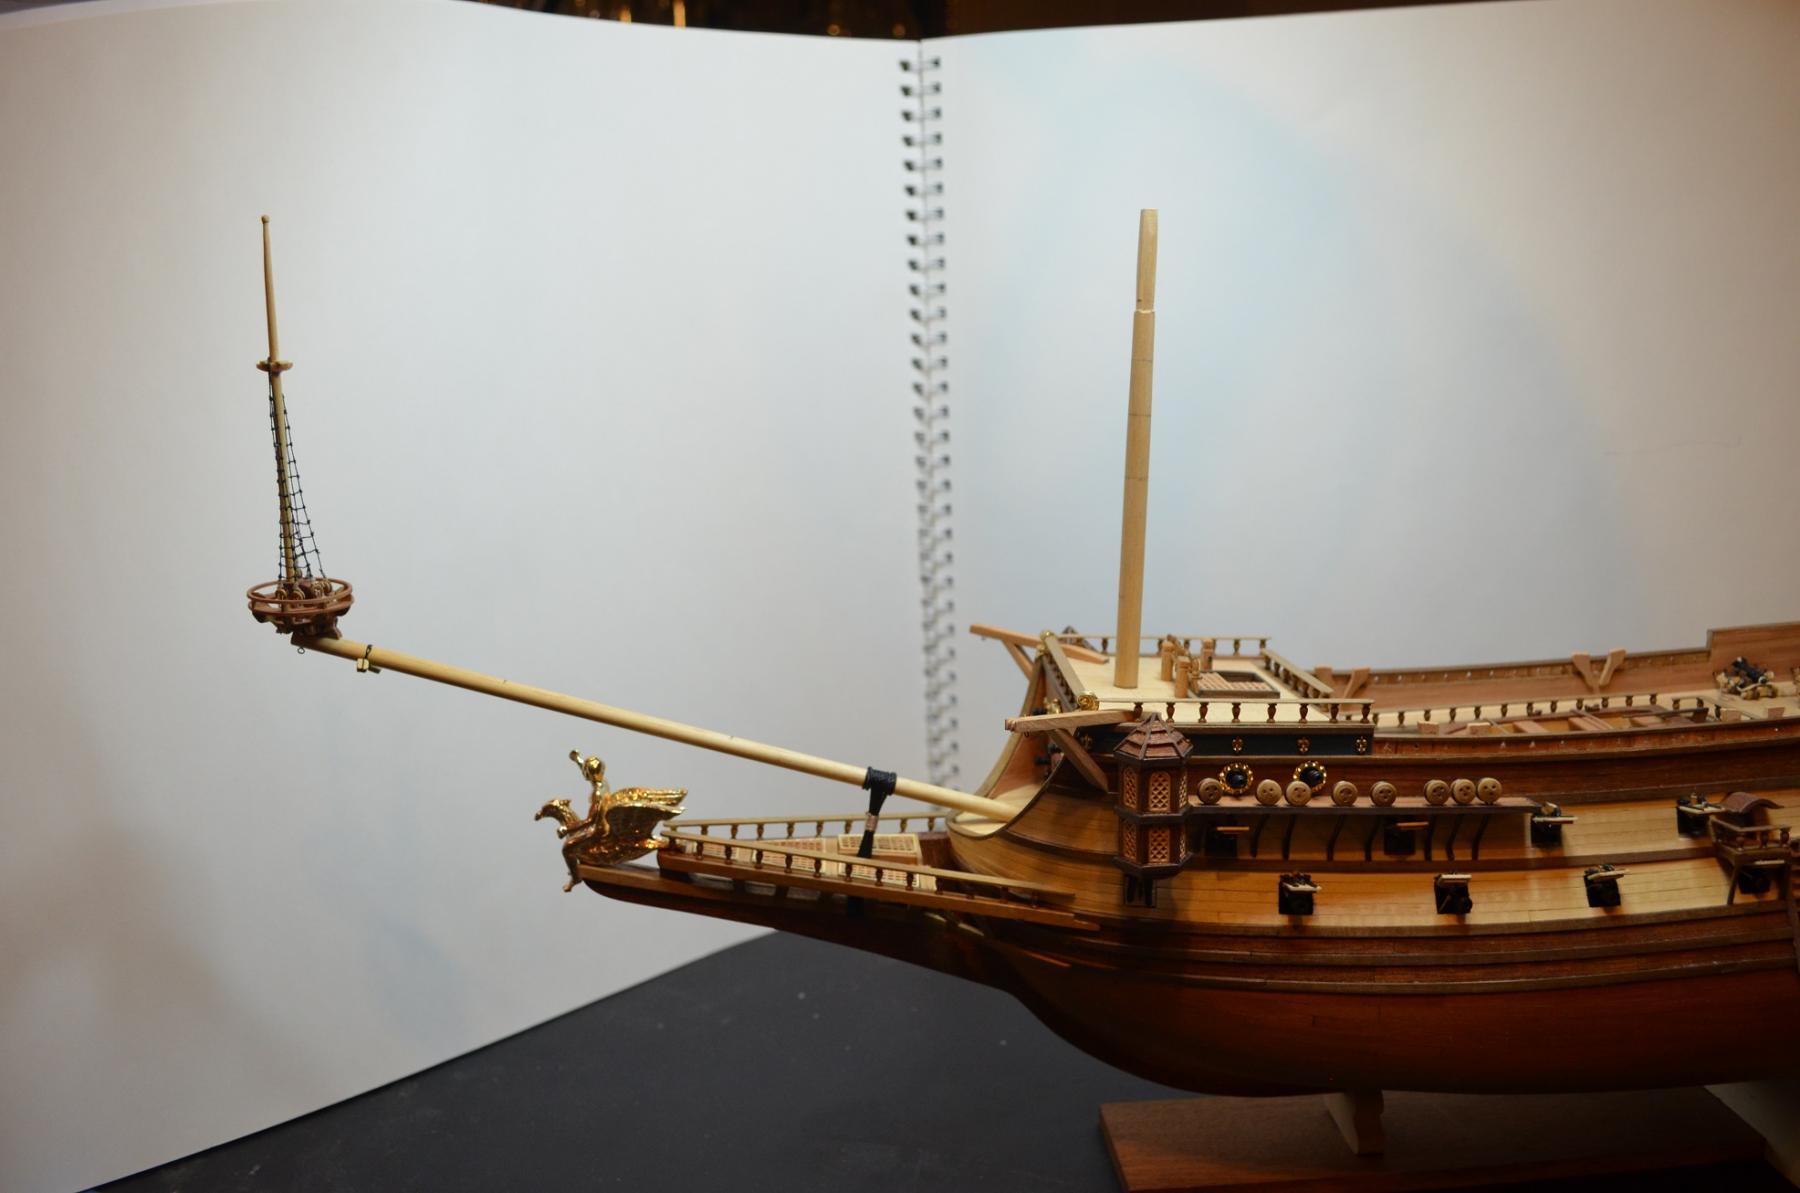
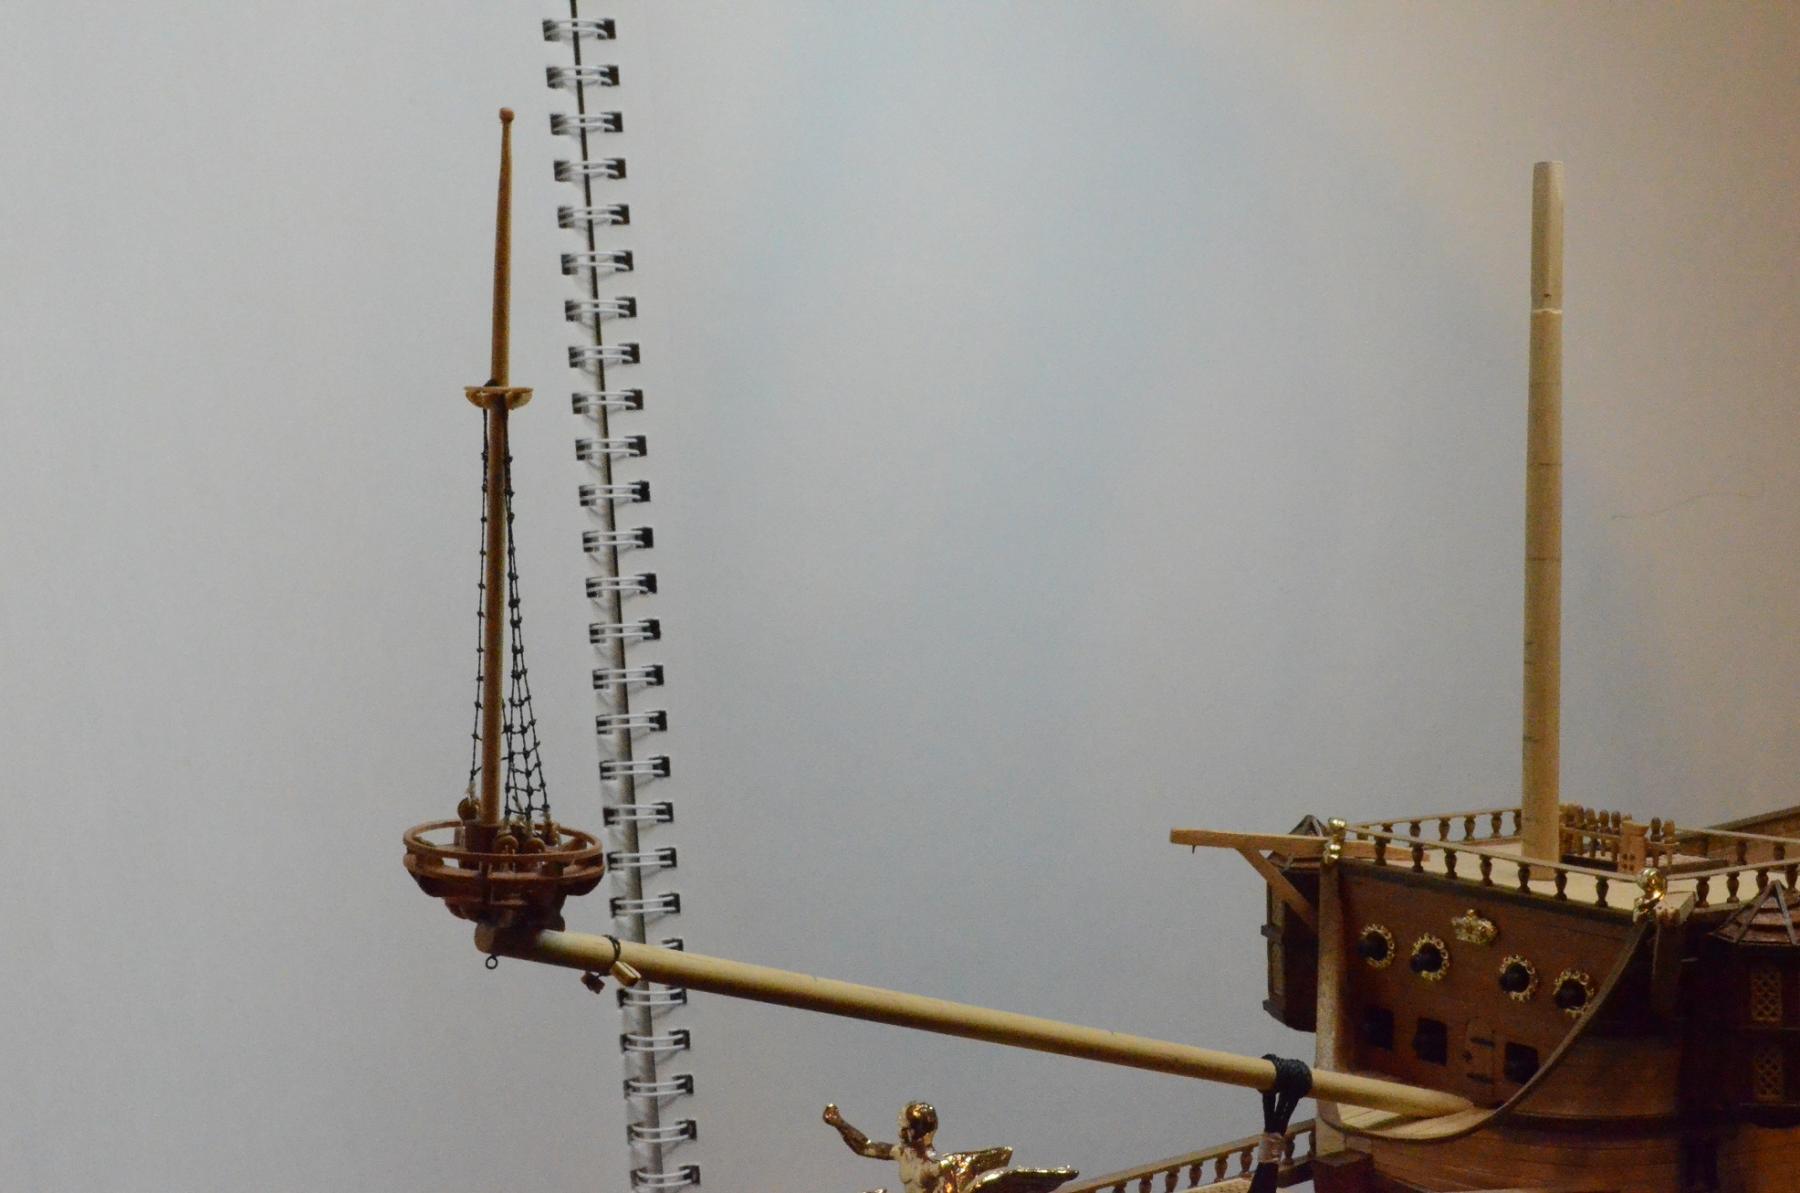
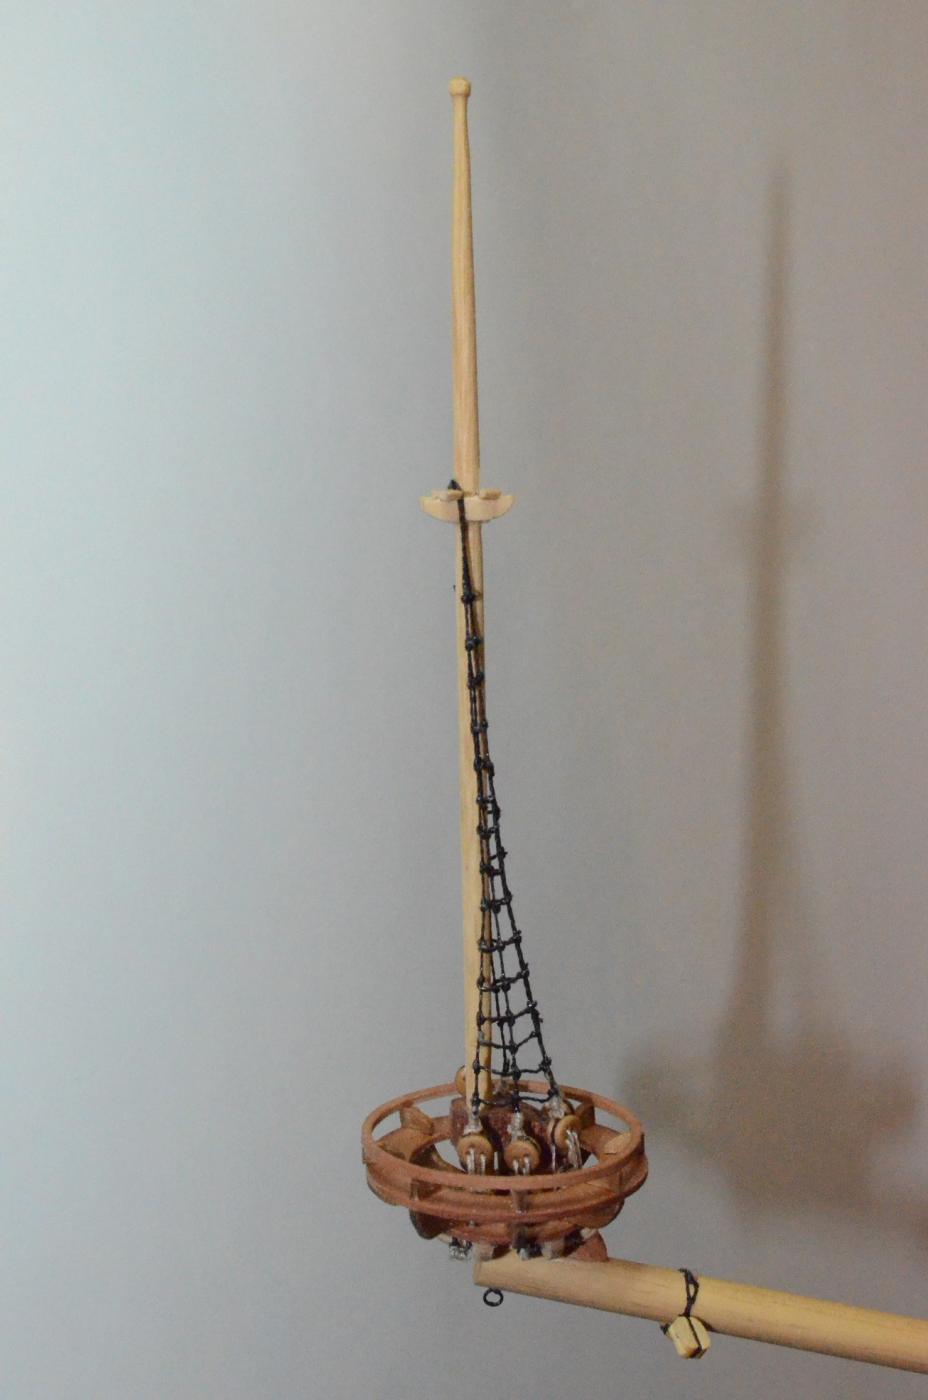
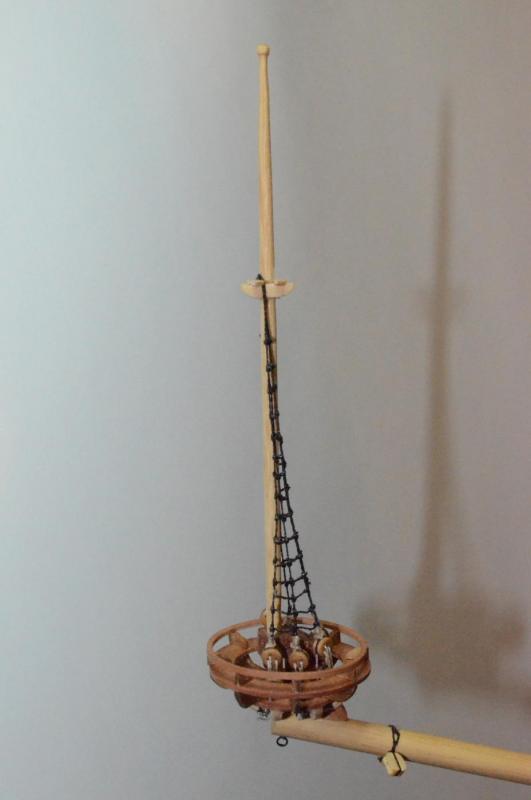
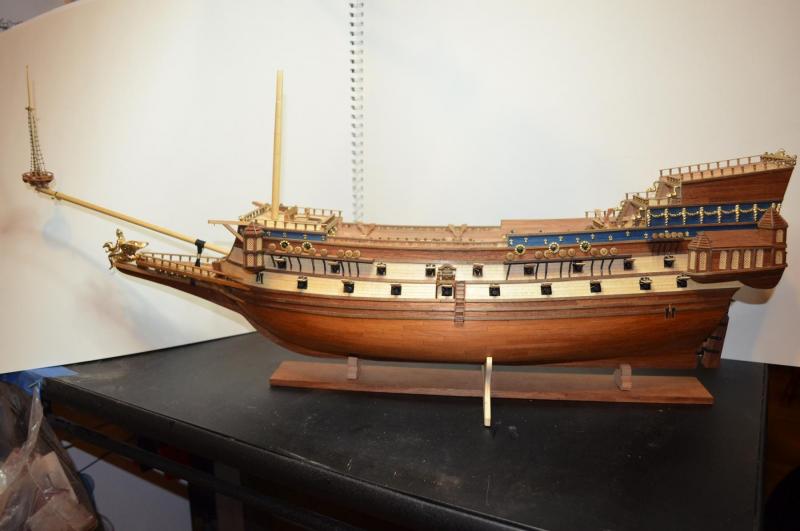
Bowsprit and bowsprit topmast is installed. La Couronne has now reached her total length of 32". There is still a lot of rigging to be done on here but until I get the foremast built the rest has to wait. So that brings me to the foremast which as you can see in some of the pictures, I have started to shape. It is nice to be building upward now as well as a different type of construction. I do think though with rigging I spend probably more time trying to identify what goes where and what do I need to make sure I have attached to make it happen. Just tracing and translating the rigging from the plans to the model is a task in and of itself and then researching exactly how those lines run through blocks, sheaves or tie off at their start and end points is a huge undertaking. Just in the couple of hours I have worked tonight I have spent maybe thirty minutes actually building and the rest was reading. I'm not complaining at all and in fact I love it! To me the research and learning is a large chunk of the fun of this hobby. Ok, that is enough talk for tonight. I will let you get to what you actually came here to see, the pictures!


- 608 replies
-
- 10
-
-
- la couronne
- corel
- (and 1 more)