gjdale
-
Posts
4,894 -
Joined
-
Last visited
Content Type
Profiles
Forums
Gallery
Events
Everything posted by gjdale
-
 Lovely planking job there Augie. If you get bored with football, try tuning in to the Cricket and watch us giving the Poms a severe thrashing (which they thoroughly deserve!) Don't worry if you don't understand the game - you'll soon pick up that we're winning, and that alone will provide many hours of satisfaction. :D
- 2,191 replies
-
- 3
-

-
- confederacy
- Model Shipways
- (and 1 more)
-
Great result Mark. See, I just knew that you'd come up with an inspirational solution! Gaps? What gaps? I see nothing! (To quote SGT Schulz......if you remember that show......)
-
I've used pretty much the same method for blackening as Bob described, although I do thoroughly clean the parts first using firstly white vinegar, and then acetone. Might be overkill but it works. I also use the solution uncut (100%). Rinsing thoroughly in water (I use distilled water) afterwards is very important to halt the chemical reaction. I've previously had all sorts of problems with chemical blackening, but since I switched to the Casey Birchwood product after a recommendation from Danny Vadas, I've had no problems at all. And the best thing about chemical blackening........there is no waiting for the paint to dry!
- 1,477 replies
-
- 2
-
-
- essex
- model shipways
- (and 1 more)
-
Well, that's something of an improvement - enough to restore your honour at least! That chair looks pretty comfy, but it's gonna get interesting as the build progresses. I think I'll sit back in my own comfy chair and watch the modelling space evolve with the build. This could be fun!
-
Looking good Patrick. Must be a good feeling to move into this new phase of the build.
-
I agree with Jim, Craig. The kit contents list should tell you how many stock strips of each dimesion, which is what you need to check for inventory. When it comes to cutting smaller pieces, always use the shortest available stock of that dimension and wood type that will do the job. That should ensure that you don't run out.
-
Nice to see planking started Sean. You might want to investigate a more sturdy work surface though mate - that picture looks like a disaster waiting to happen to me.
-
Fantastic work, as always Gil. It's really handy having you just that little bit further ahead of me so that I can start to think about what's next while having your pictures to assist that contemplation. I'm afraid that boarding pikes are one detail that my build will not be getting. Thanks again for your conversation and assistance on shroud trucks, shroud cleats and mast cleats. I am now quite satisfied with the way mine have turned out and they wouldn't even be there were it not for your assistance in the first place.
-
Of course you use them Derek - otherwise your grandson will think you don't like them! Sorry to hear of the oops with bowsprit again. The further we go with the rigging, the more careful it seems we need to be. Nearly poked my eye out on the fore yard today - thank goodness for the Optivisor, which saved me (several times).
-
Yep, as flash as a rat with a gold tooth Danny!
-
Victory by mikec - FINISHED - Mamoli
gjdale replied to mikec's topic in - Kit build logs for subjects built from 1751 - 1800
Your little launch is turning out very nicely Mike. Hope you don't get too distracted by the 1:1 project! -
Very sorry to hear that Mick. Best wishes for you and the family.
-
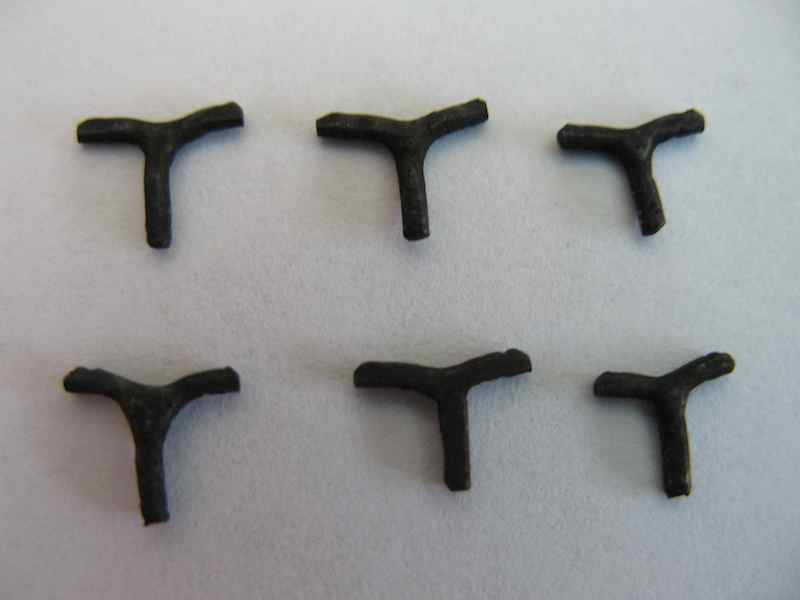
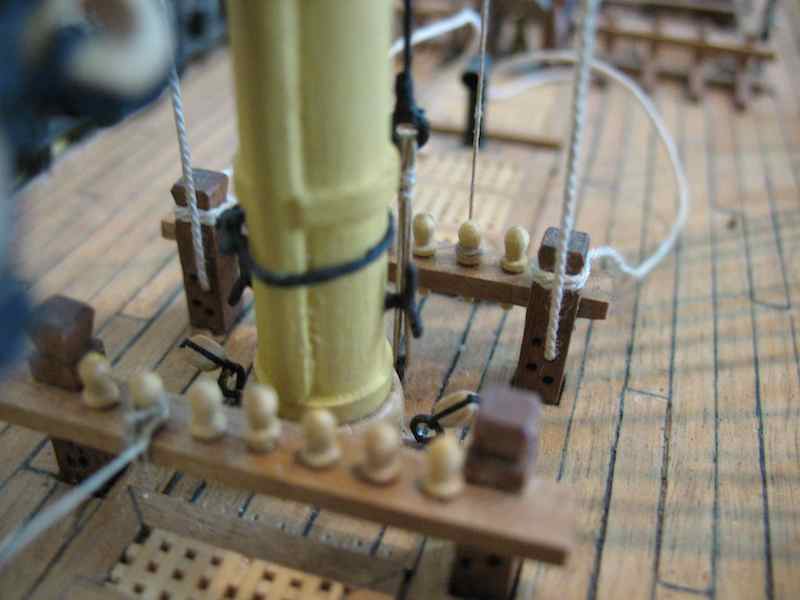
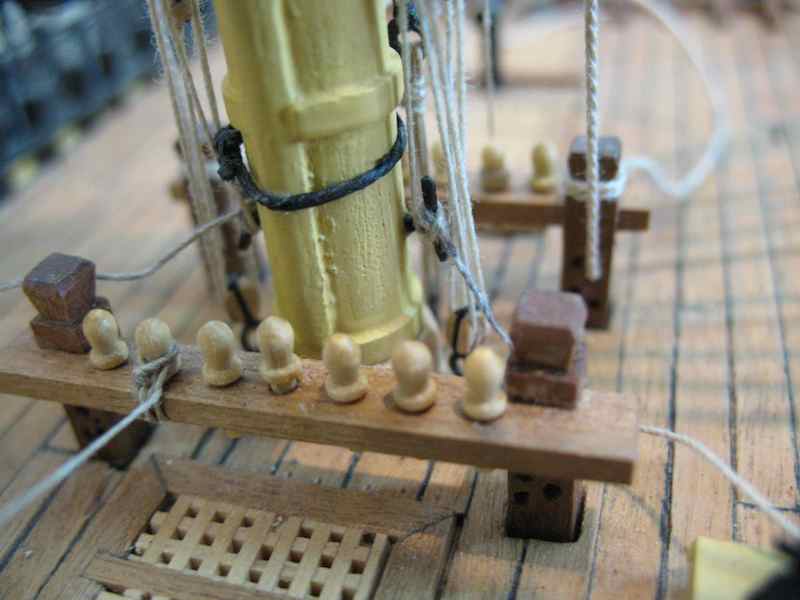
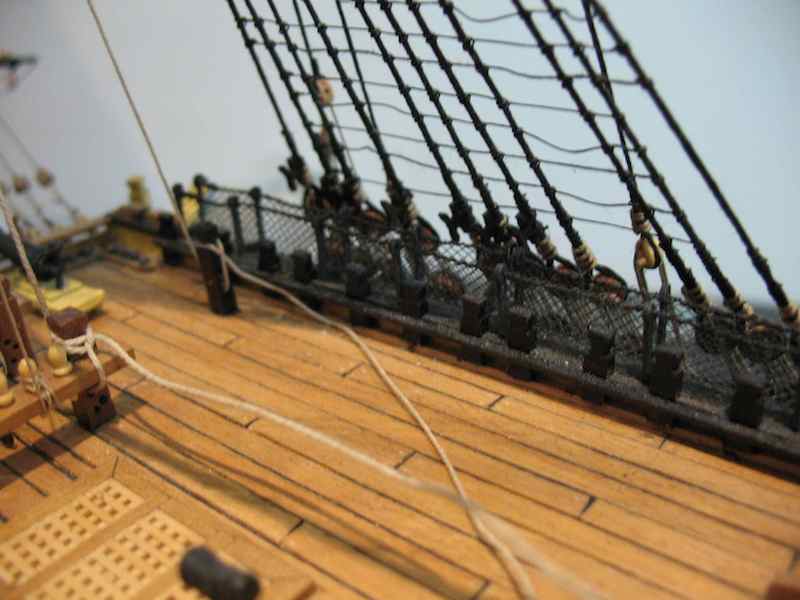
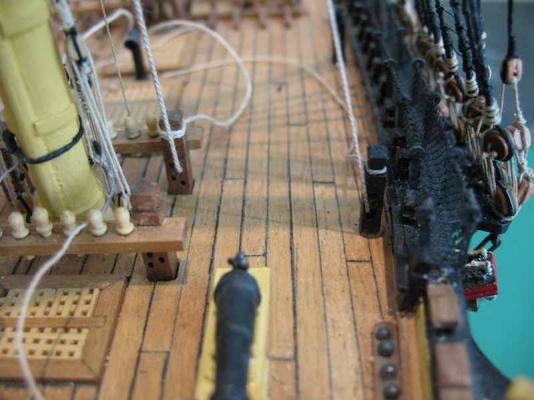
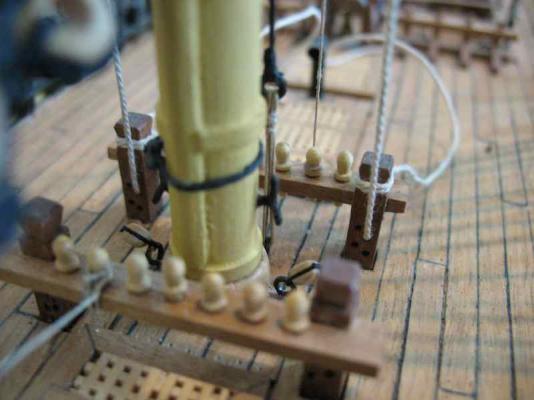
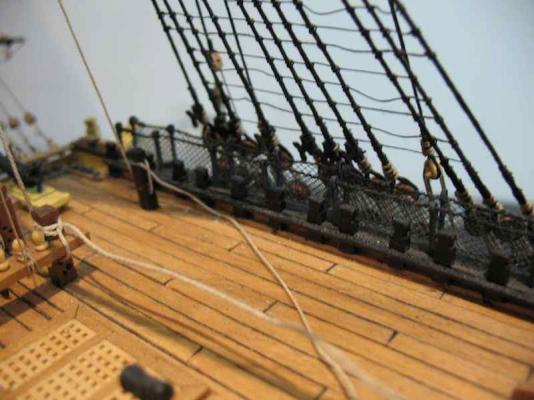
Thanks again for all the nice comments and "likes". Daniel (Dafi) - thanks for the unashamed sales pitch, but I don't think I'll be needing your product. A small update...... Following the advice/opinions of you good folks, I made a minor tweak to the Mast Cleats prior to installation, which required re-blackening as well (no prob ) And here are the Foremast set installed (Main and Mizzen Mast Cleats have also been installed): And with the Truss Pendant falls re-done to belay on the Mast Cleats: This shot shows the forward Kevel Cleats (with working sheave) installed, with the Fore Yard Lifts belayed to them. (The Kevel is on the right of the photo, next to the bulwark): And finally, those pesky Shroud Cleats. I've finished installing the Foremast Shroud Cleats. Fortunately, the Main Mast Shrouds don't use any Shroud Cleats. So, just the Mizzen Shroud Cleats left to install. The only real difficulty in installing the Foremast Shroud Cleats was the fact that the Foremast Yard was already in place, causing a "poke your eye out" hazard (the optivisor saved me several times). The Mizzen ones should be a little easier to do. Taking a photo of the installed Shroud Cleats also proved problematic. This is about the best I could do in that regard. All in all, I'm pretty happy with the way both of these cleat sets have turned out.


-
I think it's just Nature's way of telling you to wait for the Amati/Chris Watton version to be released!
-
Mobbsie, I found your inner better modeller! He's been over on my log, sending me around the buoy several times! (for which, I might add, I am most grateful).
- 1,279 replies
-
- 2
-
-
- agamemnon
- caldercraft
- (and 1 more)
-
How wonderful to see you back working in the shipyard Anja! :) I'm with Mark - mistakes? Pfffffffffff (my only word of Dutch)!
-
Hi Craig, Congrats on starting your first build log. I'm sure you'll get plenty of help and advice with this one as there are a few of these being built here. I'm always interested in watching a paddle steamer come together - one of these is on my "one day" list - so I'll follow along for the ride. Jim, would you pass the popcorn please?
-
ROYAL CAROLINE 1749 by Doris - 1:40 - CARD
gjdale replied to DORIS's topic in - Build logs for subjects built 1501 - 1750
Stunning work as always Doris. I love the way all of your figures are made resembling friends and family - what a lovely personal touch!- 883 replies
-
- 1
-
-
- royal caroline
- ship of the line
- (and 1 more)
-
Fantastic looking coppering job there Bob. Love your technique too.
-
Great ideas on display Bug - we're going through that exact conversation in my house right now! It's probably going to result in some fairly costly "negotiated" room modifications Love the idea of being able to embarrass the hell out of your teenage children - call it "parents' revenge"!
- 274 replies
-
- 1
-
-
- Santa Maria
- Artesania Latina
- (and 2 more)
-
Hi Mobbsie, Great work so far mate. A pity about having to re-do the shrouds/dead-eyes, but better to find out now rather than later on! Looking forward to more pics.
- 1,279 replies
-
- 1
-
-
- agamemnon
- caldercraft
- (and 1 more)
-
Thanks everyone for the comments and "likes" - all very much appreciated. Danny - I used Costello boxwood. I didn't want to dip into my very limited supply of English Box for this job, especially as it was partially experimental. Bug - I get all my timber from HobbyMill these days, though you won't get any English Box there. For that you will need a balaclava and a baseball bat, and the address of someone who has some stashed away! Seriously though, English box is pretty hard to come by and I understand quite expensive when you can get it. Very happy for someone to tell me I'm wrong on this though.