gjdale
-
Posts
4,894 -
Joined
-
Last visited
Content Type
Profiles
Forums
Gallery
Events
Everything posted by gjdale
-
 Thanks guys. Augie - the timber on the gun carriages will be left natural (other than a coat of wipe-on poly, which will darken it a little), in keeping with the rest of the build philosophy of "painting with timber".
- 456 replies
-
- 6
-

-
- finished
- bomb ketch
- (and 2 more)
-
I have the Proxxon FMZ vice as well, and I love it. I also have a Panavice with a suction base. I prefer the Proxxon.
-
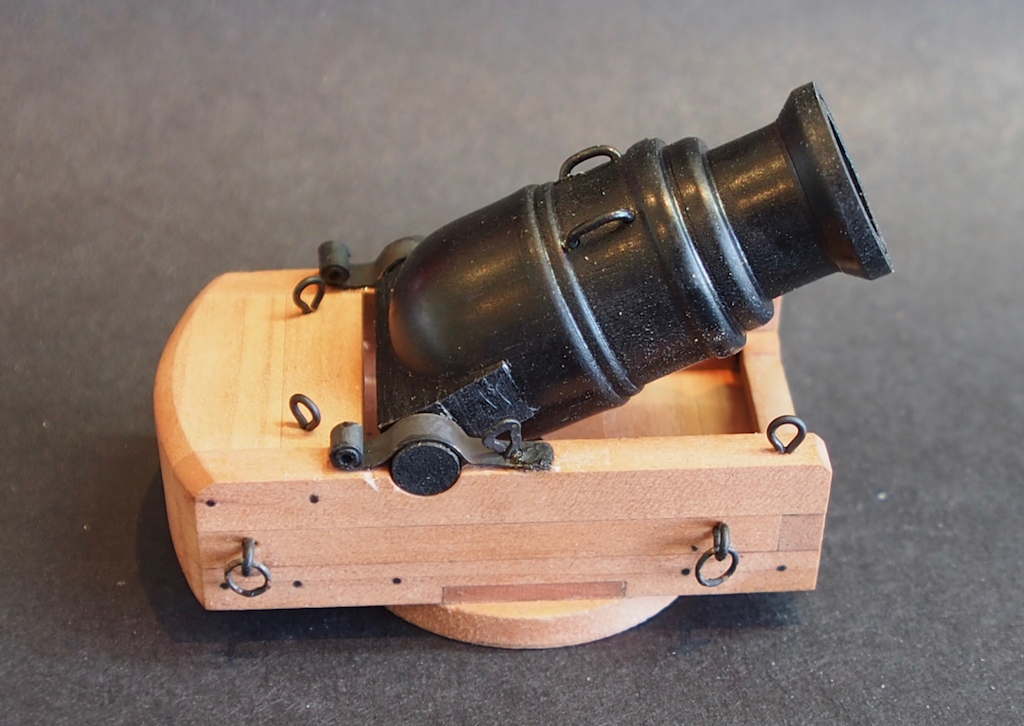
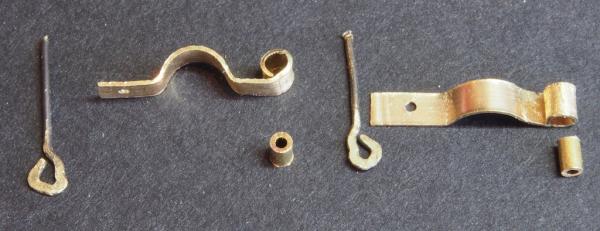
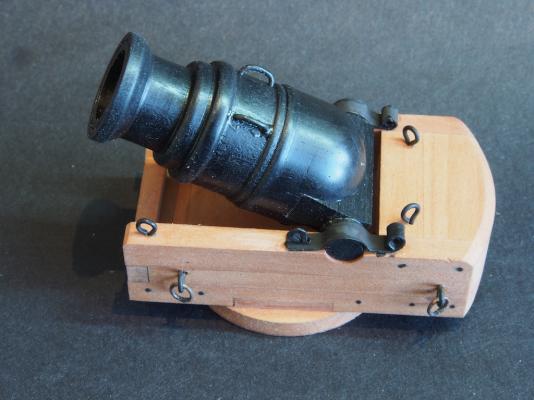
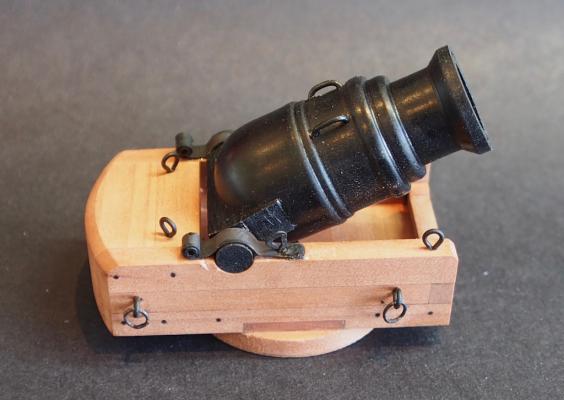
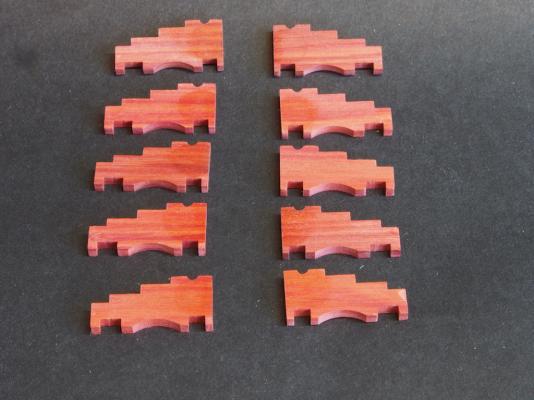
Thanks again for all the kind comments and the "likes". I can't believe it has been almost six weeks since I last posted some progress! I finally managed to get some time in the shipyard on Sunday - but only a little, so this will be only a minor update. As an aside, when I tried to post this update on Sunday, I ran into the "Sucuri" issue that many have experienced previously. A quick PM to Jim Hatch with my IP address and he fixed it in no time - thanks Jim Mortar Cap Squares The Mortar Cap Squares were made from strips of 0.01” thick brass sheet. The sheet was attached to a carrier of scrap timber using double sided tape and then cut, with the brass facing down, on the Byrnes saw to the desired width – in this case 3/32”. One end of each strip was then bent around a 1/32” thick brass rod to form the hinge end. The middle was then formed around a 5/32” rod to fit around the trunnion, and then finessed into final shape in situ. A 0.8mm hole was then drilled to take the retaining eyebolt. The retaining eyebolt was shaped by squeezing a regular eyebolt into a sort of triangular shape, and then flattening with a hammer. Finally, a short section of 1/32” brass tubing was cut to insert into the hinge end, to represent the inner part of the hinge. Here is a shot of the component parts before blackening and final assembly. All parts were then cleaned using a wire brush in a rotary tool, soaked in vinegar and then blackened with Birchwood Casey Brass Black prior to installing. Here is the completed Mortar assembly: 4lb Gun Carriages The carriages for the 4lb guns are made from Redheart. Two guns will be displayed on the model, and a further two may be incorporated into the display stand. Therefore, a total of four gun carriages will be made. The sides of the carriages are made from one piece each and are a fairly straight forward operation. A set of ten blanks (allowing for two ‘spares’) were spot glued together to enable all sides to be cut in the same operation, to produce identical parts. Once the gang was glued up, a pattern piece was applied using sticky label paper and the process of shaping was commenced. The ‘stepped’ sides and the dados for the axles were cut first using the Sherline mill. Then curvature between the axles was incorporated by using the spindle sander. Finally, the groove for the trunnion bars was cut using a ball end cutter in the Proxxon drill press (only because I didn’t have a collet small enough to fit the ball end cutter in the mill. The ends were then trimmed to length on the Byrnes disc sander and the completed part soaked in isopropyl alcohol to debond the spot-glue and separate the individual pieces. After some final cleaning up, here’s what they look like: That's as far as I managed to get on Sunday. Hopefully, next weekend I'll manage to finish the gun carriages and maybe even have a crack at turning the guns themselves.
- 456 replies
-
- 26
-
-
- finished
- bomb ketch
- (and 2 more)
-
Amazing and beautiful work Dan. Just what we have come to expect from you.
- 108 replies
-
- 3
-
-
- andrea doria
- ocean liner
- (and 1 more)
-
Congratulations Ray - a truly fine build to be proud of. Enjoy your holiday.
- 536 replies
-
- 2
-
-
- diana
- caldercraft
- (and 1 more)
-
Sorry to hear you've been unwell Augie. Wishing you a speedy recovery and return to the shipyard. I prescribe a medicinal dosage of good brandy - about a quart should do it!
- 2,191 replies
-
- 7
-
-
- confederacy
- Model Shipways
- (and 1 more)
-
Watch your backs, comin' through! Ah, that's better - just managed to get one of the last places in the front row. Pass me a beer will please you Mark? And someone send for Sjors and the popcorn machine - this is bound to be entertaining, as well as educational.
-
I'm loving this thread. Far from feeling intimidated by it, I'm picking up a lot of good tips. My favourite so far has been the power of cropping to show detailed close-up. I'll definitely be experimenting with that.
-
All looking very ship-shape there Mobbsie. I'll do my best to do some catching up this weekend!
- 255 replies
-
- 3
-
-
- granado
- bomb ketch
- (and 2 more)
-
Okay, I also need a new Thesaurus as I'm lost for words. Brilliant work Nils - I'm really enjoying following your progress here.
- 2,625 replies
-
- 5
-
-
- kaiser wilhelm der grosse
- passenger steamer
- (and 1 more)
-
Micro-Mark MicroLux LaserKnife 2525 – A Review
gjdale replied to mtaylor's topic in Modeling tools and Workshop Equipment
Thanks for a very informative post Debbie. I'm so glad you had a happy ending to your journey! -
Nice to see some progress there Charlene. Nothing wrong with bringing in an extra "contractor" to help out! Hope you get plenty of time in the shipyard together.
-
Nice work Mario. Great to see you back making saw dust! Brian - the painters tape is to make removal of the patterns easier. It holds the pattern securely while cutting, yet comes off easily and doesn't leave a sticky residue.
-
Thanks B.E. Nice to see you back here and thanks for your kind thoughts re Sam.
- 456 replies
-
- 3
-
-
- finished
- bomb ketch
- (and 2 more)
-
Looks like an interesting project Dan, think I'll pull up a chair and follow along too.
-
Nice to see you back in the shipyard Bug! And making some good progress too.
- 274 replies
-
- 2
-
-
- Santa Maria
- Artesania Latina
- (and 2 more)
-
Cutter Cheerful 1806 by rafine - FINISHED
gjdale replied to rafine's topic in - Build logs for subjects built 1801 - 1850
[Although the two sides didn't come out exactly identical, they are very close.] Are you kidding me Bob?!!! I think we may have different definitions of "close". Very nicely done. Very nice indeed.- 525 replies
-
- 5
-
-
- cheerful
- Syren Ship Model Company
- (and 1 more)
-
Your daughter is a lucky girl Richard. The lighting looks great and adds a lovely finishing touch to a fine model. Well done, Sir!
- 45 replies
-
- 2
-
-
- yakatabune
- woody joe
- (and 1 more)
-
Both Canons and Cap Squares look great Mobbsie! And Tom is right - a neat little tutorial.
- 255 replies
-
- 5
-
-
- granado
- bomb ketch
- (and 2 more)
-
Congratulations on a fine build Richard. She looks fabulous!
- 45 replies
-
- 4
-
-
- yakatabune
- woody joe
- (and 1 more)
-
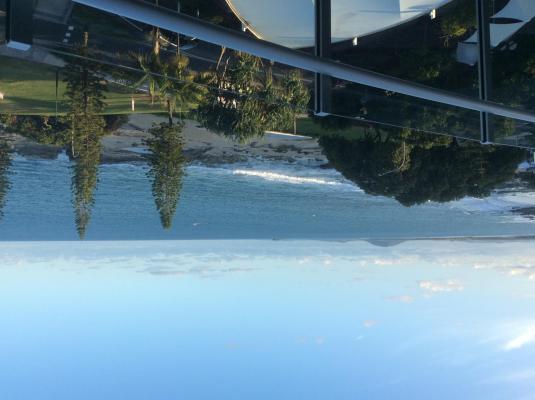
Thanks for all the kind words and the likes folks. And Happy Birthday Mike! Things have been quiet in the shipyard lately as life has been getting in the way a little. A couple of weeks ago, I wrapped up my second stint in the RAN - seven years this time around, and a total just shy of 36 years all up. I have now started my own consulting business as a precursor to total retirement in about five years from now. My cunning plan is that working for myself will give me more time in the shipyard, although I've heard the boss is a bit of a tyrant. Currently enjoying a little beach side chillax with the Admiral for a week at a very pleasant spot called Mooloolaba, on the Sunshine Coast just north of Brisbane, in Queensland. It's just a tad warmer than home right now. Here's a couple of pics of the view from the apartment - directly across the road from the beach. Life's tough sometimes! For some reason, photos taken with the iPad always seem to attach upside down. If anyone knows how to fix this, I'd be most grateful. Then again, maybe for you folks in the Northern Hemisphere they are the right way up.

- 456 replies
-
- 12
-
-
- finished
- bomb ketch
- (and 2 more)